Mirabell61
-
Posts
7,417 -
Joined
-
Last visited
Content Type
Profiles
Forums
Gallery
Events
Everything posted by Mirabell61
-
 Thanks for your nice comment Mark, it`s the removable card (was 2 GB together with an adapter-card to slip into the camera). I bought a new one (now 8 GB together with an adapter-card to slip into the camera). Result : the new card will not be activated when the camera is switched on, so I put the old one back in......, and was shocked that the old one also did`nt work any more. Because I always removed the card (when transfering the picture data) when I put it in a seperate adapter for my PC, this wo`nt work any more either, so what to do .... ? I bought a special cable one side plug for the camera, other side for USB stick. Now at least I can transfer the built in capacity data for 4 pics from the camera to the PC. I should have bought that cable years ago already ! Guess the internal interface of the camera for taking the external memory card has somehow suffered contact inside ... Nils
- 2,625 replies
-
- 5
-

-
- kaiser wilhelm der grosse
- passenger steamer
- (and 1 more)
-
many thanks to Patrick - Steve - Gerhard - Bob (Cap`n), for your kind comments.... Patrick, yes, that flash thought came to my mind, when I remembered the supporting wood chock fitted under the shrouds of most 18 th century square riggers at the mast-tops Steve, thanks again,....., there certainly will be many updates to follow... Gerhard, thanks for the compliment... Bob, for the railing handrail I was searching the web for a source that would provide wood in profile 0,6 x 1,5 mm, in good quality, and had luck in finding one... Nils
- 2,625 replies
-
- 6
-
-
- kaiser wilhelm der grosse
- passenger steamer
- (and 1 more)
-
Hi Clarence, you may want to google up Turk Models, they sell (or via local distributers) the beautiful "Panderma Ferry" kit Cheers, Nils
-
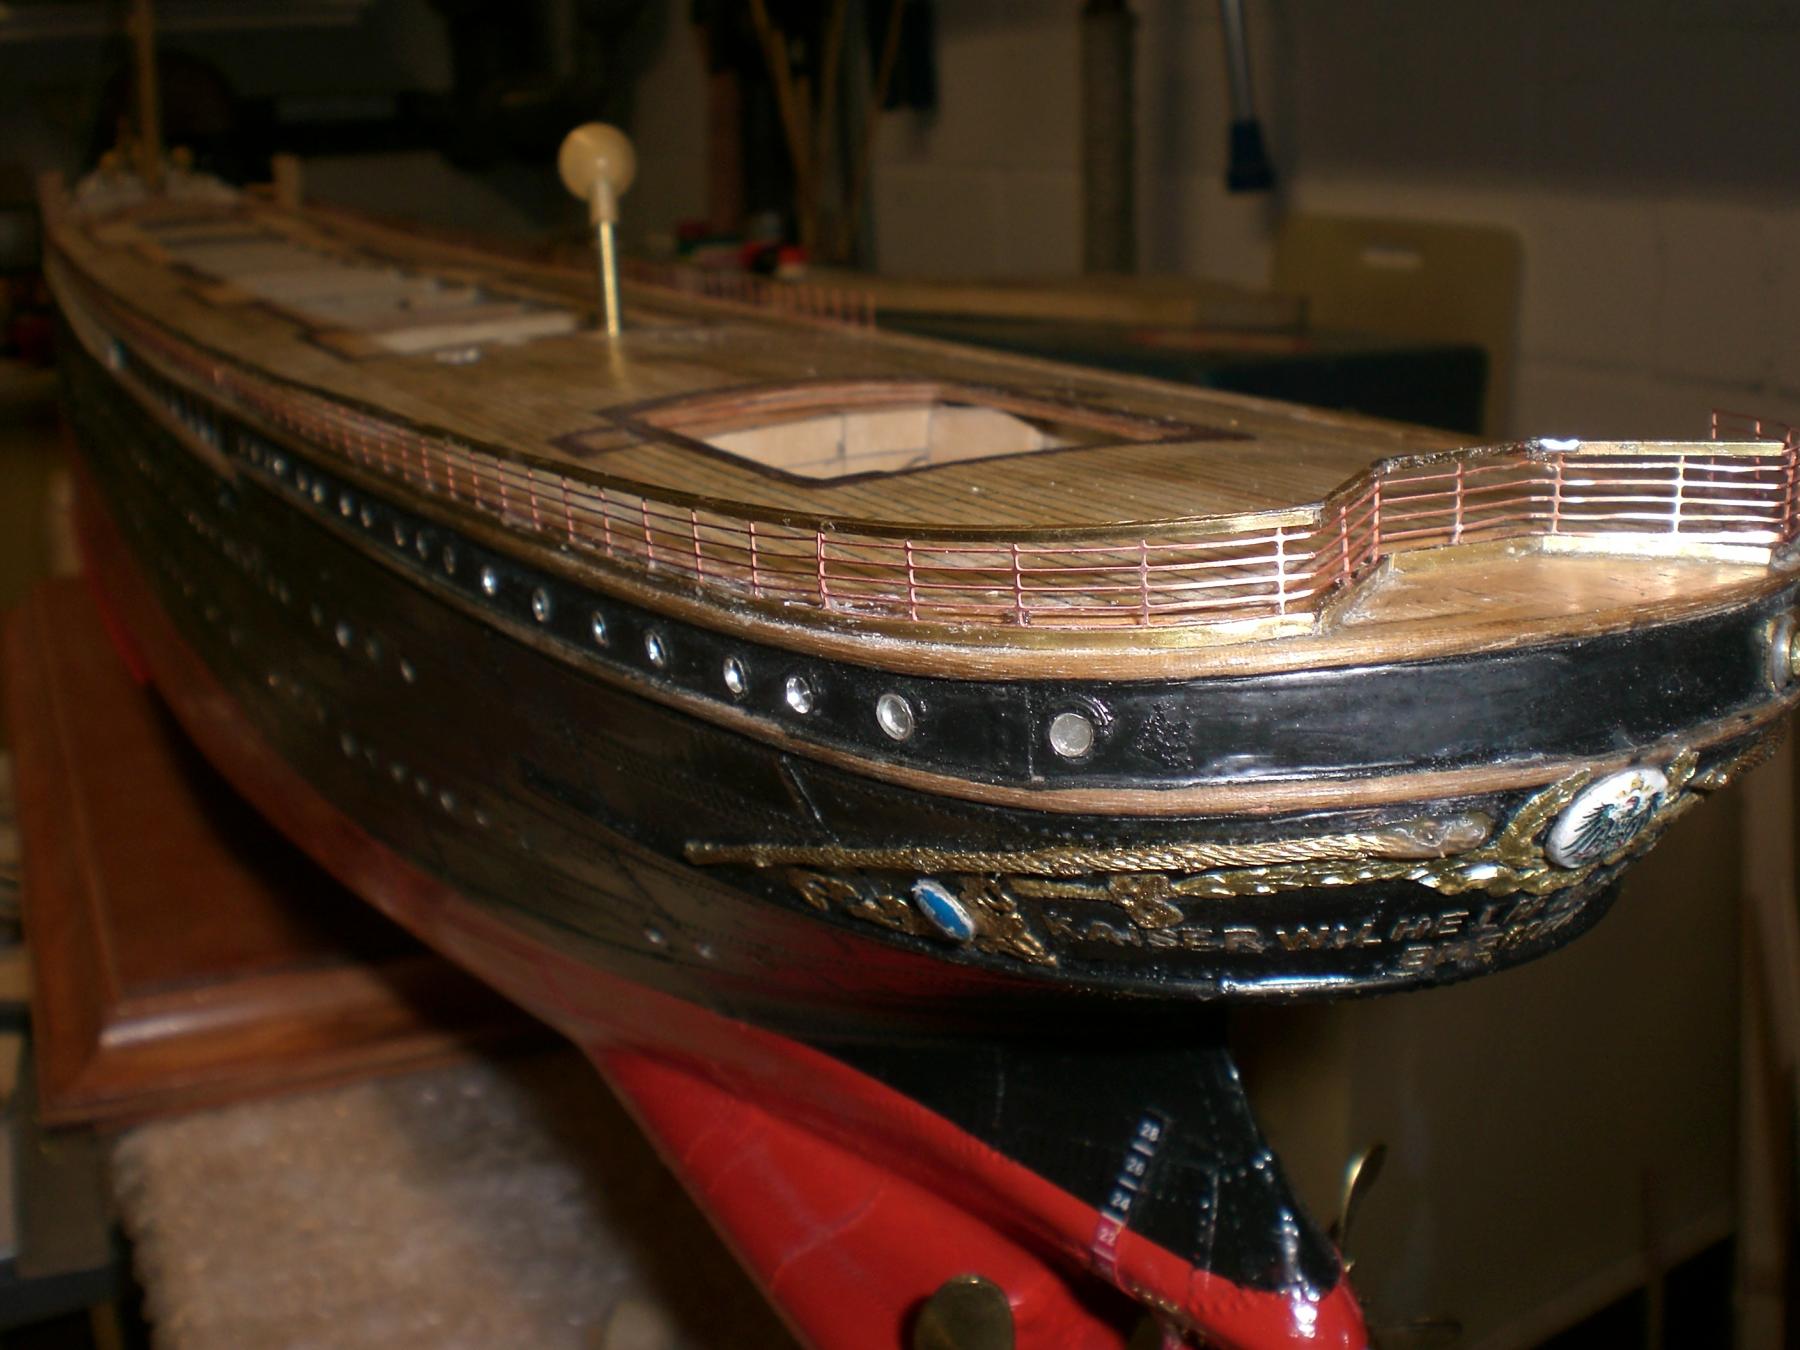
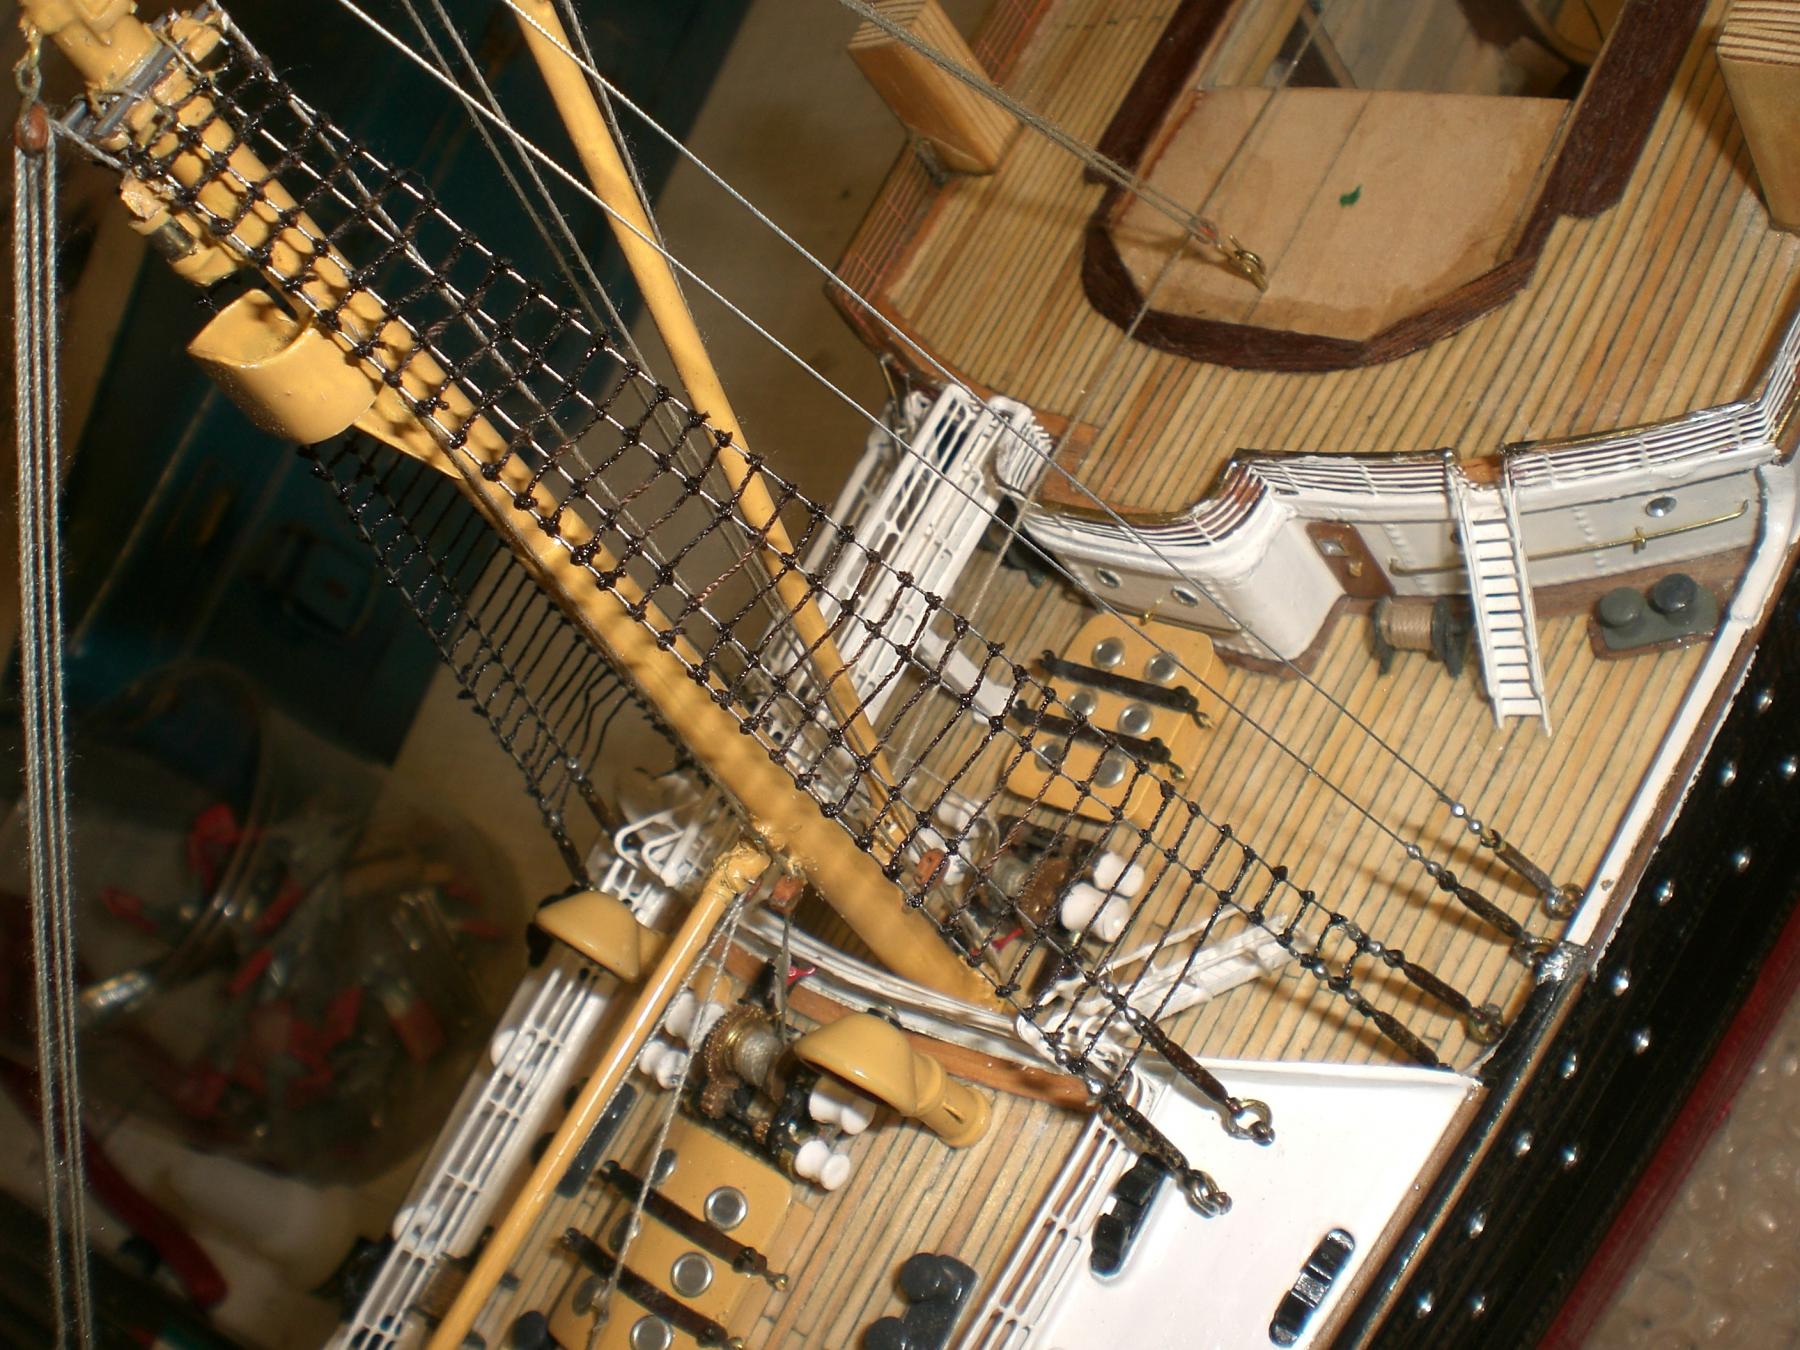
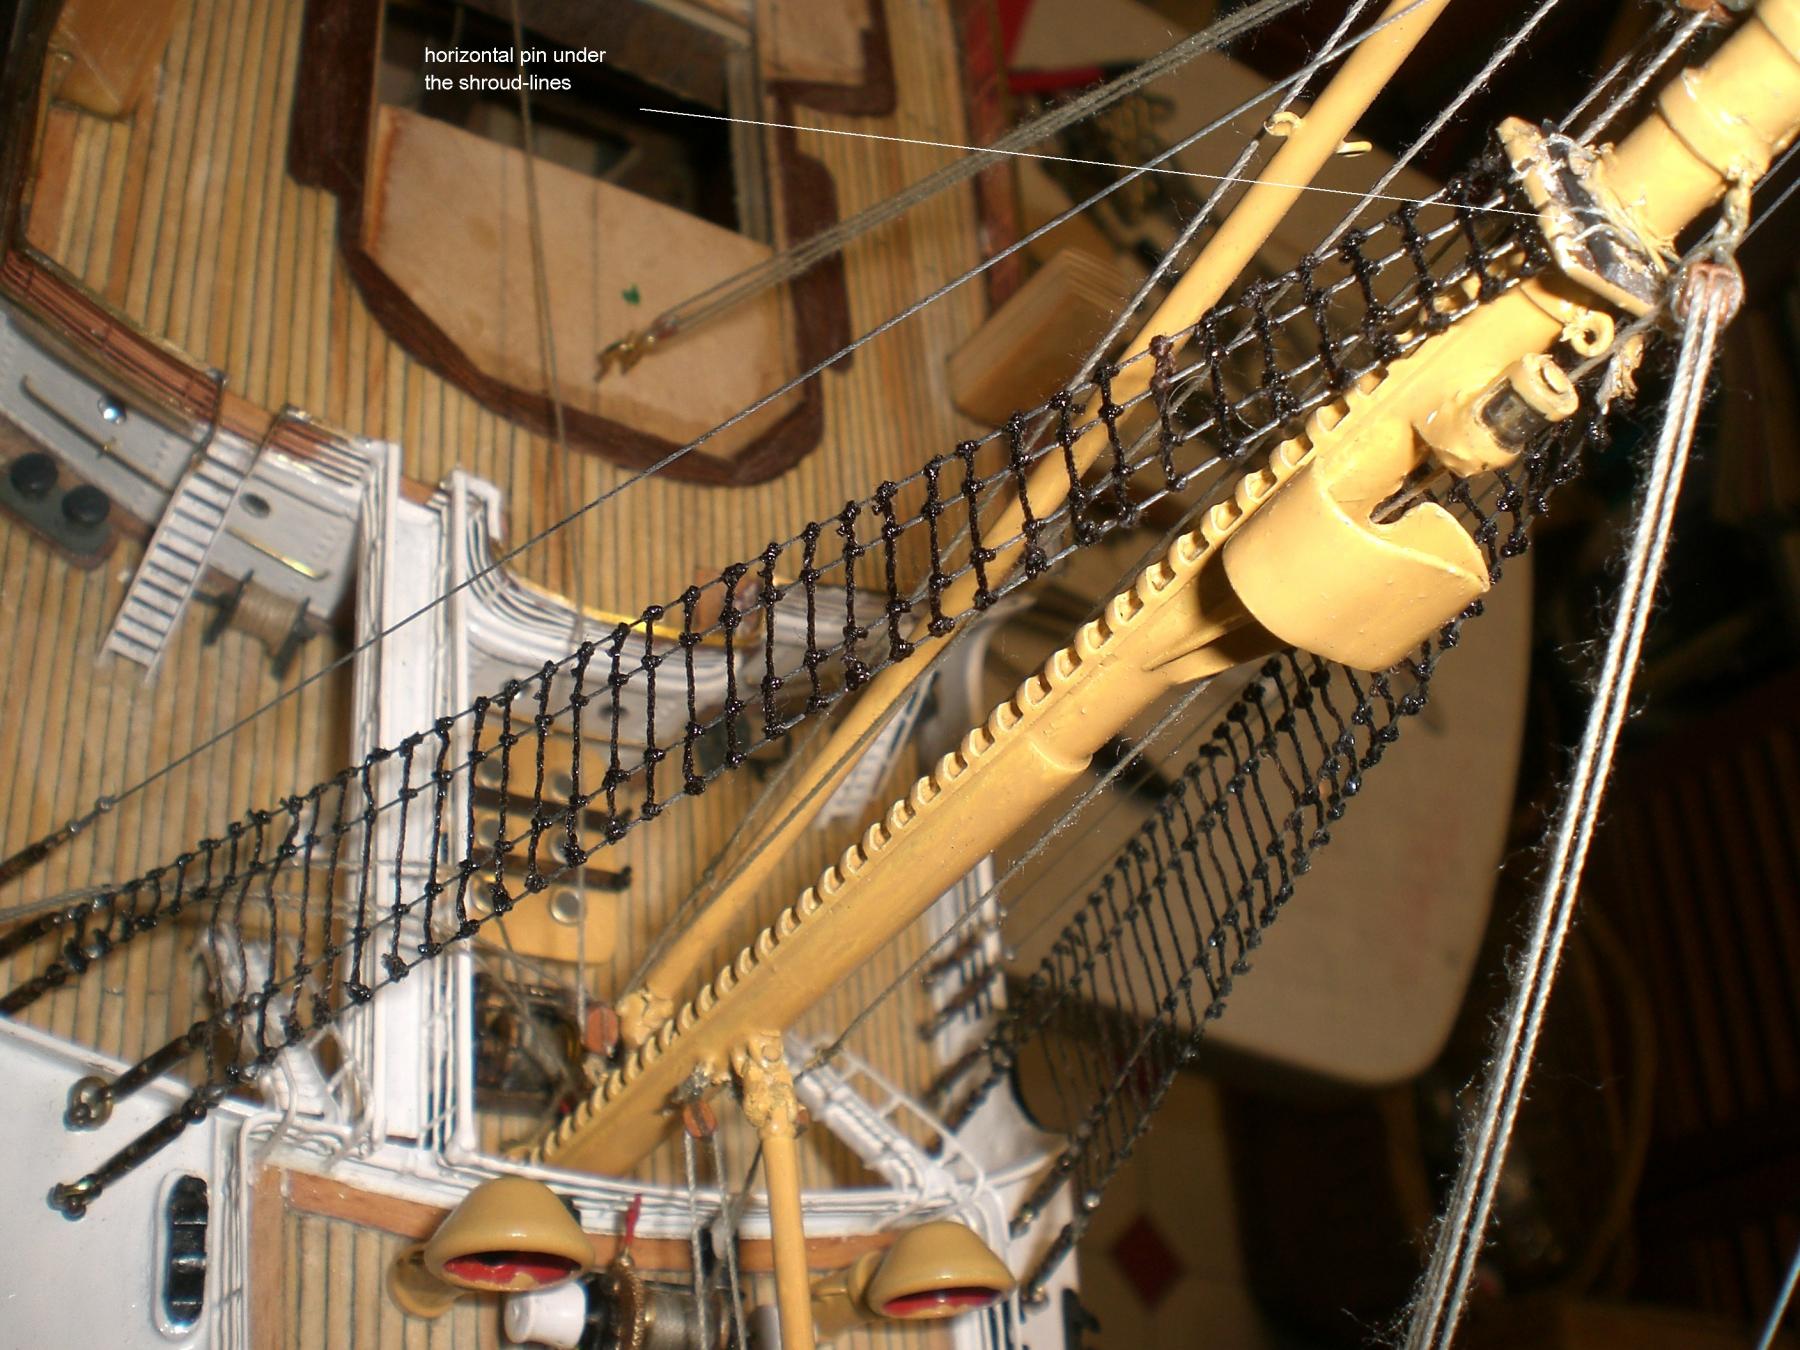
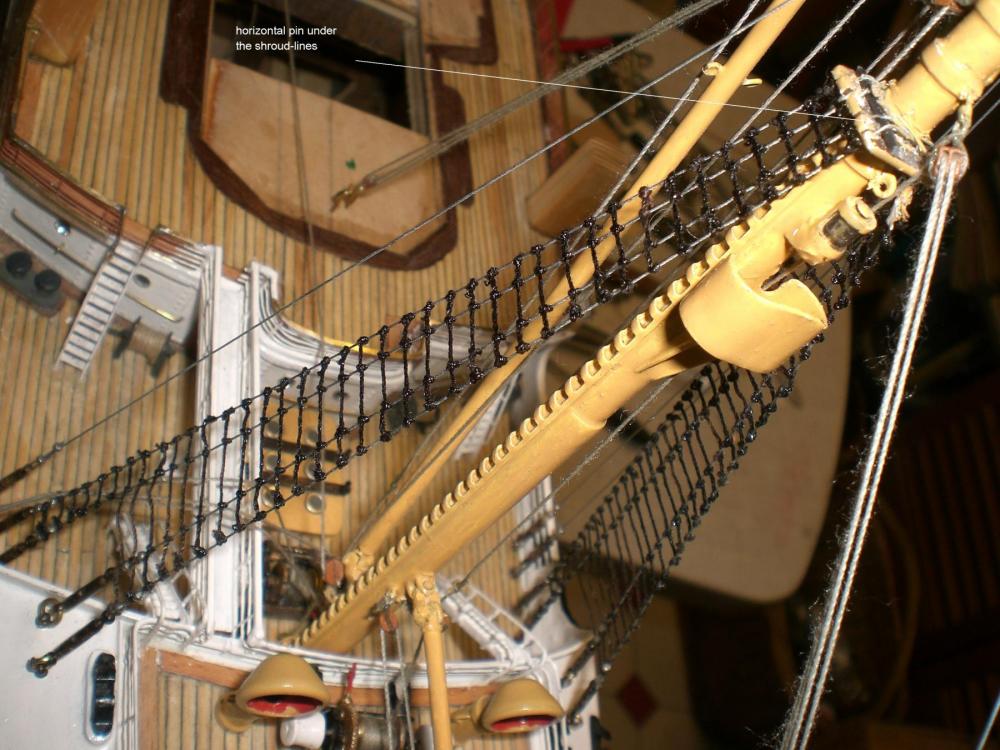
Update.... I am having some trouble with my digital camera, the additional memory chip is not accepted any more, and I do`nt know why. So the camera`s regular built in memory capacity only lasts for 4 pics. At least that still works. Will need to look out for a new camera after so many years and thousands of pics done with it... except for the last piece of railing (was about 25 cm too short of material) I have now the railings on the promenade deck. The forward rounded pieces were tricky, because of the outcuts for two stairs and the walkway. The top handrails are made from 1 x 1 mm brass U-profile and glued on with CA. I intend to put a thin strip of mahagony 0,6 x 1,5 mm on the upper side of the handrails later on. I`m most pleased and happy that the oversstressed stb. side shrouds needed not be redone ! (recent accident) with a little trick they could still be spaned properly, a piece of a 1mm diam. round pin was shoved under the shroud wires on top of the spreader plate, before they round the mast. Now there is only one starbord backstay to be redone. Nils the painting of the railings is momentary only in those areas where there is not so good accsess at a later stage refastening of the shrouds by means of a horizontal steel pin on the spreader platform


- 2,625 replies
-
- 23
-
-
- kaiser wilhelm der grosse
- passenger steamer
- (and 1 more)
-
Johann. absolutely WUNDERBAR ...... Nils
-
beautiful ship Toni, and an awsome build, that lovely painted fries makes it unmistakeable your "HMS Atalanta". In all its a pleasure to explore and look at this Swan Class model develope.... Nils
-
beautiful ship Stuart, wish you much fun with masting and rigging (steam / sailship) Nils
-
love this cutter under your hands work Chuck,.... WOW ³ Nils
- 1,051 replies
-
- 3
-
-
- cheerful
- Syren Ship Model Company
- (and 1 more)
-
Hi Mark, lovely stern rounding of that lower counter. Awsome decoration ! Nils
- 652 replies
-
- 2
-
-
- royal william
- euromodel
- (and 1 more)
-
Super work Bob, you`ve been very busy since your last post, and the result is awsome looking !! The stack with whistle and pipes looks great, also the lower deckhousing with door outcuts and porthole (nice round ! ), and hand rails, very well done, its going to be a real nostalgic beauty, when all is mounted Nils
- 348 replies
-
- 4
-
-
- pequot
- cable ship
- (and 1 more)
-
beautiful model Tadeusz, I like the selfmade metal parts, next to the making of the hull.... Nils
-
Hi Oystein, I wish you much fun and success in trying out the one or other inspiration giving detail, whenever the time comes.... Nils
- 2,625 replies
-
- 4
-
-
- kaiser wilhelm der grosse
- passenger steamer
- (and 1 more)
-
Hi Piet, yes, that was the aim, no pressure......, Thanks for your compliment Nils
- 2,625 replies
-
- 4
-
-
- kaiser wilhelm der grosse
- passenger steamer
- (and 1 more)
-
Thank you very much Grant, Nils
- 2,625 replies
-
- 4
-
-
- kaiser wilhelm der grosse
- passenger steamer
- (and 1 more)
-
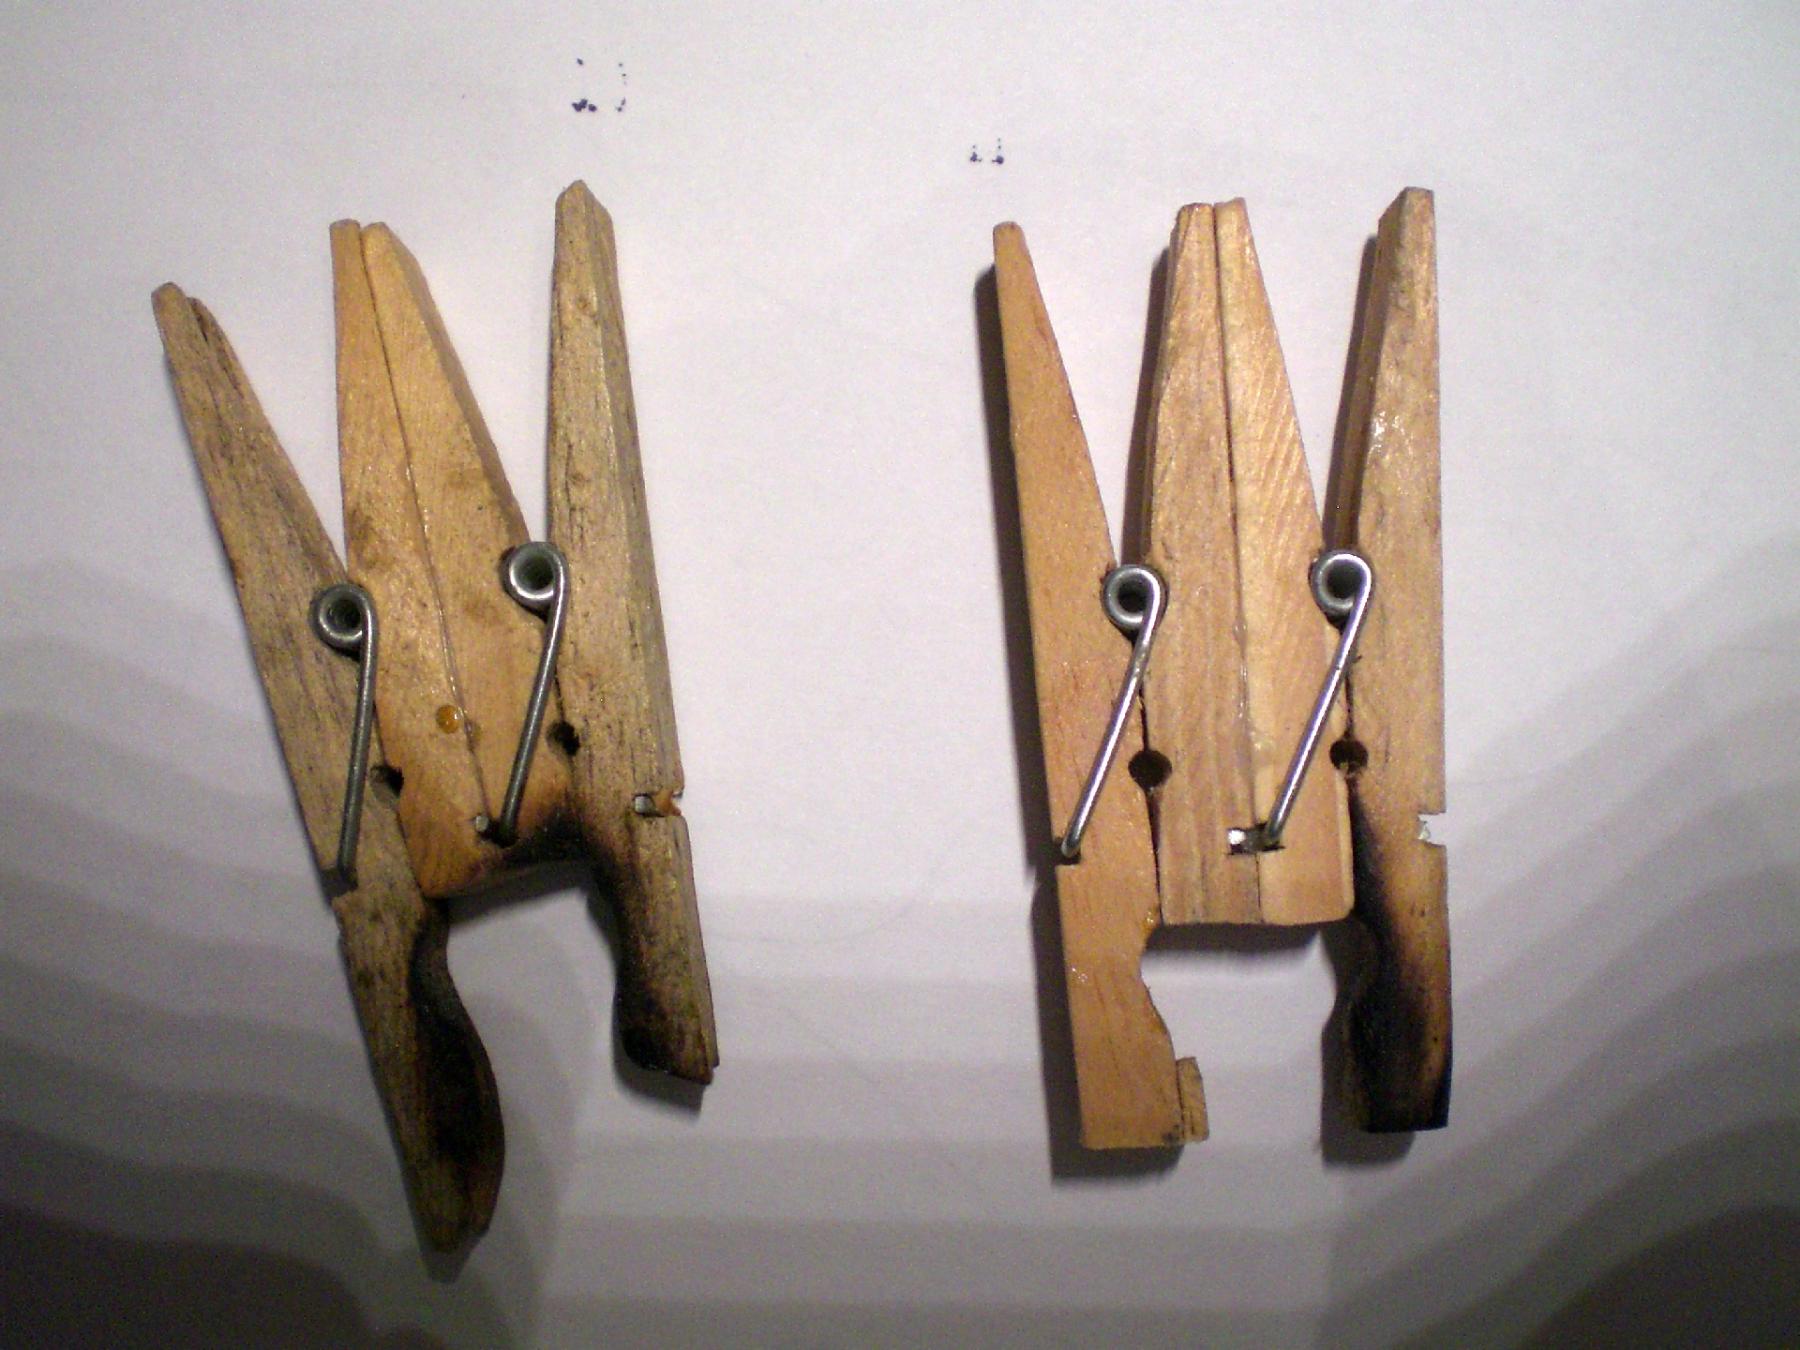
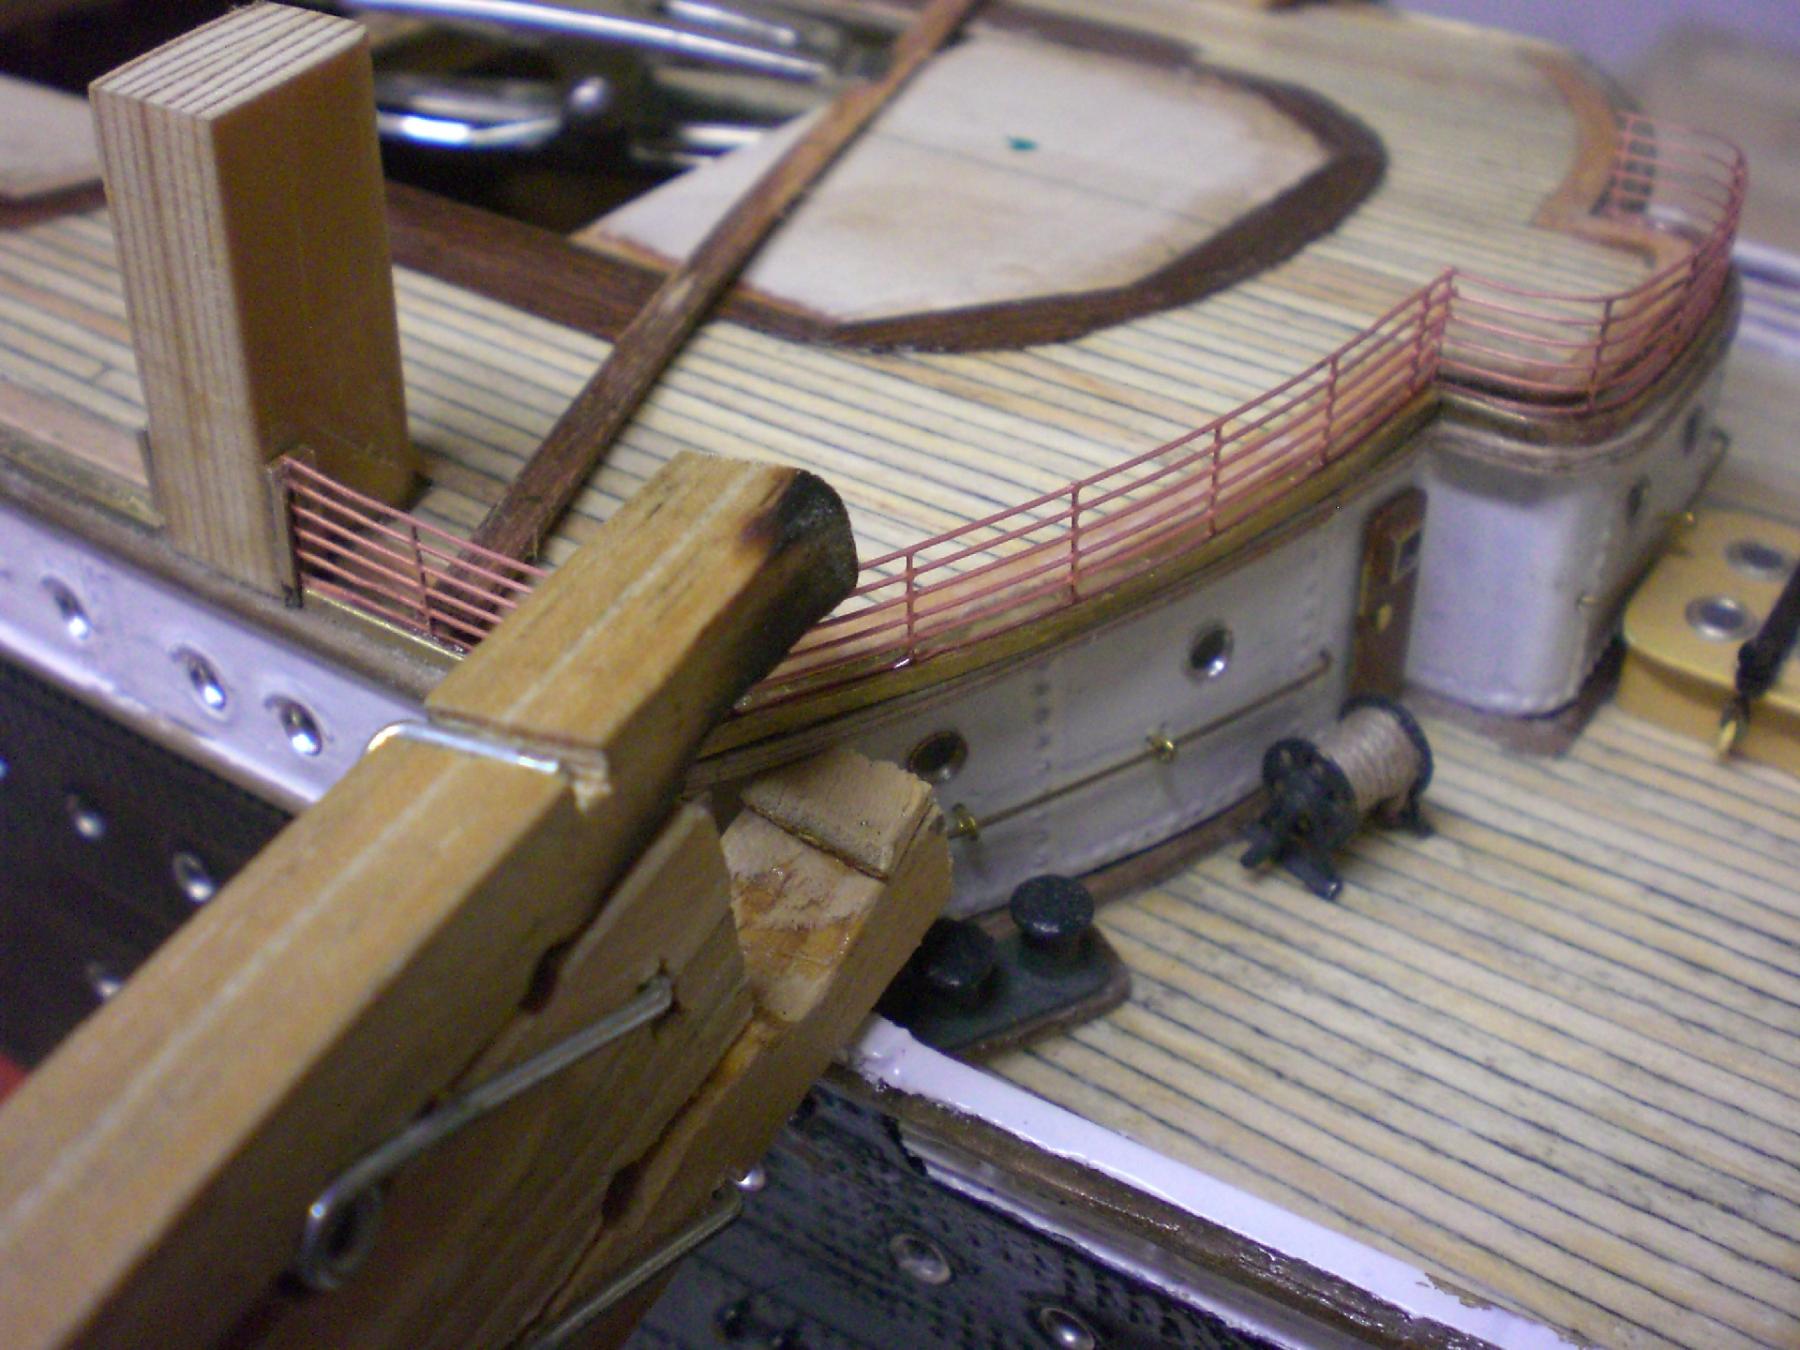
Many thanks for all your kind comments, Bob - captgino - Gerhard - Denis - Mark - Greg - David - Patrick, and all the "likes", for visiting and clicking the button.... Bob, I`m doing my best....., but not all works out as it is thought to be... Captgino, also simple clamps have their benefits...., gentle clamping, no deformation / holding, fixing while the CA cures Gerhard, those railings are so fragile, one wrong touch and the horizontal wires are bent...., but I unfortunately know no other way of doing it in that scale Denis, thanks for your word..., much appreciated Mark, using the clamp comes very handy, because the railing part has to be held in position several minutes until the cA cures... Greg, good idea in making some, I saw this once in a modeling article and tried it straight away as well, it`s also very practible for holding whilst soldering mini parts with a gentle grip, like the burnt portions can tell of... David, you are vey wellcome to try everything inspiring your mind..., I would very much like to see you starting the "SS United States" liner, fastest liner ever, driven by 4 gasturbines or so... Patrick, thanks again for your nice words... Nils
- 2,625 replies
-
- 7
-
-
- kaiser wilhelm der grosse
- passenger steamer
- (and 1 more)
-
many thanks Steve, nice comment, much appreciated... Nils
- 2,625 replies
-
- 3
-
-
- kaiser wilhelm der grosse
- passenger steamer
- (and 1 more)
-
Hi Capt. simple little gadget.... two laundry pegs , backs glued together, and inner legs cut off... Nils

- 2,625 replies
-
- 24
-
-
- kaiser wilhelm der grosse
- passenger steamer
- (and 1 more)
-
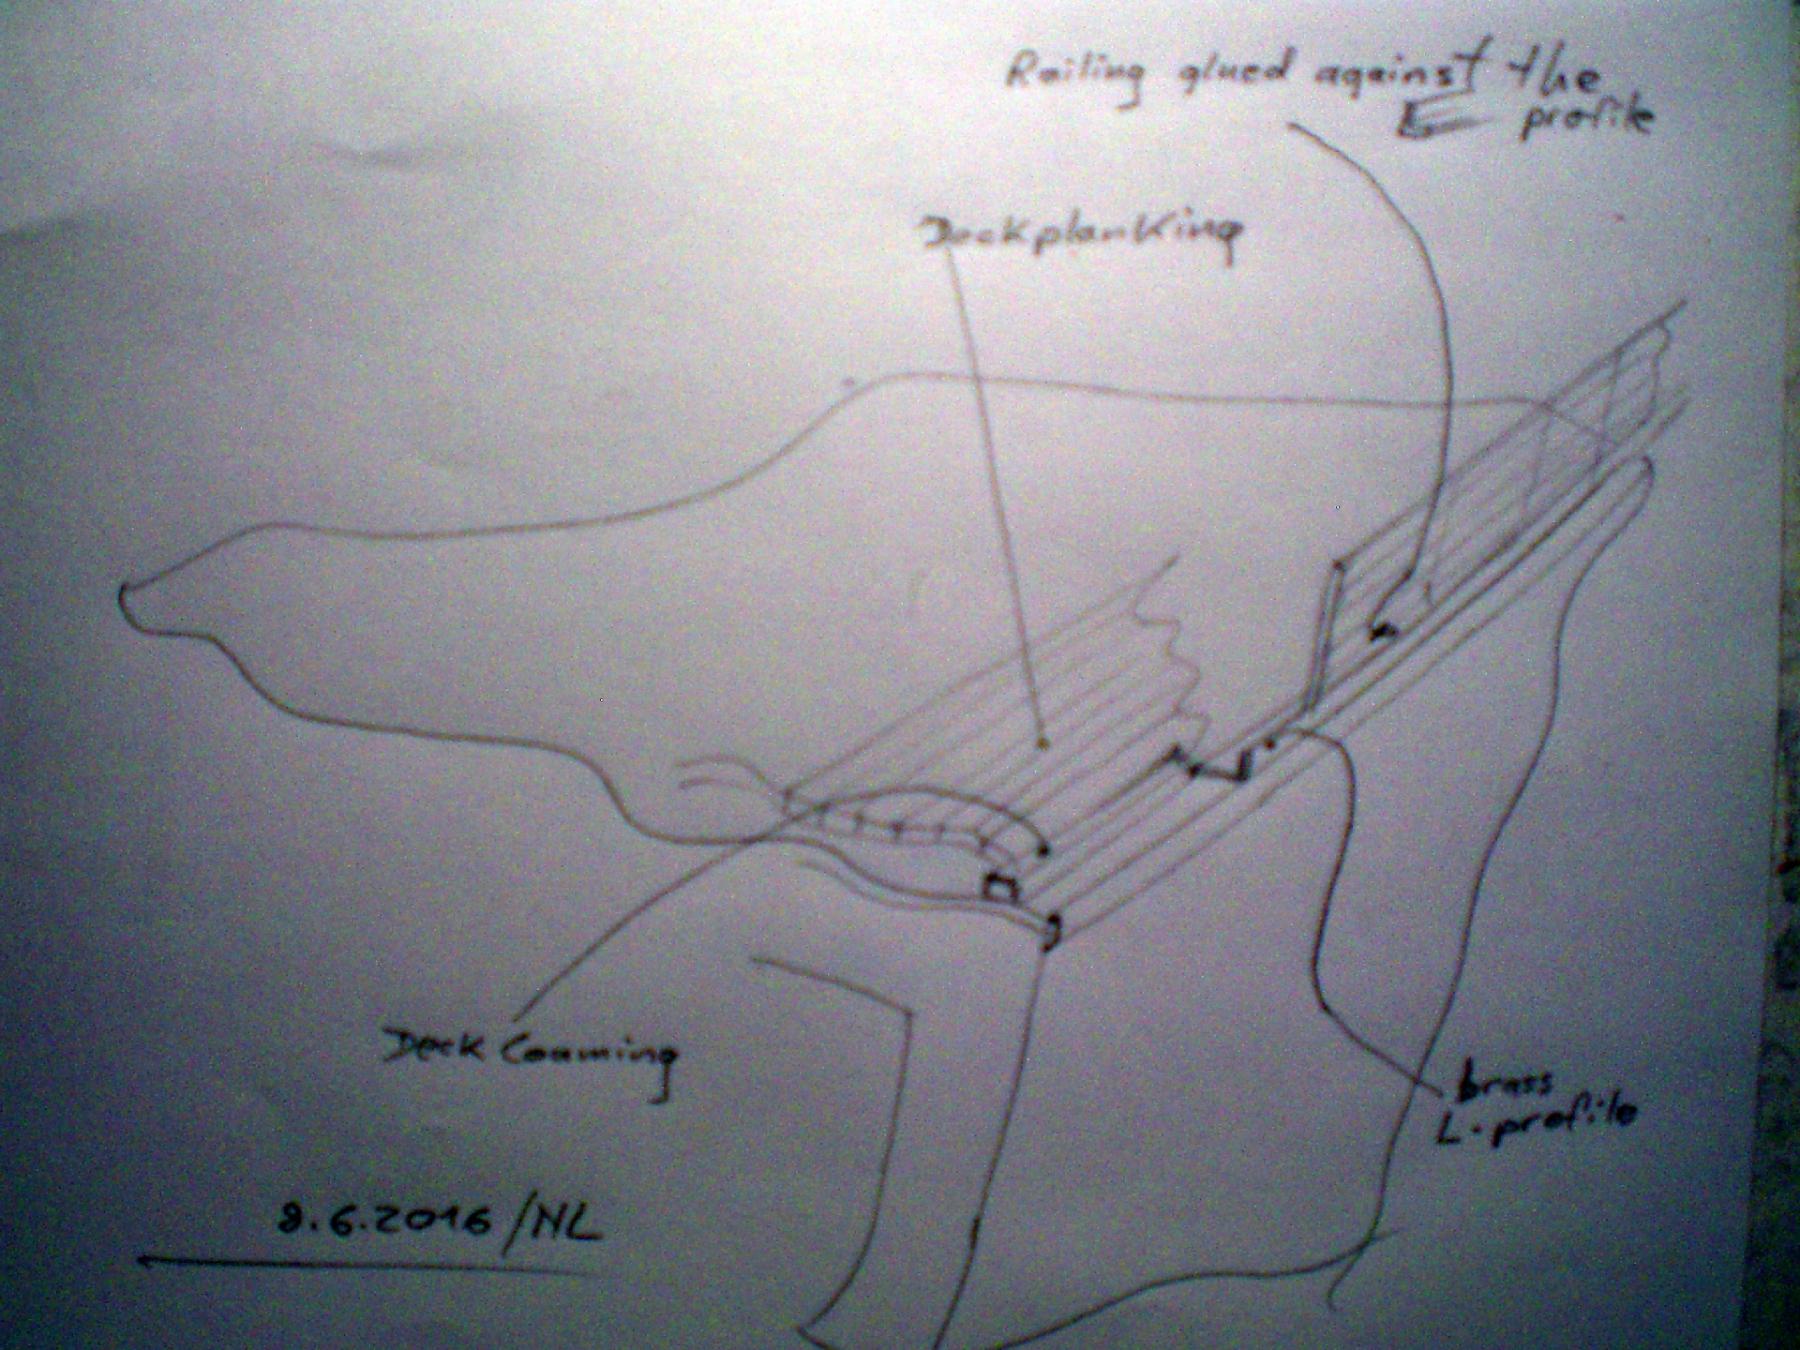
Many thanks mmdd, and Greg (the pegleg sailor) mmdd, from this stage onwards its getting a bit more ambitious..... Greg, there are no stanchion posts and no holes in the deck (too fragile in this scale). the railings are glued to the base L-profile around the edge of the deck, please refer to enclosed scetch Nils

- 2,625 replies
-
- 13
-
-
- kaiser wilhelm der grosse
- passenger steamer
- (and 1 more)
-
Hi Patrick, now that the first shock has overcome it`s fear, and the crew could report the degree of damage to the skipper, I trust you are undertaking the mending process these days. Wish you a lucky hand with the repair. You certainly shall get the "Majellan" to look nice and crisp again.... Nils
-
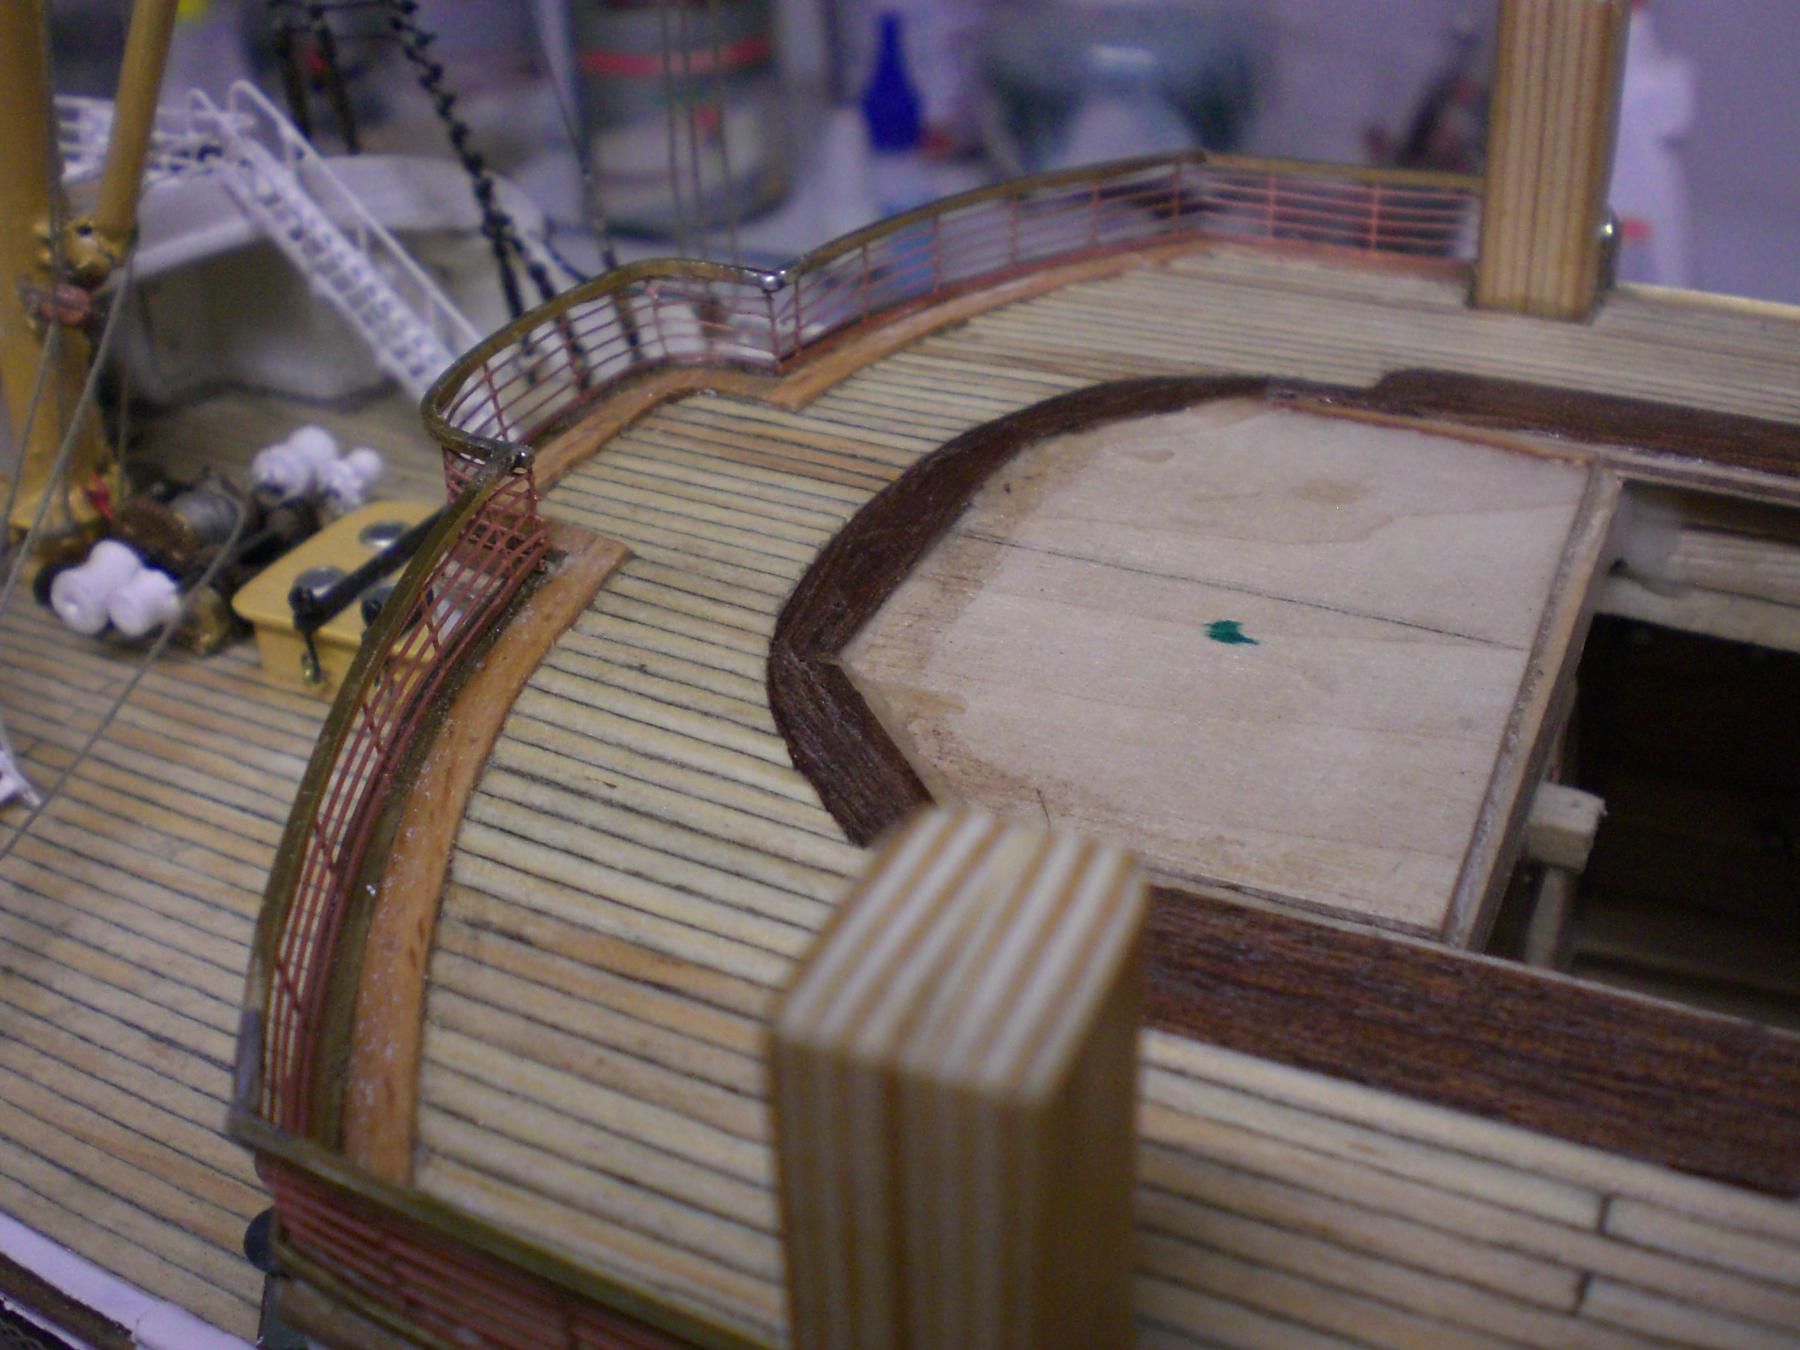
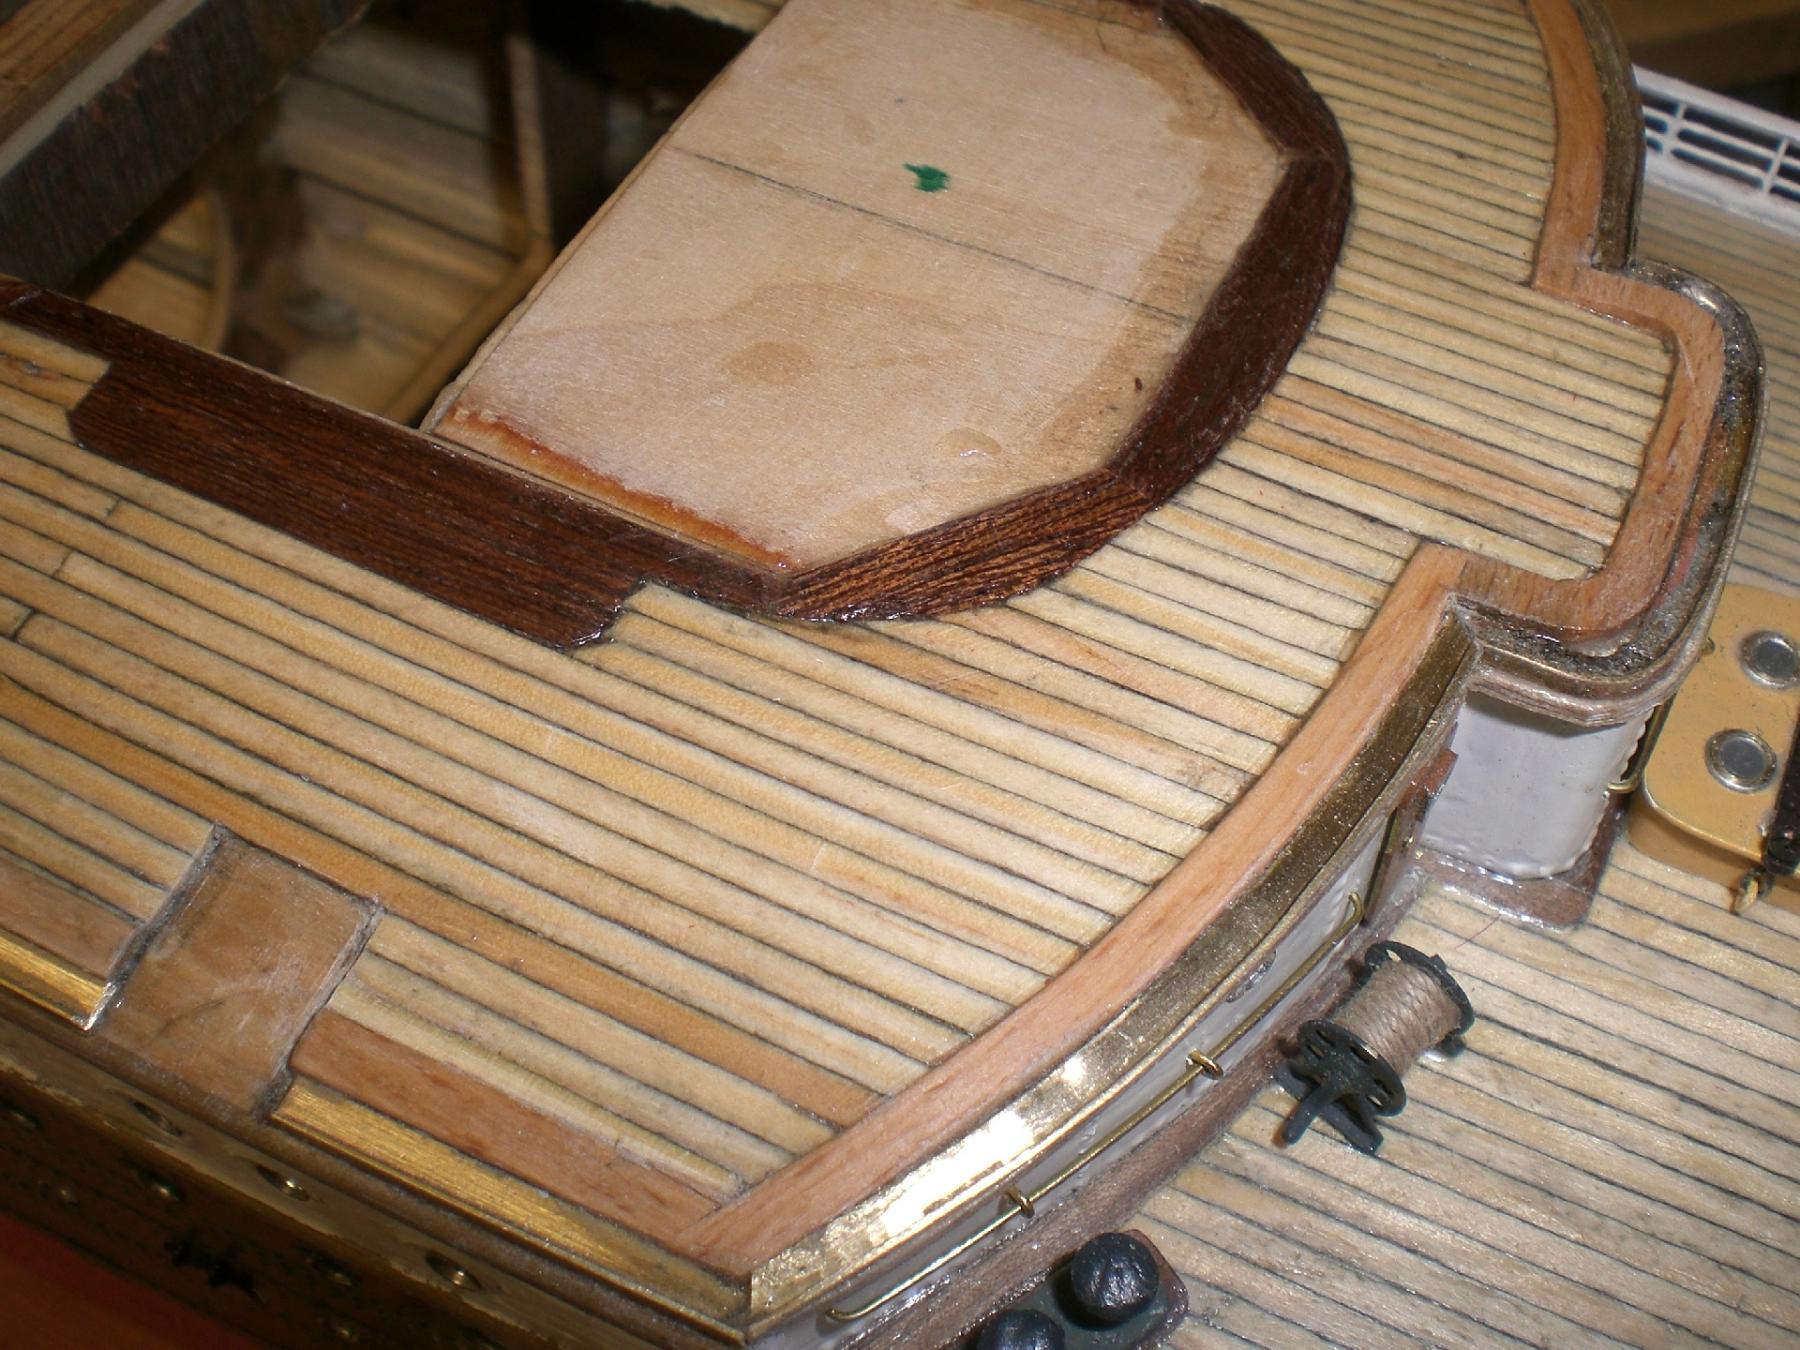
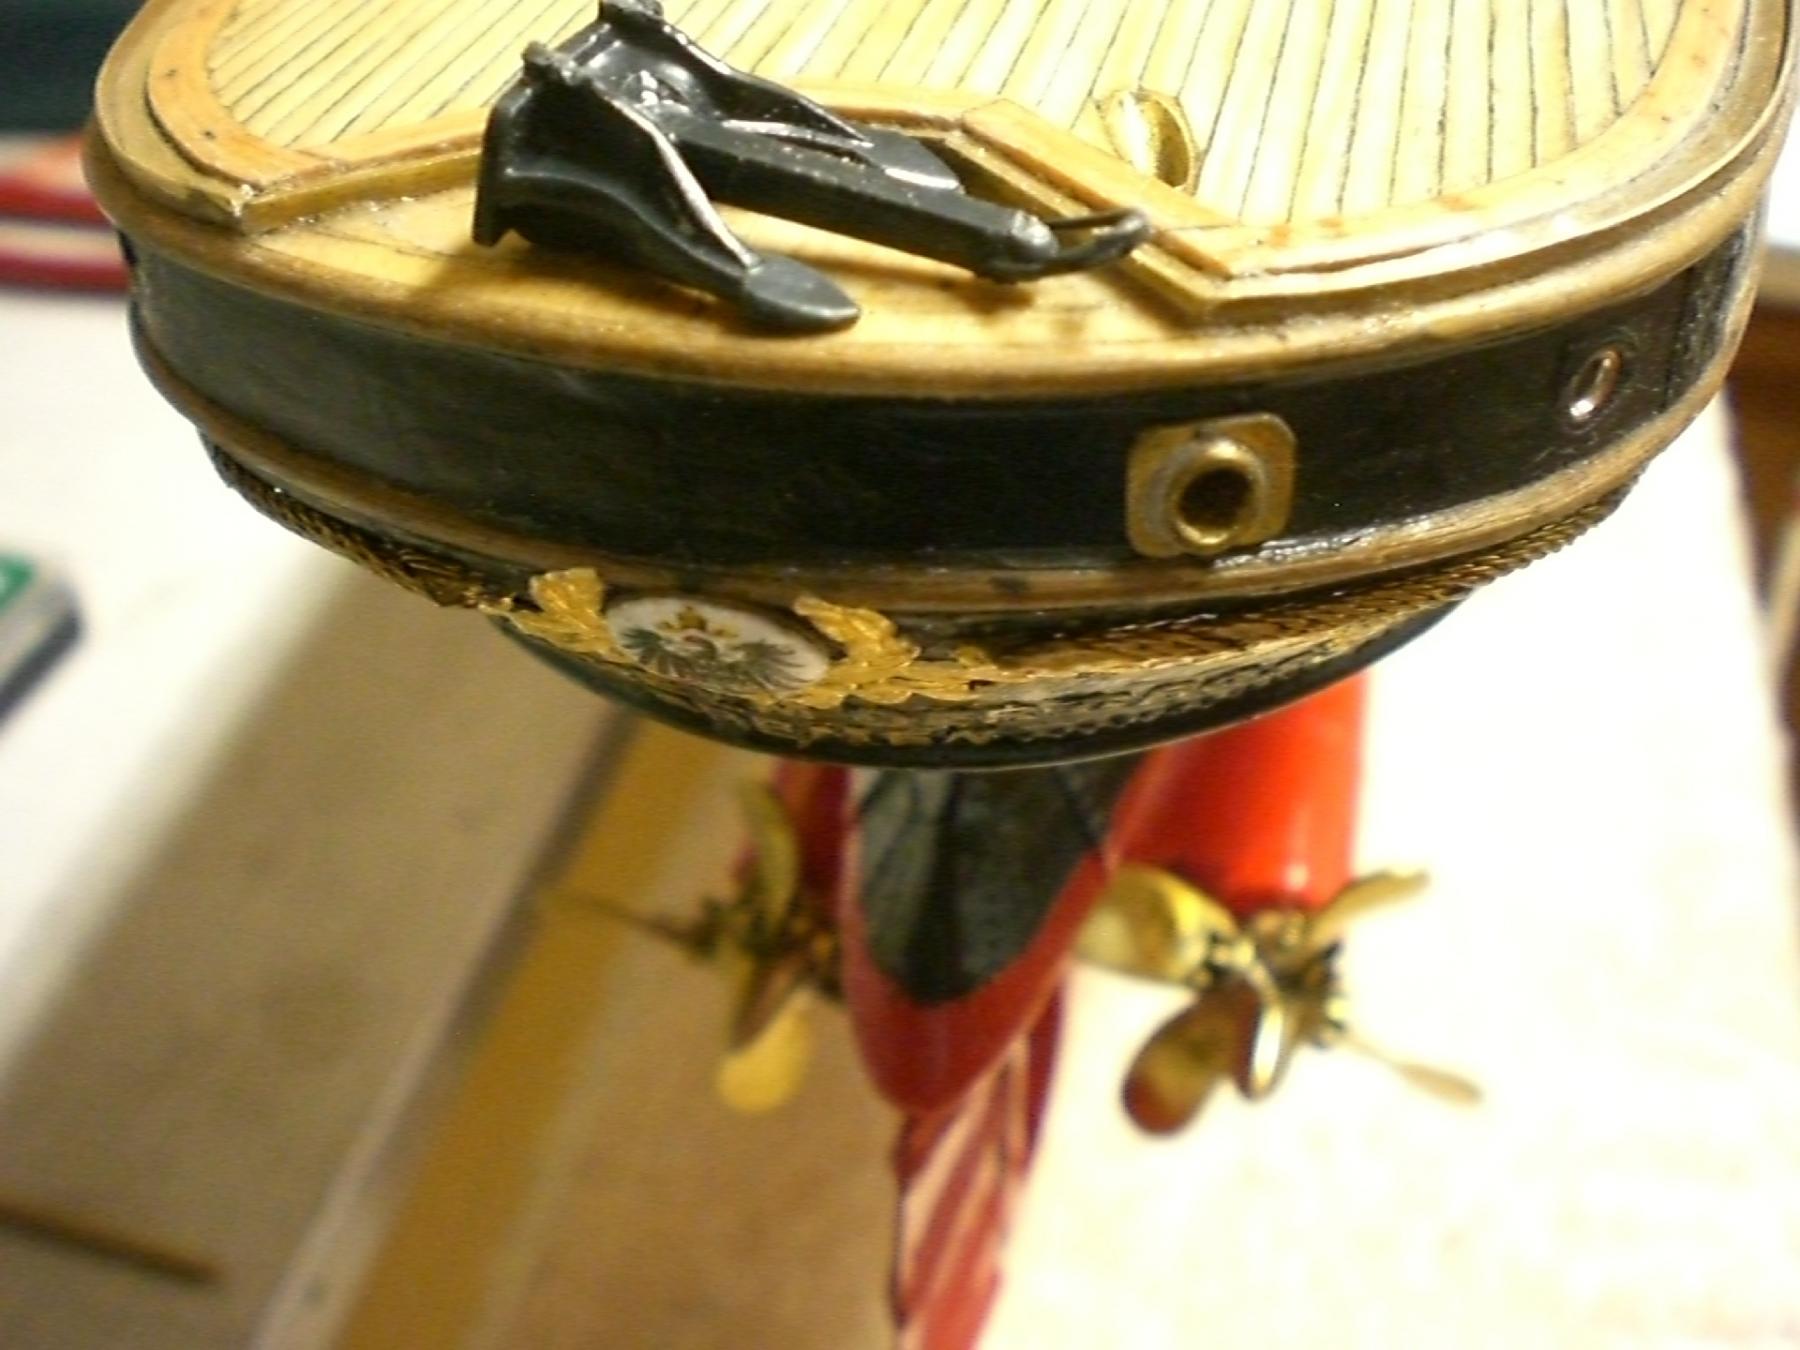
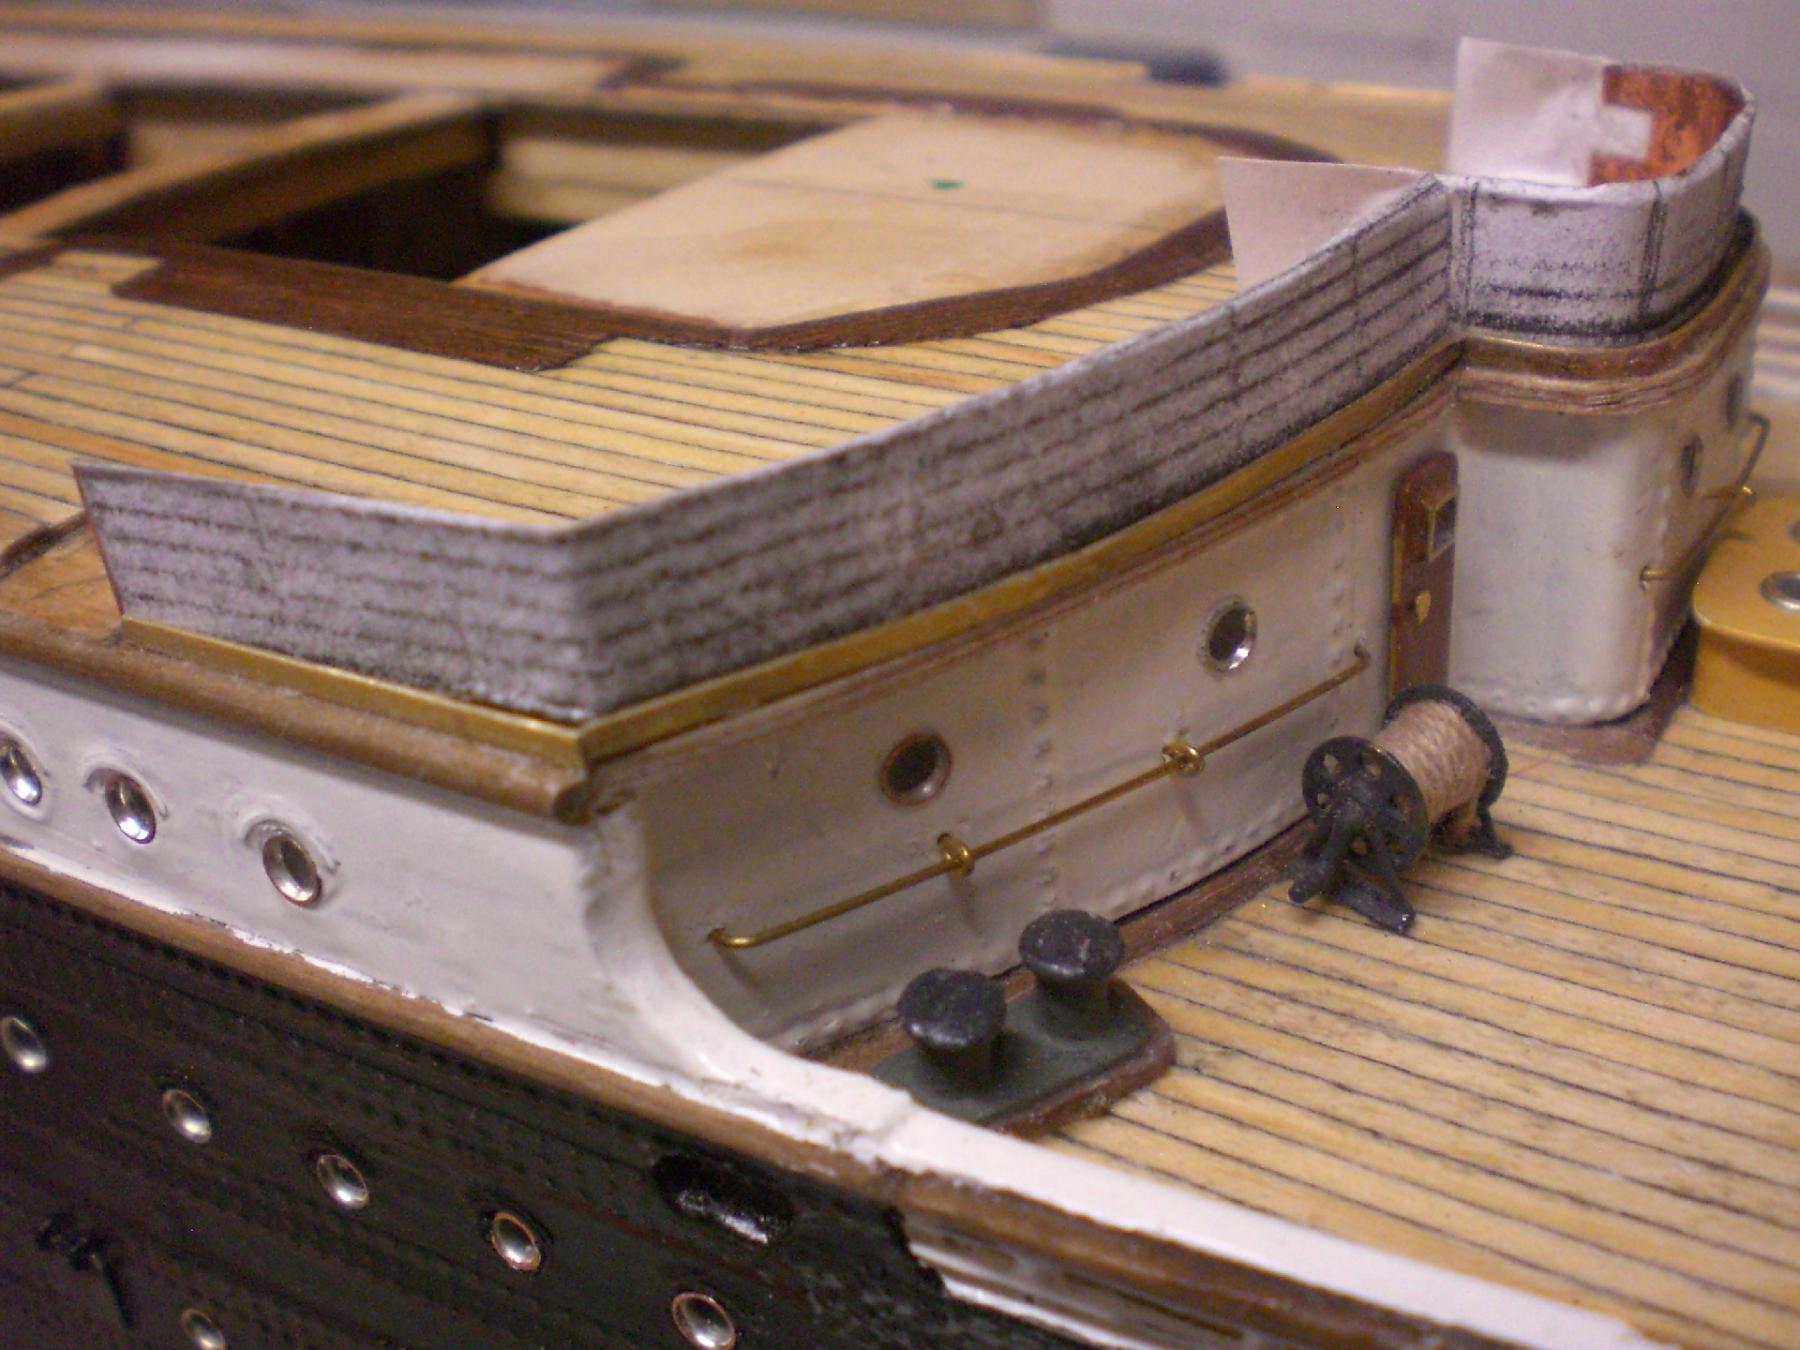
Build log part 35 Update Starting with the 8 mm high railing of and around the promenade deck..... the railing is a very fragile piece of equipment. I start with the portion which requires the most attention. In opposite to the forecastle deck railing this long railing will be glued on in sections to the base rail, instead of soldering it. I`ll ty and fit a handrail afterwards, in order to stabilize it better Nils The two rectangular (unplanked) patches take up the nav-light cabinets the stern anchor rests on a special place aft / midships before cutting the railing lengths to fit, I made some templates....... the railings are from chemical etched copper, 0,5 mm thick, in scale 1:150 (also suits my scale 1:144 well)


- 2,625 replies
-
- 28
-
-
- kaiser wilhelm der grosse
- passenger steamer
- (and 1 more)
-
Paul, your build is beautiful, the hull with all the woodwork and joinings is a pleasure to see, and the stove tops it all. Fantastic modeling !! Nils
-
beautiful pair of schooners Gregor, very nice work all the way.... Nils
- 121 replies
-
- 1
-
-
- la jacinthe
- schooner
- (and 2 more)