


Mirabell61
-
Posts
7,328 -
Joined
-
Last visited
Content Type
Profiles
Forums
Gallery
Events
Posts posted by Mirabell61
-
-
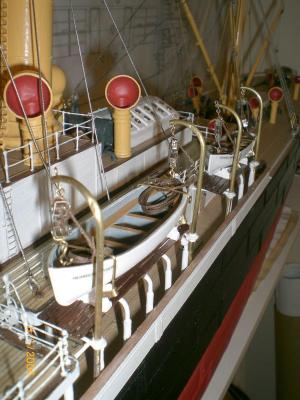
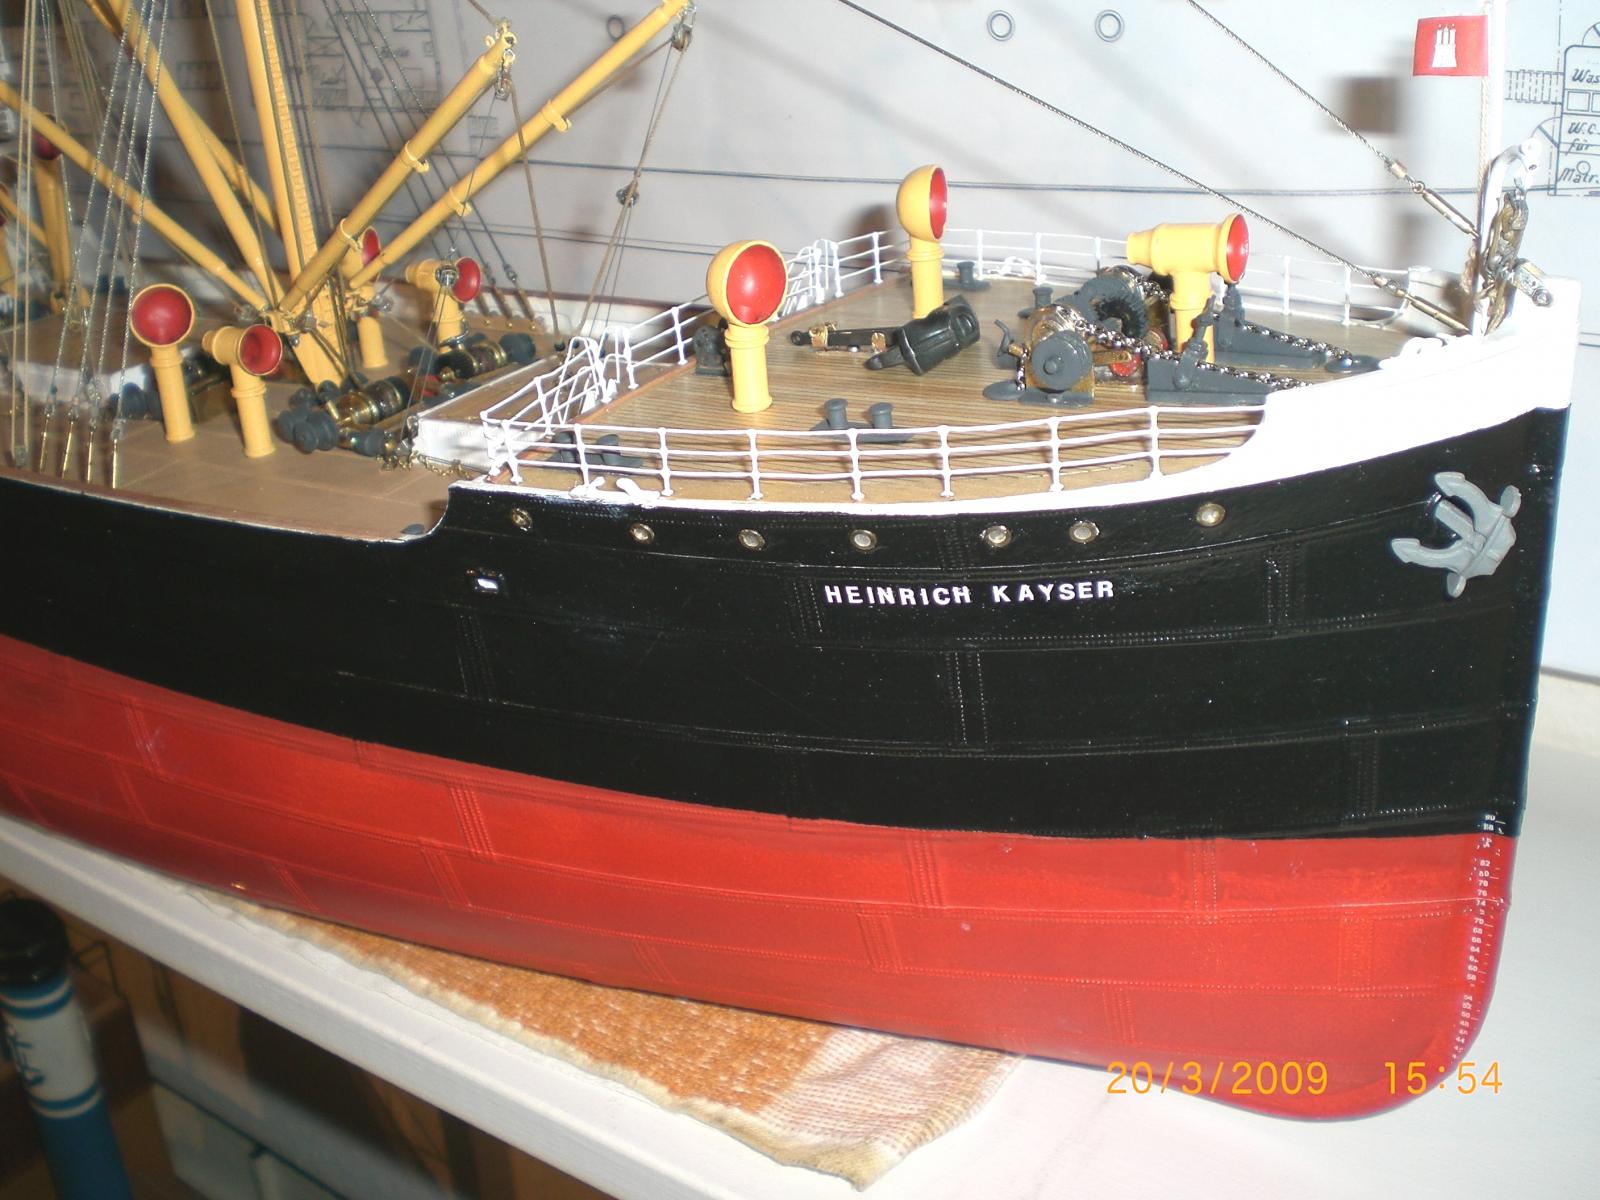
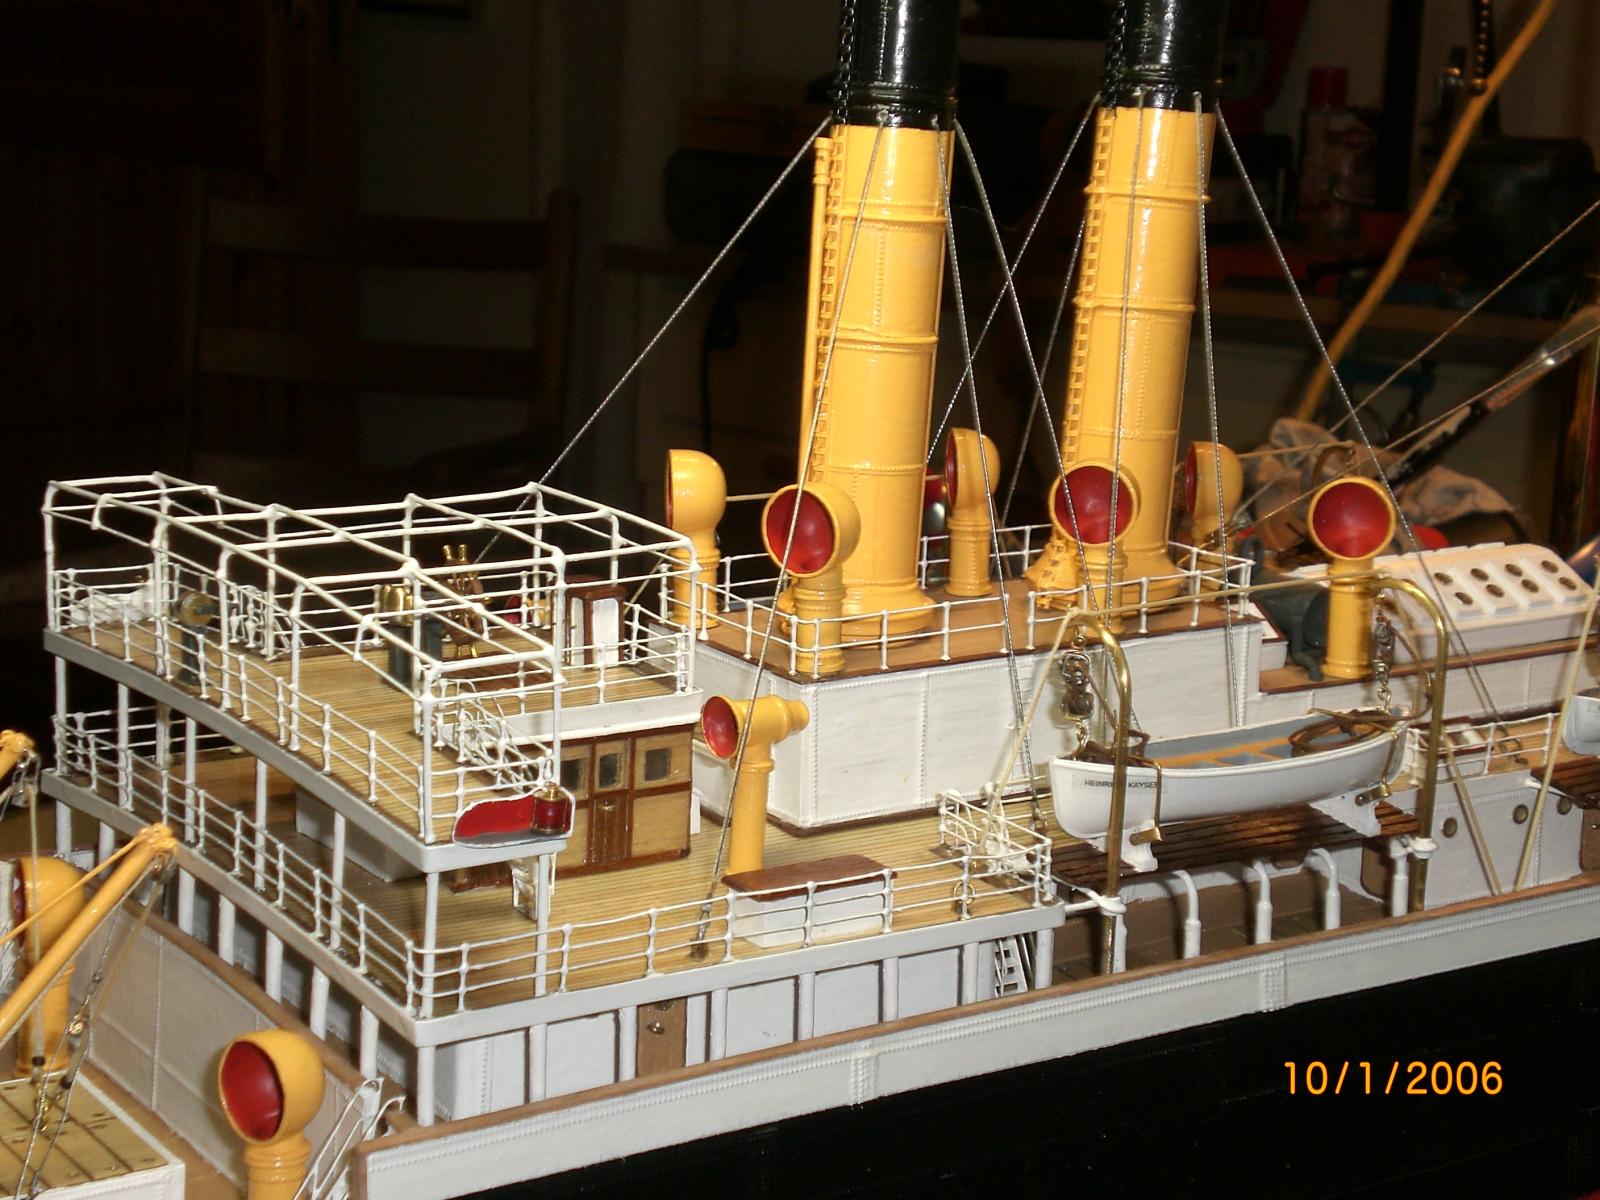
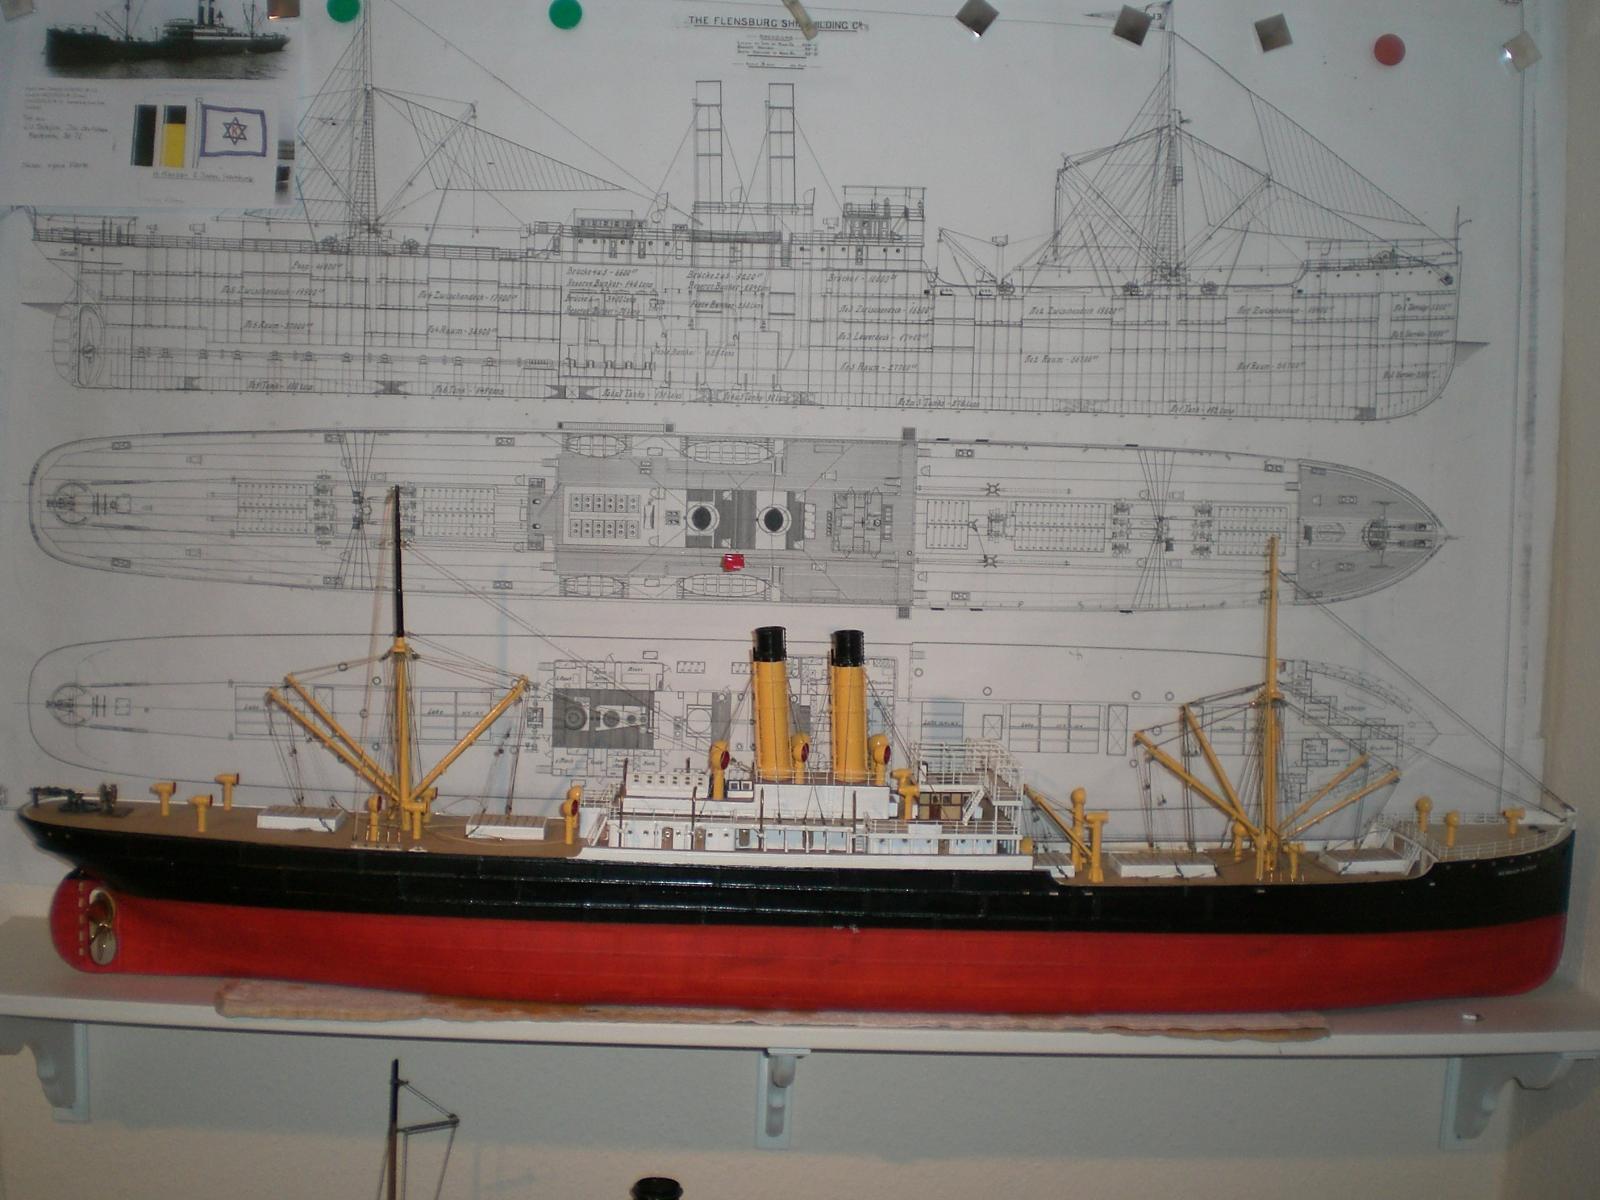
Build log part 18

forecastle railing painted
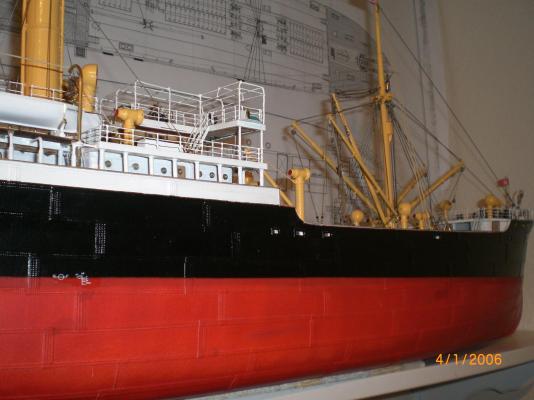
looking at her from the floor of the shipyard float-dock
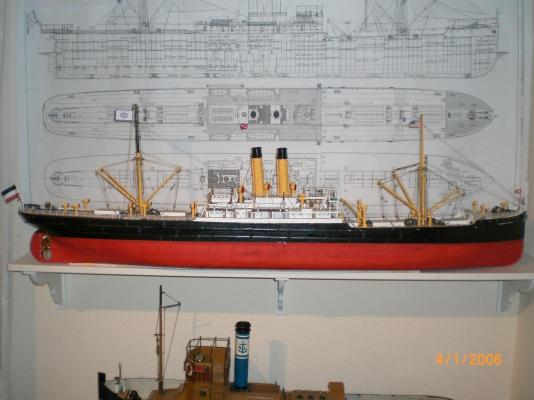
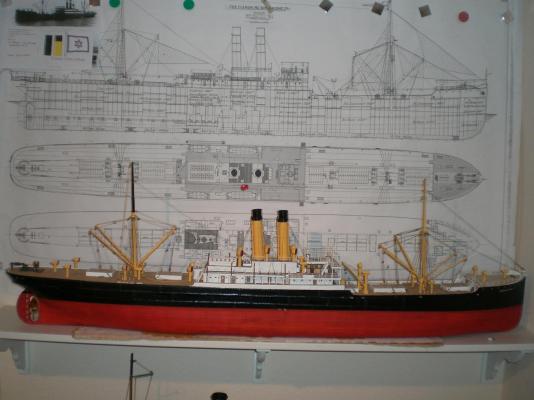
plan crosscheck and flags hoisted

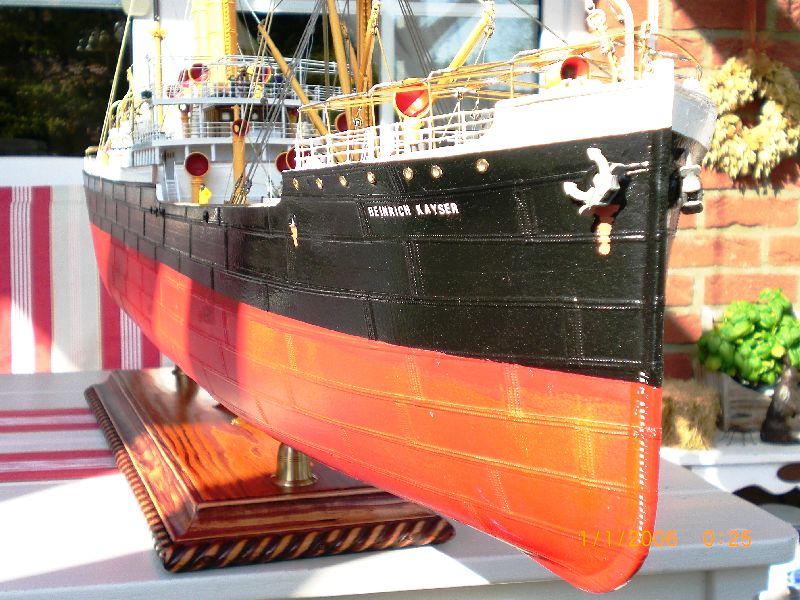
Hamburg homeport Flyer above bowpost

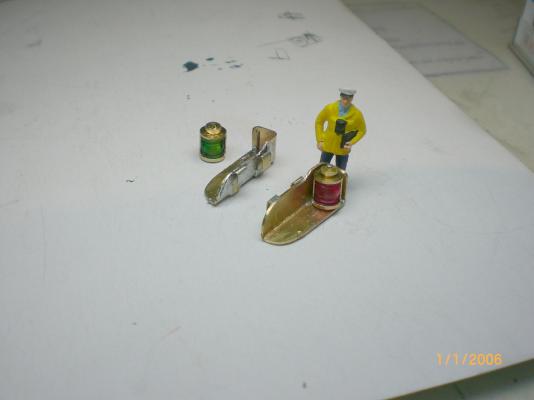
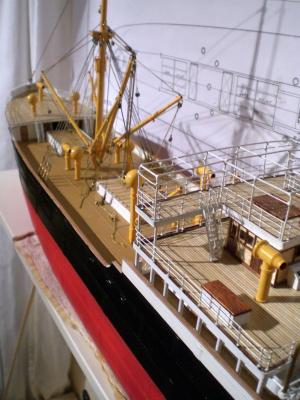
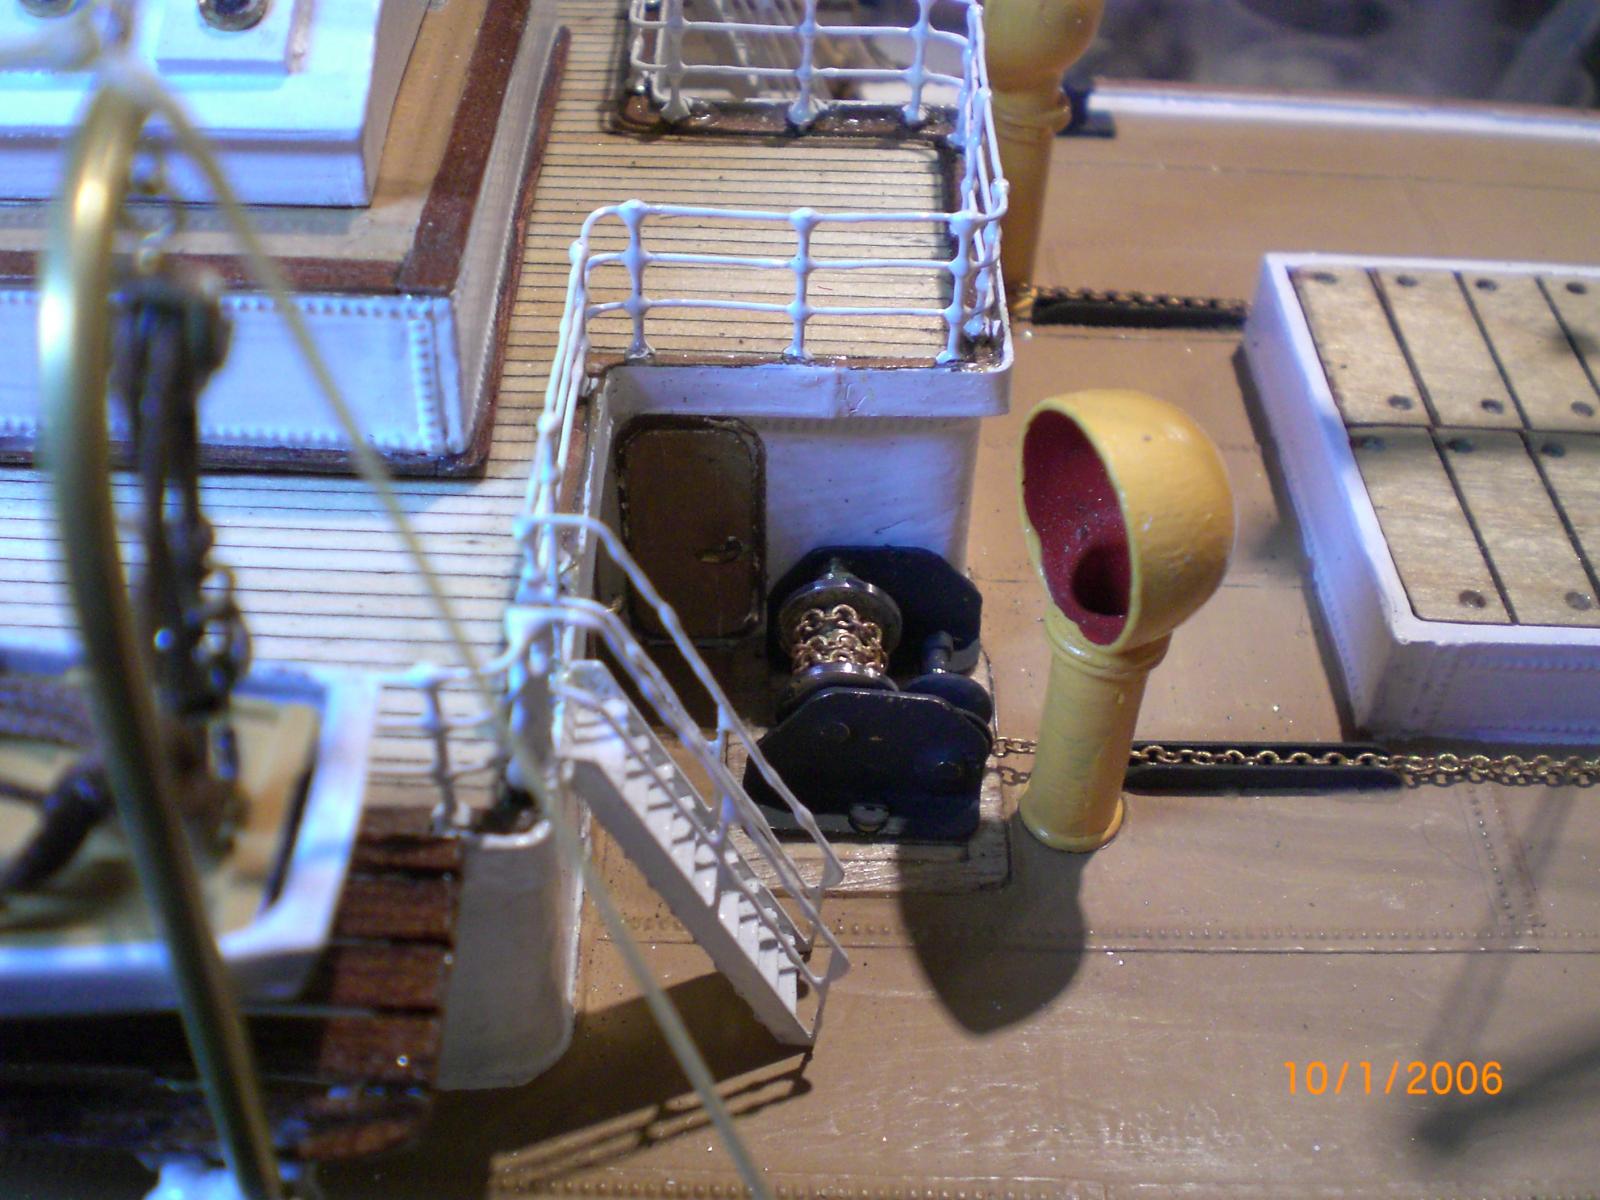
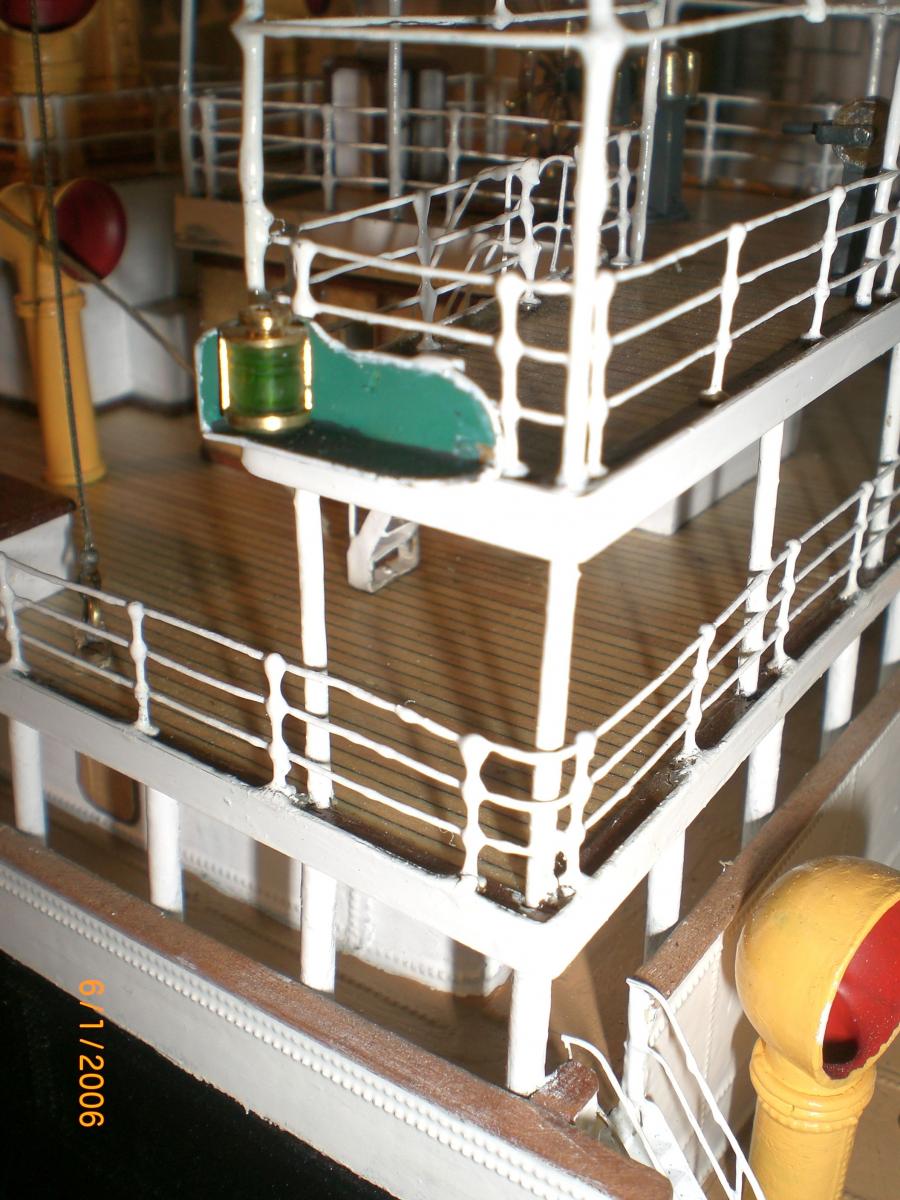
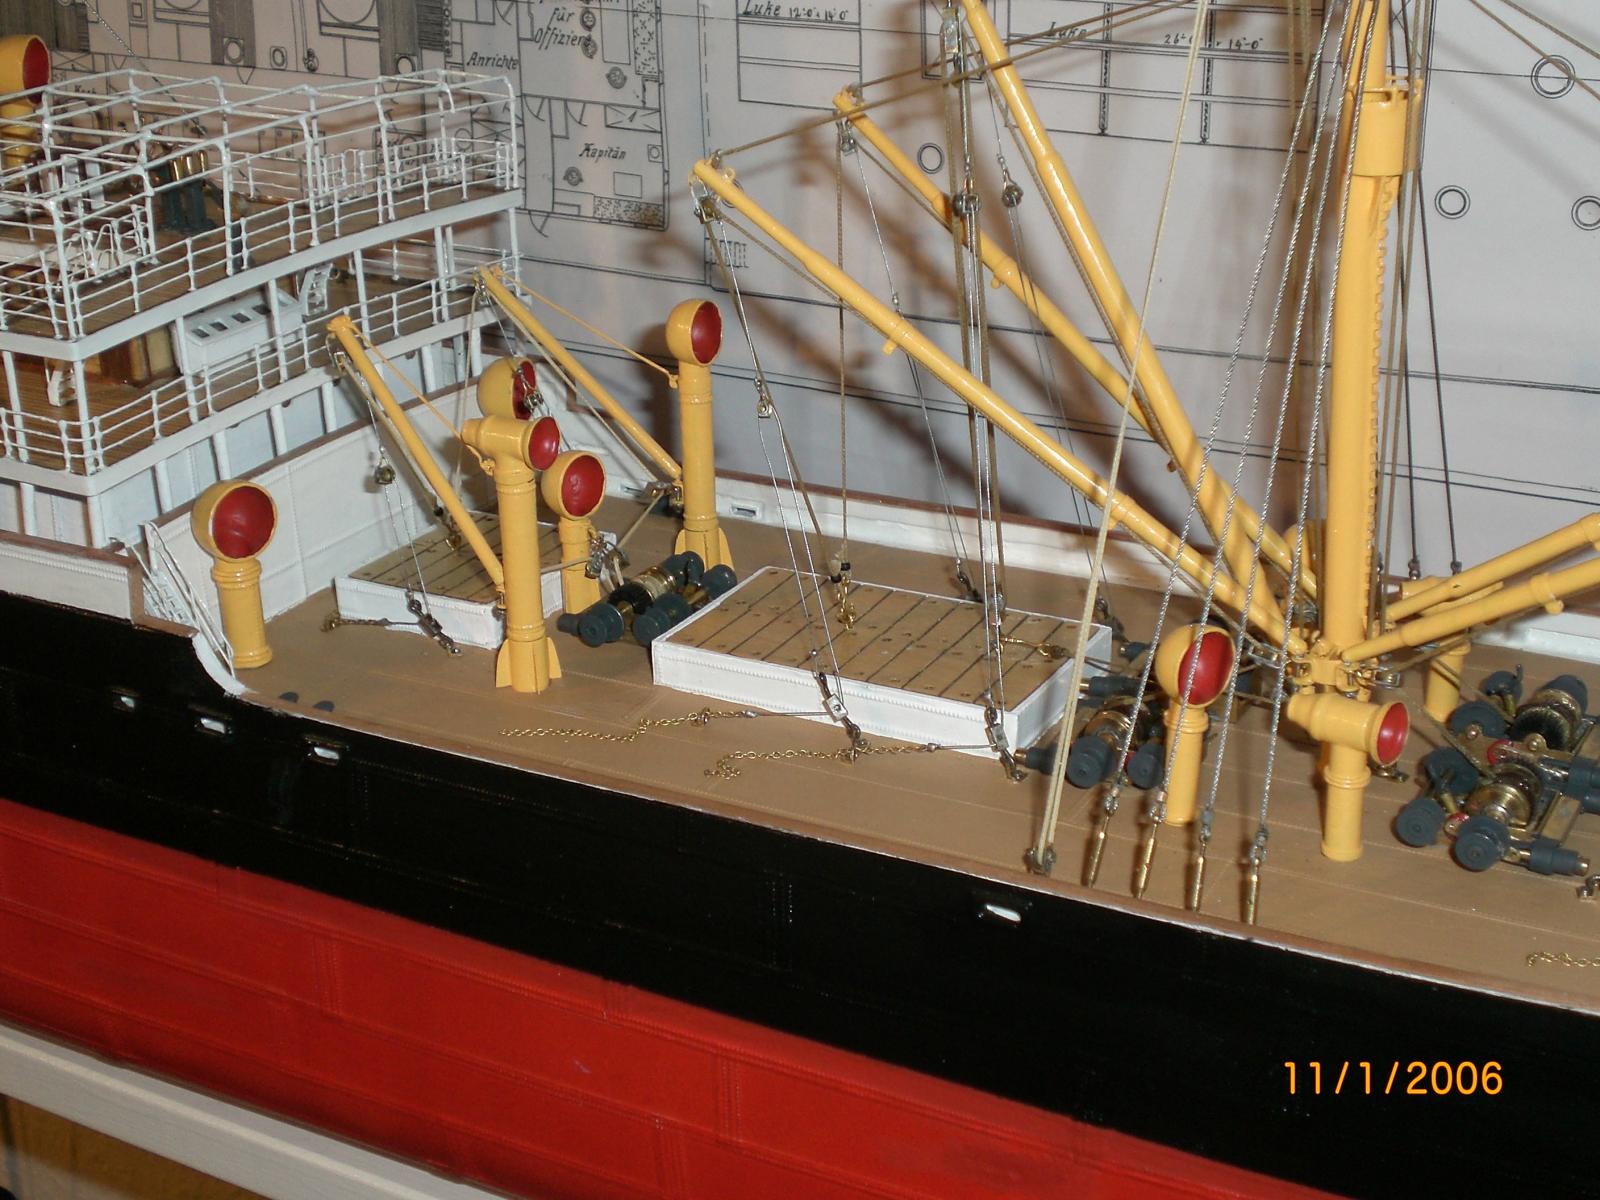
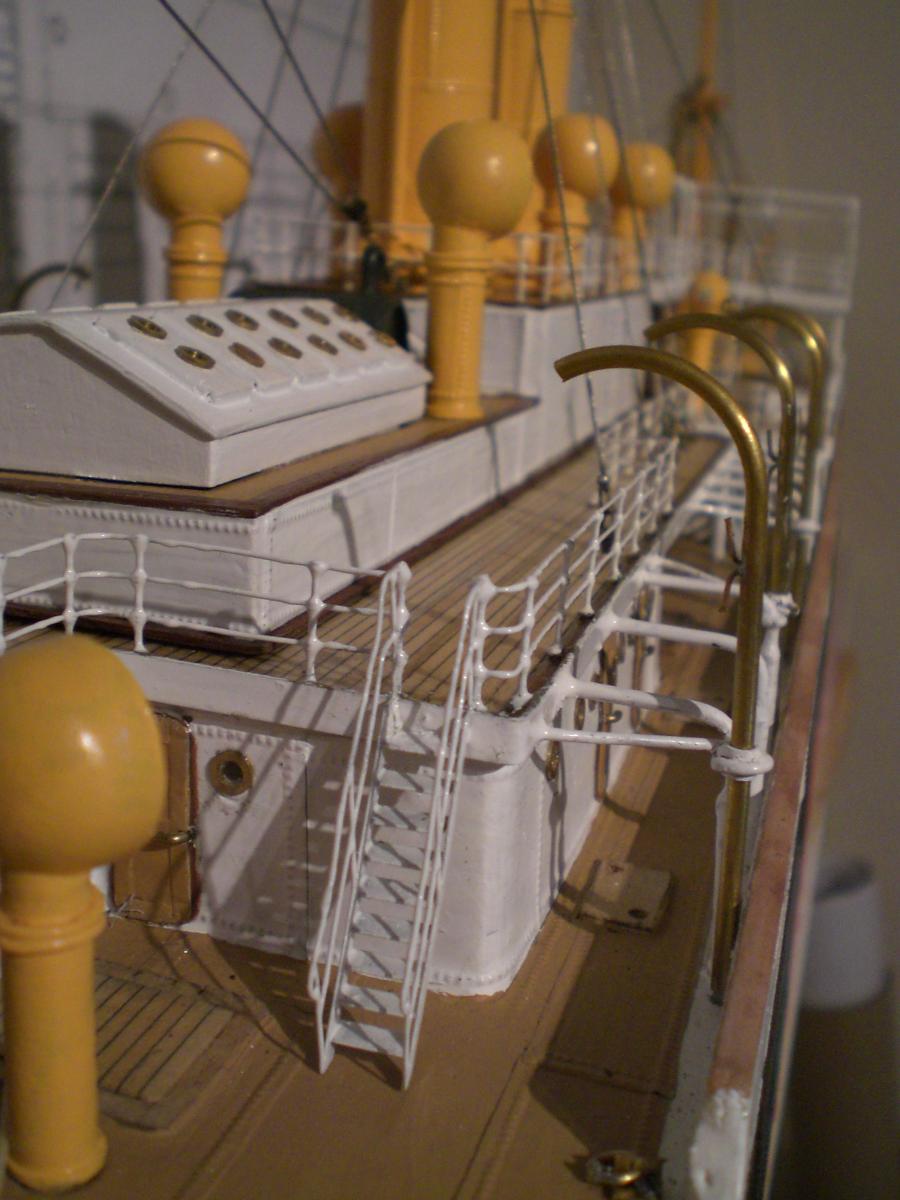
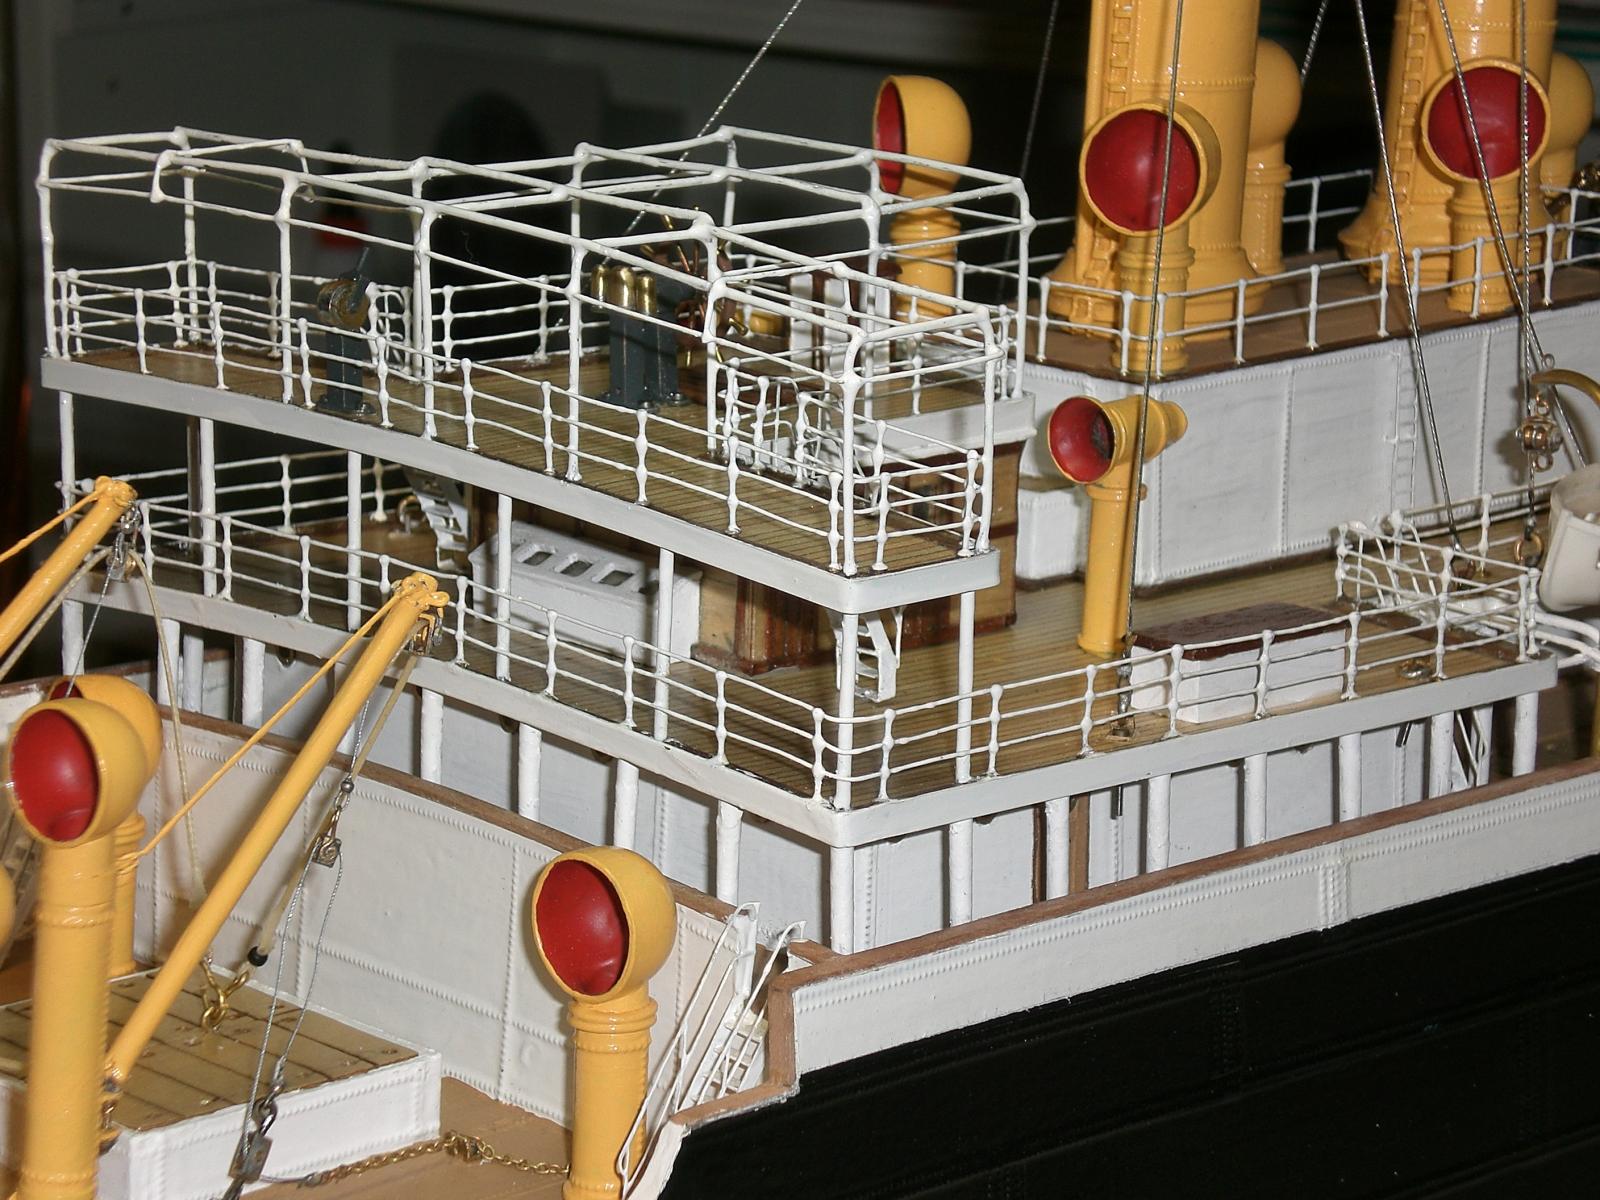
These are sand buckets for distinguishing funnel blow sparks and glimming particles falling down on decks. The bucket-racks go to the upper Bridge deck area. (sorry for the Background colour)

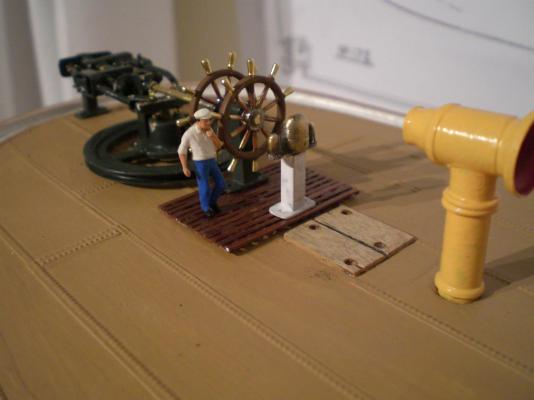
this is second officer, Louis Fretwurst, comming from his inspection round, after recognizing that certain steering chain links will Need to be replaced soon, due to wear..., when the wheather calms down
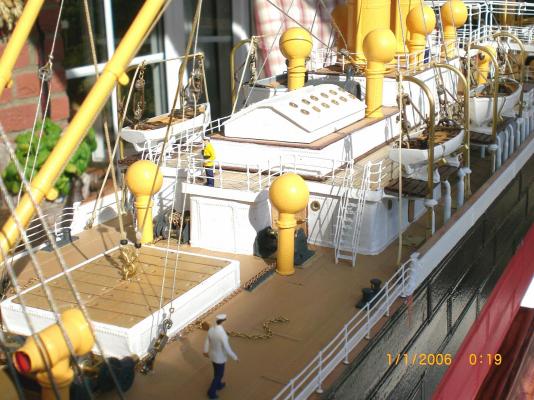
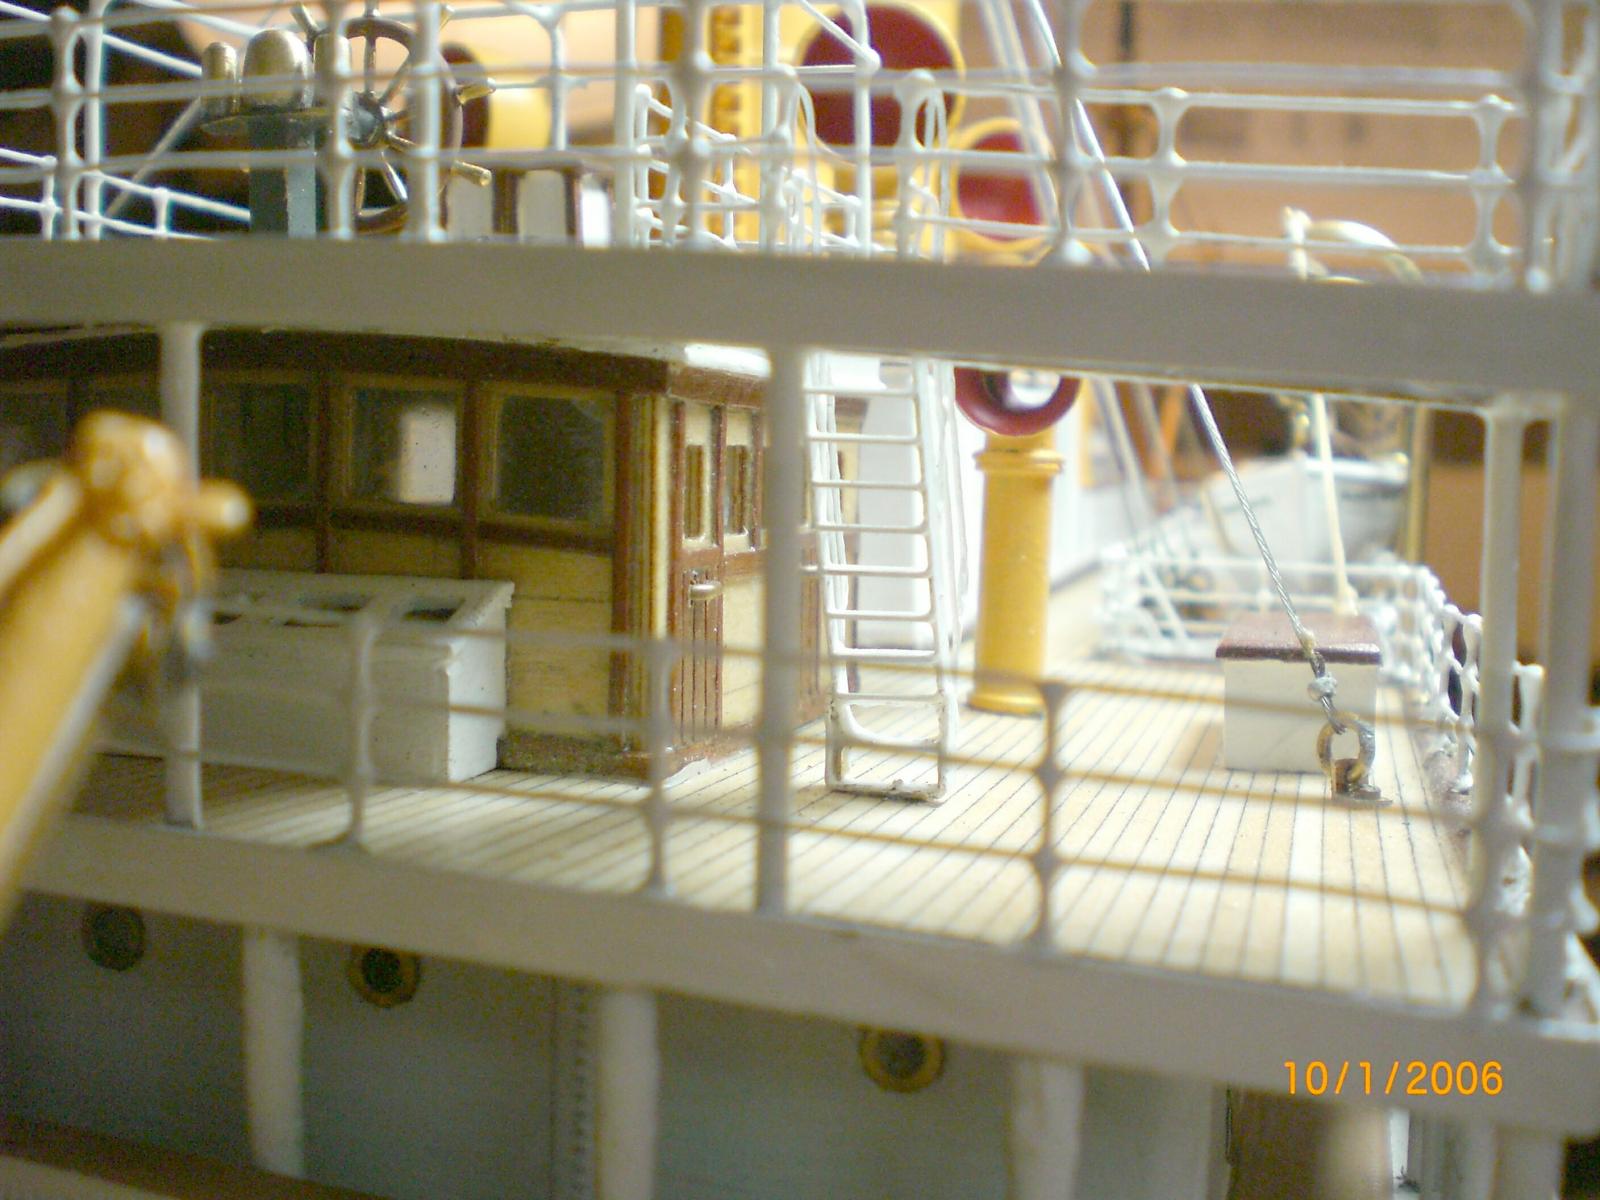
Machine assistant, Kurt Heilmann, is looking dowm from the boatdeck whilst Standing over the area where the steering steam engine is situated in the deckhousing beneath

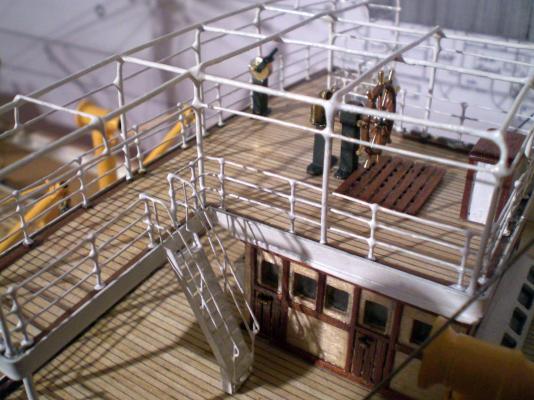
mess Steward, Johannes Steffens, is looking over the starboard side, dreaming of Christmas back home with his Family

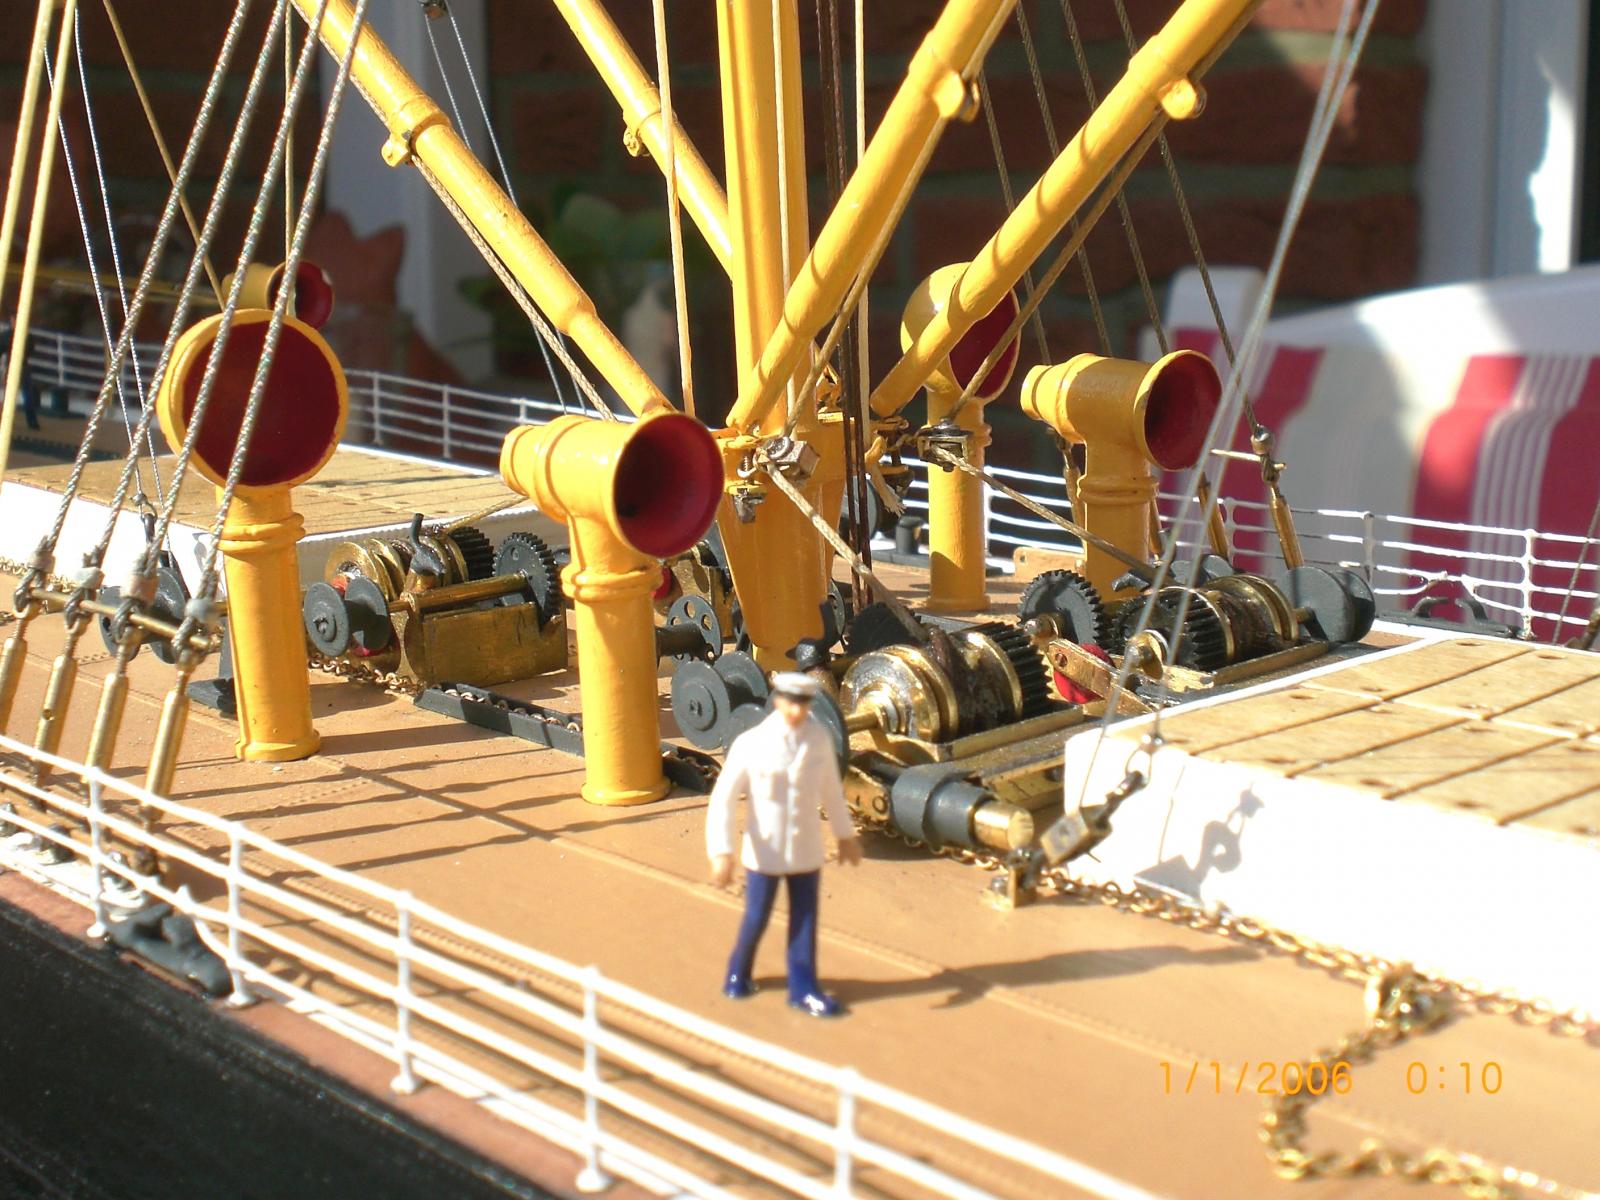
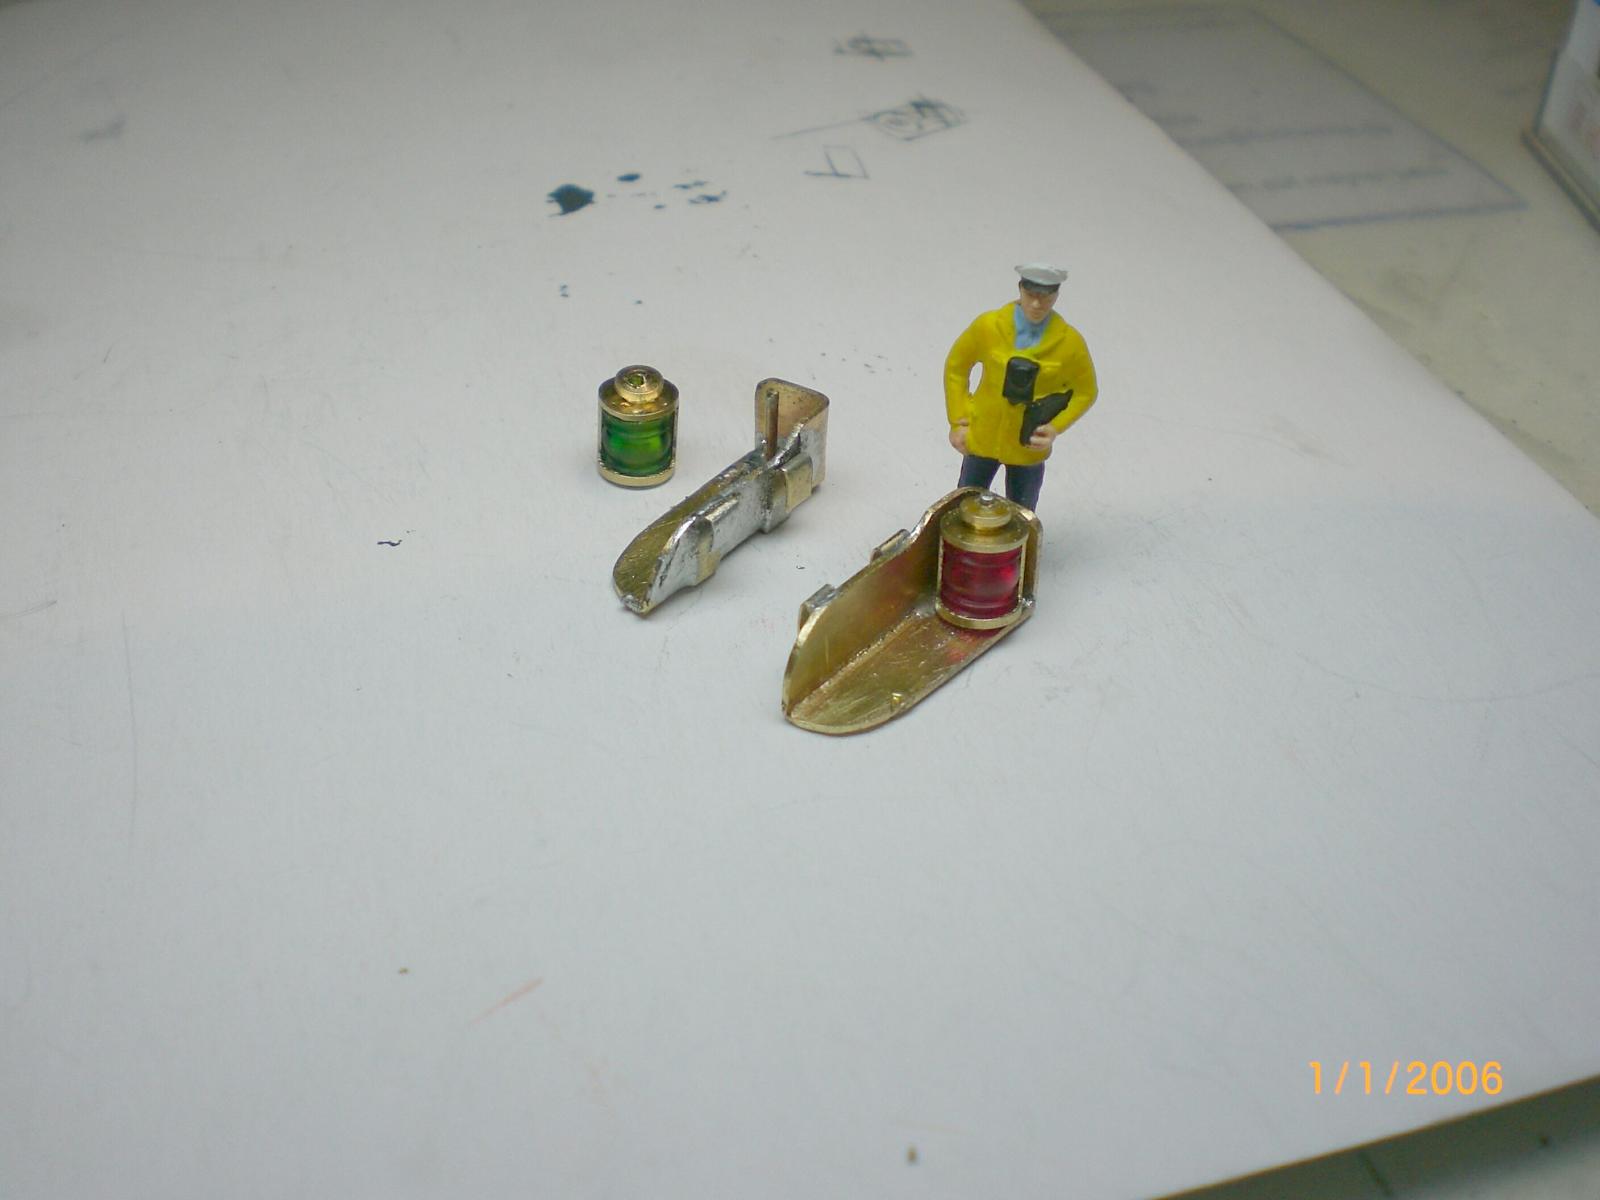
My grandfather (yellow coat, Holding binoculars) is watching out for icebergs this time of the year, whilst first officer, Richard Andreis, mid Bridge, with beard, is having a watchful eye on the Forward workdeck where donkeyman, Heinrich Grunewald, is securing the second hatch winch- and loadbeam tackle
Stern (White) Nav. light mounted, Stern flagpost and Mooring clamps mounted
Building log part 19 to follow...
-
Thank you Crackers,..
and for those Pictures, the model I aim to Introduce per build log on MSW shall be exactly fitted out as the Version in which she tragicly went down 1957
The to date already completed model can be viewed upfront in my Album in Topic "completed scratch built models" if you like
Nils
-
Crackers,
again Thank you for your Kind and appreciative words, yet there are still 4 buildlog parts to come...., hope you enjoy These as well this Weekend.
If there were to choose a next build log from my behalf, it may be the toughest and most detailed shipmodel Project I ever did to date, where I spent a real intensive investigation and Research on, as well as many for myself new experienced modeling techniques, it is the the Tallship "The Pamir"
Nils
-
Hi Popeye,
Thank you
I`m very happy if sharing this build log with others it might bring-in Inspiration to fellow builders, and also the appreciative response and nice comments of the MSW Boys and Girls has so far been very encouraging for me to do so. I hope we shall see some more steamships keellayed at this Forum
Nils
-
Bugra,
the material I use for deckrims is of 4x4 equal Long width, extruded or walzed brass angle in 0,5 mm thickness. Cut away v-Portion when bending an inner Corner and replace a Little plate in the Corner when using for an outside Corner rim.
Be careful when bending the Corner for the extruded brass is brittle due to the way it was brought into its straight Rating. I tried to aneal in bending area with gasflame and quench in cold water (should freeze in the anealed microstructure), but you Need to do some Trials with a scrap Piece of bar. Its a bit tricky because its a game of directed heat application versa cooling down neighbour area with Little mass intensive moveable "heatsuckers"
If the bend shall crack, it can be soldered together again, but that may cause someone to loose the last few Grey hairs...
ammendment:
Bugra,
the forecastle- and the poopdeck bear no extra rims, there the stanchions hold very stable in the decks basic 1,5 mm thick aero Plywood. The holes drilled into deck 0,1 mm smaller than the stanchion foots
Cheers
Nils
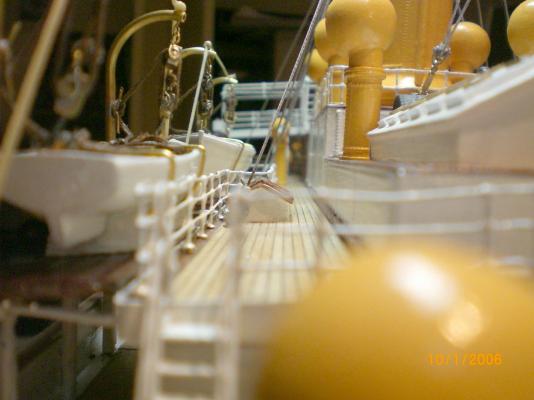
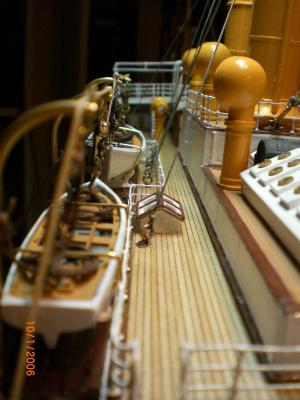
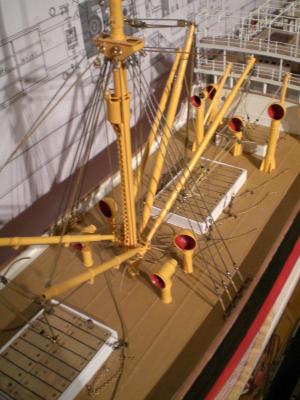
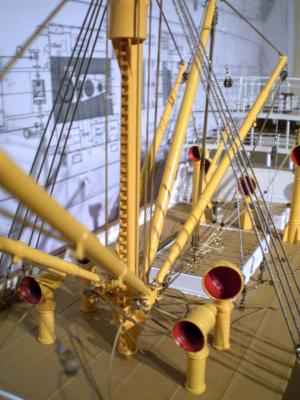
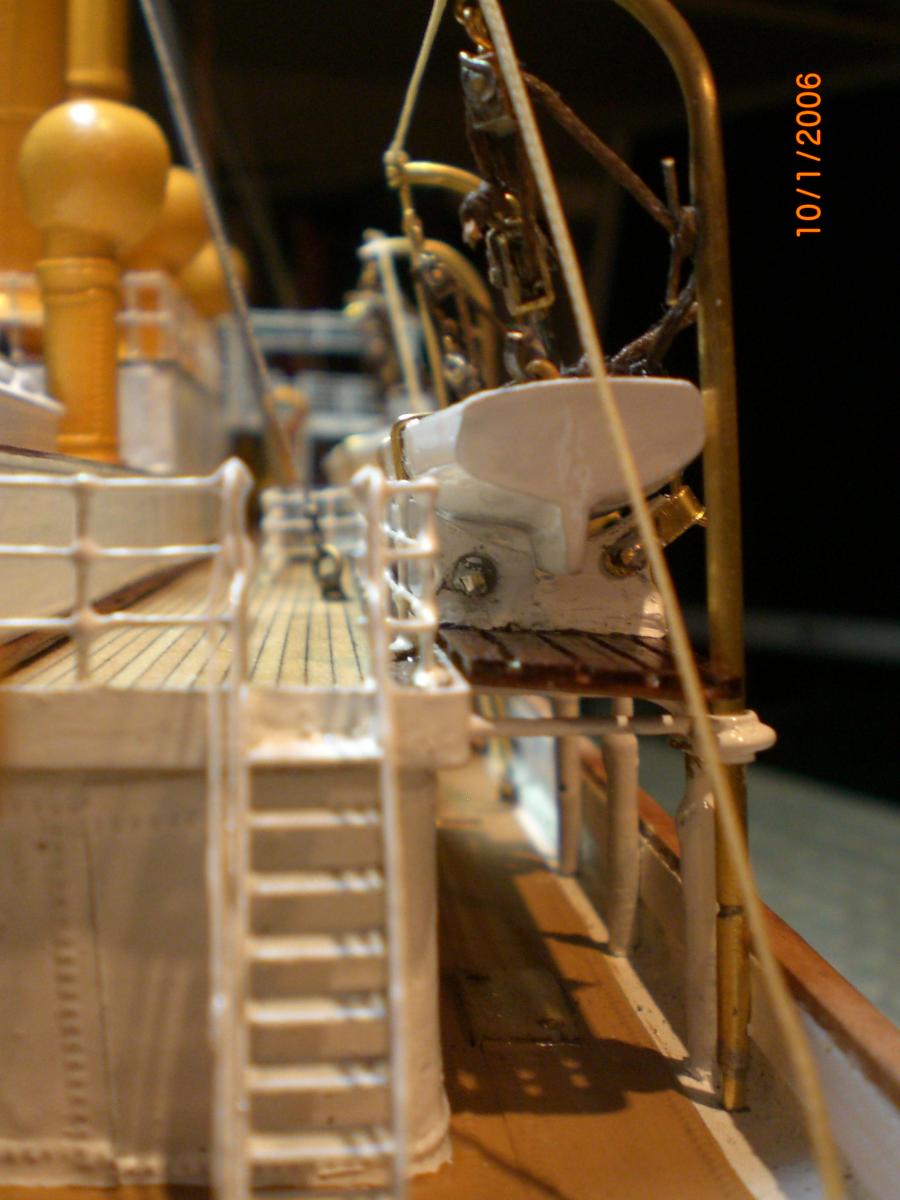
unfortunately I have no better Close ups in this Moment than These 3 pics
Hope this helps...

- ulrich, avsjerome2003, mtaylor and 4 others
-
 7
7
-
Build log part 17
there was at this time the question if partial "canvas" sea and wheather protection Panels (like Trampolin way ) should be attached to the inner side of the railing or not. decision was to let it be
this and the next six Pictures are self explaining...


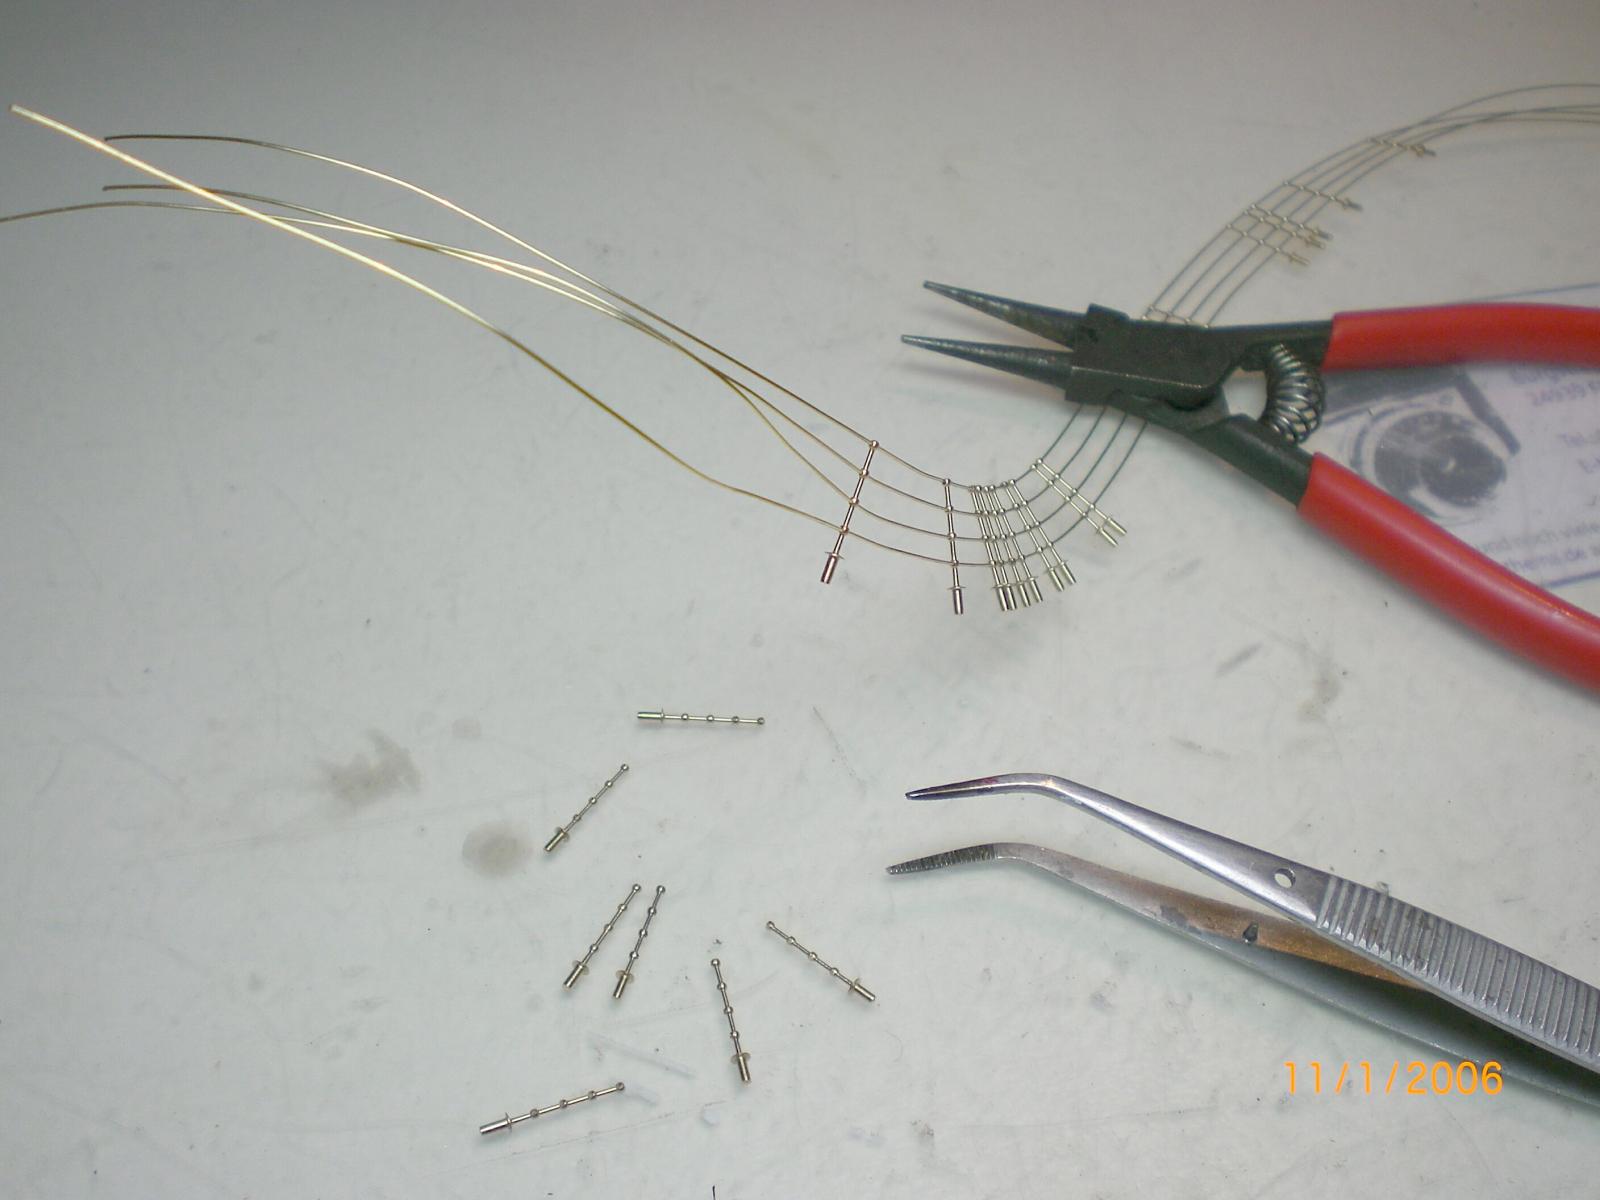
0,4mm brass wires are fiddled into the 0,43 mmm holes in the four hole railing stanchions, pre-lining up These is easier for mounting
finaly made it all around the Long poopdeck with 1 or 2 stanchion losses, but luckily with no false borings in the deck rims
Build log part 18 to follow....
- GrandpaPhil, archjofo, mtaylor and 7 others
-
10
-
Hi Danny
I think I can feel with you when you took this on, because Facelifting a junk model anyone can do somehow, but you are taking the "not mean Task" for a challenge to your superb skills in Performance to even turn Shabby into Gold, respect !!! I admire your way of Tackling this Project, please do not give up down the way, good success
Nils
-
Build log part 16
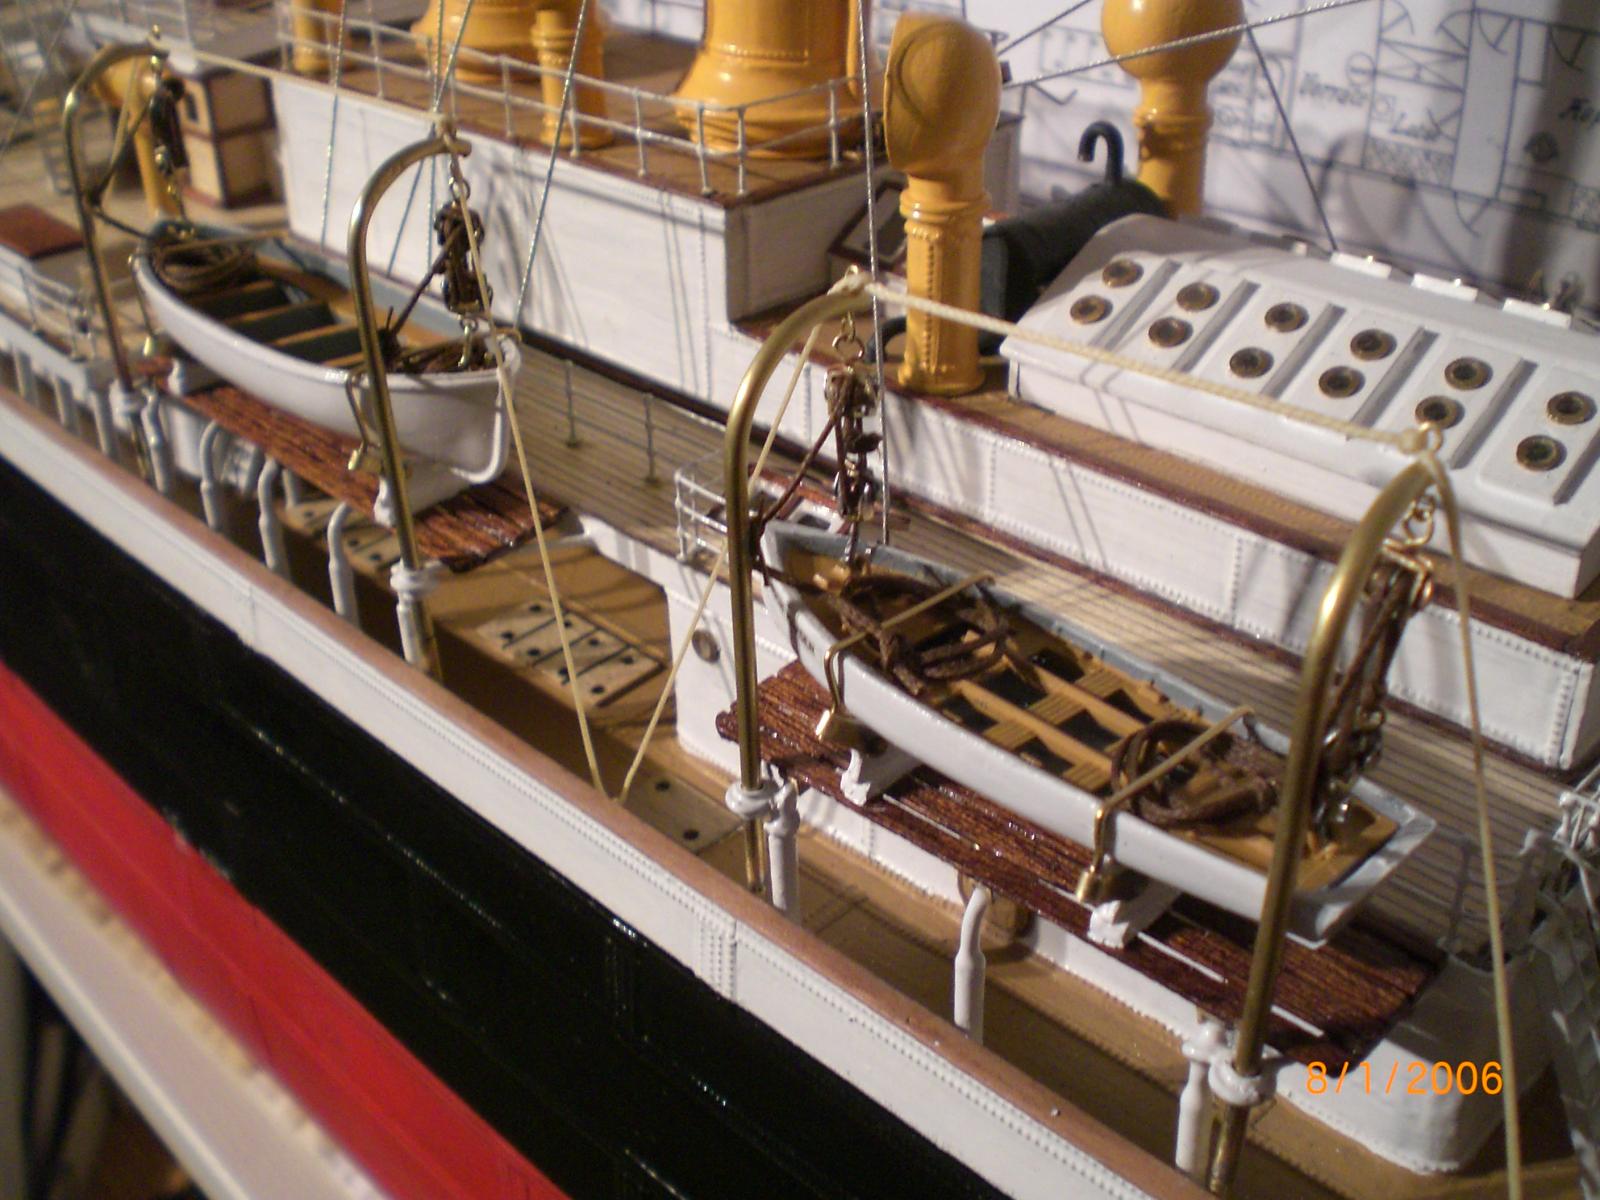
boatstation gratings, boat cradles and functional strapping down devices
Nav. light lamp fixed to upper bridge
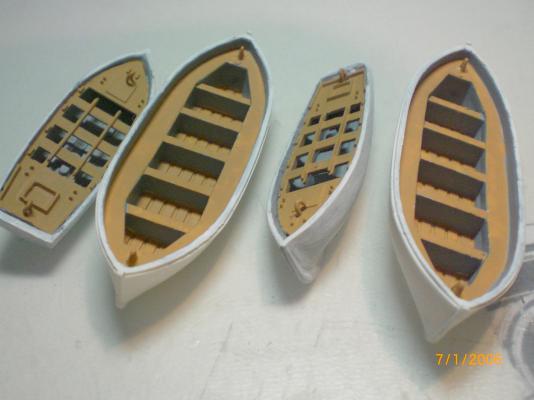
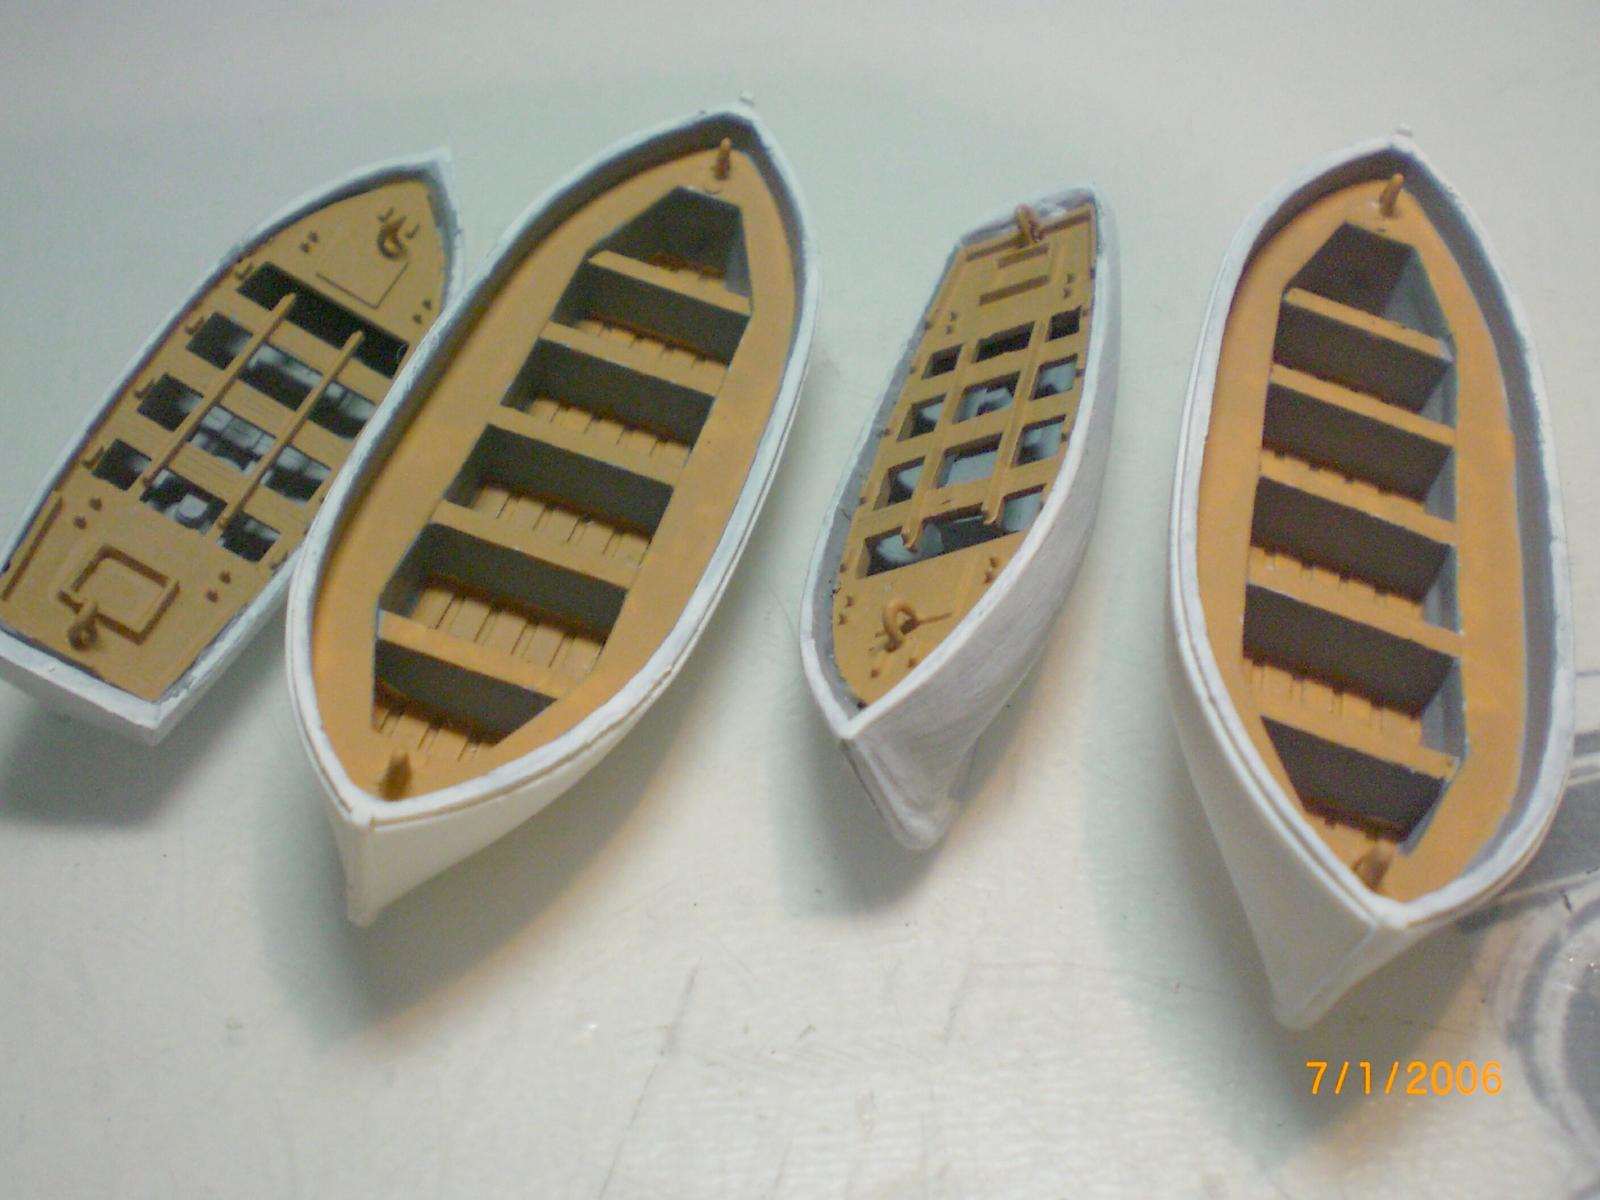
boats ready for putting on the cradles
boats tackled

the characteristic of the Elbing resp. Heinrich Kayser is that her boats were arranged in having the lifeboat in forward Position and the work boat behind. As far as my Research Shows for her sister ships it was just the other way round

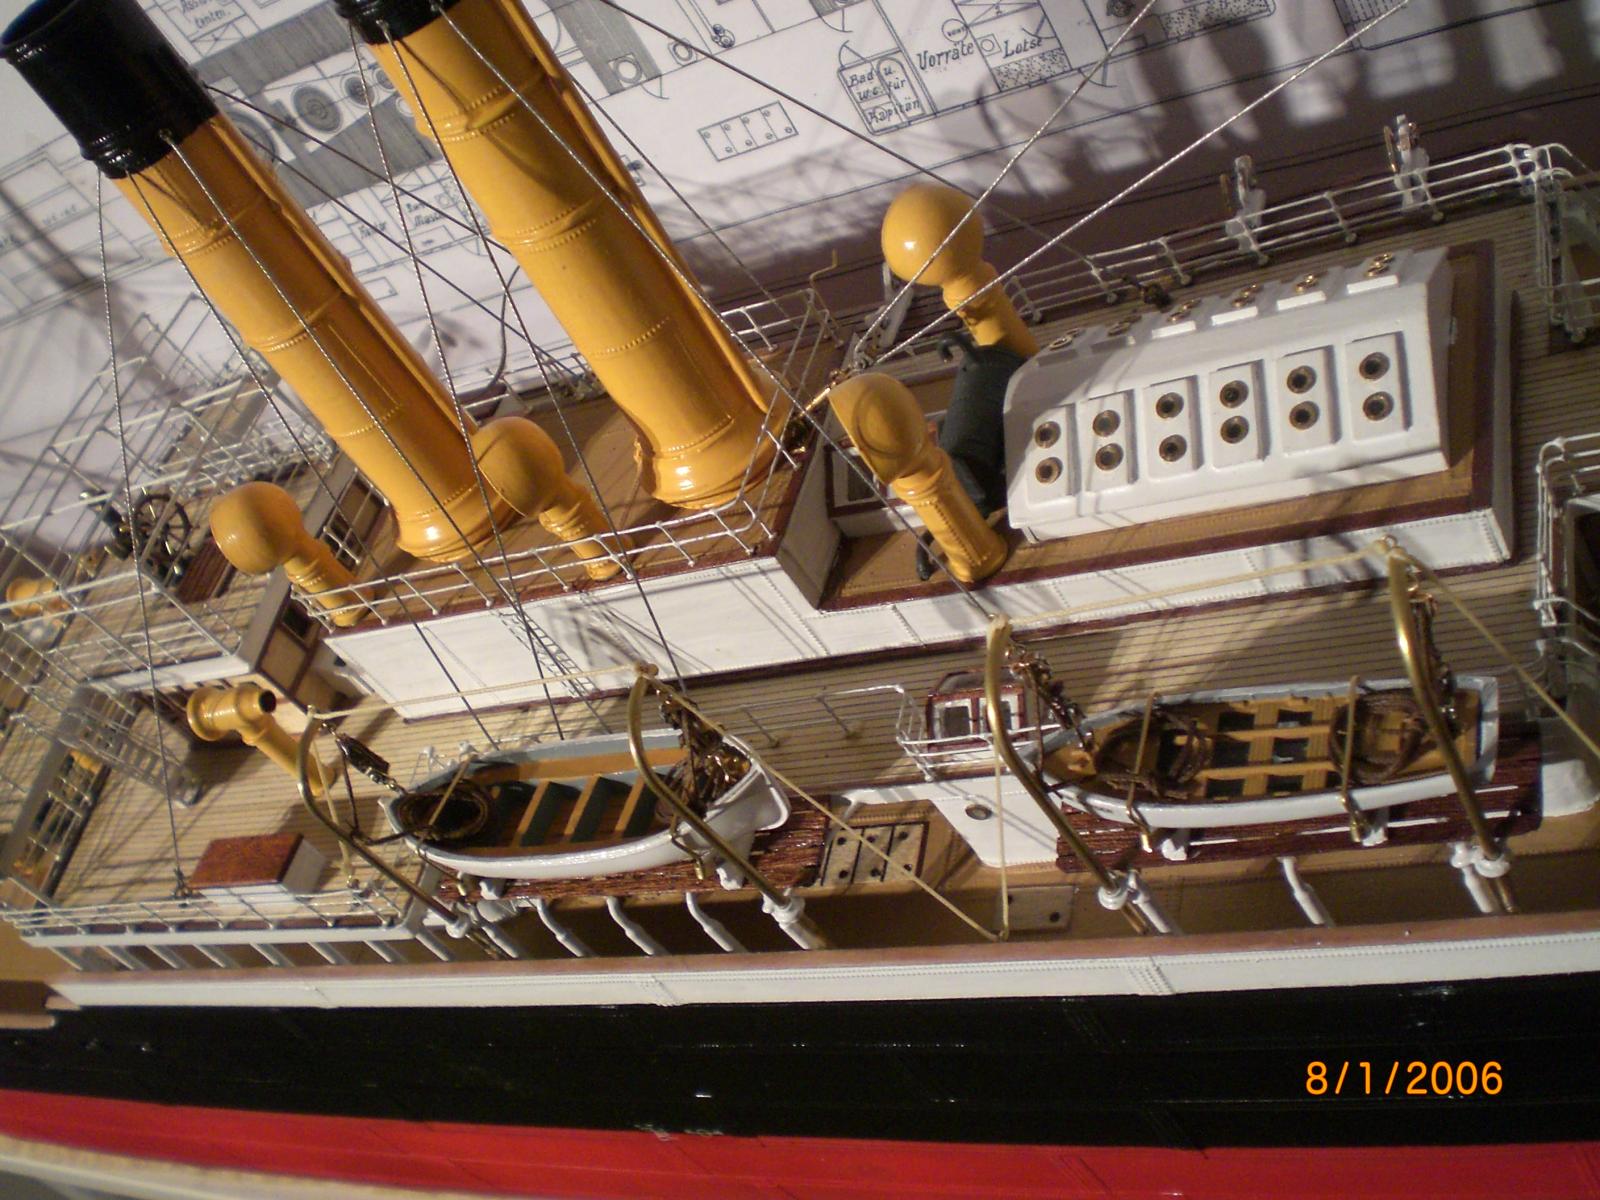
funnel and Davit stays fixed

view from aft with mounted steering chain
3 views with eyes on boatdeck level

Build log part 17 to follow....
-
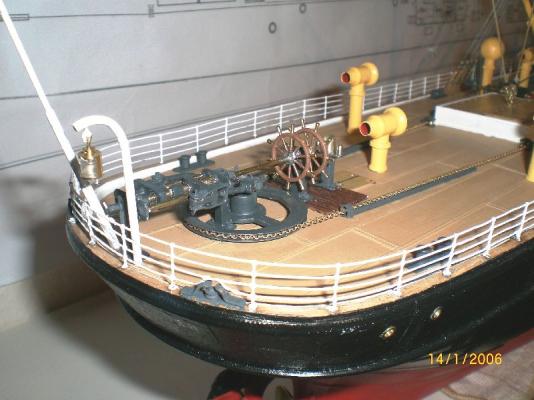
Build log part 15
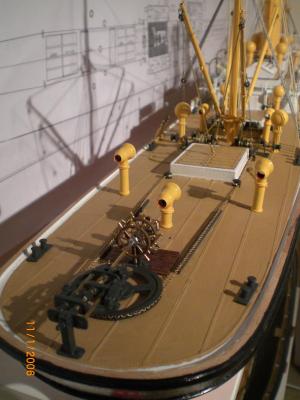
chain gude chanels

chain wind drums of steering steam engine (in deckhousing)

anchor chain guide shoes with spindle operated wedge stopper
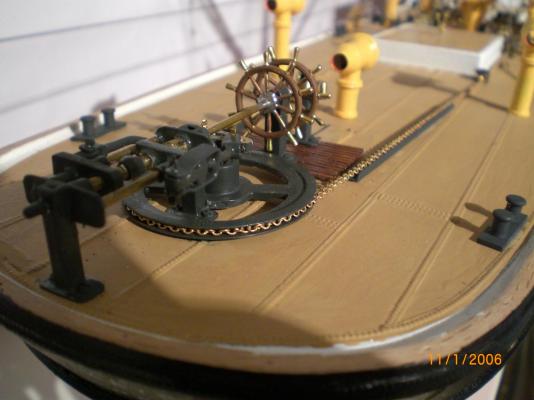
the large horizontal chain guidewheel is also from a clockwork
the two steering wheels come each in small mini kits and must be set together for assembly and soldering (RB Models)
aft mast and funneltips in black colour, and cross check with plan
the Progress at this stage is not always so obvious to be seen...
from todays Point of view I would not use These selfmade metal blocks for Tackling the loadbeams again
Nav. lights and their mounting panels
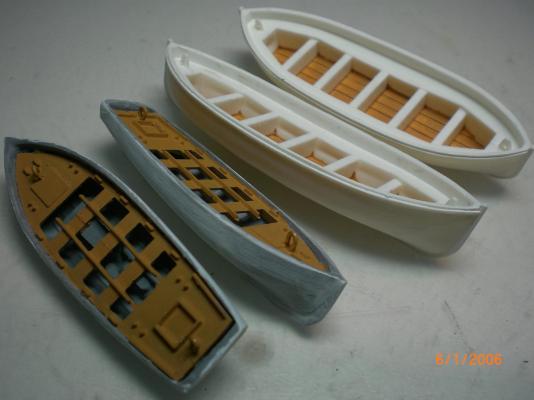
two lifeboats, two working boats
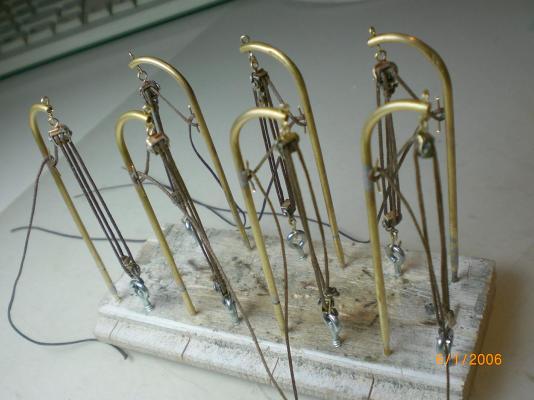
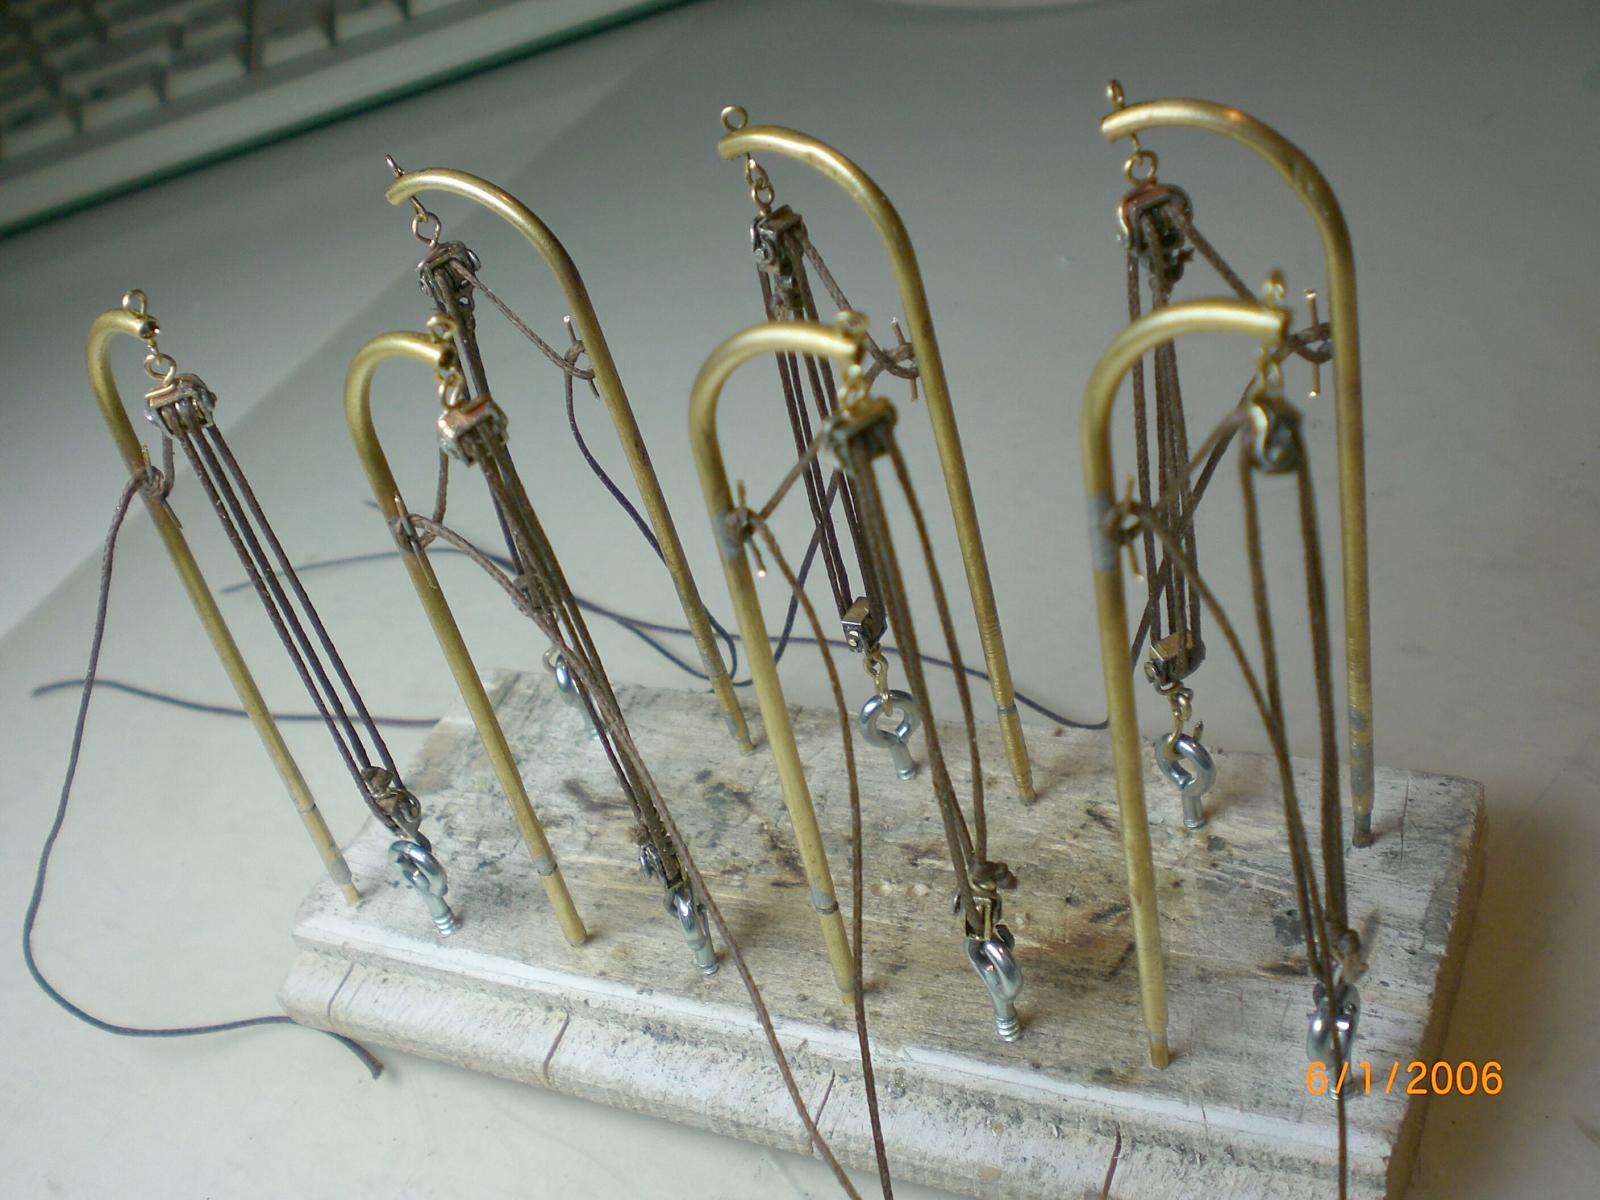
set of Davits with selfmade functional double sheaved blocks
Build log part 16 to follow...
-
Thank you for your words Michael,
I was looking for such made in metal (not cast)... in vain, so then started doing them myself
Nils
-
Bob
to get some of the assemblies to work functional was my own set Obligation and to a certain makeable degree. The winches and windlasses with working gears movable Pistons,crossheadrods and gears, etc. were at 1:96 the (for my behalf) smallest makable Limit. For the auxillary rudder spindle the Tools for cutting M2 threads left /right and the M2 female threaded wedge would have been so exspensive that I nearly waved the functional Feature obligation, but then came the brainflash with utilizing the M2 brass Stay spanner with beautiful M2 threads, costing me appr. 2,- Euro
Cheers
Nils
-
Looking at your deck details, I keep having to remind myself that the scale is not 1:48 but 1:96! Very nice metalwork indeed, Nils.
Thank you Druxey
Nils
-
Thank you John
I`m glad that you like it
Nils
-
Superb work, Nils!
John
Thank you John
Nils
-
Build log part 14
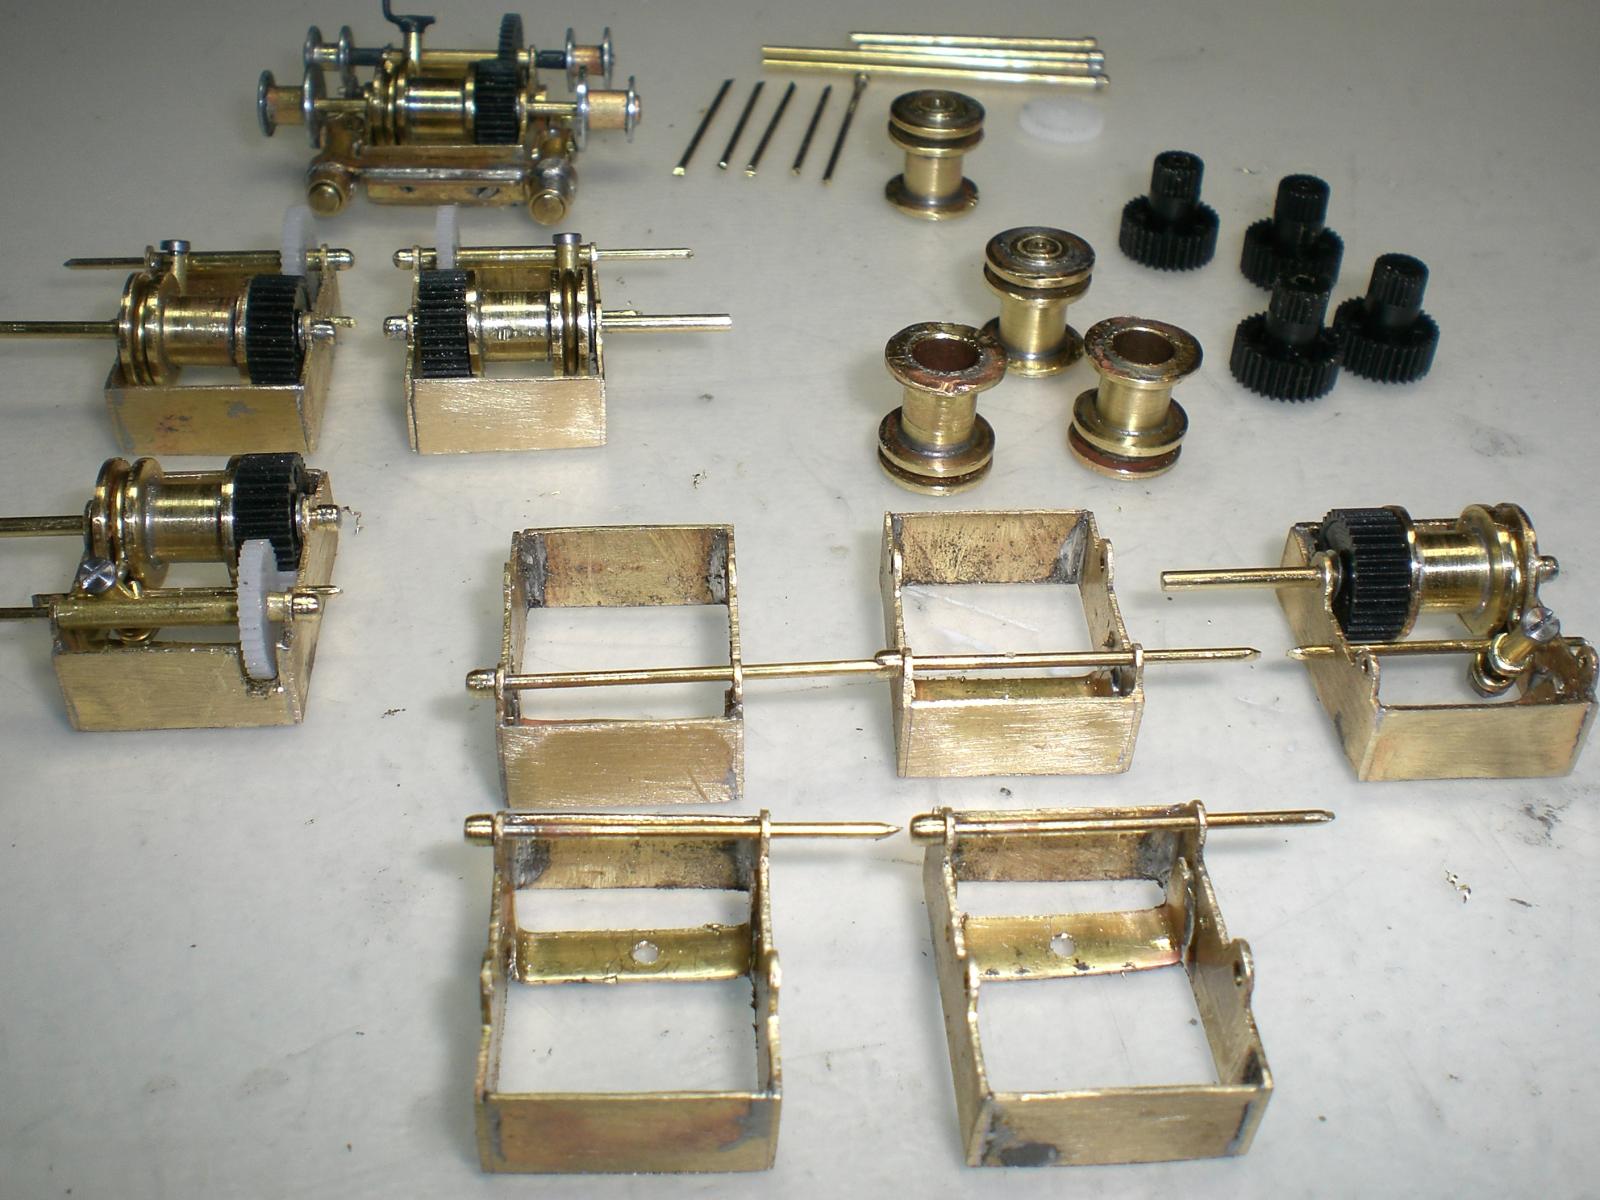
now quite a lot of metal has work to be done....
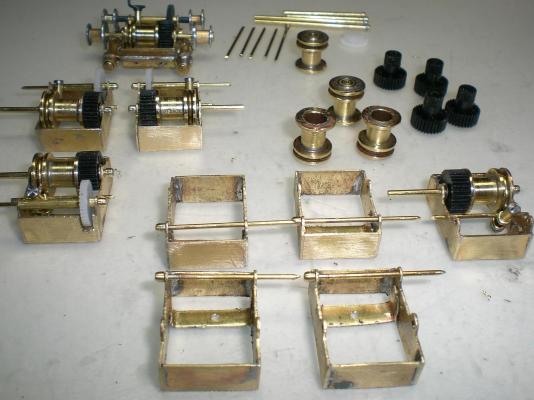
that gives the Feeling Henry Ford must have had with early factory production, many repeating parts and assemblies...
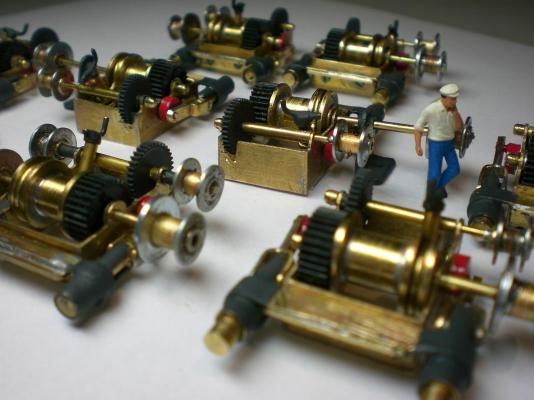
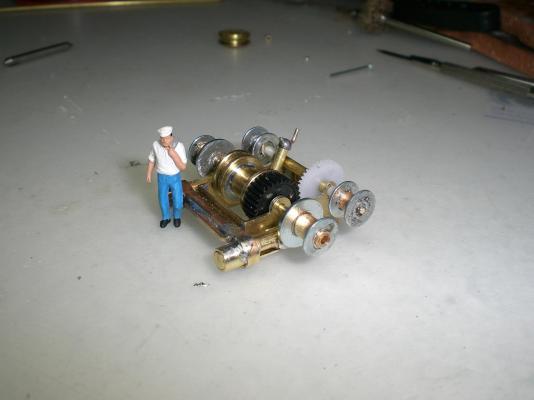
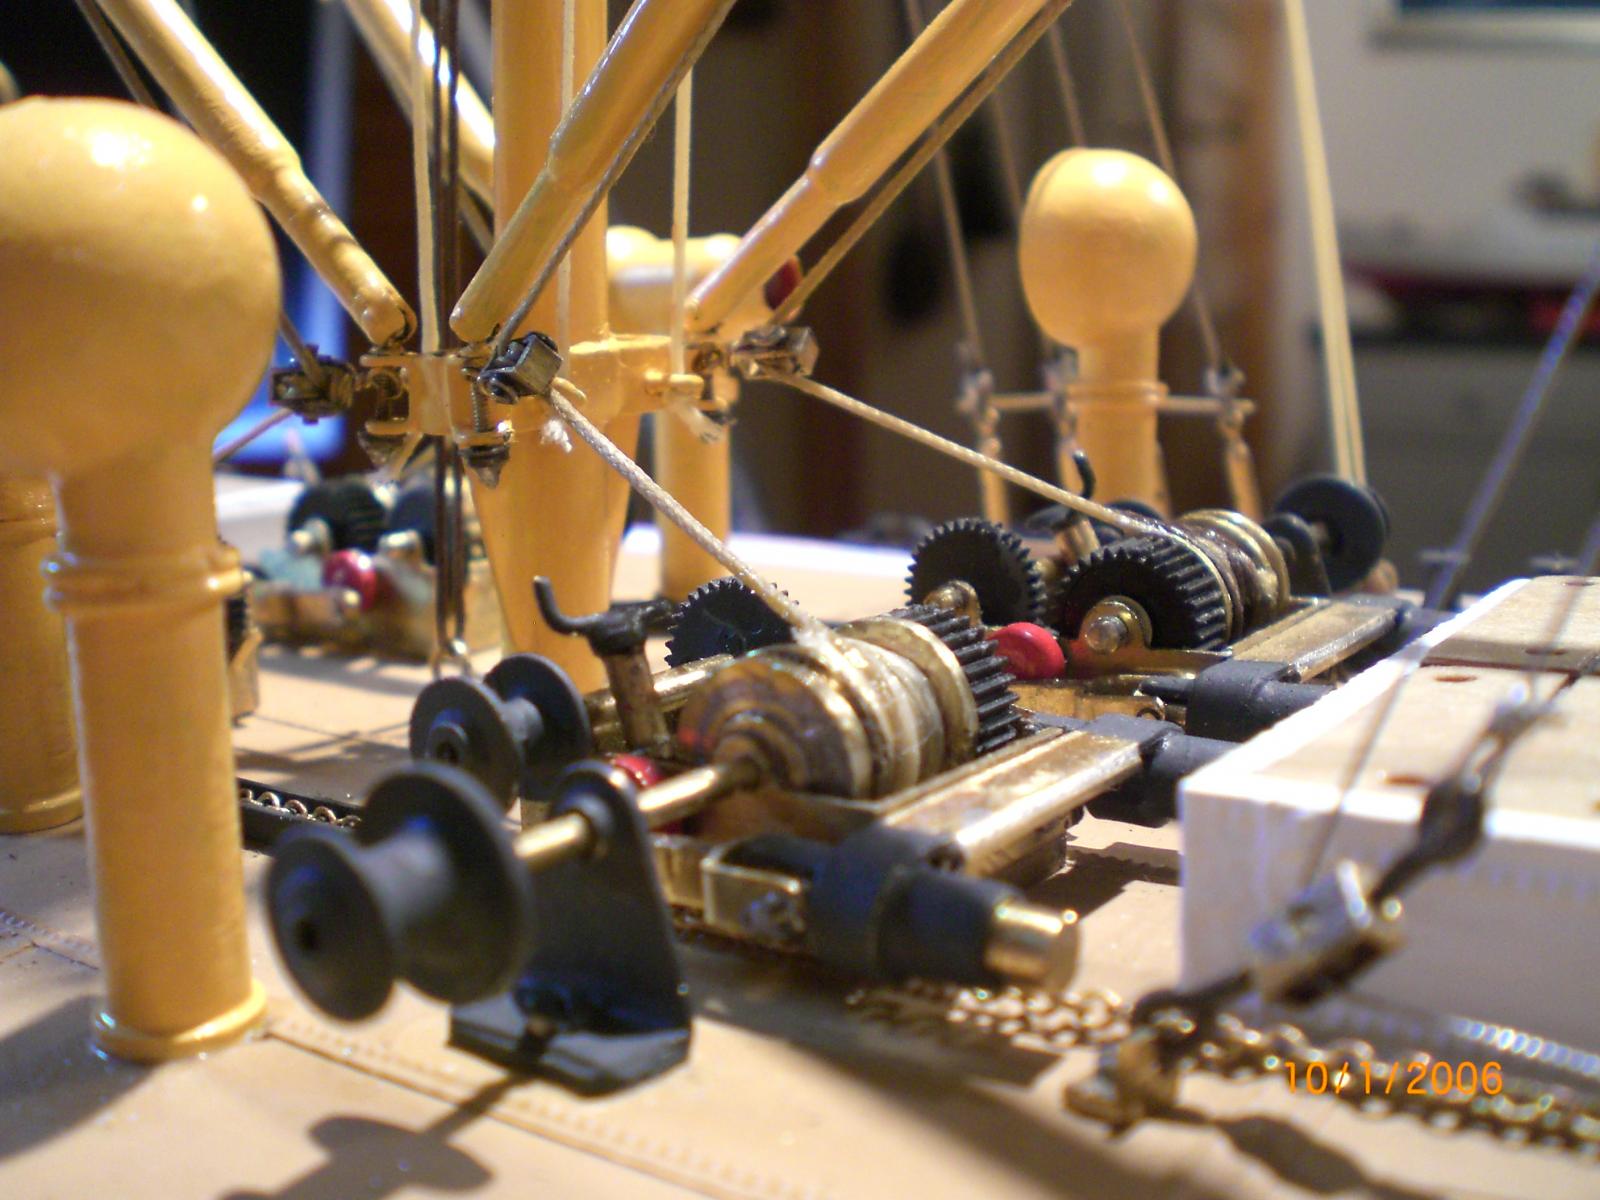
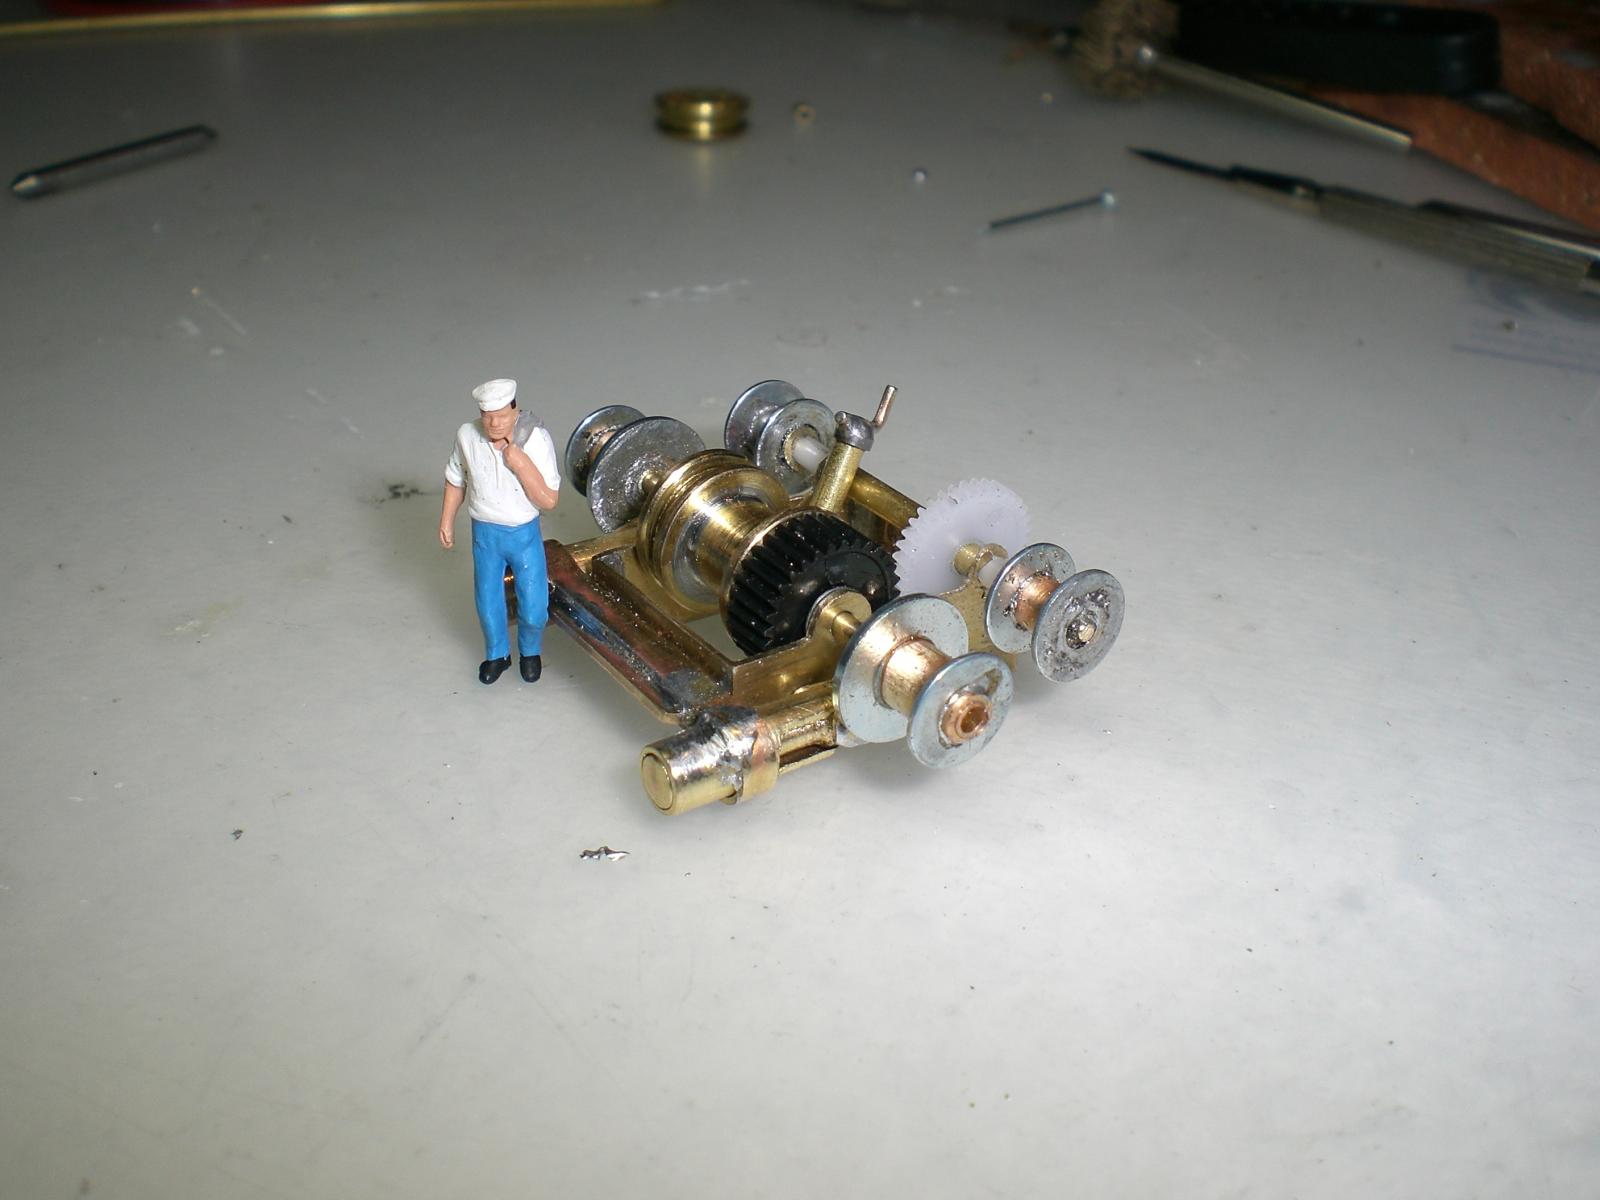
winches-windlasses all in scale 1:96
a Little painting, but I wanted the brass to be visible for nostagalgic appeal
well, here they are rowed up infront of the factory yard

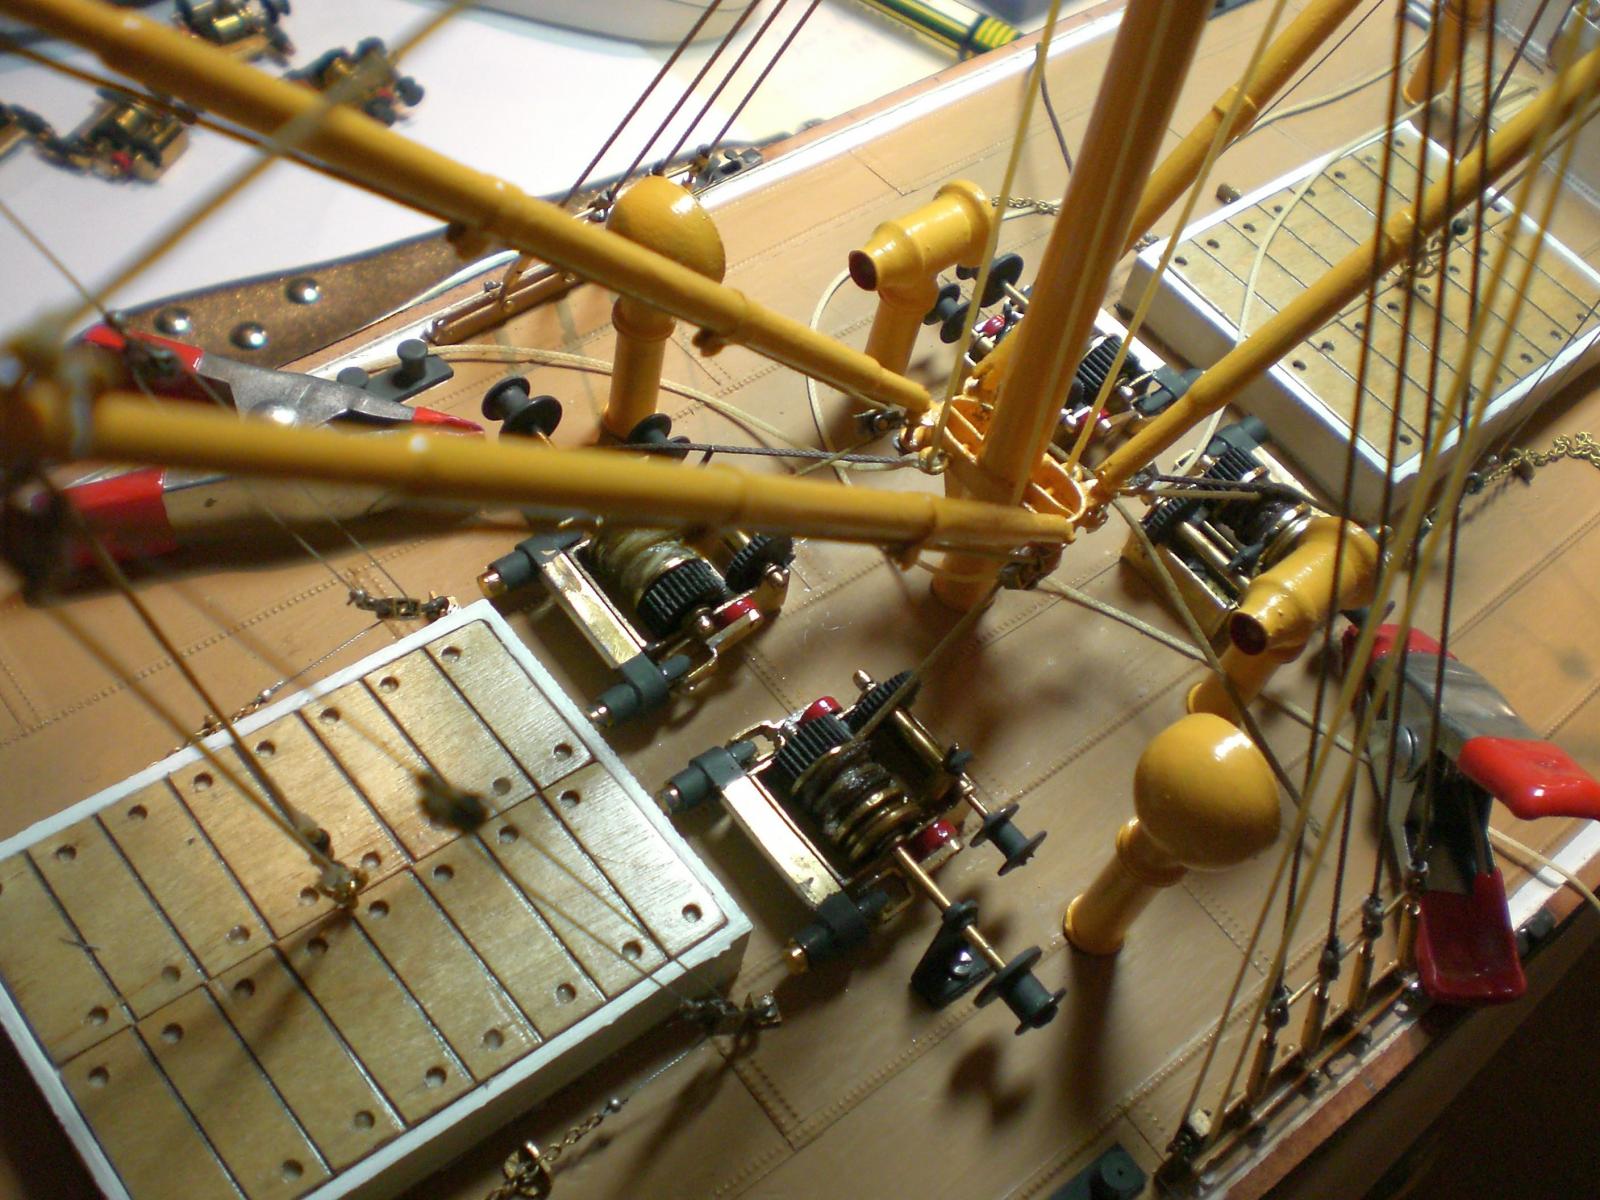
and then fitted at the loading stations

another birds view on the auxillary rudderstand
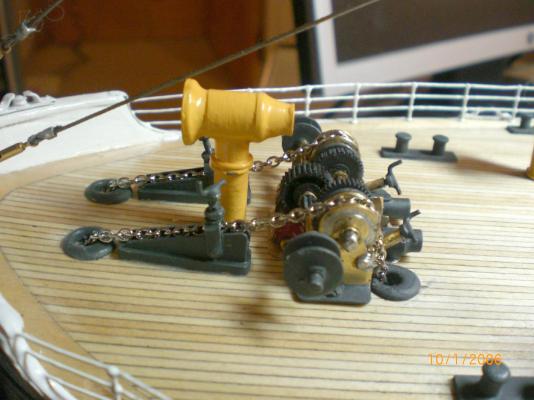
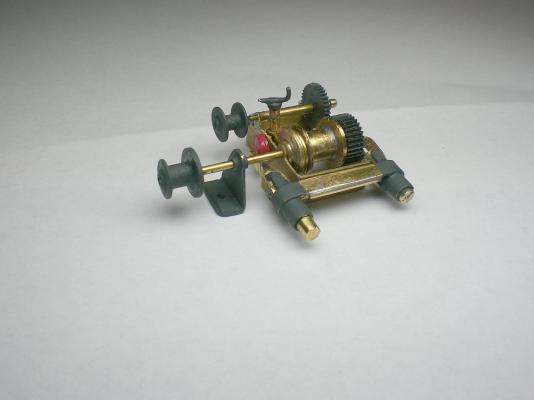
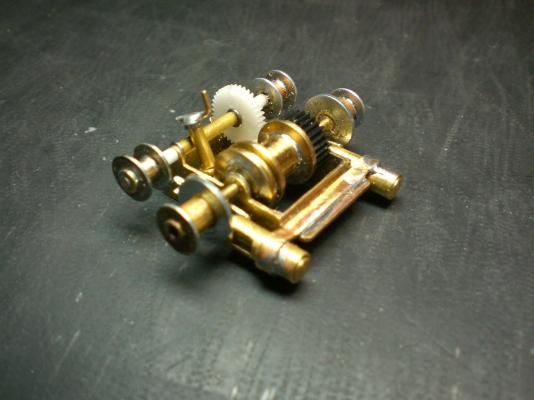
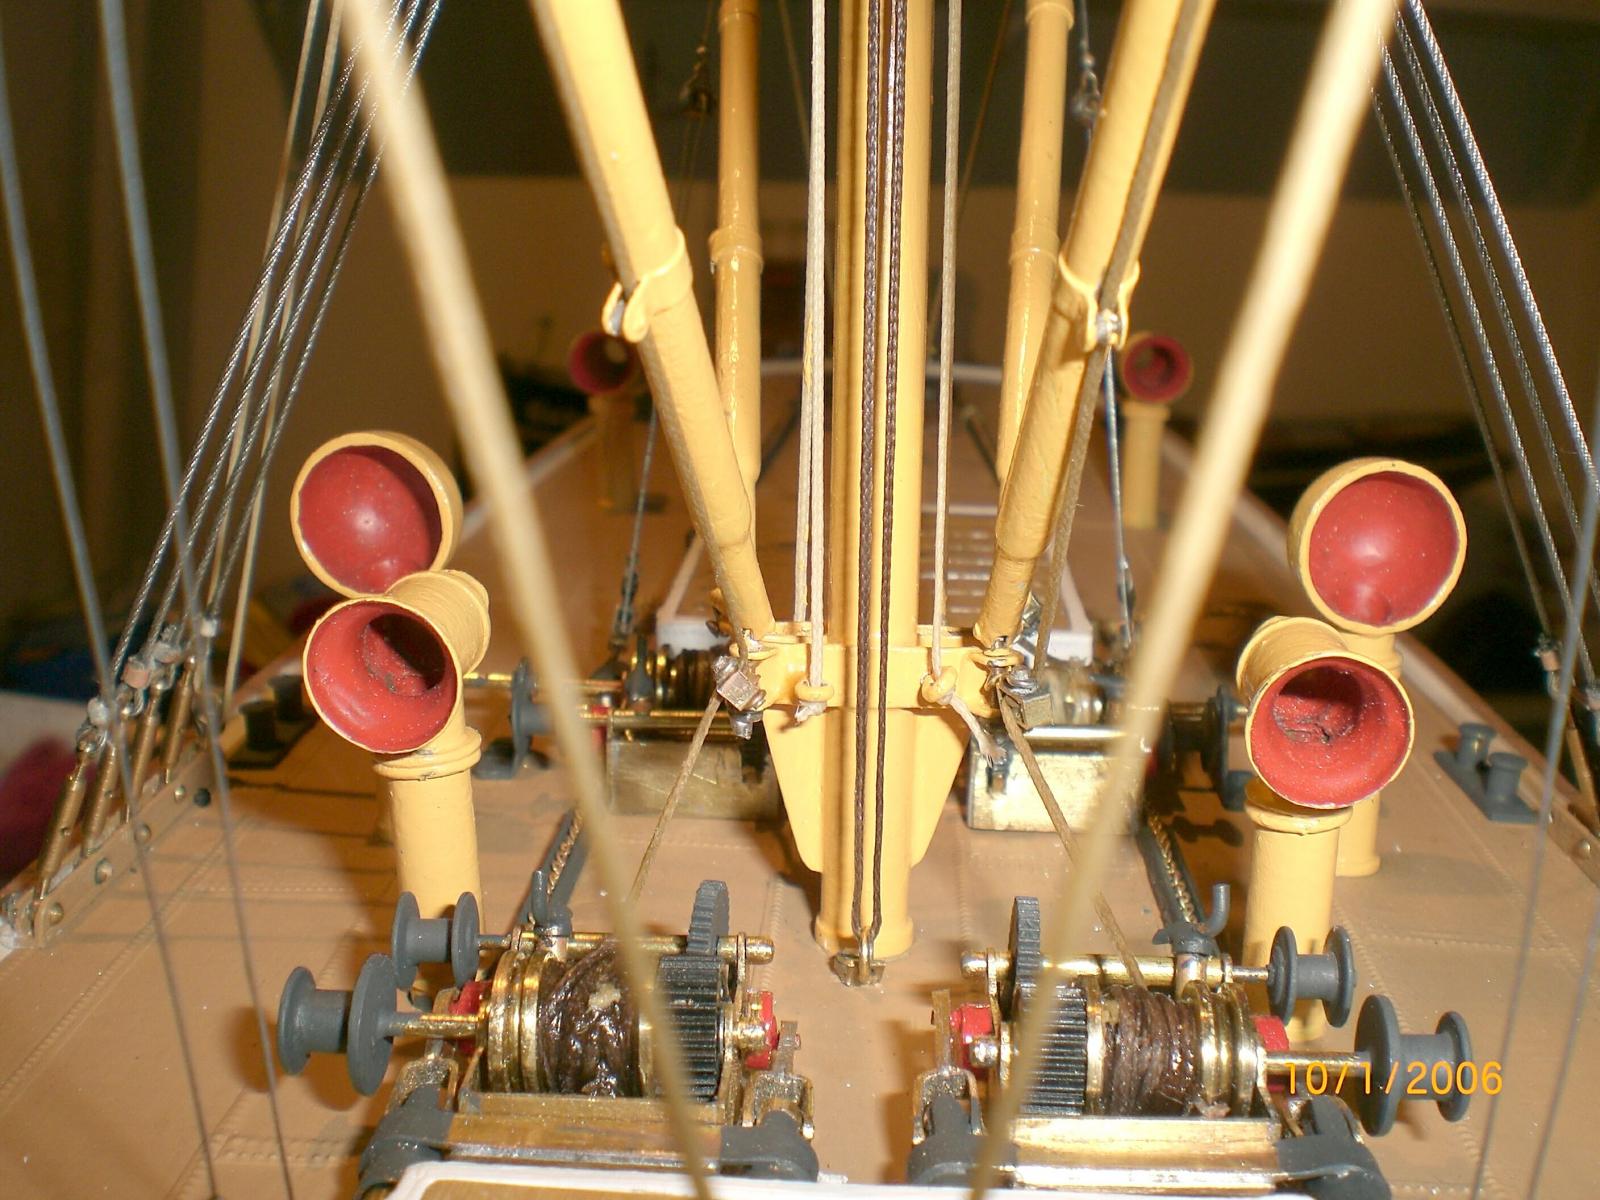
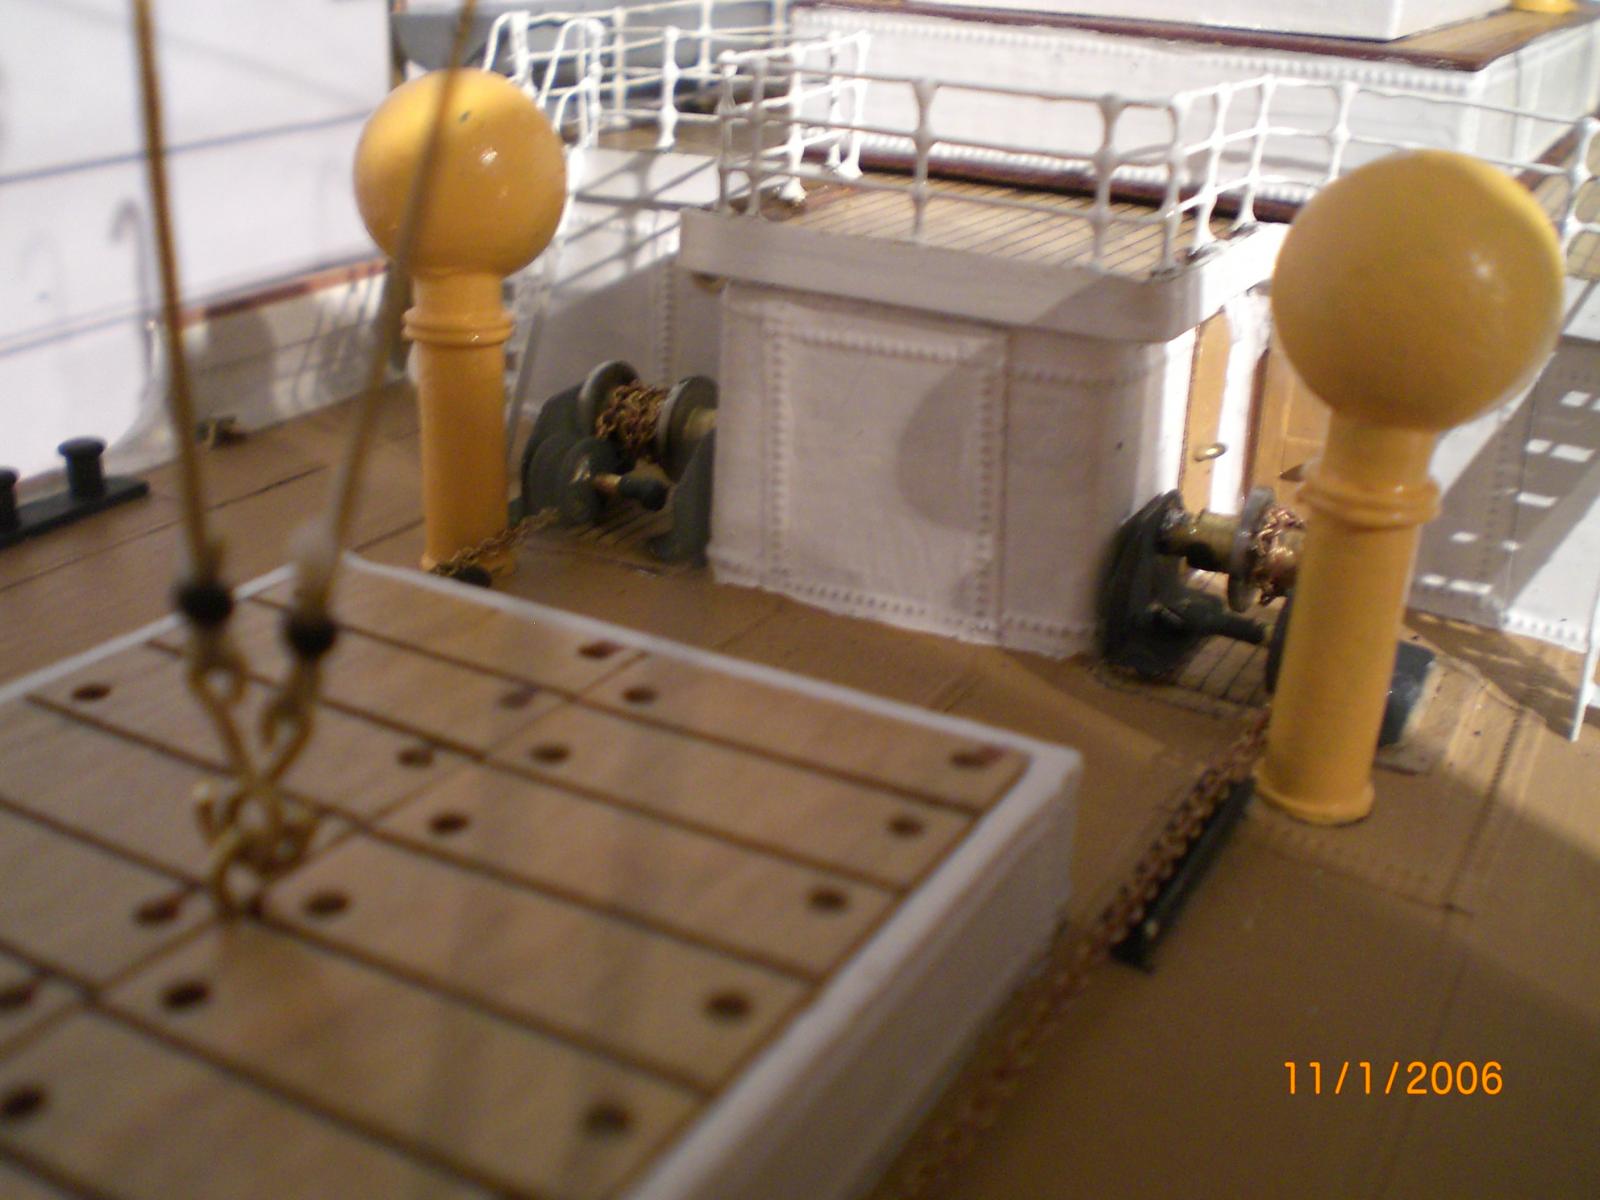
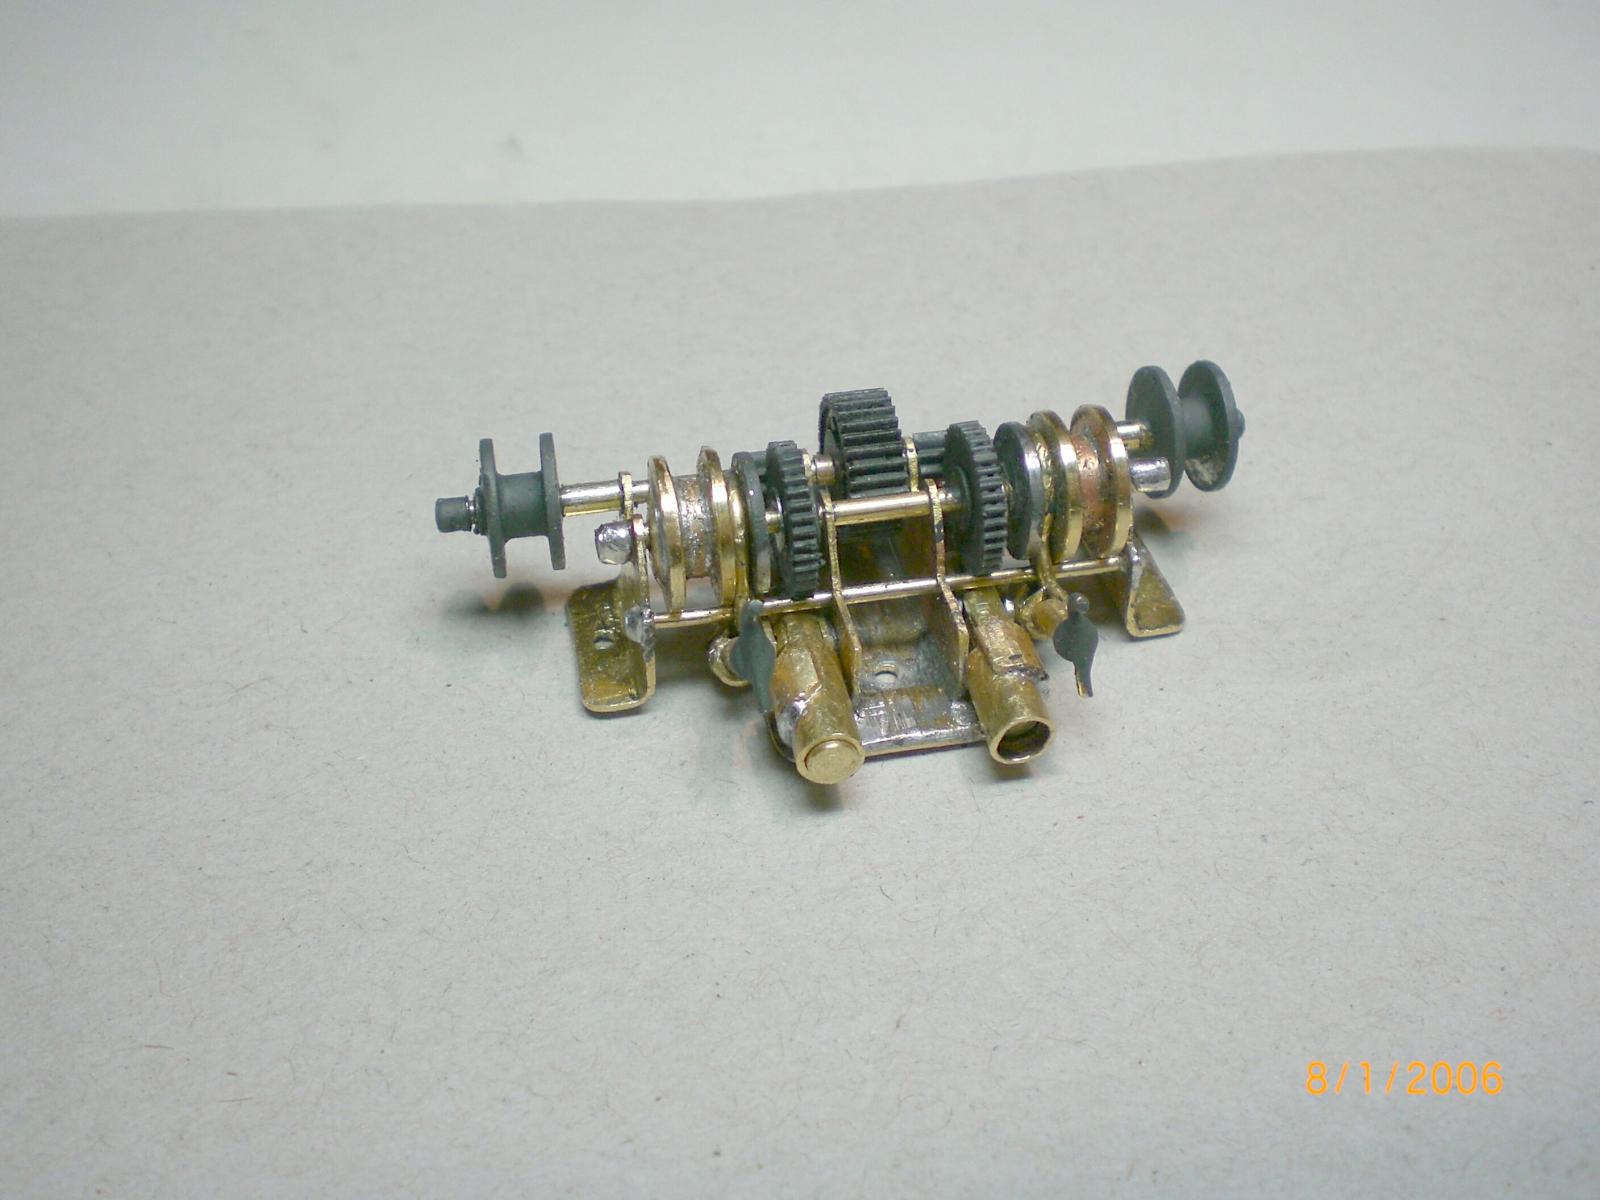
3 views of the twin steam-cylinder forecastle anchorchain windlass
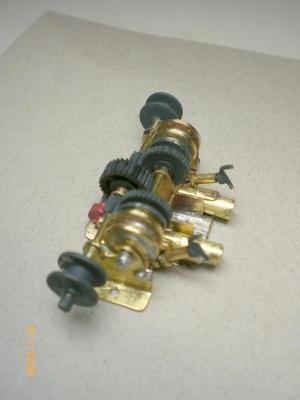


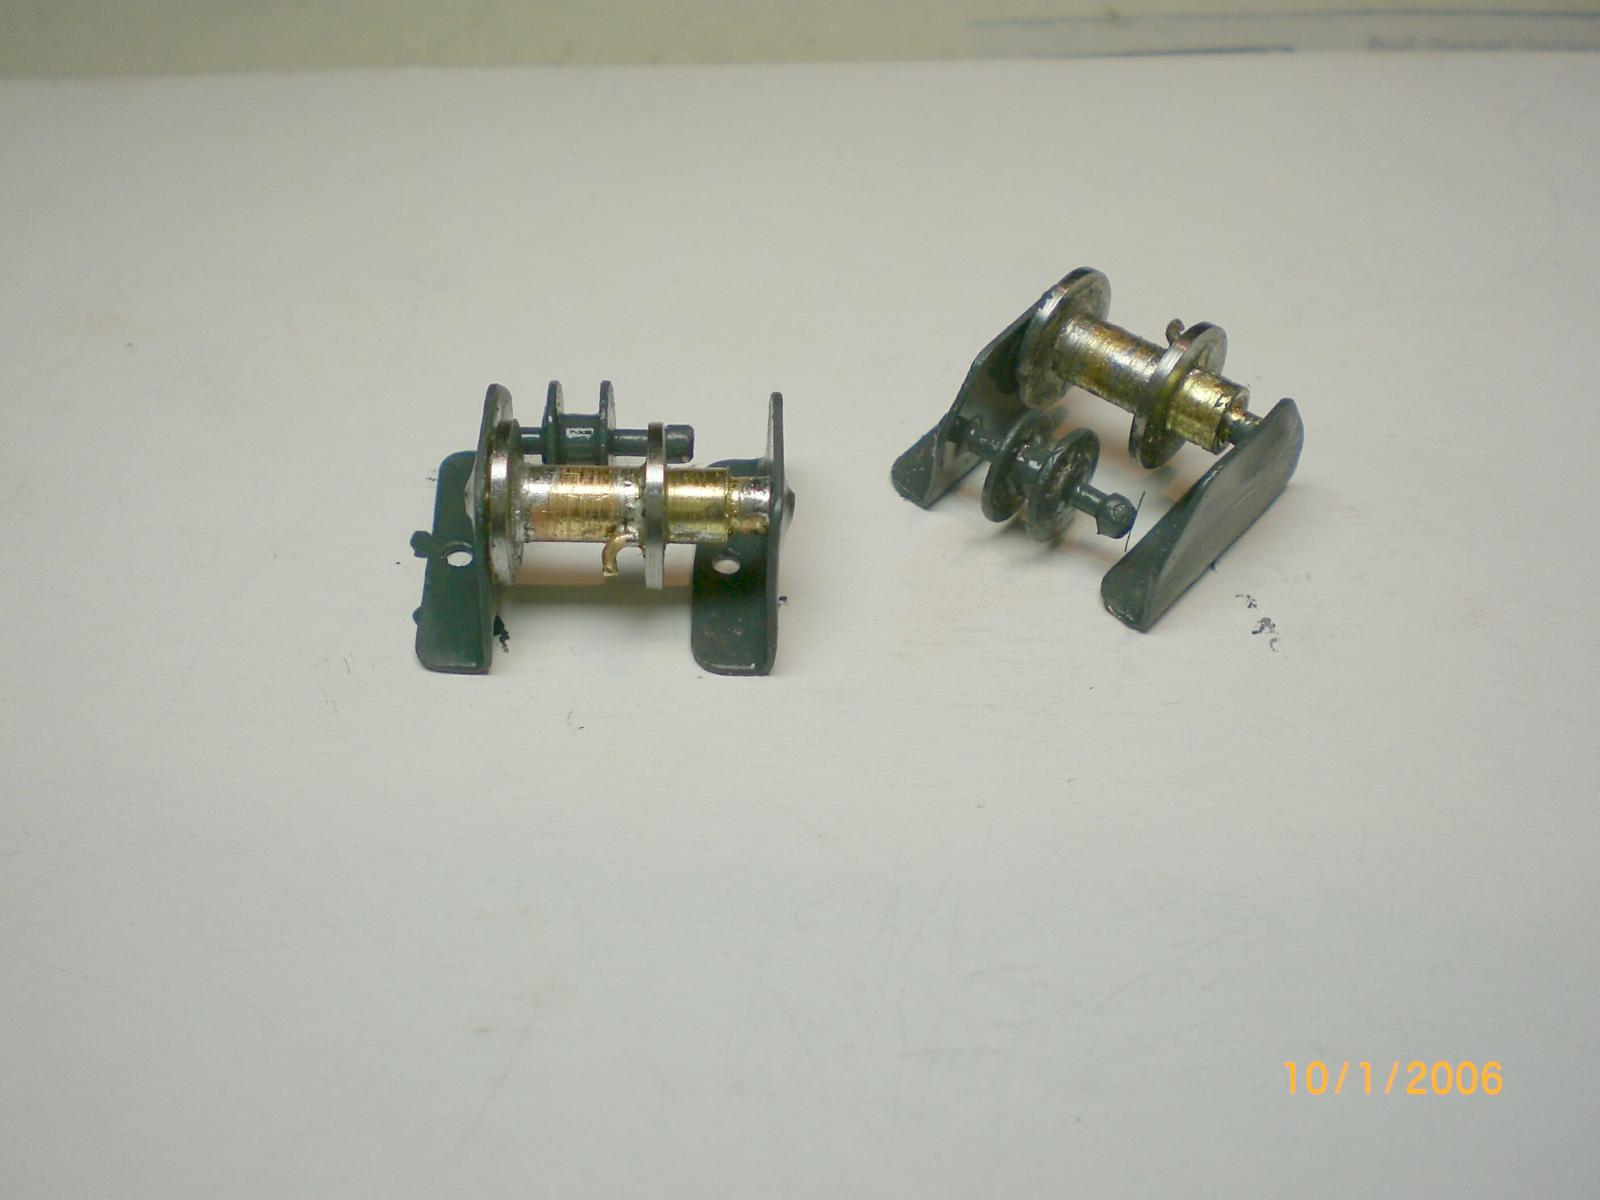
These two chain-spoolwinder-drums with slide guide are connected port / starboard to the steam-rudderchain engine in the (not visable) aft deckhousing compartment.
Build log part 15 to follow....
- captainbob, tarbrush, Captain Slog and 5 others
-
8
-
Thank you Robin
your words of a fellow Senior member are very much appreciated
Nils
-
Building log part 13

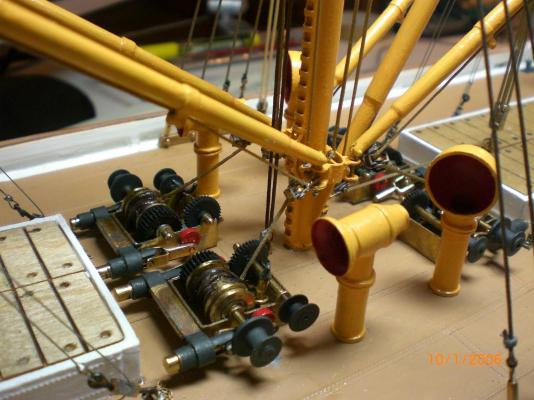
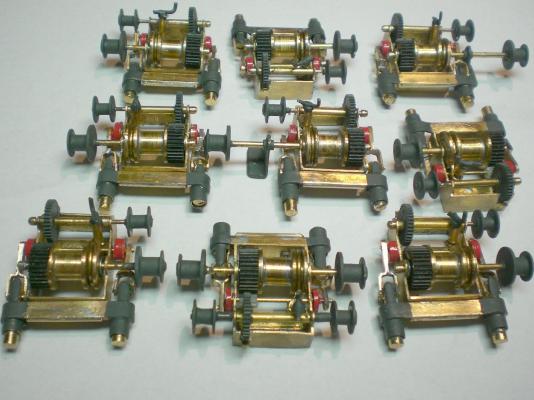
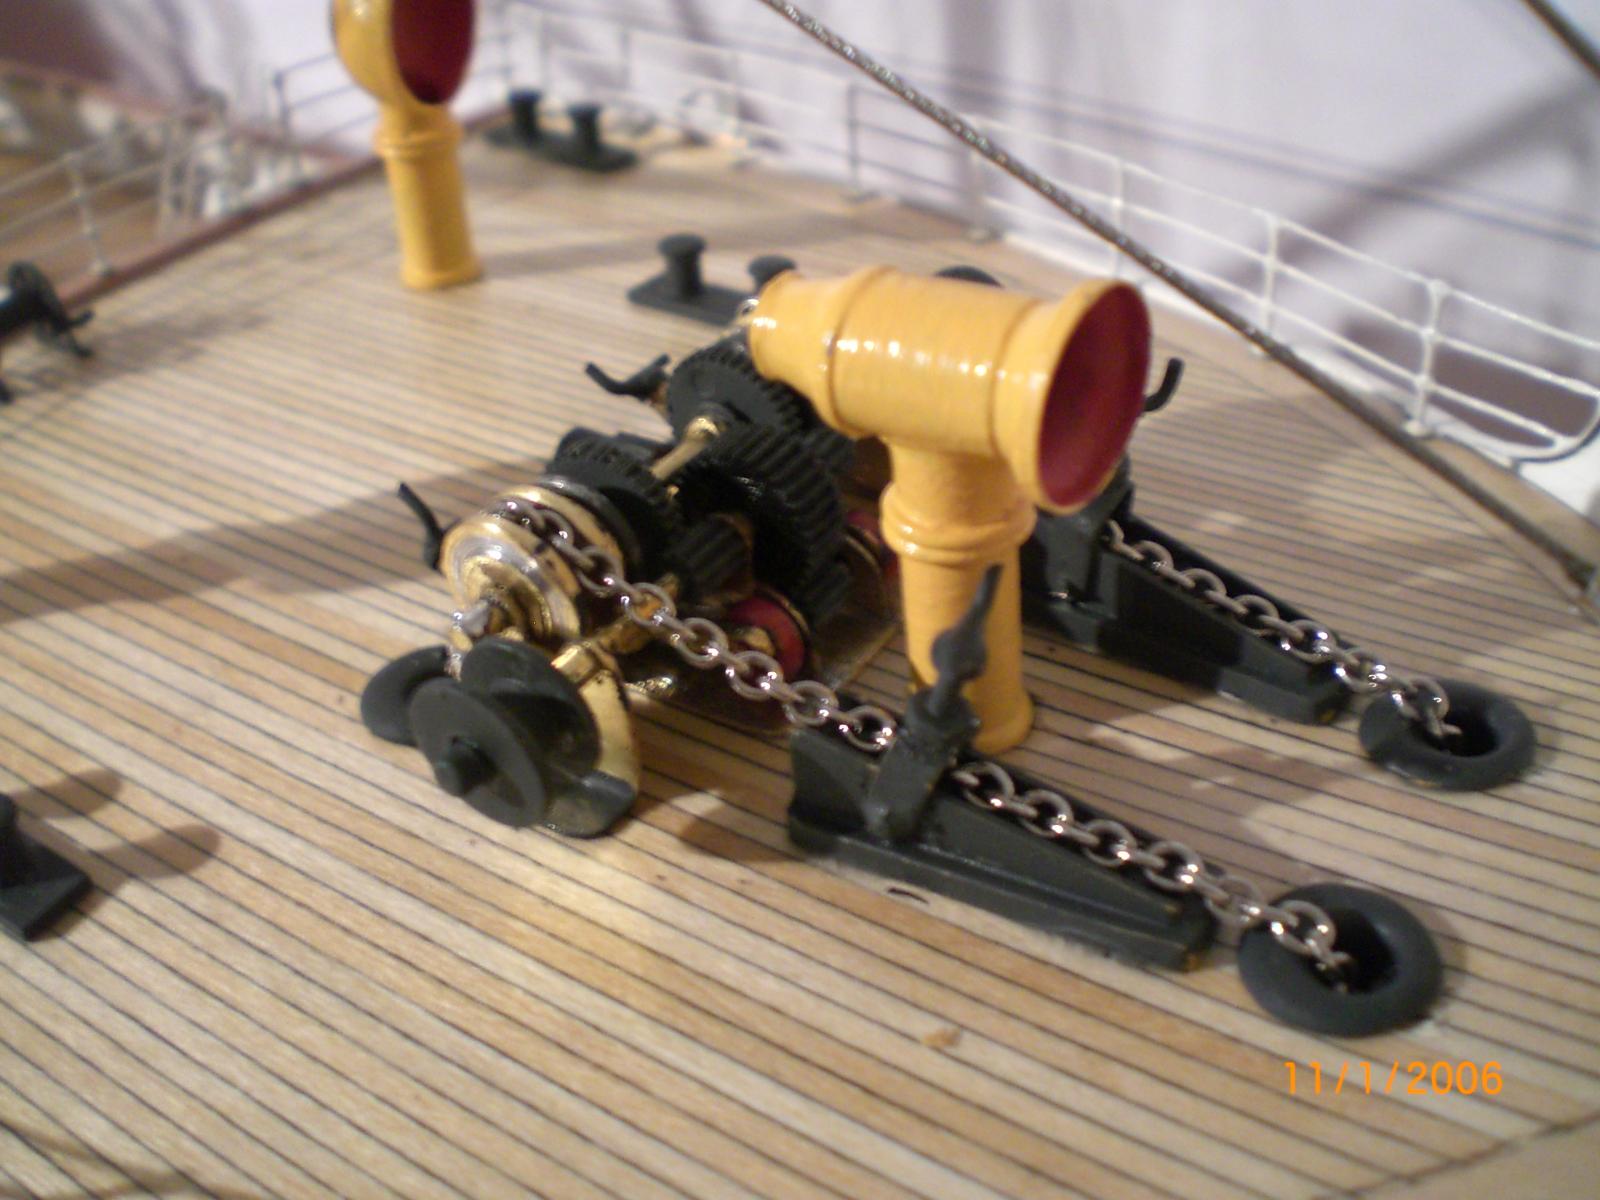
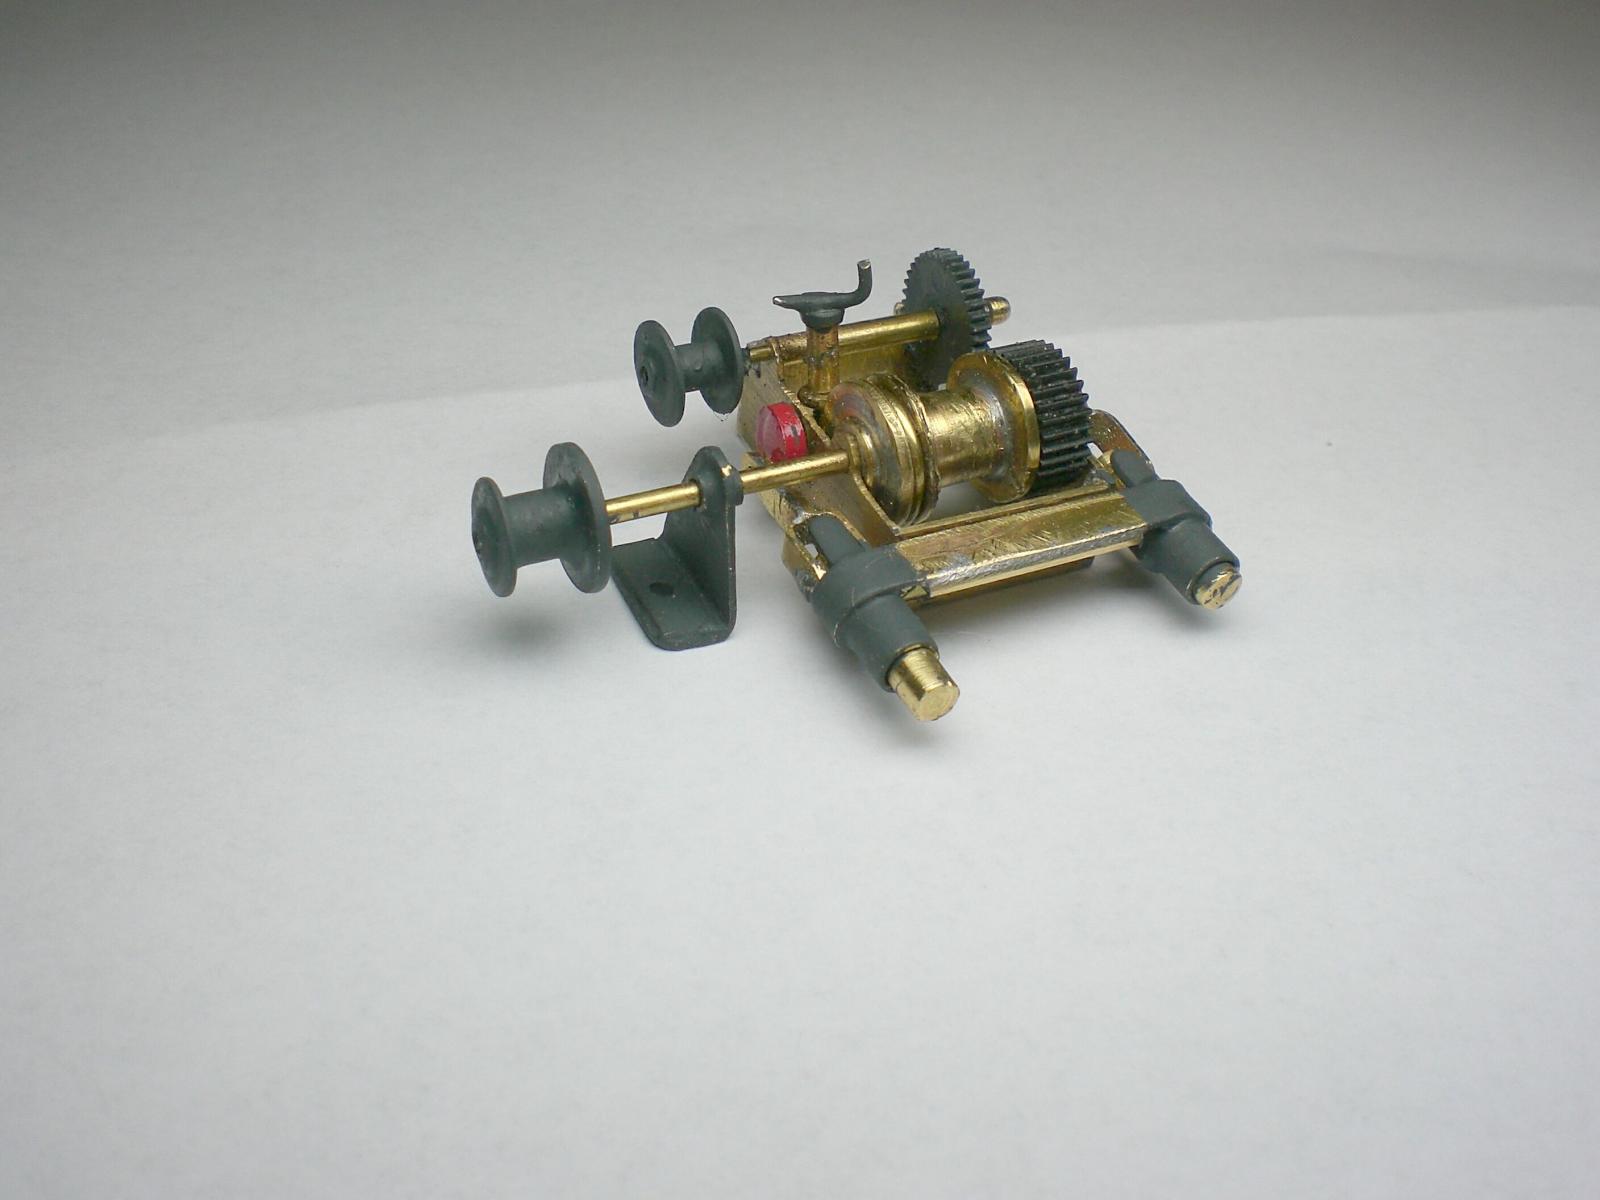
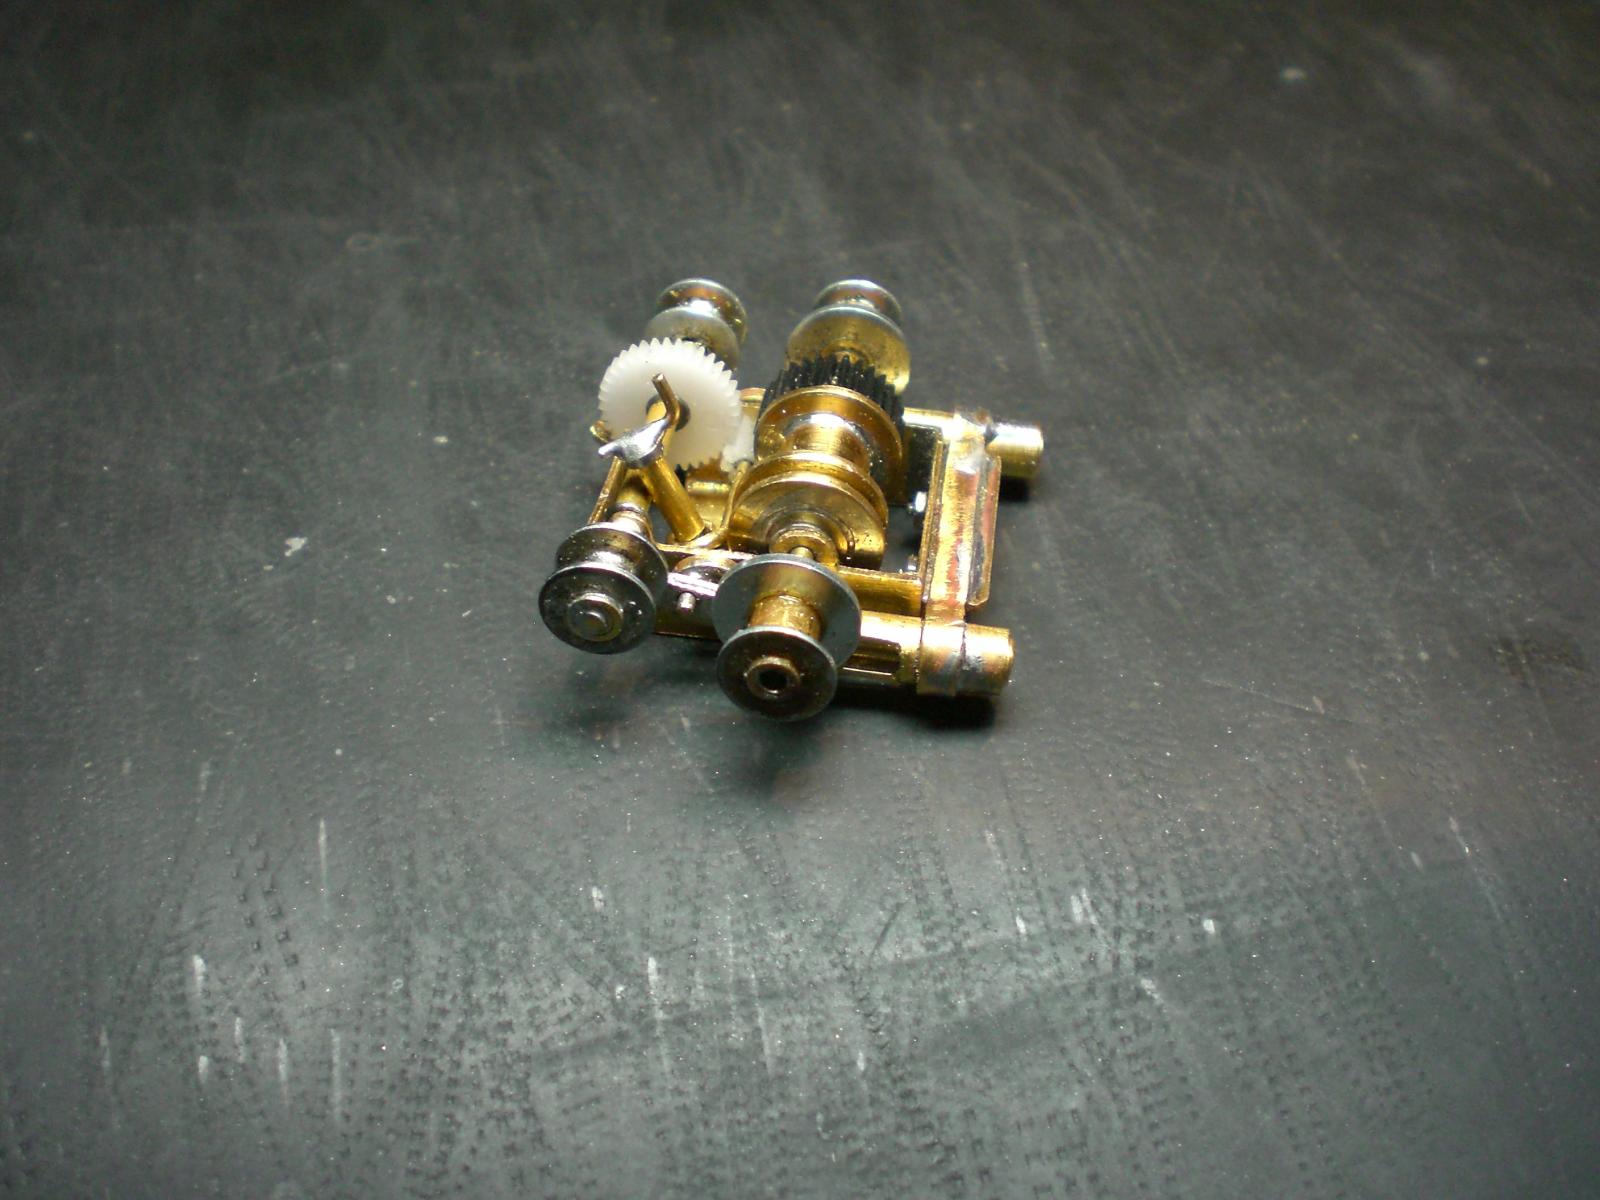
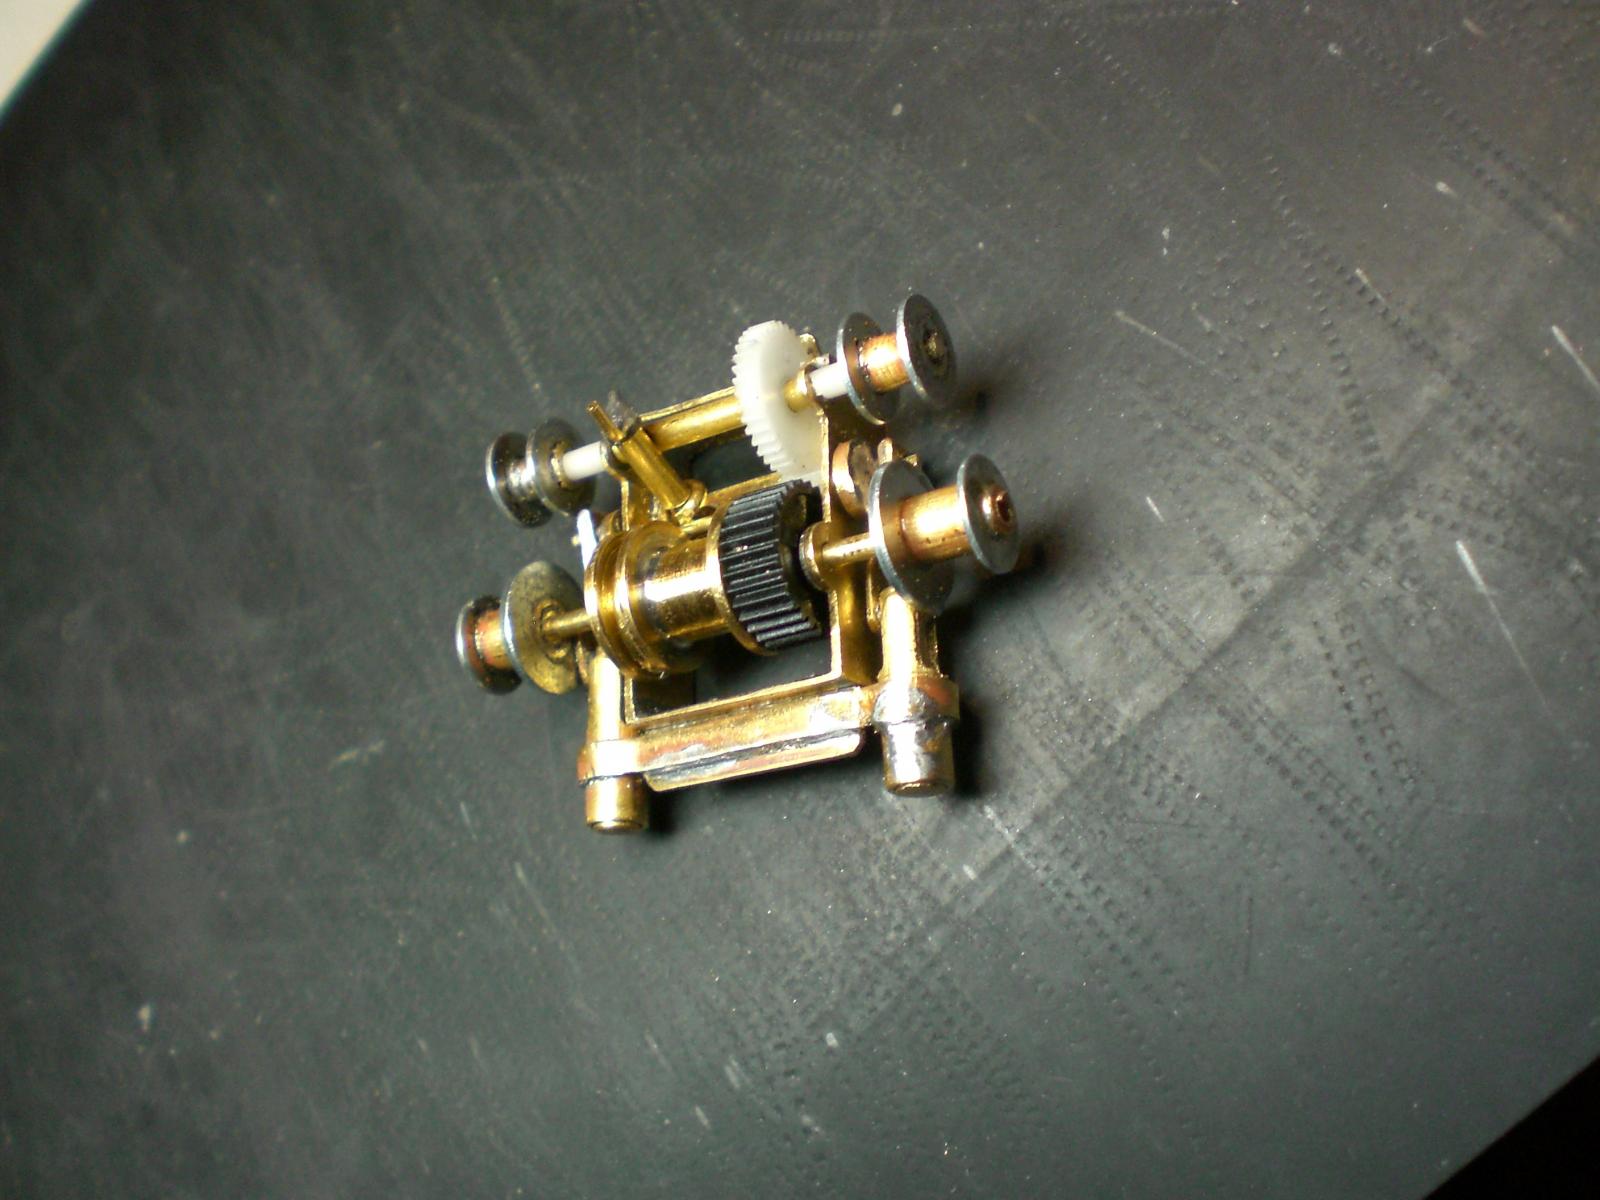
now ist time to do some more Details..., there are 11 steam-winches / windlasses in different types and in coilspool- and gear Arrangement to be made in scale 1:96
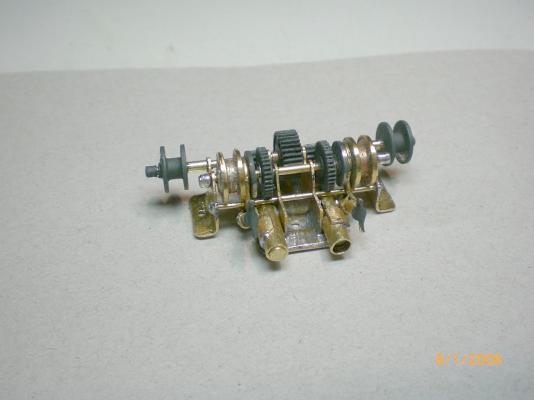
Here beginning with one of the loadbeam winches...with each two steam cylinder attachments working on the fast crankshaft rod, and with spindle opperated drum band-brake


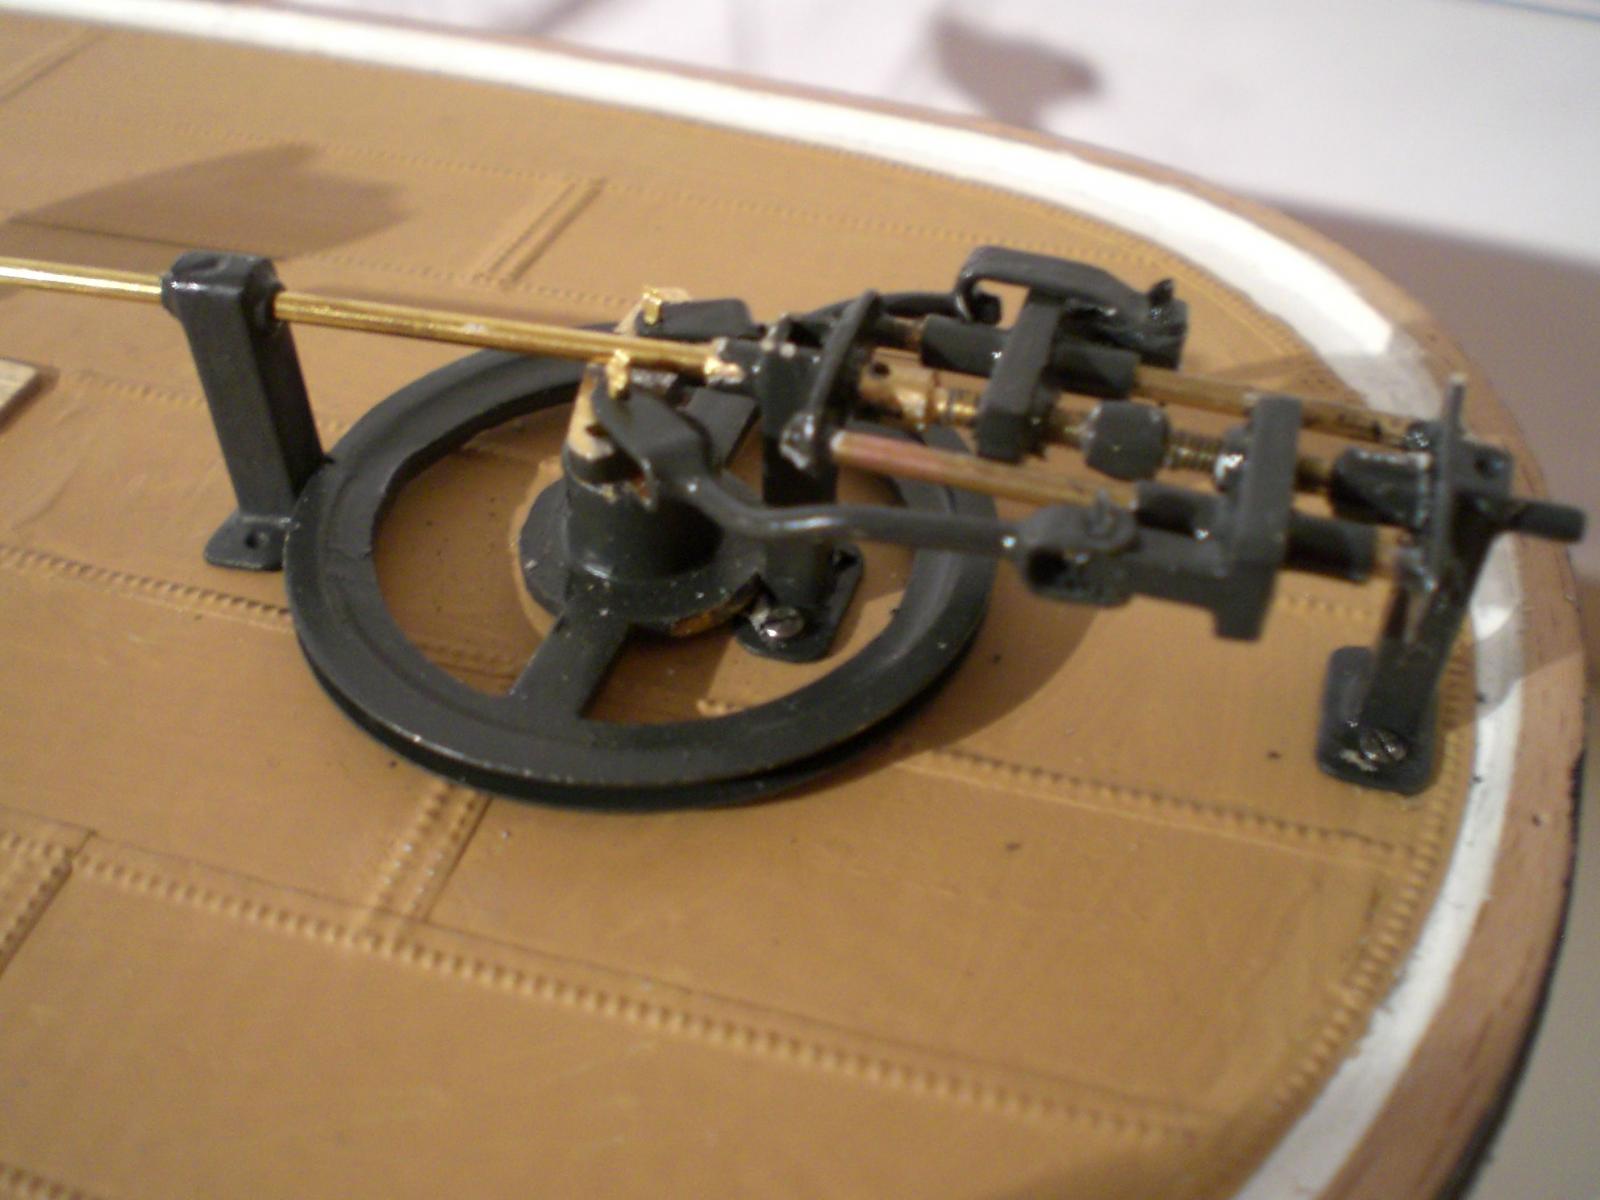
auxillary rudder stand
upper Bridge rudder stand and machine telemotor.
The Bridge steering was remote conrolling steamvalves of the steamsupply to an seperate steam engine situated in horizontal Position in the aftside of the mid-deckhousing. The prelonged crankshaftends sticked out to port and starbord side and connected to the opposite turning chainwinderes of the steering chain. It was that steering chain that broke and caused the unmanouverability of the ship. Probably in the heavy washing sea with flooded decks the auxillary rudderstand could not be maned.The ship was sowith doomed to ist fate...

funnel stays mounted
building log part 14 to follow.....
-
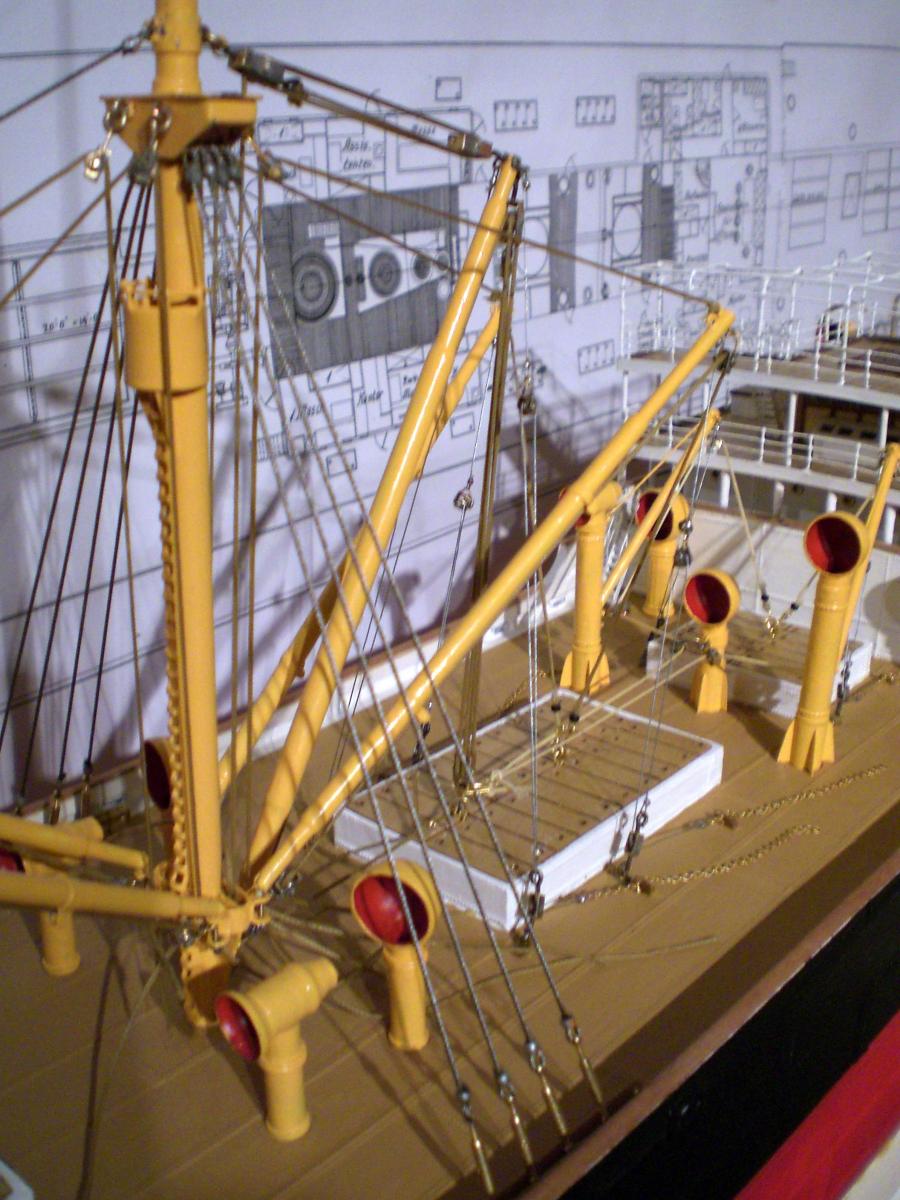
Build log part 12

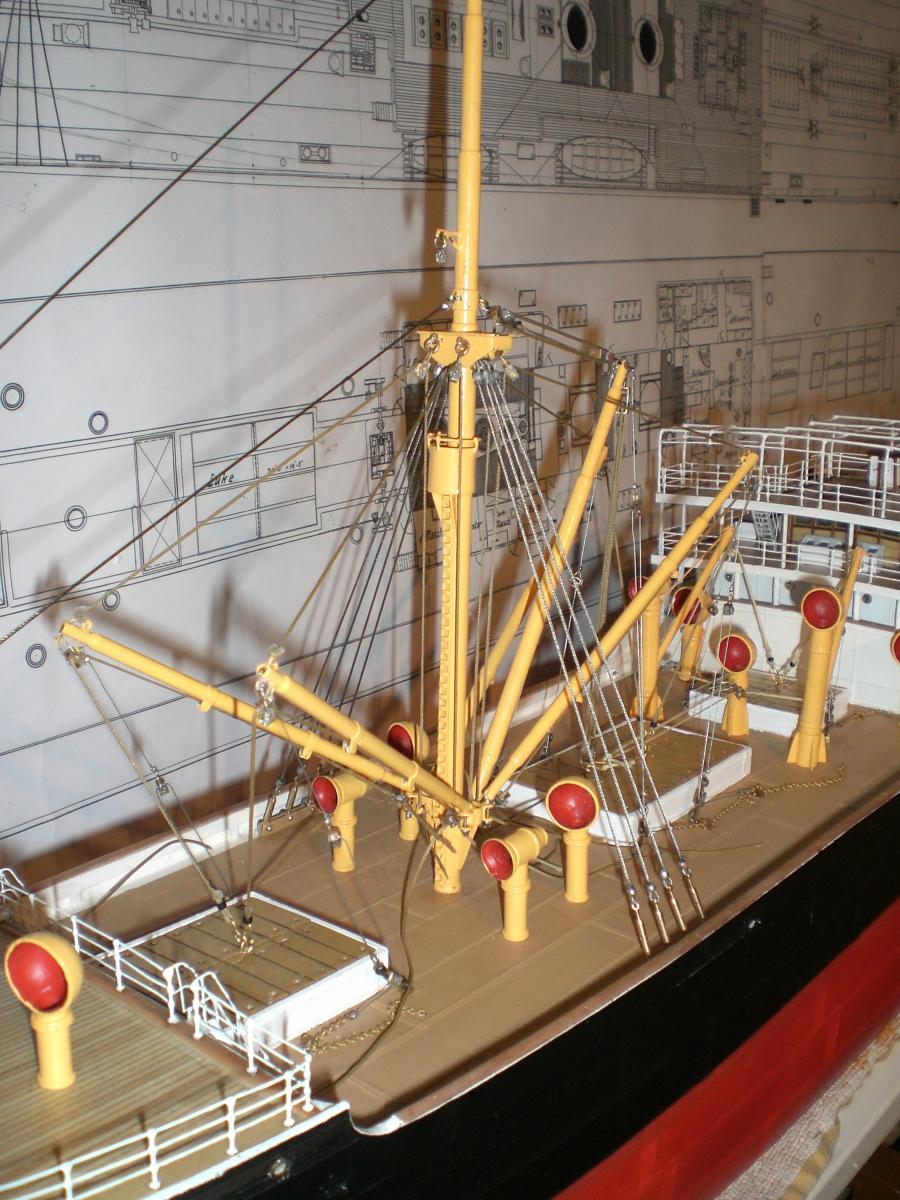
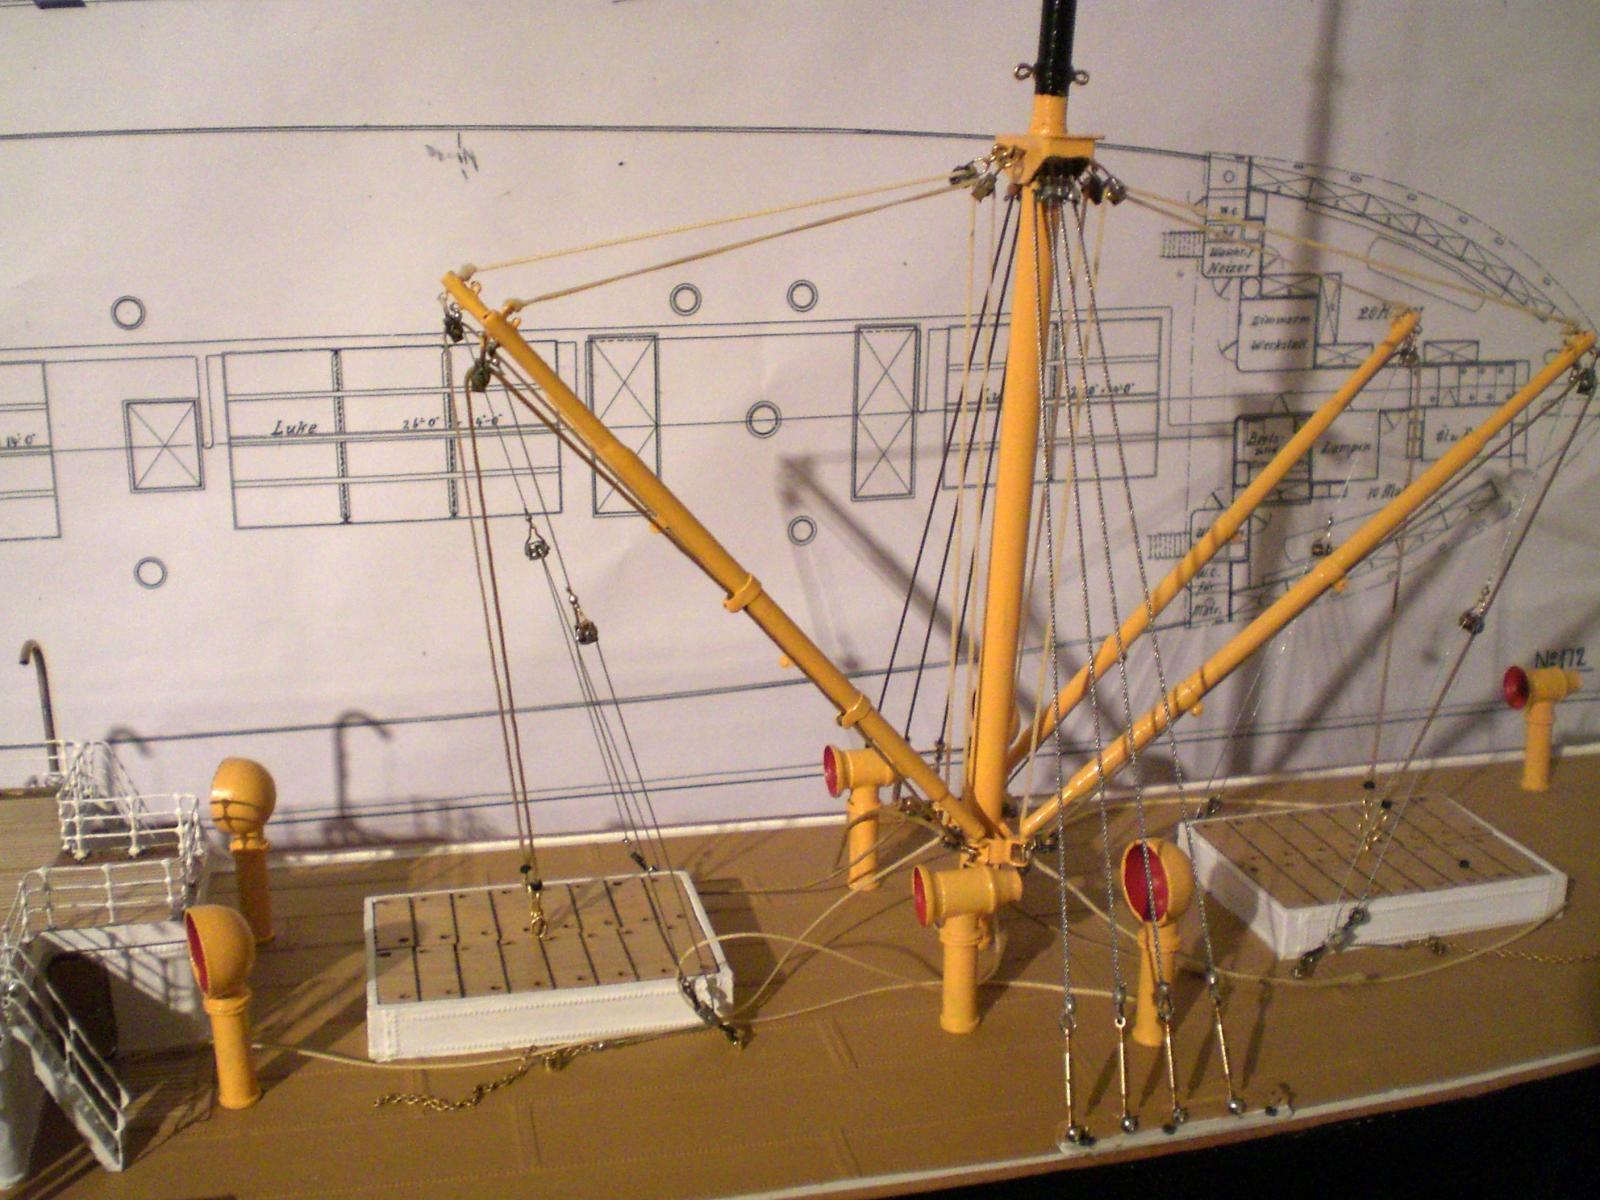
starting with the rigging, stays, shrouds and loadbeam tackle

I began in using stainless steel wire chords, but that caused too much Trouble in soldering,although Special alloy solder and Special flux was used. Swapped to using tin galvanized steel chords (exellent soldering possible wih the old experienced way !)
The great functional shroud and stay spanners (source : RB Models)allow strumming, you can Play bassguitar on. This Feature was addopted with good success to my tallship models as well

The heavy (Center placed to the Forward mast)beam gets a Special tackle

here we have the kinematic components of the auxillary, emergency rudder device. The horizontal spindle Left + right thread allows real fuctional Operation, when clutched in to rudder shaft, disabling the normal chain remote steering.


now nearly ready for the poopdeck railing to be fitted
Build log part 13 to follow....
-
B.E.
Thank you for your Kind words
Nils
-

The Deutsches Schiffahrtsmuseum in Bremerhaven, Germany, would be grateful to have your model in their collection, since the HEINRICH KAYSER was her home port at Bremerhaven.
Your model is such a wonderful example of the modeler's art, everybody should have the privilege to see your creative work. I hope you will consider my suggestion.
Montani semper liberi Happy modeling
Crackers


Crackers,
many thanks for your appreciative and encouraging words, I`ll have your Suggestion in mind for the day when (if) I Need to give it in other than family Hands. Question: do you as a Senior model builder have any personal relation to Bremerhaven? You are correct, the Shipping Company Kayser & Son was based at Bremerhaven before the ship had been transfered to their Hamburg subsiduary, but that is only known to very few People..... The fate of that shipping Company owner Family really shocked me and was very much touching, sad to say.
Nils
-
-
Thank you Ray,
Thank you John
regards
Nils
-
Bob
you shall make me very happy if you go on pleasing your mind (thought), and very welcome to the stoker gang, who really knows in our days of gas turbine and atomic operated ship powerplants, what a stephenson reverse device is
Cheers
Nils
-
Hi,
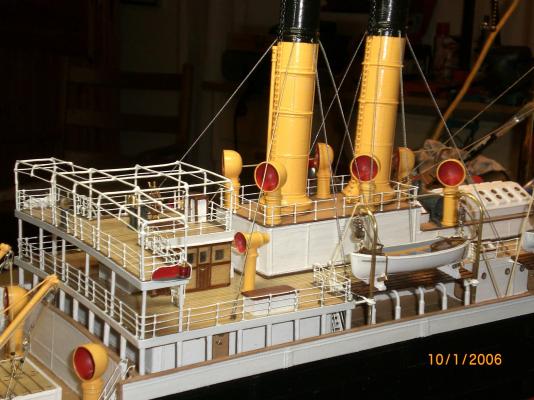
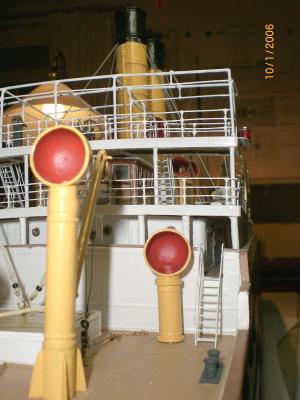
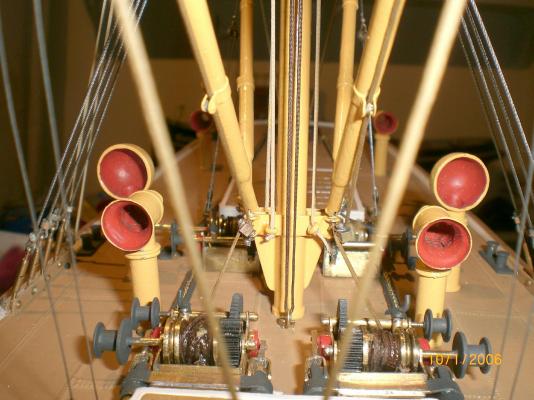
trust you are reflecting to the outlet (suction mode) vents...
well, the longer vertical tube is cut to fit soldering a small short cross-tube on top, an then for the parts of the intake side and for the discharge side I cut these off the Ends of small steel-brassplated mini Christmas Jingle bells
In case you mean the spheric bowl typ, this is shown earlier in part 4 of my build log
Hope this serves your question
Nils
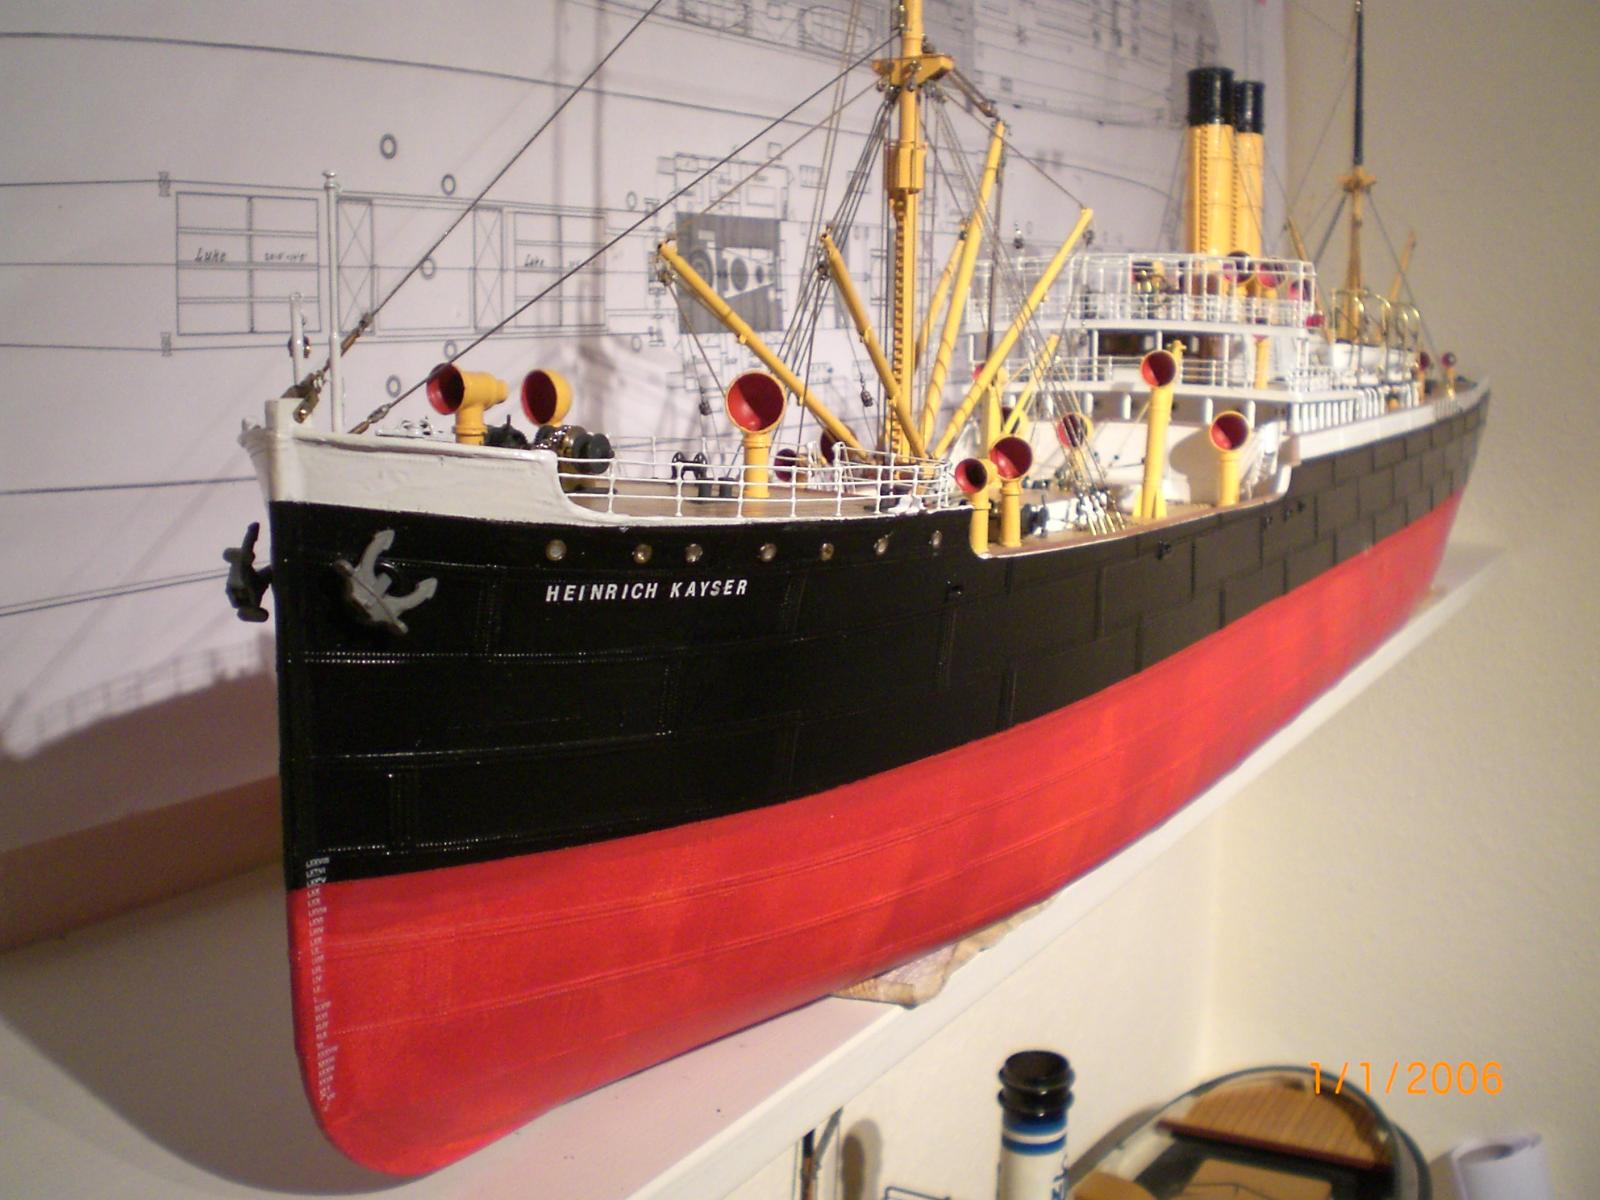


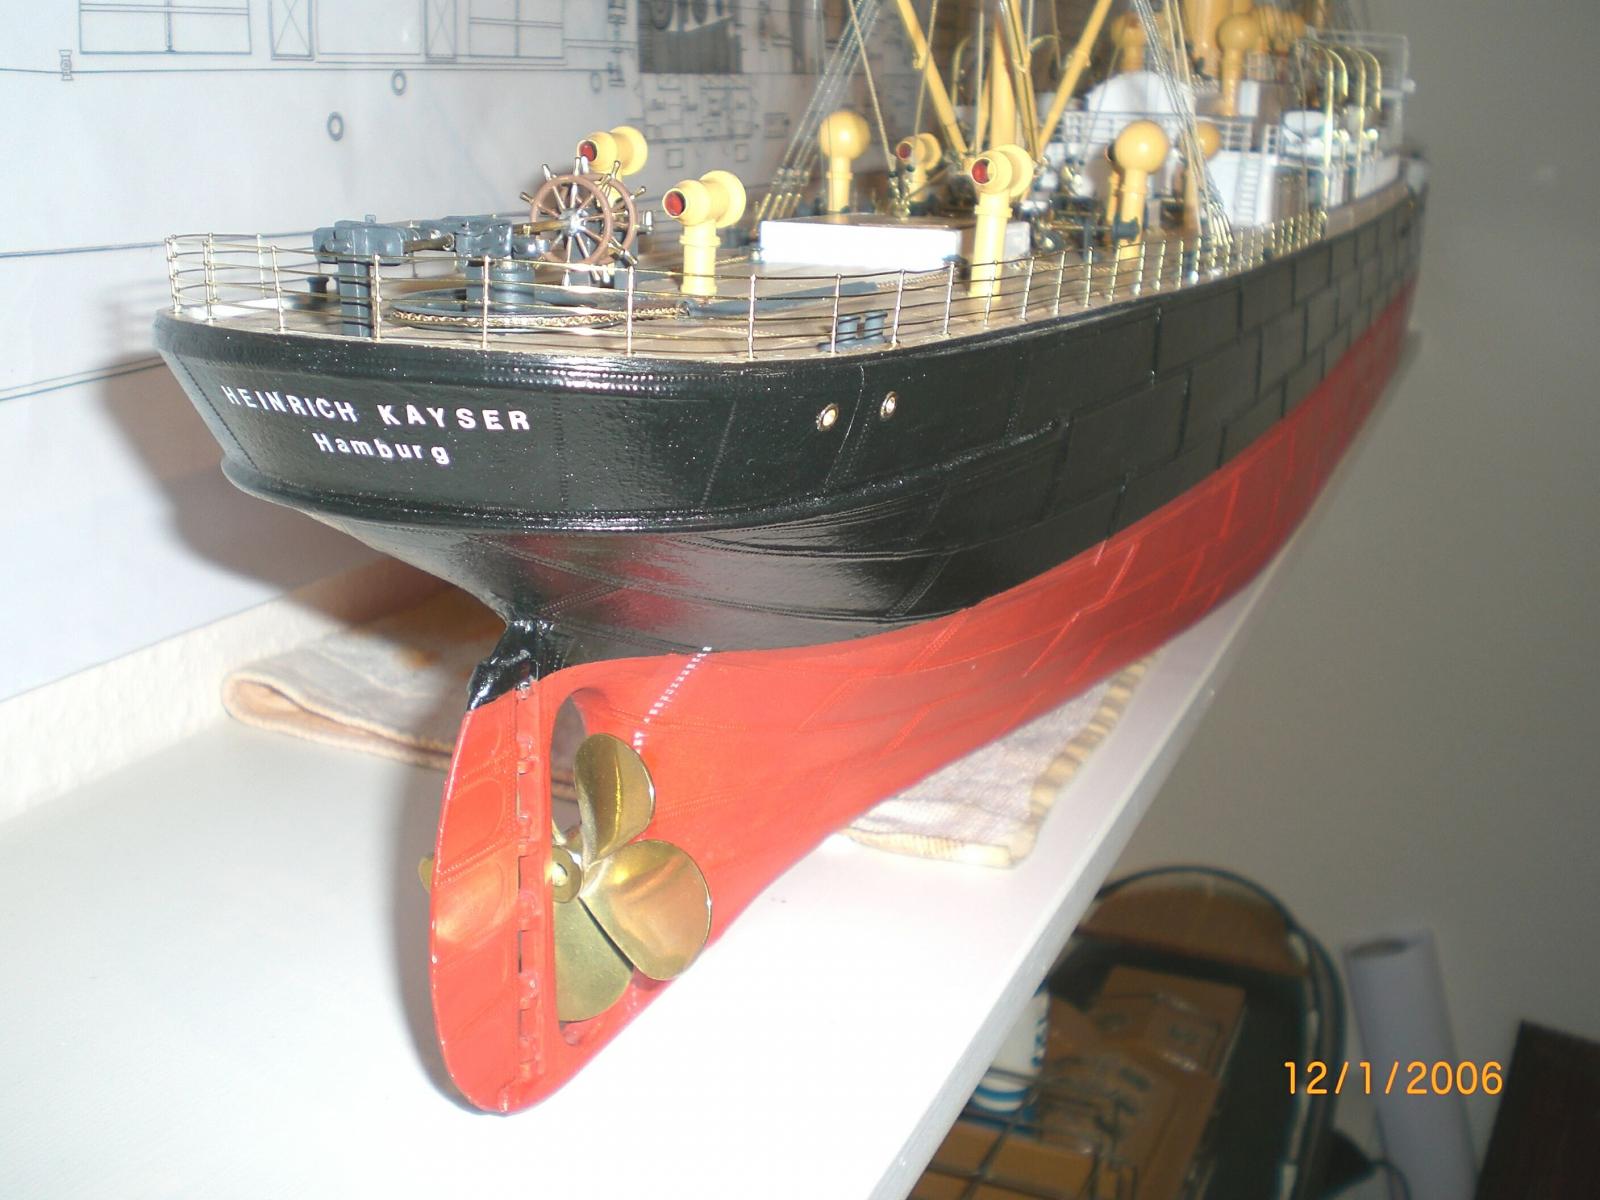


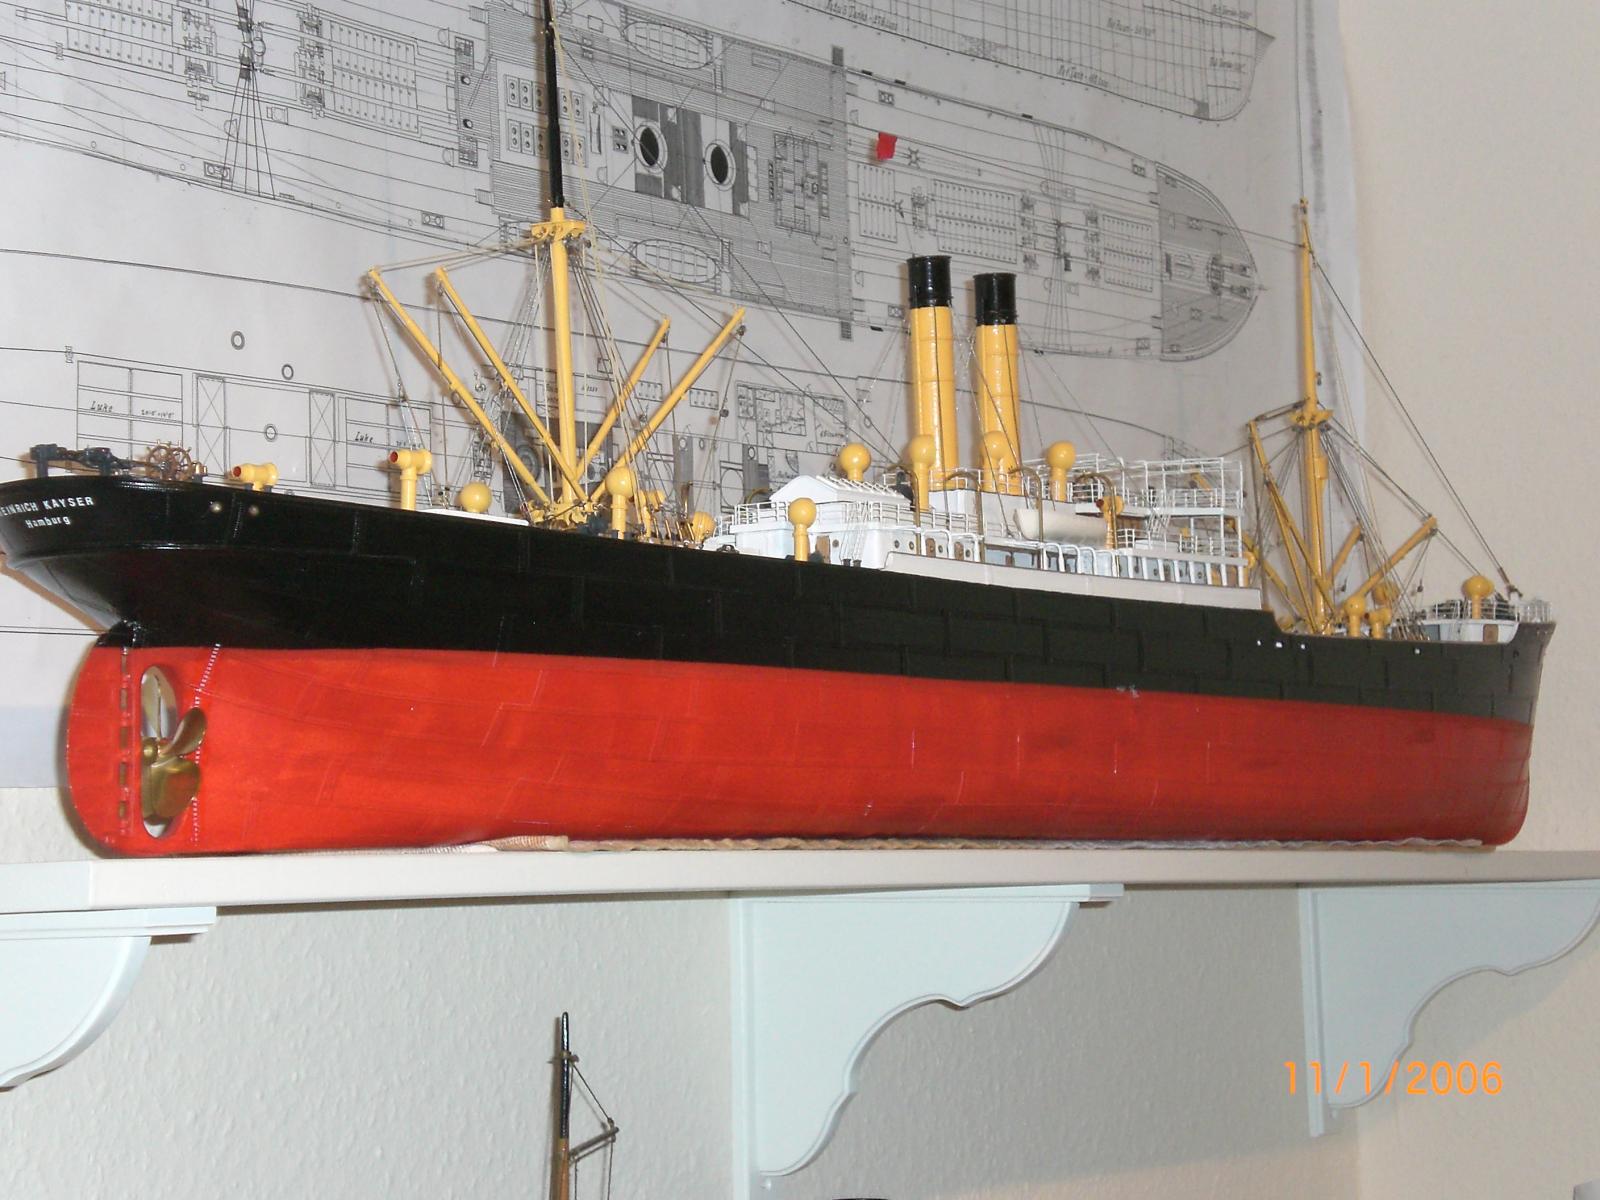


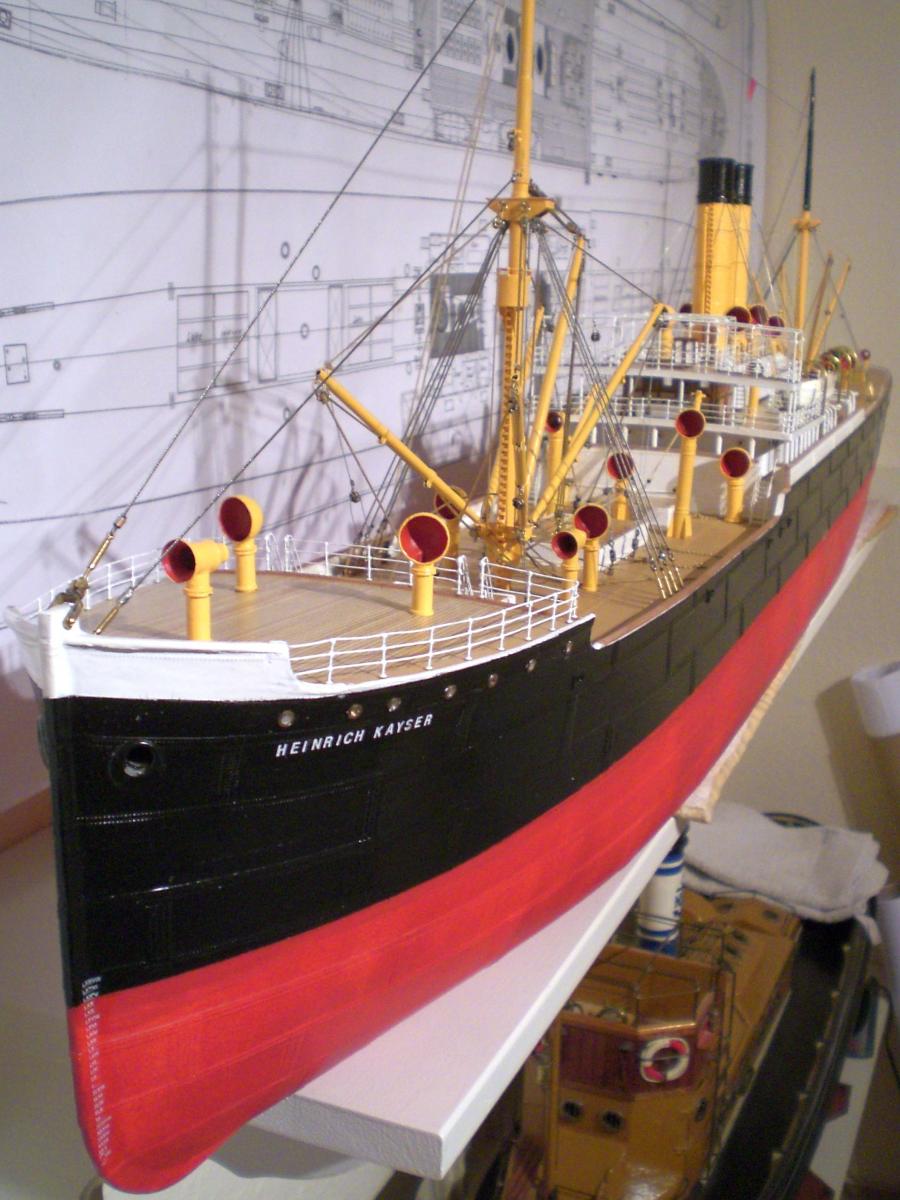
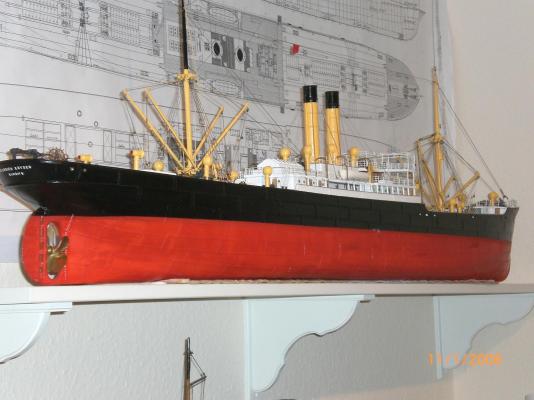
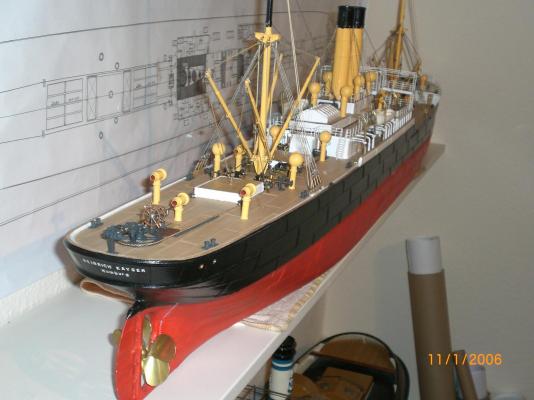
Heinrich Kayser 1898 by Nils Langemann - FINISHED - scale 1:96 - as she appeared in 1922
in - Build logs for subjects built 1851 - 1900
Posted · Edited by Mirabell61
Building log part 19
The building is now slowly coming to its end (two more additional log parts to go), this all was reflecting 2 years of much motivated fun in modeling
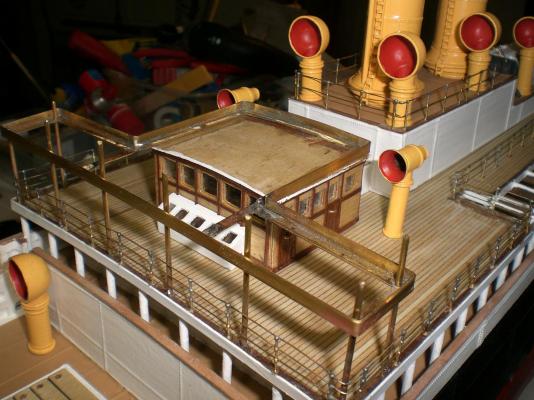
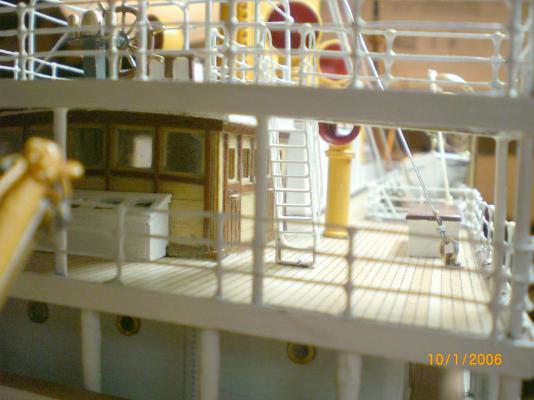
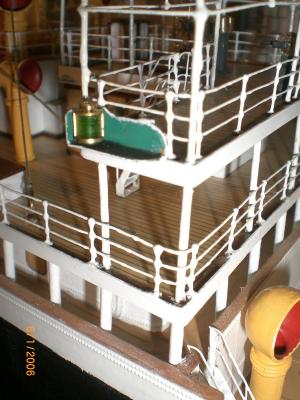
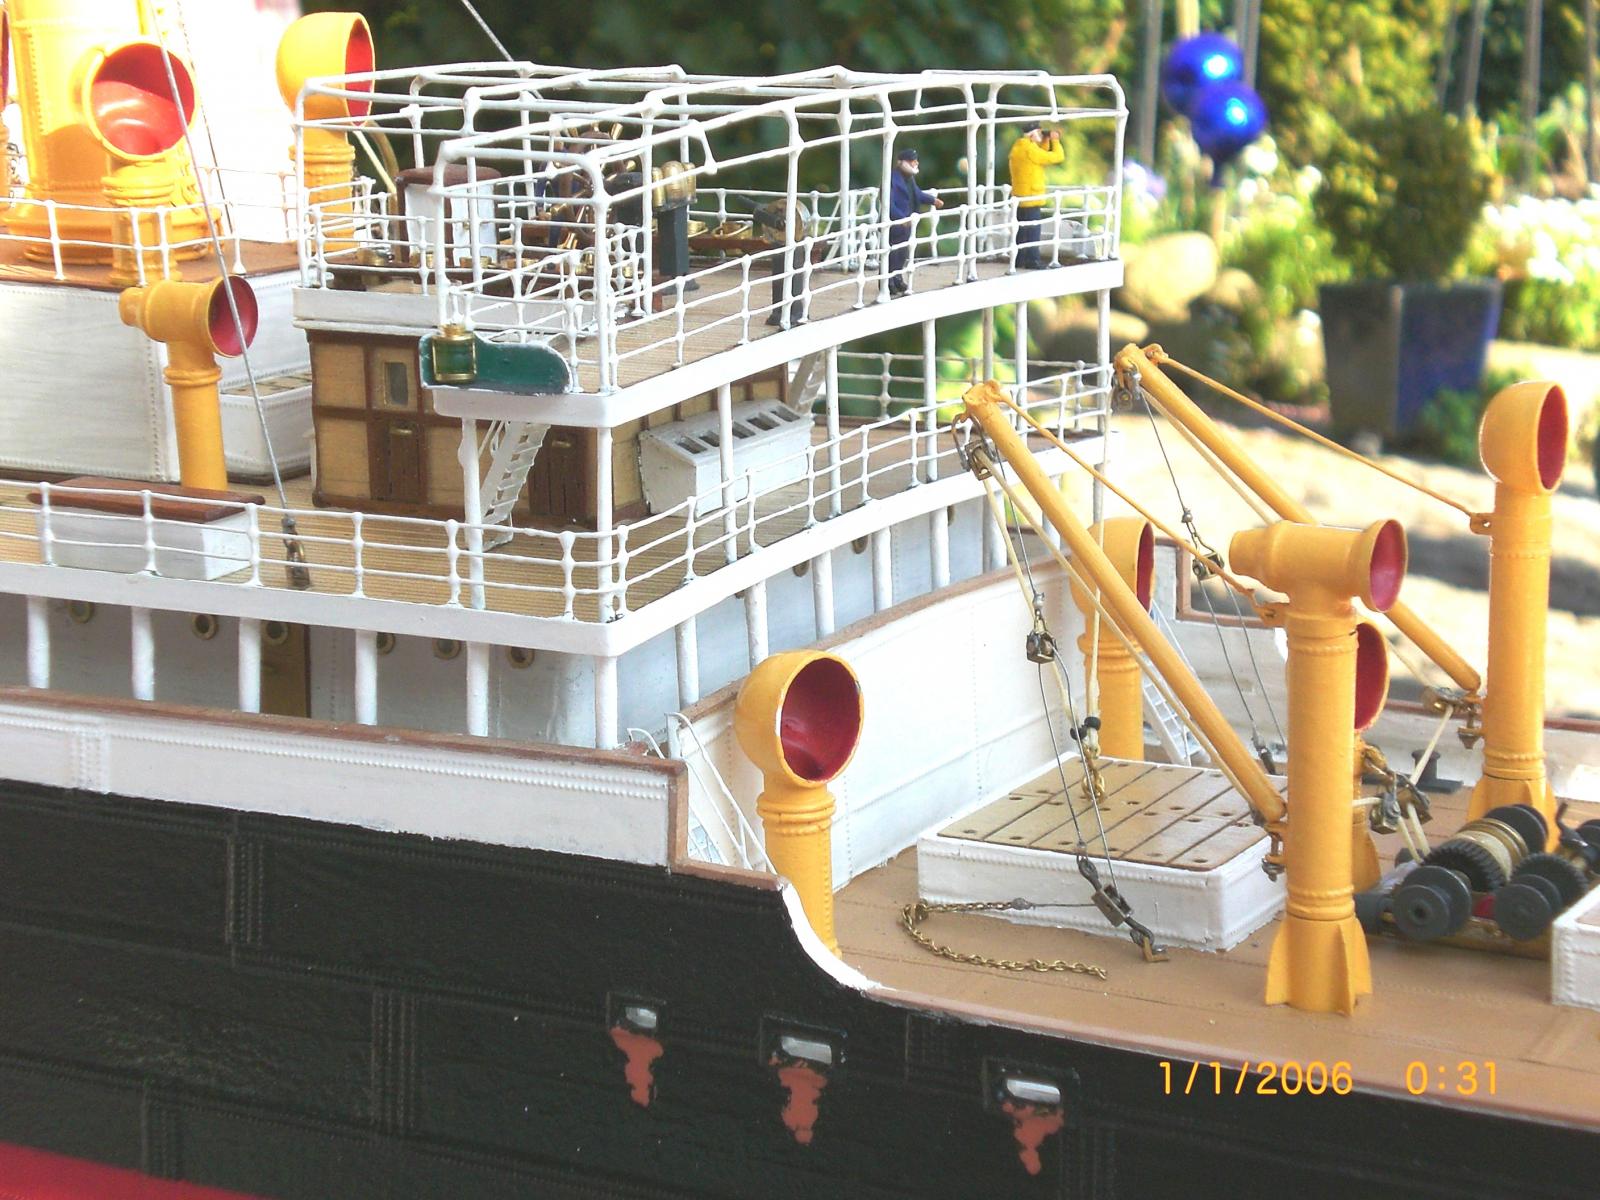
Bridge and wheelhouse Areas completed
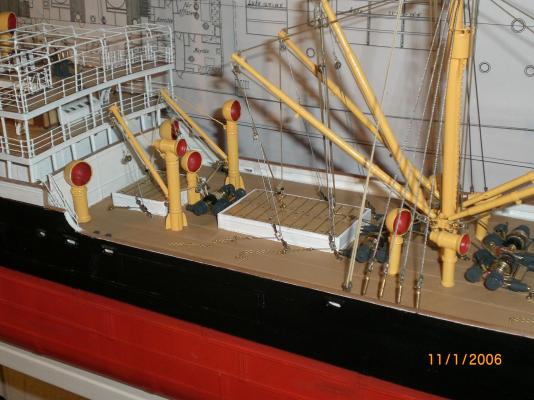
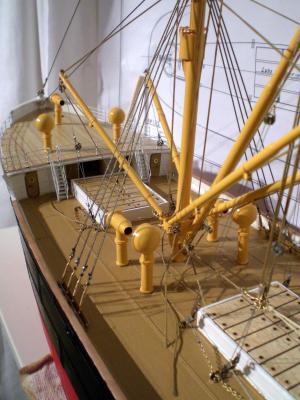
forecastle- and aft poopdeck sun shading Framework attached
donkeyman at work
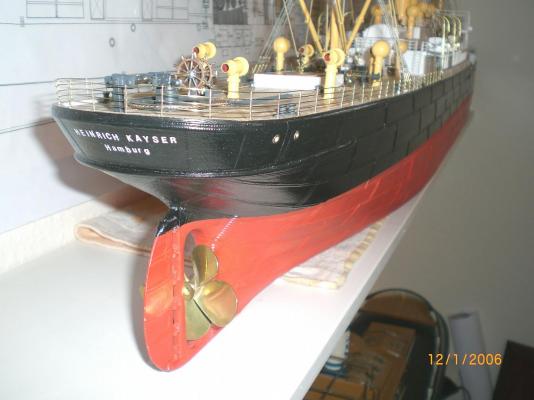
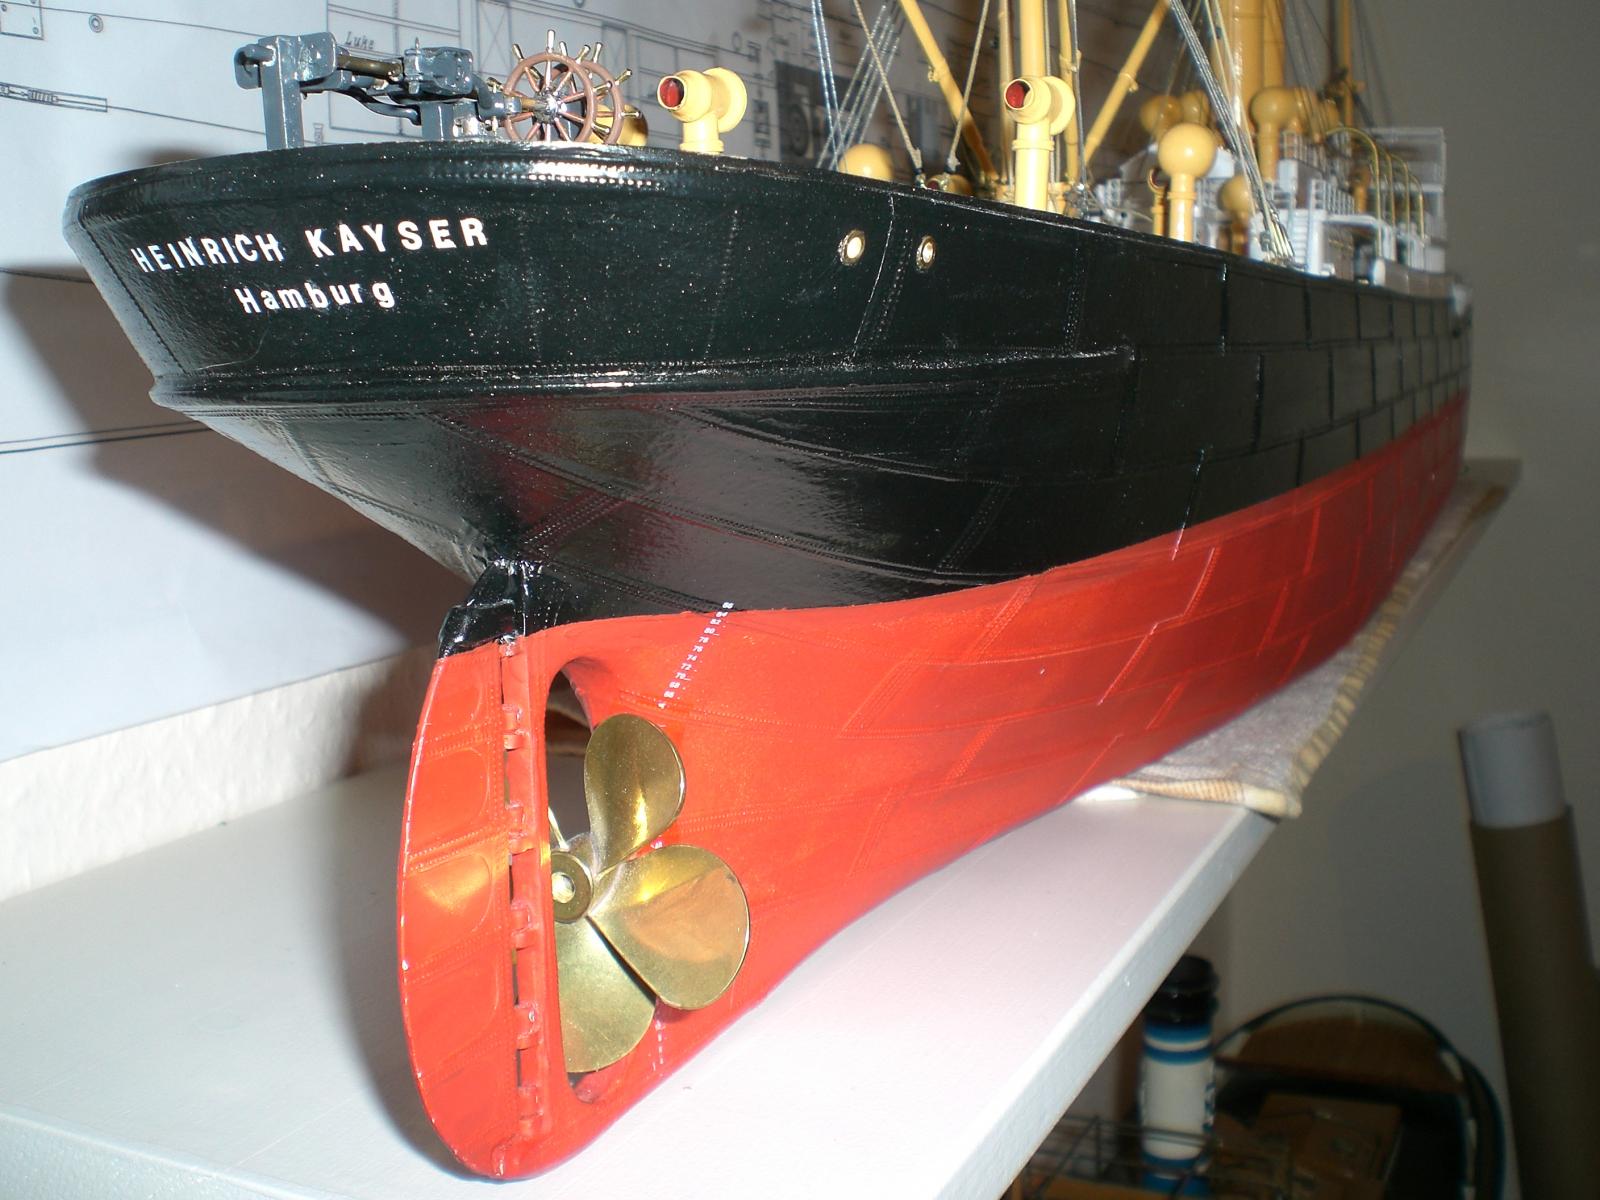
colour of rust stains at the scuppers could be improved
One optional thought : When I saw a Picture of her sistership (the USS Camden, ex Kiel) that was still bearing ratlines to the shrouds, that would provide nice authentic Appeal. Shall think about it
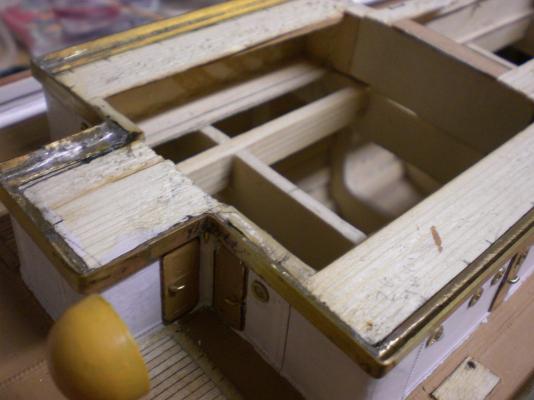
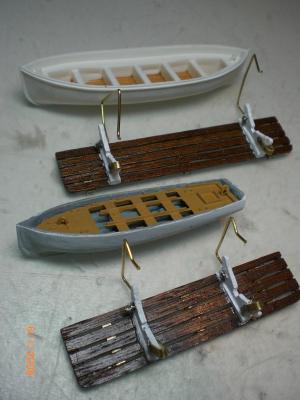
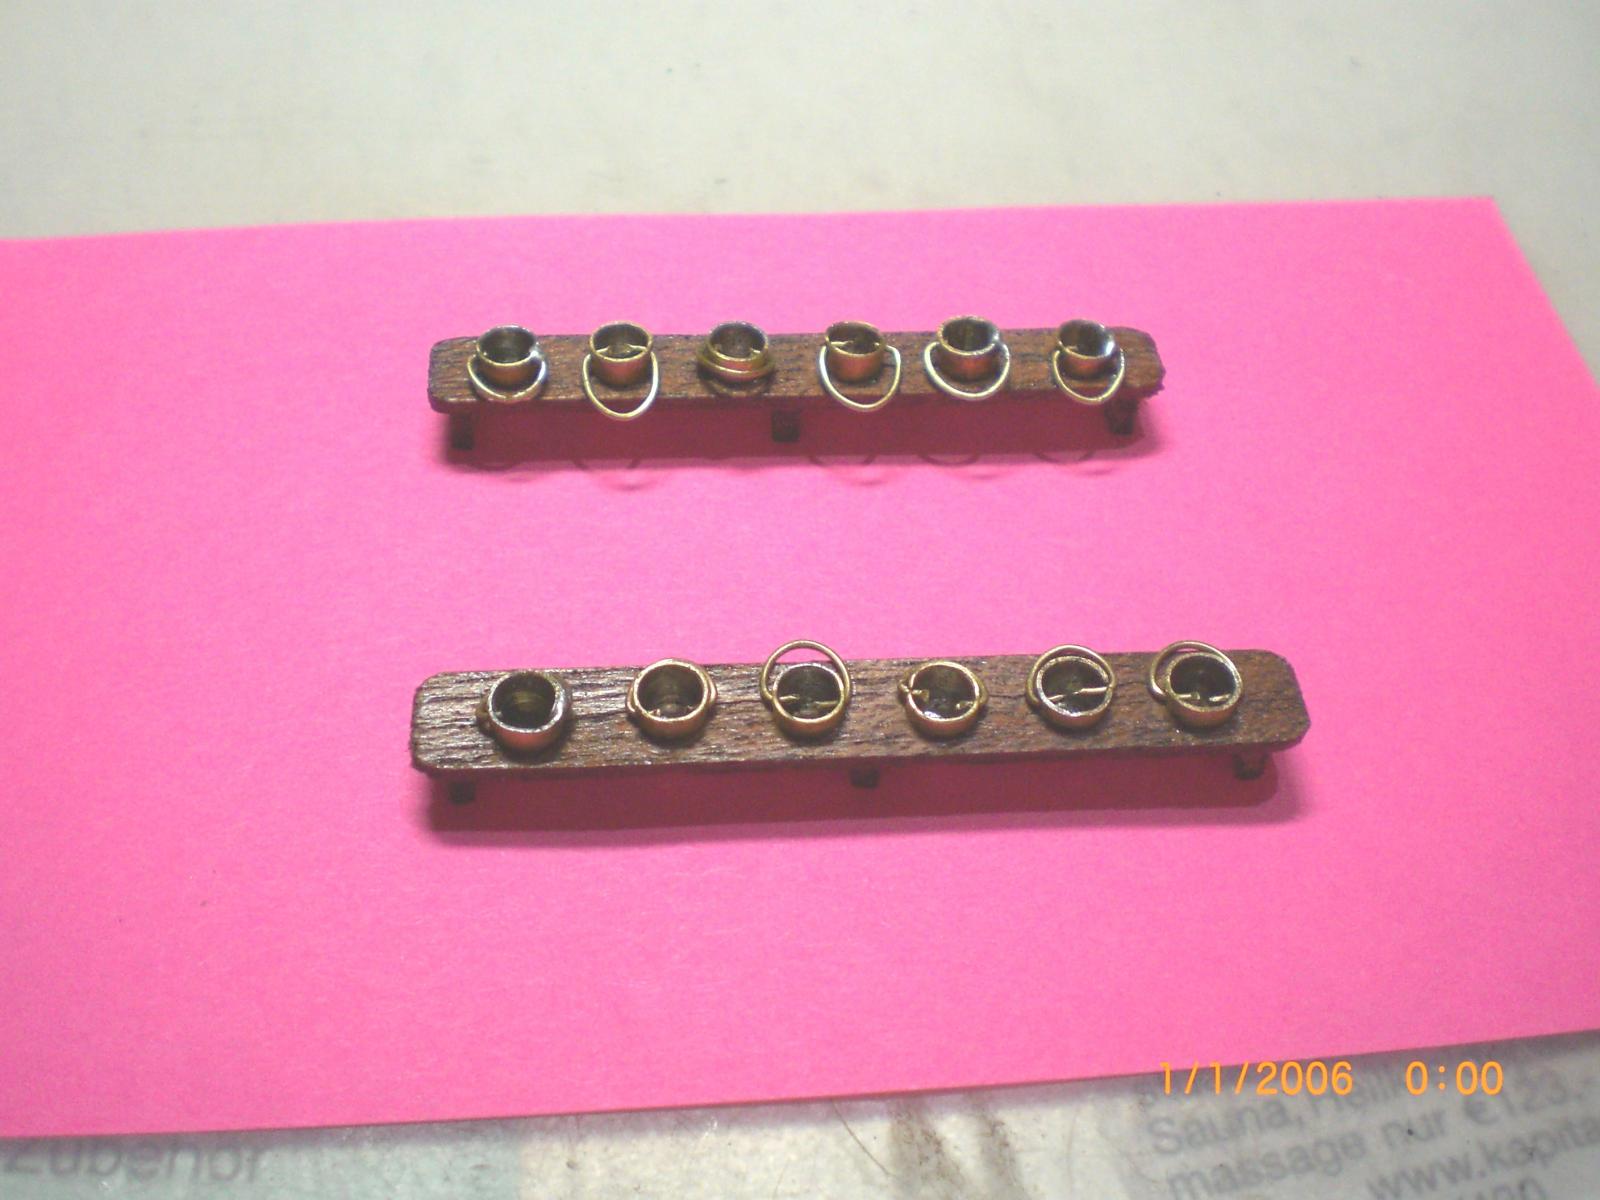
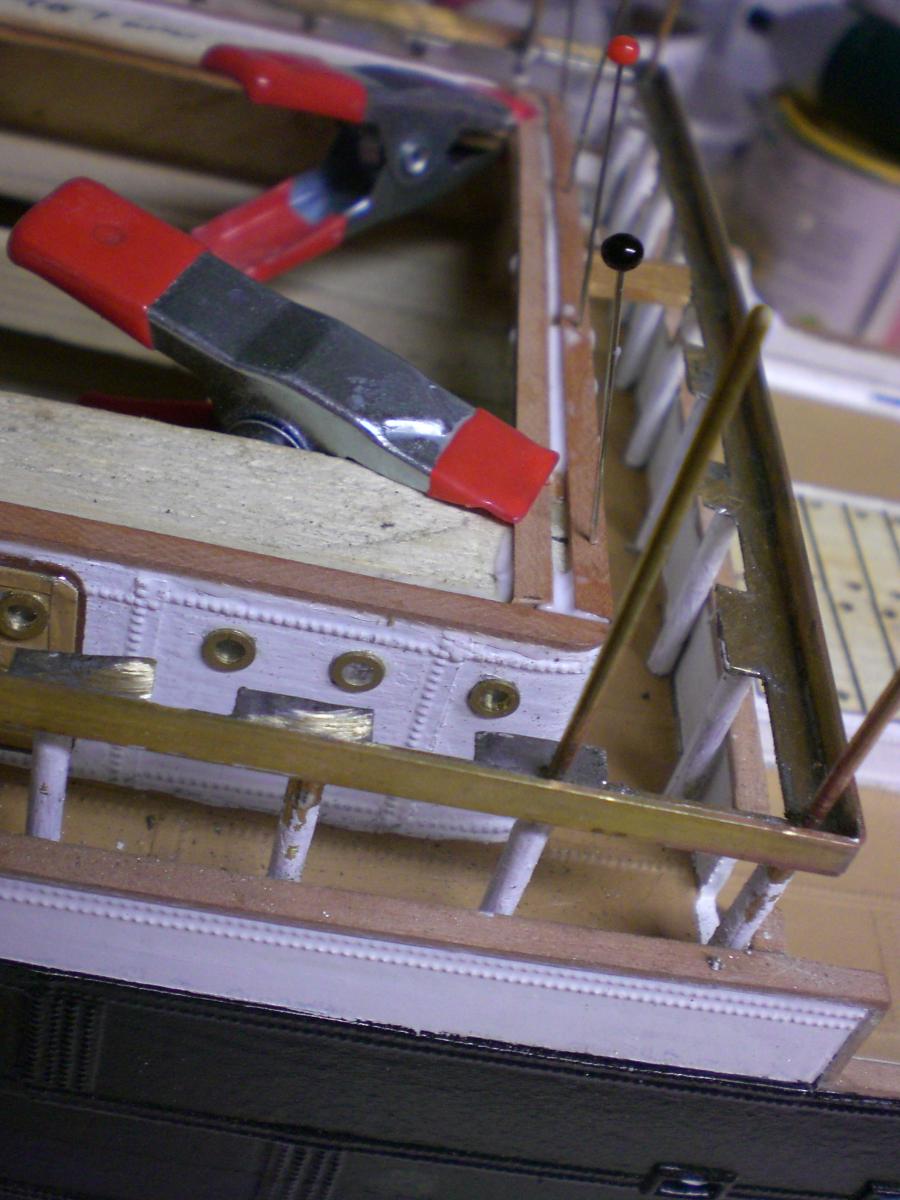
These two gigs represent the Positioning and Fixing soldering devices for the bow and Stern sun shelter constructions. The holes are not portholes, they provide hold to the mini laundry-clamps for Fixing the brass beams when soldering
This is what in my mind the to be exchanged Propellor in historic correct Version should look like. Perhaps I`ll build one in resin and have an Investment casting brass prop made...
Build log part 20 to follow...