Wahka_est
-
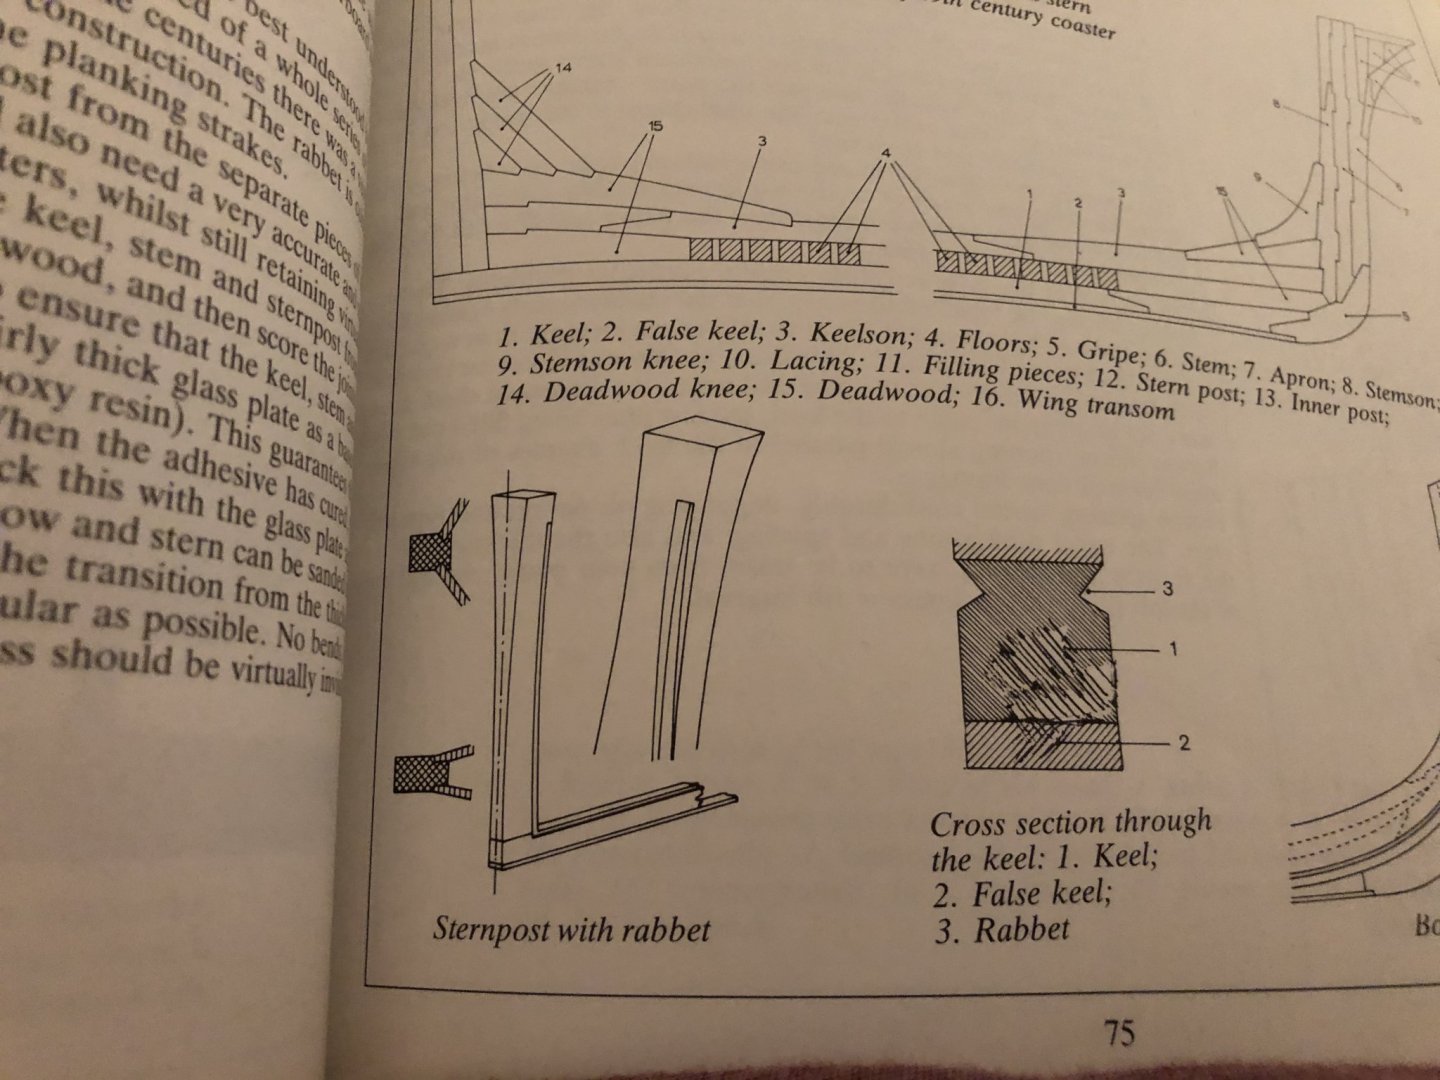
Posts
522 -
Joined
-
Last visited
Content Type
Profiles
Forums
Gallery
Events
Everything posted by Wahka_est
-
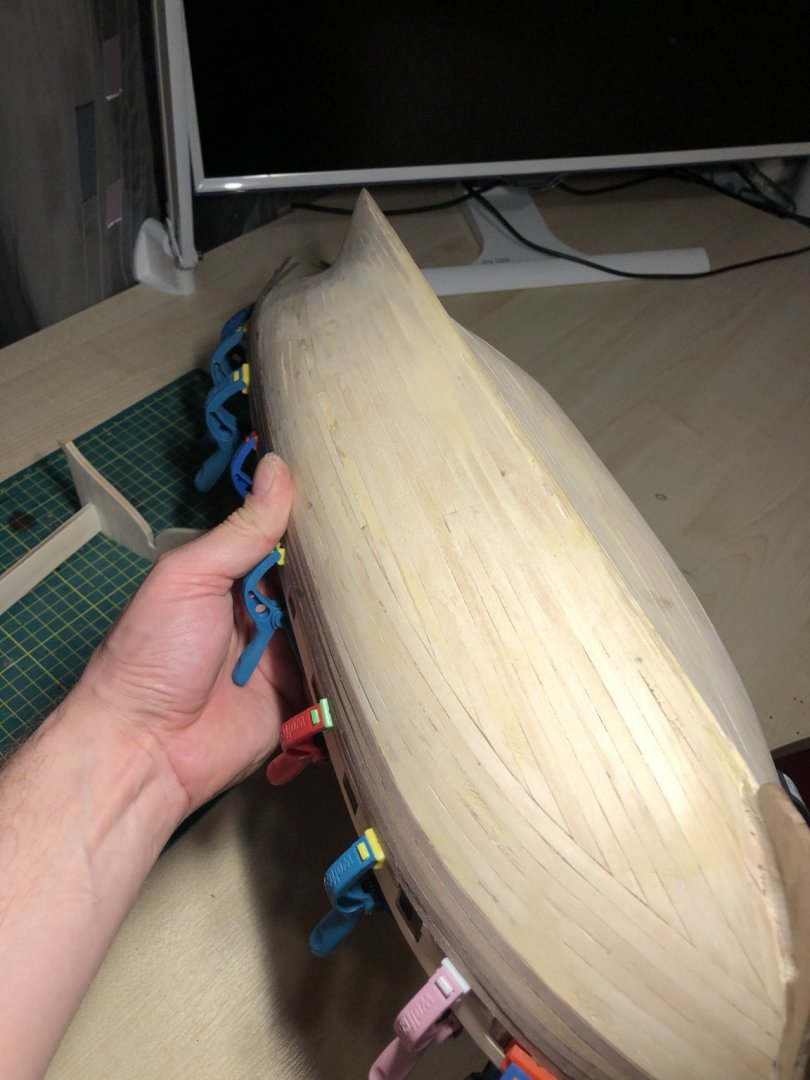
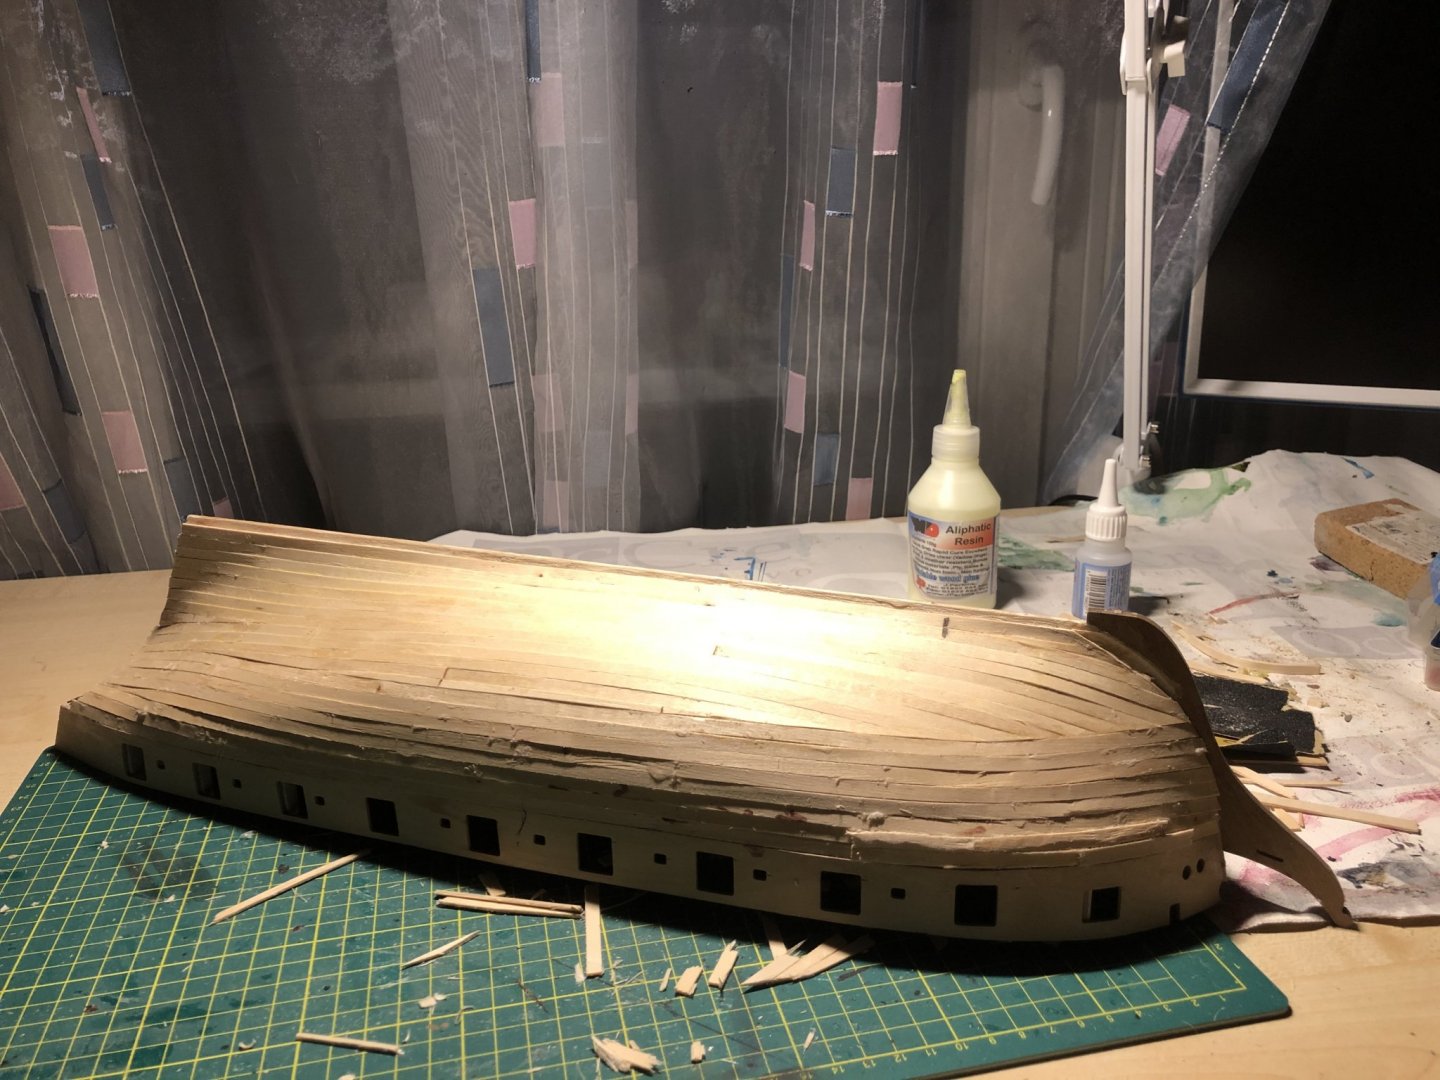
1st planking done and sanded. Needed a bit filler. Started 2nd planking. Huge problem with planks as they all are hairy on sides and dont have nice straight cut. I have no idea why its like that-maybe the kit is so old... Still decided to continiue and did some testing with sanding-it will make it mich better and will fill the joints. But still.... Would say that drawings are nice but there are still so many blind spots where pictures would be helpful-thank god for one build here where hull is done. But walnut is really nice-i love it. It also does not suck CA in so mich and marks van be sanded off. Regarding future builds...Model Expo discount got me a little crazy and i got few years of kits coming in....


-
Nice progress! Mine is blue. Maybe some orange/yellow to mimic the candlelight inside?
-
HMS Terror by Opa47 - OcCre - 1:75
Wahka_est replied to Opa47's topic in - Kit build logs for subjects built from 1801 - 1850
Welcome to Terror building club-we have few ongoing here right now. -
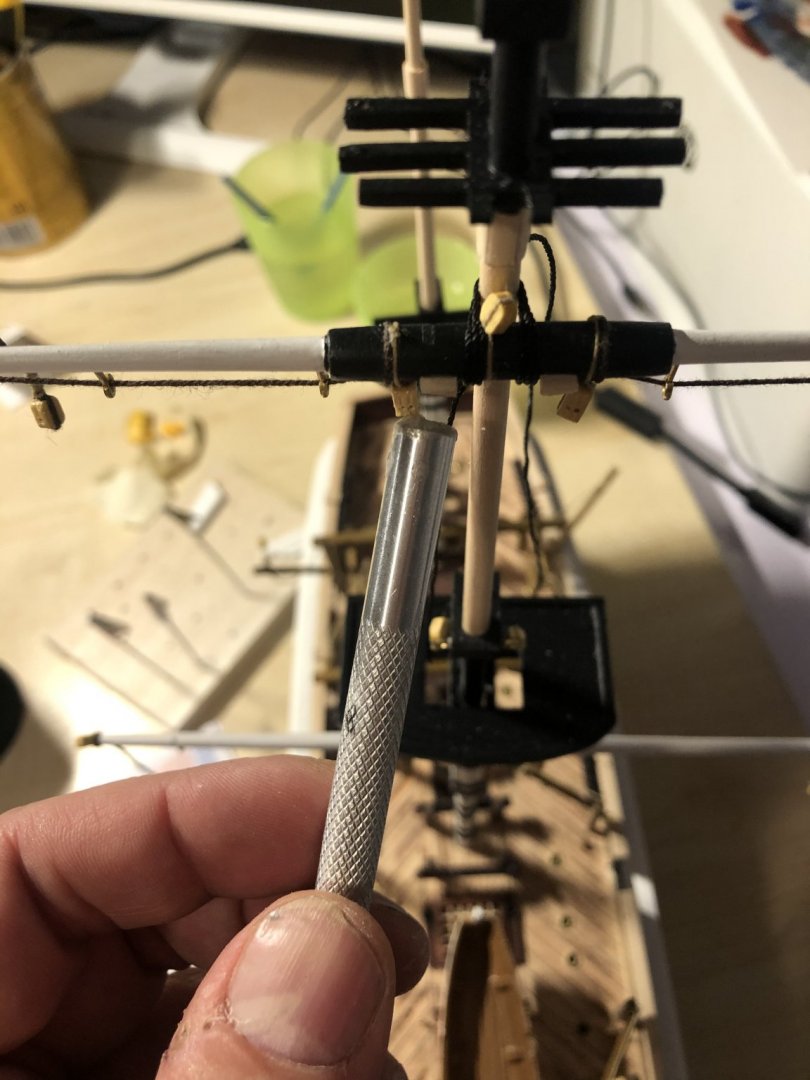
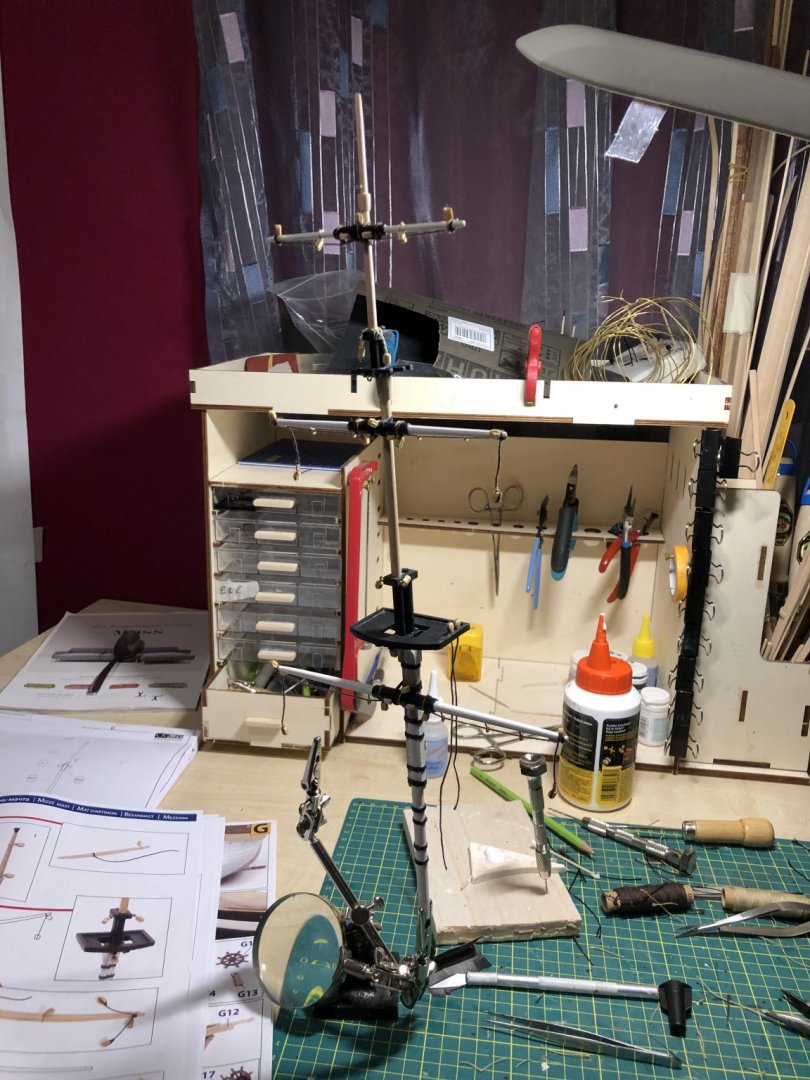
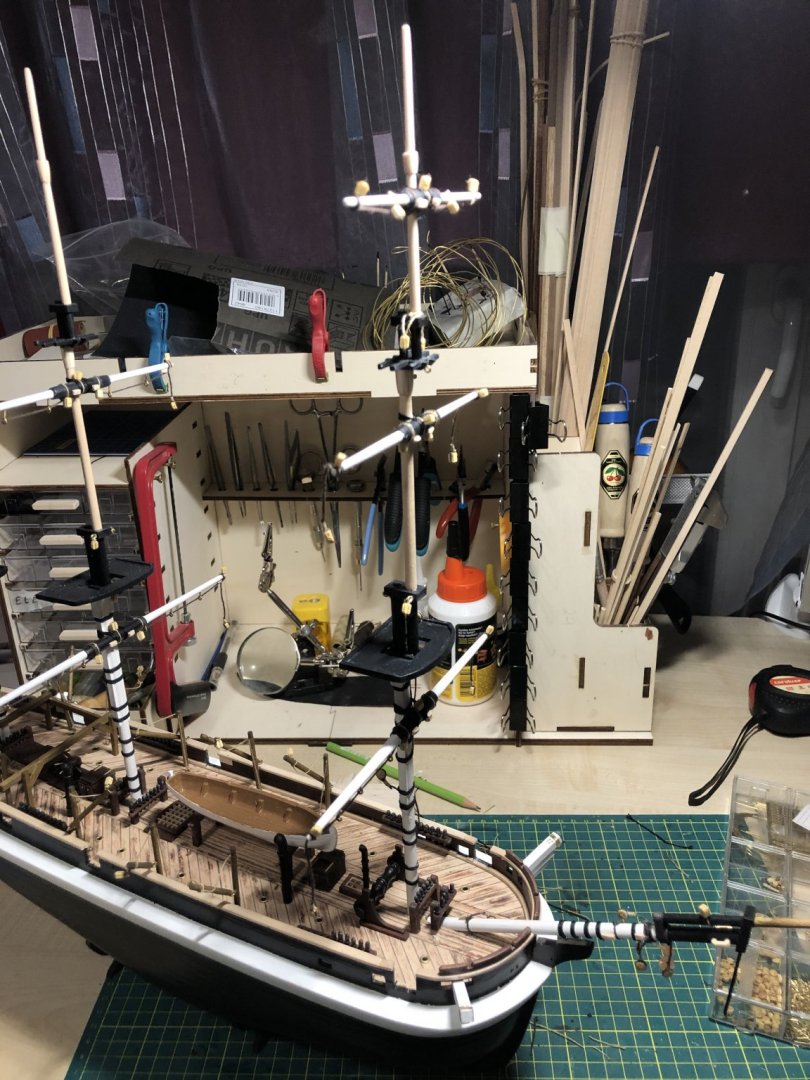
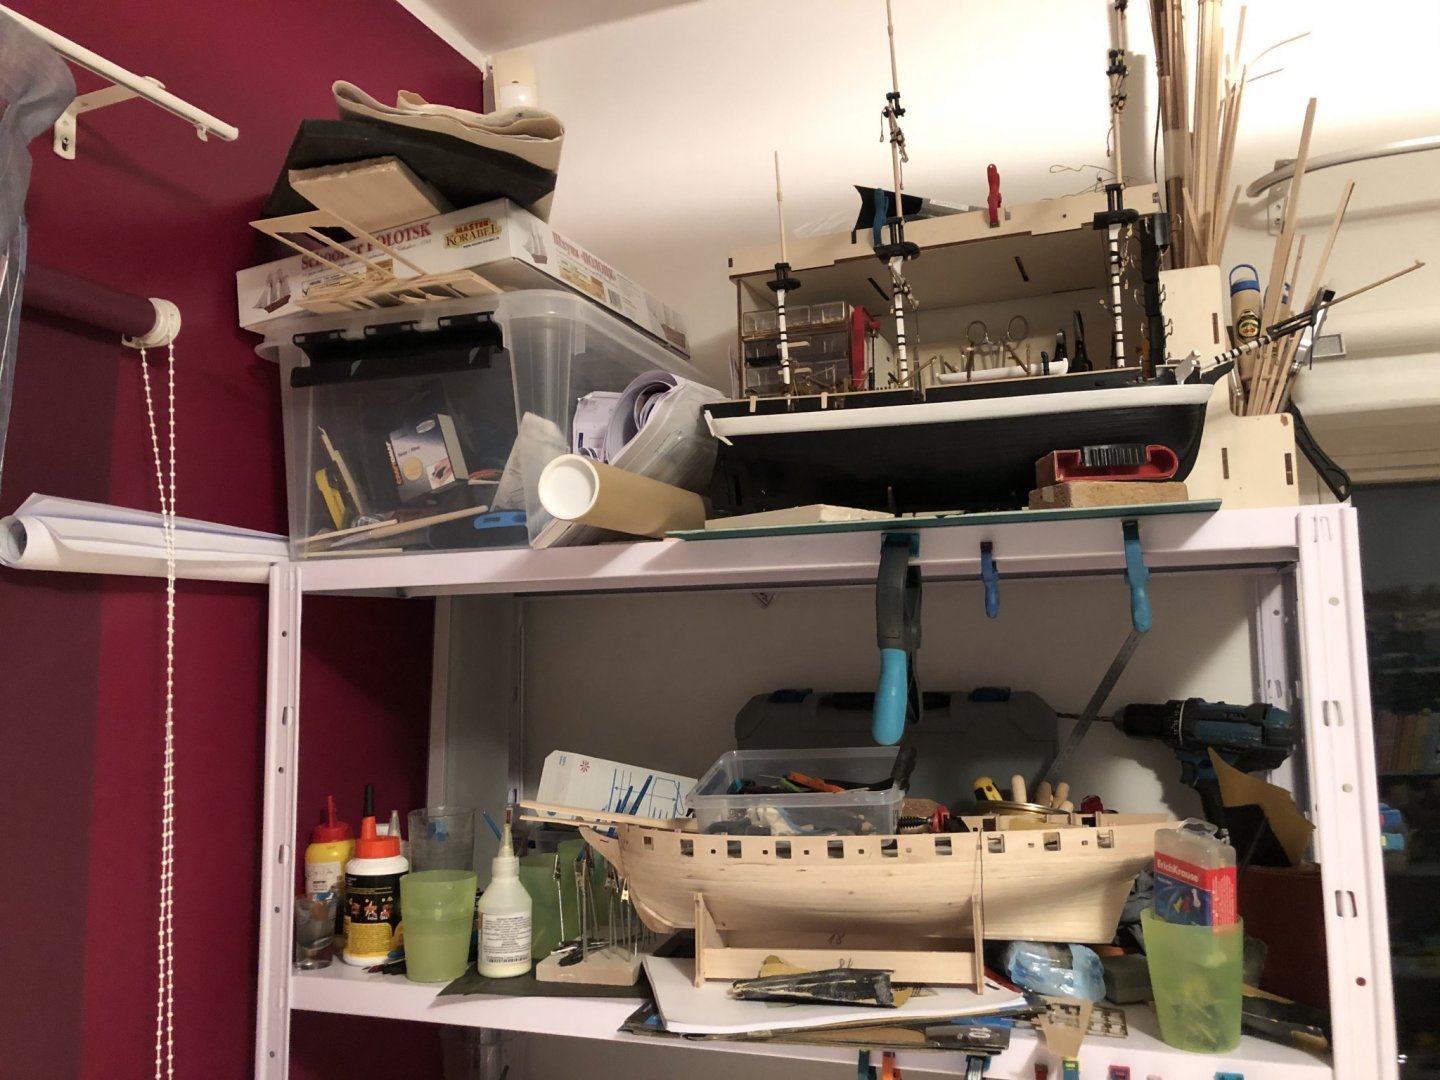
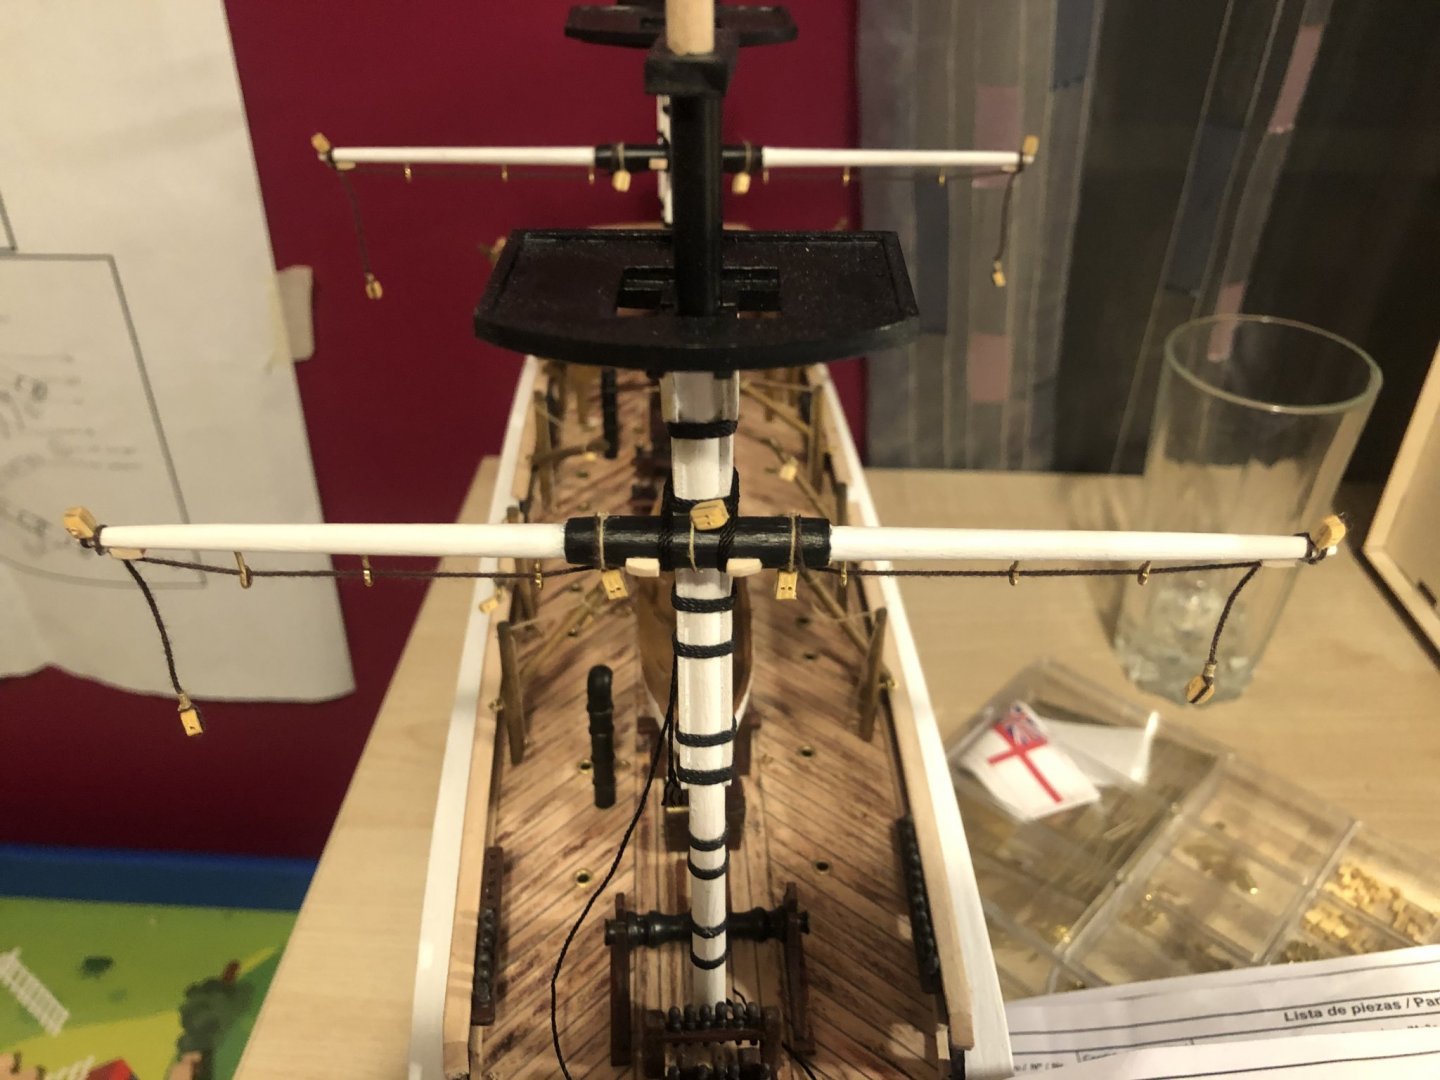
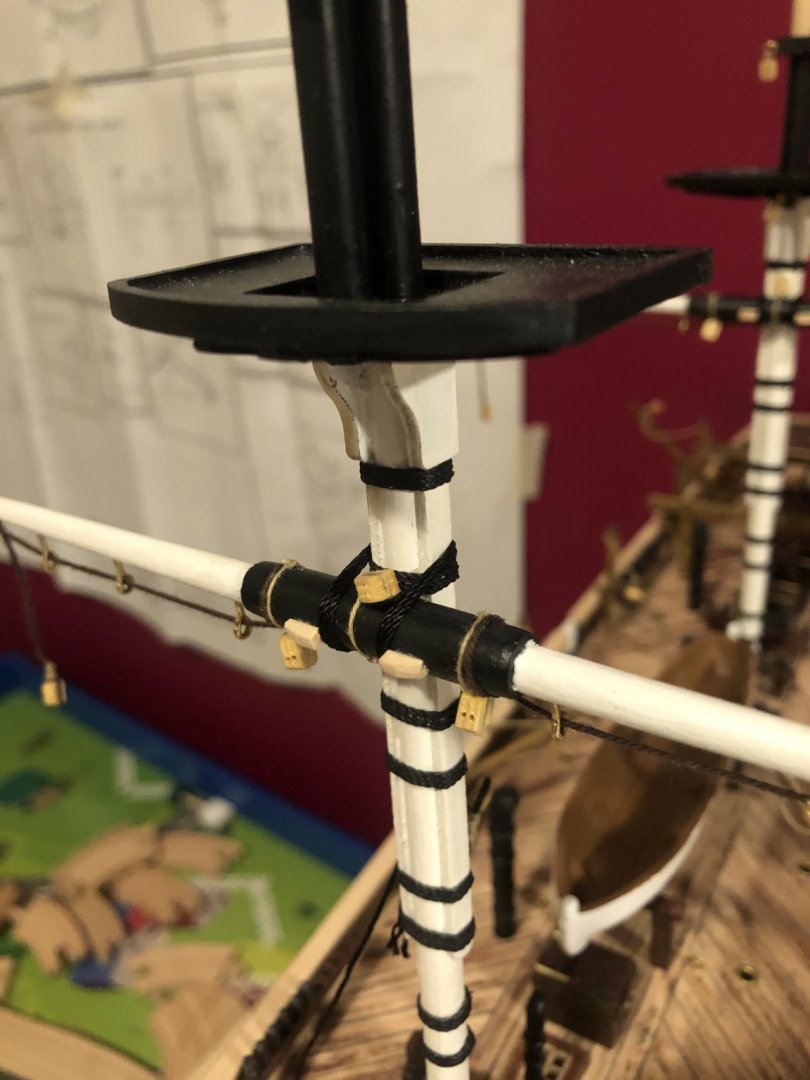
Fore mast allmost done. Tried my hand on platform deadeyesi would say ok result. Also pictures of my “mobile workstation” provided by Admiral and “warehouse”.


-
Really nice build! I have Polotsk waiting on top of closet for right time :). Wahka
- 40 replies
-
- 2
-

-
- finished
- master korabel
- (and 2 more)
-
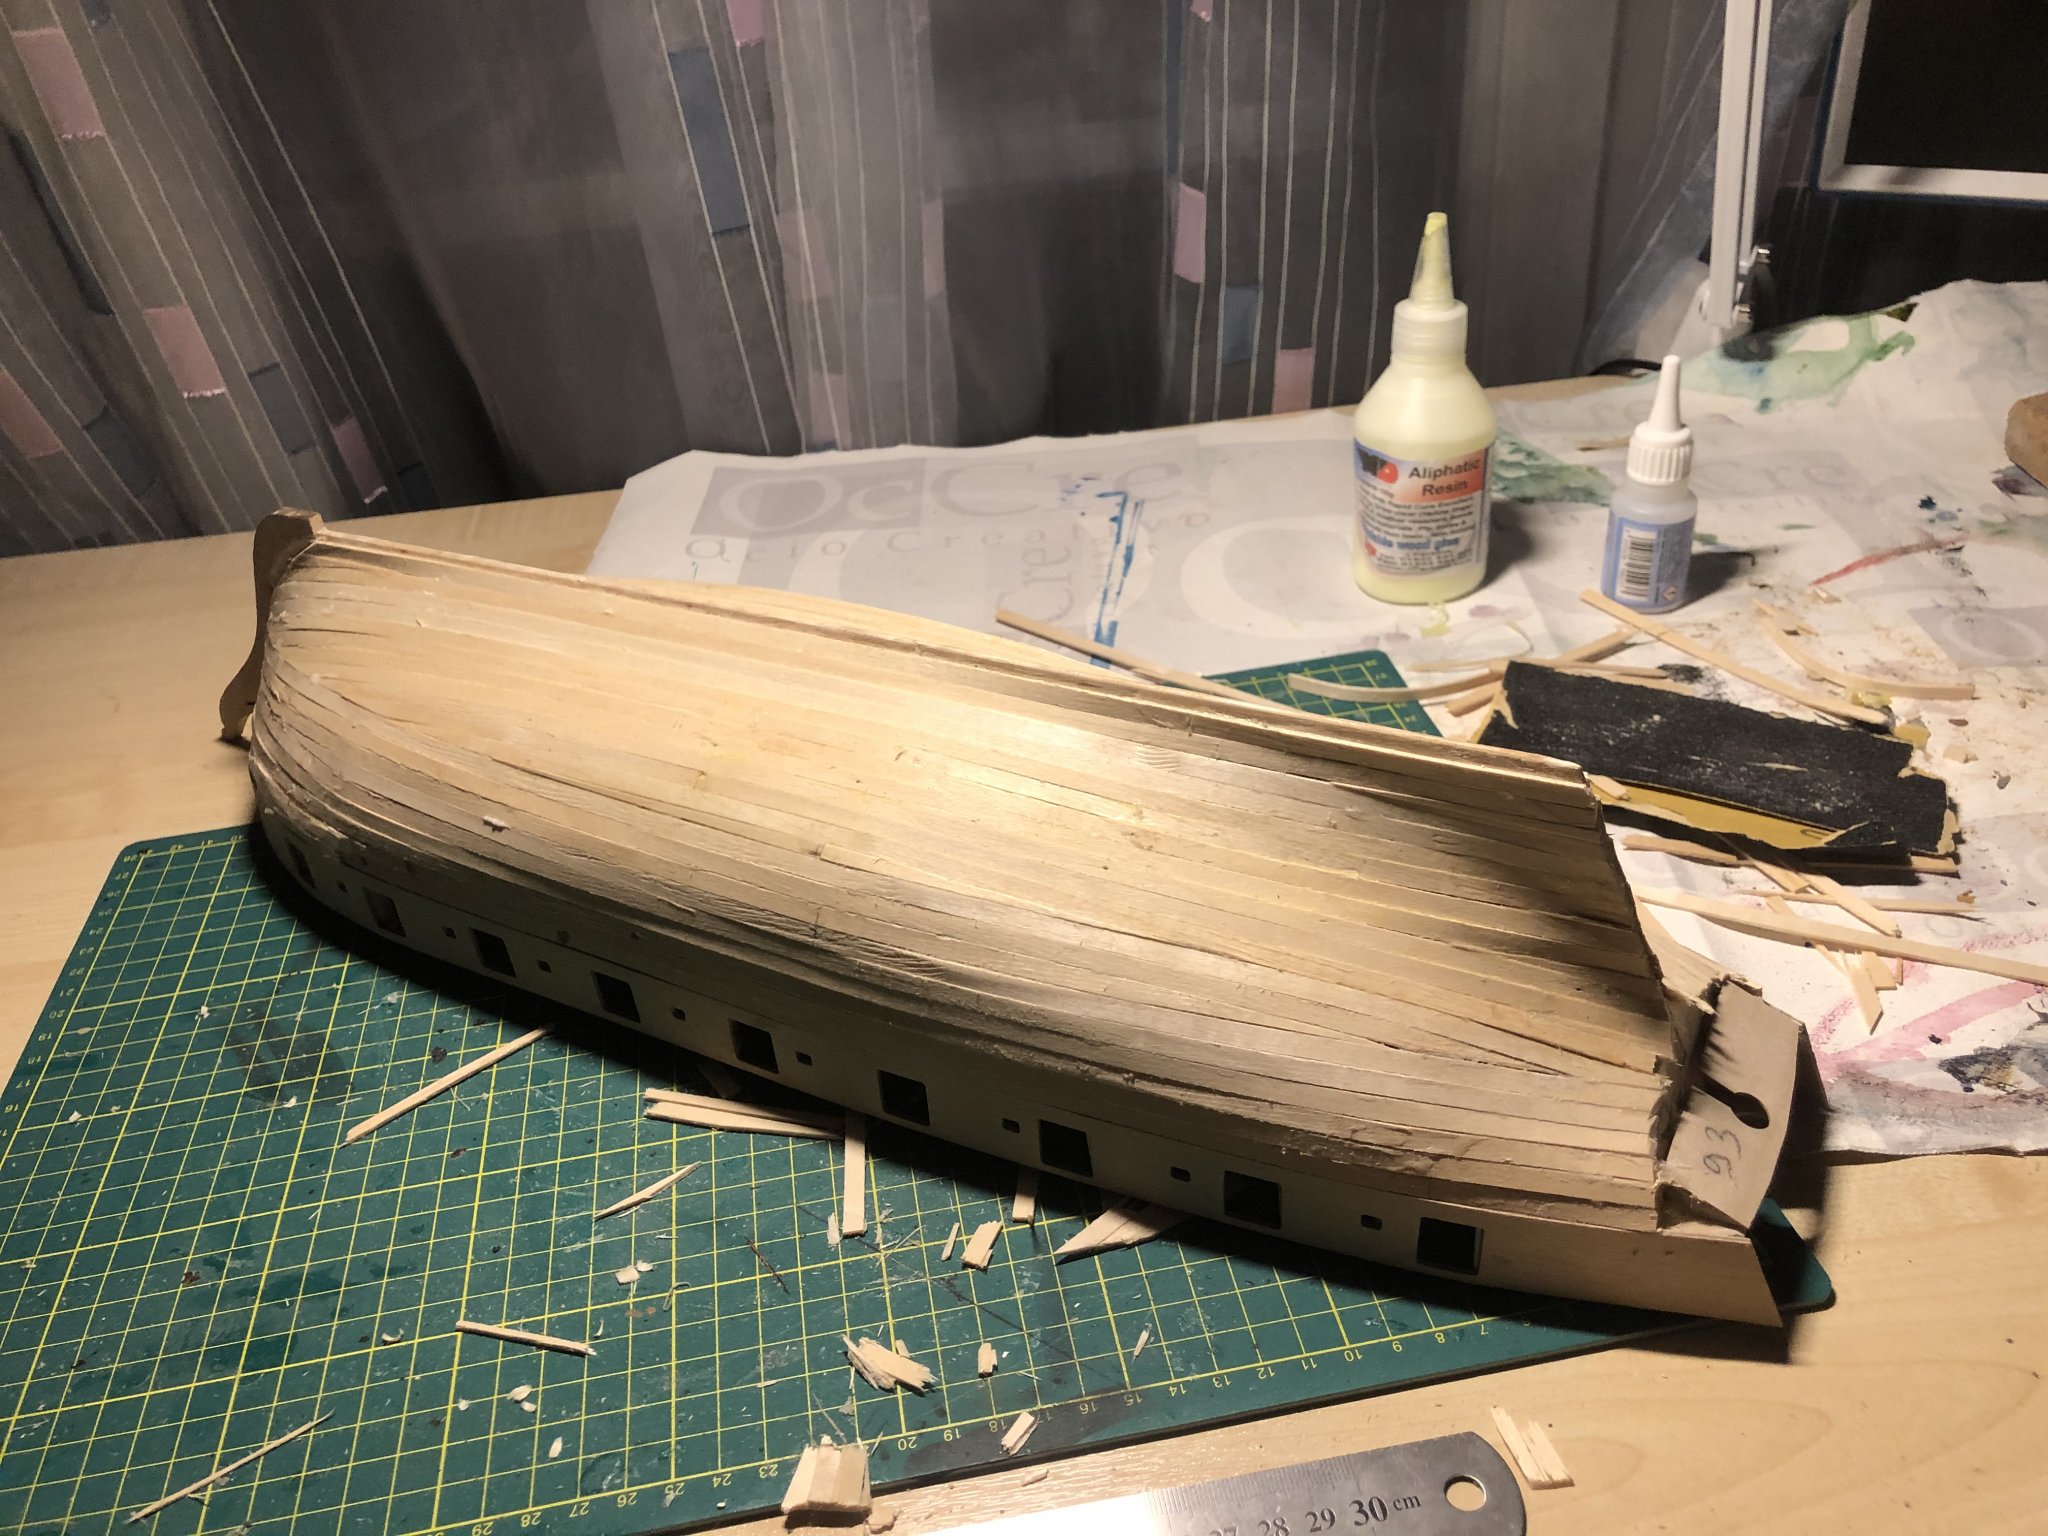
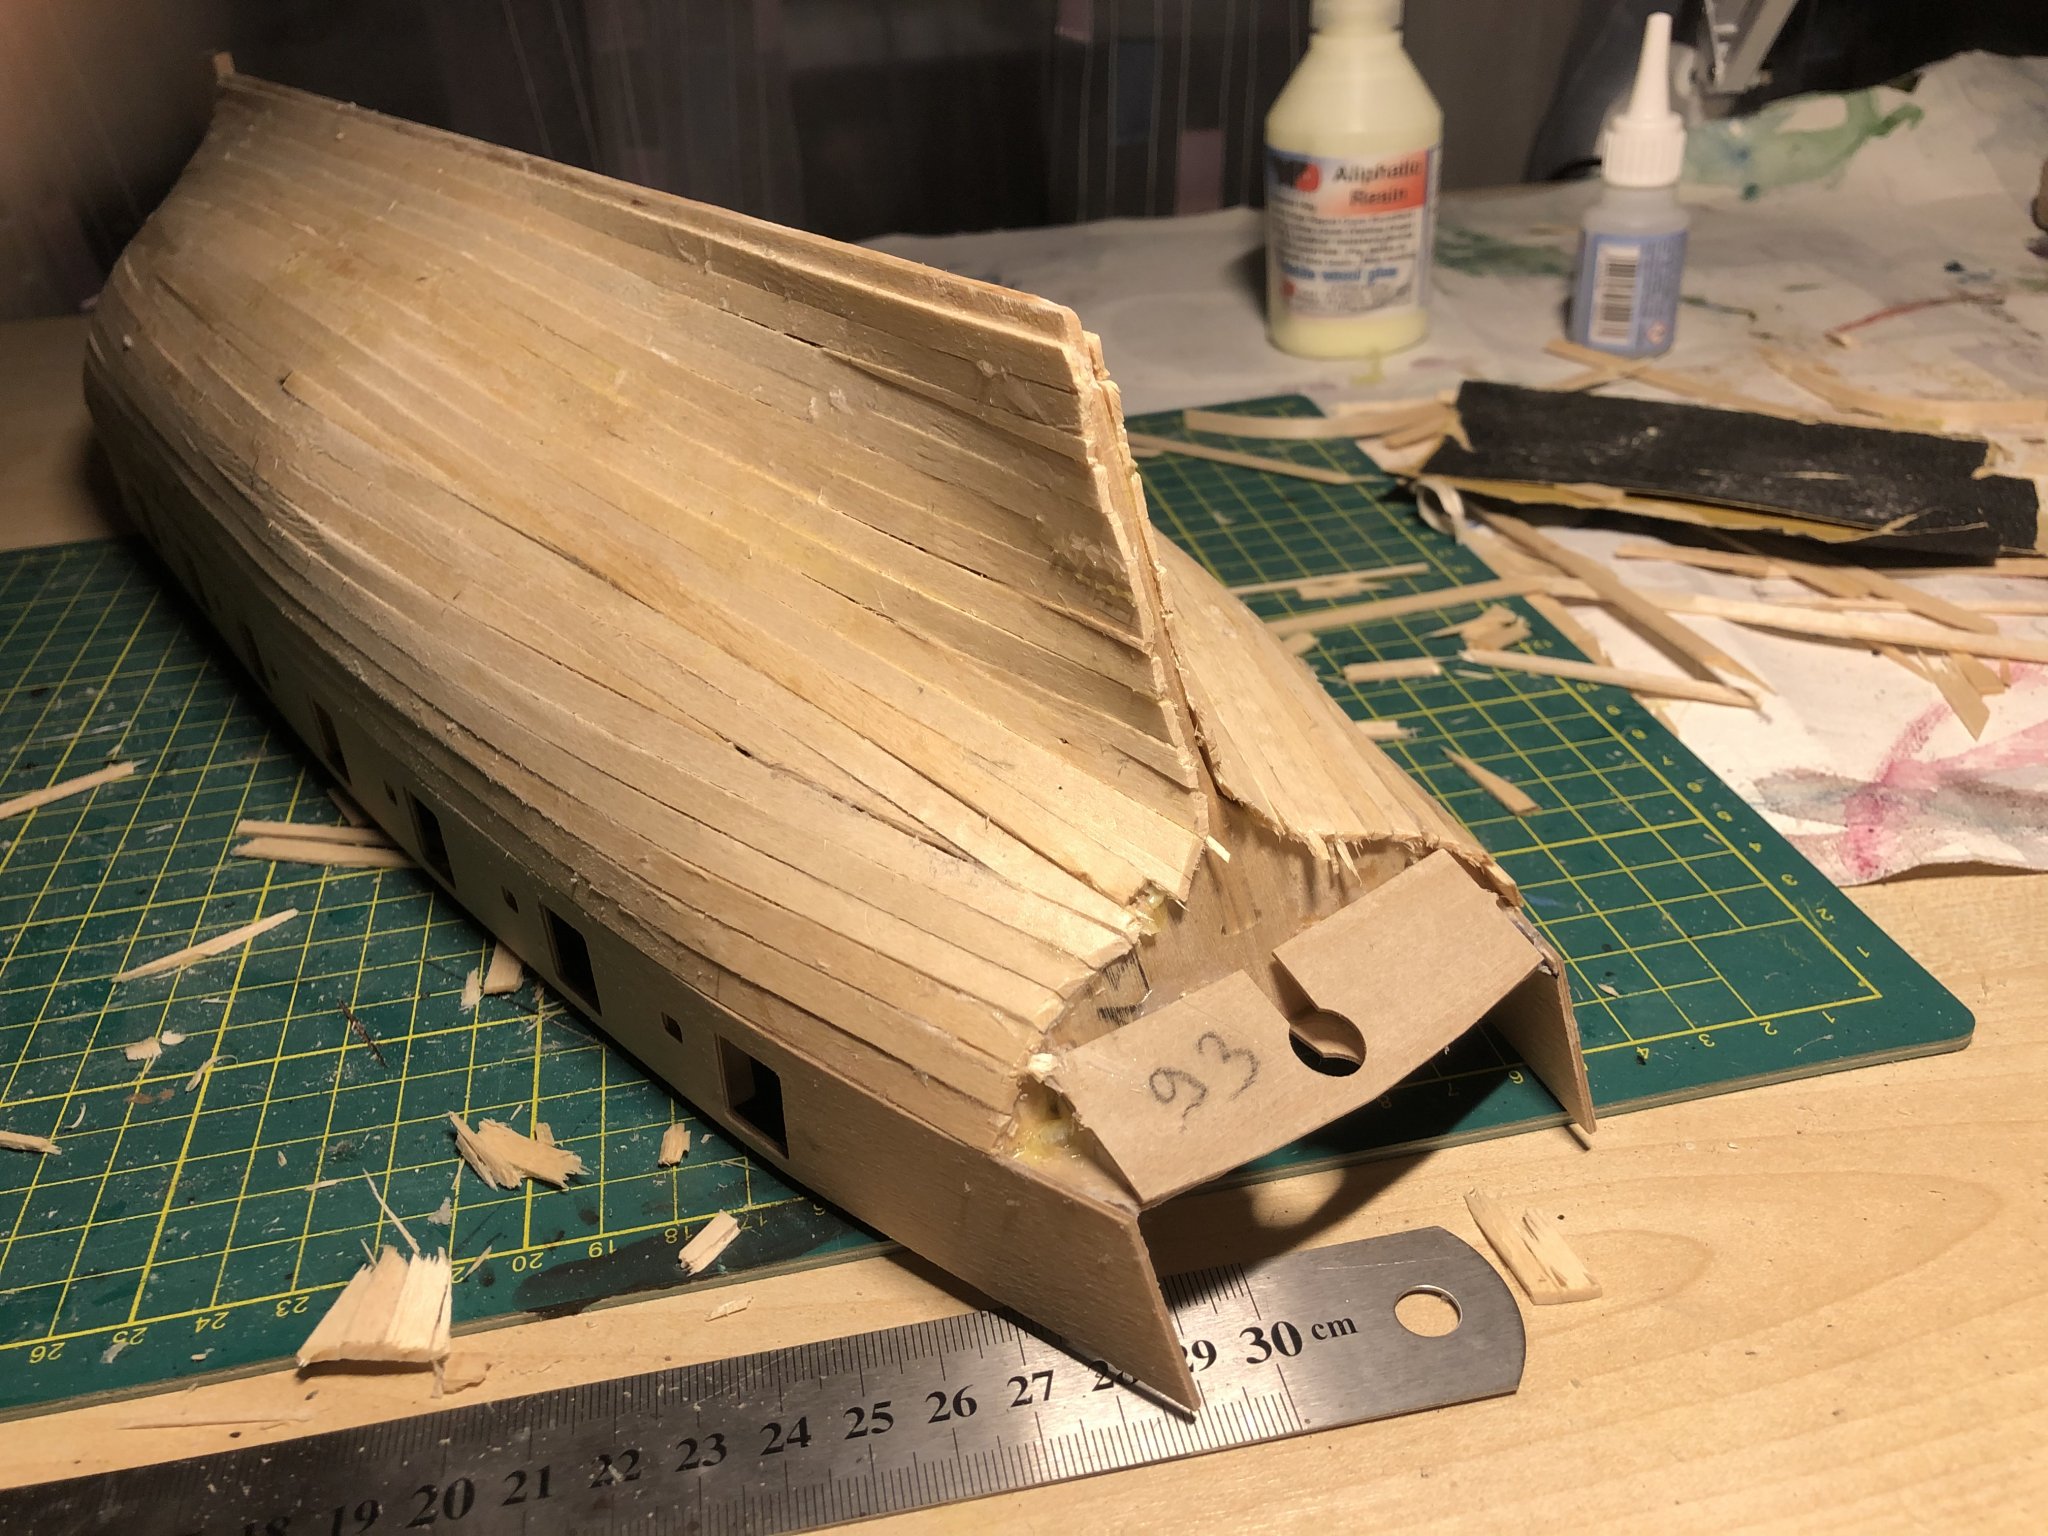
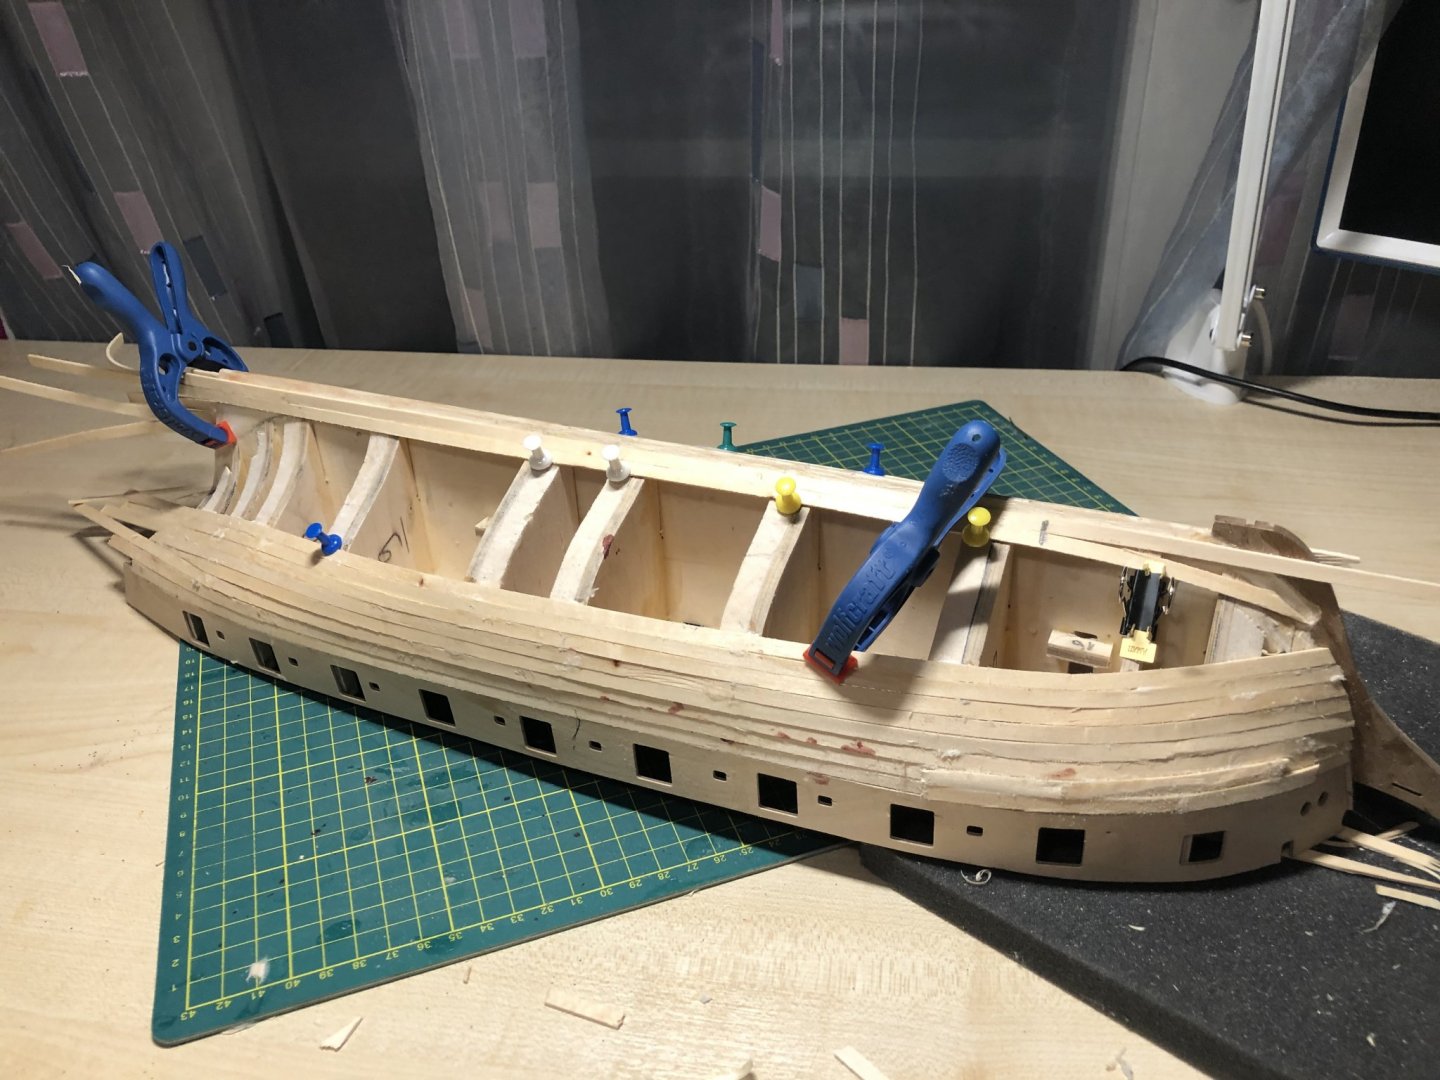
1st planking done. Needs some filler. Overall happy with outcome. Will pay special attention to area mext to keel so that 2nd planking would drop nicely next to keel. Stern needs some balsa block for 2nd planking. I would say that Cruiser has more difficult planking that Terror.


-
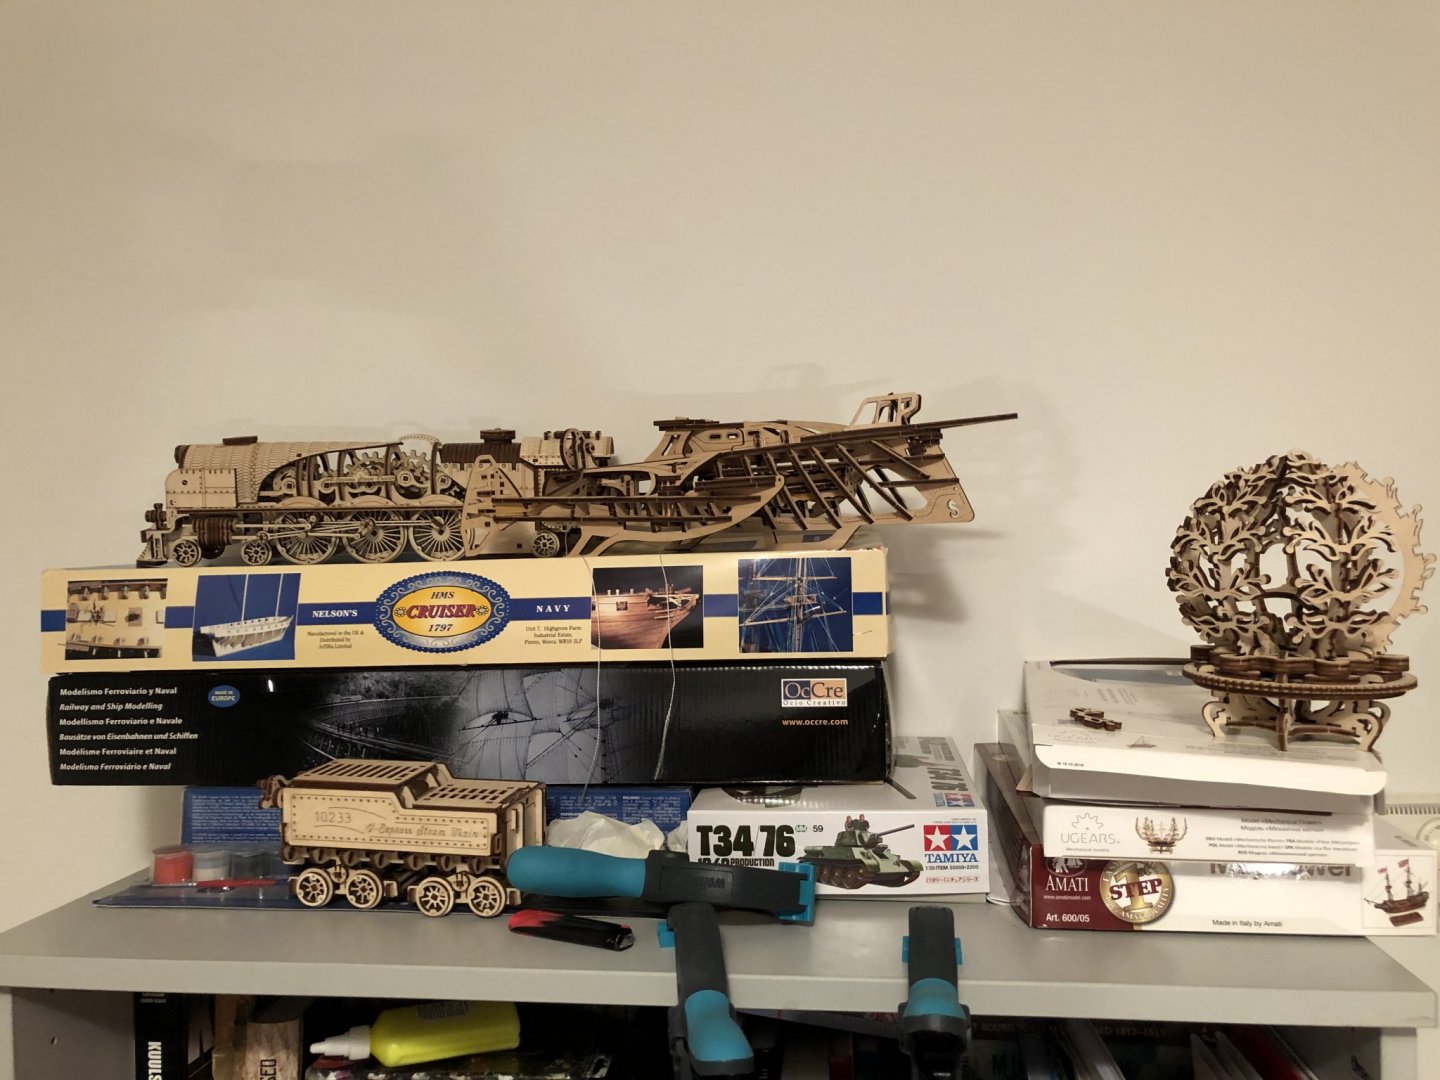
Hi Is there subject ( didnt find it) where hreat discount deals on kits are informed? Wahka
-
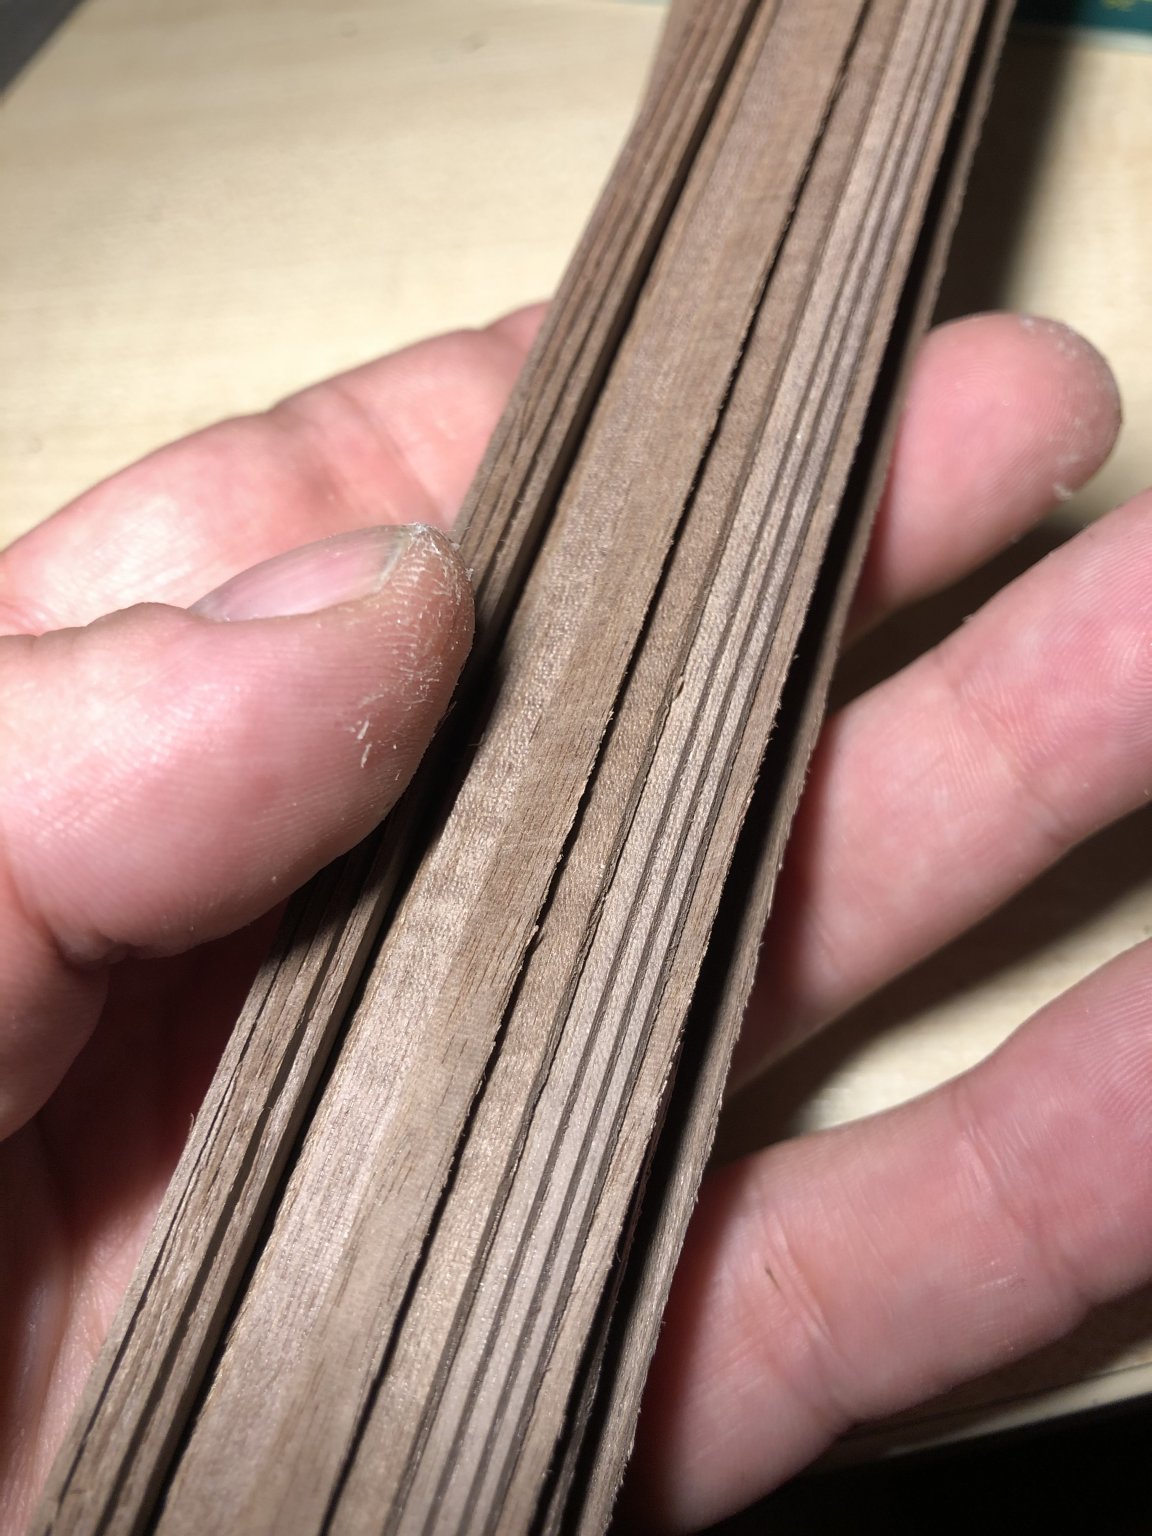
Progress on 1st planking. Tried different approaches just to test them. Im still bad with tappering. Dont like how it looks but sanding will clear it out. Somehow these wood strip dont fit it so well as Terrora did. These are also thinner and more fragile-im sure this is really old kit. But that should still affect the wood if its stored properly. Near bow the gunport bulkwark didnt bend well so there was gap between blank and it-glued few extra pieces and will sand it down. Decided to put 1st plank on keel also then i know i can sand it down and have right surface for 2nd planking. Summary-planking needs still practice.
-
I really like your build, nice work! I got my hands on MK Polotsk that is on the que on self. Hope to start that maybe during the summer time.
-
No photos but yesterday evening i sat down and read about planking from books i bought. Also today read NRG articles about planking. Would say i got much smarter. Books have some info missing or its just all over the book. 2-3 books together with articles might give 95% of the real picture (all depend what you are chaseing). Glued balsa filler blocks to bulkheads and will cut extra off tomorrow hopefully. Then i can continiue with planking. I try to put special attention on tappering etc to master my skills.
-
Focused on Hms Cruiser for few evening so no real progress on Terror. Seems i have catched a little spring cold (maybe corona, who knows) and head and nose feel little offset. Like previous 15 years i have cured it with pure vodka, like this time. I managed to finish fore mast lower yard. Taken into account i was drunk all criticism is accepted :). Lesson for tonight-when being drunk and doing rigging, then double check when cutting leftover ropes. You might cut off some block-yes i did. I will probably focus little more on Hms Cruiser for now on cause i like the planking process for some reason but i still aim to finish the Terror start of July( as former construction project manager inhabe to have deadlines )

-
Hi, Thank you very much. Your proposed solution is really helpful and seems the best and safest way. I checked Snake blogs and to be honest it seems that they dont focus on that issue. Many ships have coper plating and therefore it dosent matter to them. I will try to do it like you said - thin the keel (allready done), cut a notch with same bearing line, sunk 1st planking into notch, 2nd planking would also be sunked a little but only so it would be same surface as fale keel. This means i will install last pieces of keel when planking is done so i can sand it even so i dont damage the keel. My plan is to leave this ship unpainted cause thats the reason i choose it - it looks really good (at least on pictures) without any painting etc.
-
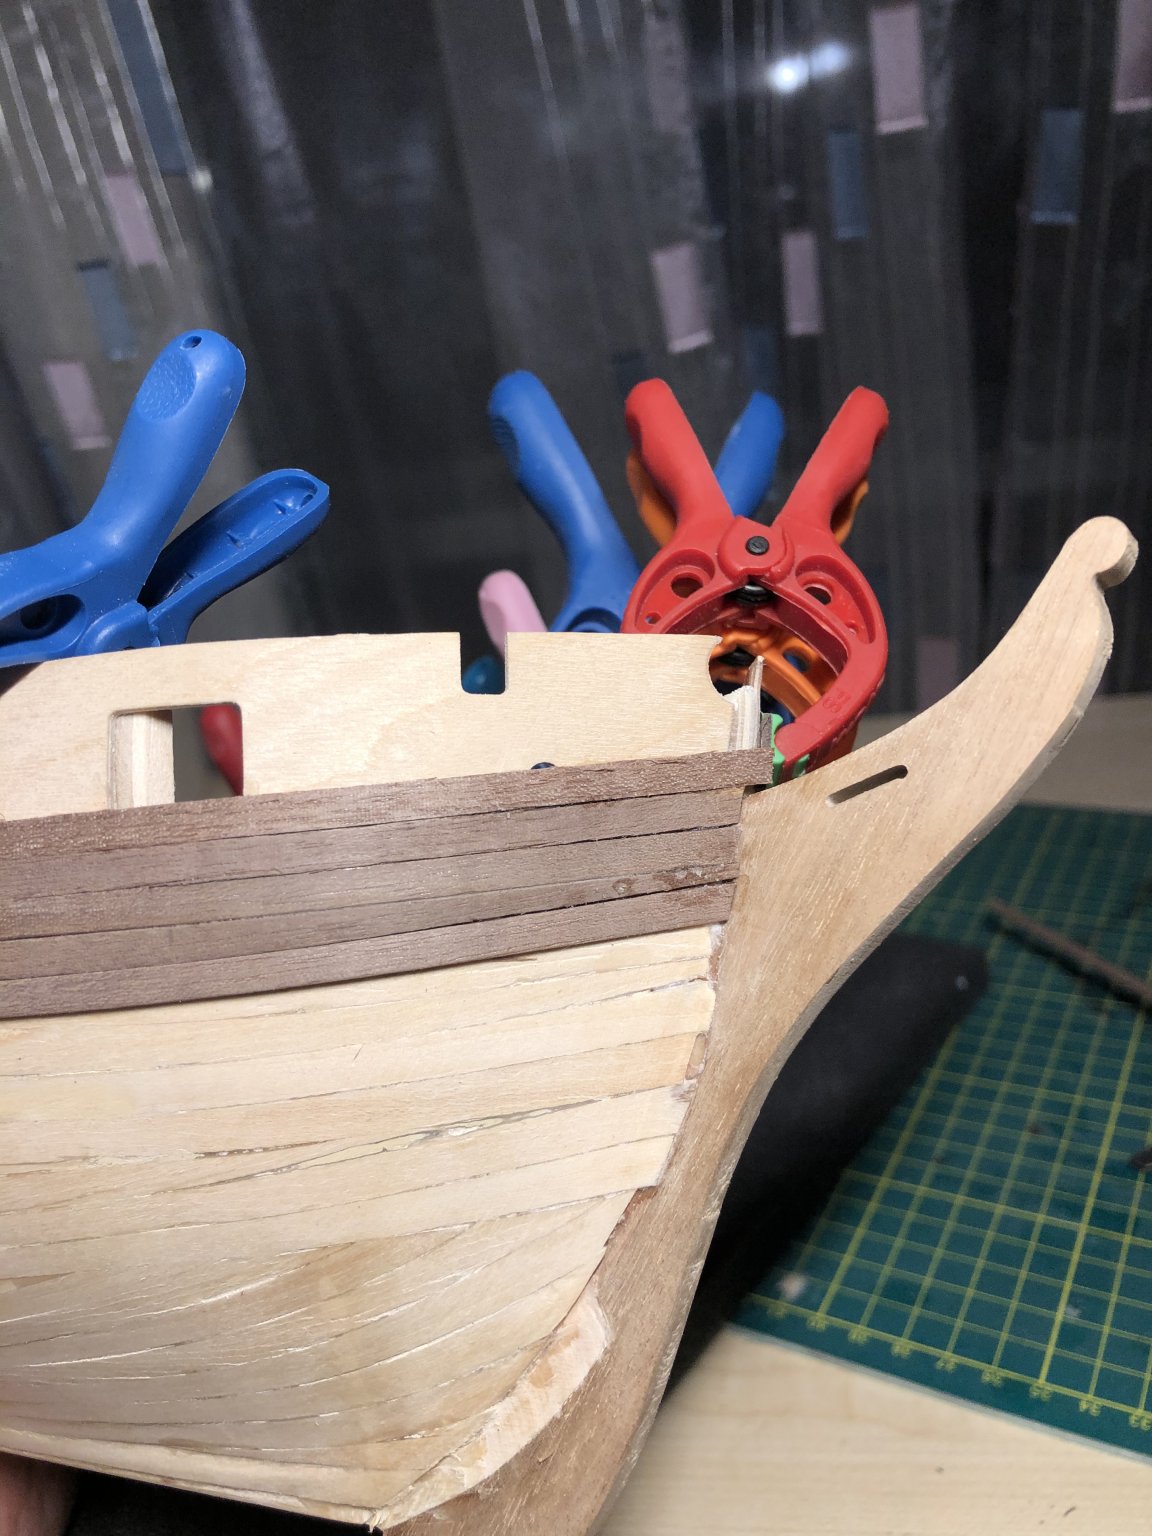
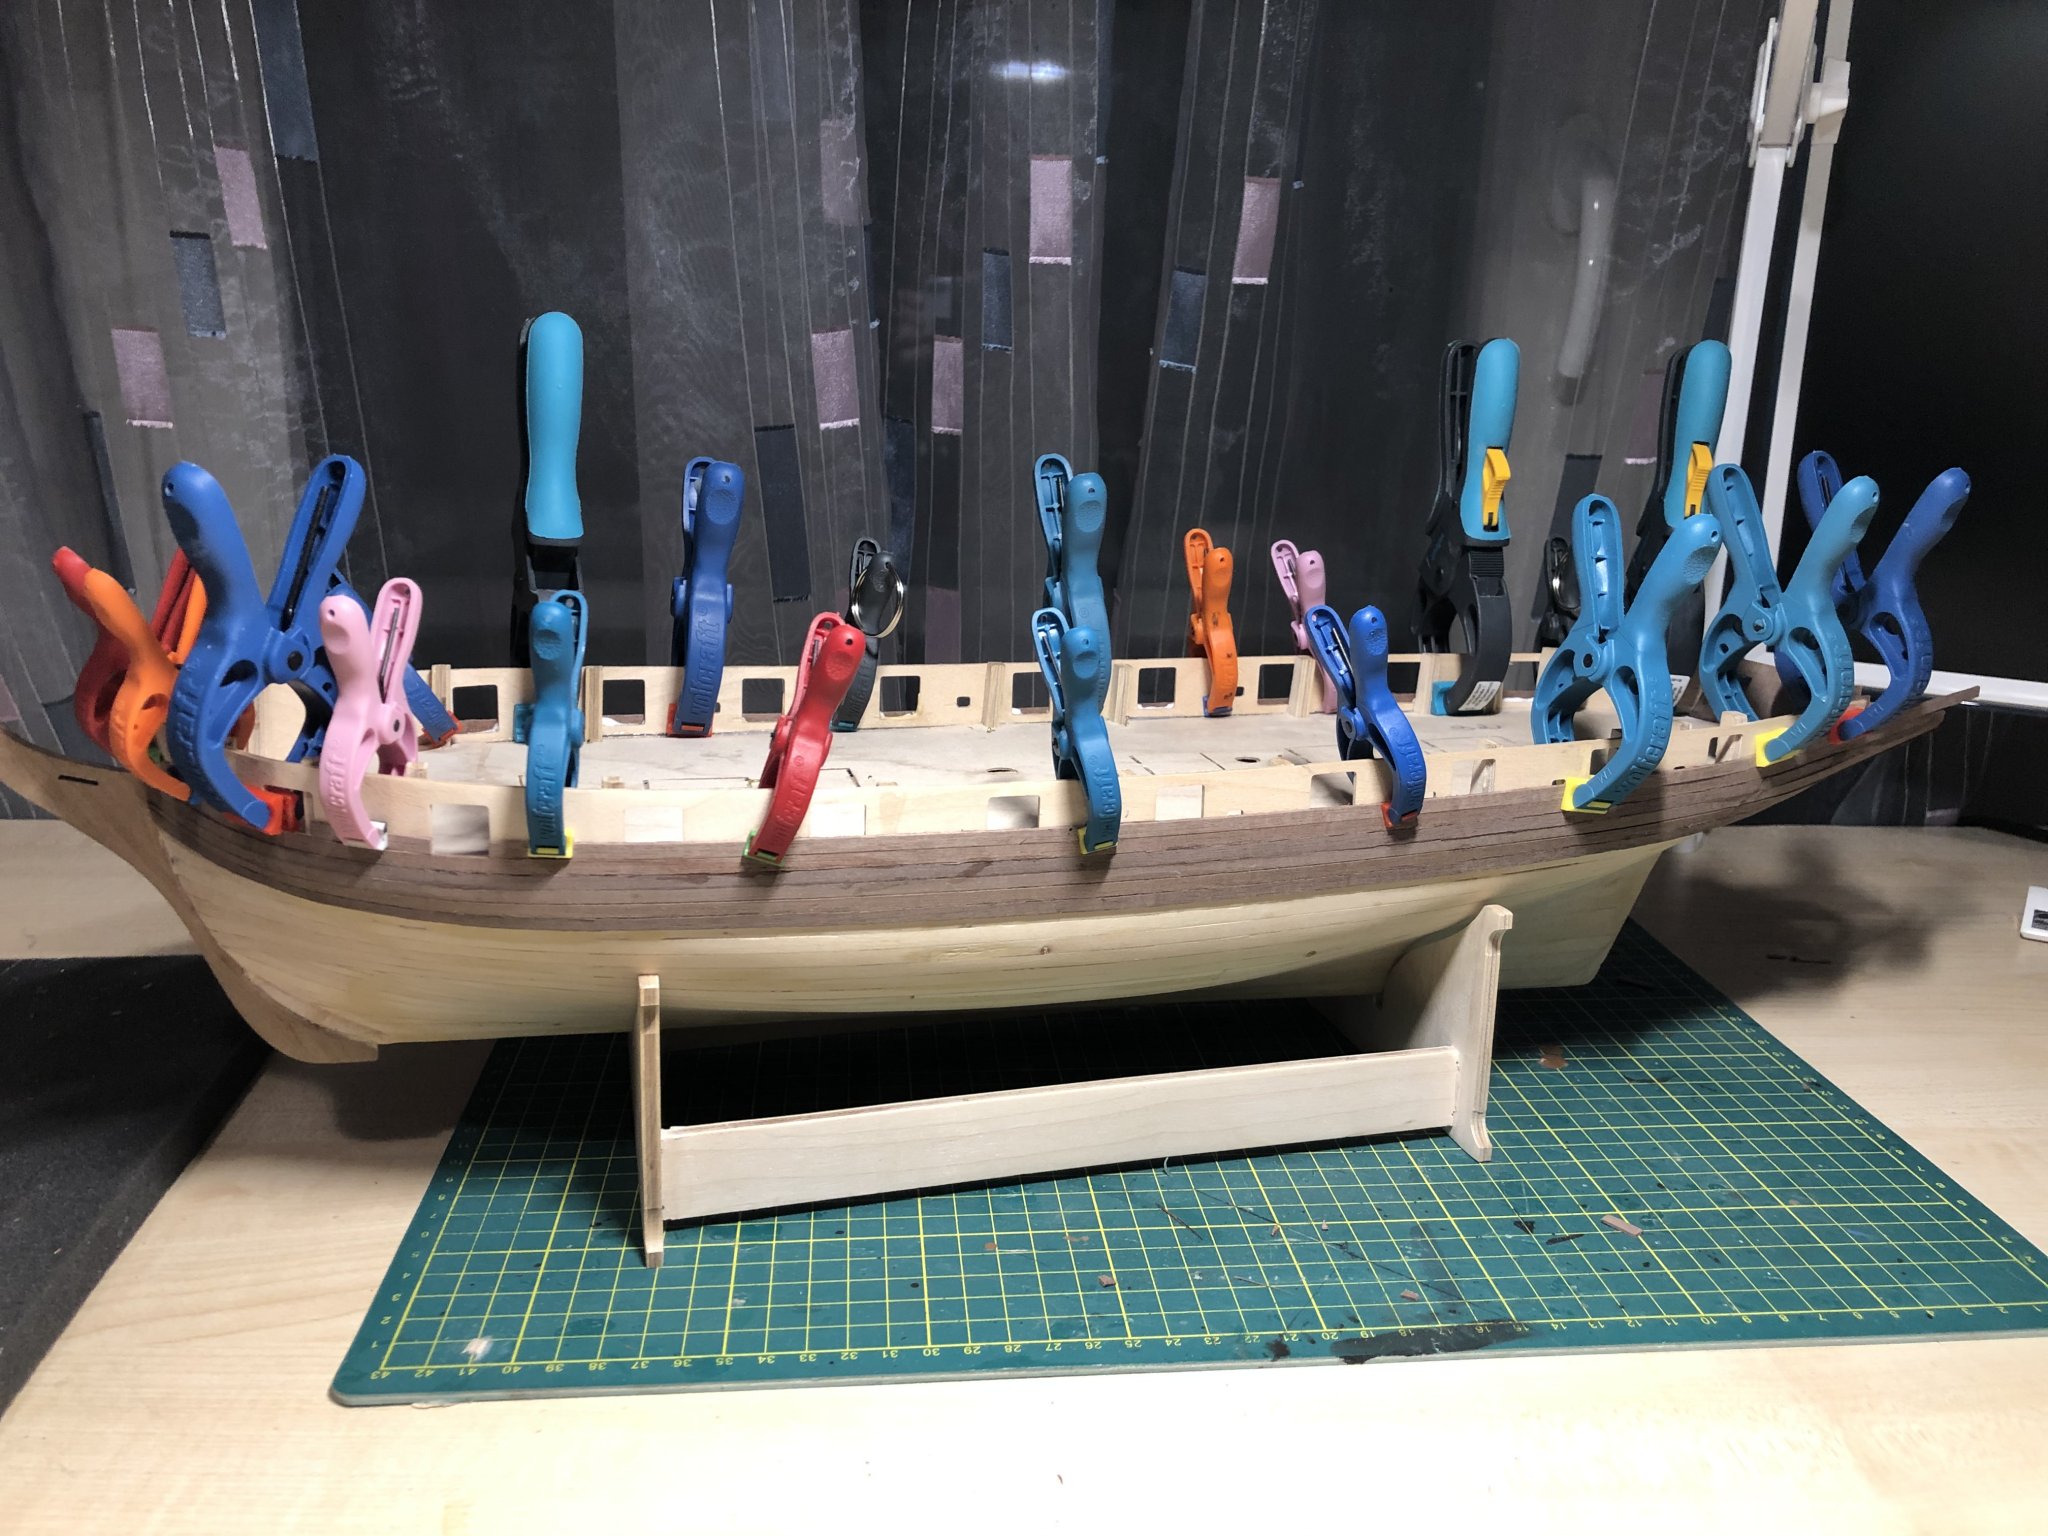
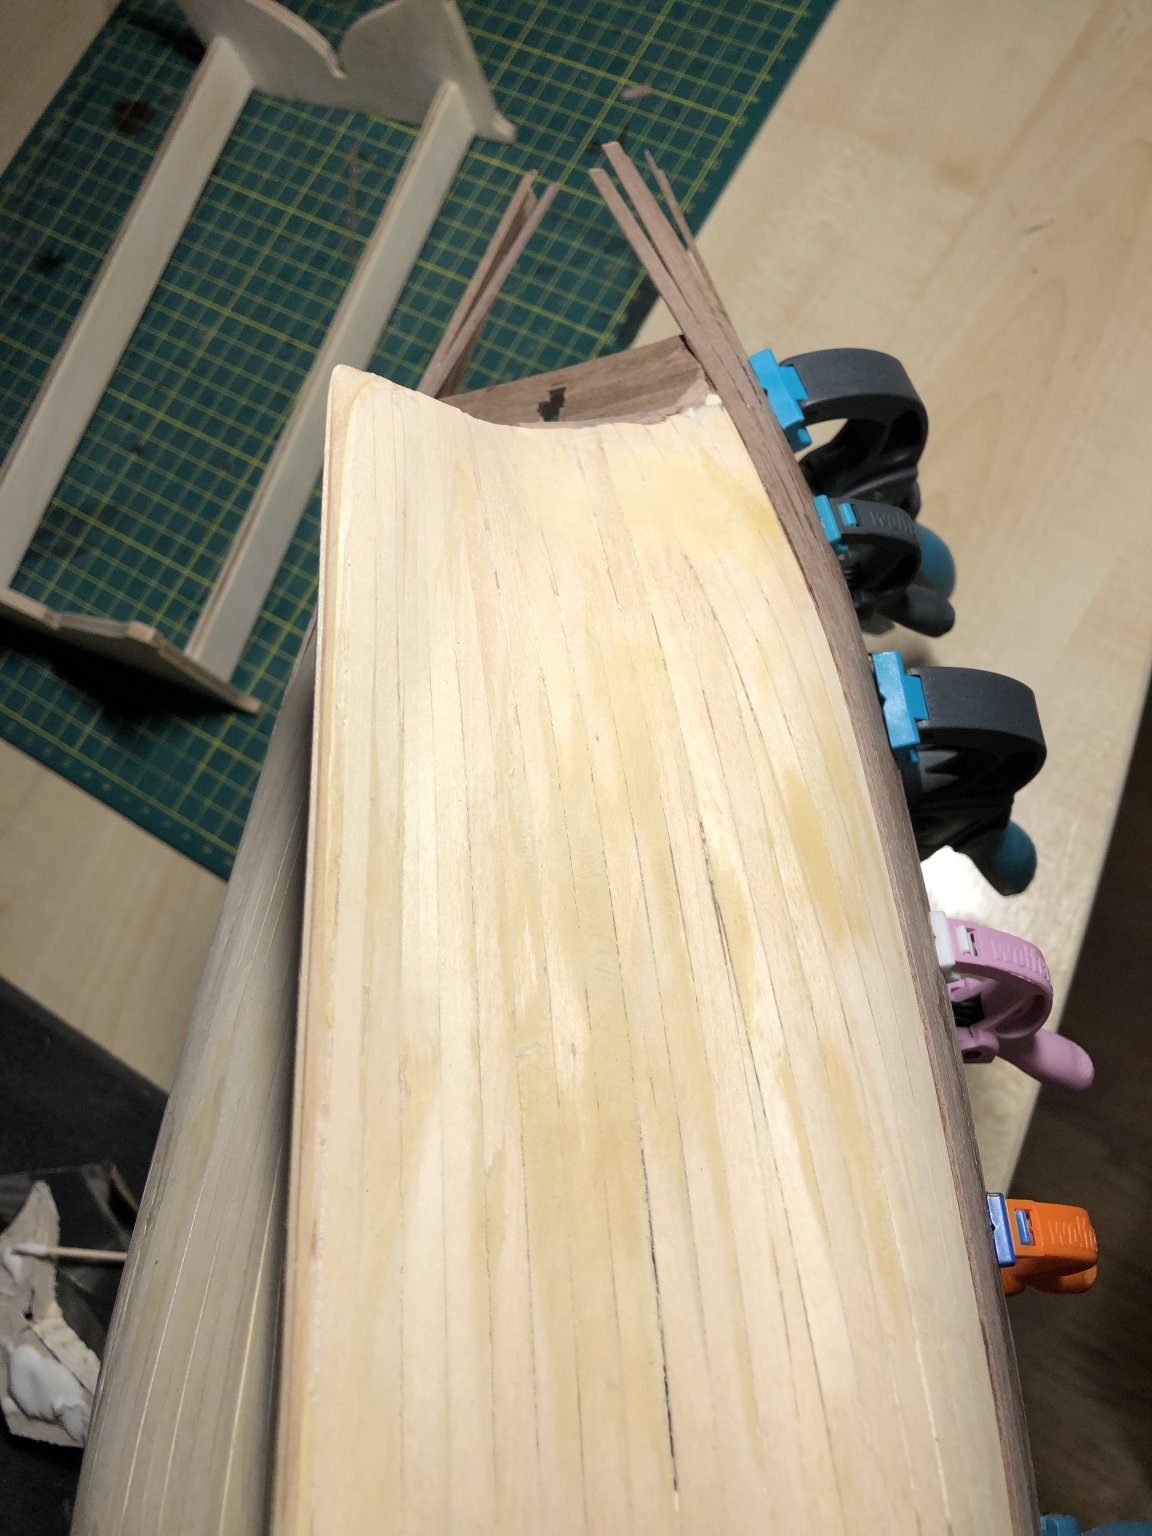
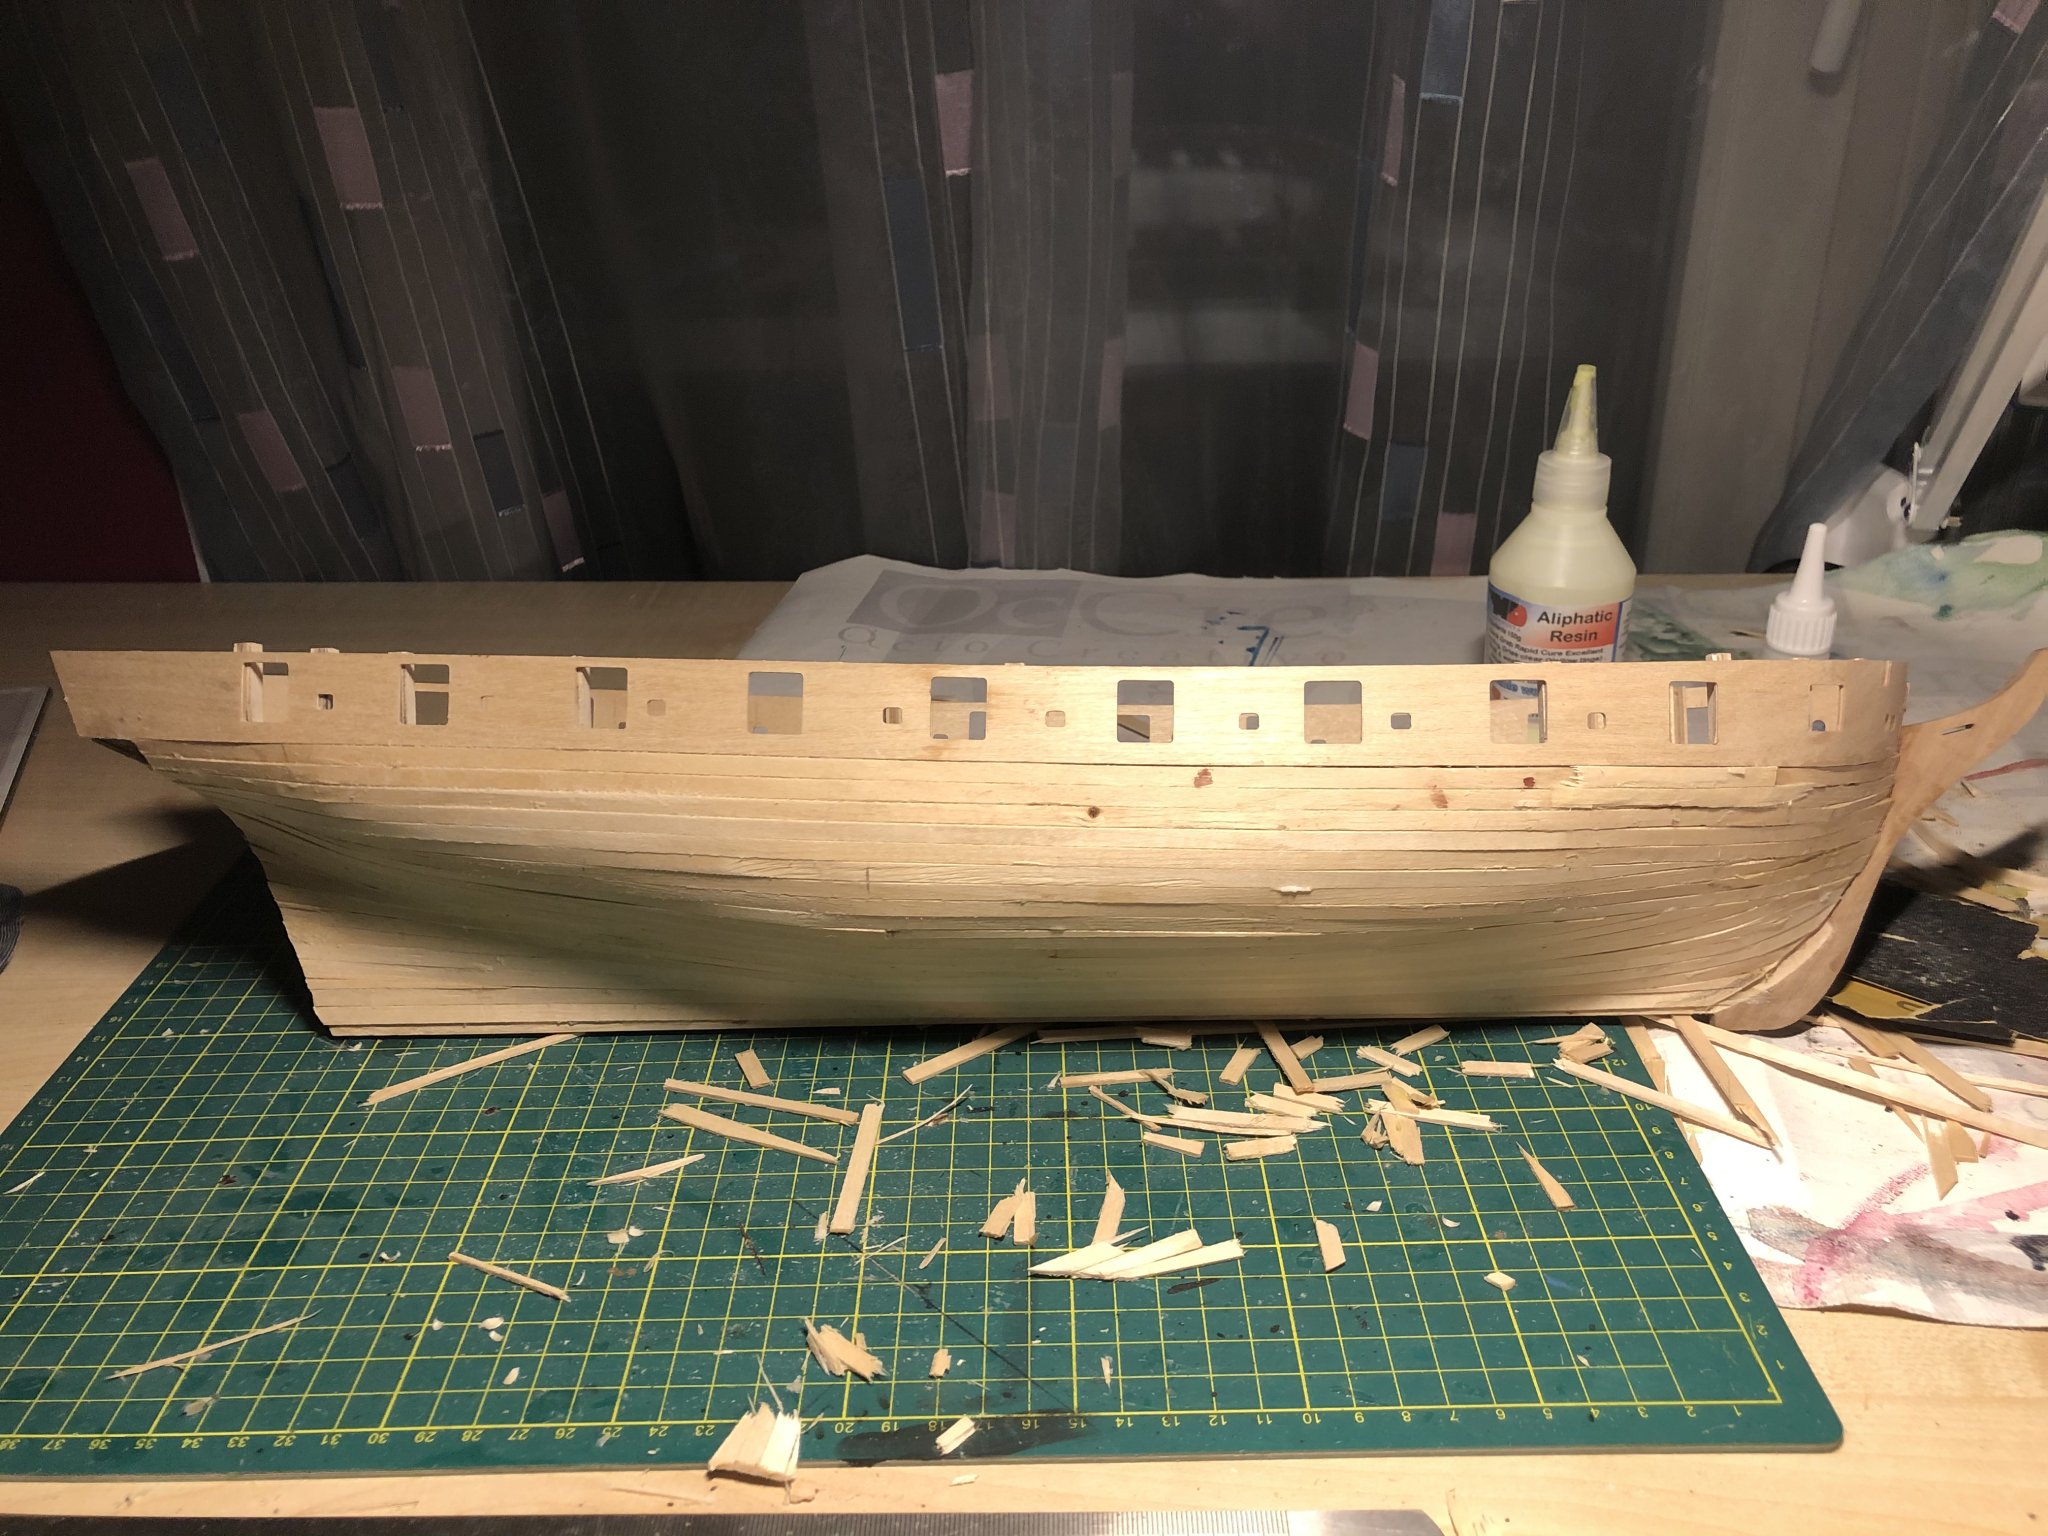
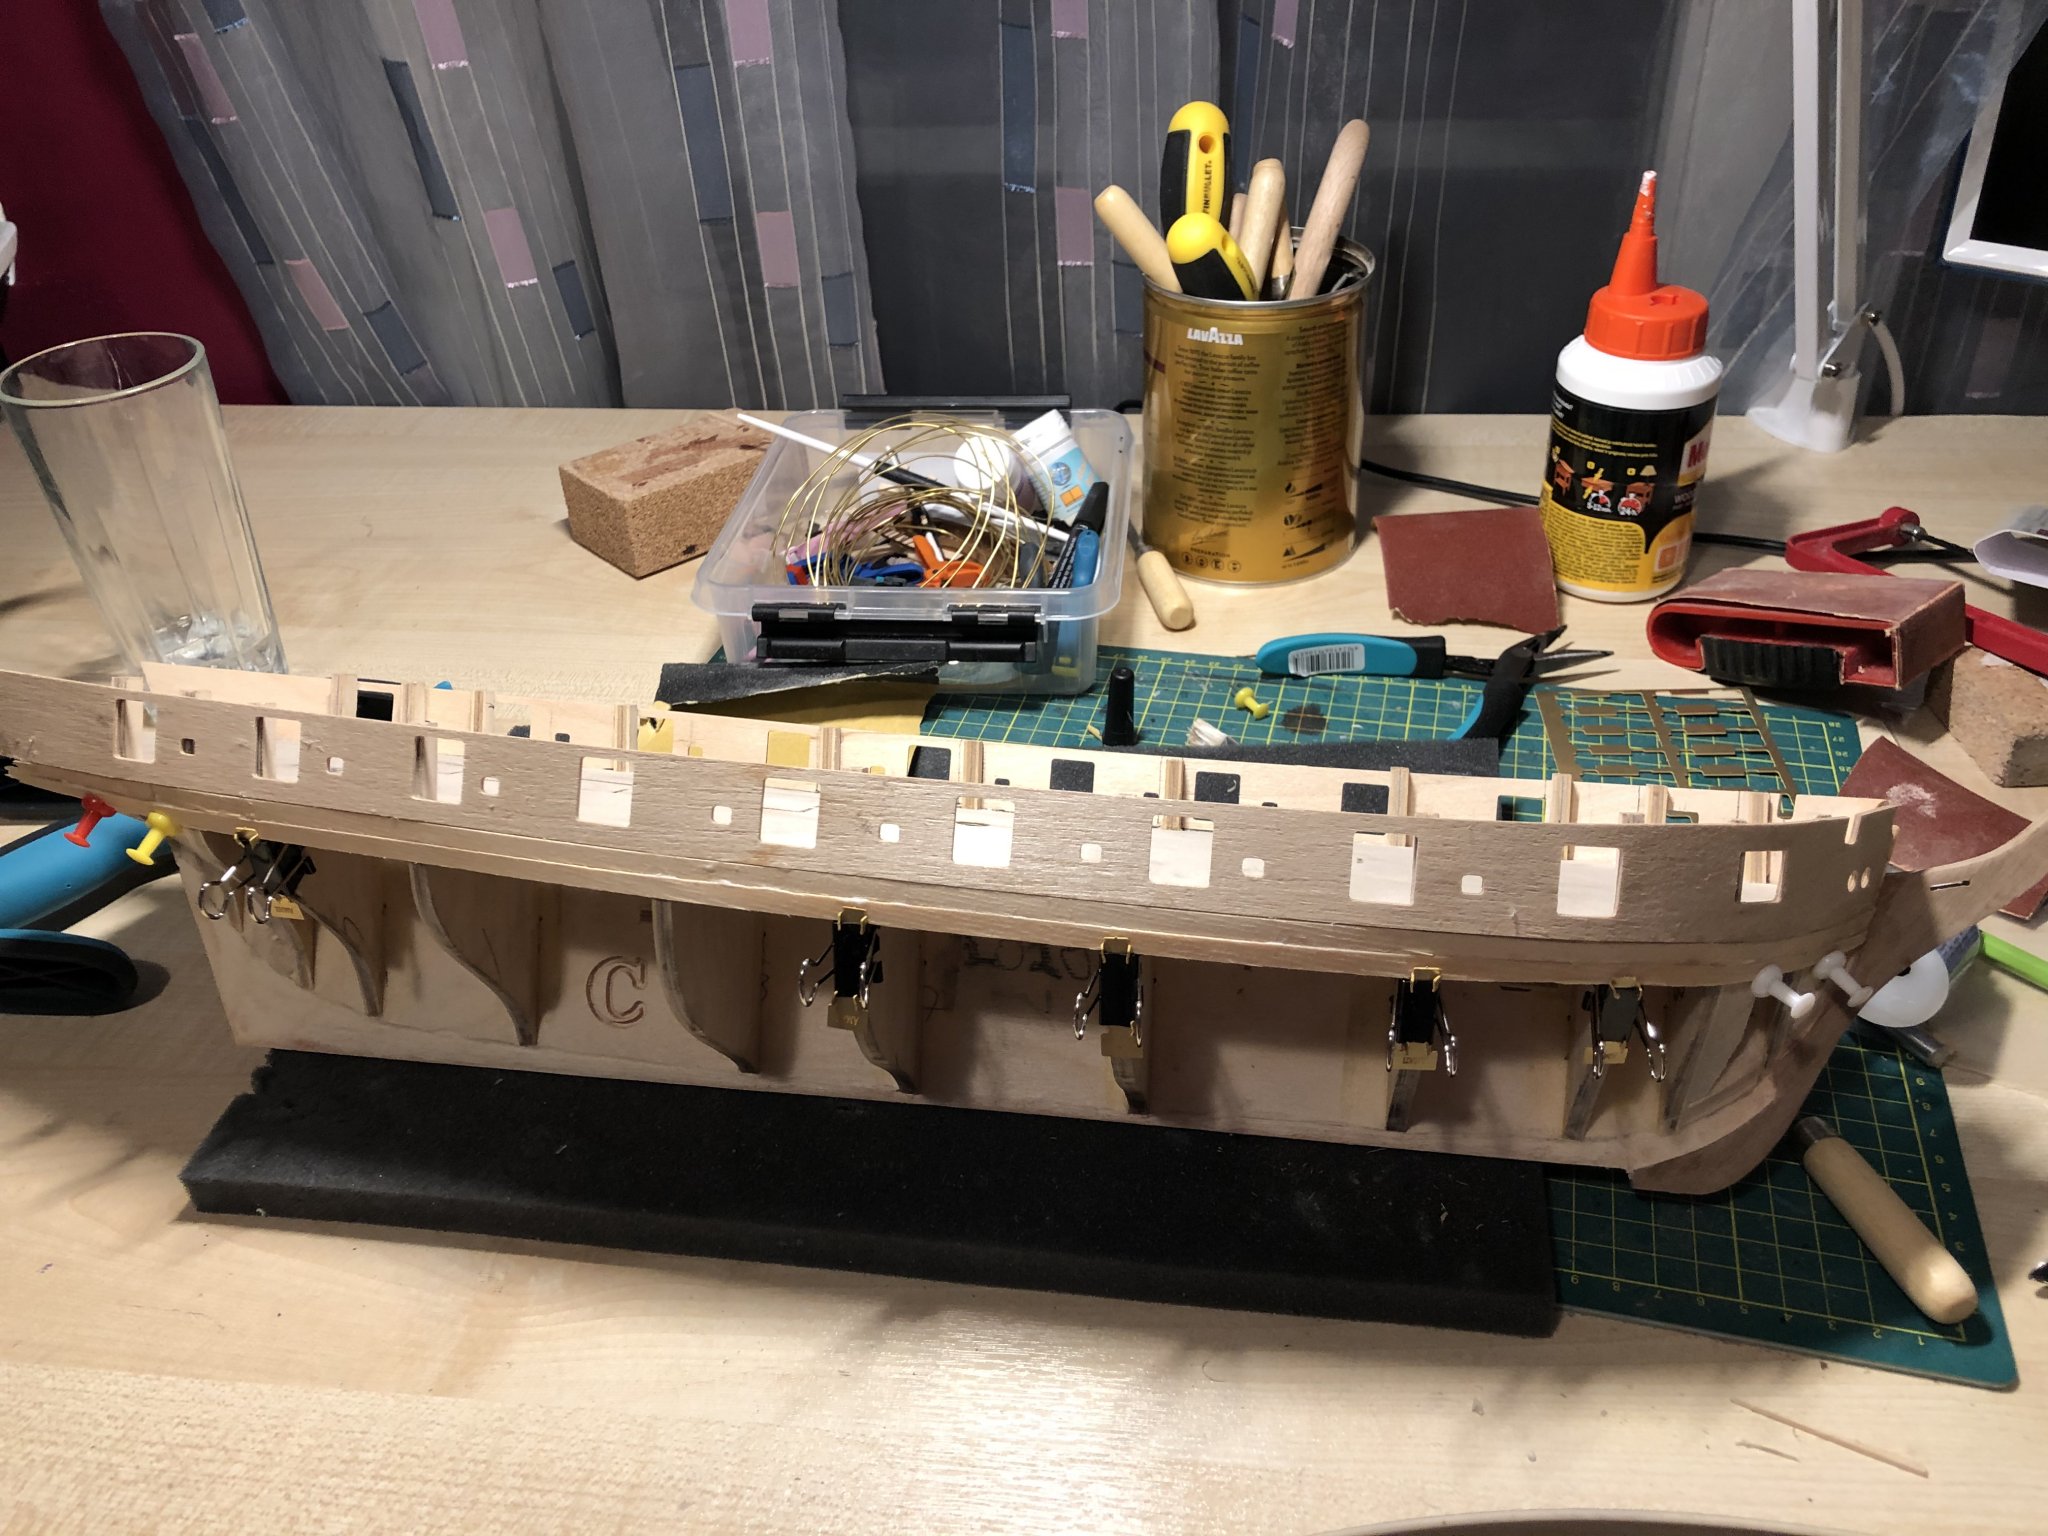
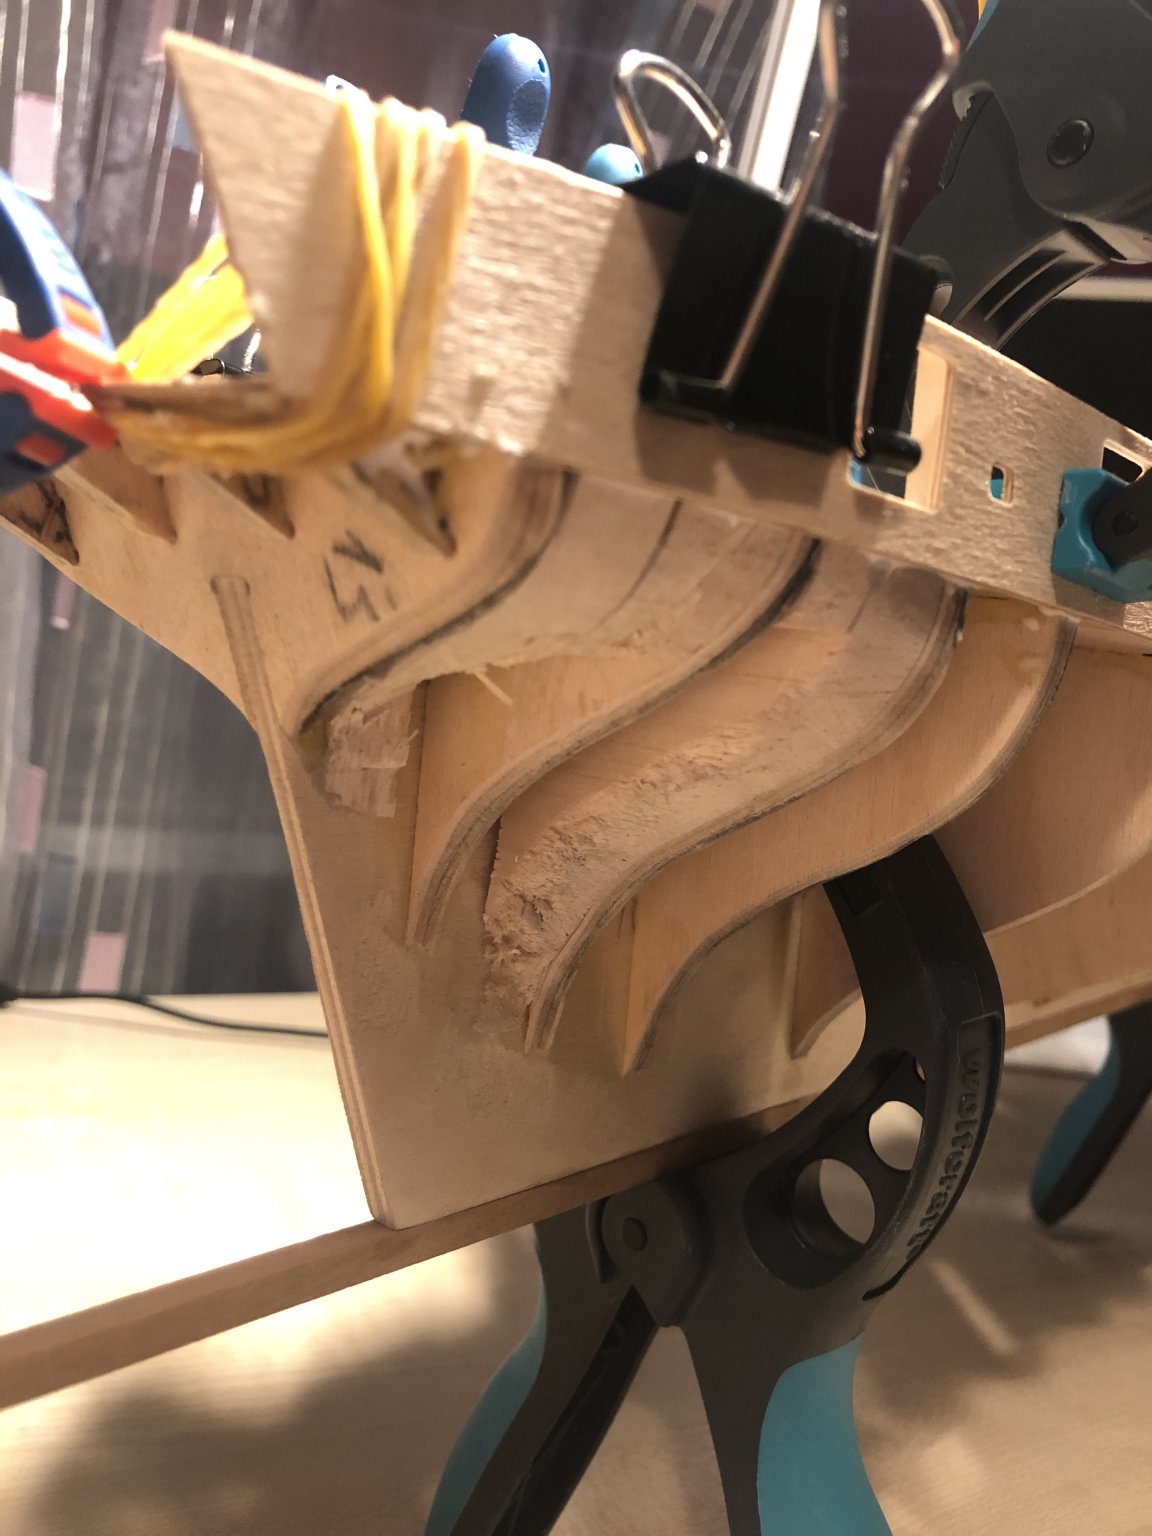
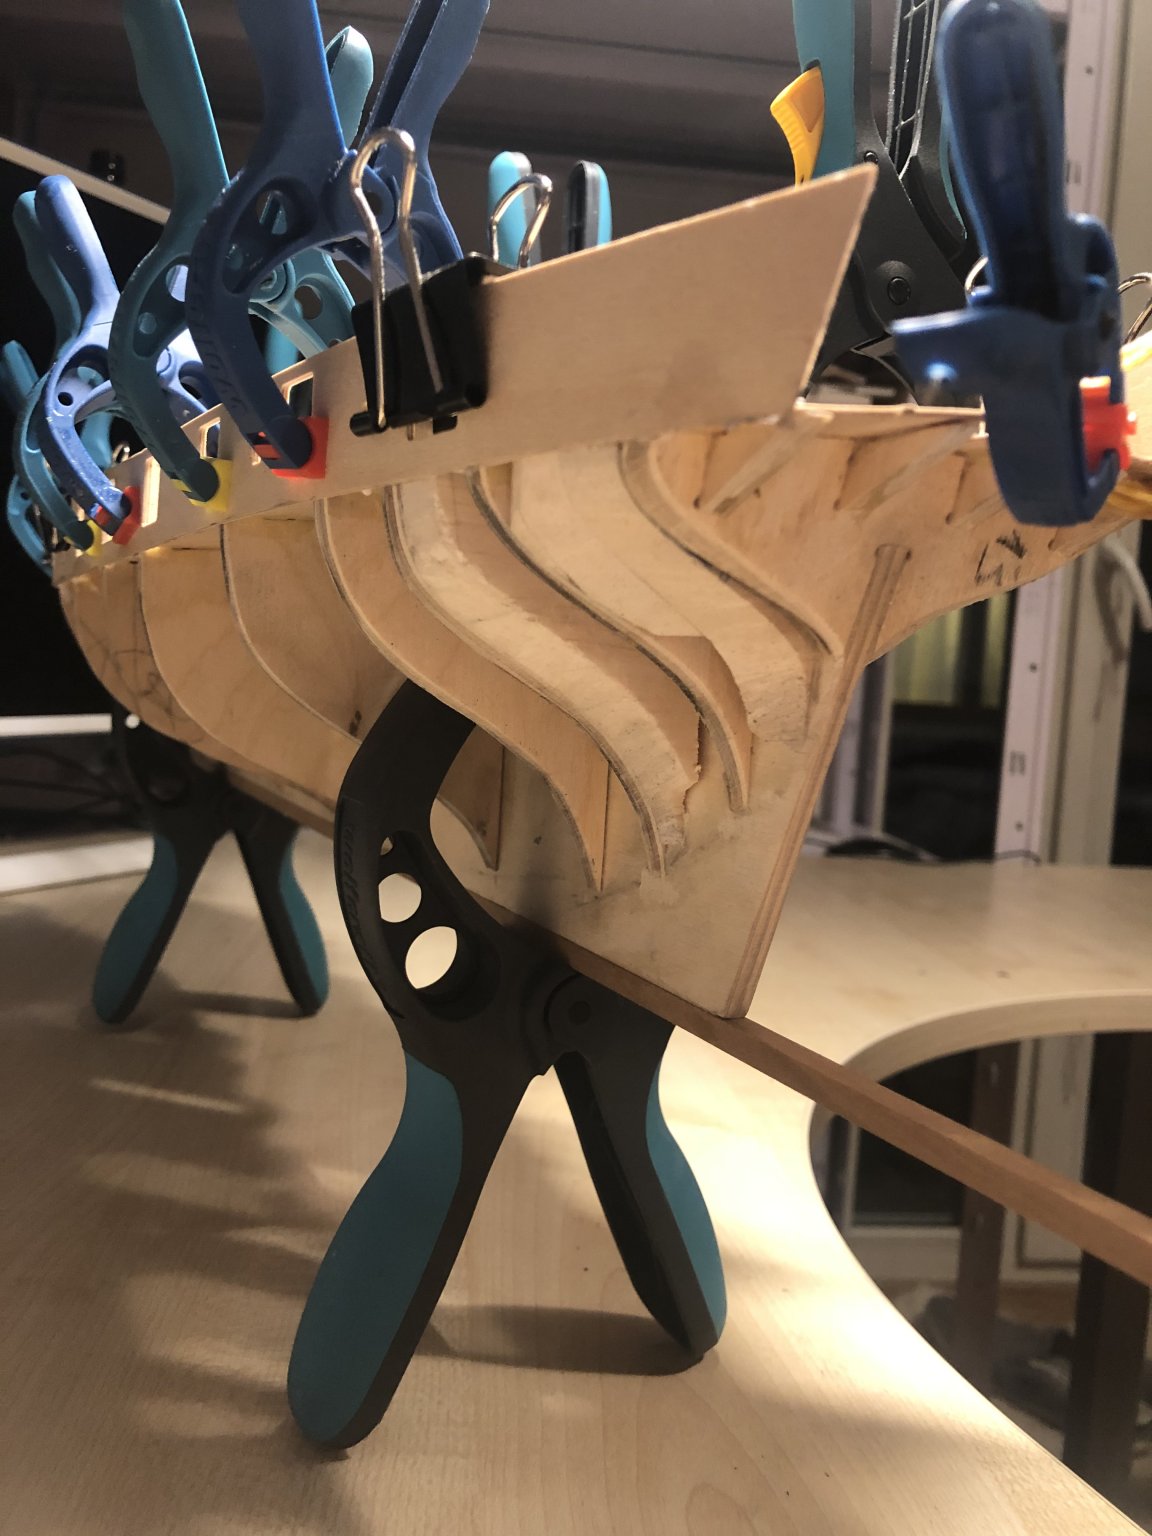
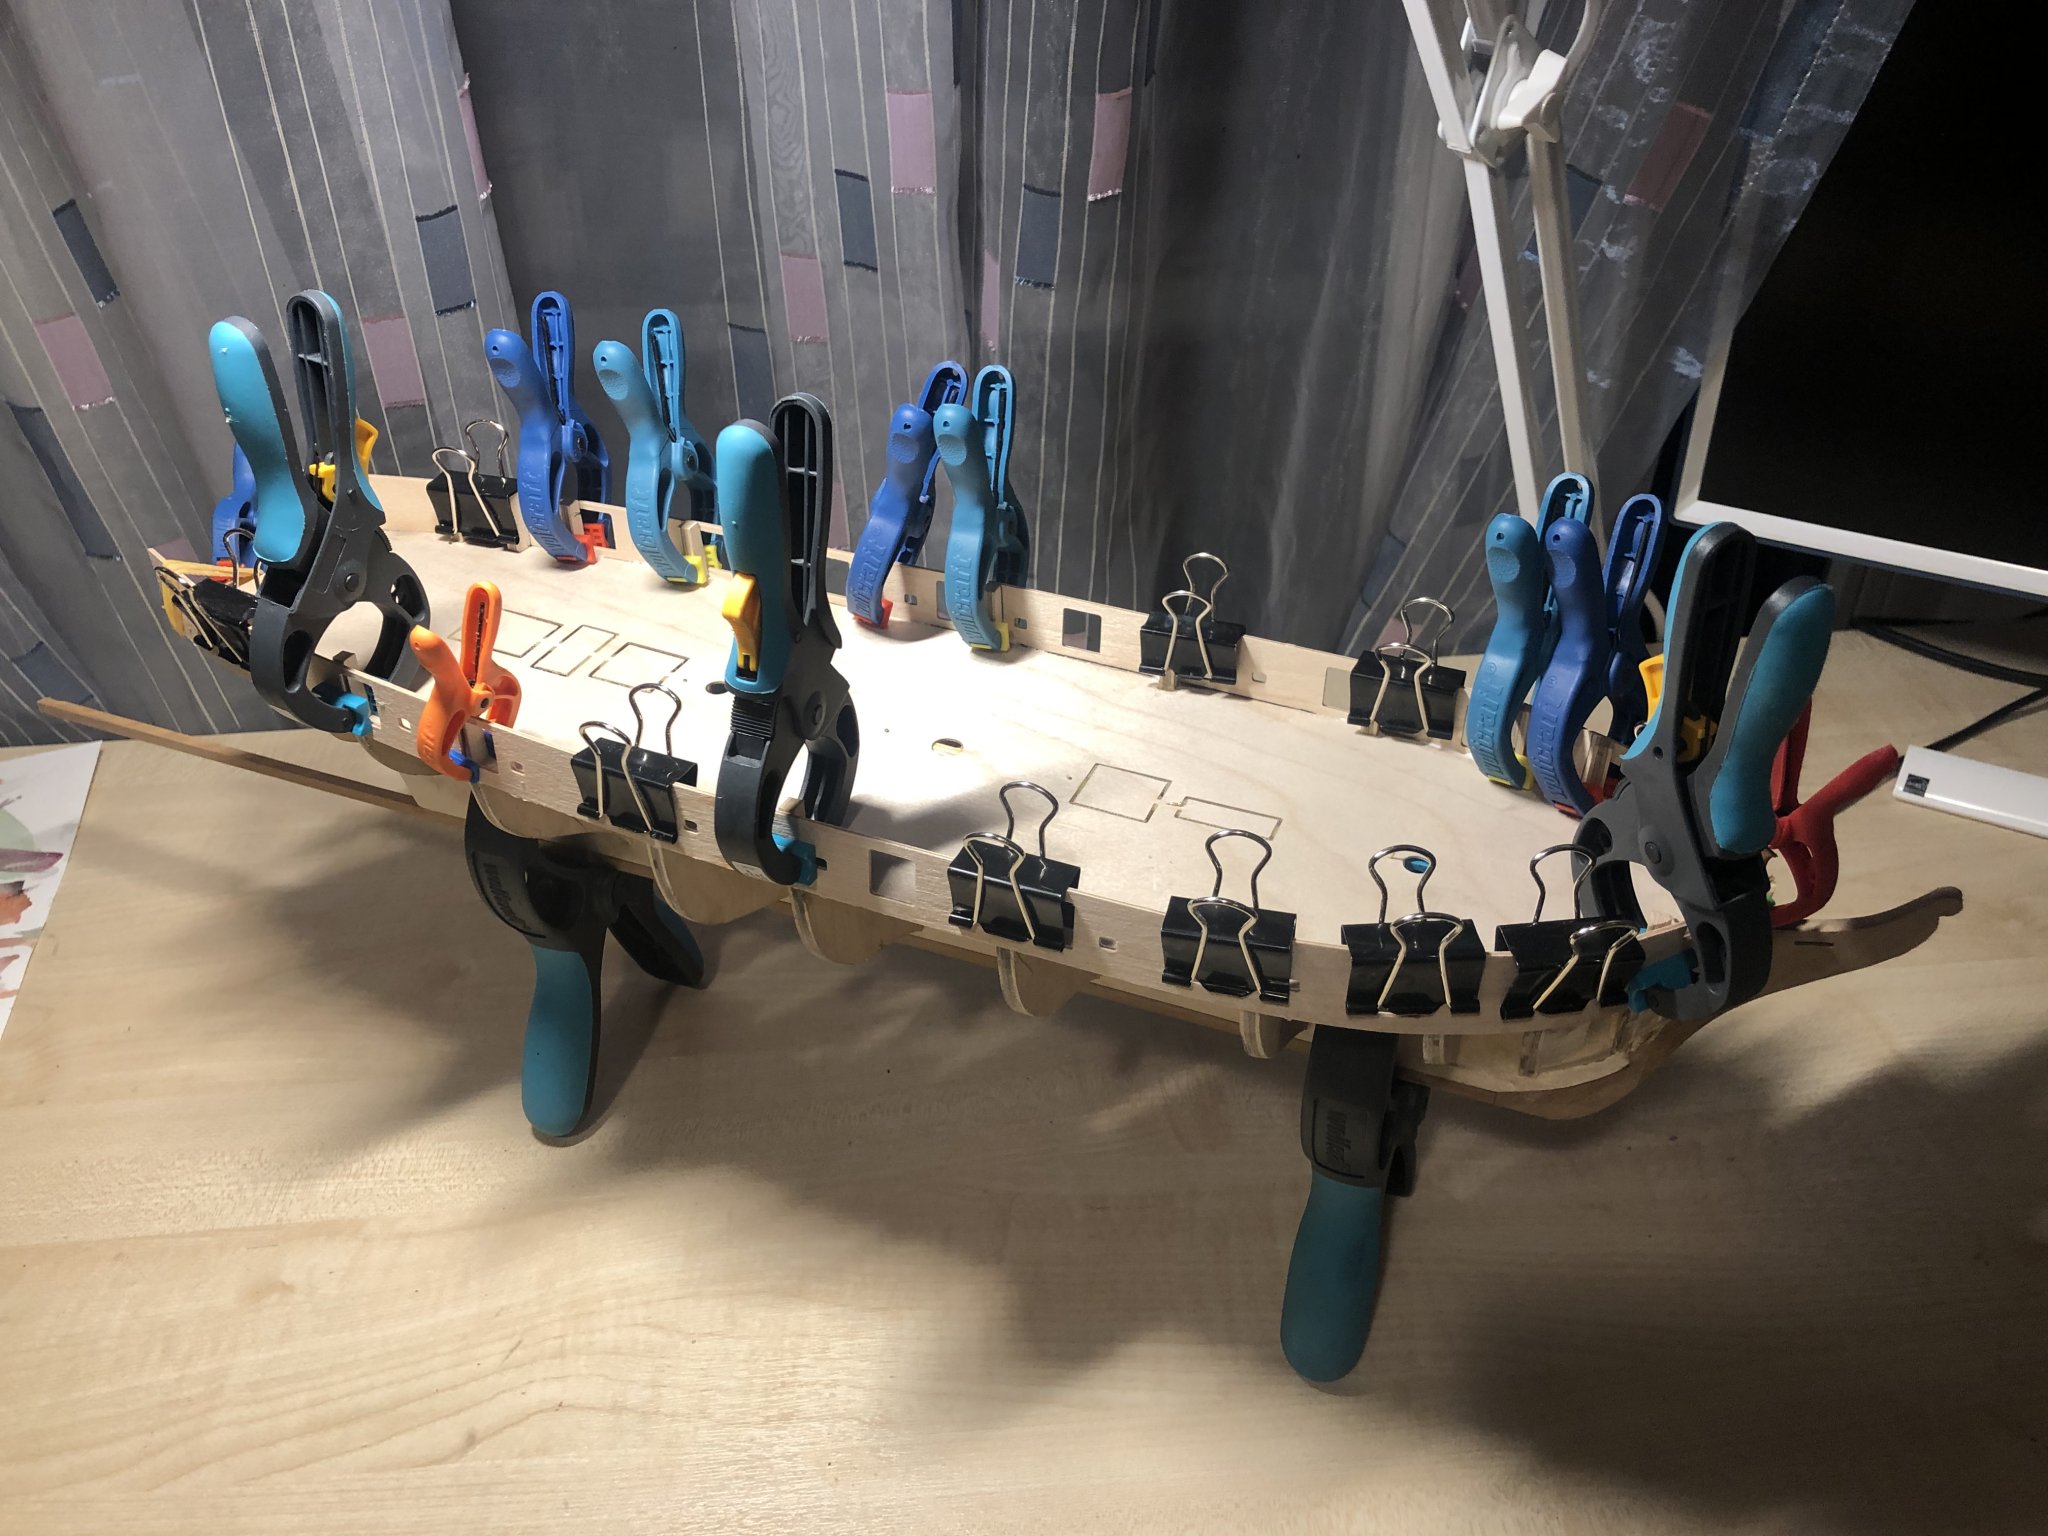
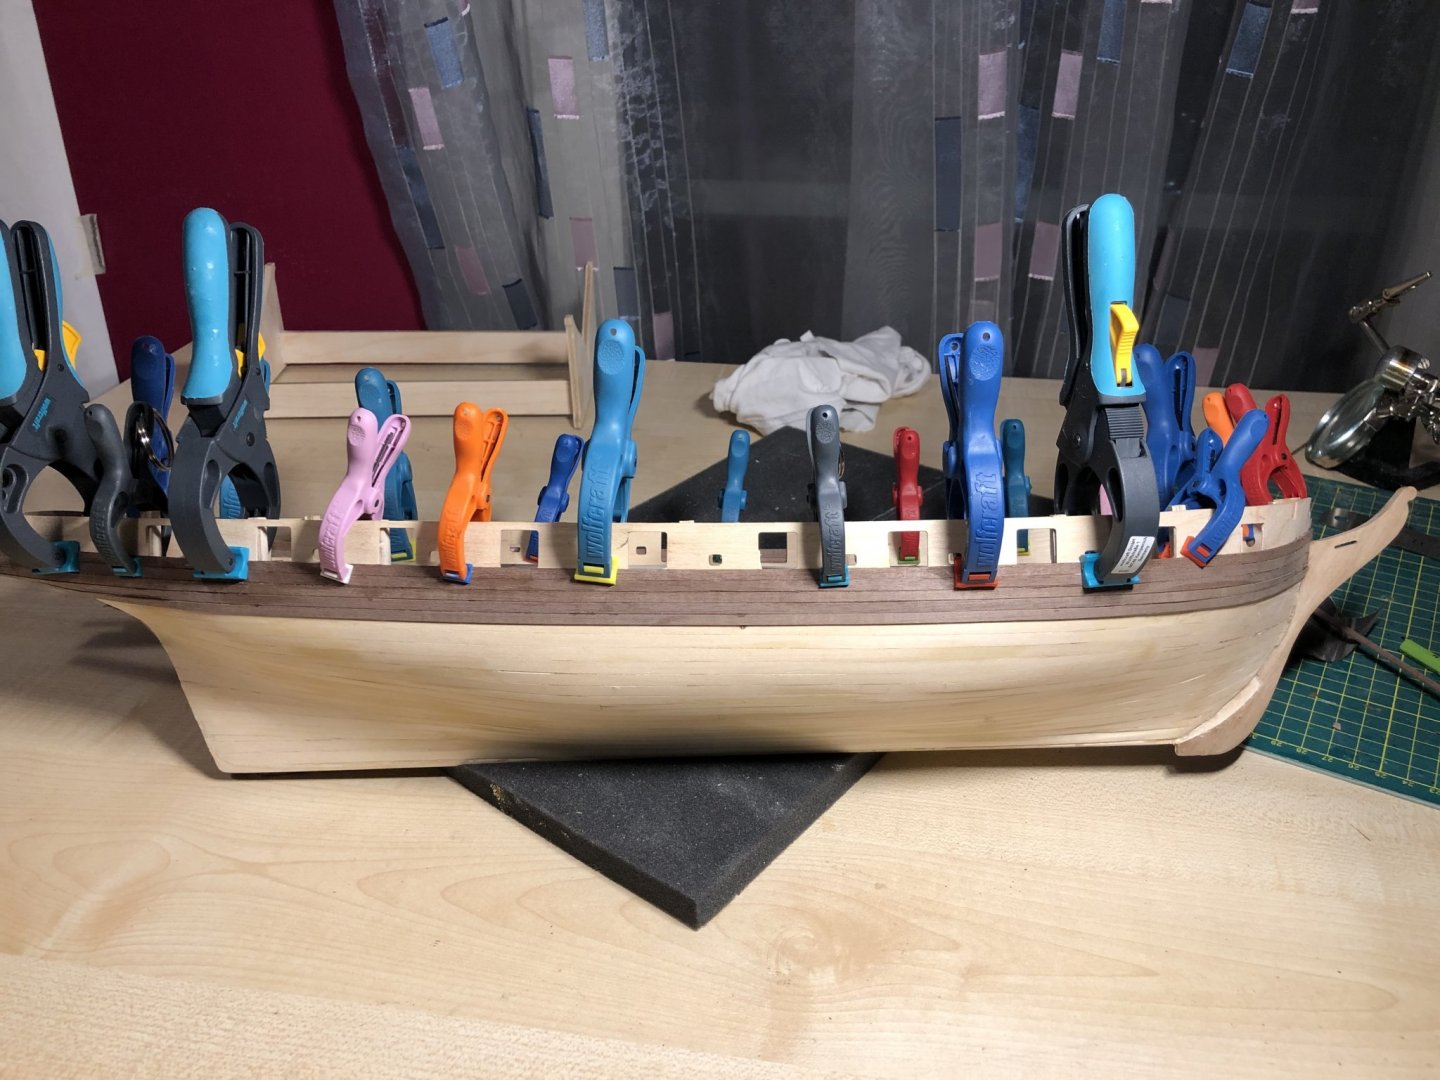
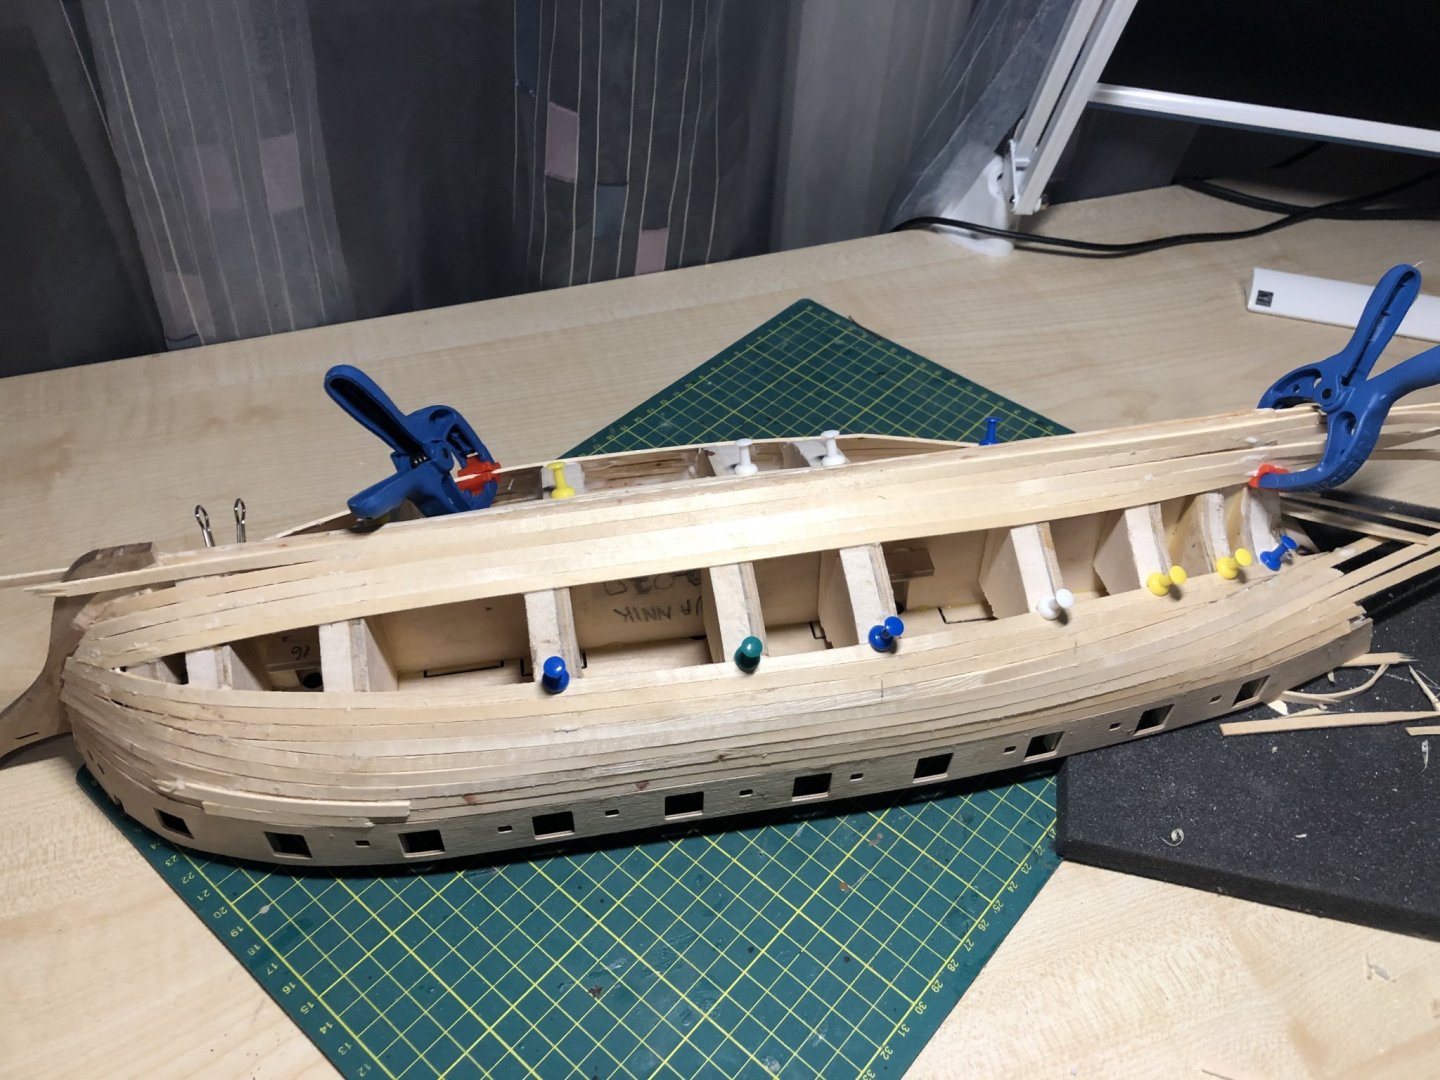
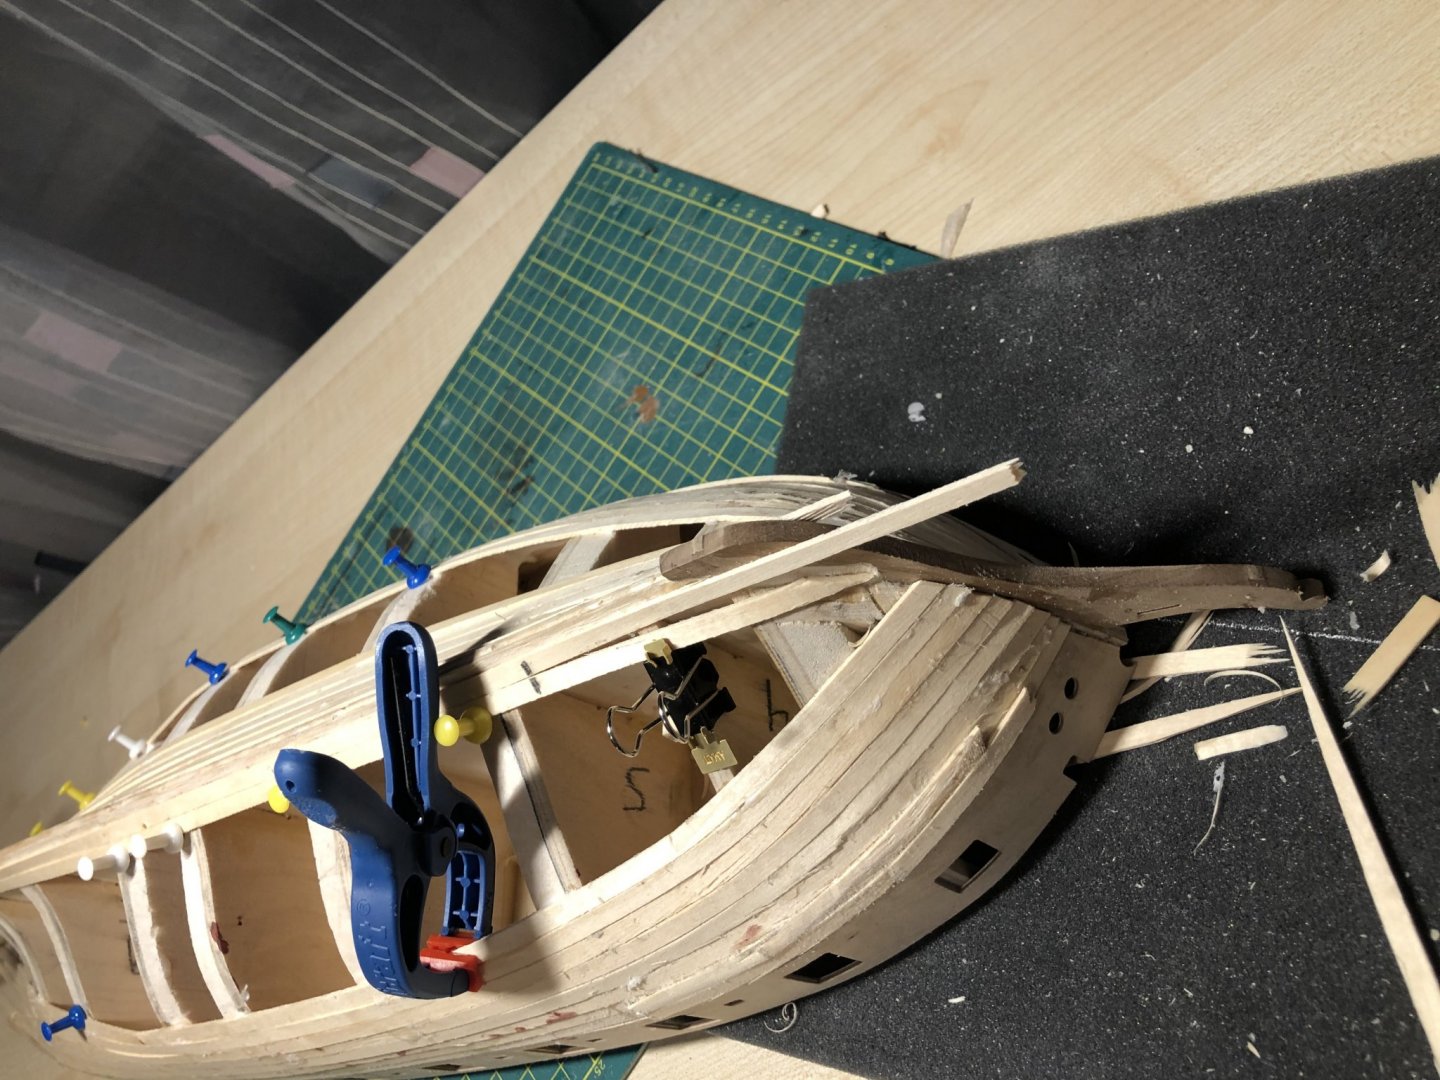
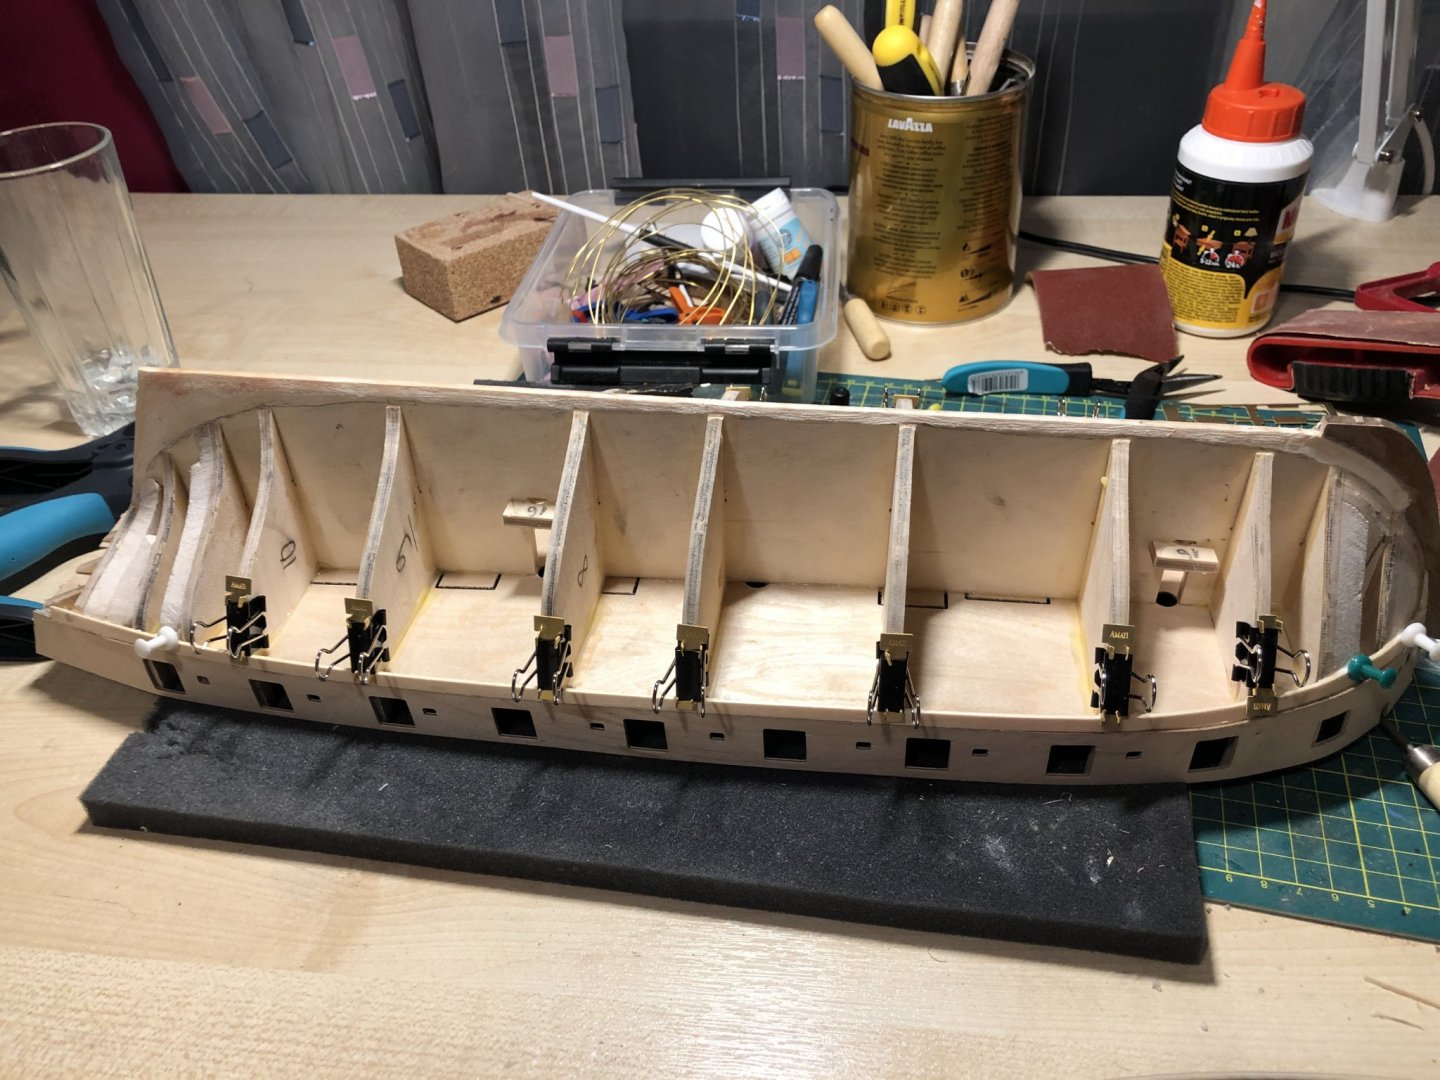
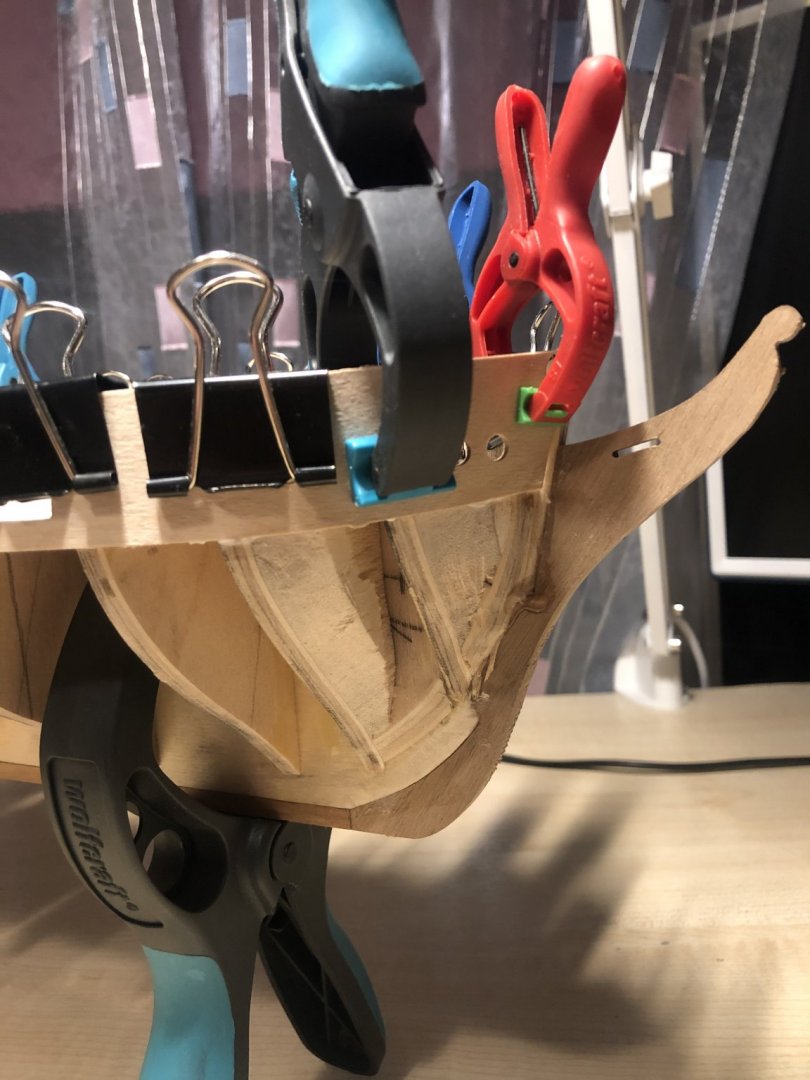
Bulkwarks were glued nicely. In this build i educate myself more with books and other material. Will try to make a huge jump in general quality and techniques also. As it came to my mind that this hull isnt like Terroe i had to remove false keel in order to sand down keel at the areas where there arent any bulkhead. Otherwise planking would be 2mm over the false keel when finished. Installed 3 planks. 1st blanks under gunport bulkhead went in without tapering. Will start tapering from 2nd plank. Got new toy-Amati clamps. Good investment. Bad is that i cant install many planks at once. So i prepared filler blocks for each bulkhead (tried to avoid that and rush into planking) that i will glue on at next build day. This means at each bulkhead i can glue it with pva and fix with superglue as i have enough surface to work on. i allready see that planks are meeting the gunport bulkheads line at bow area in one place. I will cover that area with extra planks and sand it down at later stage of the build. Question-should i apply 1st planking to the area where there isnt any bulkheads and its just keel? I should be logical to put only 2nd planking there that would meet with the false keel(rabbet line). the area is sanded down with dremel for now.

-
Hi Thought about teying to do long joints with balck 0,5 rope. My biggest concern is that during sanding it will make rope hairy. Any ideas/suggestion on that?
-
HMS Terror by Mish - OcCre - 1:65
Wahka_est replied to Mish's topic in - Kit build logs for subjects built from 1801 - 1850
Hi, Nice progress! Doing my first build Terror also. Cut those planks back 1-2 frames as Keith said and you be fine. An other suggestion would be not to push nails totally in leave them little out. You will sand yourself mad with them in there. Remove the nails after planking is done for better sanding. -
Nice progress! Pictures are made after cleaning ;). Its hard to keep it clean as you add tools all the time when building. Solved it like that so that every night i will focus on certan work so the tools wont build up - like yards and rigging etc.
-
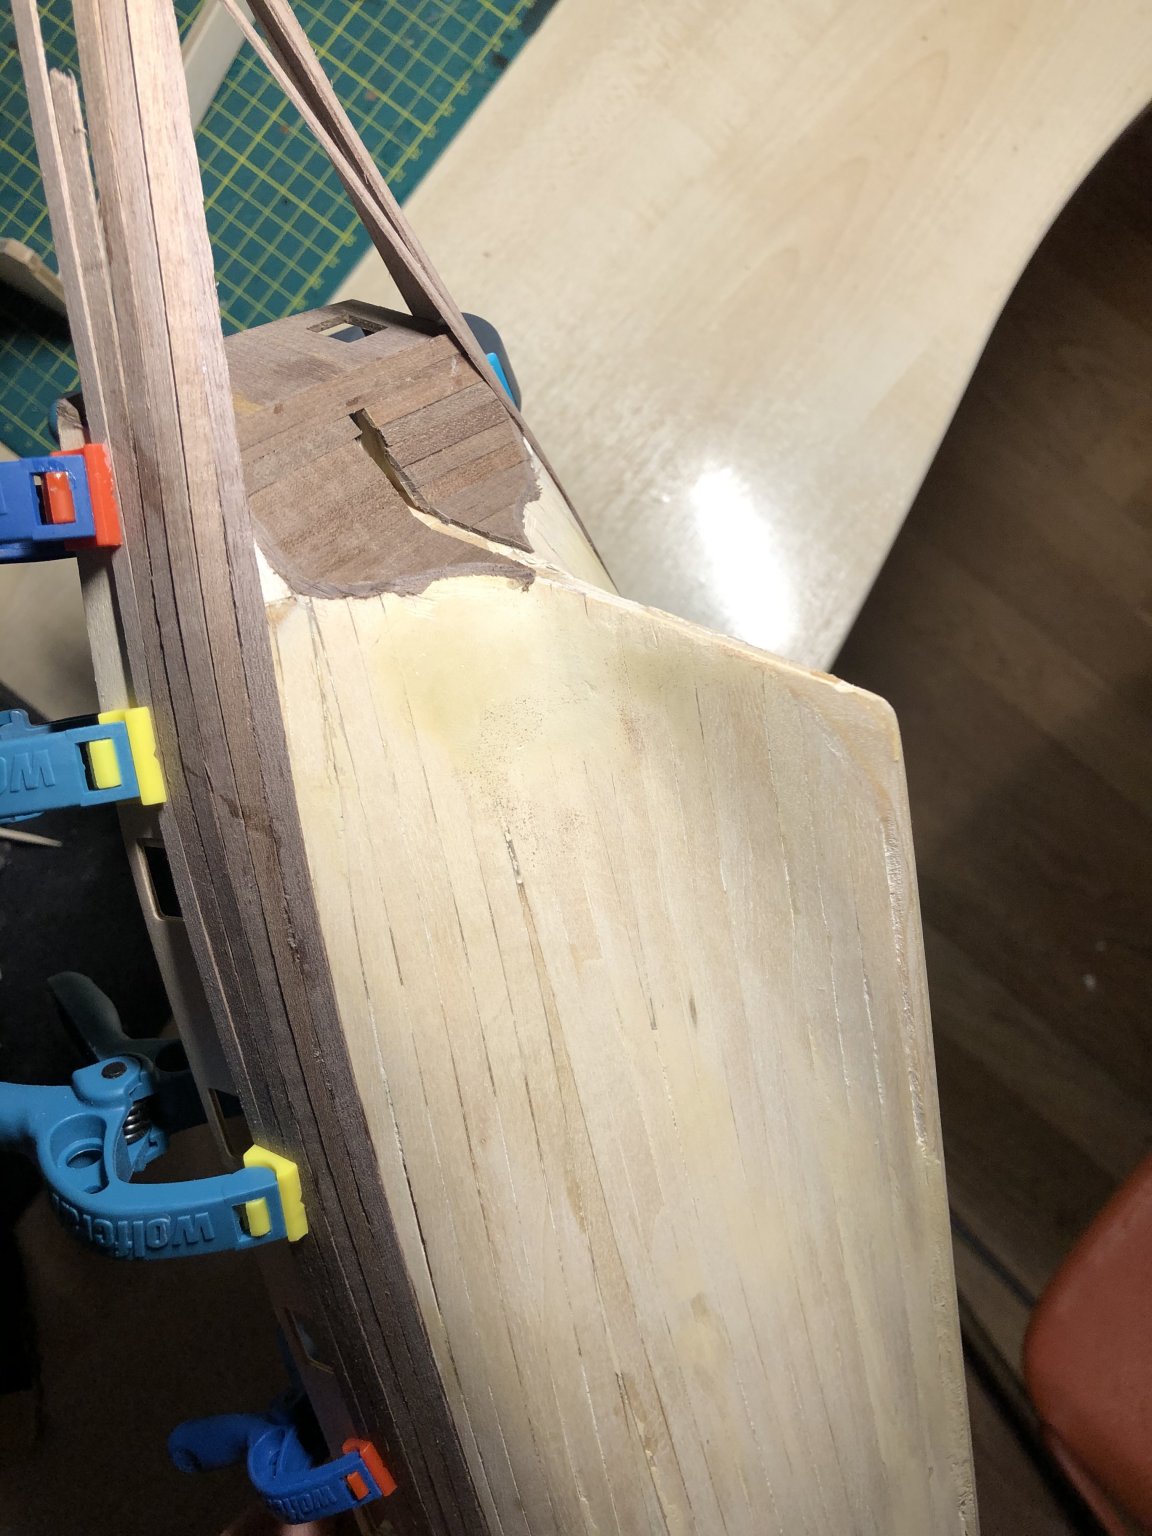
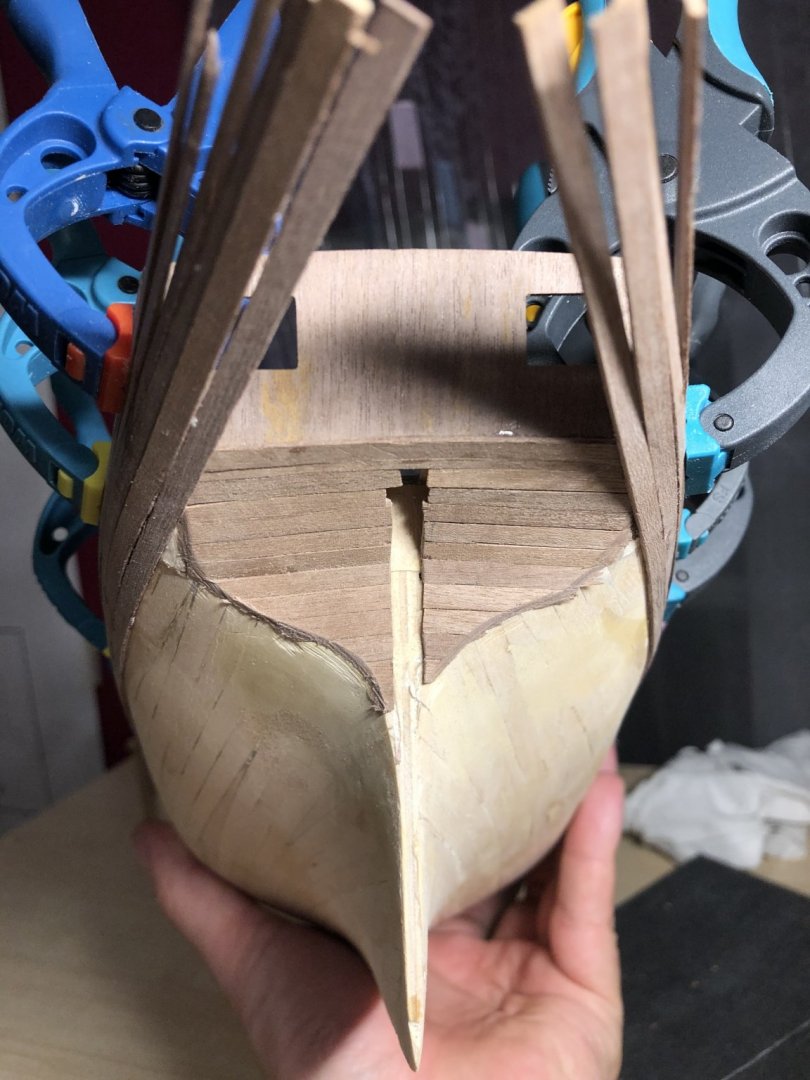
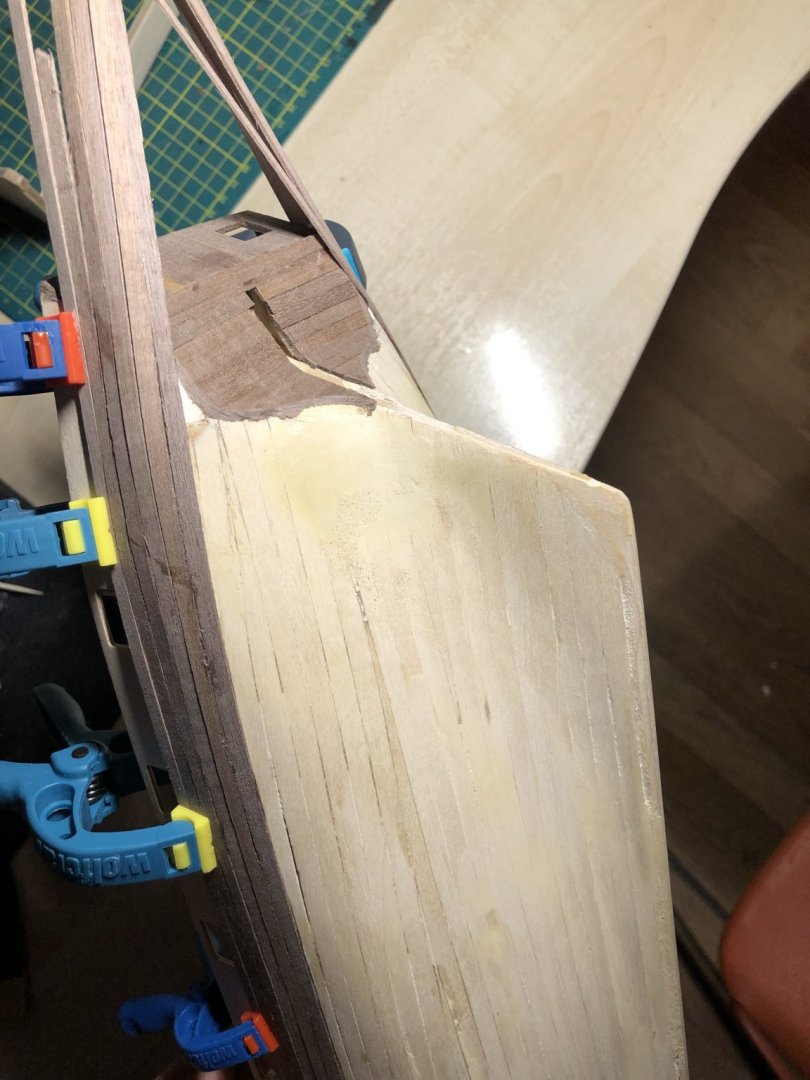
Got clearance from Admiral to do some heavy sanding so was able to move on - had to vacuum whole living after that. Gunport bulkwark was the most complicated fit so far. Did it so that marked line on bulkwark where it should meet false deck. Fit isnt 100% perfect, some gaps, but 2nd layer will cover it. Applied too much CA at bow so it ran on keel(heavy sanding awaits i guess). That was only way to get it to stick at deck. As its my 2nd build i have learned a bit. Added some balsa filler blocks and intend to add some more before the planking. Some tore apart during sanding. i know it dosent look nice at the moment but thats my style to make hull rock solid and it all will be covered. Next is to finish with the keel and stren bulkwark.


-
Ok tnx for the info.
-
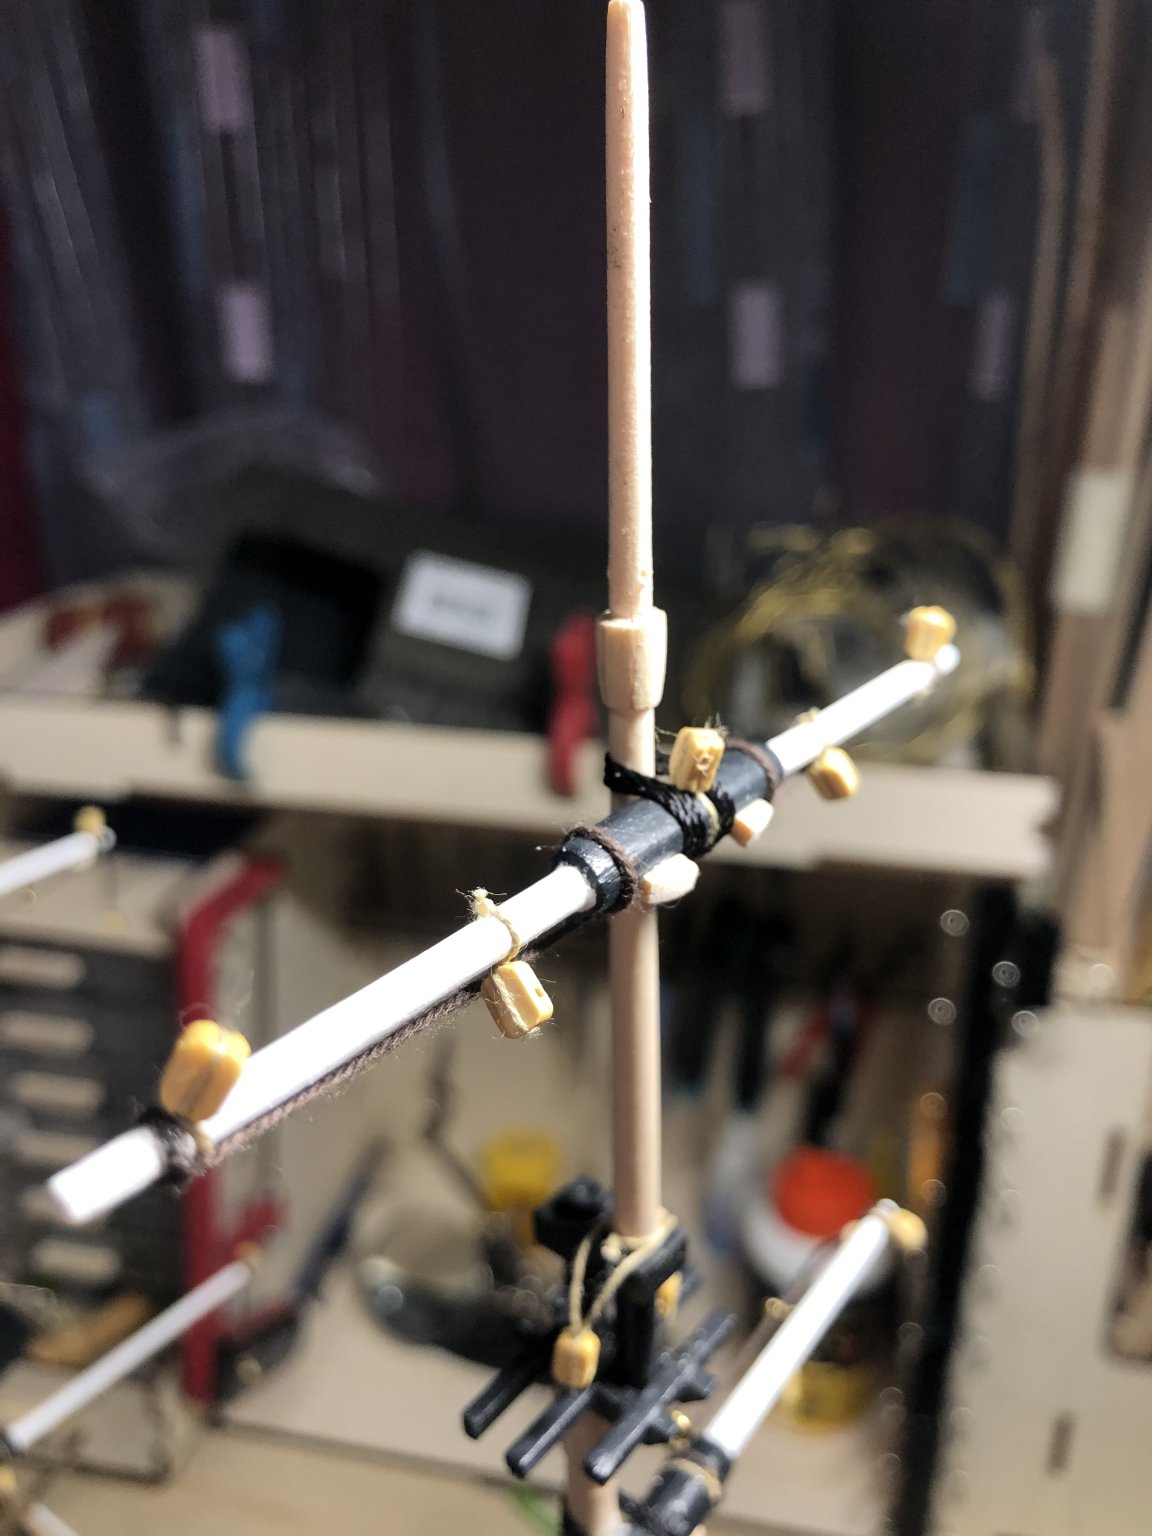
Ok so if i understand location is depending on the length on the yard.
-
Im useing Admiralty ones vause im not familir with woodwork and it seemed like safe bet. Im happy with them-no issues so far. Only concern is which one to use. As i understand many folks use normal ones from hardware store but im not in point of experimenting yet. Also varnishes are Admiralty, this build is matt. To summarize i suggest, specially for newbie(sry if you arent). NB! Always make mockup before applying it on ship. Happy to answer if you have some other questions.
-
Nice tip with the pin-will use that also. Tnx
-
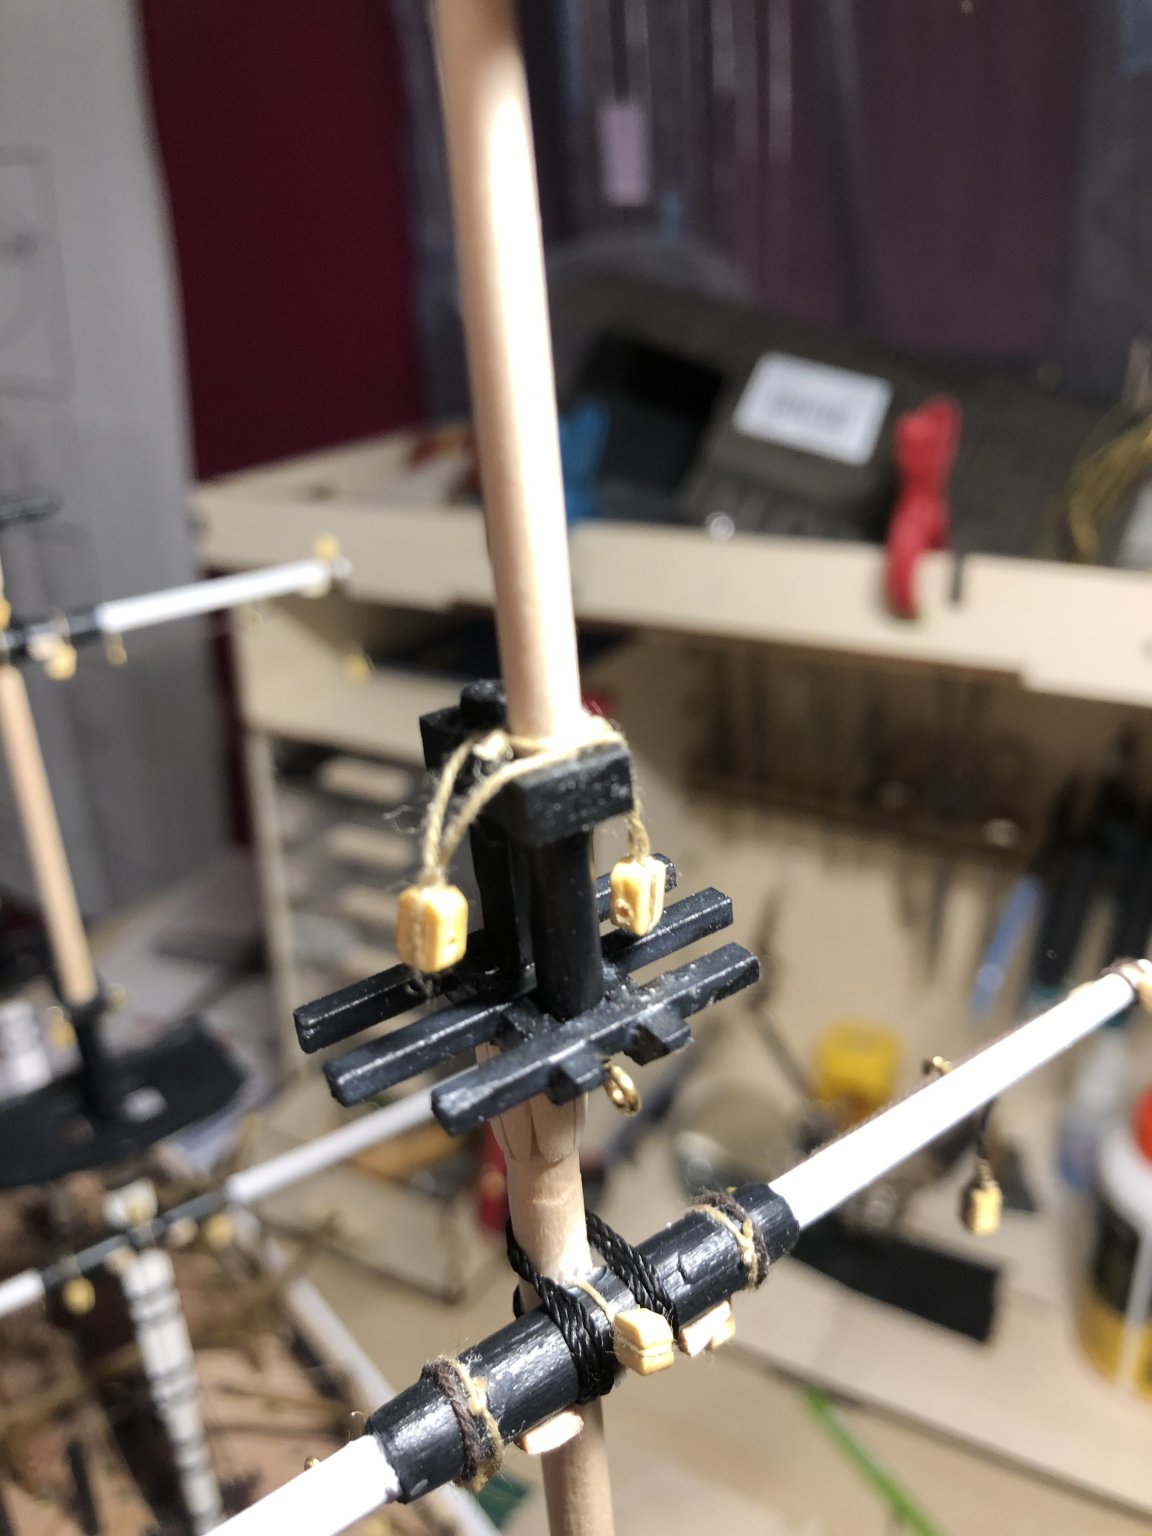
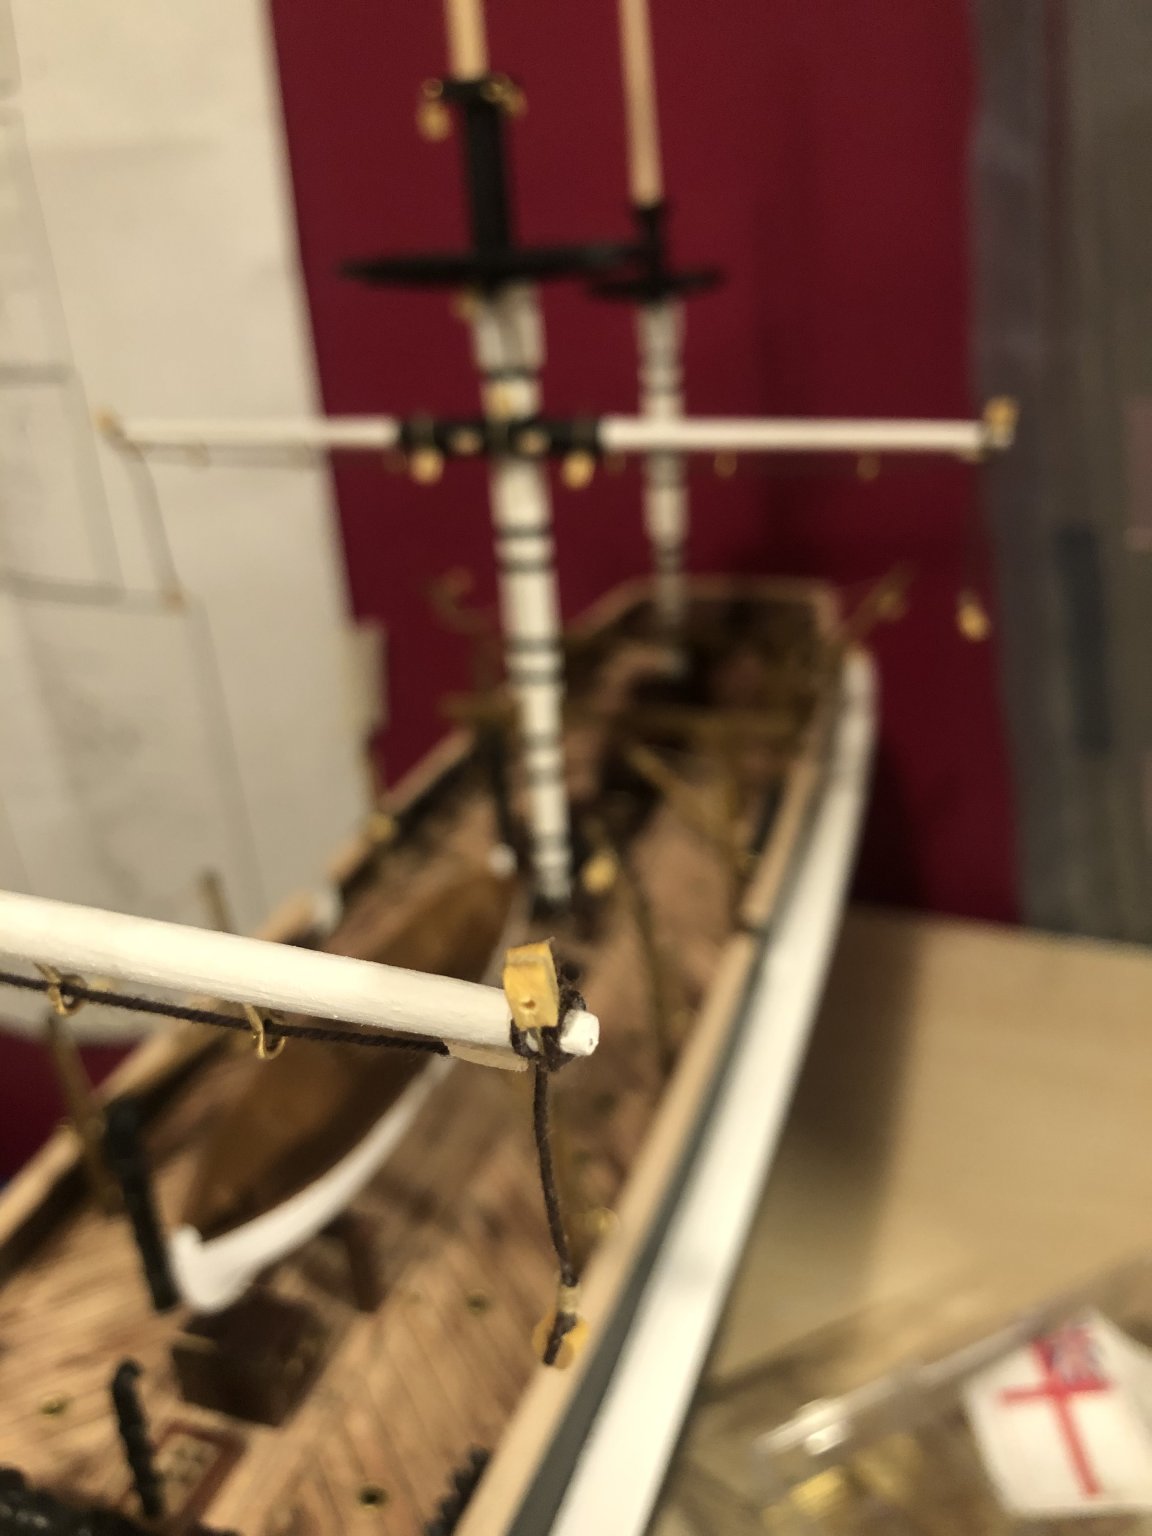
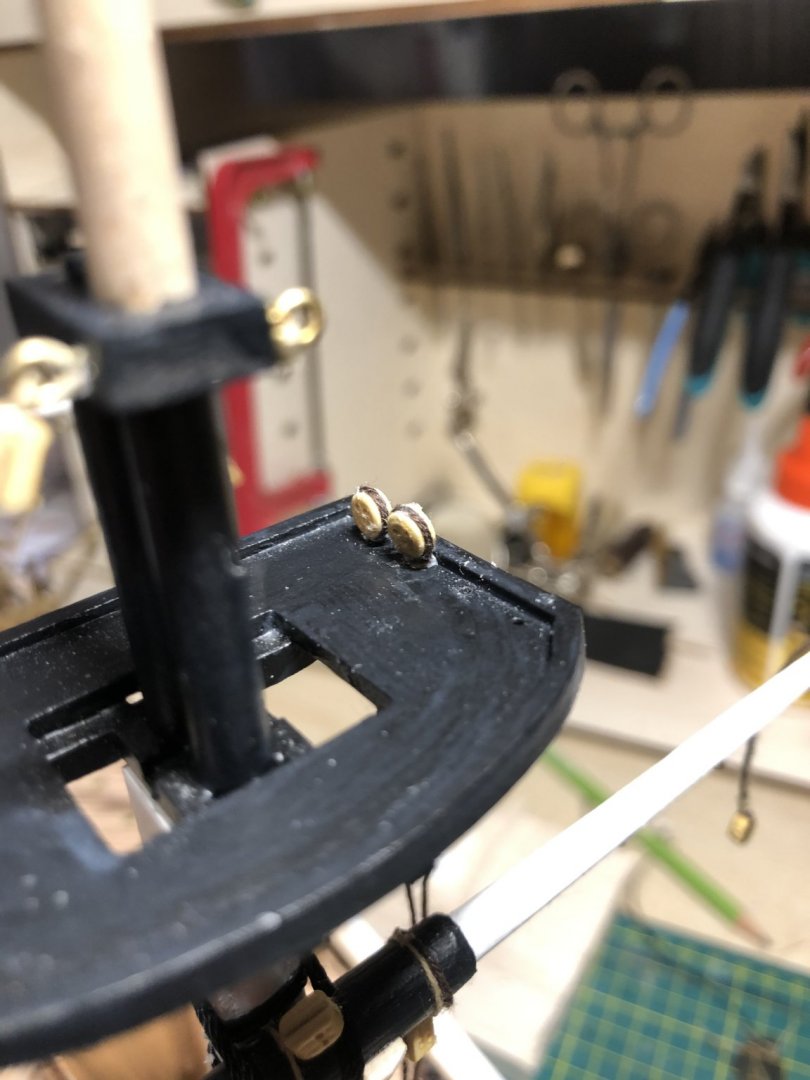
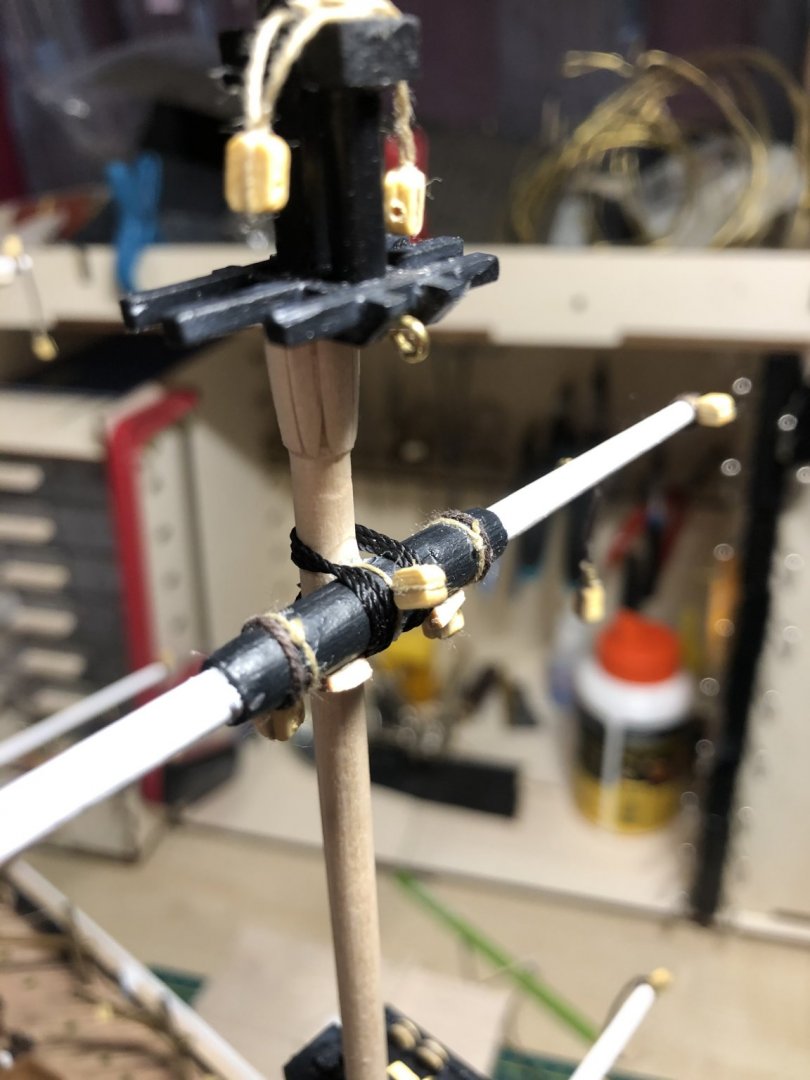
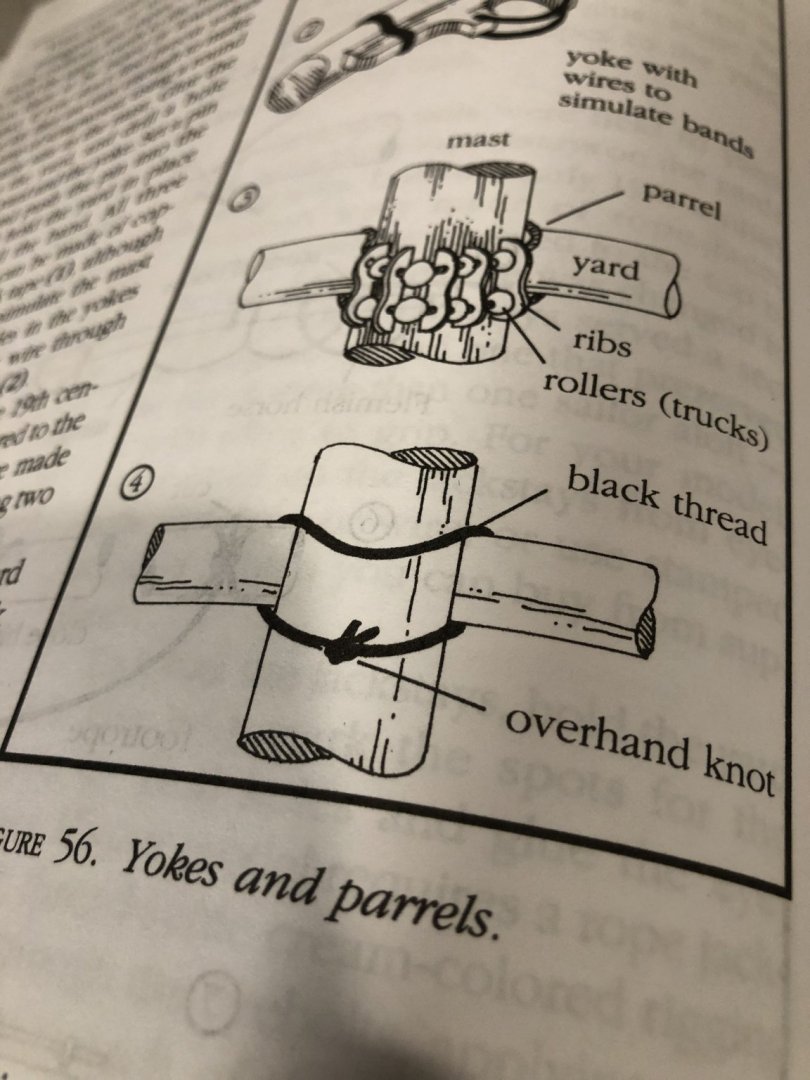
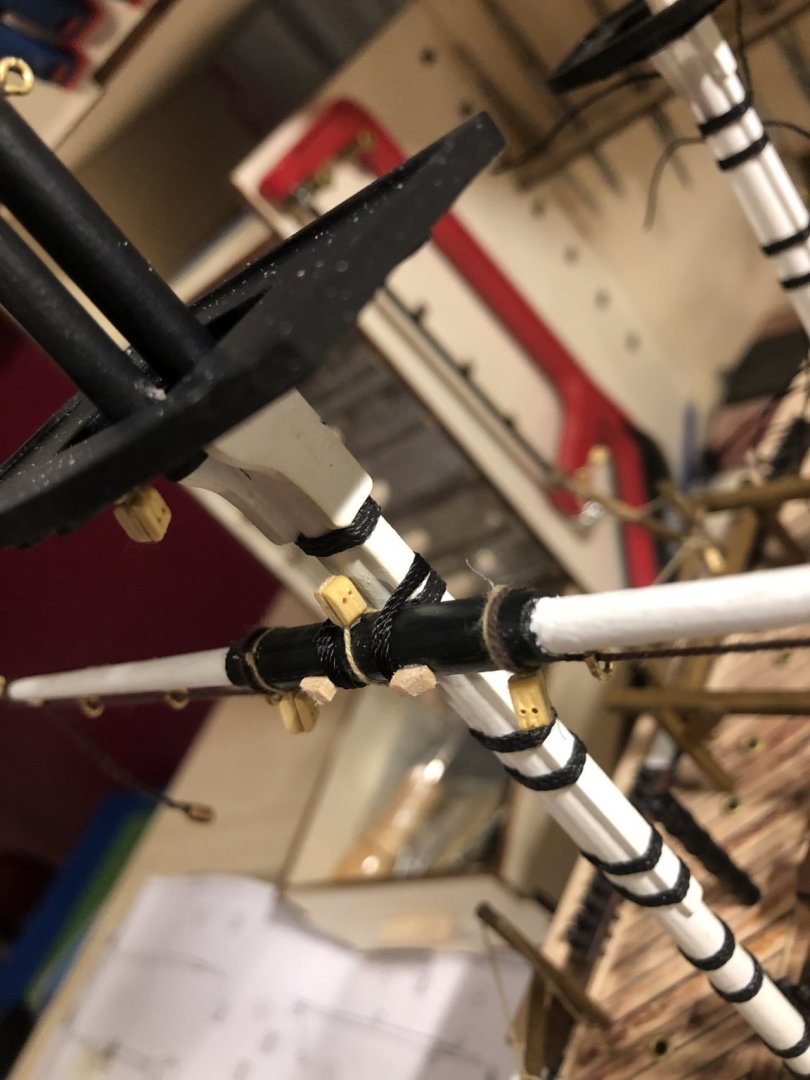
Hi all As my first build i have question regarding position of blocks that i point on photo. Do those have to be on same line on different yards but same mast? Occres instructions on Terror are really bad-one info on drawing but photo instructions are totally different.

-
I did it like this but with 3 times around yard and mast. Hope this helps you.
-
No its not a superglue. It dries in 24h but fully transparent. Question - these blocks ik pointing on yard, do they have to be on same line with every yard? Instructions are really unclear and some photos show them in complitely different location.