


Veszett Roka
-
Posts
382 -
Joined
-
Last visited
Content Type
Profiles
Forums
Gallery
Events
Posts posted by Veszett Roka
-
-
7 hours ago, ccoyle said:
Here, Kevin -- I have created a Polish-English dictionary for you based on my "extensive working knowledge" of the language:
- okrety: ship
- klej: glue
- drut: wire
Okay, that's all I know. For the rest, you're on your own. 😜
Not at all Chris, you forgot the most important word: Nazdrowie! Believe me, 'polak' has excellent sort of vodkas. It is must for ship modelling Kev!
Good luck for PoW, i will follow you.- Old Collingwood, Canute, mtaylor and 1 other
-
 4
4
-
-
Hi Ian,
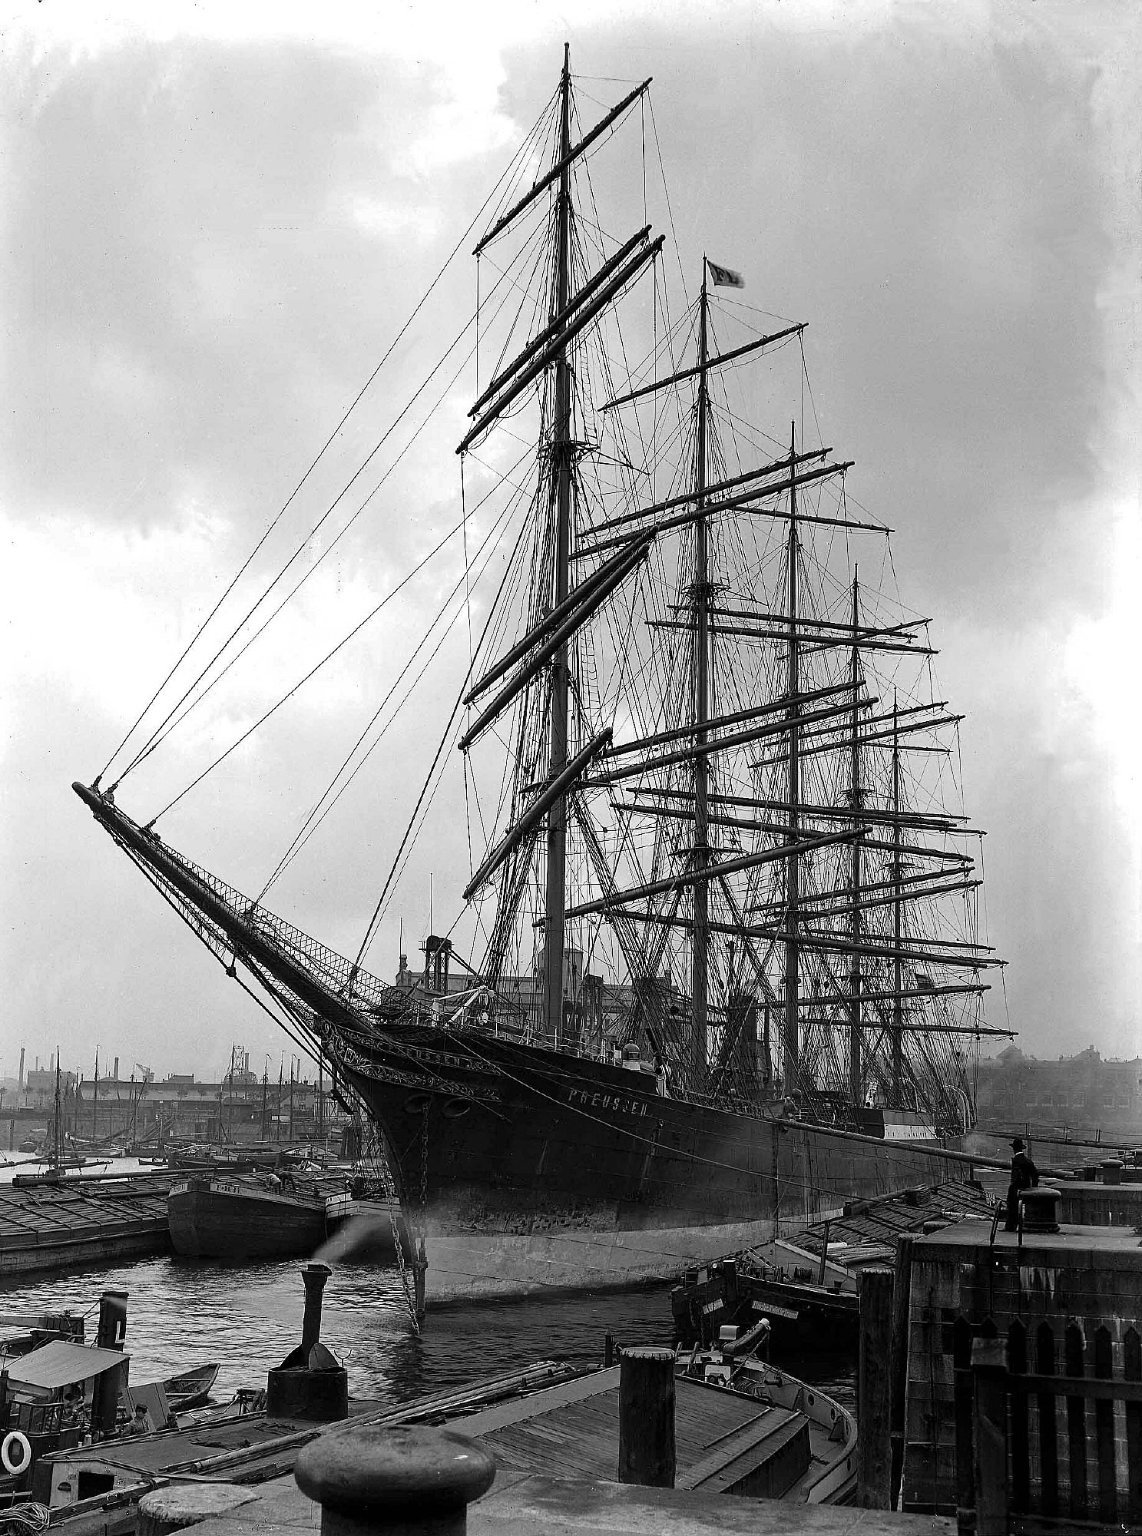
in the background i made a little research. Preussen's chimneys were foldable. Let me cite the picture from the wreck: You can see a round shaped holders for them, at the top of the boiler room the short base visible. This is why we didn't see the remarkably high columns on some pictures - the crew fold them back to the holder when they were not in use, and raised if needed but in this case the sails had to be furled.
So you just followed the practice to lay down the too high chimney.

-
That should be fine. I found you a detailed drawing, maybe this helps.
-
-
5 hours ago, Hubac's Historian said:
Wow - that is such a peculiar “innovation”.
You will find that one is very useful for the Airfix Vasa. Thats a beautiful model and still the most accurate on the market (no so many kit i saw however). It will require extensive bashing, as no handrails, no cleats, no blocks were included in the box (maybe because i have the 'special edition' version?).
The ratline tool will help you to line up the horizontal ropes perfectly, especially on mid and top shrouds. -
-
21 minutes ago, wefalck said:
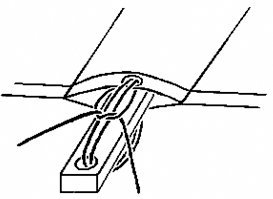
The lifebuoys I have seen, and the German late 19th regulations stipulate the same, seem to have the line attached with a strip of heavy canvas around the ring, rather than a serving line. I will use some very light silk paper, like cigarette paper, for the purpose.
You fire buckets also look good ! I am not a fire-fighting expert (Kurt van Dahm here would be ...), but believe that sand is used only on electrical equipment (would there be electrical lighting on AMAPÁ ?), on material that could with water and thereby releasing heat, or when no water would be available (say in forests). Besides, the sand in open buckets would become wet very quickly from the rain and spray - and there is no shortage of water on a ship
") You could give the buckets also handles made from wire ...
You could give the buckets also handles made from wire ...
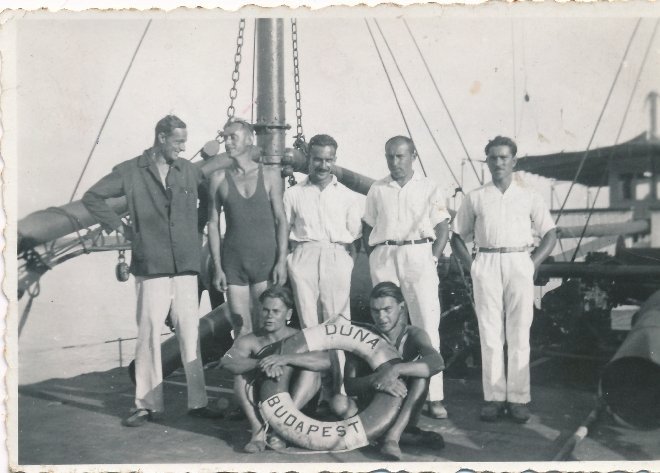
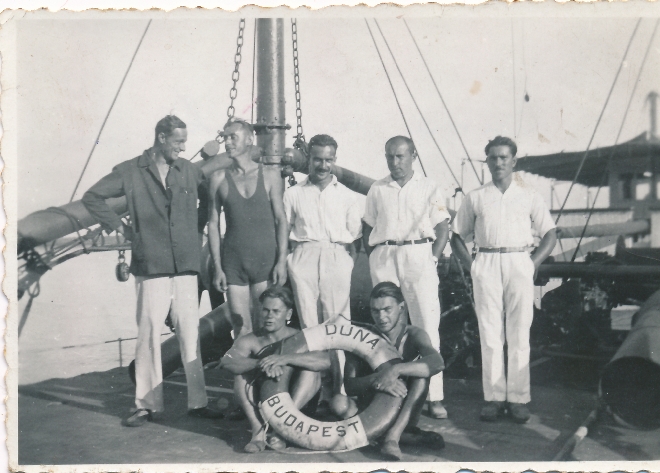
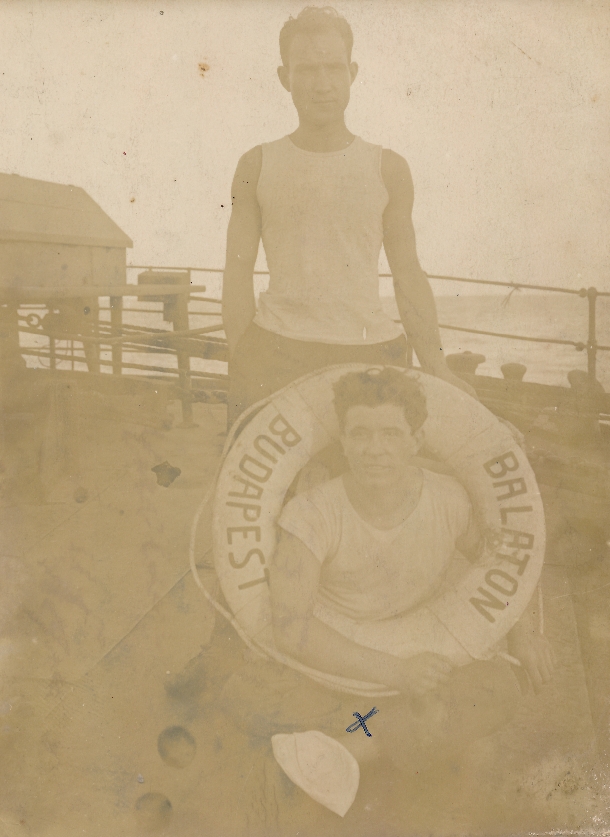
Correct, the grabbing line wasn't served but attached with canvas. Here are two pictures of 1920 hungarian ships' ring, i held them in my hand in reality too.
Sand is not for electrical fires, but oil or grease, any liquid which lighter than water thus 'swimming' on it and cannot get separated from oxygen source.
-
2 hours ago, Ian_Grant said:
I've never sailed anything bigger than my dinghy (Bombardier Invitation)
Hah! Novice! Sail once a Soling in high wind, i guarantee you will fall in love for a lifetime.

More seriously, i competed in international Pirate, 470, Soling, Elliott770, sailed a 40er Scharenkreuzer and few motorboats, including a passenger ship - please forgive me for diesel engine
- Hubac's Historian and Ian_Grant
-
1
-
 1
1
-
39 minutes ago, Bill97 said:
I am aware about alcohol removing acrylic paint since I to have unfortunately had to use it time and again over the years!
I do so. However, it is somewhat in reverse order. First i do use alcohol, then next day i have to remove the acrylic paint
")
-
On 1/3/2022 at 7:53 PM, Mr Rogers said:
Thanks for the reply, Ian.
I am in the process of building the PASSAT. It is my first sail ship and at first I didn't worry too much about the rigging. After more and more research though it gets more and more intimidating. I just finished laying the deck and I don't have much time to work on the model so I am quite far from working on the rigging. I hope I can figure it our when I get there.
If you allow me an offtopic note under your log Ian? For Passat builders, here is a half-hour documentary from Peking, the true sister ship of Passat. Luckily both of the old ladies are museum ships today, probably tons of reference pictures available, so this is more than a curiosity. Man, what a life it was!
-
-
-
6 hours ago, Greg G said:
Thank you very much Richard .
I download the file and it all work fine. I did have to download VLC media player to get the sound as the windows 10 media player would not play the sound recording .
That maybe just me .The recording is a big help to me on doing the Pevensey hull .
Greg
Hi Greg,
Sound was fine for me, but i'm a Linux user.
-
I think it is a great improvement Ian. Be proud!
-
4 hours ago, wefalck said:
In most, but the very largest scales, the pattern of the real wood grain is way over-scale or not of the right sort. Also imitating the correct colour using dyes or stains tends to be a hit and miss action ...
No one should build any wooden shipmodel (except gigantic ones) if we would take the wood grain patterns this serious. For colors, use veneer.
- Egilman, lmagna, popeye the sailor and 4 others
-
7
-
18 hours ago, Ian_Grant said:
Veszett, your "Pamir" looks great!! I noticed the anchor crane seems way more substantial than mine; but looking at the photo of Preussen wrecked Heller seems to have got it right.
Here is another pic, however it is not so informative. I think your anchor crane is correct for Preussen.

-
I do understand the reason of paper decoration, but found somehow pity that we shall cover a wooden panel with a printed wood imitation paper.
- Egilman, mtaylor, aydingocer and 4 others
-
7
-
-
1 hour ago, wemattson said:
Yes, I will be doing a build log for the Passat. I'm in the process of finishing up Revell's Colombia Express, and Academy's USS Reuben James first. I wish I had done a build log of those two because I feel that a build log helps keep the building process moving forward.
Absolutely. And this is the reason why i didn't started a build log for my Pamir, because it would be a dead log - i have so little time for build her 😢
-
17 hours ago, wemattson said:
The Passat should be getting started in February.
Looking for another windjammer! Will you start a build log?
-
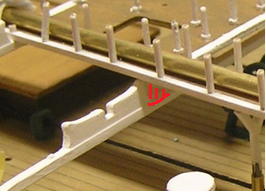
Great improvement Ian. What if you add padding between the boat support and the flybridge?
-
-


New member checking in!
in New member Introductions
Posted
You did indeed. Welcome to the MSW community, and have good times!