

Beakerboy123
-
Posts
41 -
Joined
-
Last visited
Content Type
Profiles
Forums
Gallery
Events
Posts posted by Beakerboy123
-
-
Tore he old hull down to the “studs”. Dusek Models sent me a new laser cut panel and replacement wood to start over. Shipping actually cost more than the wood. I’d do things differently now but I didn’t want complicated so I paid for convenience.
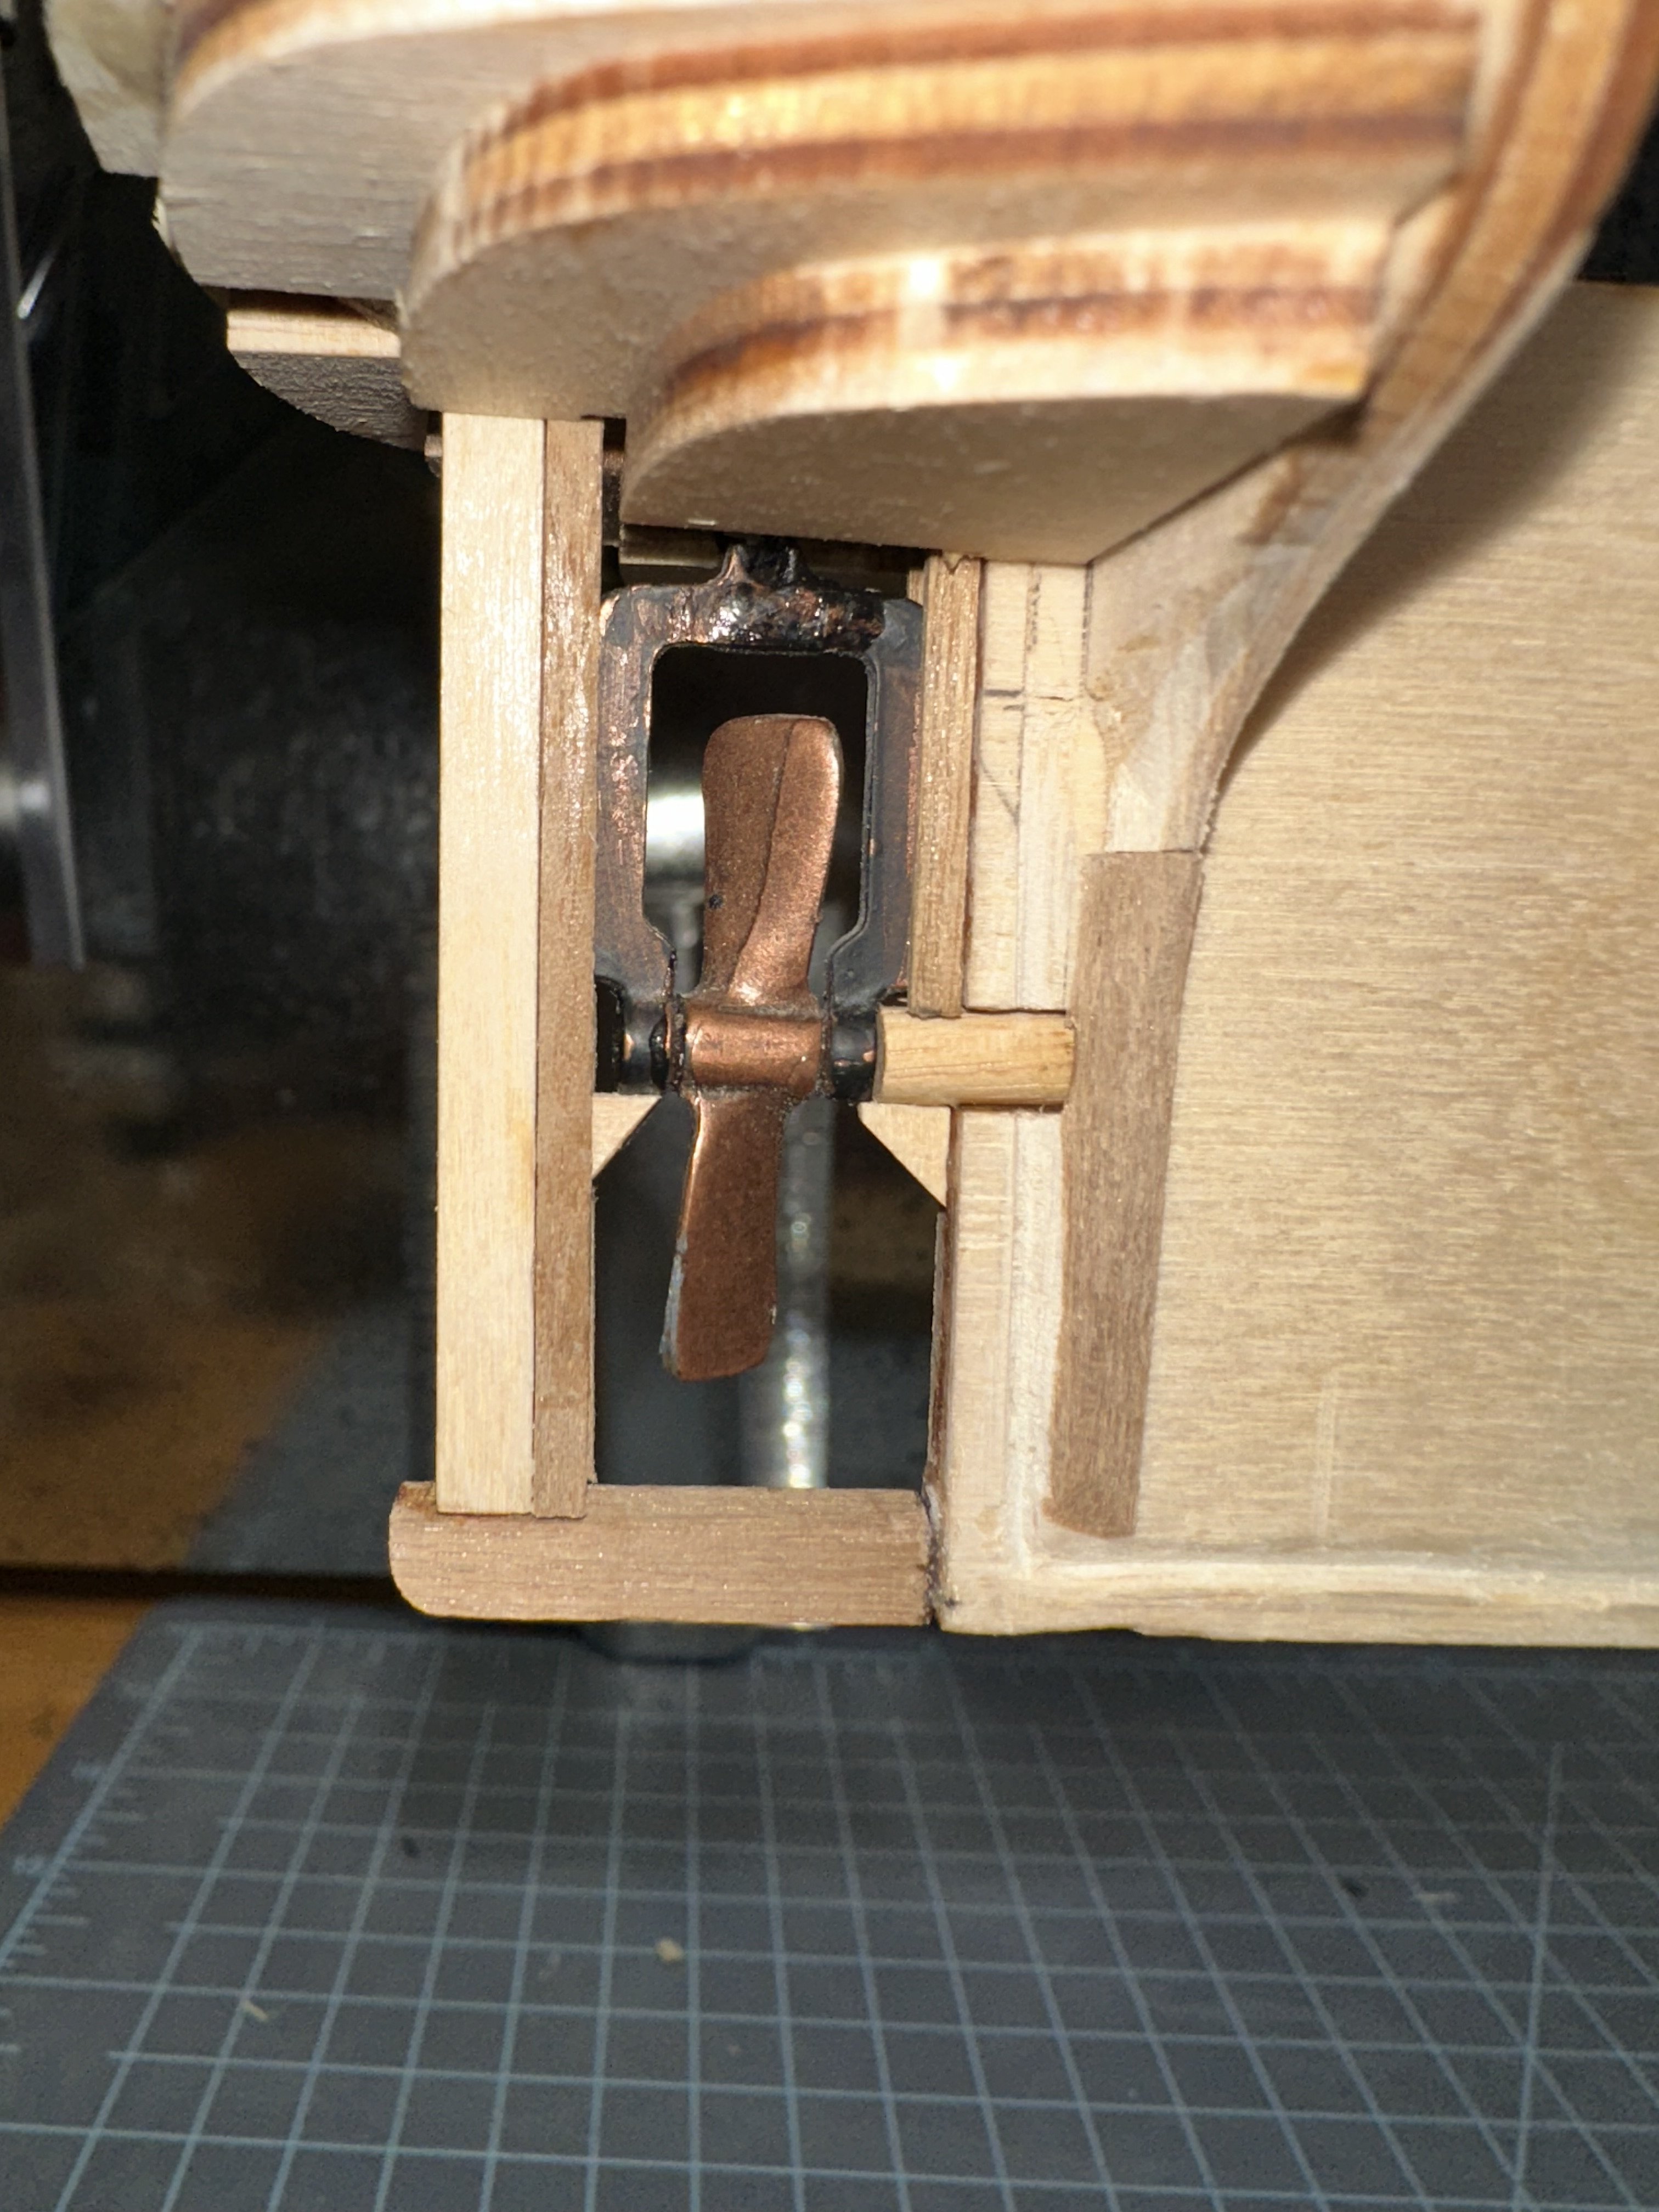
Here’s the blank canvas in my homemade keel vice.
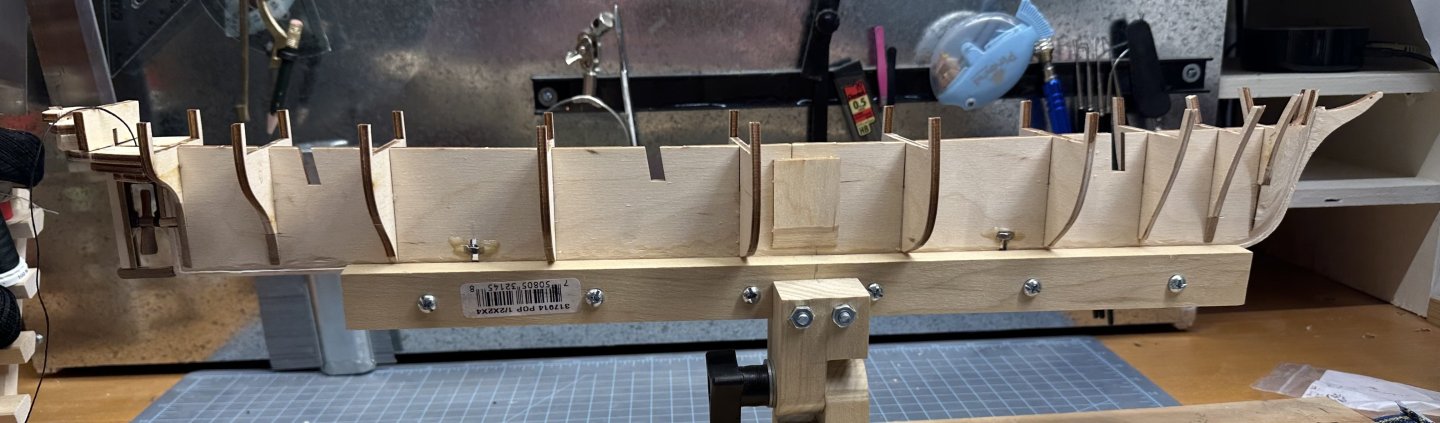
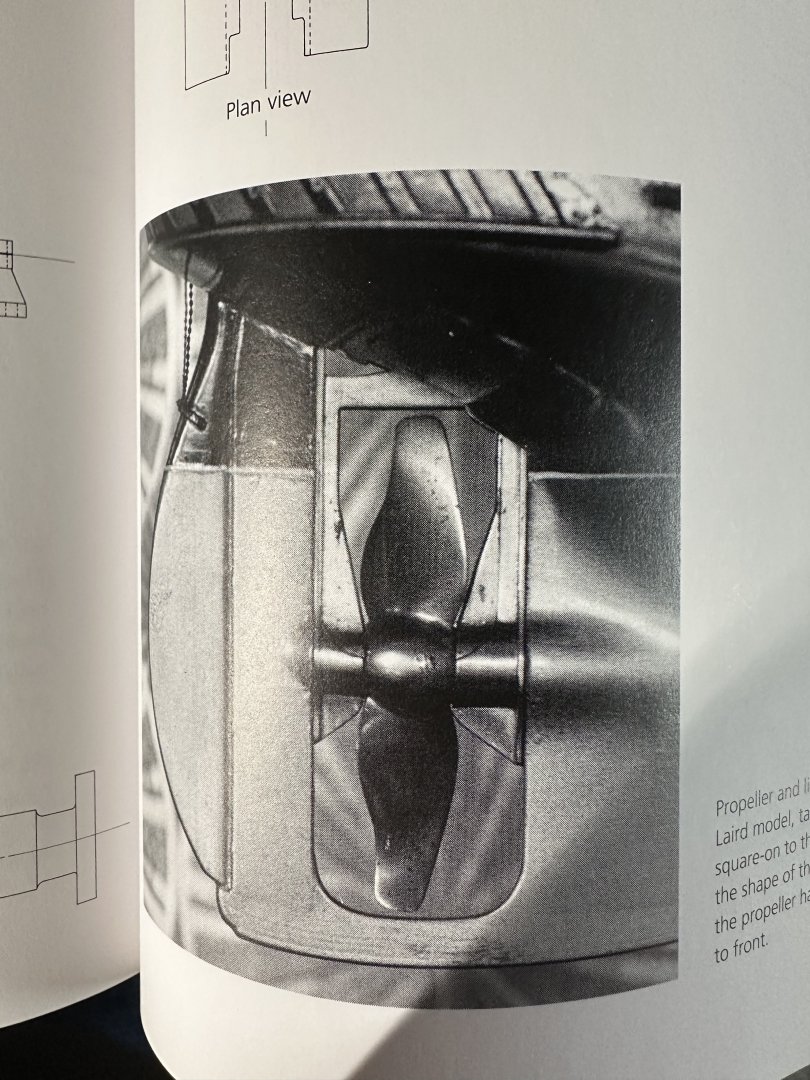
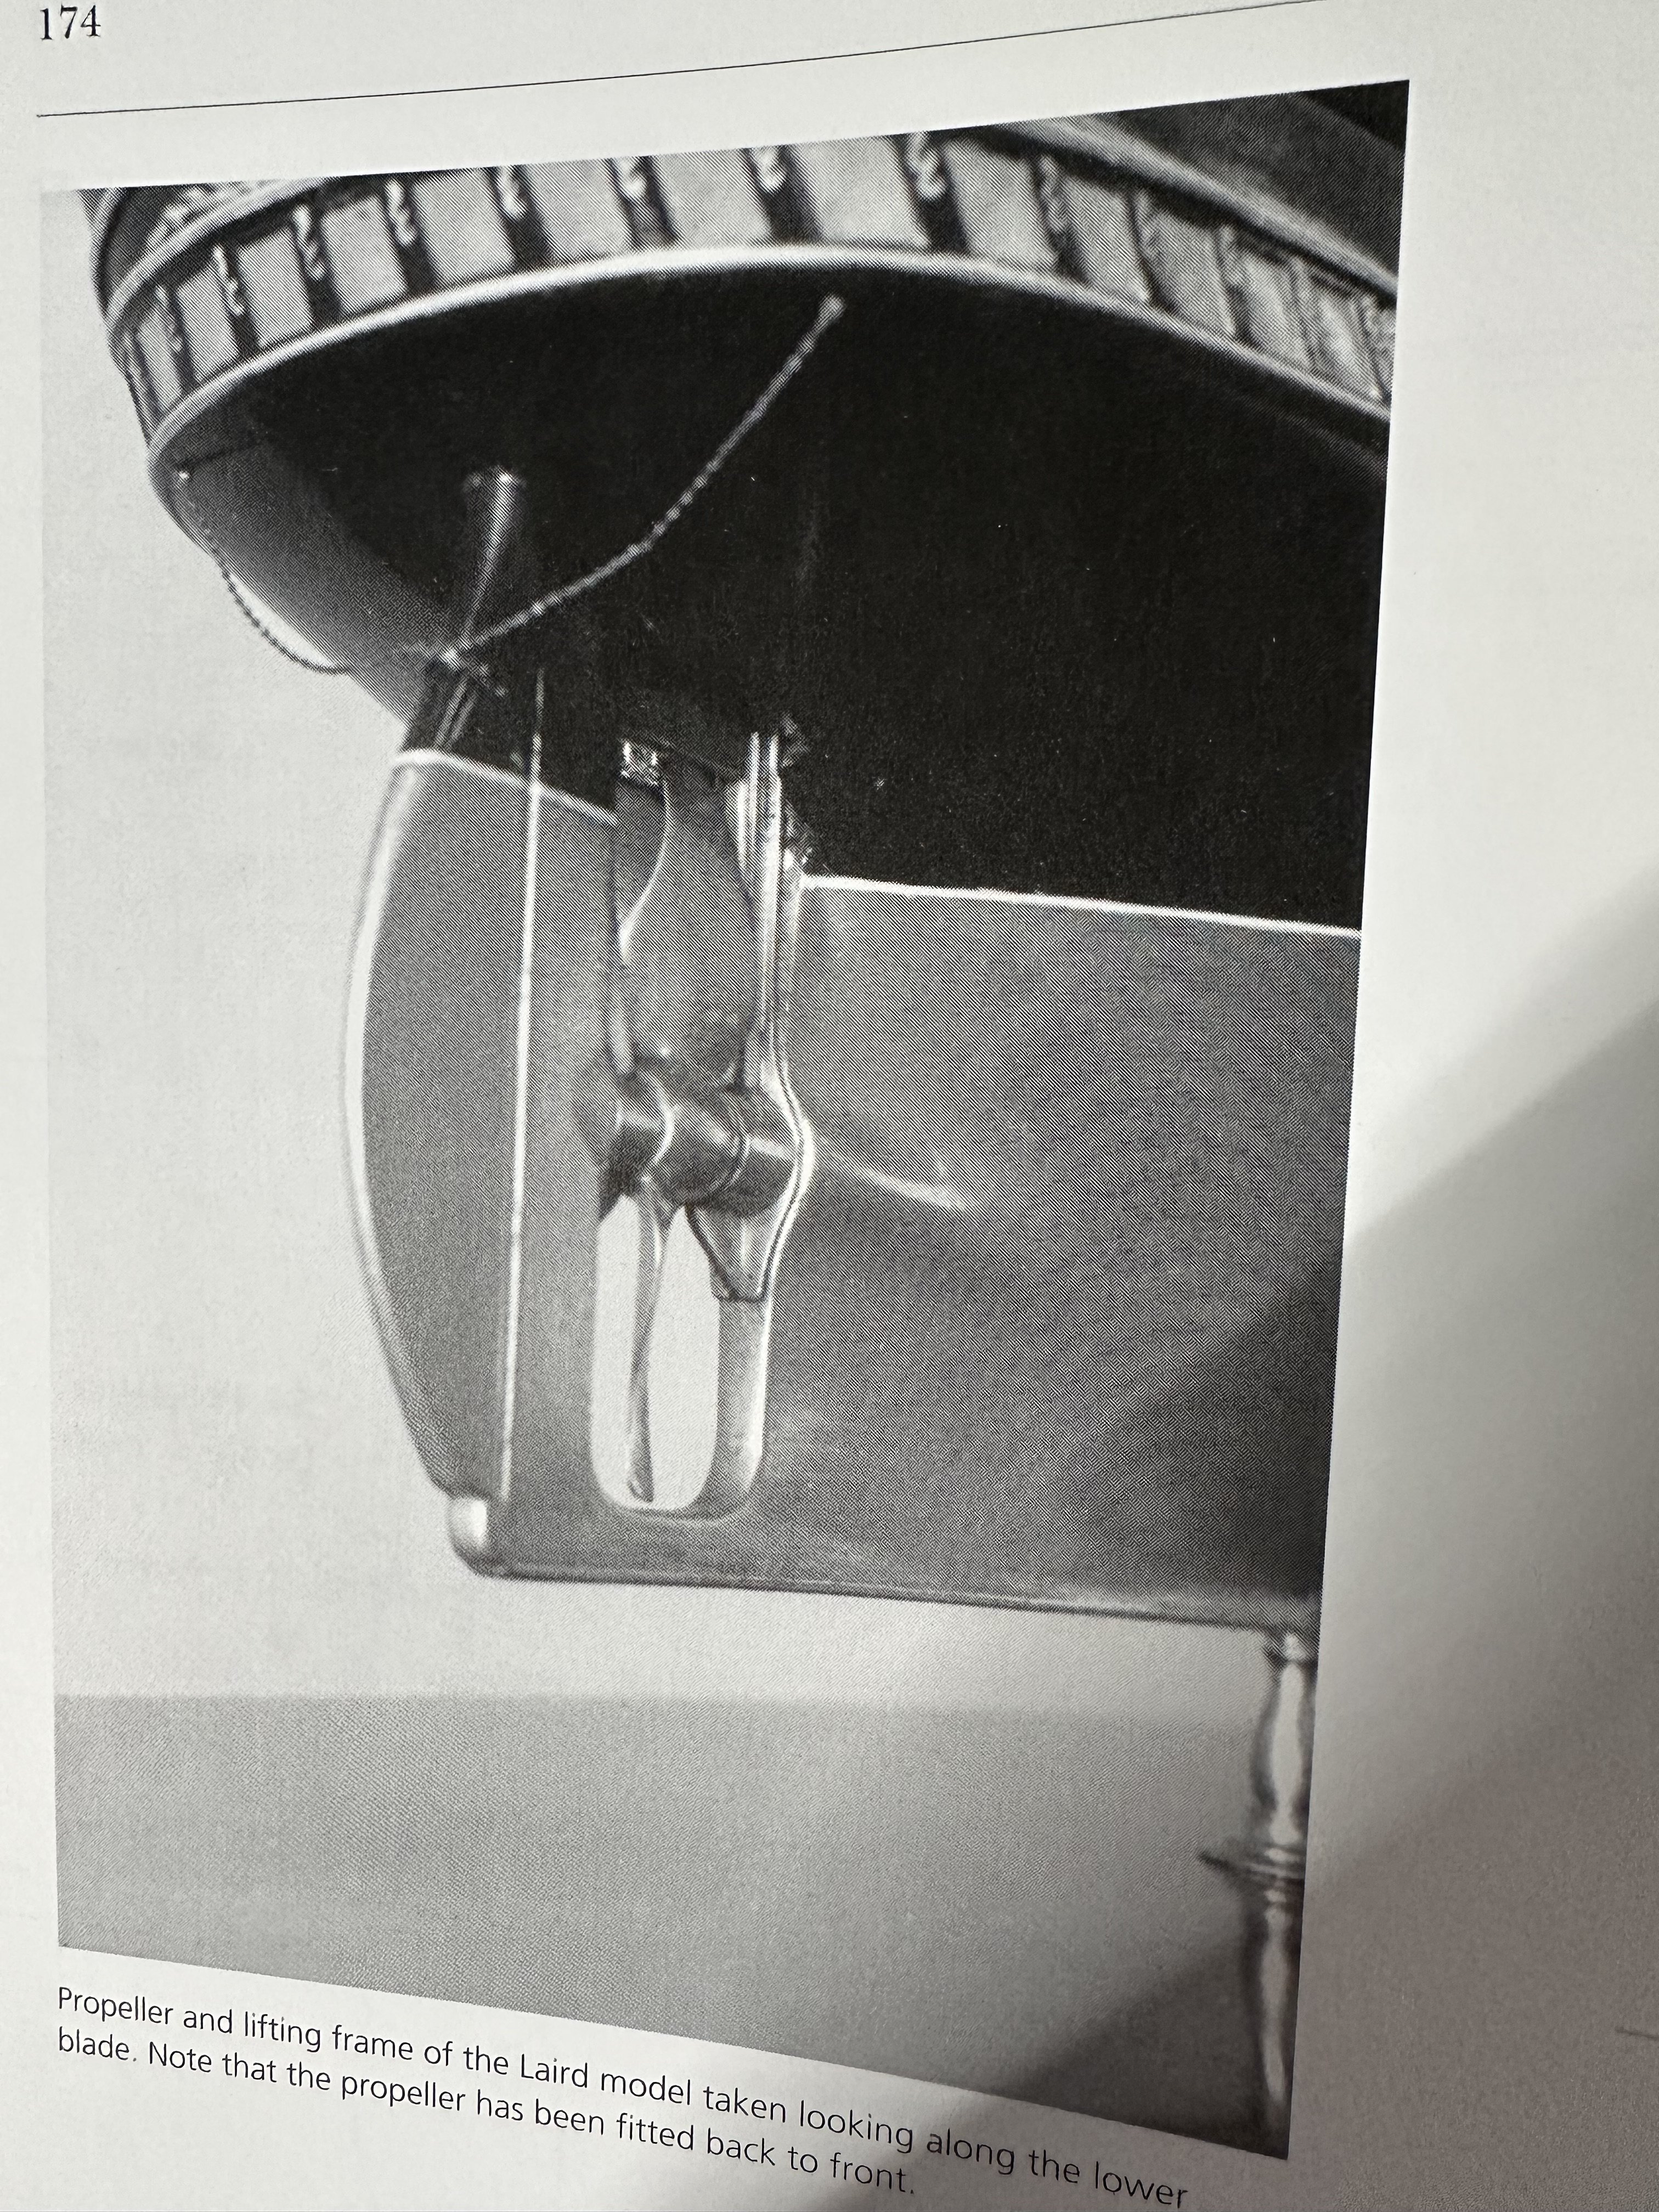
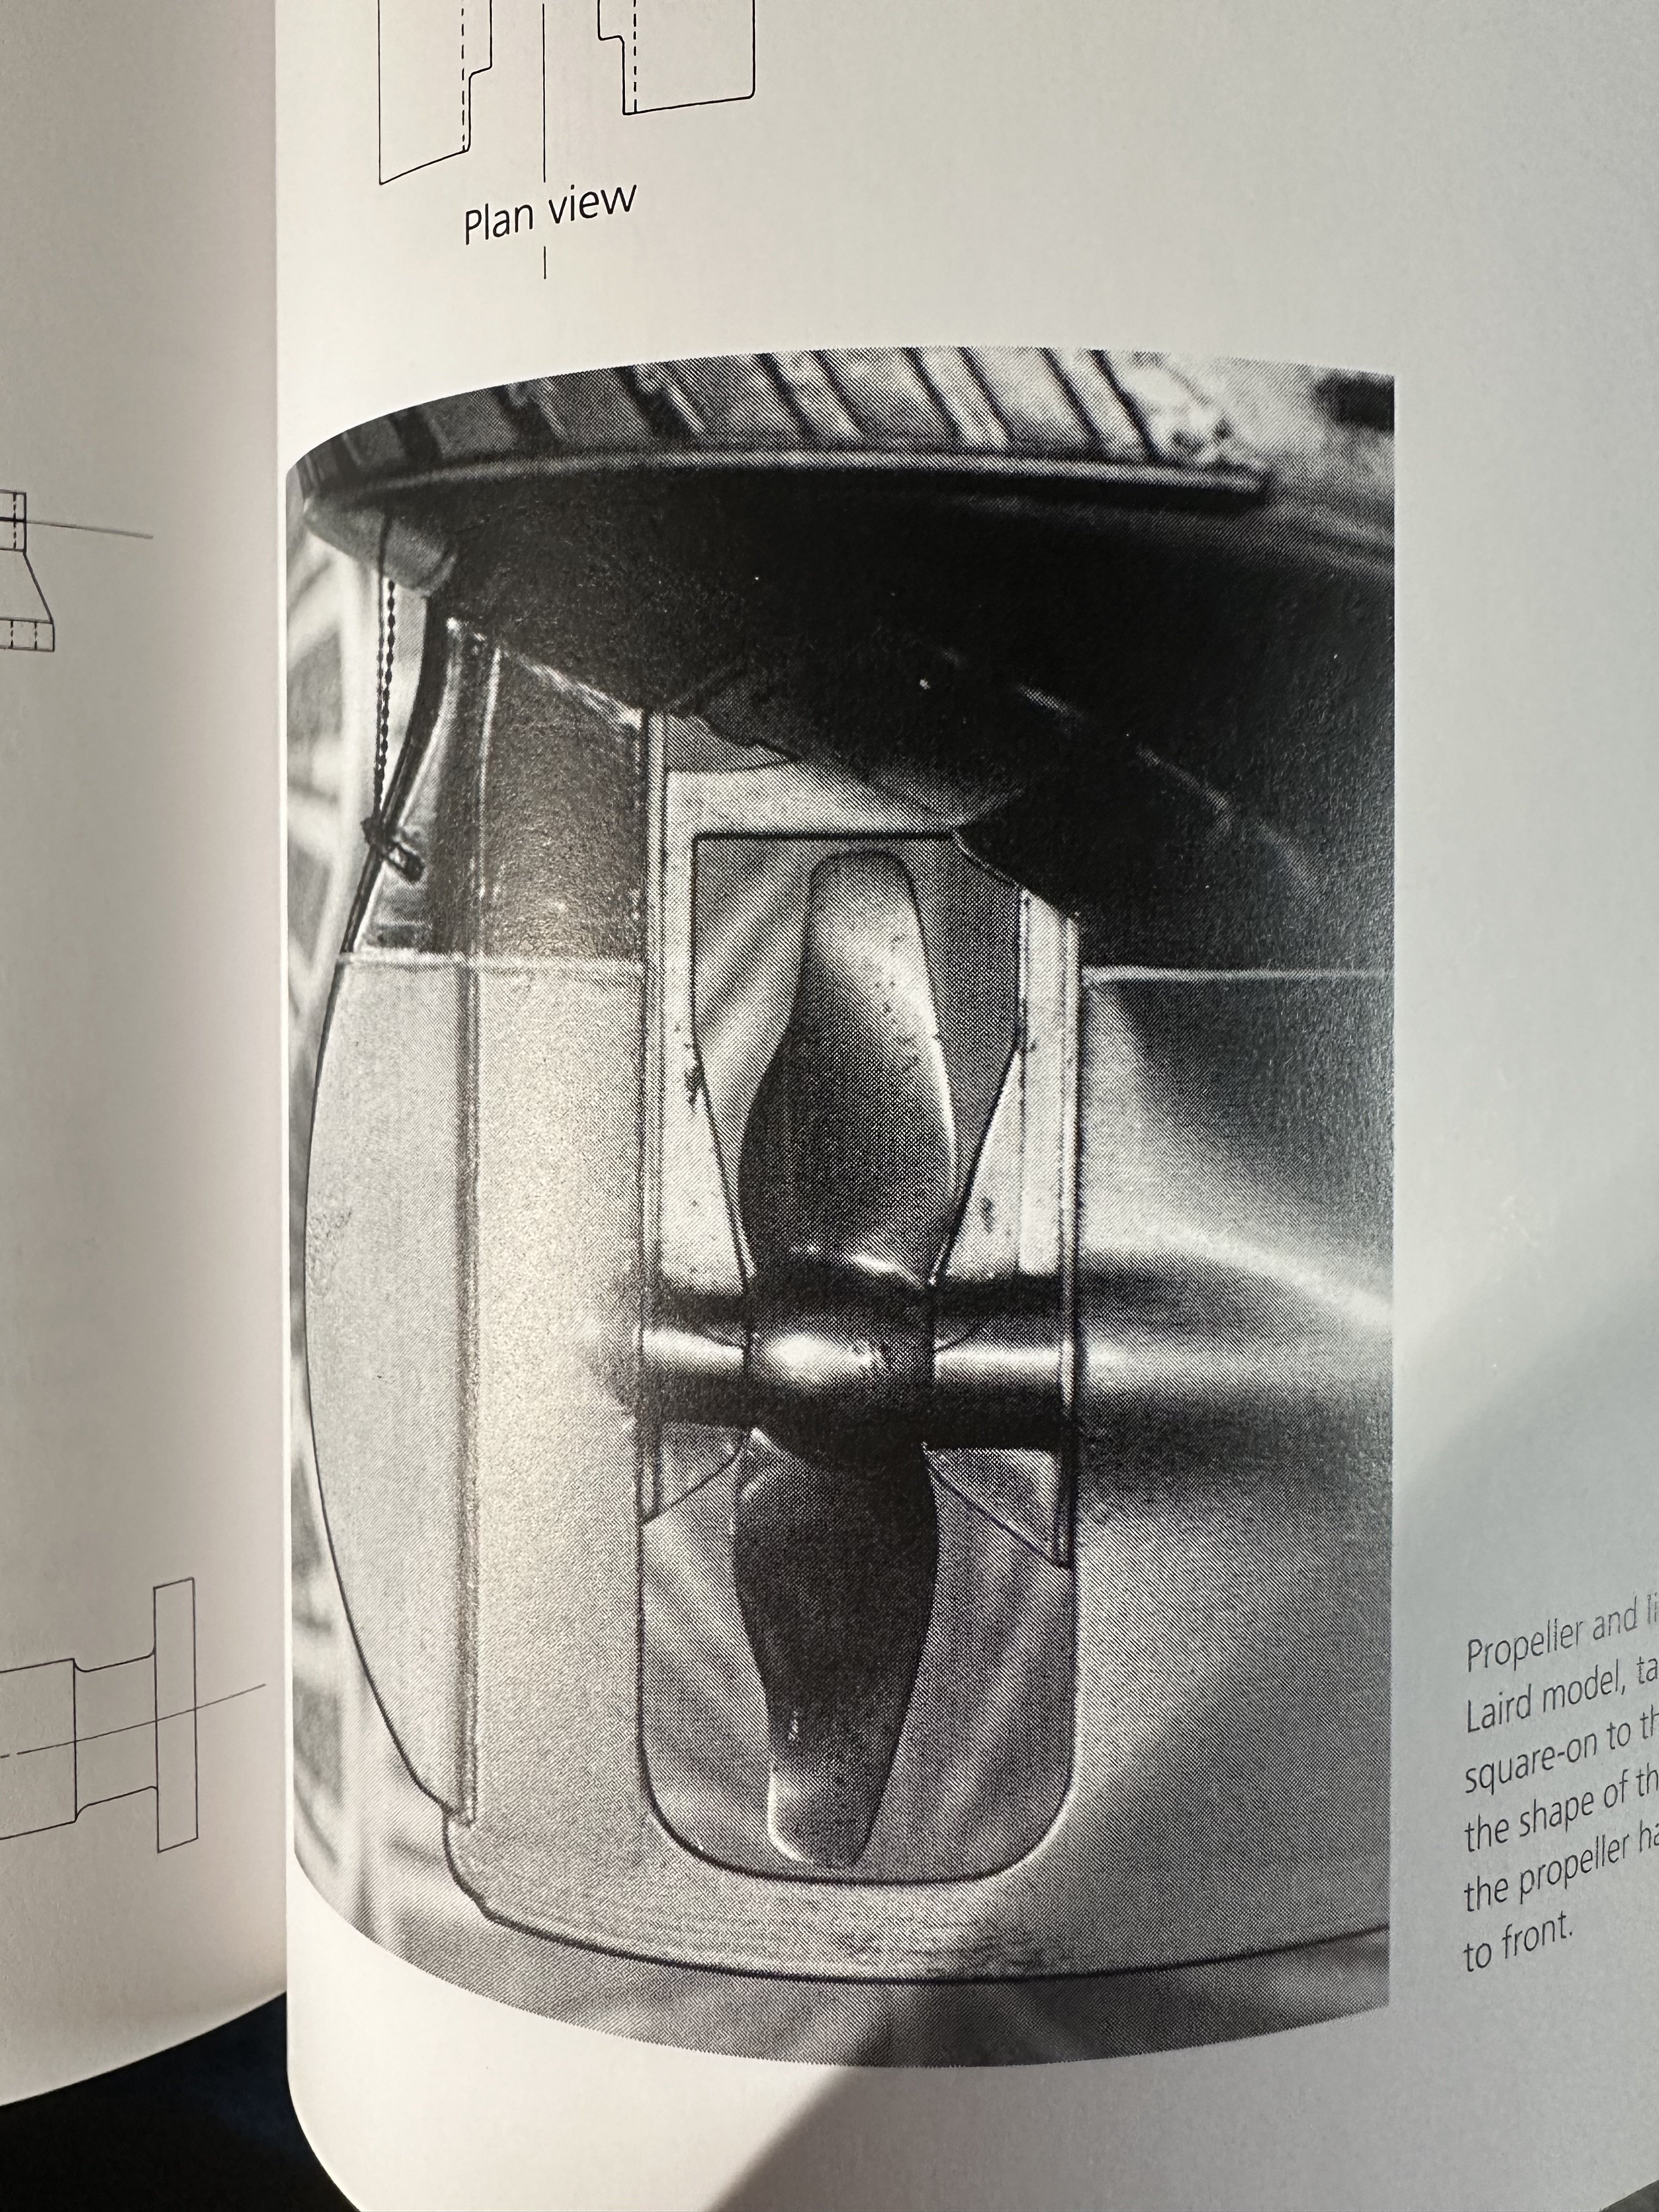
I installed the lifting frame and propeller. using as my guide the Bowcock book, which bases its measurements and drawings on original builders blueprints as well as two models that are also based on those blueprints, one is on display in an art gallery in the town the Alabama was built (Laird Model), the other is on display at the Mariner’s Museum at Newport News (Bolloch Model).
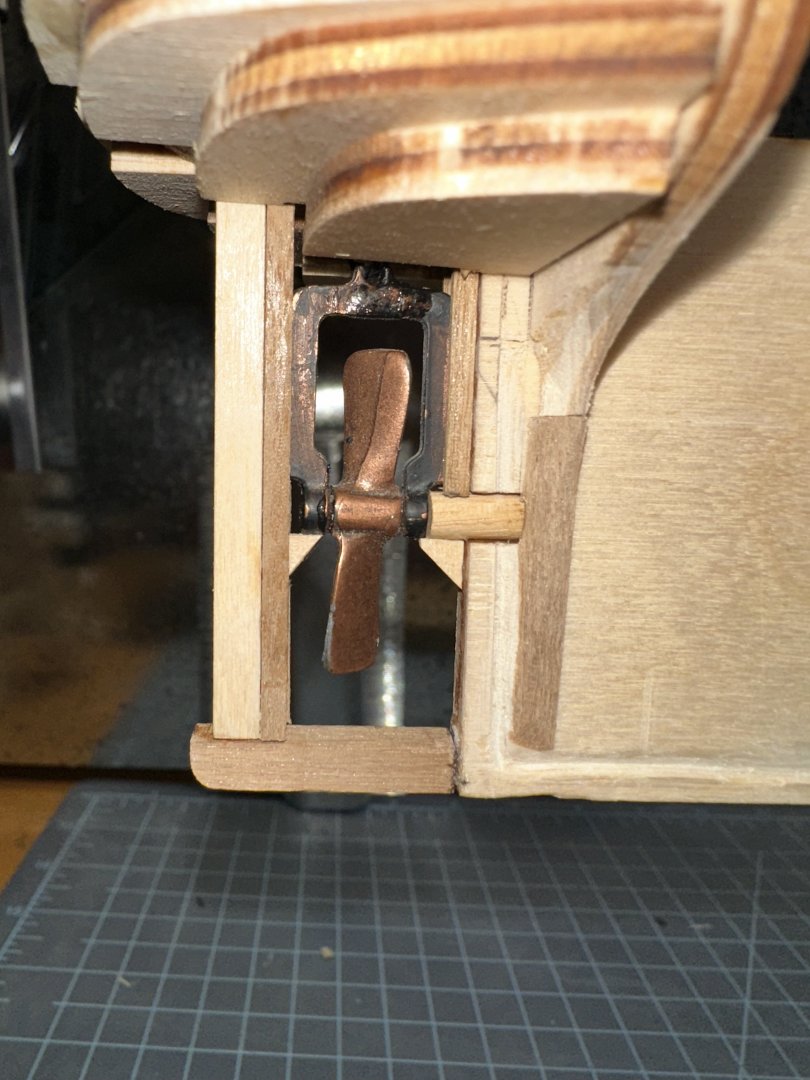

I’ll take the prop out to sand down the aft section around the stern cabin.- Knocklouder, Gregory, ccoyle and 3 others
-
 6
6
-
Re-starting this Mamoli CSS Alabama that I got as a Christmas present in 2009 when I didn’t know squazine about how to build. Then I got some practicums and built their kits and decided to strip my Alabama down to the bulkheads and start over. Duczec Models sent me replacement wood and I finally got done with my previous ship. Now I’m ready to build this one.
A friend from the Model Shipwrights of Ohio loaned me his CSS Alabama: Anatomy of a Confederate Raider (Bowcock) to guide me along.
Let’s see how this turns out. I’ll be adding some pics next.
-
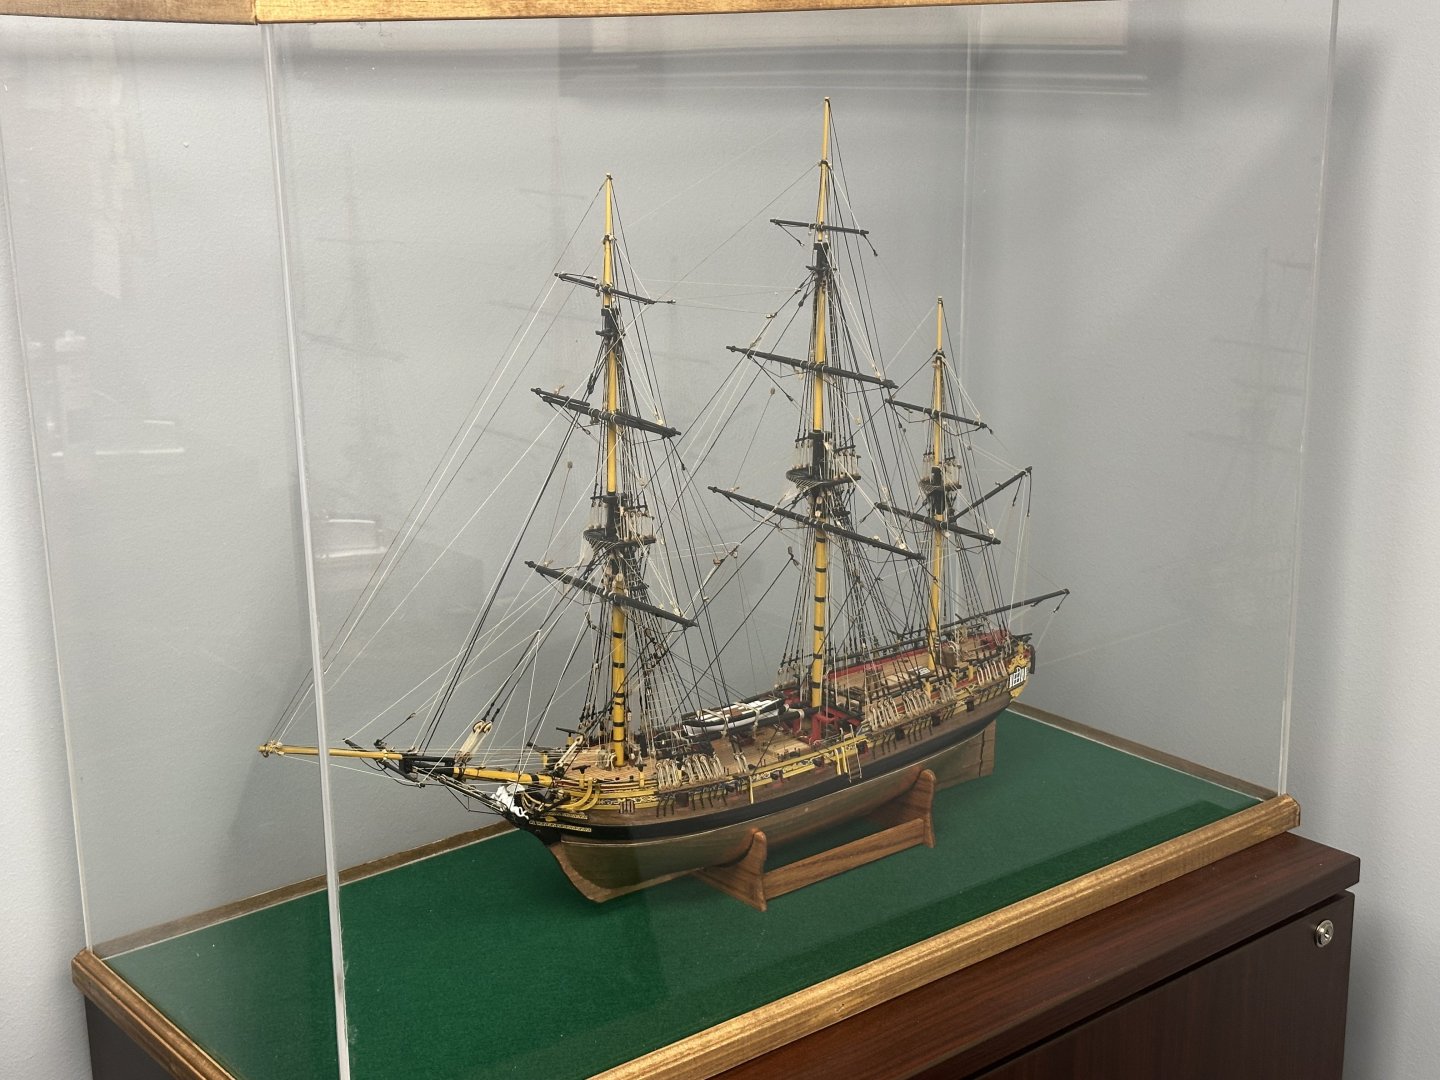
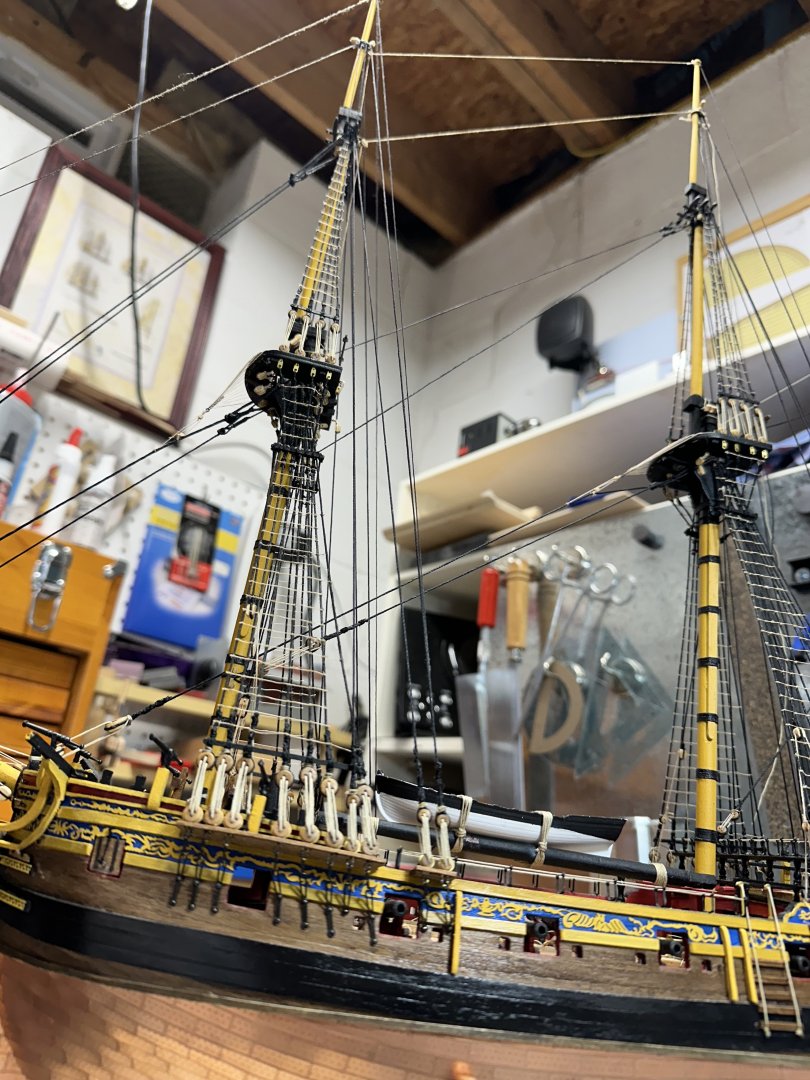
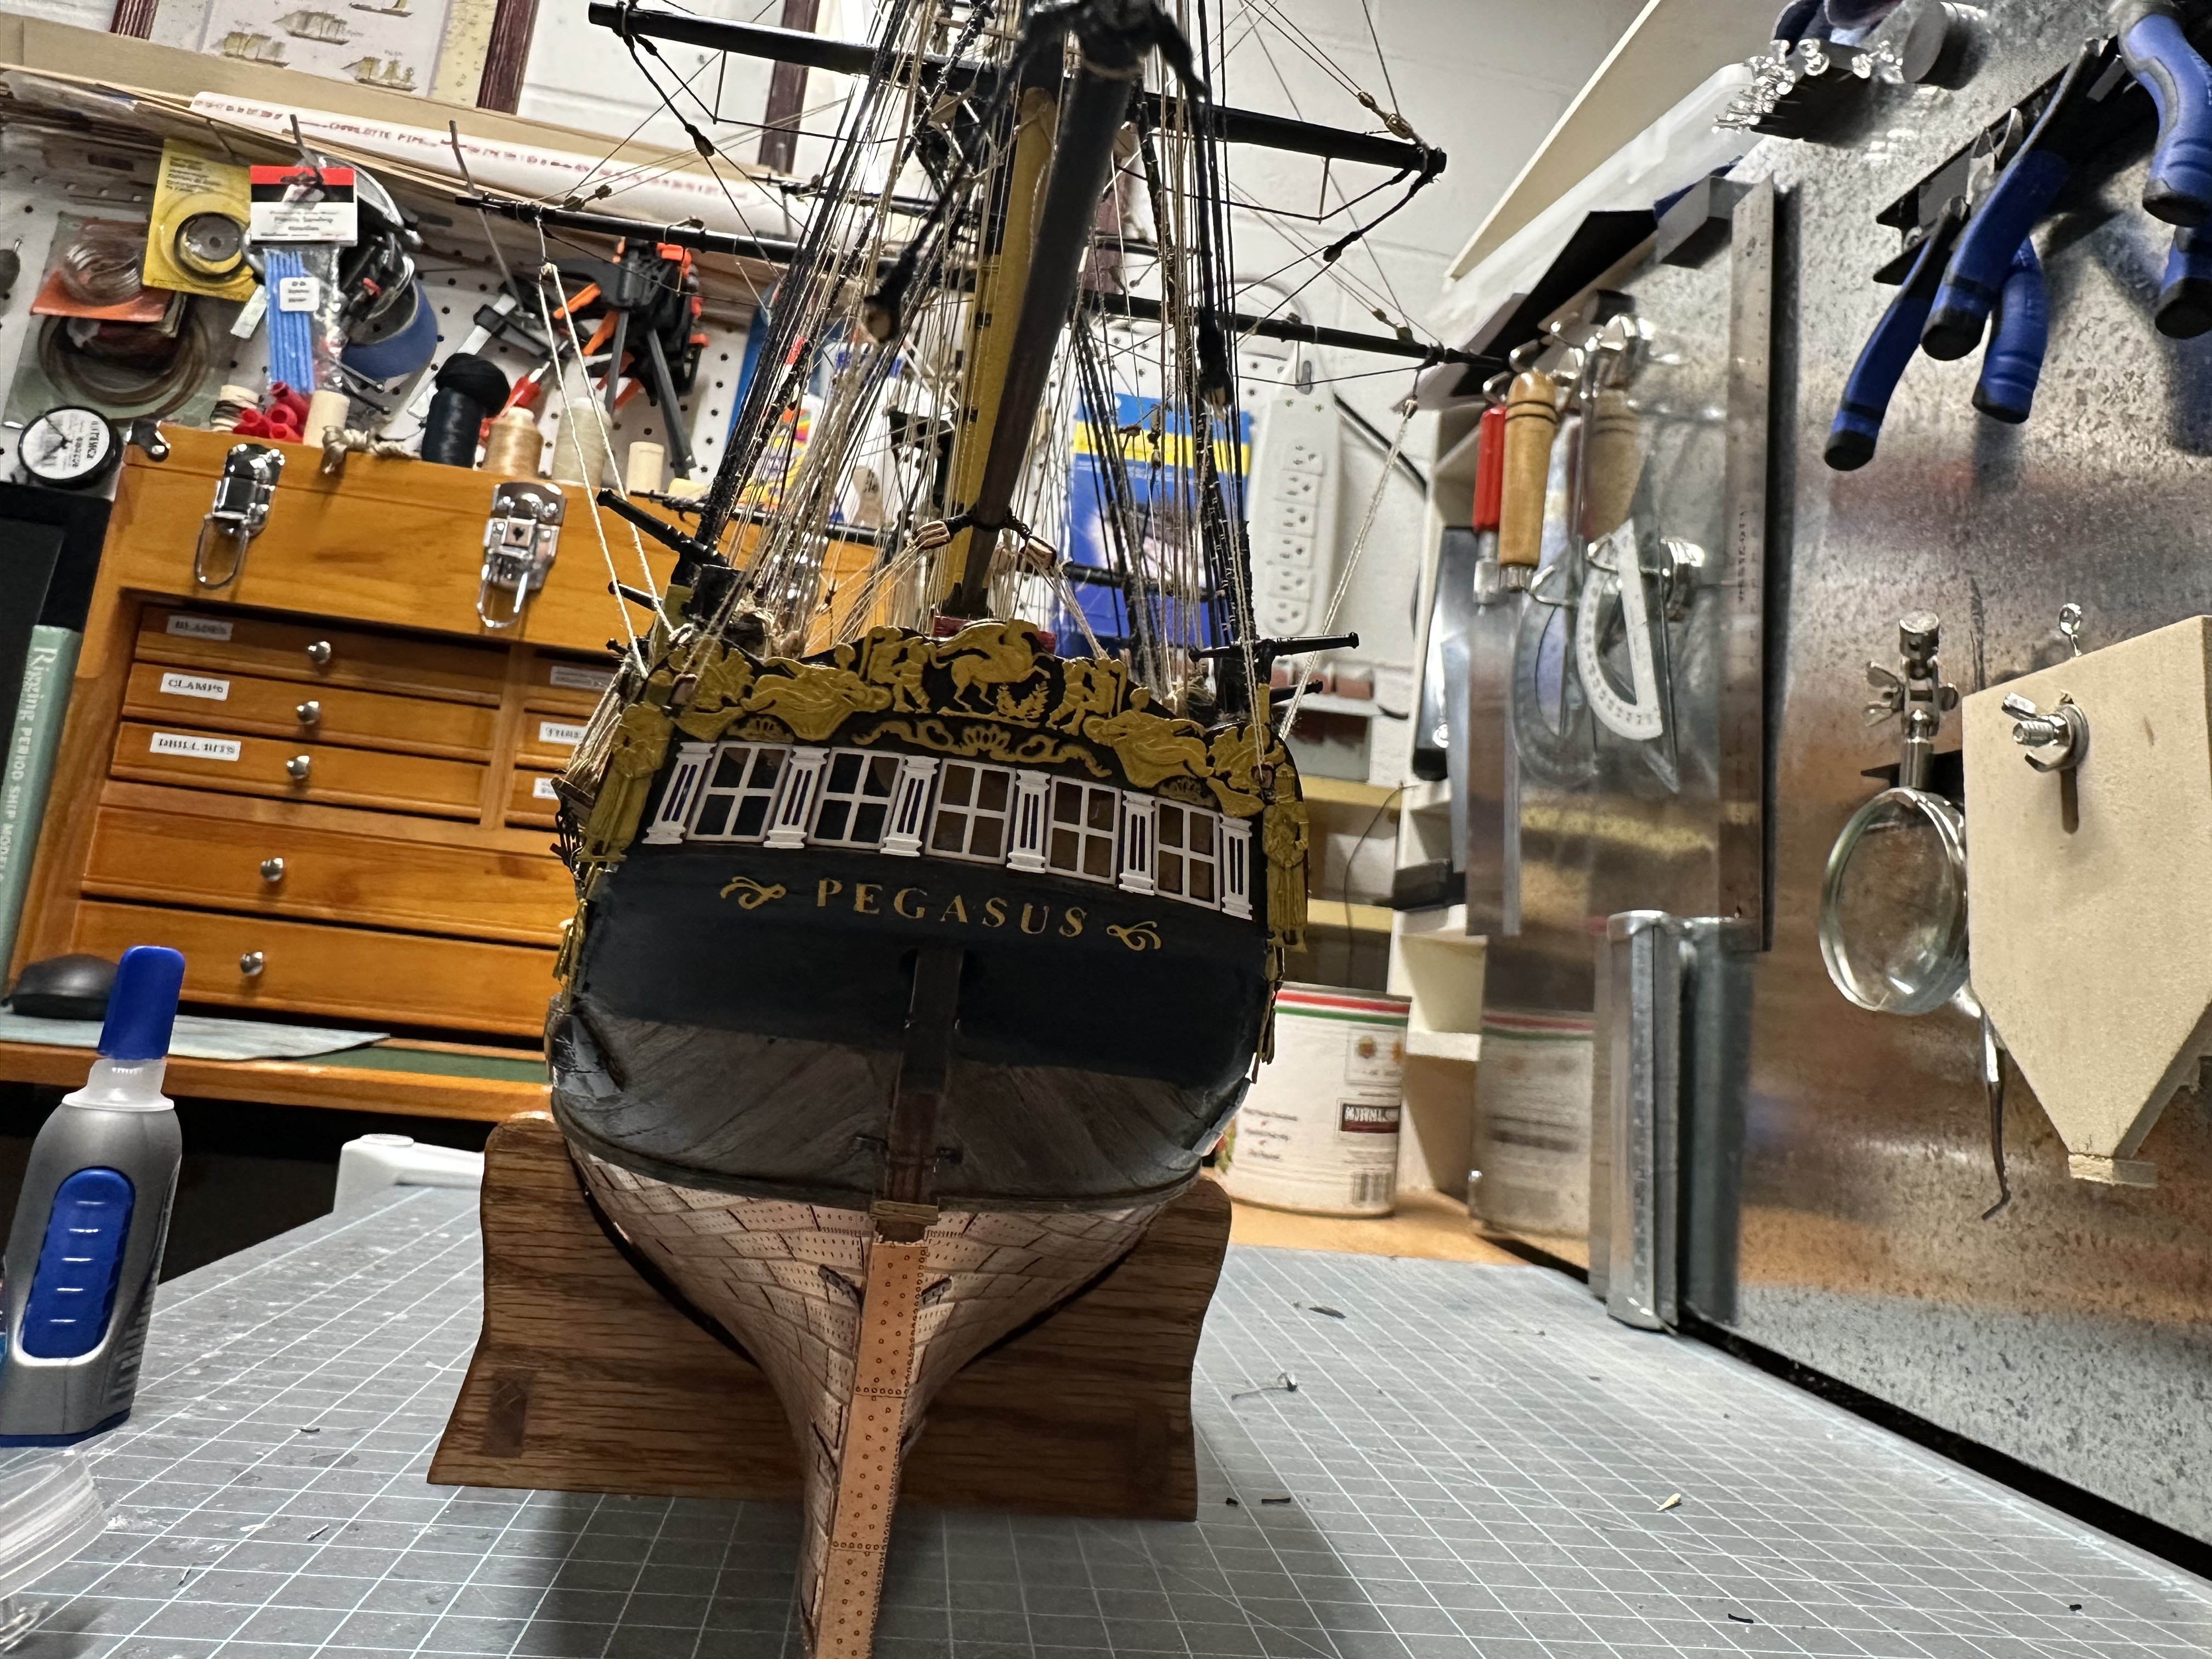
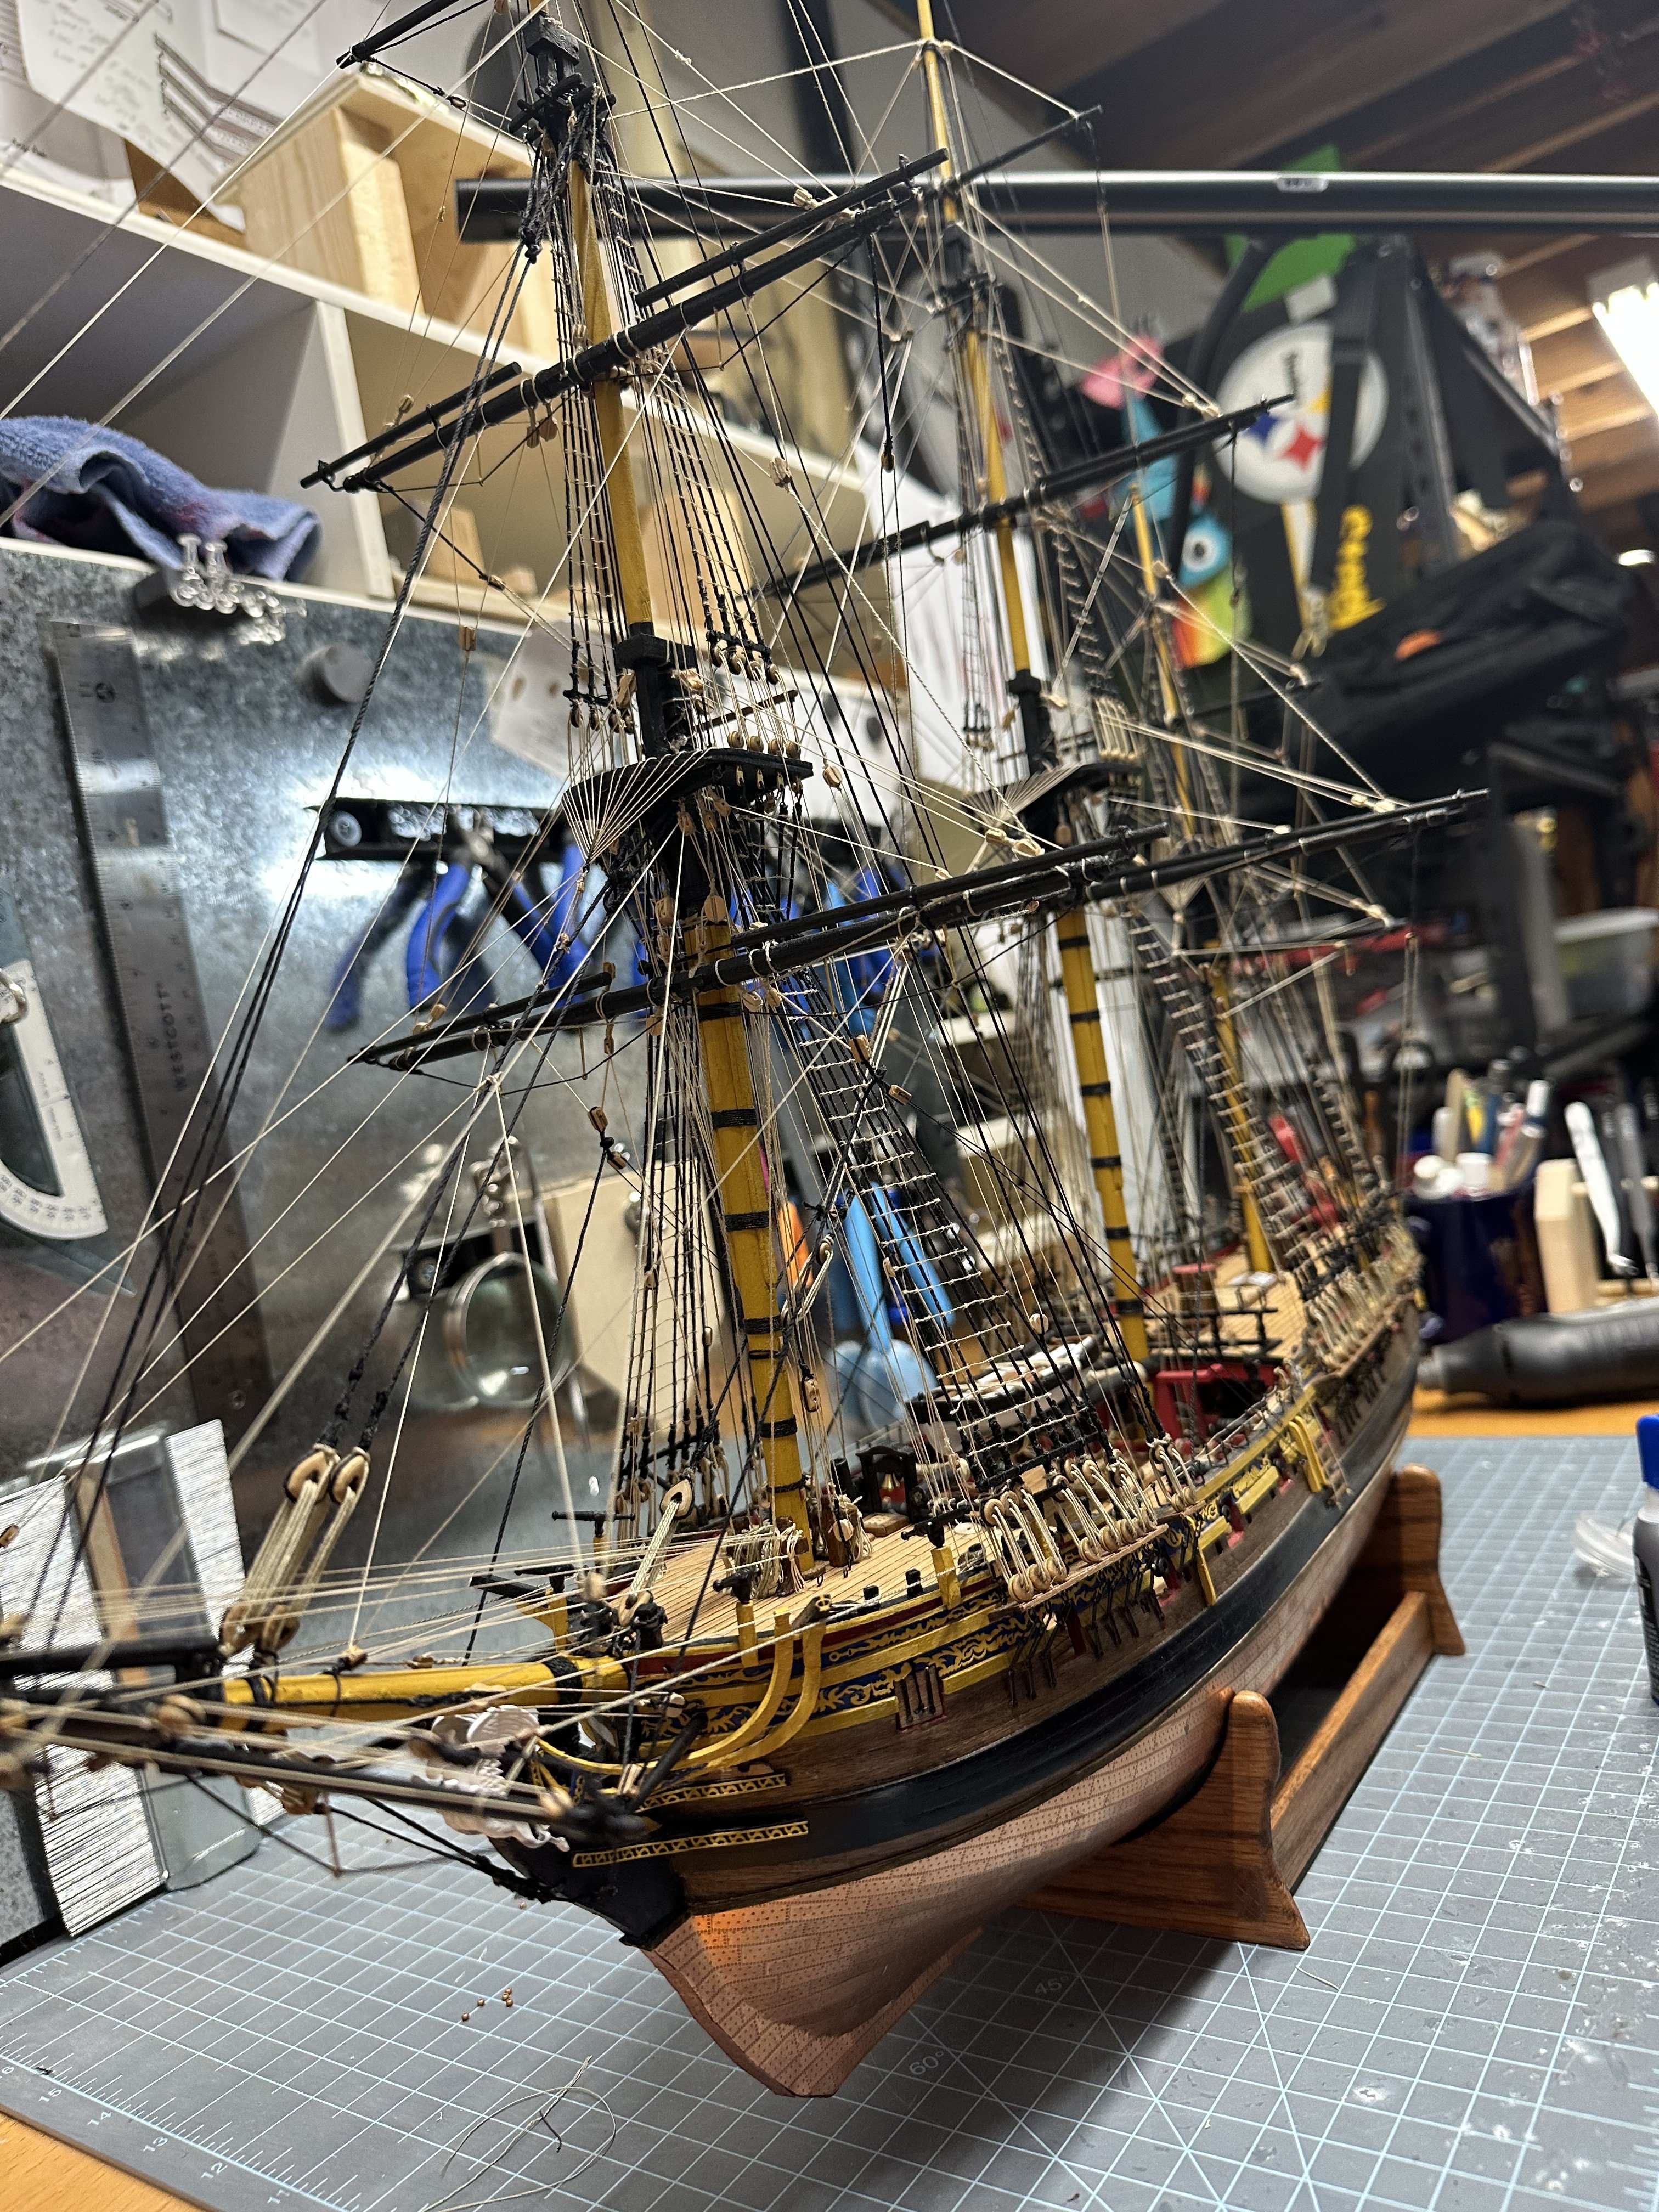
Pegasus is in her place in my office. Love just staring at it.

- Knocklouder, vossiewulf, Moonbug and 5 others
-
7
-
 1
1
-
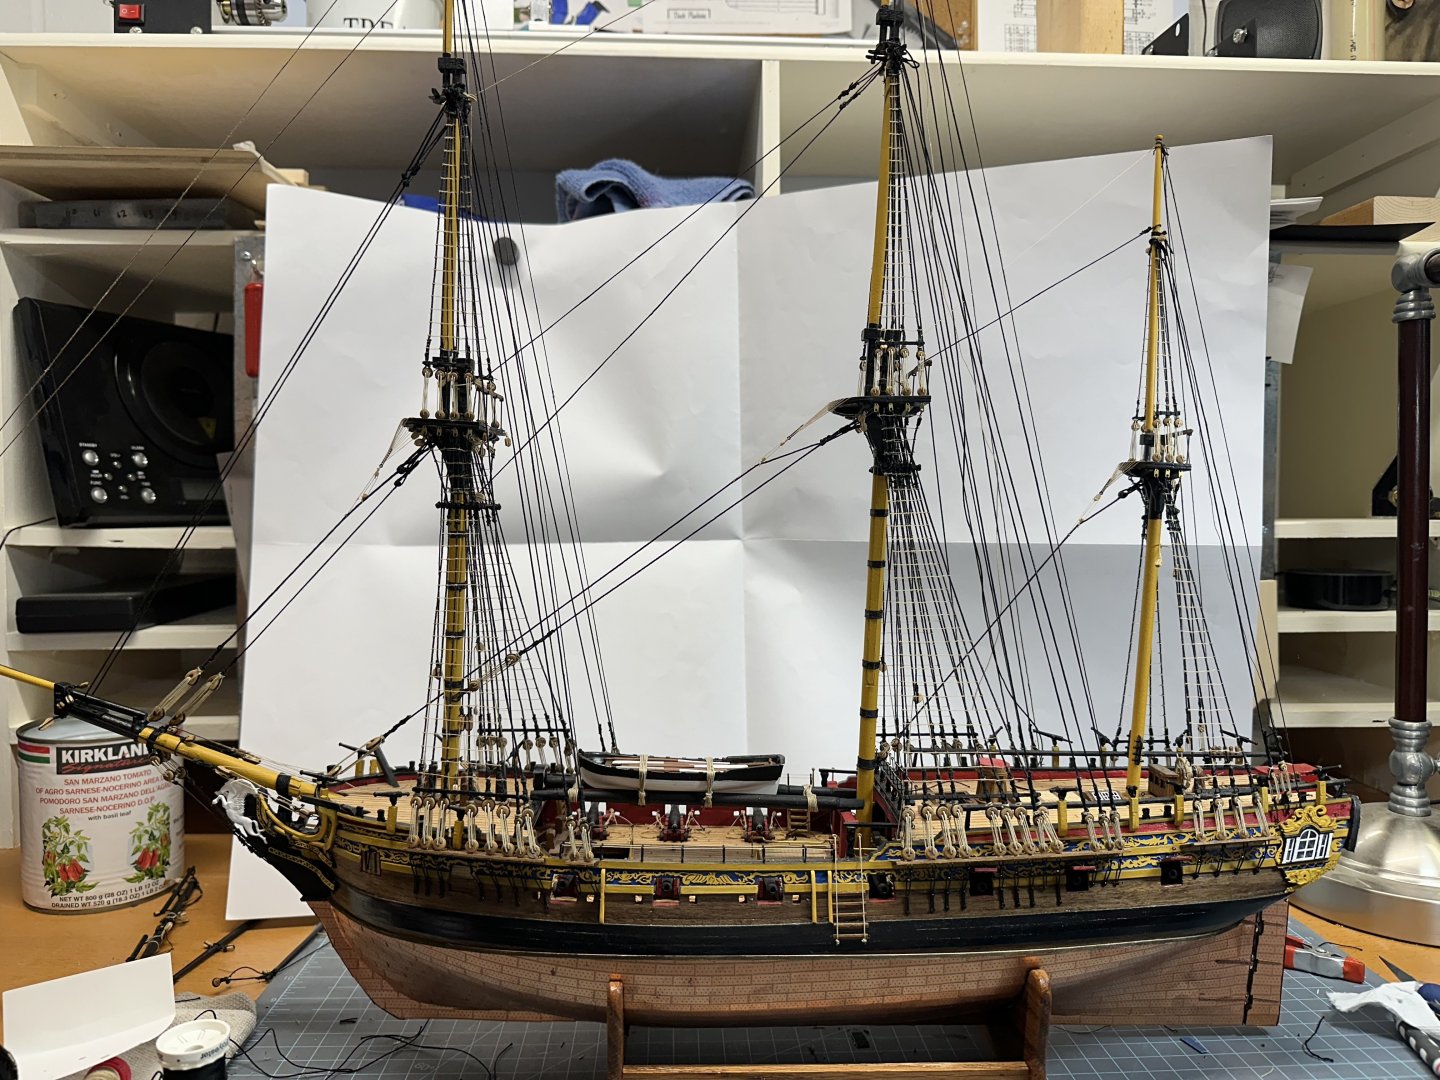
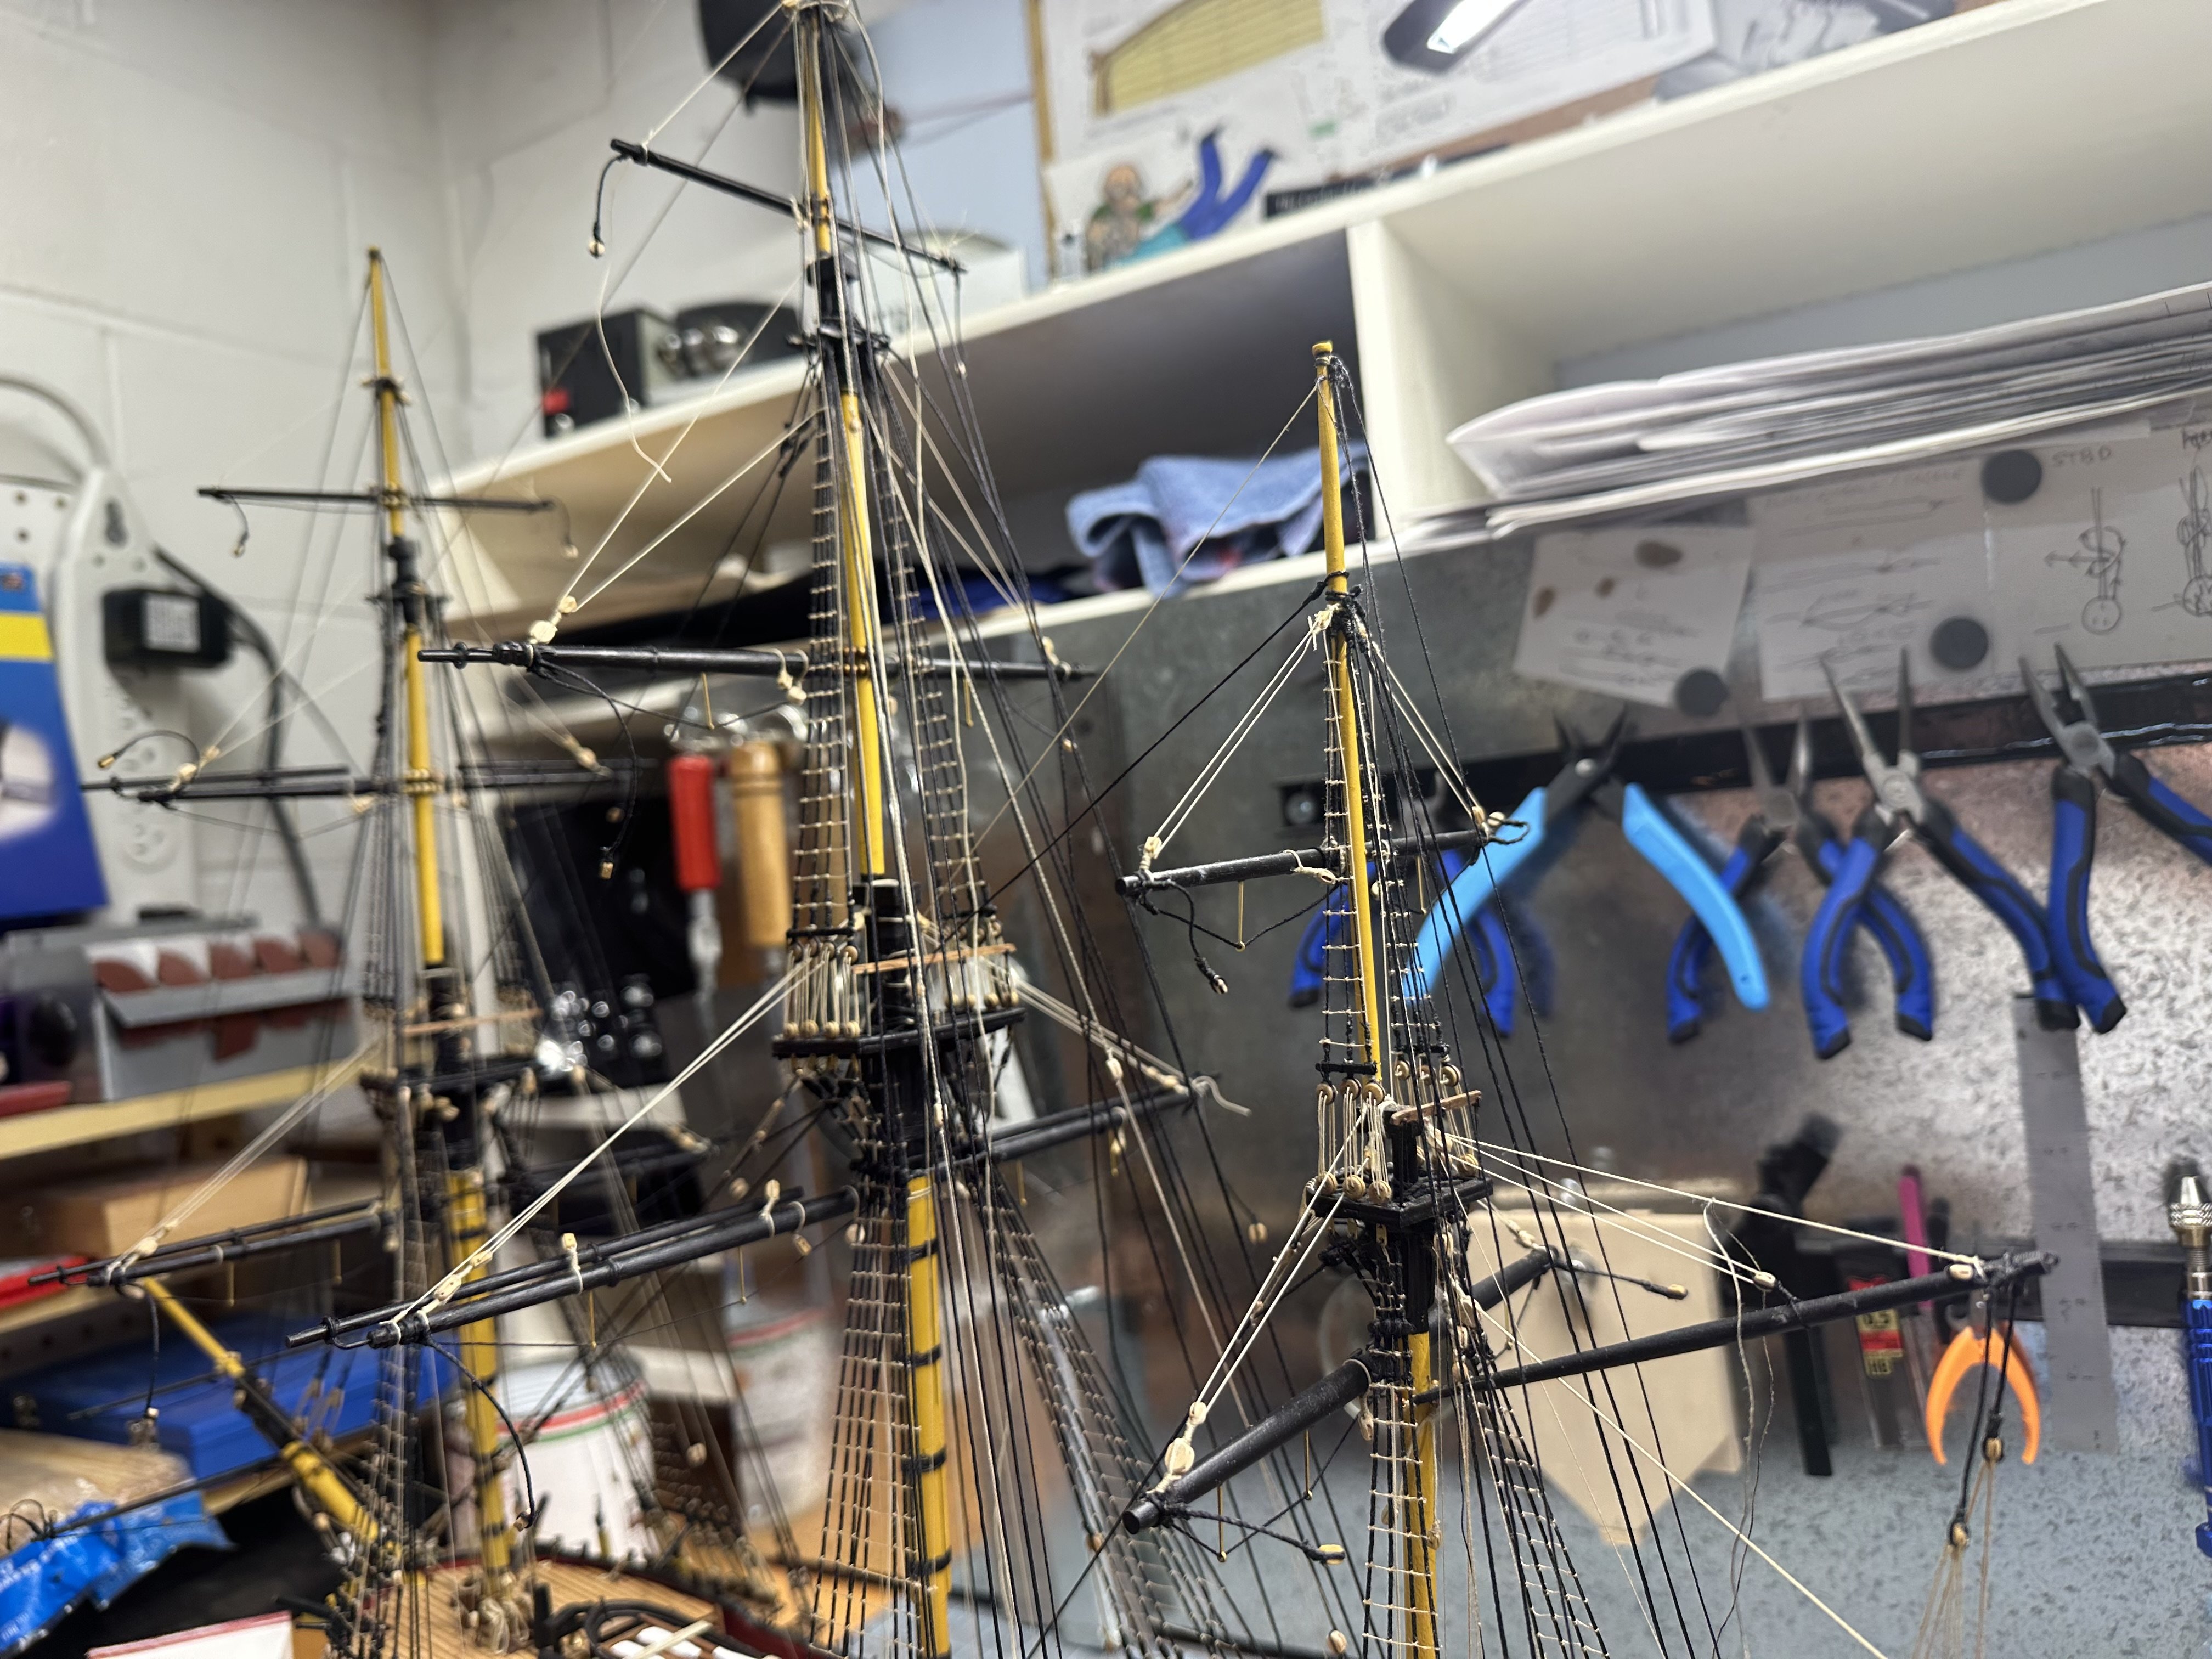
She’s finished. Thank God for Christmas vacation time! Logged hours: 678h over a 4 year period. The rigging took the lion share of the time overall. What a project. I’m sticking to single masted jobs for a while. Sheesh.

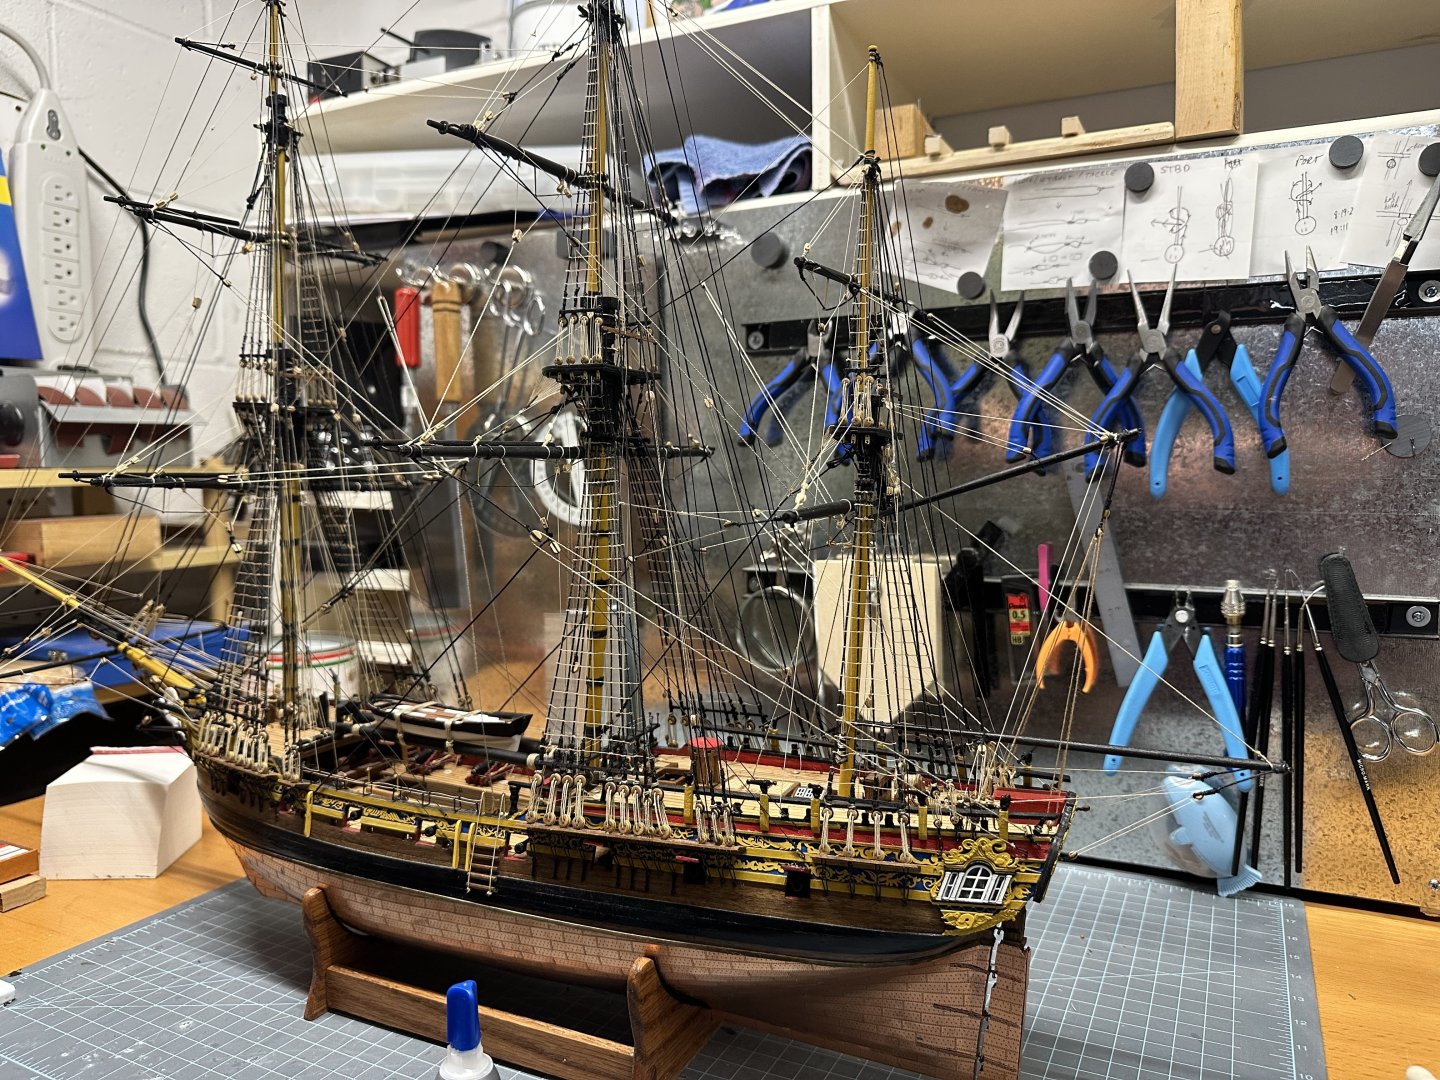

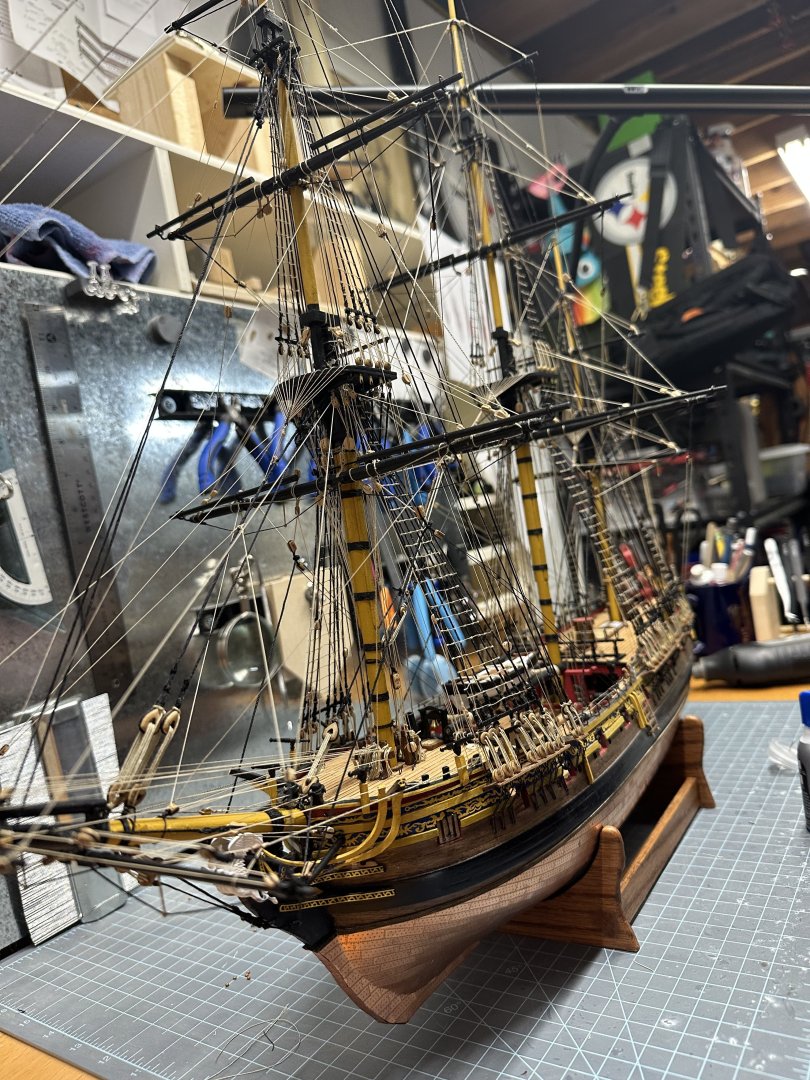
Next up is the case. I’m going acrylic. I made my one and only glass one last year and said no more.
- vossiewulf, KARAVOKIRIS, SiriusVoyager and 4 others
-
3
-
4
-
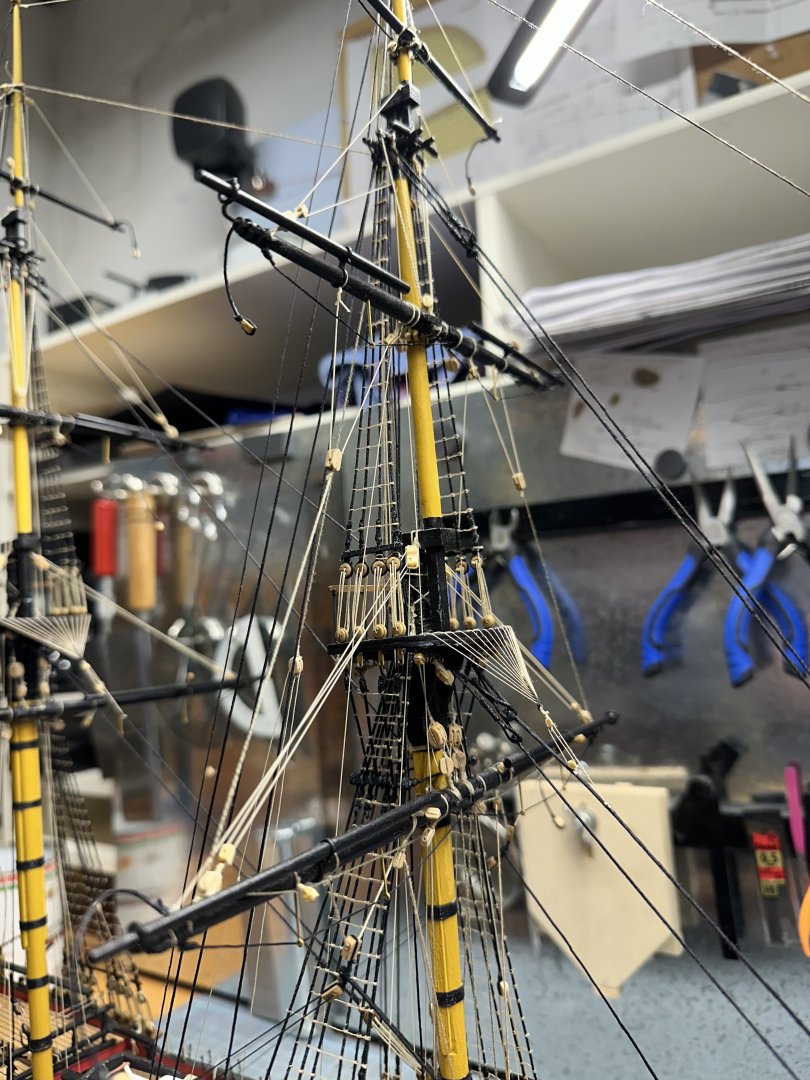
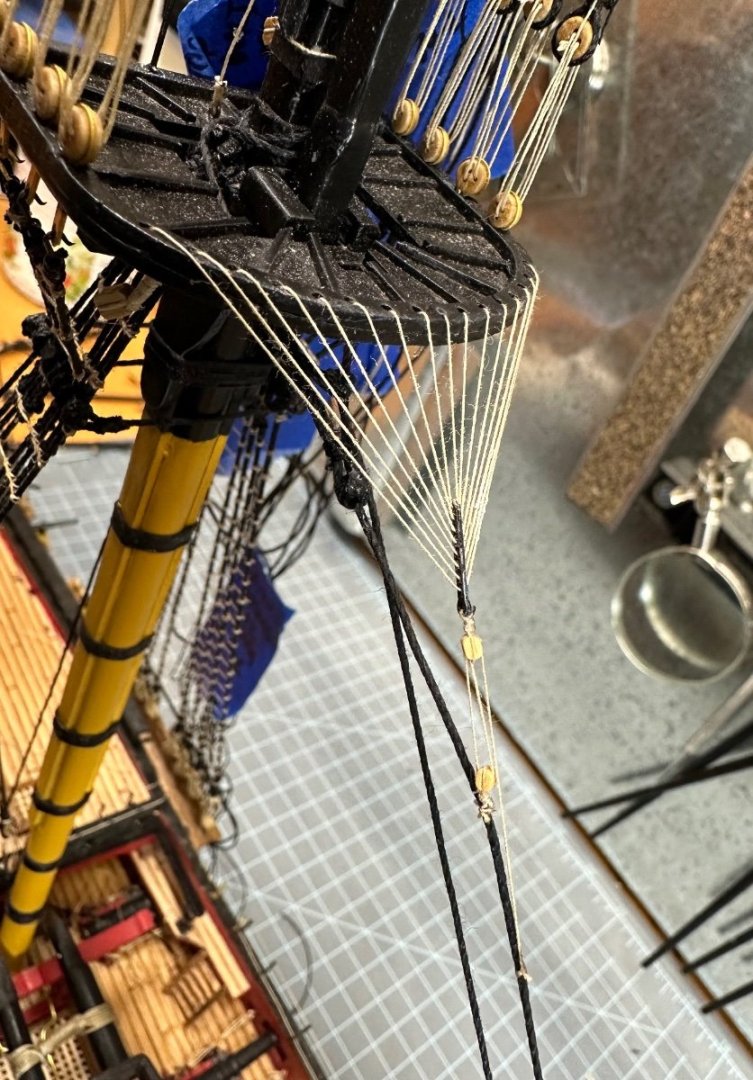
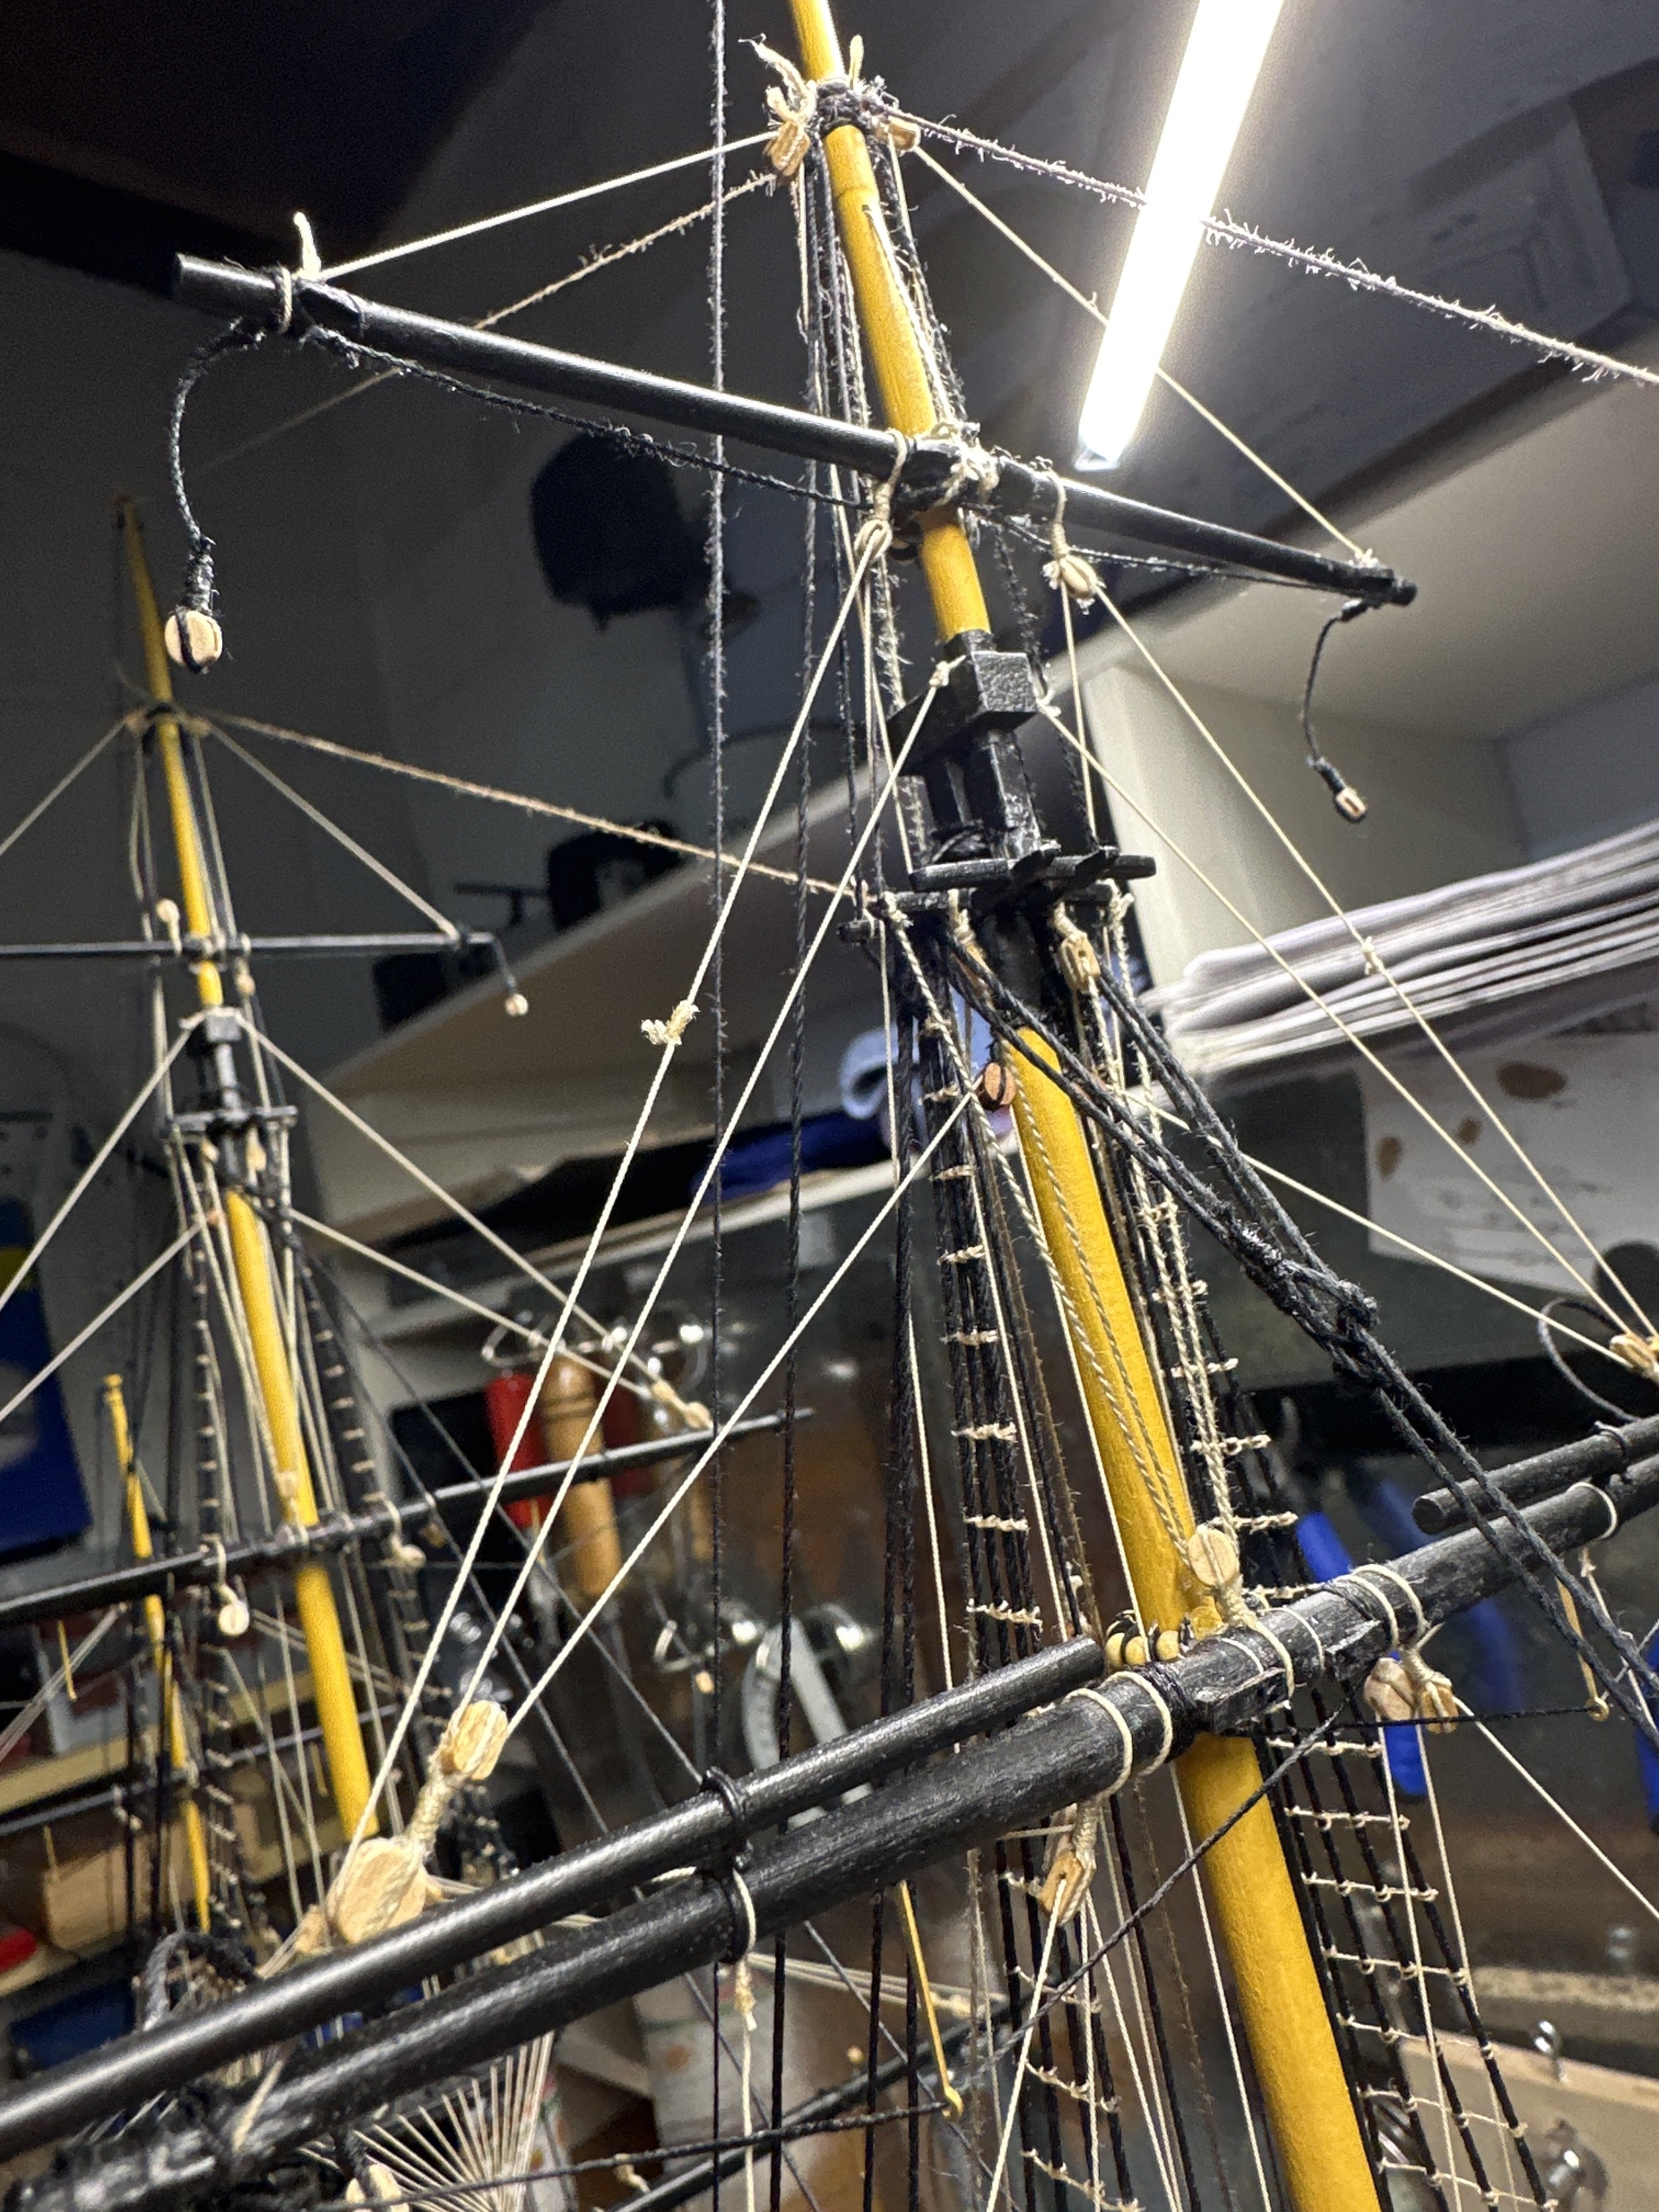
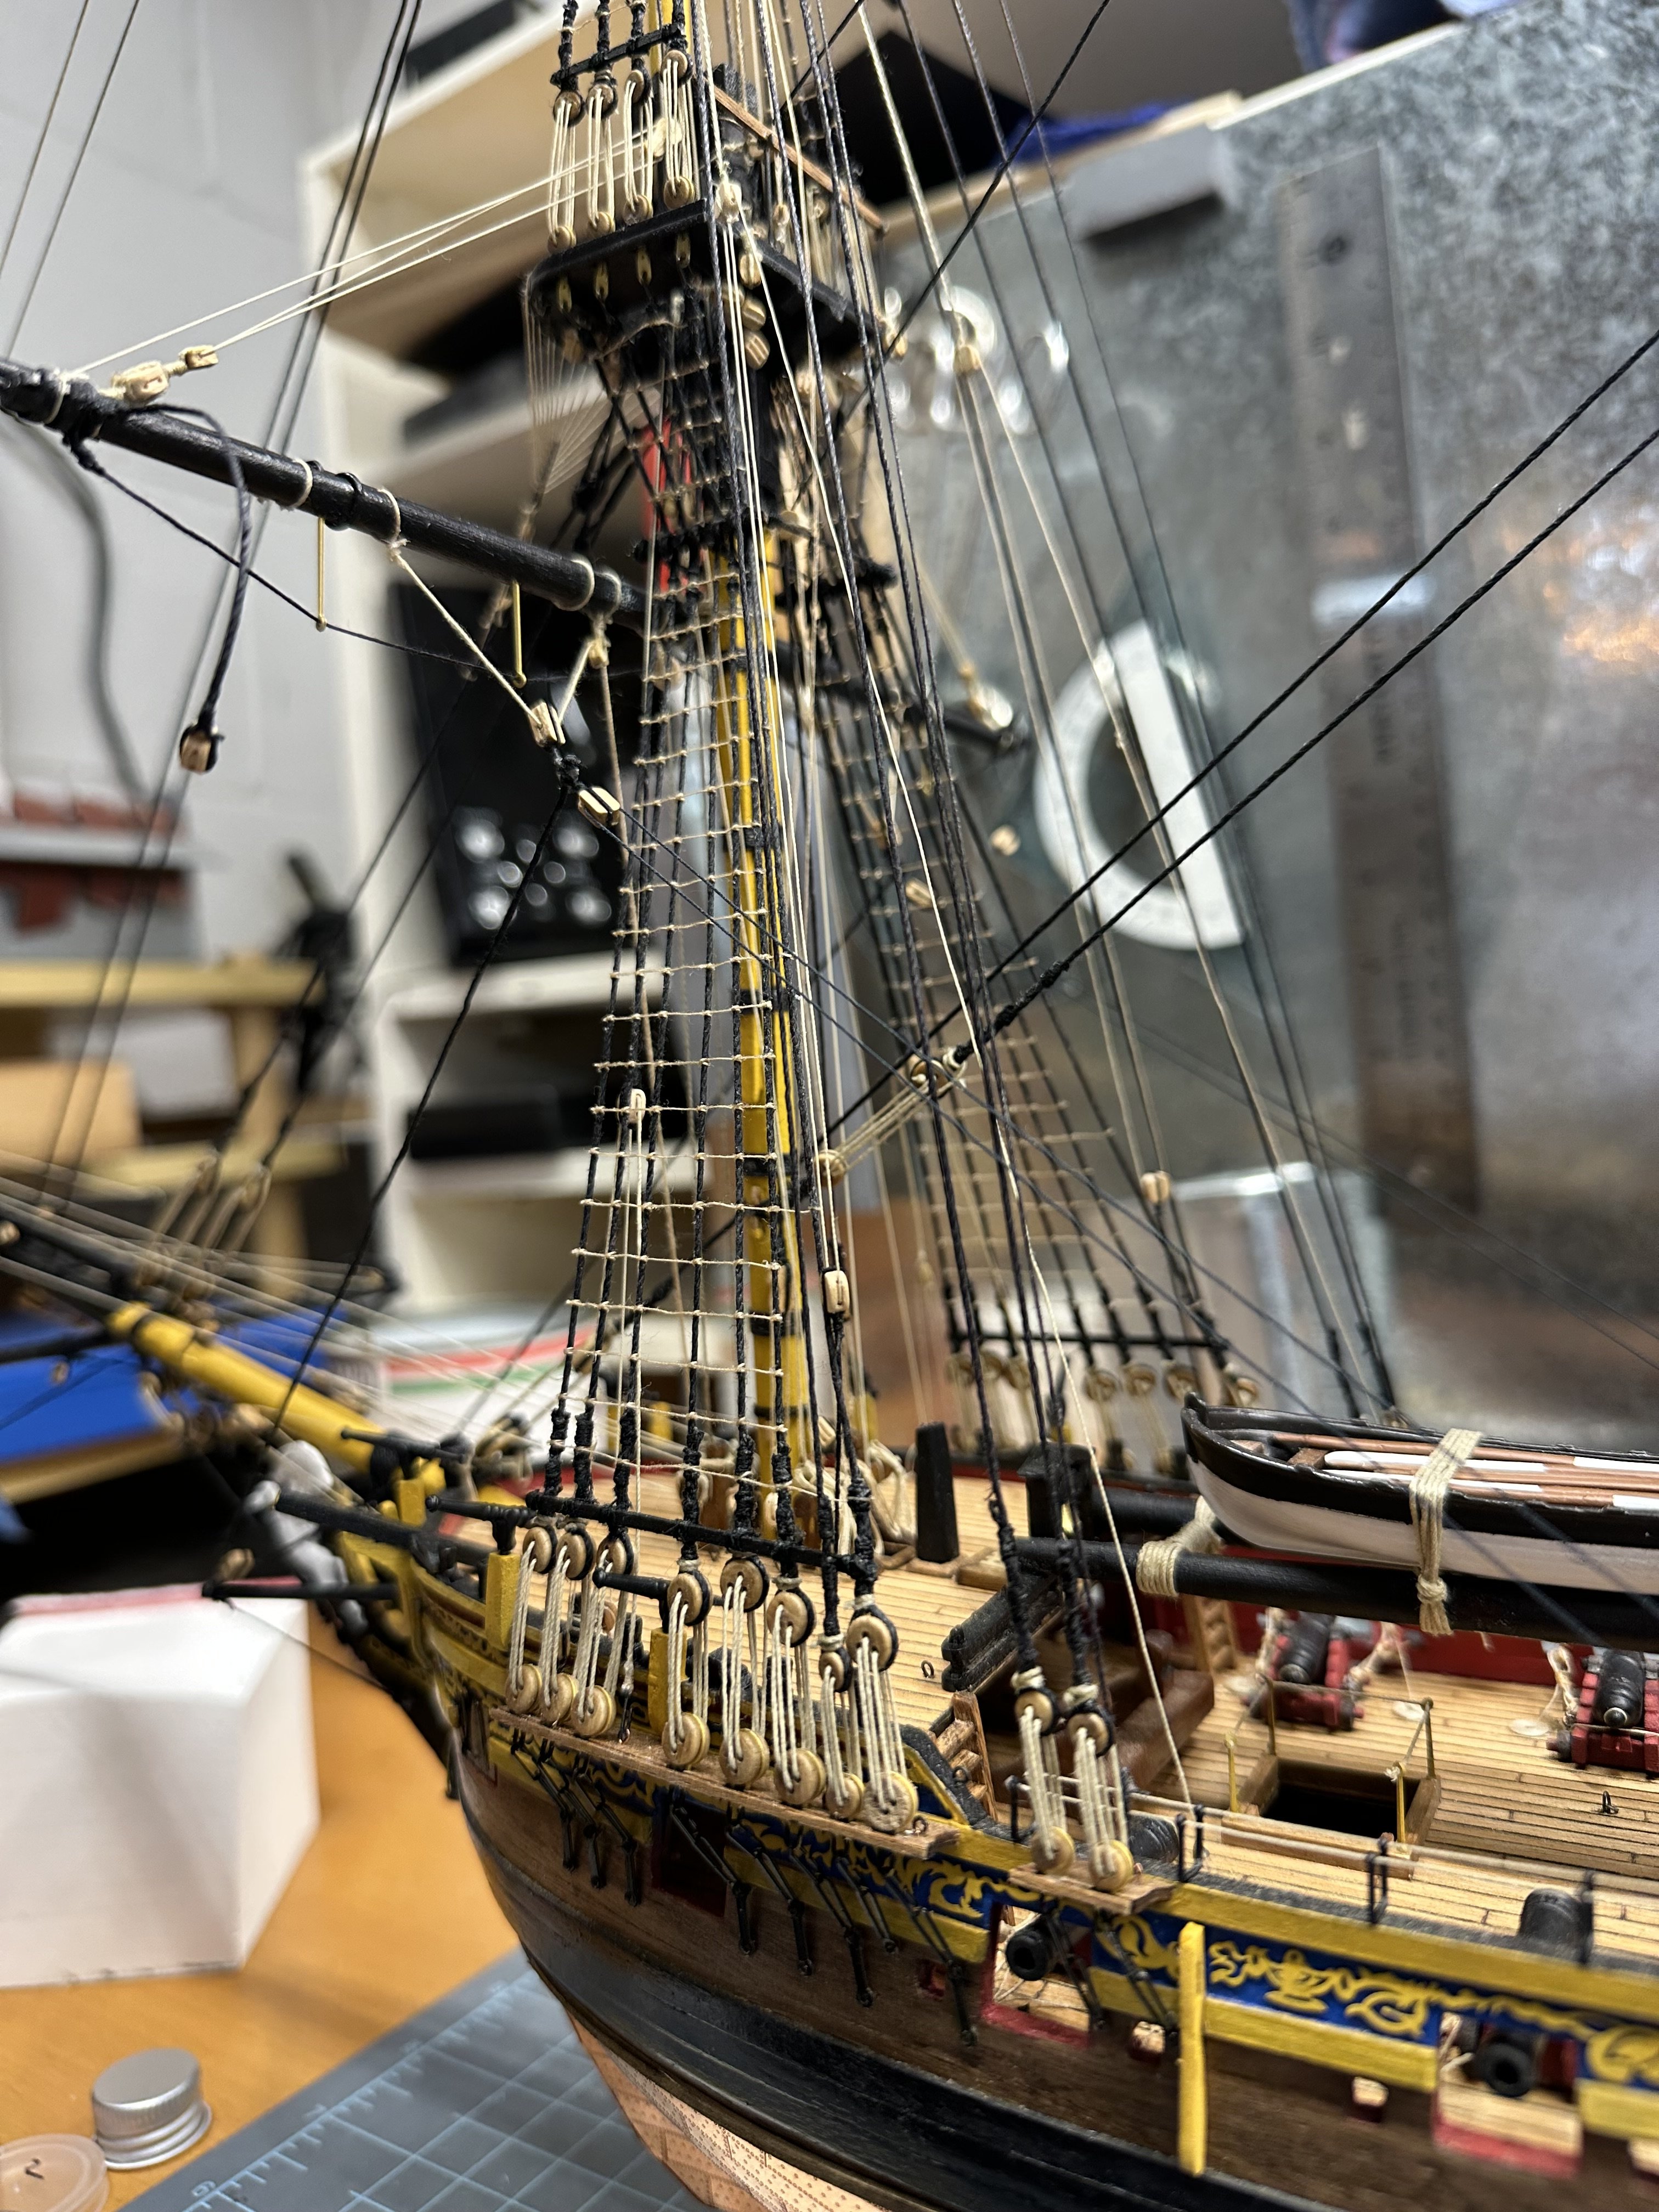
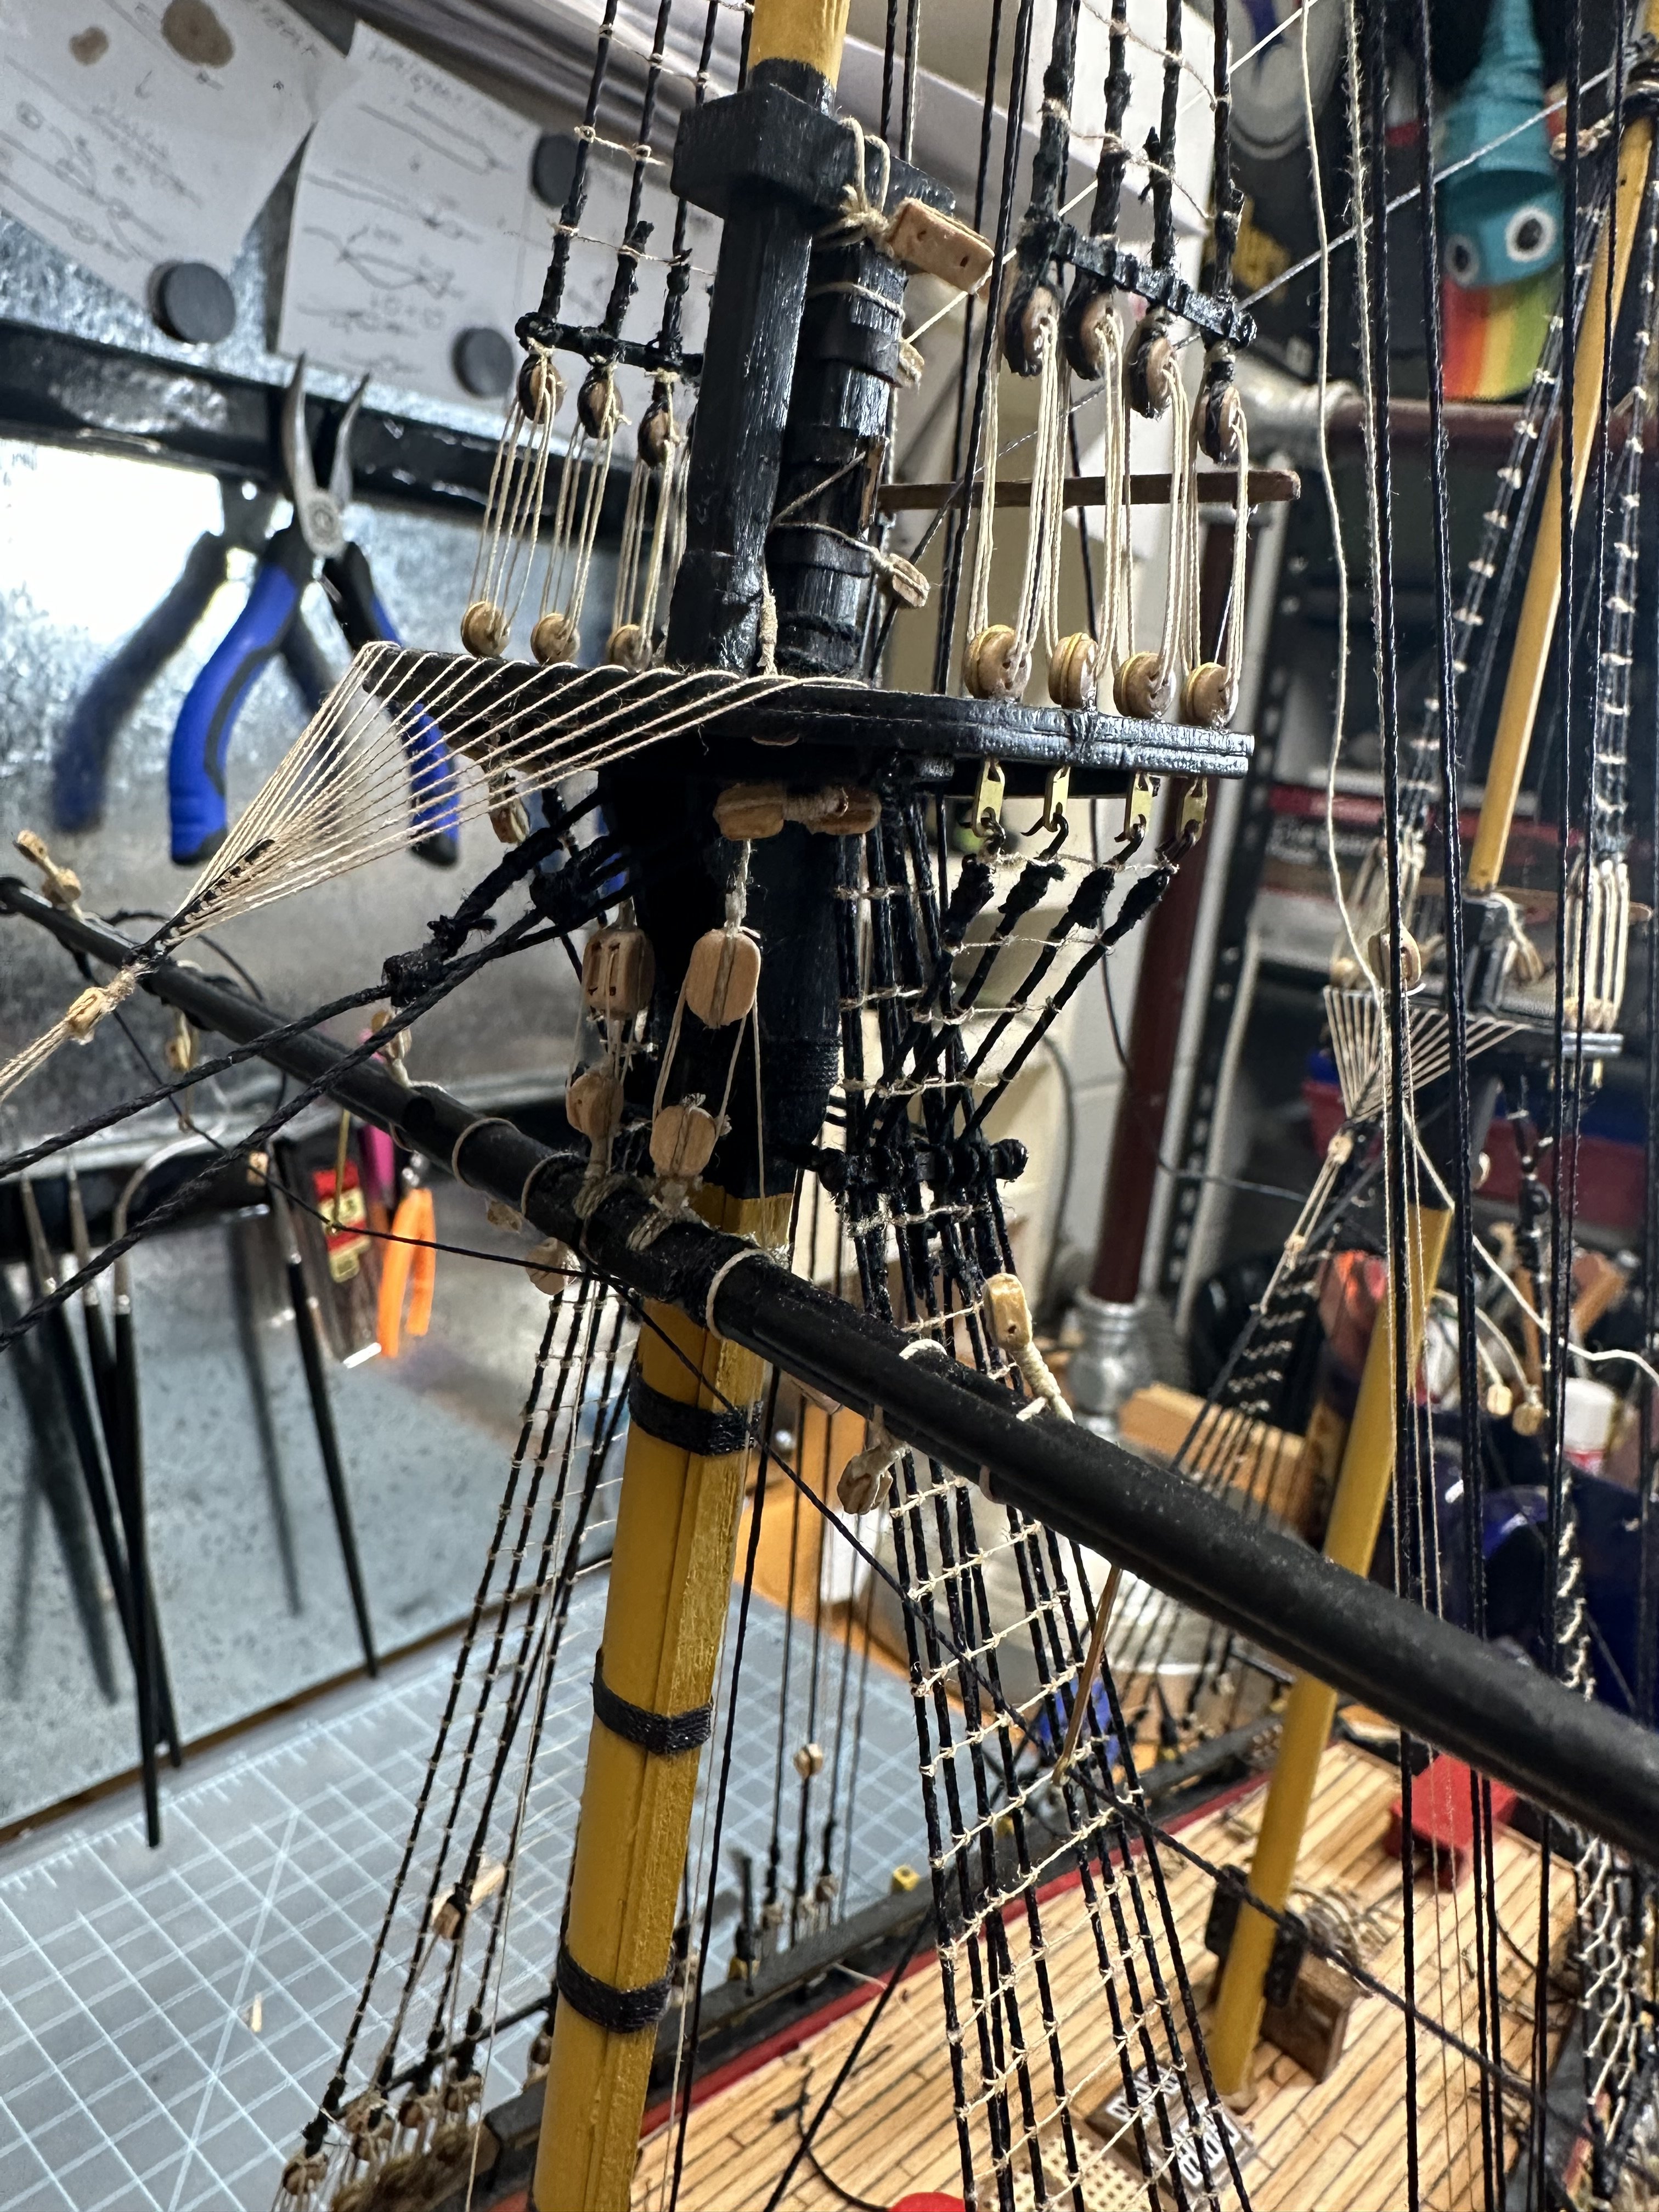
More eye candy. Foremast buntlines.

and more of the weird knots in the middle of the line.

like the tack knot. I seized the top line and grabbed the knotted end of the lower line.


more progress pics
- KARAVOKIRIS and Knocklouder
-
2
-
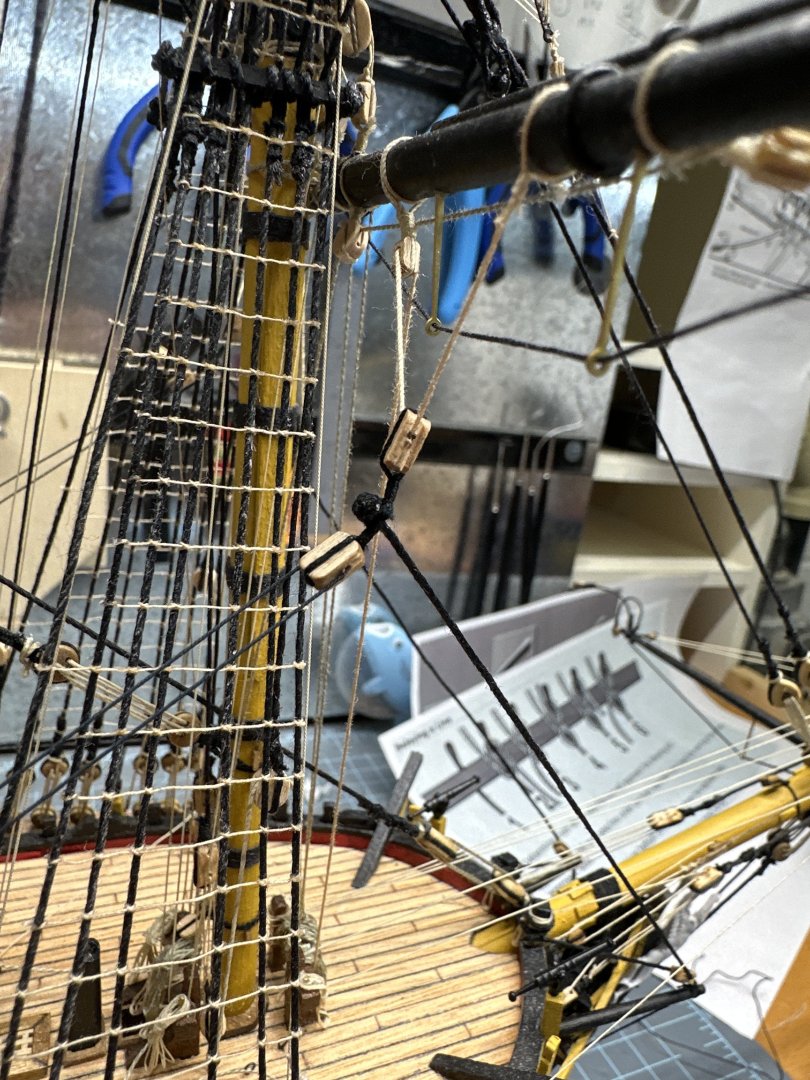
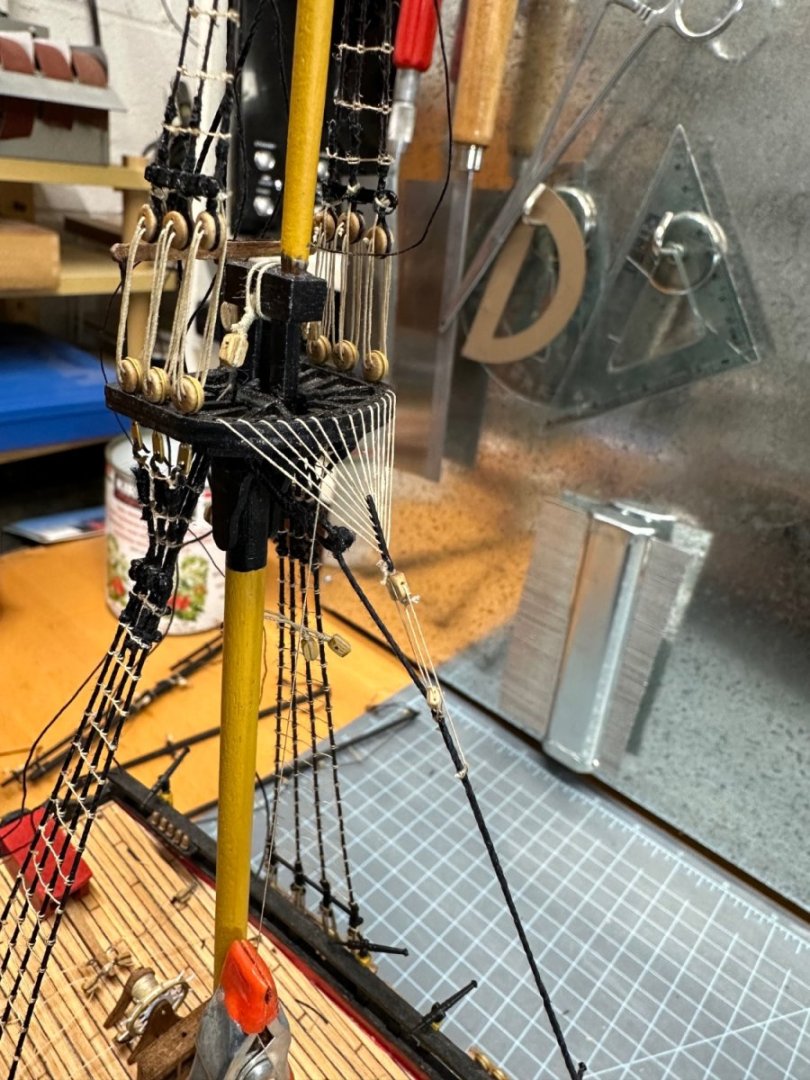
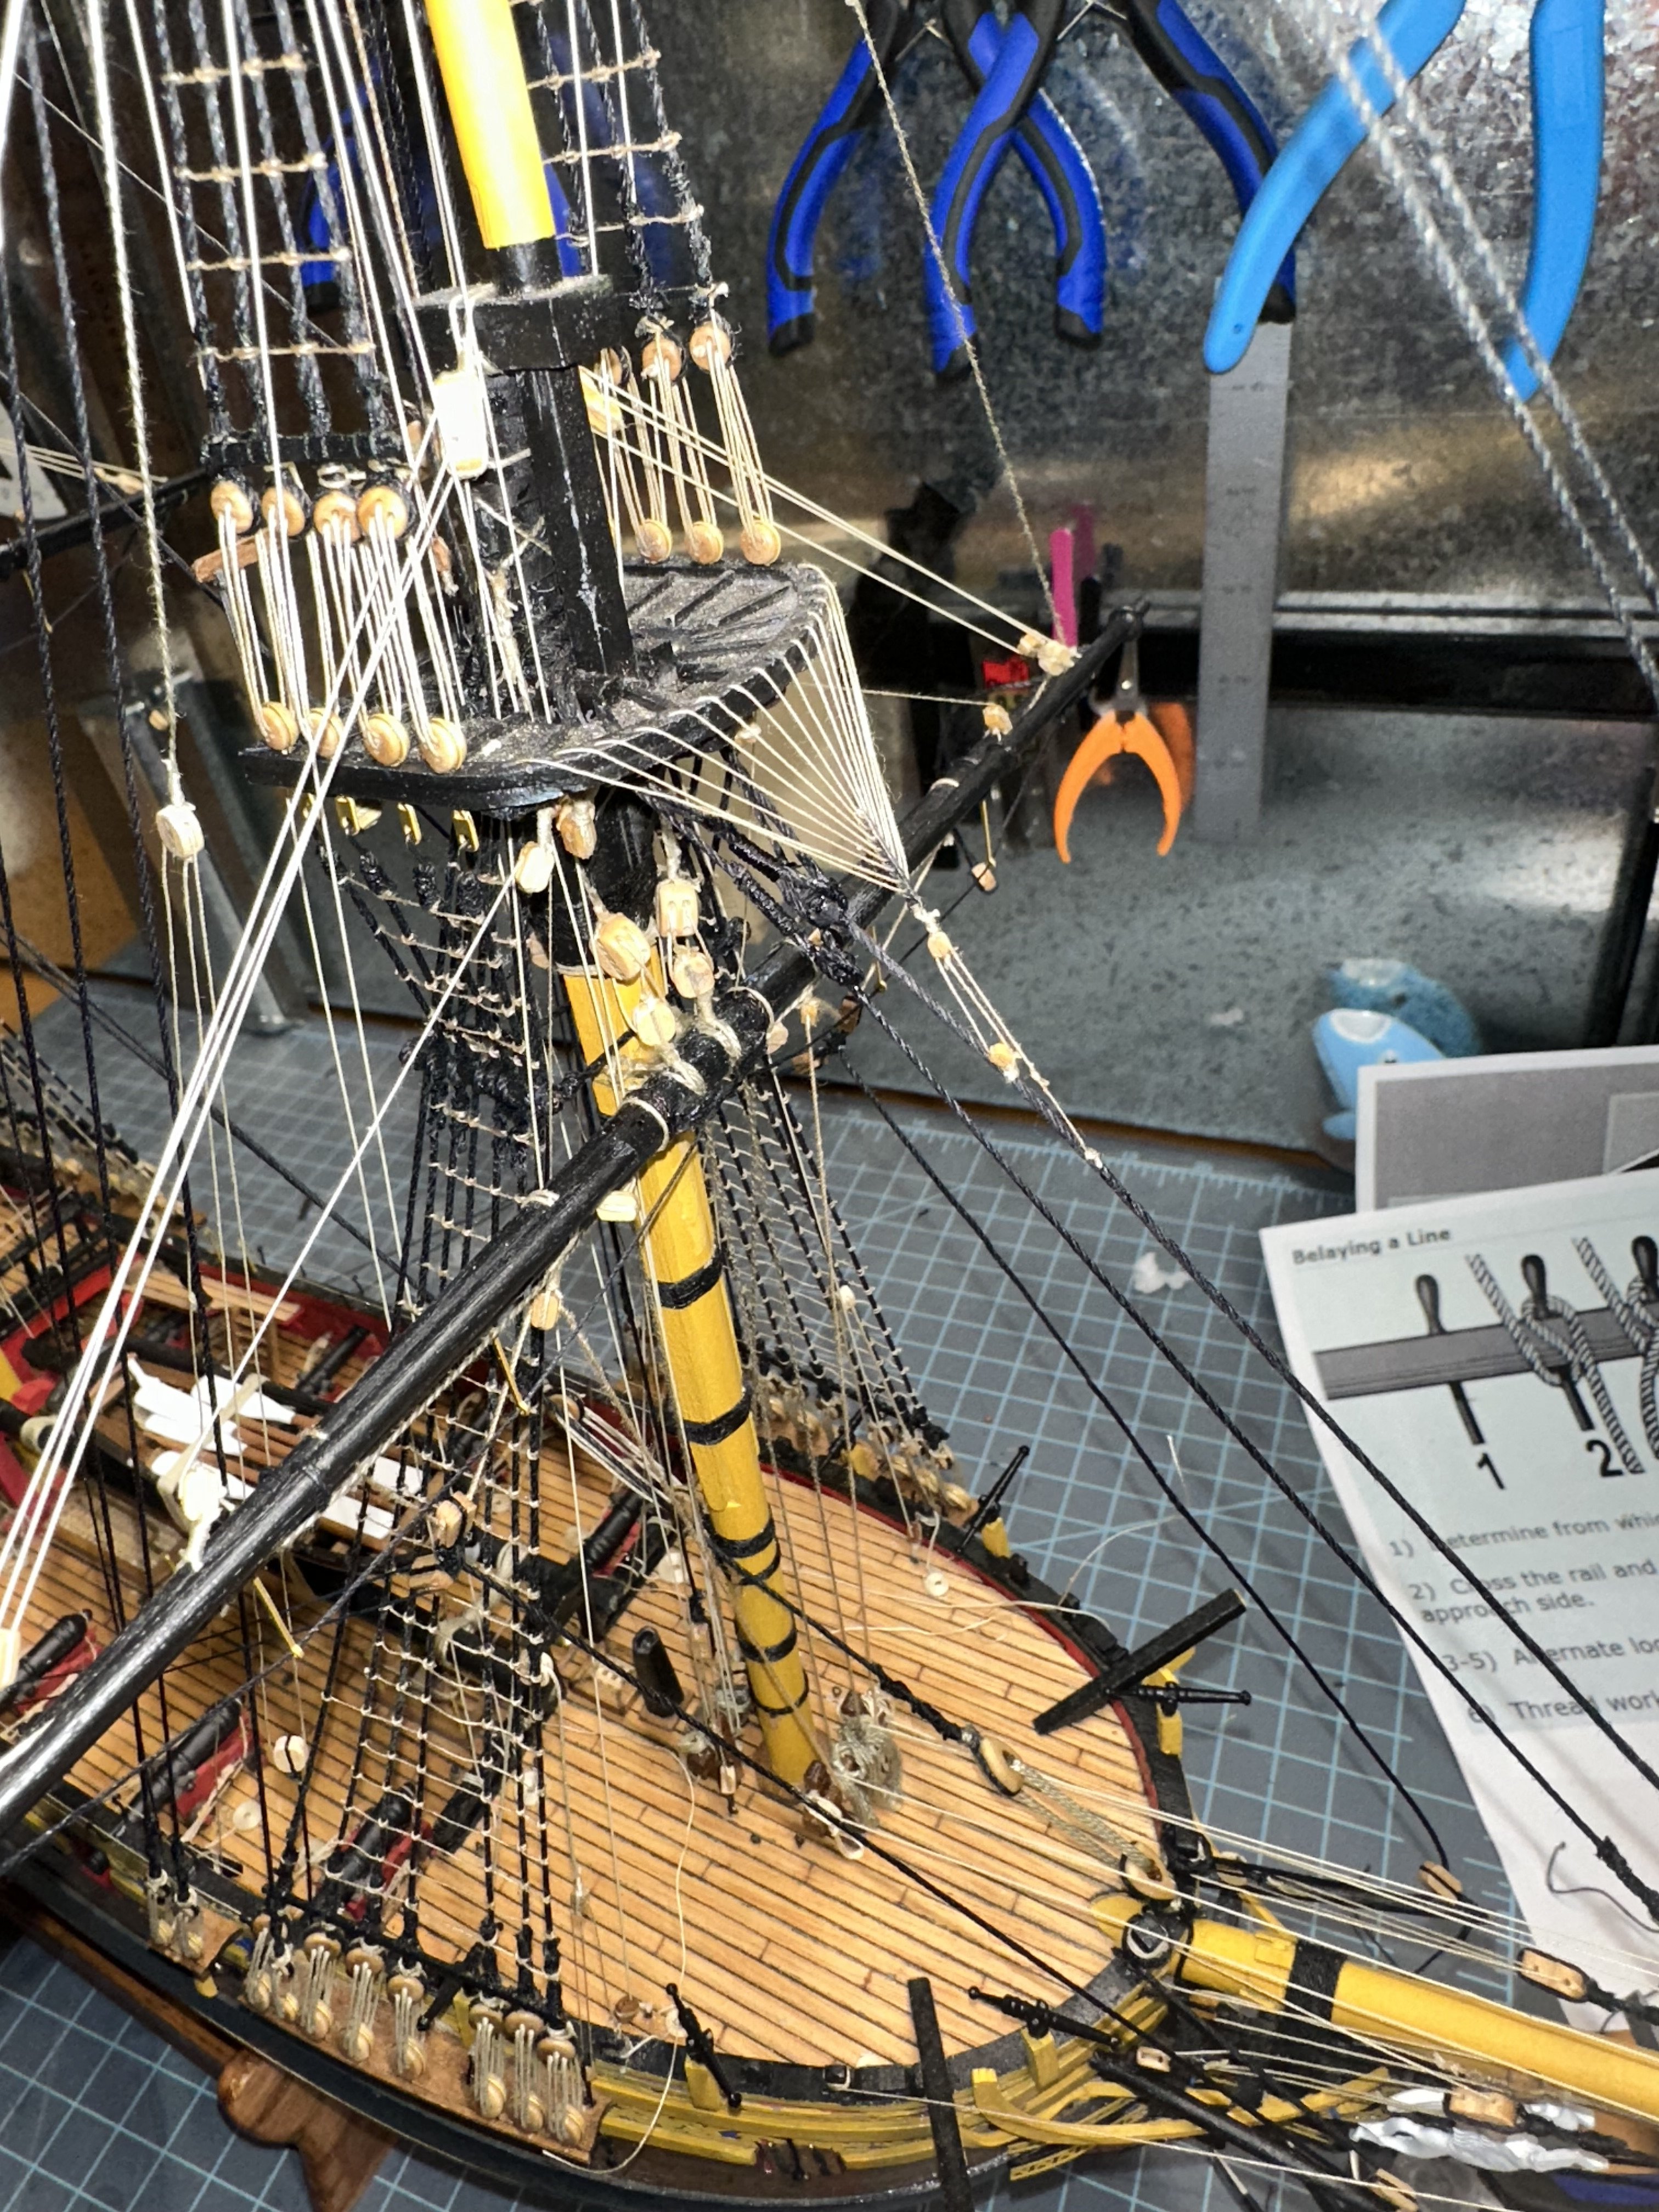
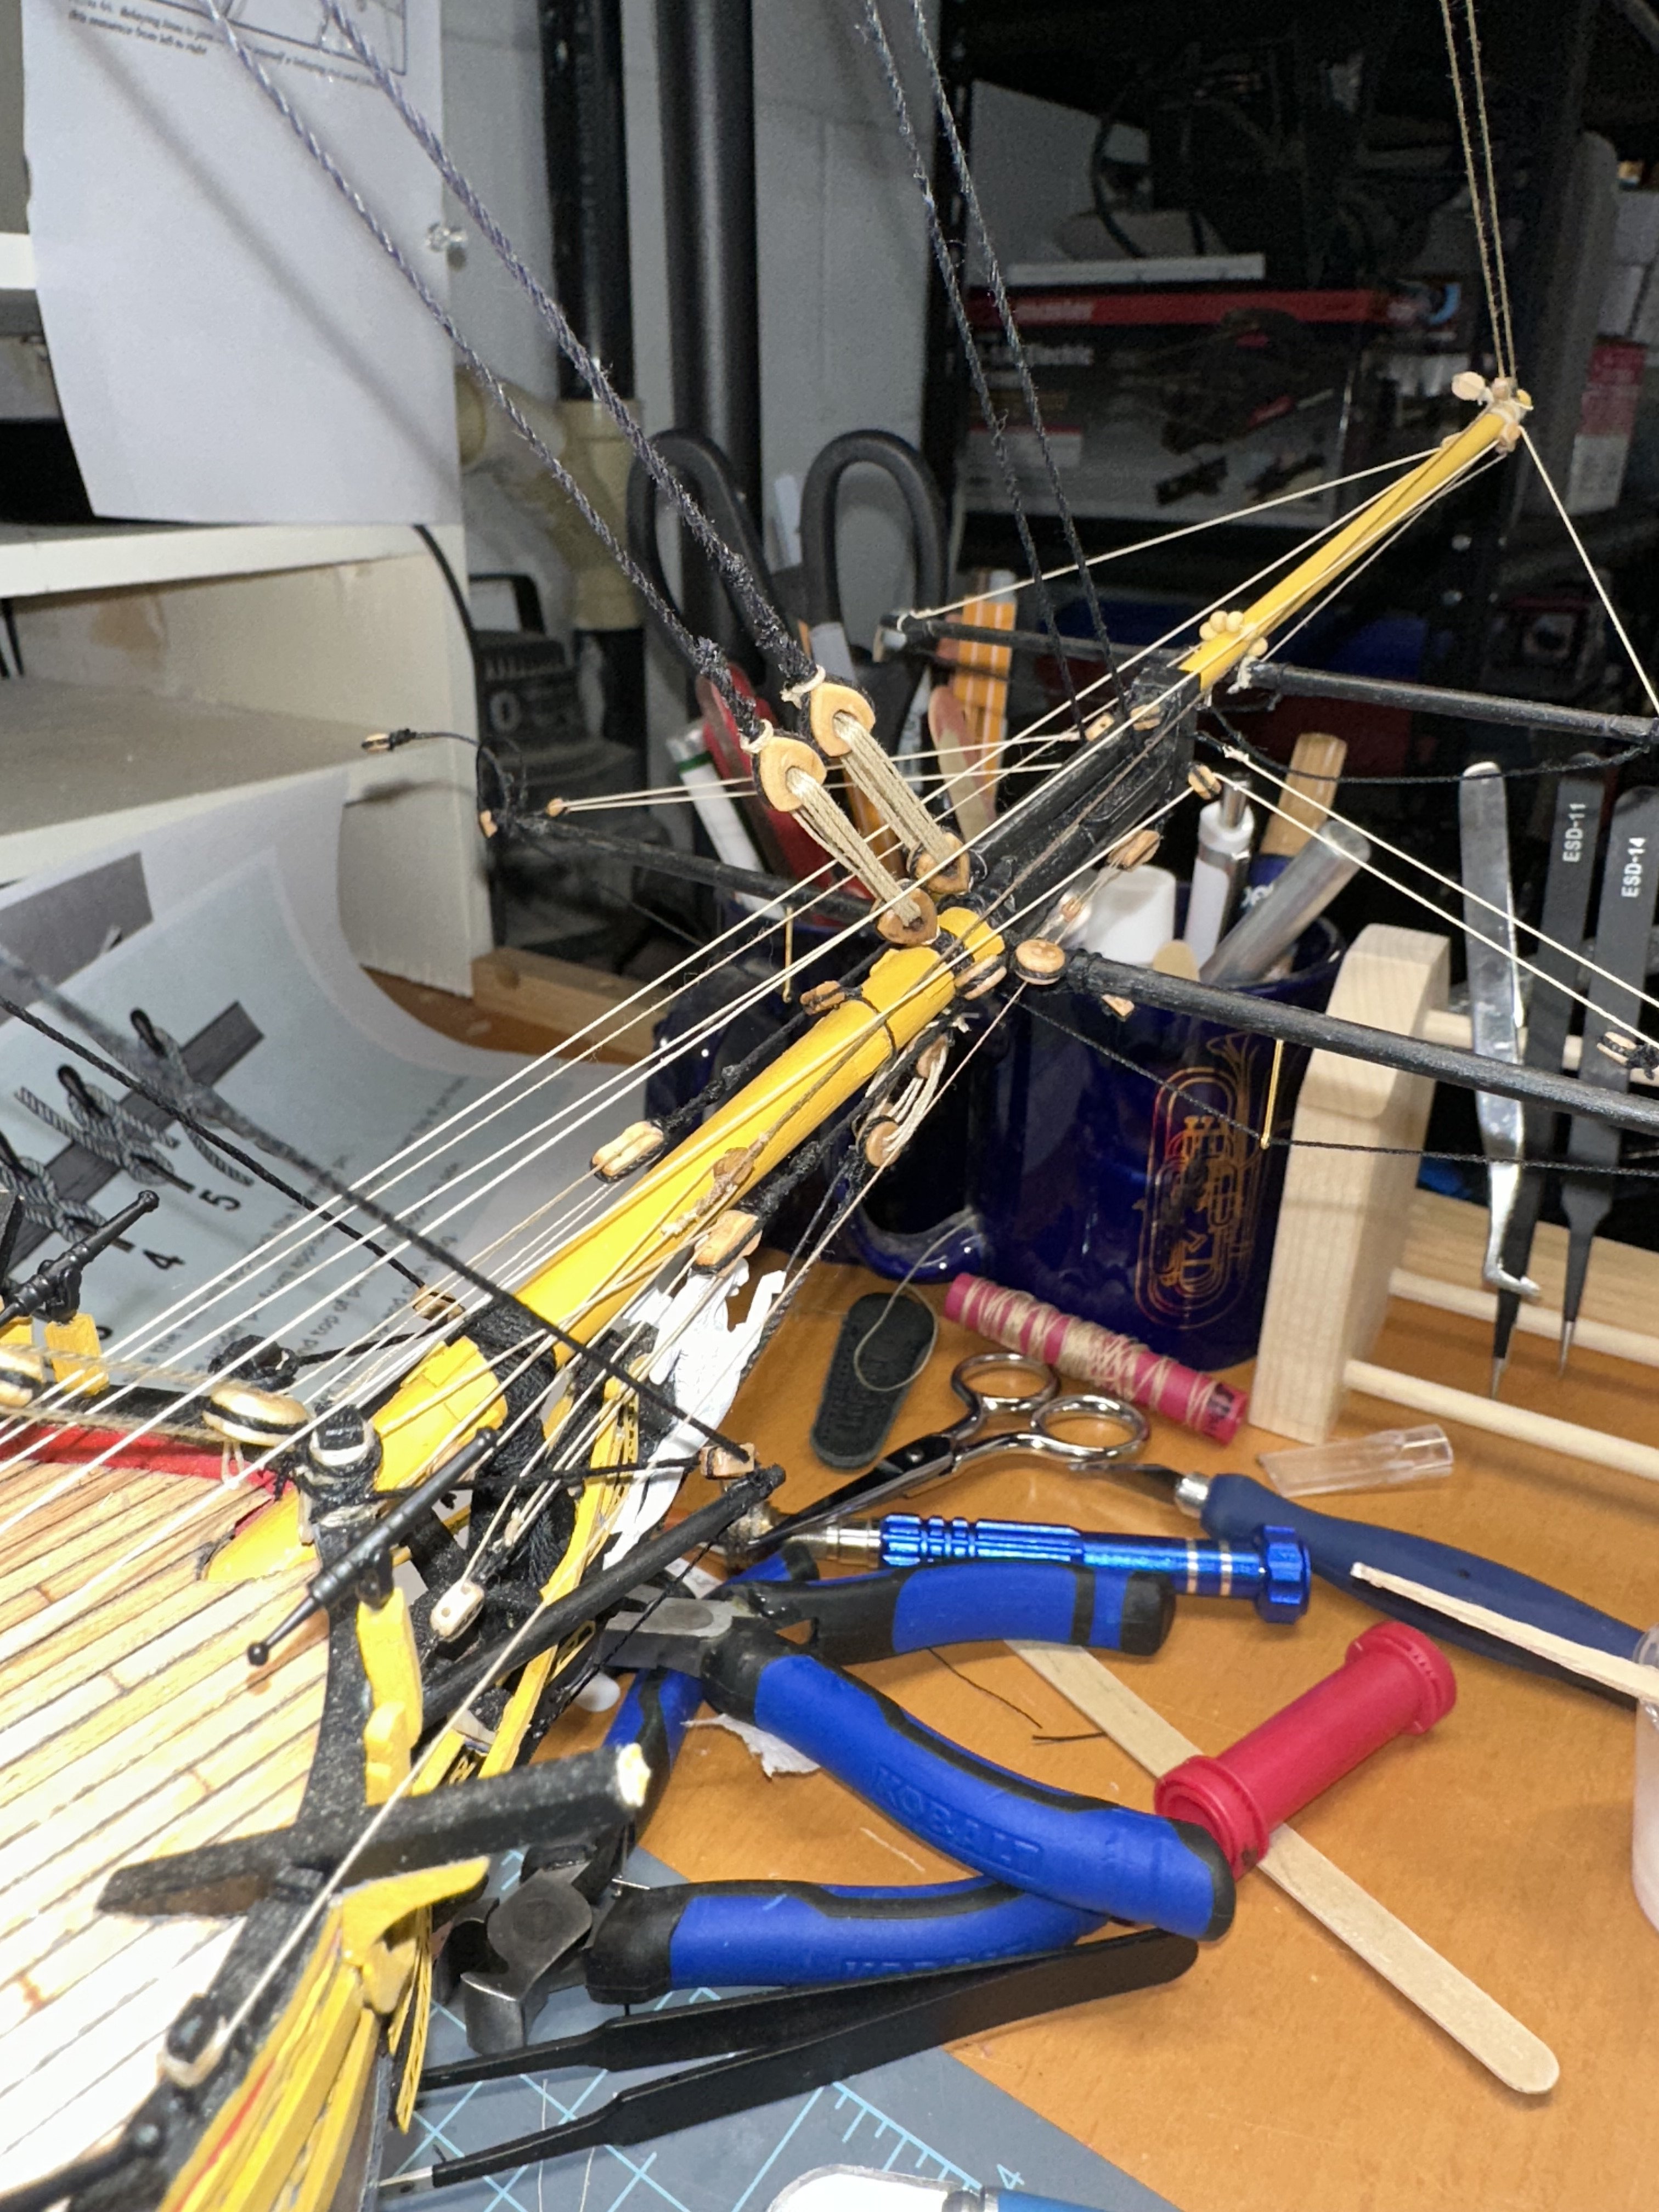
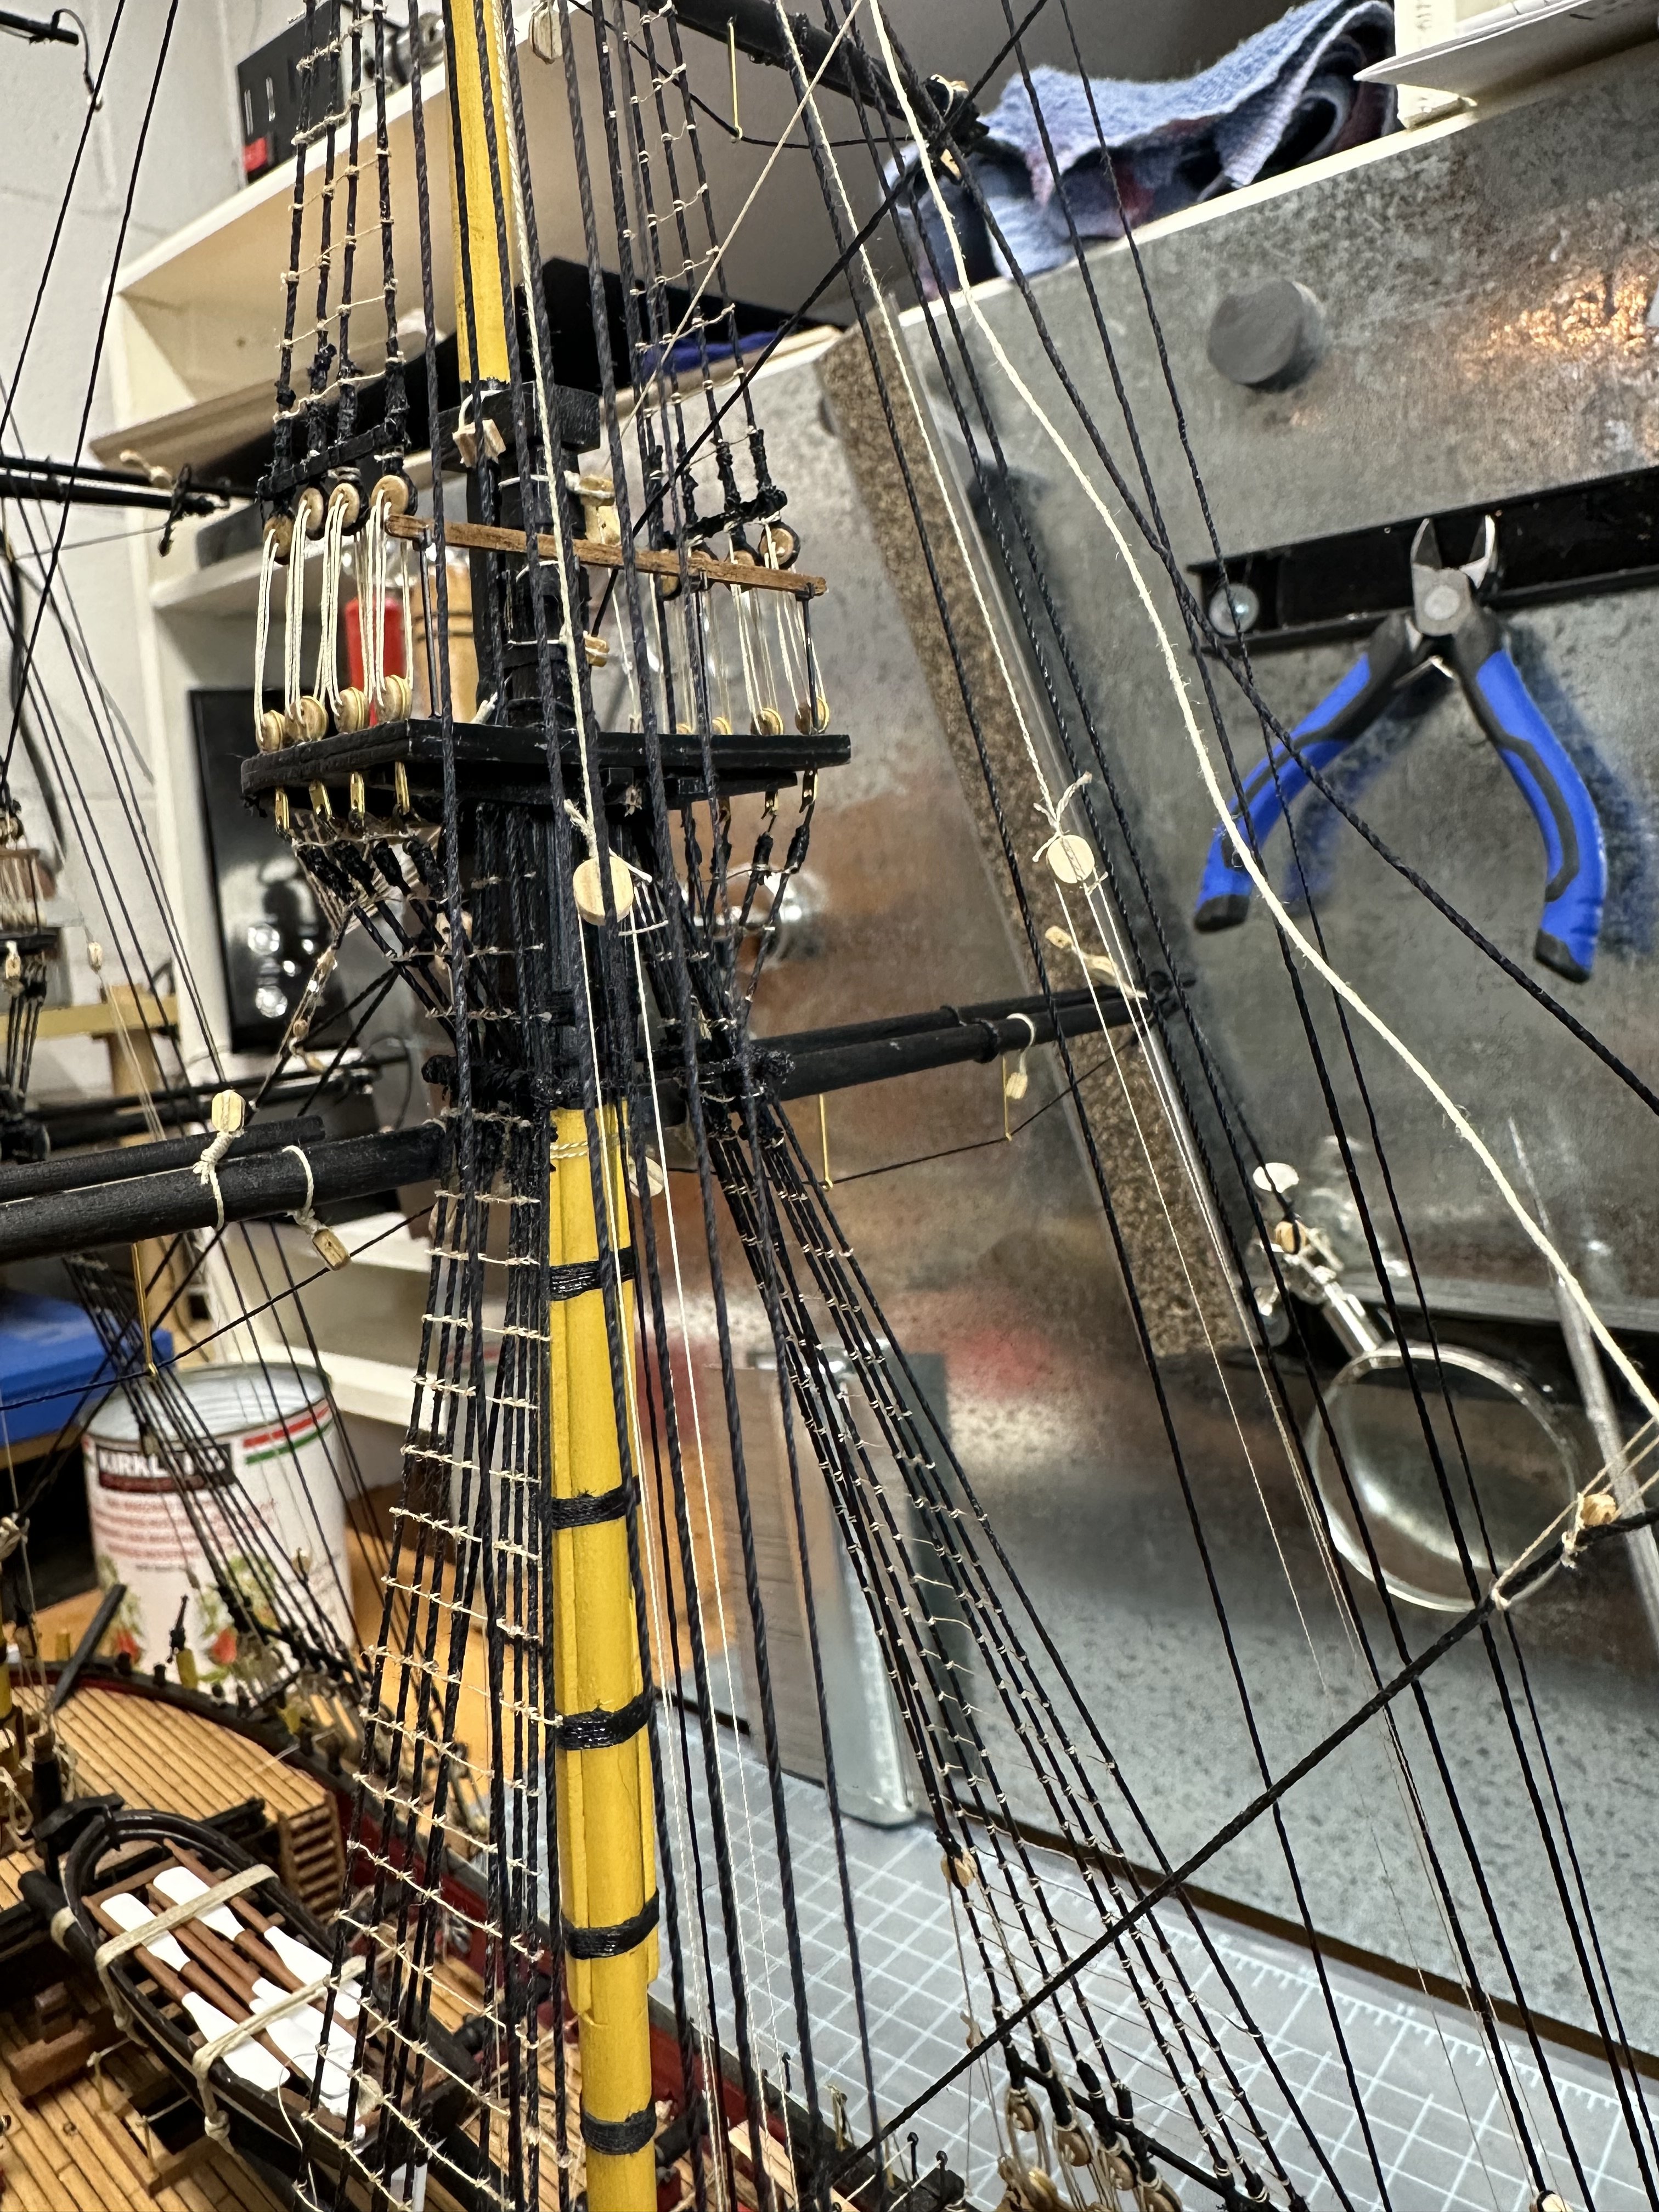
The topsail cluelines (or clewlines?).
 Last year I bought Syren’s Rope Rocket Ropewalk and man, does it make nice rope. I bought some high end embroidery thread in tan and black and my lines don’t kink like the kit rope does.
The foremast tacks are done also.
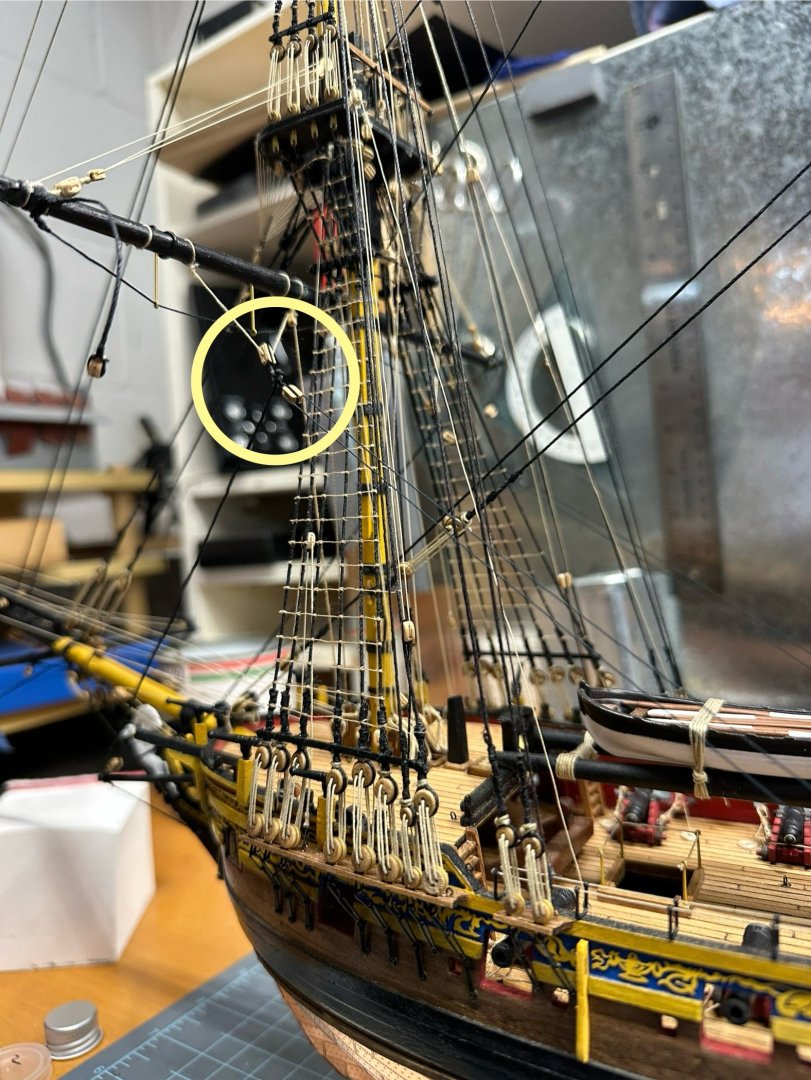
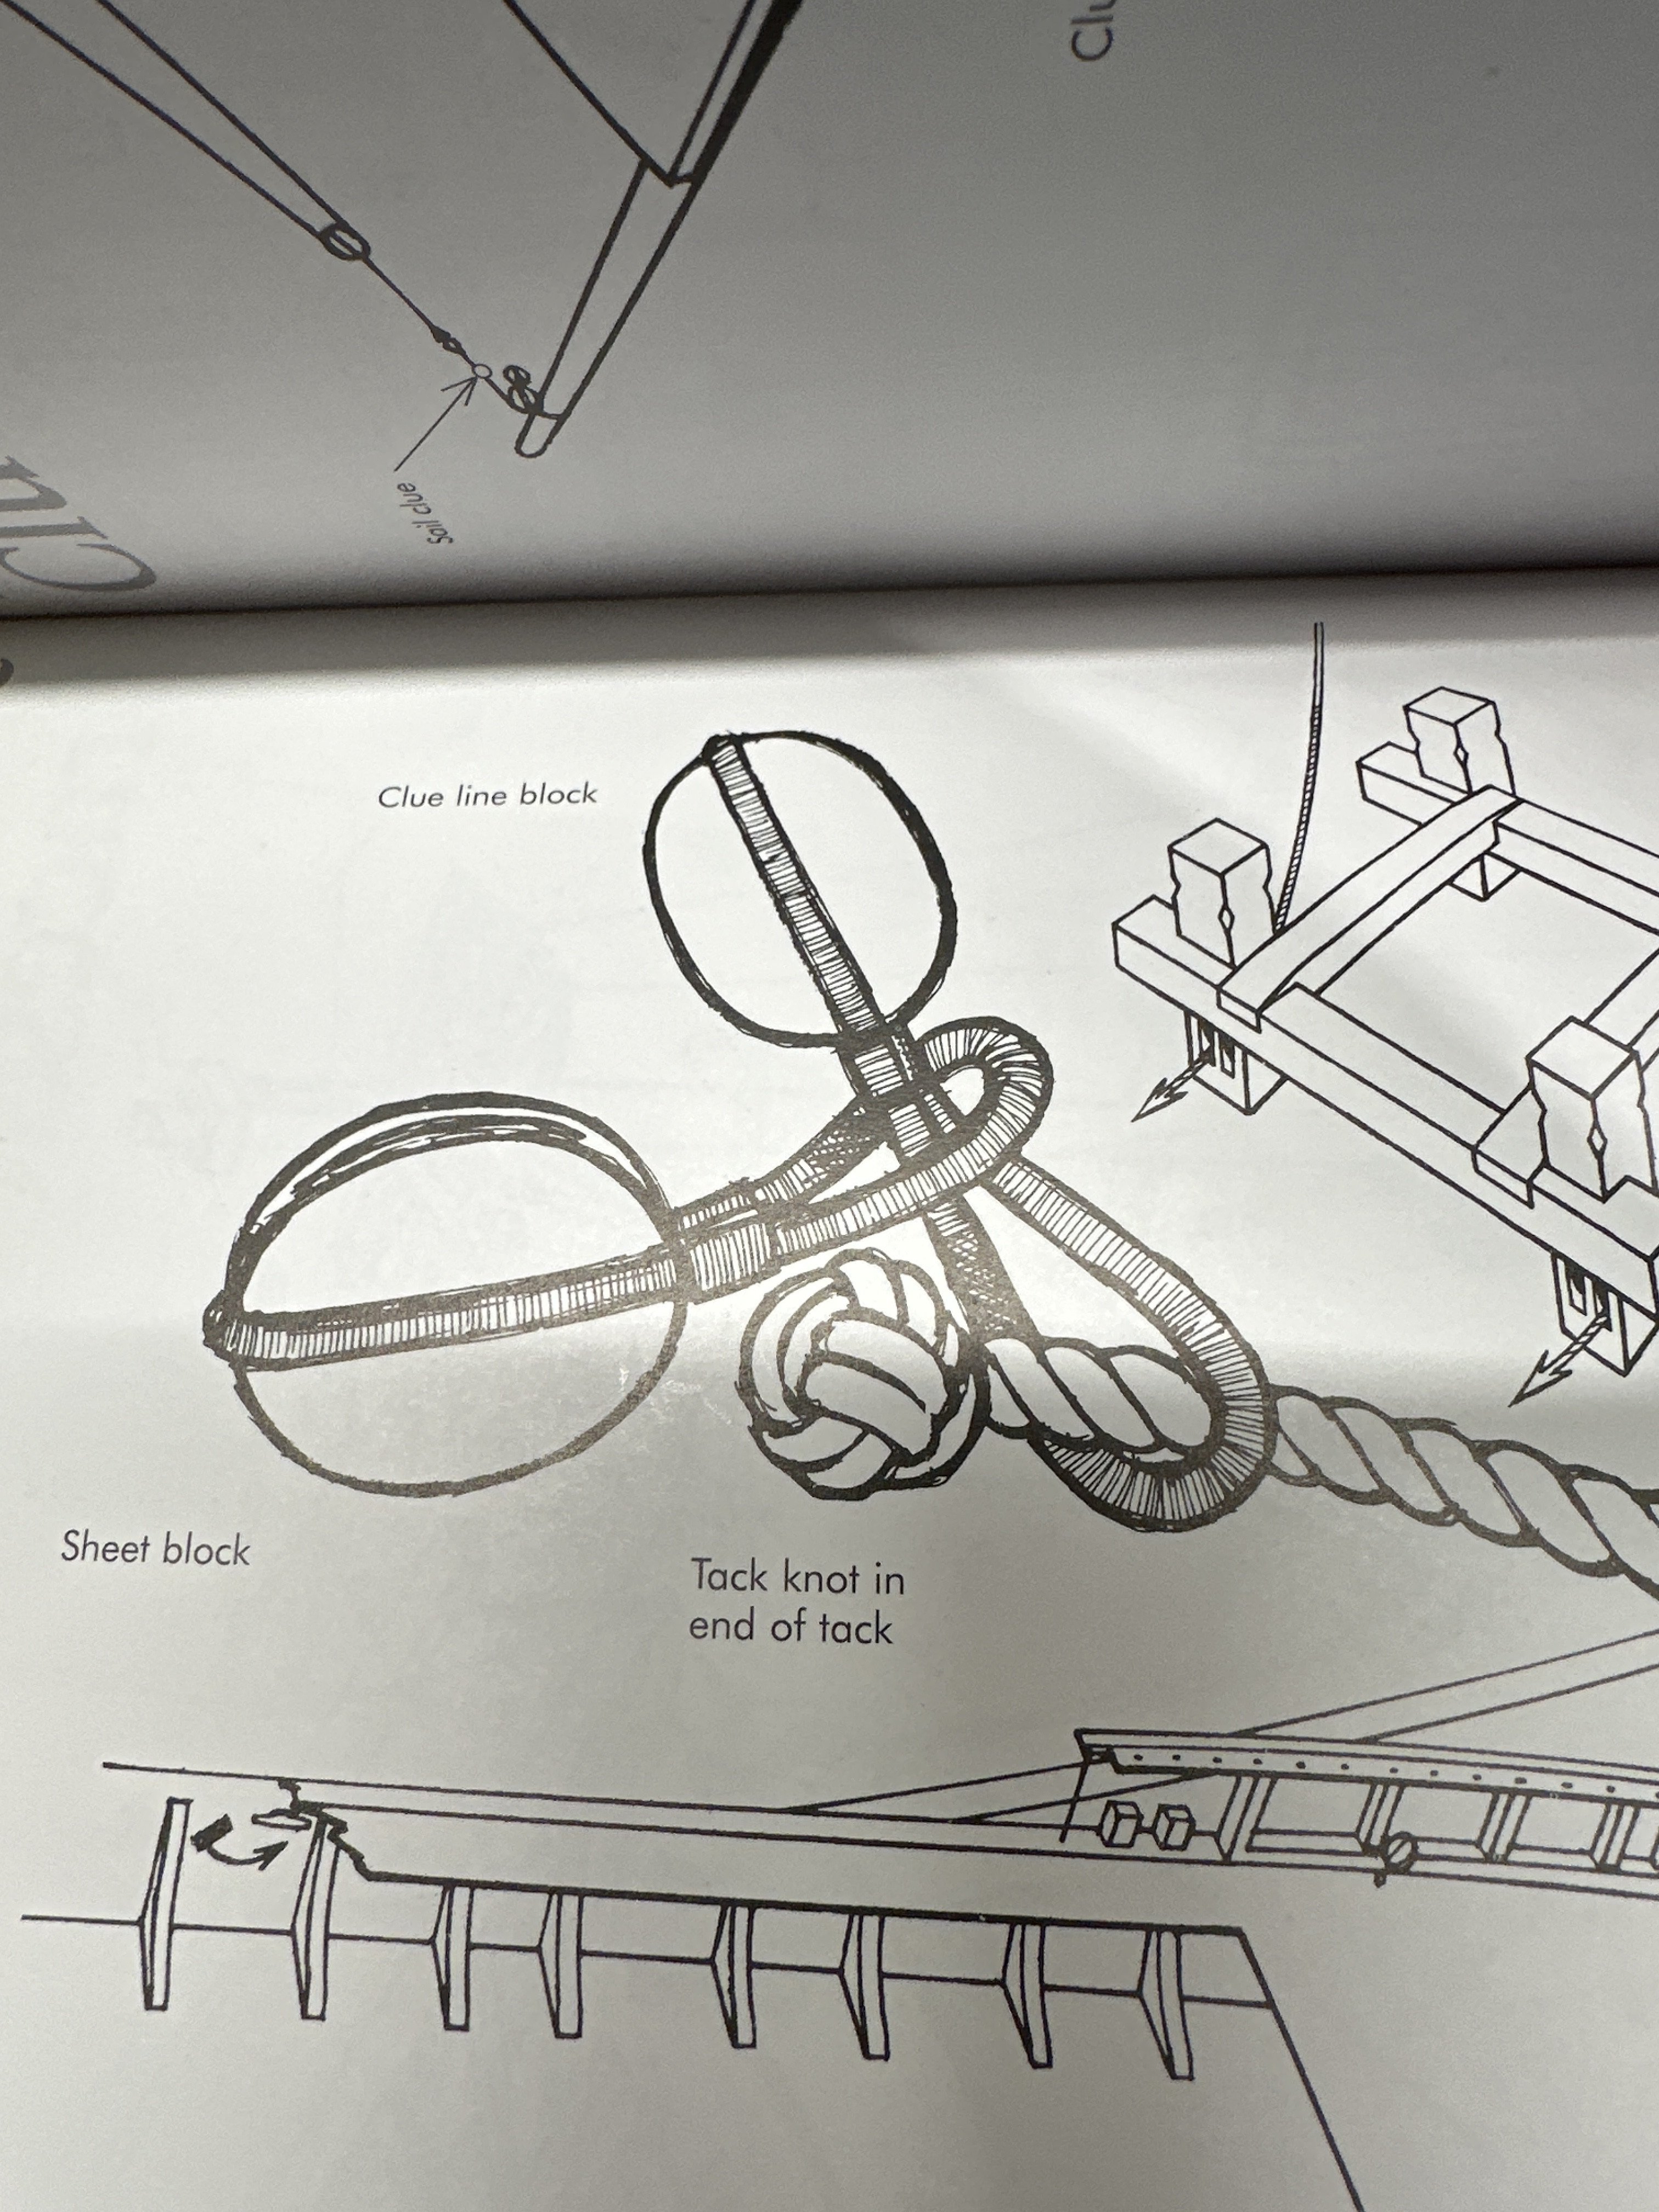
There’s a cool but fiddly knot sequence to make the tacks that join the sheet block and clue line block with a tack block.
See pic from “Rigging Period Model Ship”

The tack block is tied down through a block on the boomkin and back thru to the knightshead.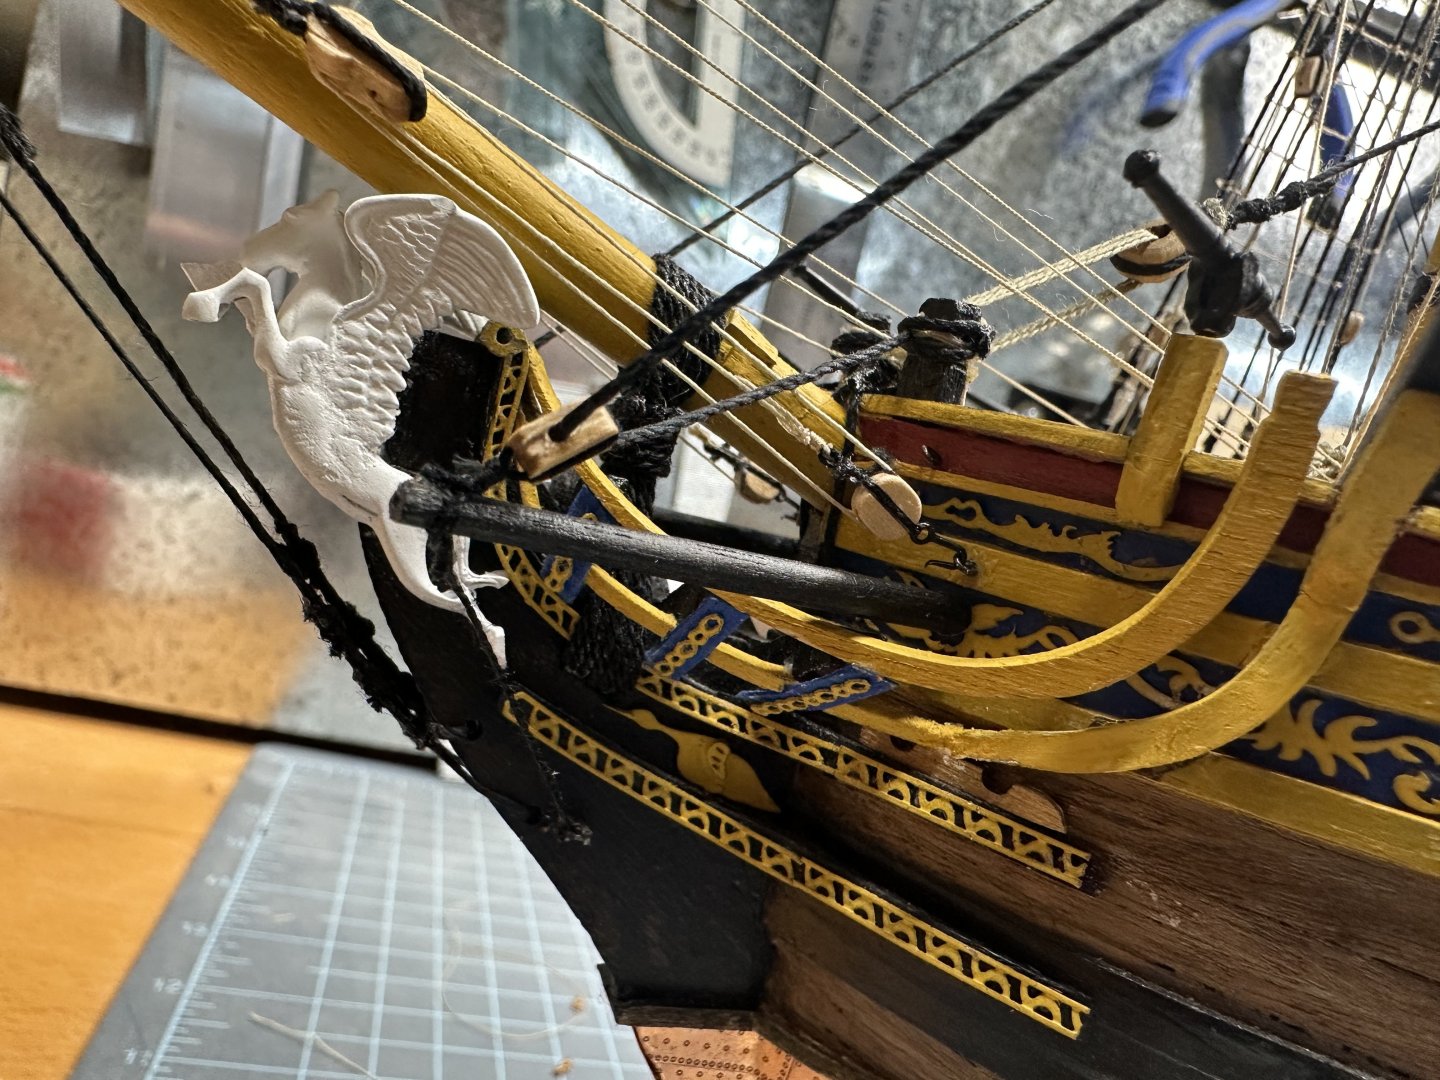
I’m beginning to see the light at the end of the tunnel.

- KARAVOKIRIS and Knocklouder
-
2
-
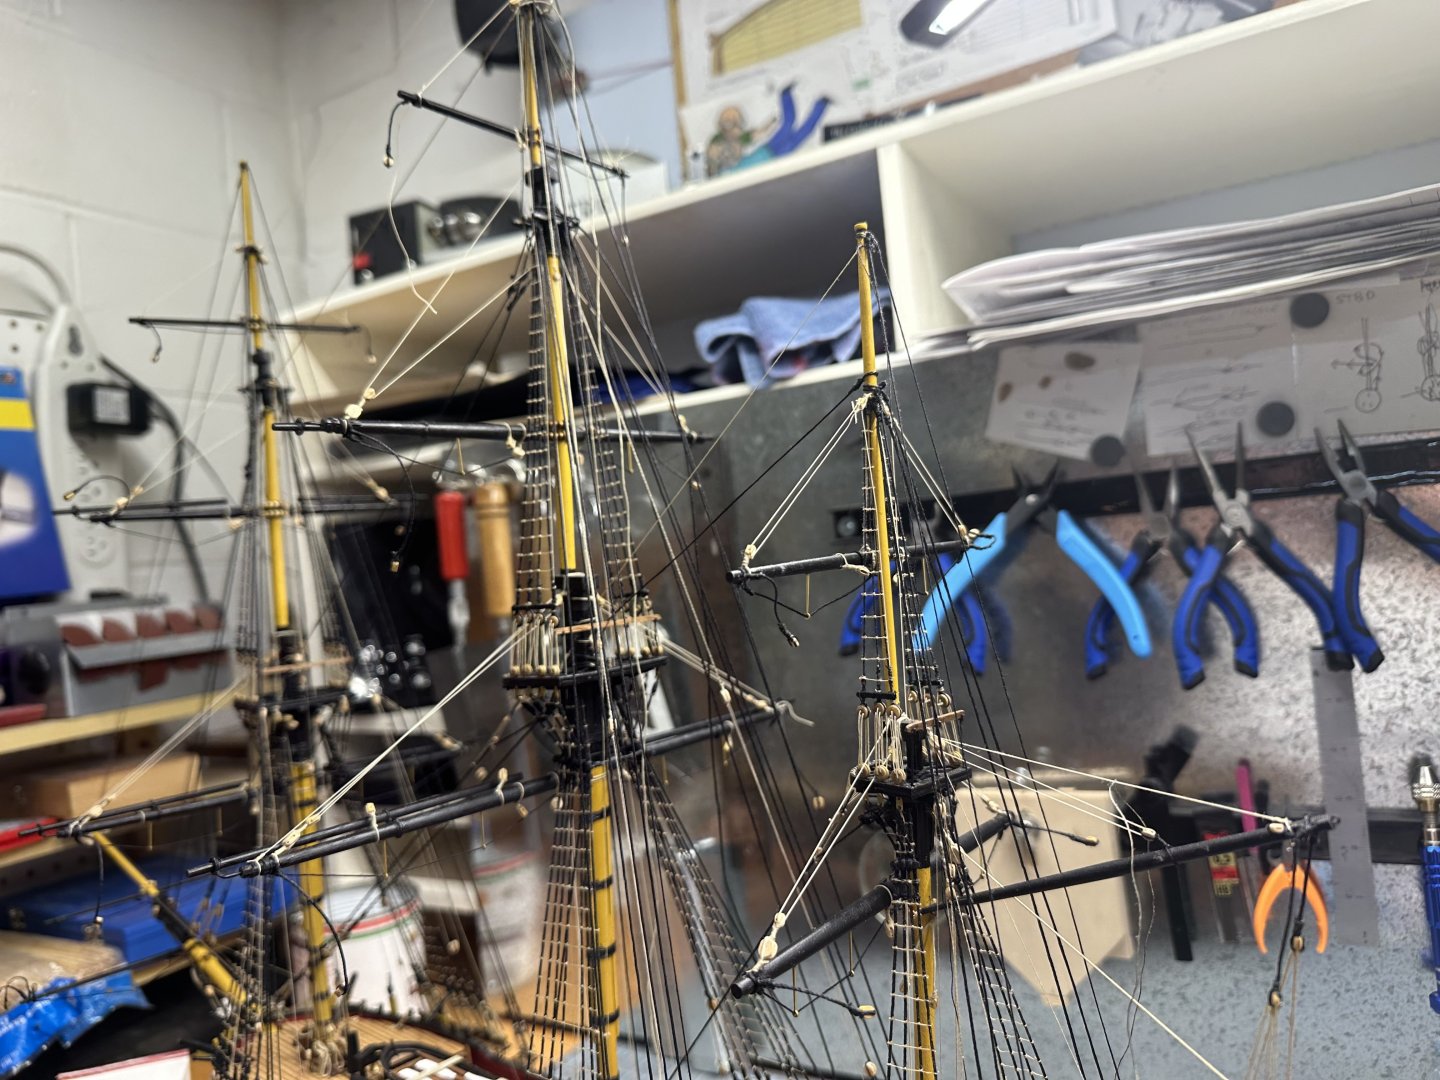
Looks good. Glad to hear you are recovering from Covid. I’ve been staring at a mass and tangle of lines for so long that those masts look all bare! We’ve all been there!
-
On 11/21/2024 at 6:00 PM, Knocklouder said:
Well finally. It has been a ruff couple of months,to say the least. Got the covid cleared up, but managed to rip some tendos and stretch the ligaments in my left leg. Then fell into a mass depression. It sucks so time to put the big boy pants on a get back at her.

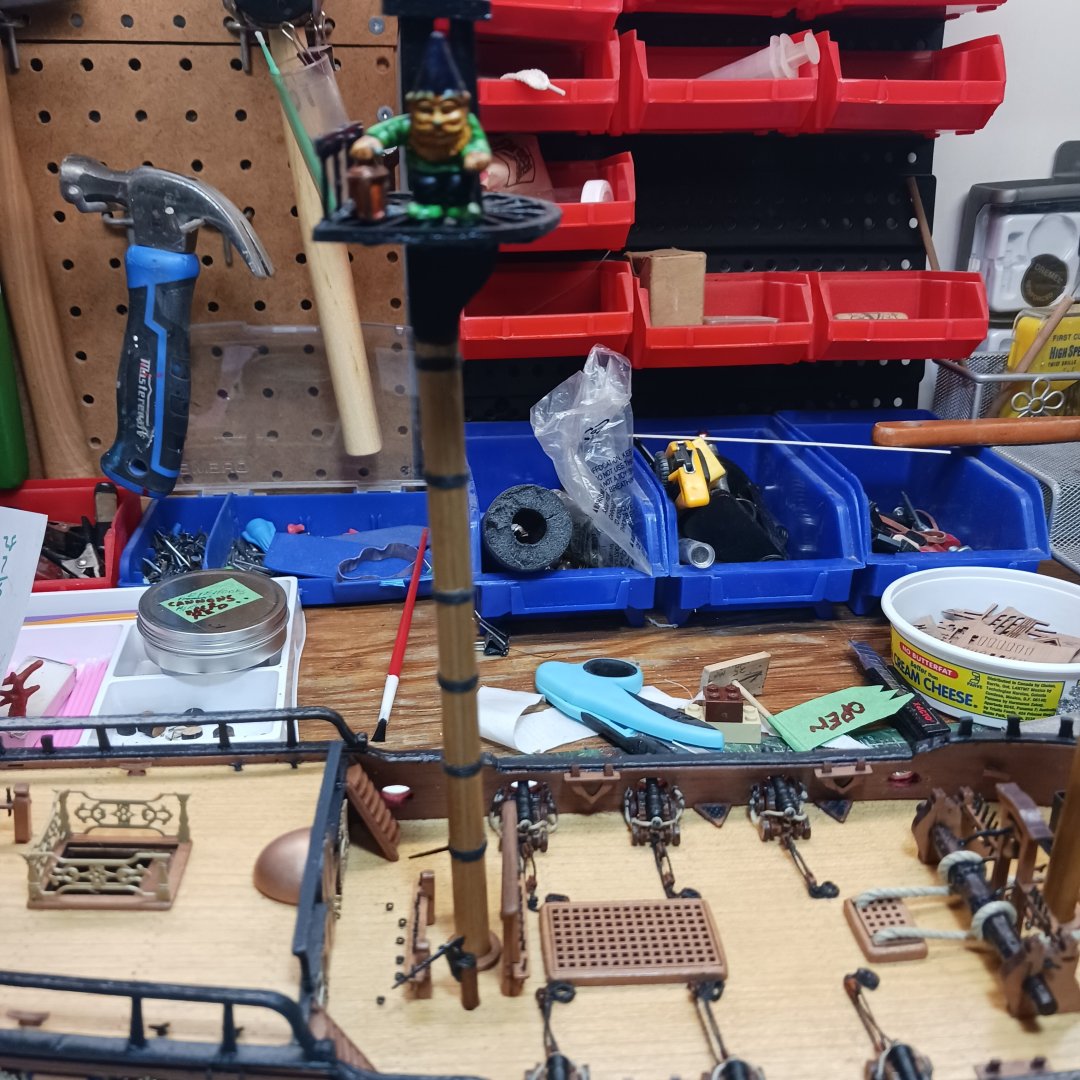
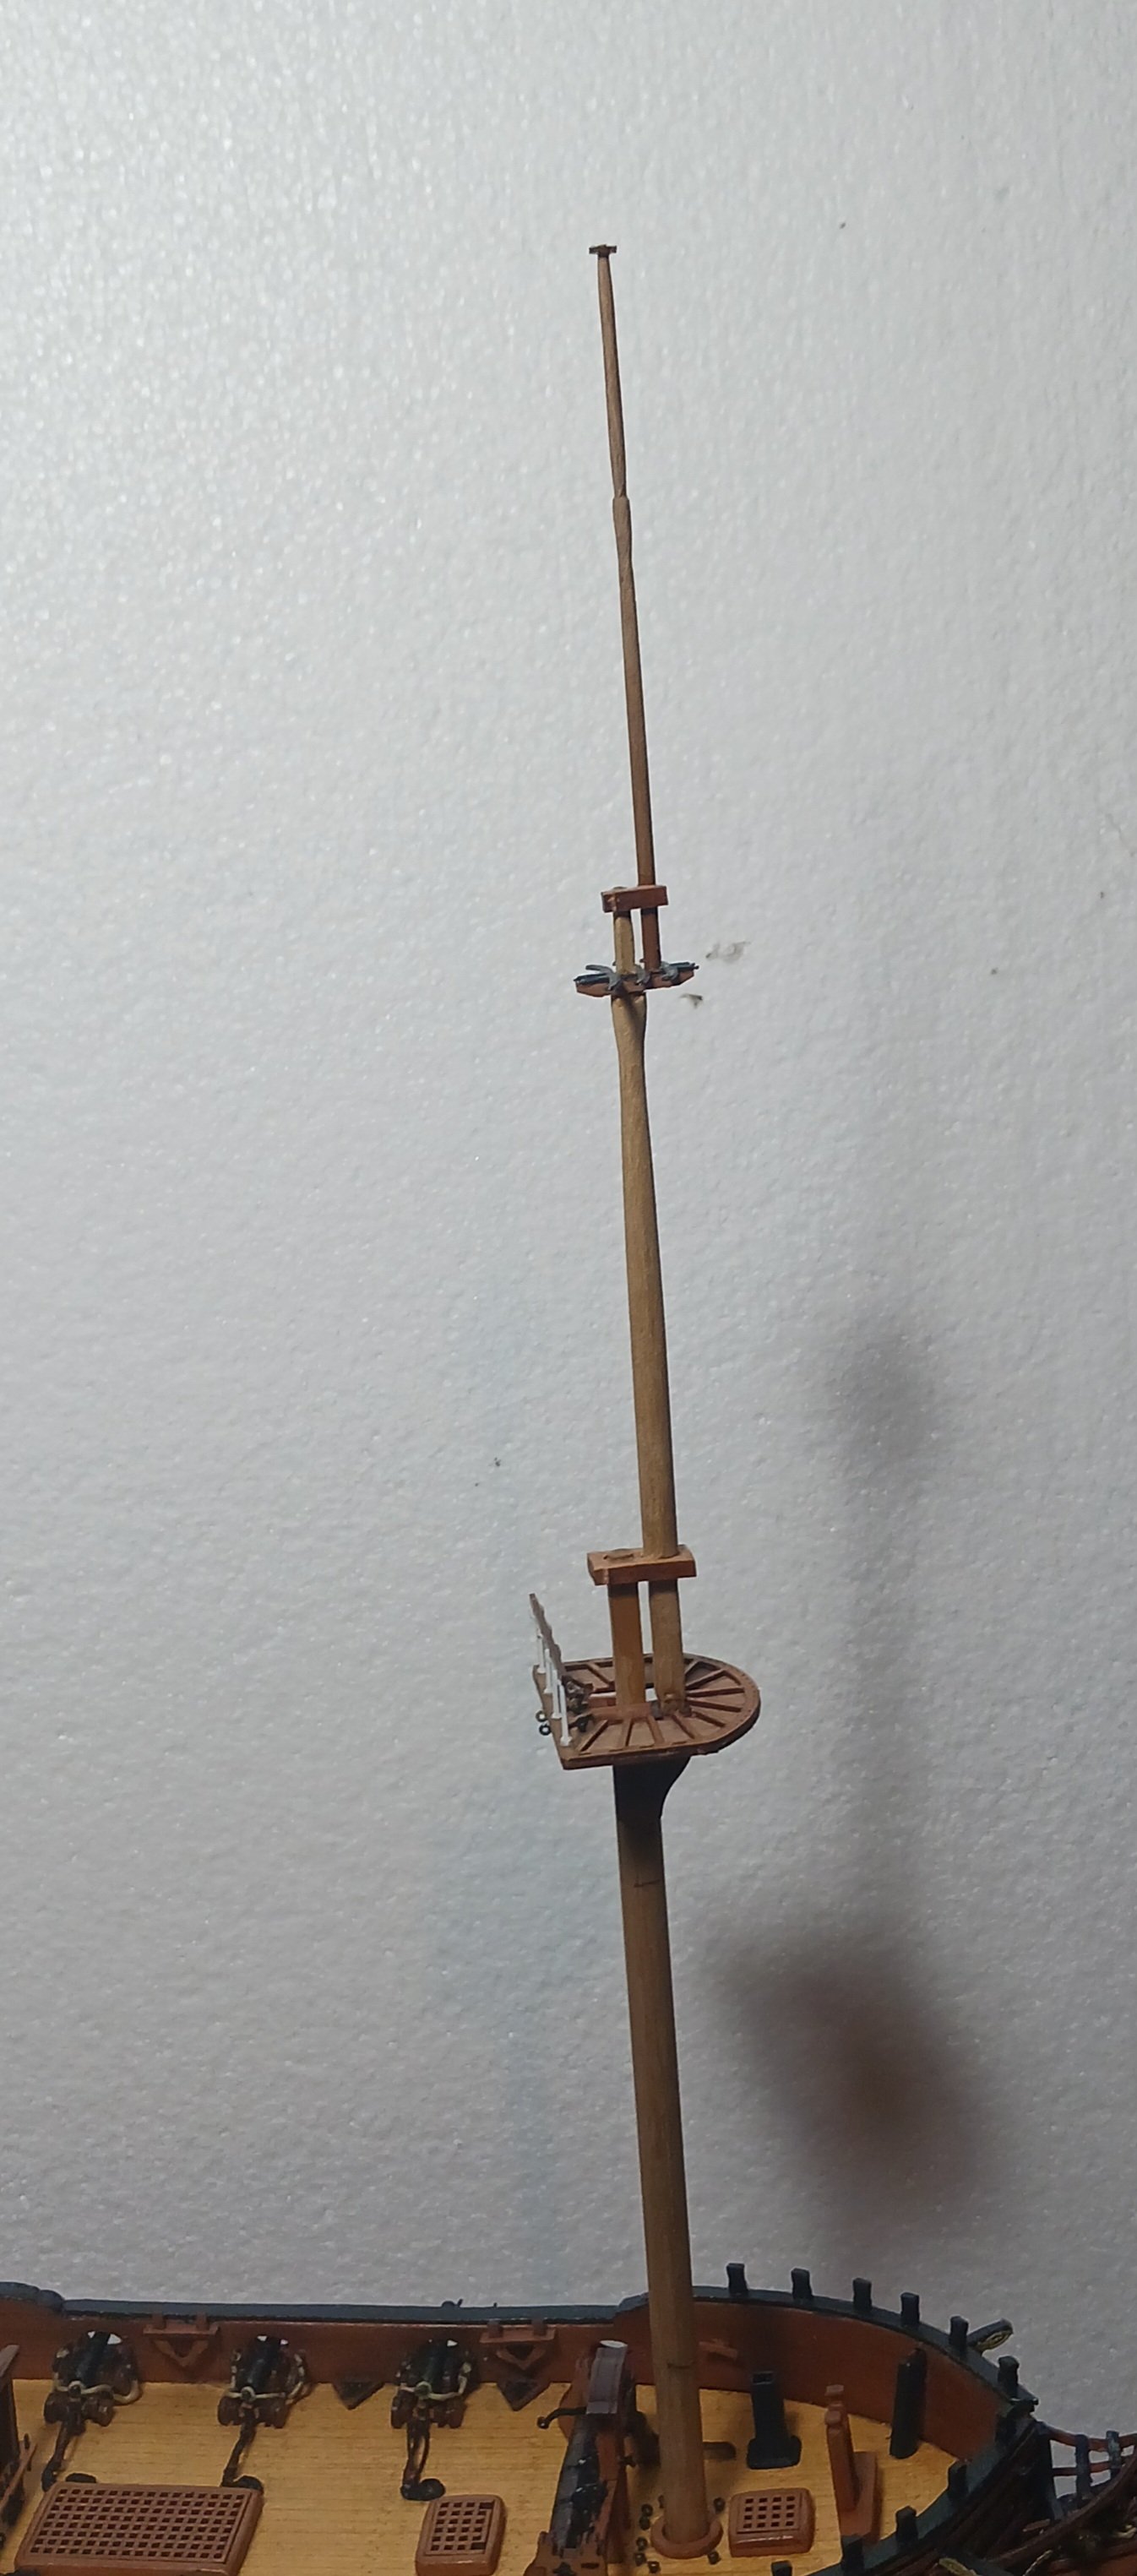
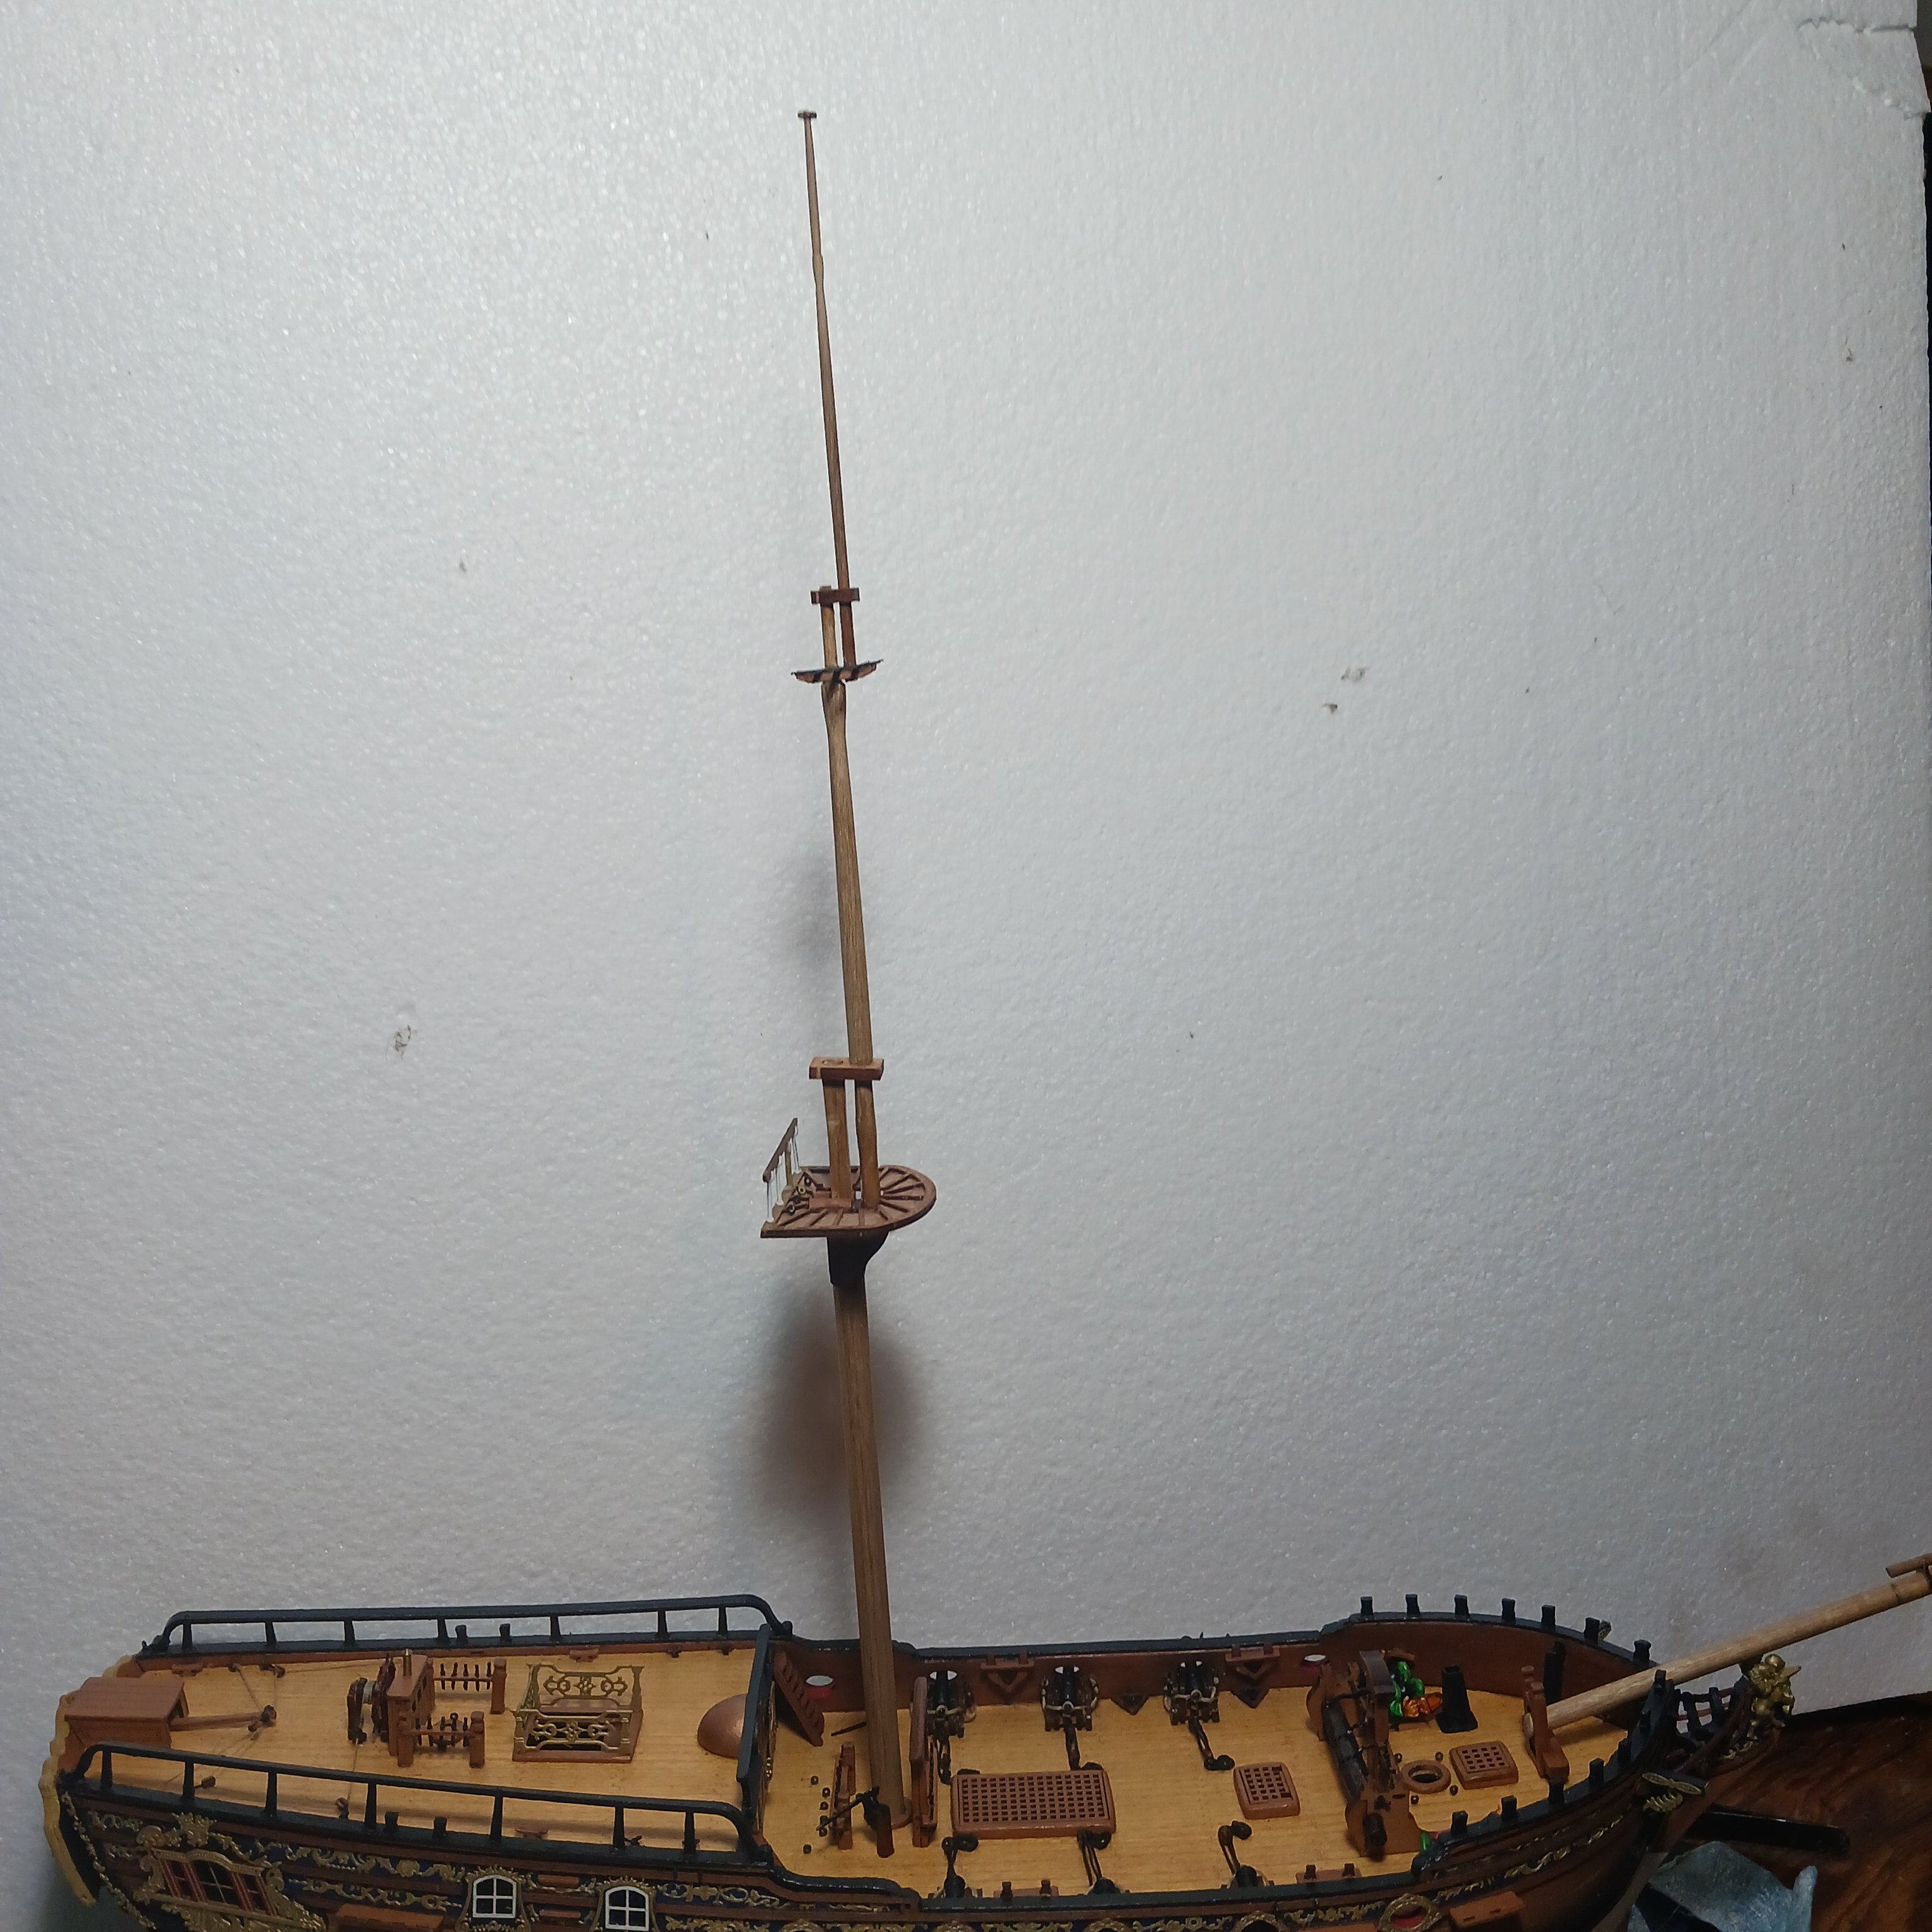
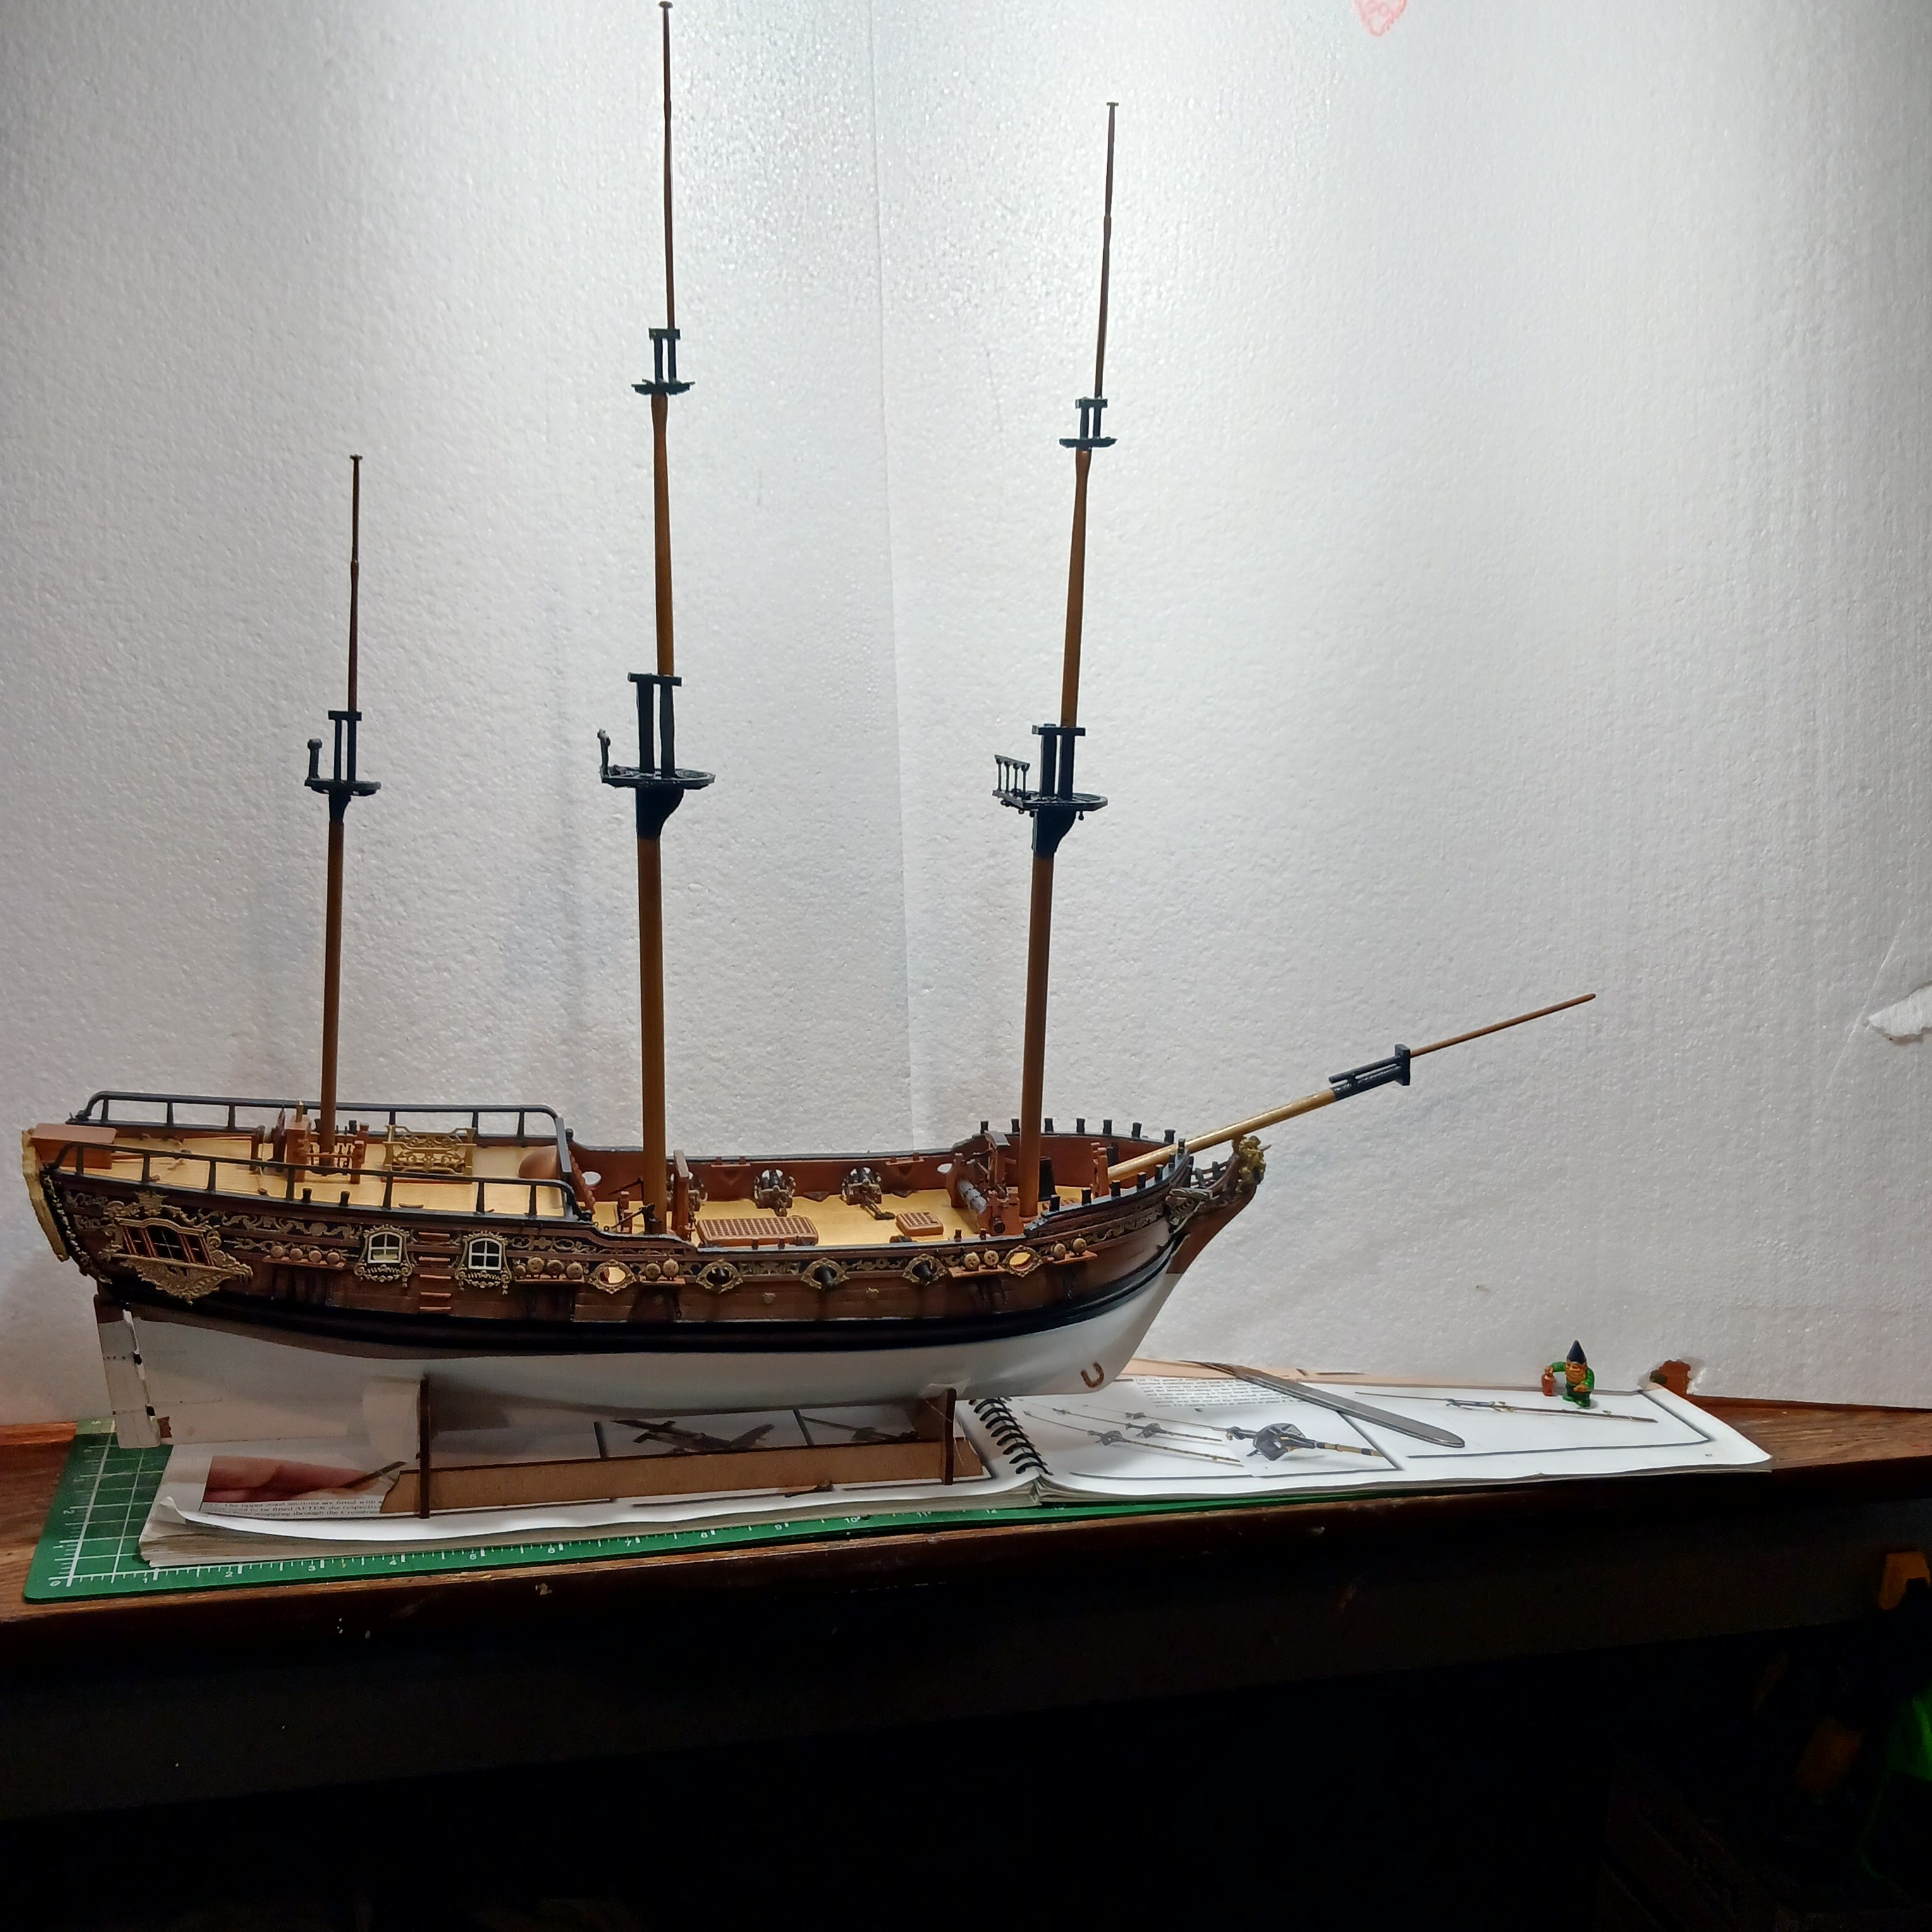
Goober is ready, let's start making the bowsprit, then the foremast. Followed by the main and mizzen masts.


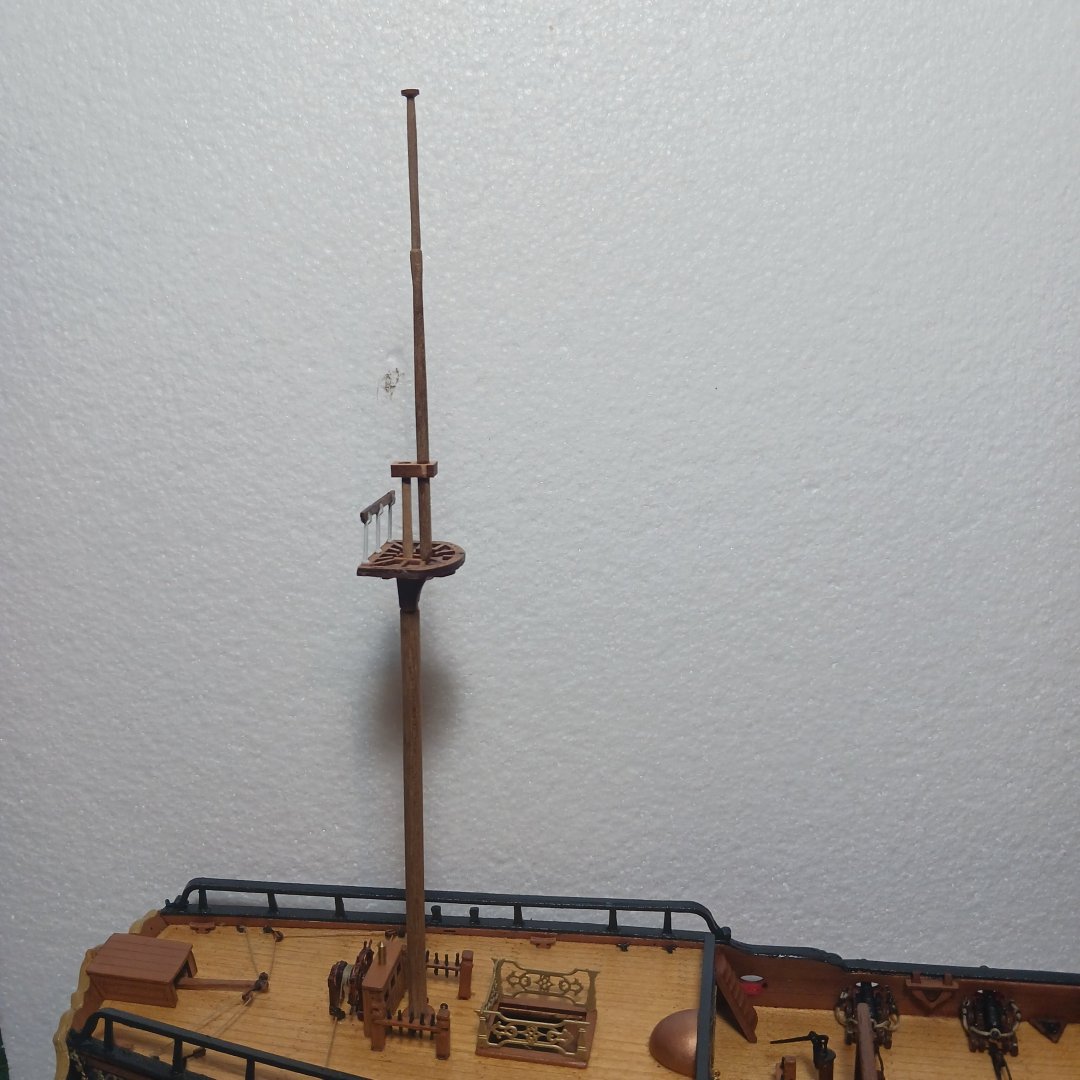
Then I painted them all . Next up all the blocks and woldings,cleats, stays.
Then clean all the holes out and get the yards ready.


It sure is good to finally start building again. I can smell the ratlines in the air, lol.
I started serving some lines for the shrouds, but that is going to take a little practice to get it just right for me. I done several lines and they are starting to look good. Serving and seizing will slow things down but at least I am moving lol.
I got my Duchess of Kingston figure ready to paint but I have lots to do on the ship first.
Hopefully it won't take me so long to post again. We will see, the first Mate went to see her sisters for a week so I should be able to get some building done while she gone lol 😆

Bob M
PFC GNOMER PILE
GOOBER.

-
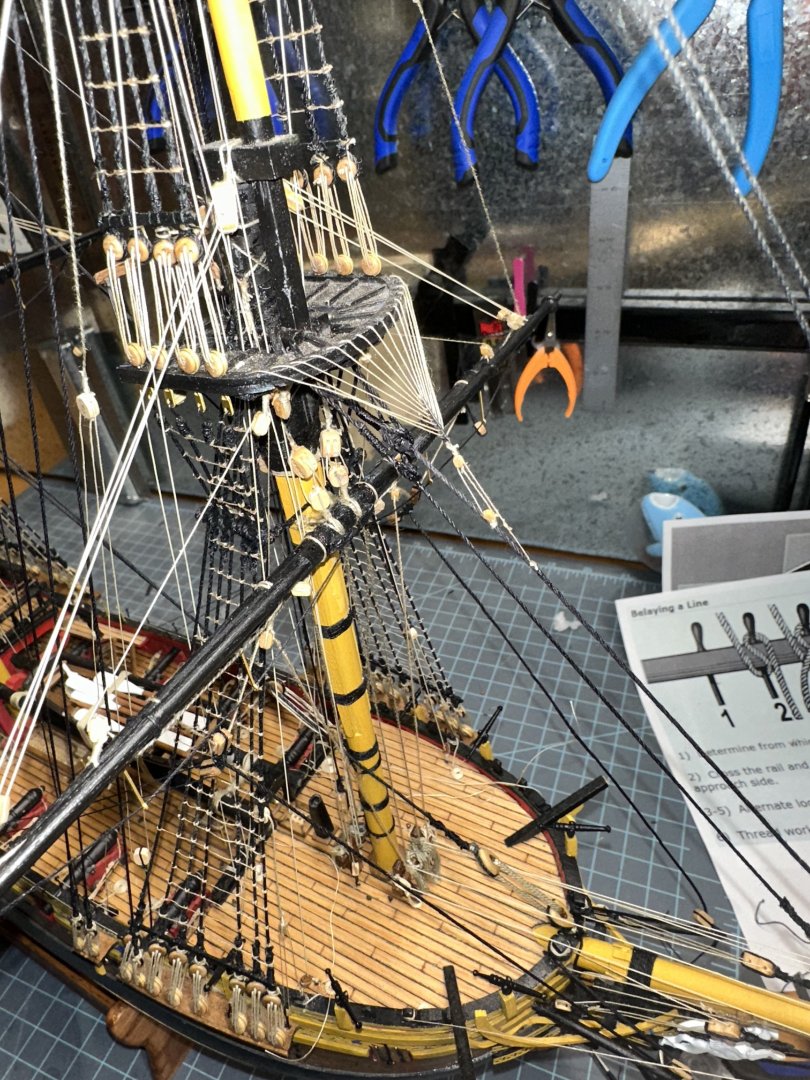
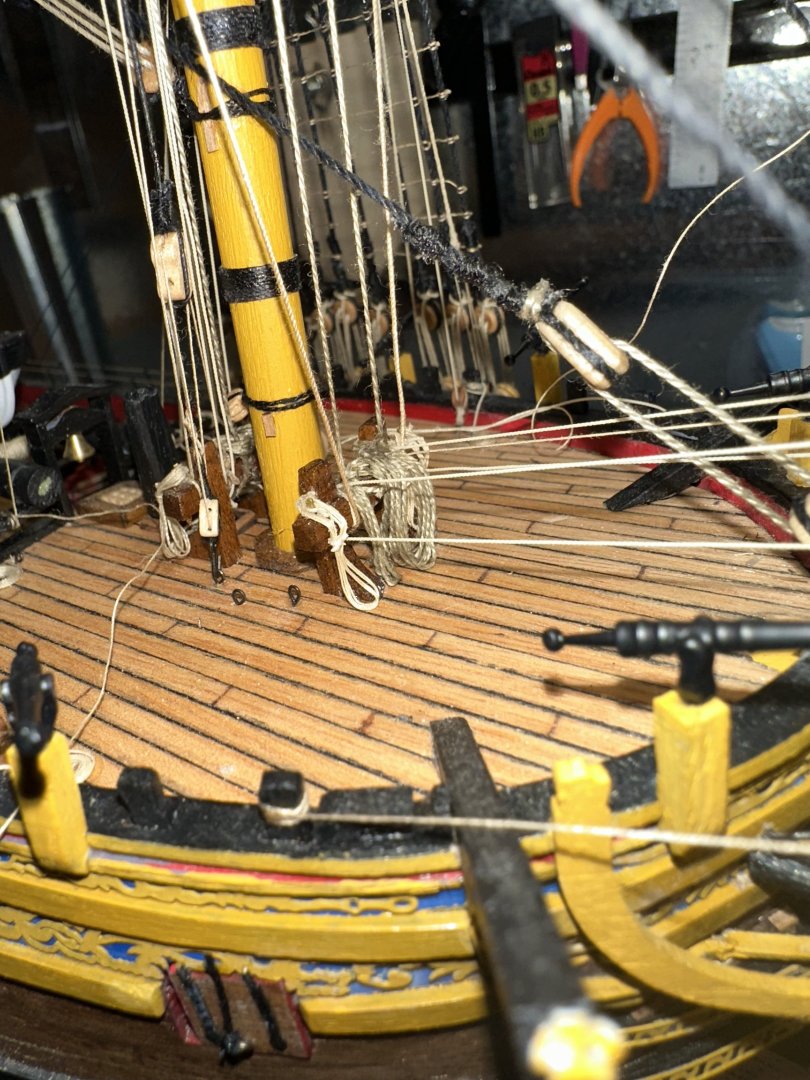
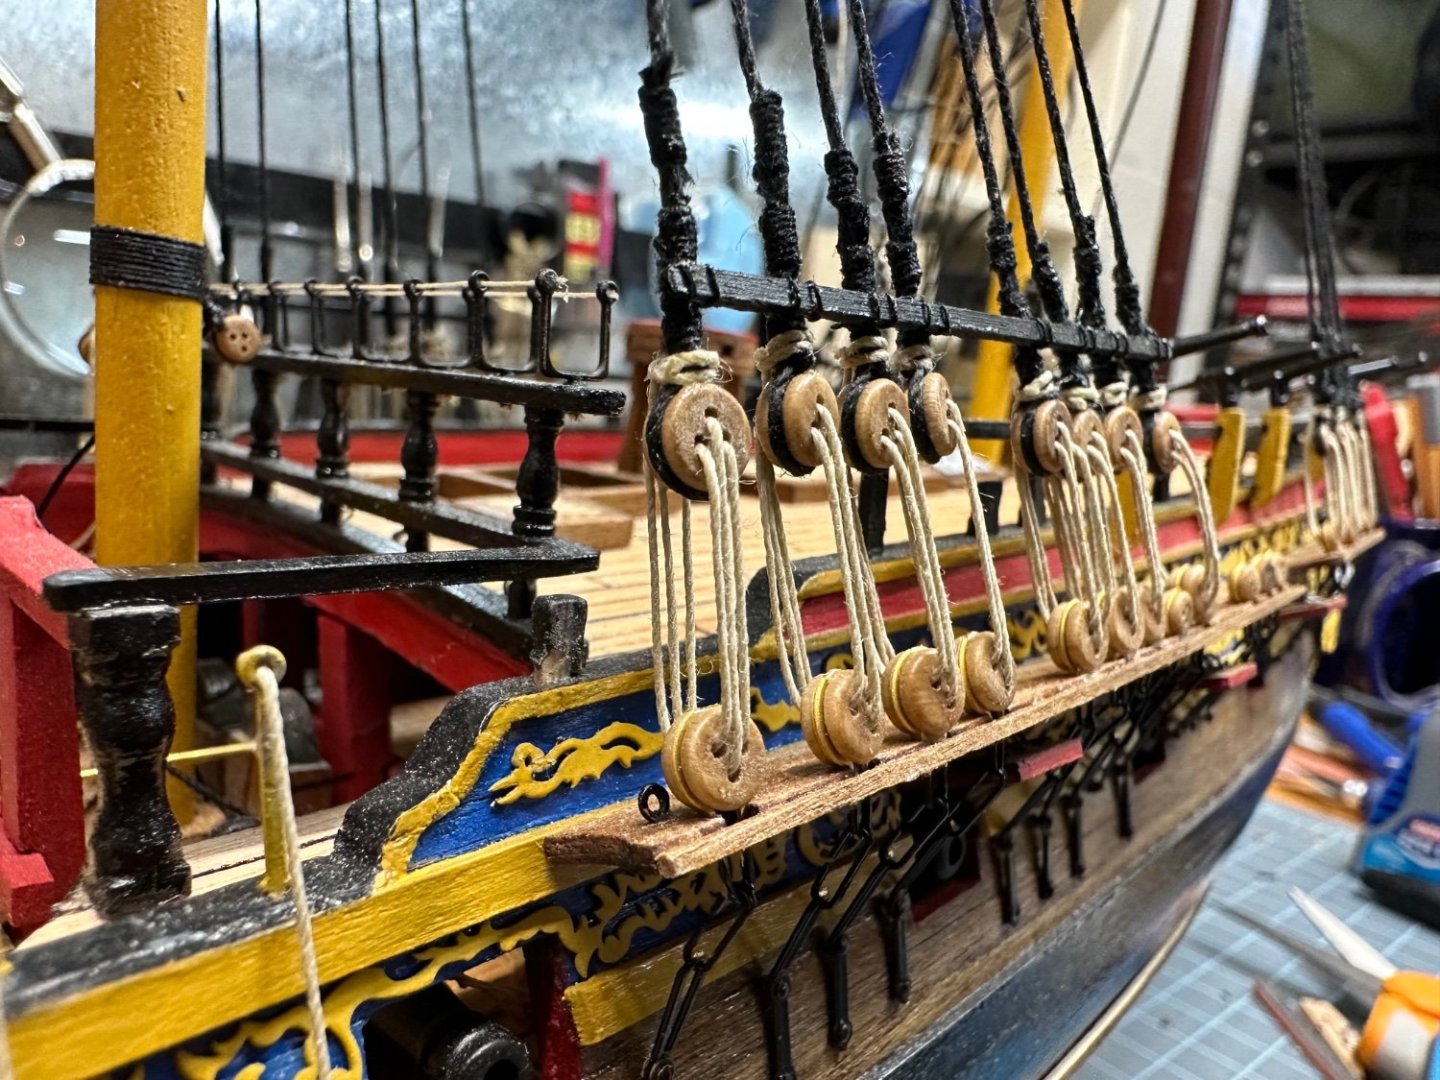
Lots done since last post. Finally finished the fore, main, and mizzen mast lifts. Just need to trim tag ends off once the glue dries. Overall I’m happy how they turned out. Took nearly 15 hrs to do. This hobby is certainly not for someone looking for instant gratification…
I tied them to their prescribed belay point and affixed rope hanks and coils as I felt were appropriate. The coils may be incorrect but I’m happy with it. It looks “ship-ish”, besides, the directions said to tie to the rail, and I didn’t know what to do with the rope end. It looked kind of awkward hanging there.
I have one more set of lifts to do (spritsail yardarms) and then the clewlines and buntlines. Then I’m done.
- Barbossa and Knocklouder
-
1
-
1
-
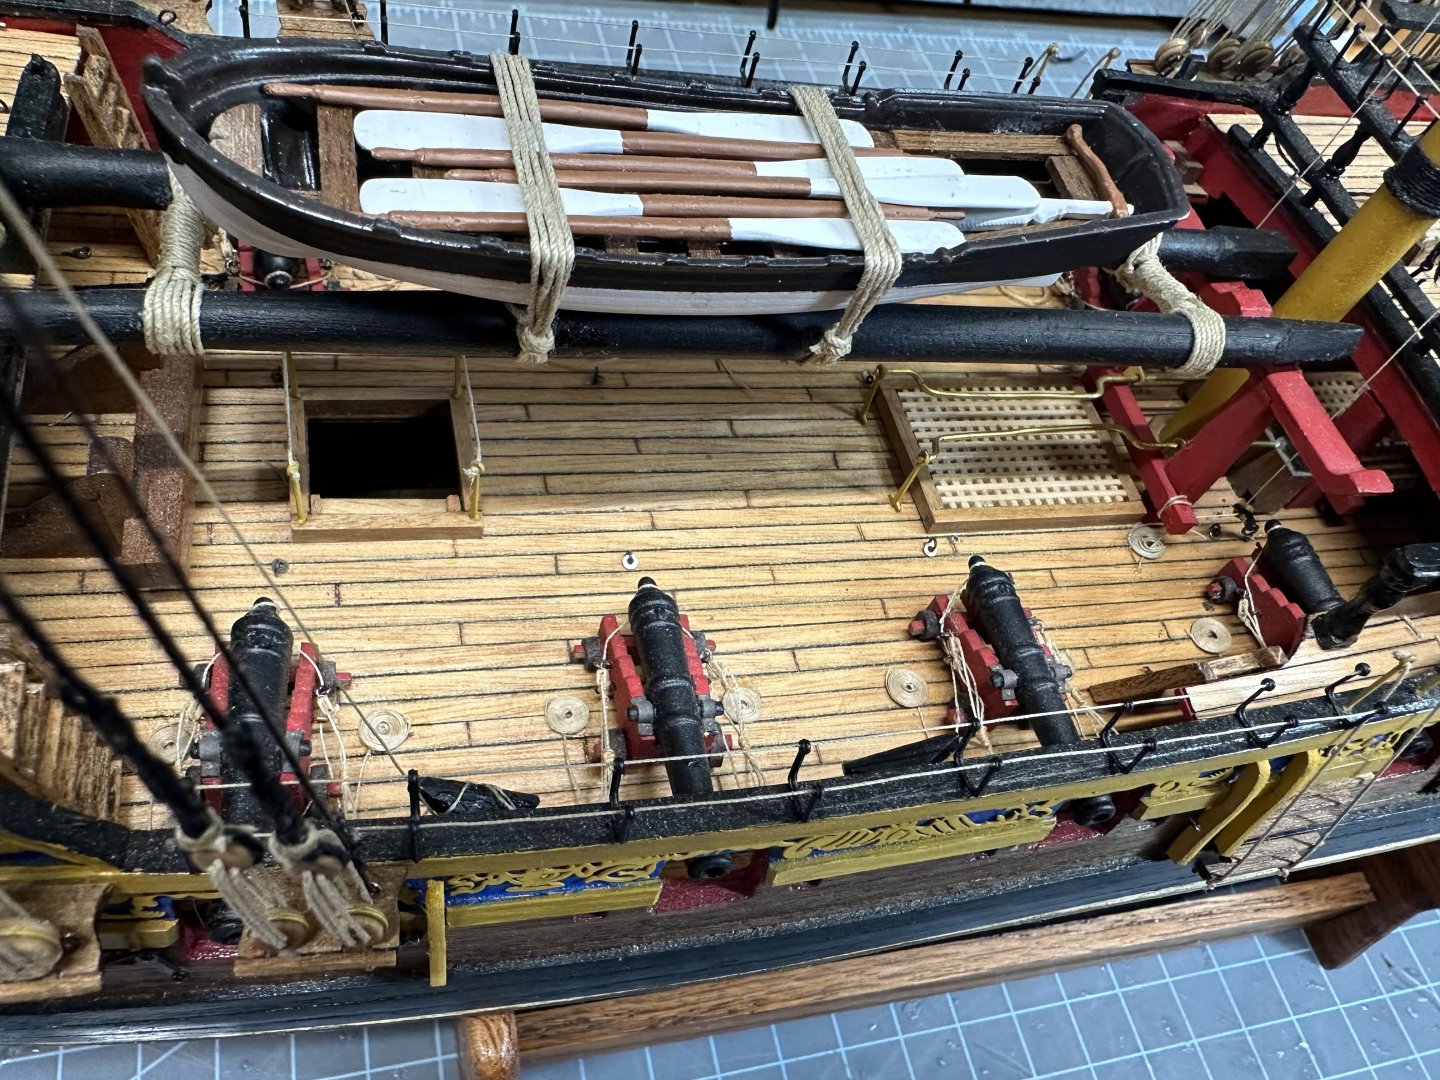
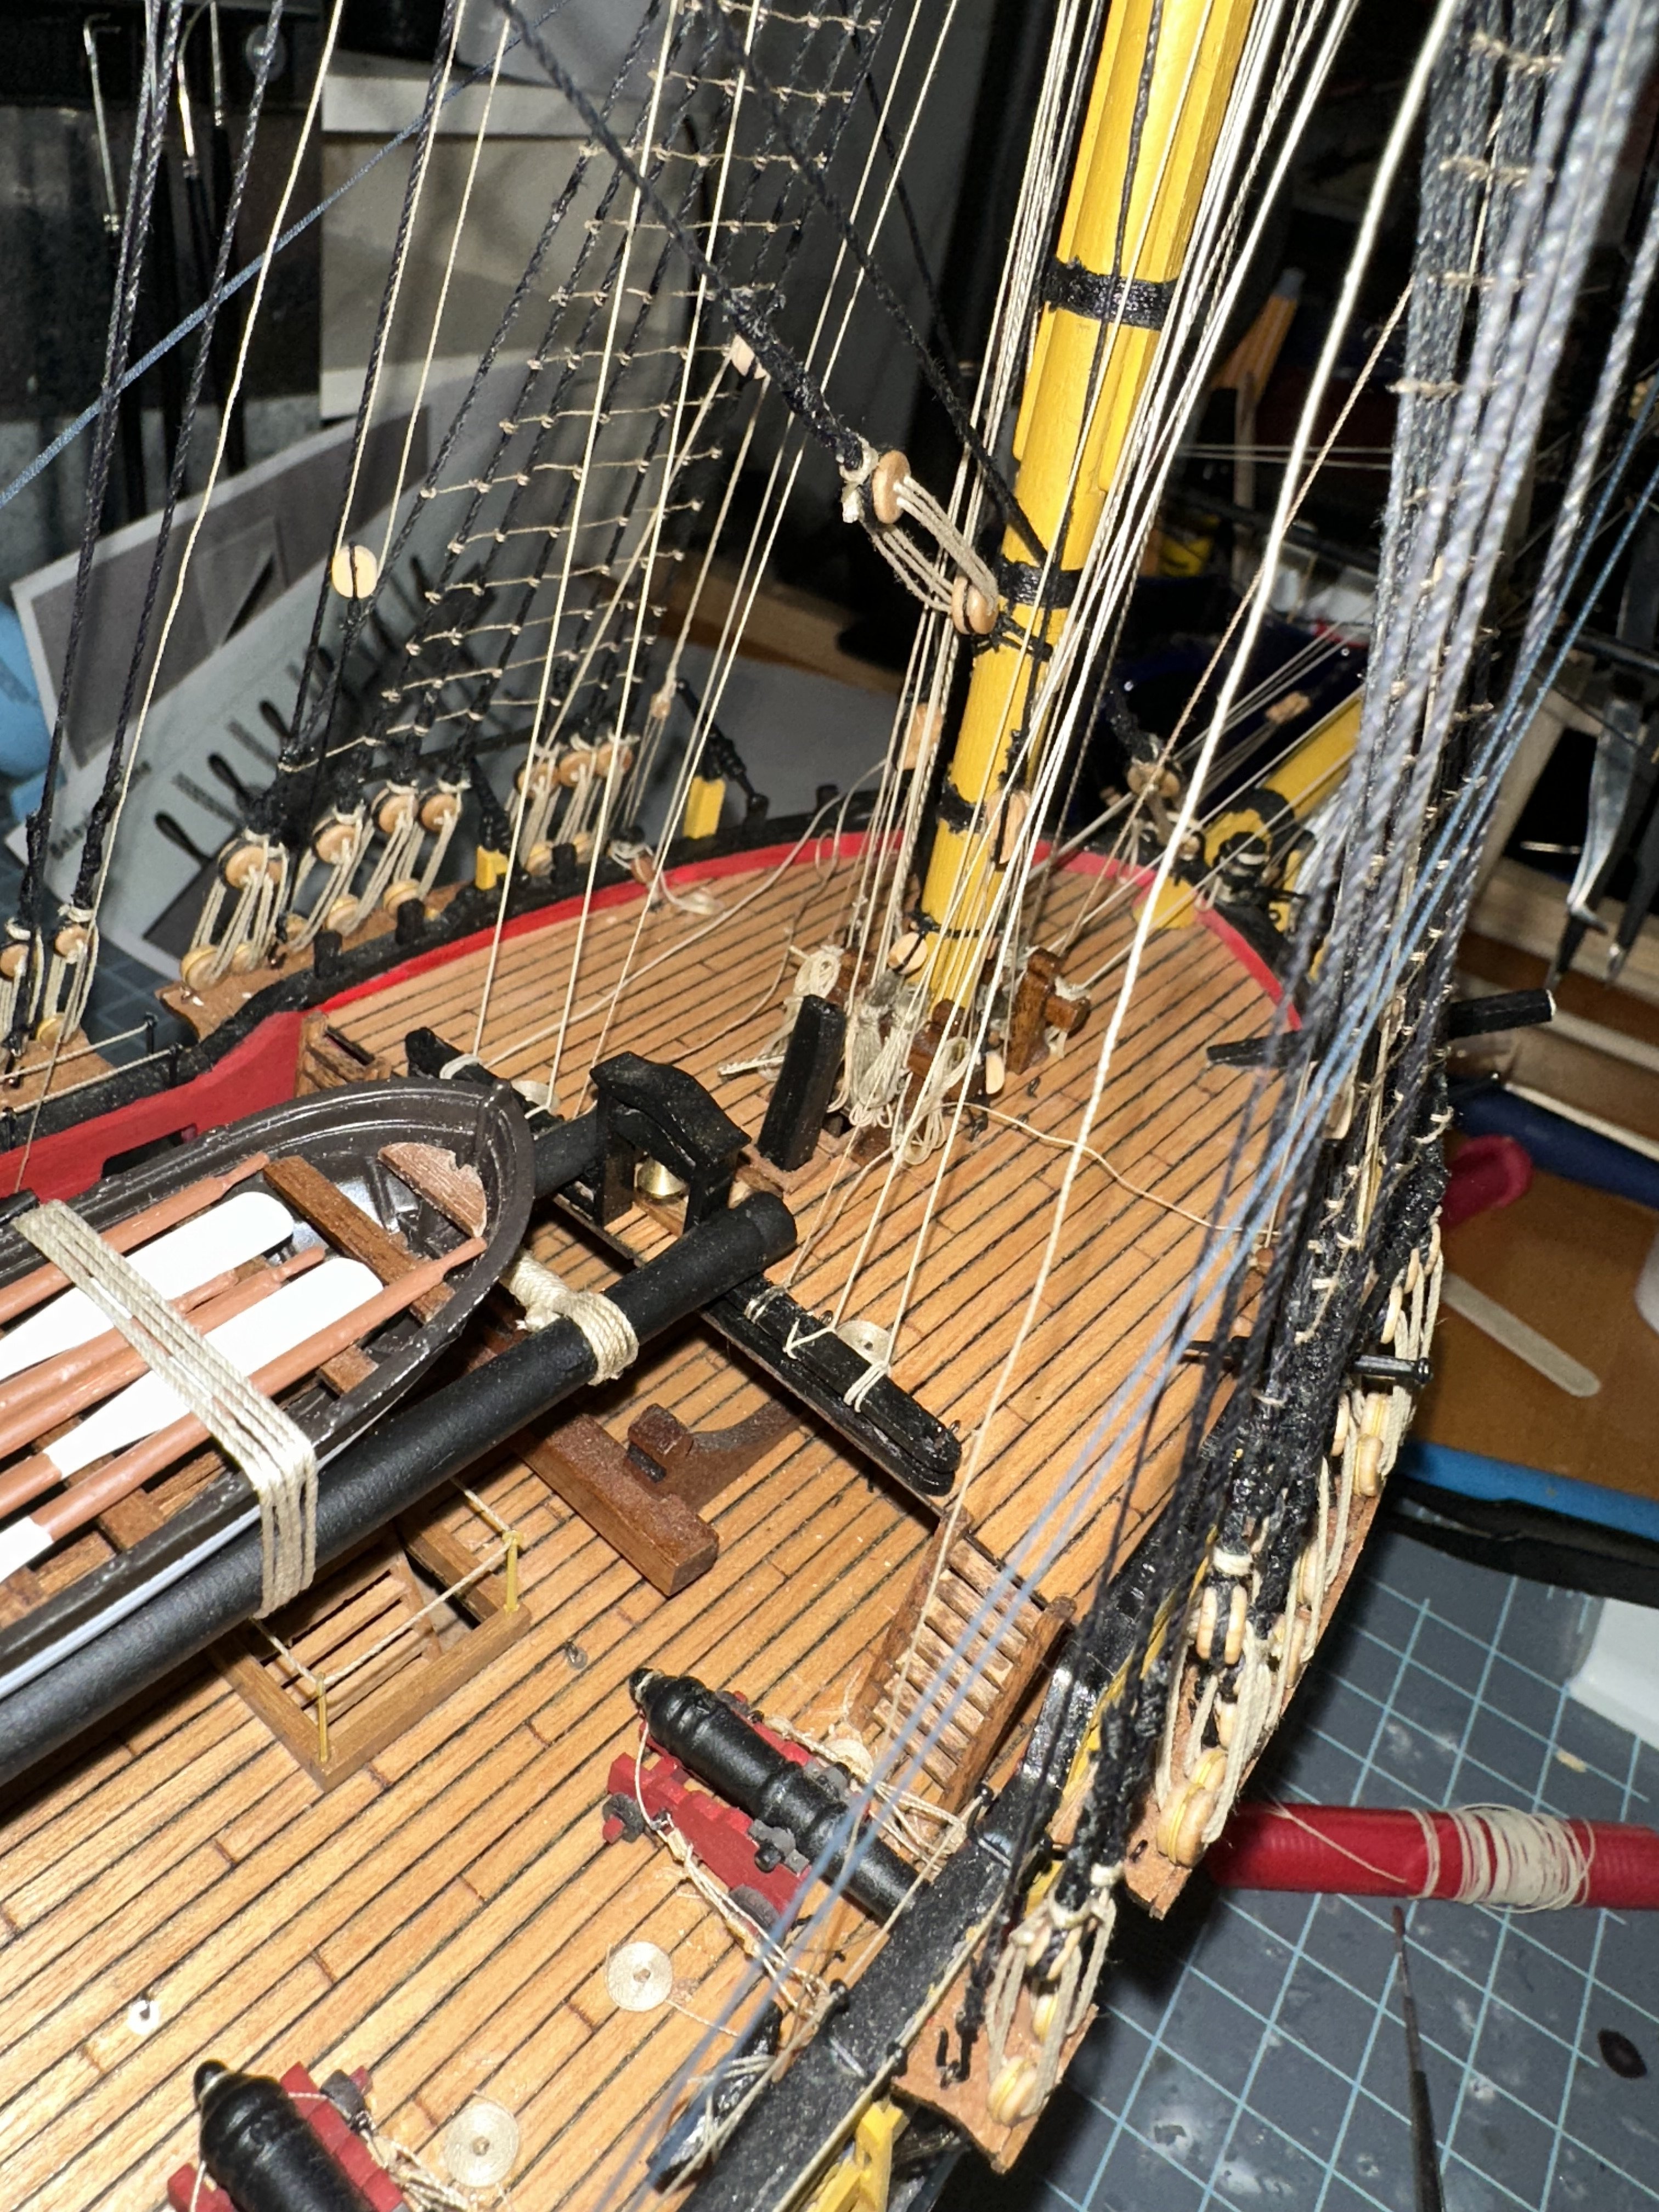
The port side guns done. Yes, I very much prefer how this looks vs how it was.
- AJohnson, Knocklouder and brunnels
-
3
-
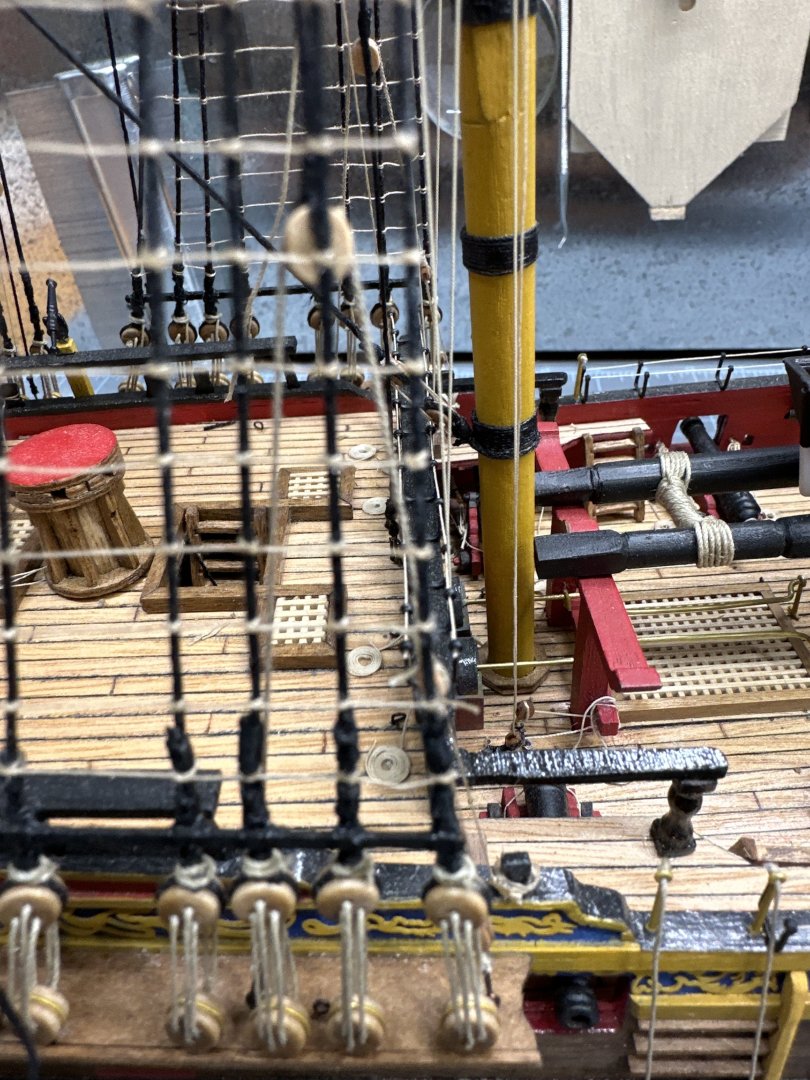
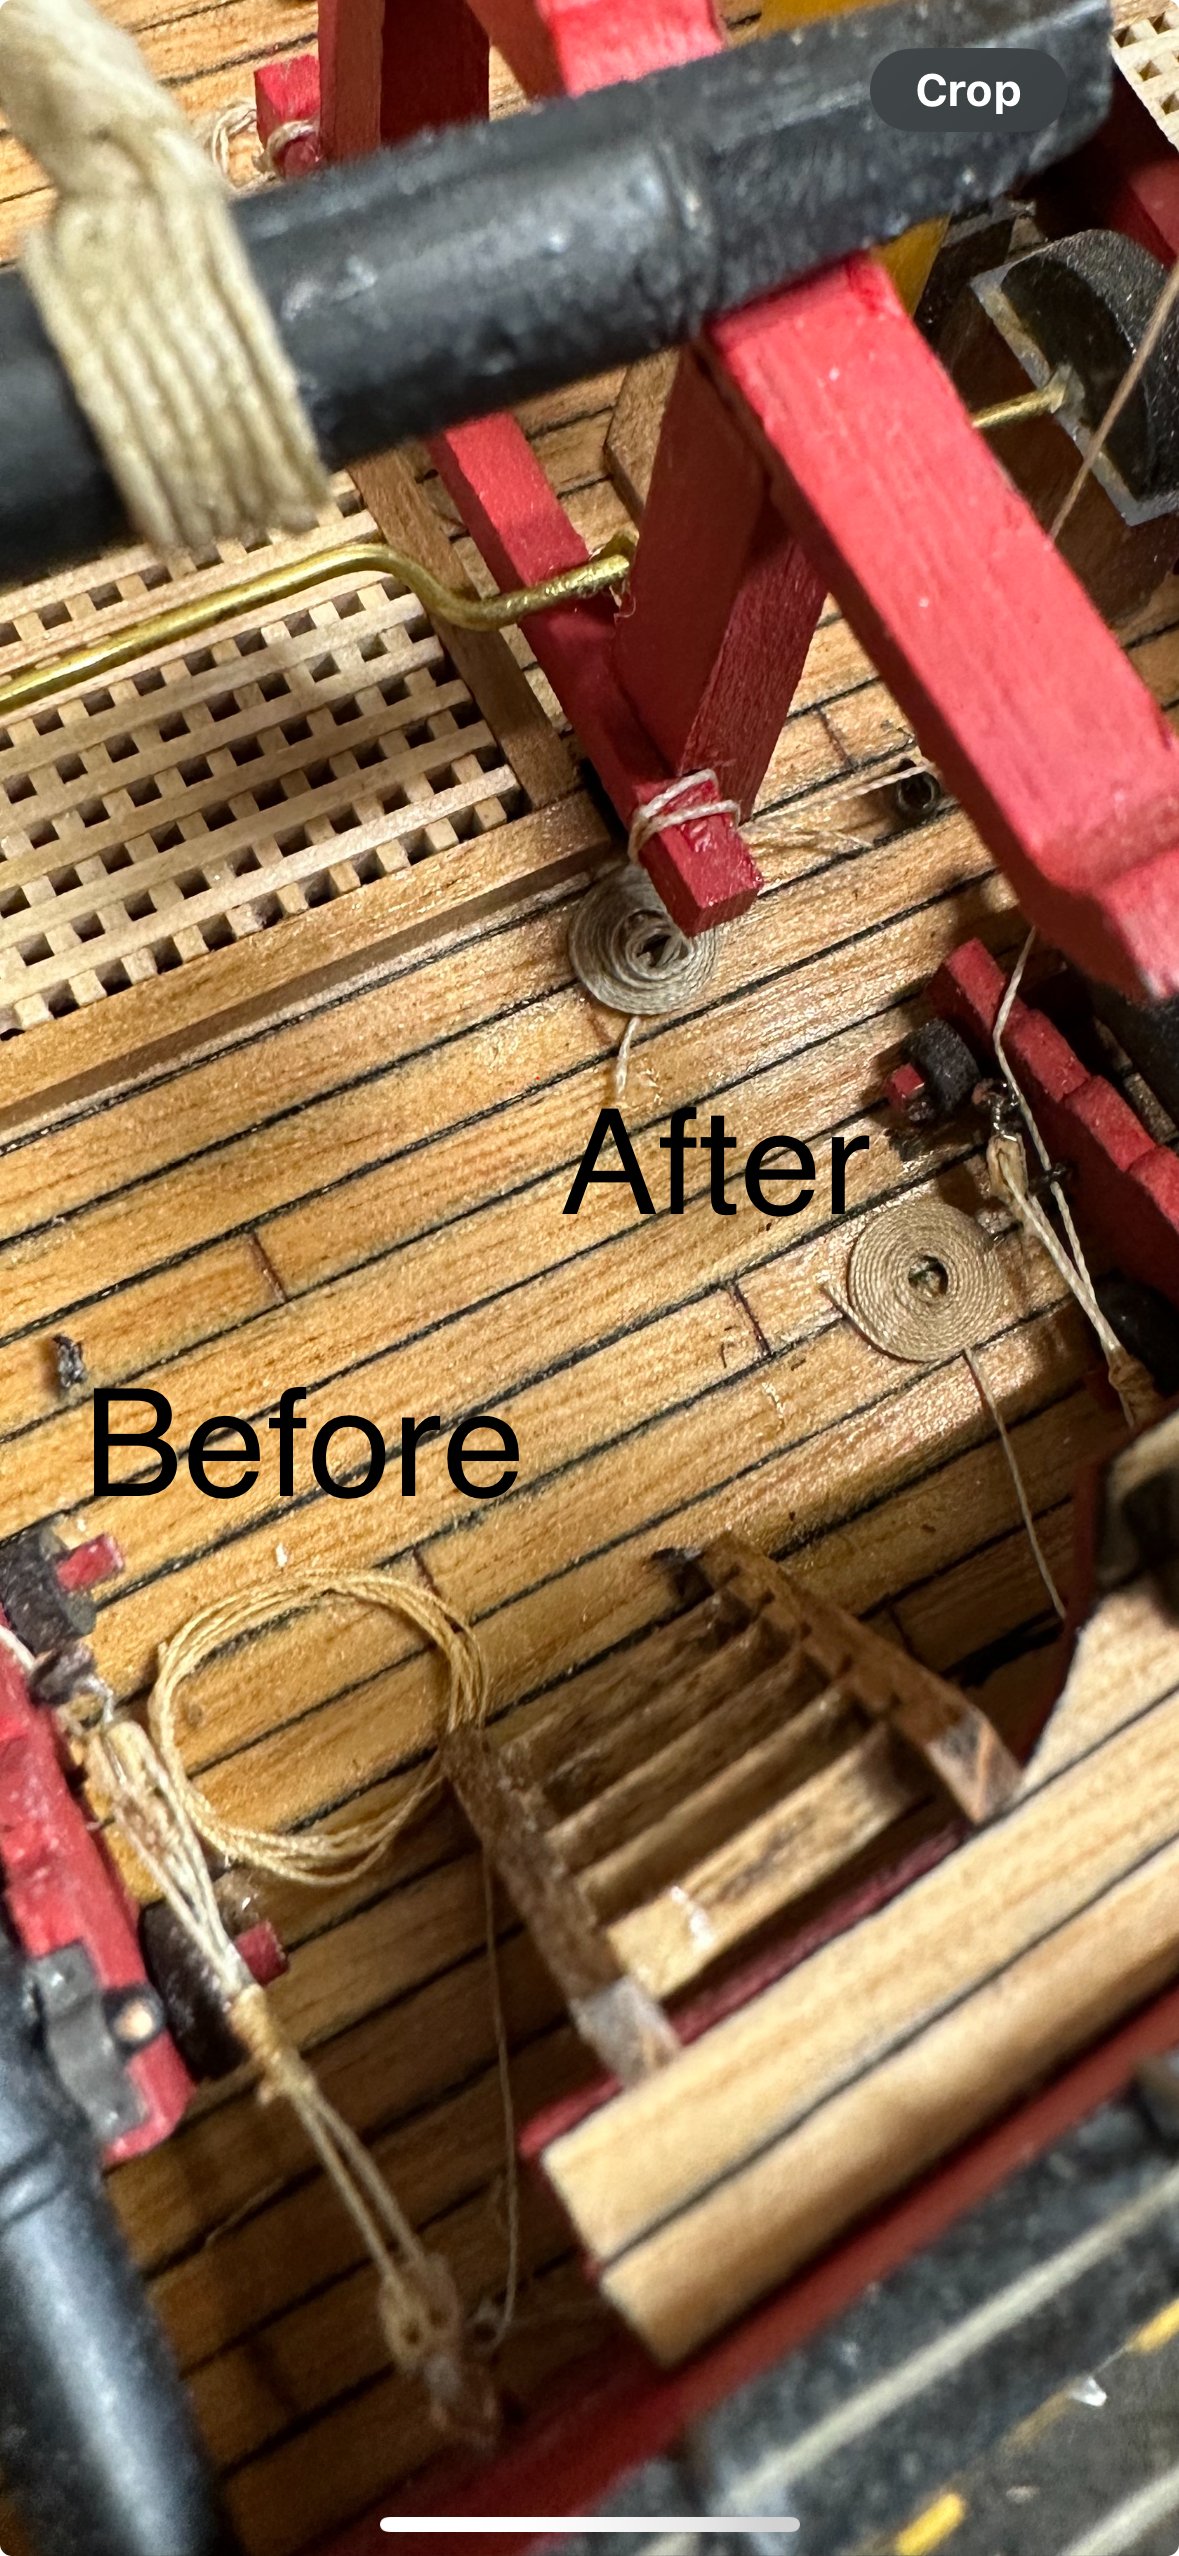
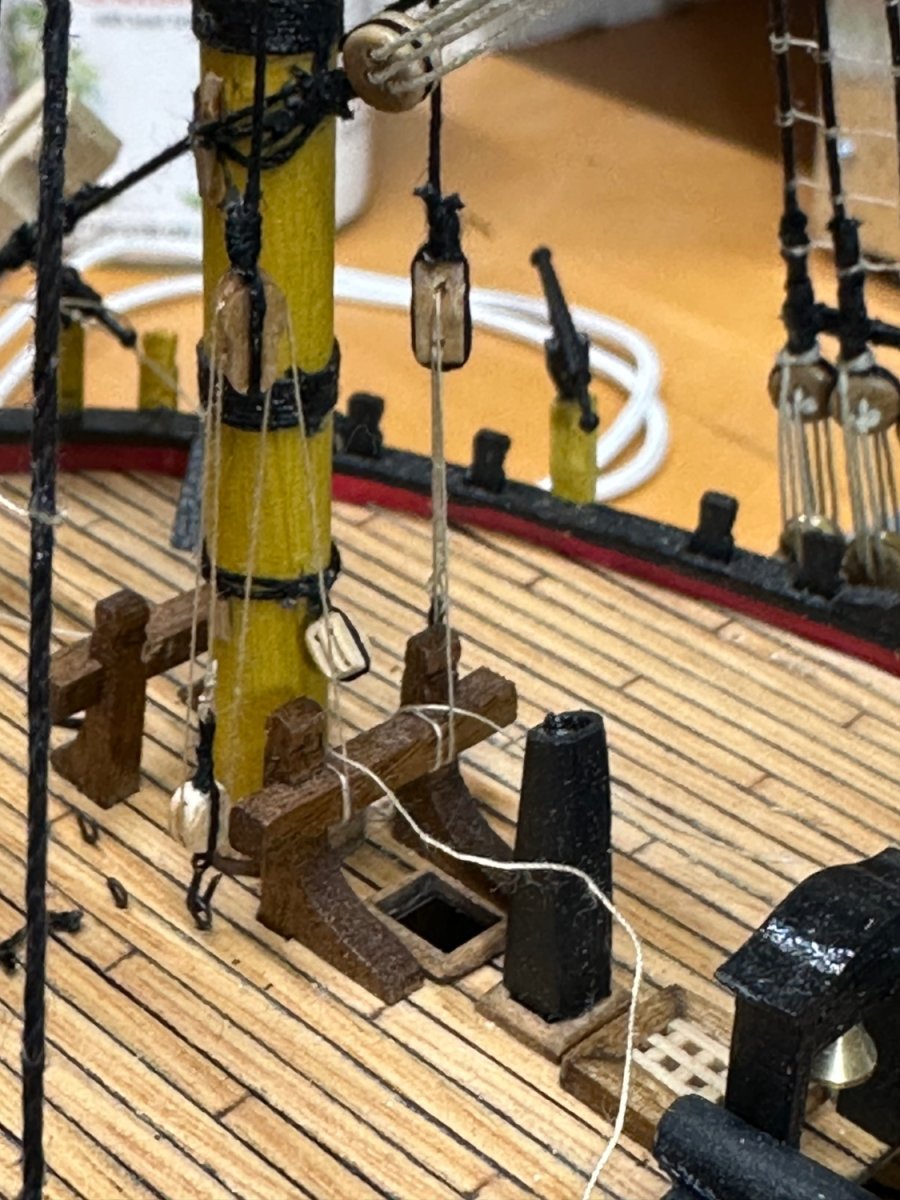
Took advantage of the day off to do something I should’ve done a while ago and that is to fix the rope coils astride my guns. The pic shows before and after.

I did these coils a few years ago and was never happy with them. This weekend I was looking thru the modelshipworld.com site and came across jigs for rope coils and $3 at the Dollar Store later I have rope coils. I pulled off the old ratty coils and started replacing with clean neat ones. Very happy with the results.- CiscoH and Knocklouder
-
2
-
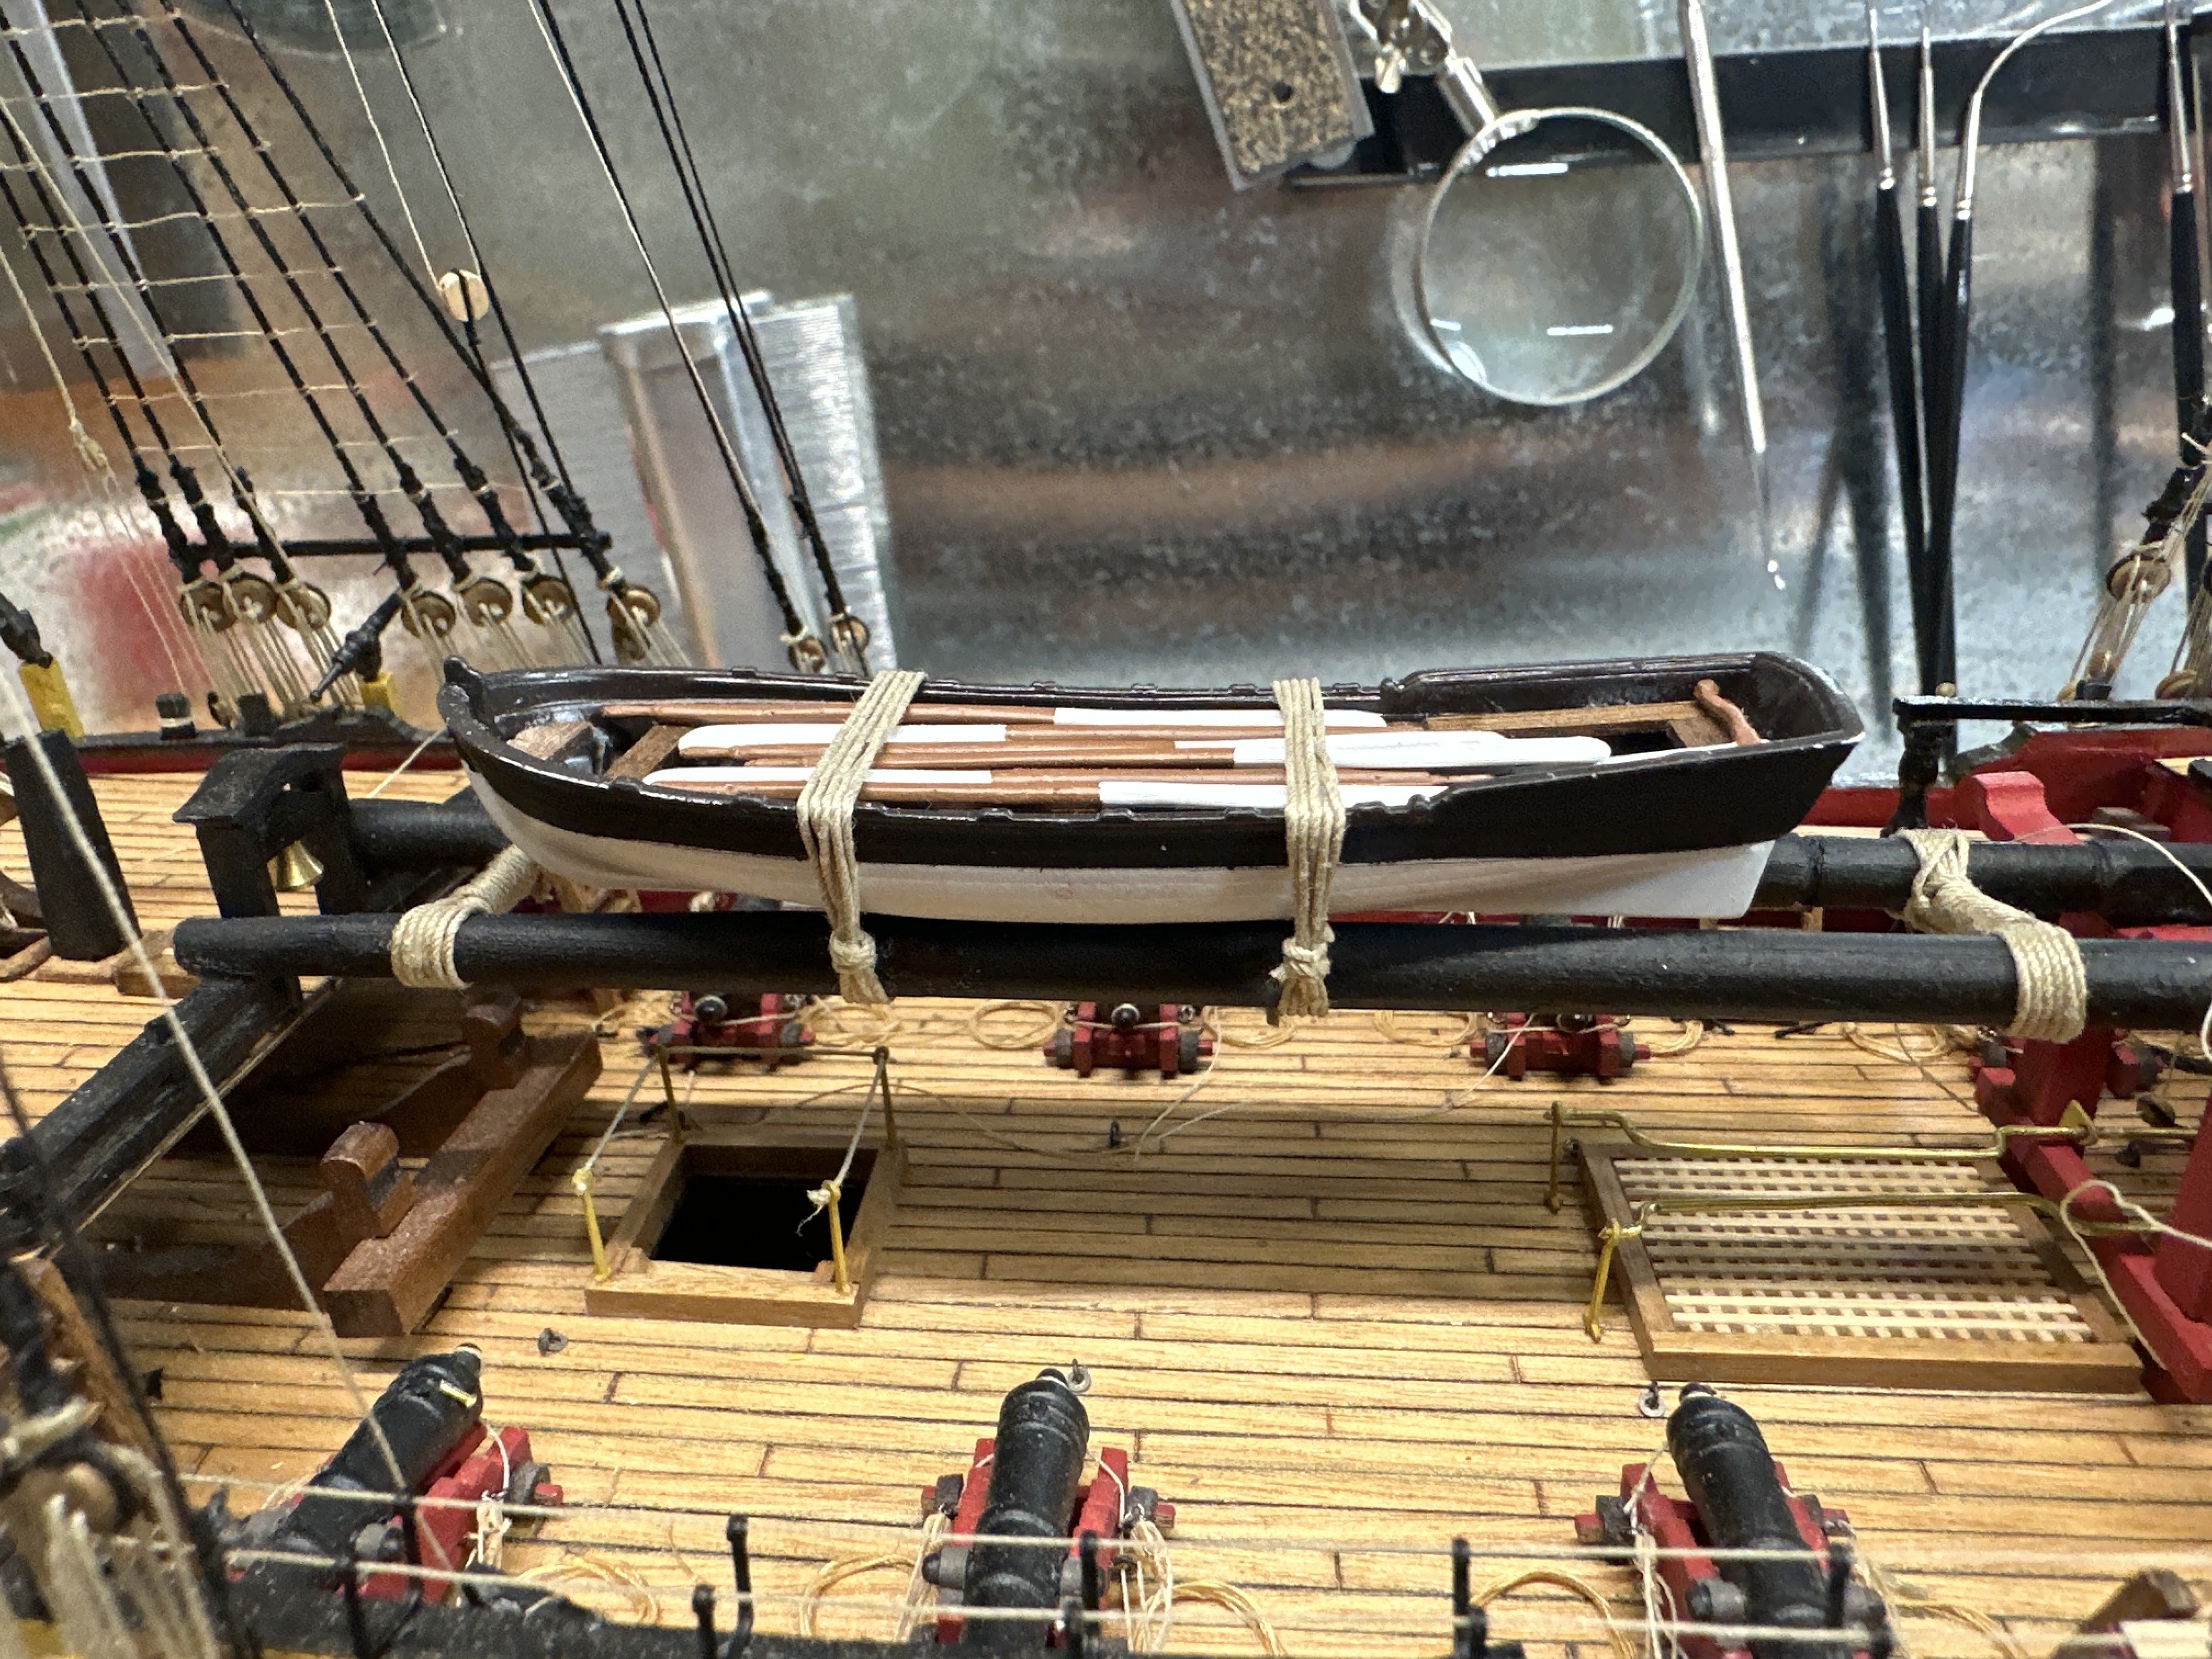
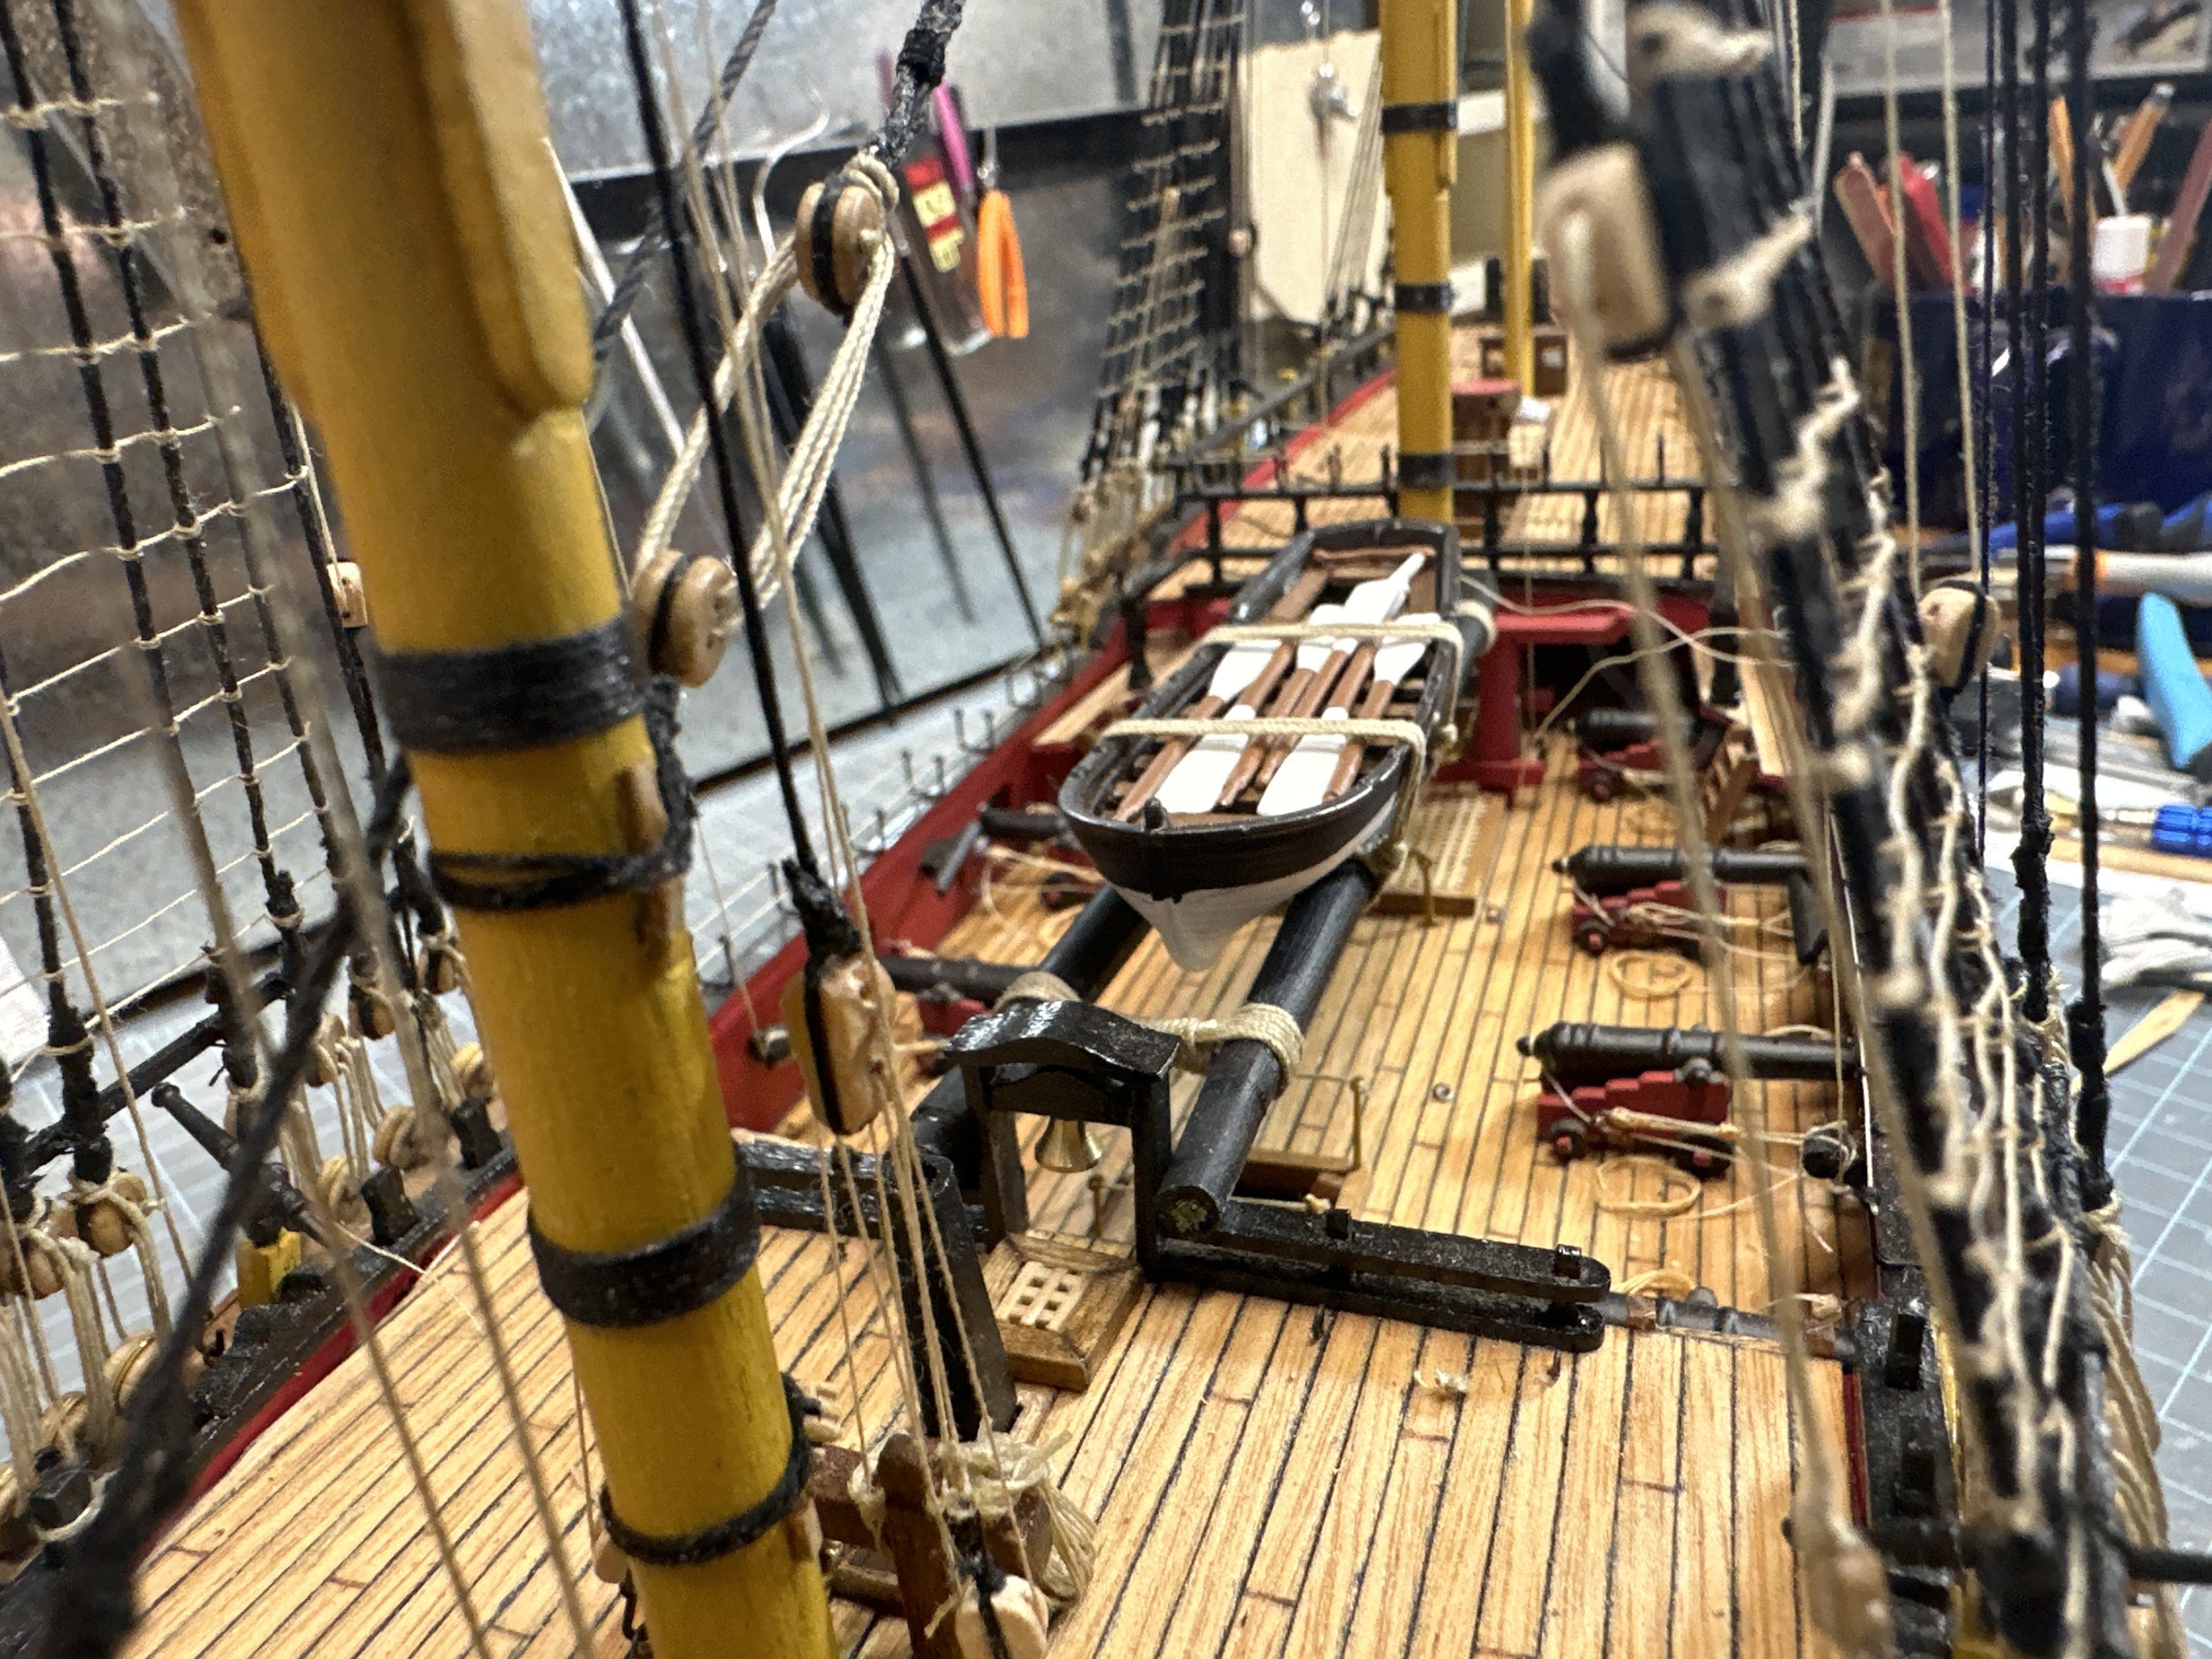
Here’s another detail Amati really didn’t cover well, the ships boat. I did this some time ago but forgot to post. I had to do some digging on what they looked like but eventually I put on the ship’s boat, at least one of the one it came with. I bought the oars aftermarket. The planks are walnut.


I’m pleased how it turned out.
- Thukydides and PaddyO
-
2
-
Foremast yards have their tyes. Now adding tyes to main yards. These are the main jeers and main topsail yard tyes. Looks just like the foremast ones.
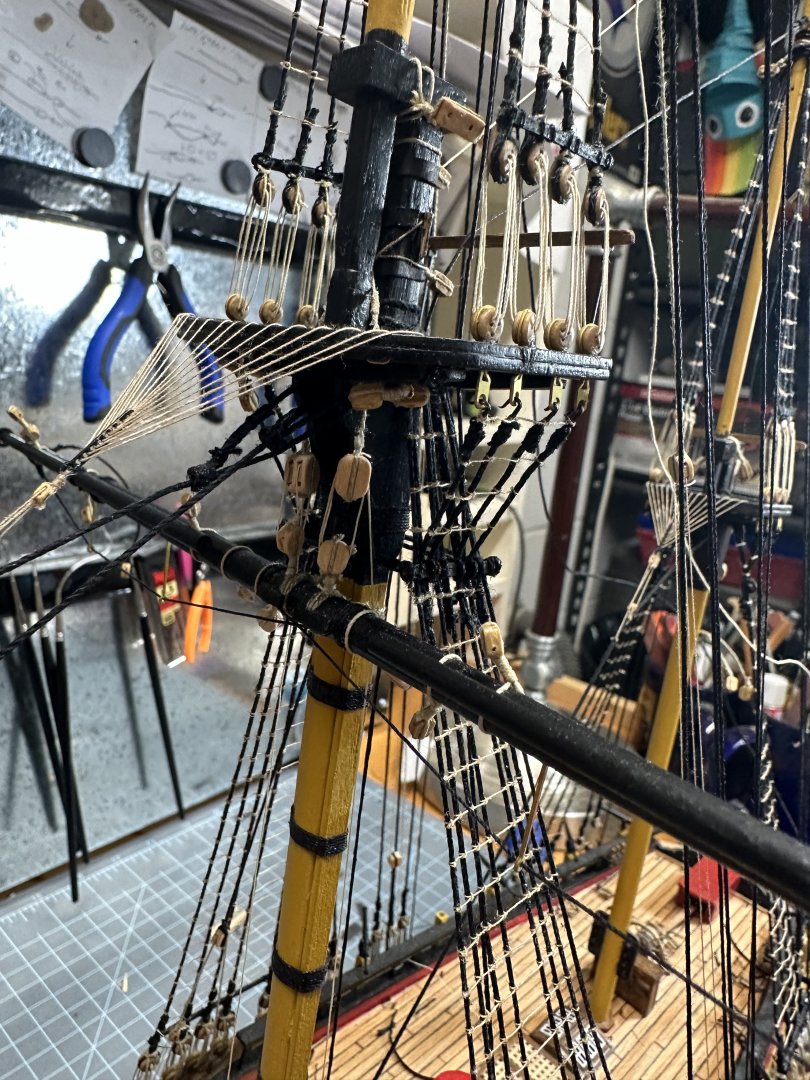
Next will be the main topgallant tye and halliard.
Still not done tho. Mizzen and bowsprit and also all my lifts. Still a bunch to do.- ccoyle, Knocklouder and Barbossa
-
3
-
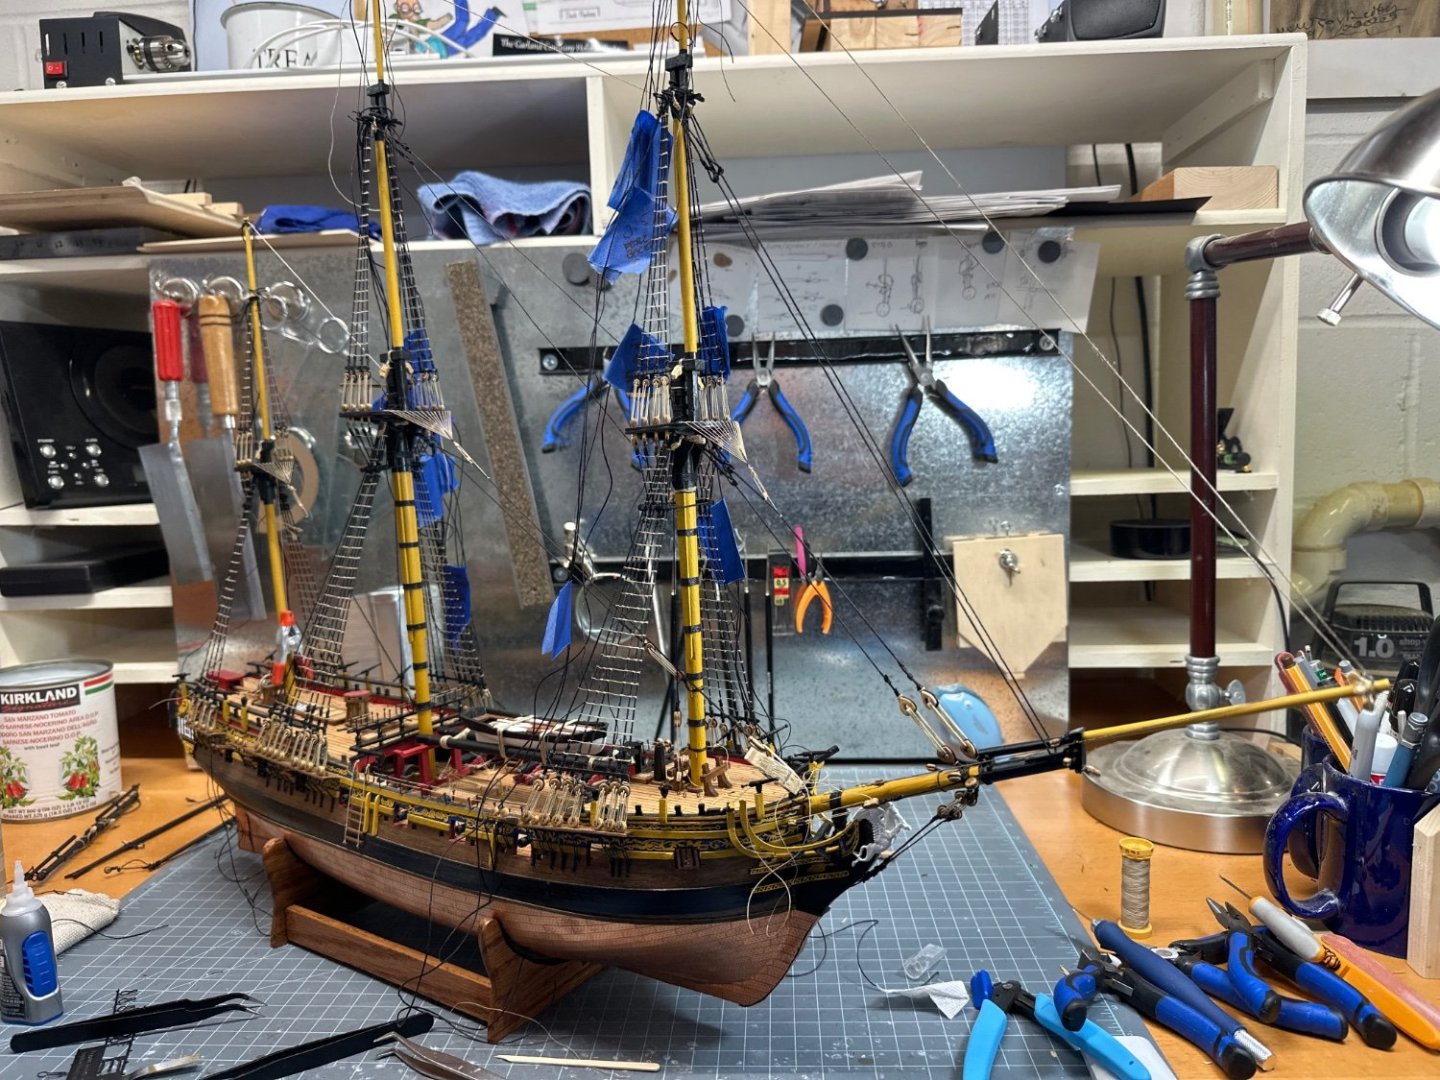
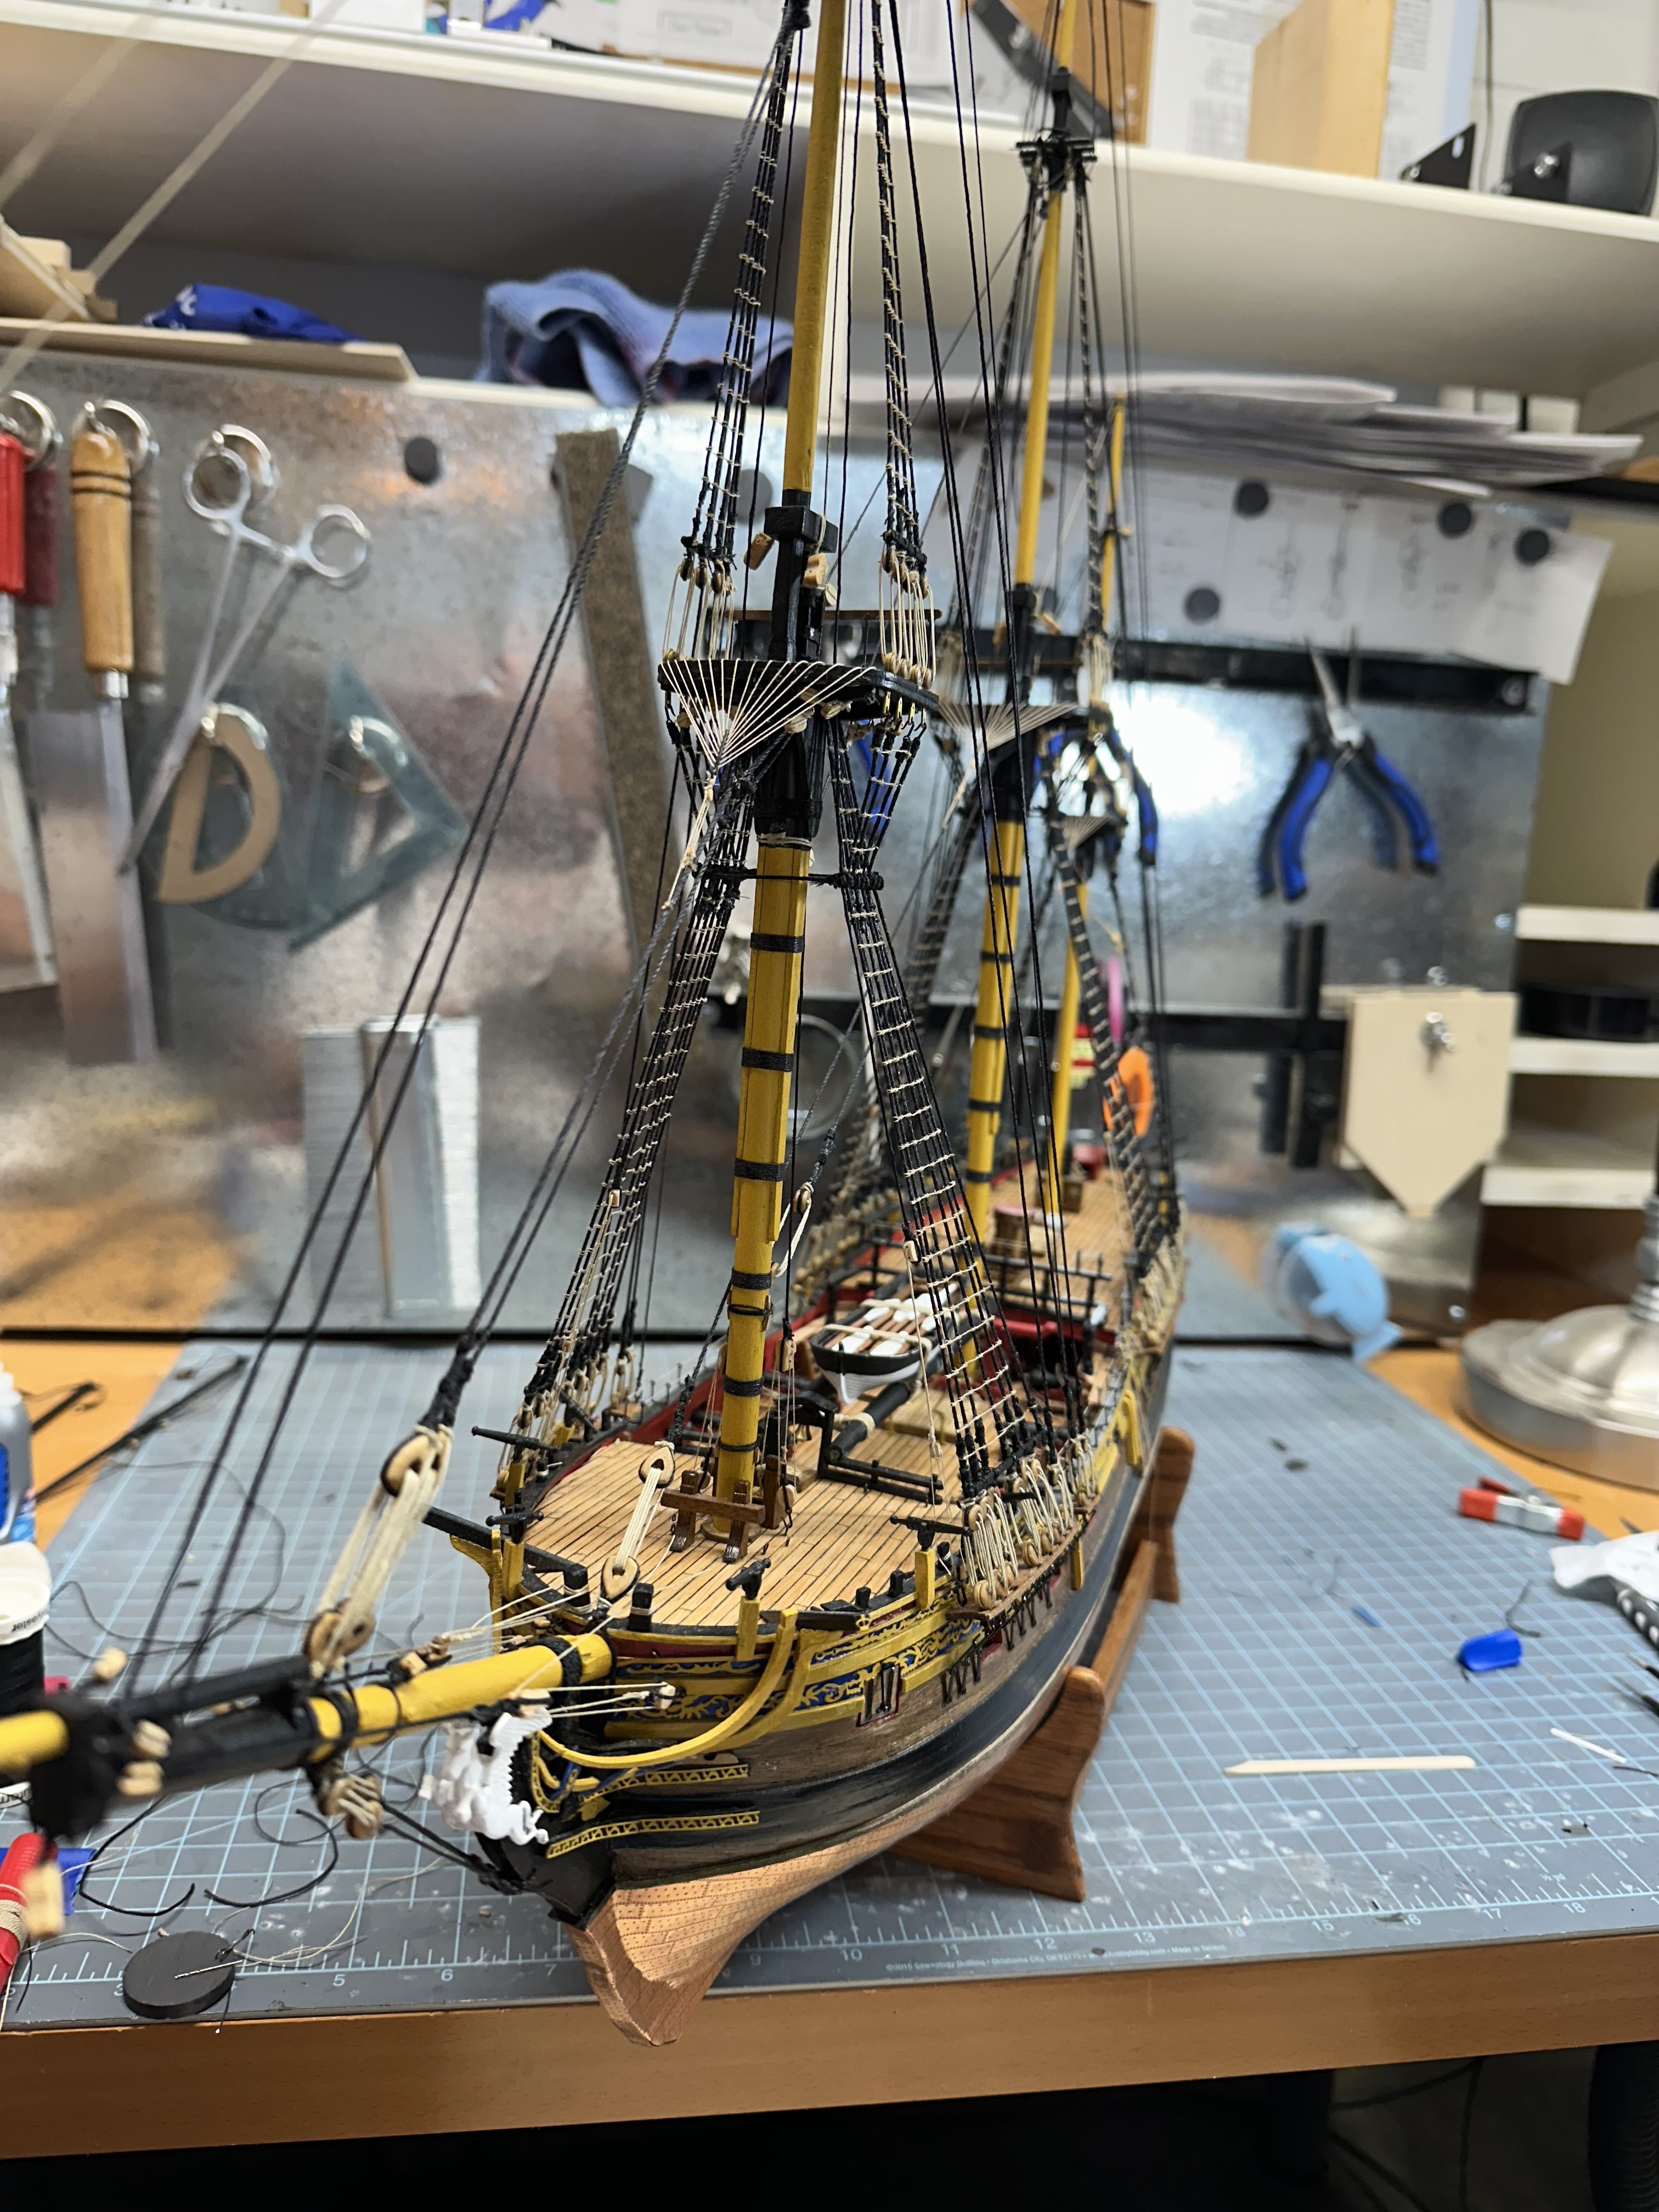
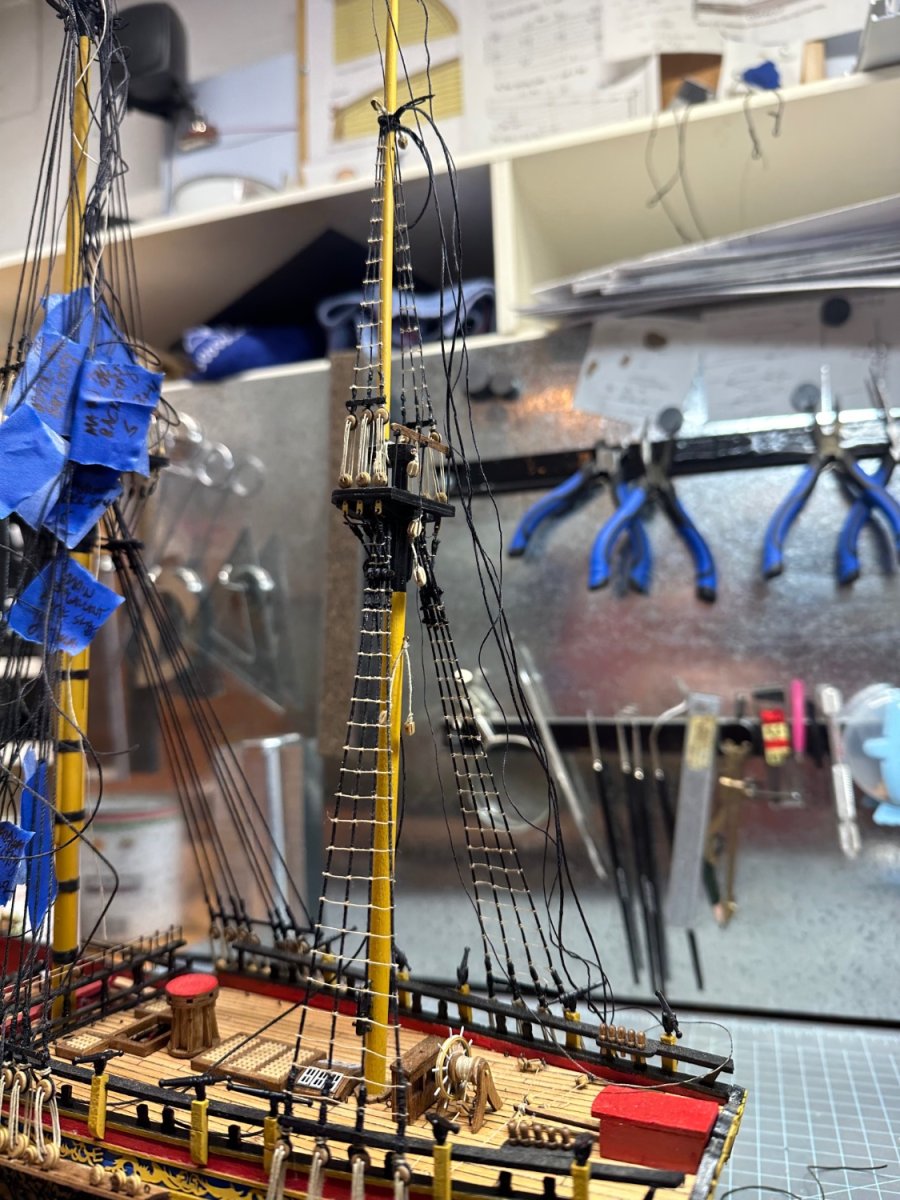
Finally done with the stays and backstays. Yards are next. I’m seeing the light at the end of the tunnel.

- BenD, Blue Ensign, wvdhee and 4 others
-
7
-
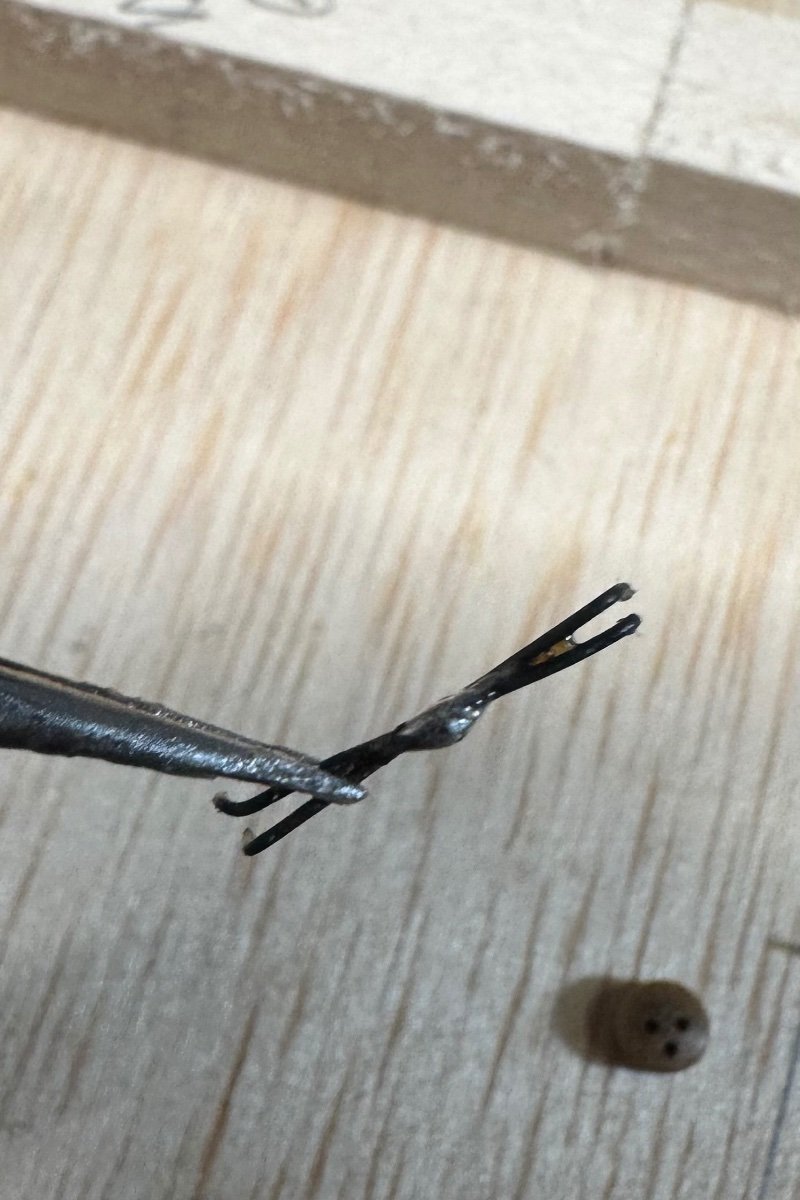
Was starting the foremast backstays, which are just smaller versions of the shroud deadeyes. Using the same (2 x diameter) + radius relation between top and bottom, I decided to use another wire criss-cross jig so that all of the distances were more or less equal. The two crossed wire was so fiddly that I soldered the wires at the intersection. Now it’s easy to insert.
before soldering I used a small nail to hold the tops of the deadeye in place, then bent the wires to go into the two lower holes.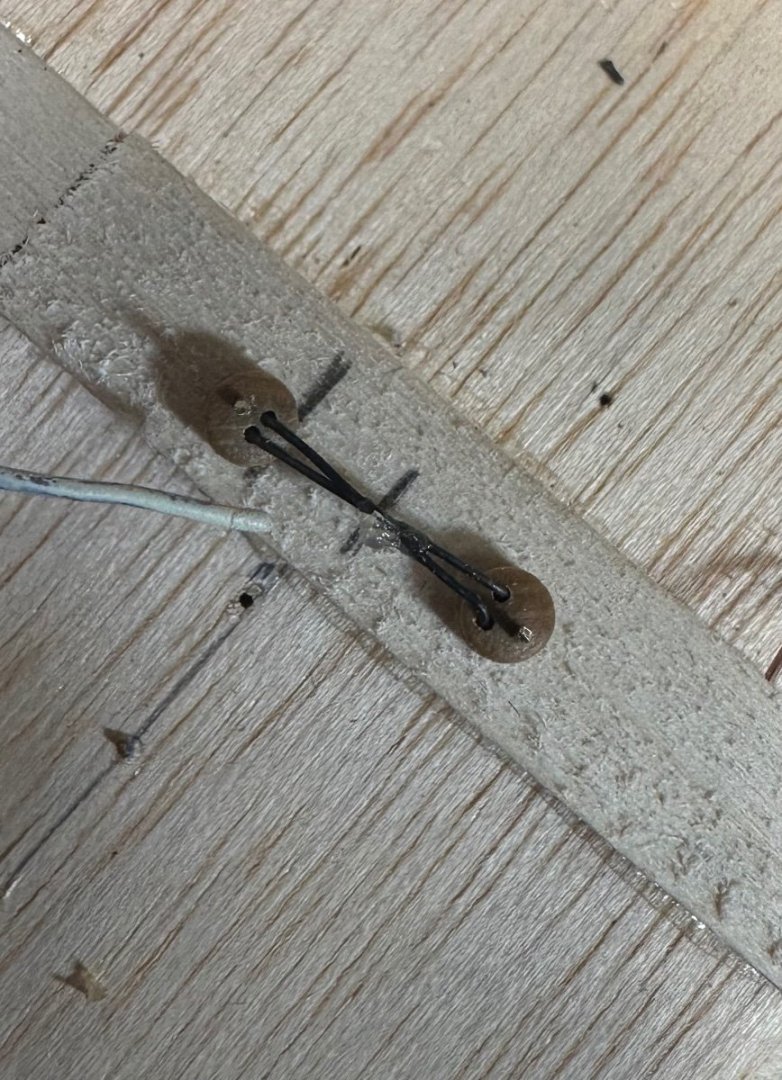
a little flux, and some solder…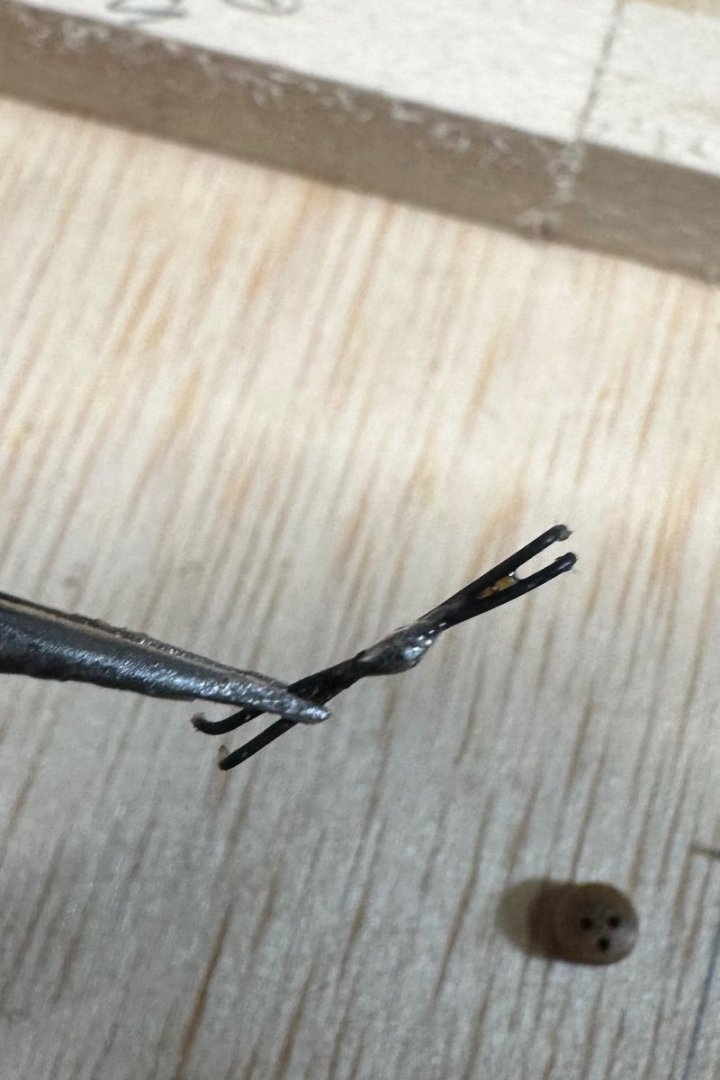
Hopefully that’ll work.
- Knocklouder, BenD and Moonbug
-
3
-
550h. And still counting.
- Knocklouder and Mr Whippy
-
2
-
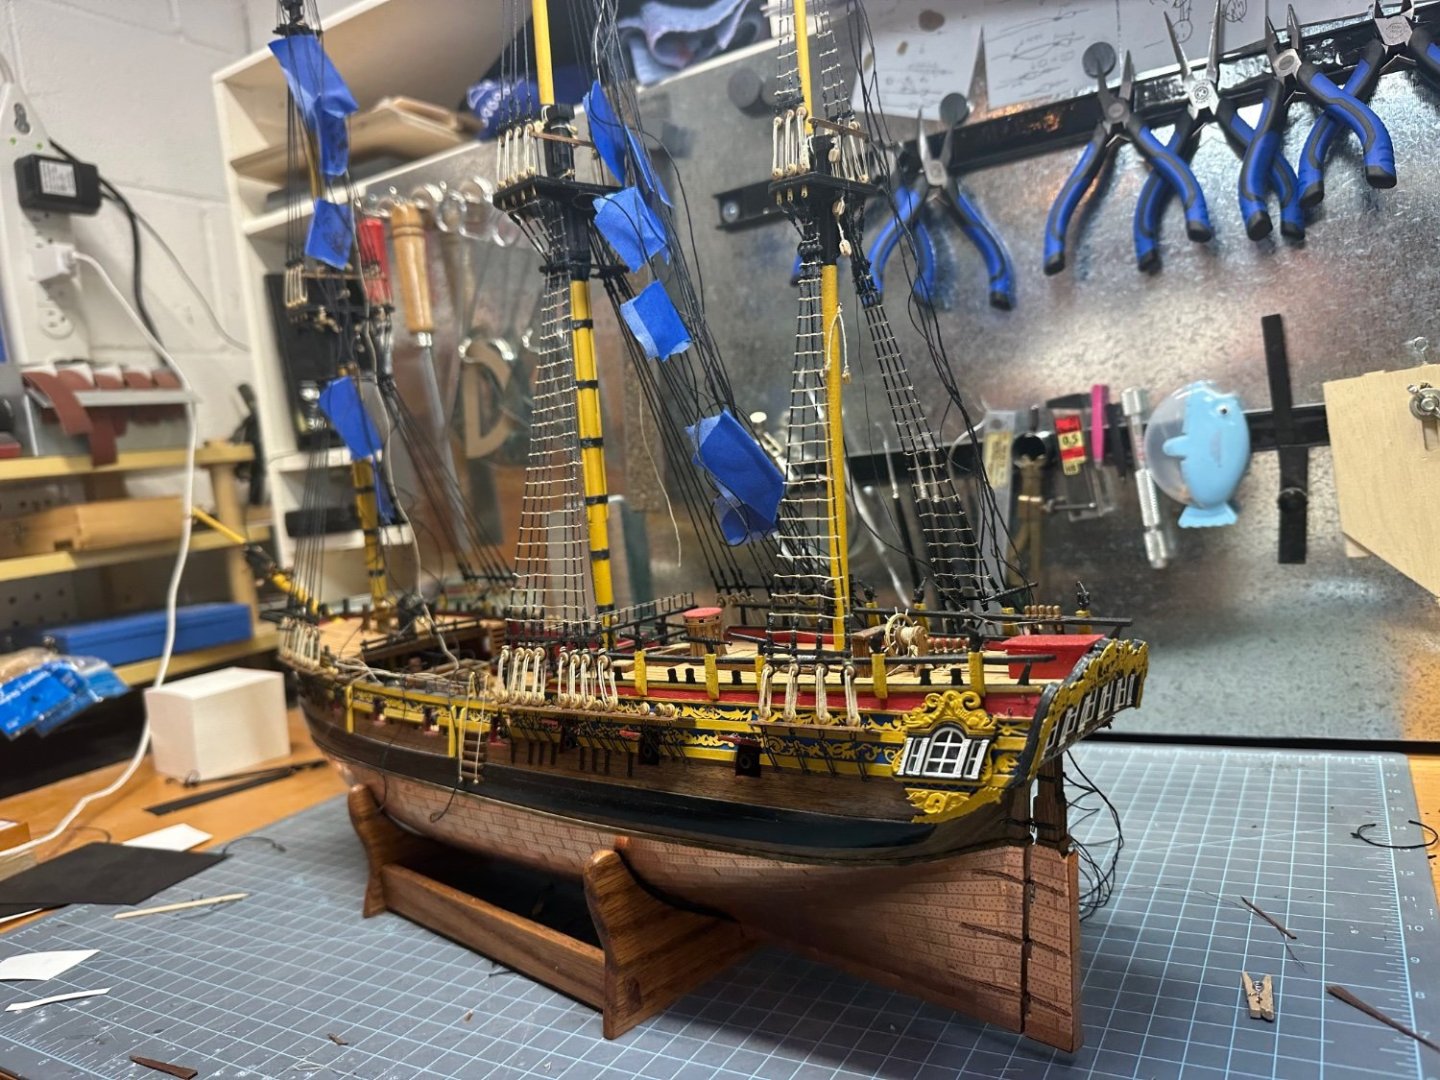
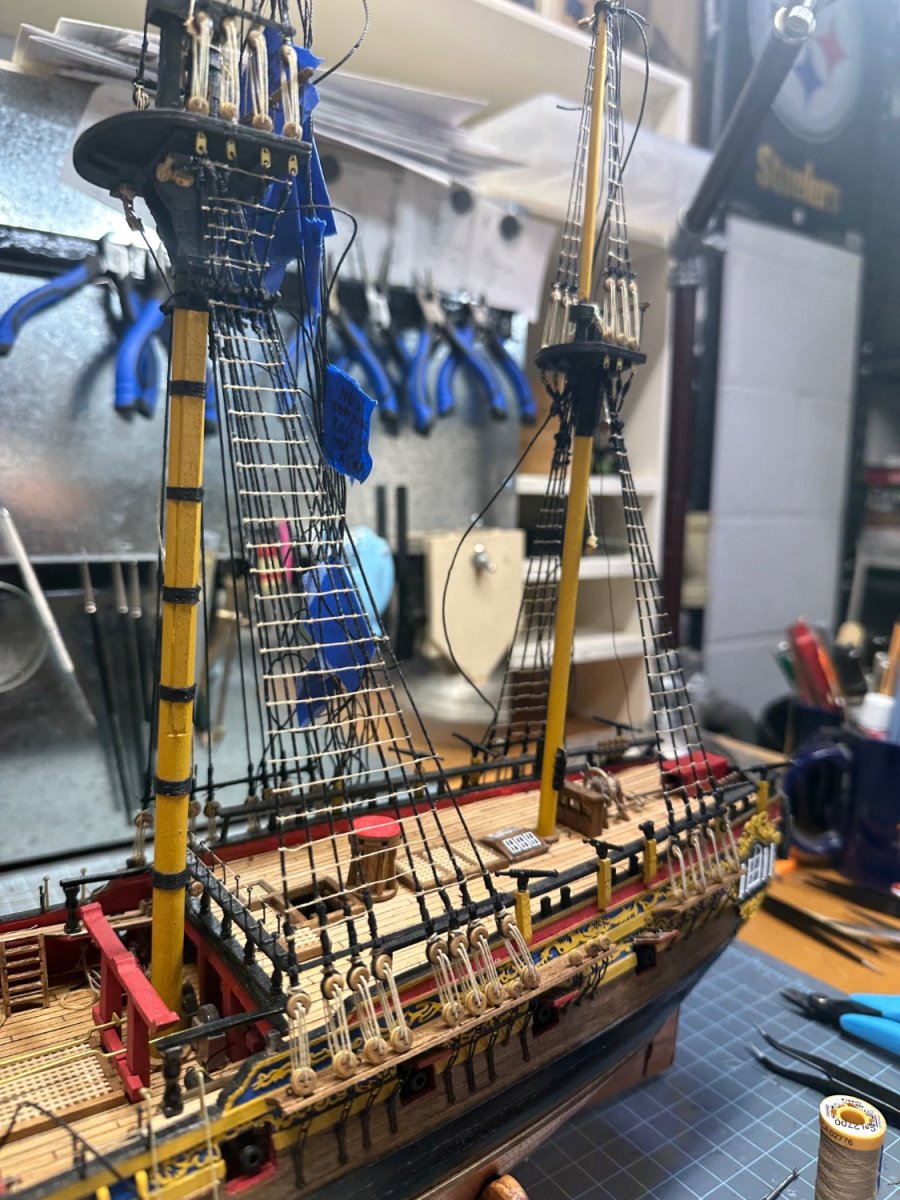
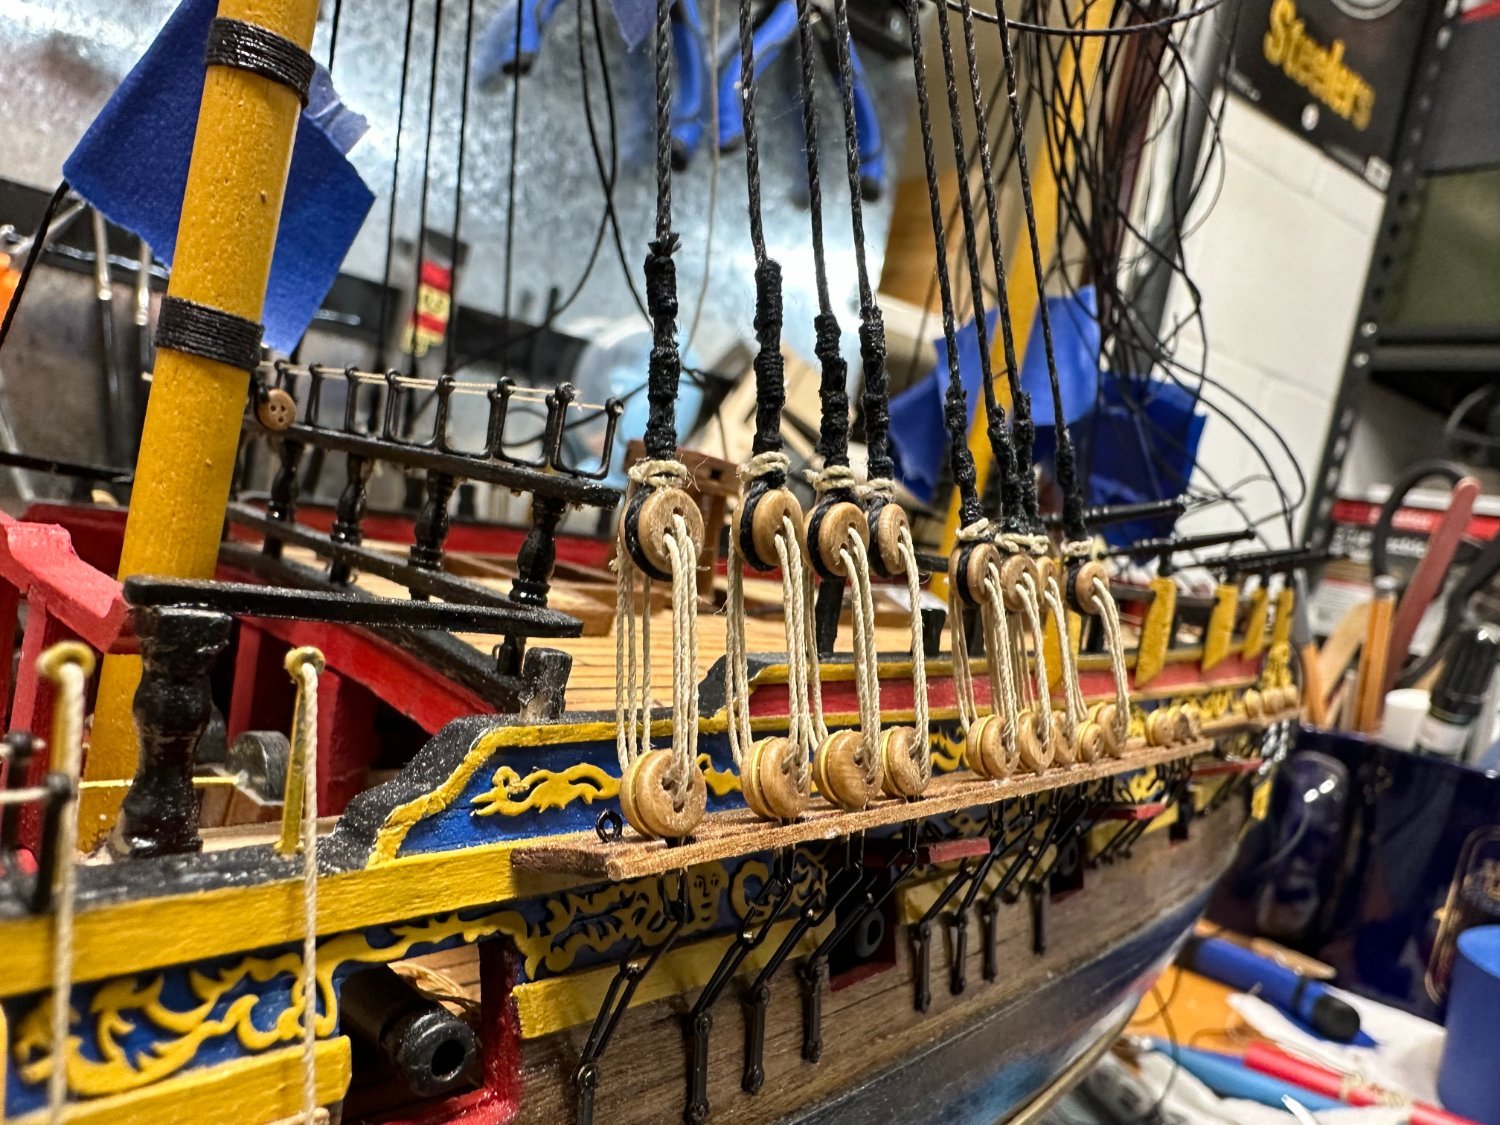
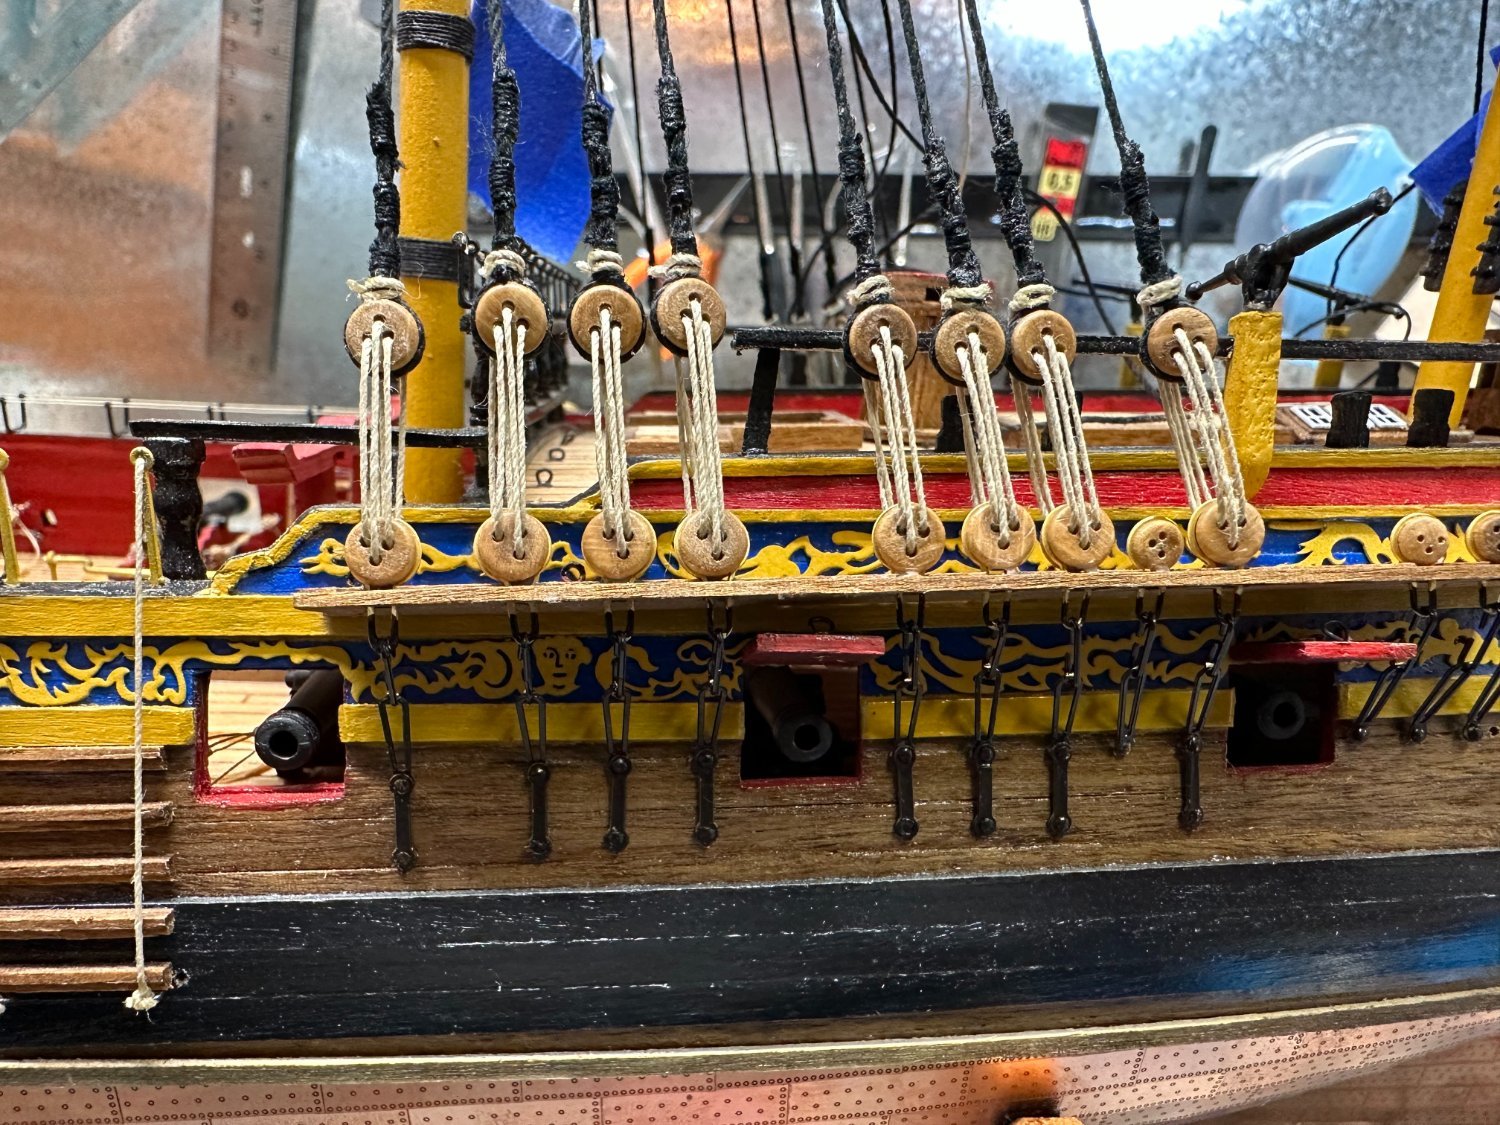
All of the crowsfeet are done. And my stays look to be done. Ready to begin backstays.
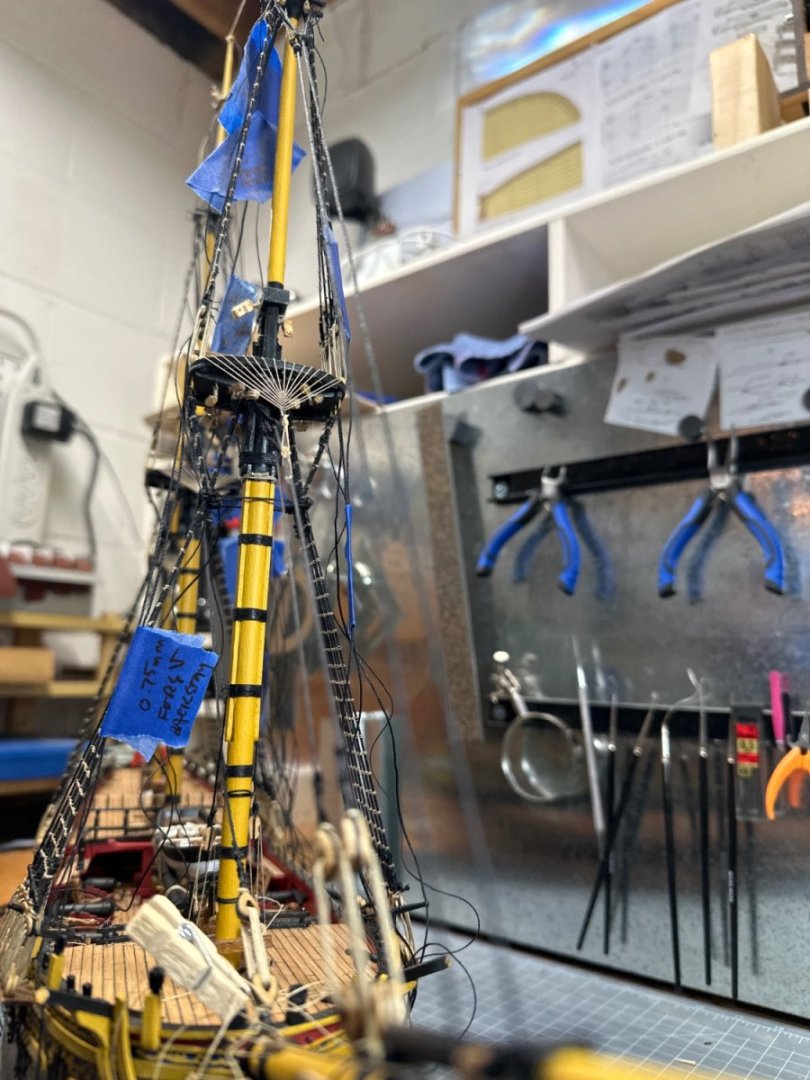
Here’s the full view so far. The blue tape is there to keep tabs on the back stays that remain. I tied those on before I stepped the masts.
I’m actually logging my time on Excel, so each time I sit down and work, I “punch in”. It’s interesting to see how long it takes to do these features, and I try to improve that time if there are multiple of the same, like the guns or masts. I averaged about two and a half hours for each crowsfeet.
- BenD, Knocklouder and Mr Whippy
-
3
-
Fore mast stays are done.
Rounding off my 3rd Christmas time off with this ship tying (and retying, and re-retying) the maintop stay and maintop preventer stays and hooking them into the deck. I’ll trim some more of the pennants off when the glue dries. Also, I’ll use a jig to create rope hanks and place them on the pin rail. The tie off is temporary.

- Knocklouder, Mr Whippy, KARAVOKIRIS and 2 others
-
5
-
Focused on the bowsprit today. Bobstays, fore stays and fore preventer stays attached.
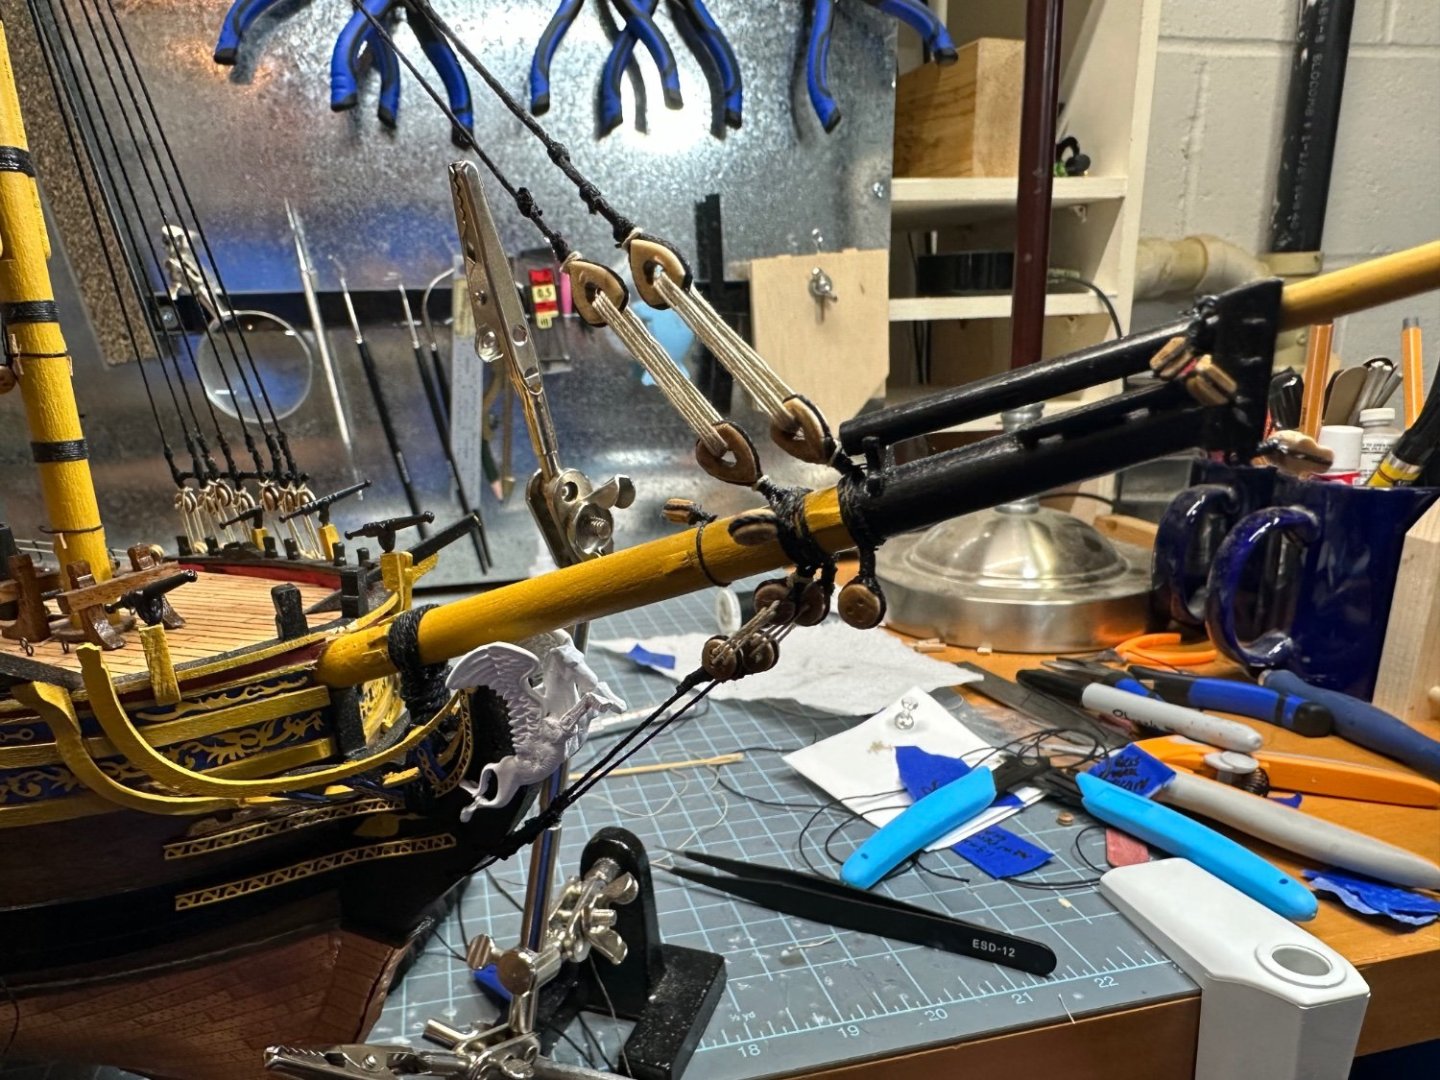 Also with touched up Pegasus figurehead. More tomorrow.
- CiscoH, BenD, KARAVOKIRIS and 4 others
-
7
-
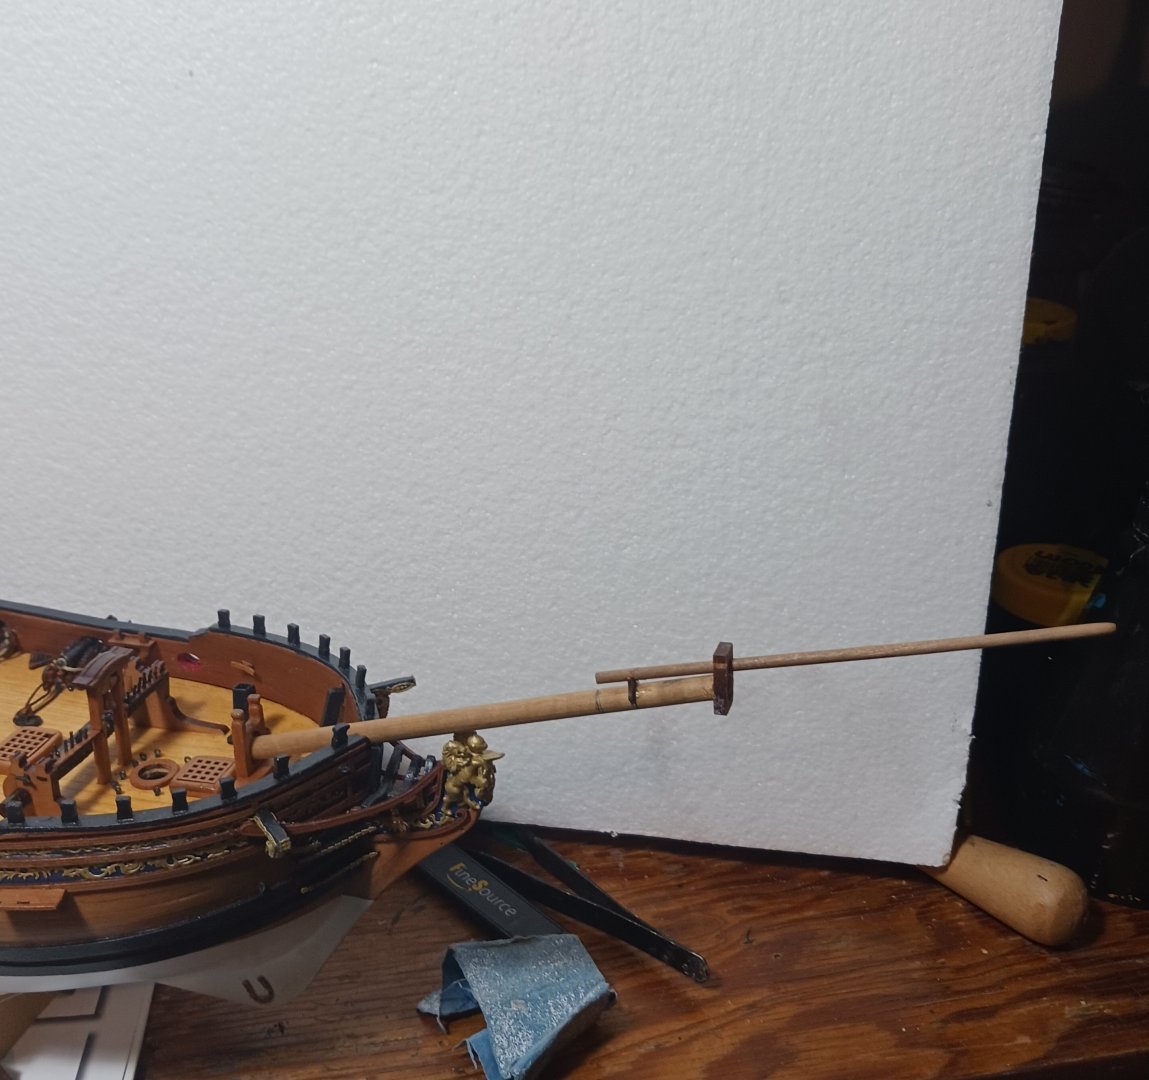
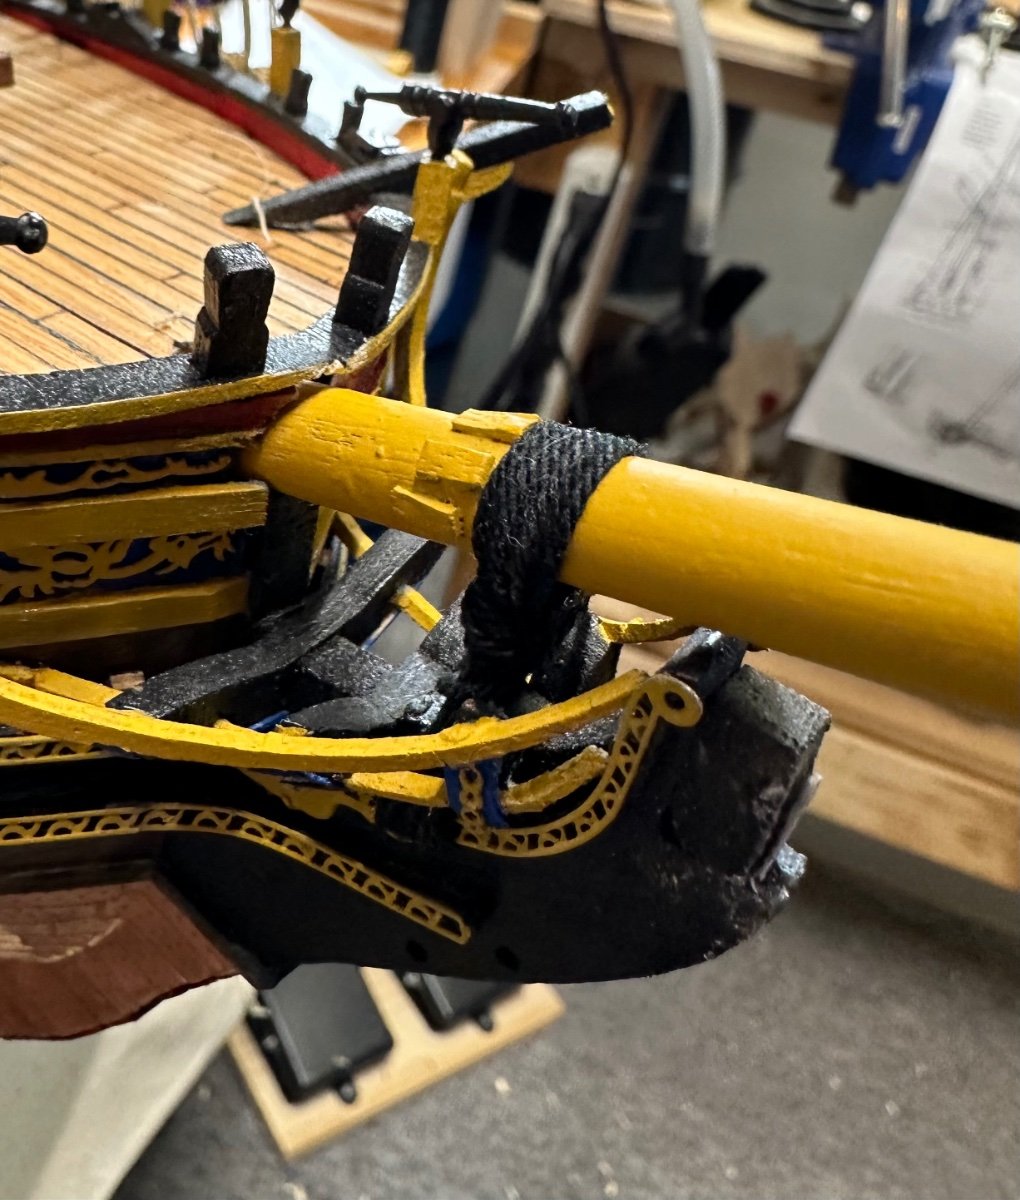
I’m tired of ratlines and I have only the port foremast ones to do, so I thought I’d work with the bowsprit today. Got the gammoning attached.

I removed the Pegasus figurehead to touch it up in the booth.
- BenD, Mr Whippy, KARAVOKIRIS and 1 other
-
4
-
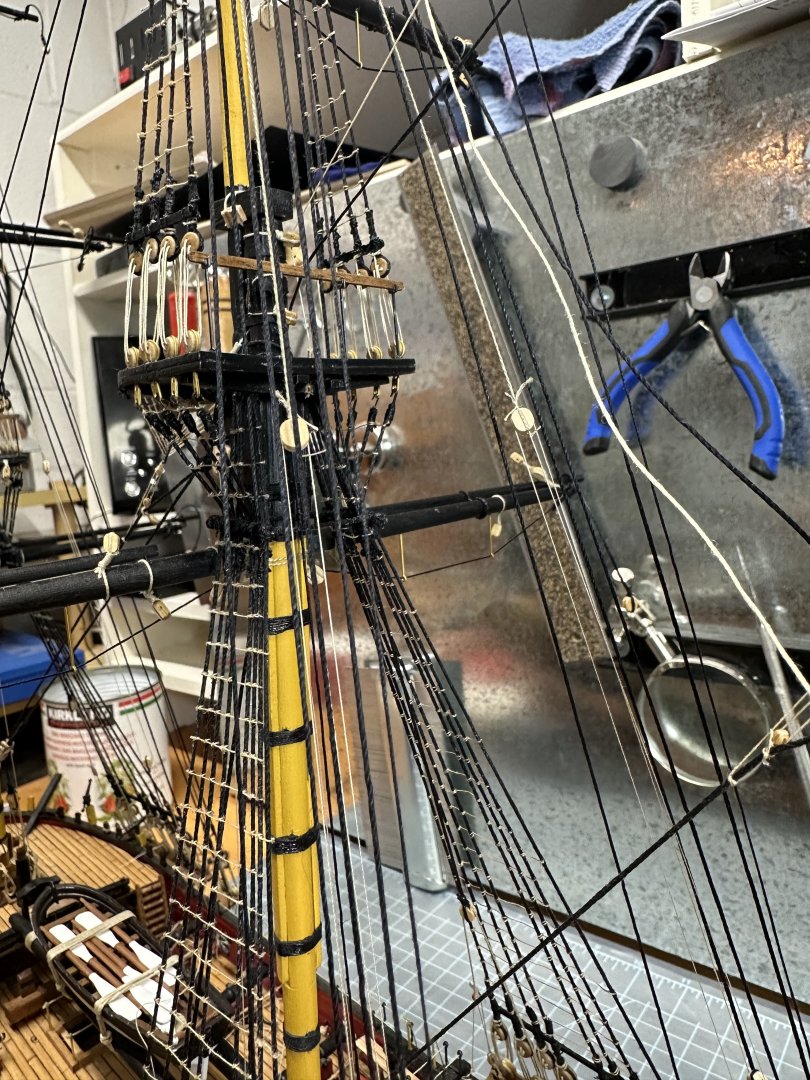
Took advantage of some time on Sunday to get the mainmast ratlines finished up to the main top.

That’ll be it for this week unfortunately.
- KARAVOKIRIS, Mr Whippy, Knocklouder and 1 other
-
4
-
Gallbladder surgery allowed me to get out of doing fall chores and cleaning! My wife suggested to go and build my ship because it allowed me to just sit and heal. Got all of the sheerpoles tied off and the mizzen ratlines completed-both sides.

- Thukydides, aliluke, Mr Whippy and 1 other
-
4
-
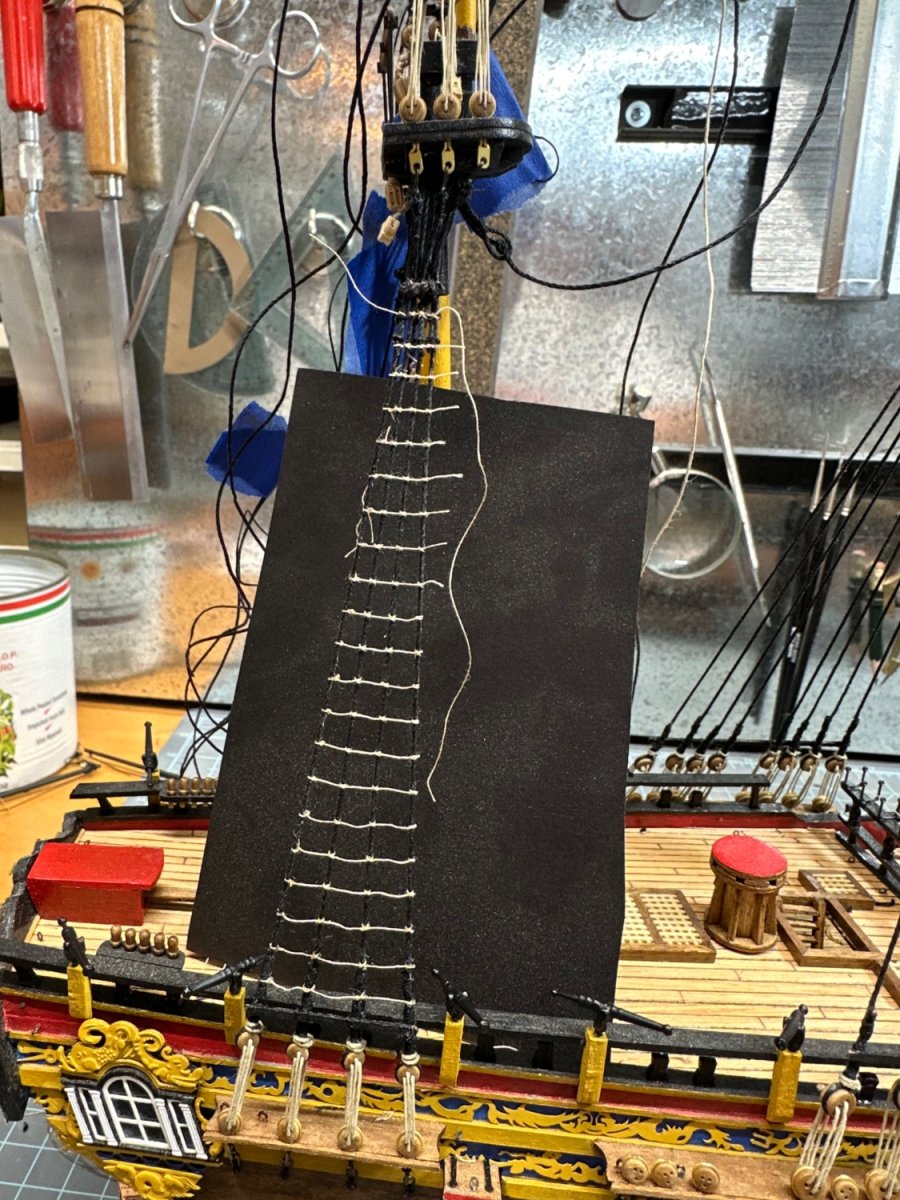
Added sheerpoles. I tied them to the shrouds with a simple double knot, one in each side of the shroud.
Then started the daunting task of the ratlines. I made a width gauge out of card stock to keep the distance the same and more or less keep the lines level. I also cut a black card stock shape to add some relief to the light color thread I was using.


This is the stbd side mizzen done.
- Ronald-V, Mr Whippy, Knocklouder and 2 others
-
5
-


CSS Alabama by Beakerboy123 - Mamoli - 1:120
in - Kit build logs for subjects built from 1851 - 1900
Posted
First plank of the first layer of planking is in place, this Mamoli kit is weird (to me at least) because I’ve always started with the wale as the first plank. They have you starting at a reference mark on the sides of the transom. The top of the plank runs flush along the very top of the bulkheads up to 6 and 5, which stick up higher.

The way the instructions look, the remainder of the first layer of planks run based on this first one. Referring to the Bowcock book, the hull is very sheer, no protruding wale plank below the gun ports.