HOLIDAY DONATION DRIVE - SUPPORT MSW - DO YOUR PART TO KEEP THIS GREAT FORUM GOING!
×


Bill97
-
Posts
2,704 -
Joined
-
Last visited
Content Type
Profiles
Forums
Gallery
Events
Everything posted by Bill97
-
Ian the anchors are fixed! In and he episode we watched the couple and realtor were looking at old Queen Anne style grand houses. Very grand in size. We have been to Toronto and then east toward Lake Ontario. Beautiful little town we stayed in was Niagara by the Sea, I think that was the name. Several times we have ventured up to Halifax and other parts of NS.
-
Thanks Ian. I see what you are talking about. Will get to shipyard early to make this correction! Still dealing with disgruntled USS Constitution crew that will need newly painted clothing and looking for my Admiral Nelson. it has been great fun Ian. Could not have done it without you. By the way my wife and I watch this series on TV called House Hunter International. Last night’s episode was about a couple looking for the perfect home in Ottawa. The parts of your city in the episode are beautiful! I always enjoy our visits to Canada.
-
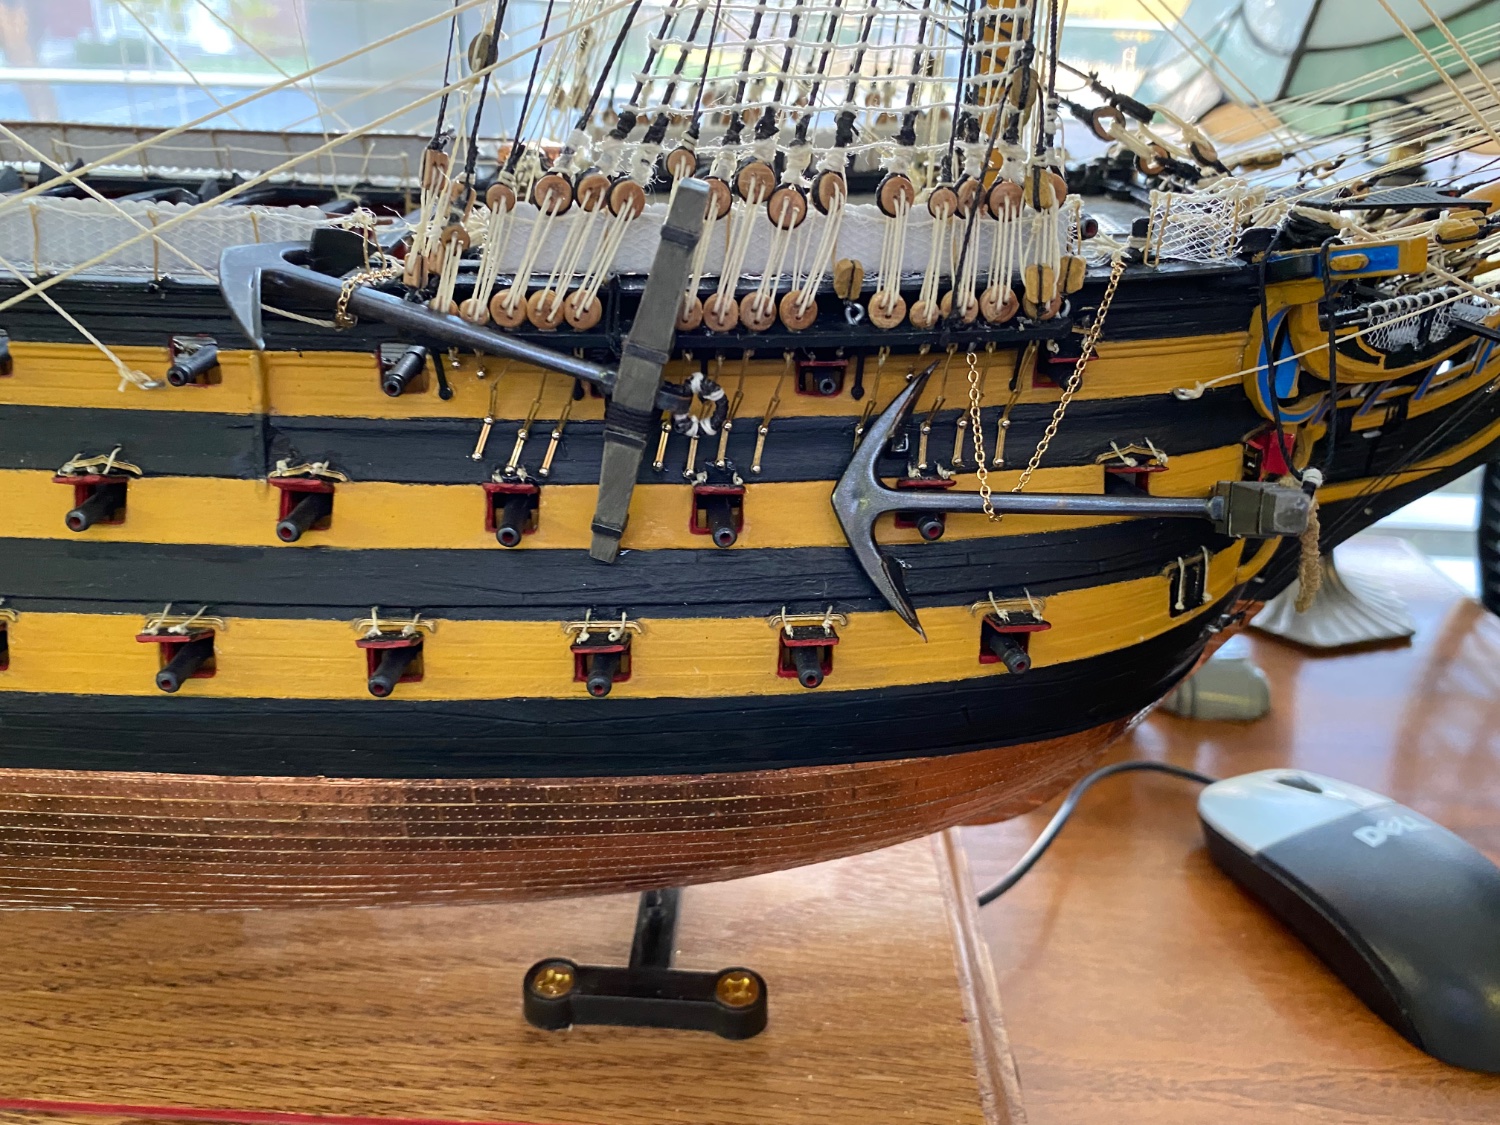
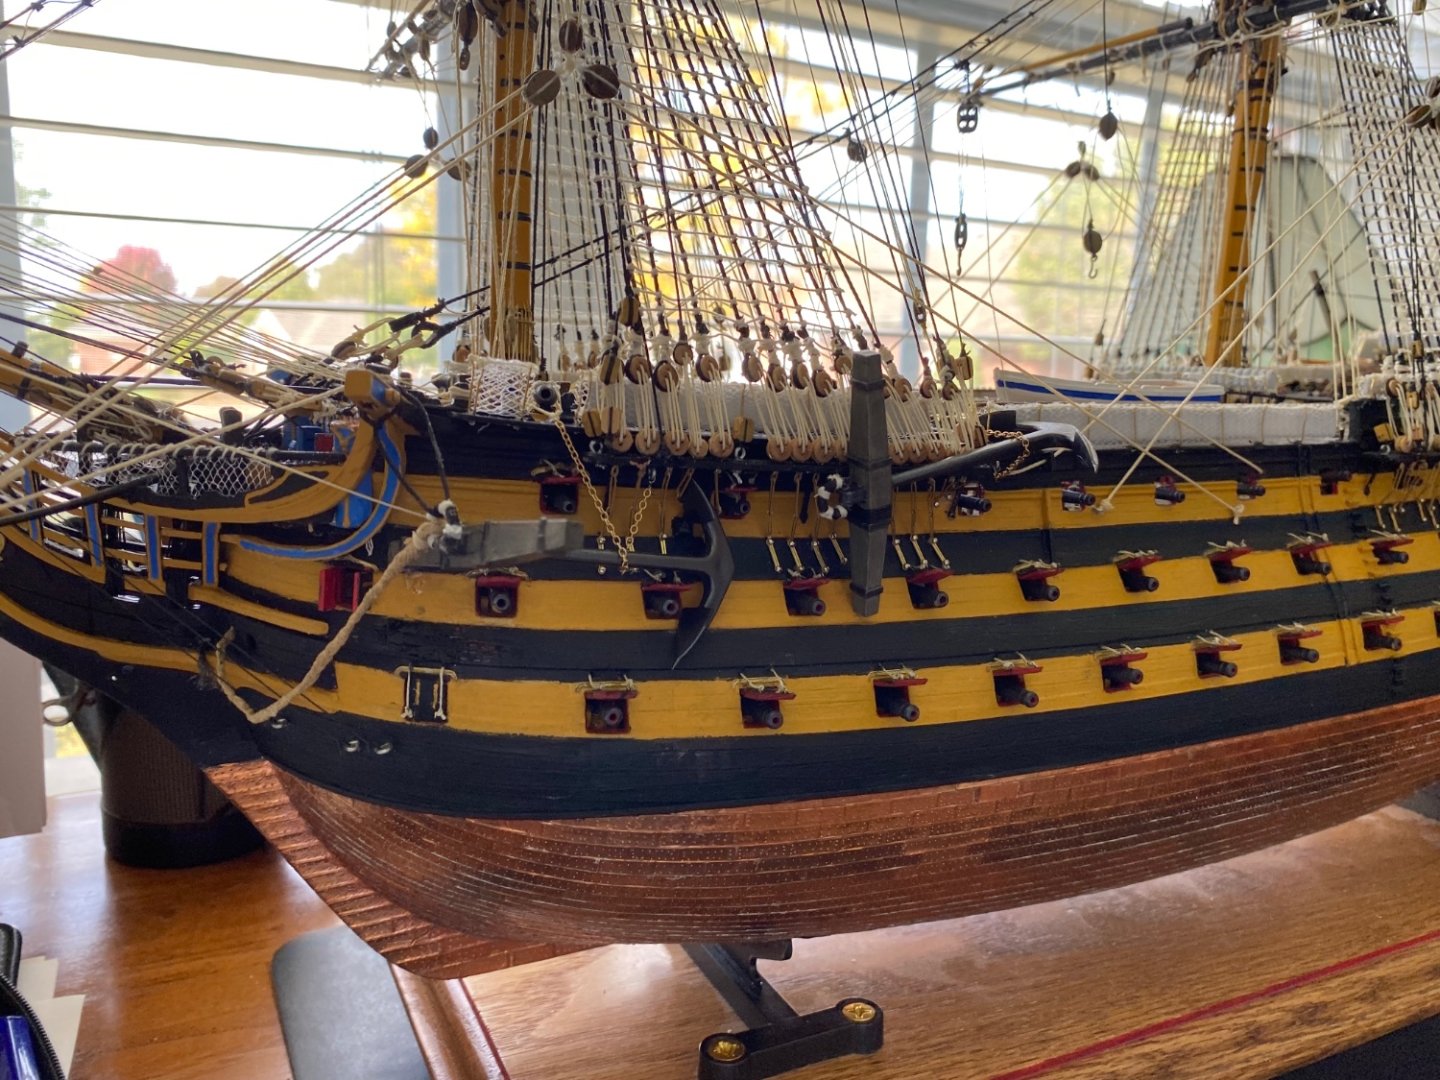
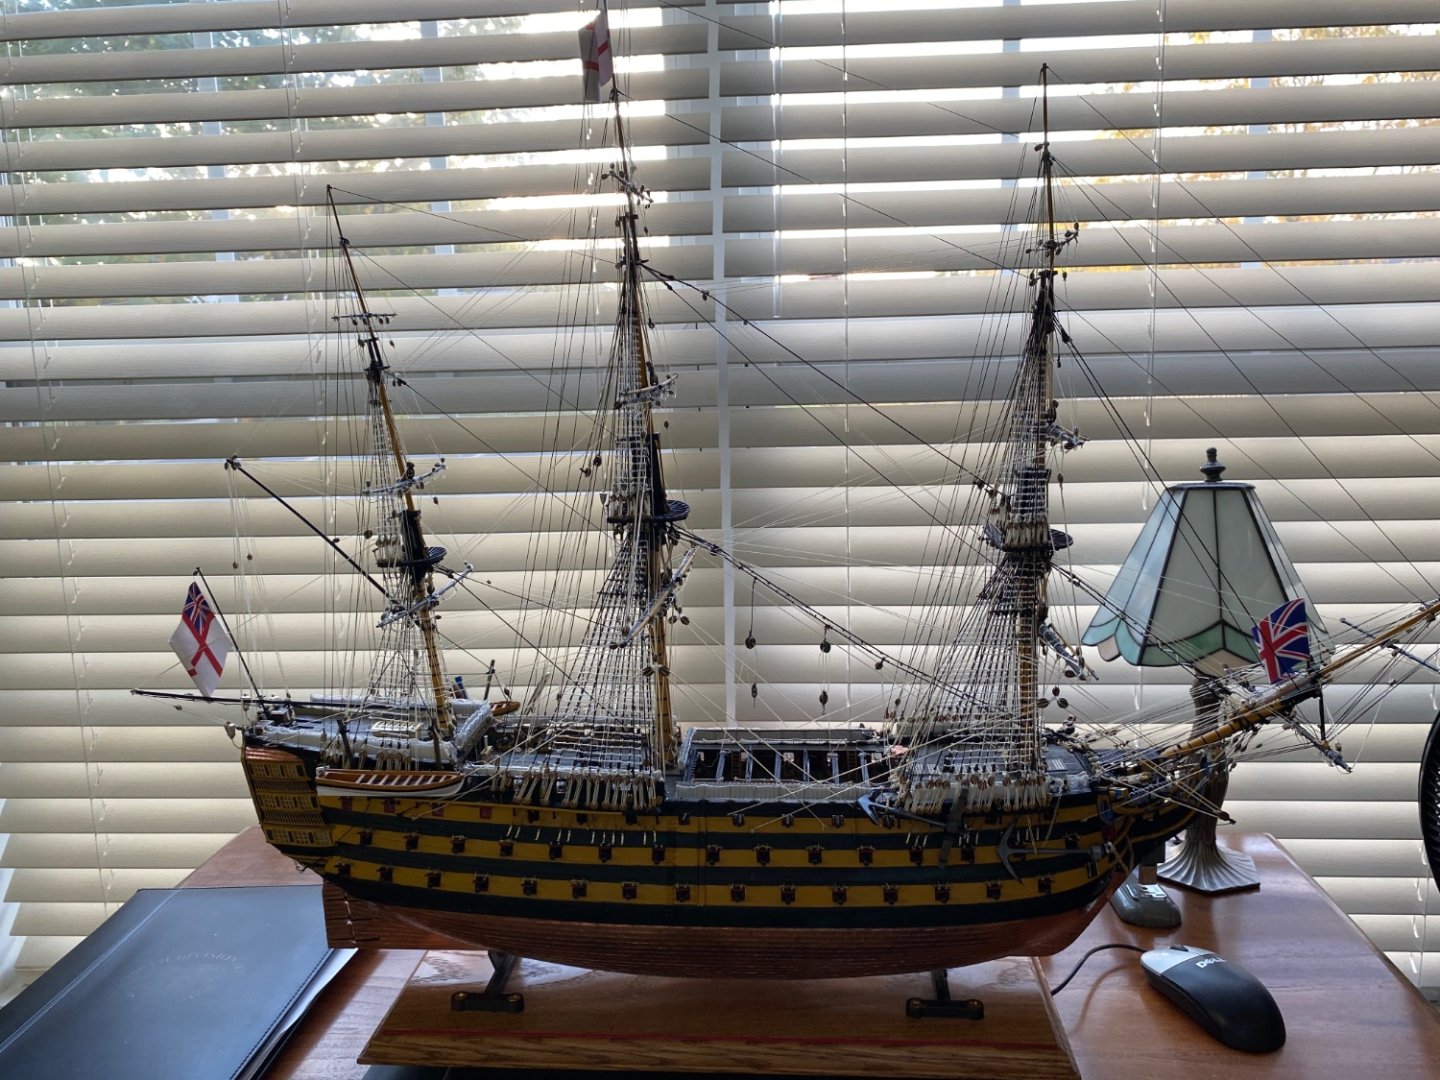
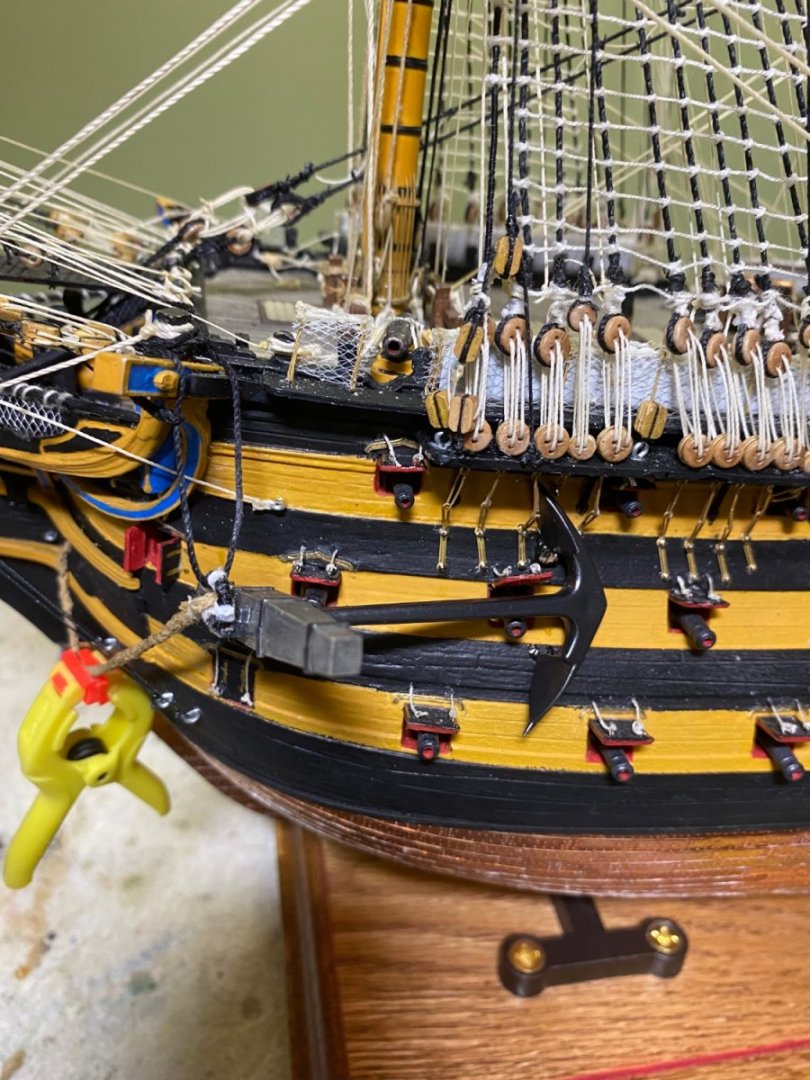
I now have the four anchors attached and rigged. Ian on your recommendation I removed the anchor ring and repositioned it to better reflect a more natural hang. With the attachment of the anchors the construction and rigging of my HMS Victory is, do I dare say, complete! Now to add life to the ship with a working crew. I have a handful of crewmen that deserted my USS Constitution. Not sure they came aboard the Victory voluntarily but once I get them in their new uniforms and show them around the ship, I am sure the will adjust nicely or find themselves in a he brig😀. I have a couple characters that I can select from to make my one armed Nelson wearing his hat the way he preferred.


-
Thanks JeffT. I went back and edited the titles. Here are the four, and period, needing updated. All four are Bill97. I will see if I can figure out how to PM you the link if you still need it. 1501-1750. Man O’ War Mayflower Wasa 1851-1900. Cutty Sark Thanks again
-
How do I edit the title from post 1? I went to one of my finished builds and was able to add the Finished tag but could not figure out how to edit the title.
-
Thanks. I will give I a try.
-
I have a number of build logs over the years here on MSW. All are finished except for the build I am currently working on. I have noticed on the index that the word Finished is indicated to the far right on many of the various builds. Curious how this comes about so that my build logs can show Finished?
-
Absolutely beautiful Robert! As I said before, your craftsmanship and precision is very impressive! I am glad you went with the lights. Going to study if I can possibly do that with my smaller scale 1/100 Soleli Royal. Although I am not at all the electrician you are.
- 527 replies
-
- 1
-

-
- caldercraft
- victory
- (and 1 more)
-
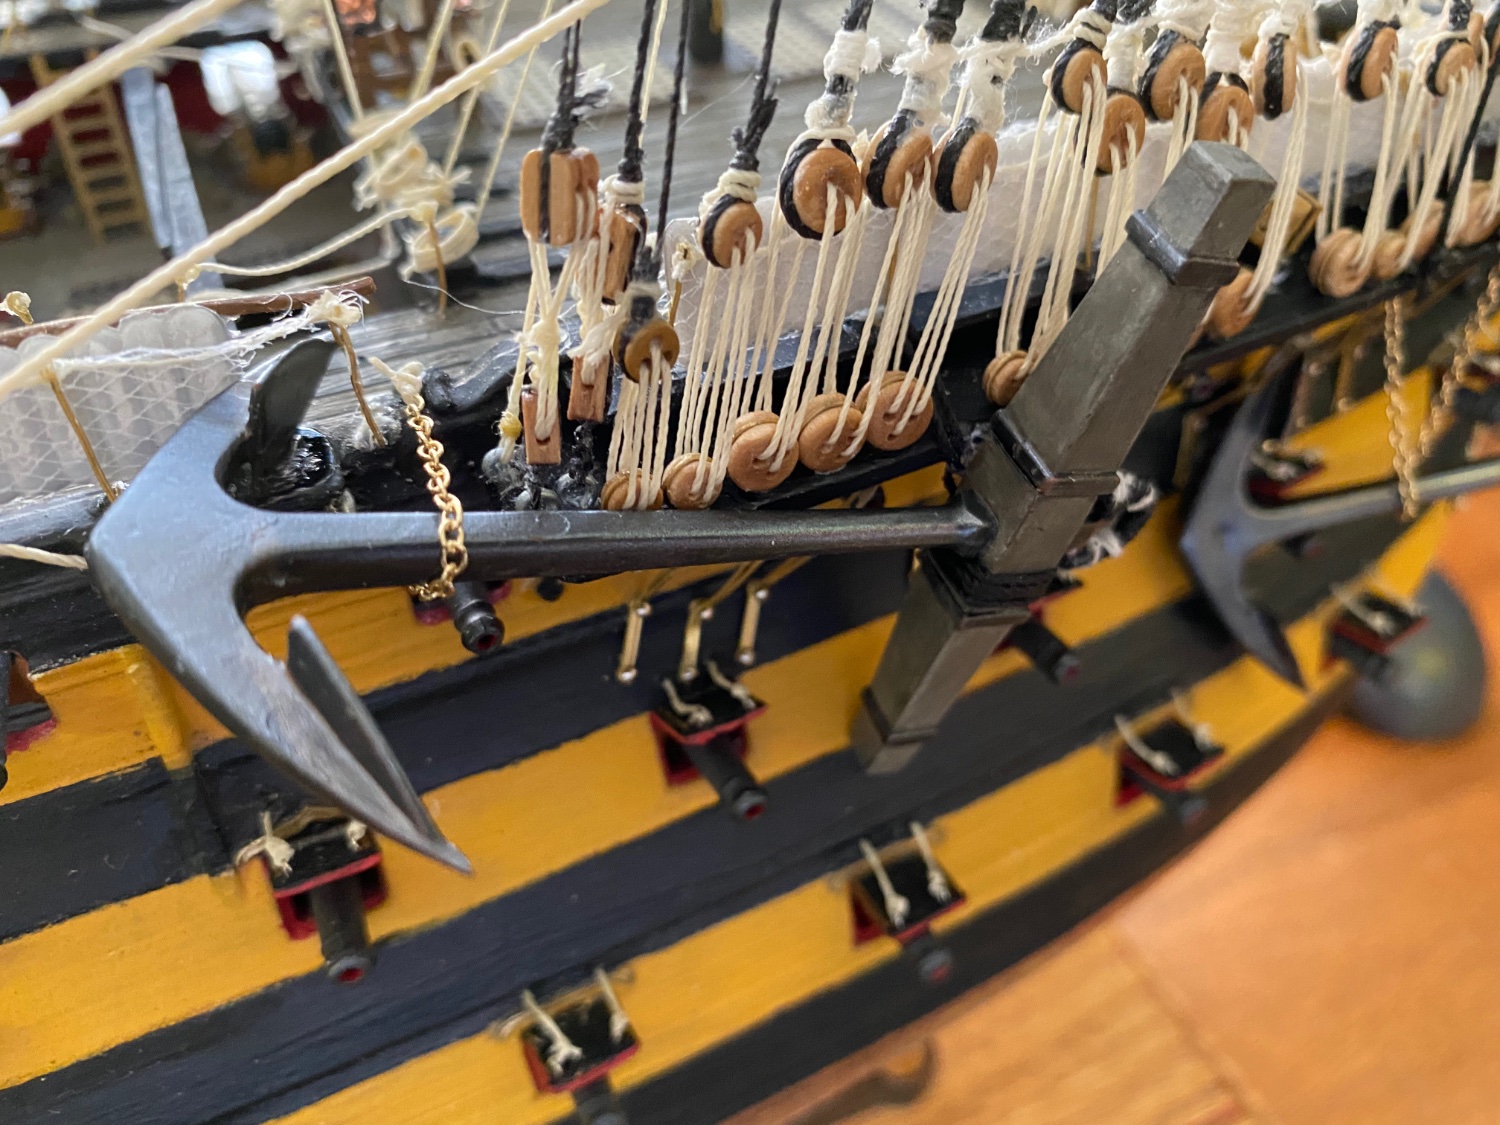
Thanks my friend. I just could not get my head around anchor buoys. I had never heard that term or seen such a thing. When I looked at your anchor rigging picture I was seeing three different rigging features used to hold the anchor up horizontal. The “cat stoopper”, shank painter chain, and this unnamed white rope seized and wrapped around the end. It looked as if it lead up to the channel and tied there maybe to help support that end of the anchor. Even though you had described it earlier it just was not clicking in my old brain that line was not helping to support the anchor. It was simply running up to and attached to the anchor buoy. Appreciate your patience.
-
Ian after reading #1419 over and over again I think I finally understand 😊 That anchor buoy is what the lashing on the anchor is. When the anchor is pulled up the rope is coiled and hung on the shrouds. So am I correct to understand that when the anchor was dropped the buoy was dropped with it and floated on top the water to show where the anchor was? If so I understand now after studying your pictures and text. I definitely apologize for being so dense. 😀 So I would not add that lashing on the anchor unless I plan to add the buoy as well?
-
Thanks Ian. Still can’t figure out where the end of the line you have wrapped around the end of the anchor goes. Does it just tie to the channel? I looked back to #1419 and remember now you explained the chain there. I really must apologize for repeating my question.
-
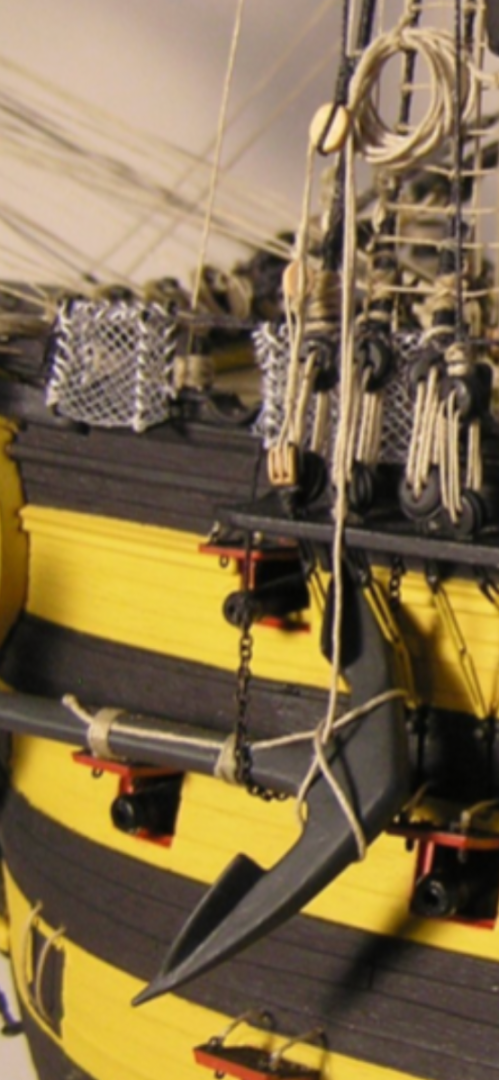
Ian n this picture of your anchor where is that white rope that is wrapped around the business end f the anchor going? It looks like it goes up to a block then maybe reeves through it down to another at the channel maybe? I have the first part of the anchor rigging done, I think, but not sure about the rest. Also looks as if there is a chain as well.
-
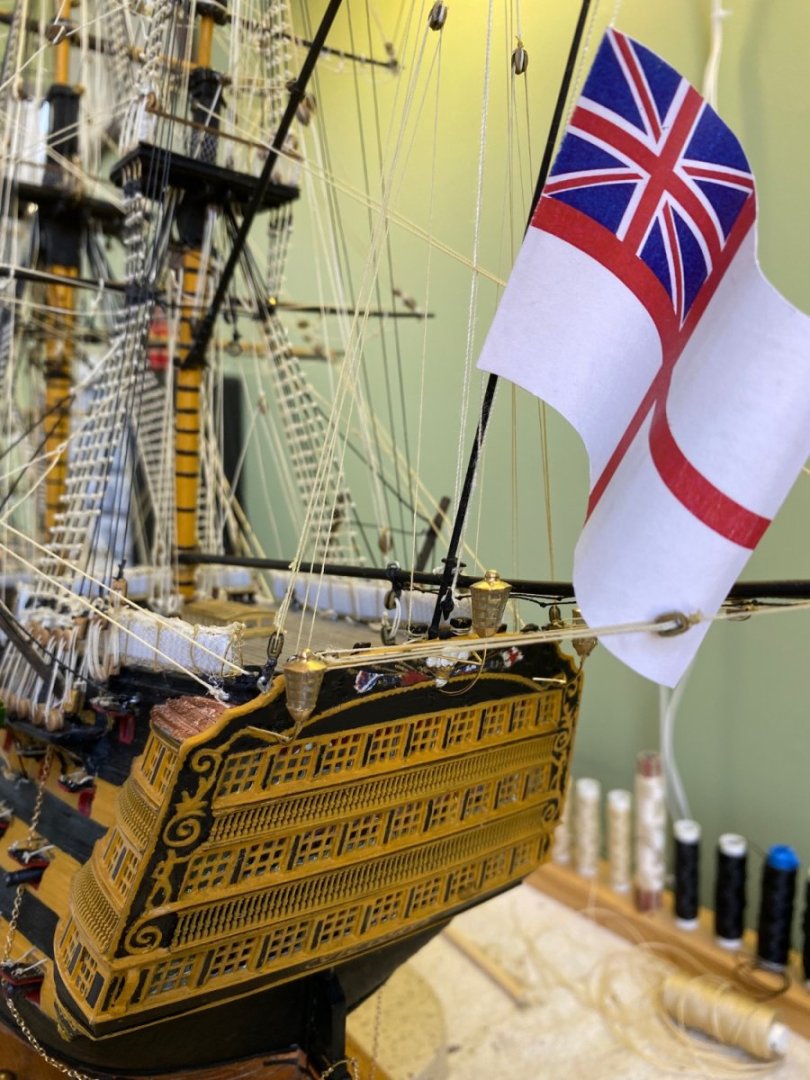
Ian I am beginning to think about and design the display case. I want to put it in my living room. A couple times you have included a photo of your’s in a comment. I have quickly scrolled back through my blog and your’s to find out he picture, and of course when I want it I can’t find it. I like the height of your’s since it is not real intrusive in the room. What is the height of the legs or table your case sets on? If I remember correctly, it looks about the height of a coffee table, maybe? Do you find the height good and comfortable for viewing?
-
Ian I did think about it and decided to leave them alone. i had not thought about my emergency rudder chains being below the water line. I need to move them up, take out the eyebolt in the hull, and patch my copper. Speaking of Robert’s Caldercraft. A while back I got a copy of the Caldercraft instructions and did from time to time look at them for clarification of a step. I looked at it again recently in reference to the anchor rigging and contrary to Longridge, it shows leaving the large triple block with the hook and the haliard reeved through the cathead hooked on the anchor ring even though the anchor is lashed up in the shoe.
-
So Ian if I go by Lees my topgallant lifts are not 100% wrong! If Lees says deadeye or cleat, mine is almost to a shroud cleat (just no cleat 😉). Maybe I will leave those lines alone and move on to the anchors. Robert I must compliment you on the outstanding craftsmanship of your rigging of the deadeyes and shrouds! That is some beautiful work that puts mine to shame. That is one area I really need practice and improvement before I start my Soleli Royal.
-
Thanks Ian. I do remember that and seeing this figure in Longridge’s book. That is the way I originally had mine and changed it after we had that discussion about me having mine tied on the outside of the shrouds. Depending on my mood I may go back and put them back where they were before, without thimbles. See Robert, I knew Ian, or someone, would come through for you. 😊 I have to go back in and fix my emergency chains that hang below the water line.
-
Robert initially that is exactly what I did for any lines that the instructions said to belay at a deadeye or a shroud. Later I learned that lines belayed at shrouds were not tied around the deadeye but instead to a shroud cleat. I had a number of lines tied at both the lower shrouds and the upper shrouds just like you do. I felt this scale is to small to try to make little tiny shroud cleats so what I’d did (not saying this is correct) is to untie all the ones I had around the bottom of a deadeye and tie them to the shroud right below the bottom ratline. Hope this is helpful. Maybe someone else can shed some light.
-
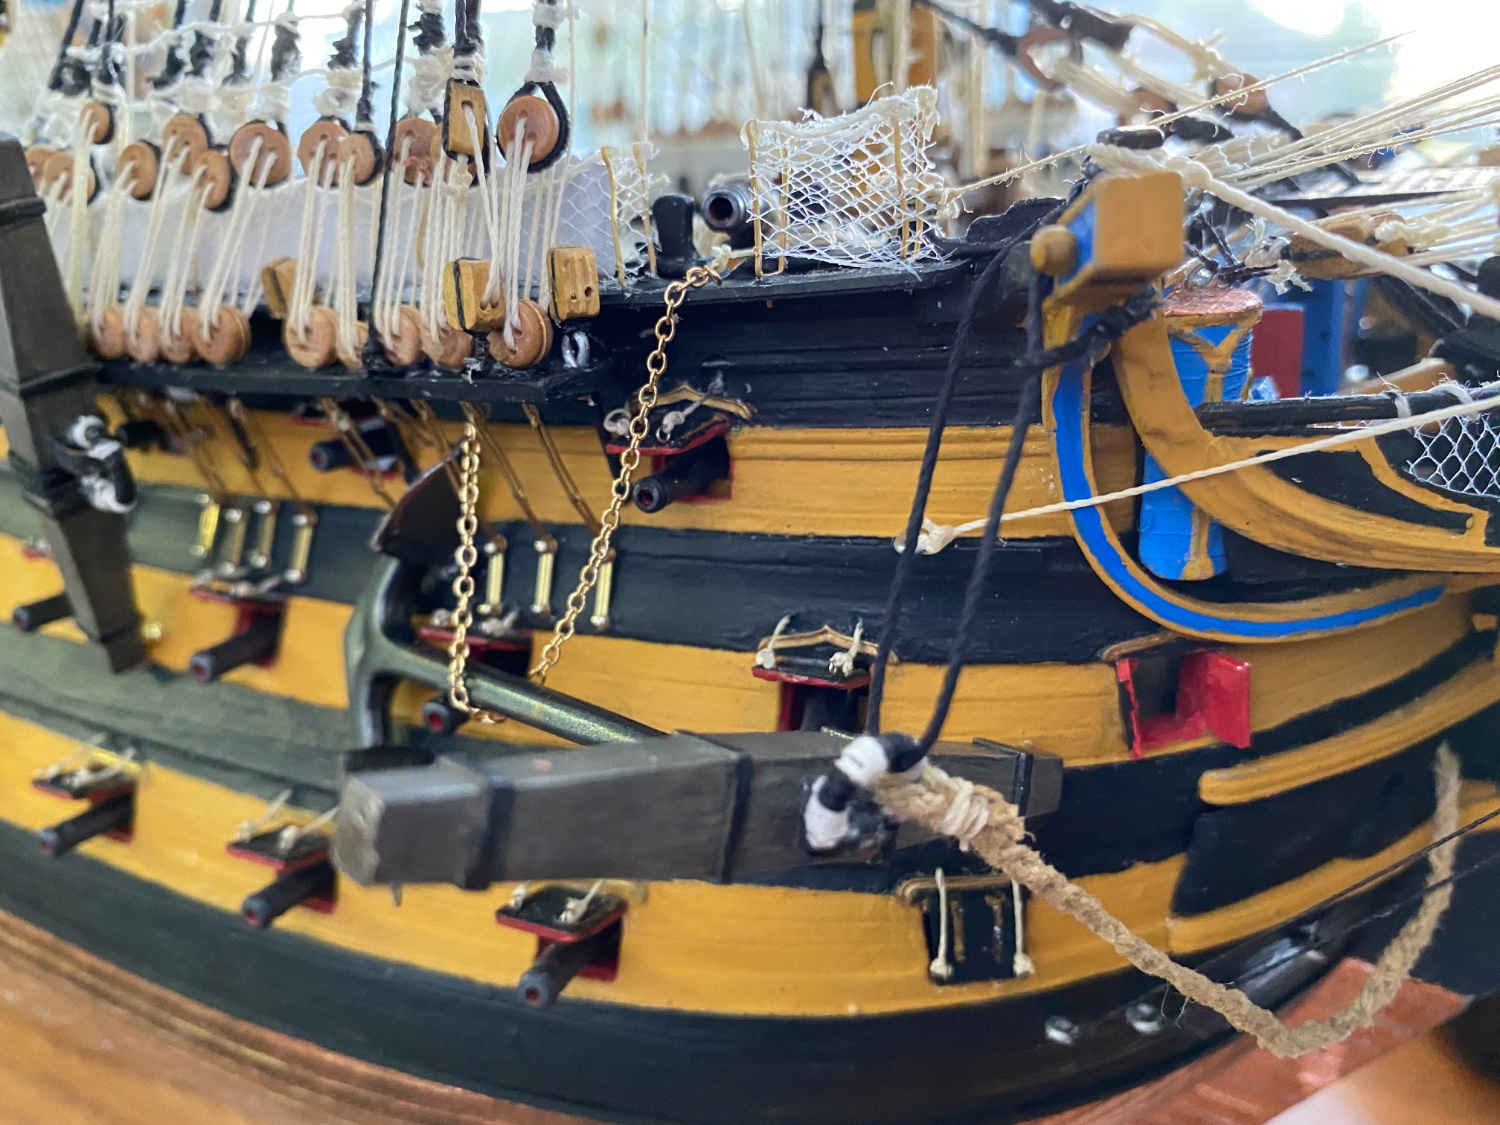
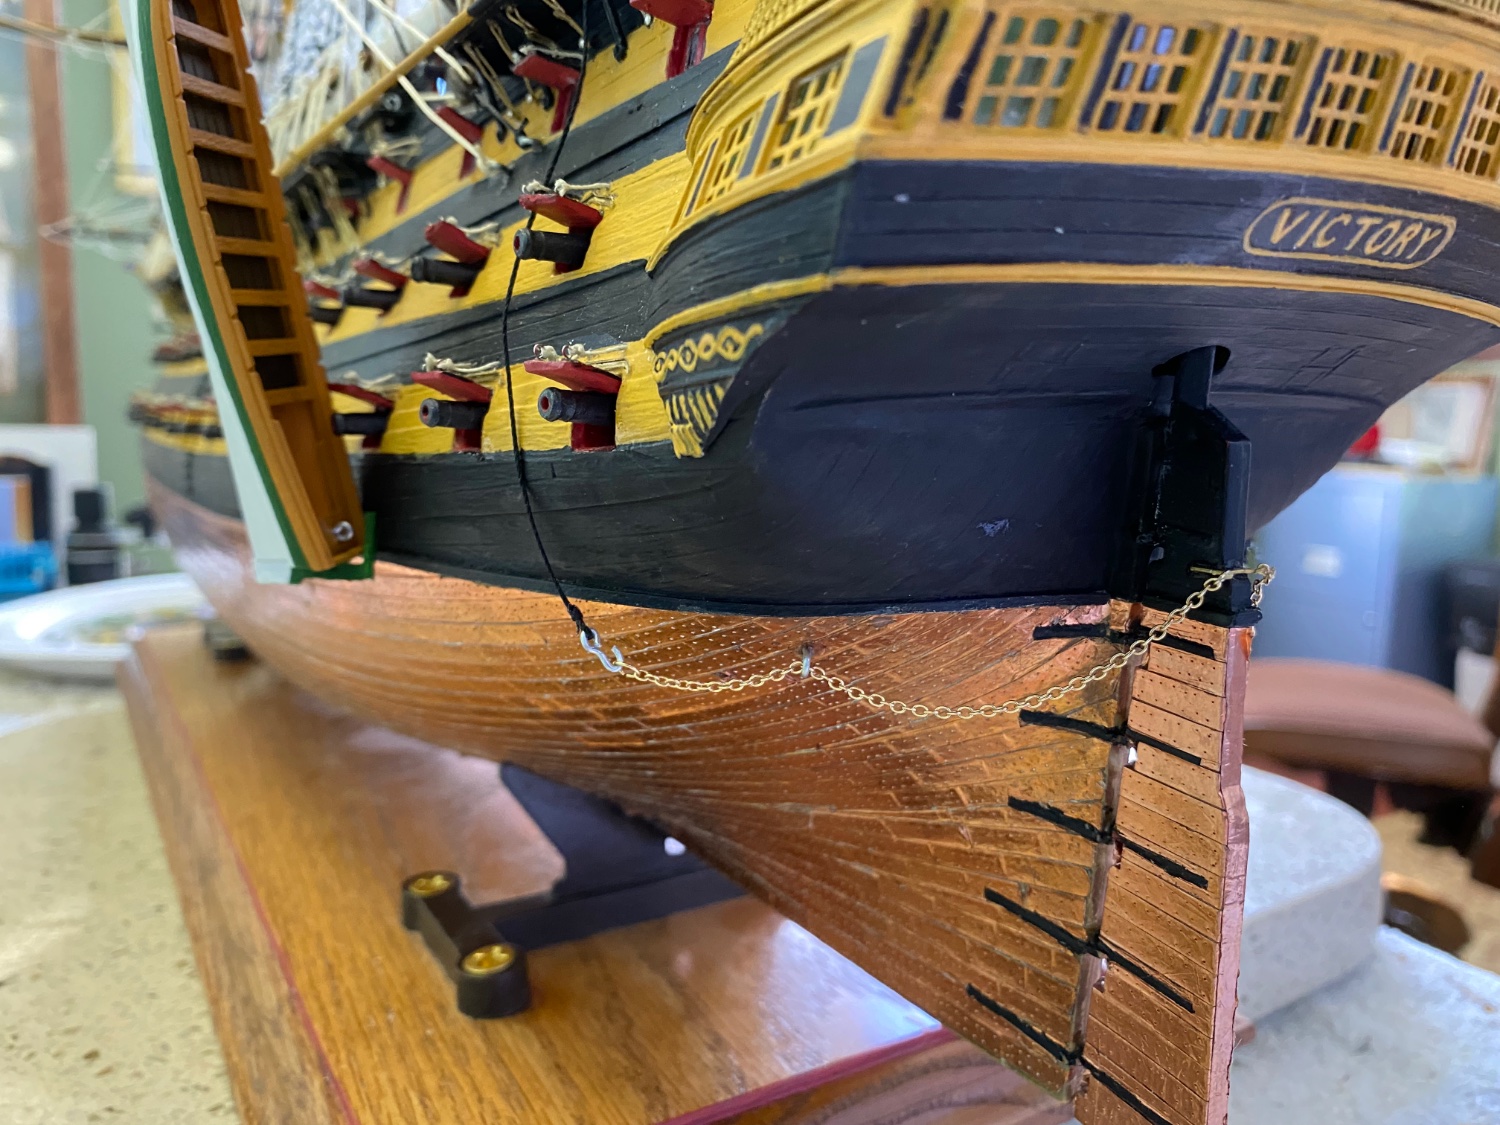
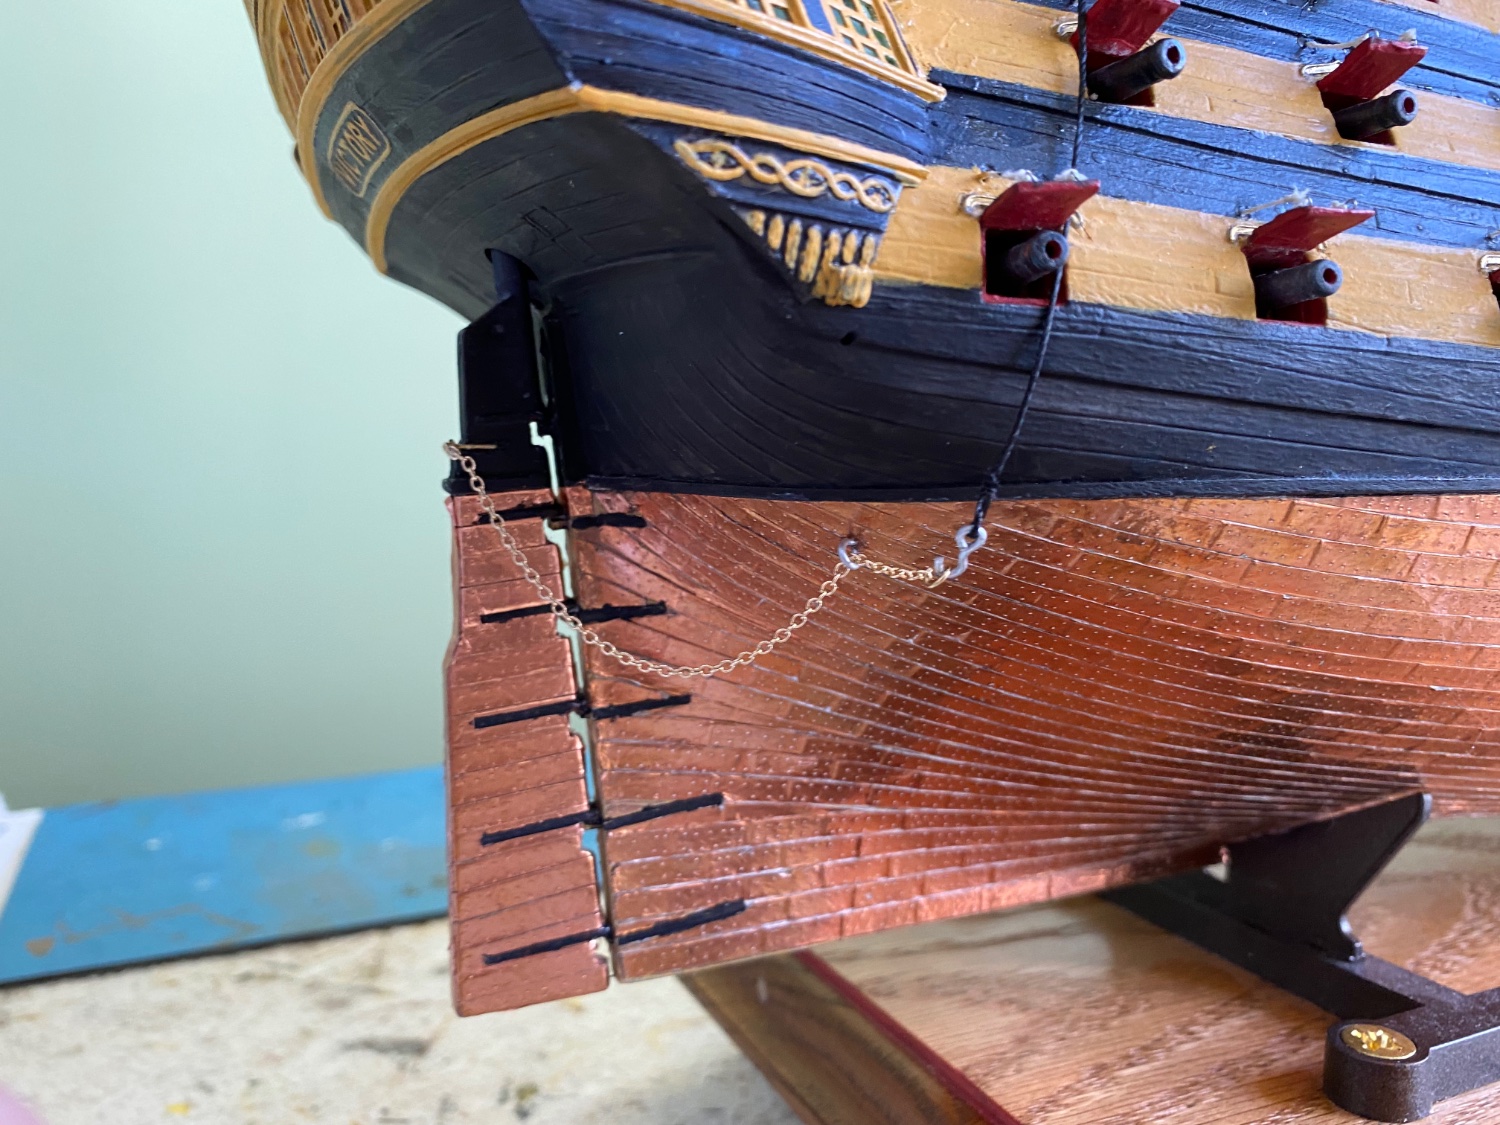
Mexspur I think you are right. I still have it wrong!! All the chain should be above the copper. Back to the drawing room. Another easy fix.
-
Oh OK Ian you mentioned a rope was connected to the chain. Now I see the rope has a hook that the chain connects to down near the eyebolt. Easy fix. git the lanterns painted and mounted. You were right the little lines that simulate the cage the lens sets in were a task. Some came out pretty good, others not so much. Fix the emergency chain then all that is left is those anchors once I am confident I understand them. I think I got it. Then I am going to fabricate an Admiral Nelson out of my crew men and paint them all.

-
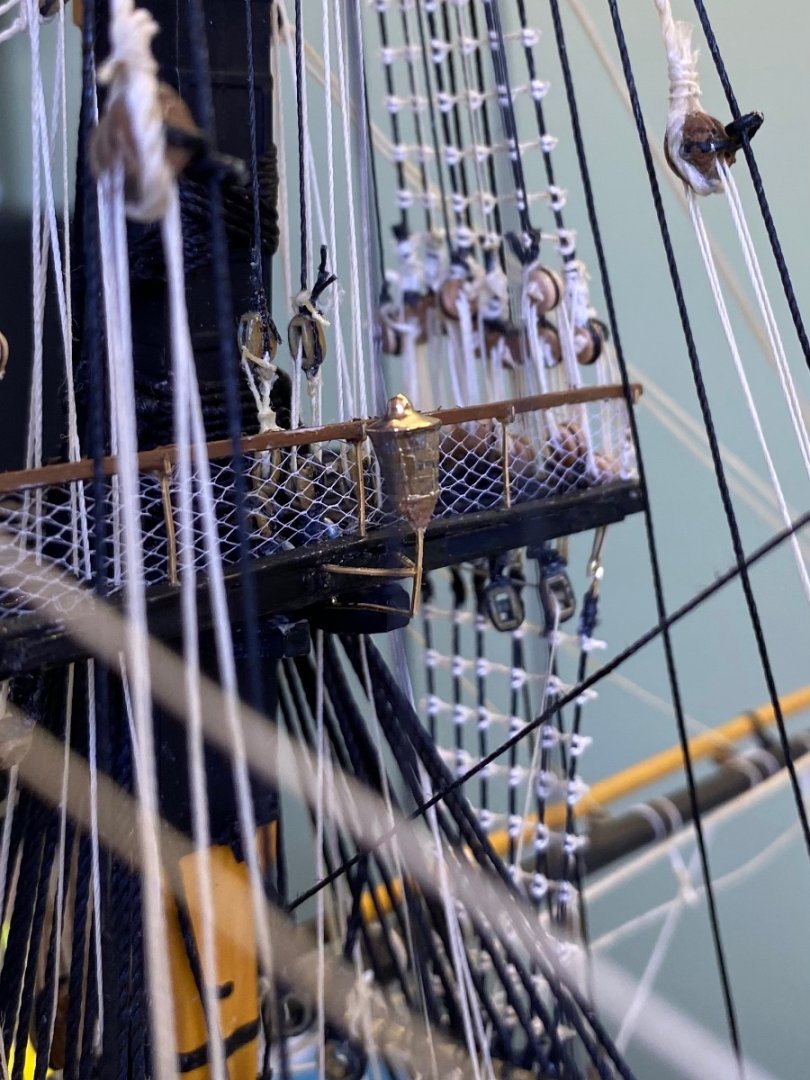
Ian I found this picture you included way back in post #118. Now to see if I can understand it. It looks like you have parts of the rigging going up into the shrouds.
-
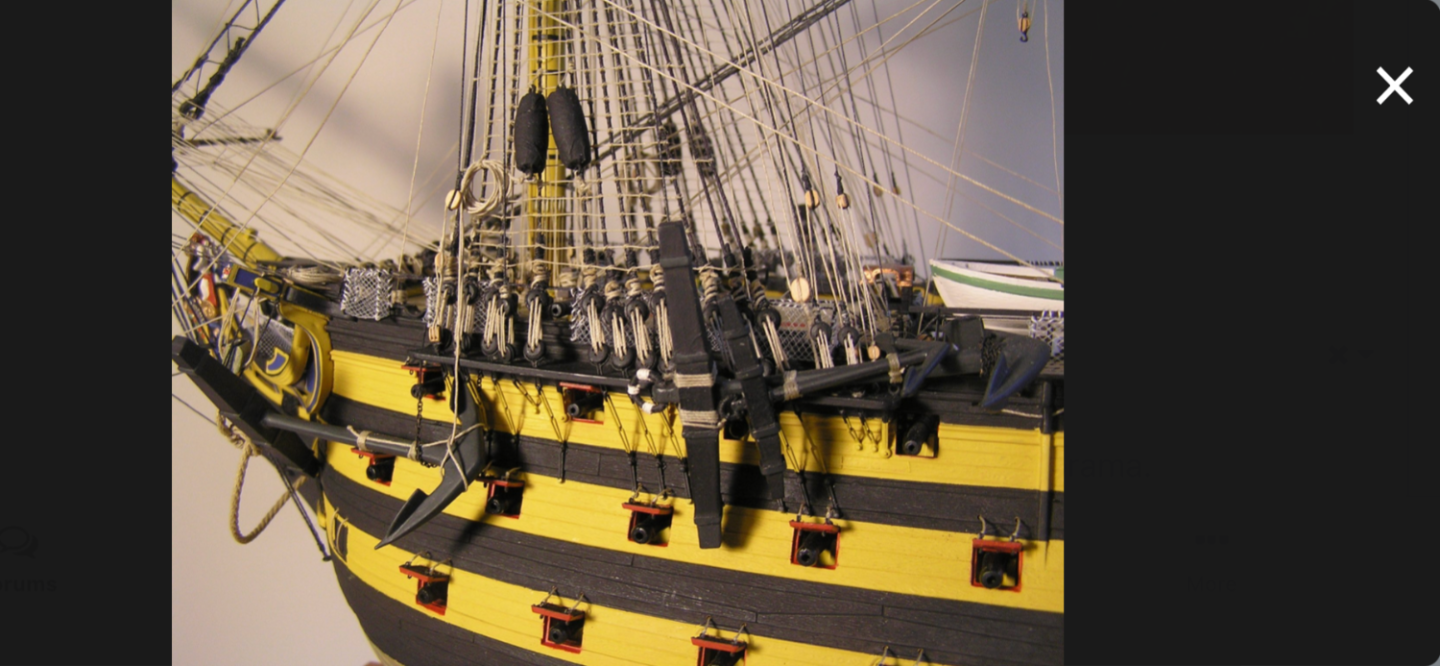
Ian that is crazy about you and your daughter! Doubt that has happened before. I just need to modify my rudder handle to get the eye under it. I can’t imagine anyone I know examining my boats that close and saying Hey how did the crewmen steer the boat with that eyebolt in the way of the rudder handle? But like all these things I will know. Still looking for your anchor rigging description. I found Caldercraft’s anchor rigging but it looks like it has been simplified. May not authentic, not sure.
-
Ian I zoomed in on your boats in post #1401. I see on a couple you have an eyebolt in the deck portion under the rudder handle as well as a ring through the eyebolts. Is that correct? I like that better than the way I did it. Simple fix.