

Rodolfo Bigoni
-
Posts
118 -
Joined
-
Last visited
Content Type
Profiles
Forums
Gallery
Events
Posts posted by Rodolfo Bigoni
-
-
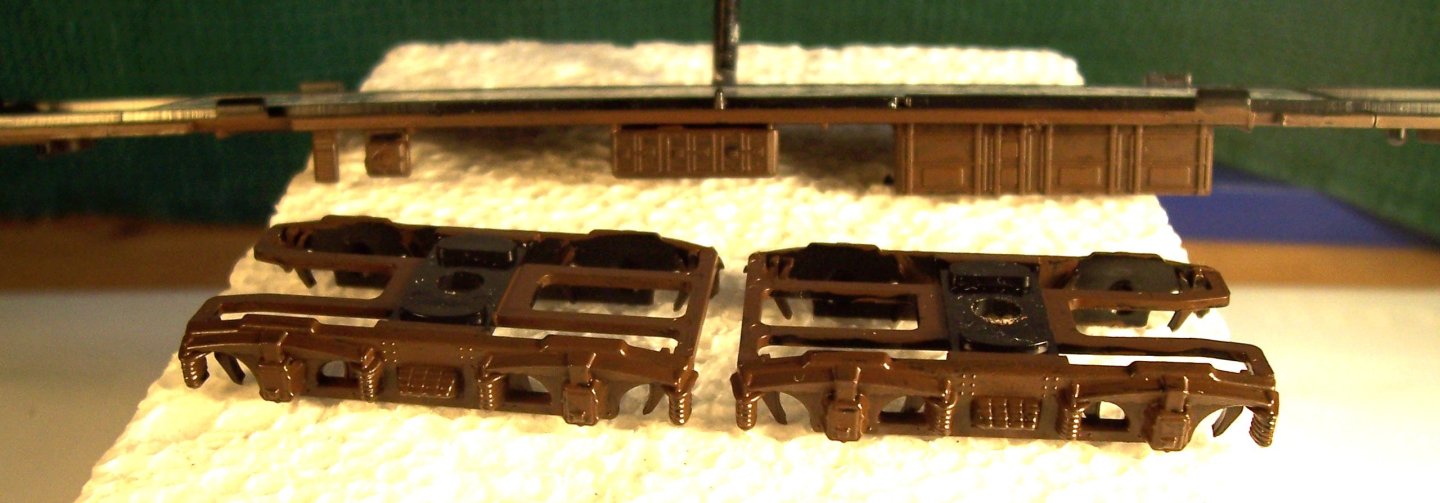
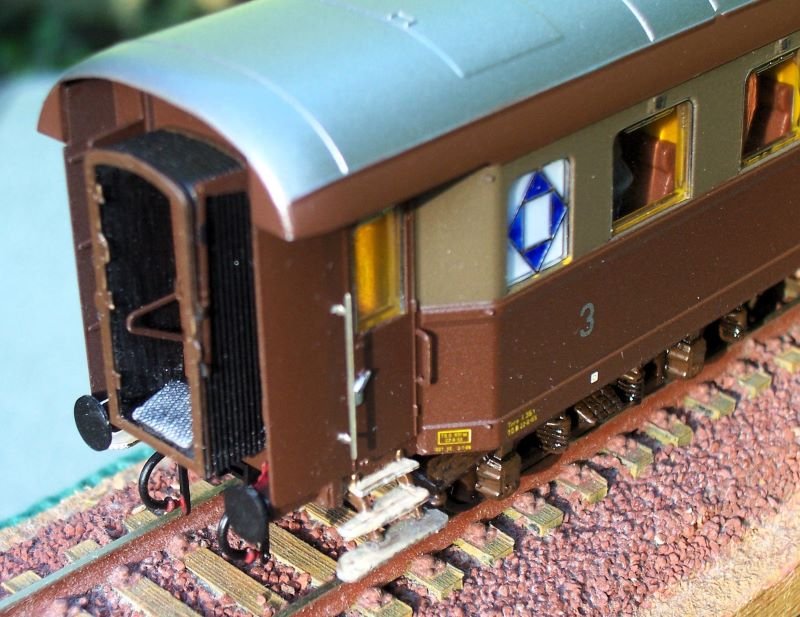
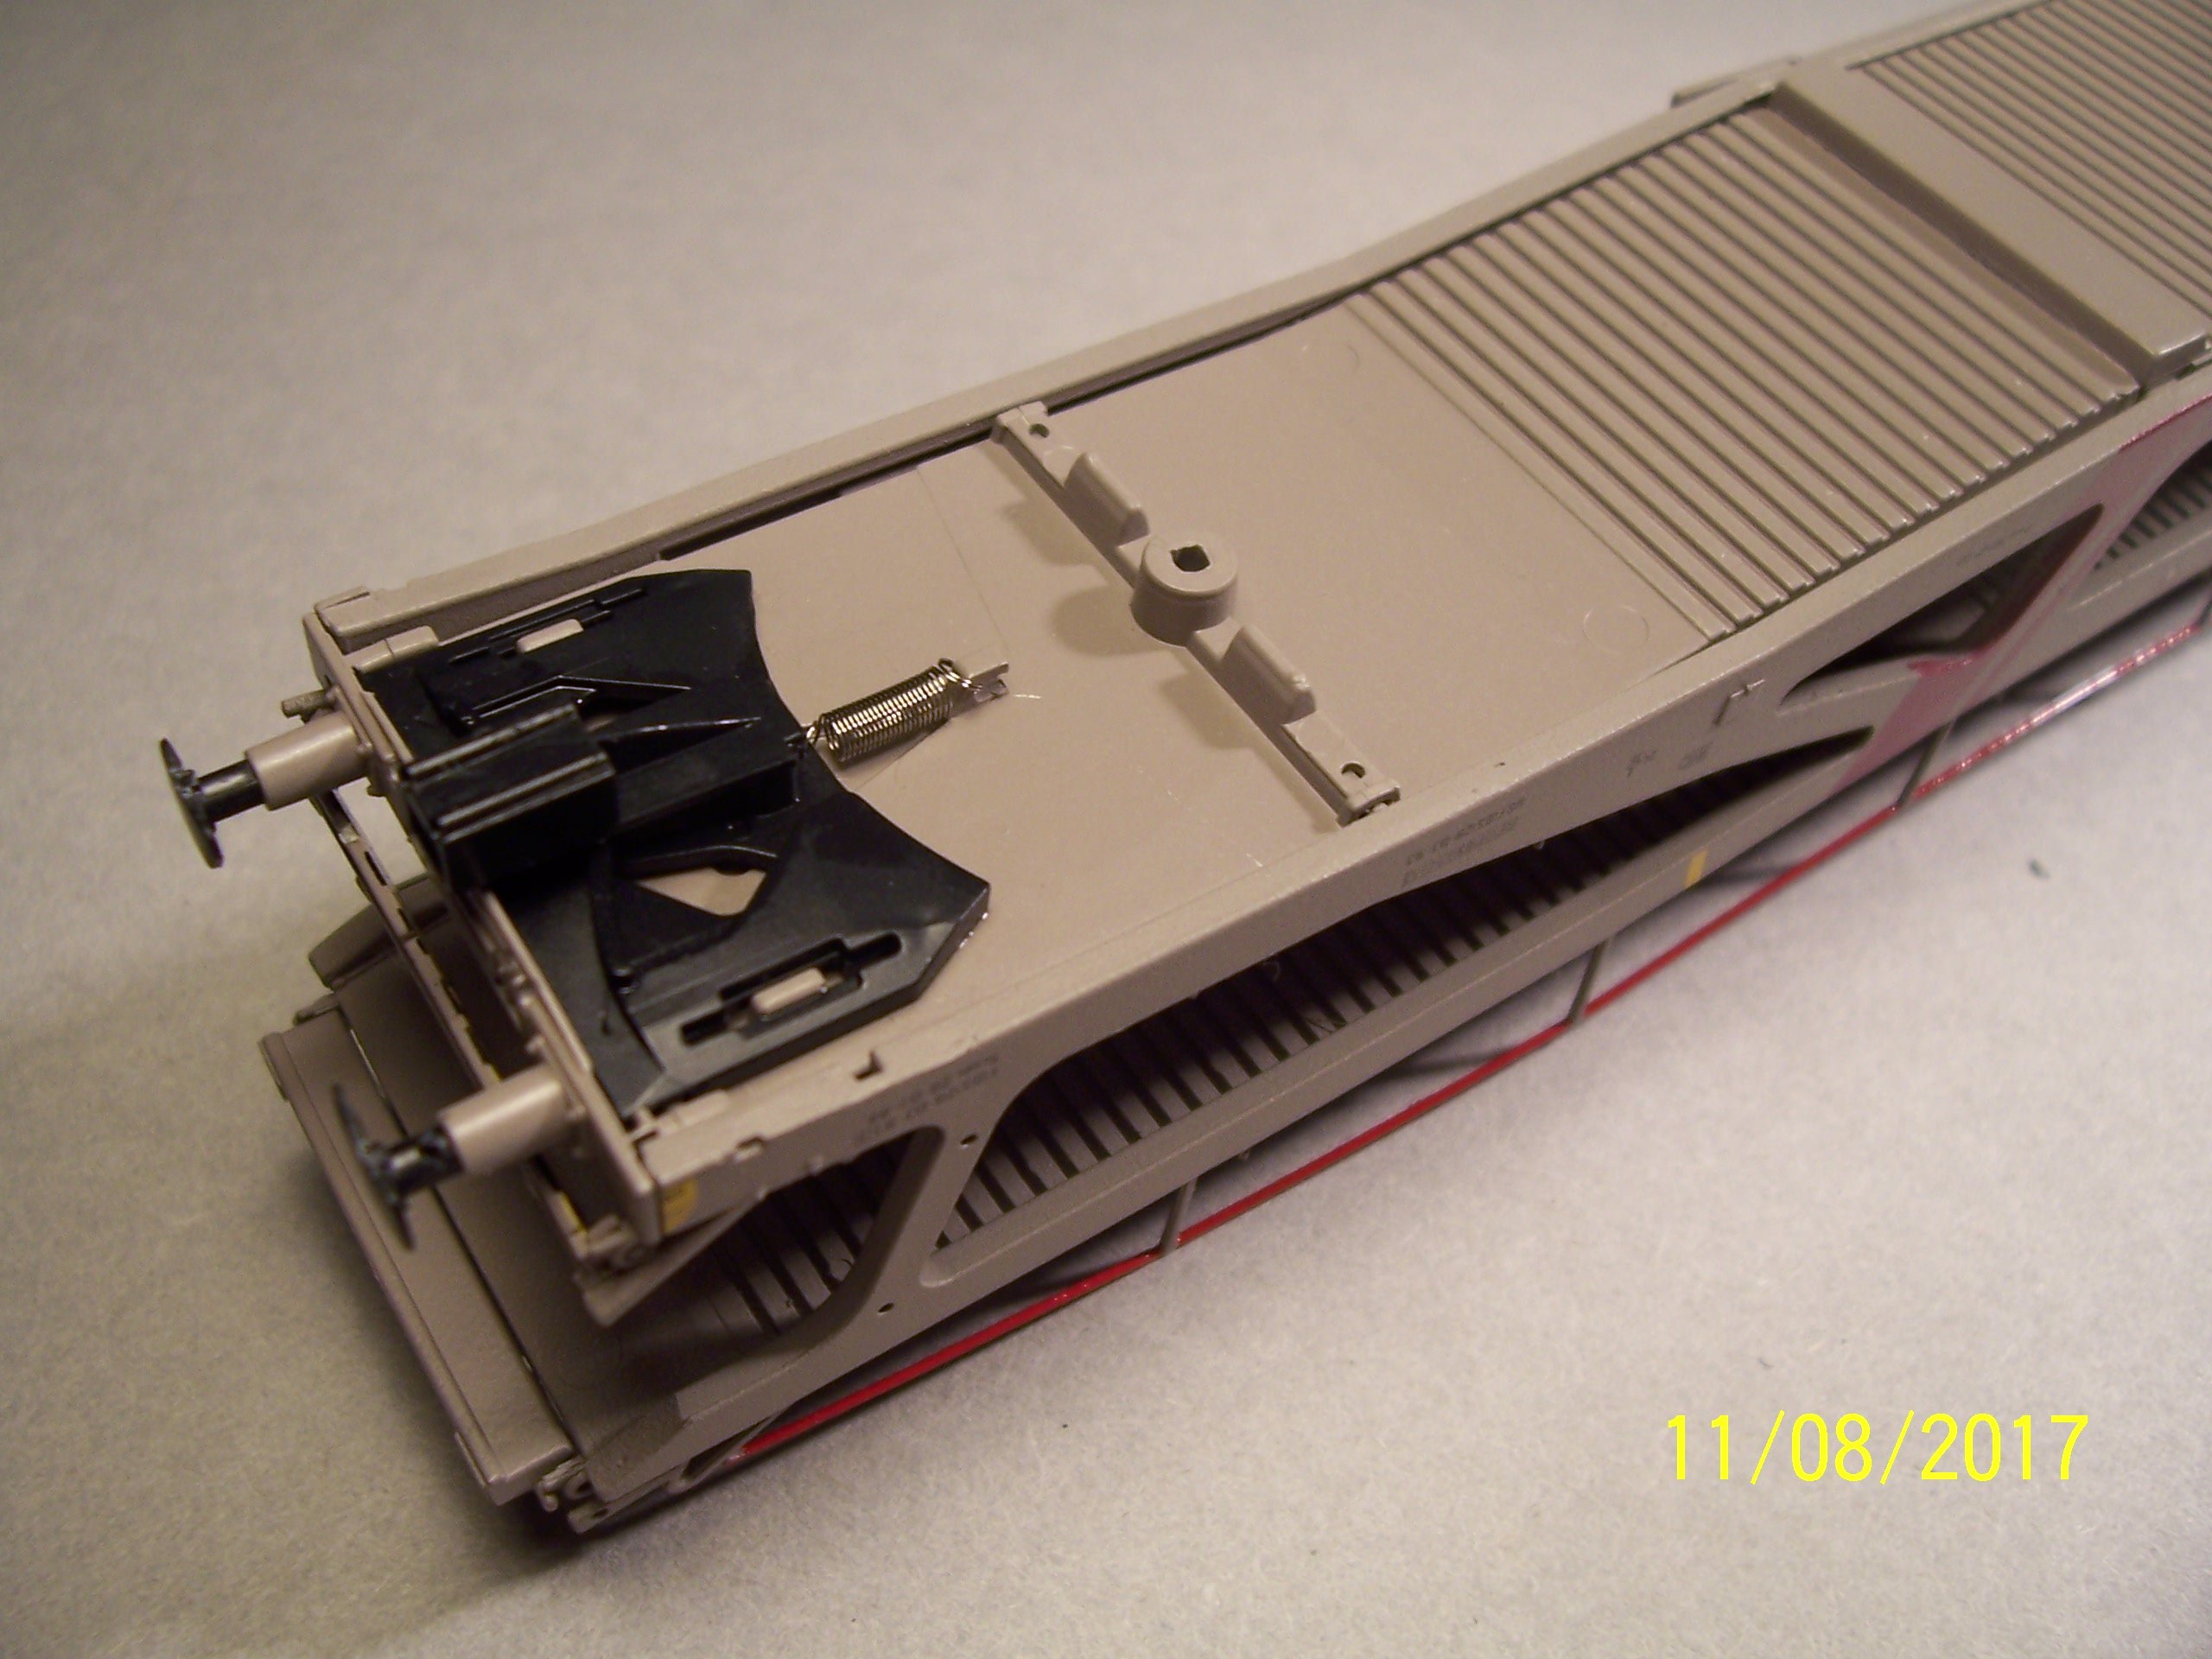
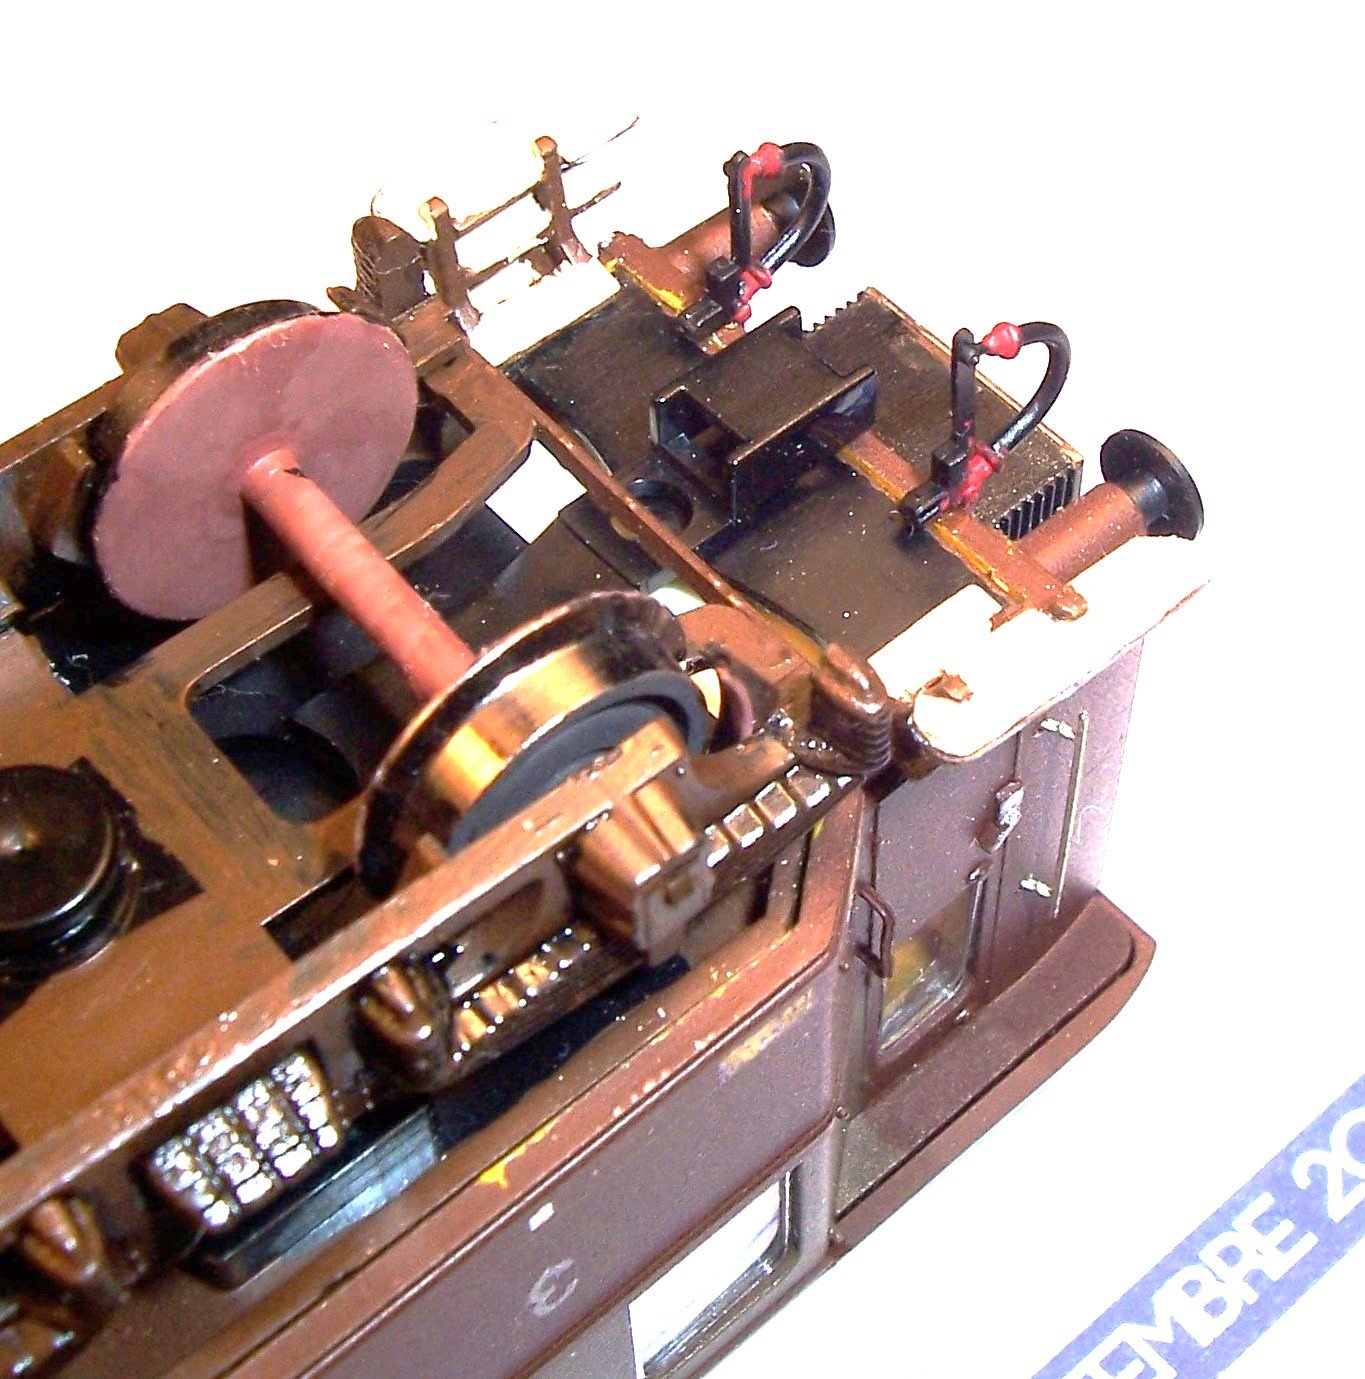
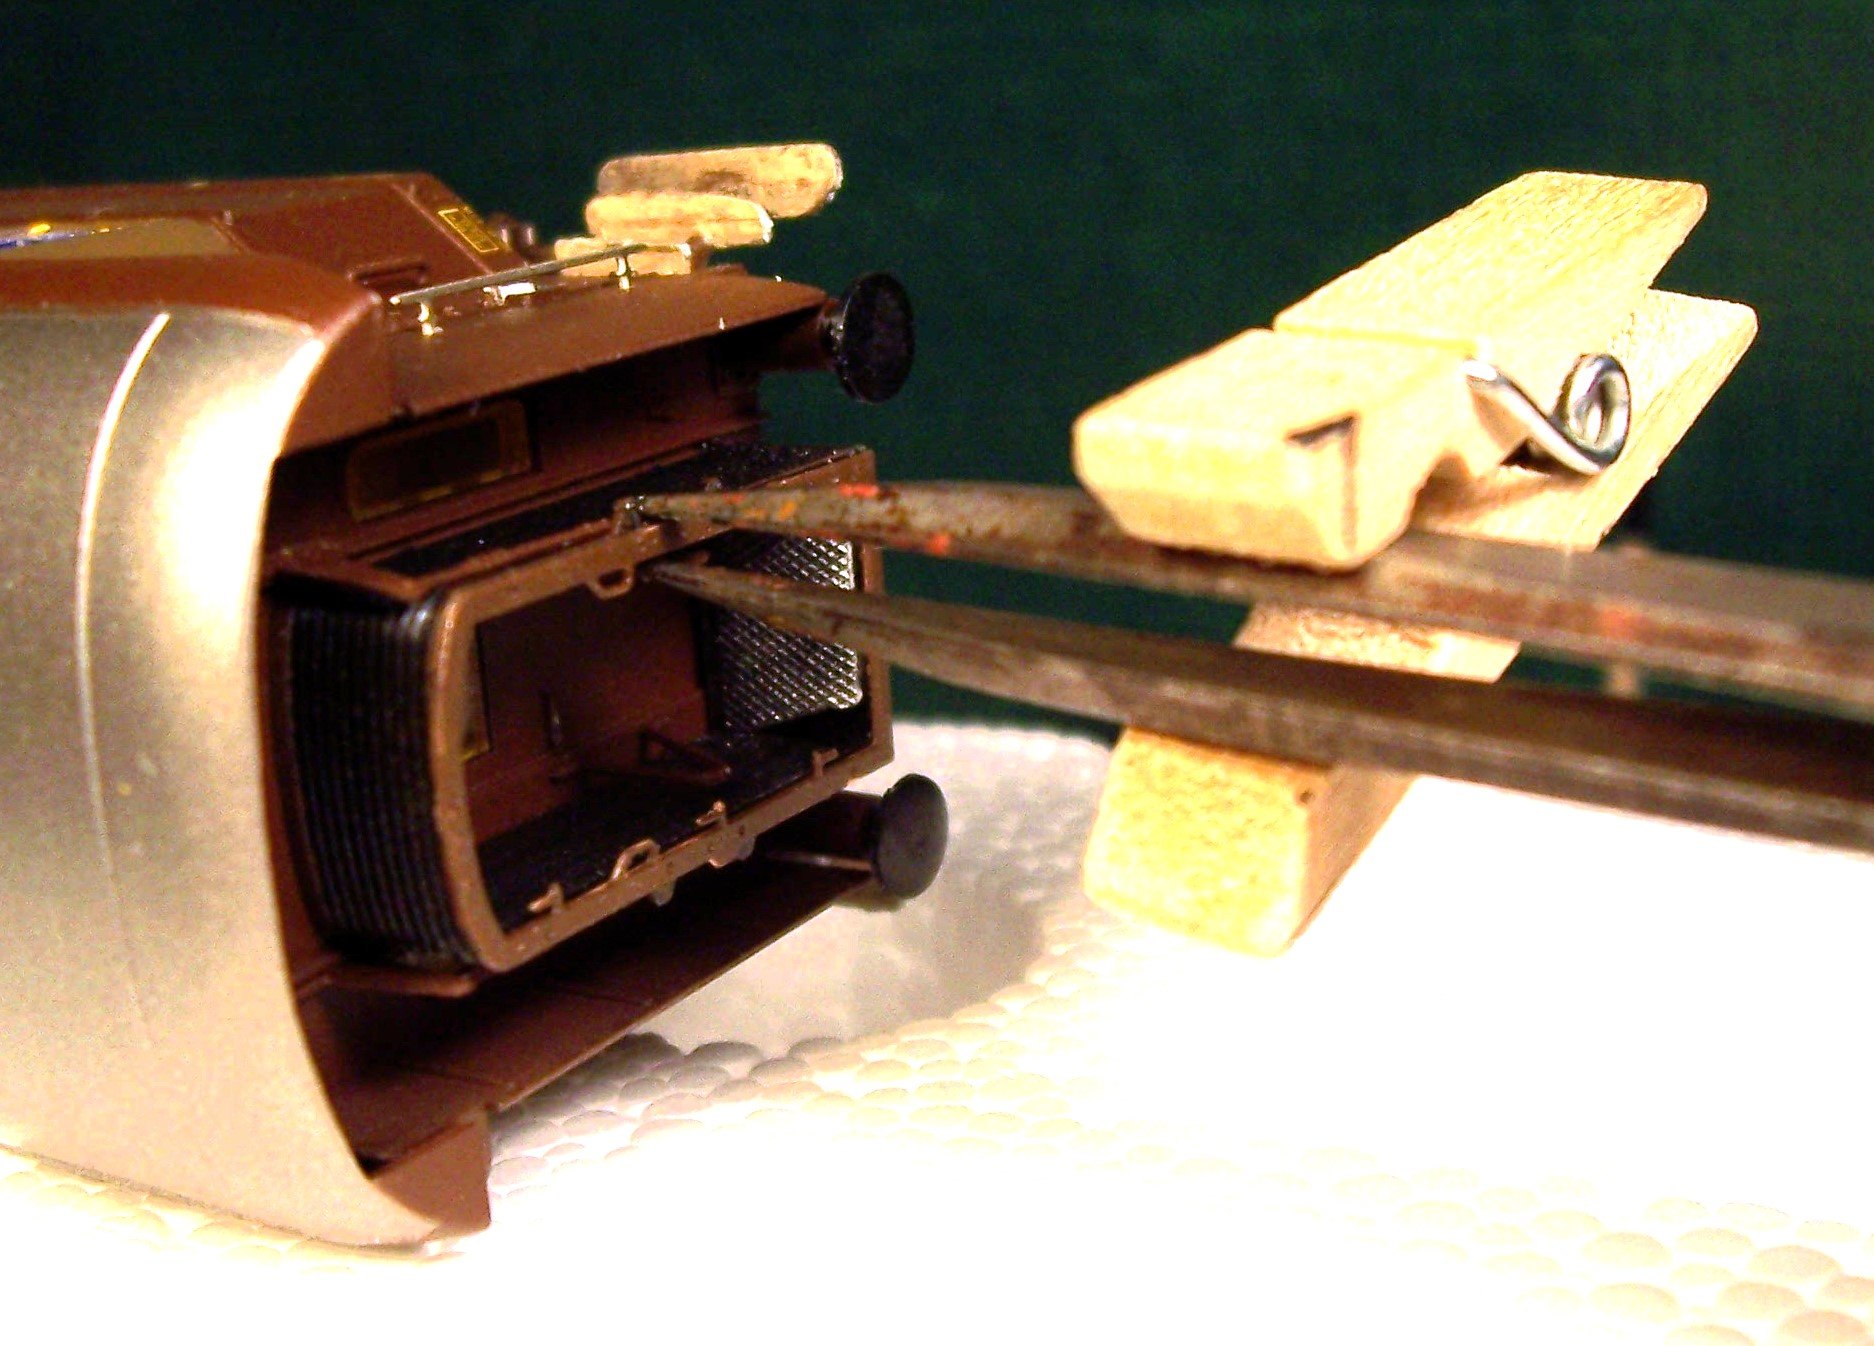
The following carriage is more recent and therefore it belongs to era IV.
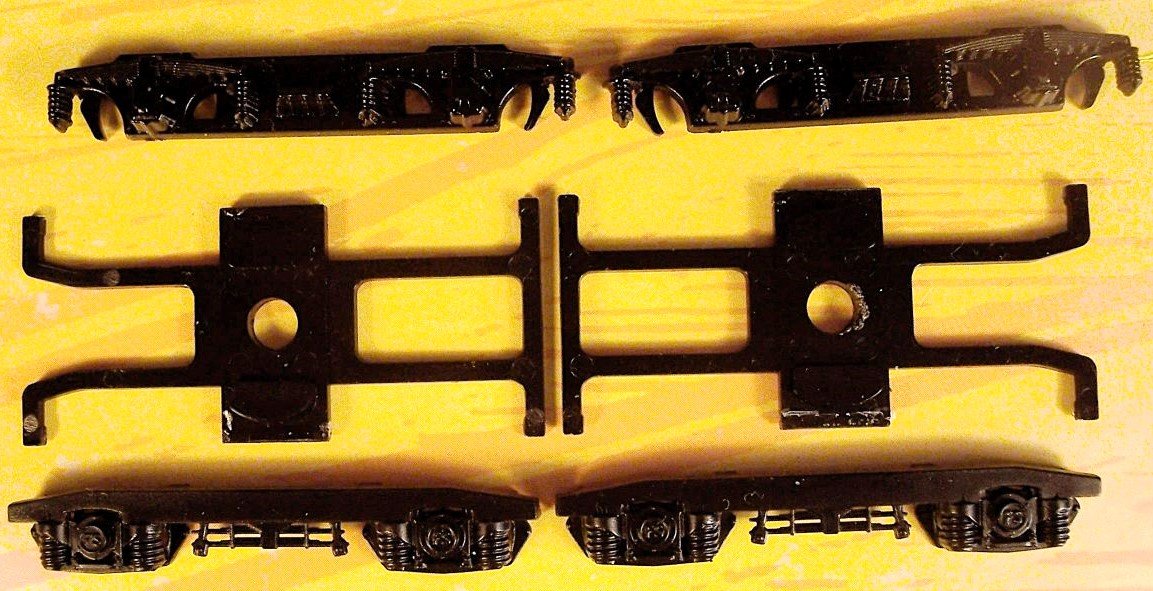
After removing the bogies, the kinematic mechanism for short coupling can be seen:

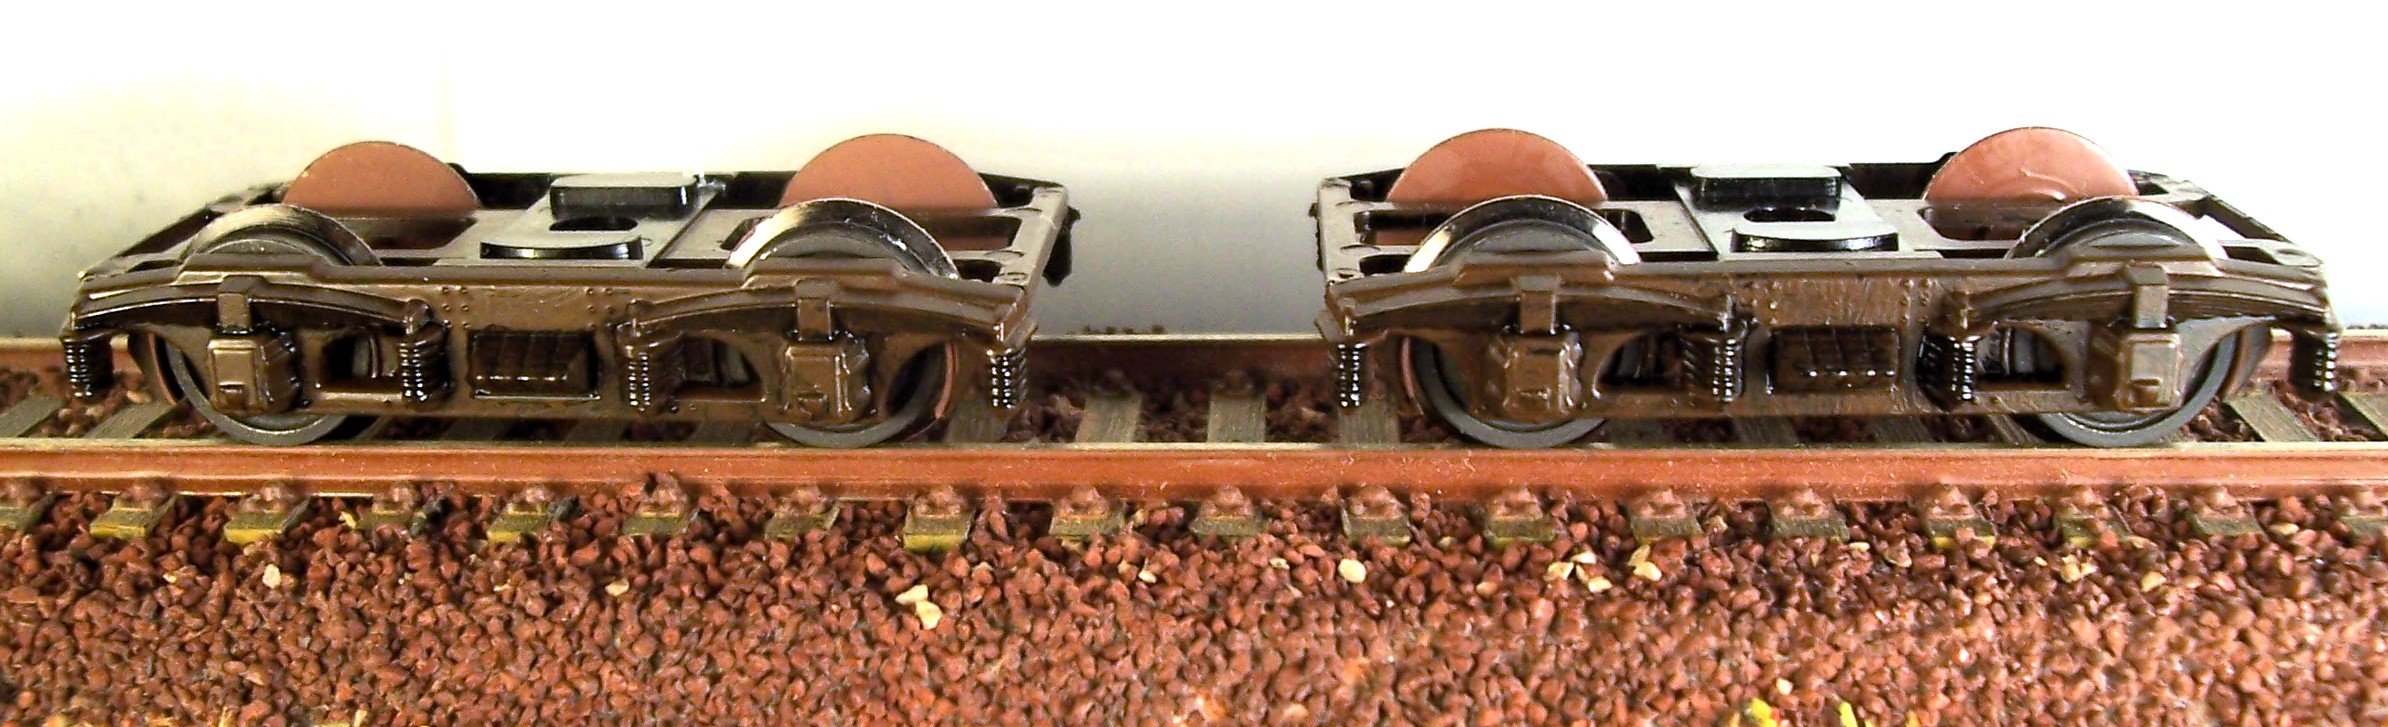
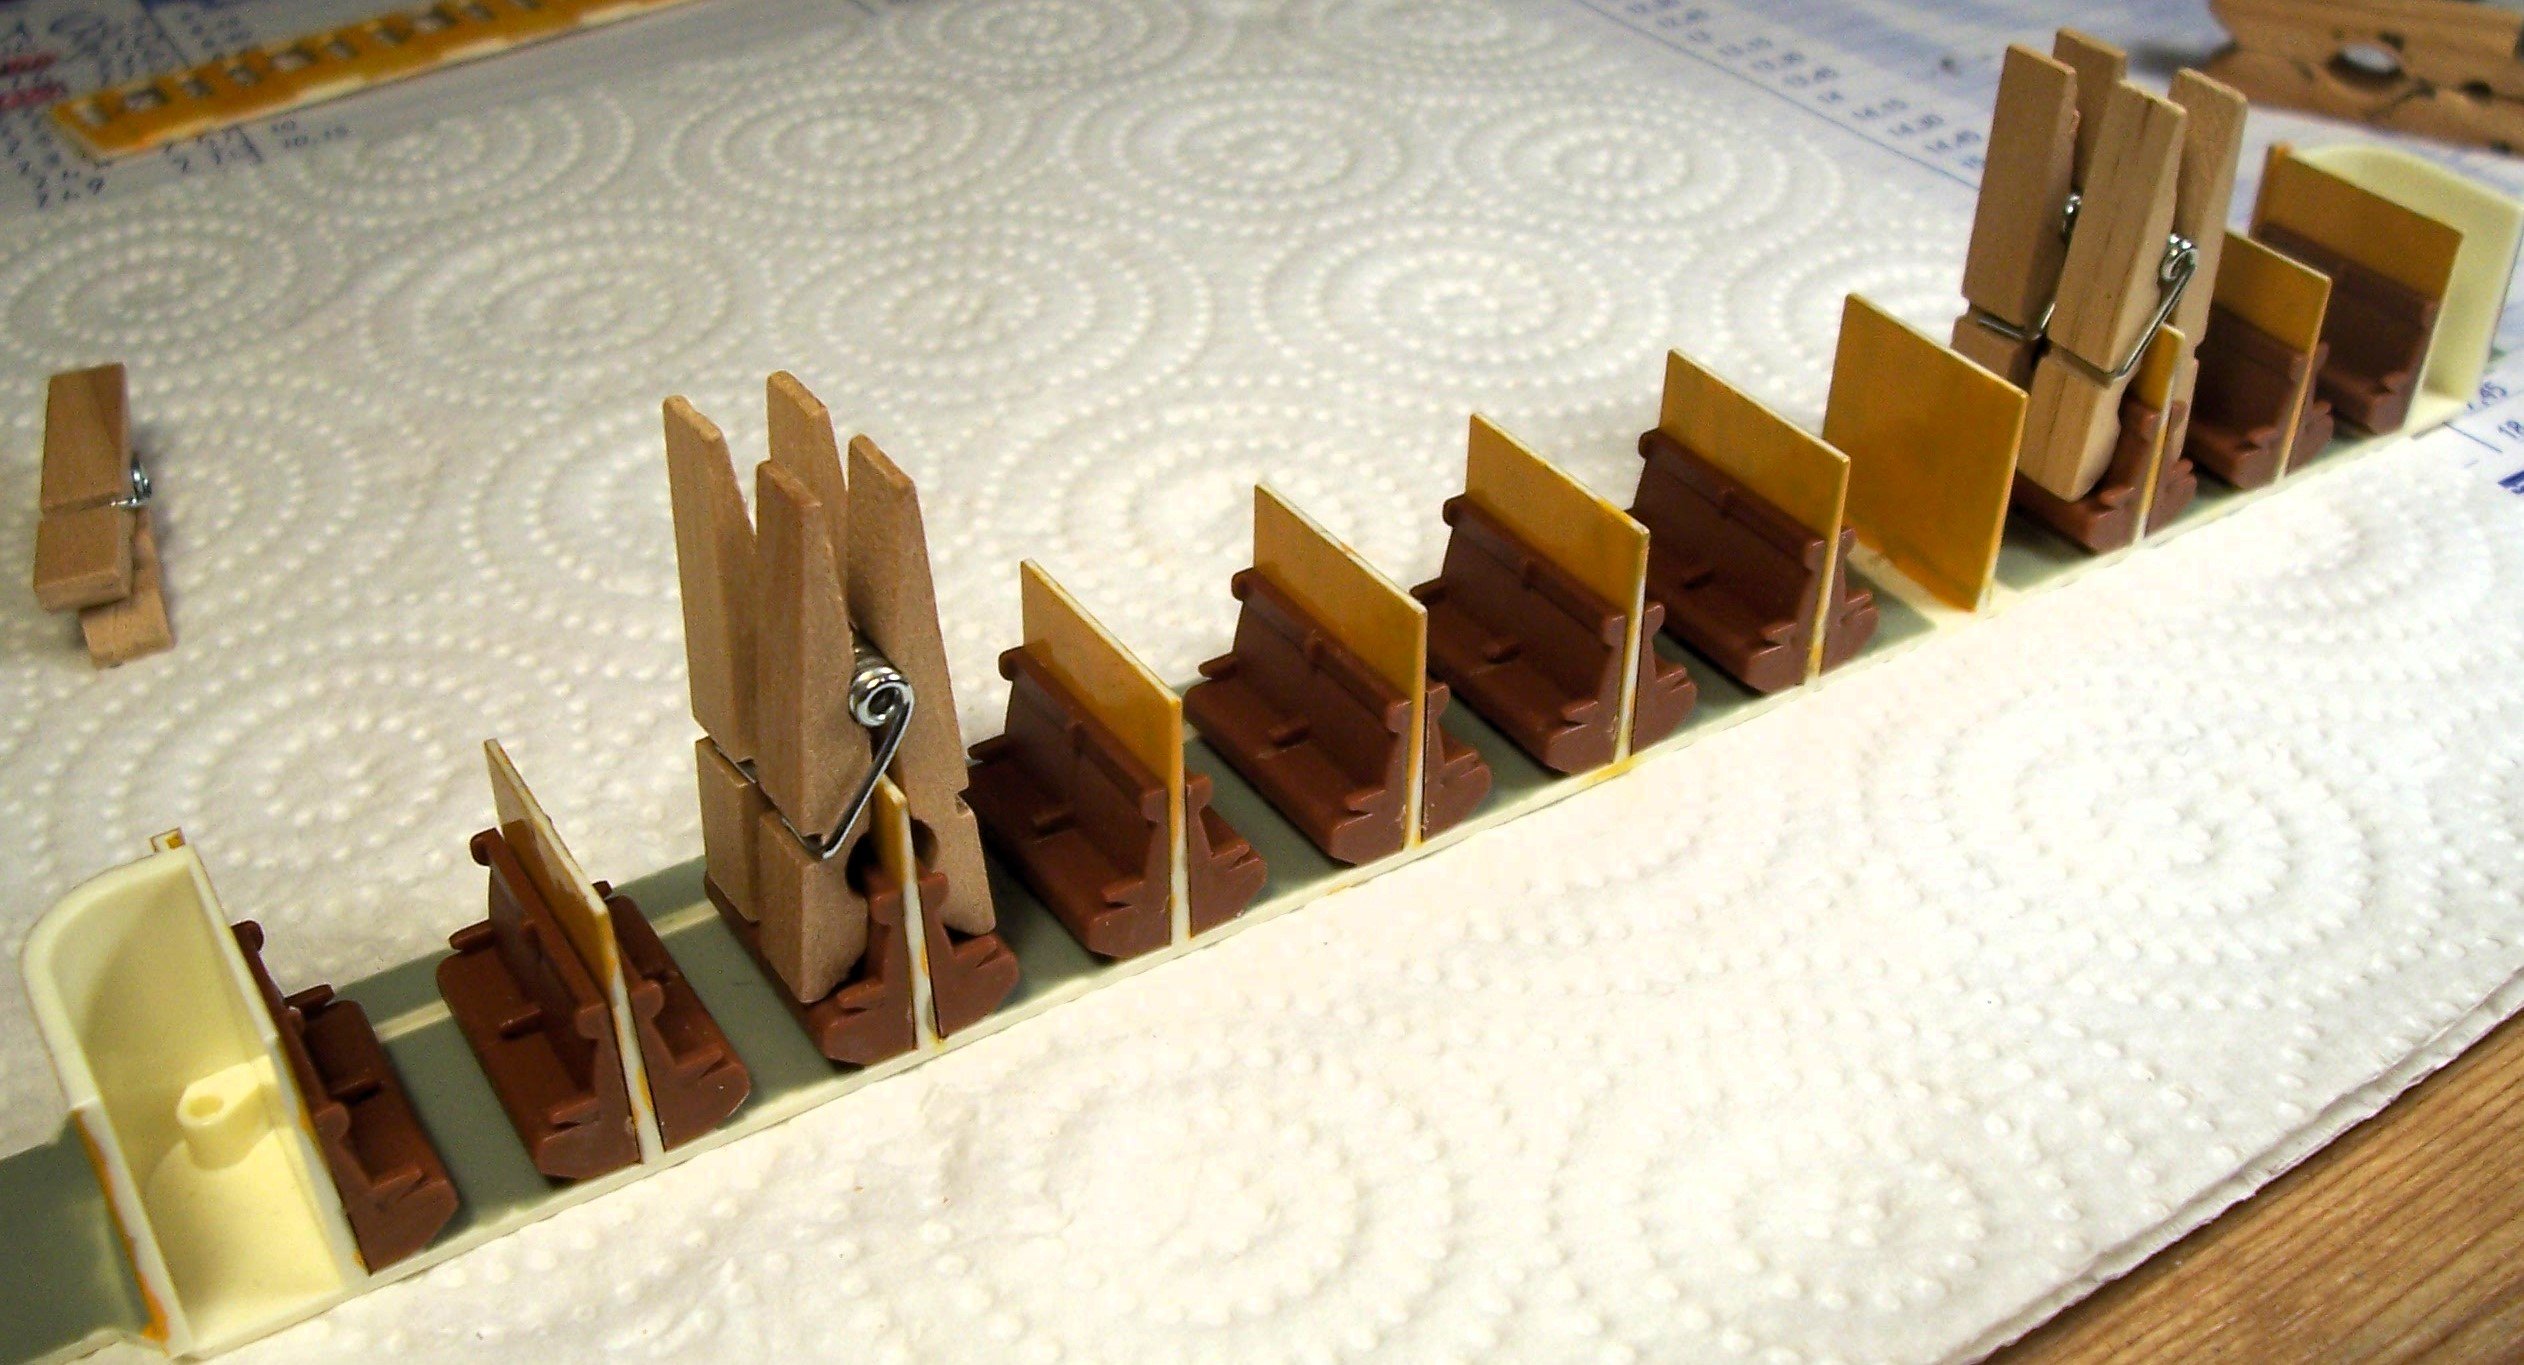
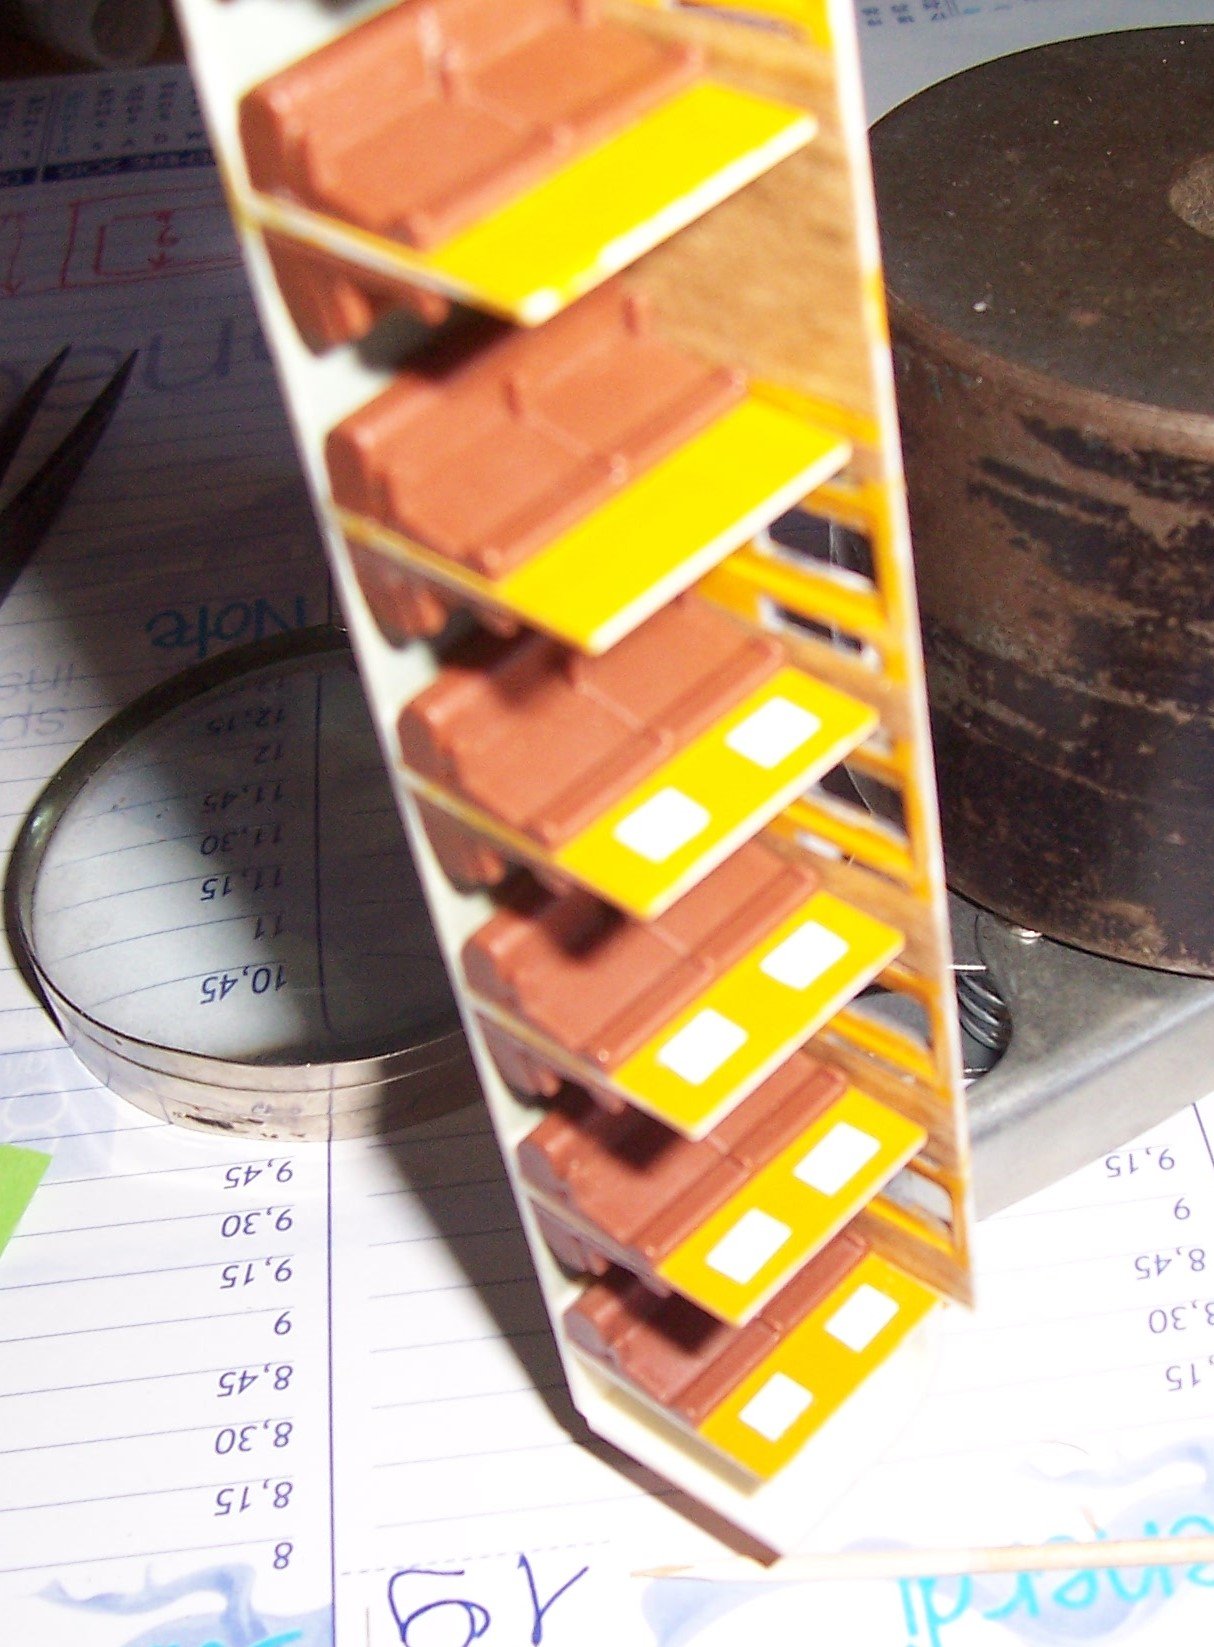
The bogies have movable sides; being black, they should be painted in the correct color:
.JPG.792b4cbaf5ffd3f8dfe55ce37031cfb0.JPG)
.thumb.JPG.4182670a1ba586930e692b23882b4312.JPG)
Of course, realism can be improved by adding traces of oil and rust.
Rodolfo
-
Hi Steven,
In my experience,, building railcar is more easy than building coach that are more easy than building diesel loco that are more easy than building electric that are more easy than building steam...really I began to build a steam one, many years ago but I've yet to solve some problems on chassis and wheels...
red.thumb.JPG.b1a66f342cb750111837367bee8e668b.JPG)
The locomotive in the picture is Italian (FS = Ferrovie dello Stato = Italian Railways) like the coach. Here you might see the work I made about maintenance and body improvements:
https://www.chimicaone.it/le-locomotive-fs-gr-835-nel-modellismo/
and theyr history (unfortunately in Italian):
https://www.chimicaone.it/gr-835-la-locomotiva-fs-da-manovra/
Have a nice Sunday!
Rodolfo
red.thumb.JPG.d36404ff490a577b7090dc41feec3d99.JPG)
- Ronald-V and PvG Aussie
-
 2
2
-
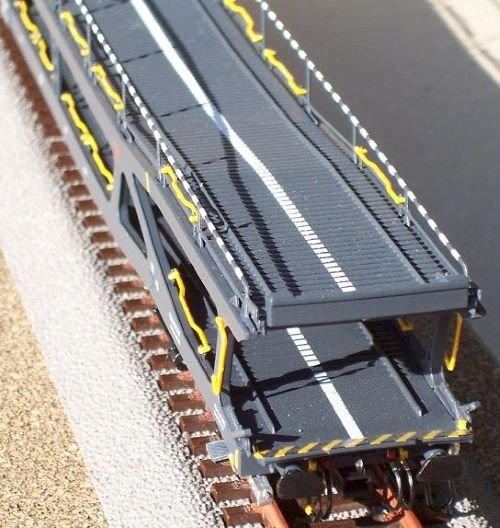
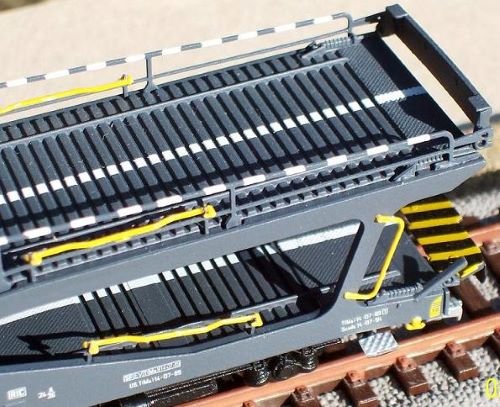
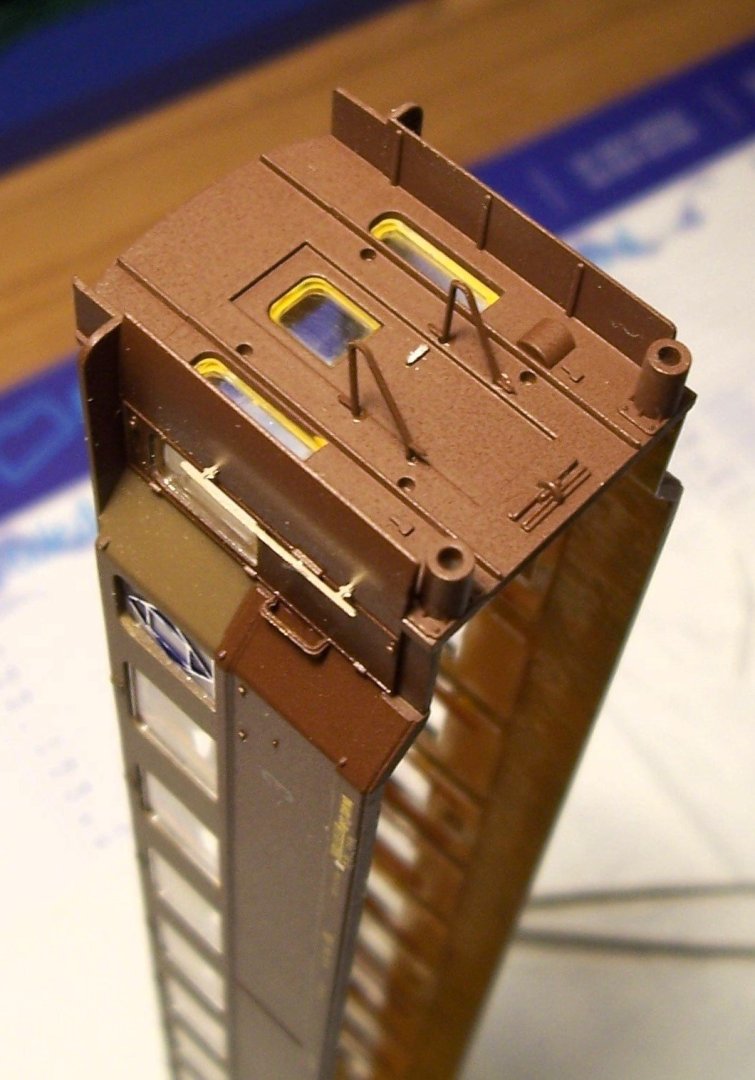
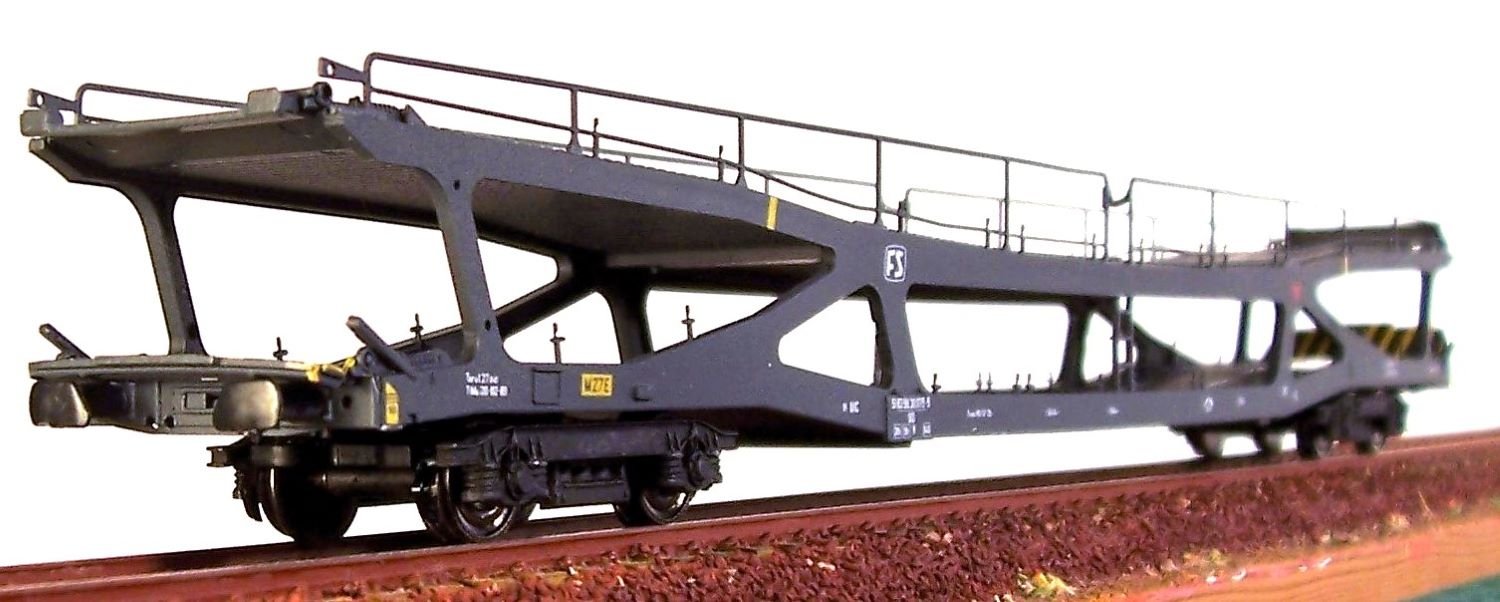
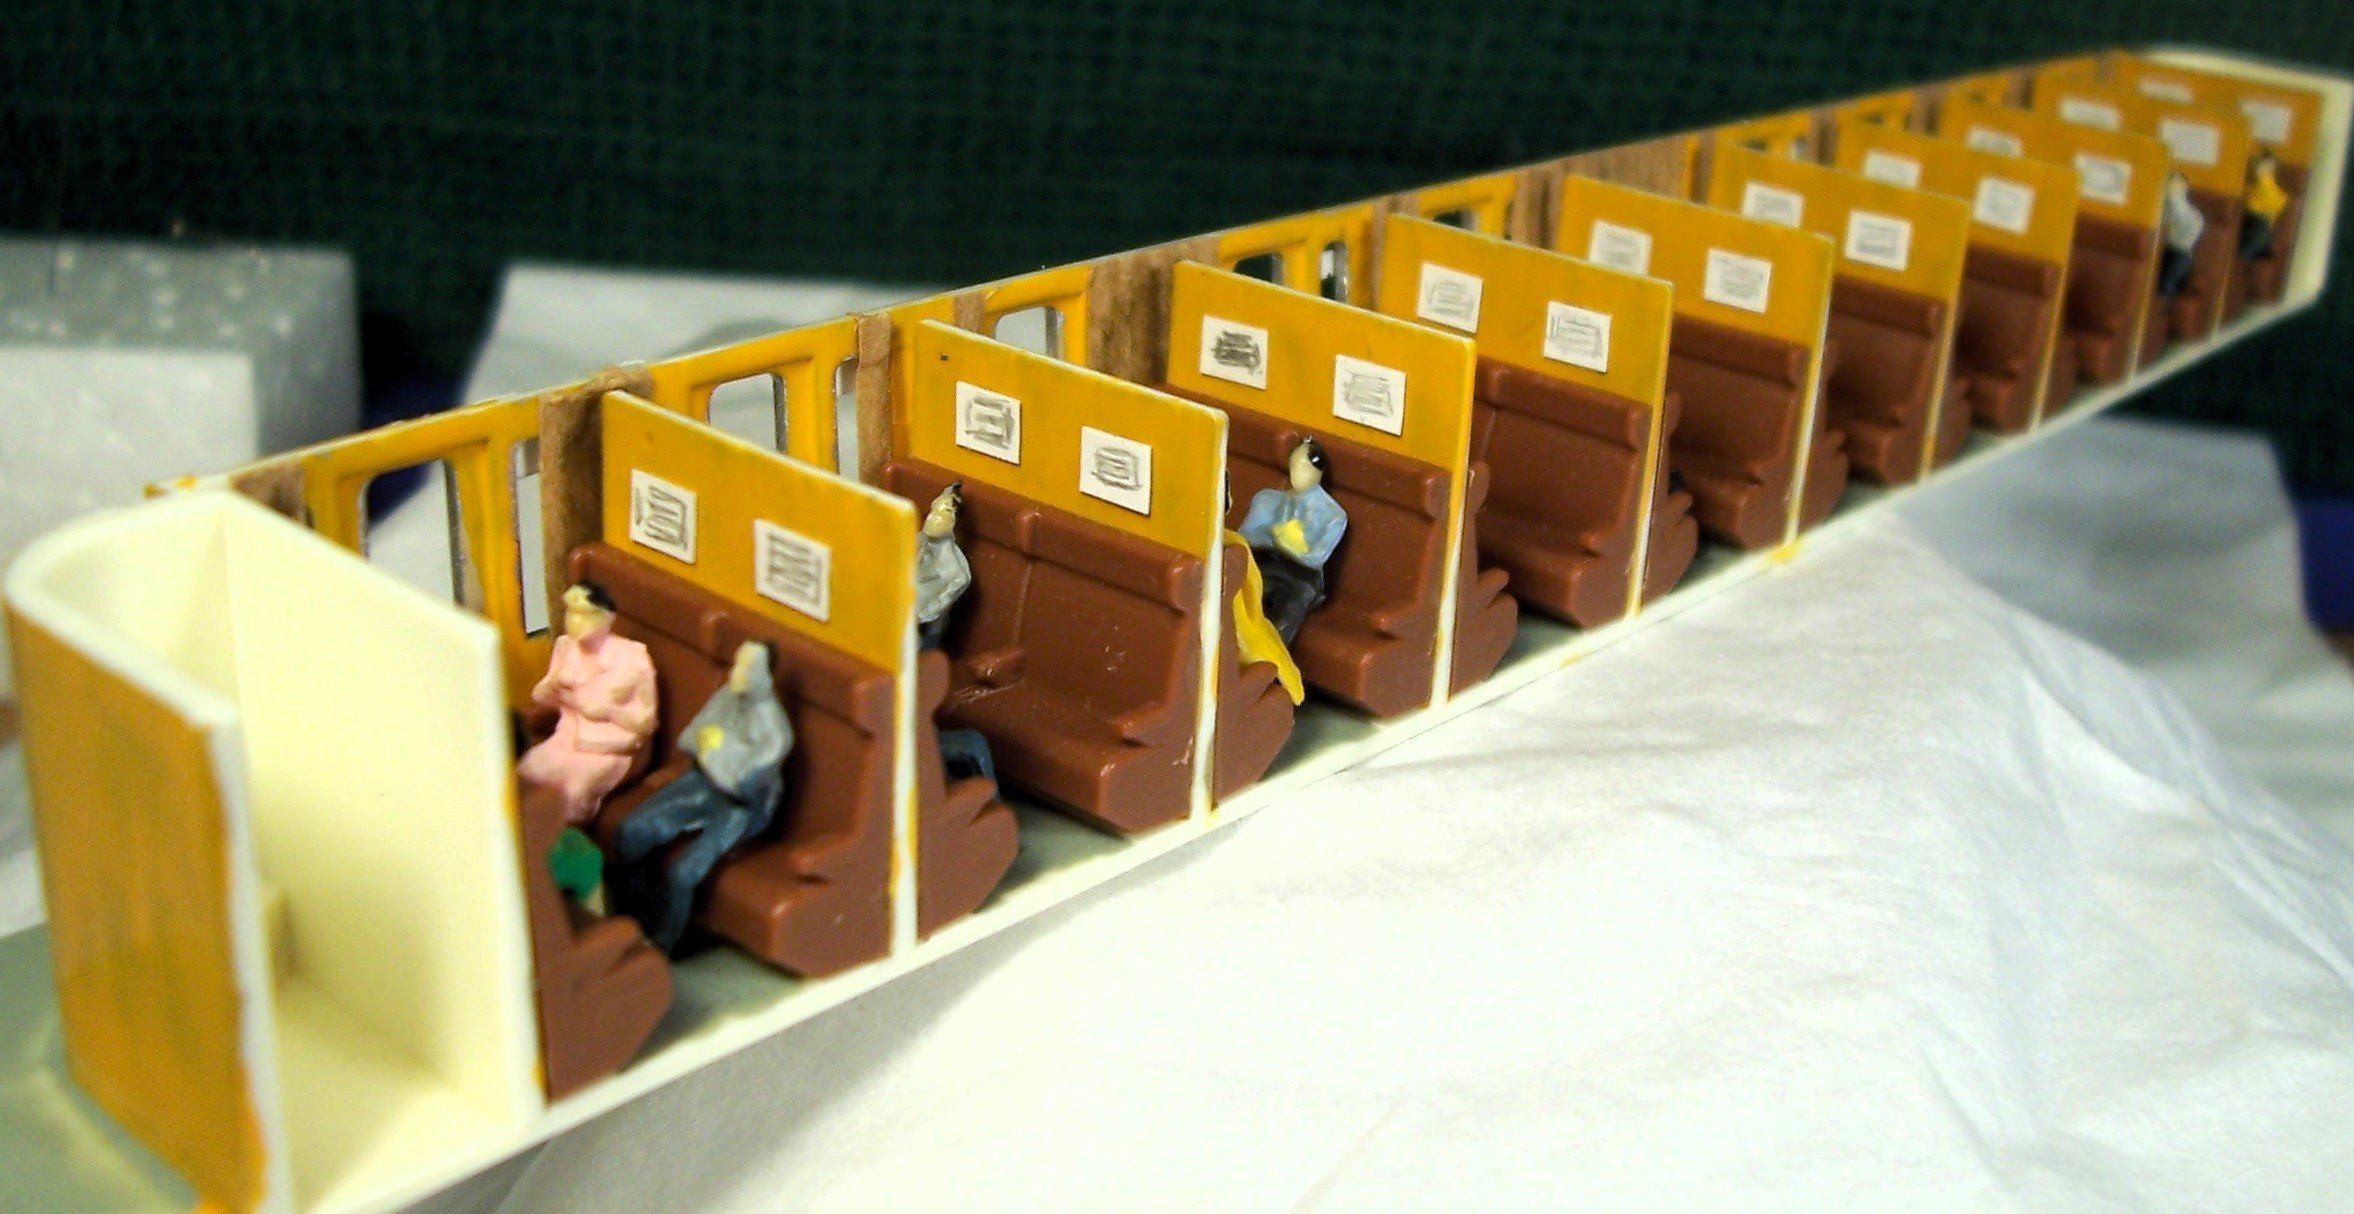
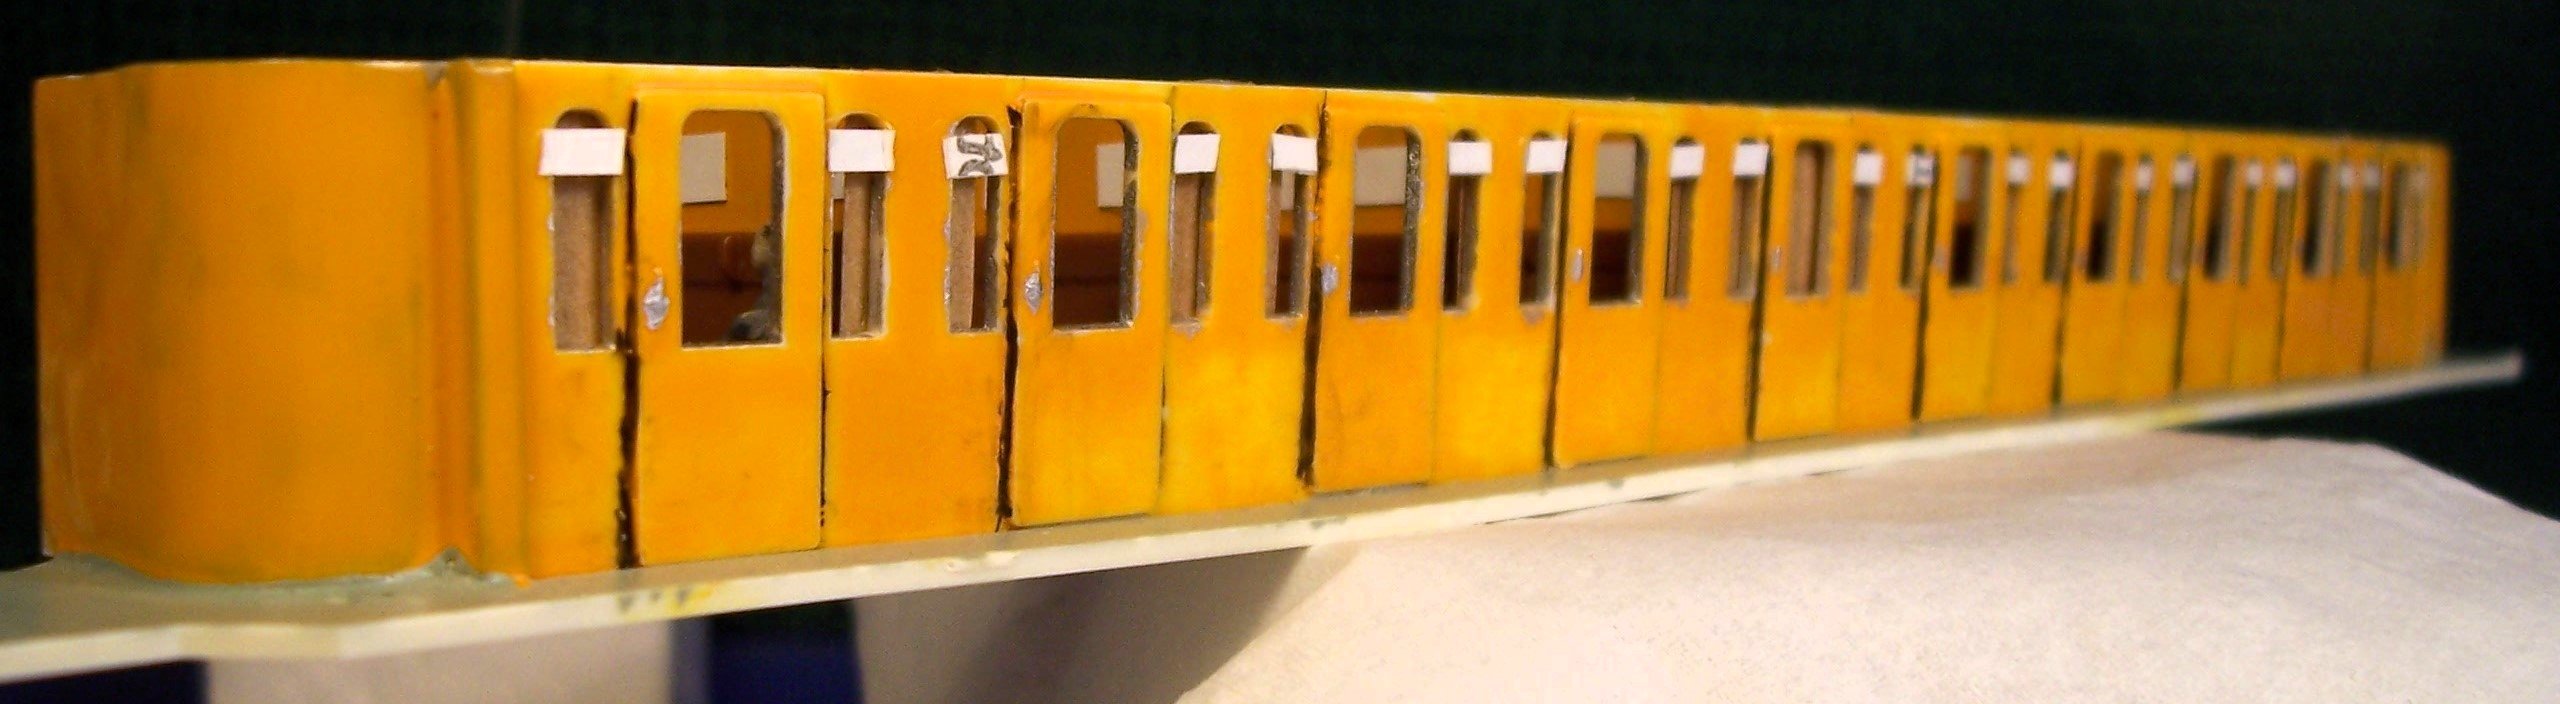
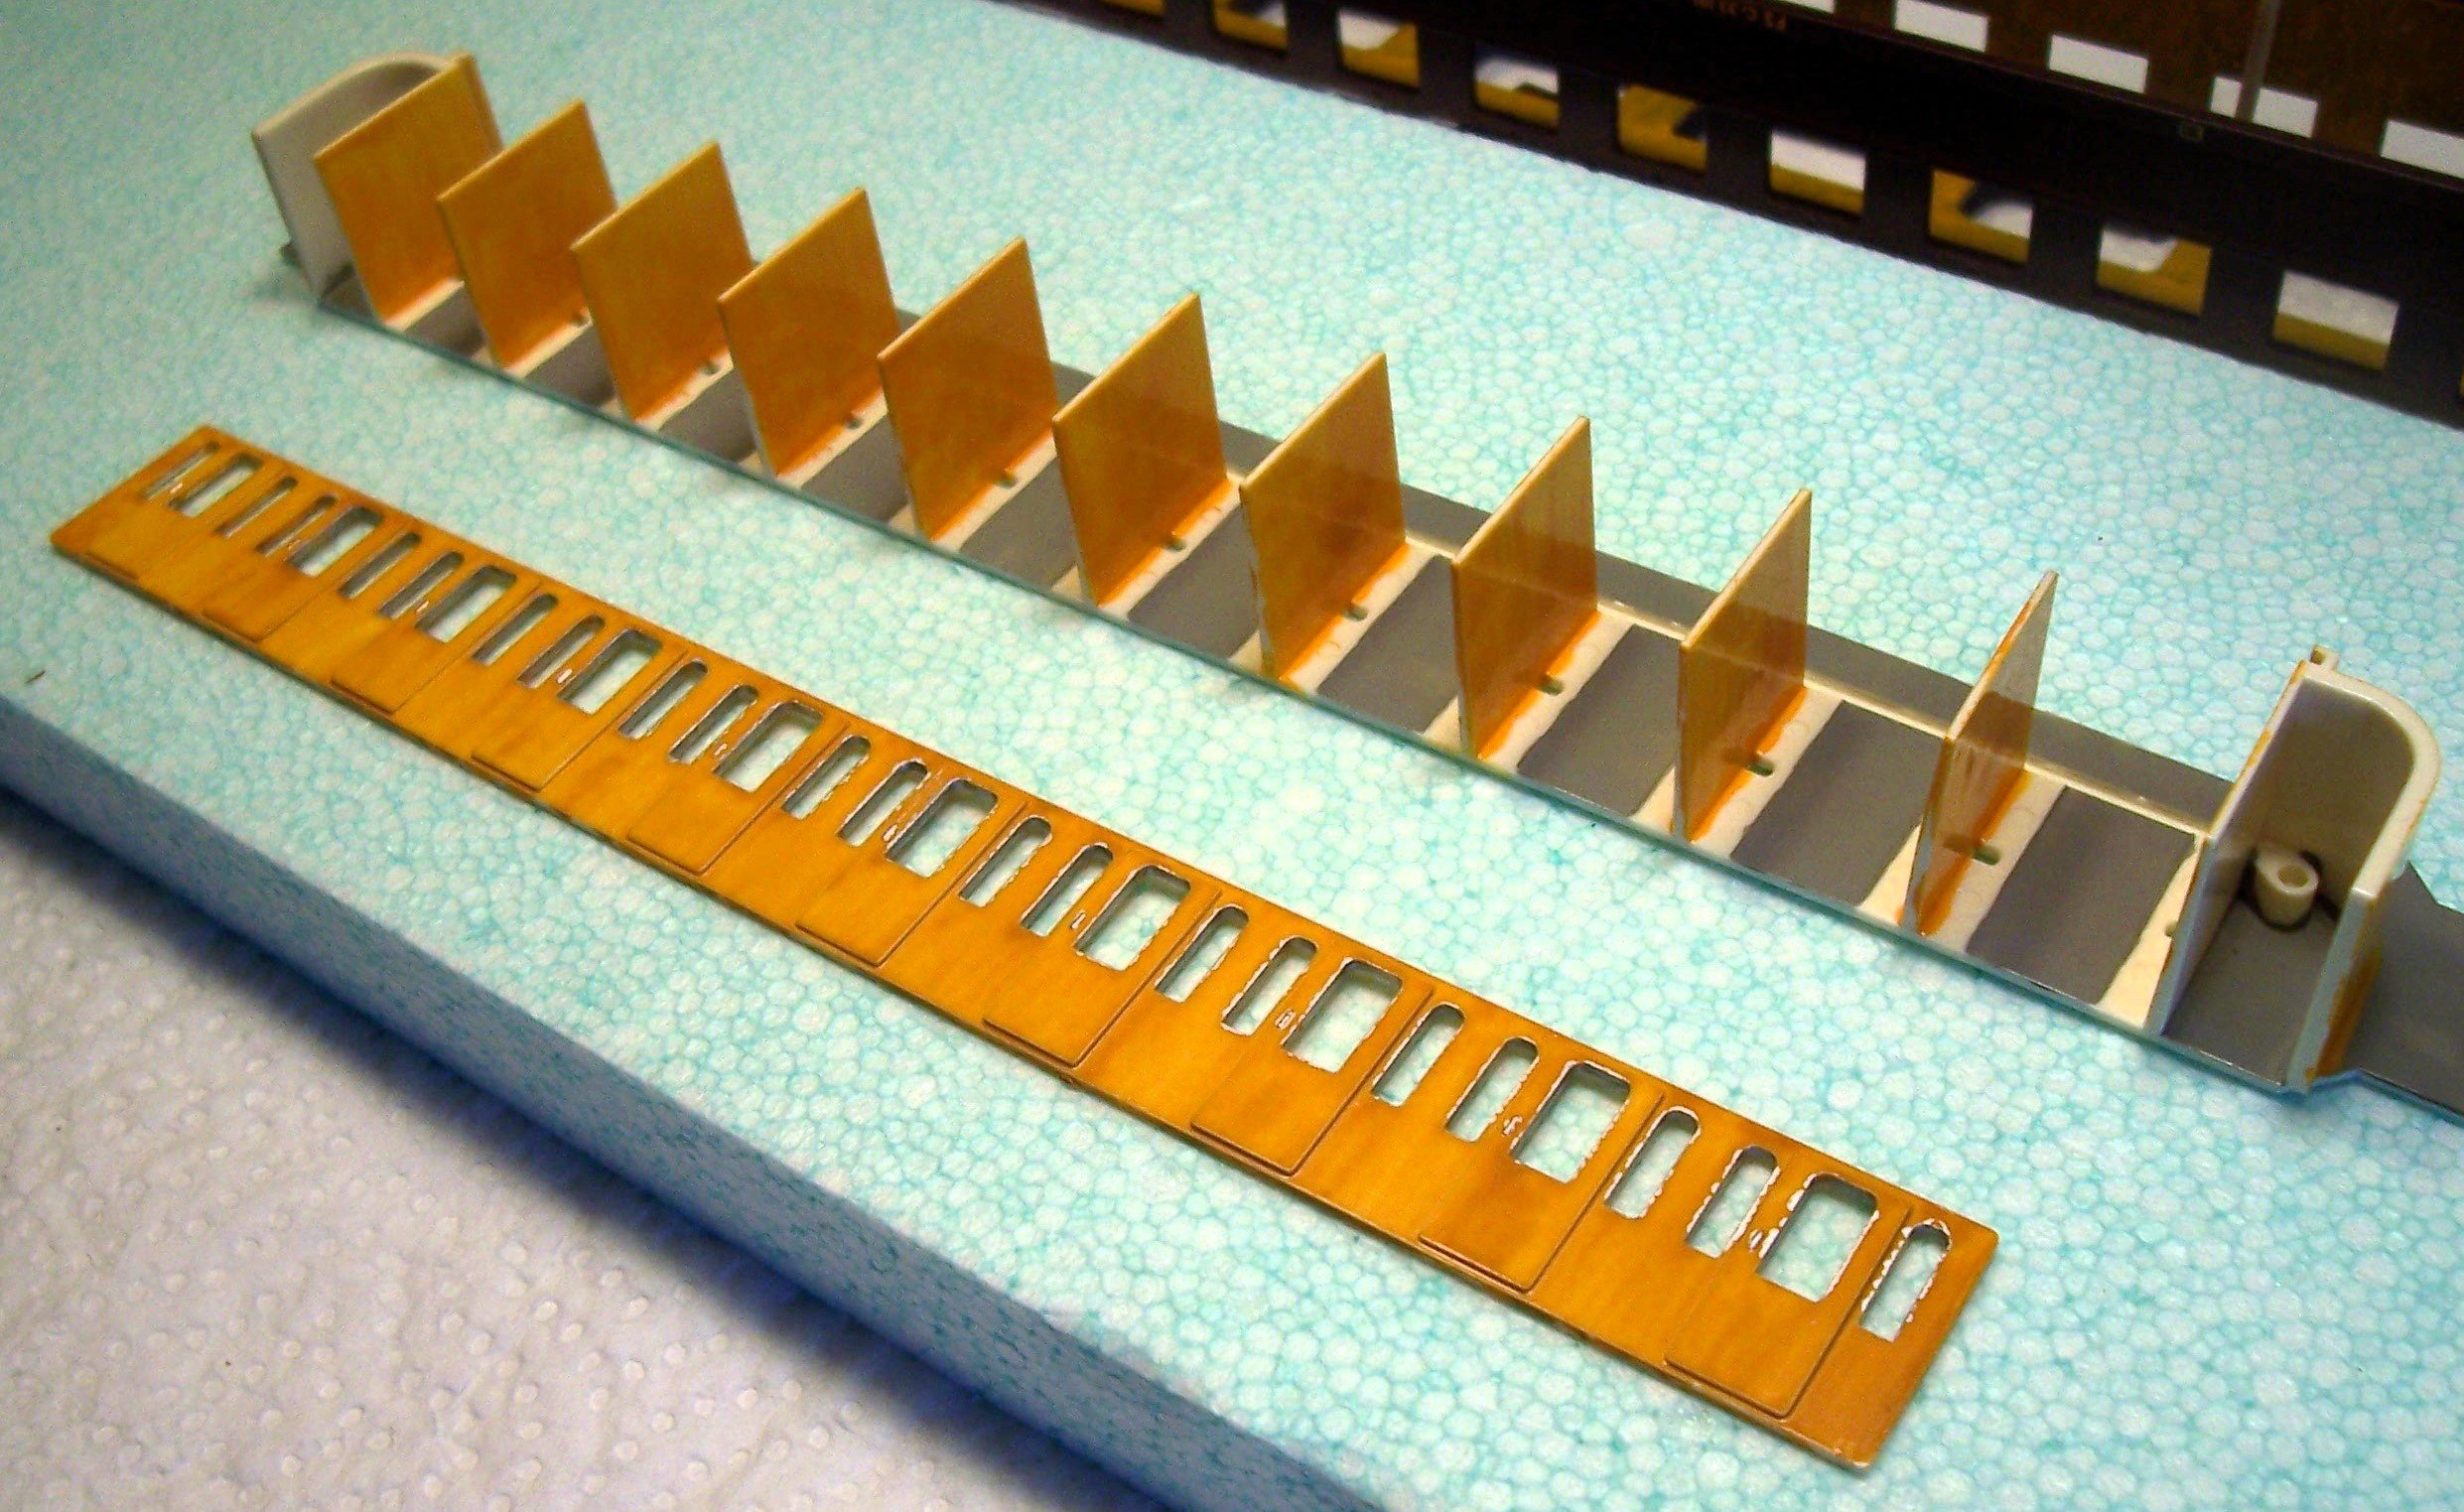
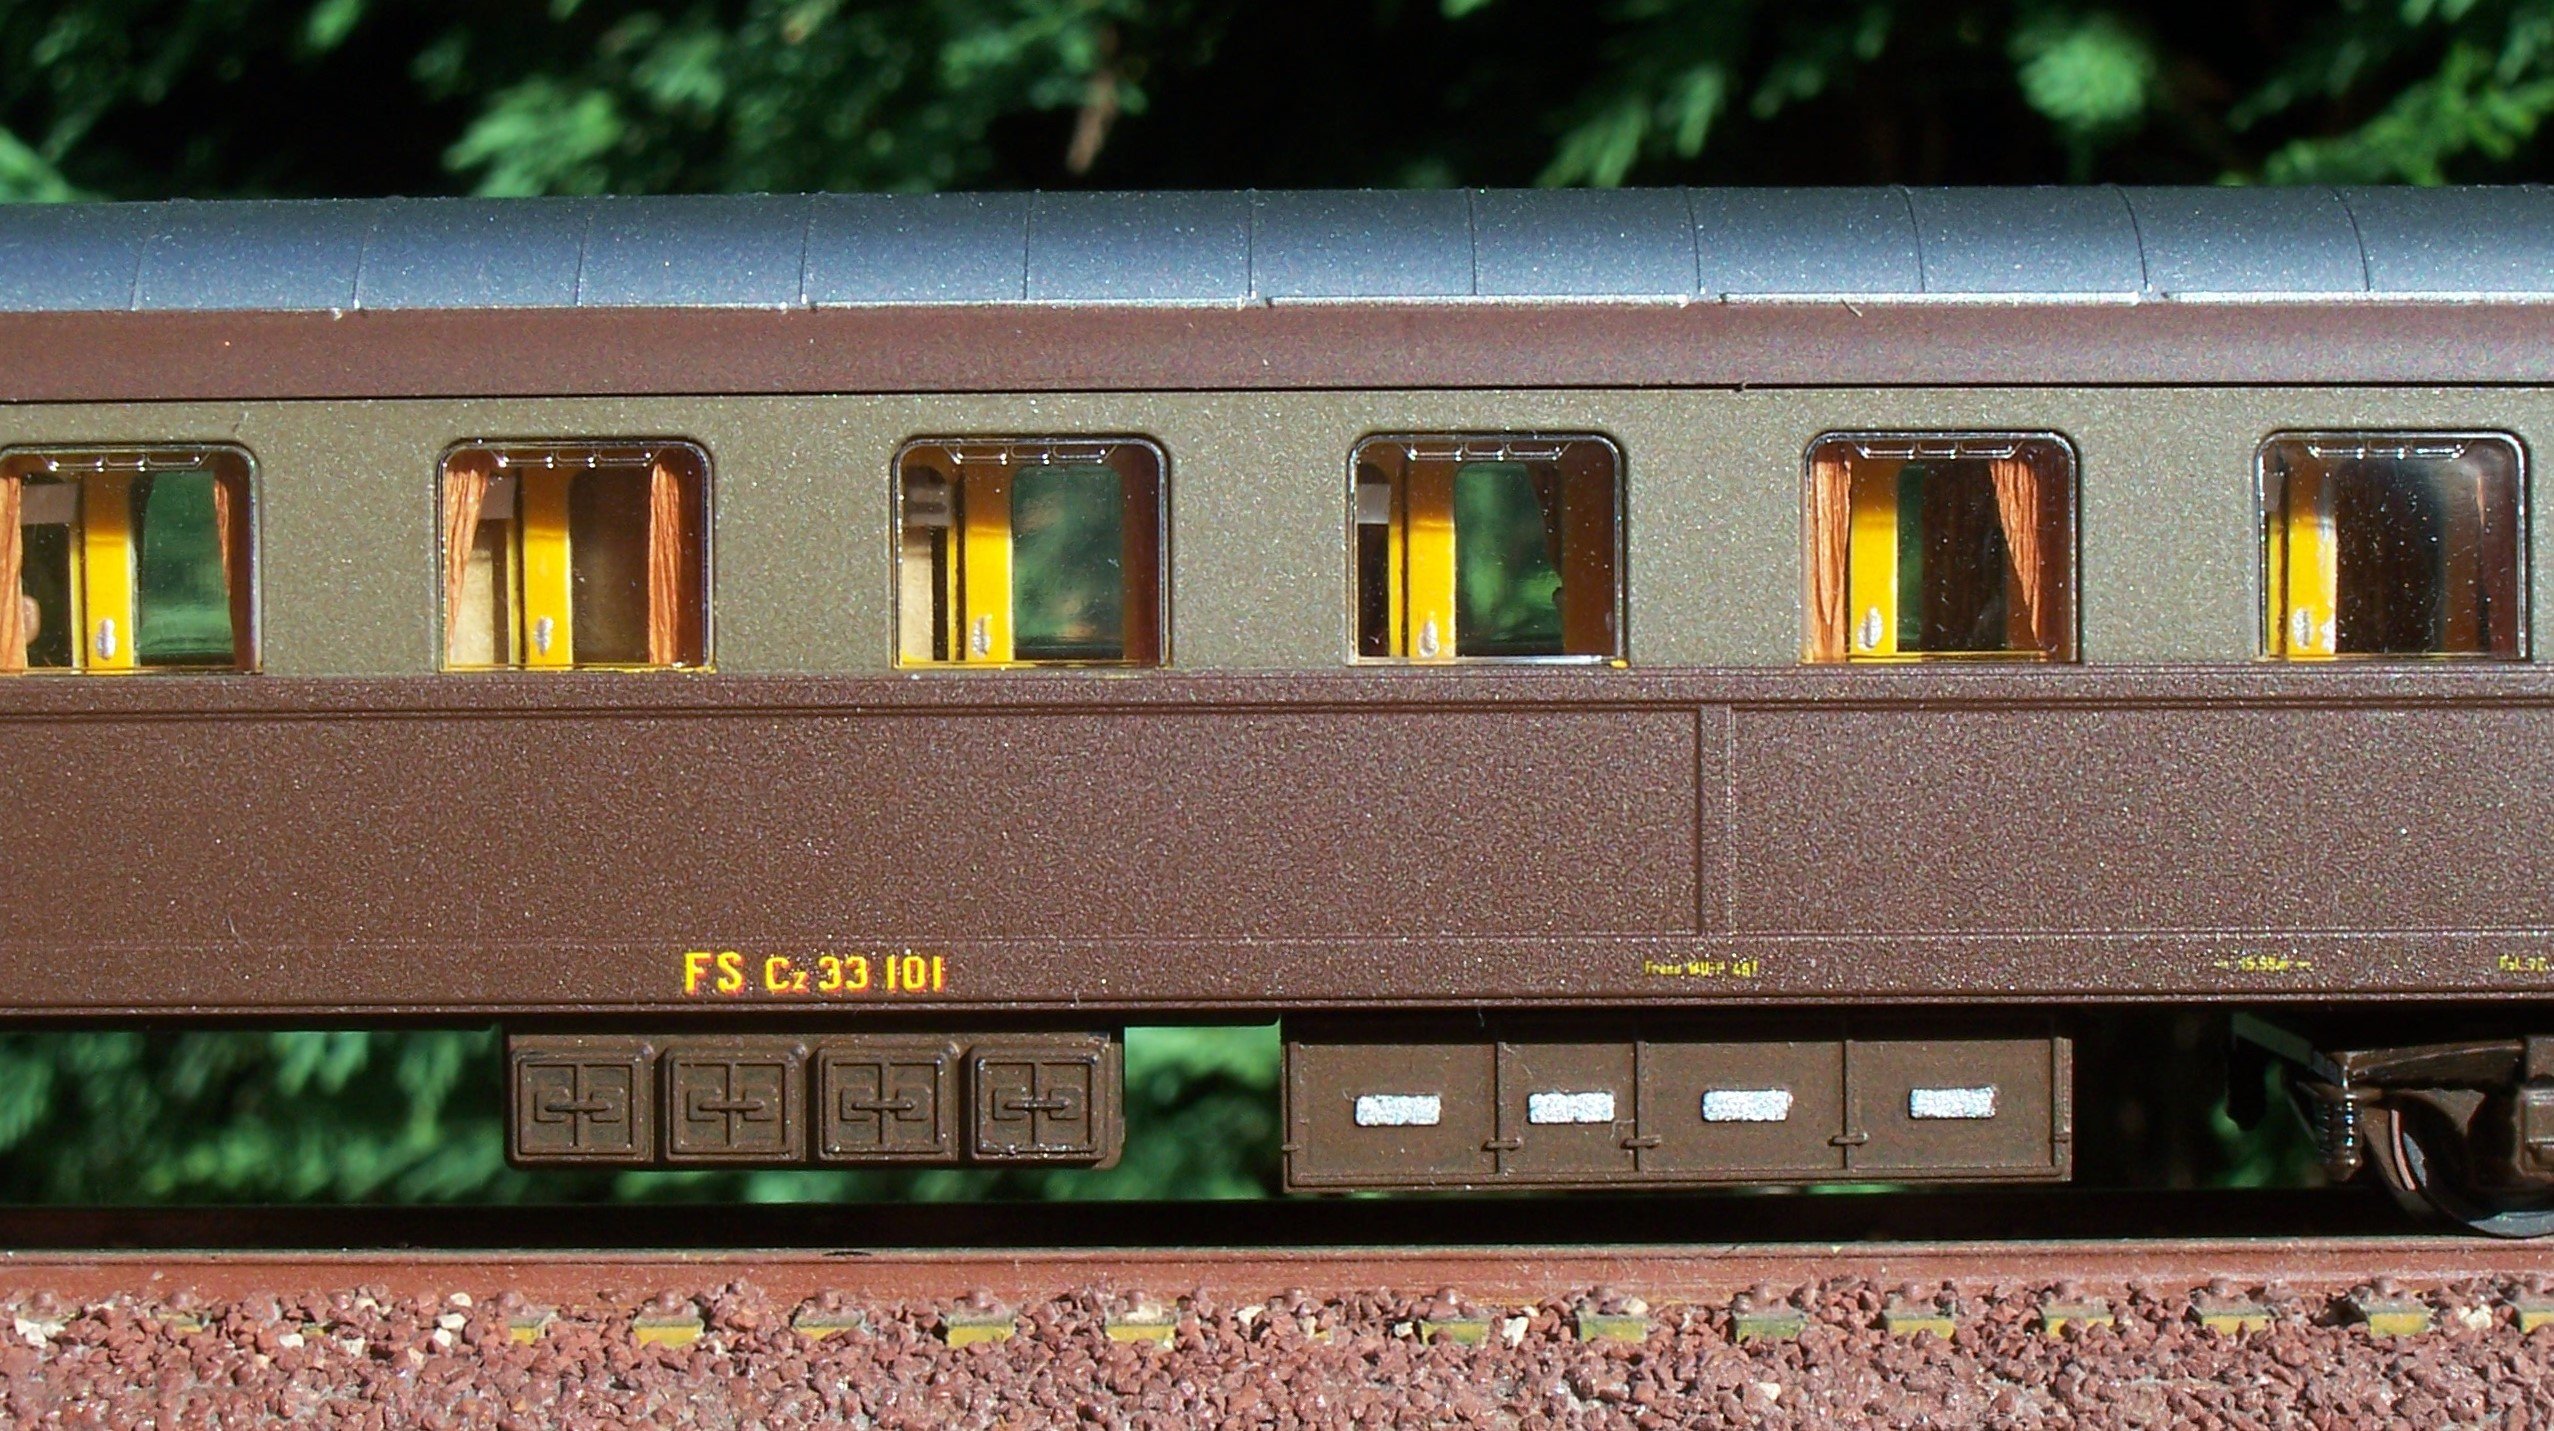
White zebra striping of the handrails is done by holding the van against a ruler and painting it with very opaque white dye at regular intervals:
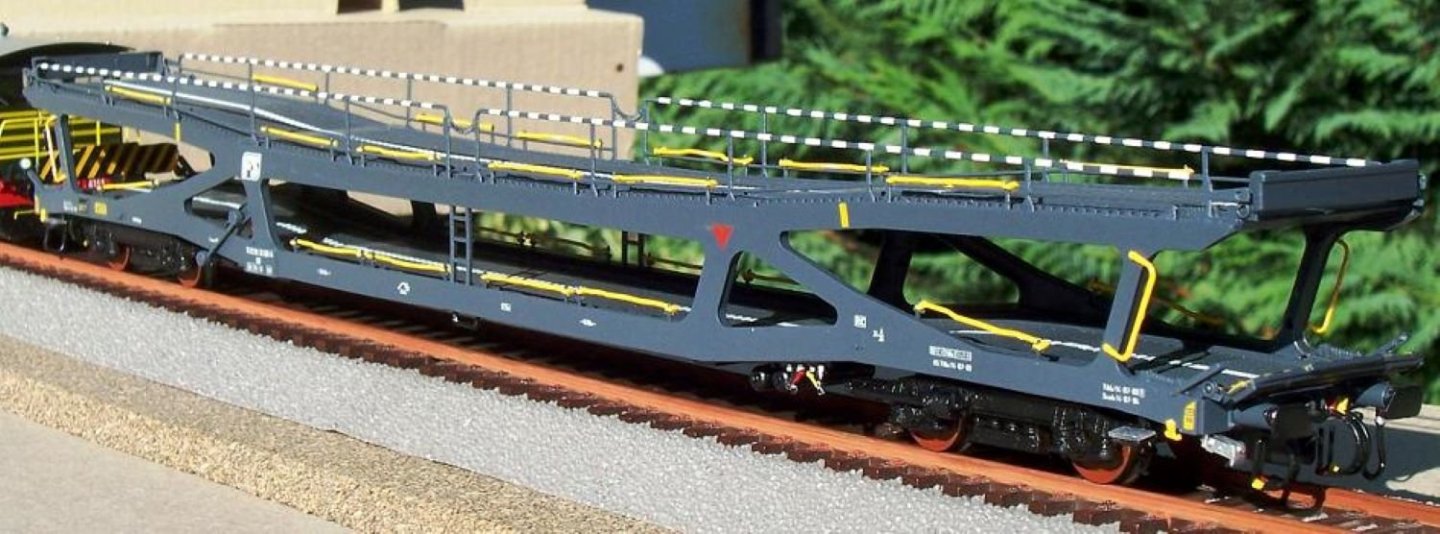
Car stops, side handholds, anchoring hooks, and the five-spoke hand wheel are painted yellow:
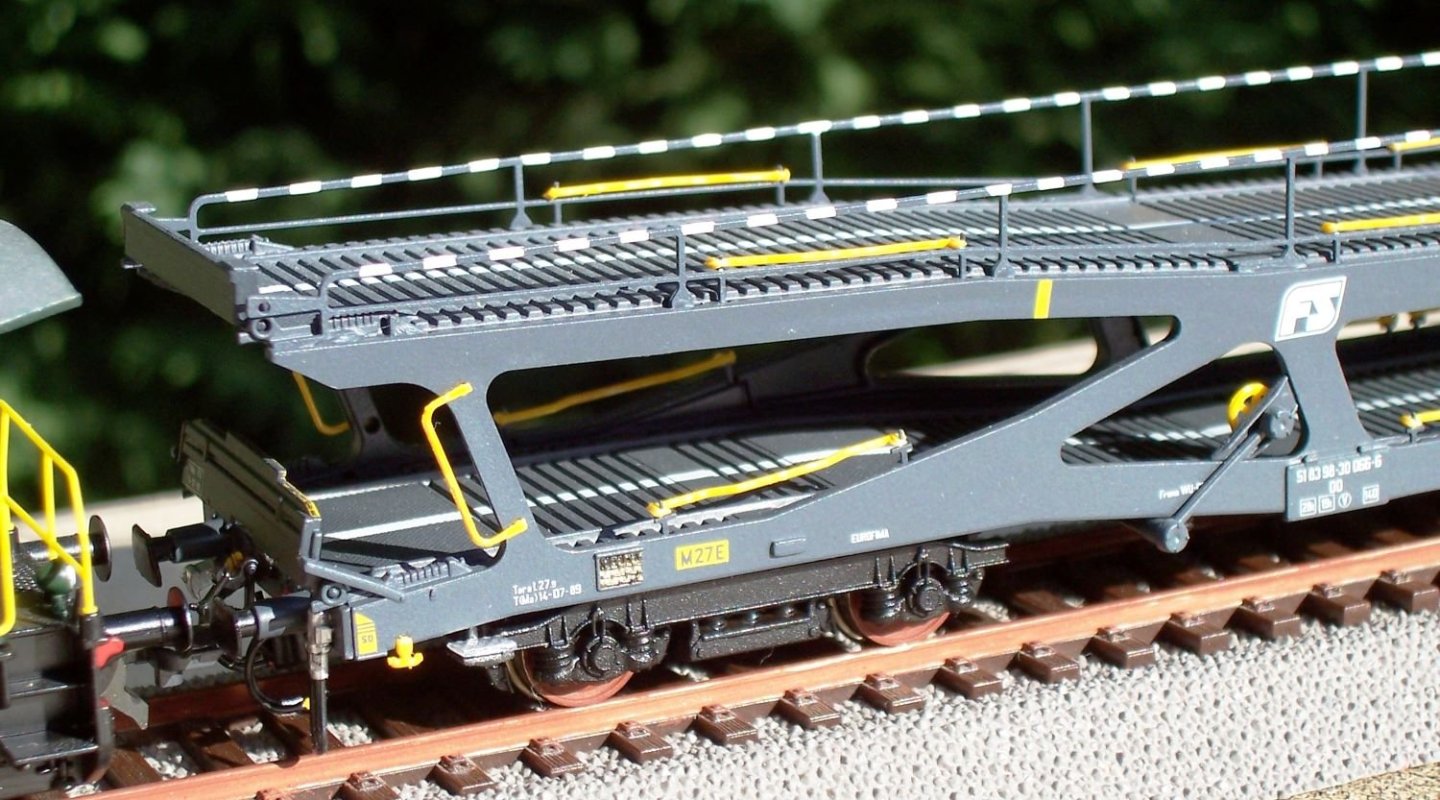
Bogies are painted with matt black and wheels in rust.
Next time, the bogies and the railwagon in Era IV.
See you later,
Rodolfo
-
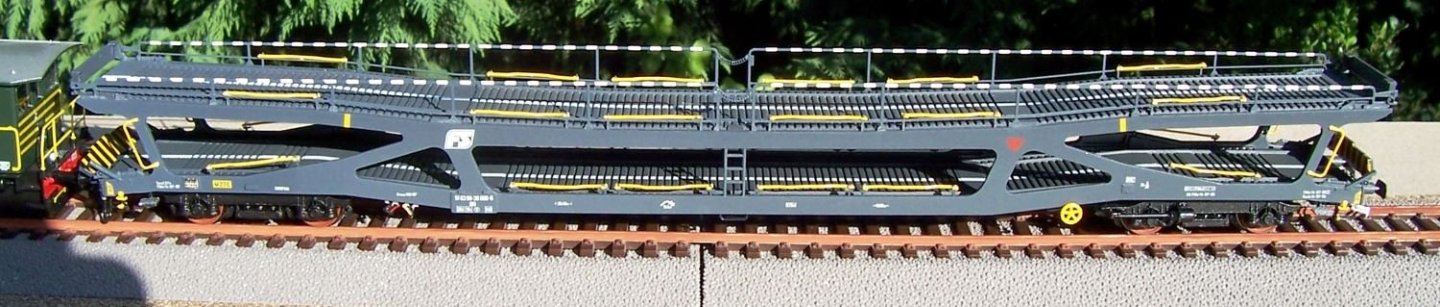
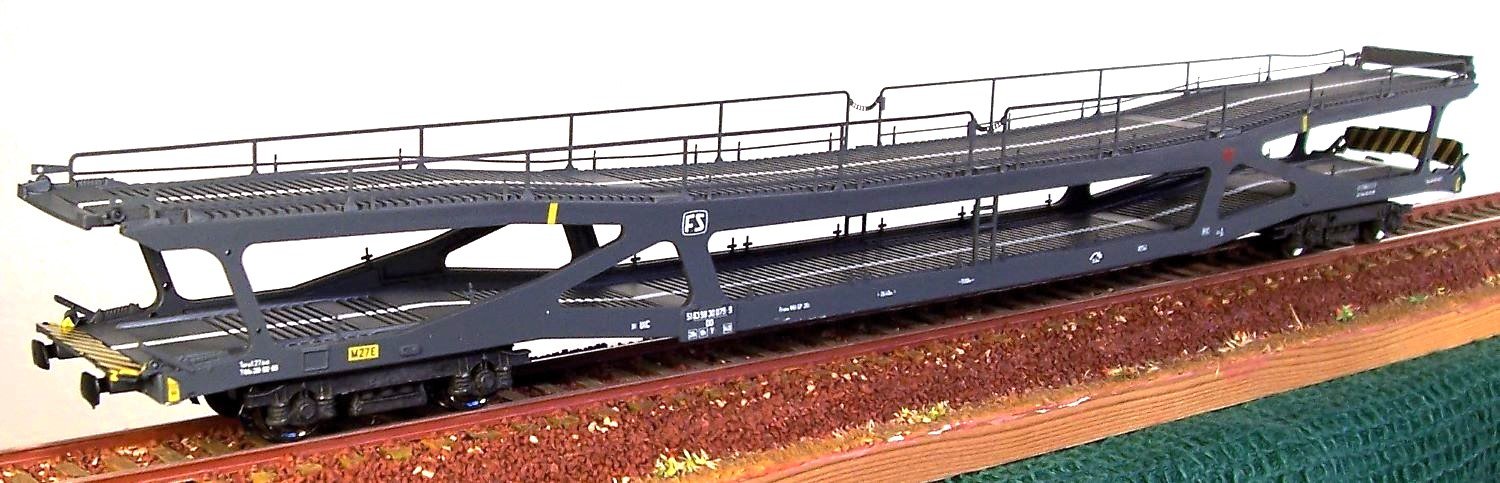
Dear friends, these wagons were inserted into passenger convoys to transport the cars of travelers.
We will examine three versions, slightly different from each other. First, the version in Era IIIb (1956-1968). For the history and other details of this railway rolling stock:https://www.chimicaone.it/carro-furgone-ddm-delle-fs/
The box:
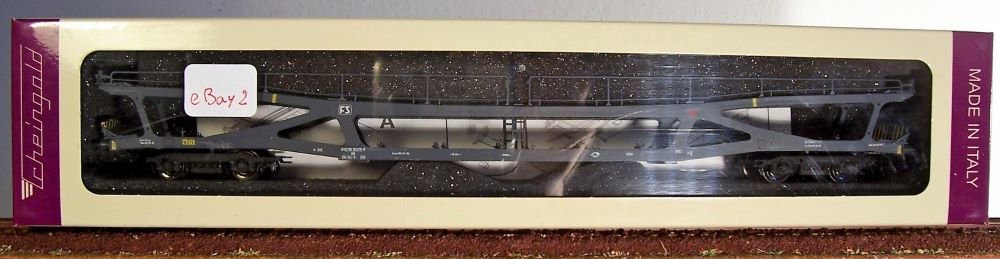
The railcar:


After the presentation, we'll begin the modifications.
See you later,
Rodolfo
-
Thank you Mark and greetings to all friends. I will be back soon with more model railroads!
Rodolfo
- king derelict, Jack12477, Ronald-V and 6 others
-
9
-
The air-couplers have been glued:

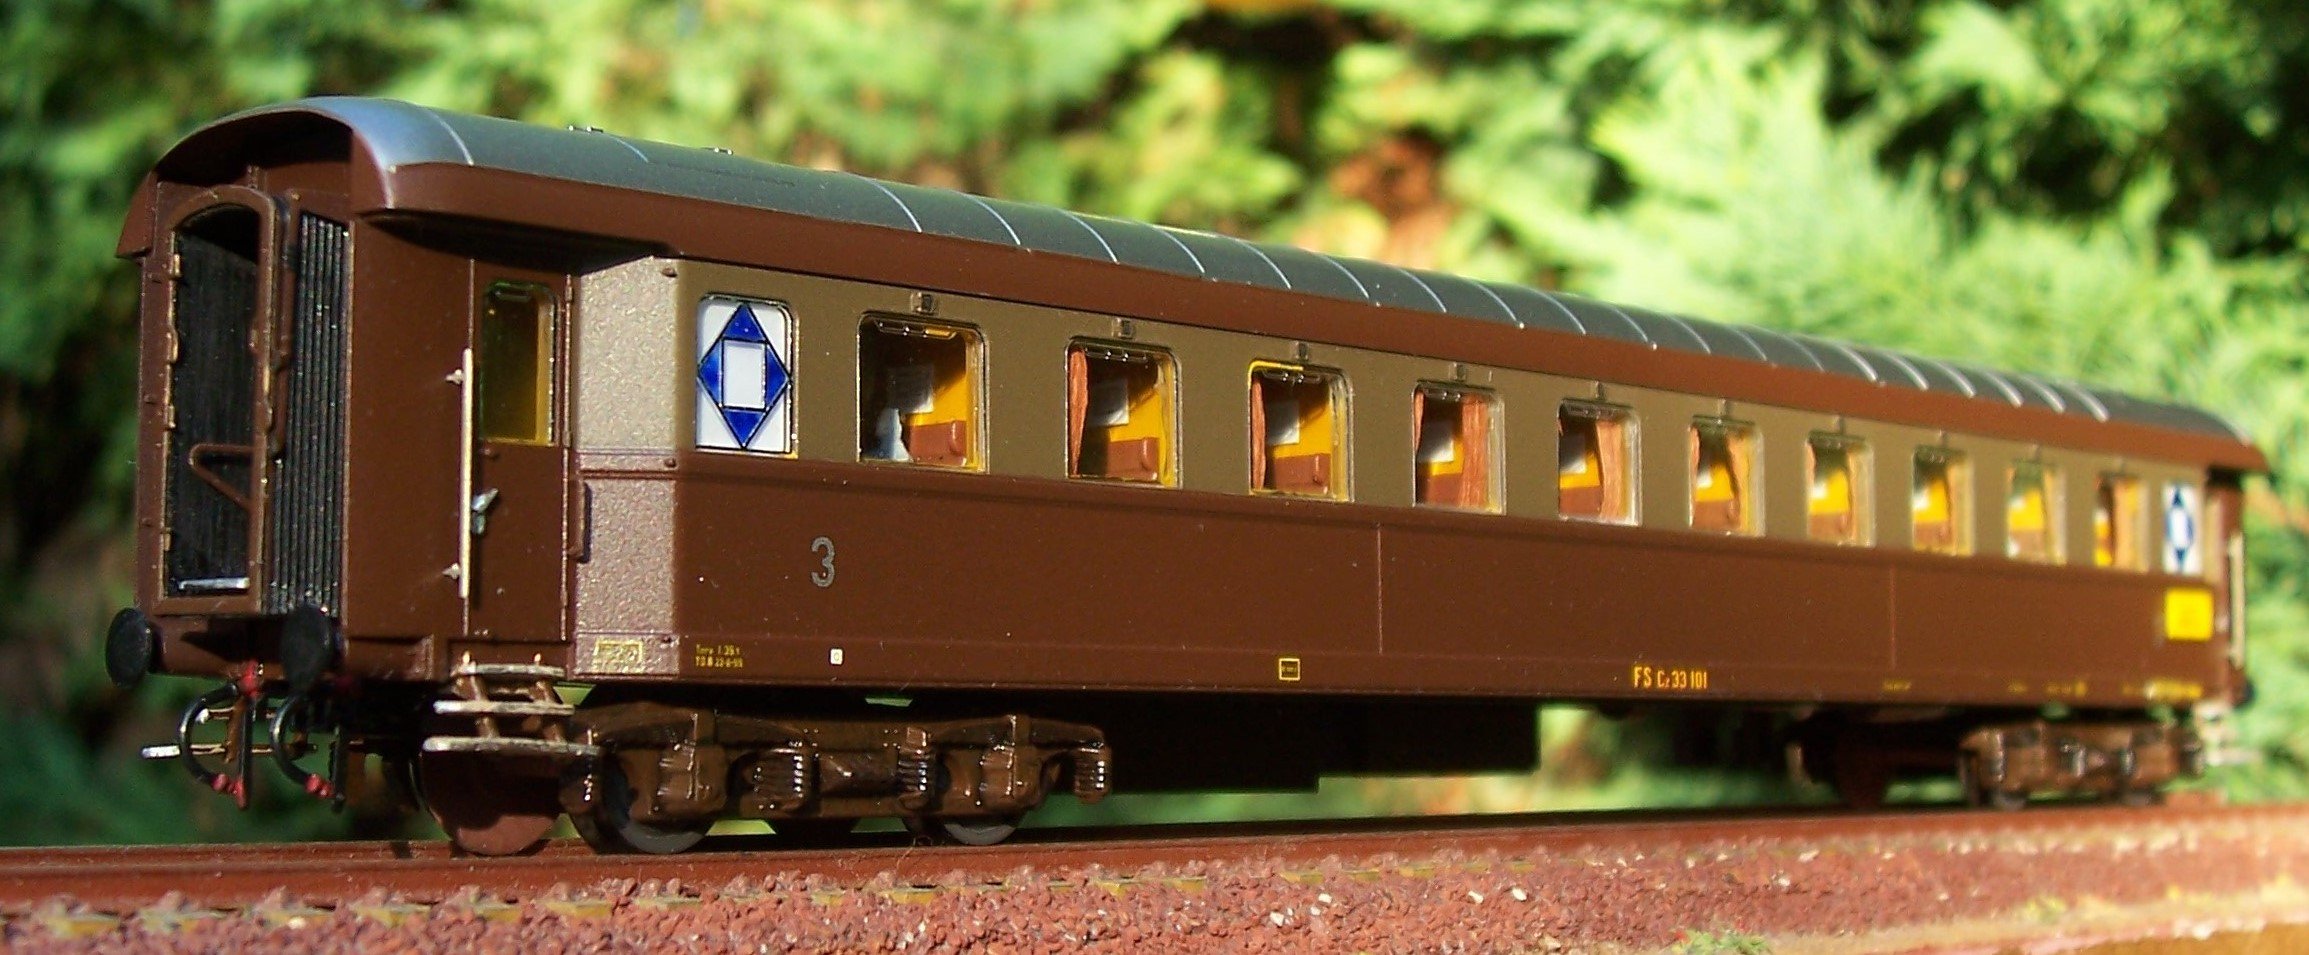
Roof insertion and the carriage is finished!

A warm greeting to all the modelers!
Rodolfo
- Jack12477, Egilman, Haliburton and 10 others
-
13
-
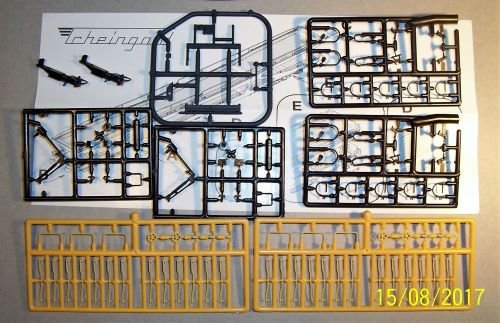
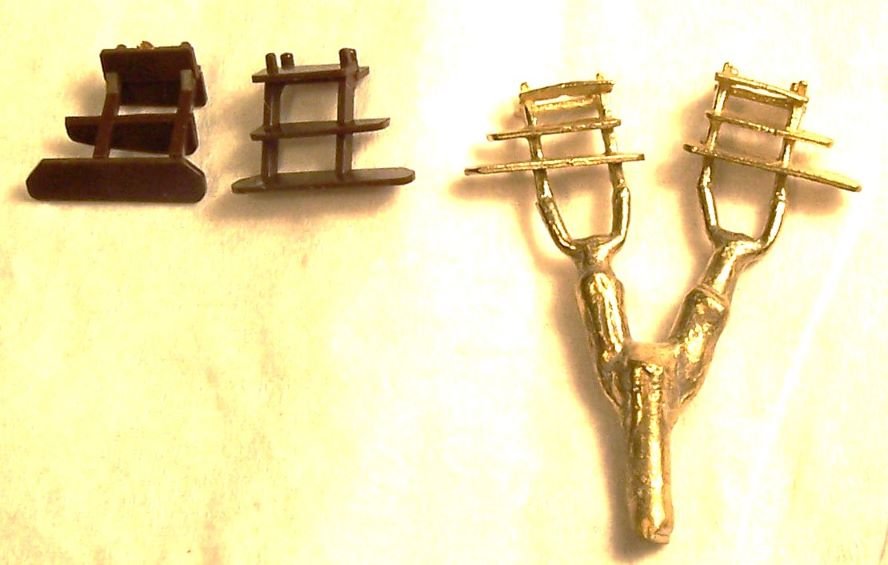
The ladders: there are two type; here we'll use the metallic ones (found on the internet):
Insertion of ladders, puffers and bellows tie-rods:

A whole image at this stage:
Next step we'll finish this carriage.
See you later!
Rodolfo
-
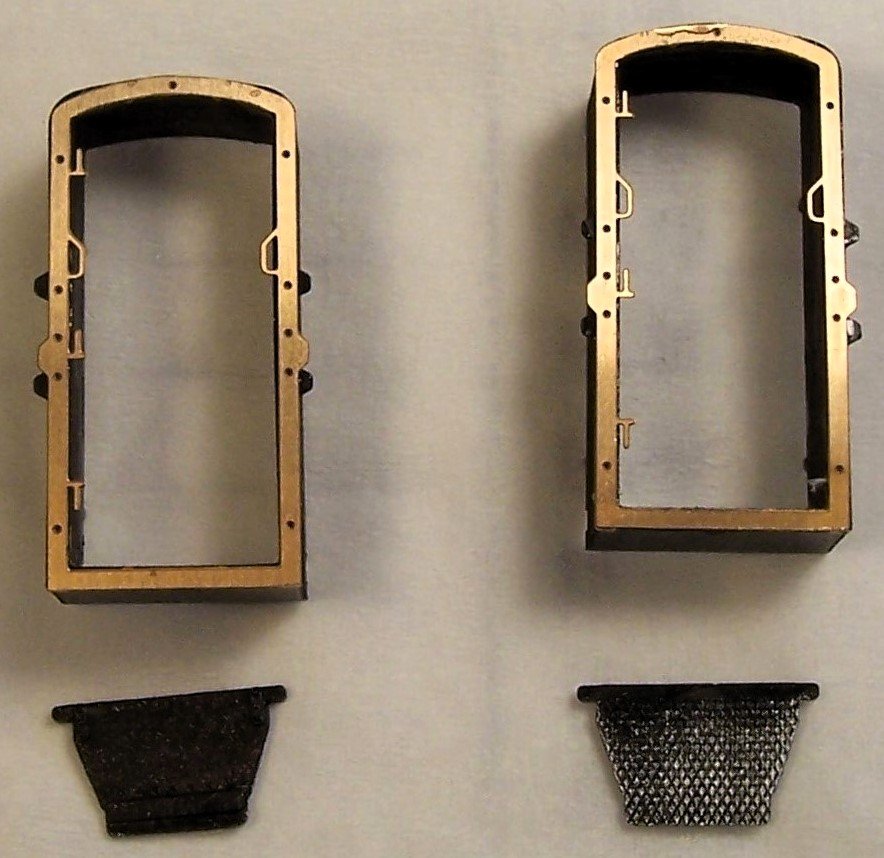
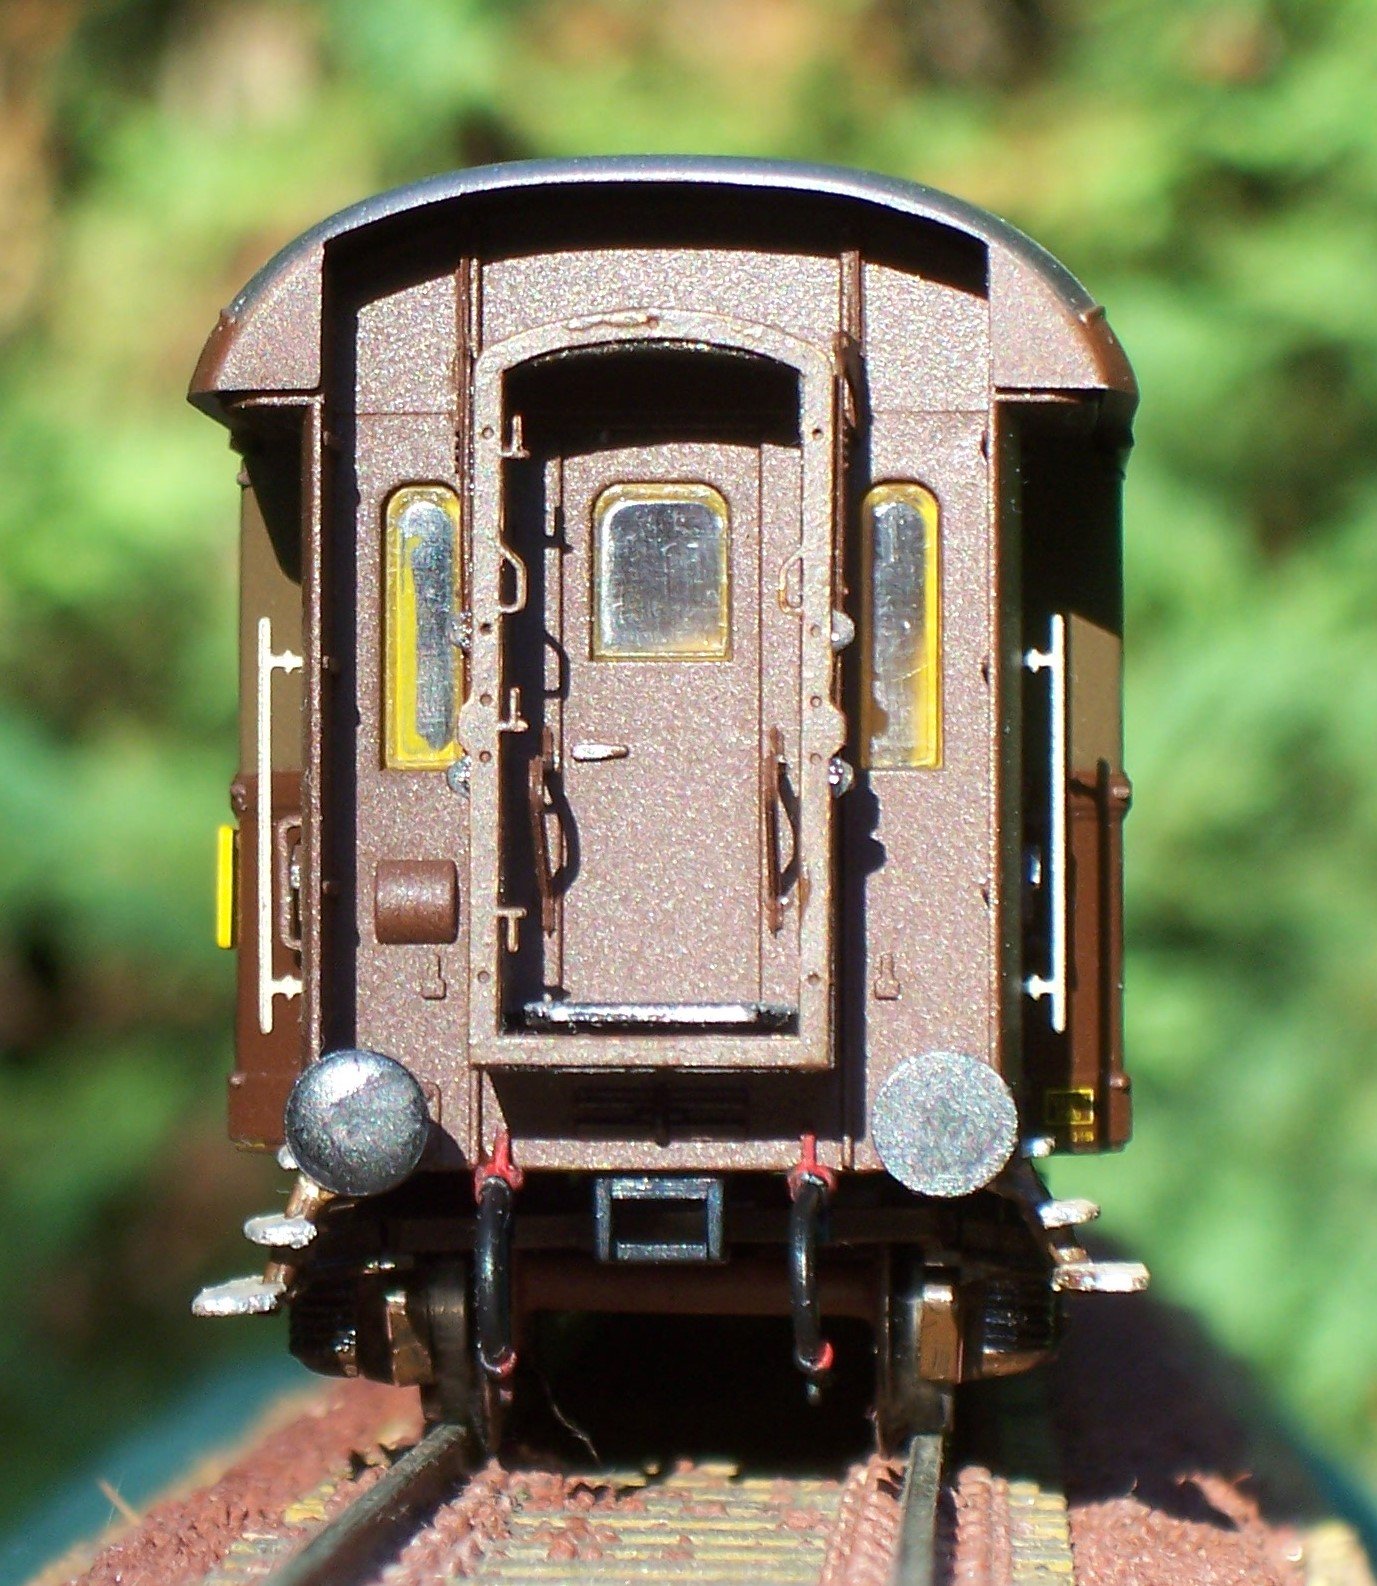
The windows:
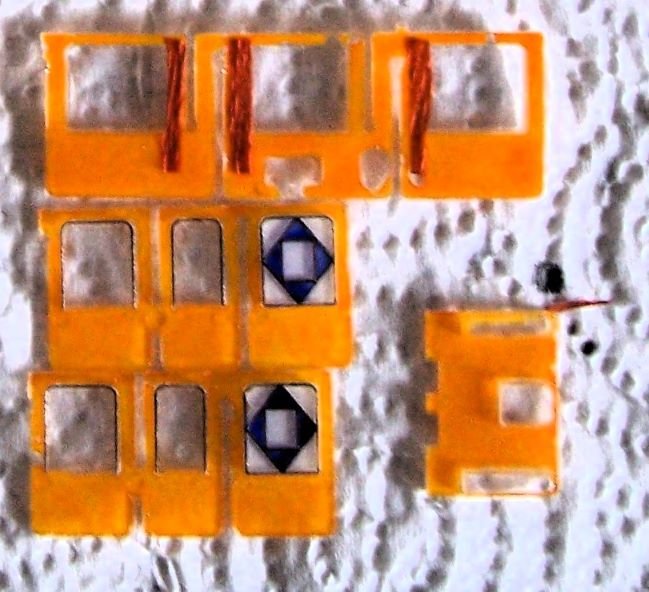

Drilling the holes:
The bellows open and closed:
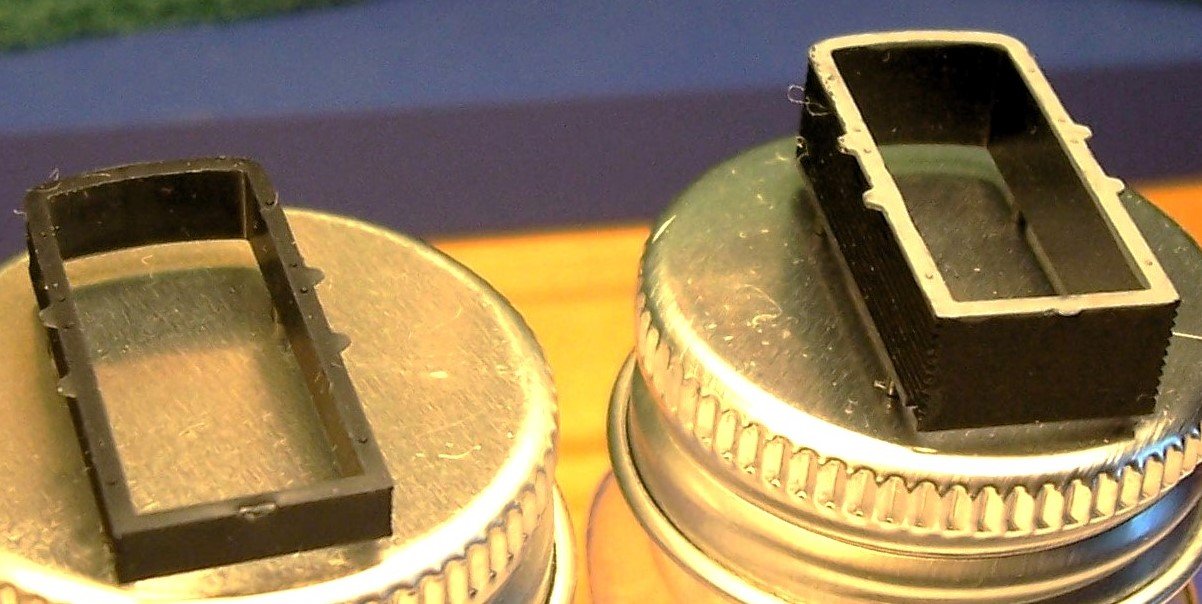
We'll use both the open ones:
Next step: ladders and bellows tie-rods.
Rodolfo
- Haliburton, yvesvidal, Egilman and 5 others
-
8
-
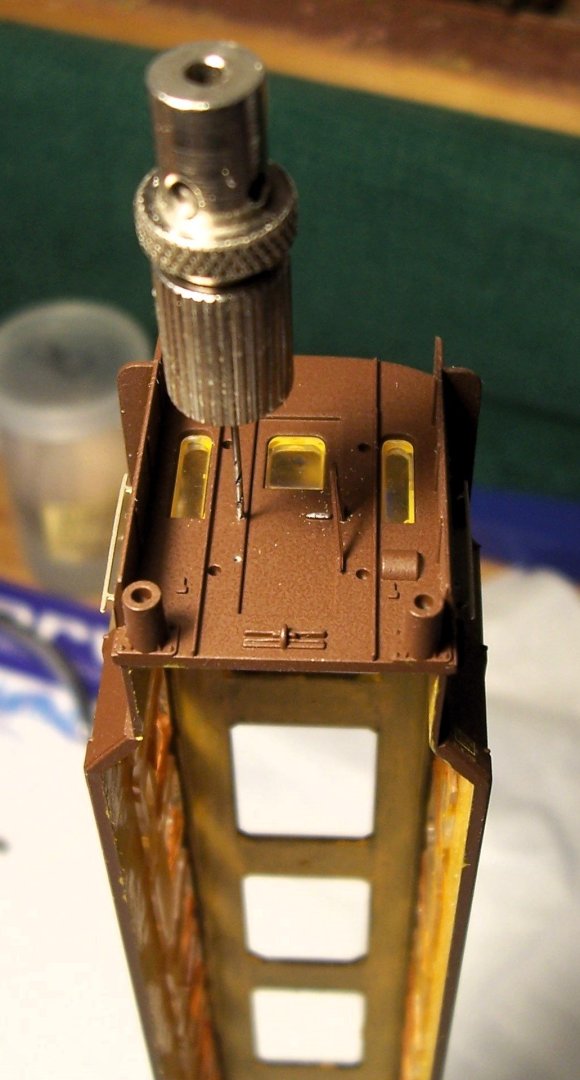
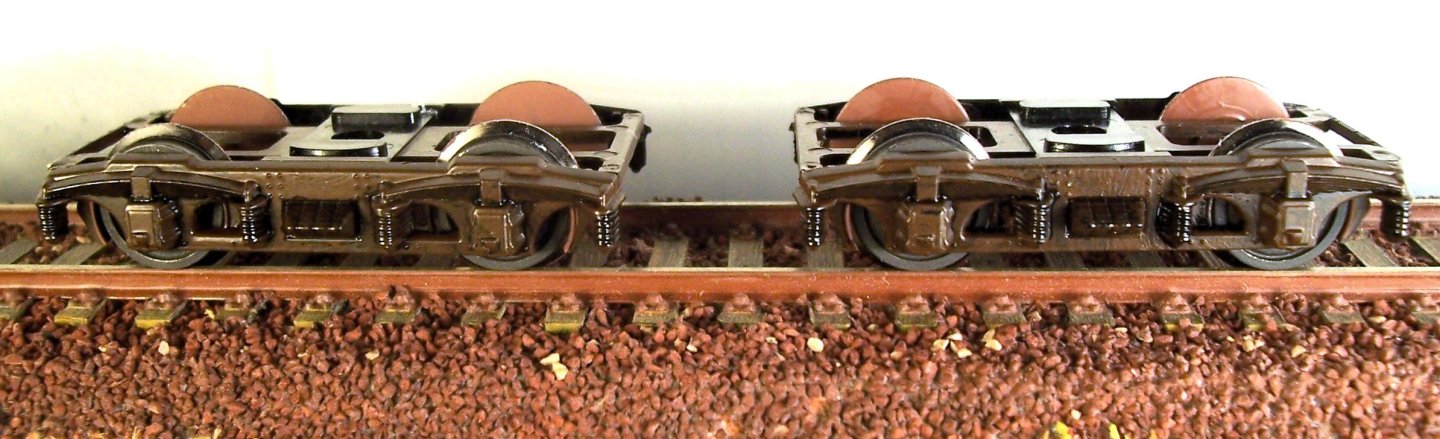
And now, the bogies; there are old and new bogies:
For this coach the old ones were chosen and painted in clear brown:
The finished bogies:
Next time: the windows and the heads of the carriage. See you soon,
Rodolfo
- druxey, GrandpaPhil, Jack12477 and 8 others
-
11
-
-
-
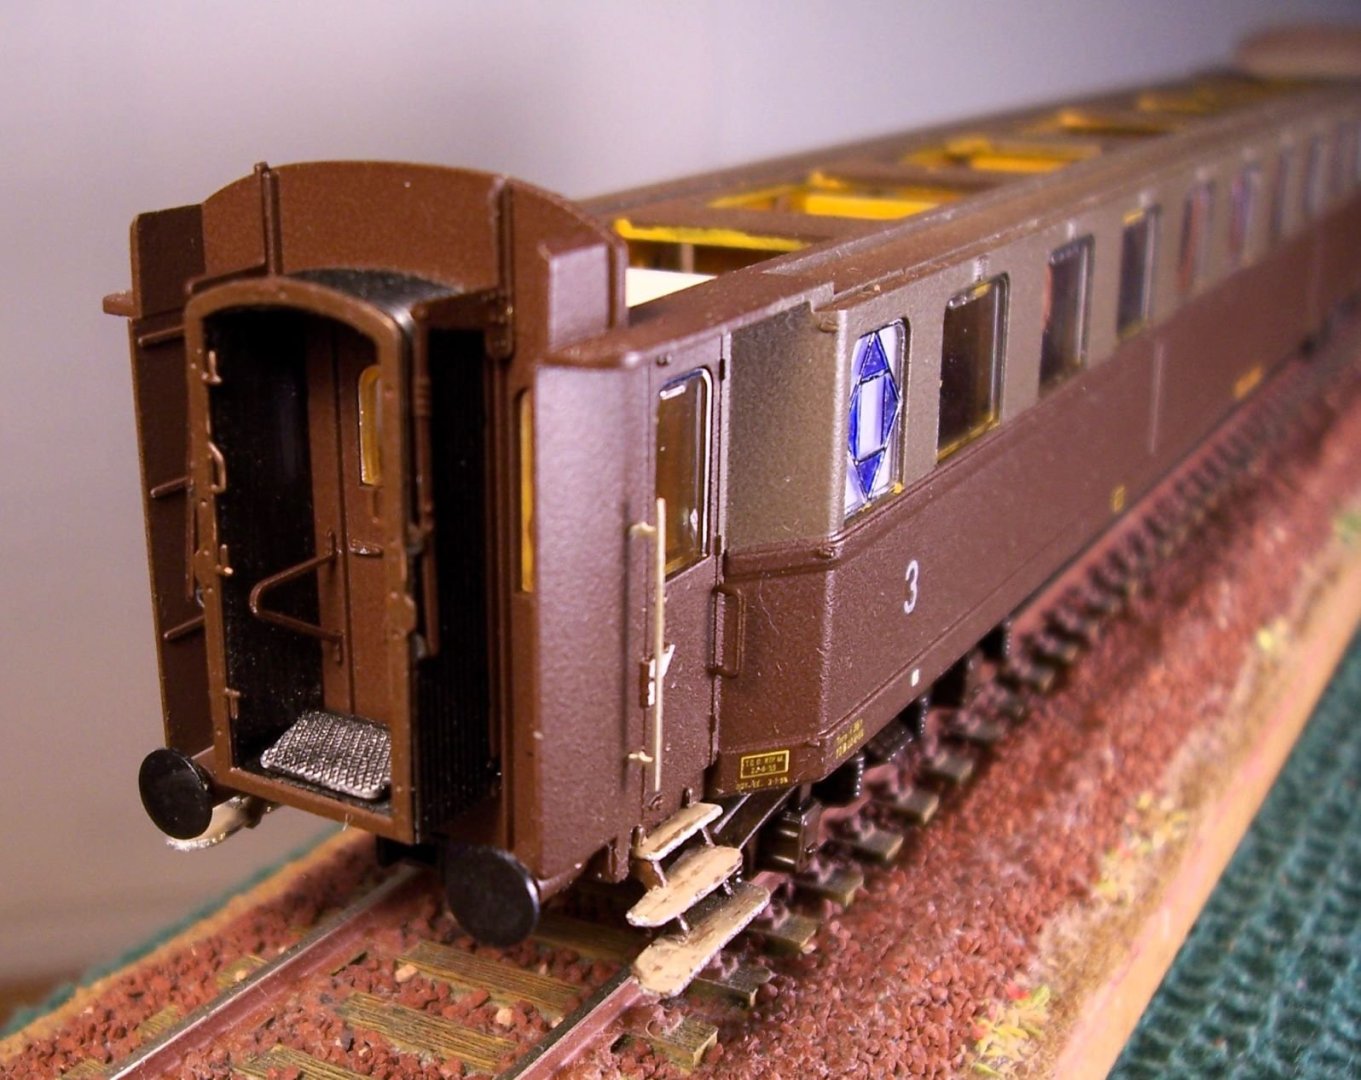
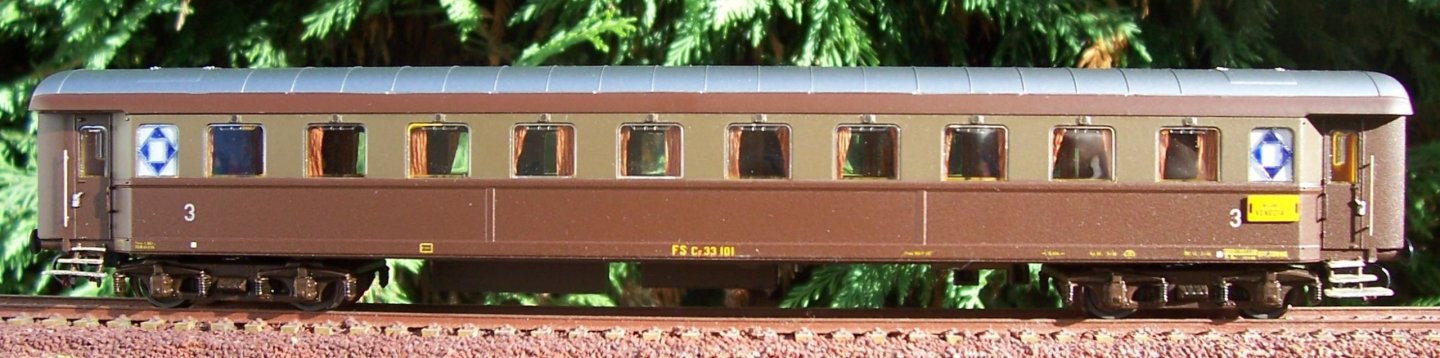
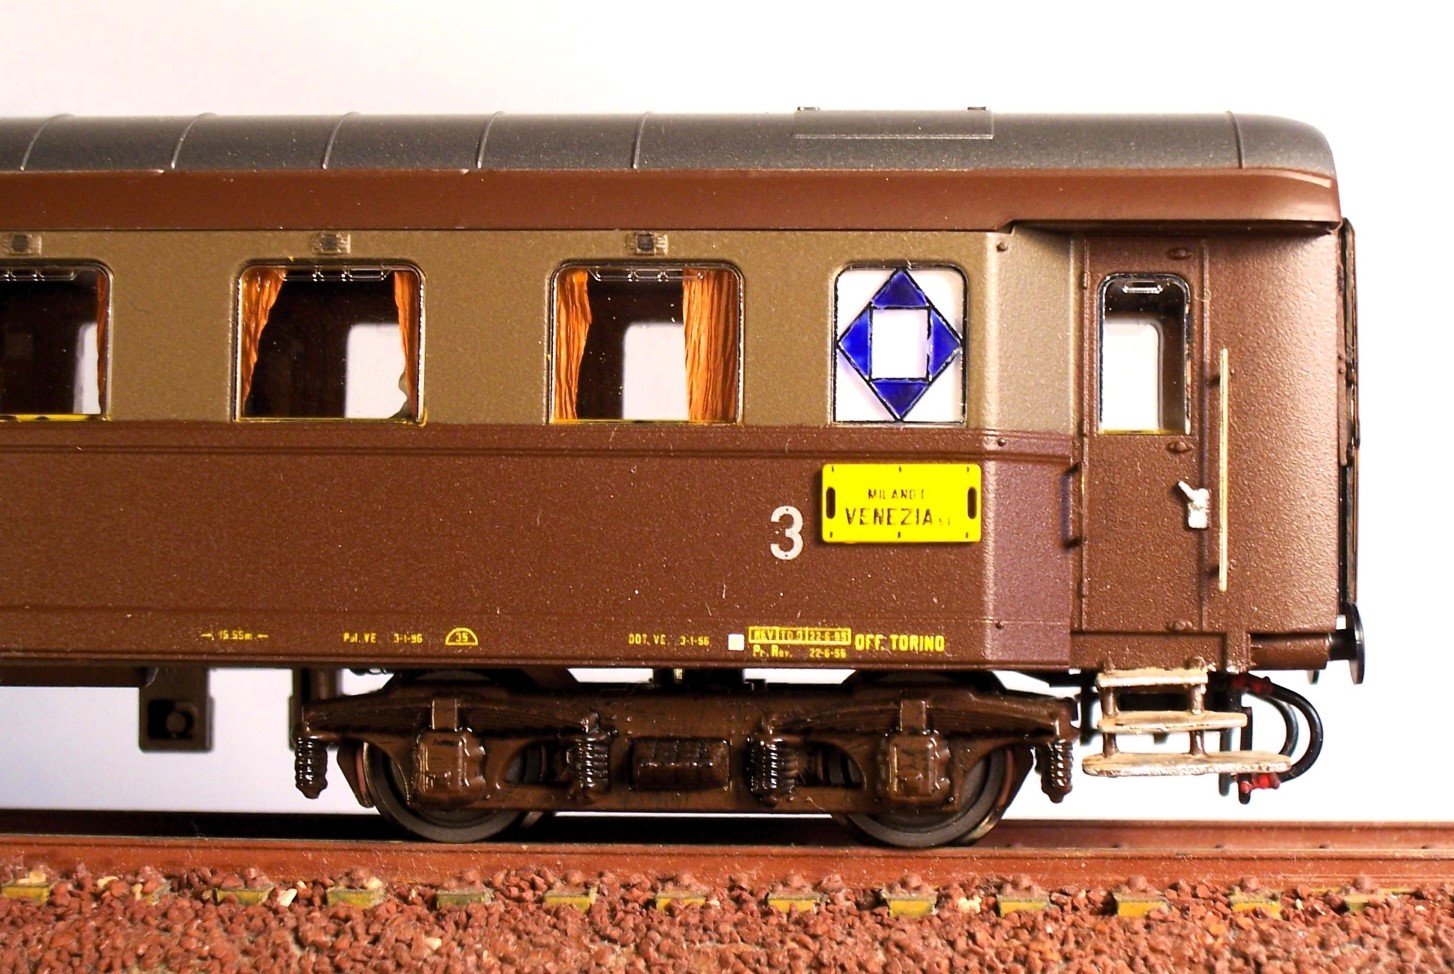
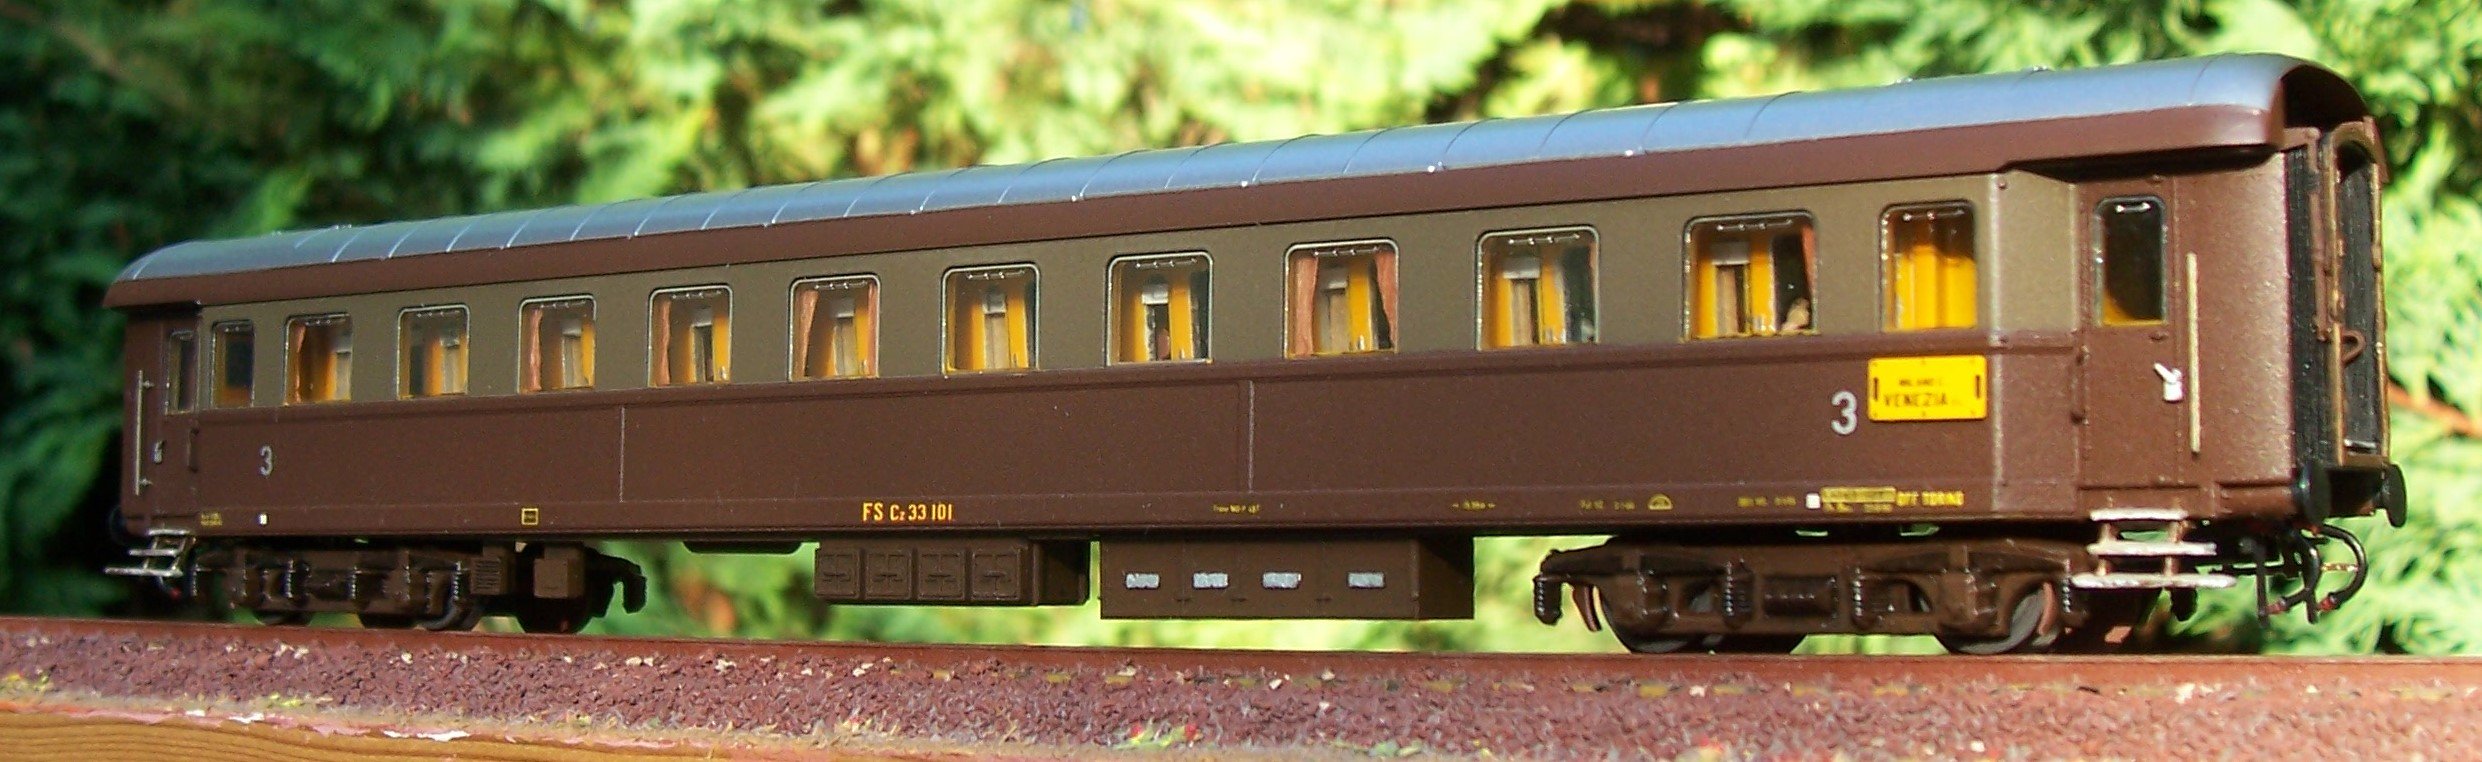
Dear modeling friends,
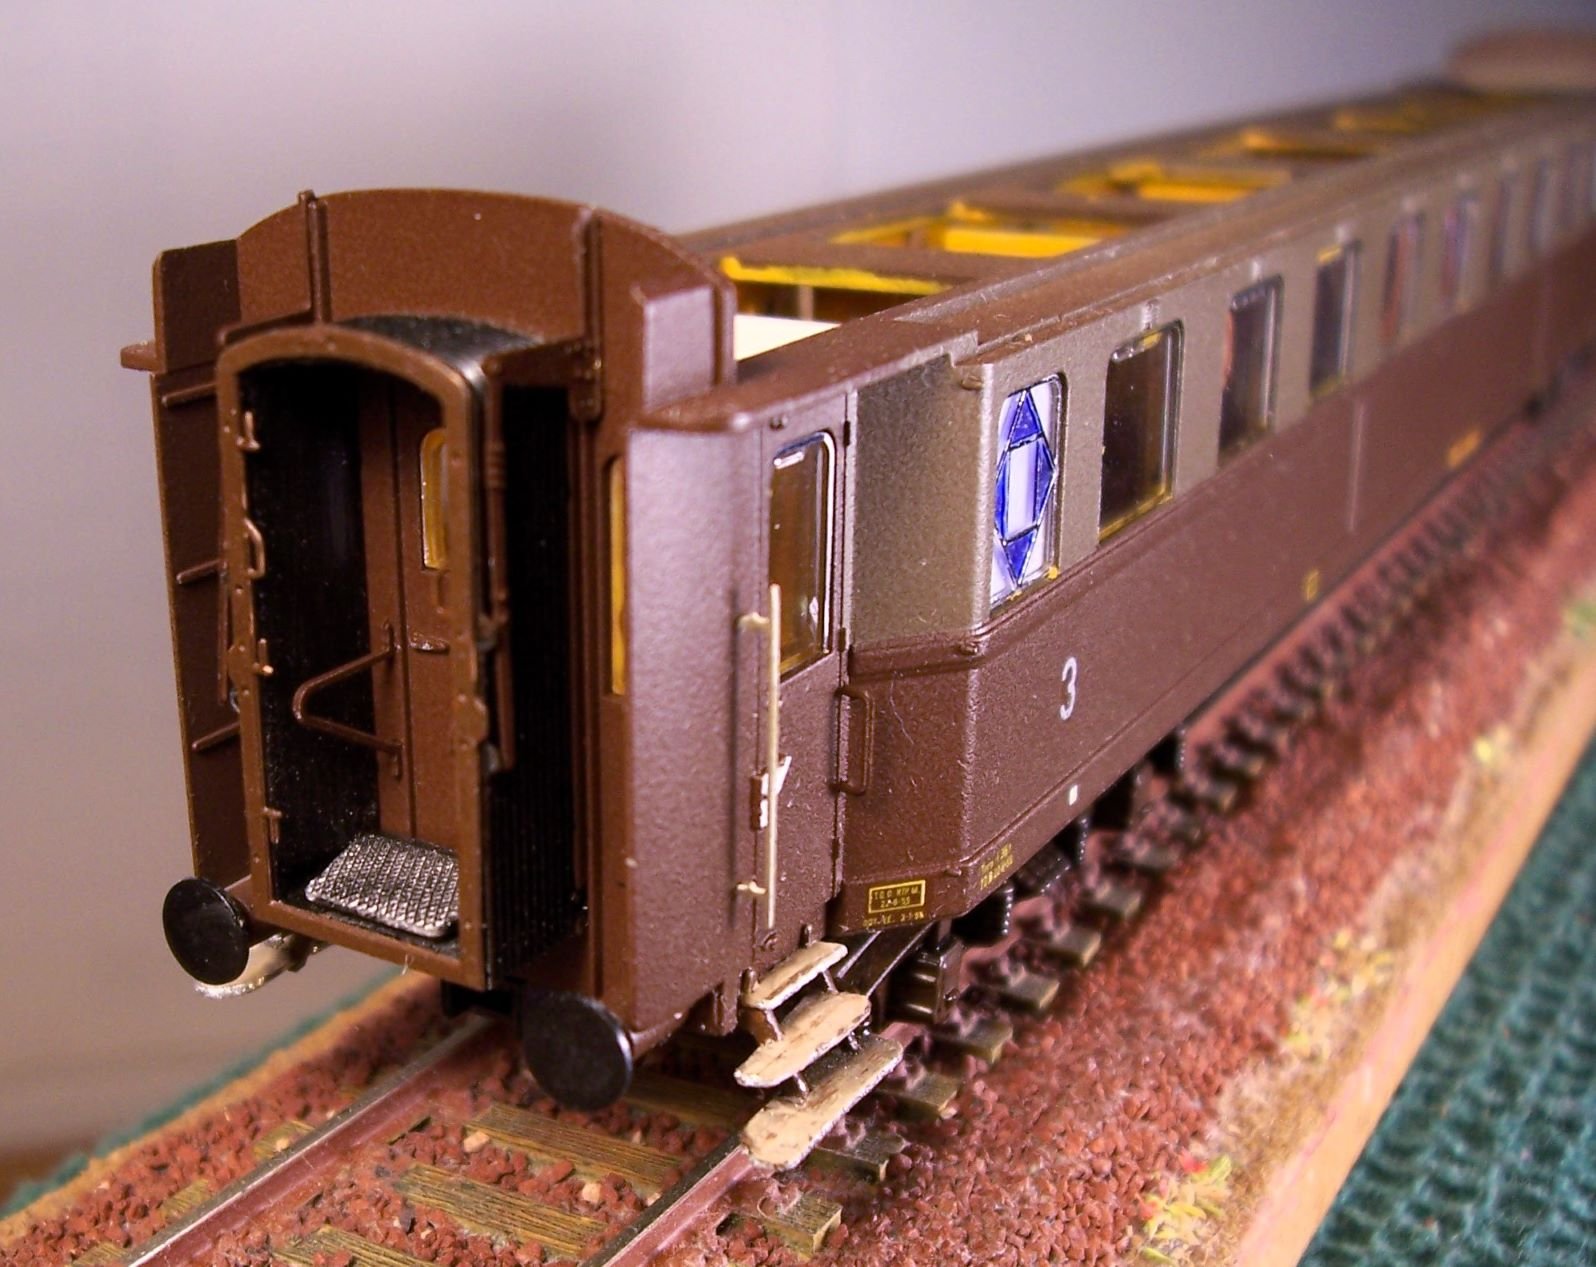
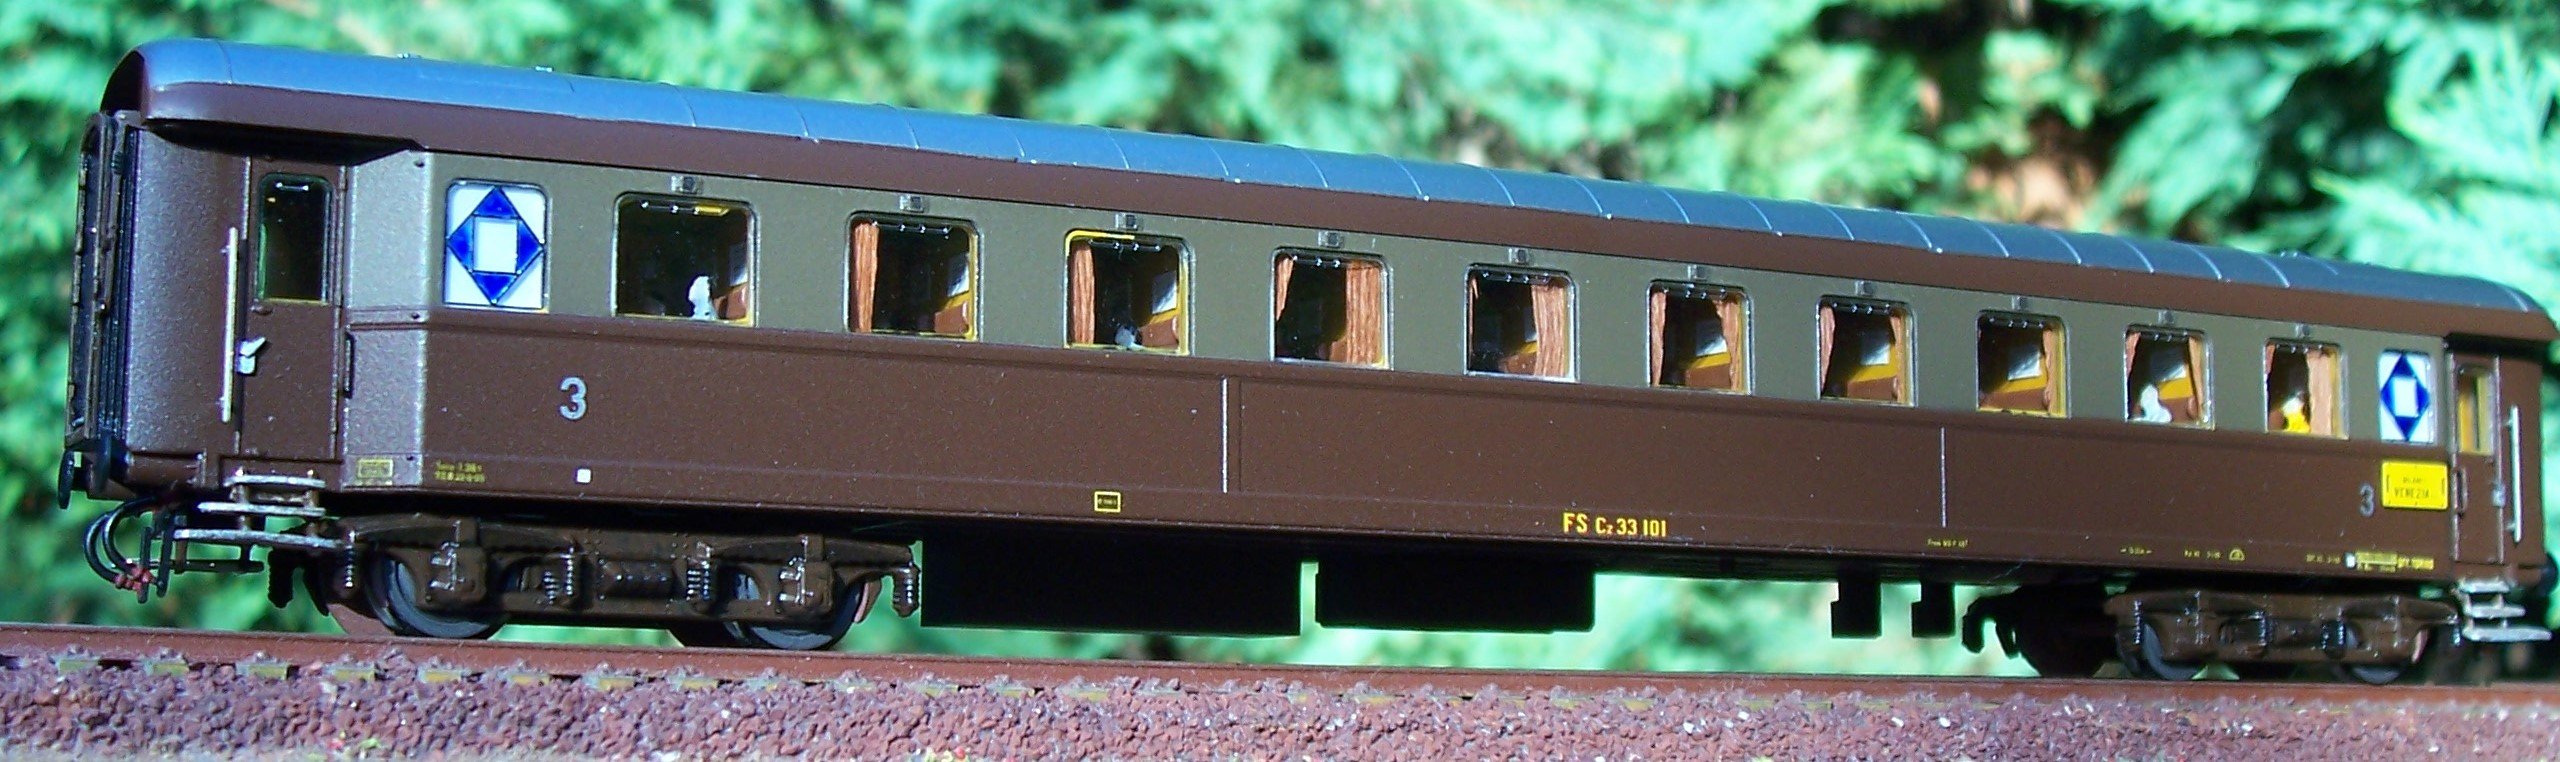
I post below pictures of the construction of a carriage of the Italian State Railways: Railway carriage Type 1946, 3rd class - brown isabella, Scale H0 (1/87)Since I have no knowledge of technical railway terms in English, I cannot describe the step-by-step work, but the pictures should be sufficient. A description in Italian can be found here .
Below are pictures of the carriage in its wholety:


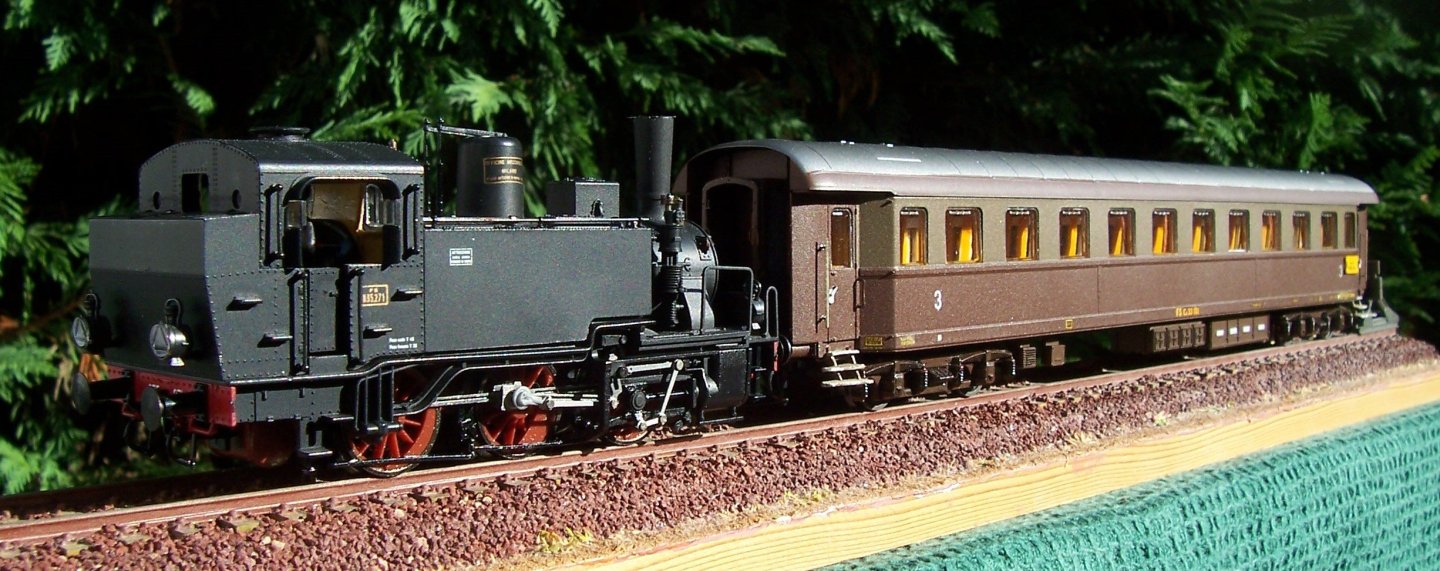
The coach pulled by a shunting locomotive:

Coming soon, some more photos with further details.
Rodolfo
- Haliburton, king derelict, mtaylor and 7 others
-
6
-
 4
4
-
Thank you Steven, Johnny and Bob,
For Steven: maybe starting right away with a locomotive as the first model was a challenging choice, a wagon or a railway carriage would have been easier to start with.I will now follow your advice to post some photos in the “Non-shipbuilding” section of MSW; this is an anticipation:
A fond farewell to all of you ship modelers, I hope to return soon with a new shipyard!
Rodolfo
-
Many thanks, Steven.
The scale of the railway coach is H0 (1/87)
You're right, I could put up these pictures in the "Non-Ship categorised builds...after sixty-five years I've tons of material...
-
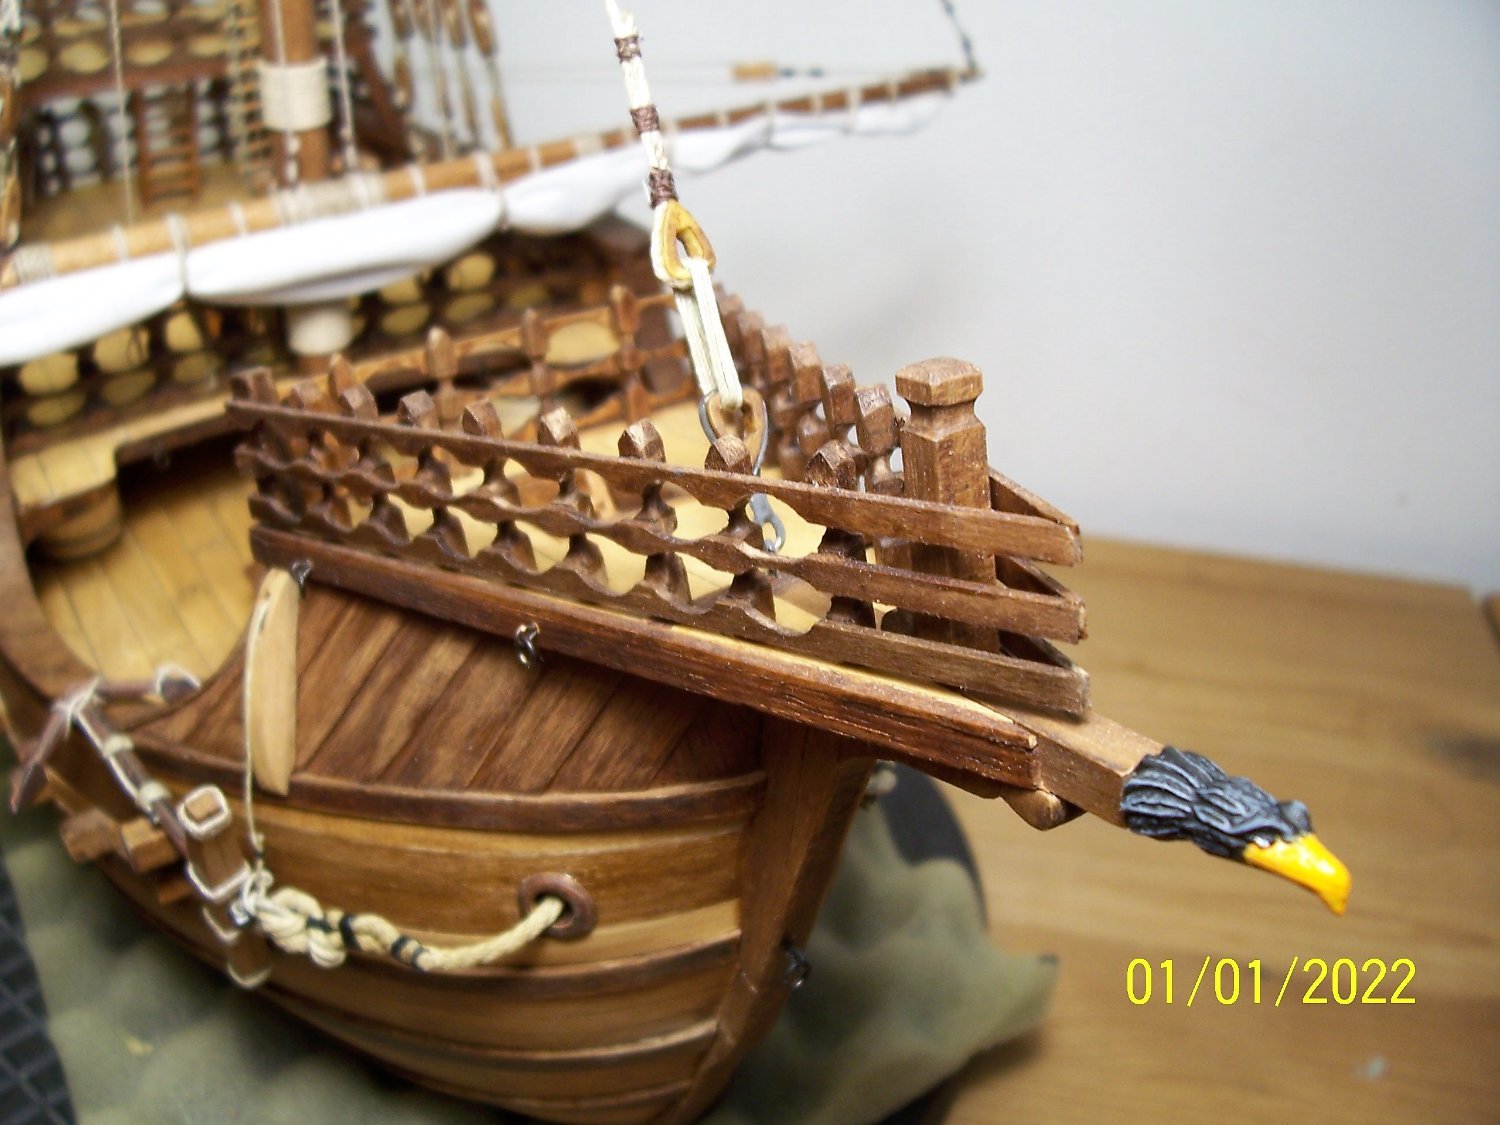
Very Dear friends,
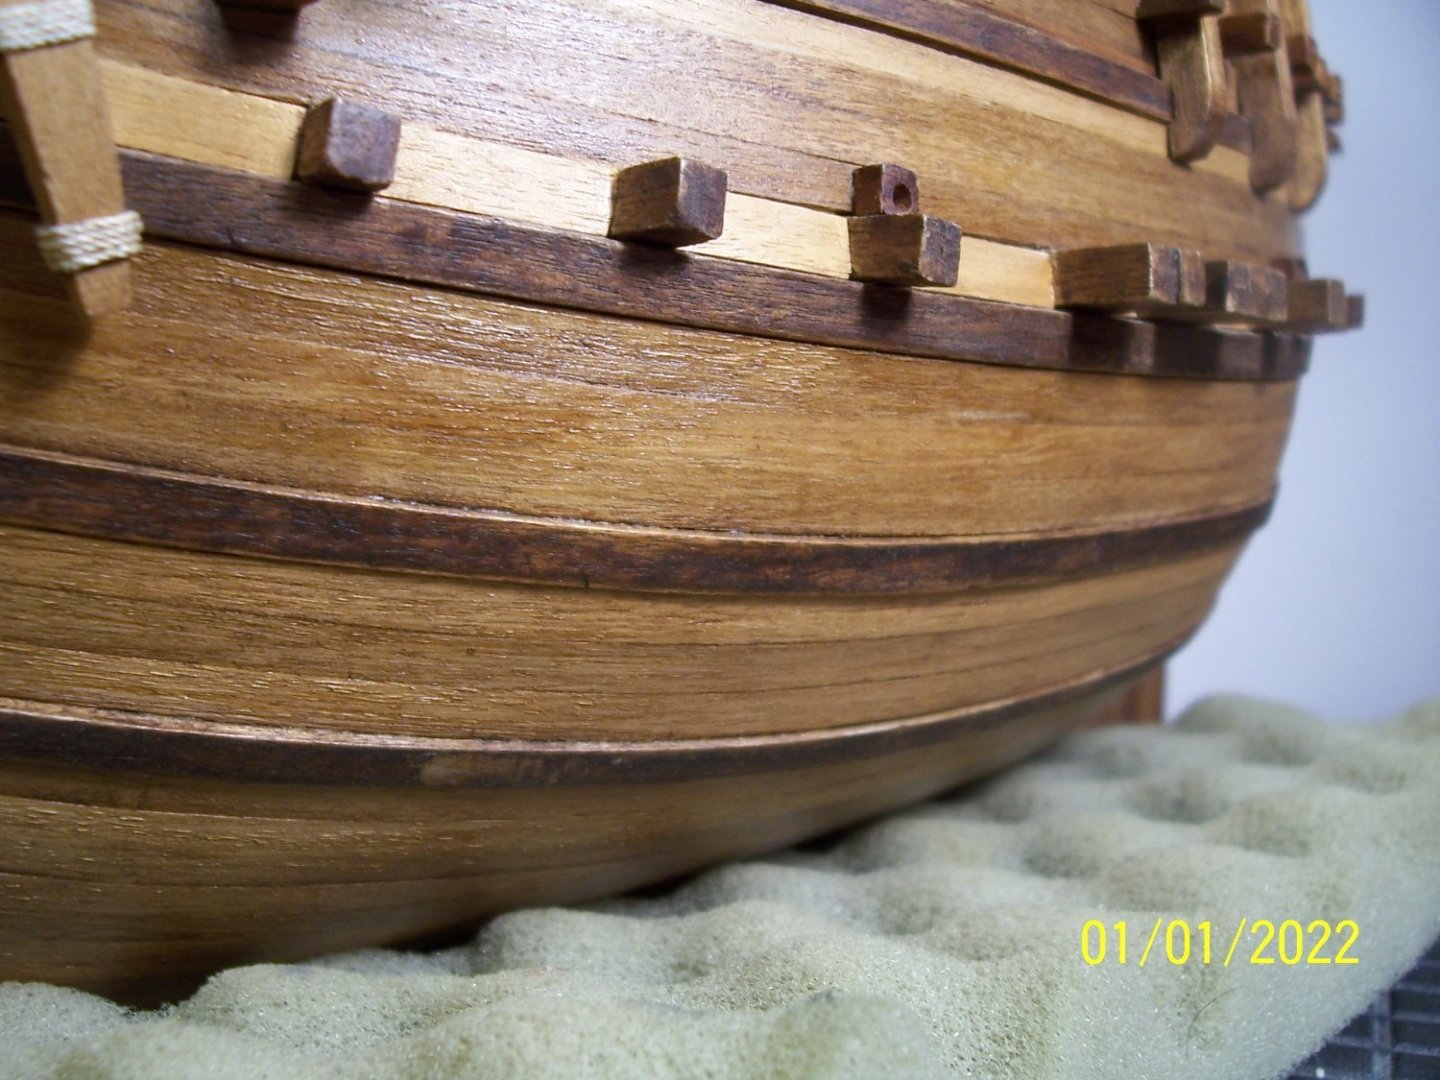
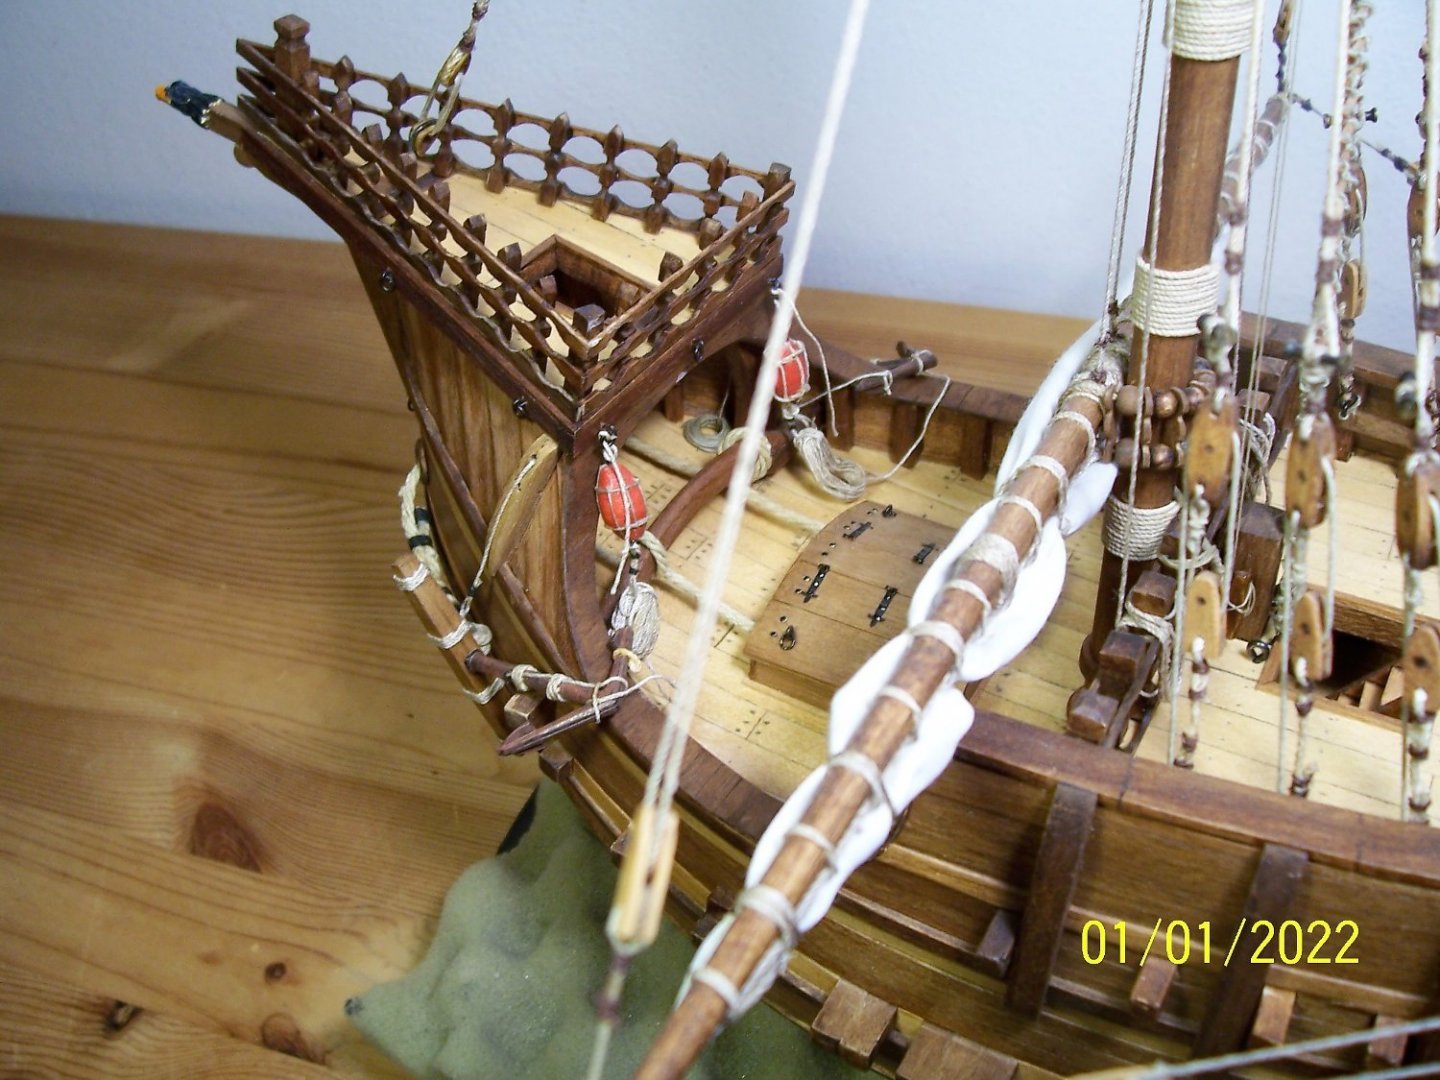
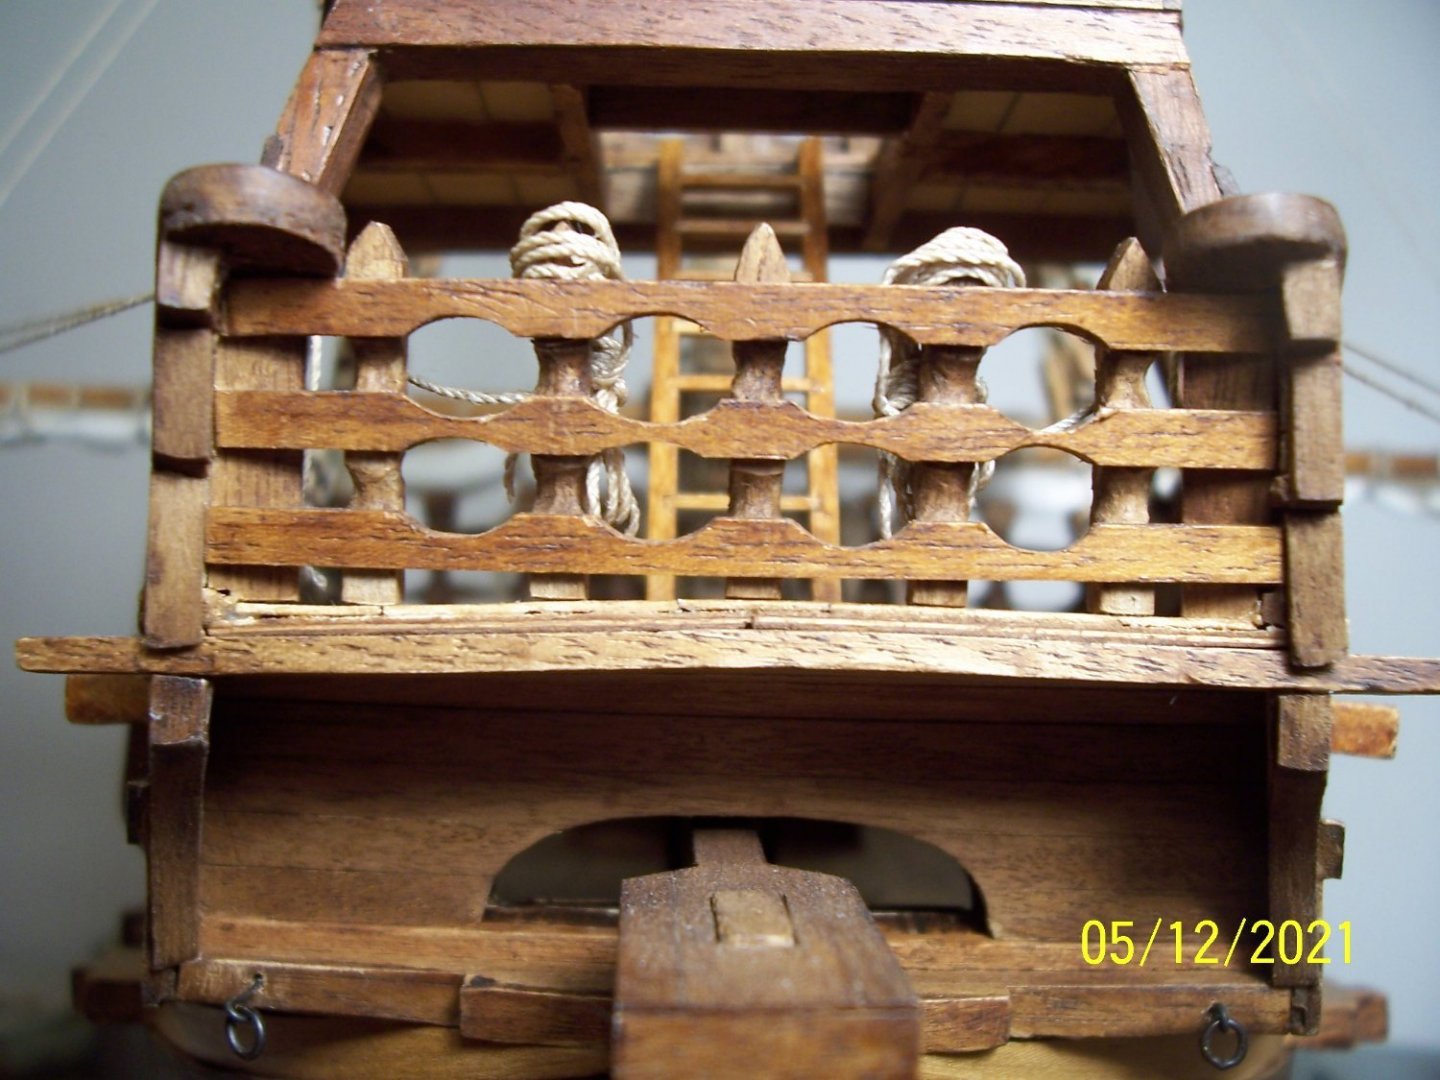
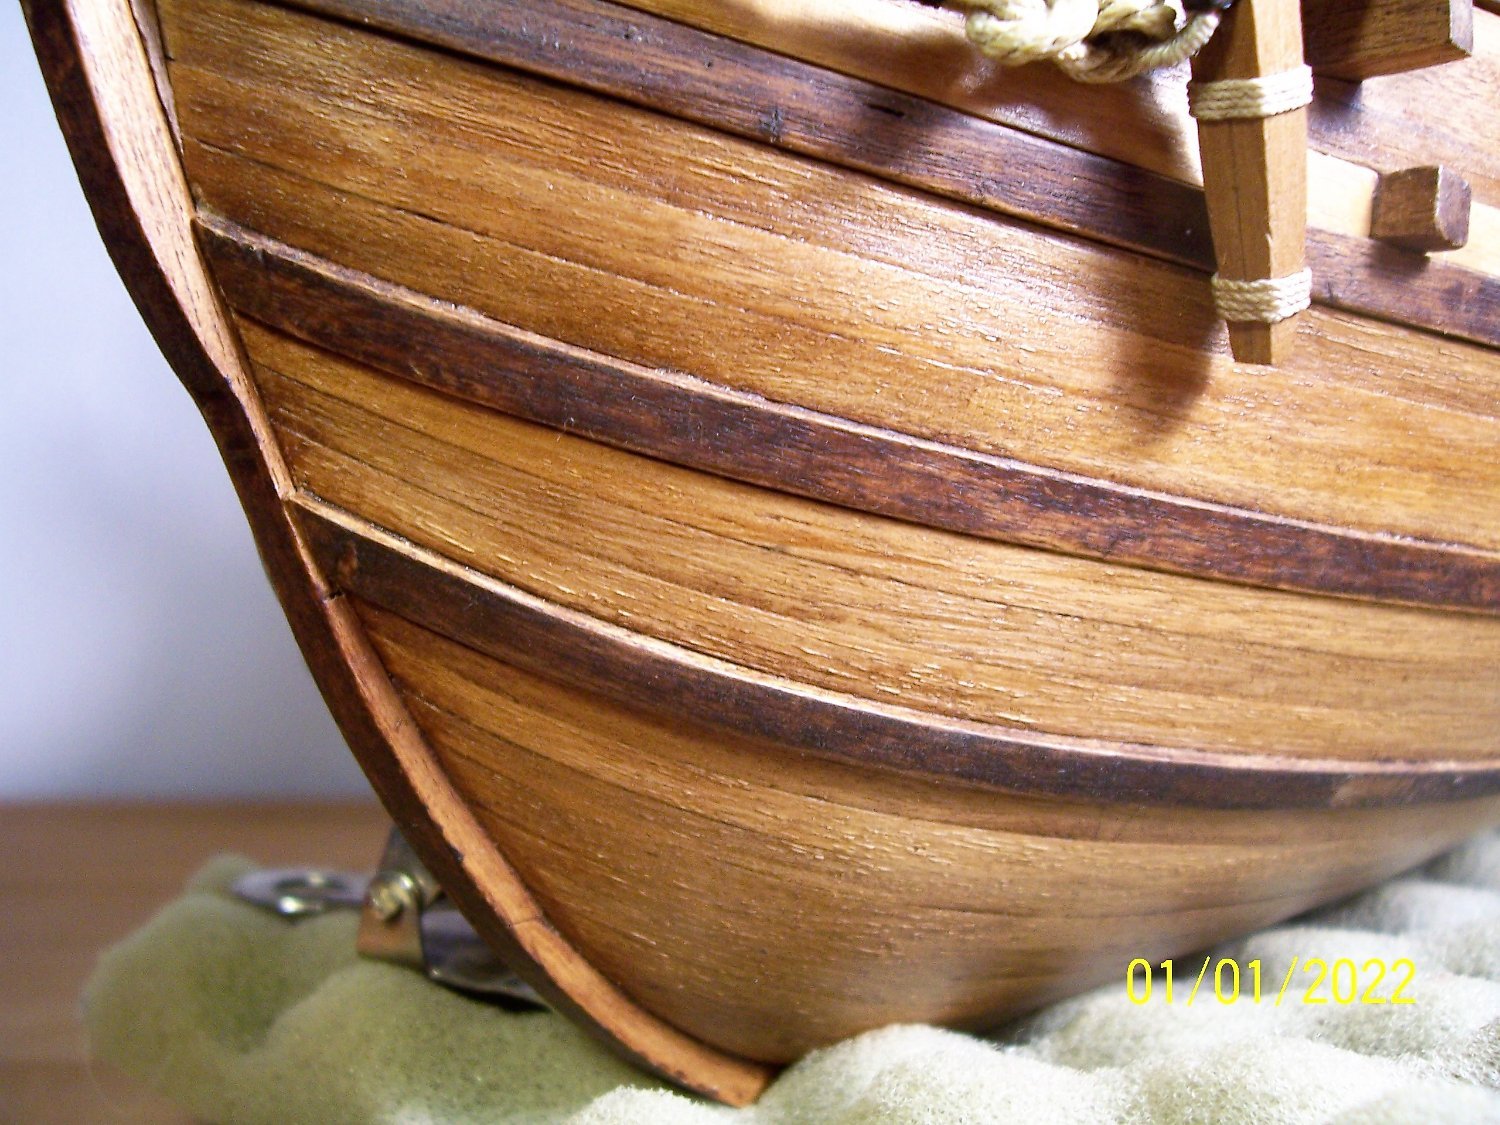
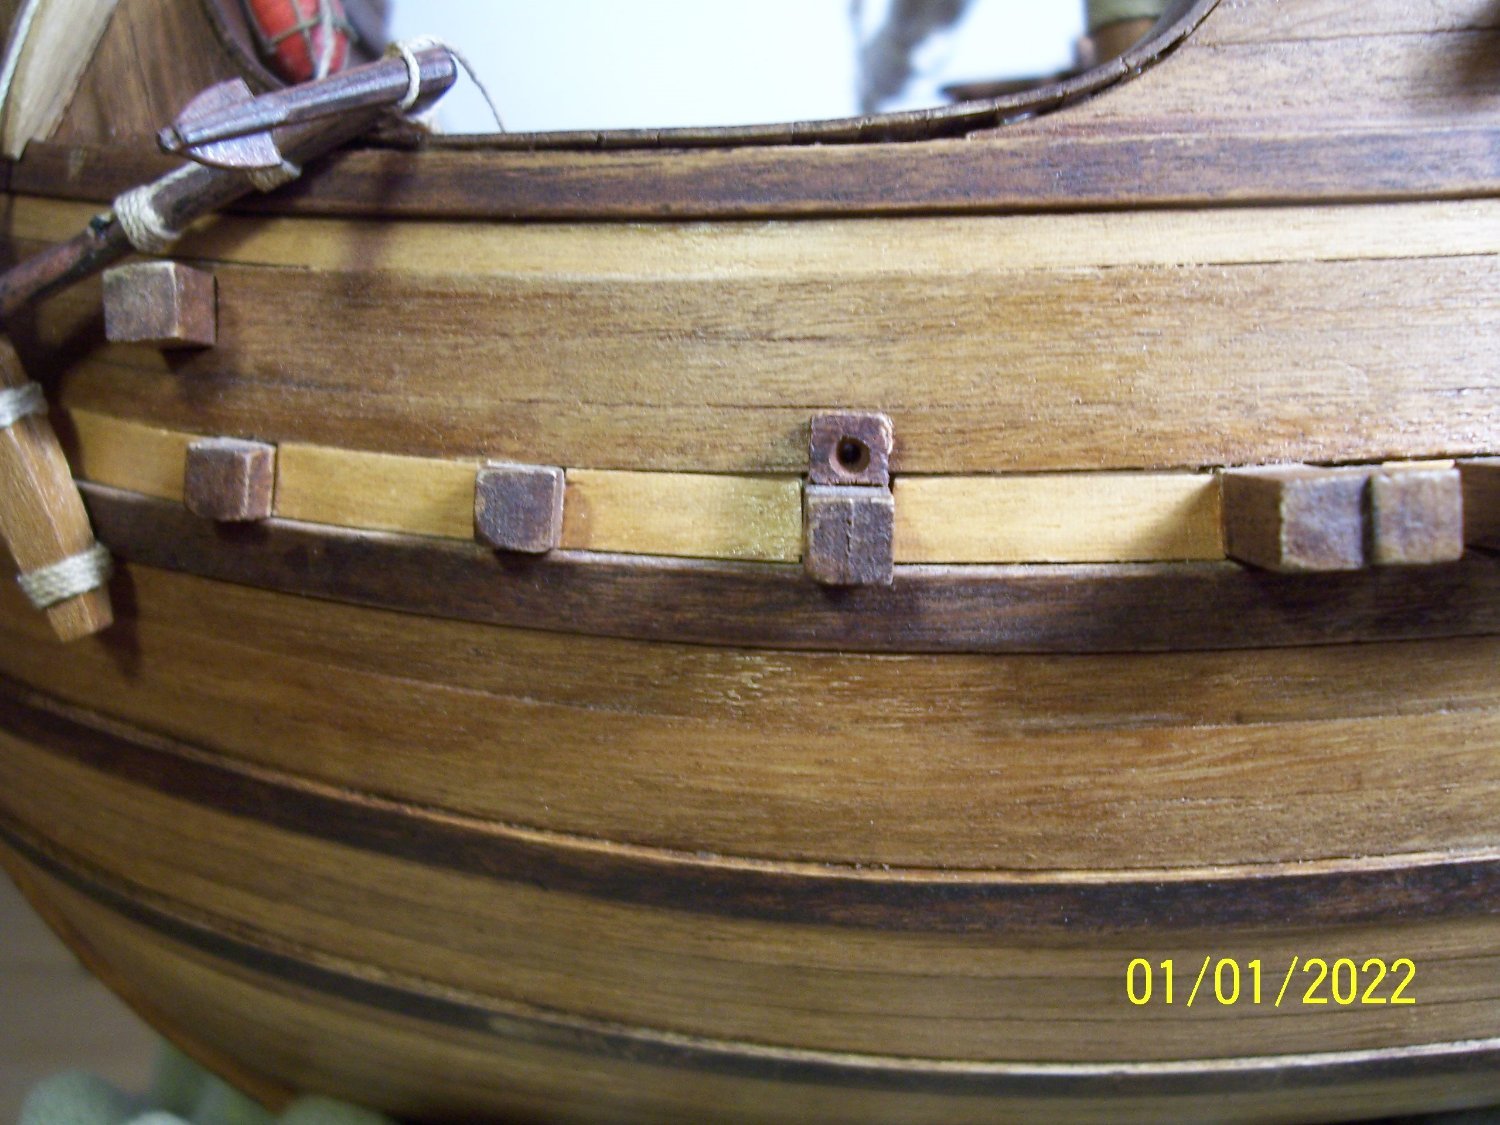
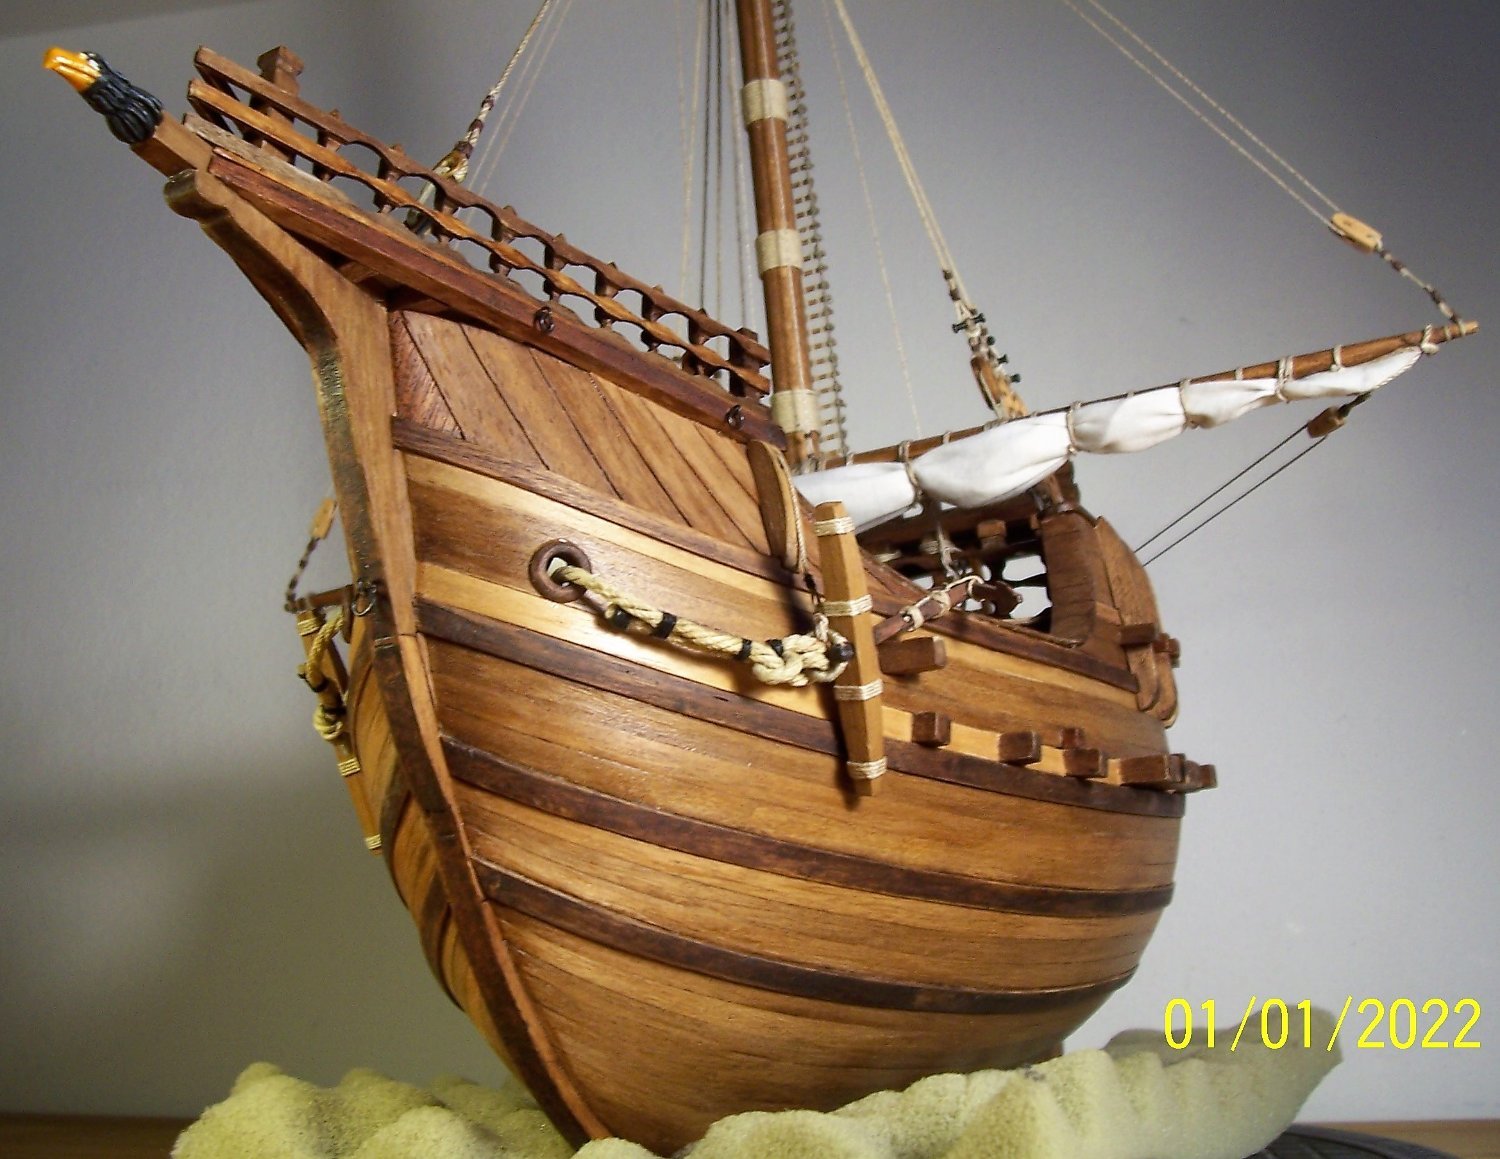
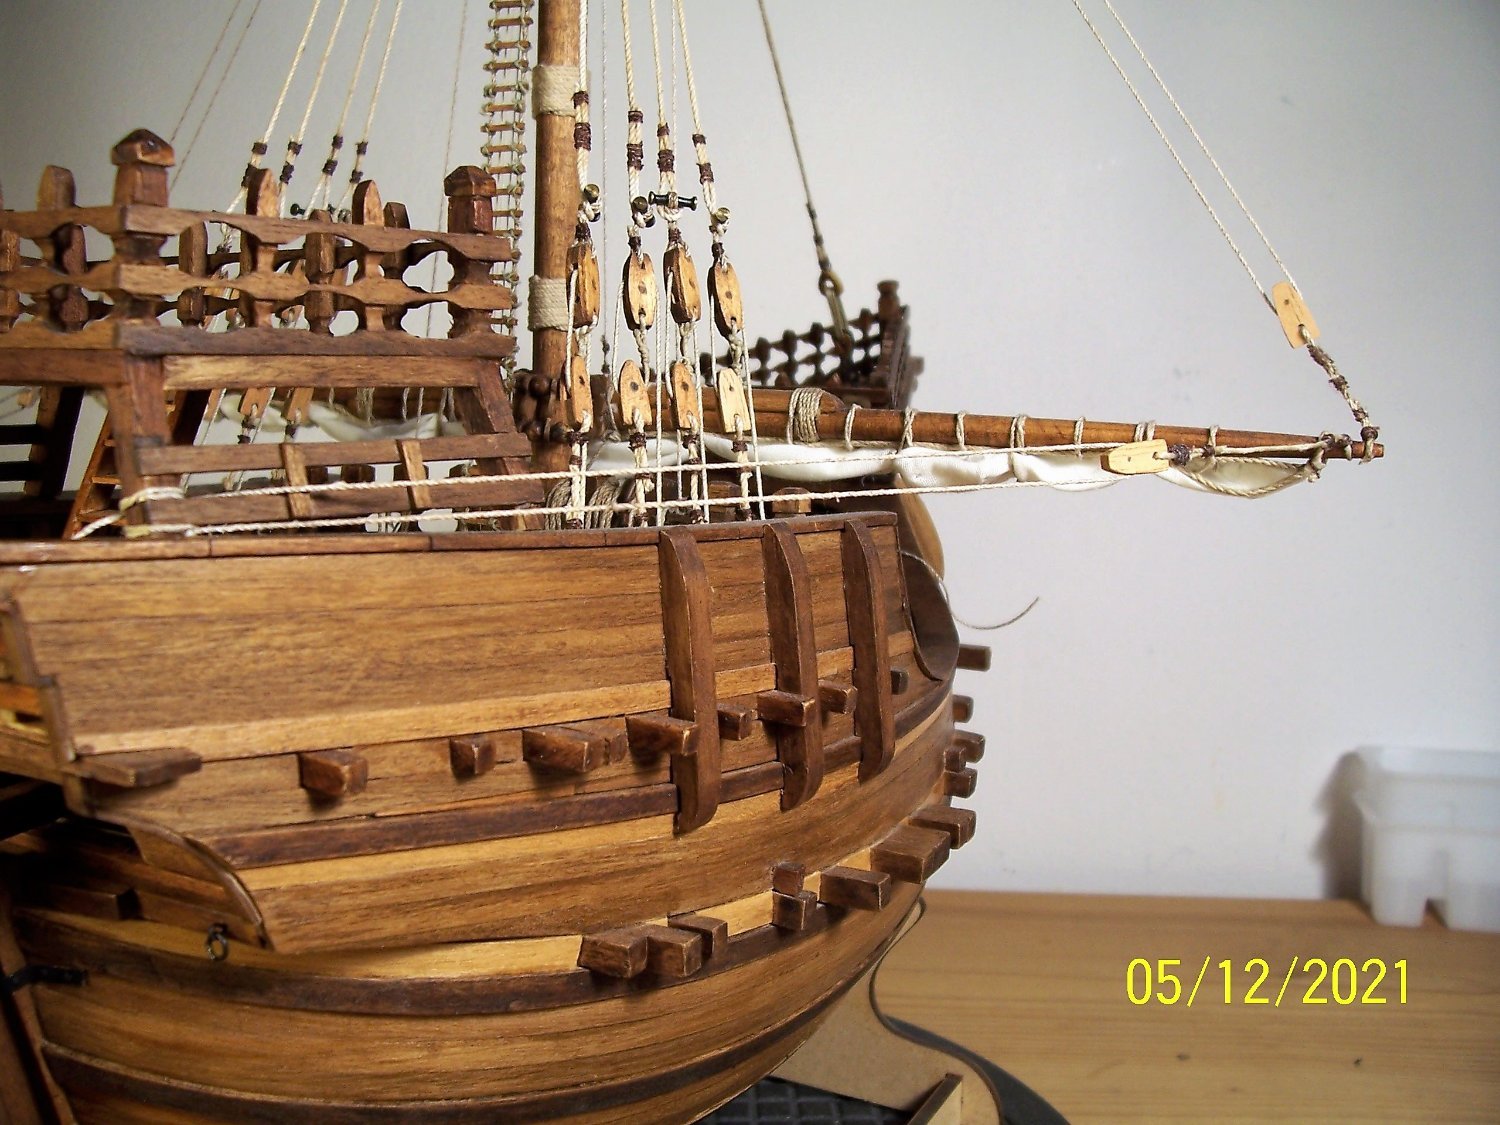
after a few years I have discovered I made a mistake in the construction of the cathead: the cable starts from it, goes to the anchor and comes back inside the ship's bulwark. It is also a logical path, requiring less effort to set the anchor: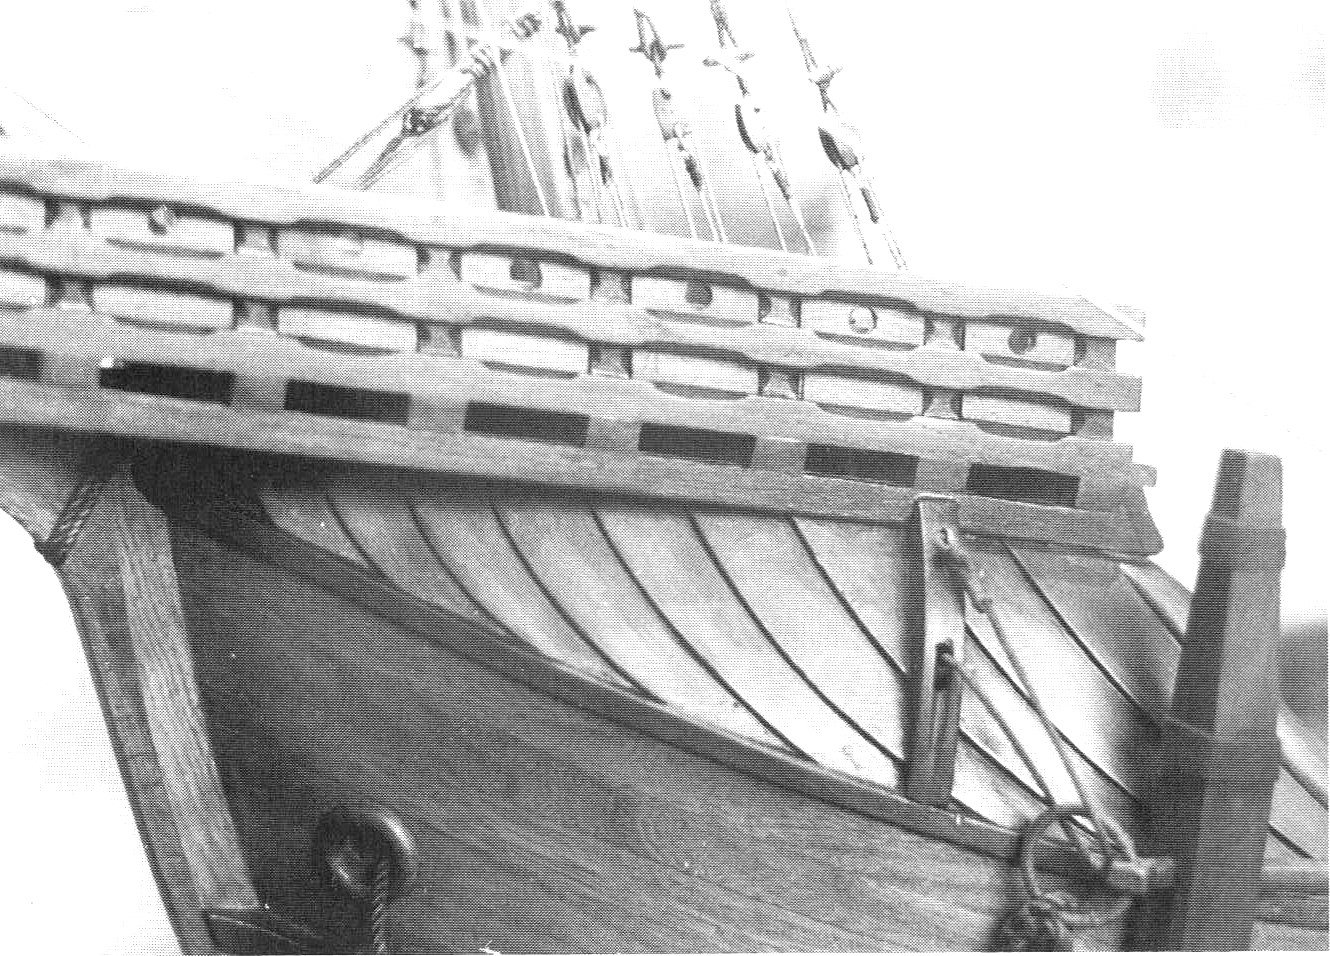
The picture shows the model of Martinez-Hidalgo's Santa Maria which is in the Maritime Museum in Barcelona and is taken from “THE SHIPS OF CHRISTOPHER COLUMBUS” by Xavier Pastor. Now I really don't feel like modifying the structure (although it doesn't seem difficult), but I thought I should communicate this so that those who are building similar models don't fall into my mistake.
Greeting to all, I continue to look at your valuable works, but for now I remain “railway”!
- Baker, GrandpaPhil and Doreltomin
-
3
-
-
-
Thanks Steven for your considerations!
Hi Patrick, speaking of admirals in the house, I'm beginning to think I'm going to be a lazy, unwilling sailor.......😉
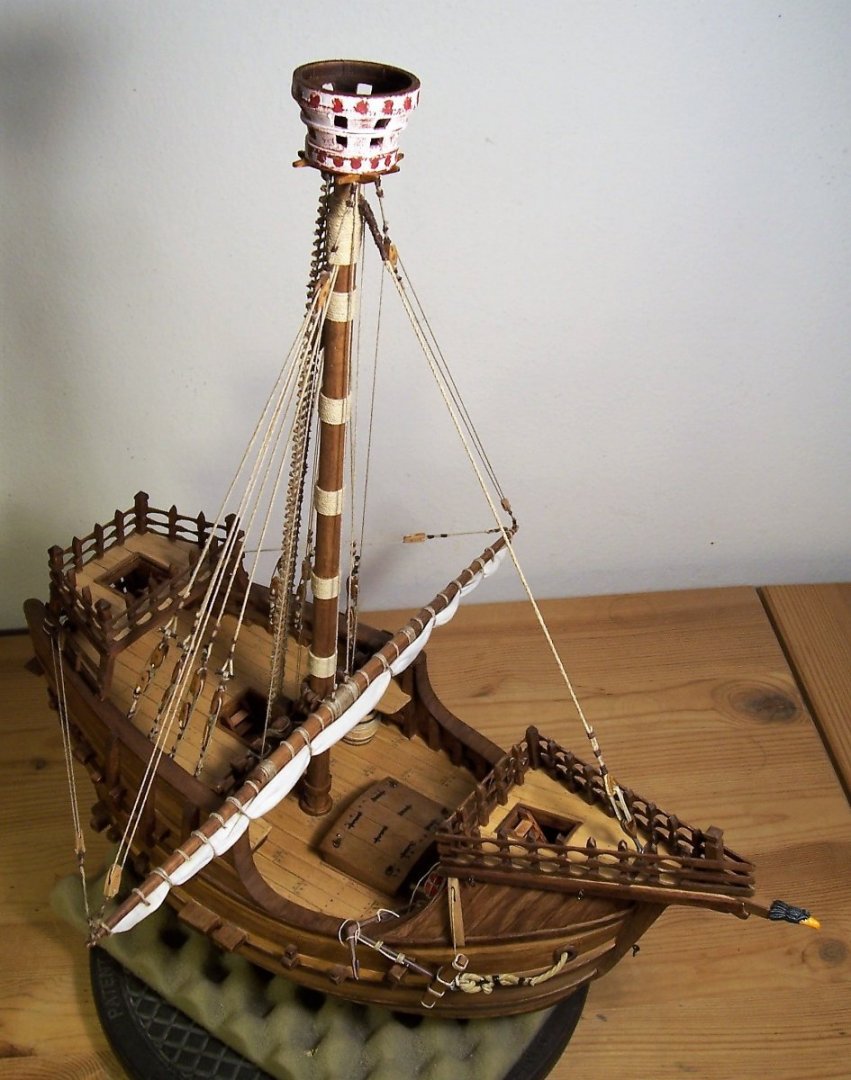
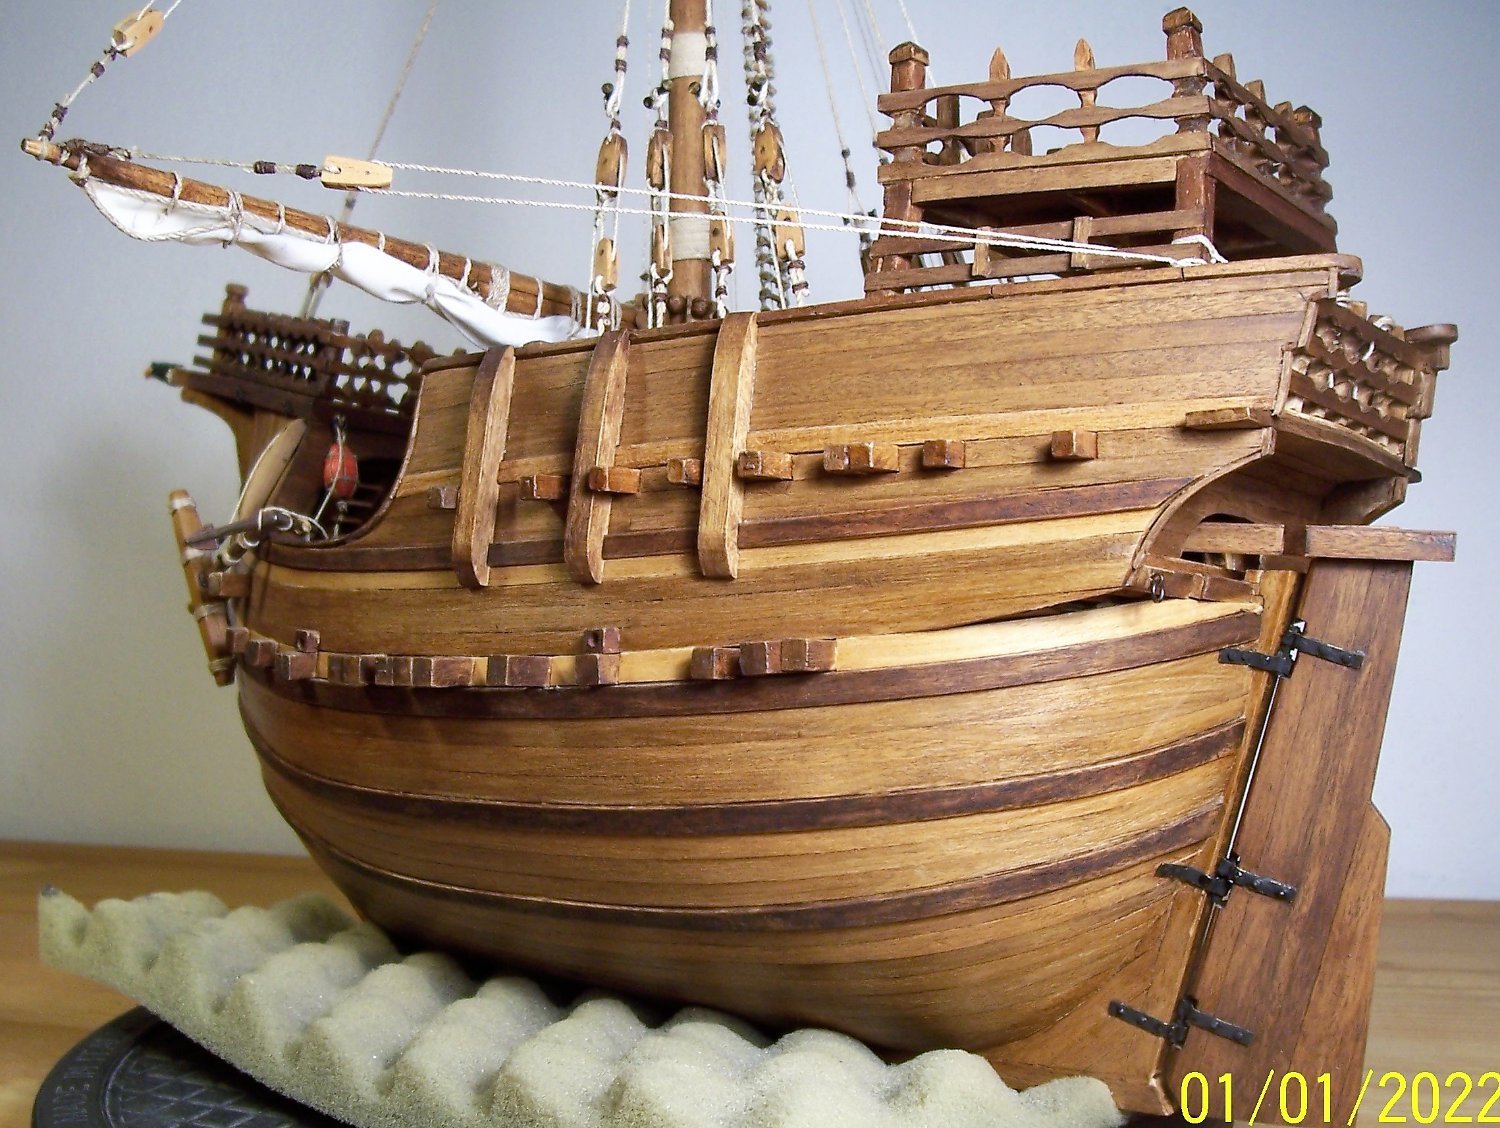
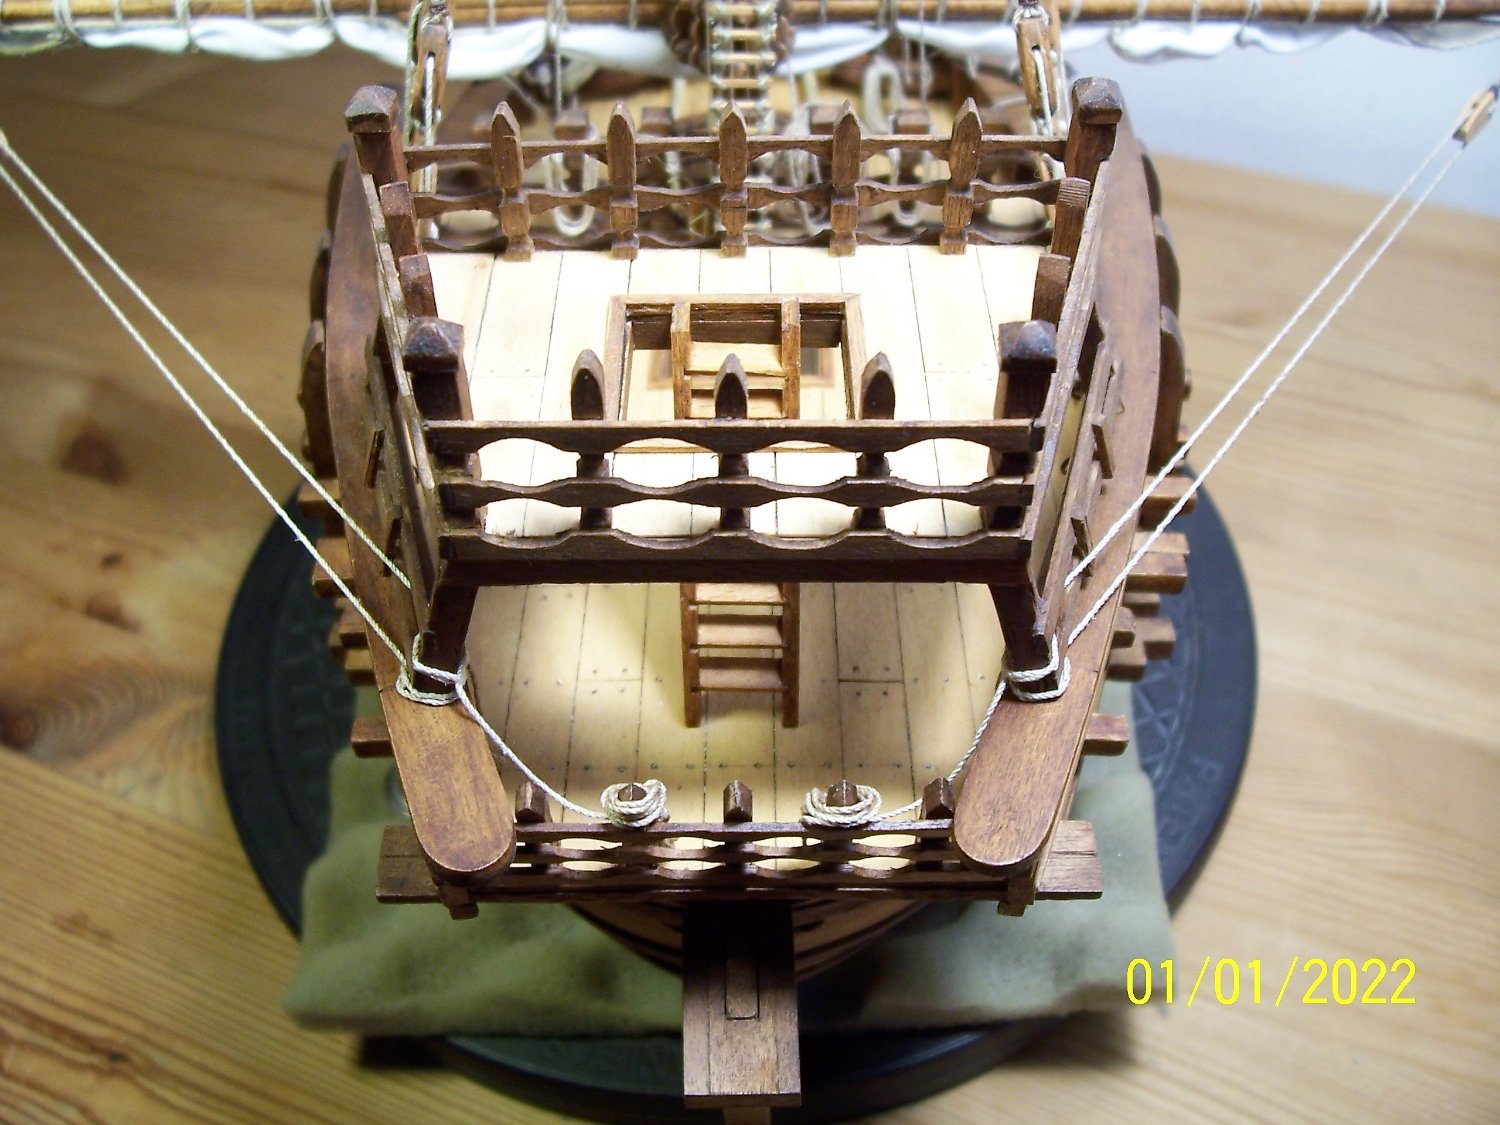
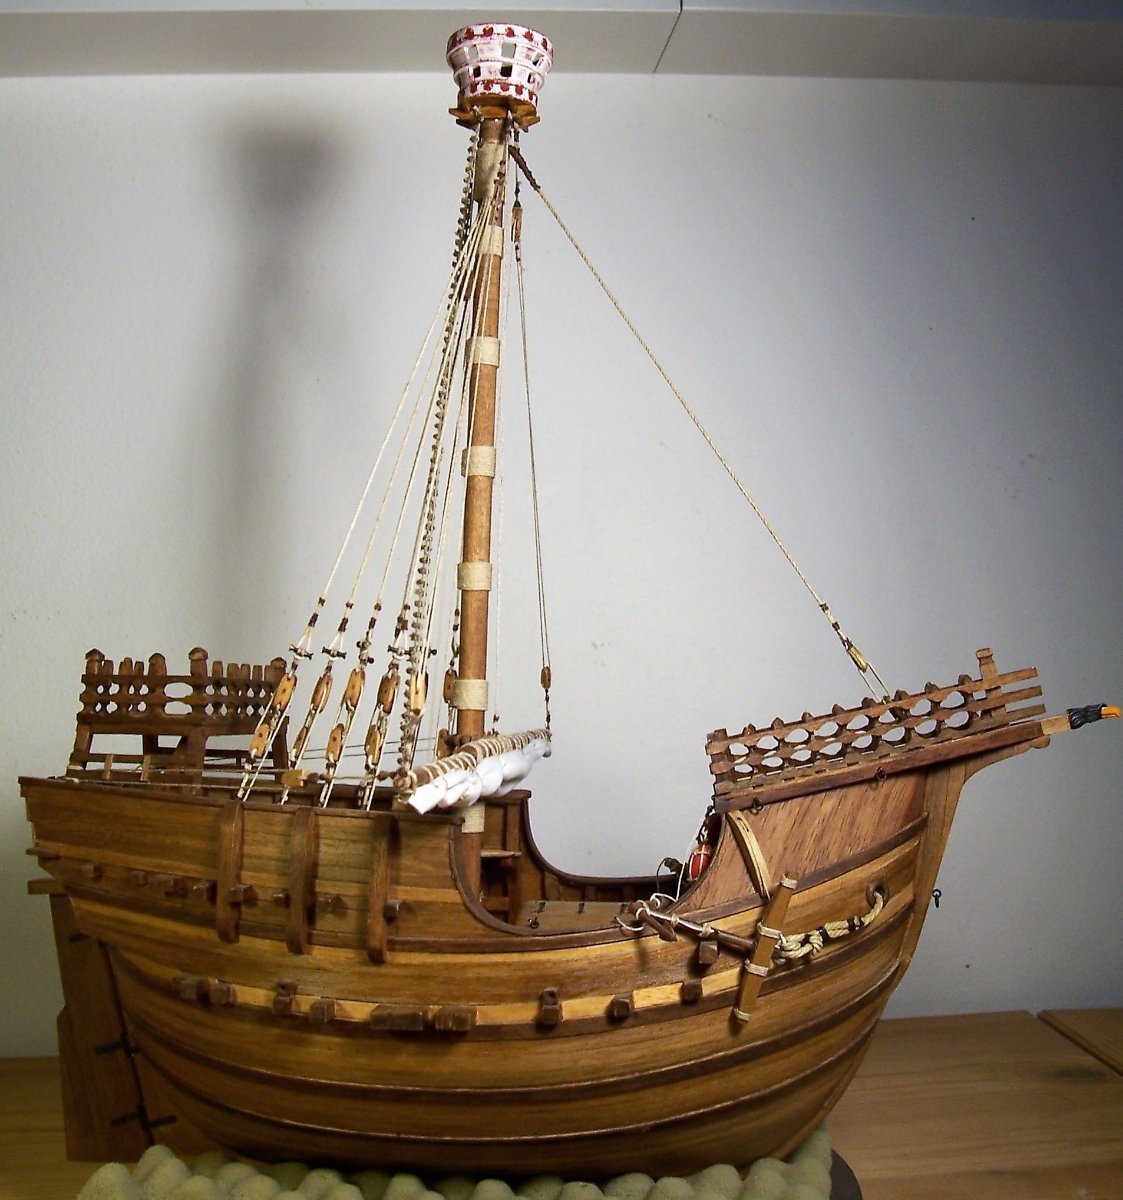
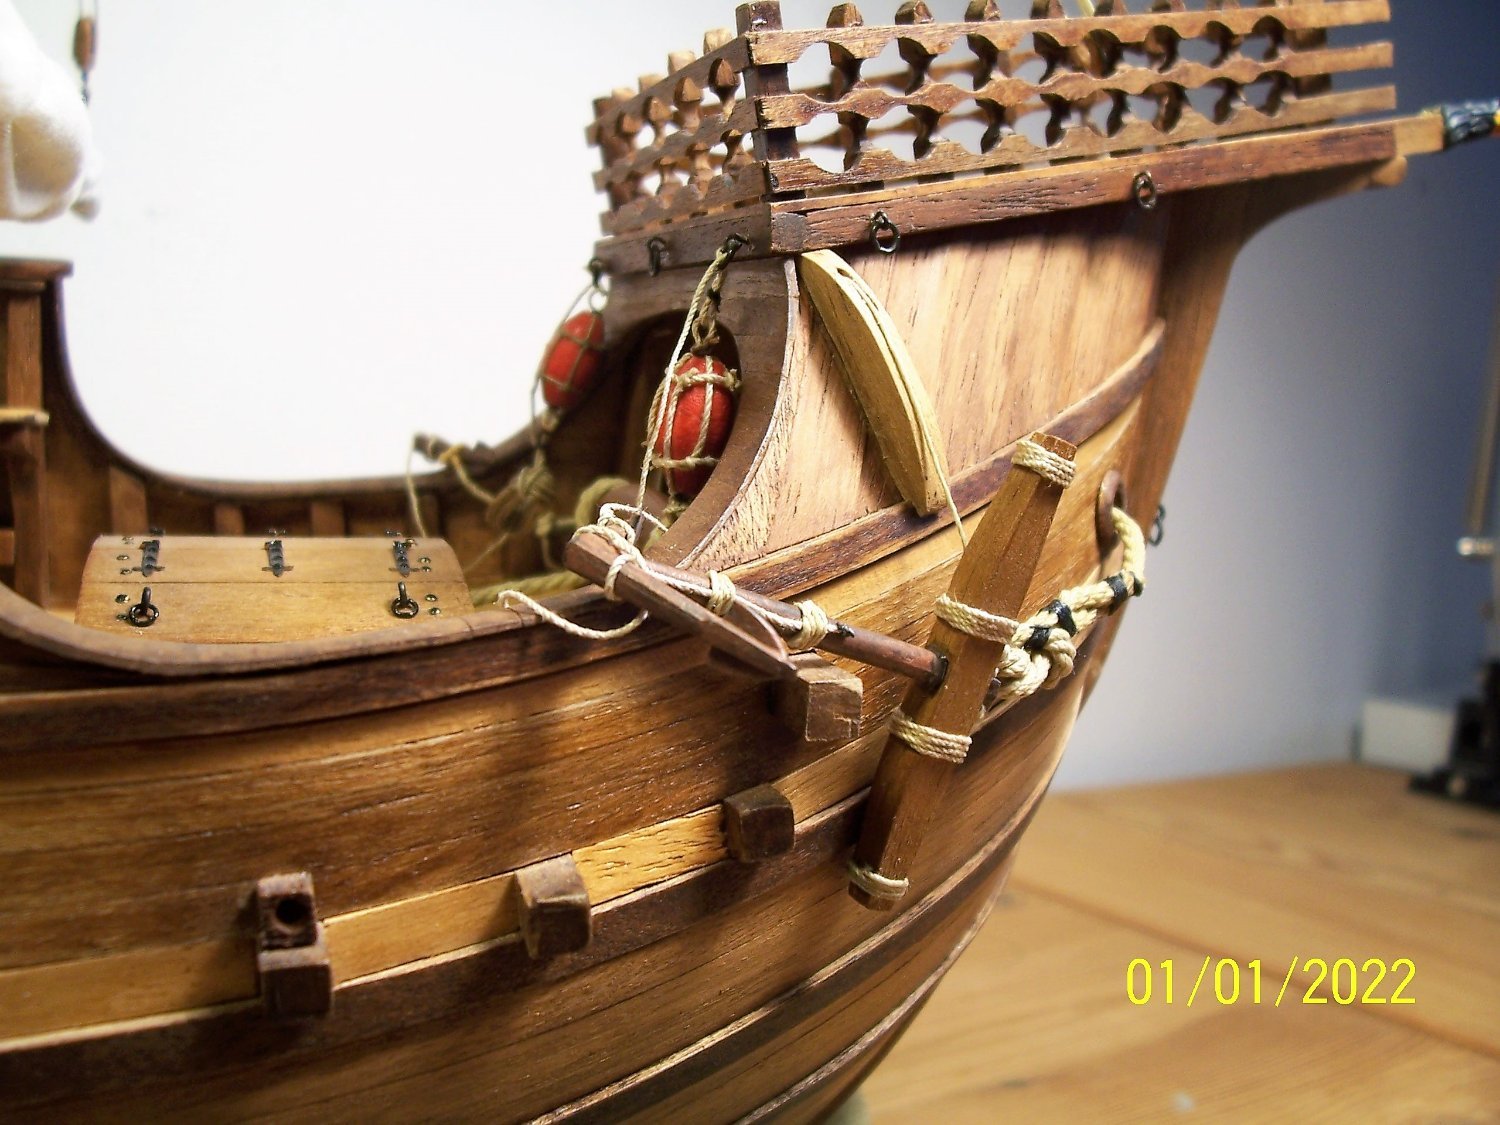
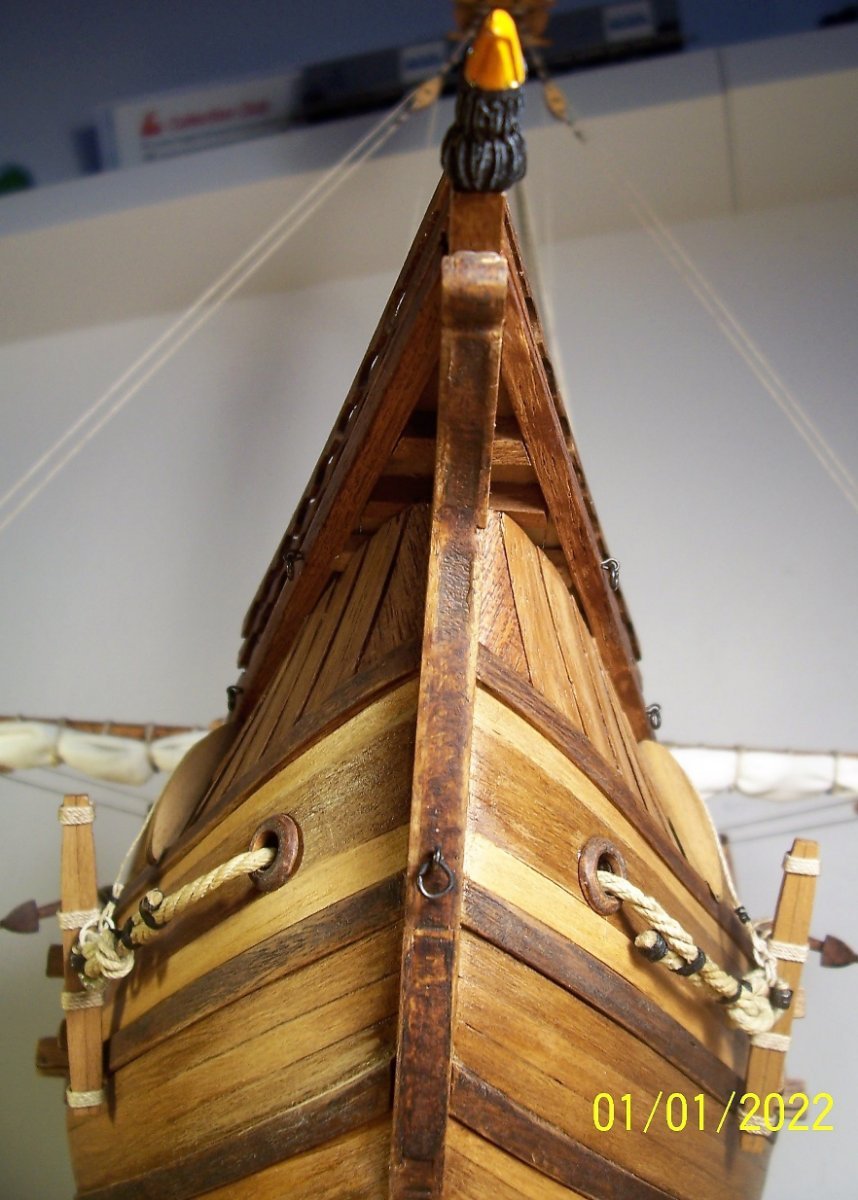
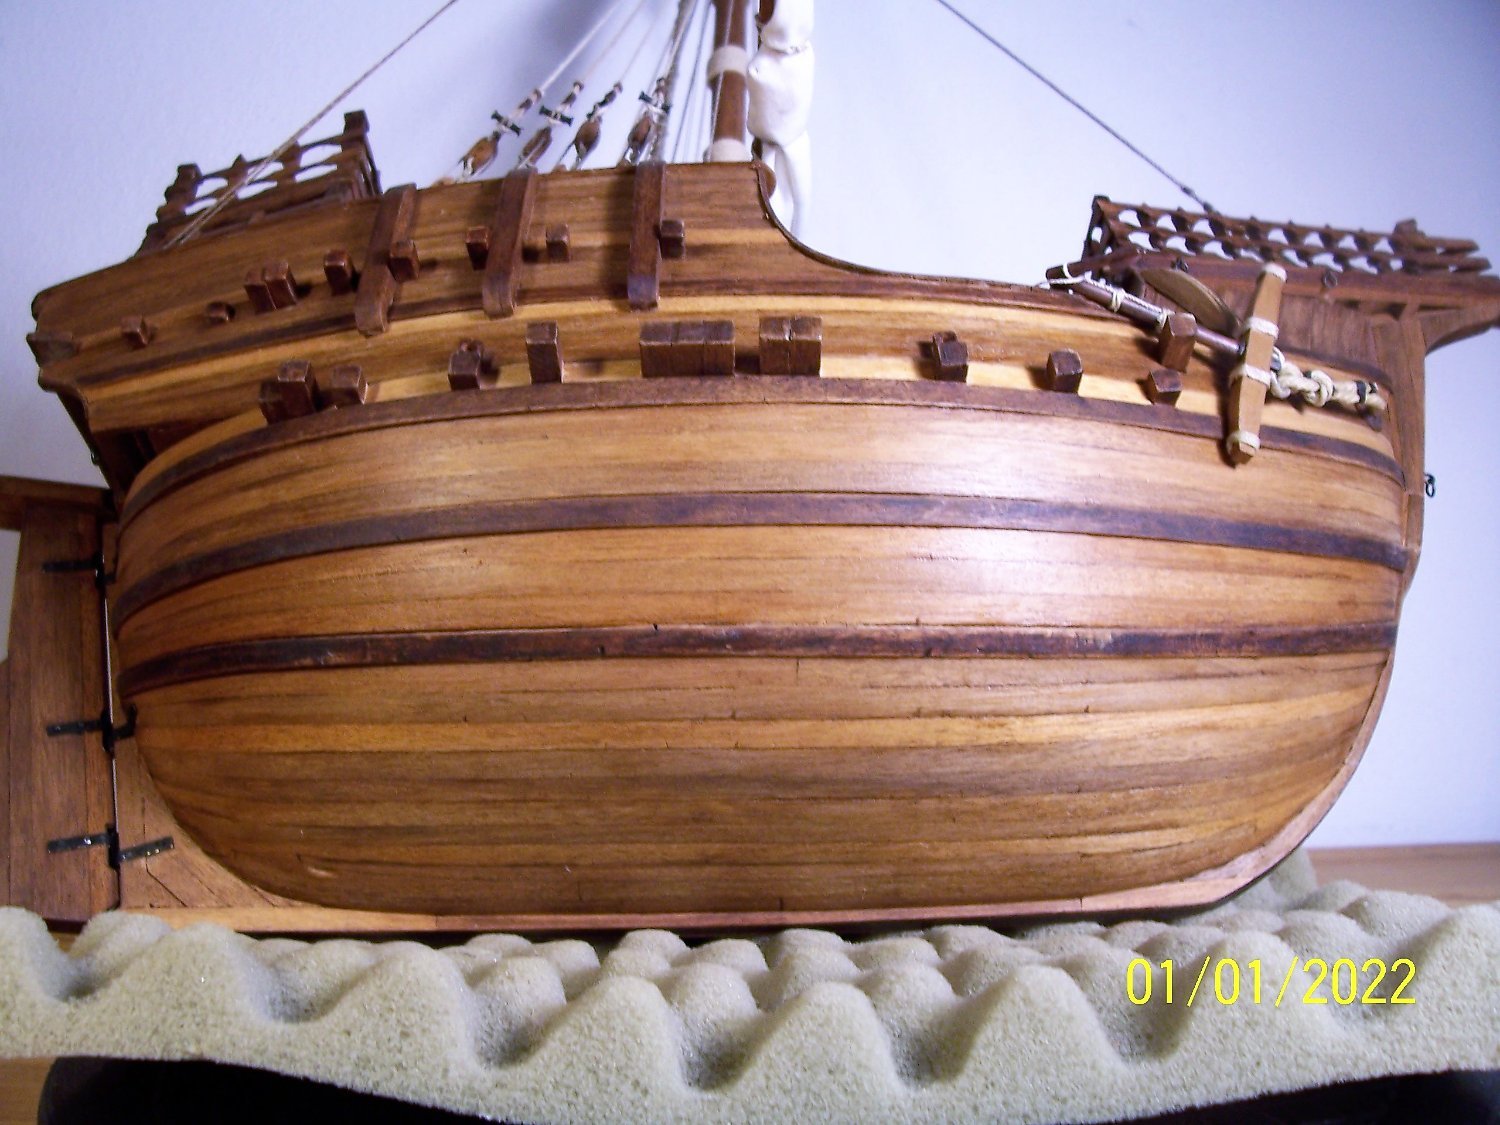
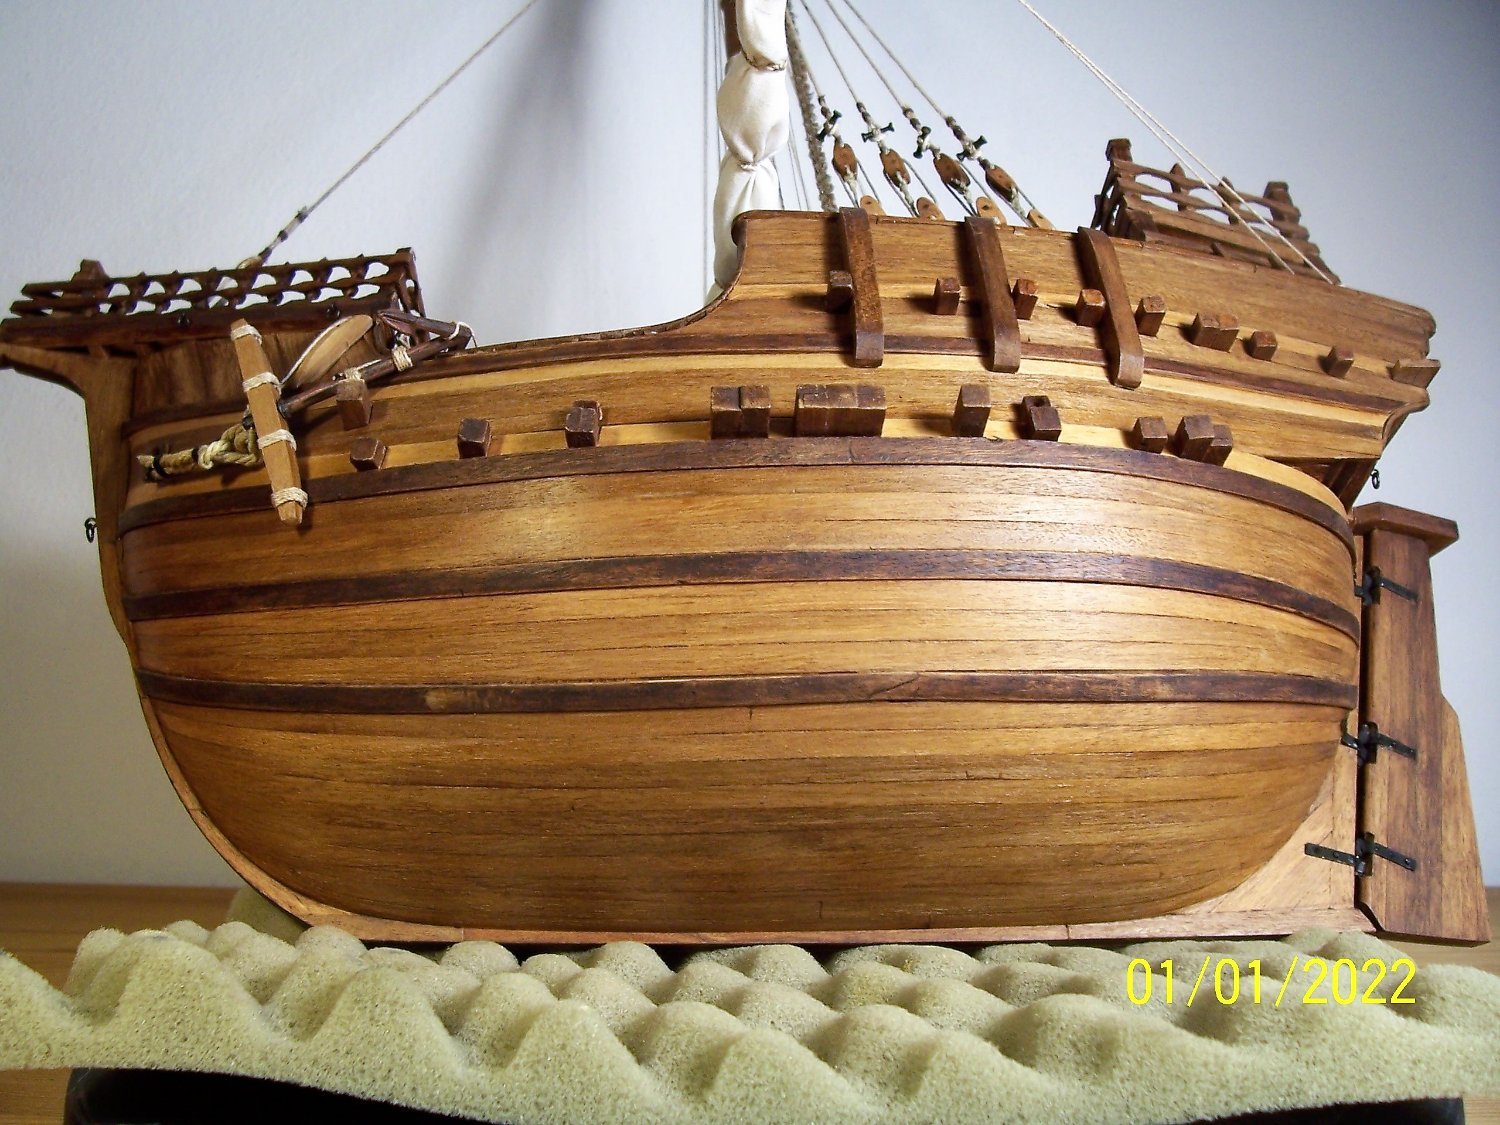
Dear shipmates,
the last detail has also been fixed and the Coca is finally completed. The yard has been active for two years and three months, so much time is also due to the many changes made to the manufacturer's instructions. It was a very exciting journey that forced me and allowed me to learn a lot of new things of a super fascinating, diversified and complex world. I want to express my feelings of deep gratitude to those who have accompanied me on this journey, and everyone who took a look at this build, helping me with their considerations, advice and comments to build a better model than I would have done alone.I wanted to take the pictures in the morning with the sun shining, but here in the foggy Ferrara I think I would have had to wait for a very long time, so I set up the autarchic micro photo set and did my best to present the final summary of the work.
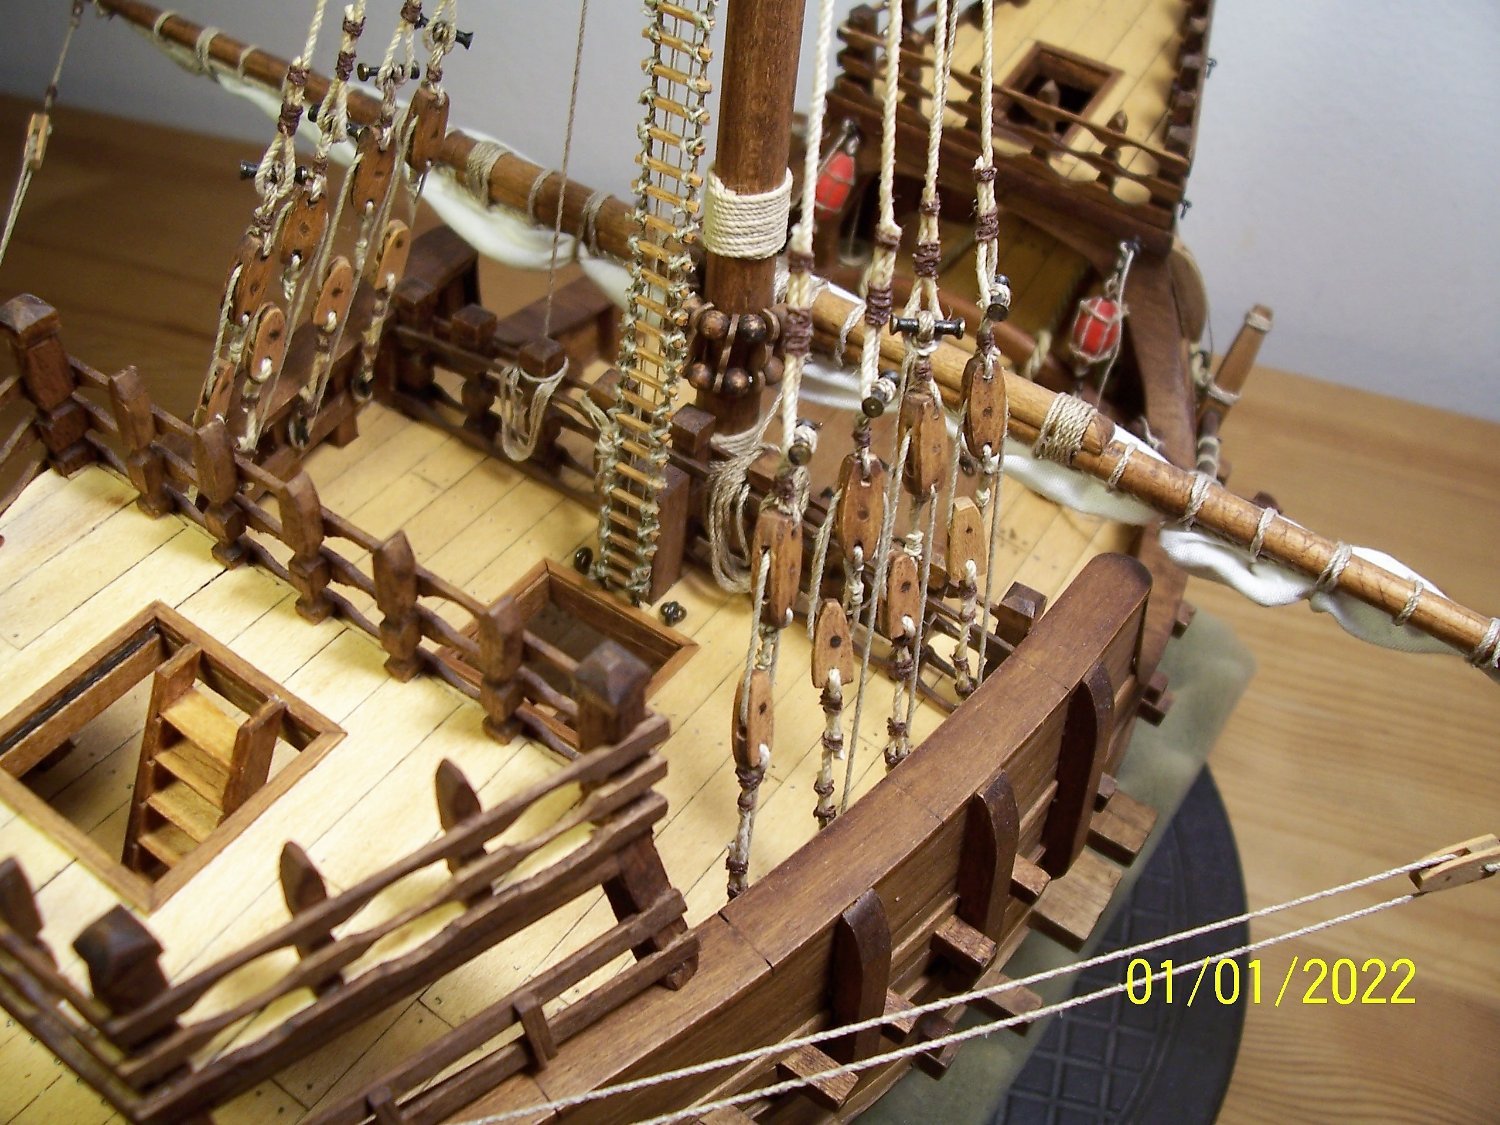
Here are some images for a general view:
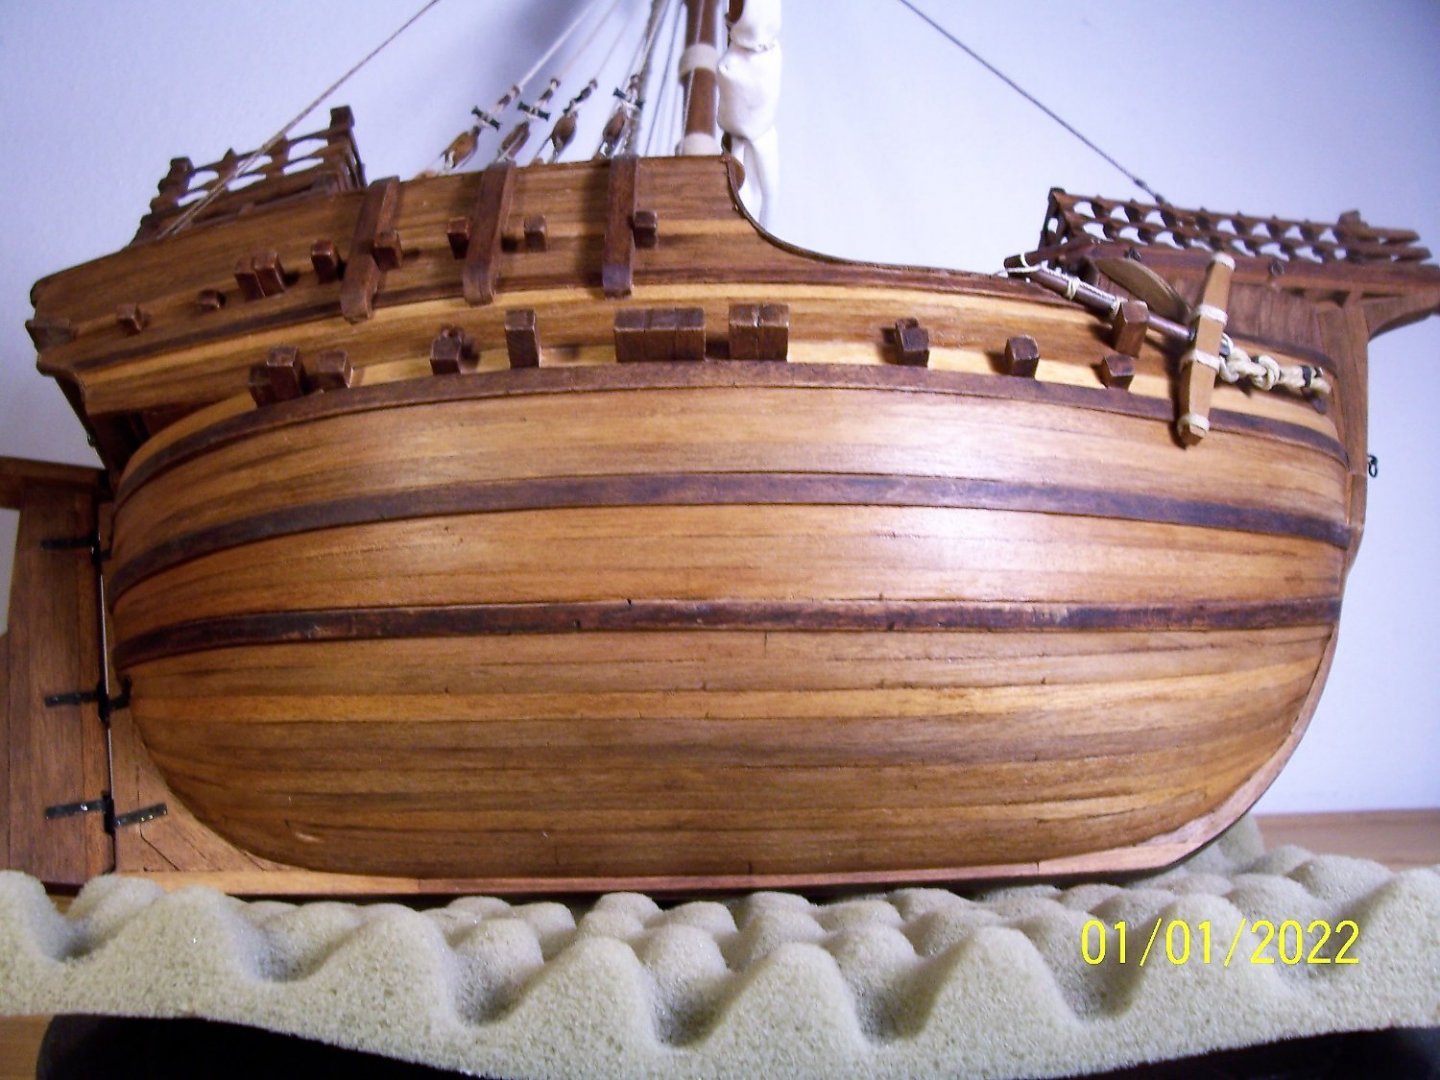

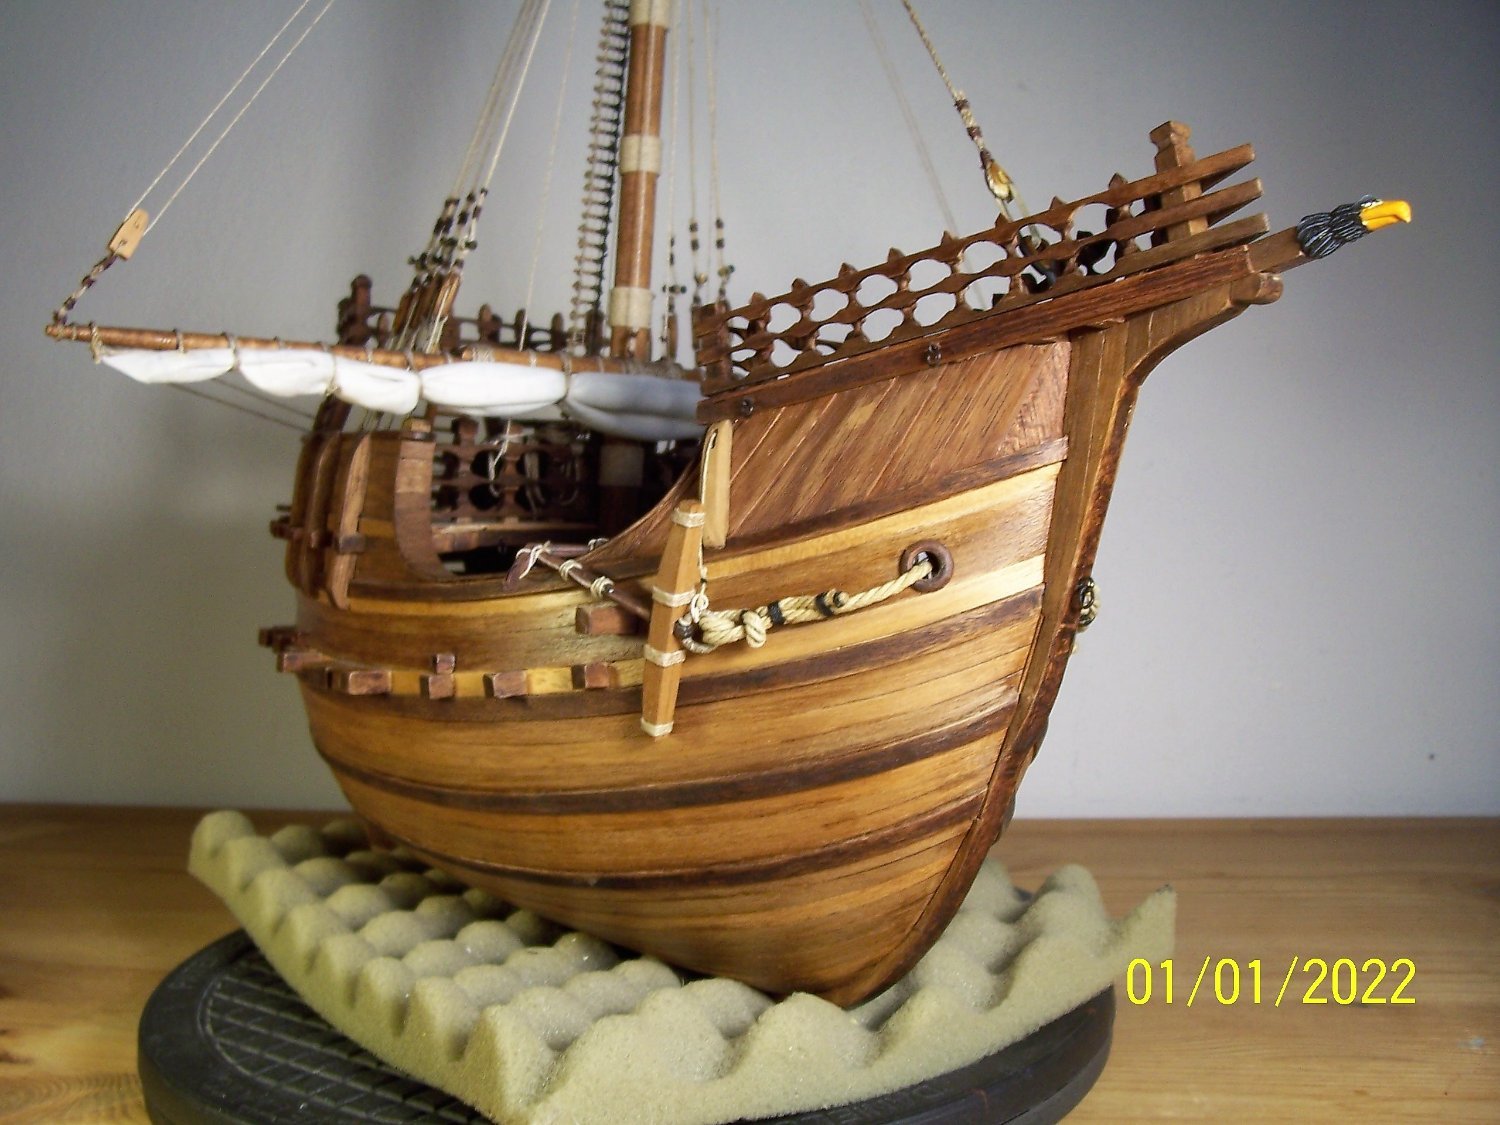
Amidship:


Next: the bow...
- Wintergreen, ccoyle, Louie da fly and 2 others
-
2
-
3
-
Thanks a lot Steven, for the support and suggestions, always appreciated.
After a lot of meditation, I realized what I didn't like: the top is " aged " while the ship looks like it just came out of the arsenal. So should I rejuvenate the top or age the ship (the latter option is very challenging...)?
The desperate search for a loophole suggested me this way out: at that time there were not our brilliant synthetic solvent colors, the binder will have been egg white or some oil, probably a year of sun, wind, rain, salt, hot and cold, dry and wet could have ruined the dye, maybe bought cheap and of poor quality. Moreover, it is not a warship always kept shiny, it is an honest boat that must give profit with little expense ... A good wood instead could resist better to the marine climate.
True or false this hypothesis, my conscience is silenced and so I continued with the yardarms: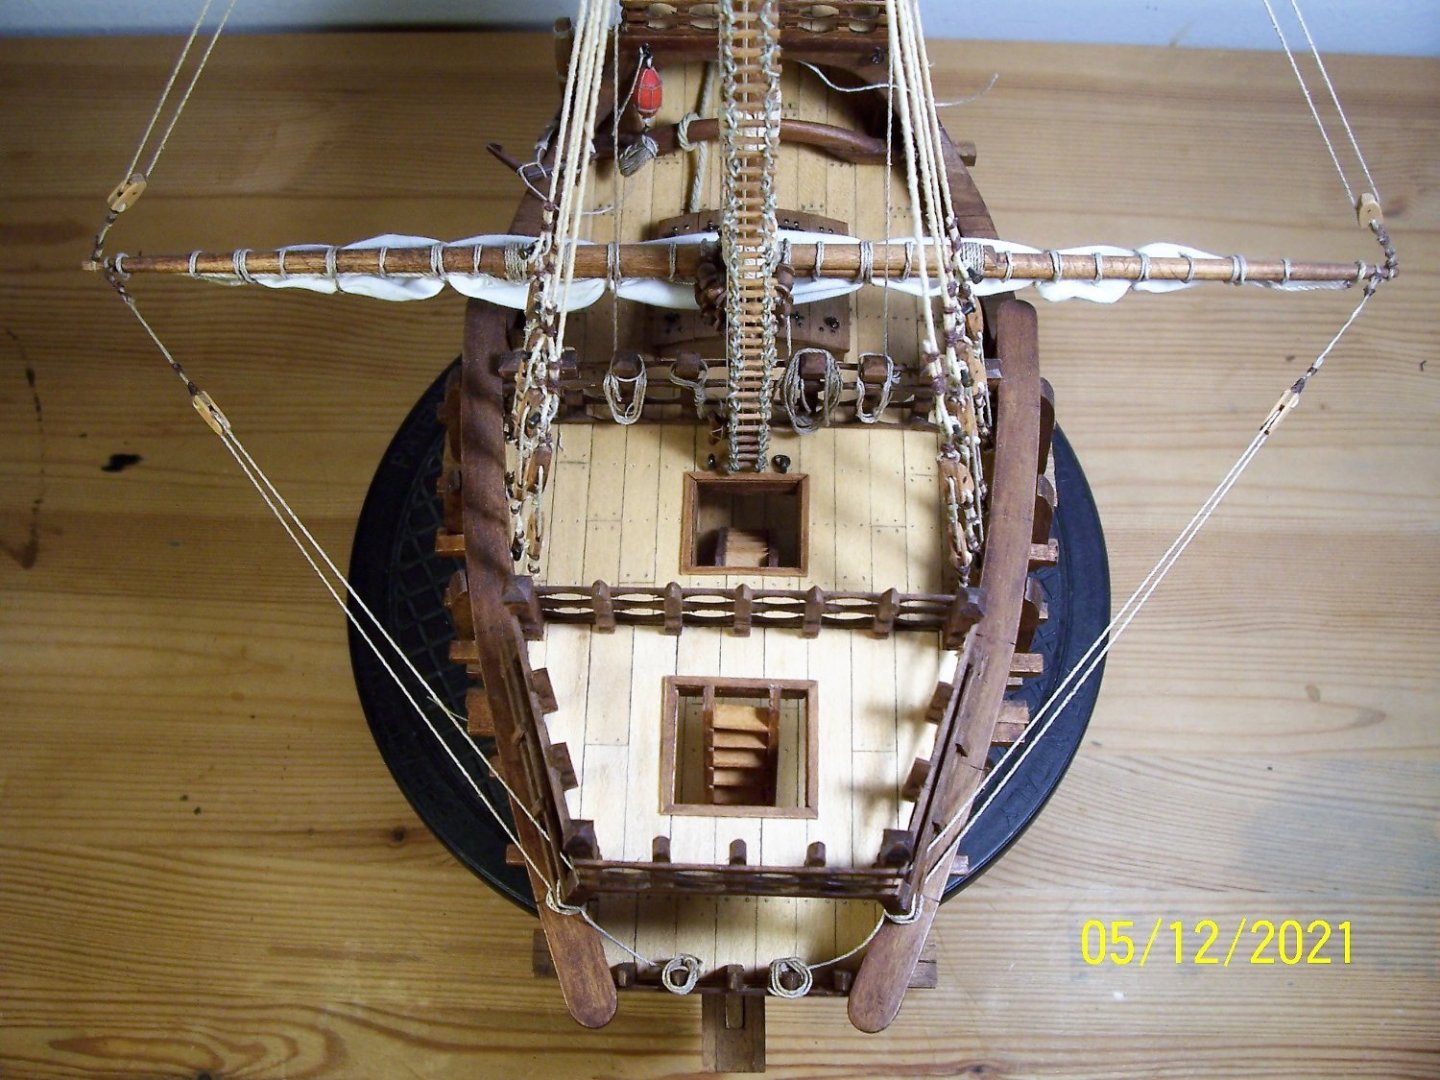
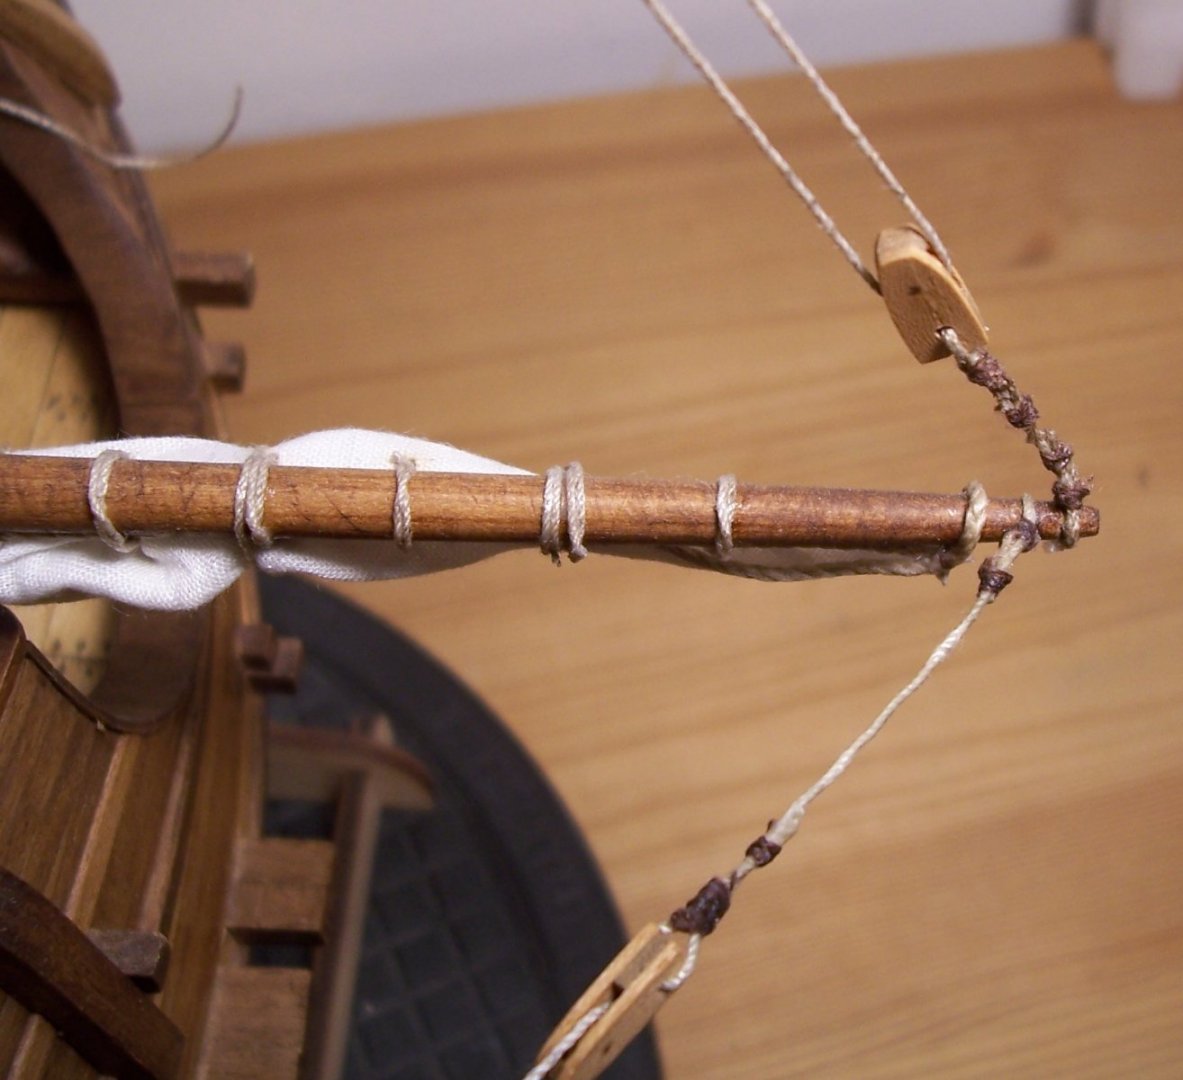

.thumb.JPG.5ec1f48775fbac02d600ec00e4bdcfaa.JPG)
I hope for you all a much better New Year than the year that is ending now....
Rodolfo- GrandpaPhil, KentM, Clark Griswold and 3 others
-
5
-
1
-
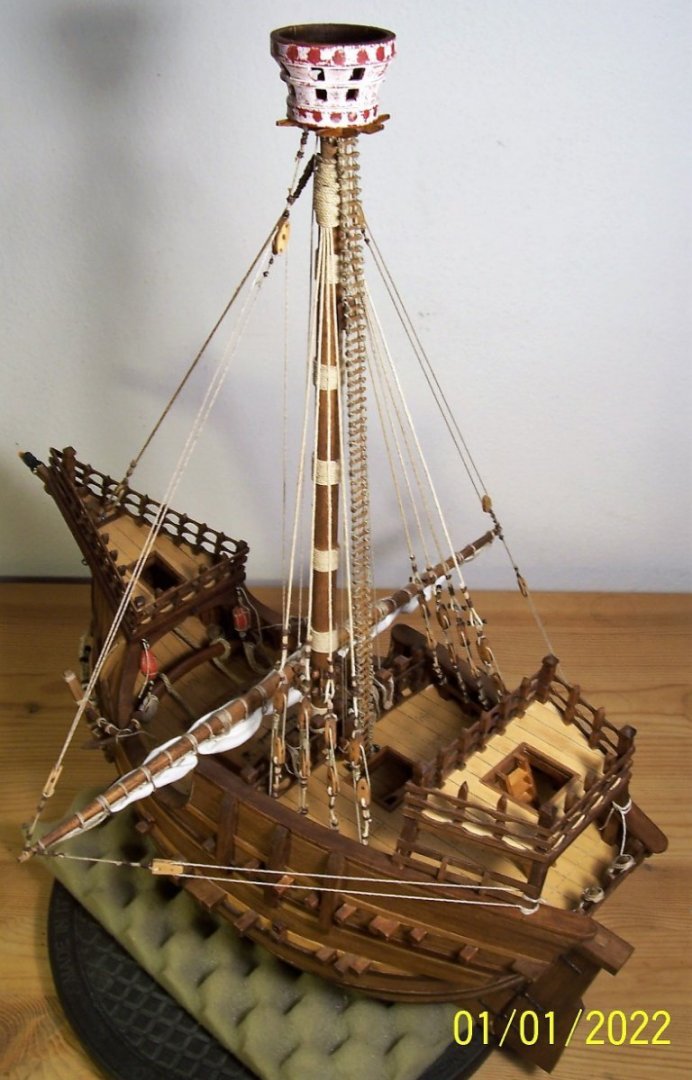
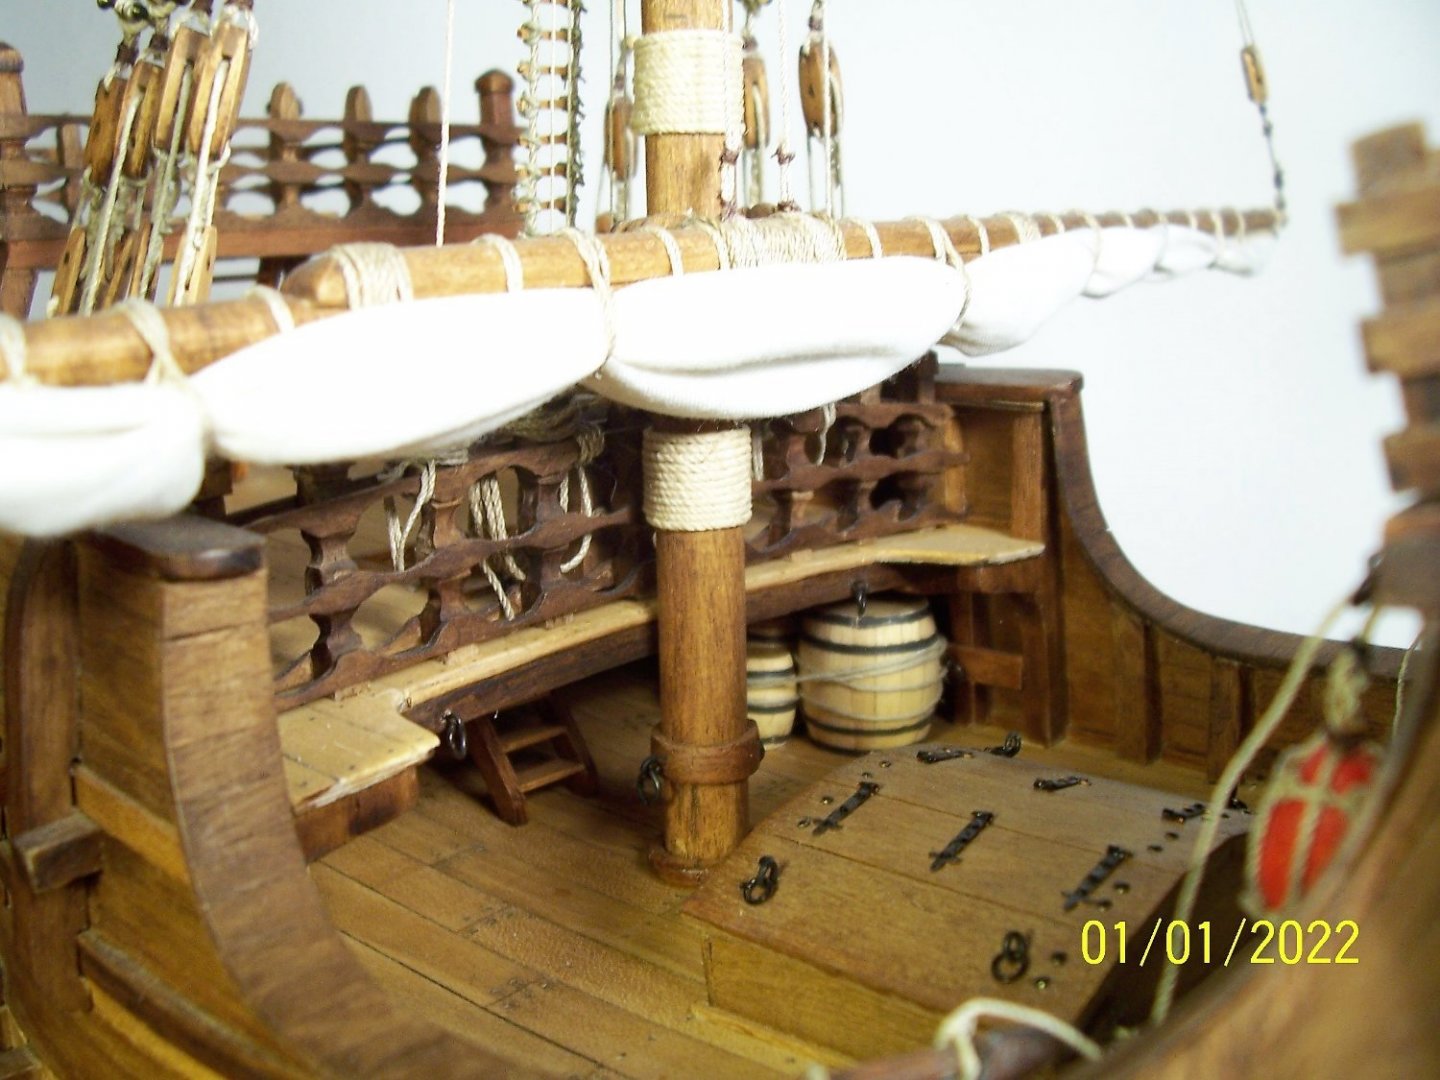
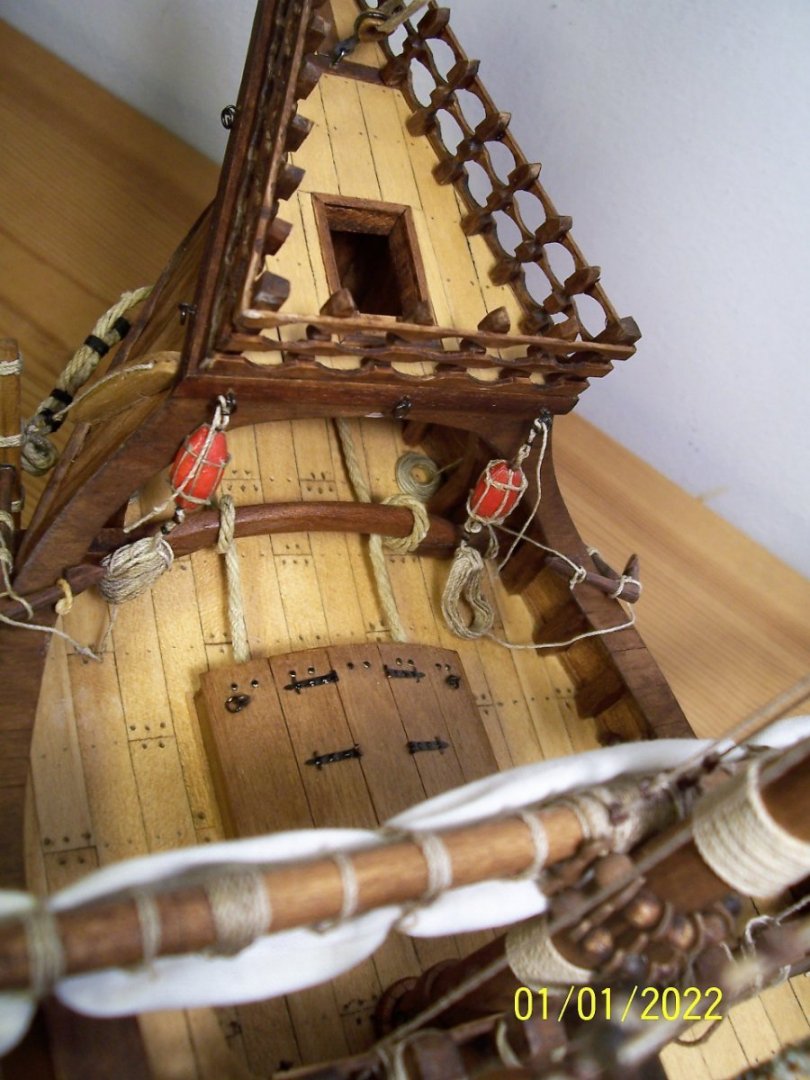
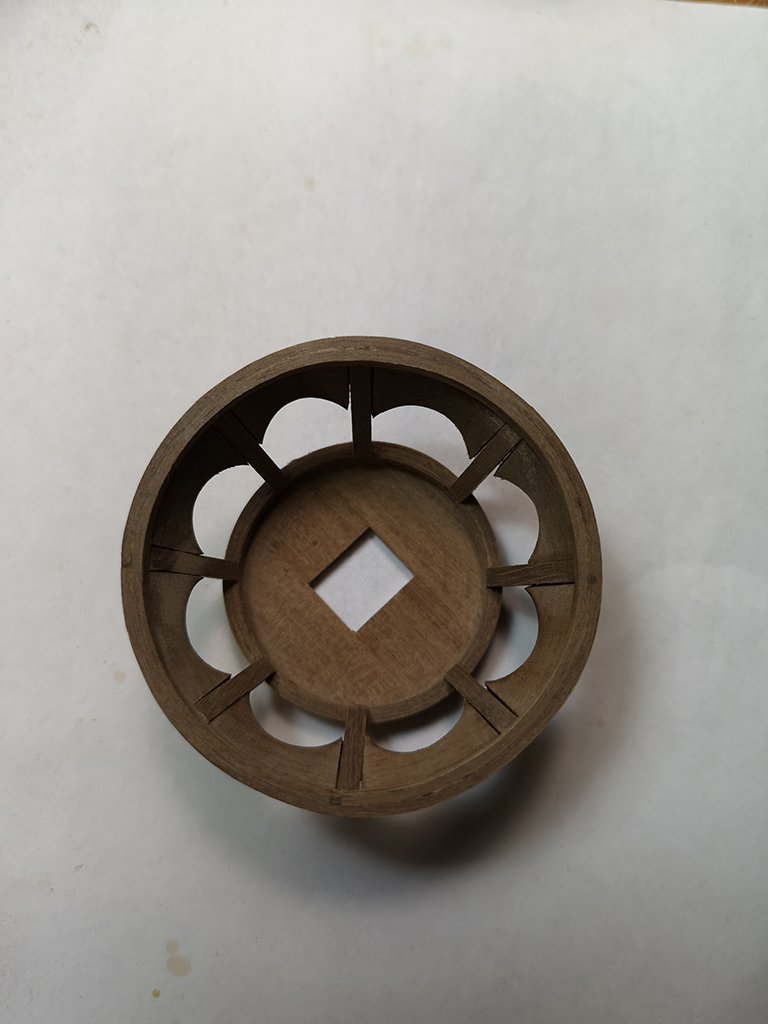
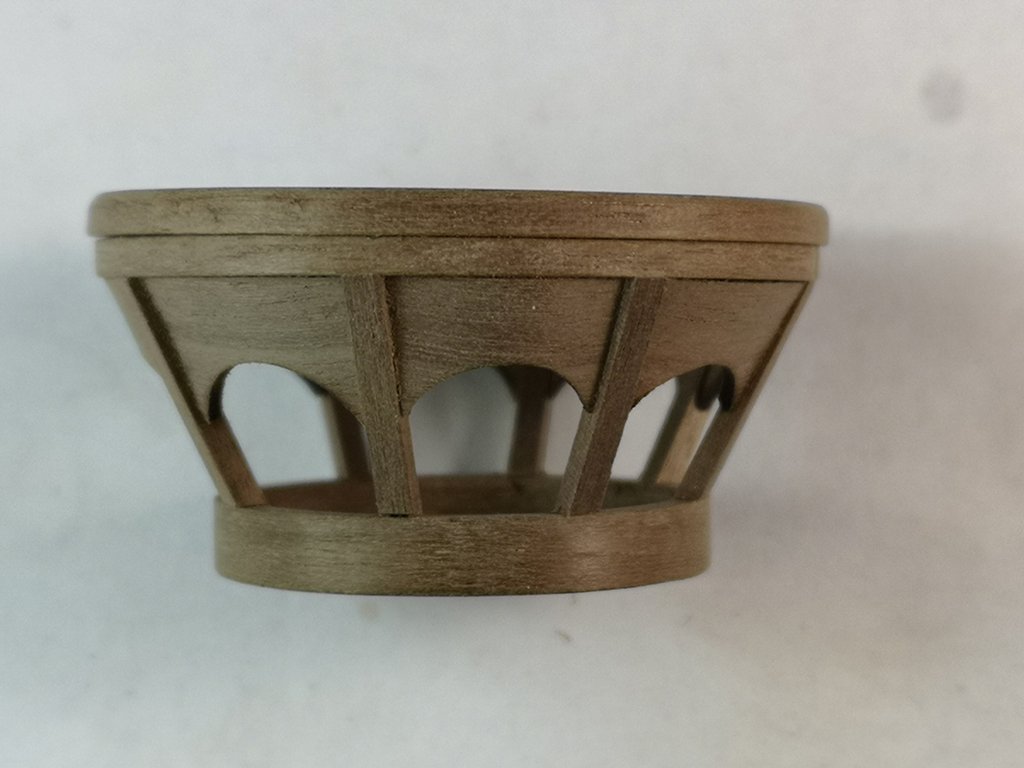
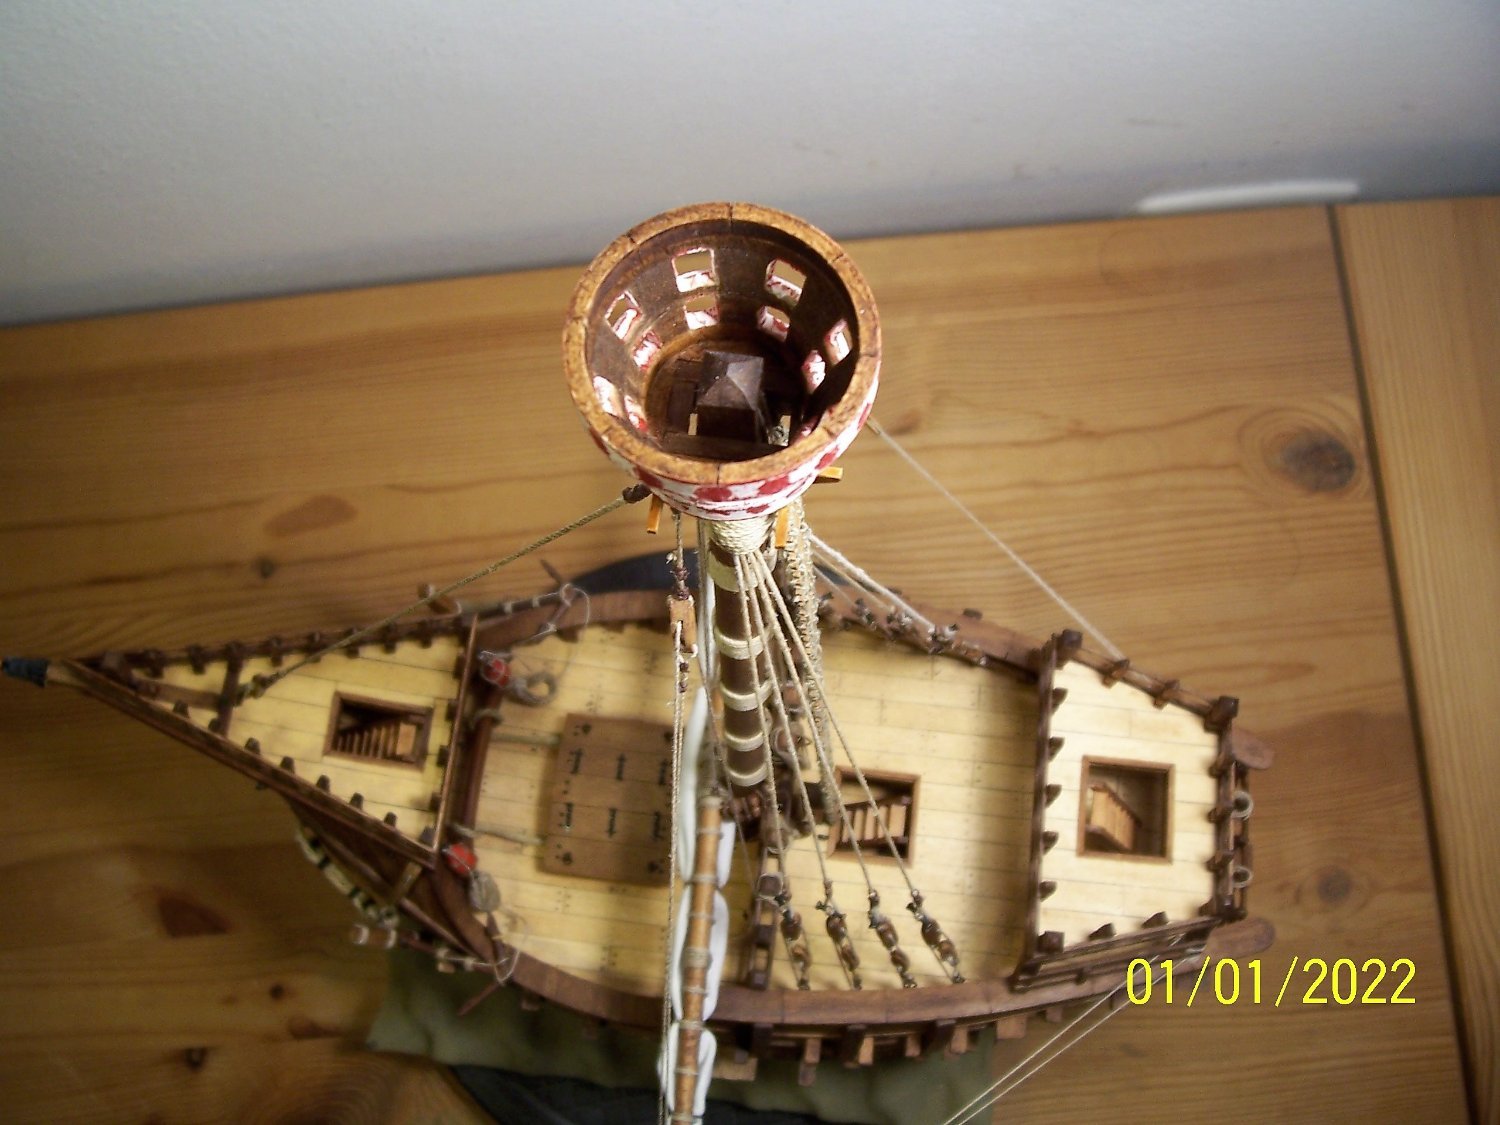
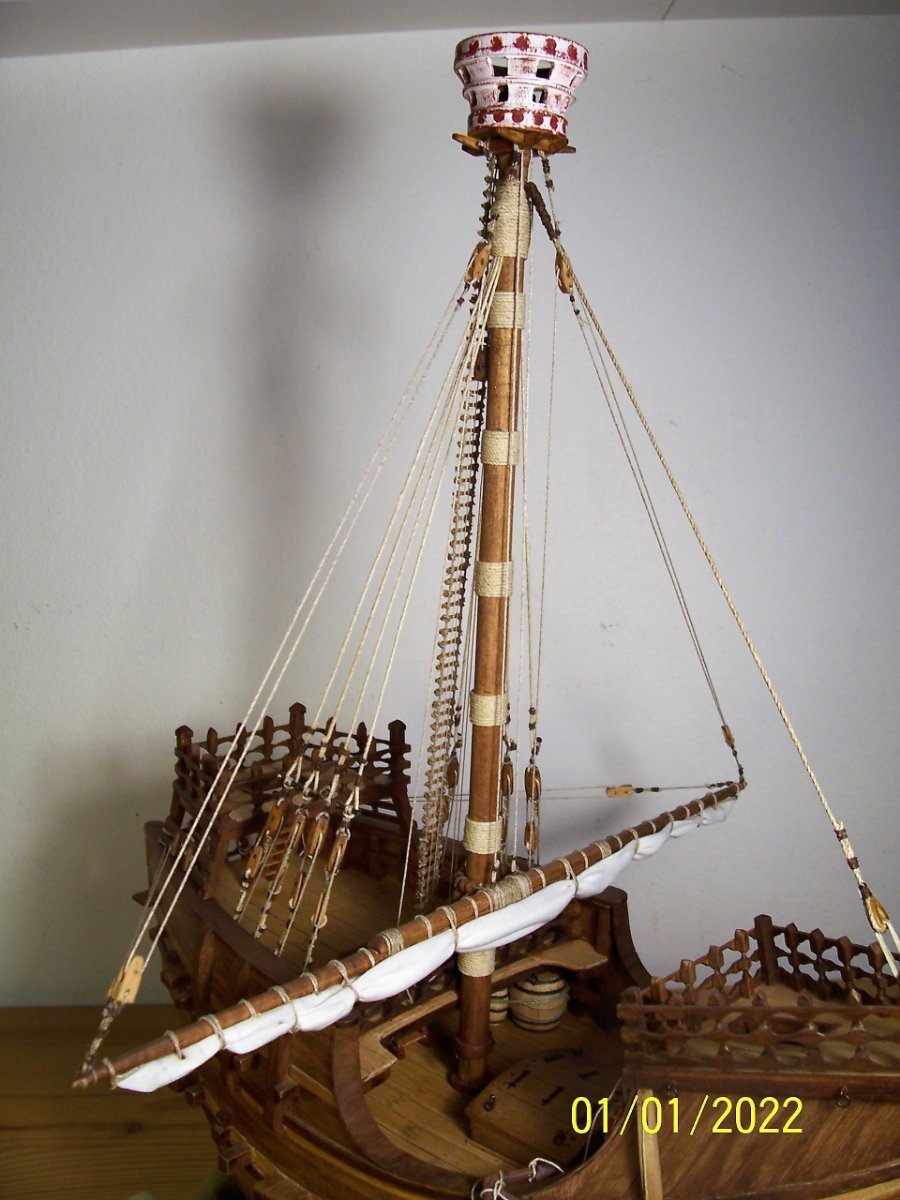
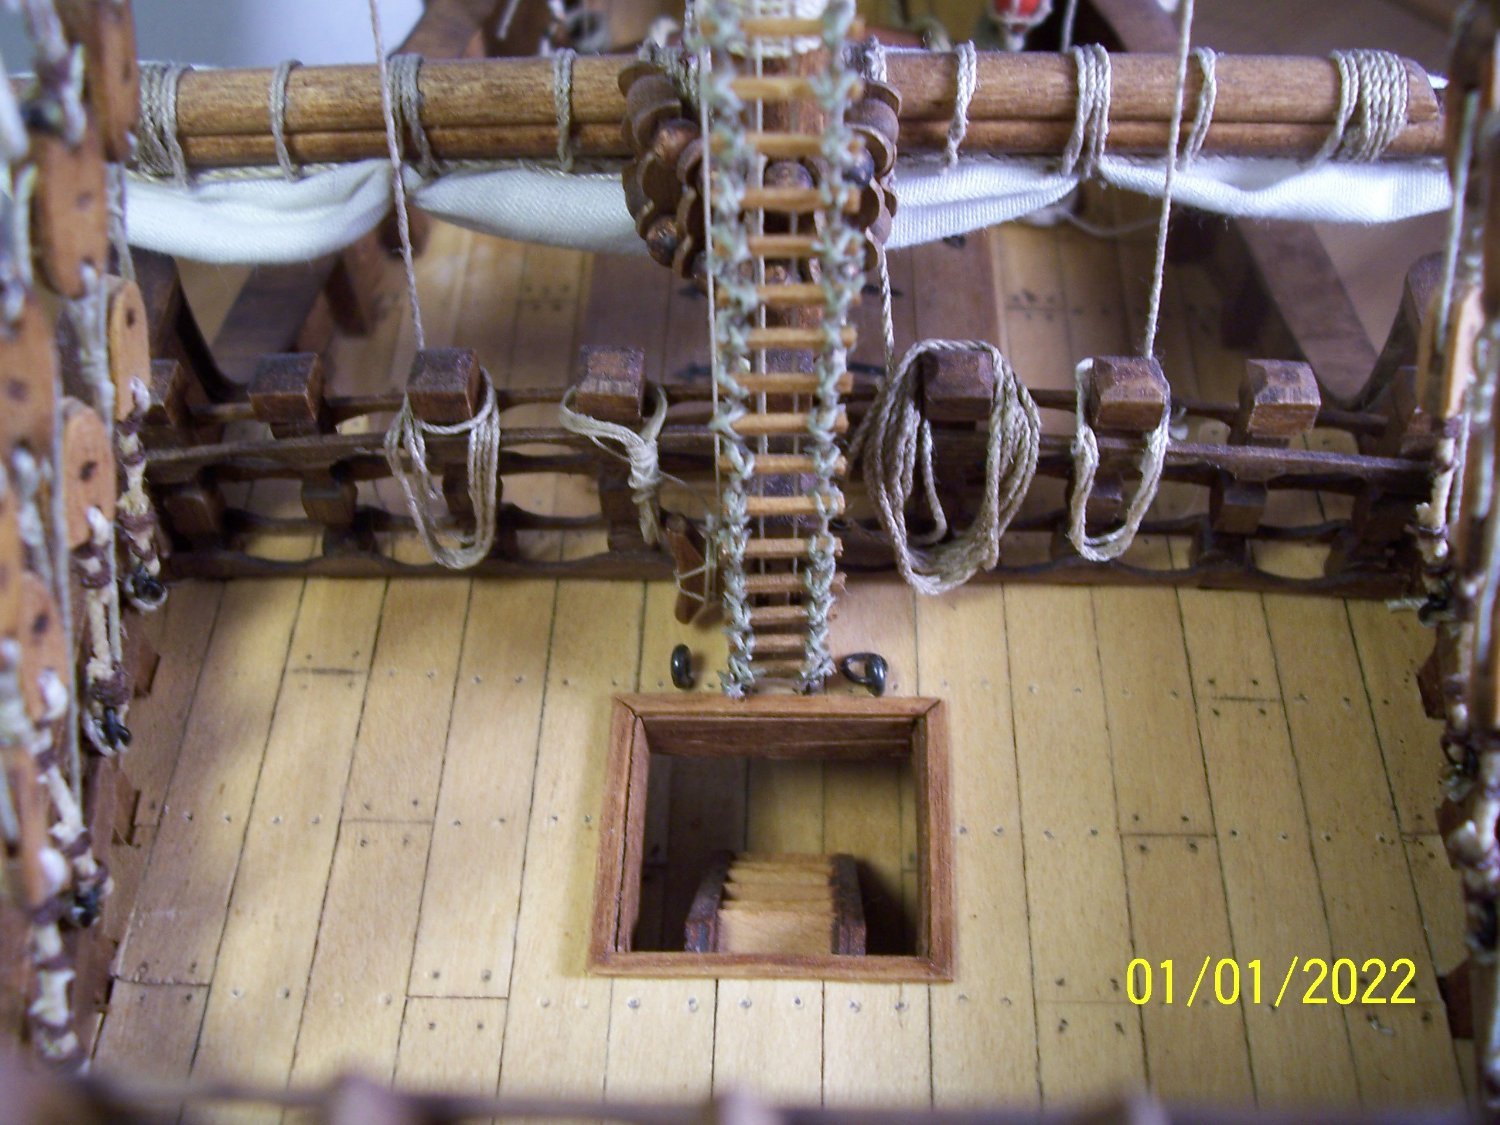
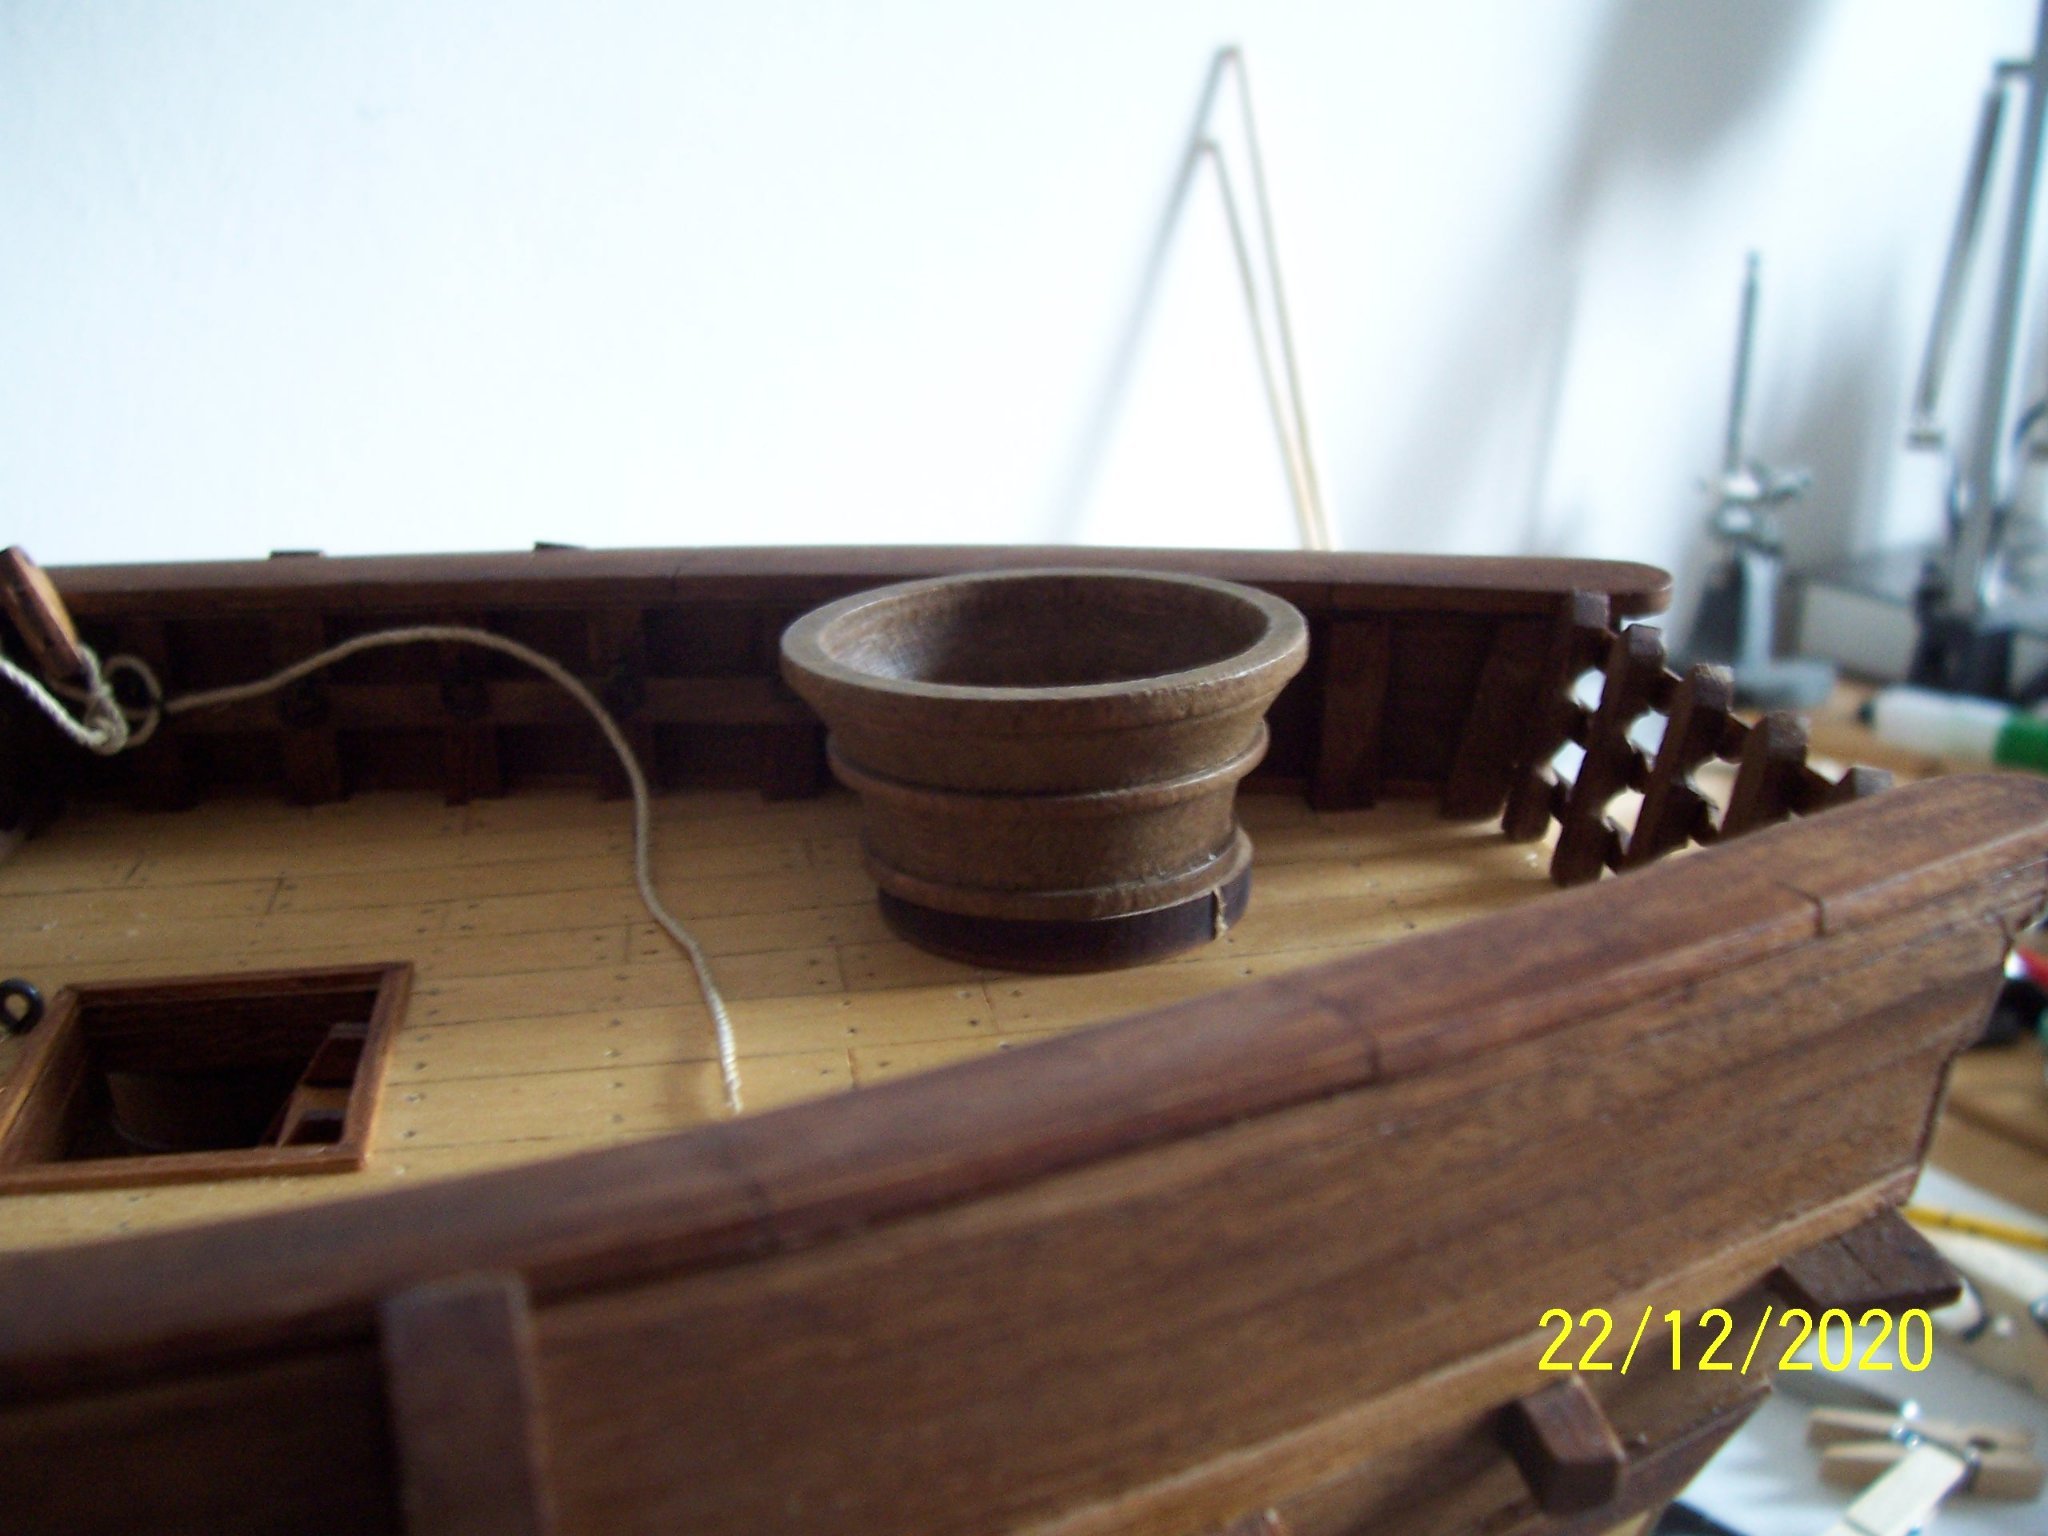
Dear friends, now it's time to go around the top. The manufacturer AMATI gives this solution:


All in all, it can be considered acceptable.
But I really like the way Clark Griswold elaborated on his Coca, so I made 16 symmetrical openings and after I inserted some pieces of walnut lath on the bottom, taking care not to interfere with the ropes:


.thumb.JPG.958e84d9dd405b2618f73436a8ed7edb.JPG)
.thumb.JPG.b6a636d2a51a1ed7587a1ee706f27ca7.JPG)
.thumb.JPG.faf8ad124aff3567dbf38445707f8675.JPG)
I colored it white with red dots, because I saw a similar scheme on: "Historic Ship Models" by Wolfram Zu Mondfeld, (although in black and white). I used opaque acrylic paints, first dark red and then white (after covering the red circle areas with adhesive paper discs). After that, I gave it a very light rubbing down with very fine sandpaper and water to further dull the colors.
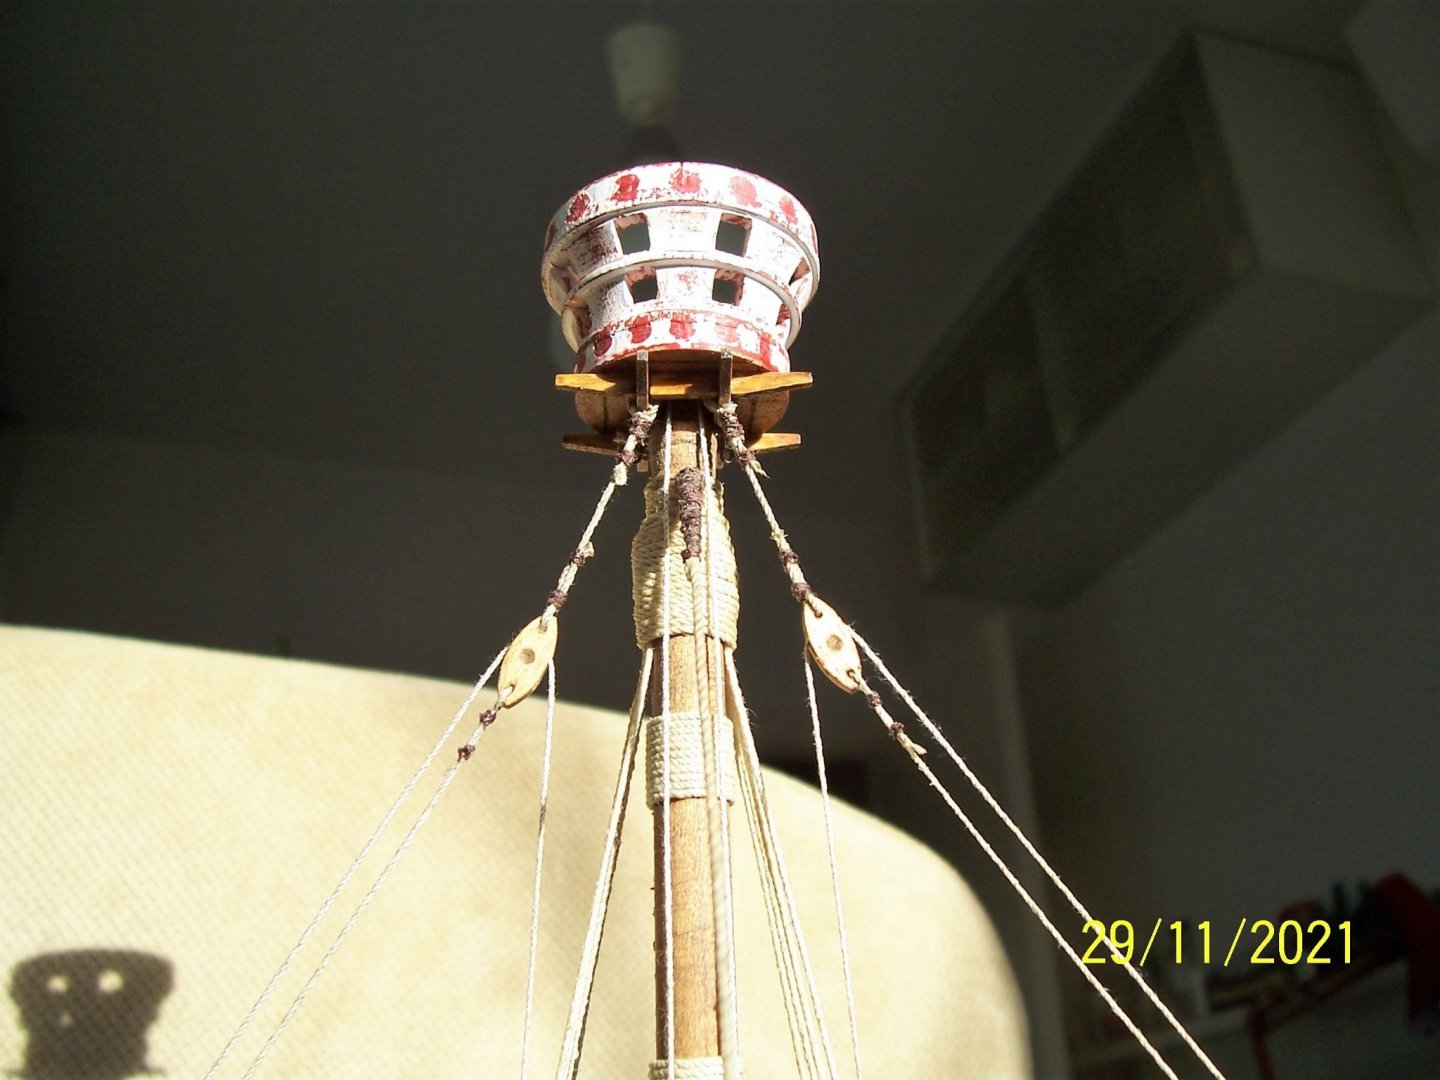
Some of our colleagues suggested to give a pass of diluted black/brown/grey satin color to further age the top and I think I'll try that.
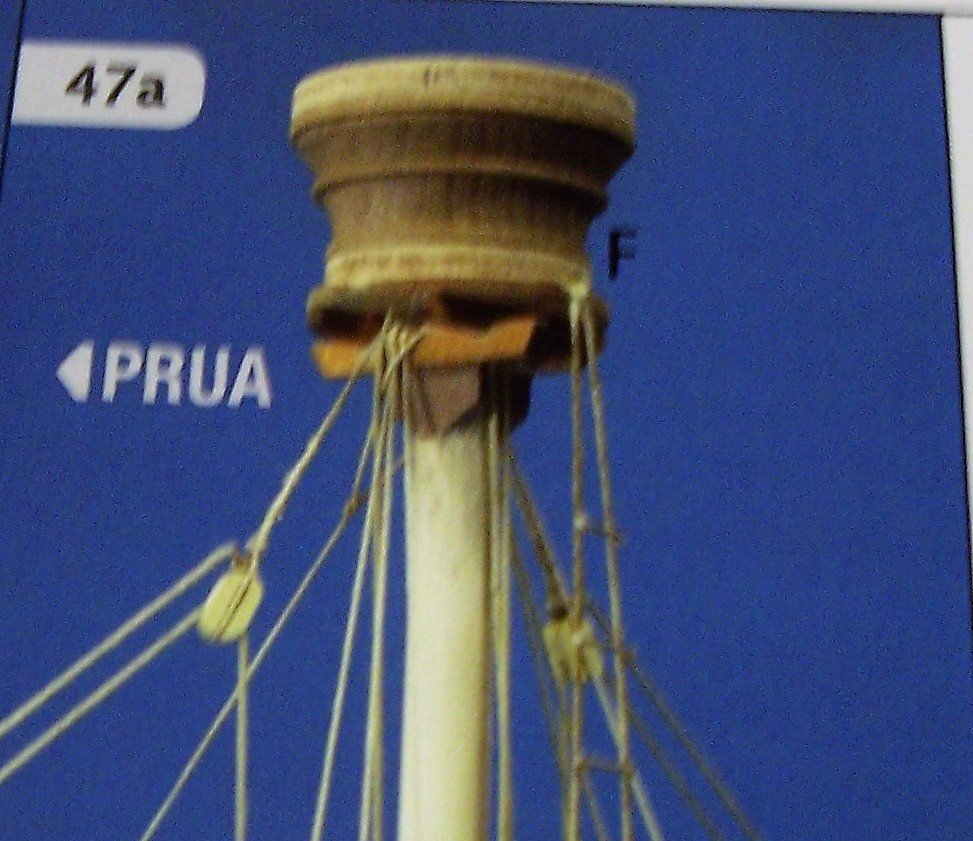
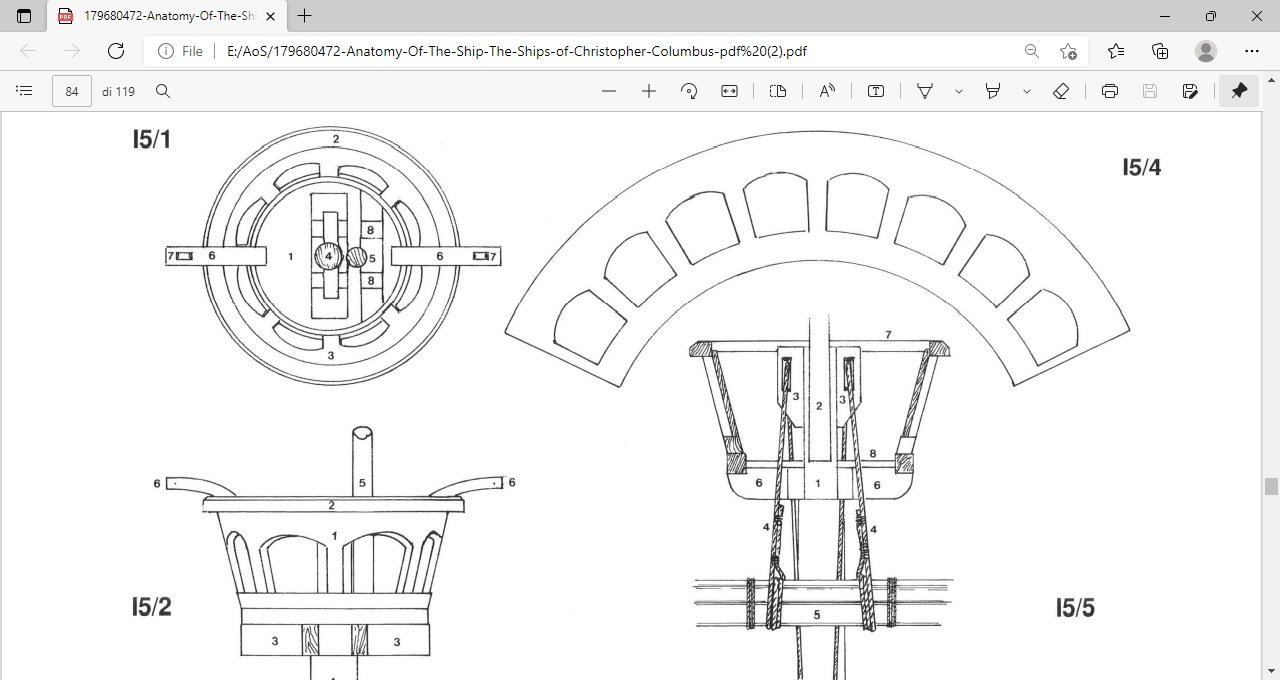
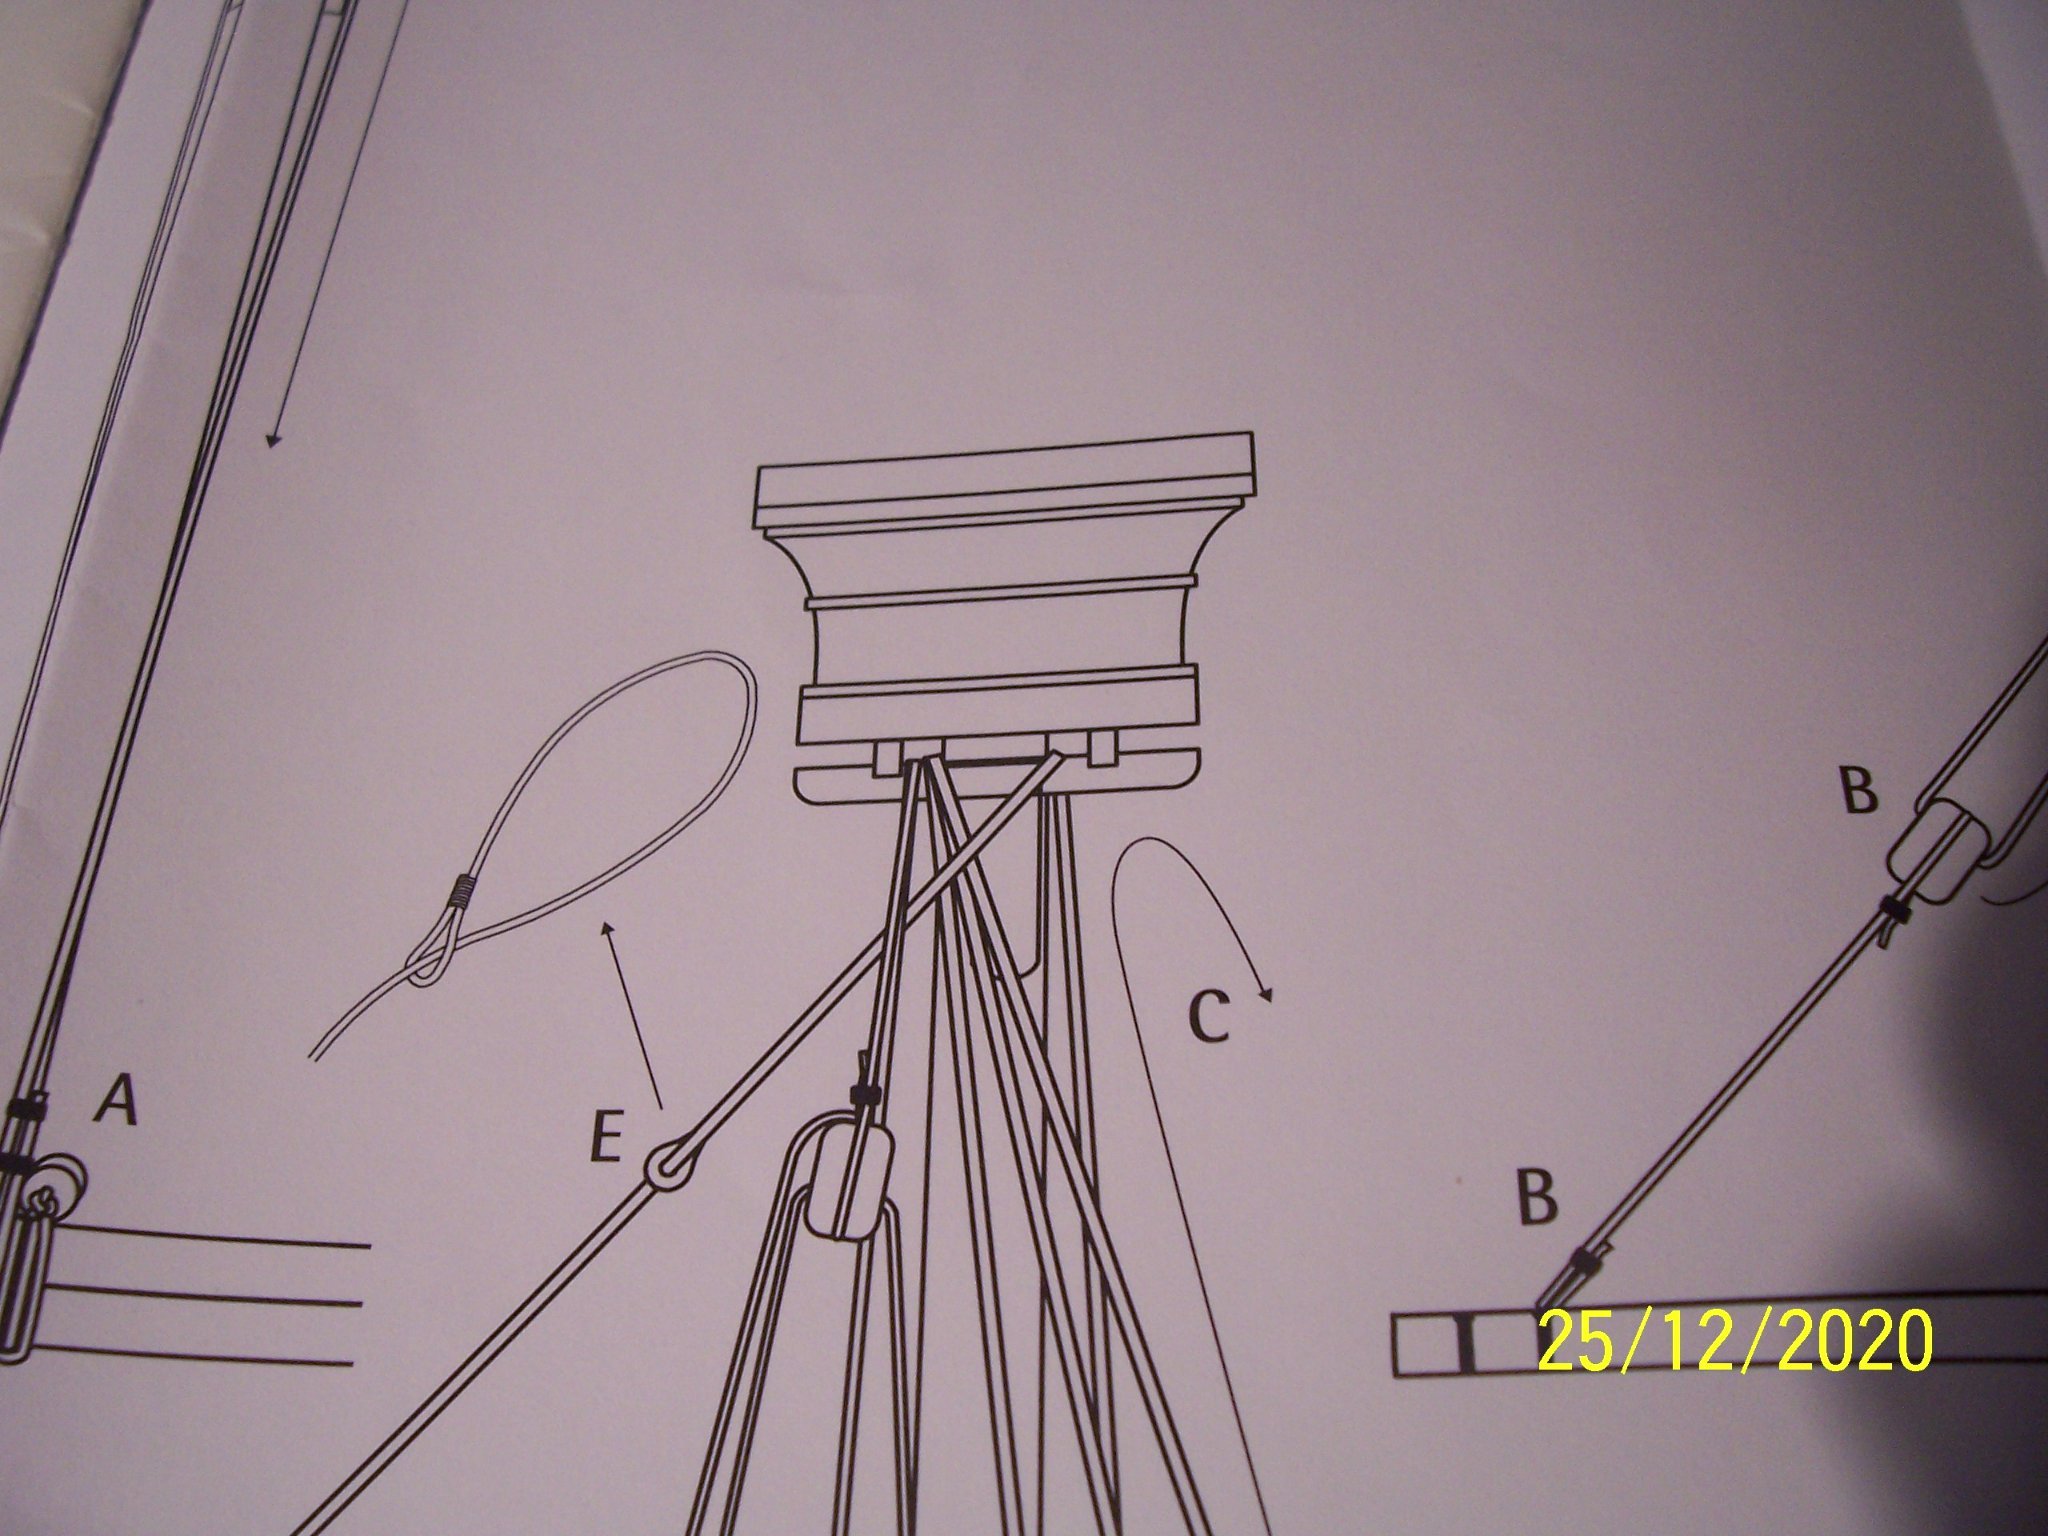
Another solution could be to build a new one, like this draw of Xavier Pastor, in his book "The Ships of Christopher Columbus":
An Italian modeller built it so and it seems very nice:
See you later; next subject will be the yard braces.
Rodolfo
-
Hi Clark,
I solved the problem of the sail using a little, cut piece of the material of AMATI:
.thumb.JPG.4d7ad55fd75d2f04406c5c81ff49042a.JPG)
.thumb.JPG.92650e505c2d76562c84bd756746c3ba.JPG)
.thumb.JPG.b8b32c5cd93e1ff8827dde574de106a5.JPG)
At the end it seems to me quite acceptable...
Rodolfo
-
-
Dear friends,
this is the final result about the whole complex of anchor plus anchor buoy plus the rope for the cathead:
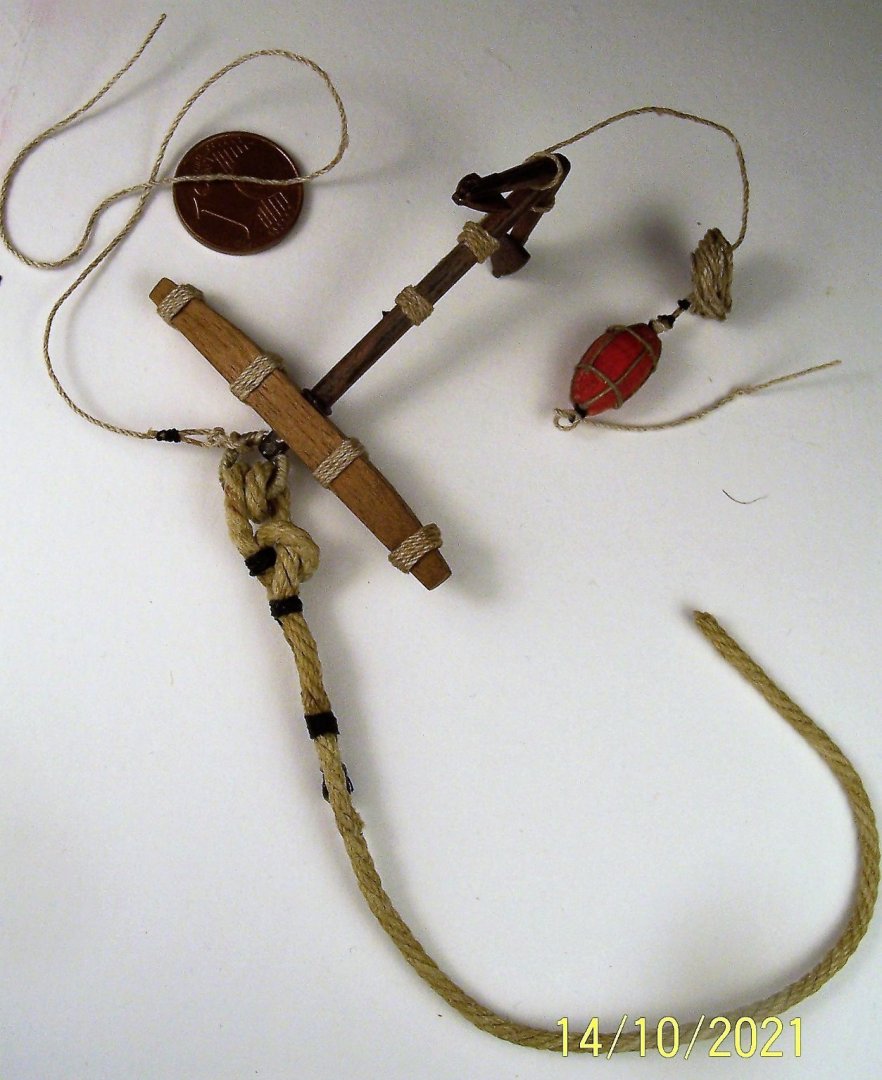
Now, it has to be put on the ship...see you later!
Rodolfo
- GrandpaPhil, Clark Griswold, Baker and 1 other
-
4
-
These are some kinds of anchor buoy, I suppose not all suitable for the Cocca:
.jpg.2a79e02fbe8dcfc00e71018251347d74.jpg)
Since it's an object that needs to be visible to mark the position of the anchor, I thought I'd color it matte red. Then proceed to build the rings, which can be made of metal (to be blackened) or rope, as I preferred to do.
.thumb.JPG.3e9c1a615dee0211becdbdb783a815dd.JPG)
.thumb.JPG.35610f36fea25fcca6c6e3333b69deb1.JPG)
.thumb.JPG.788a0a6b4ecd88bd0c9668f8a1fc73e6.JPG)
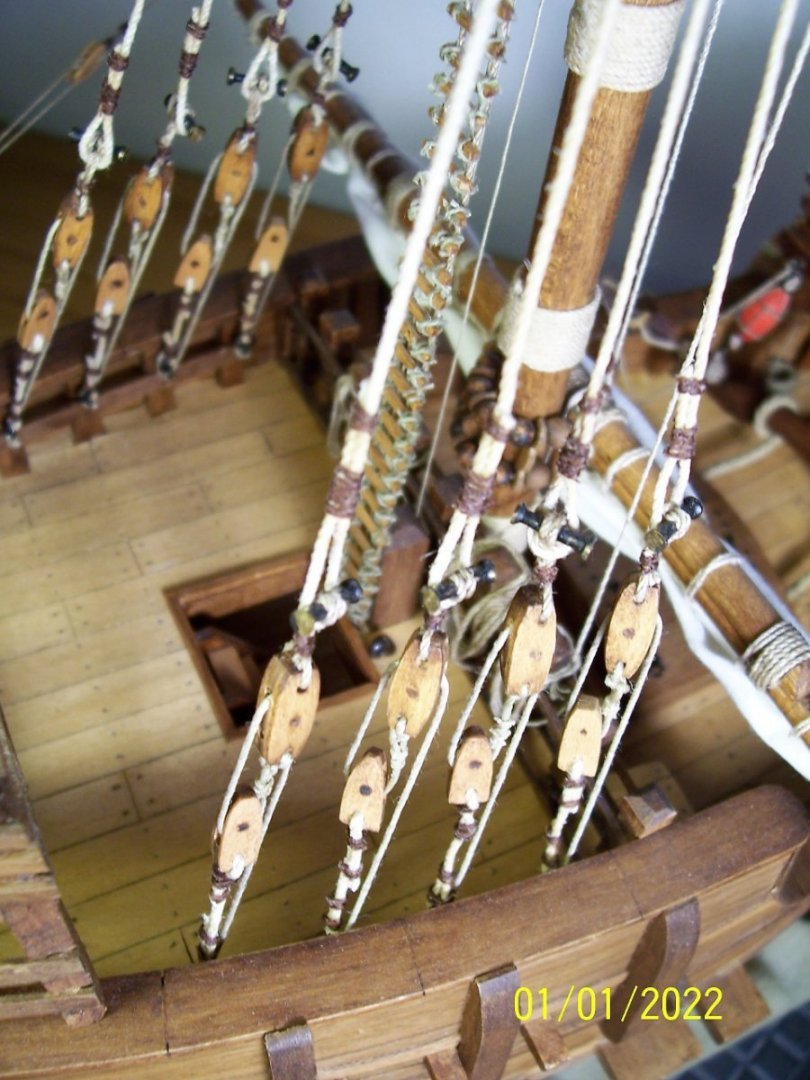
After that you build around it that envelope of interlaced strings; it's a job that requires a lot of patience:
.thumb.JPG.bcf9bc3adb53171bd2fb35c6175eb9f2.JPG)
.thumb.JPG.71403f3cdfb9028b66b04c54ab87d7f7.JPG)
.jpg.8d32e3e4a955570ba30ab56a3cdc2871.jpg)
And this is the result...now it has to be connected to the anchor.
See you soon!
Rodolfo
- GrandpaPhil, KentM, Baker and 1 other
-
4
.JPG.4e2f89592066440fc1df91623fbfa78f.JPG)
red.JPG.97eecd340314bdcf6d842c4796d97681.JPG)
red.JPG.2e5778b28d1bdf755b3cce54f98fb3c2.JPG)


.JPG.4a6ee571faafeaea286b3e244ac536ee.JPG)

.JPG.6d860aca6de0b93631fe476f8b90c48d.JPG)
.JPG.e86644e8123d57640abd8d728b5c826a.JPG)
.JPG.0ff560aa8449164b9fb766ab28bc0ca7.JPG)

.JPG.9fe880c9ac5097236a83c97d17cde40a.JPG)
.JPG.3b216b3ce5a1932a2f3cfca293896ee8.JPG)
.JPG.e3d54c057ef9d6653bf4e086084c409a.JPG)
.JPG.72b33406053e47c19e2e15e9f8edb427.JPG)
.JPG.08f7ded1ebfc1b7c0d6e2891ad09e51c.JPG)
.JPG.65c626a75793c4e96e9e1b92577b23be.JPG)
.JPG.11f055435fb58fcc7c57baaca35a14e4.JPG)
.JPG.364379058bb5f100e9b5c2447811f788.JPG)
.JPG.c674bafd2d7776e3ad80efe82522dad3.JPG)
.JPG.cd2b6cecd3ec4d777a2aae4373c76f2c.JPG)
.JPG.409bdb371aee9a53983c27ed5e483000.JPG)

.JPG.c64c34938c177641fada6d359a17fdcf.JPG)
.JPG.35da8864797be5dab602722decef609a.JPG)
.JPG.ff8928db41aed7d7083d38cb3b73c497.JPG)
.JPG.ee77f22b3a7a2c9ea32da7729c320764.JPG)
.JPG.3a7d44507ccbdac07ca58ae9e98dccef.JPG)
FS (Italian State Railways) DDm - Italian wagon for transporting cars following passenger trains - era III - by Rodolfo Bigoni - TRHEINGOLD - Scale 1/87 - PLASTIC and METAL.
in Non-ship/categorised builds
Posted
The railway carriage:
The rail car after modifications3.thumb.JPG.03859692603b1bc7e1fc1348324cd85b.JPG)
See you later!
Rodolfo