

Harvey Golden
-
Posts
430 -
Joined
-
Last visited
Content Type
Profiles
Forums
Gallery
Events
Posts posted by Harvey Golden
-
-
Recent Progress: The nearly full-length pintails have been installed. These are glue-laminated to proper bend, then attached-- a bit of a clamping nightmare. The winch been held up due to not having any suitable gears laying about; a little 'mixed-bag' of clock parts from eBay solved this issue, though some smaller ones are still en-route (The gear drives a messenger chain to the pumps and a another pair of winch heads further aft). The king post was a lovely fit through the deck, and while admiring my incredible workmanship, I dropped it all the way through, never to be seen again, hopefully. A drop of glue followed it up so it wouldn't rattle and remind me of my stupidity. The new one is pretty nice, though. More of the winch mechanism will follow, as well as cap-rail re-enforcements, etc.
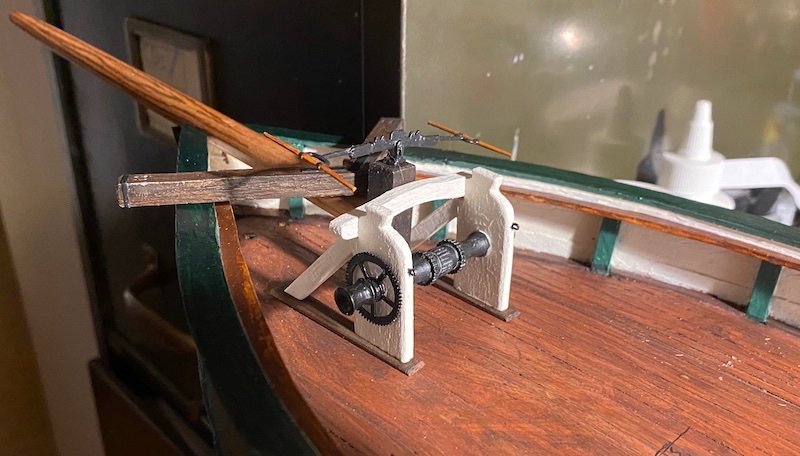
I've also go the mast made (tapered and painted)-- from a 1/2" poplar dowel. No lathe here, nor any better ideas than hand-turning it on a bench sander. The chain plate channels have also been added (a pair on each side of the cap-rails). Several more deck houses and apertures to make, and other odds and ends and then the rigging will begin in earnest.
- Srodbro, Keith Black, mtaylor and 3 others
-
 6
6
-
Looks like an interesting project! If you can find Haddon & Hornell's "Canoes of Oceania" or Dodd's "Polynesian Seafaring," you'll see the incredible variety of Pacific sailing canoes in great detail. The variations of the word Vaka (waka, va'a, wa'a, waga, etc. ) are essentially all the same word, just with regional accents and/or people from different backgrounds and 'ears' putting it into writing, thus creating these orthographical spellings. Specific to Hawaiian canoes-- a copy of Tommy Holmes' incredible book (I forget the name) would undoubtedly smooth the way and further inspire. Looking forward!
H-
-
1 hour ago, thibaultron said:
It would not matter, the treasure is now legaly considered stolen property, and would be consficated as soon as he starts showing or selling it. D..m greedy governments.
Counterpoint: Greedy grave robber (and investors).
- mtaylor and thibaultron
-
2
-
Some thoughts on splotchy irregularities, etc... You are looking for solutions to fix this, but the solution might be an aesthetic decision. If you are going for the brand-new Canoa de Rancho factory show room look, splotchiness may well be a problem worth fixing. But these were work boats built and maintained by less than affluent fishermen for functionality above all. A bit of wear, repair, and splotch here and there can effectively convey the craft's humble existence-- if done well, it will breathe life into the model.
- ccoyle, JacquesCousteau and mtaylor
-
2
-
 1
1
-
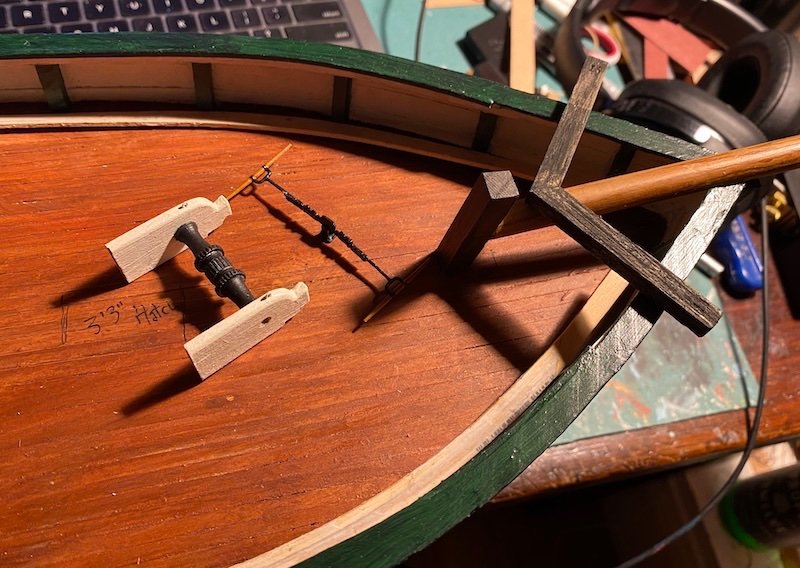
Lots of progress-- comparatively, anyhow. Some Bluejacket fittings showed up, so more work on the windlass and catheads. The hand cranks are situated on the top of the bitt, so I had to make a new base with pivot (The Bluejacket winch is for a side mount). I also had to lengthen the handles a bit with some micro-woodworking involving mortise and tenons on two tiny scraps of wood tenoned into the ends of the center piece. (The bent laminated unpainted strips are the full-length pintails still waiting to be mounted up near the cap rail.) Many, many more details to come for this area of the ship.
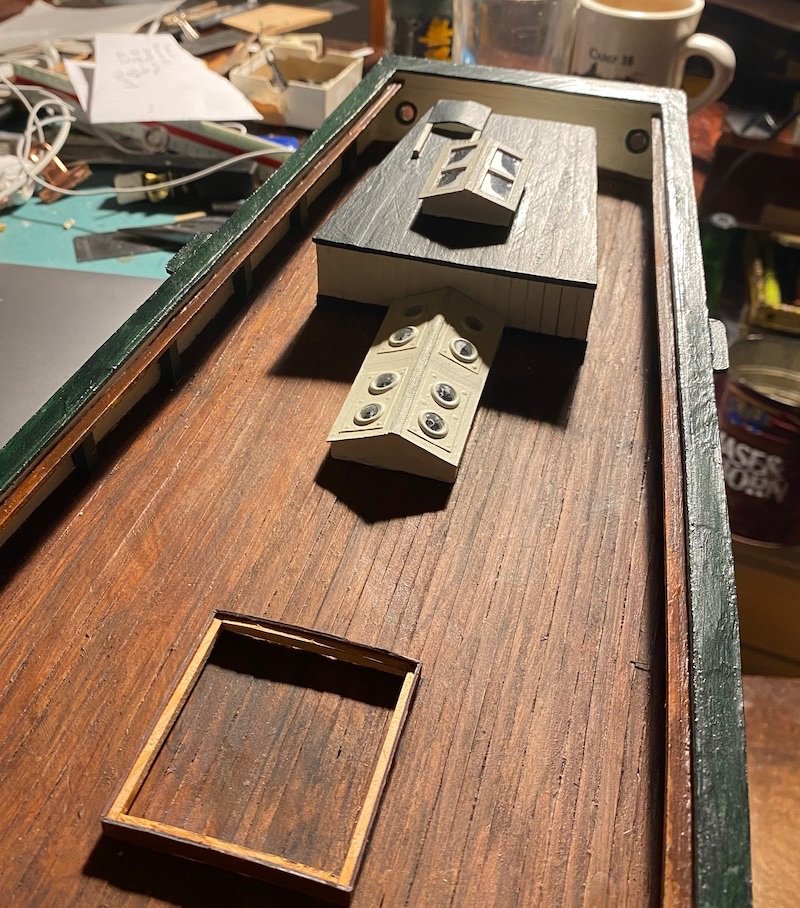
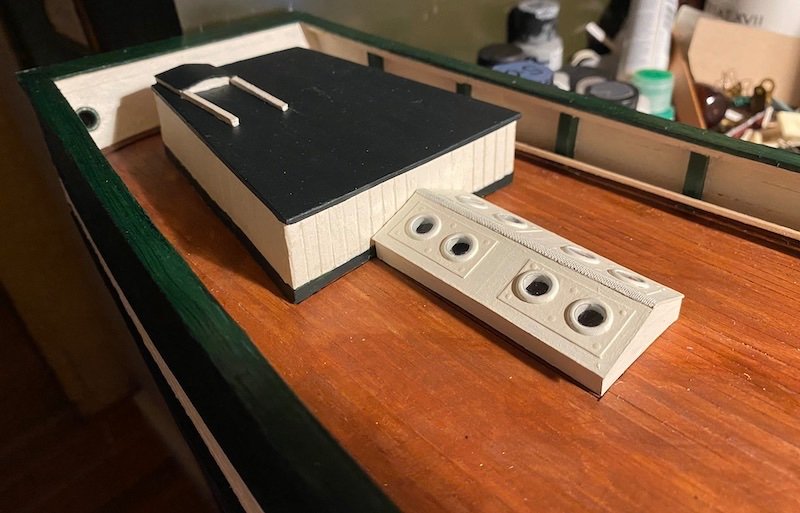
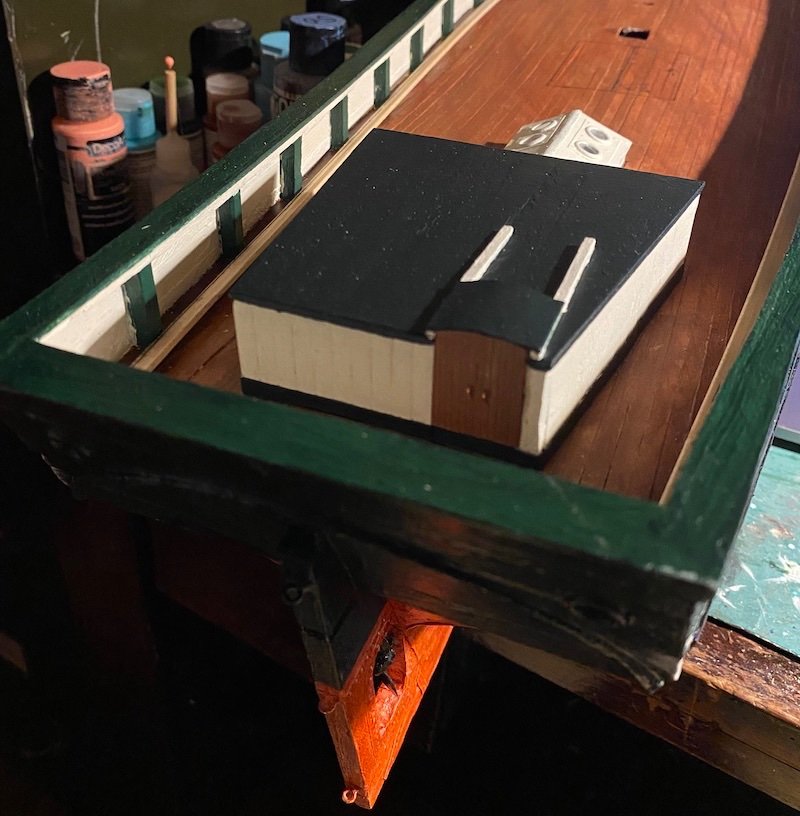
I've also built the deck house and engine room skylights. The house is planked (cedar veneer) glued on heavy paper (The house's skylight is in progress). The skylight is paper with perfectly sized brass grommets I had leftover from another project. The glass is from packaging material, and it was my lucky day to find out that a standard hole-punch made the perfect size panes for the grommets. Need a little puttying at the connections of the deck and house and skylight. . .
Not sure if the companionway had drop-boards or doors . . . the model will have doors. (Edited: The Plans show doors! ...My mistake (and correct solution).
- wefalck, modelsailing, mtaylor and 4 others
-
7
-
Dear Nate, From the image you posted, I think you are asking about mast bands (not hoops)? You seem to be getting answers for mast hoops. I don't know the answer to your question, but I suspect what you show would have been metal. Best, H-
- mtaylor, wefalck, 3DShipWright and 1 other
-
4
-
Thank you Wefalck. These shelves do seem to be used as pin-rails here & there; they run from the transom to the catheads. I'll have to look up "monkey rails." Your photos continue to be of great assistance!
P.S. Upon double-checking, the HAMMS drawings do label this piece as "Pin Rail."
-
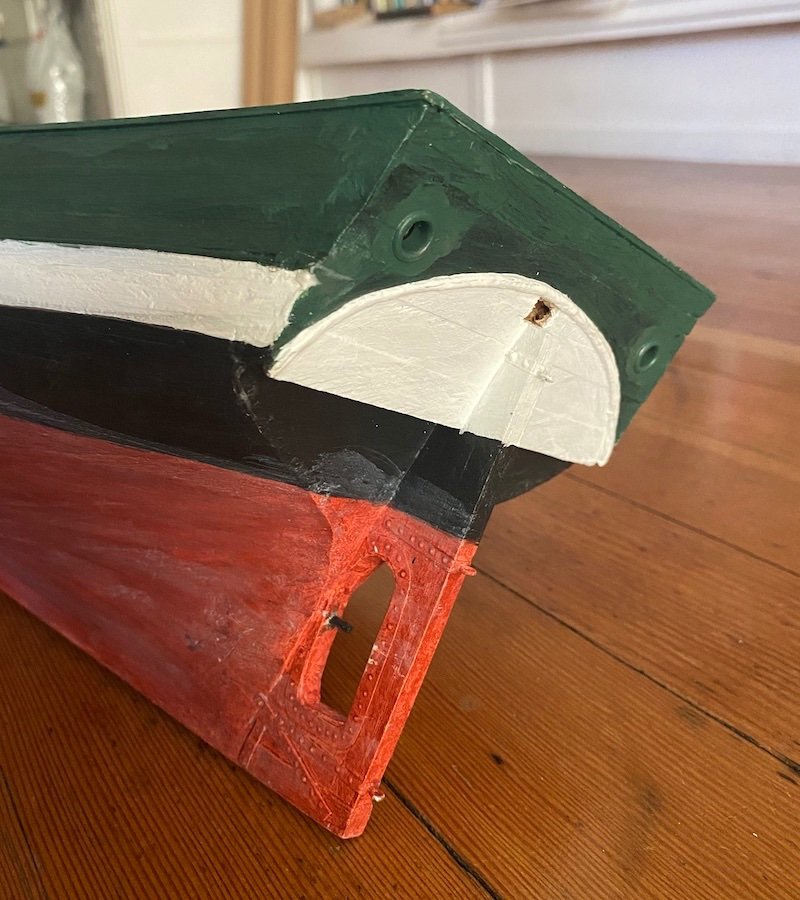
Some recent progress: The king post and bowsprit are dry-fitted. I'm starting to make cabin sides and other deck furniture (the windlass supports are shown). There are shelves inboard of the bulwarks that have been perplexing me for a while, but I've finally settled on laminating them from fine strips instead of scarfing in the curves and fairing-- a matter of getting a plank to bend against its width. These aren't fitted or shown, but should appear with the next update. Also visible in the photo is some iron strapping set around the stem as ice protection. These aren't on the Gjøa today, but are visible in historic images taken while she was in San Francisco. They are made from paper with dots of glue for drift heads. Note on the bowsprit: I've doubled the 'grain' with a felt-tip marker to be more in scale (compare left-to-right).
-
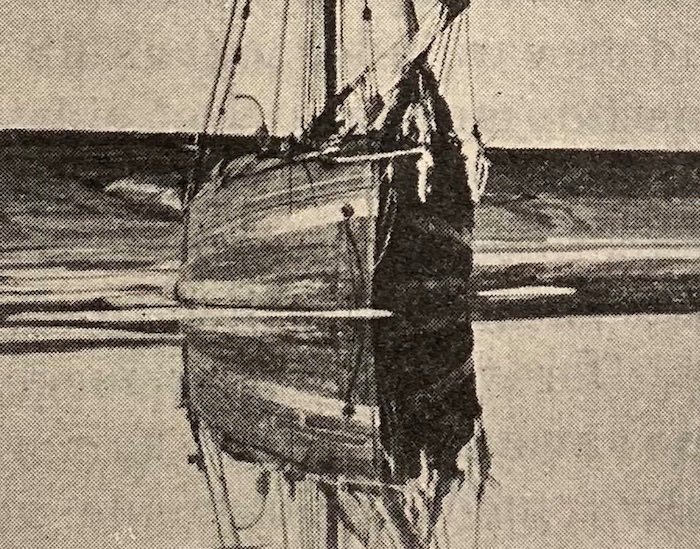
Not much progress, though a bit of a breakthrough with regards to the Gjøa's boats. It seems the kits for this ship have a skiff and two prams with them, and the drawing of the Gjøa in Amundsen's own published popular account of the voyage shows the skiff and two prams as well (below).
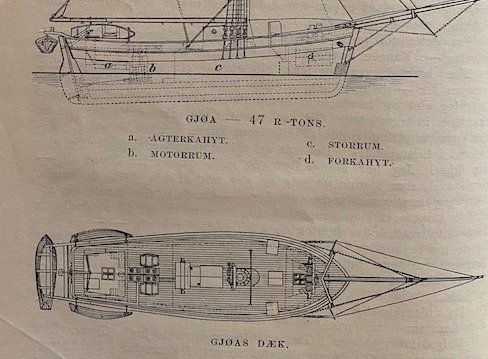
But in the recently published "Roald Amundsen's Diaries" (Fram Museum, 2017), a historic photo shows what I naively thought was a whaleboat with "Gjøa" painted on its side. A closer look at the rudder made me think it may be a Norwegian local type, and it sure resembles an Oselvar type, not unique at all to Hardanger, where Gjøa was built (detail below from pg. 23).
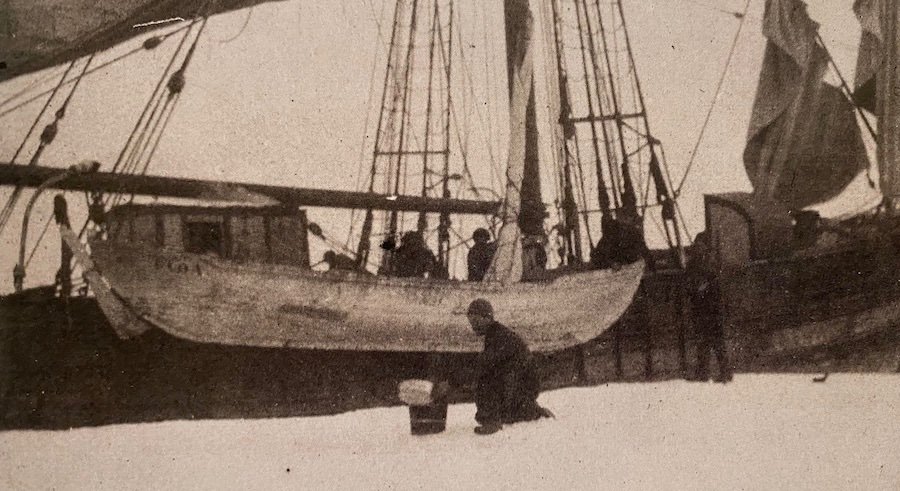
The Oselvar seems to be painted (who knows what color!), and has what look like added wash-strakes forward. Anyhow, it seems the Gjøa's true compliment of boats on the famous voyage was: 1 pram, 1 oselvar, 1 skiff (which Amundsen refers to as a dory), and a canvas canoe that is mentioned and appears in some images.
So... from the drawing at https://www.oselvarverkstaden.no/historia/
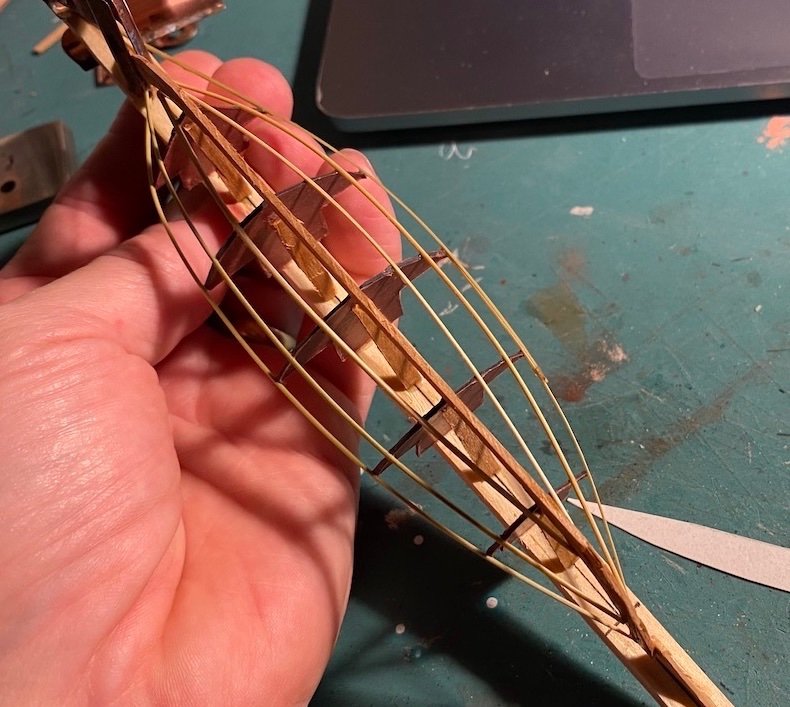
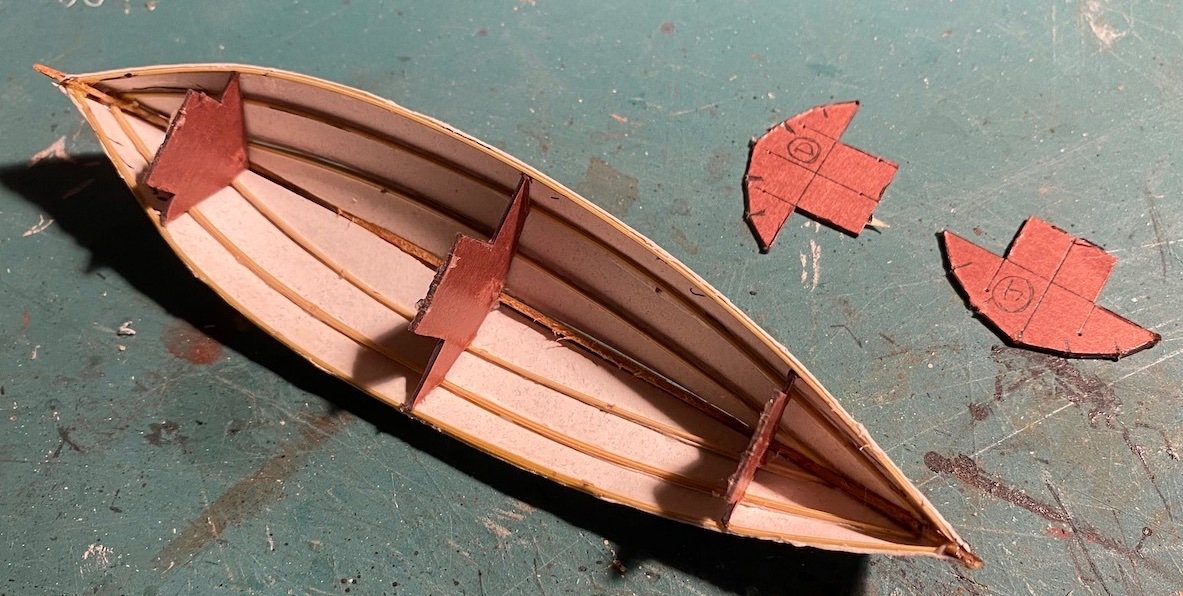
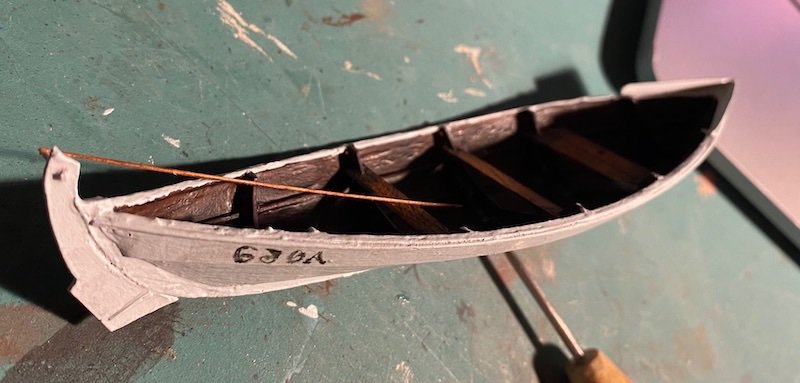
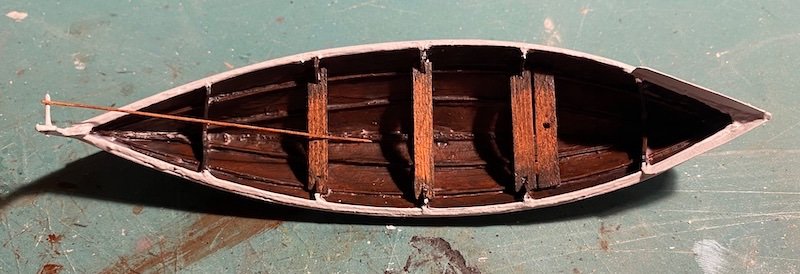
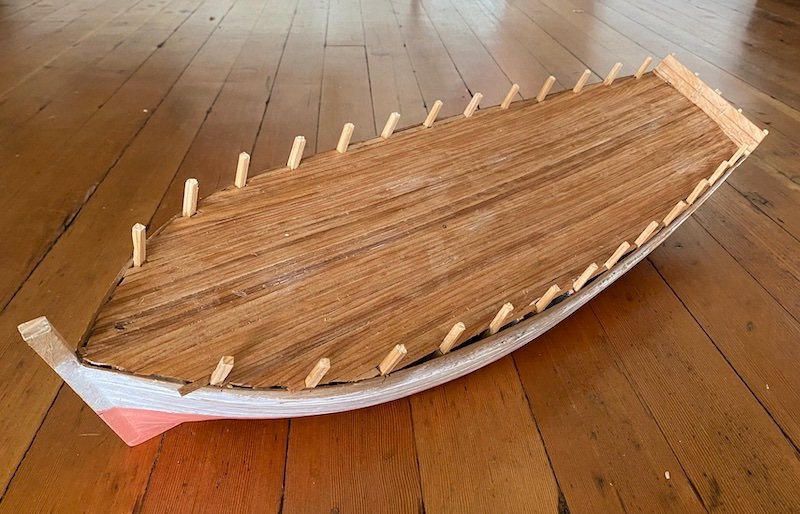
I tried to fill the ledges of the lower ribands to make the model appear more like the lapped-strakes of the original in the inside, but it clearly needs more. Perhaps I should have snipped-out the bamboo ribands to achieve this. . . live and learn, fill and patch!
- JacquesCousteau, Montaigne, Colin B and 4 others
-
7
-
On 8/24/2023 at 9:54 PM, JacquesCousteau said:
Also, if anyone has any suggestions on how to match this color/weathering, I'm all ears!

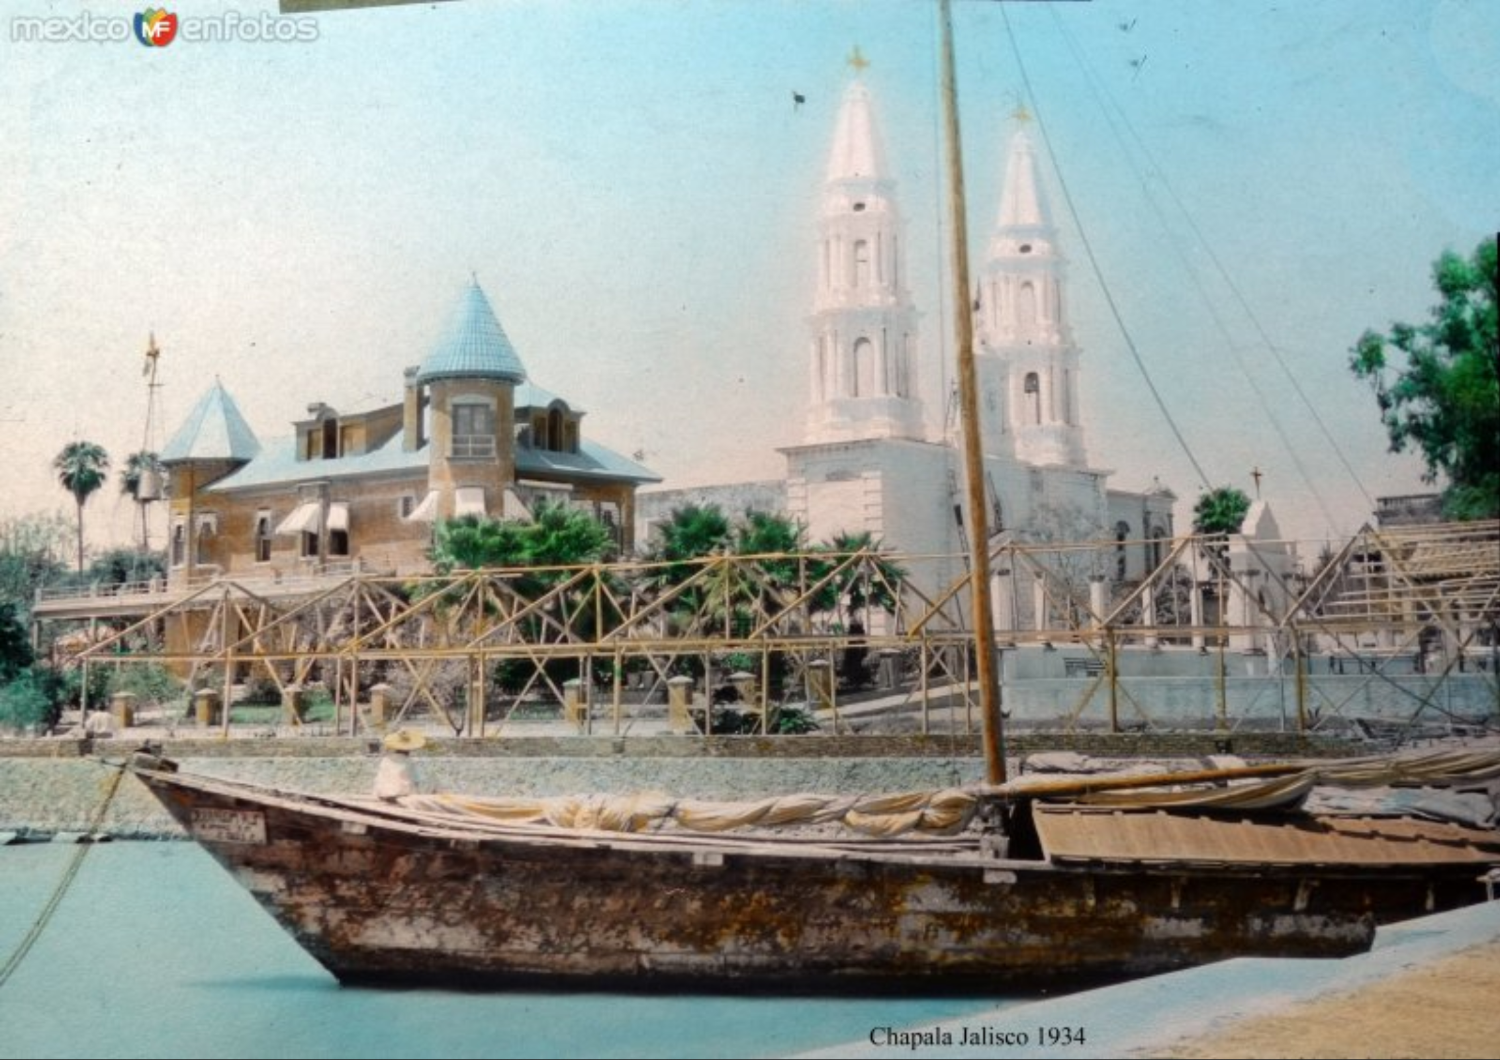
I was wondering about the colors-- seems all the images have been B & W. The image from 1934 is likely hand-colored, but it sure captures the mottled look, whatever colors they may be. Seems like a light base color, and sponging on a brown and/or blackish wash might do the trick. I'm very much enjoying this project! (I liked your last one too, and immediately regretted not going to Xochimilco when I was down there in April).
Best,
Harvey
- JacquesCousteau, mtaylor and Retired guy
-
2
-
1
-
On 8/20/2023 at 3:58 AM, Jules van Beek said:
For me it is remarkable to see that the line "presenting someone's work without mentioning the author is not the same as presenting someone's work and claiming it as your own" jumped out at you. The fact that Hoving accuses Witsen of being a thief and a deceiver, without providing any evidence, does not seem to stir up that same emotion for you.
Dear Jules,
I haven't read Hoving, Witsen, Fournier, or really any other text mentioned in this thread, but I am enjoying the presentation/discussion. As a victim of intellectual property theft/plagiarism, the line just struck me as perhaps a bit breezy, but I wholly take into account your mention of historical context, and thank you for it. As for disagreements between scholars, whether it be between Hoving and Witsen, or between you and Hoving, it is entirely up to those involved to handle it graciously, respectfully, and ideally with lots of evidence to support opinions, and of course without personal attacks or accusations.
Best,
Harvey
-
7 hours ago, Jules van Beek said:
Presenting someone's work without mentioning the author is not the same as presenting someone's work and claiming it as your own.
This line jumped out at me; I'm not a lawyer, but this may be incorrect ethically (or even legally dependent on nationality). Presenting someone else's work without attribution is (in effect) claiming it as your own, I believe. Apologies if this seems a minor point.
Harvey
- JacquesCousteau and mtaylor
-
2
-
The MotorBoating/Ideal Series is a great collection-- I've built a number of models out of the 6 I have when I was prototyping a full-size cabin cruiser design. One issue I've noted with them is that sometimes the same designs will persist through two or more volumes, so there is redundancy. That is a superb haul, by the way!
- mtaylor and thibaultron
-
2
-
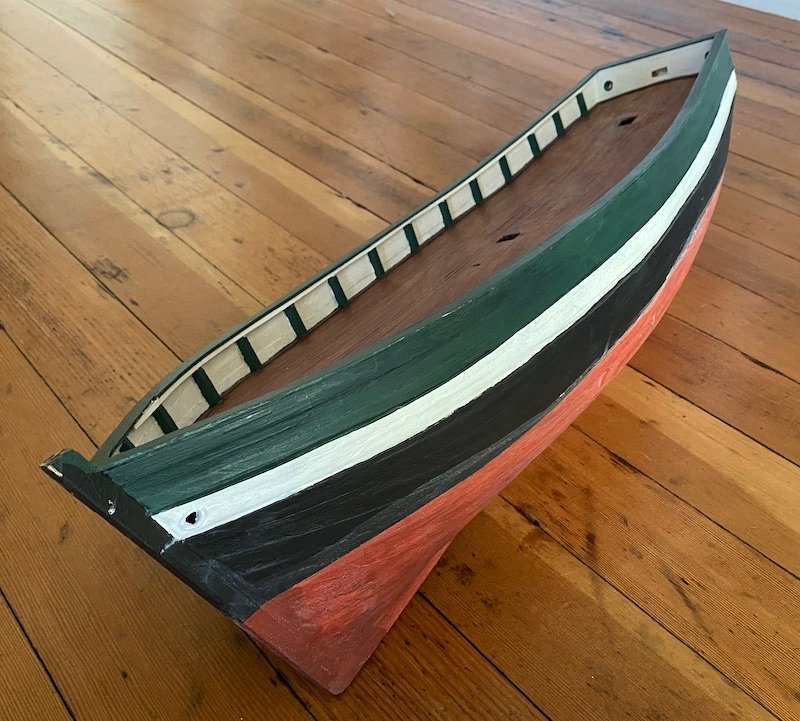
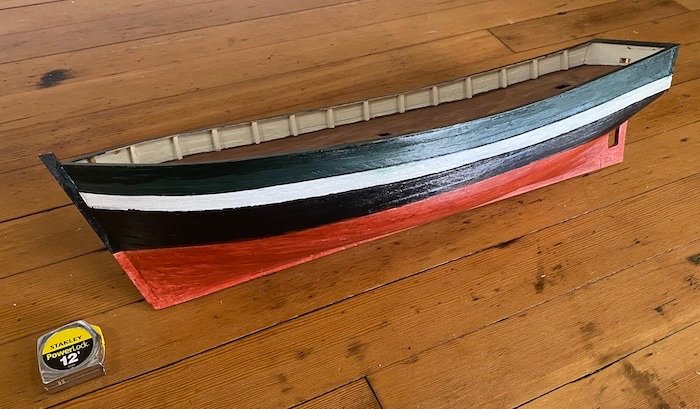
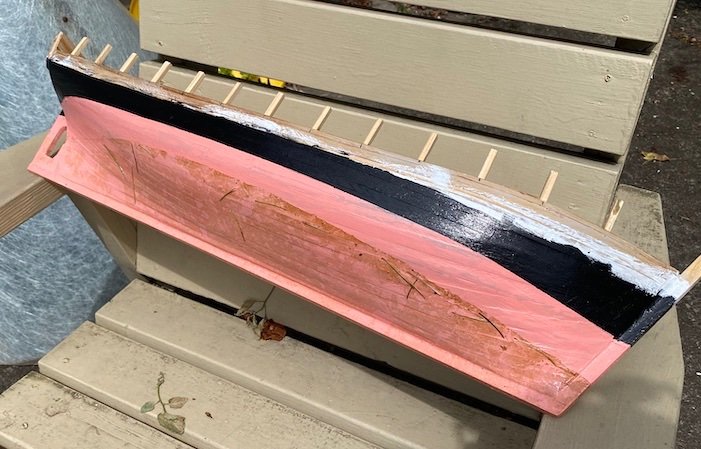
Slow going during the summer: Got the hawse outlets in (bow and stern), and more work done on the bulwarks. Further fine-tuning of the color scheme, too, which is proving a challenge as it seems to have been adjusted many times over the years in San Francisco, and is currently displayed in a scheme that doesn't match historic images taken during the Passage (There is a bit of guess-work regarding the colors.) I've started marking out the structures' footprints; will also add the shelf around the bulwark and transom, and cut the several square scuppers (as opposed to the longer thinner ones she now has). Things ought to pick up in the fall!
- Montaigne, GrandpaPhil, Colin B and 4 others
-
7
-
Charles M. Scammon's "The Marine Mammals of the North-western Coast of North America" might be of some help. It shows blubber hooks, whaling and flensing equipment, and even diagrams the harnessing of whales to be flensed. It is free at https://www.google.com/books/edition/The_Marine_Mammals_of_the_North_western/enc3AQAAMAAJ?hl=en&gbpv=1&dq=Scammon&printsec=frontcover
The info is less about how the rigging is attached to the ship than it is to the whale.
PP. 186-276 in particular.
(Dover made a fine reprint that may be quite affordable if a hardcopy is desired).
--Harvey
-
Covering the hull with paper will obscure the wood grain. The edges of the paper, if lined properly and cut to plate size can appear very much like a steel skin, and the paper pieces can be butted or lapped slightly as-per your preference.
-Harvey
- Roger Pellett, Bob Cleek, mtaylor and 2 others
-
5
-
I just popped into the Hanthorn Cannery Museum (Astoria Oregon's other Maritime Museum), and found this title in their gift shop. The gift shop is unstaffed with an honor system of payment, but for once someone was actually working there that day, so I had to pay actual money for it. The book is extensively illustrated, and not with the usual images one sees of these ships-- Marsh had access to the Oregonian's maritime columnist's personal images from his work during the war years, and the photos are outstanding and reproduced in the highest quality. Despite the title, the book also covers Victory Ships, Casablanca Class flat-tops, and T-2 Tankers, also built by Kaiser yards in the area; a large section even includes other local companies supporting the effort such as Gunderson (Landing craft, etc.), Albina Engine and Machine Works (PCs, etc.), Commercial Iron Works (outfitting C-2s, etc.), Willamette Iron & Steel Co. (steam locomotives for Russia and misc. maritime work/outfitting), and Astoria Marine Construction Co. (YMSs [minesweepers]). Hardbound at 256 pages; $50.00USD.
Having just scratch built a variety of ships from this era with Portland connections (C-1, C-2, C-3, T-2, EC-2, VC-2), this book is a delight to have, though I might have to build a YMS and PC now . . . It may not be the handiest resource for the modeler, but there are gems in the photographs, and the history is rich and compelling-- particularly for any interested in Pacific Northwest Maritime history.
Oh. . . the chap actually manning the gift shop that day? The Author himself. If you're local, pop by for the chance of a signed copy.


-
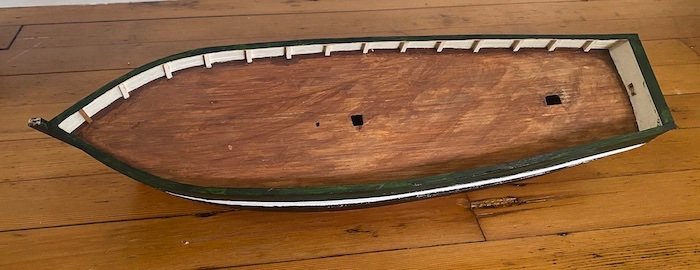
A bit more progress: Hull more or less done (aside from detailing) from keel to bulwark caps/rails (or whatever they are called). Will be slow going while the weather is good . . . bear with me. Have found that plans that seem extremely detailed tend to blur into the mists as one progresses with a model. That one line on that one drawing made perfect sense and was the highest credit to the surveyor-draftsman . . . until I had to make what it represented(!) A big thanks to Wefalck for sharing photos he took of the Gjöa, and a big thanks in general to MSW for facilitating such connections.
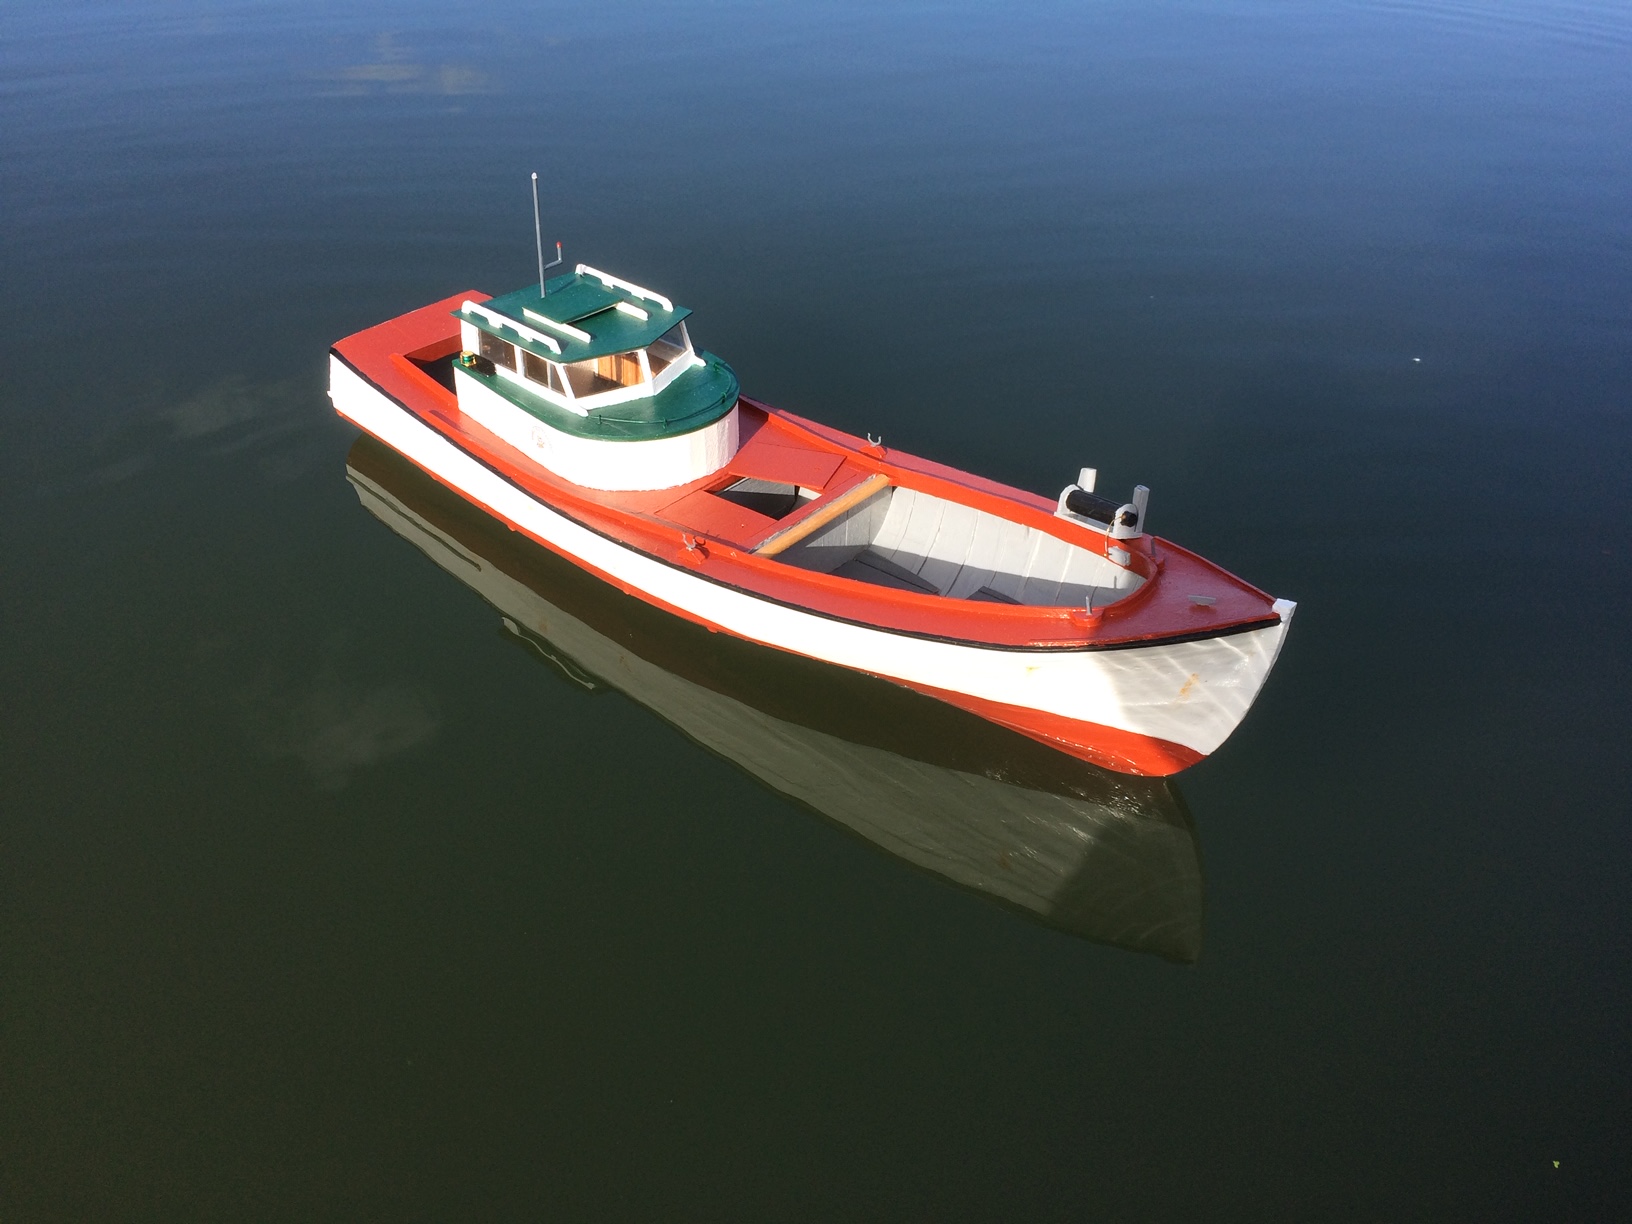
P.S. This thing is a lot bigger than I was expecting. I am completely mystified as to how that may have happened. And at 1.9kg/ almost 4# with ballast . . .
😉
- Montaigne, GrandpaPhil, Colin B and 4 others
-
7
-
15 hours ago, Louie da fly said:
It's like Captain Cook's axe ...
This is interesting, the national variations on the theme. As an American, I first heard of this idea as being "George Washington's axe." Funny how in the end that Theseus' ship was just replaced by a bunch of axes.
- Canute, mtaylor and thibaultron
-
1
-
 2
2
-
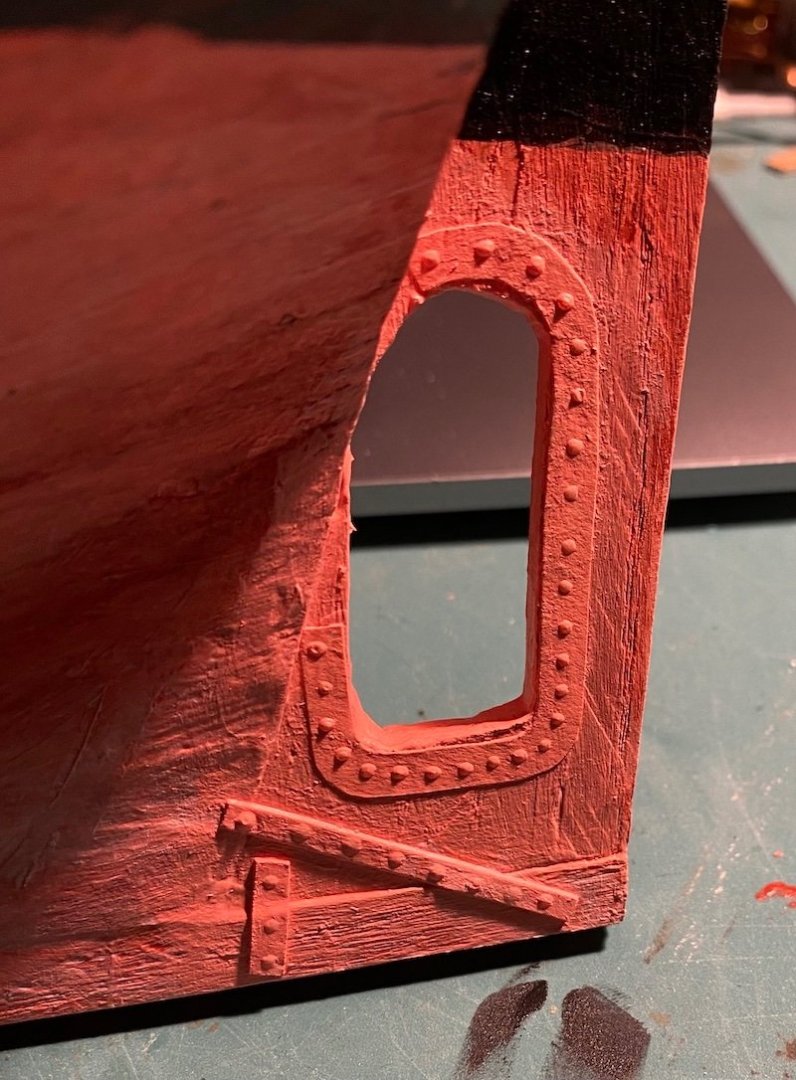
Slow progress lately-- mostly just cleaning up the decking. I did get the iron strapping on the stern post. I use heavy paper with dots of glue for rivet/drift heads. Up ahead: the bulwarks. Historic photos and modern photos of the Gjøa-- as she is today-- show entirely different methods of scuppering. I'll go with the early method, which seems to be intermittent square openings, whereas today she seems to have long narrow gaps between the bulwarks and the level of the deck. ...I wonder why it was changed?
- ccoyle, Mirabell61, Keith Black and 5 others
-
8
-
Perhaps not so dodgy, but definitely a 'solution.' -Acquired at a Portland estate sale.
- mtaylor, thibaultron, BLACK VIKING and 6 others
-
8
-
 1
1
-
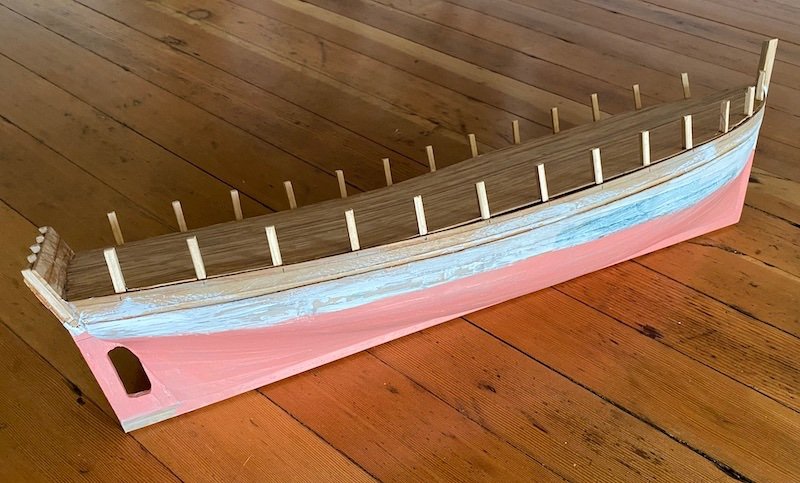
More ballast needed! About half-way up the dry pink should do it (Nice of the local waters to mark the hull so well). Am aiming for the waterline shown in the historic photo taken at King William Island; seems to riding ever-so-slightly bow-high in the image.
- GrandpaPhil, mtaylor, Keith Black and 1 other
-
4
-
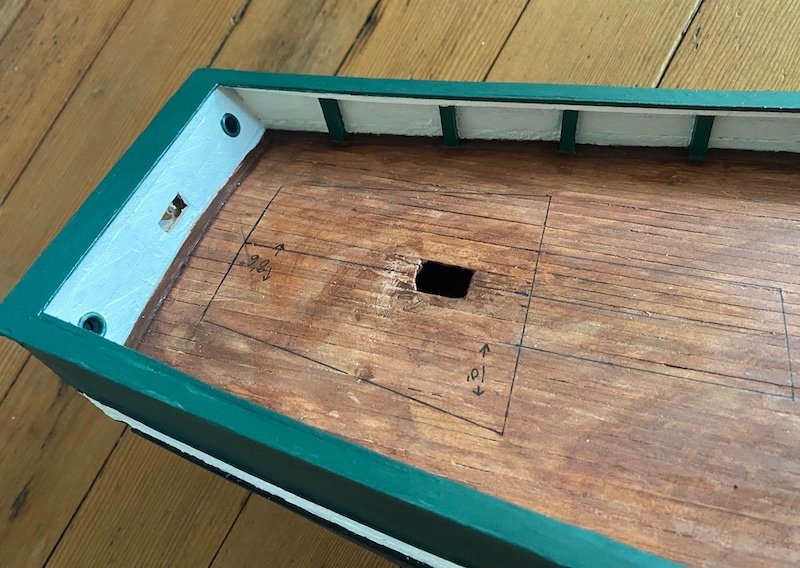
The stern timbers are in place and the screw aperture is cut. A lot of sanding, filling and priming. Getting ready to strike the waterline. The decking is almost complete-- I'll do a float test before completing the deck in case it needs more ballast. (I've put in a fair amount of ballast already, so any additional will be to fine-tune/balance the vessel-- I don't make these as functioning models, but I like to put them on the water for photos . . . and even to swim with them in the summer). Looking forward to building up the bulwarks, which will hopefully keep me from breaking some of the timber heads off several times a day.
- Keith Black, Montaigne and Paul Le Wol
-
3
-
Just speaking with regards to the inking style. . . the strakes are not continued inside the loops, and the heavier line weight on the shadow side (left) is not present inside the loops-- both suggest that these are not open loops. ... and yet they lack the shading/line weight of having a dead eye in place, never mind any holes for the deadeyes. Not knowing anything about these vessels, I'd think the draftsman simply didn't finish rendering the deadeyes.
- thibaultron and mtaylor
-
2

Gjøa 1872 by Harvey Golden - Roald Amundsen's Cutter built at Rosedahl, Norway
in - Build logs for subjects built 1851 - 1900
Posted
Thank you Keith-- I thought about doing this, but decided the bench sander would be easier to handle and set up. I do use my drill my dowel making though, and know what you mean about 'smoking a drill'(!)
Best, H-