DocBlake
-
Posts
1,811 -
Joined
-
Last visited
Content Type
Profiles
Forums
Gallery
Events
Everything posted by DocBlake
-
 Sorry you had to go through a re-do. I hate when that happens! Those parts are called billboards - where the "bill" of the anchor rests when the anchor is lashed to the side.
-
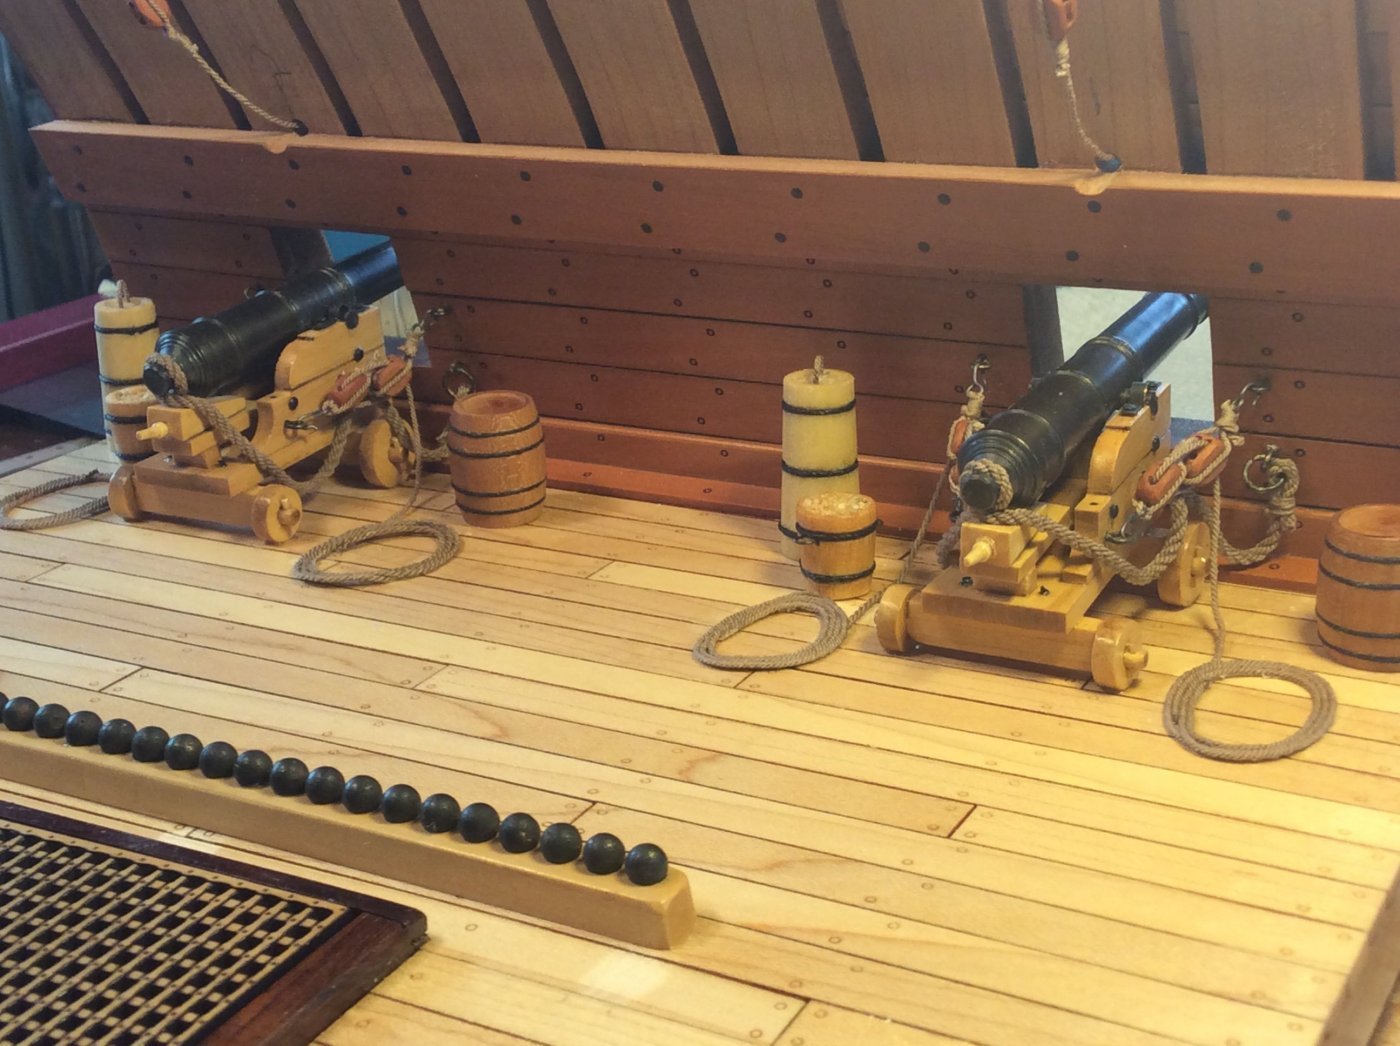
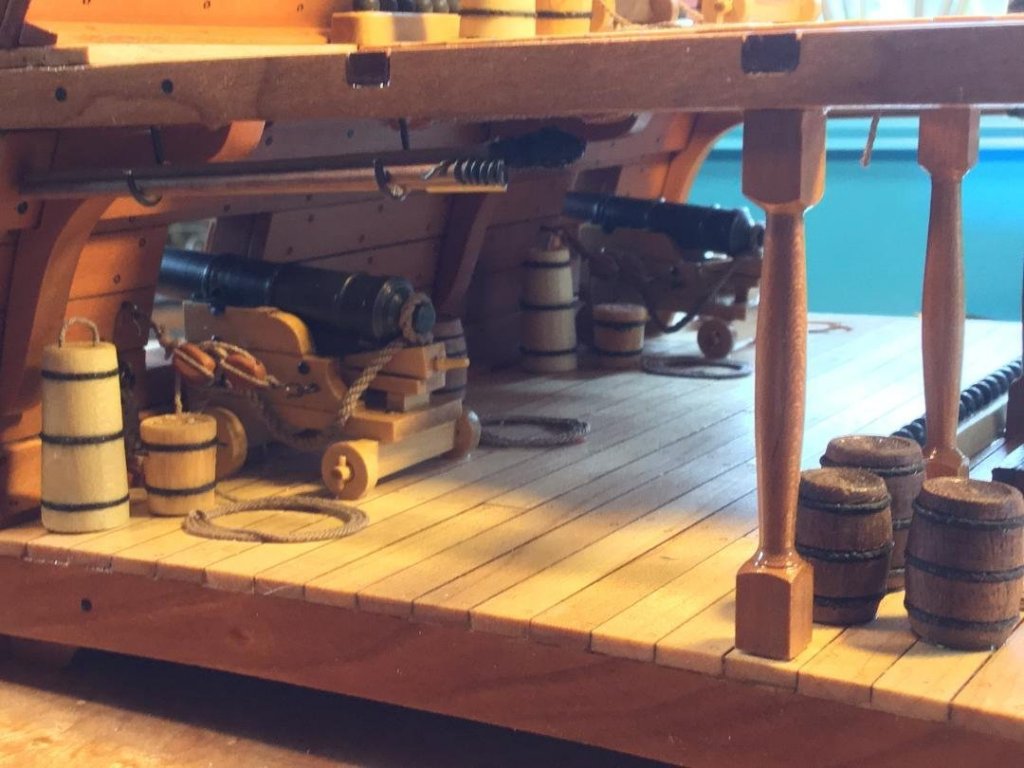
That's what I do also. Here are the two gun deck cannons rigged (from my 17th Century Battle Station).

- 164 replies
-
- 1
-

-
- first build
- model shipways
- (and 2 more)
-
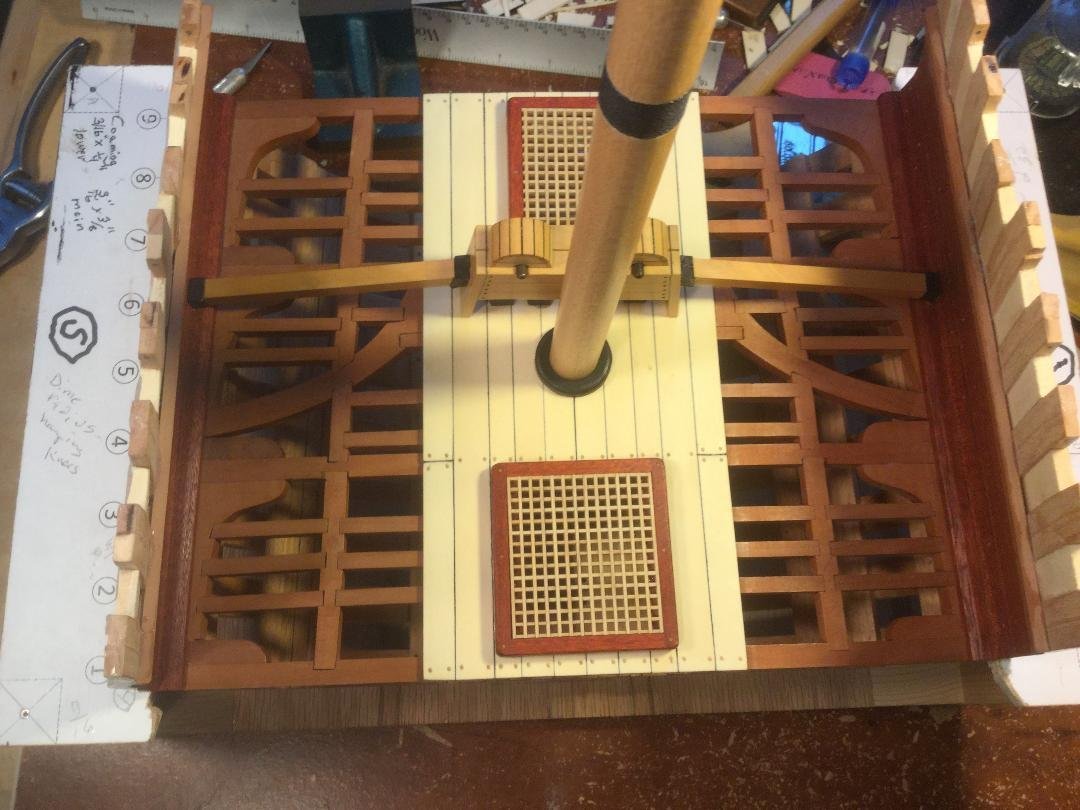
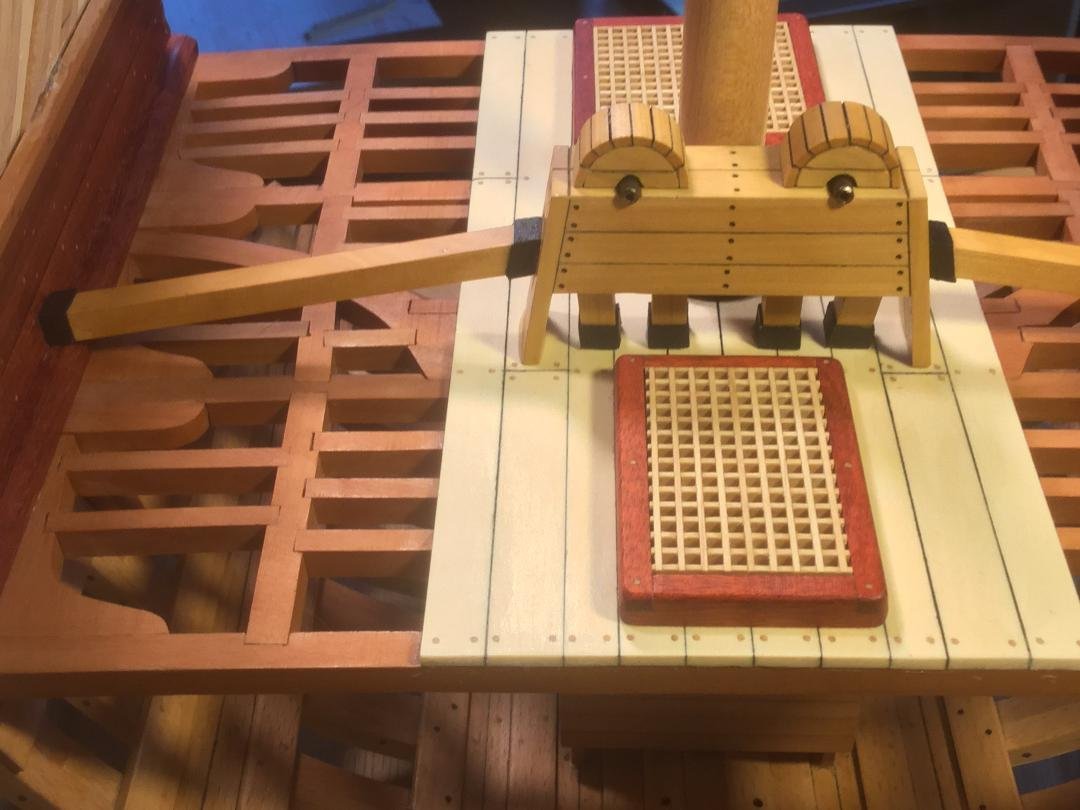
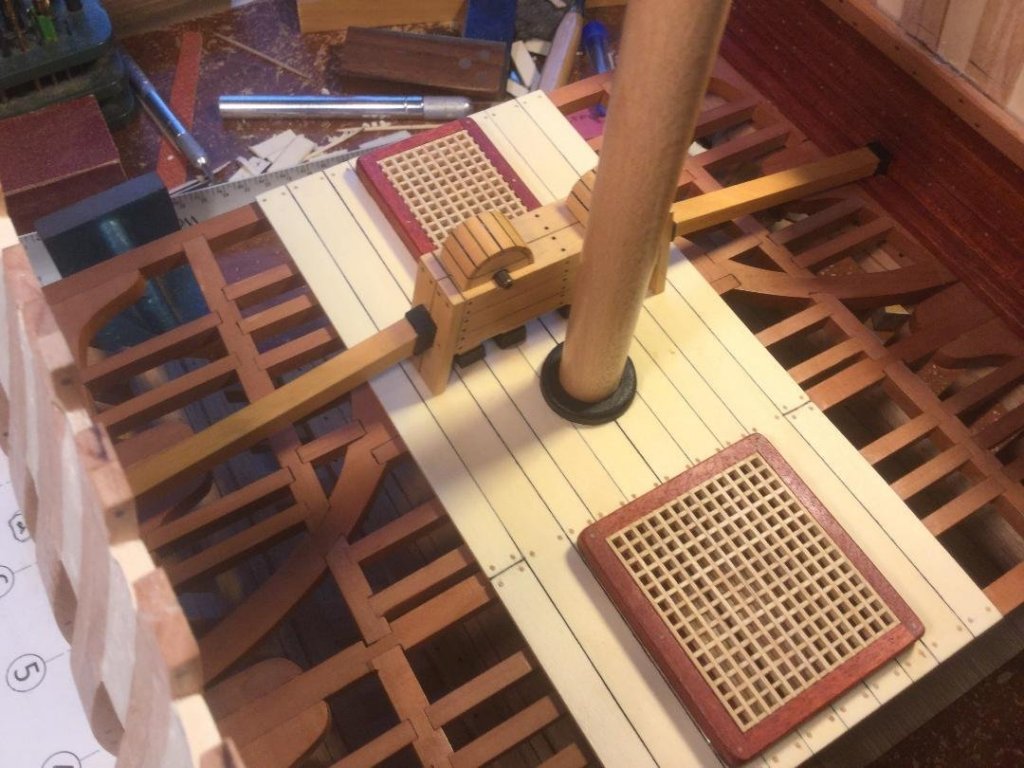
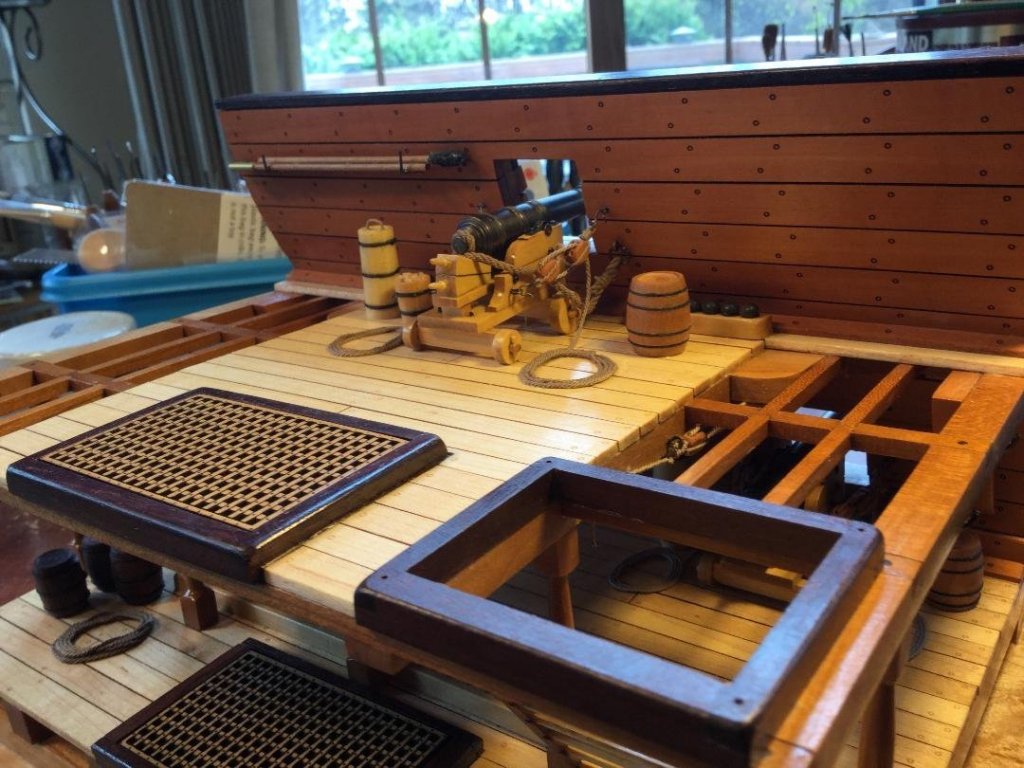
I glued the hatches and the dales in place. I also made two mast wedge rings out of ebony, and glued one in place. The waterways and inboard planking (spirketing) are also installed and treenailed. The stub mast isn't glued down. The crank handles will be fitted when the bitts are added a little later. There is one coat of poly on the model.


- 164 replies
-
- 21
-
-
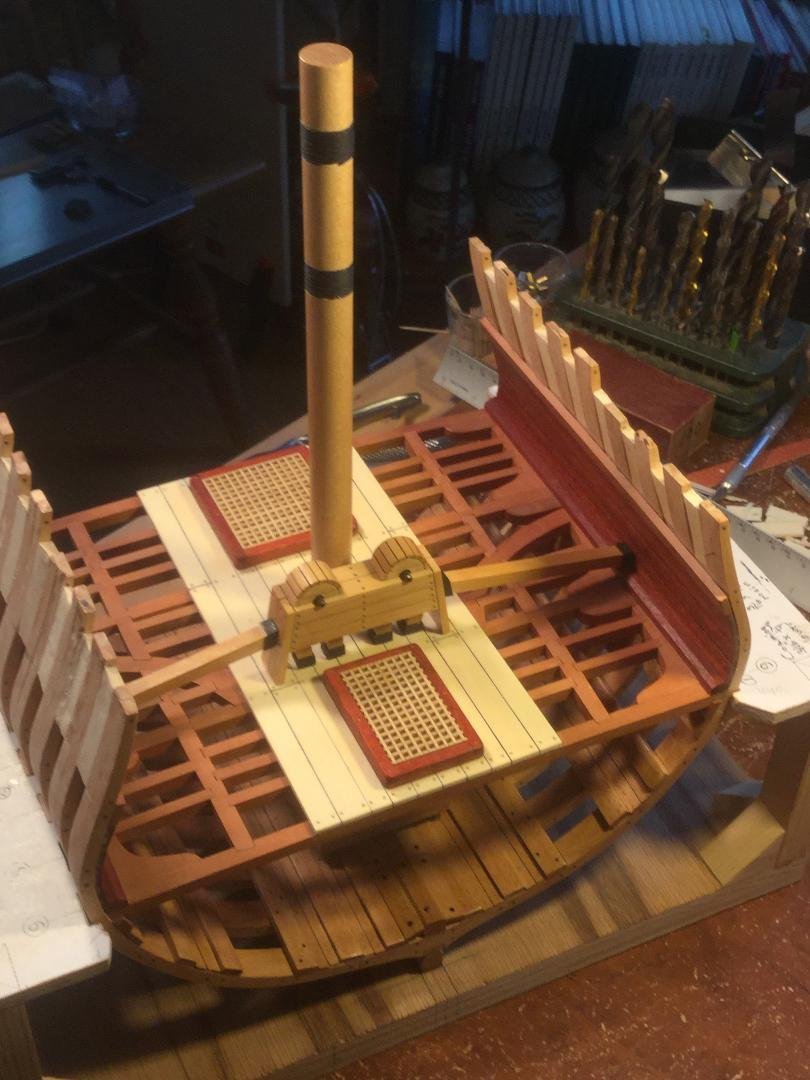
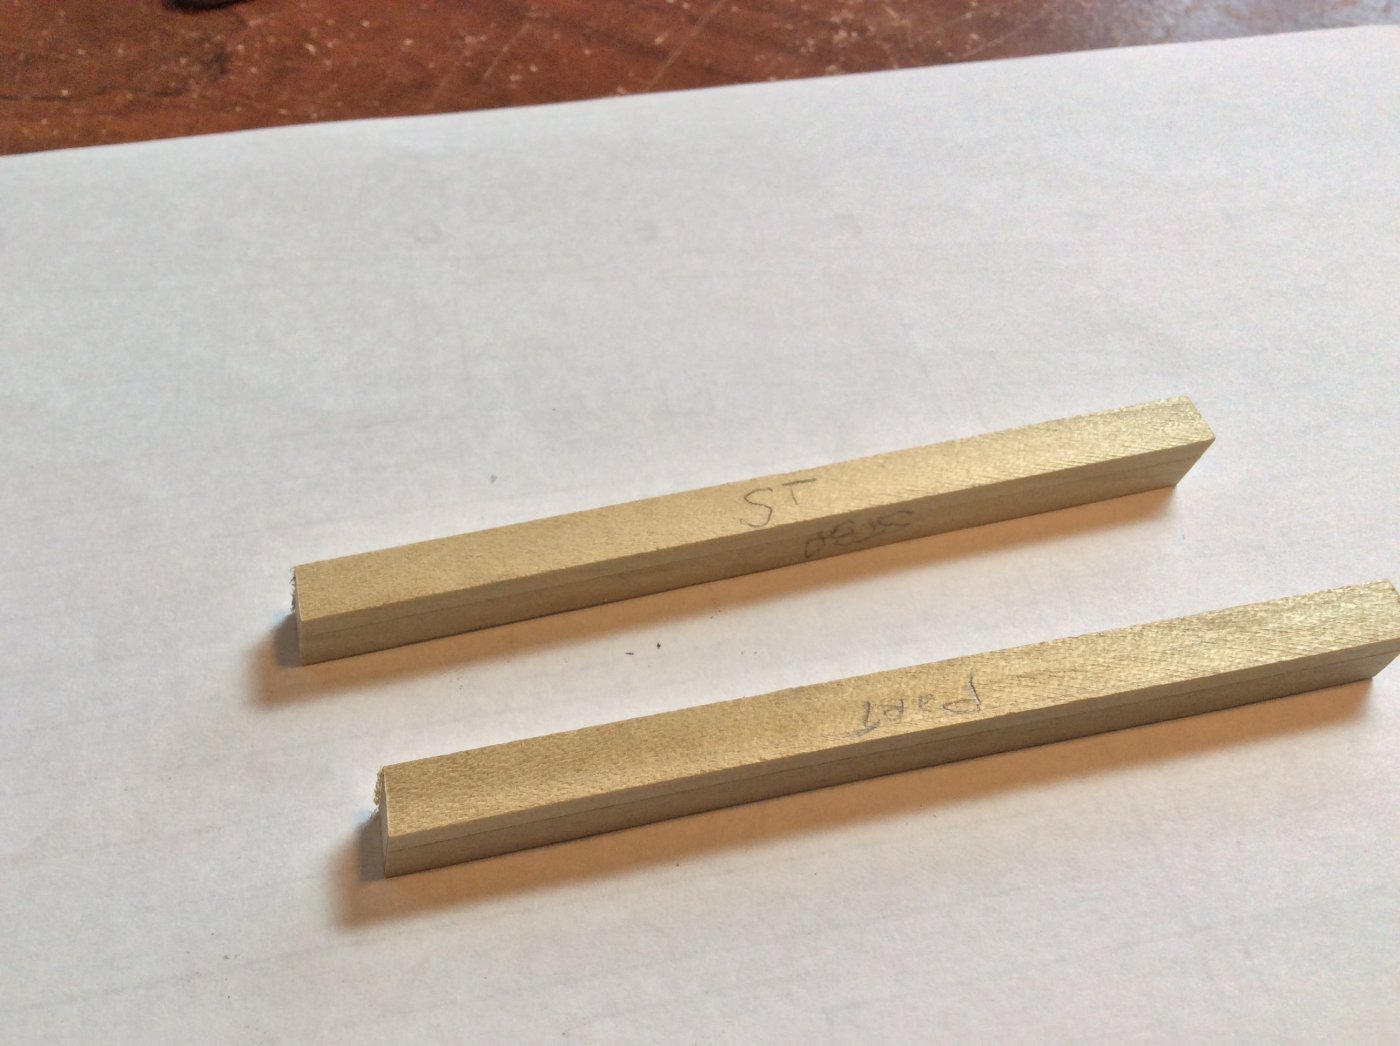
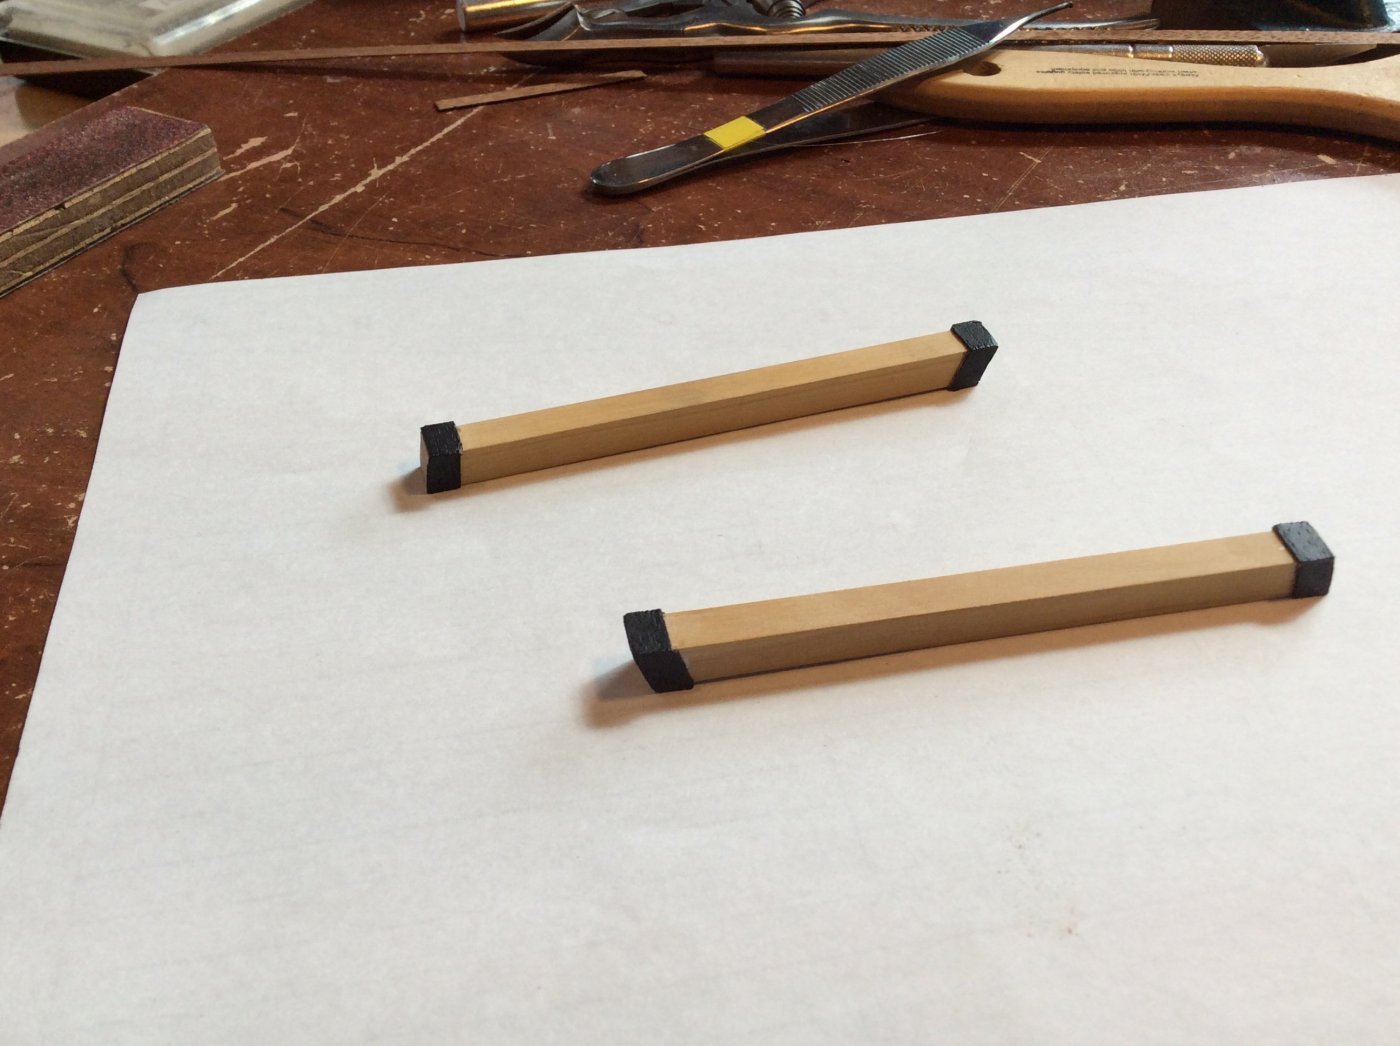
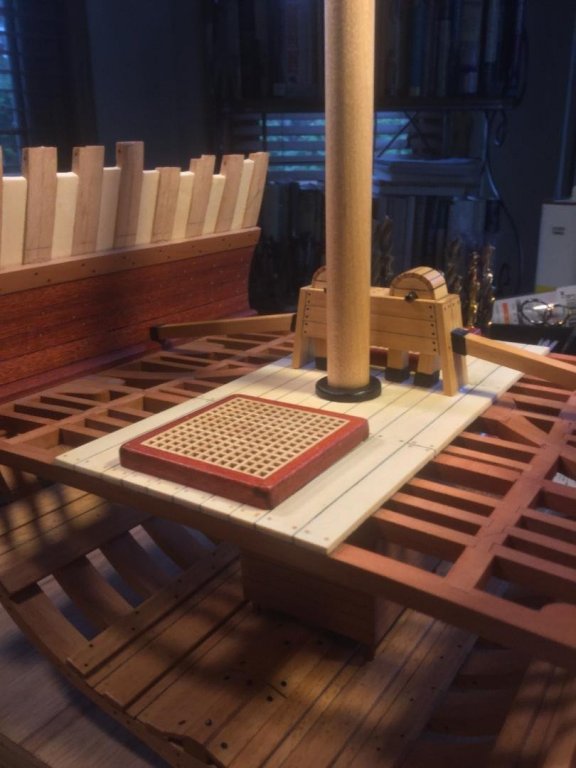
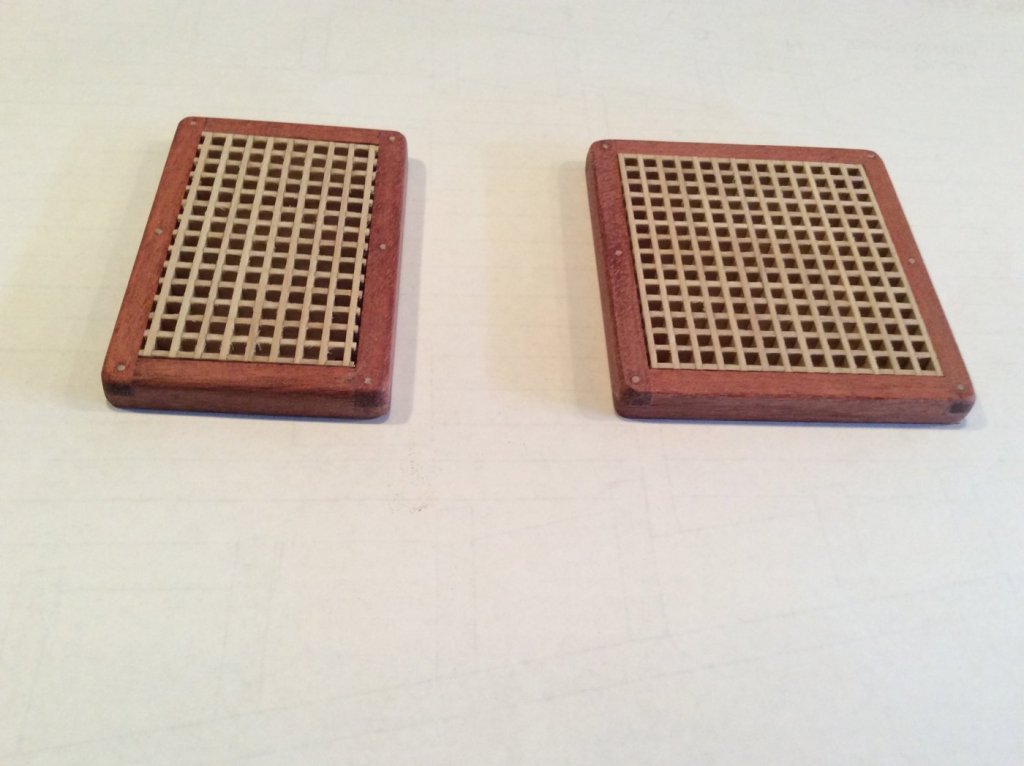
I planked the central part of the lower deck, leaving openings for the hatches and cutting out the mast hole. I also glued the mast partner ring in place (made of ebony). After finishing the chain pump housing/cistern, I pinned and glued it to the lower deck in the proper position. Next was making the pump dales or bilge water discharge pipes, that lead from the cisterns down to the bulwark at the waterway. I made mockups for the dales out of poplar, and carefully snuck up on the proper angles using my Byrnes sander. After I was satisfied with the fit, I transferred the dimensions and angles to the boxwood stock I milled for the finished dales. I glued small pieces of veneer dyed black to each end of each dale to simulate reinforcing iron bands. These weren't needed, historically, but I added them for visual interest anyway! My last task was to finish up the hatch coamings and grating. Busy few days!


- 164 replies
-
- 18
-
-
Great work as usual, David!
-
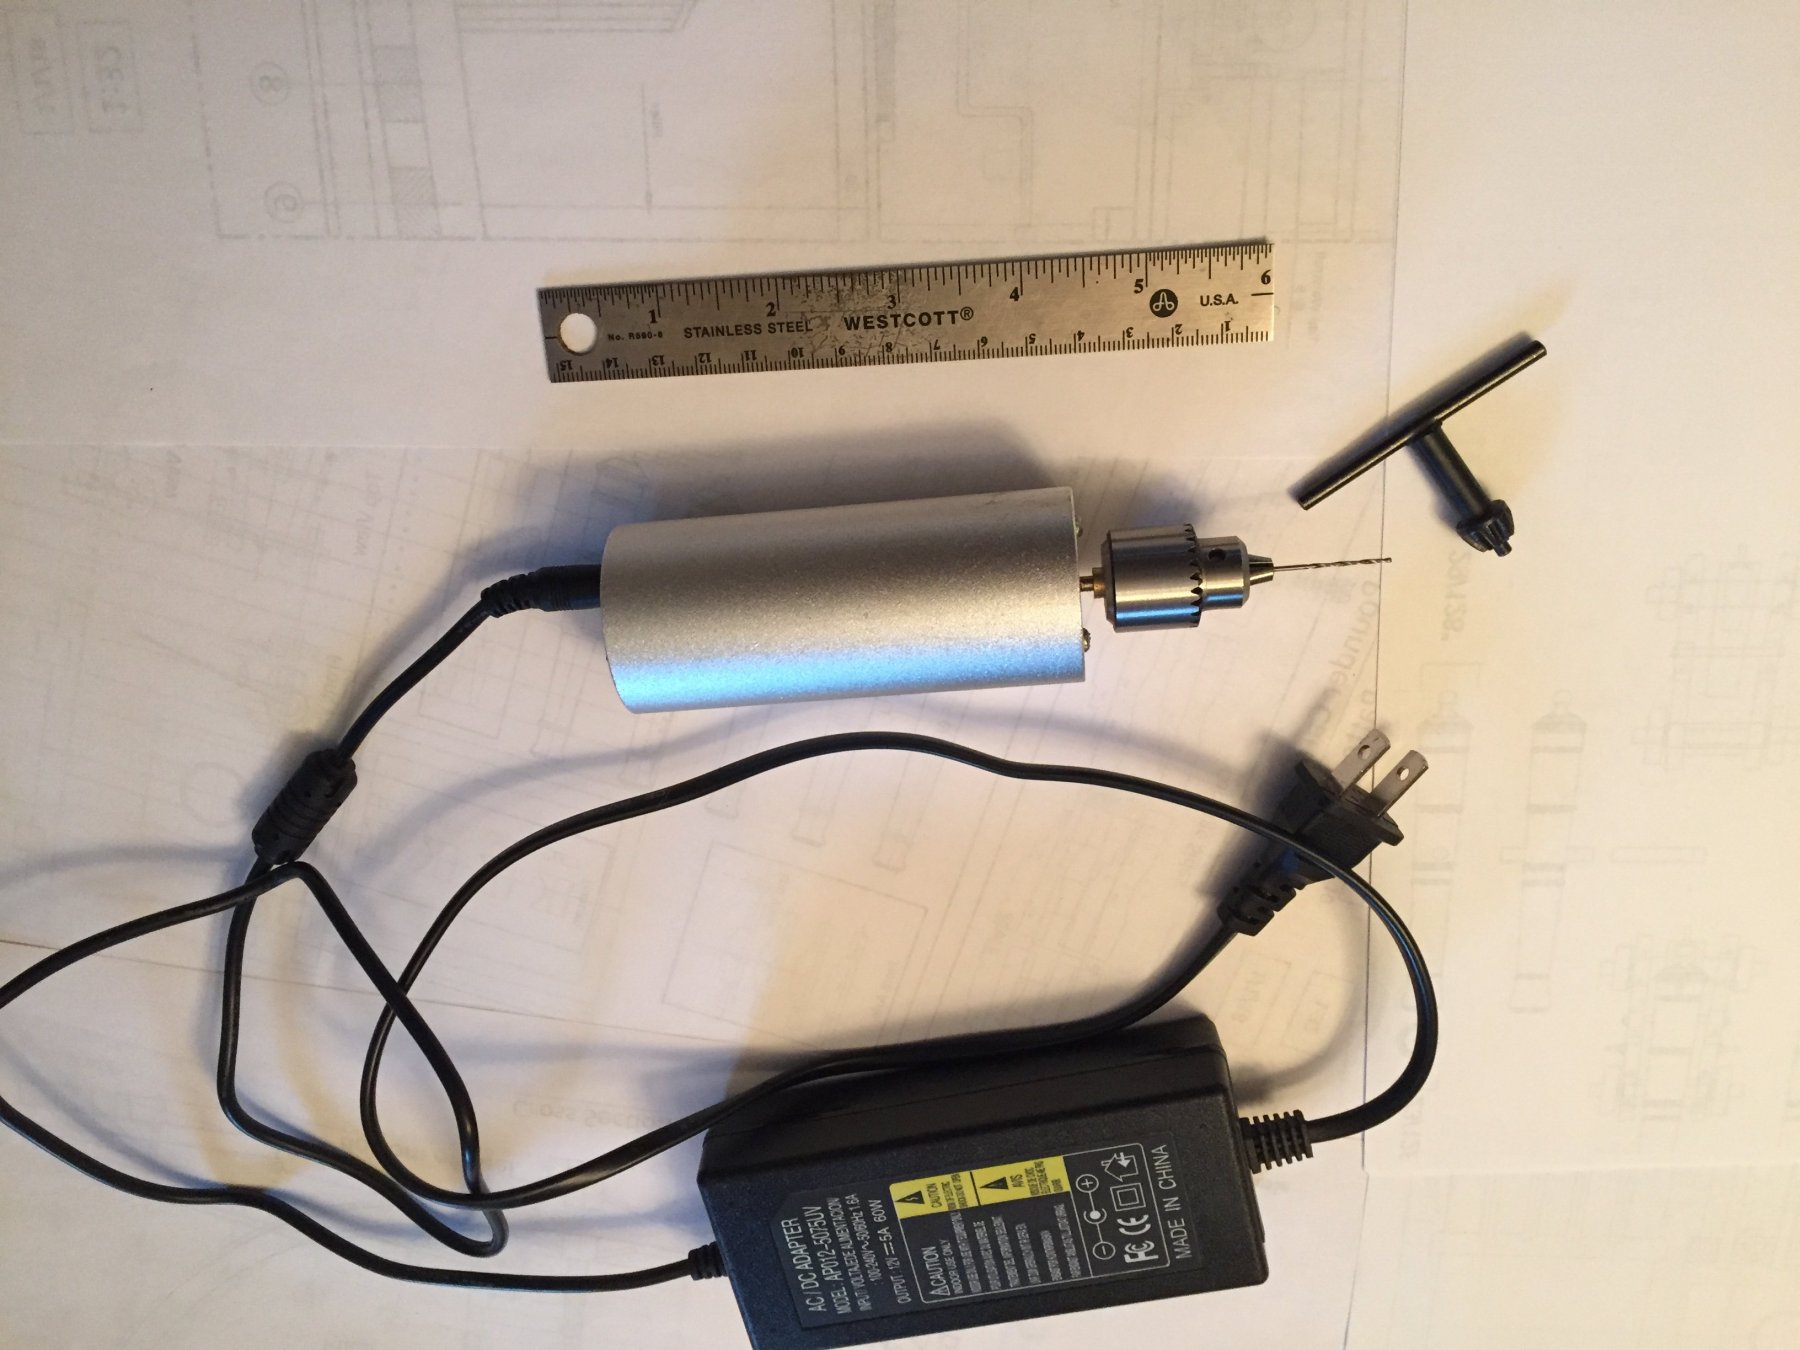
I picked up this drill from Amazon a while ago, and it is the best small tool for model making that I own! It is small (6" long), operates at low rpm, and is able to accommodate drill sizes from #80 (.0135") to #22 (5/32"). This is perfect for drilling treenail holes. Just use an awl to put a tiny hole in the wood, rest the drill bit in the hole and turn the drill on. Excellent control, unlike a Dremel, and no more sore hands from using a pin vice, or broken bits using the manual push-action hand drill. I cannot recommend this more highly! And only $30! https://www.amazon.com/gp/product/B06XGQ24PS/ref=ppx_yo_dt_b_asin_title_o03_s00?ie=UTF8&psc=1

-
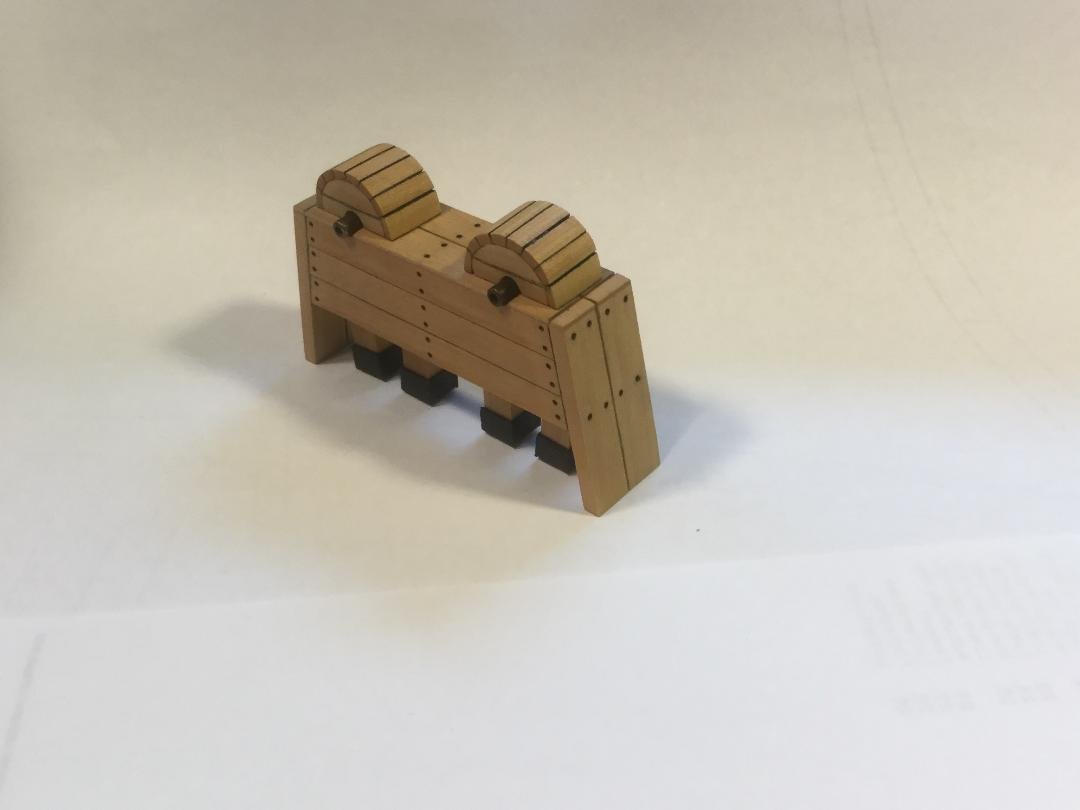
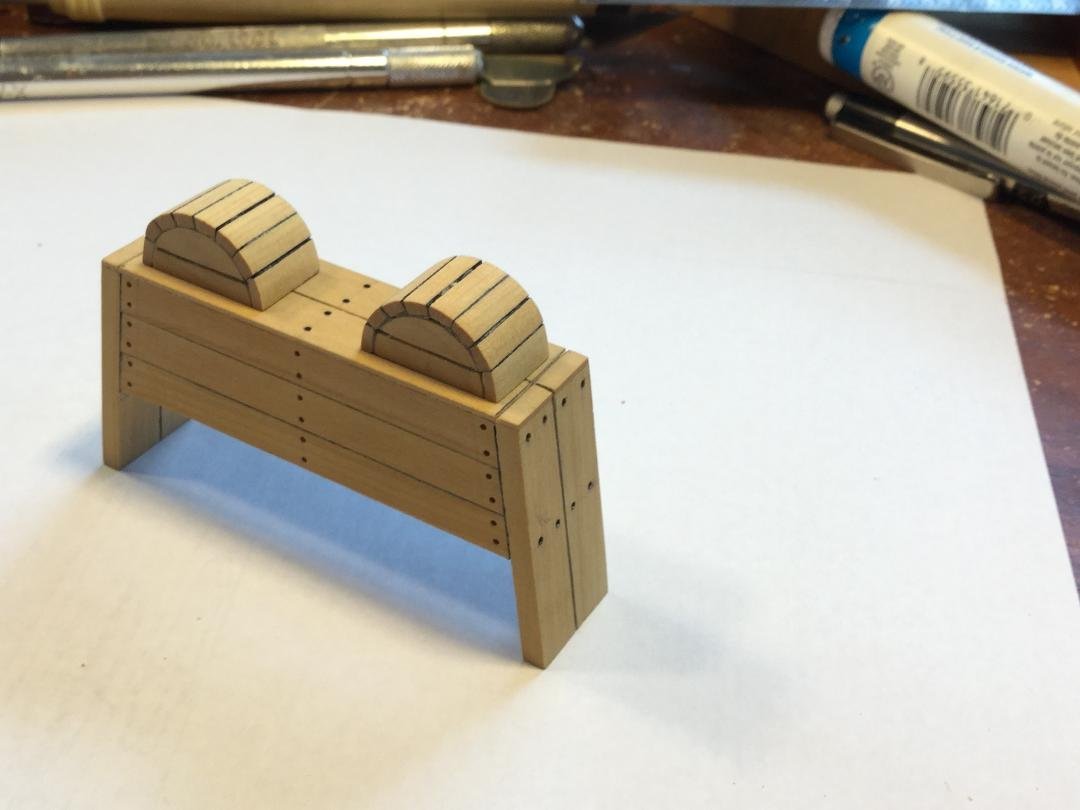
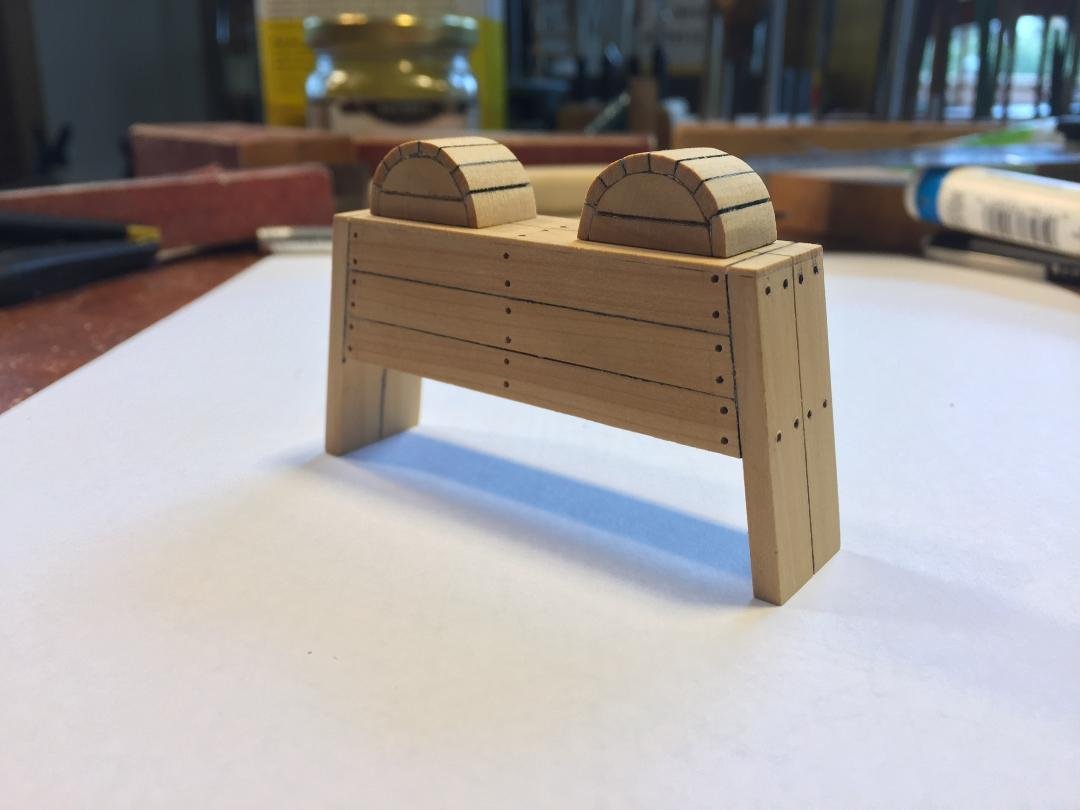
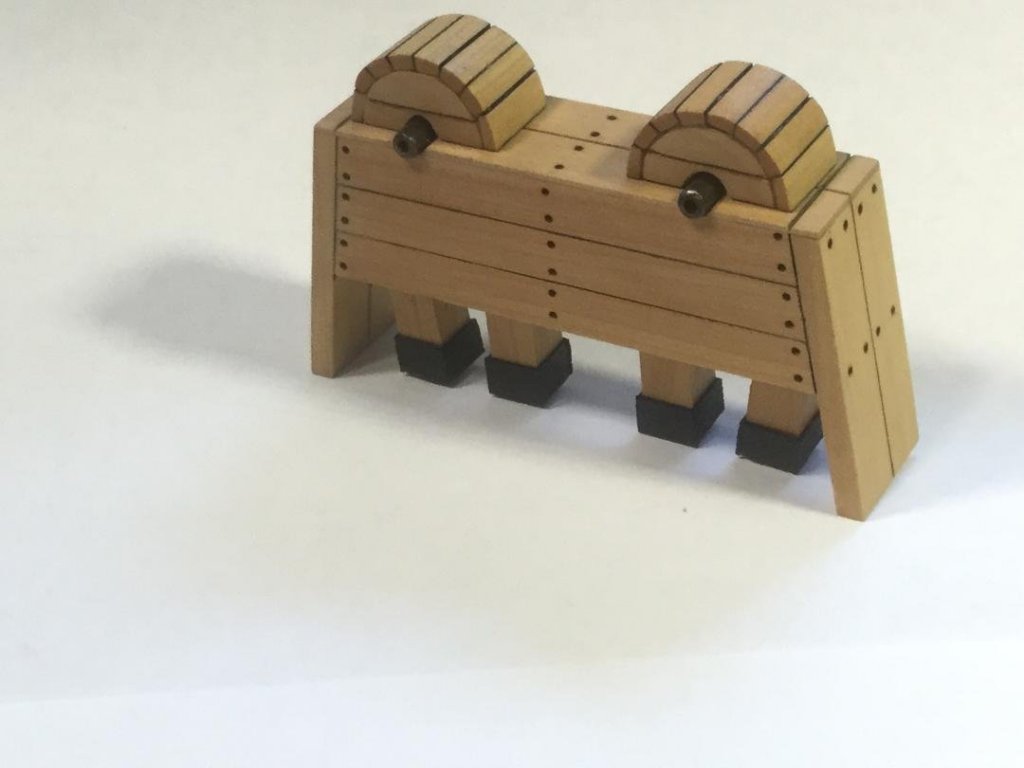
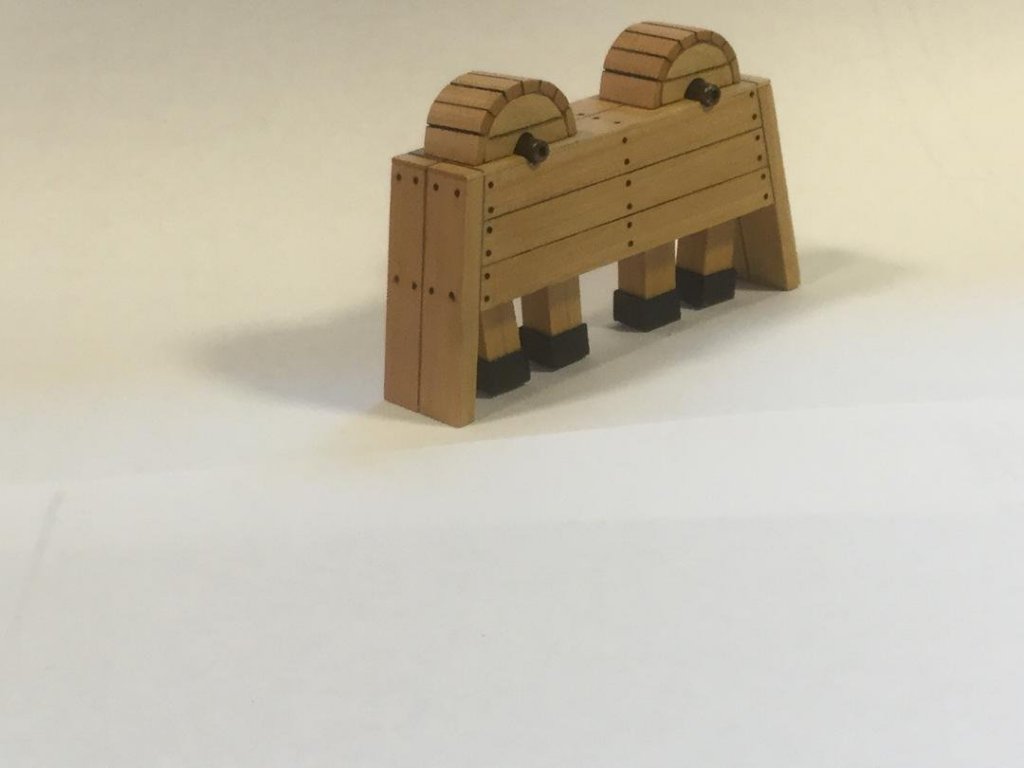
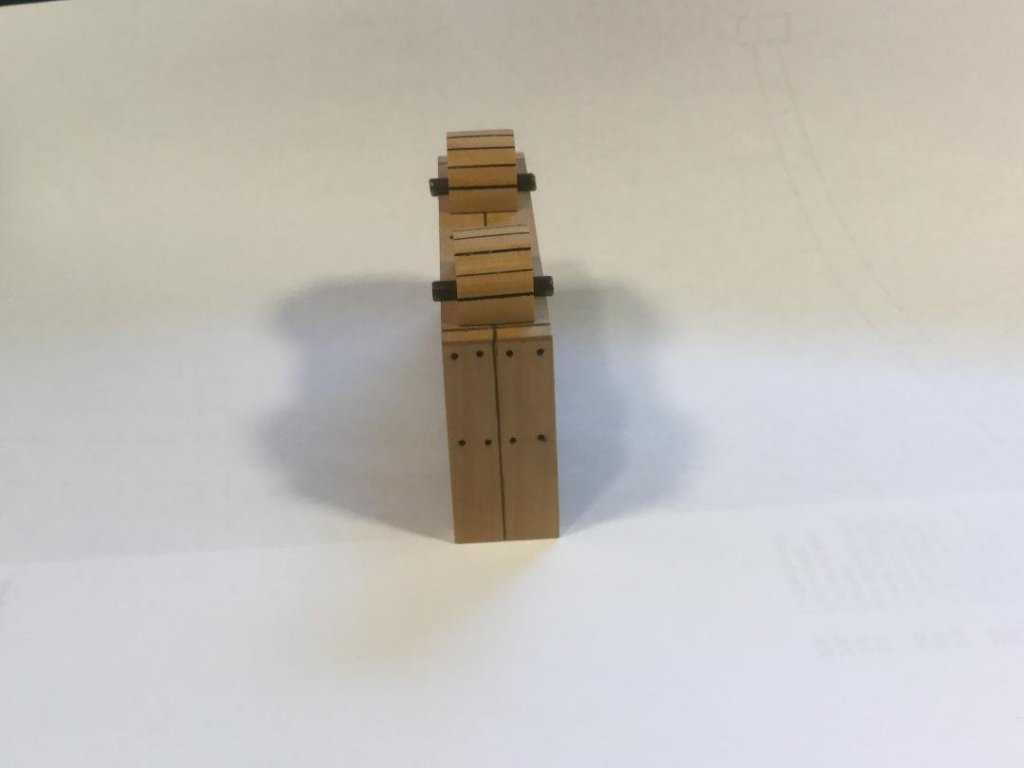
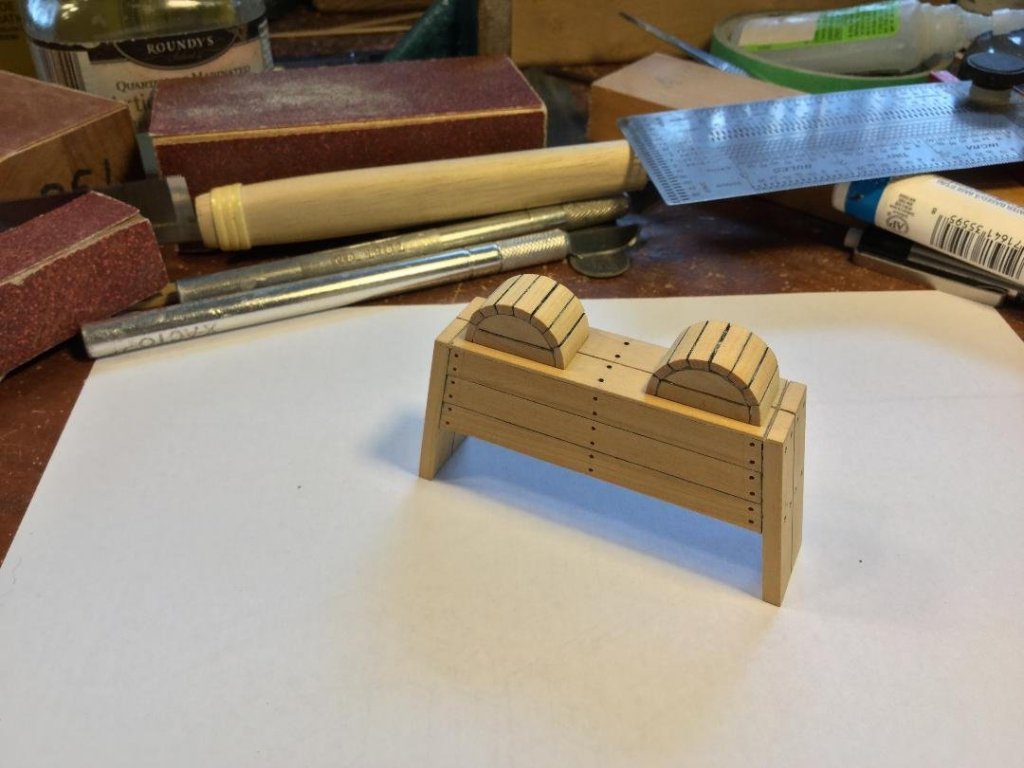
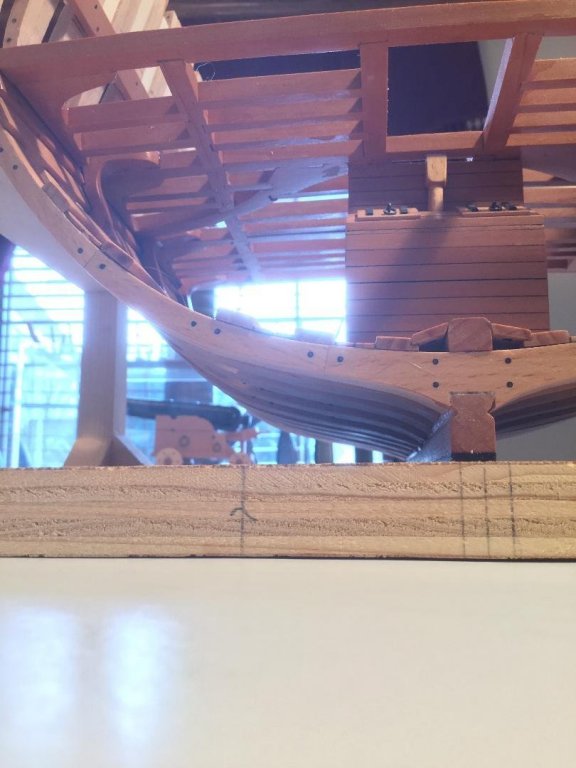
I finished up the chain pumps, except for the pump dales (conduits for the bilge water to leave the pumps for outside the ship). Once the lower deck central planking is in, I'll fit the dales. I didn't spend much time super detailing the crank bearings, as they will be only marginally visible under the main deck planking. I did add some trim to the two back cases and 2 return cases at the point where they pass through the lower deck on their way to the bilge in the well. This was done for visual interest, not historical accuracy. As mentioned before, I didn't bother simulating bolts in the wooden slats that form the wheel covers. The four cases under the reservoirs extend down into the bilge and are the "tracks" in which the actual chain driven mechanism runs. The outermost ones are SUPPOSED to be at an angle! 😀

- 164 replies
-
- 16
-
-
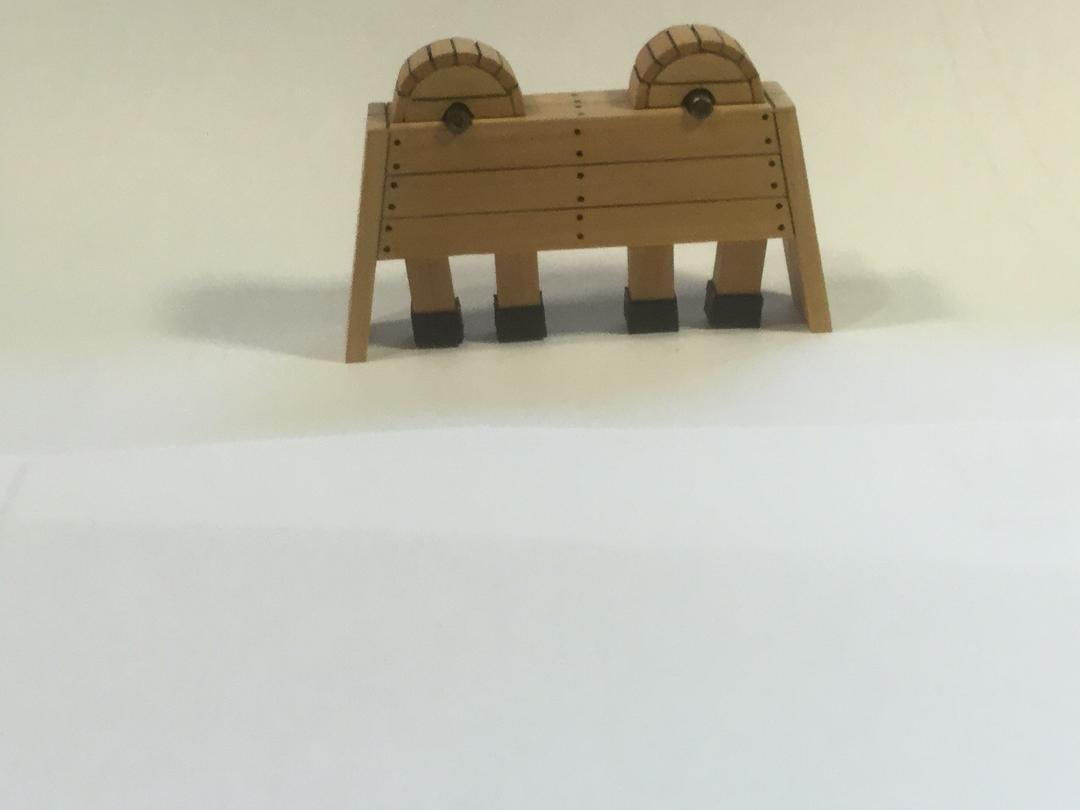
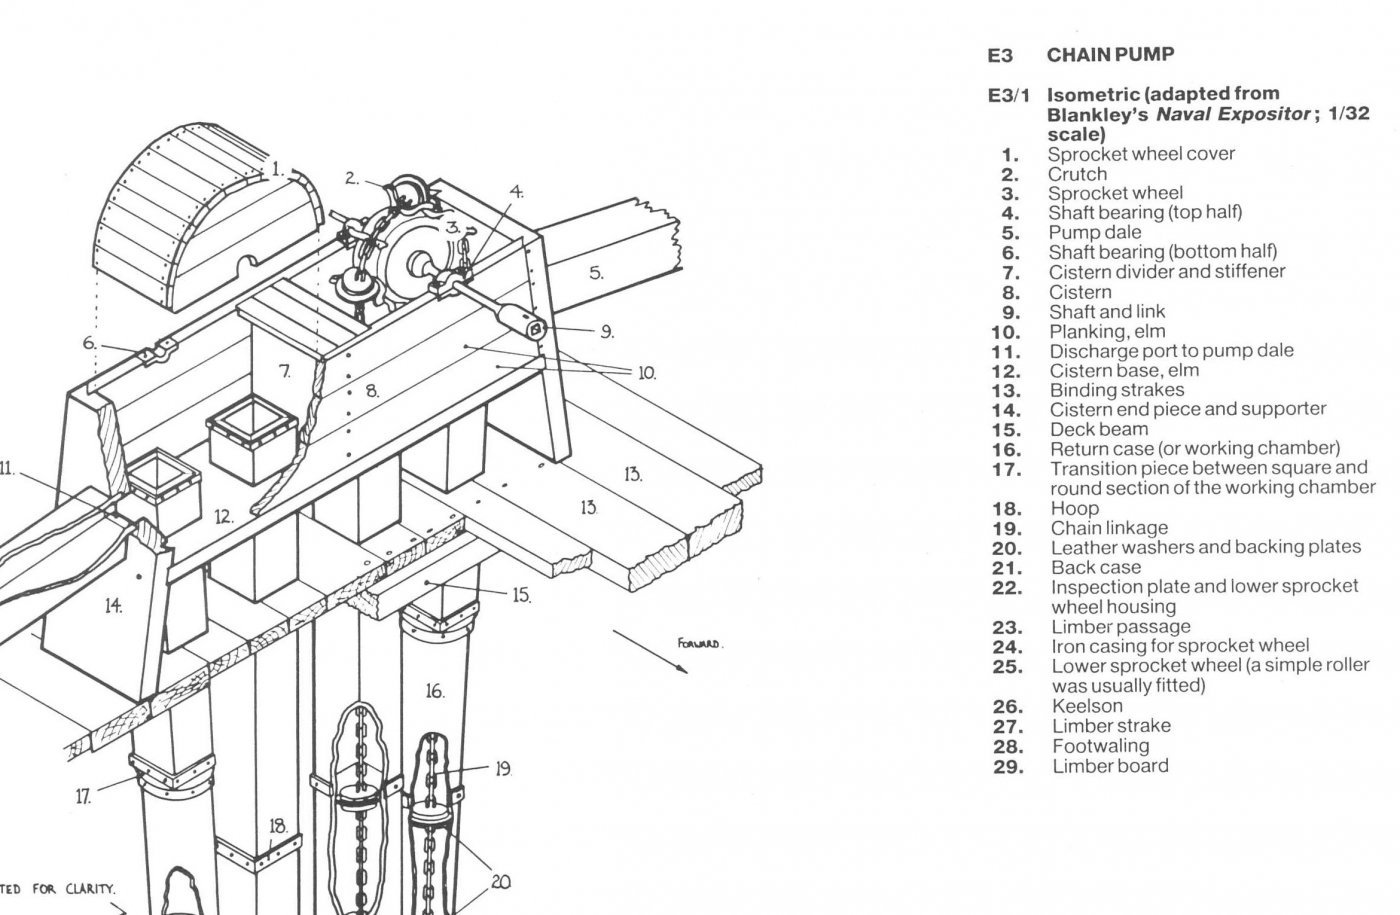
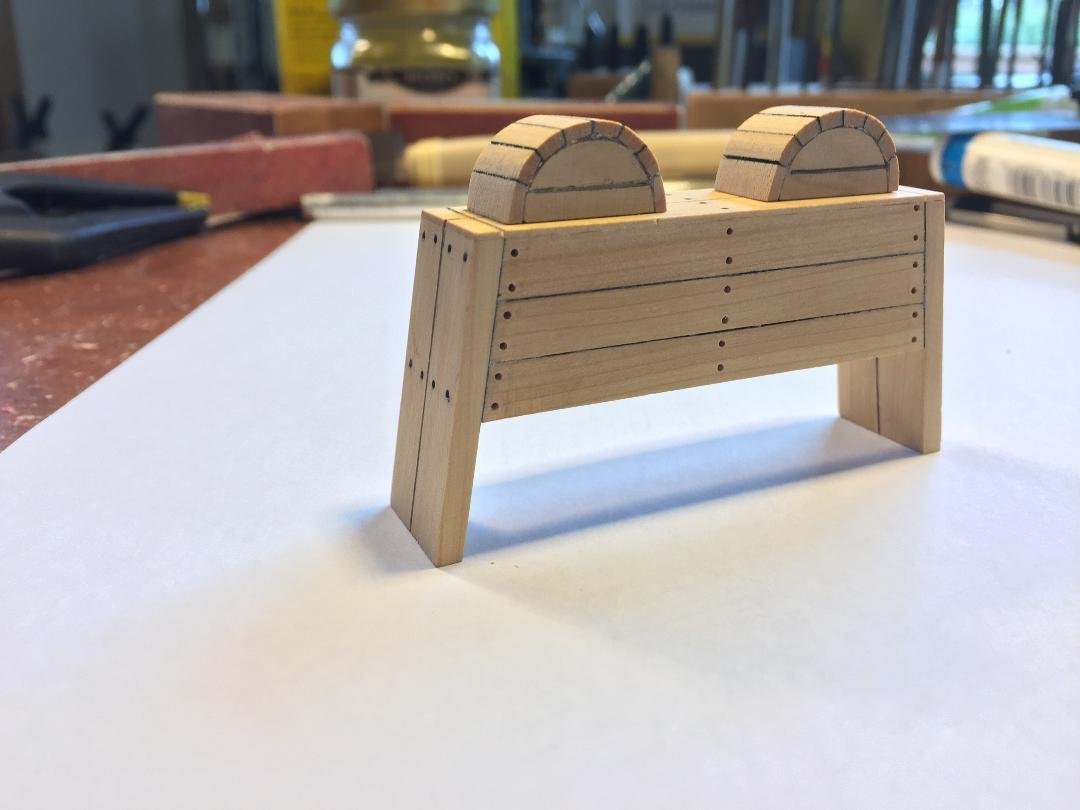
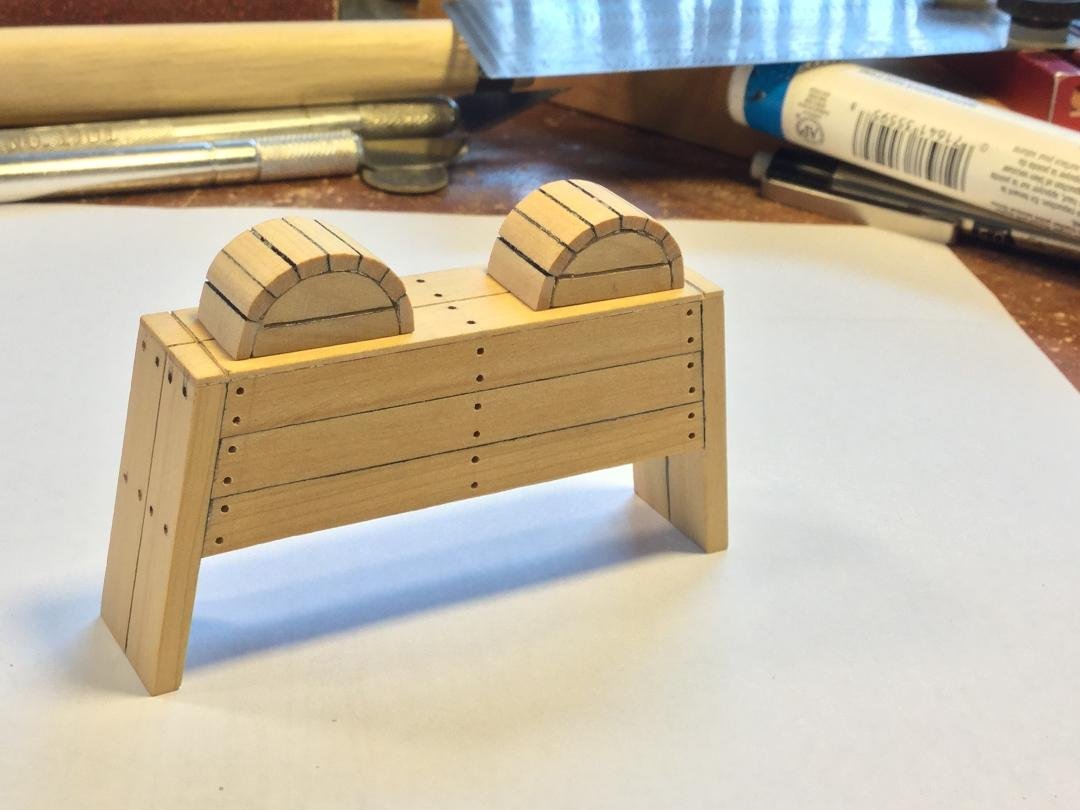
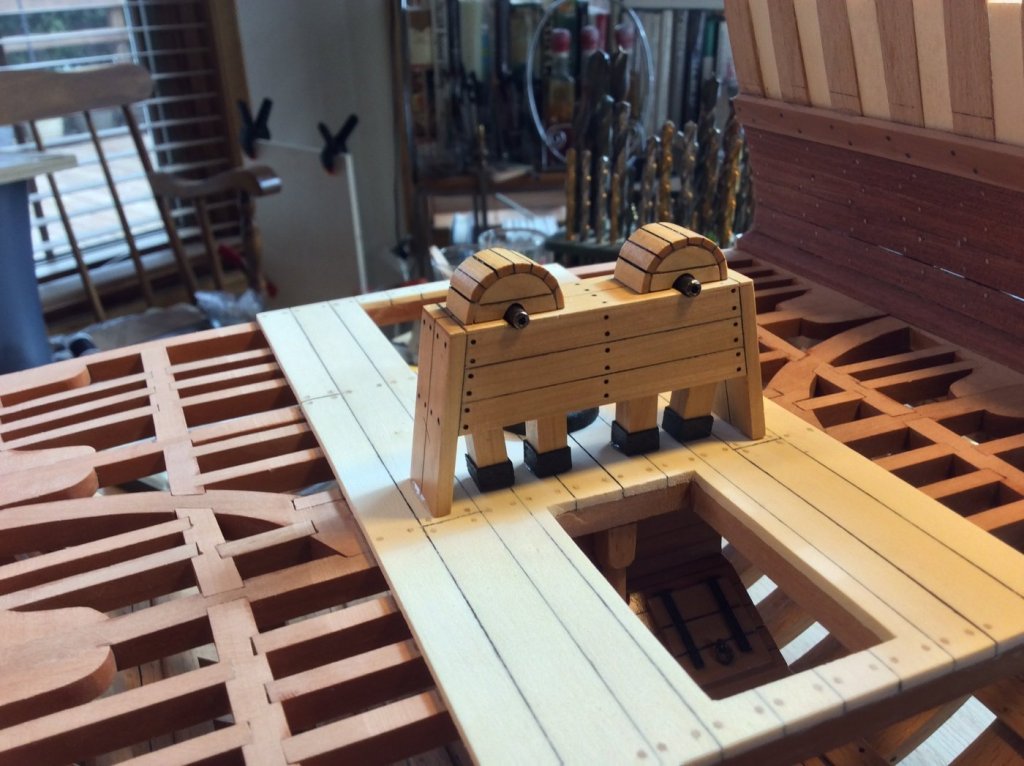
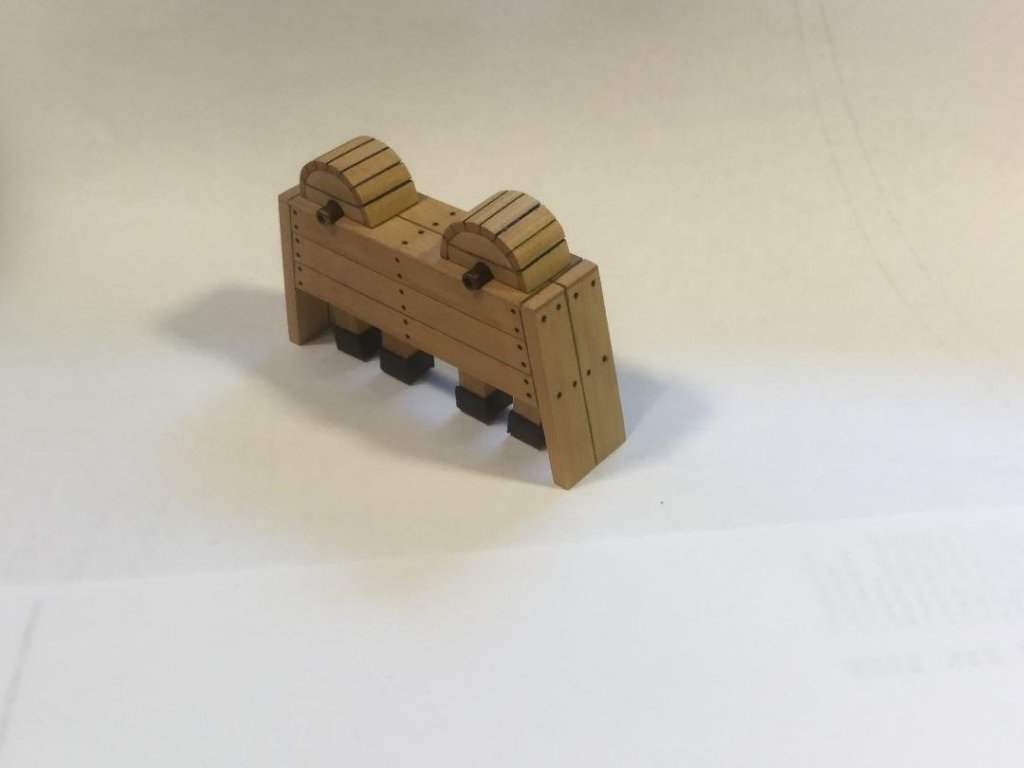
I had some discussions about the construction of the chain pumps. Some wanted the pump housing and pump dales (the conduit for water from the cistern to the outside of the ship) painted black. This would suggest they were made of metal. Goodwin's book pretty much concedes the pump housing etc. were made of wood...elm specifically. I decided to build the pumps out of boxwood. I cut a blank to shape, added the boxwood supports and planked it with boxwood. The wheel covers were cut from some 5/8" dowel and sanded flat to create the half-cylinder shape. These were then planked with 1/16" thick boxwood. I was going to add black treenails to simulate bolts holding the structure together, but I realized that the holes would only be about 1/32" diameter (1" in scale). At this size it wasn't really worth it. I just drilled holes for the bolt locations and darkened the holes with a lead pencil. I didn't bother to simulate bolts on the slats on the wheel As mentioned, in the AOTS book, the cistern and sprocket wheel covers were clearly made of wood - the legend specifies they were elm. I don't think it would be wrong to leave the chain pumps and pump dales natural wood color. I may add some reinforcement banding to the dales for visual interest, but they weren't subject to a lot of internal pressure as elm tree pumps would have been, so they really weren't needed.


- 164 replies
-
- 22
-
-

-
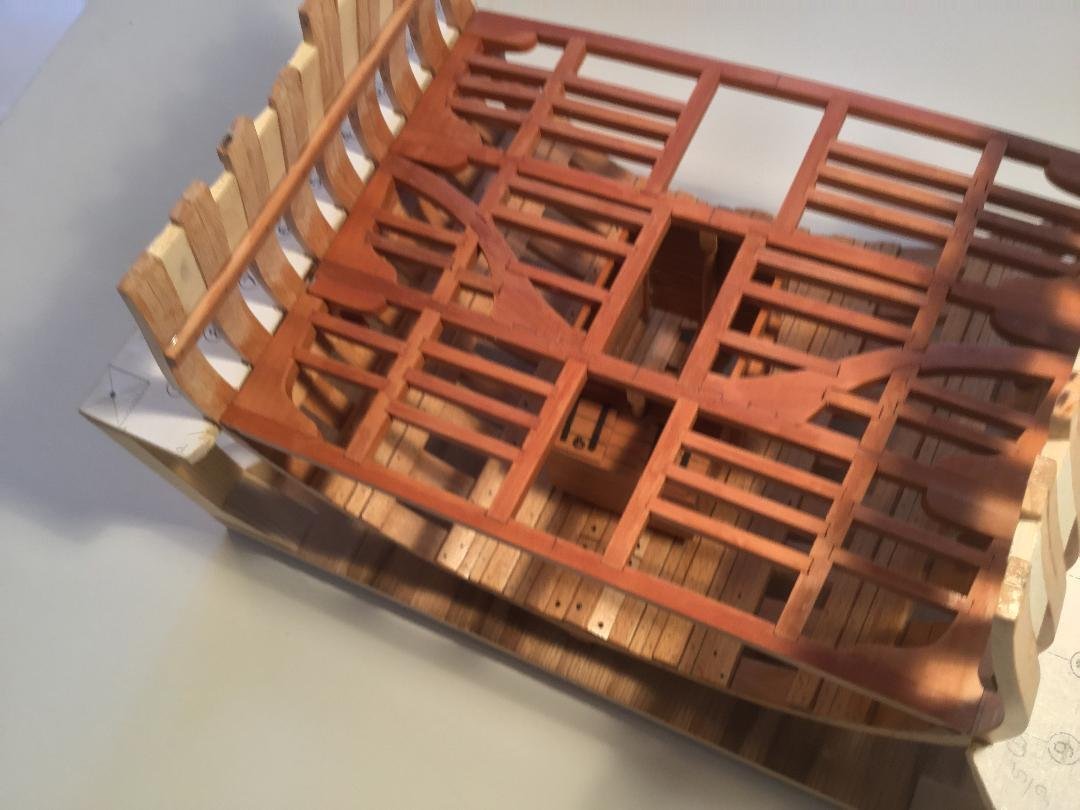
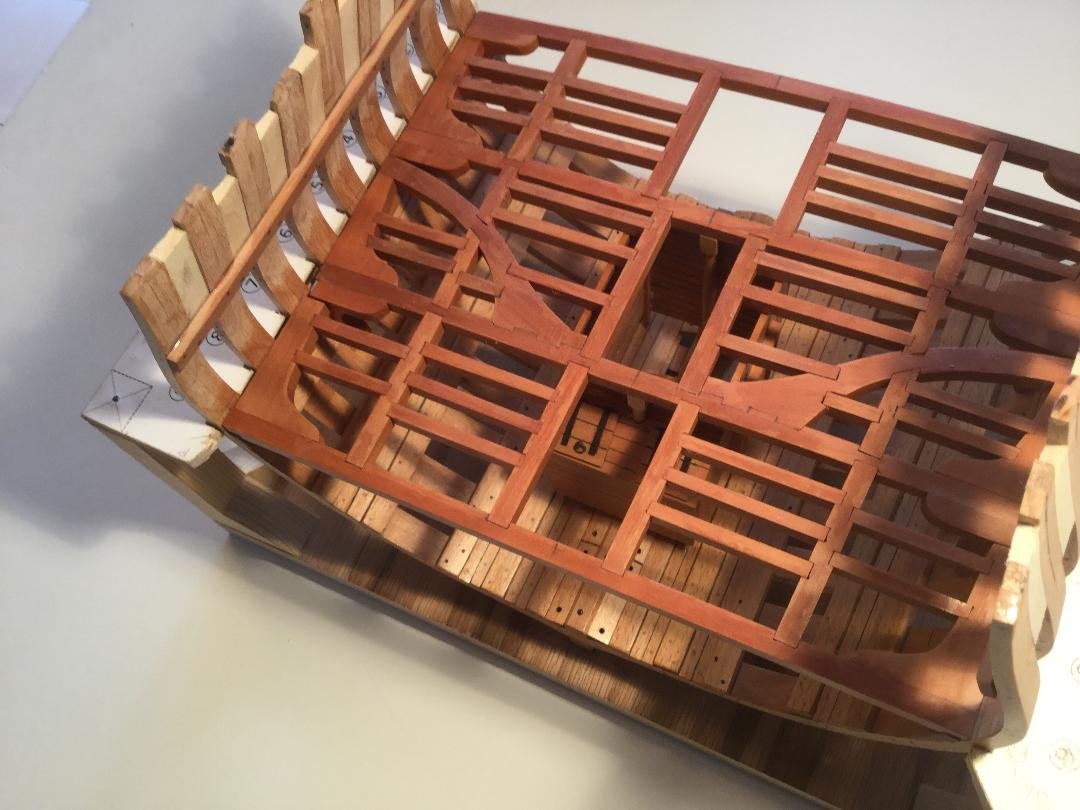
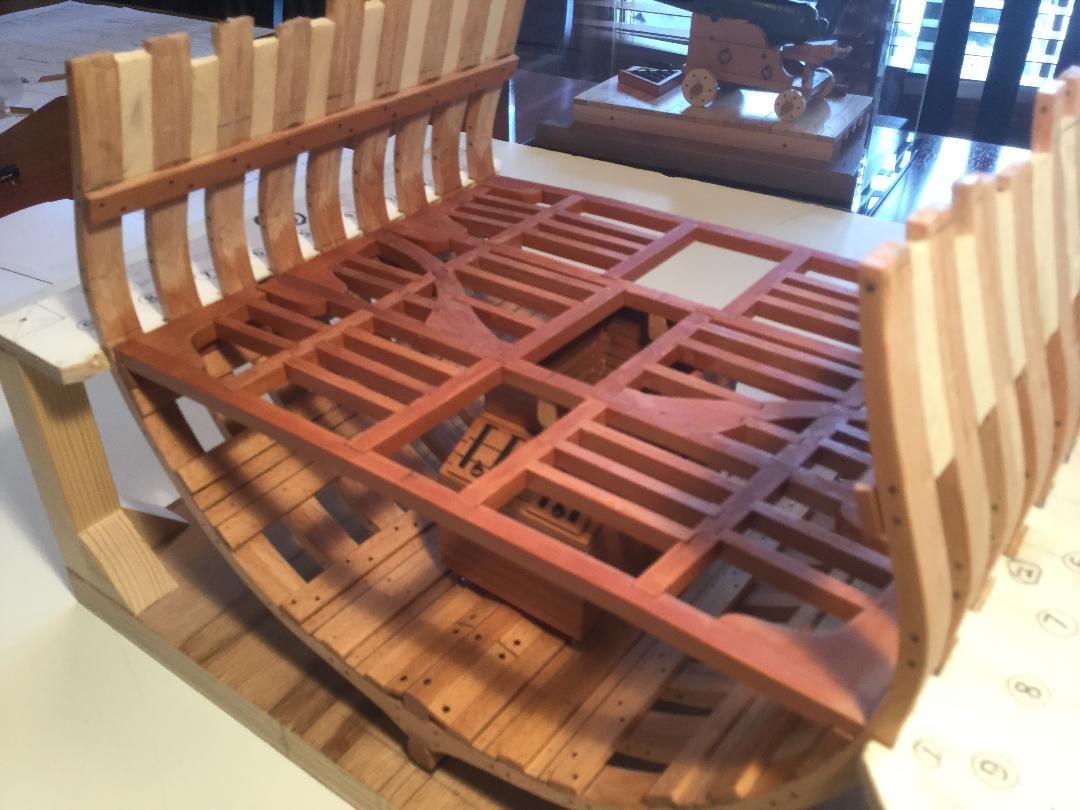
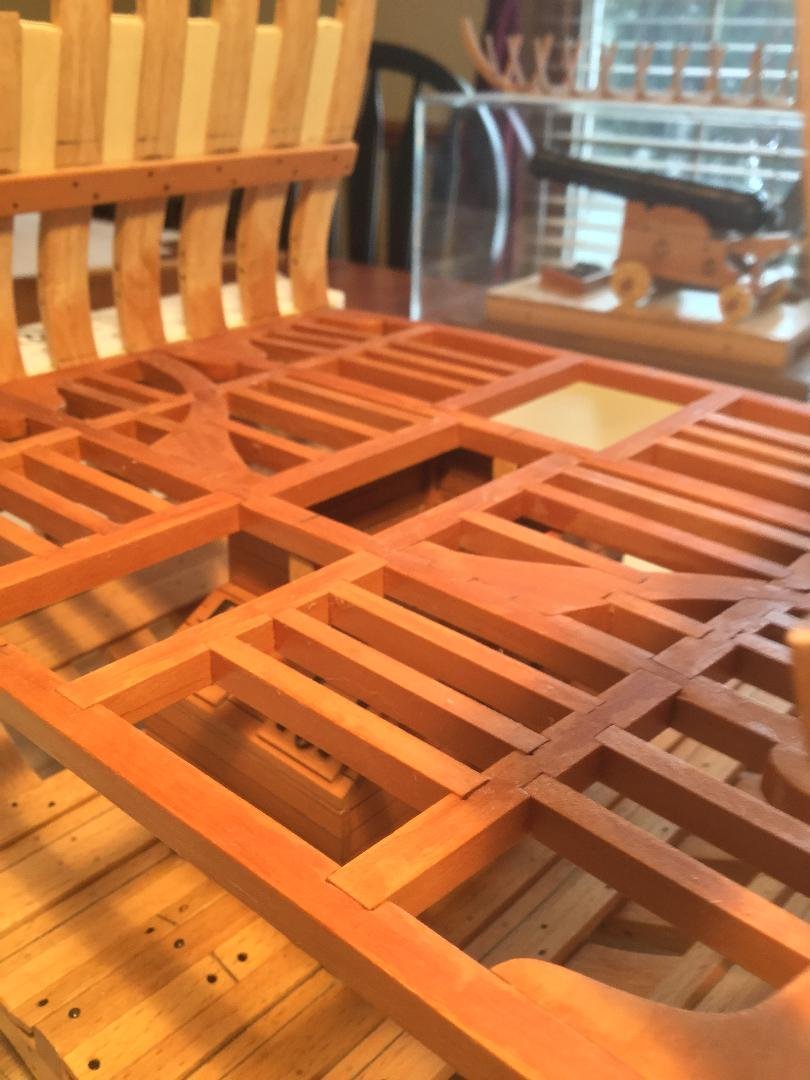
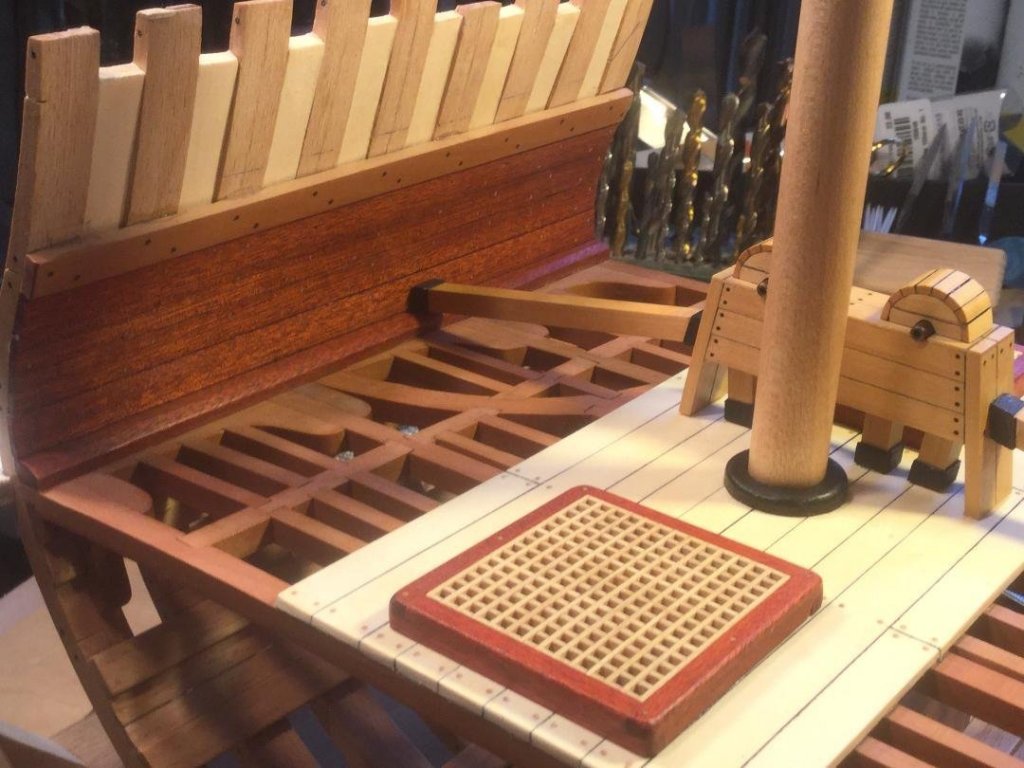
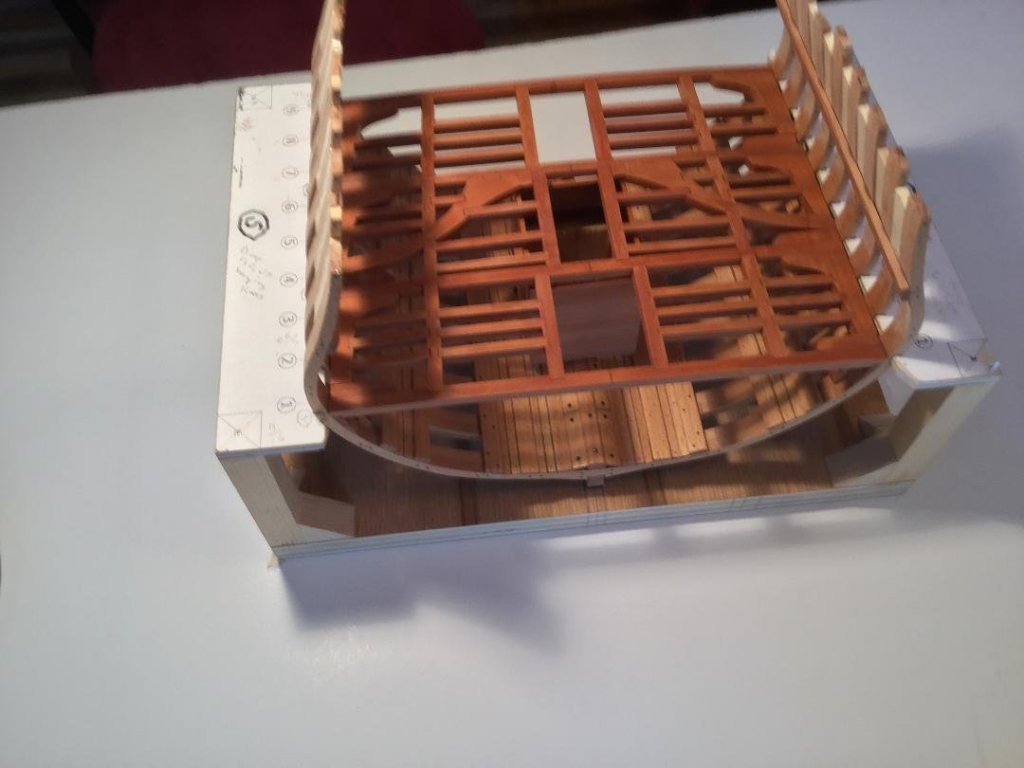
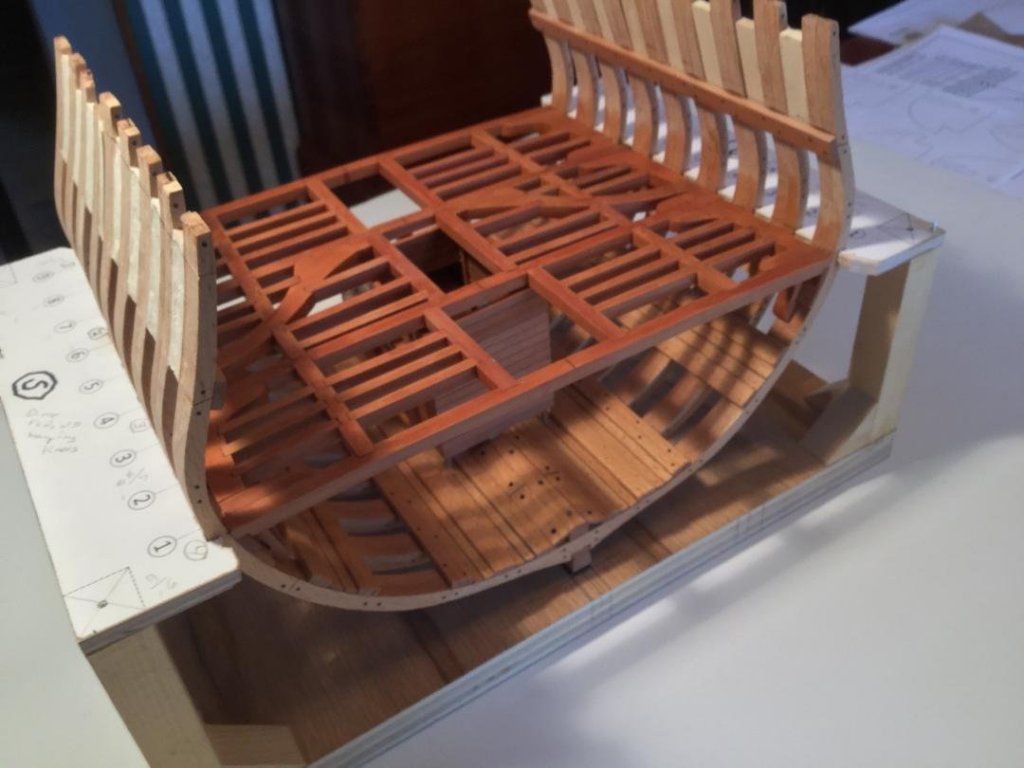
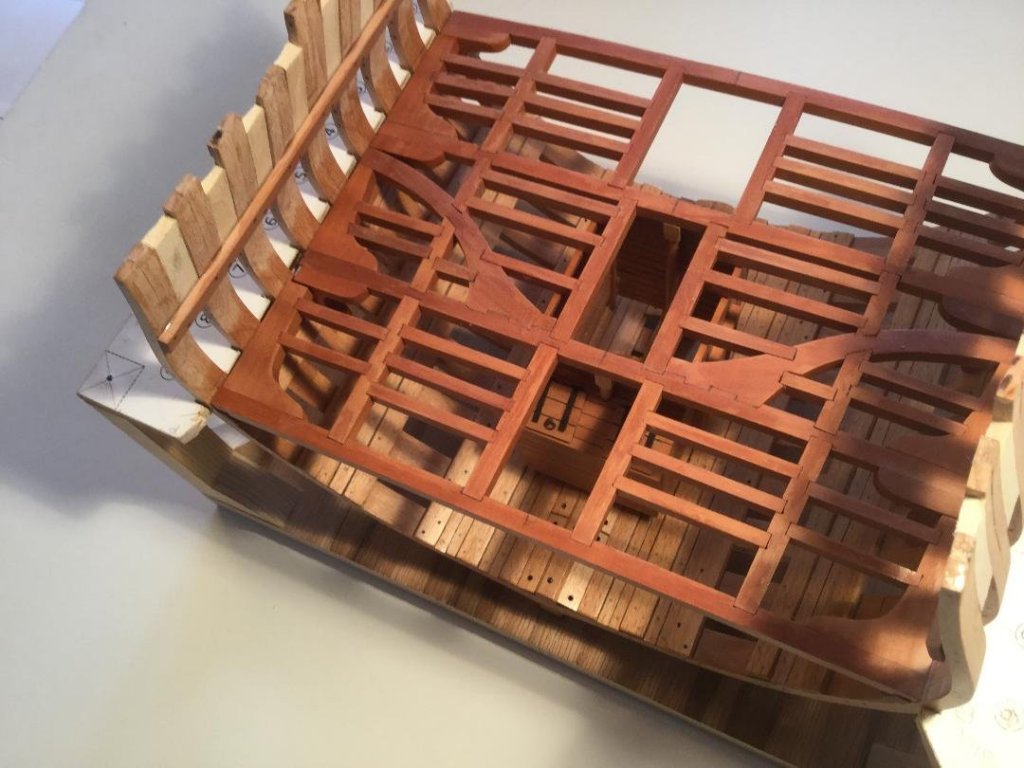
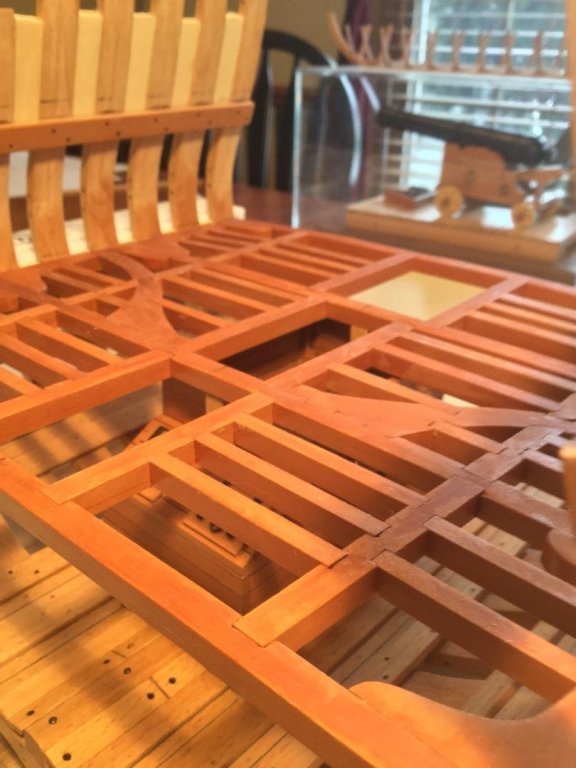
Except for the mast partners the lower deck framing is complete. I wiped it down with mineral spirits to give you an idea of how the finished product will look. I'm planning holly for the decking and bloodwood for the spirketing. The hatch coamings will be bloodwood and the grating boxwood. Next is the waterways and spirketing, then the chain pumps and hatches.


- 164 replies
-
- 20
-
-
Don’t feel bad. We all have them. And some are real doozies! The windlass will cover, but I agree with a dowel up to the level of the sub deck and then fit in little pieces of decking to match your planking pattern, to camouflage the boo boo!
-
I don’t like to blow my own horn much, but both my Battle Station and my 17th Century Naval Cannon won silver awards in scratch built categories at Manitowoc. It was fun to be involved and meet so many great people!
- 128 replies
-
- 10
-
-
- mordaunt
- battle station
- (and 1 more)
-
Hi Patrick! Thanks for the kind words, and congratulations to you, again! Great job on Sultana! I get a lot of my wood locally at a hardwood distributor called Kettle Moraine Hardwoods. Swiss pear and boxwood are sourced from the internet. I have a full size shop in addition to my miniature shop so I mill all my own wood.
- 128 replies
-
- 5
-
-
- mordaunt
- battle station
- (and 1 more)
-
Very nice, Ken. Glad to see you back at your build,
- 122 replies
-
- 2
-
-
- independence
- privateer
- (and 1 more)
-
Congratulations on your gold medal and your “Best Novice Builder” award at the Manitowoc contest. Well done, Patrick!
- 449 replies
-
- 2
-
-
- sultana
- model shipways
- (and 2 more)
-
Thanks so much, guys! Shipshaper: We’ll miss you in Manitowoc! Yes, I will be bringing the Battle Station to the show and contest.
- 128 replies
-
- 4
-
-
- mordaunt
- battle station
- (and 1 more)
-
Every time any one mentions Vanda-Lay Industries I have to smile! George Constanza used the alias "Art Vandalay" when he wanted to be anonymous, and "Vandalay Industries" when he needed a fictious employer. "Seinfeld" was hilarious!😄
-
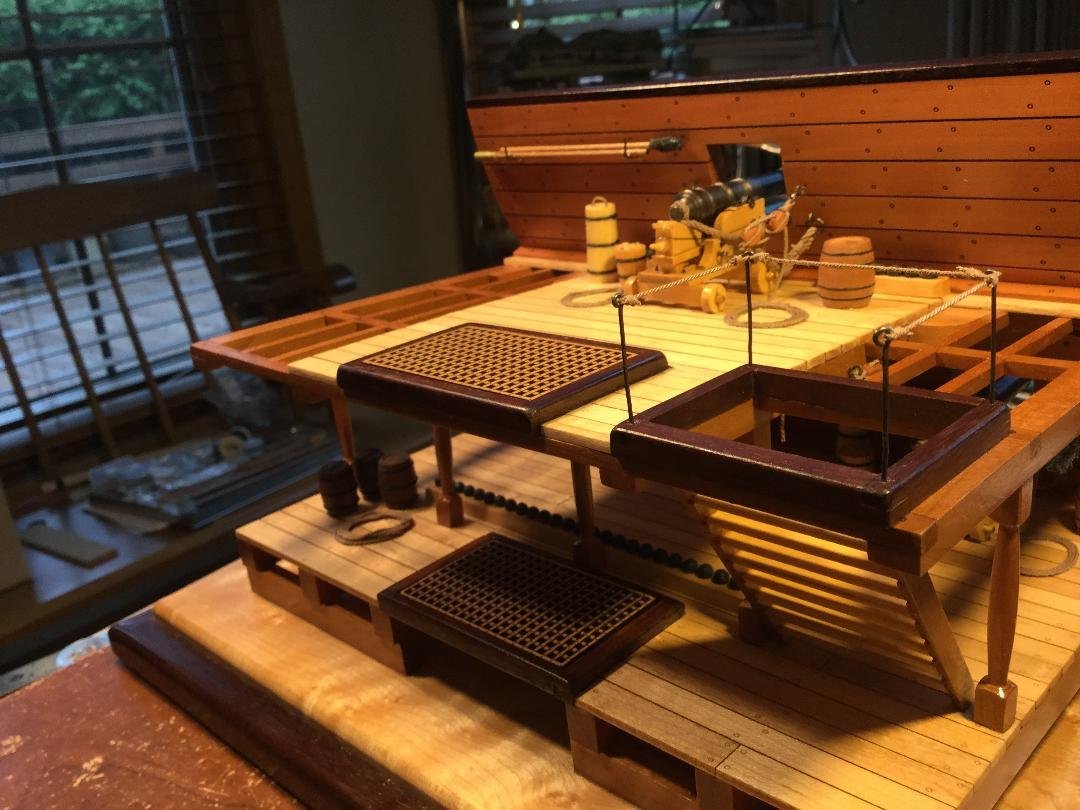
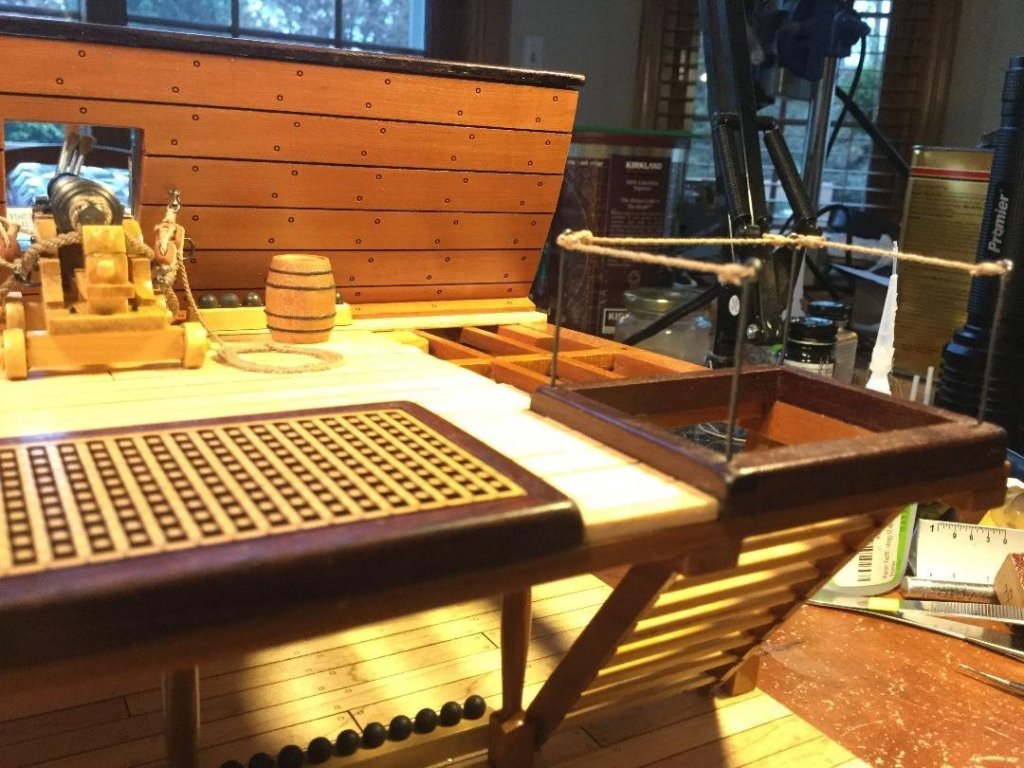
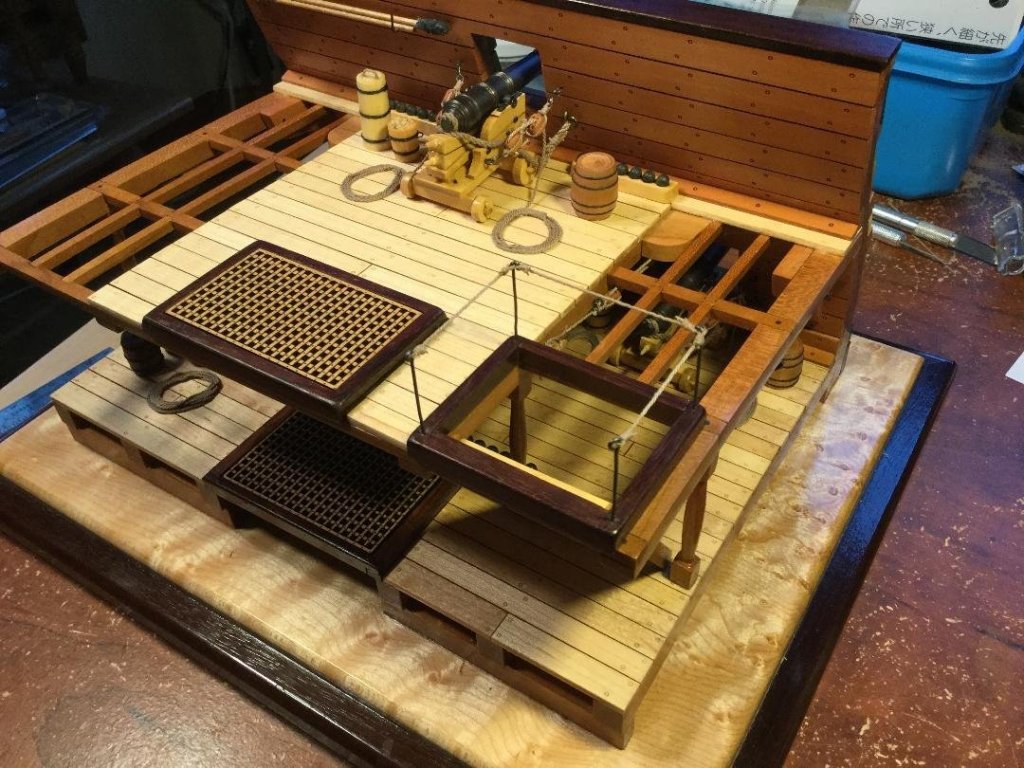
Thanks, guys! In thinking about things, I realized that the hatch with the ladder to the gun deck would need a railing of some sort to keep the sailors from falling below deck and breaking their necks. I also realized that in bad weather or heavy seas, this hatch, like the others on deck, would need to be "battened down". The easiest solution was a rope line strung through removable stanchions, probably made of cast iron. I added the rope line to the coaming. I'm not sure if it's historically accurate, but it makes sense to me!

- 128 replies
-
- 16
-
-
- mordaunt
- battle station
- (and 1 more)
-
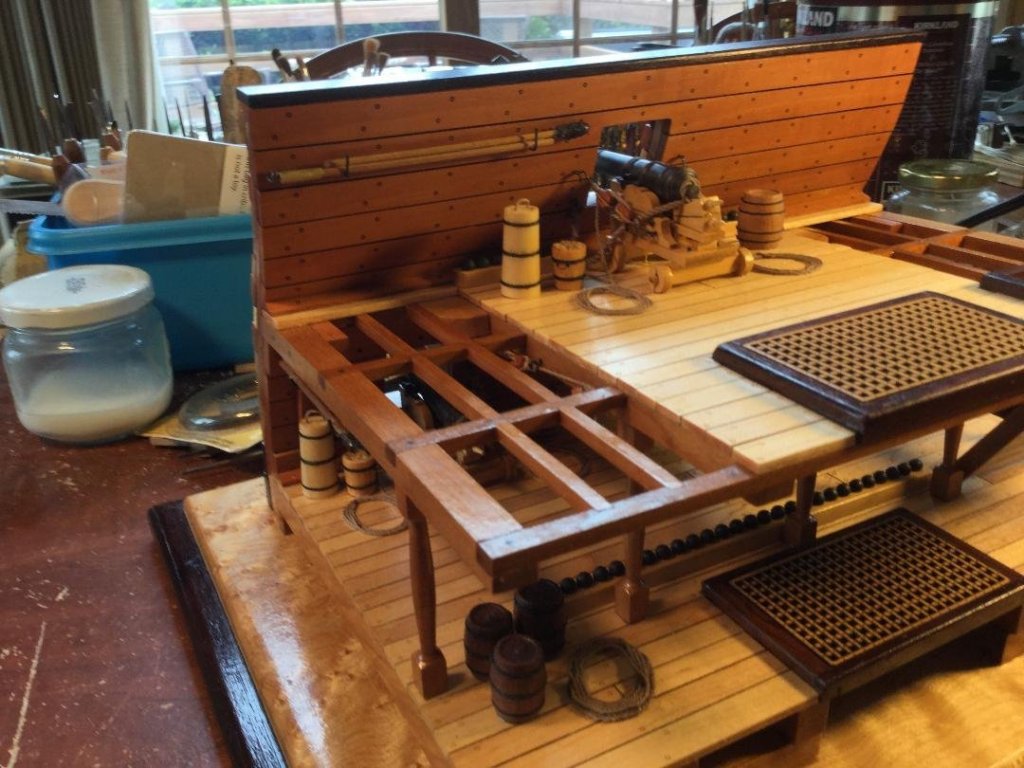
Thanks, guys! I'm getting close to done. I installed the upper deck, pinned and glued the cannon and rigged it. Then I added the various gun accessories. The only task left is to place stanchions with a guard rope around the ladder passageway.


- 128 replies
-
- 16
-
-
-
- mordaunt
- battle station
- (and 1 more)