


Glen McGuire
-
Posts
1,257 -
Joined
-
Last visited
Content Type
Profiles
Forums
Gallery
Events
Posts posted by Glen McGuire
-
-
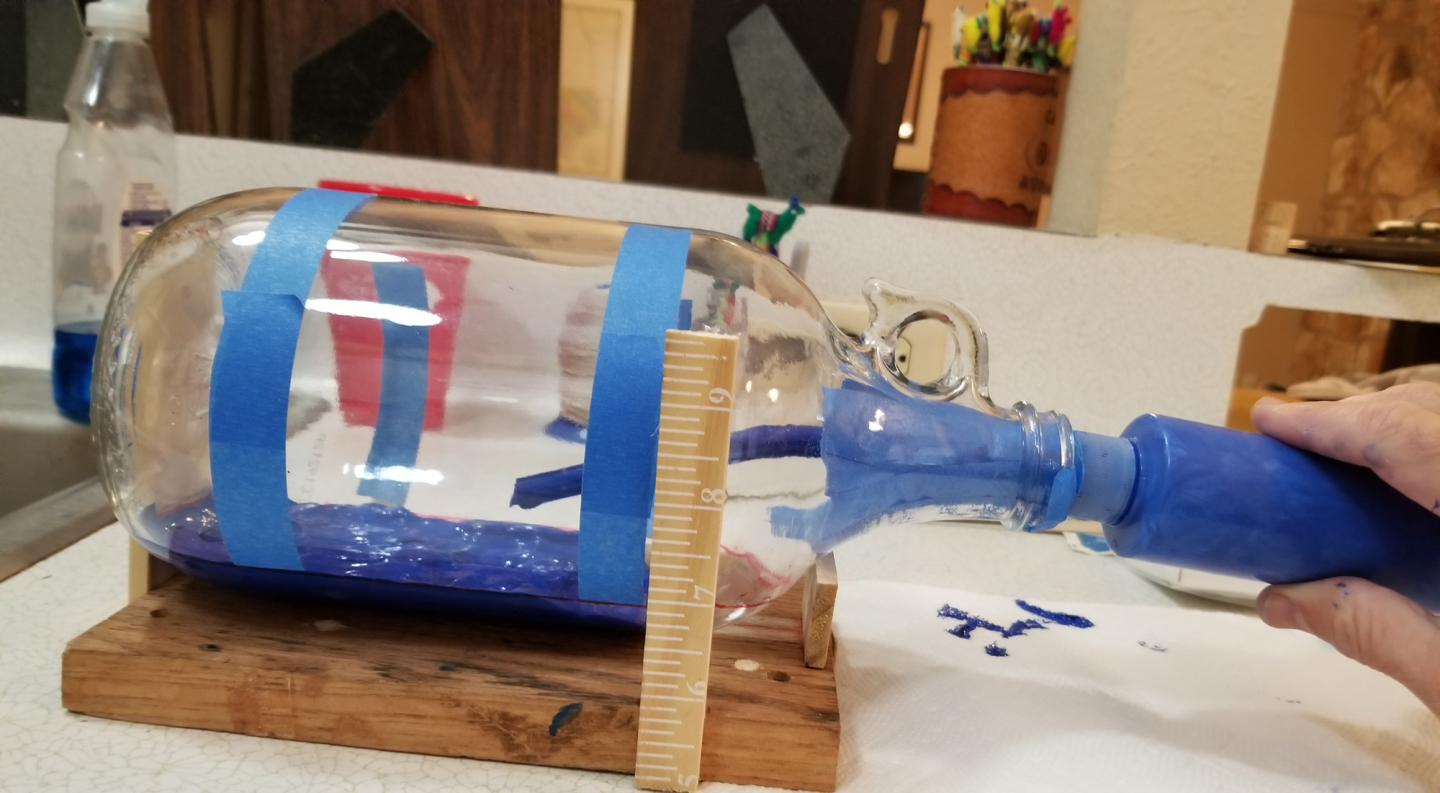
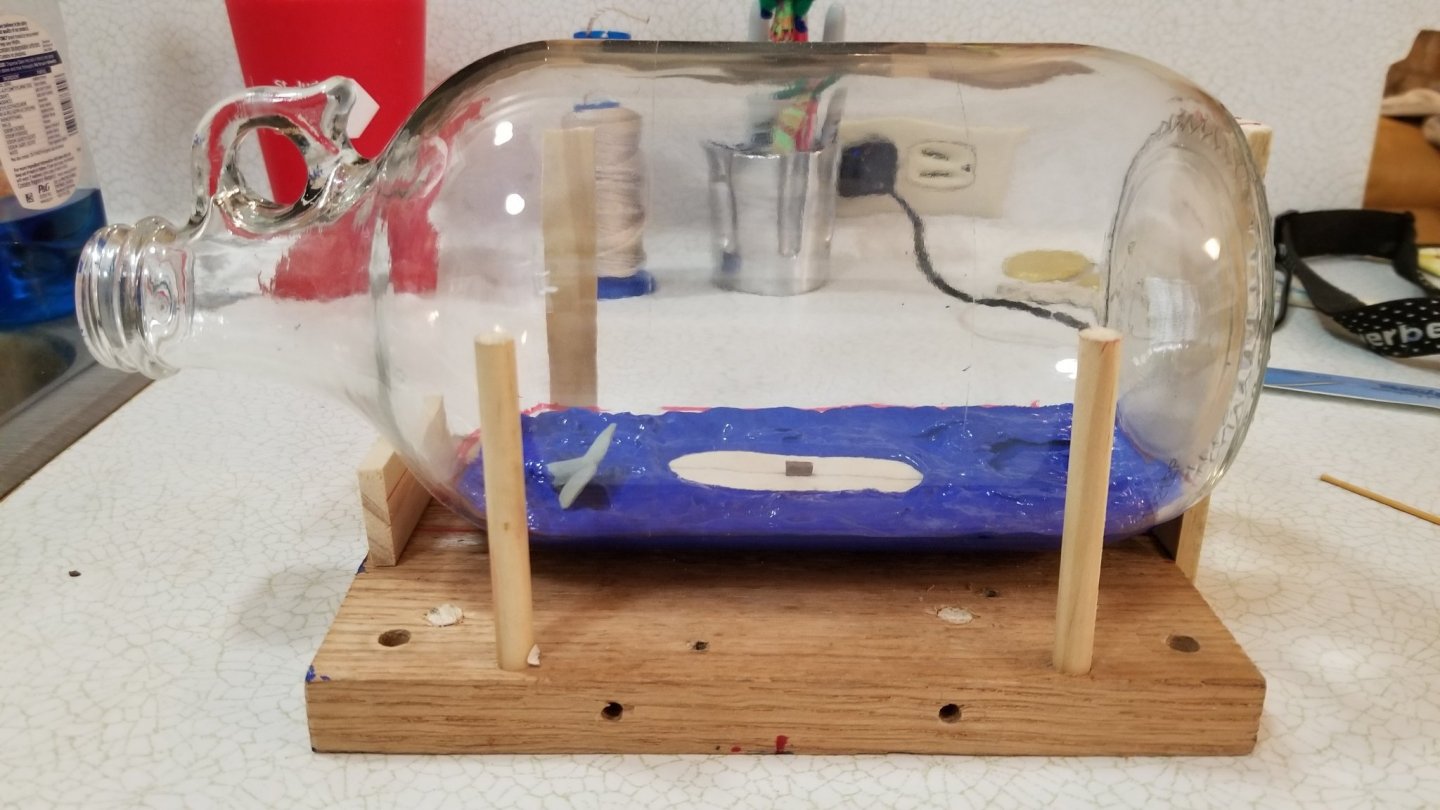
The 1st pic below shows how I got the paint inside the bottle. The 2nd pic shows the base in place and a little whale tail I found. Hopefully the whale tail does not get in the way when I try to maneuver the ship to the base. If it does, I may have to find a little harpoon and do a bit of whaling myself!
The downside of having such a thick layer of acrylic paint is that it takes a looooong time to dry. It will be a few days before it’s solid and ready for the ship squeeze.
The moment of truth is almost here! Thanks @mtaylor and @Landlubber Mike for crossing fingers and toes and everything else!
-
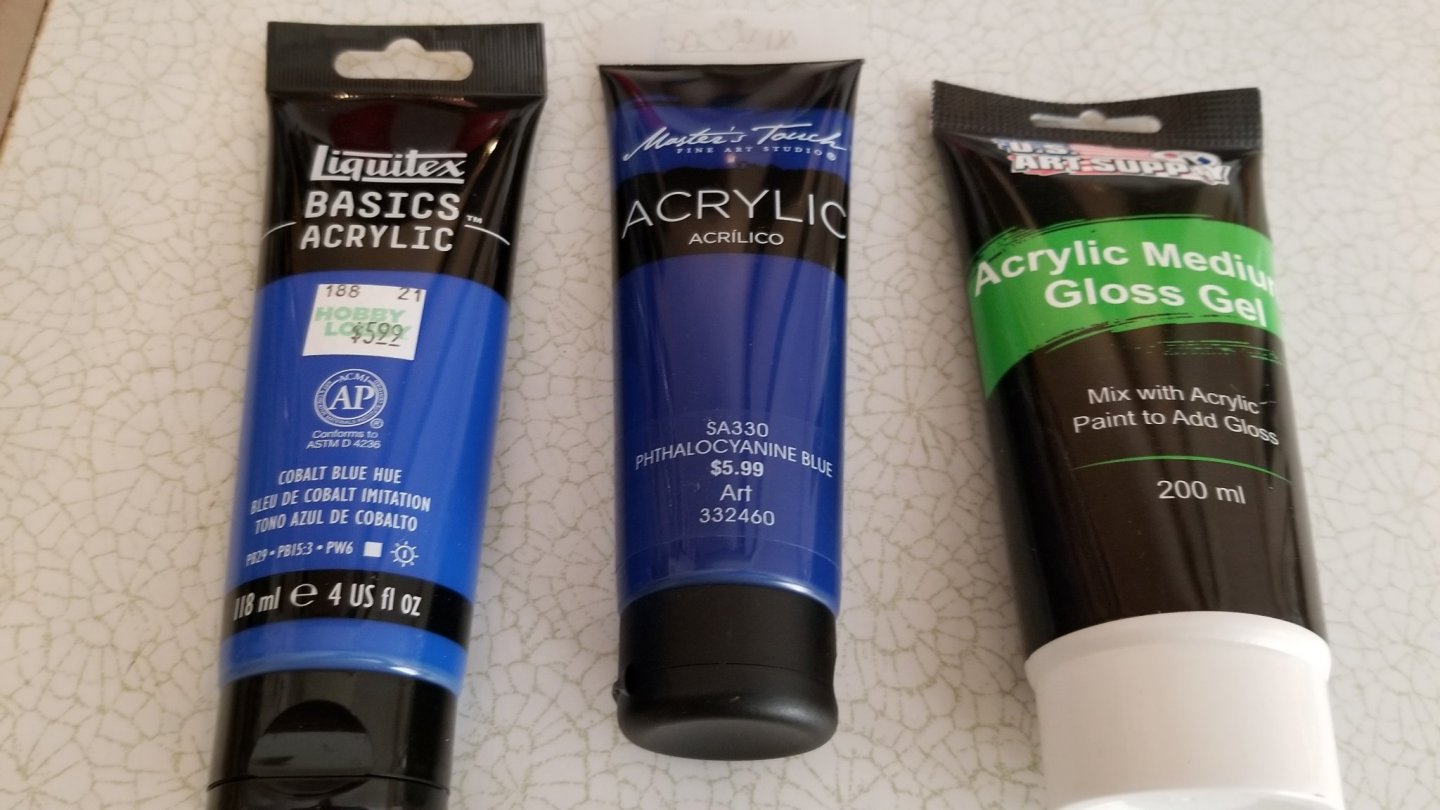
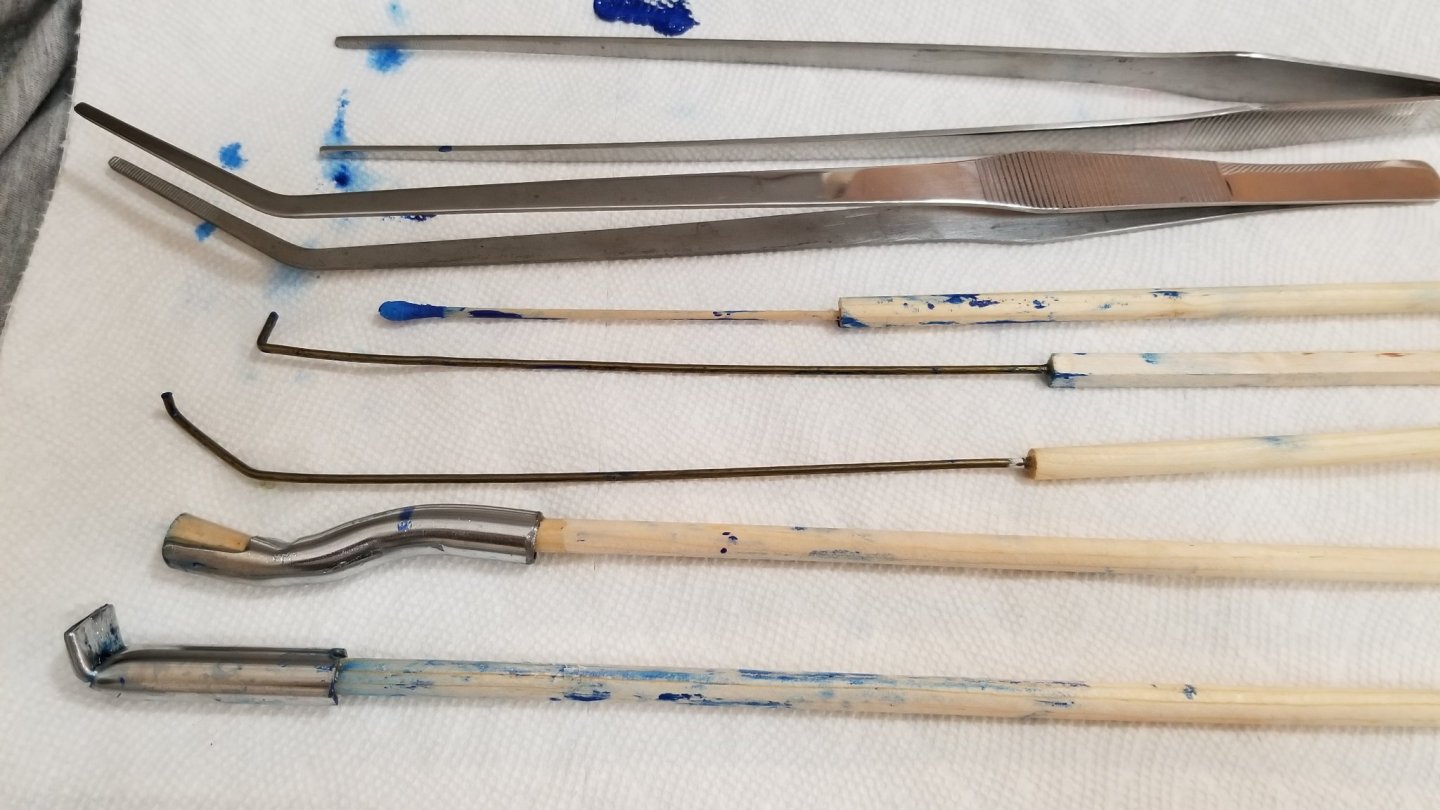
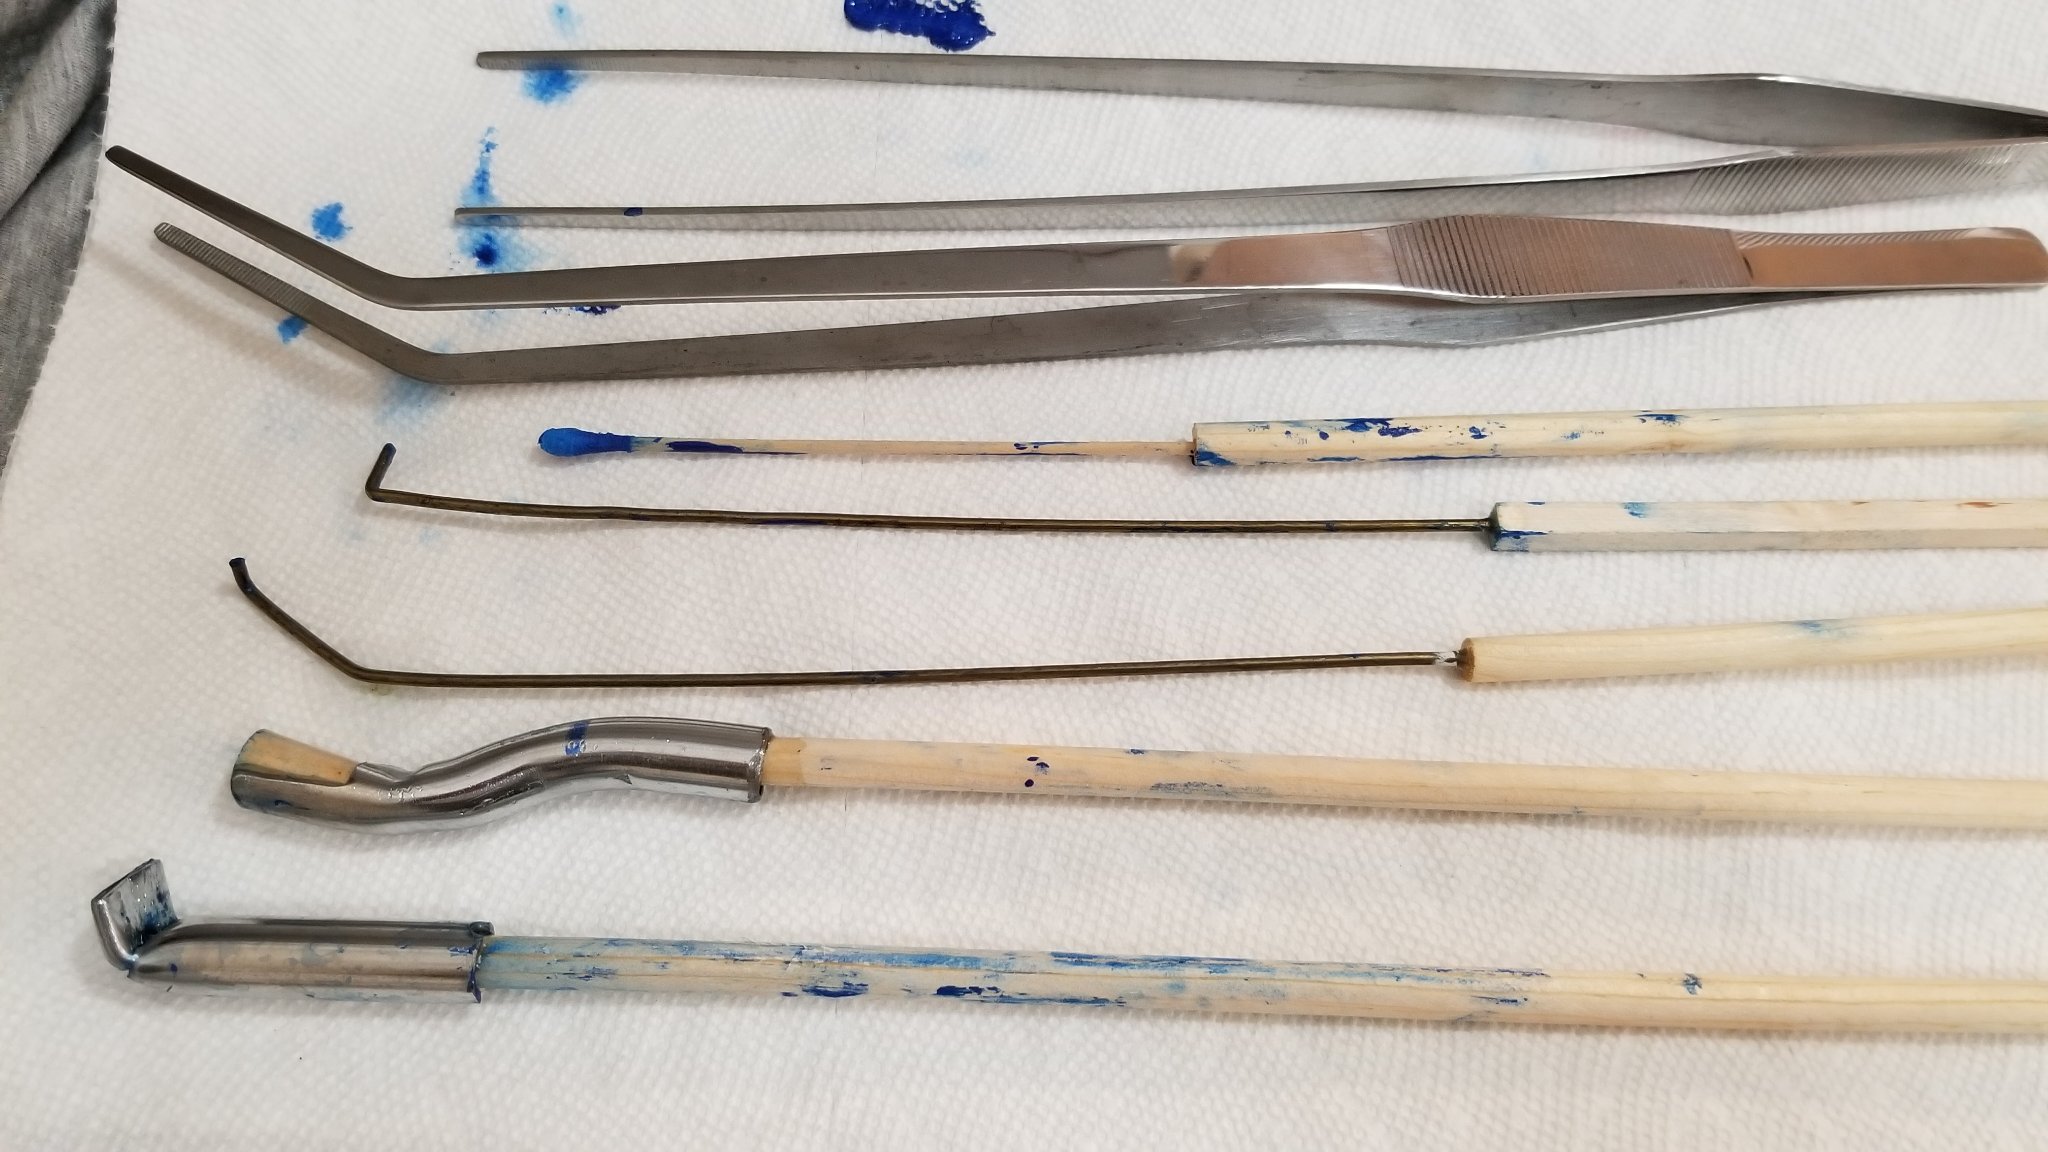
For the ocean, I’m doing the same thing I did for the Amati Hannah kit. I blend 2 different shade of thick blue acrylic paint and also mix in some medium gloss gel. I really like the consistency of the acrylic paint. It’s impossible to make it smooth inside the bottle so no matter how you work it, you get all these natural surface irregularities much like a real ocean. The gloss gel adds a shiny reflection of light off the edges of the paint surface which gives it a look like sunlight reflecting off water. My mixture is pretty much 1-1-1. The 2nd pic shows the tools I use to push the paint around once it’s inside the bottle.
- GrandpaPhil, mtaylor, Ian_Grant and 2 others
-
 5
5
-
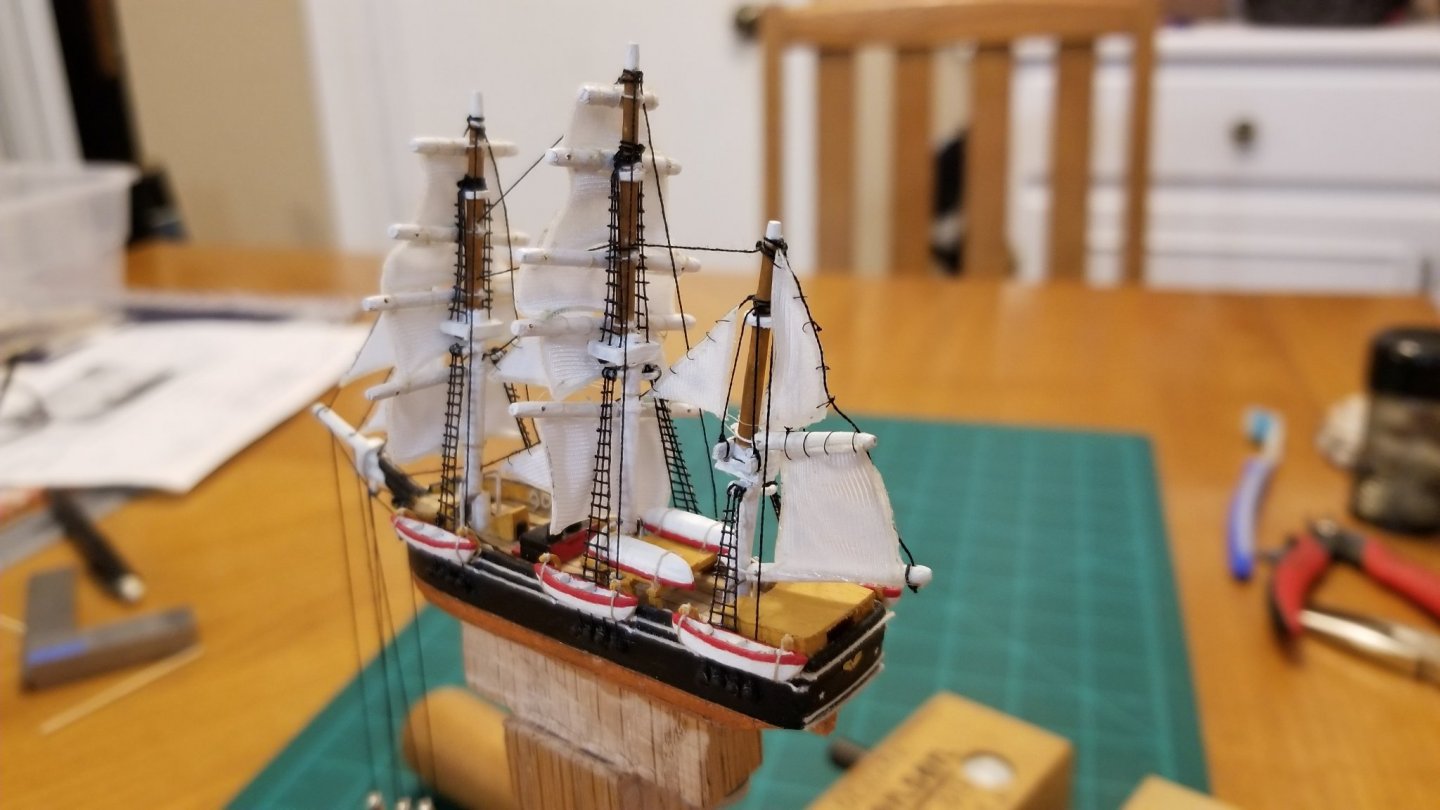
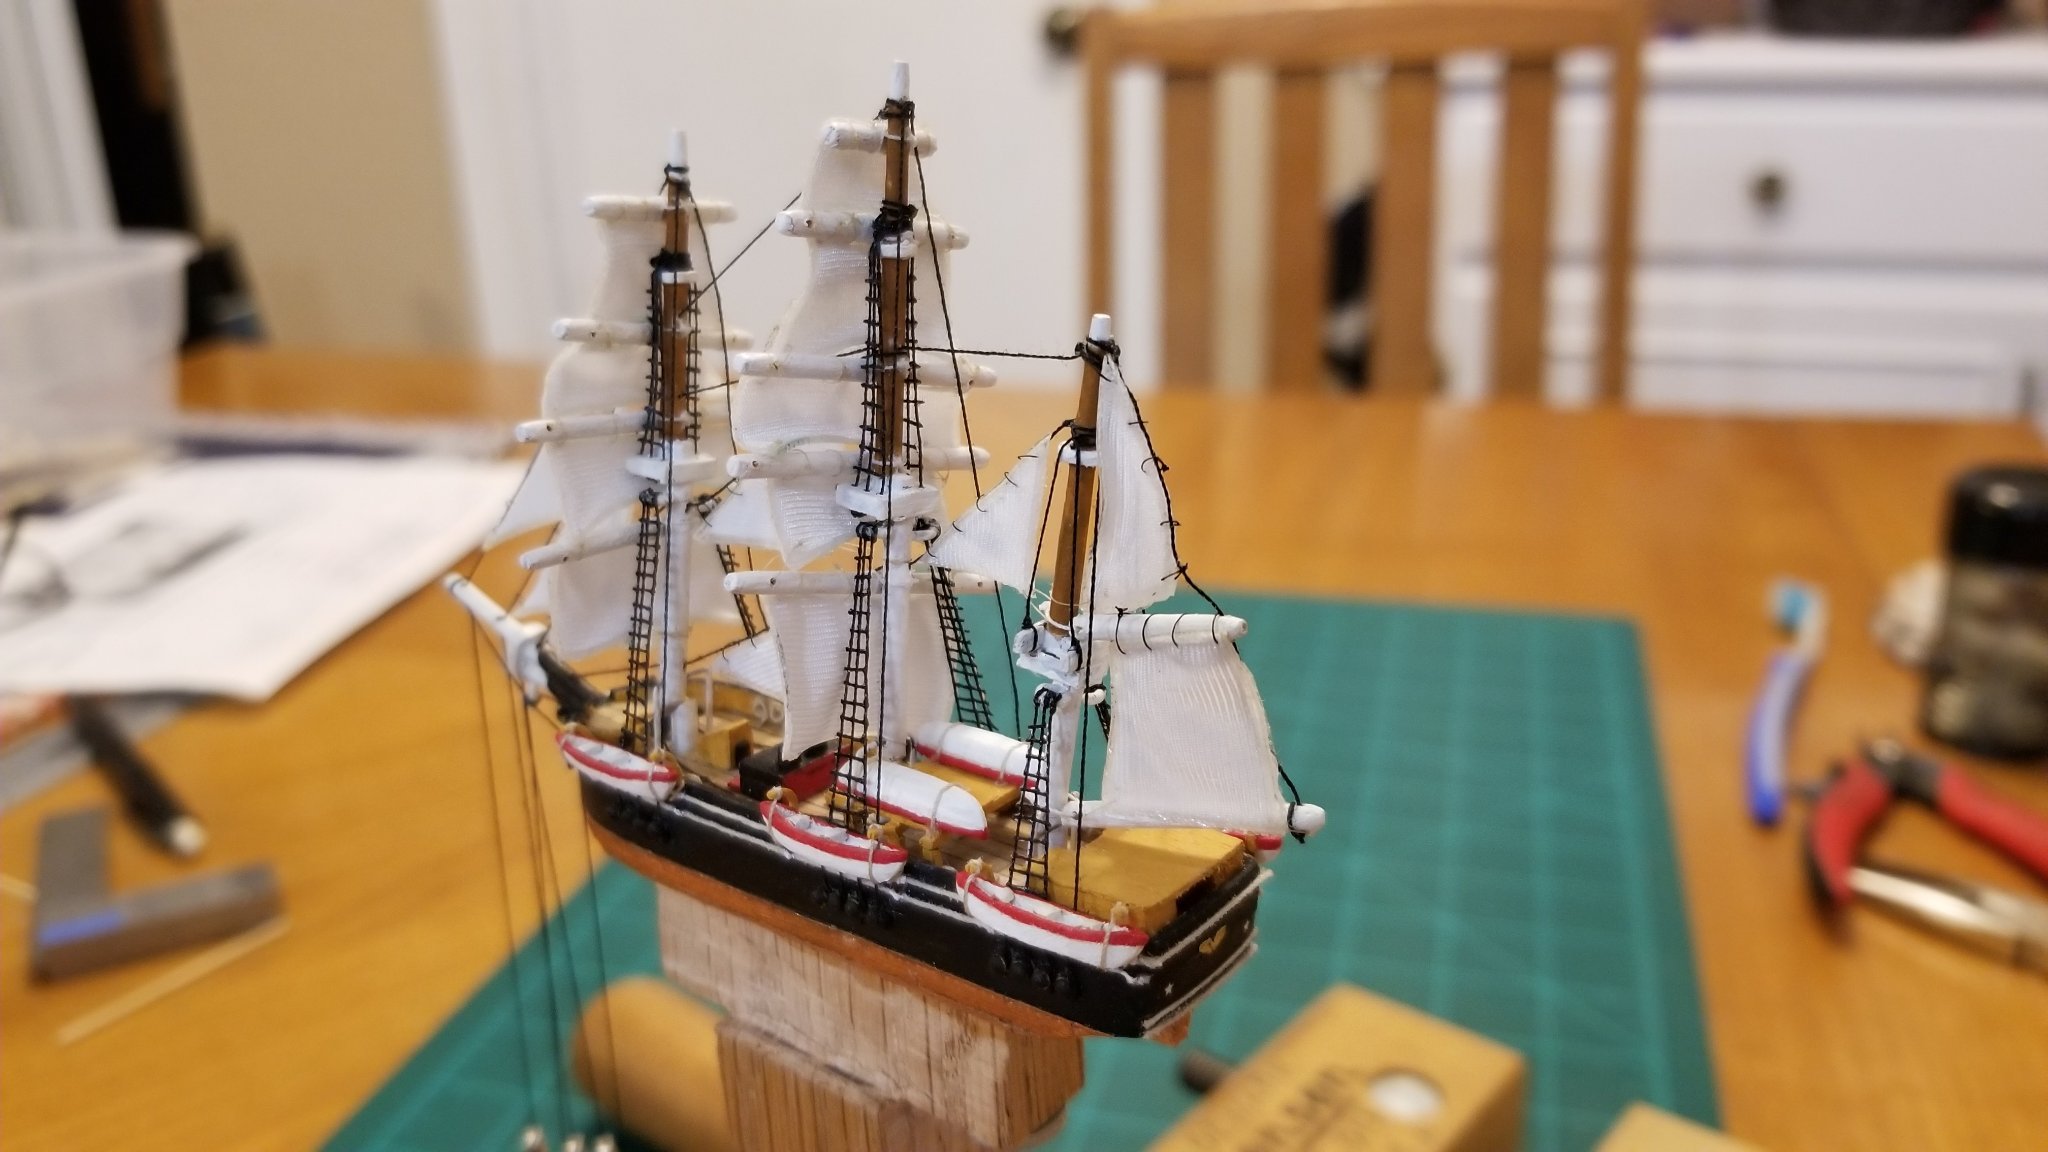
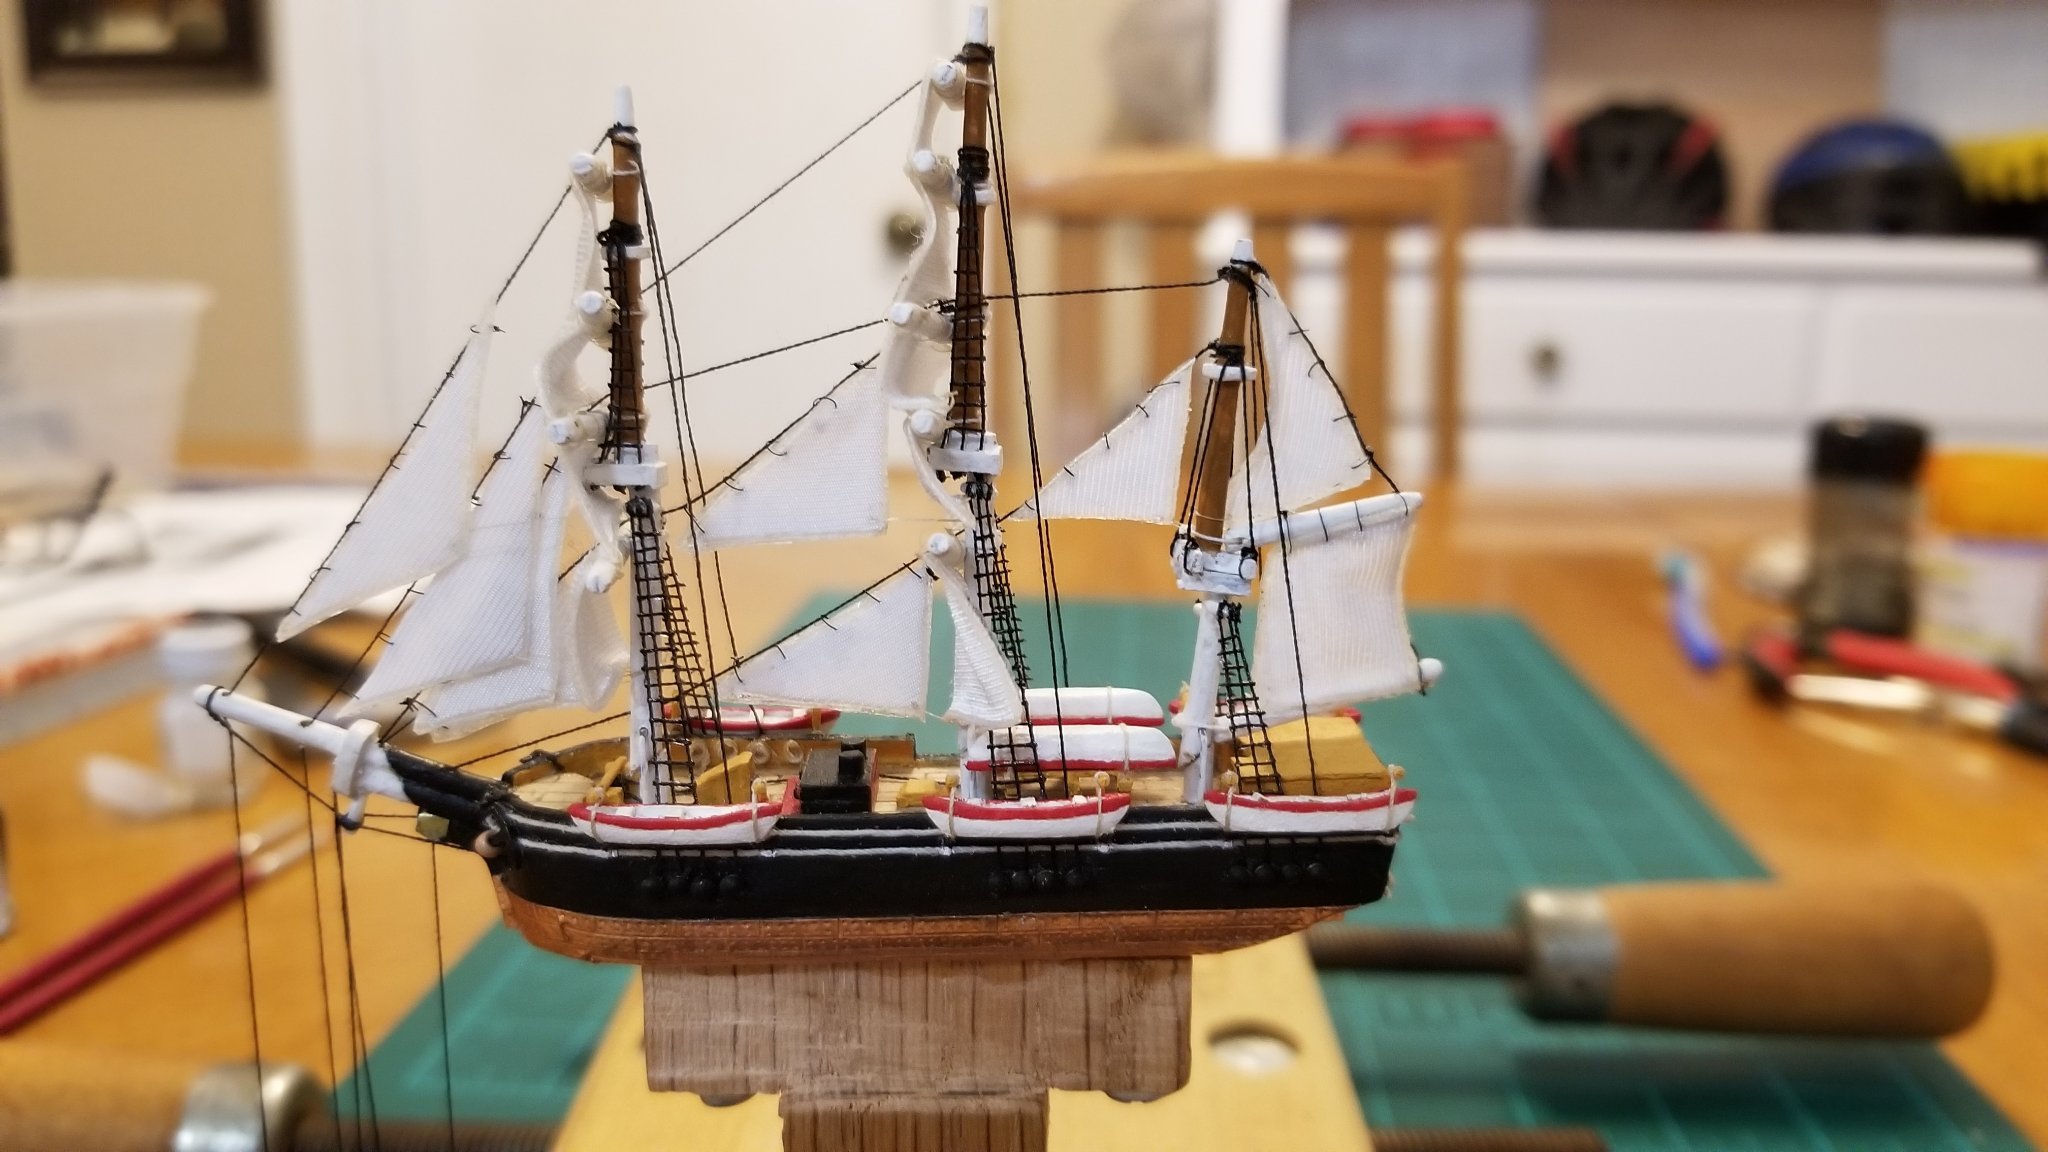
The last step in the construction of the ship was attaching the whale boats and adding the lines that secure them to the davits and boat bearer.
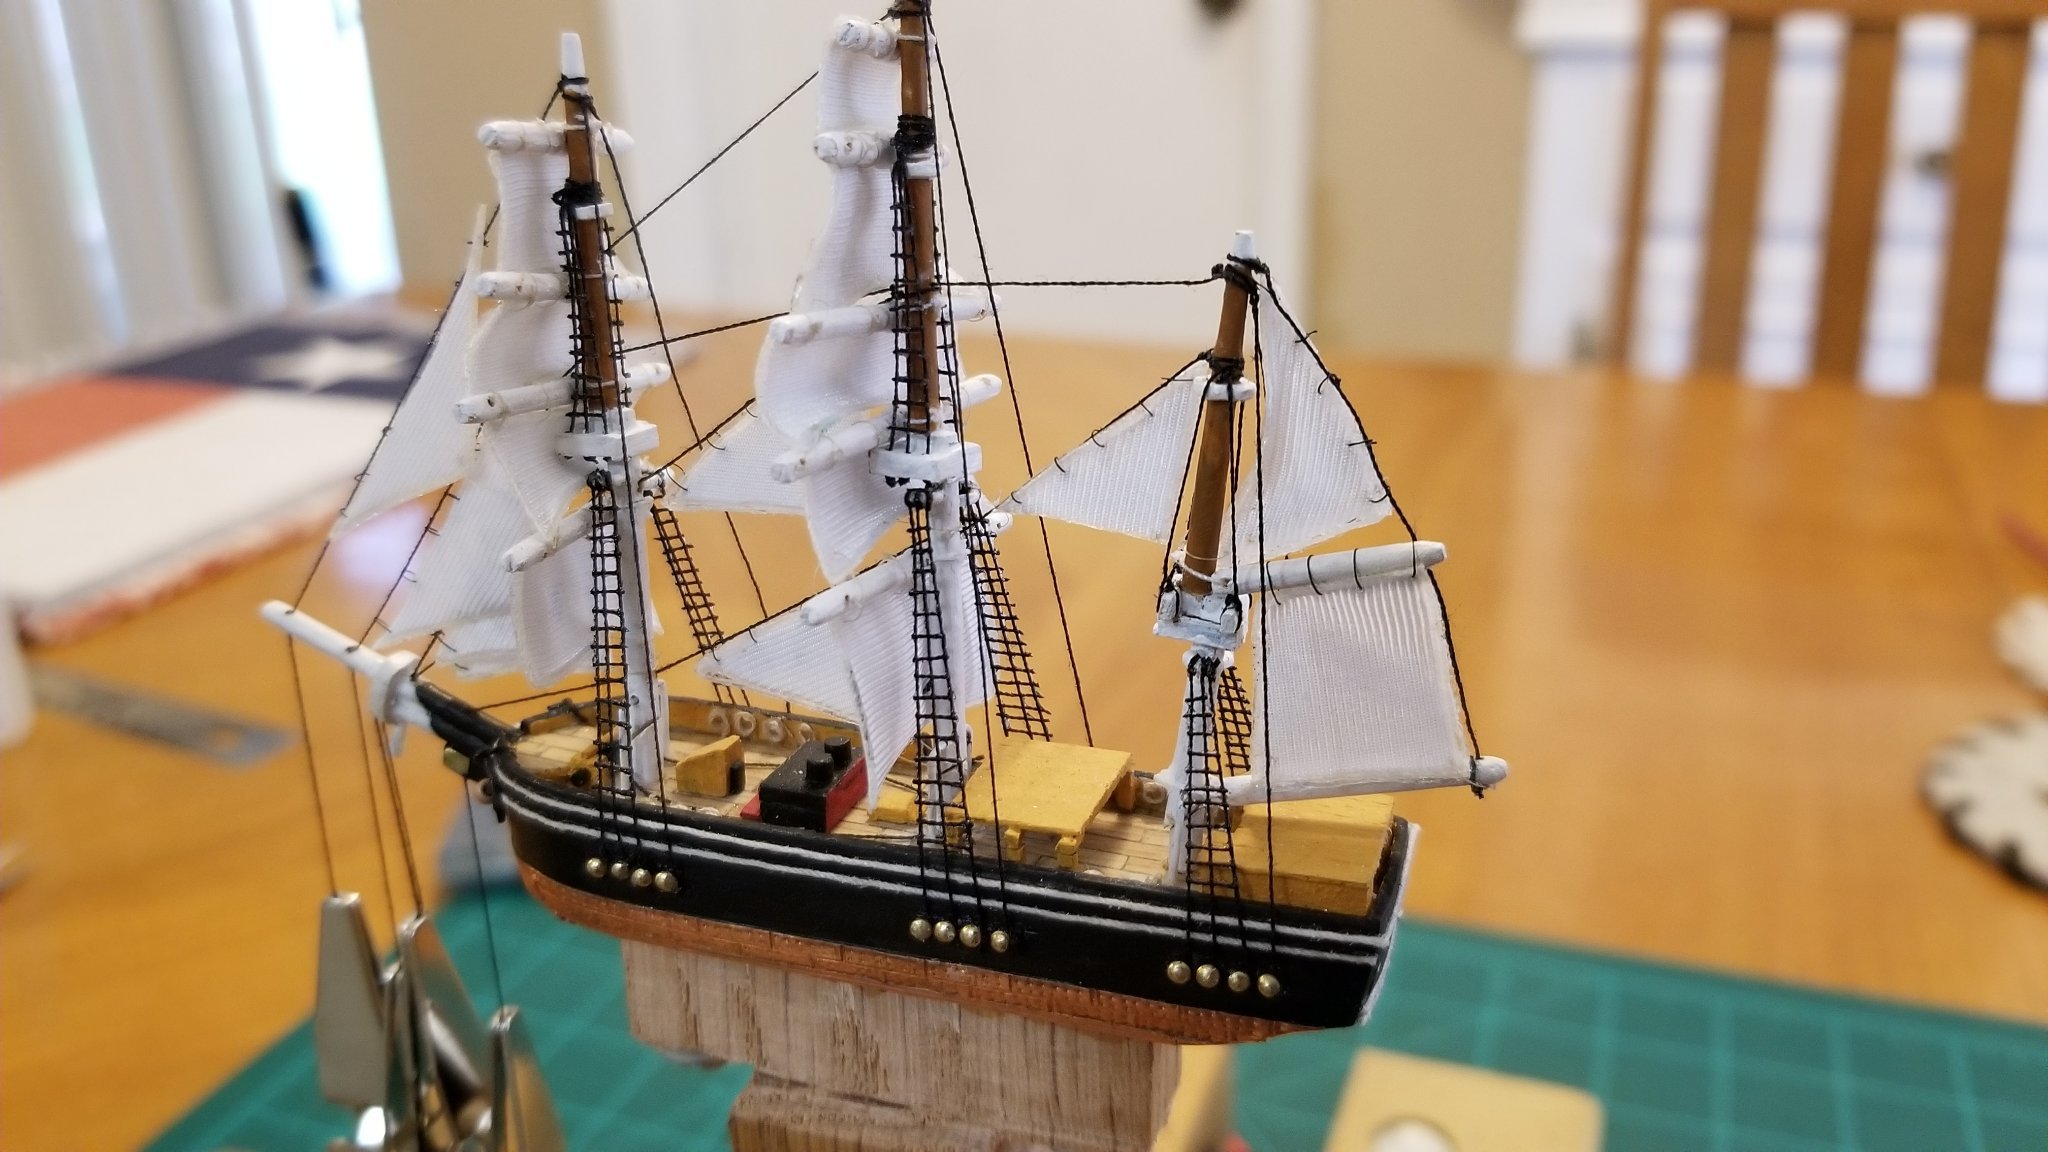
With that accomplished, I believe the ship is complete. @Landlubber Mike (or anyone else familiar with the Morgan) – if you can see anything that I have overlooked please let me know. My goal was to build something that was easily identifiable as the Morgan even at this small scale.
Good news/bad news. Even with all the whale boats attached, the ship fits nicely width-wise into the neck of the bottle. But vertical-wise it is extremely tight. I’m not 100% sure I can push it in without breaking something. It's close!
After I put the ocean into the bottle, I will spend some time trying find a way to compress things vertically just a bit more. I don’t need much.

- Keith Black, mtaylor, Landlubber Mike and 5 others
-
7
-
 1
1
-
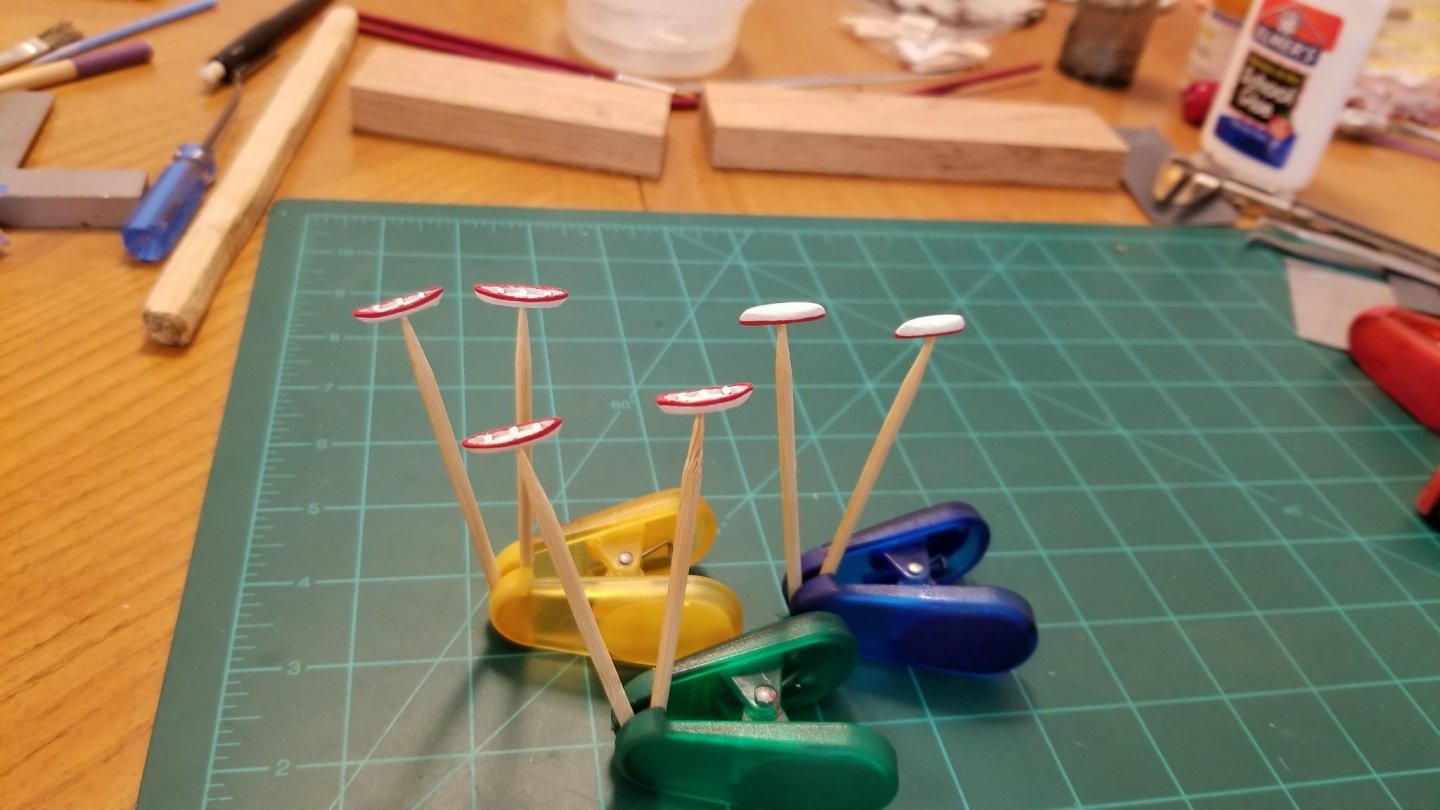
Whale boats on a stick! Gluing them to bamboo skewers turned out to be a good way to hold the tiny things while I painted them. The 2 that are upside down are the ones that will lay on the boat bearer shelter mid-ship. I took this pic before I realized I needed to build 1 more so there's actually a total of 7.
- Scott Mitchell, mtaylor, ccoyle and 2 others
-
5
-
Thanks for the confirmation, Mike. Gotta build 1 more whale boat. Fortunately it should not take too long since I've already made about 20 of them counting ones that did not make the cut and ended up in the trash!
- mtaylor and Landlubber Mike
-
2
-
Thanks, Mike! But dang it, I just realized I think I need a 3rd whale boat and another set of davits on the port side (which will be my display side). Does your kit have 3 boats on the port side and 2 on the starboard?
- mtaylor and Landlubber Mike
-
2
-
Hey Keith - Your perseverance is an inspiration. Can't wait to see some pictures of the rigging in progress. Fantastic build so far!
- Keith Black, FriedClams and mtaylor
-
2
-
1
-
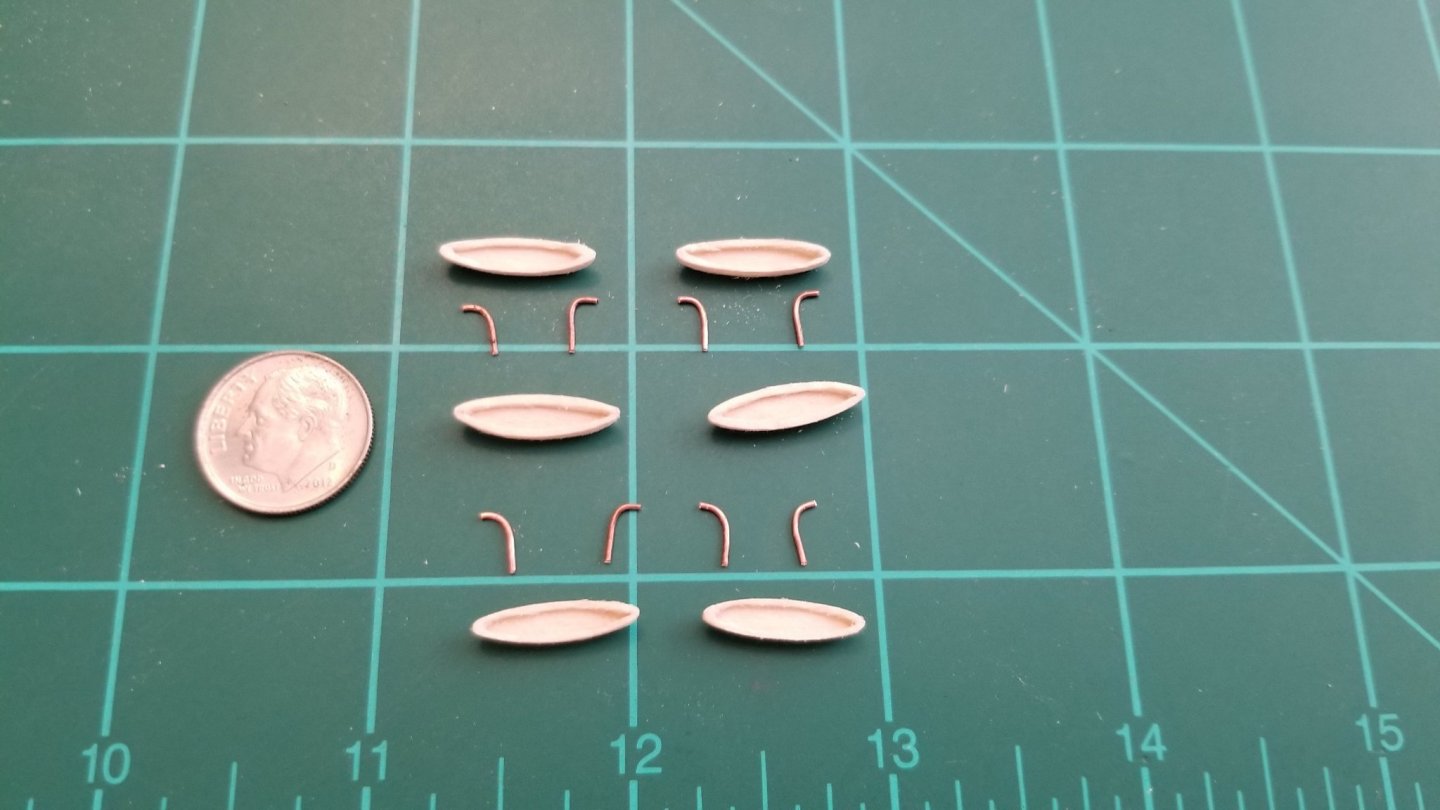
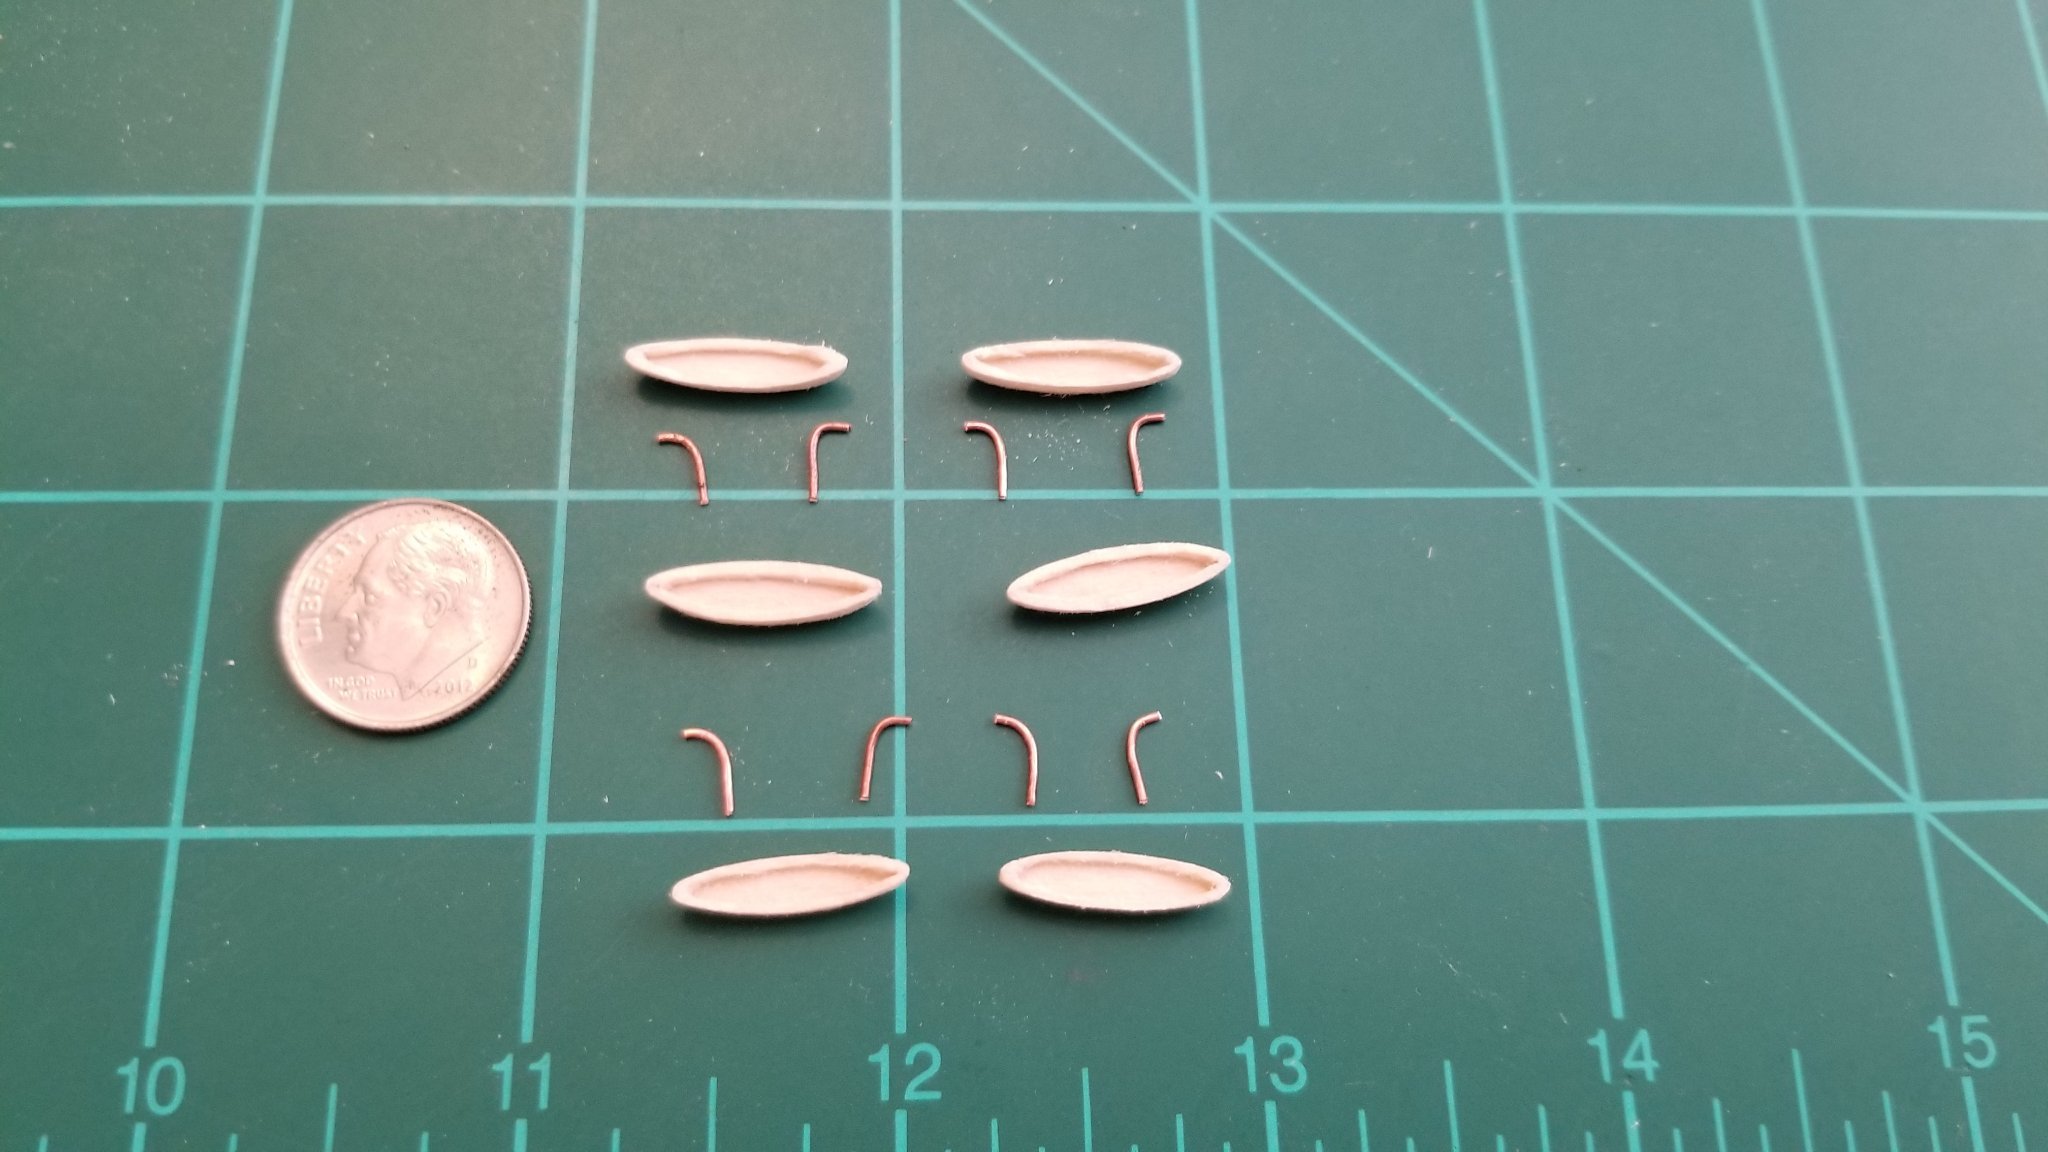
I cut all the whale boats out and sanded them into their final shape to await painting. Next was figuring out the davits. I finally settled on thin copper wire since it’s easy to bend into the right shape (and I also had plenty in my garage). I glued them to the side of the ship and painted them 3 different colors (ochre above the bulwark and then black and white below to blend in with the hull color and pinstripes. I’ve seen this in pics of the real ship and some models.
- Keith Black, GrandpaPhil, ccoyle and 1 other
-
4
-
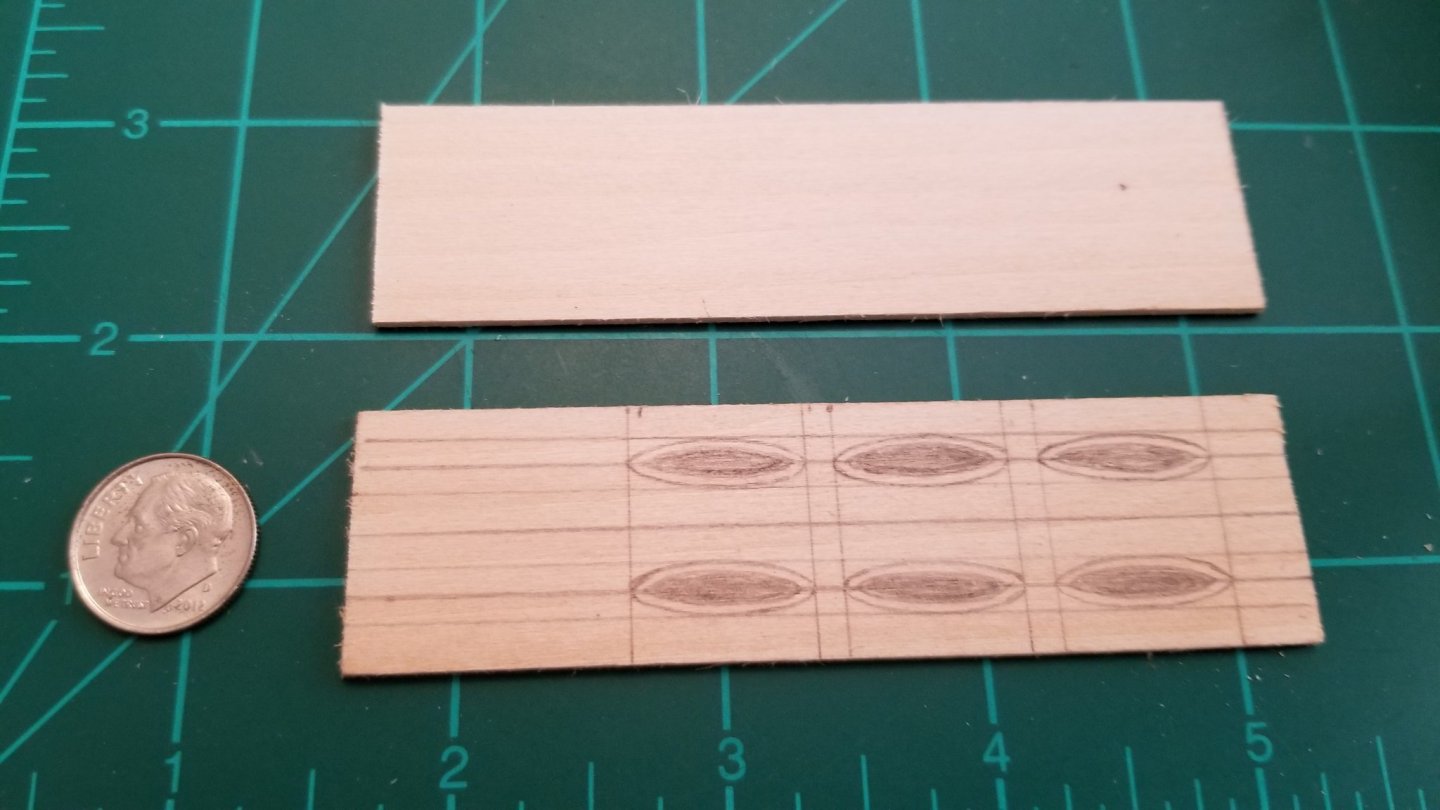
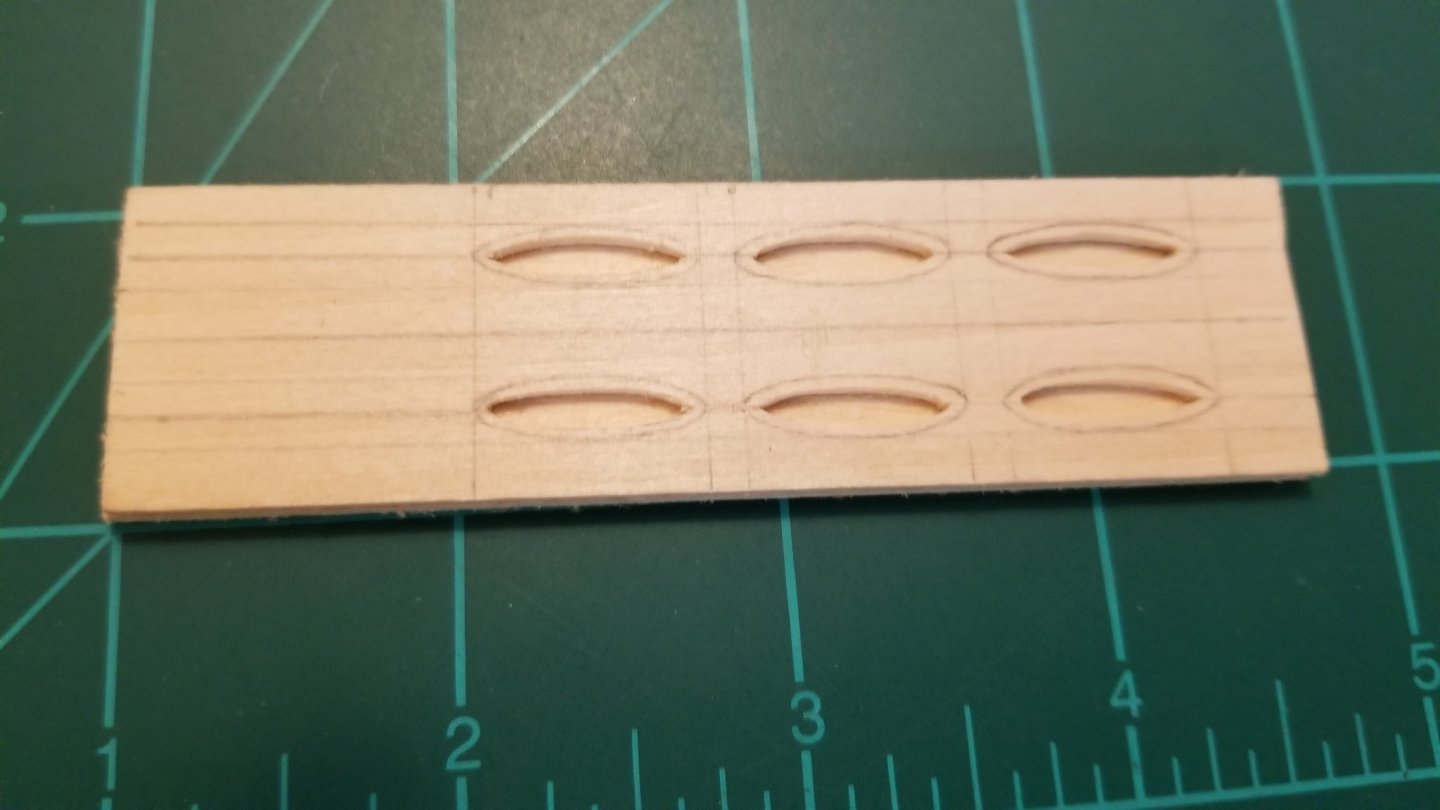
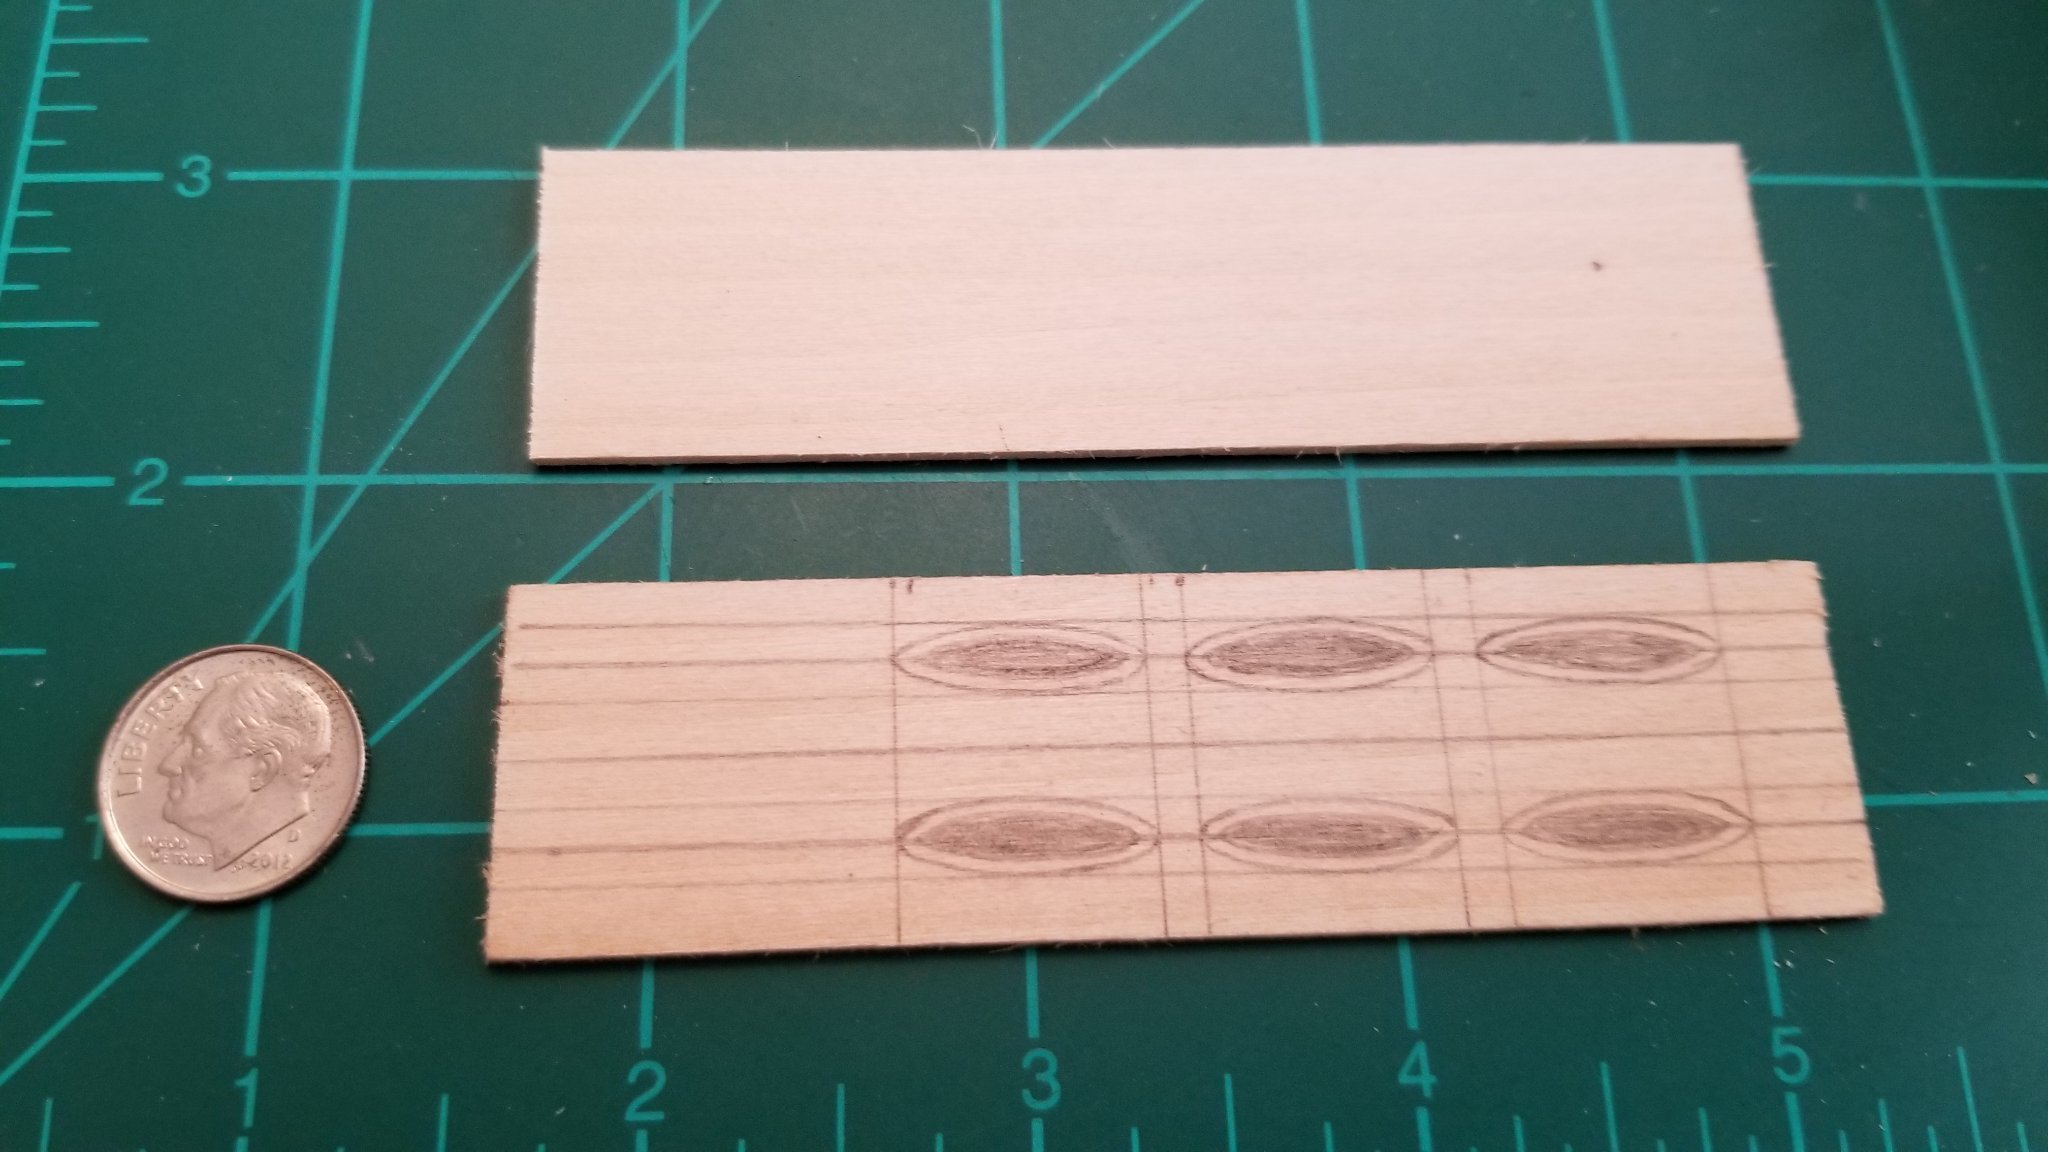
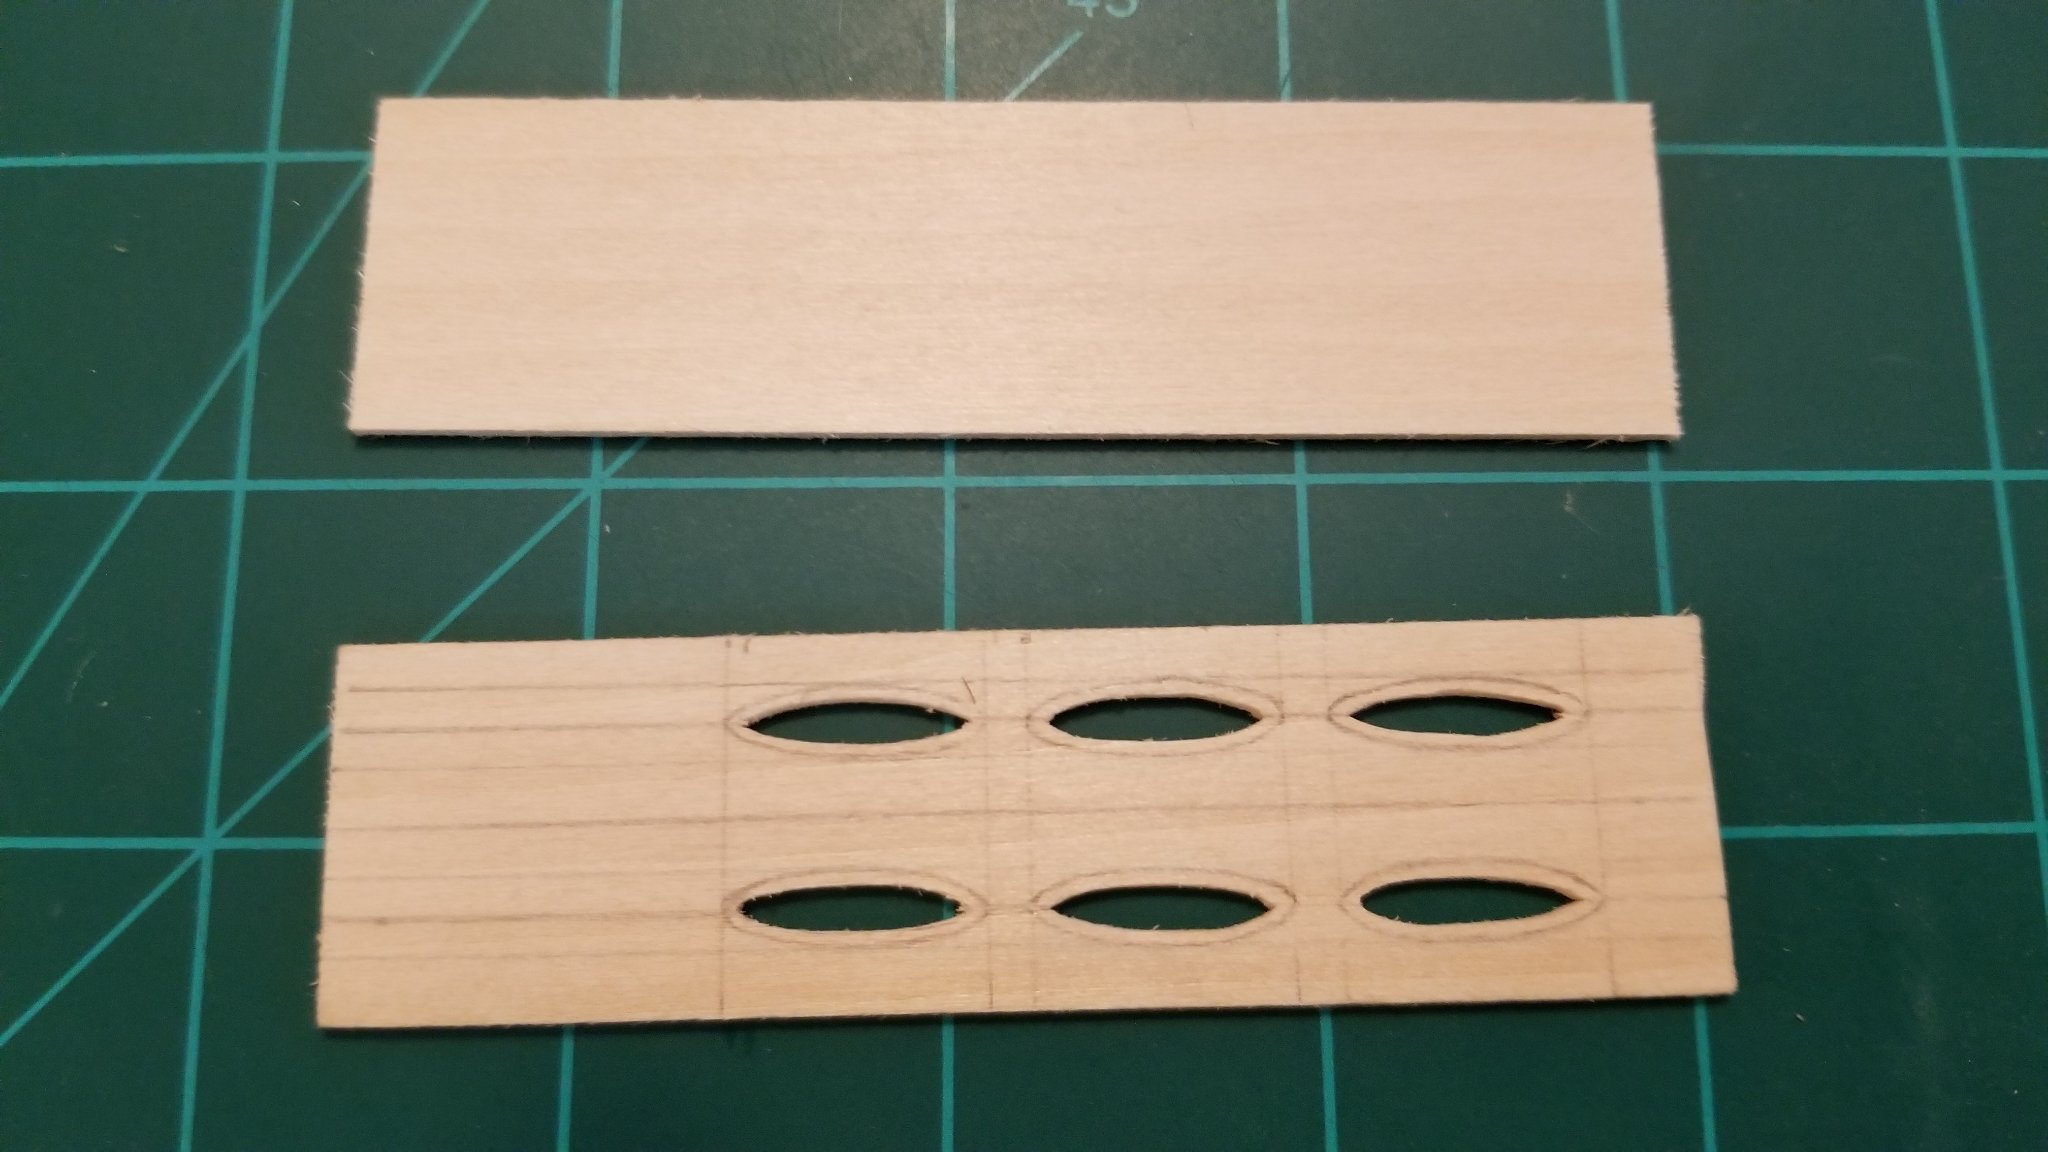
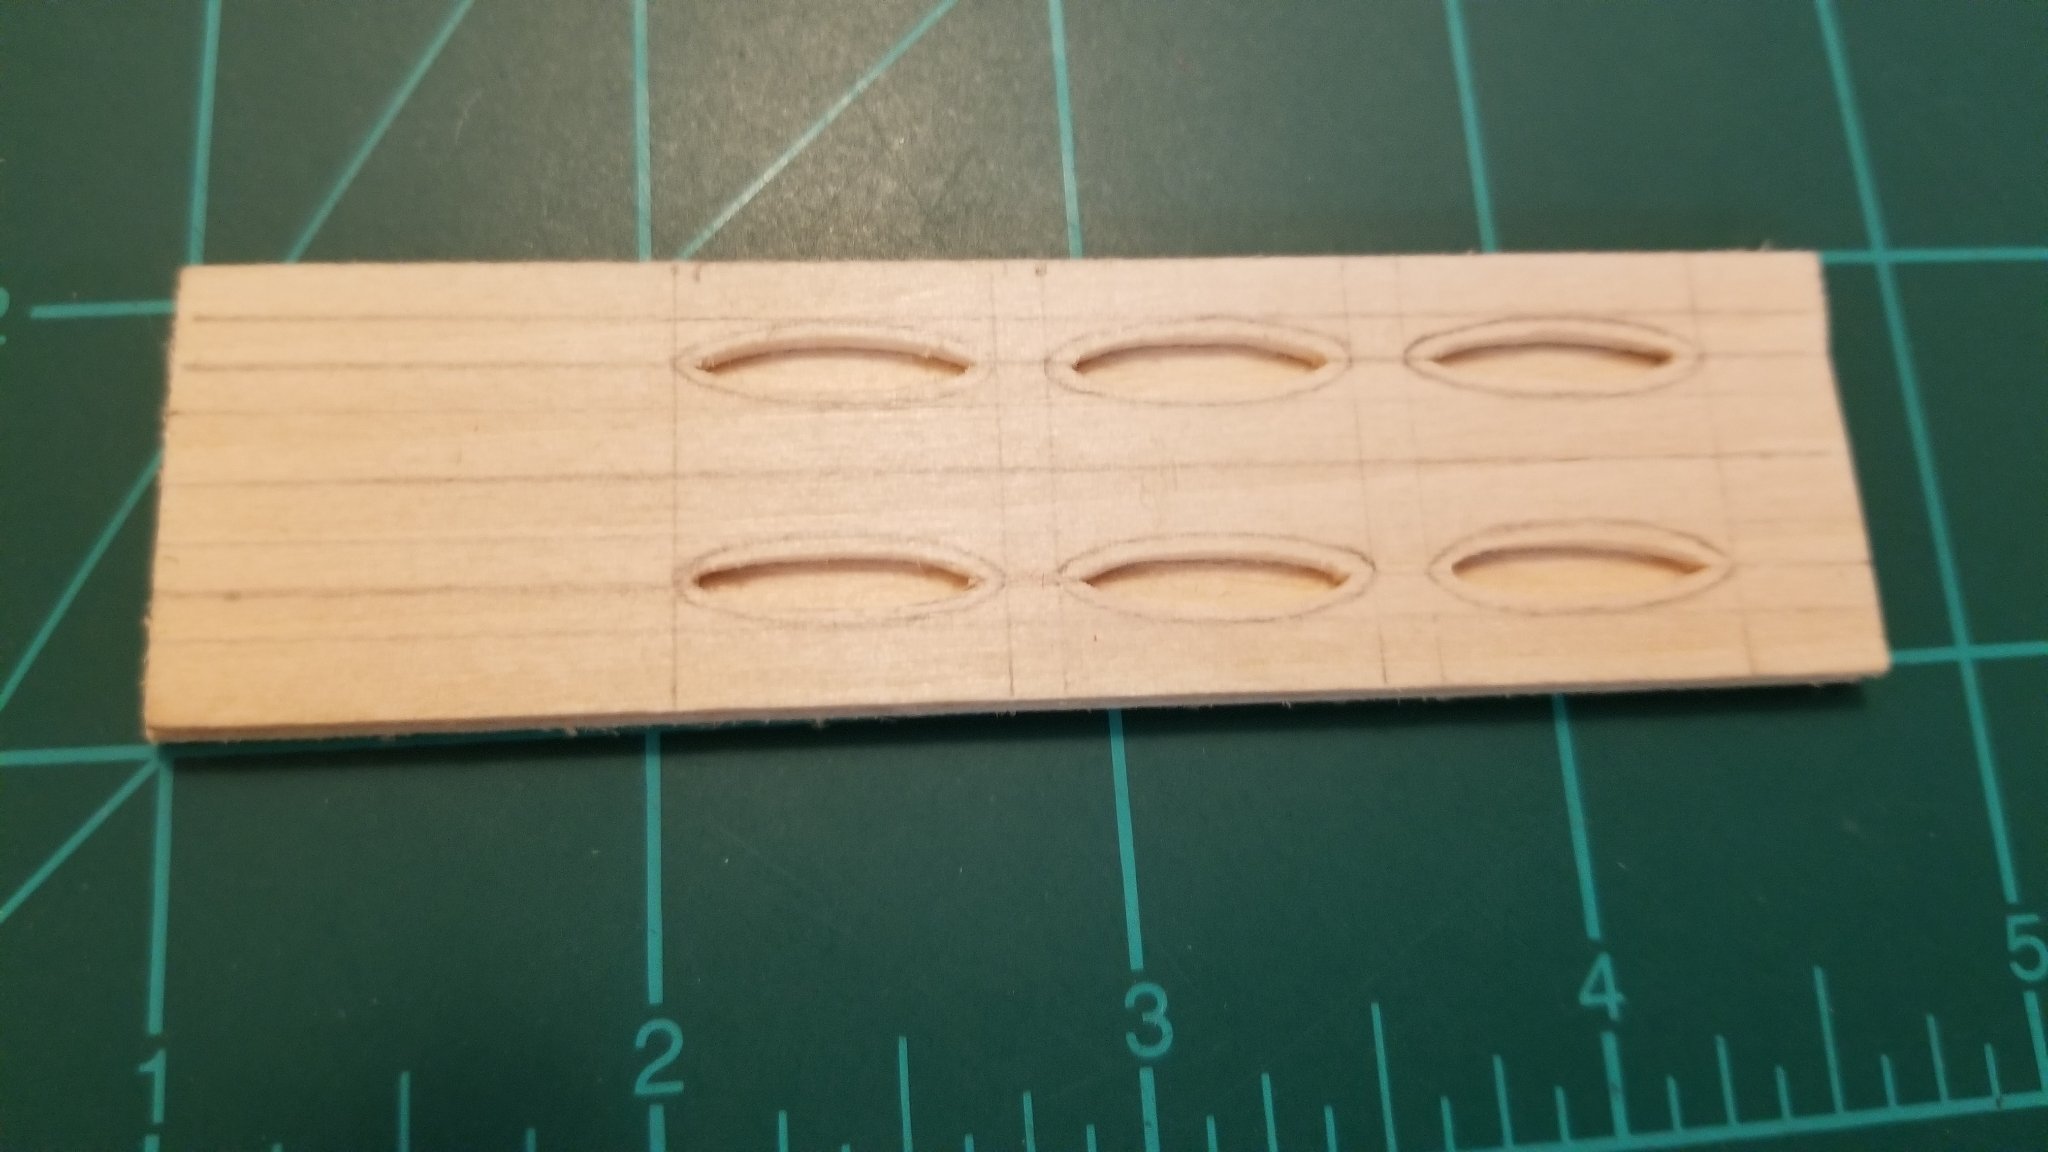
For the whale boats, I’m doing a 2-piece lamination using 1/16” thick basswood strips. I’m not that great at wood carving so instead of having to carve out the inside of a single piece of wood and try to get the depth even, I can just cut a hole in the top layer and glue it to the bottom layer.

-
Thanks, Mike! The thing I've learned quickly about these SIB projects is that you can feel good about your progress, but you're always nervous till the very end when the boat is safely in the bottle!
- mtaylor and Landlubber Mike
-
2
-
-
Finished up the lower shrouds and ratlines today which meant it was time for the first big test! Would all this stuff fit inside the neck of the bottle when I mashed everything down or did I go overboard loading up the ship with all those sails, yards, fittings, etc.?
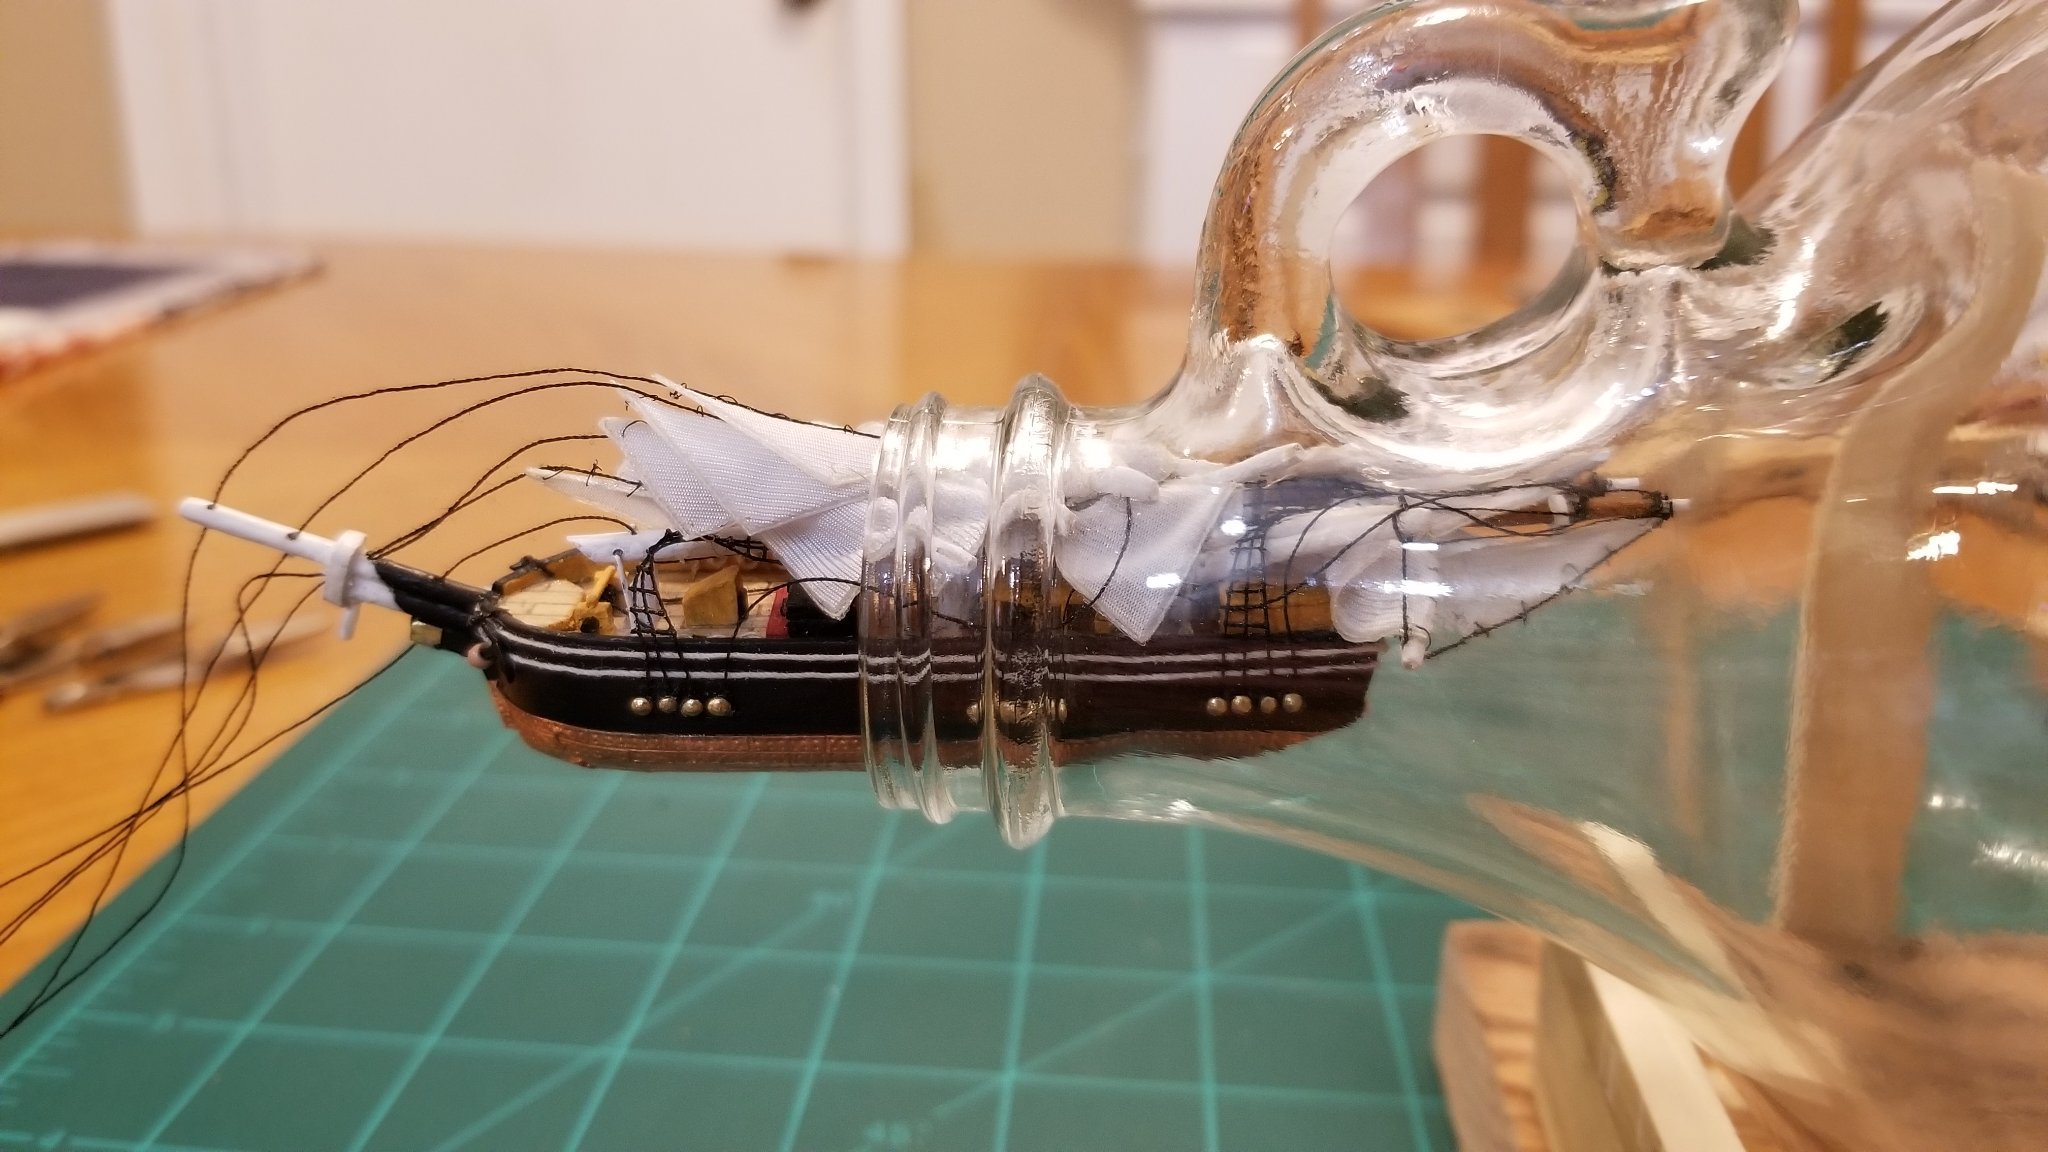
Well……it worked!! But just barely. I gently (and not so gently) cajoled it a little over halfway in, which was enough to get the thickest part of the ship past the thinnest part of the neck. Then I pulled the whole thing back out, remounted on the stand, and raised the masts. Thankfully, everything returned to original form pretty well! Relief is a word not near strong enough to describe how I’m feeling.Pics below show before the squeeze, during, and after.
Now it's on to the whale boats!


- Keith Black, ccoyle, Landlubber Mike and 1 other
-
4
-
Thanks, Mark. Yes, definitely going to be a "sea display". I like the idea of some whale boats in the water. I'm pretty sure I have room to mount whale boats on 1 side of the ship and fit it inside the bottle neck. So maybe I mount those on the display side and have the ones from the other side in the water. Hmmmmmm.
- Landlubber Mike and mtaylor
-
2
-
Thanks, Mike. After I get the lower shrouds and ratlines in place it will be time for a test squeeze! Hopefully it will fit ok. After that comes the whale boats. Still not sure what I'm going to do with those. I guess with a scratch build, you just make things up as you go, right? 😃
- Landlubber Mike and mtaylor
-
2
-
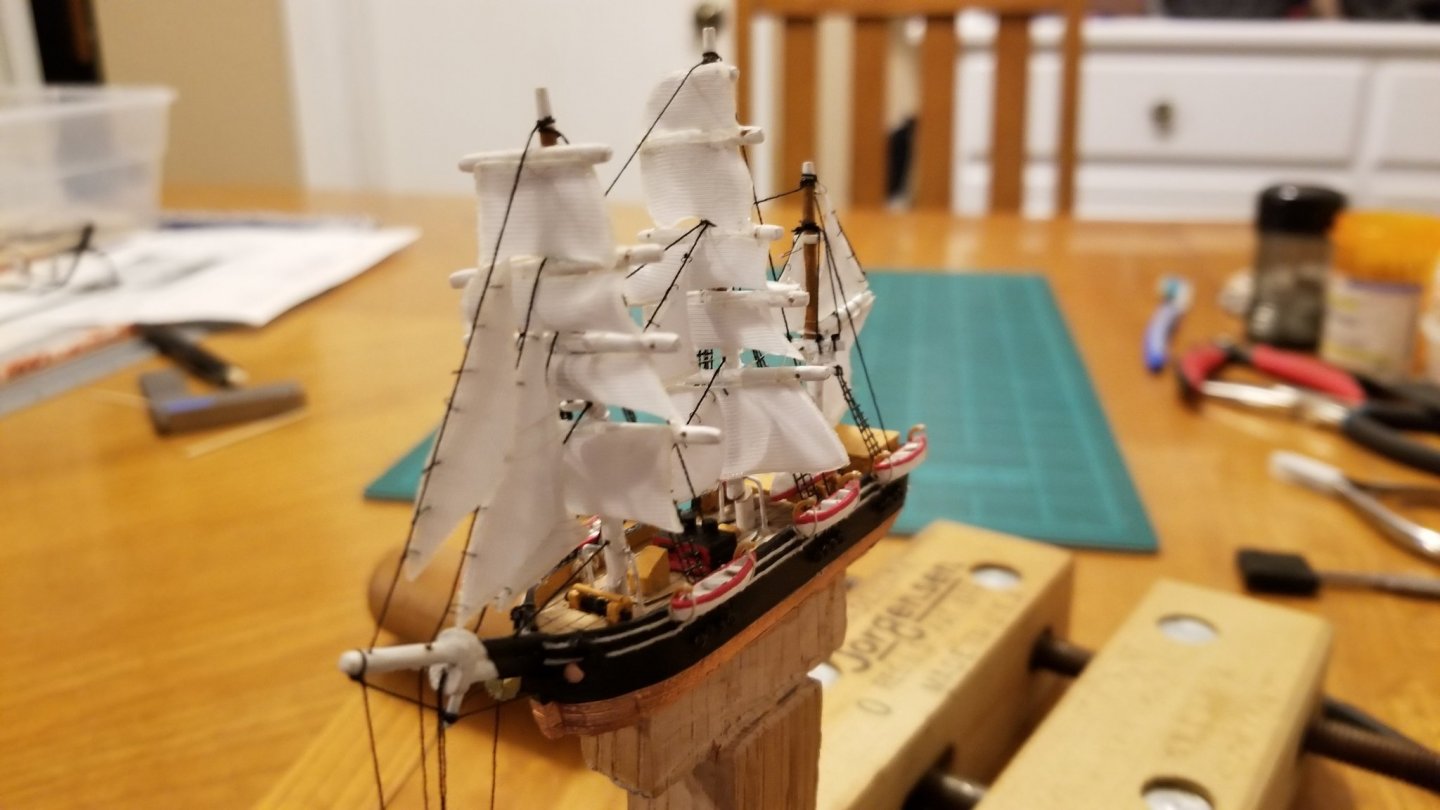
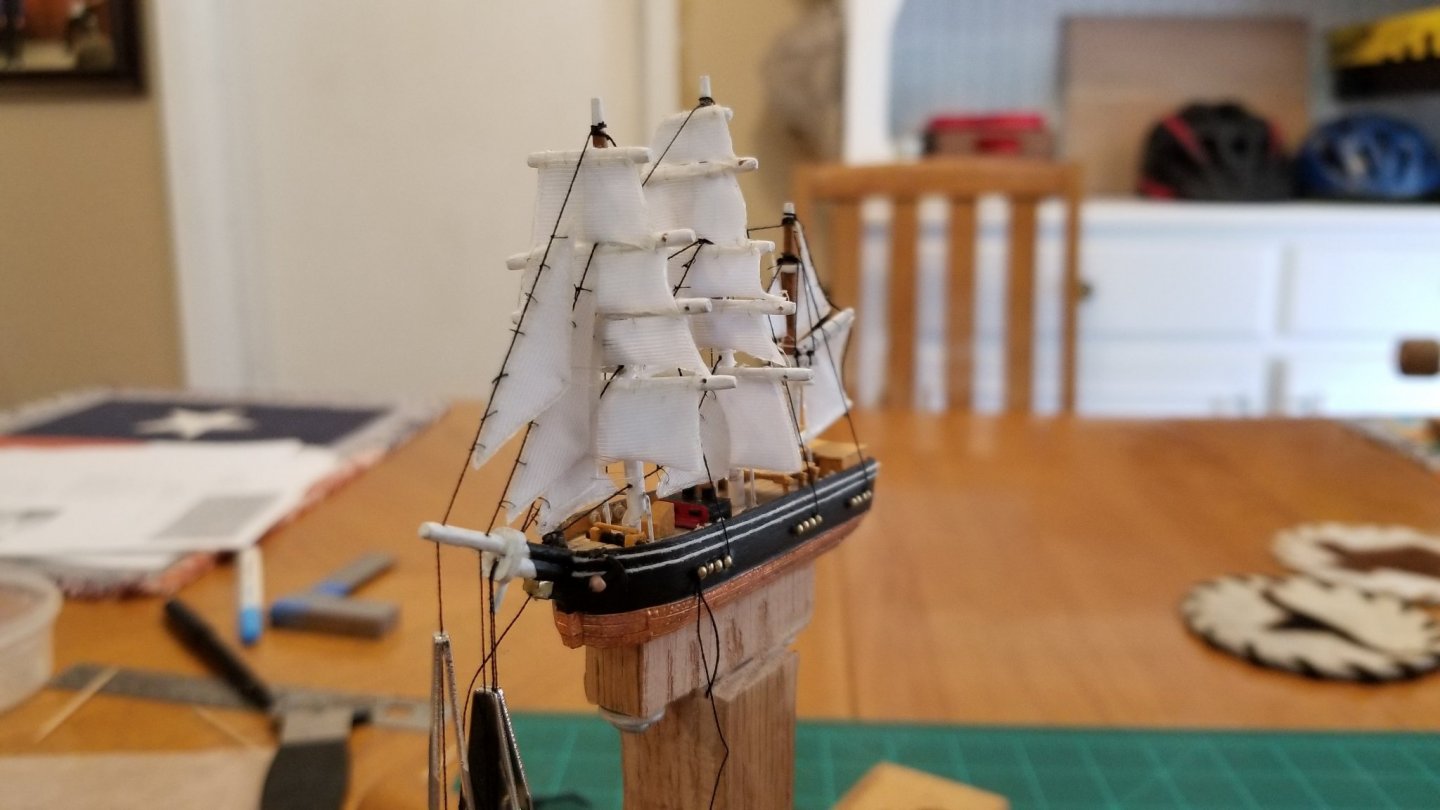
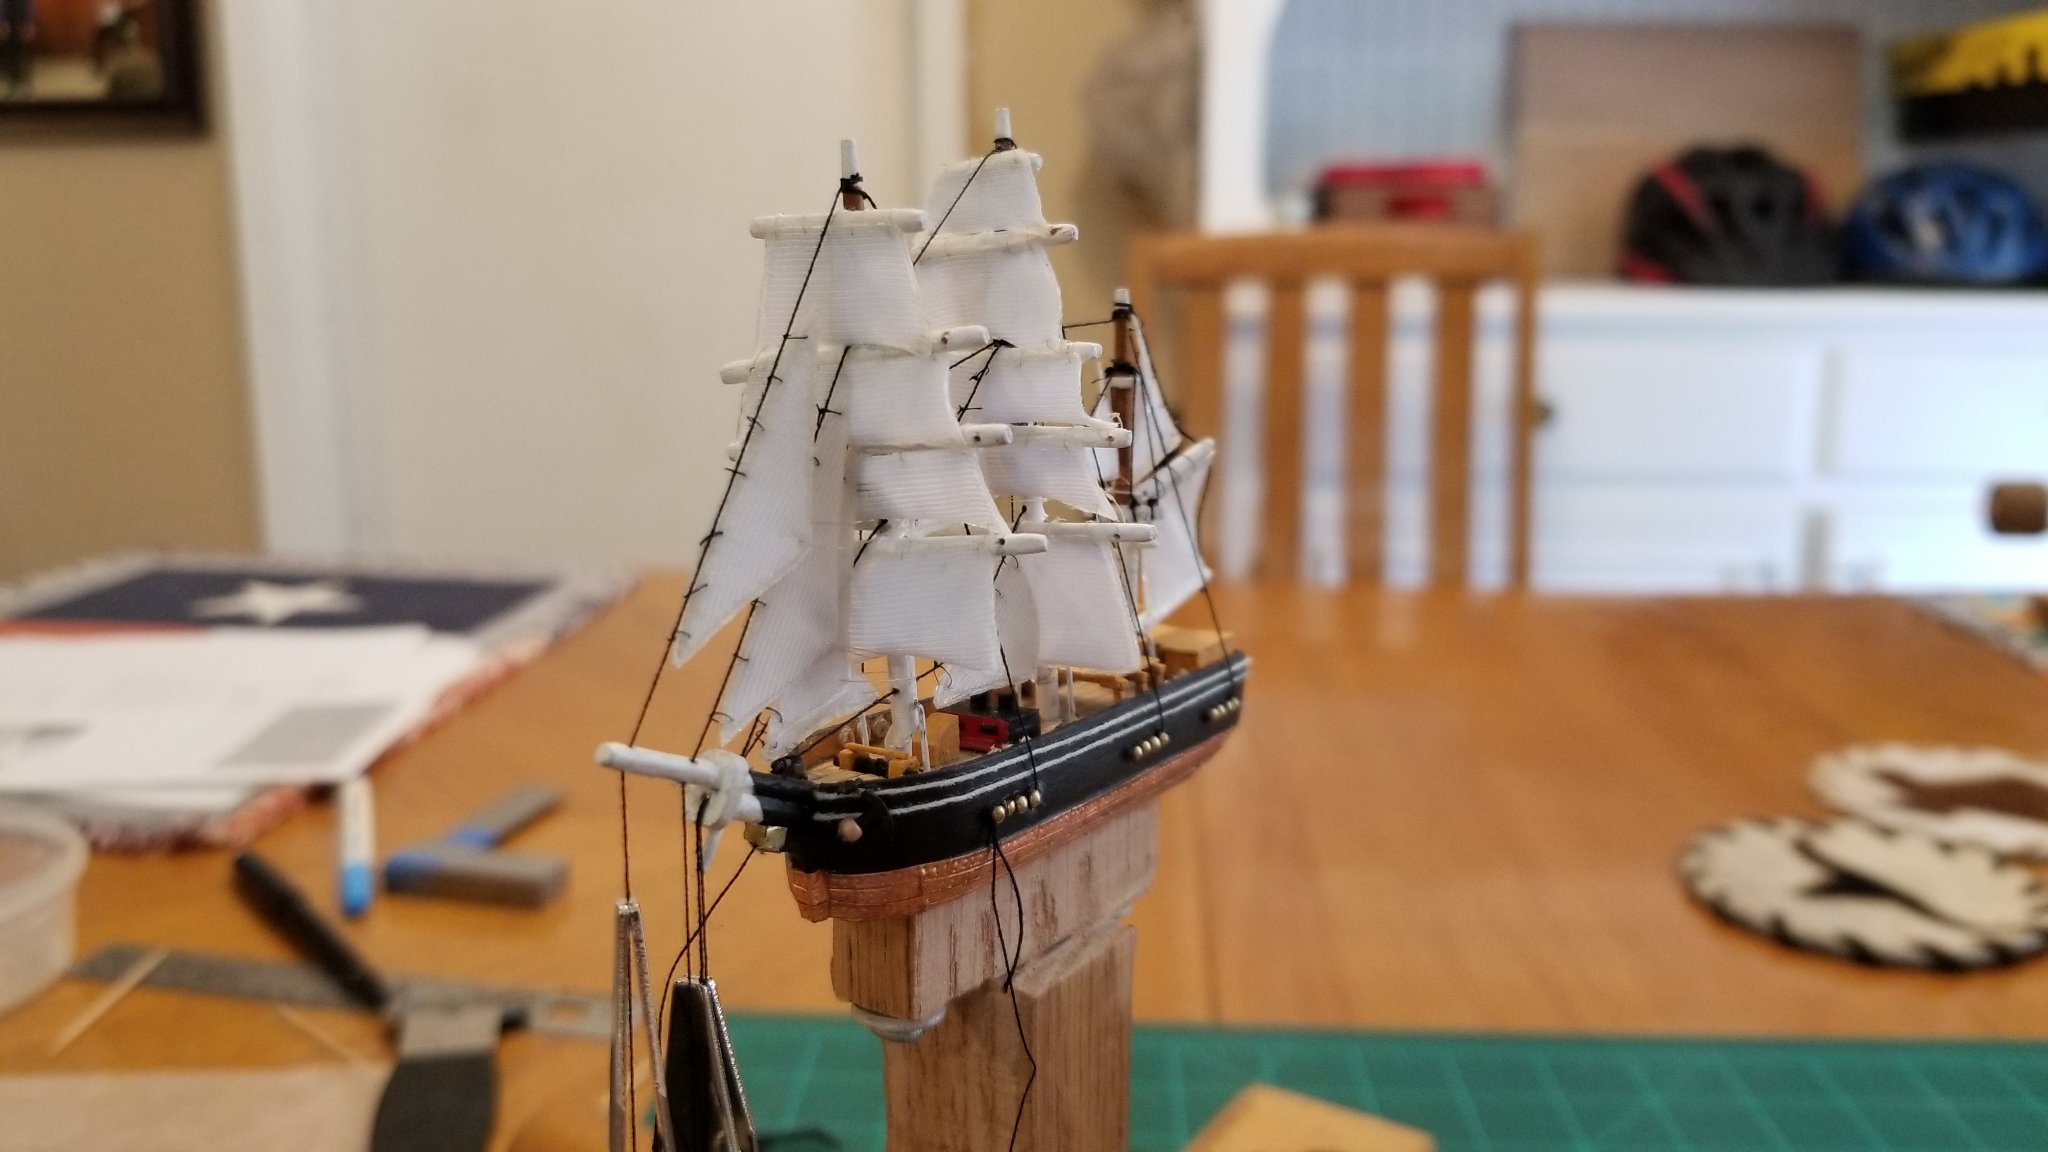
Finally done with hanging all the sails! Very tedious process tying each of them to the yards and stays but I’m happy with the look.
I found a new tool which has become indispensable – a $6 cuticle trimmer! It’s soooo much easier to use than scissors for clipping away thread close to each knot. Although I must admit that I got careless a couple of times and clipped an extra thread or two causing some rework. Unfortunately, one happened to be the main topmast stay which resulted in another round of cussing and an extra hour to fix.

- Ian_Grant, mtaylor and GrandpaPhil
-
3
-
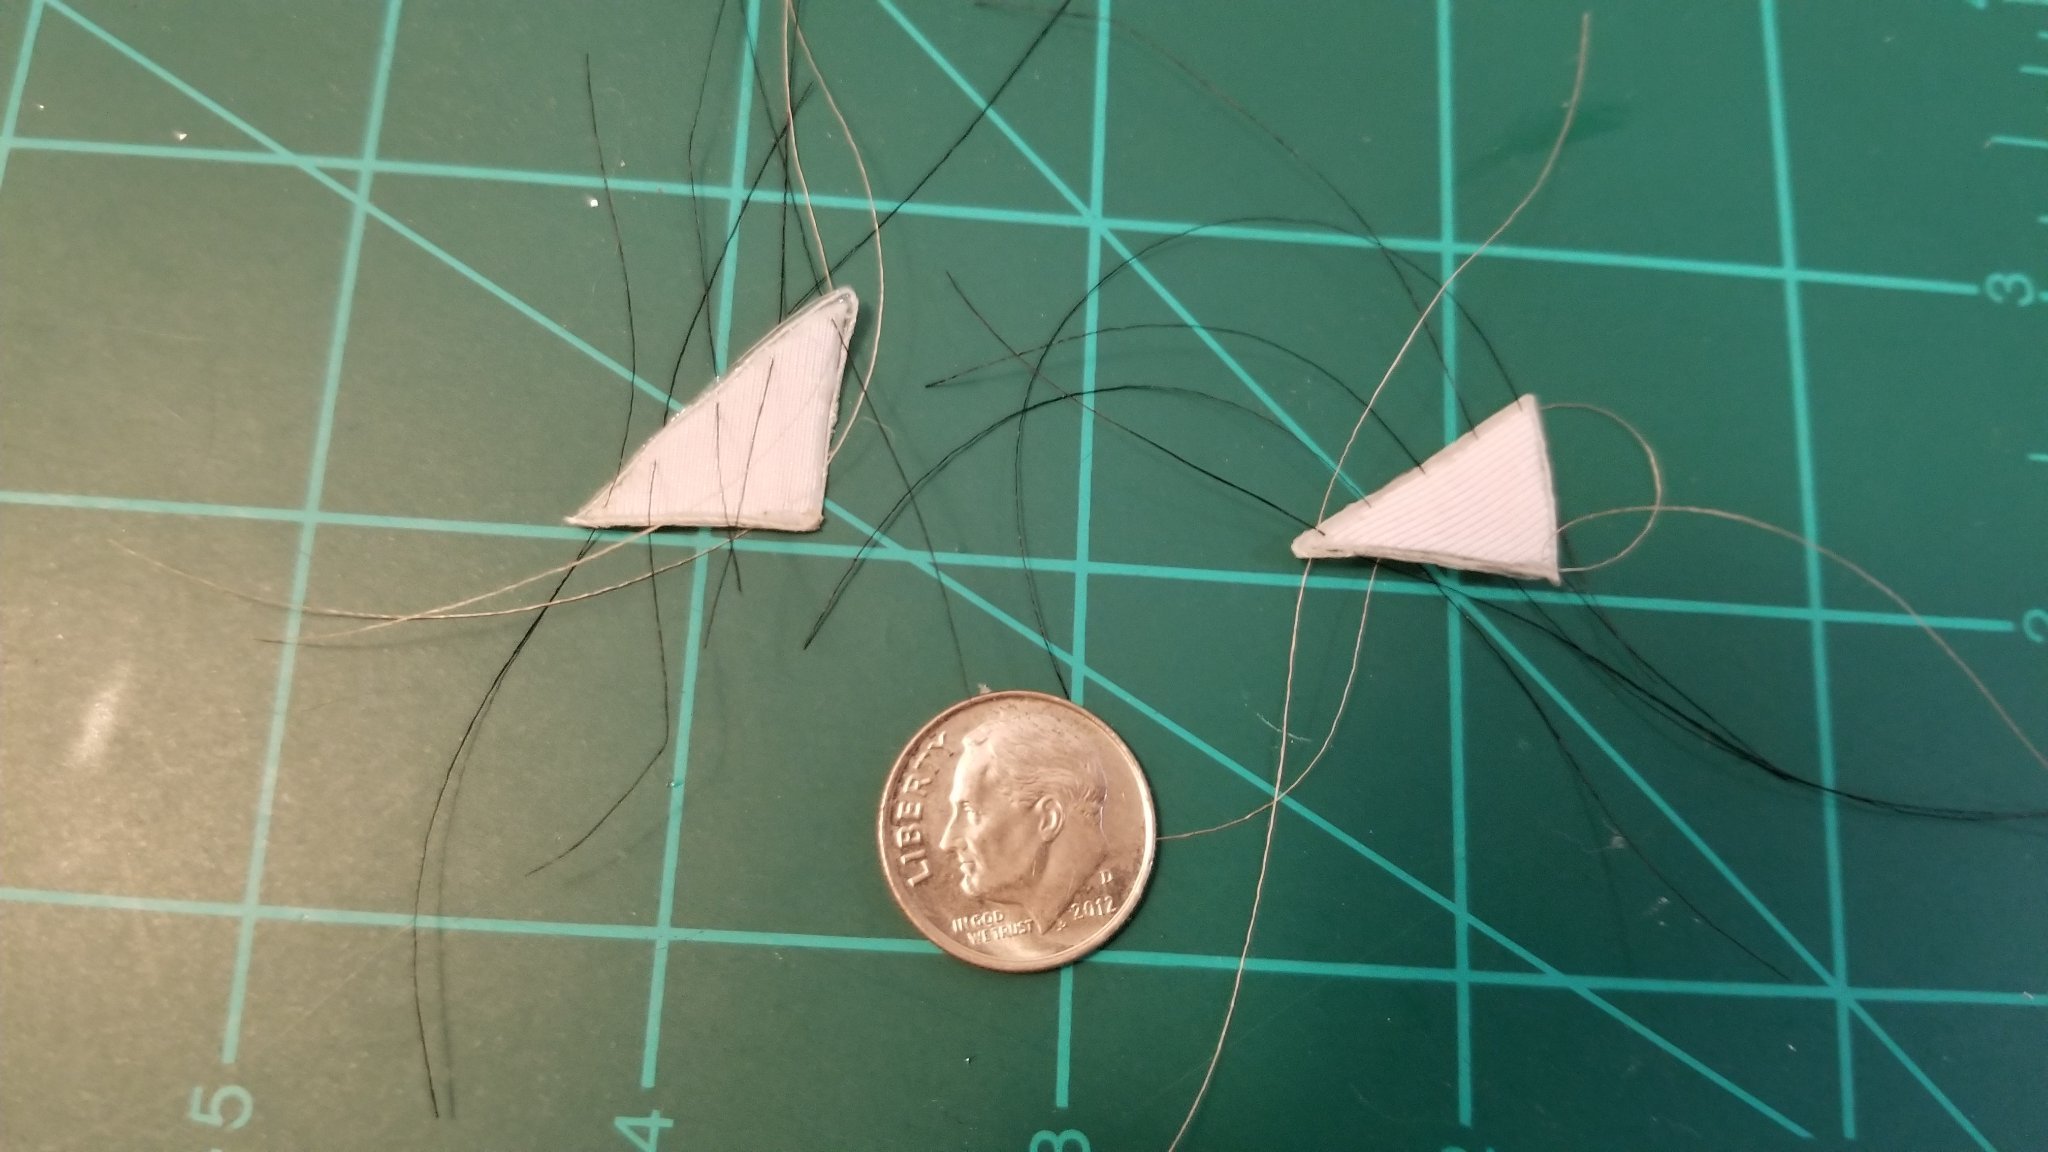
I’m trying a couple of new materials for the sail making and installation. The material I’m using for each sail is very thin, supple and has a little stretch. I’m thinking this will make things easier when I have to compress all 18 sails into a little wad, stuff it inside the bottle, and then raise them back to their original shape. The downside is that the material is difficult to work with when you need to cut small, exact shapes. I've had to redo more than I can count!
The other new material I’m trying out is fly fishing fly tying thread (Uni-thread 8/0 72D) for securing the mizzen and stay sails. This thread is also more challenging as it seems to have a mind of its own when I try to tie small knots. But I like how thin it is.
So it’s taking a little longer to get thru this phase of the build, but I think it will be worth it when I’m done.


-
5 hours ago, Landlubber Mike said:
One of the side benefits of the SIB builds is you can consume the contents when looking for the right bottle
")
Amen to that!!
BTW, after studying the sail plans you sent me, I realized that my yard lengths were off by 1/4" - 1/2" on each. At this scale that's quite a bit, which meant I could not just let it go. Fortunately, I erred on the long side so I spent last night clipping off the ends and then trying to re-taper them while still attached to the mast. It did not turn out pretty but I managed to do it without breaking anything.
Texas two-step - a couple forward and one back. Ugh!
- mtaylor and Landlubber Mike
-
2
-
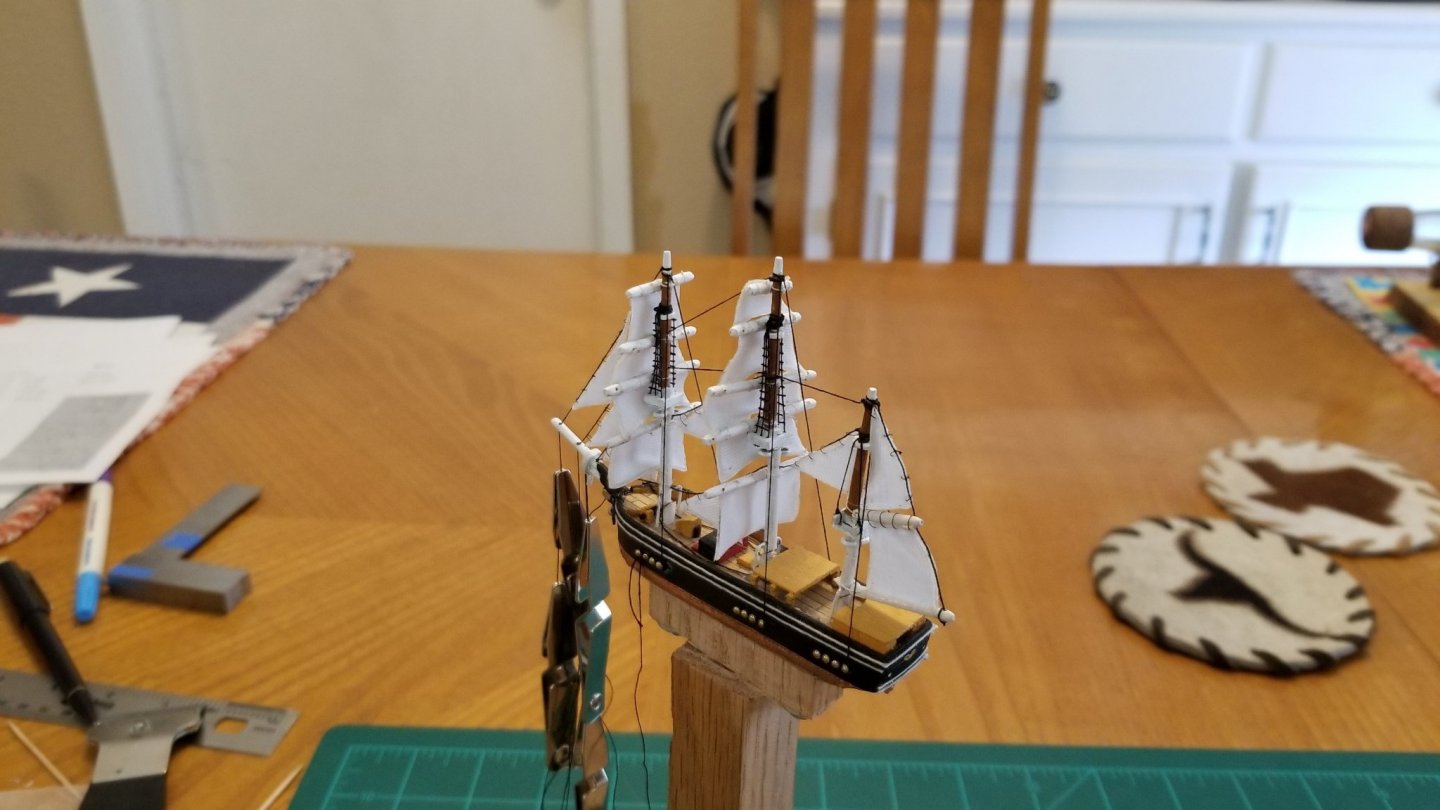
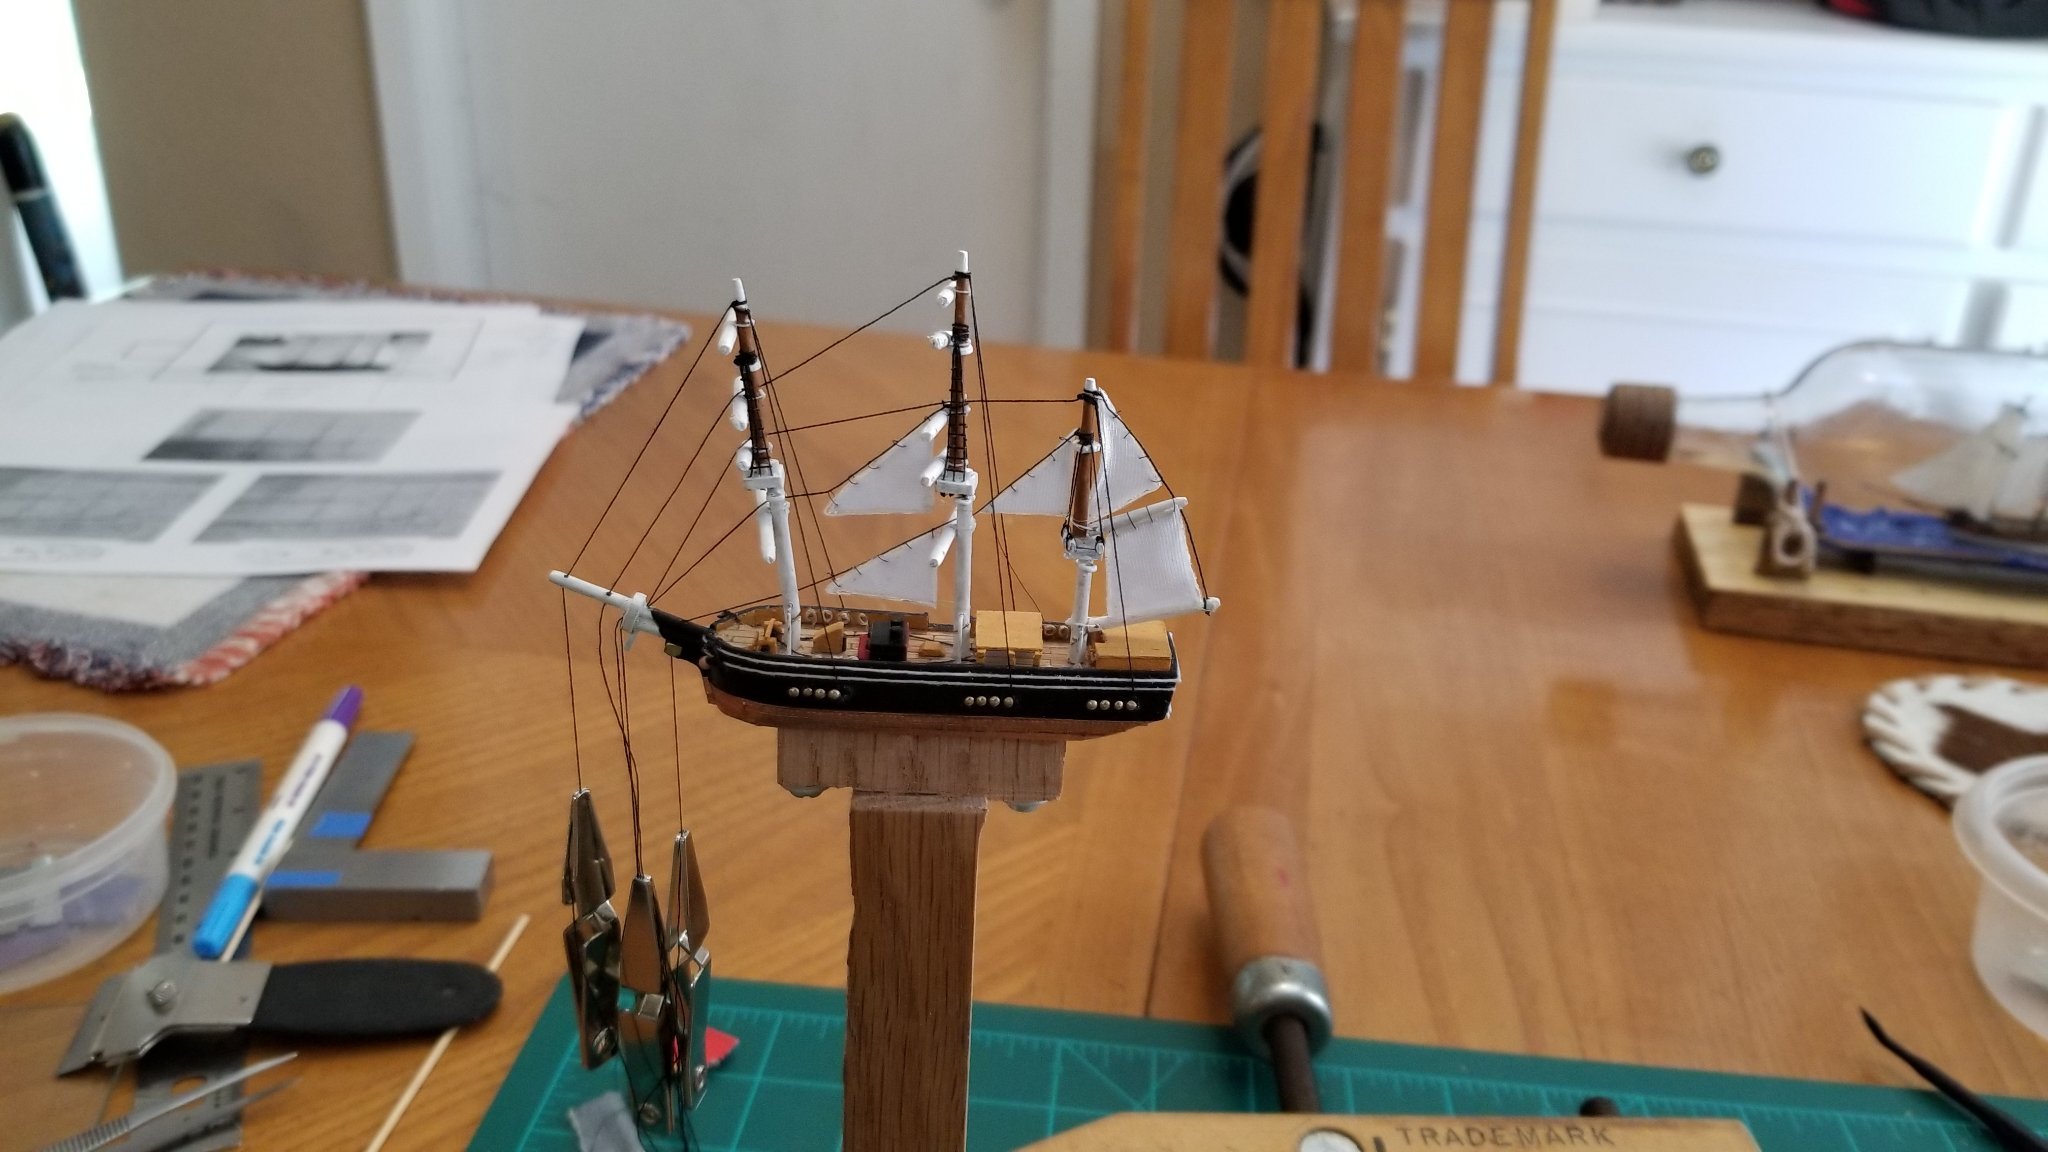
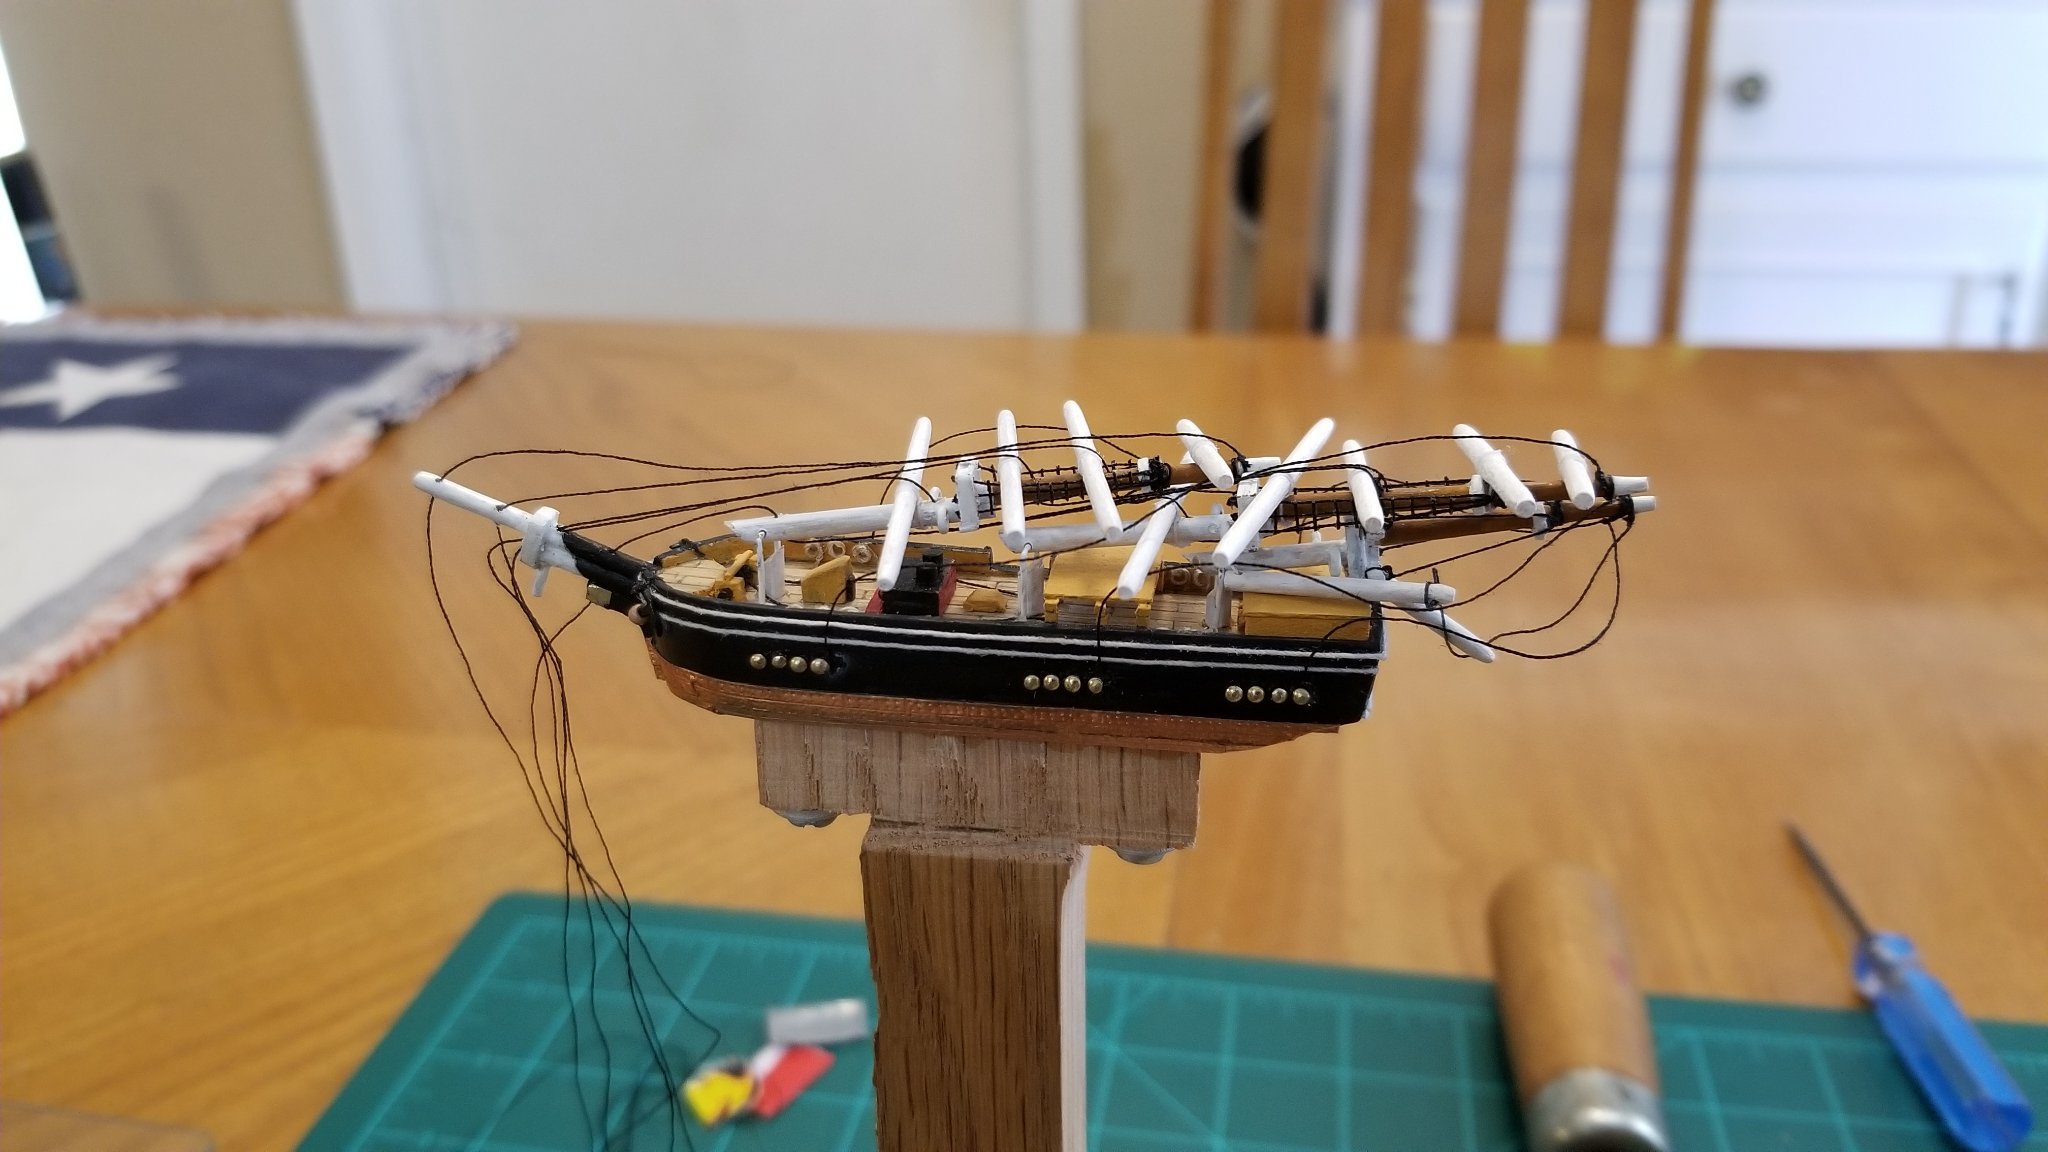
I finished the upper shrouds/ratlines and back stays. Then I got all the pull lines in place. There’s 1 pull line for each mast, but I’ve got 2 additional lines that run thru the bowsprit and out the neck of the bottle. These additional lines will carry the lower main stay sail and the lower fore stay sail.
I think I’m going to skip the lower mizzen stay sail. I’d have to run a line thru the base of the main mast, then over the tryworks, windlass, quarterdeck on the bow, and then out. I don’t think it would look very good.With the masts folded over, the ship will barely fit in the neck of the bottle. I need to figure out how to squeeze it down a little more because I’ve still got a lot of sails to add. I don’t know if this is all going to work out or not!


- Ian_Grant, mtaylor, GrandpaPhil and 2 others
-
5
-
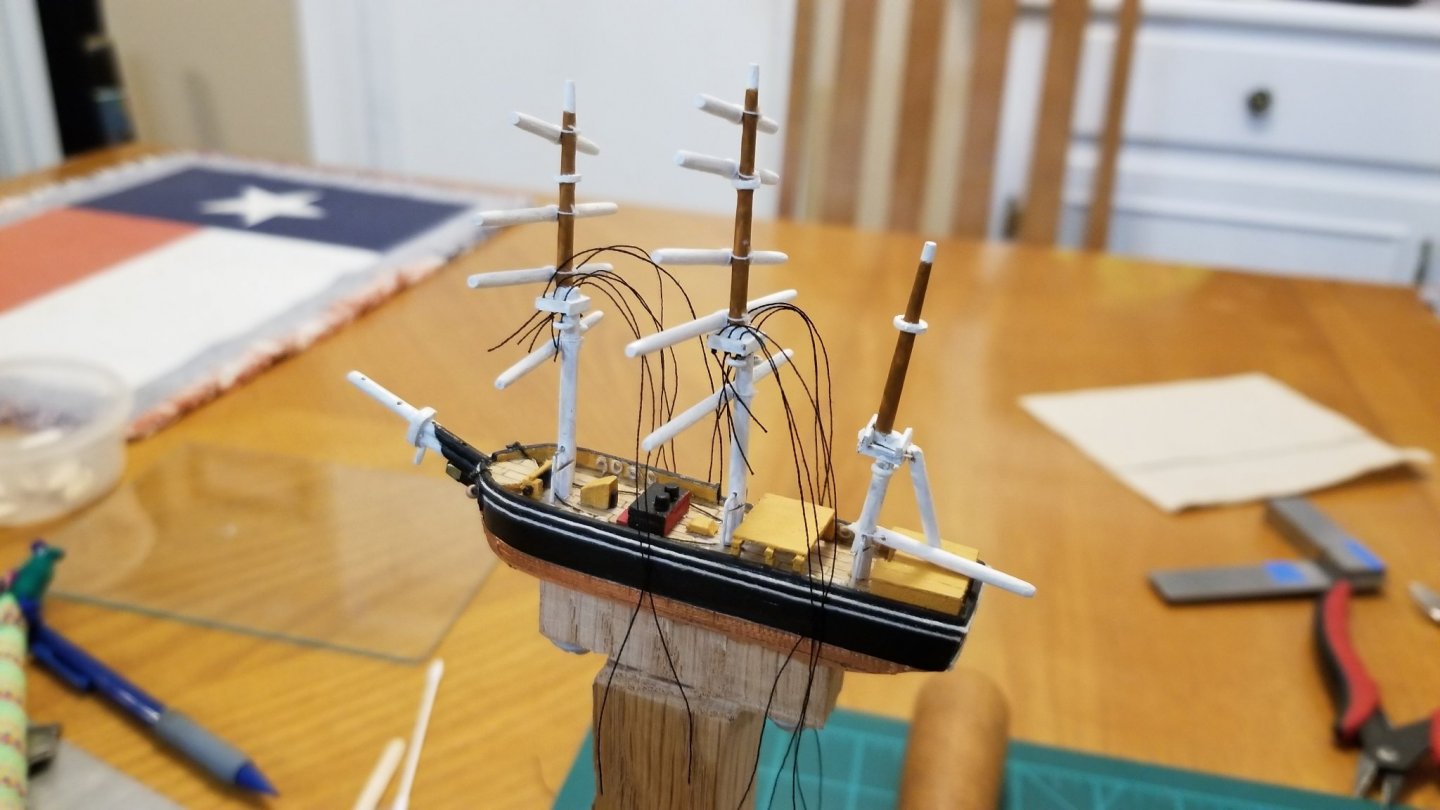
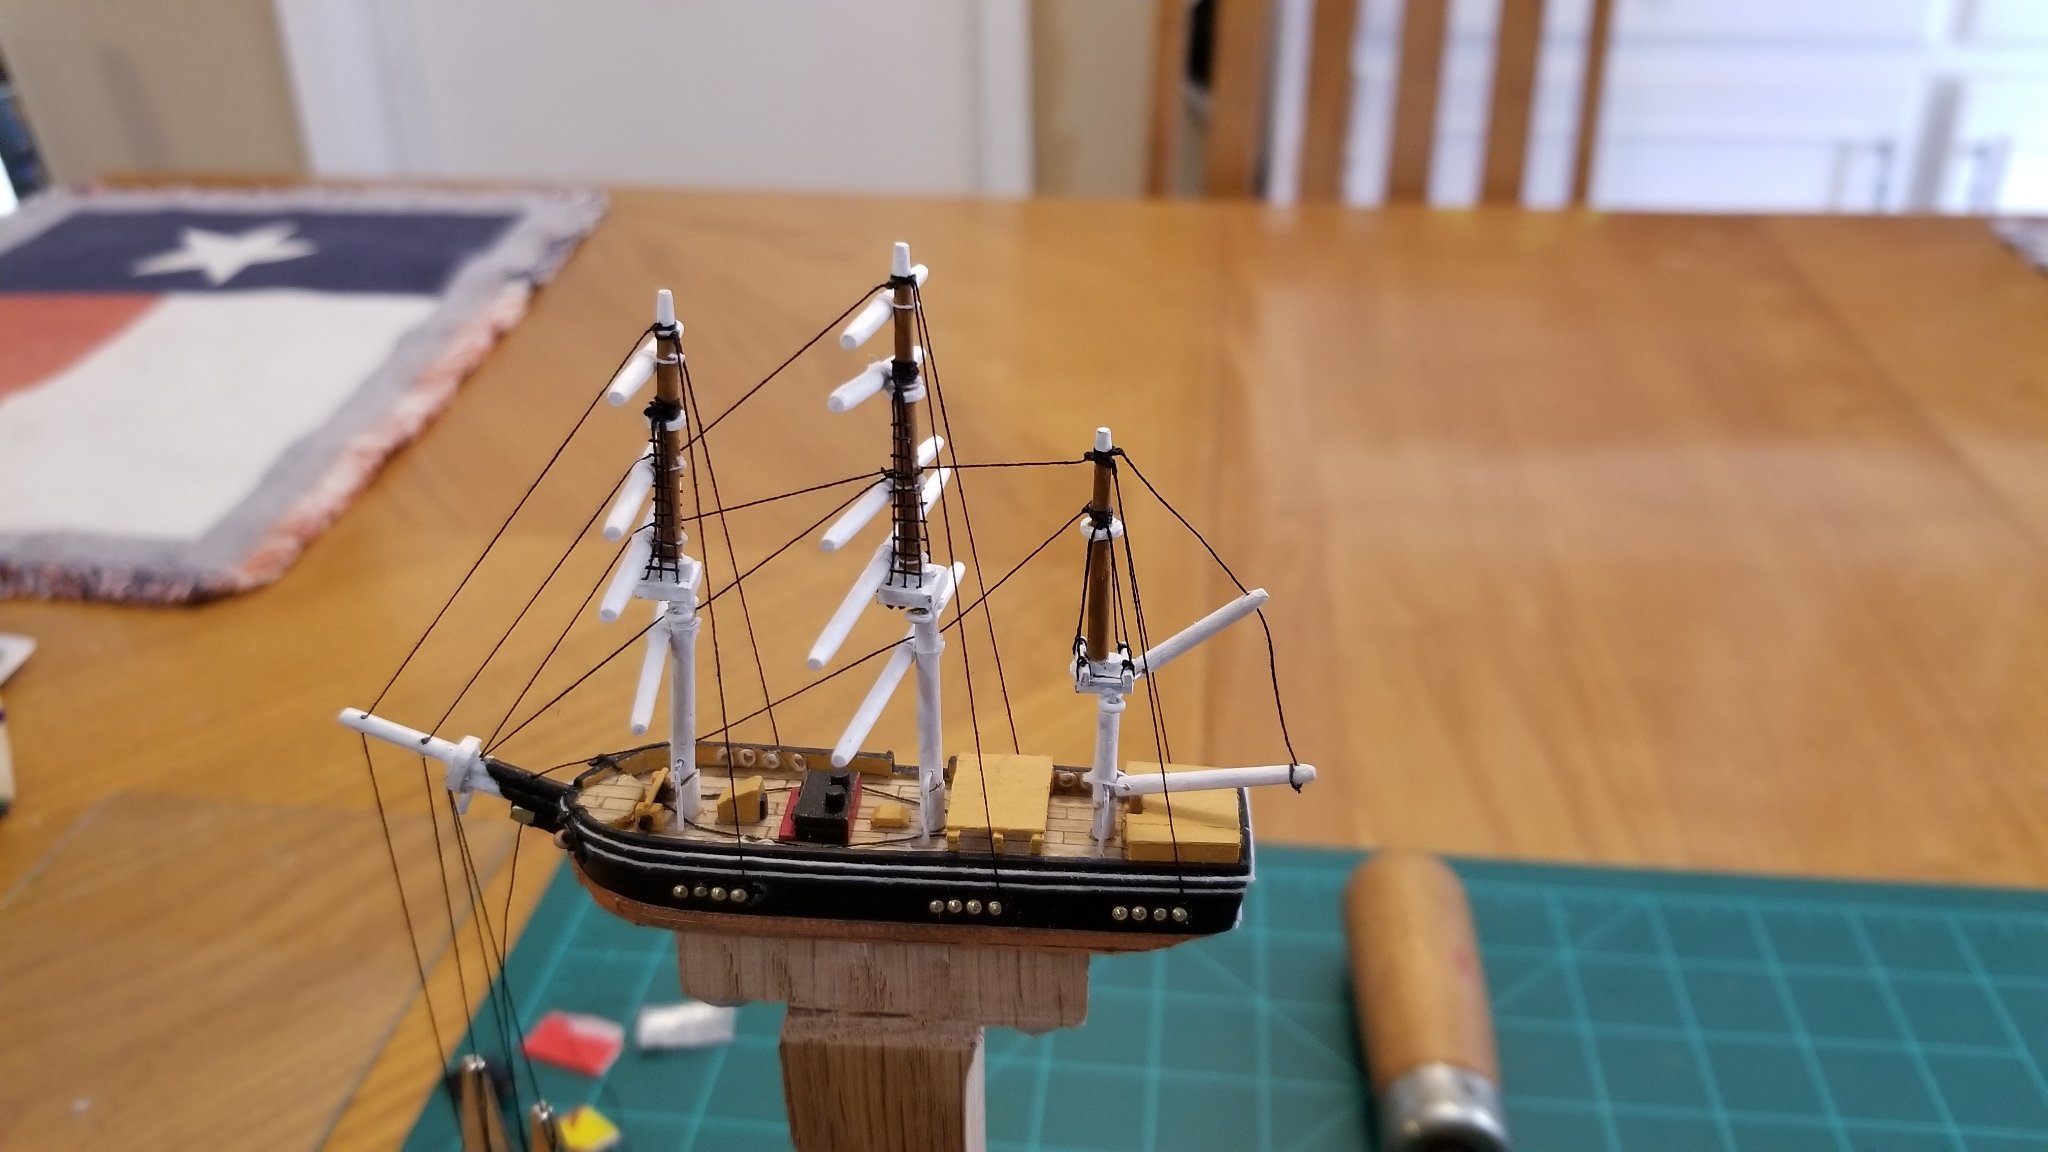
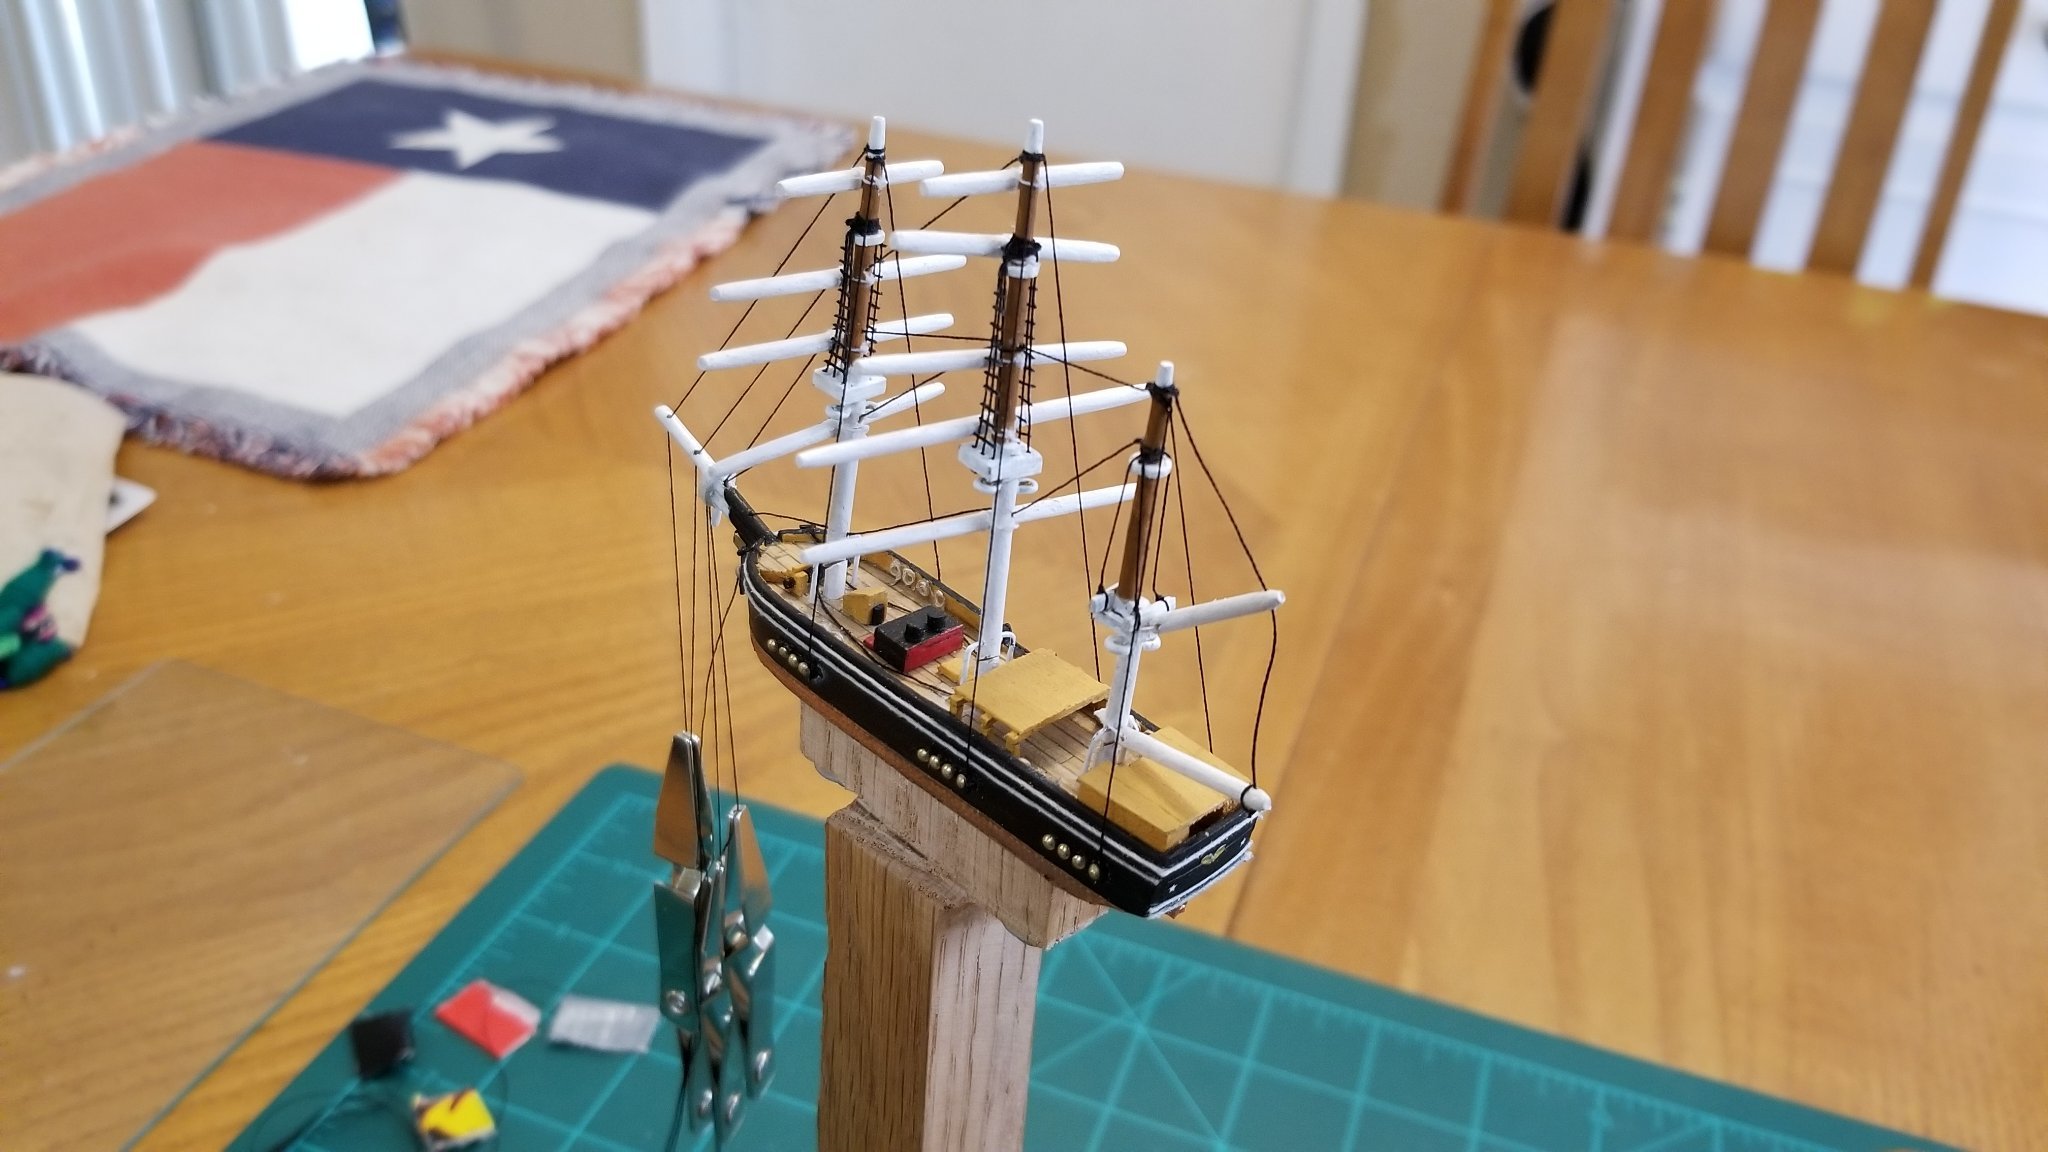
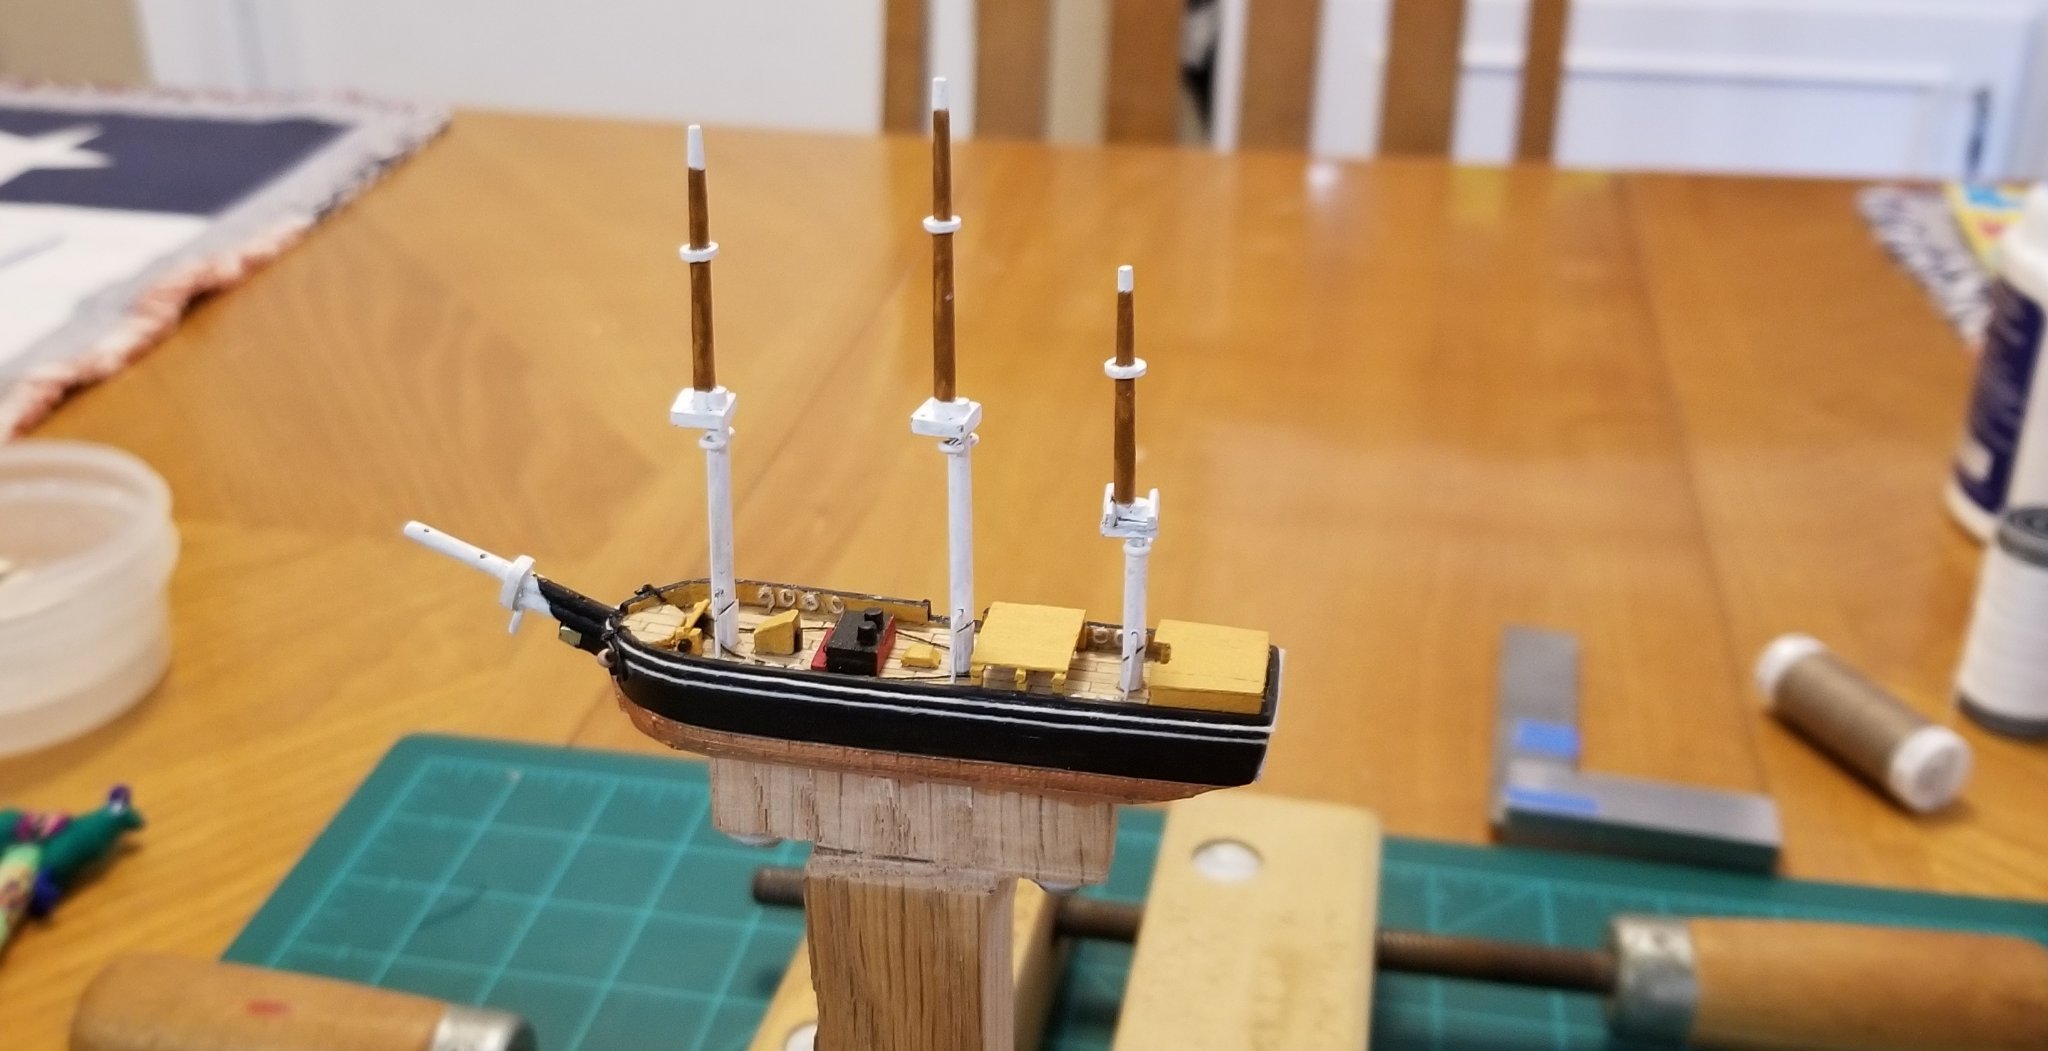
Got all the yards cut, tapered, painted and affixed to the masts along with the mizzen gaff and boom. The yards are regular toothpicks sanded down just a touch and tapered at each end. They are attached to the masts with a cow hitch around the middle of the yard and then a simple knot tied around the back of the mast. That knot configuration lets them fold up and align with the mast pretty easily.
Next I permanently affixed the masts to the hull. Then it was UGH! @&*#$%!! I suddenly realized I should have tied the upper ratline shrouds BEFORE installing the masts. Threading the line thru the tiny holes in the mast tops would have been way easier on the bench instead of on the boat. But live and learn. I managed to get it done but it took a lot longer than it should have.
I may be biting off more than I can chew trying to put upper and lower ratlines on the fore and main masts at this scale. But I think it will be a good look if I can pull it off.
- Landlubber Mike, Ian_Grant and mtaylor
-
3
-
I just finished one of these about a month ago. Definitely lots of fun, but I did manage to find some stress (self-induced) in the process! Enjoy the ride!
- Landlubber Mike and mtaylor
-
2
-
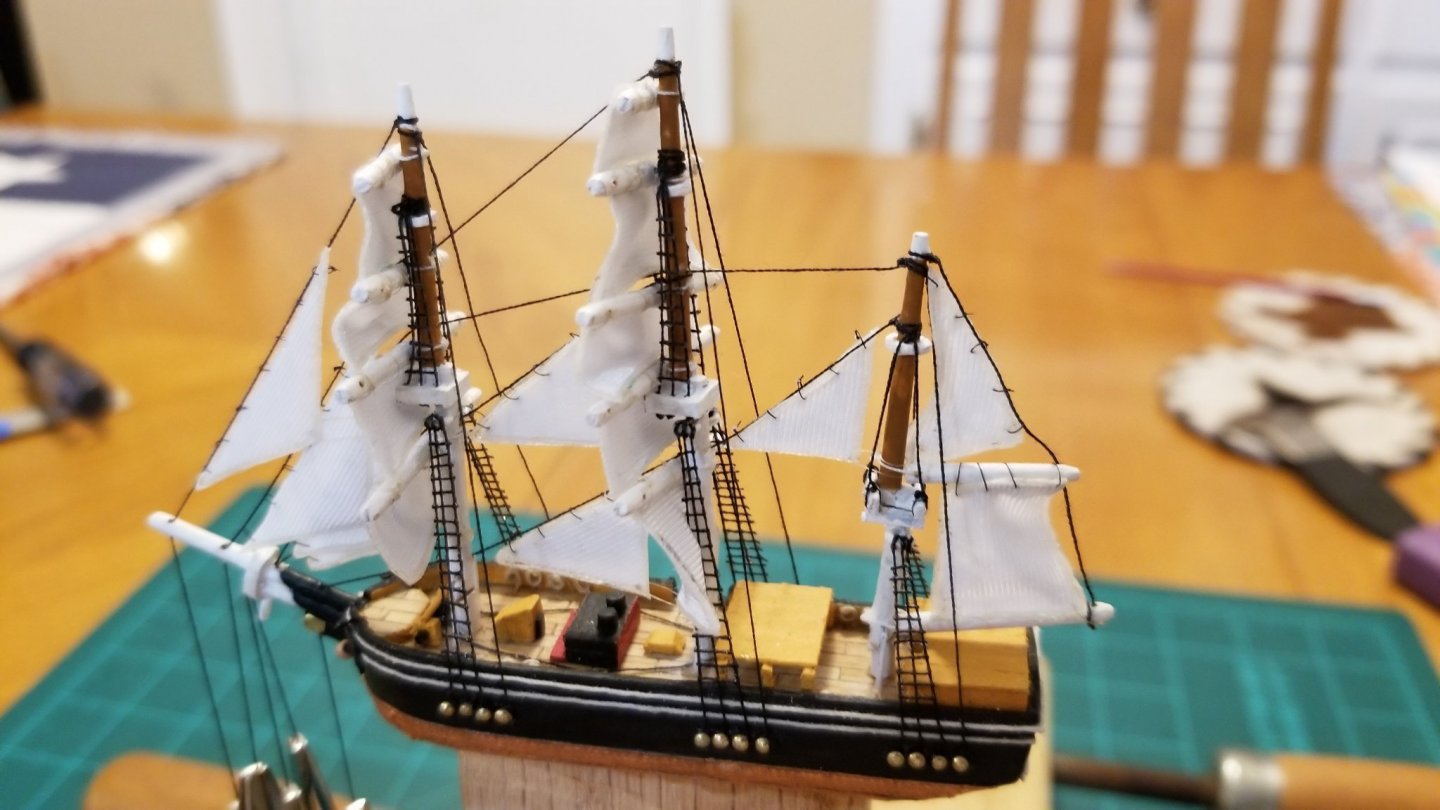
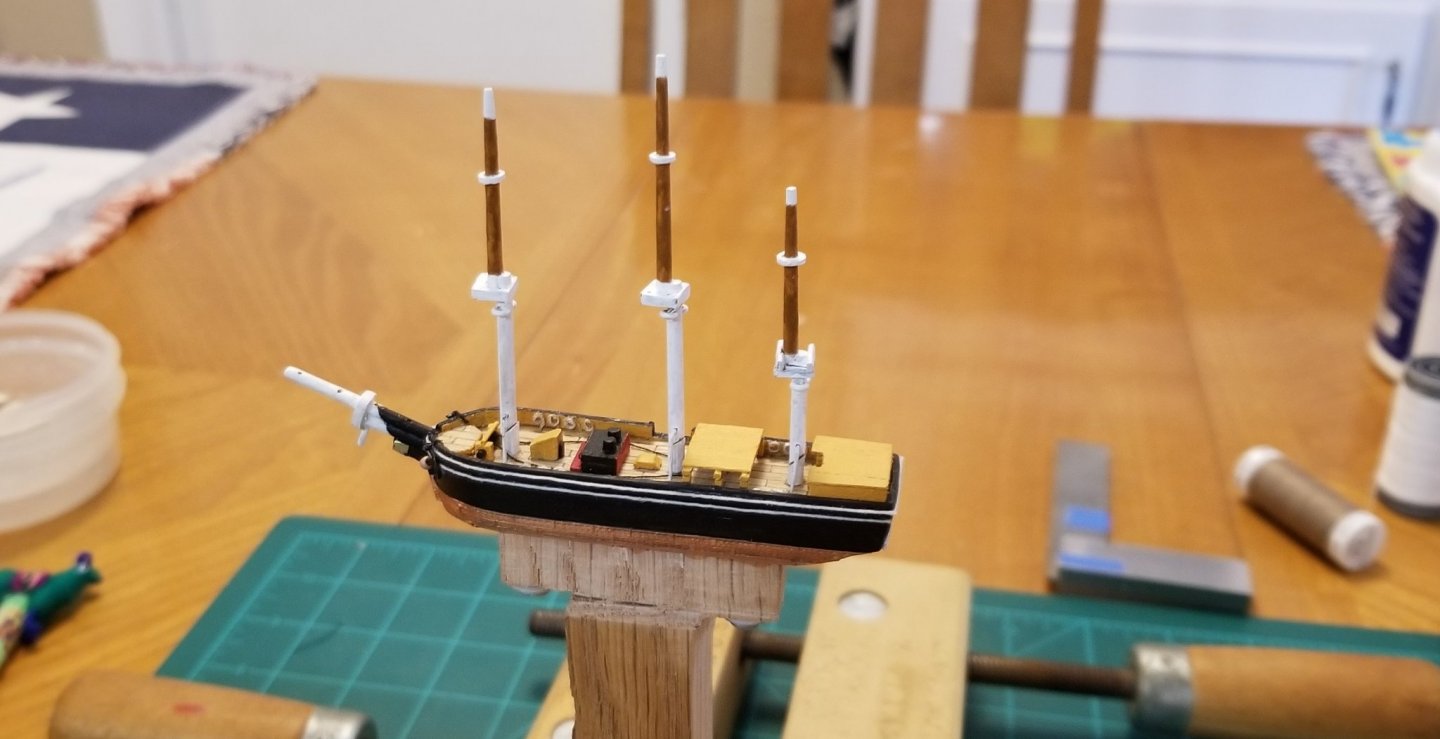
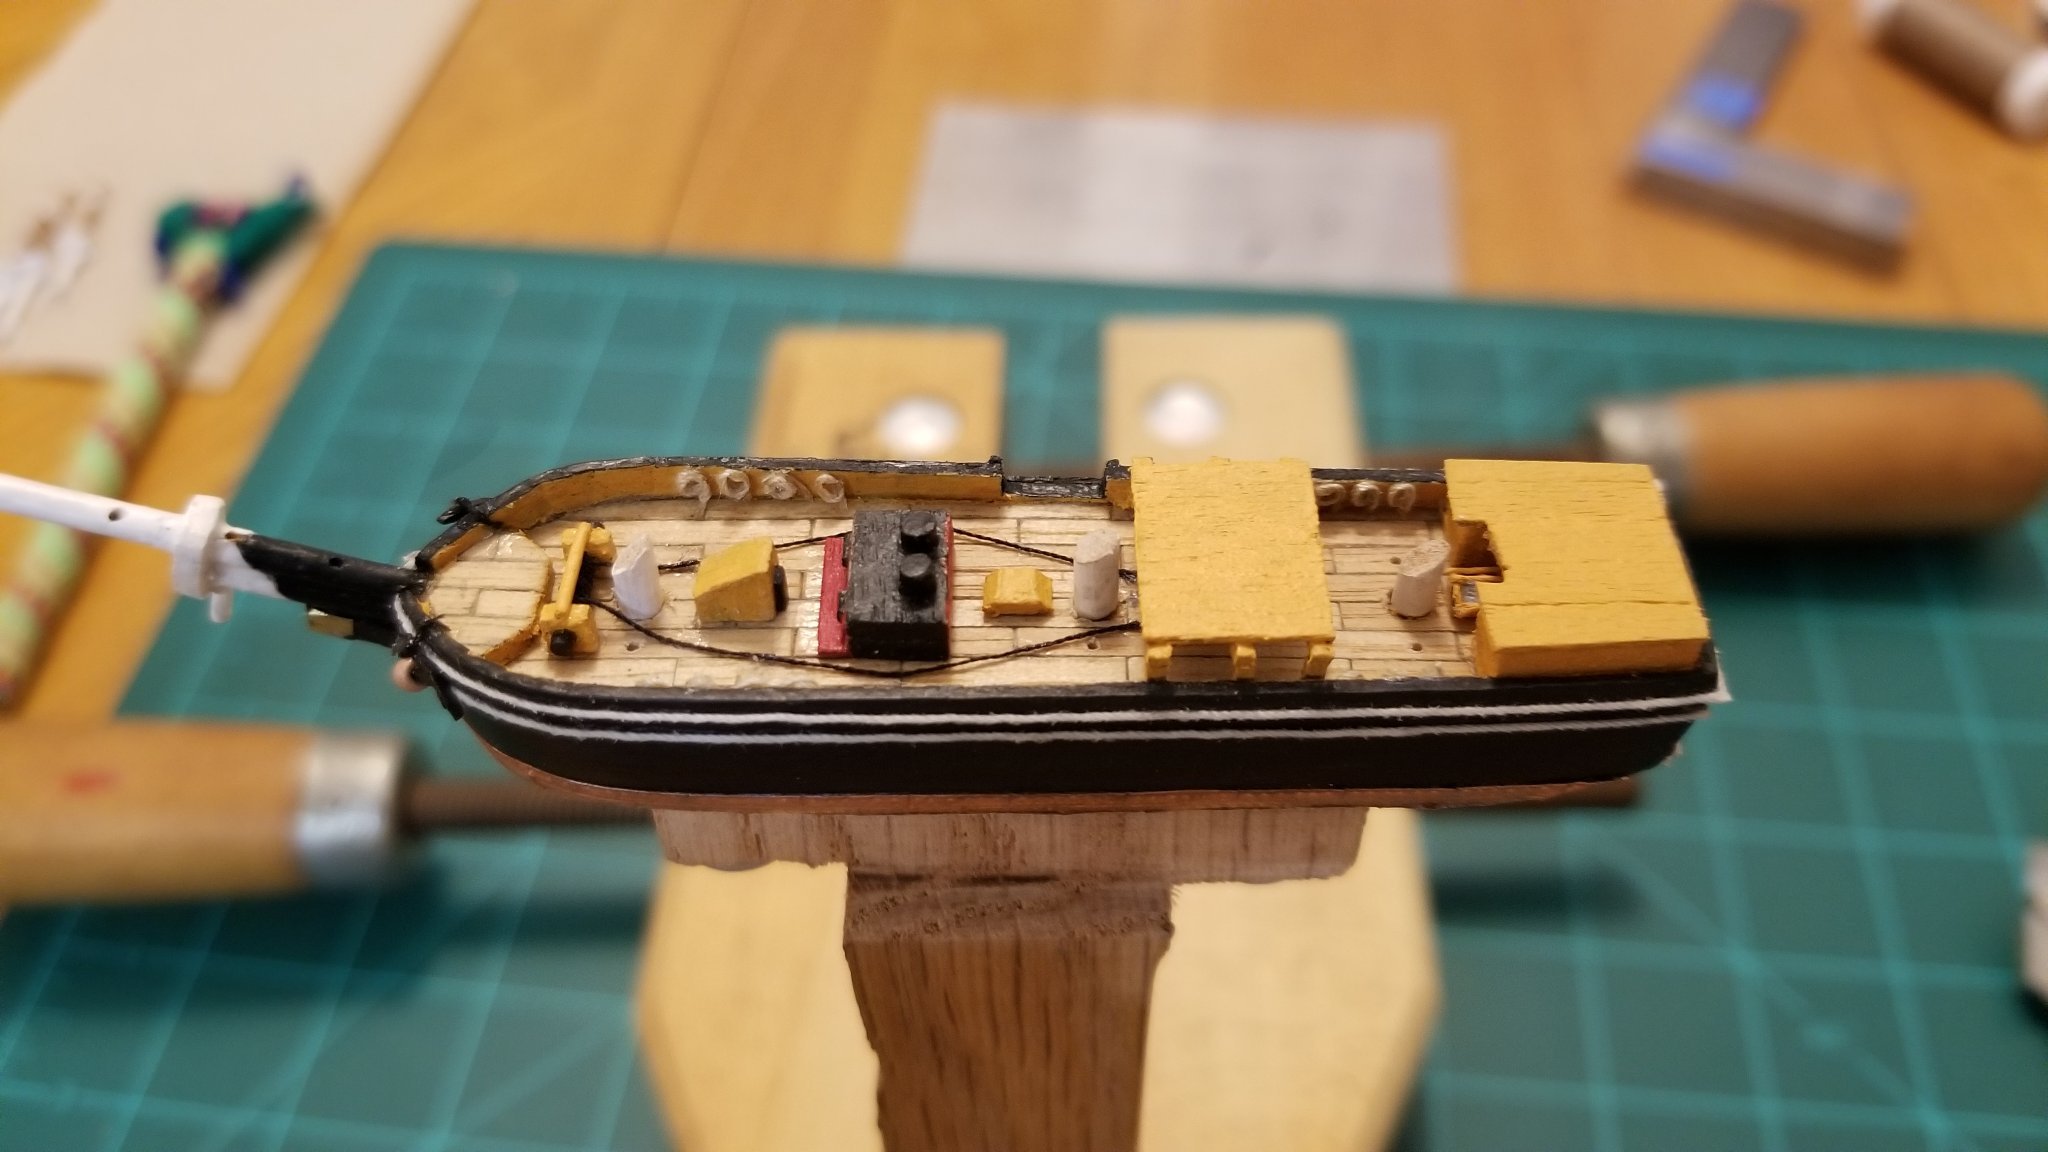
Oops. Realized I was not quite ready for the yards, etc. It was actually time to build the boat bearer and put all the deck fittings in place (where are the instructions for this?!) 😃
I’ve seen some models with 2 boat bearers (fore and mid-ship) and others with only 1 (mid-ship). I’m going with having only the 1 near mid-ship.
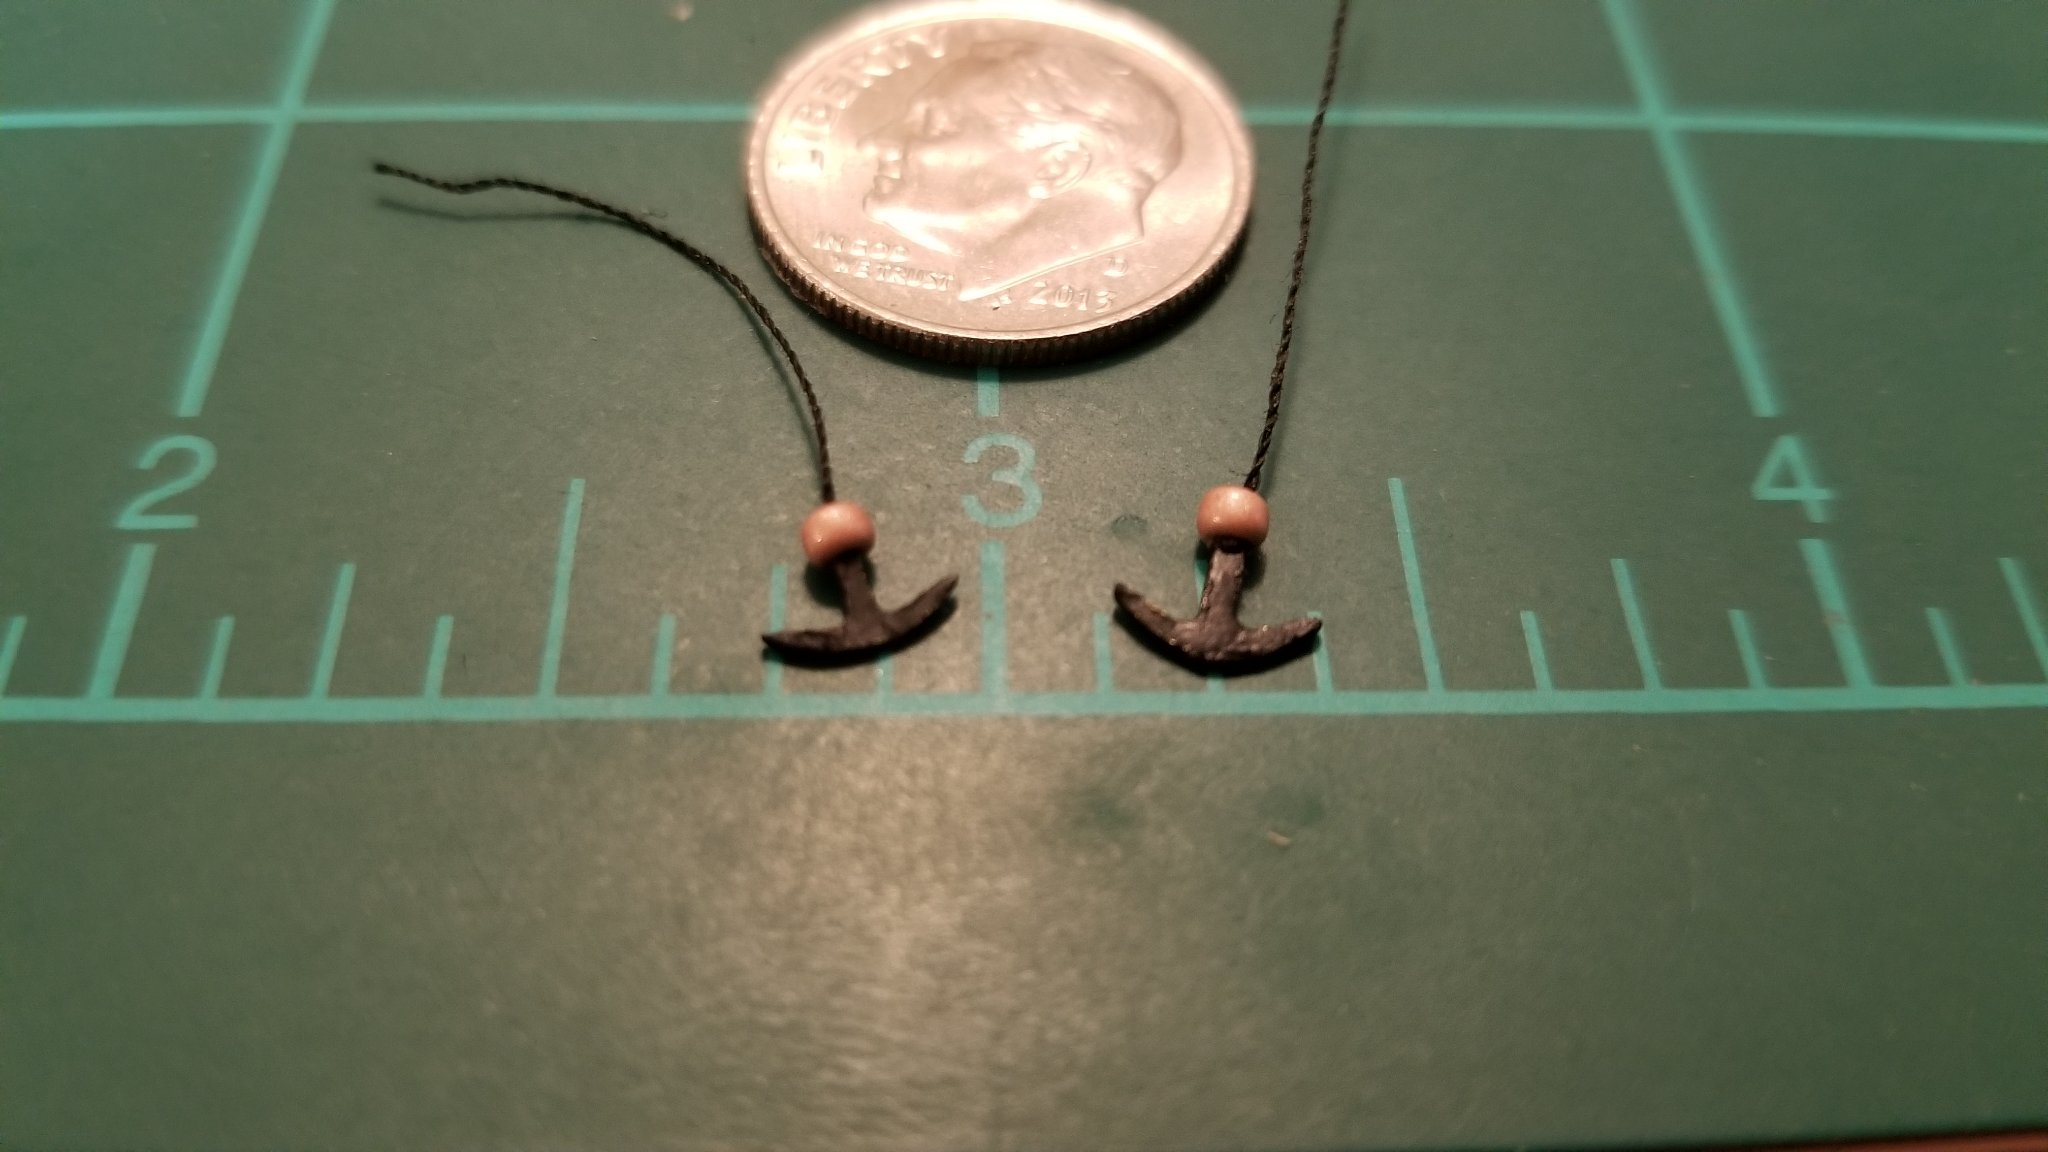
I also realized I needed anchors, so I spent a ridiculous amount of time filing teeny anchors out of photo-etch brass sprues leftover from the Amati Hannah.In the last pic, the masts are not permanently installed, just put in place to see how the overall look is shaping up.


-
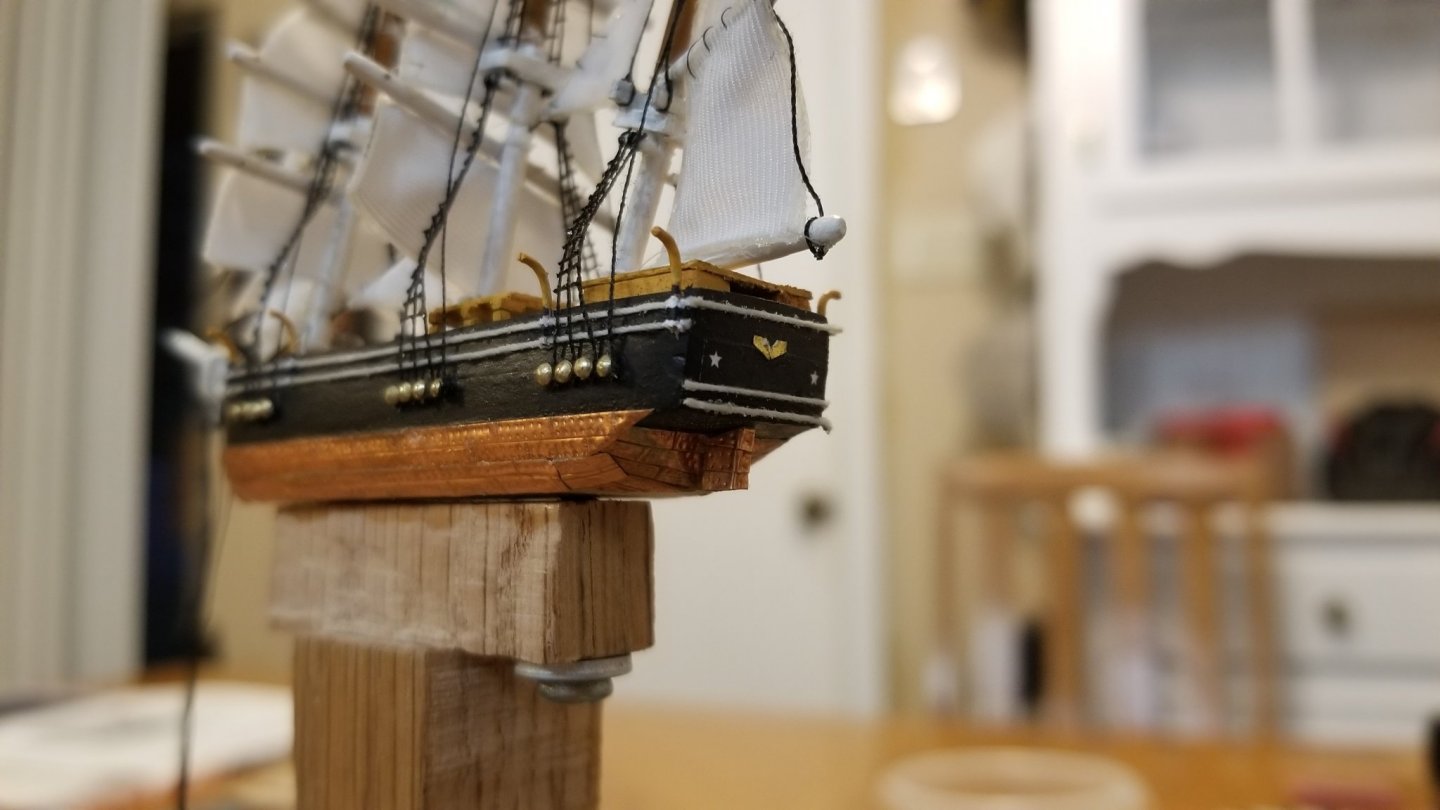
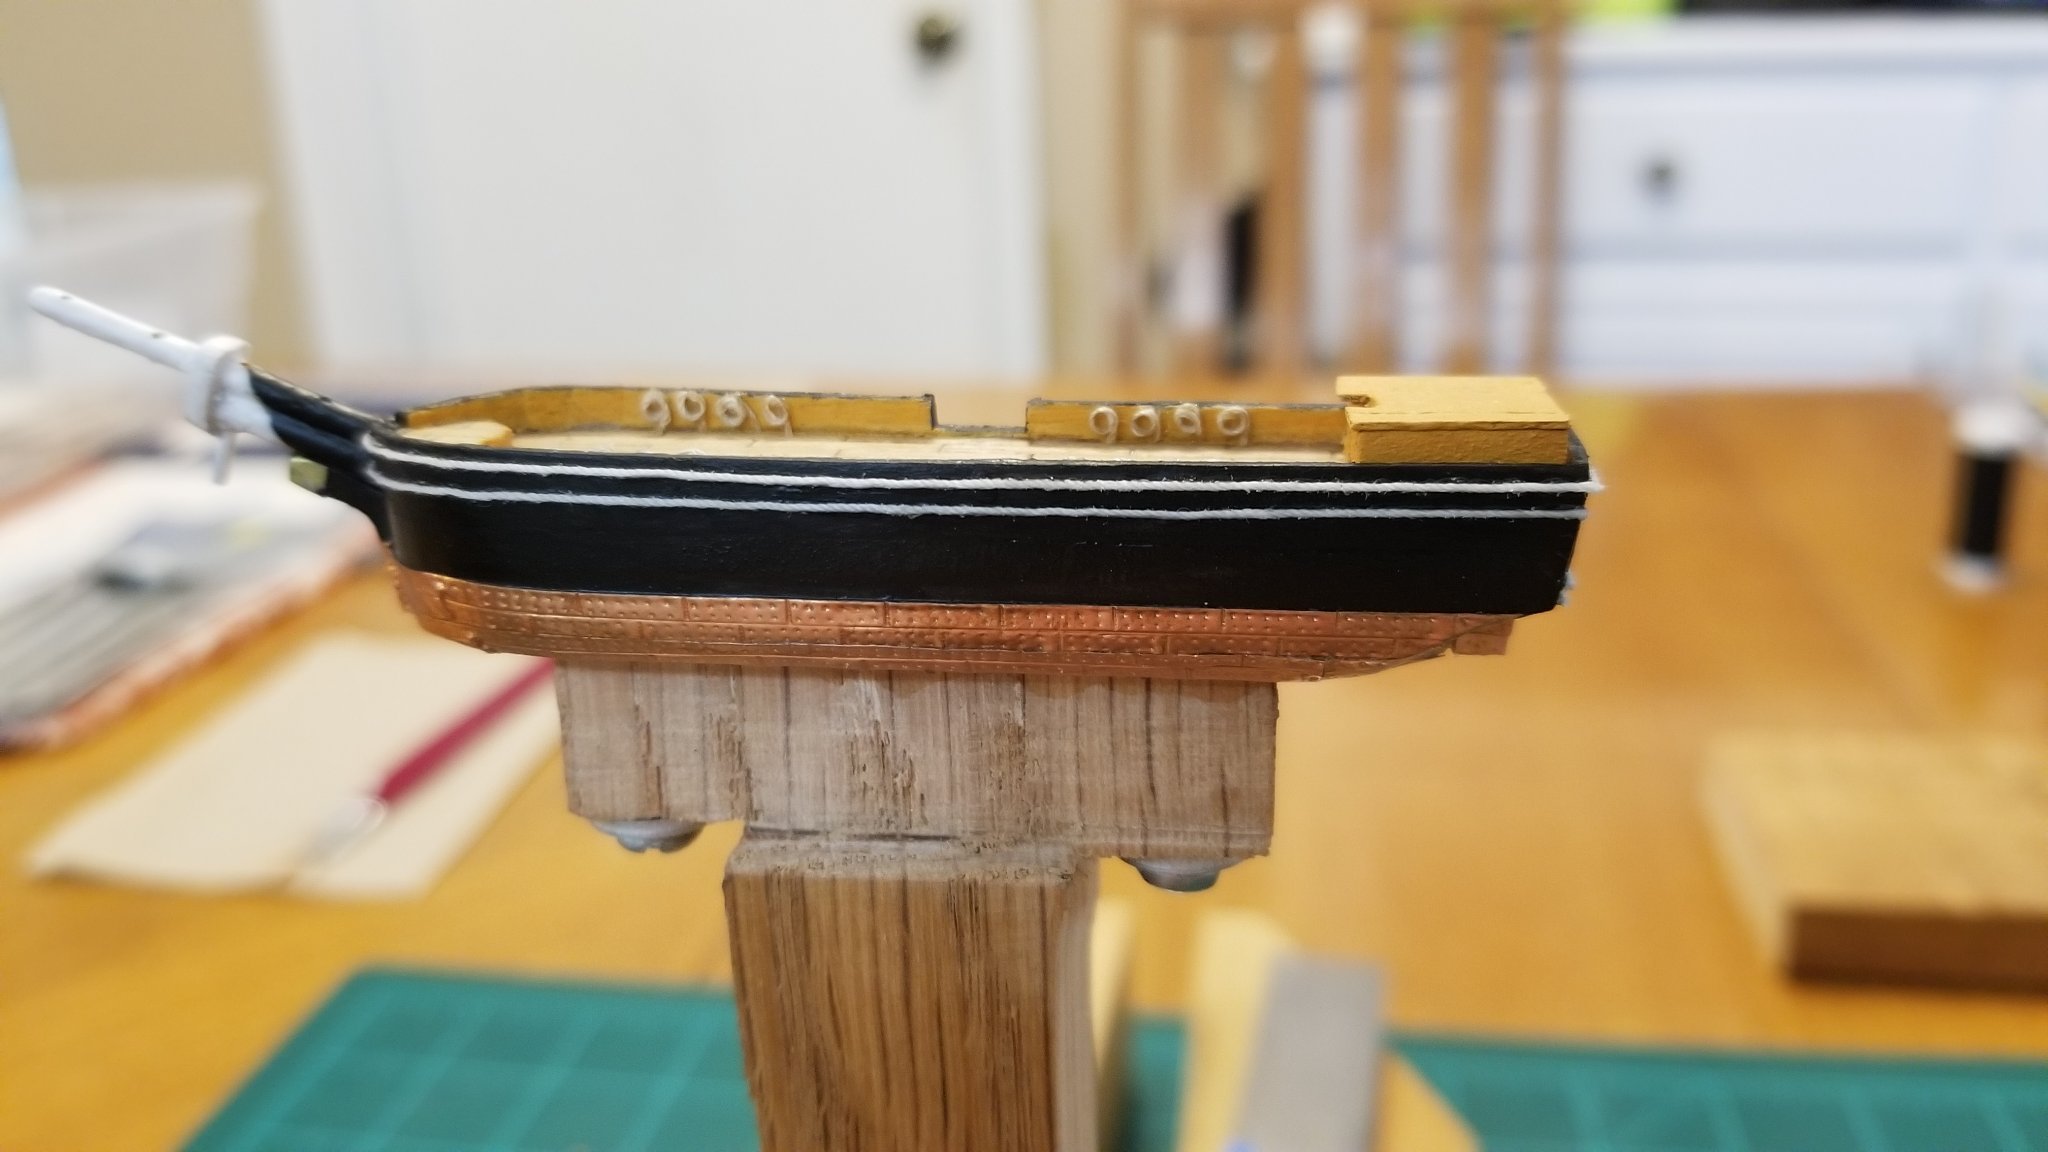
Thanks, Mike. Yes, thread for the white rails. I tried thin strips of wood, paint, tape, but none of those looked very good (more like I was not skilled enough to make them look good). So I decided to try white thread and was really happy with how it turned out. A little fuzzy on these close-up pics but looks much better when you are just looking at it with no magnification. To me, the white pinstriping is such a distinctive part of Morgan's look I wanted to try and get it right.
- mtaylor and Landlubber Mike
-
2
-
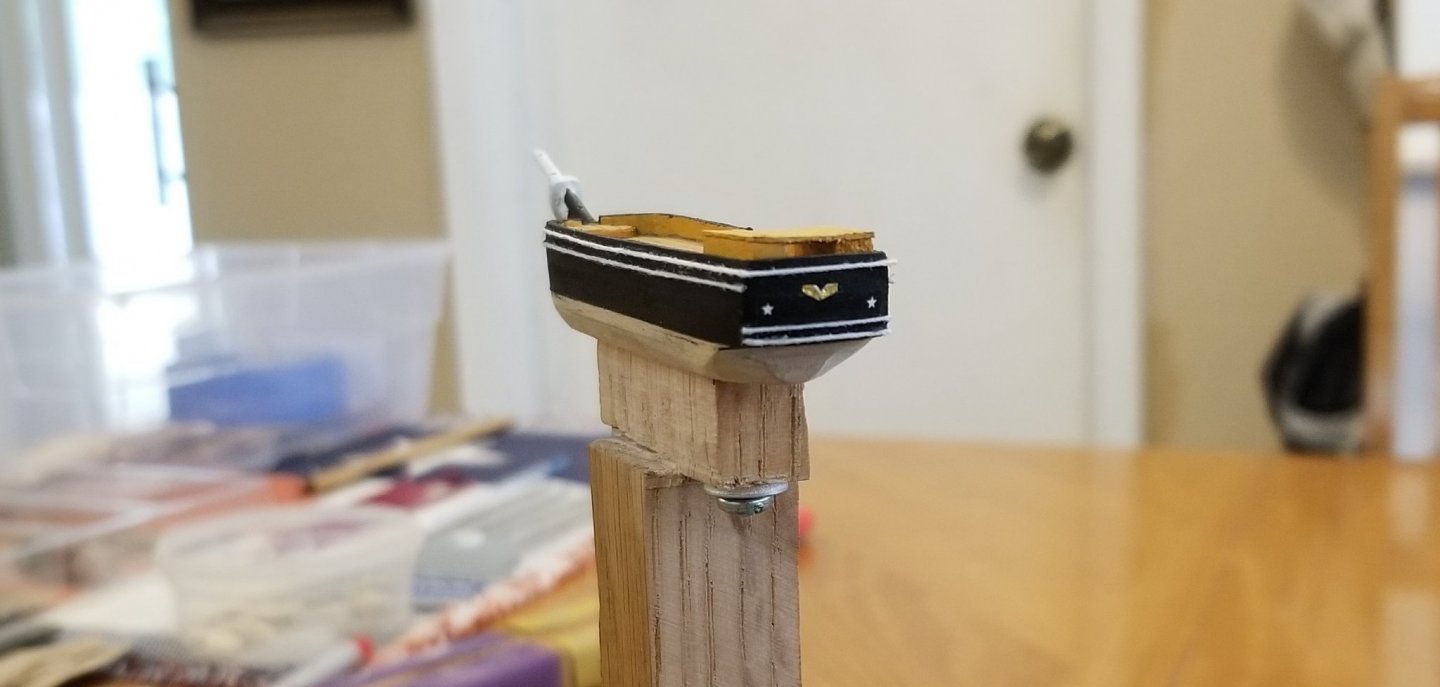
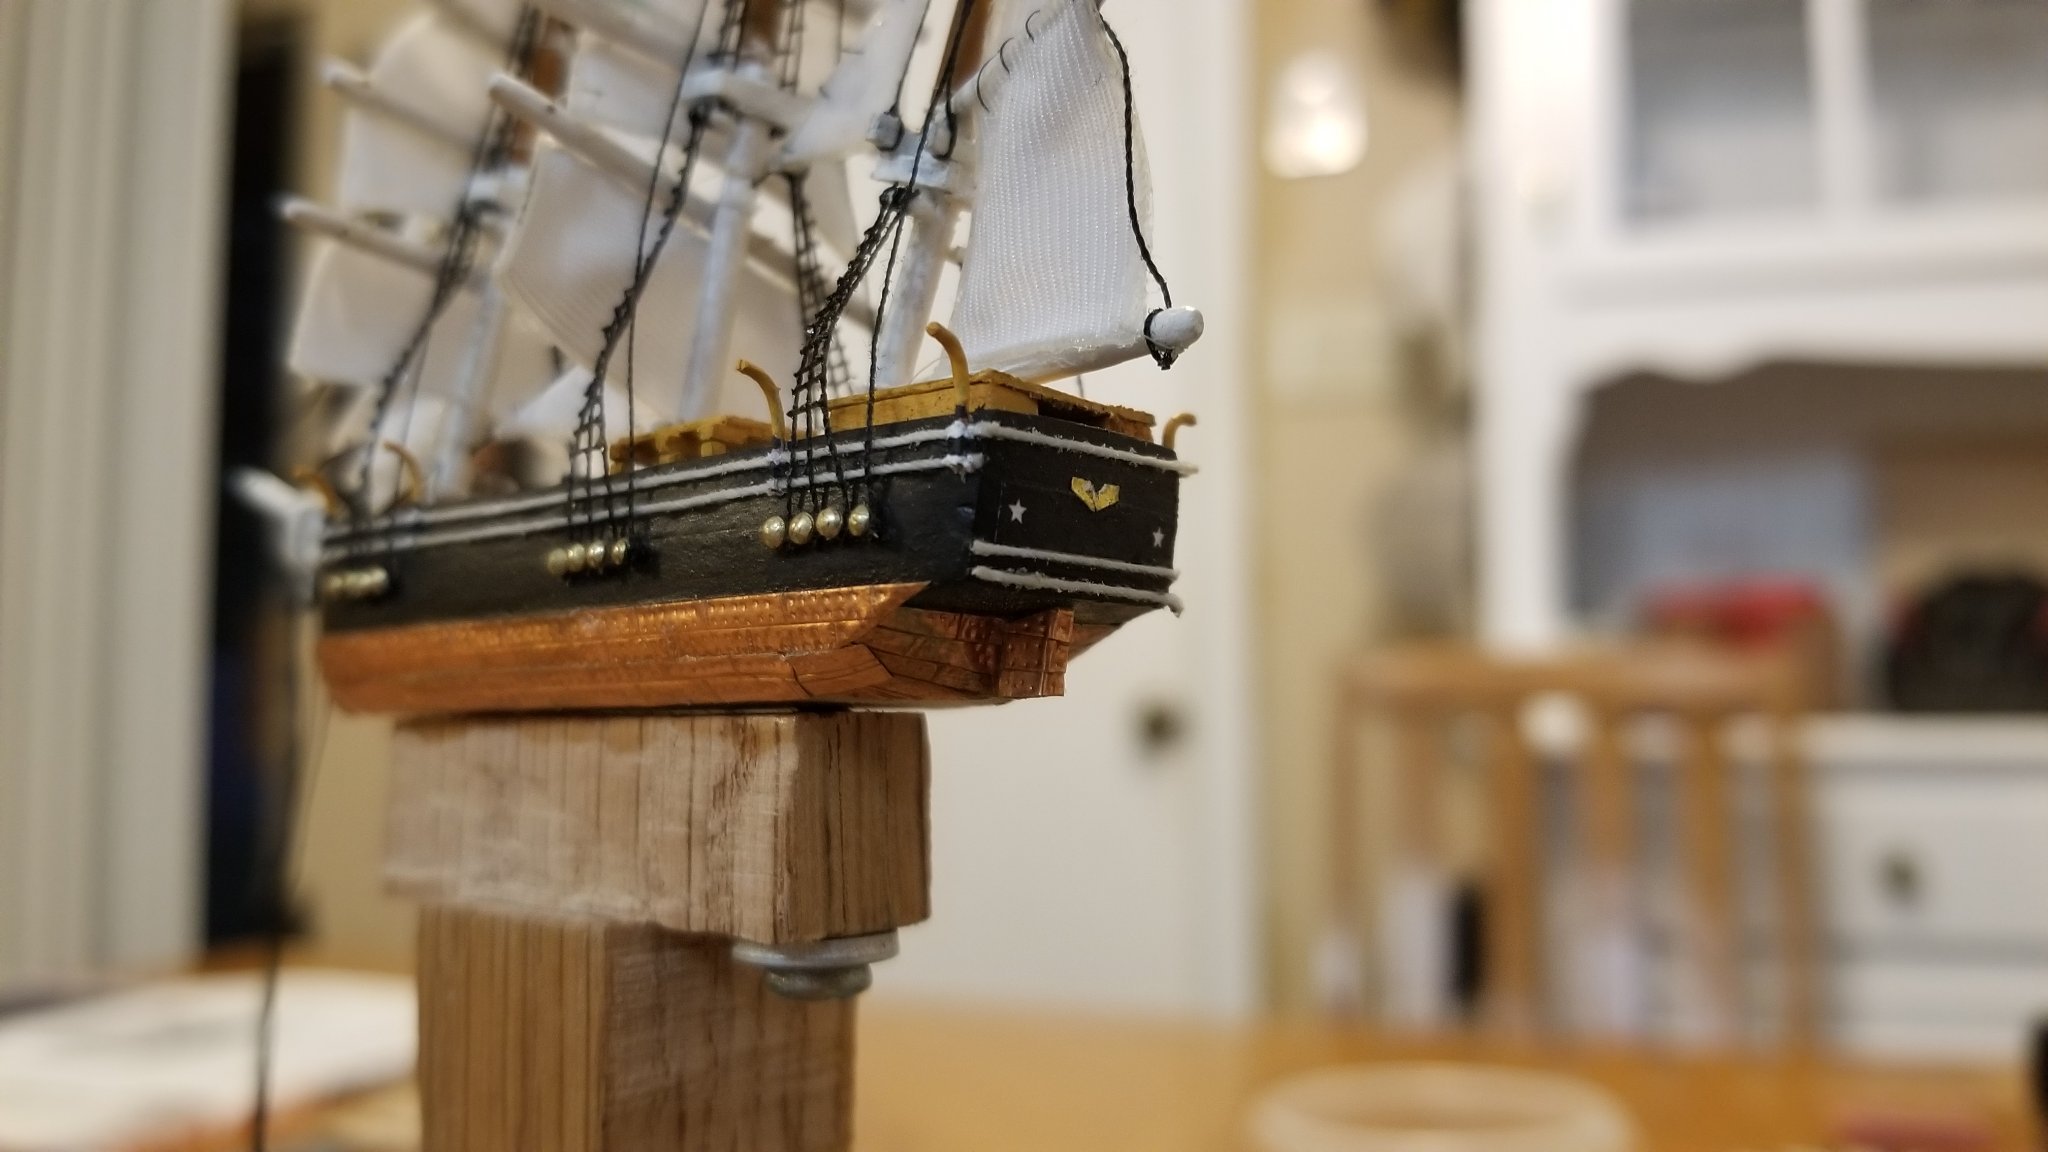
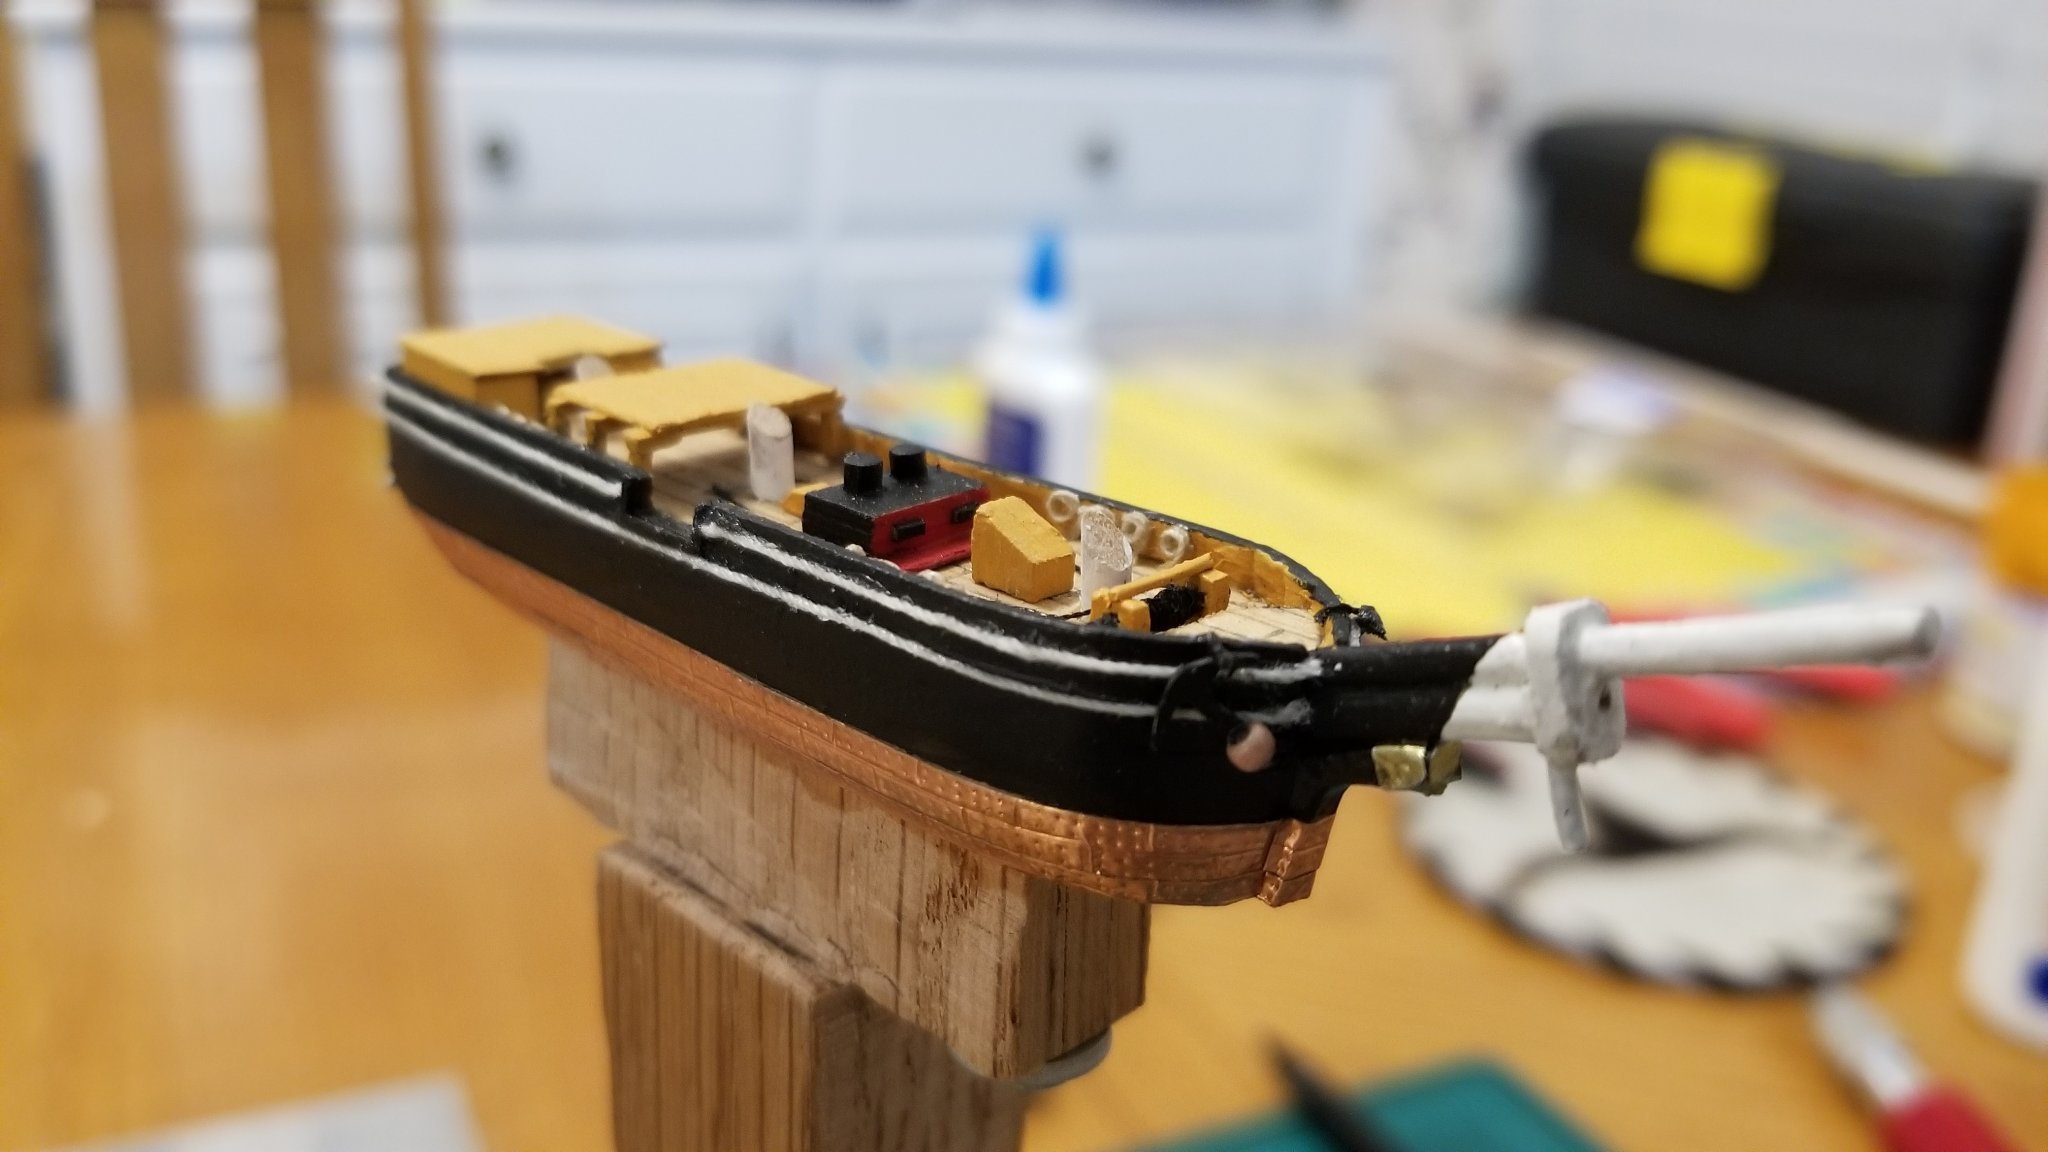
Other Morgan distinctions that I wanted to try and feature were the 2 white stars and gold eagle on the transom. I gave up on the “Charles W Morgan New Bedford” lettering. It was going to be way to small, but I hoped I could pull off the stars and eagle.
For the stars, I used powerpoint and made 2 of the smallest stars the program would allow me to draw and placed them on a black background 7/16” apart. Then I printed it out, cut the strip, and affixed to the transom with white glue.
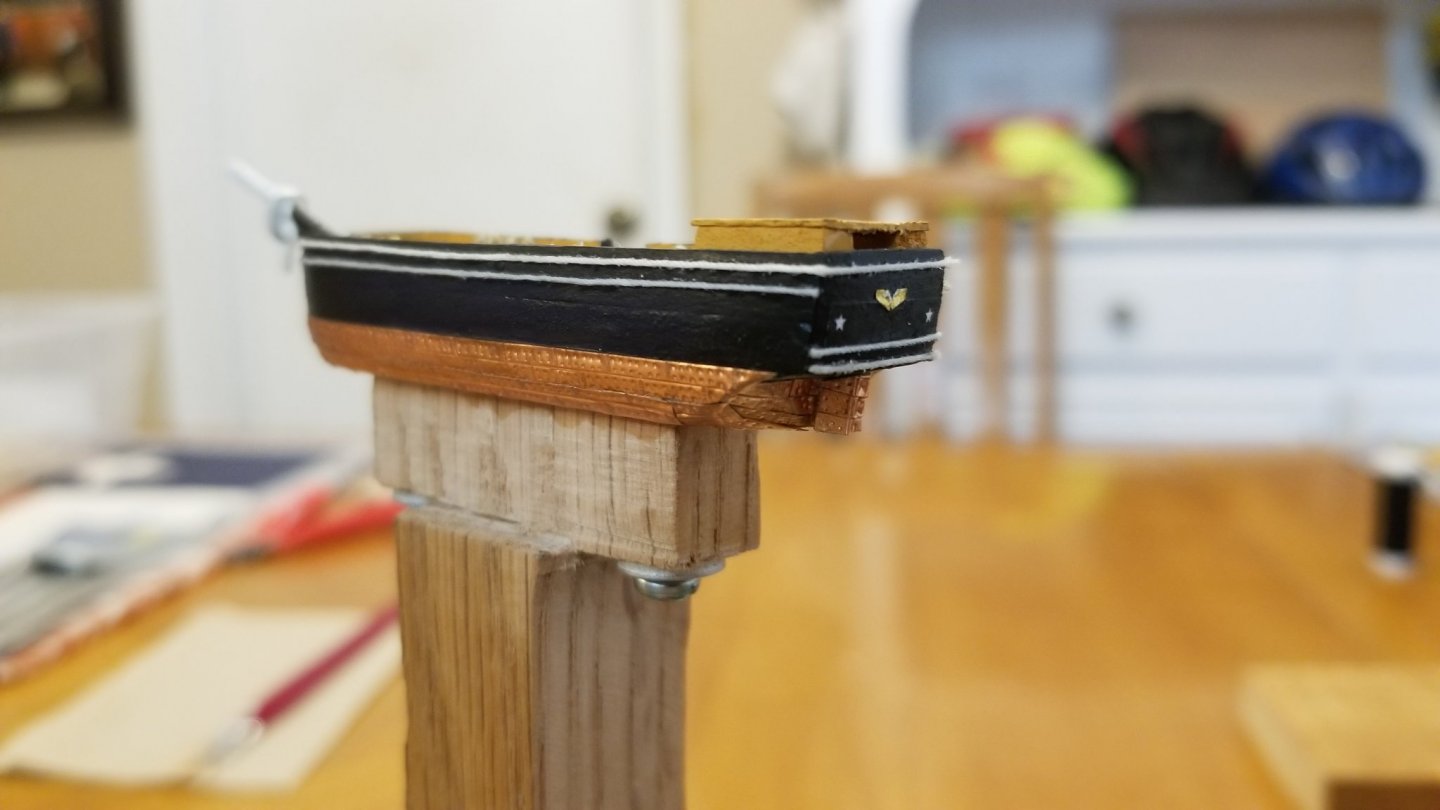
For the eagle, I used some gold foil off more chocolate (those fake gold coins they put at the checkout counters so kids will grab them and throw them in the cart when parents aren’t looking). I cut it into a tiny shape somewhat resembling a flying eagle, and glued it on. The further away, the better it (and everything else) looks!Lastly, I coppered the lower half of the hull with tape and added some rope hanks to the inside of the bulwarks. Now it’s on to the yards, gaff, and boom and completing the masts.

- mtaylor, Cuda1949 and GrandpaPhil
-
3
-
Thanks, Mike. My Leavitt book on the Morgan finally arrived today. Great recommendation!
- mtaylor and Landlubber Mike
-
2


Charles W Morgan by Glen McGuire - FINISHED - 1/400 – BOTTLE – 1/400
in - Build logs for subjects built 1801 - 1850
Posted
Thank you, Scott. I found your Morgan build log last week and started following it. I've gotta say, your work on the deck fittings is just remarkable - the tryworks in particular. Little rectangles of sandpaper for bricks? Wow. Using a dremel wheel for the knife stone? That is just cool. And I don't think I've seen anything like the way you've aged everything. Tremendous work.