


Glen McGuire
-
Posts
1,257 -
Joined
-
Last visited
Content Type
Profiles
Forums
Gallery
Events
Posts posted by Glen McGuire
-
-
On to the water. My water is a mix of acrylic paint and medium gloss gel. I did a small test last week where I put a dab of the mixture on a small pane of glass and then pushed a small wooden practice hull into it. After drying, the mixture adhered to the glass really well and the hull was quite secure.
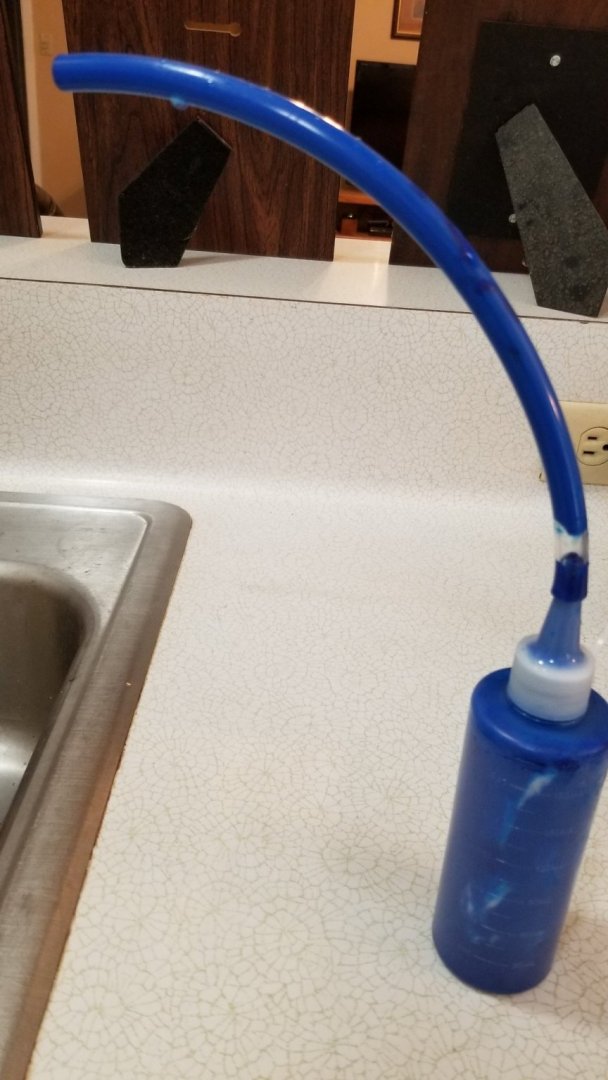
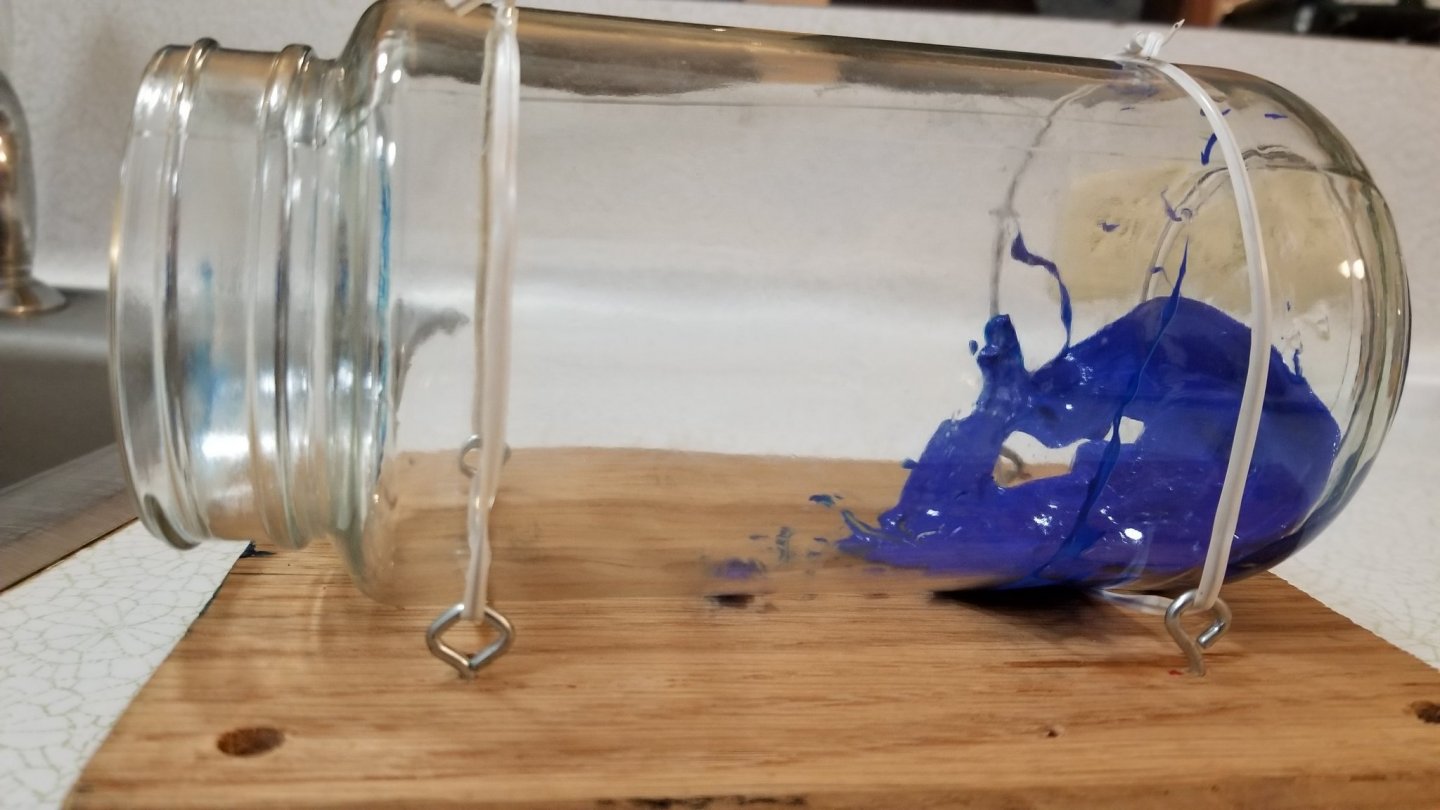
So now all I had to do was figure out the best way to get the water into the bottle. Thankfully I decided to do a test run on a scrap bottle. I filled a plastic squeeze bottle with the paint/gloss gel mixture and attached a long piece of surgical tube to the bottle's nipple (since I would need to reach all the way to the back end the bottle). Then I stuck the tube into the bottle and started squeezing. Things worked nicely at first. But after I had gotten some of the mixture in the bottle, things clogged up a bit. So I squeezed harder. Then harder. Then harder. Then BLAP!! The clog gave way and I splattered my water all over the back end of the scrap bottle (2nd pic below). This would have been impossible to clean up in the real bottle.
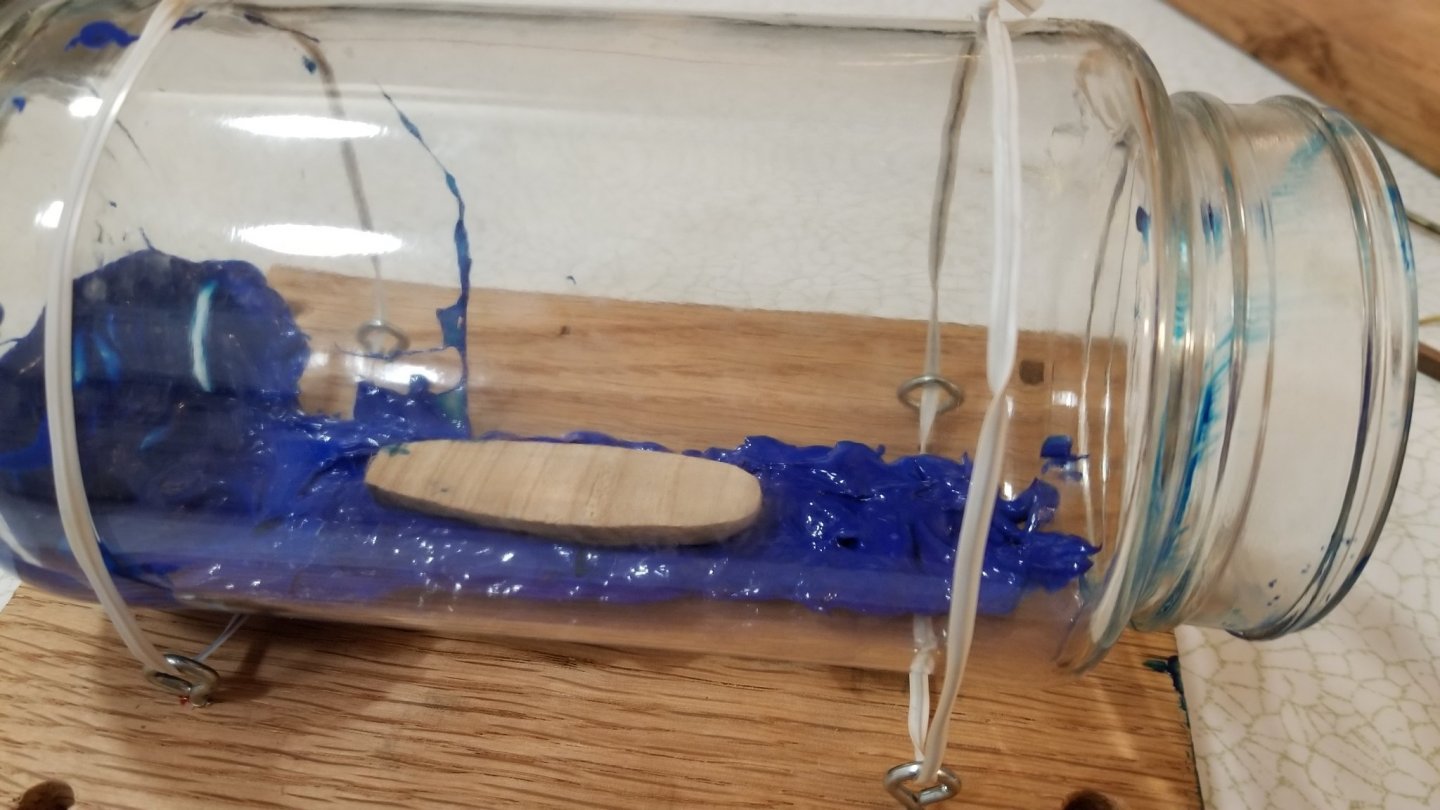
Fortunately, this was only a test. So I finished putting my water in the scrap bottle, swirled it around a bit for waves, and place another practice hull in the middle of it. I like the way it looks. I've just got to figure out a safer way to get my water in the bottle.
Things don't always go smoothly with this hobby, do they!
-
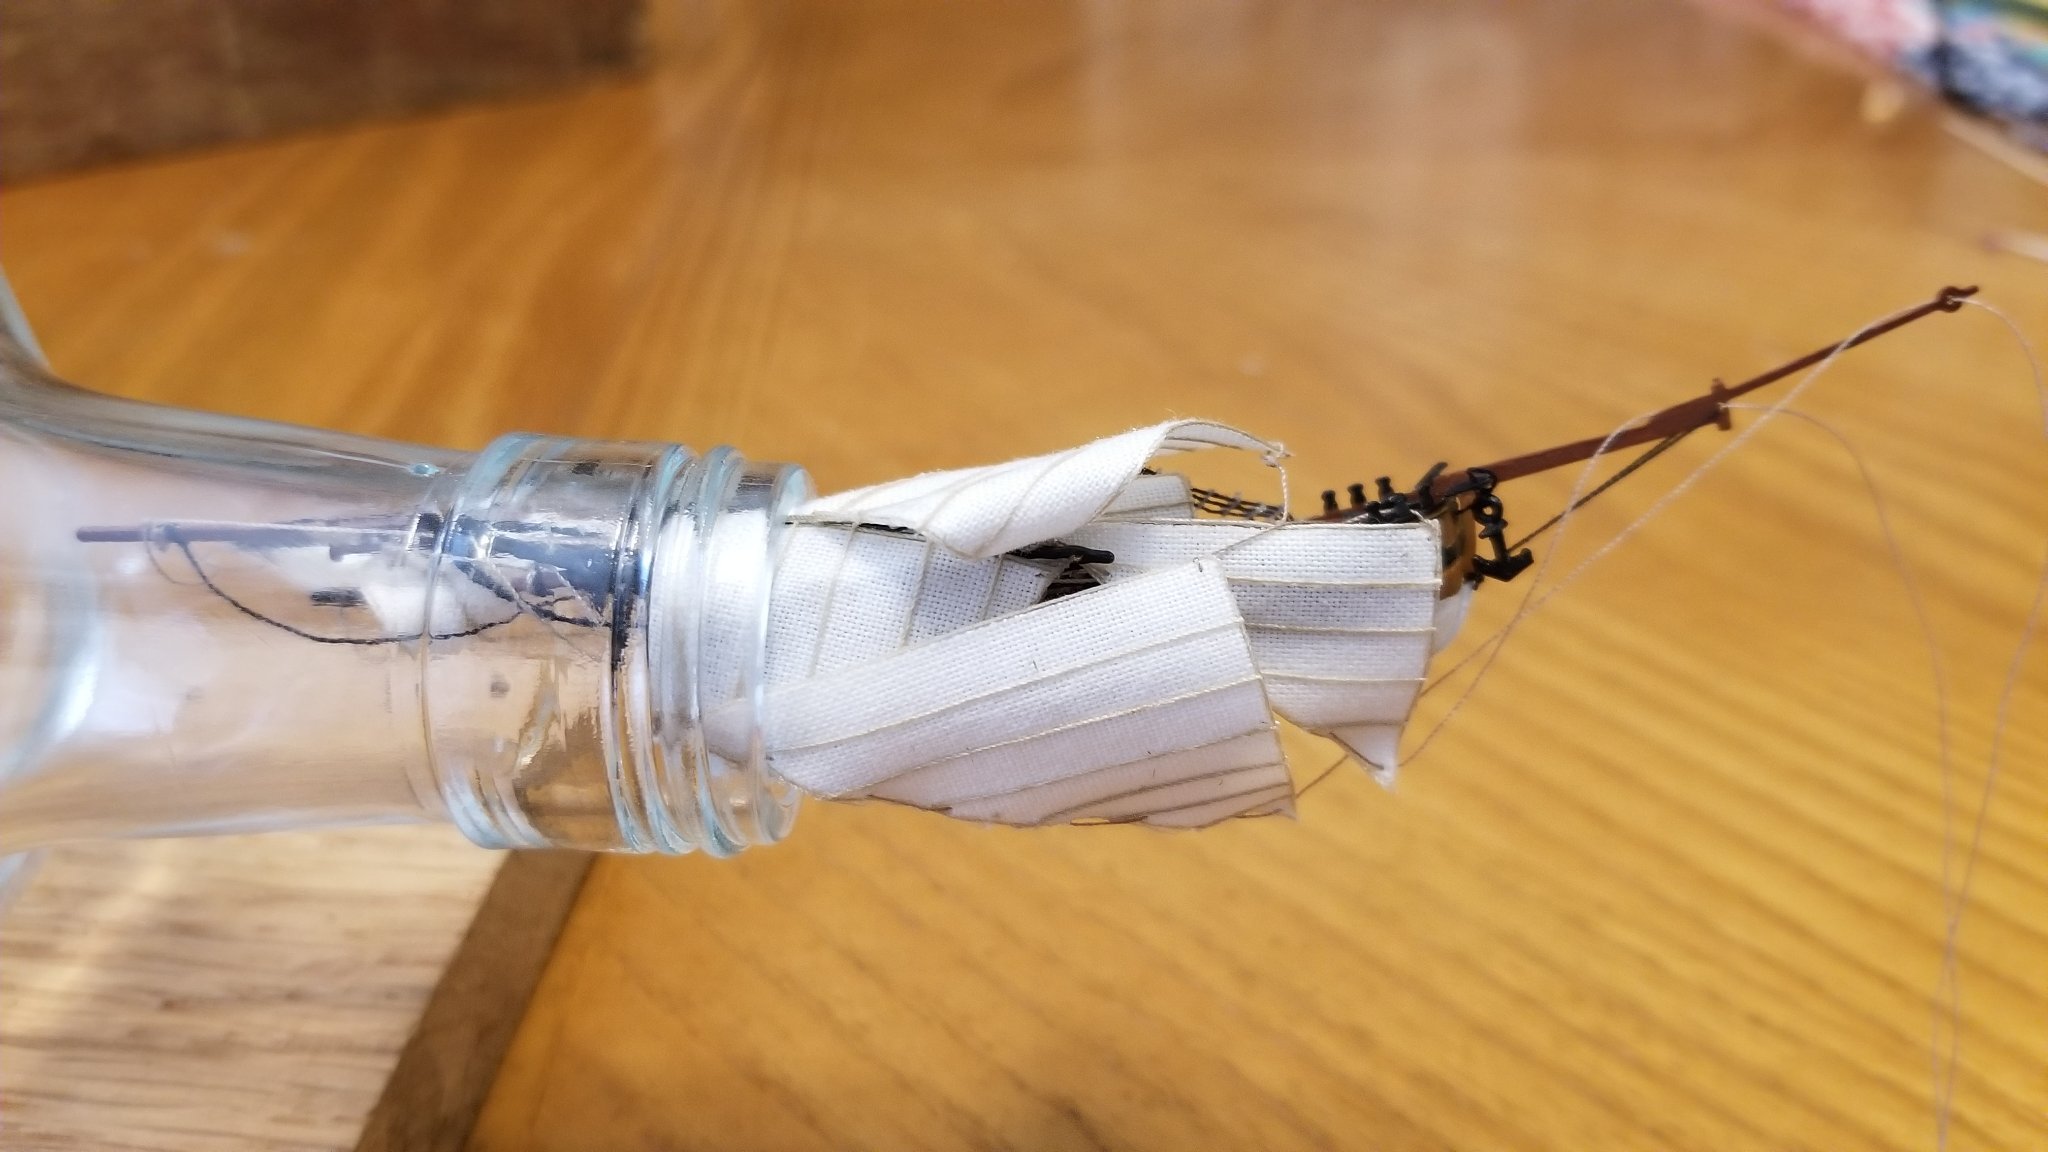
I did a test smash to see if I could get the ship into the bottle opening without breaking or bending anything. It's kind of like trying to fold a fitted sheet, there's just no good, smooth way to do it. But I got it in pretty far so I think I'm good from that standpoint. Now whether or not it will stay in the little insertion tool I made, we will see about that when it's really game time.

- Ryland Craze, gjdale, GrandpaPhil and 2 others
-
 5
5
-
@gjdale Hey Grant - your CA idea for threading worked perfectly and helped speed things up for me. Thanks for the tip!
The ship is complete. Now I just gotta get up the nerve to mash it all down and see if it's going to fit inside the bottle opening. I will give that a try and if it looks like it's going to work, I'll start on the water effects.


- gjdale, Keith Black, Landlubber Mike and 2 others
-
4
-
 1
1
-
@Landlubber Mike Thanks, Mike. The more sails and stuff I install on the ship the smaller that bottle opening looks. Is it cheating to go buy a bigger bottle? 😲
-
-
5 hours ago, gjdale said:
You might try dabbing some thin CA directly to the end of the thread and carefully rubbing it in.
That's a great idea, Grant. I will give it a try.
- Keith Black and gjdale
-
2
-
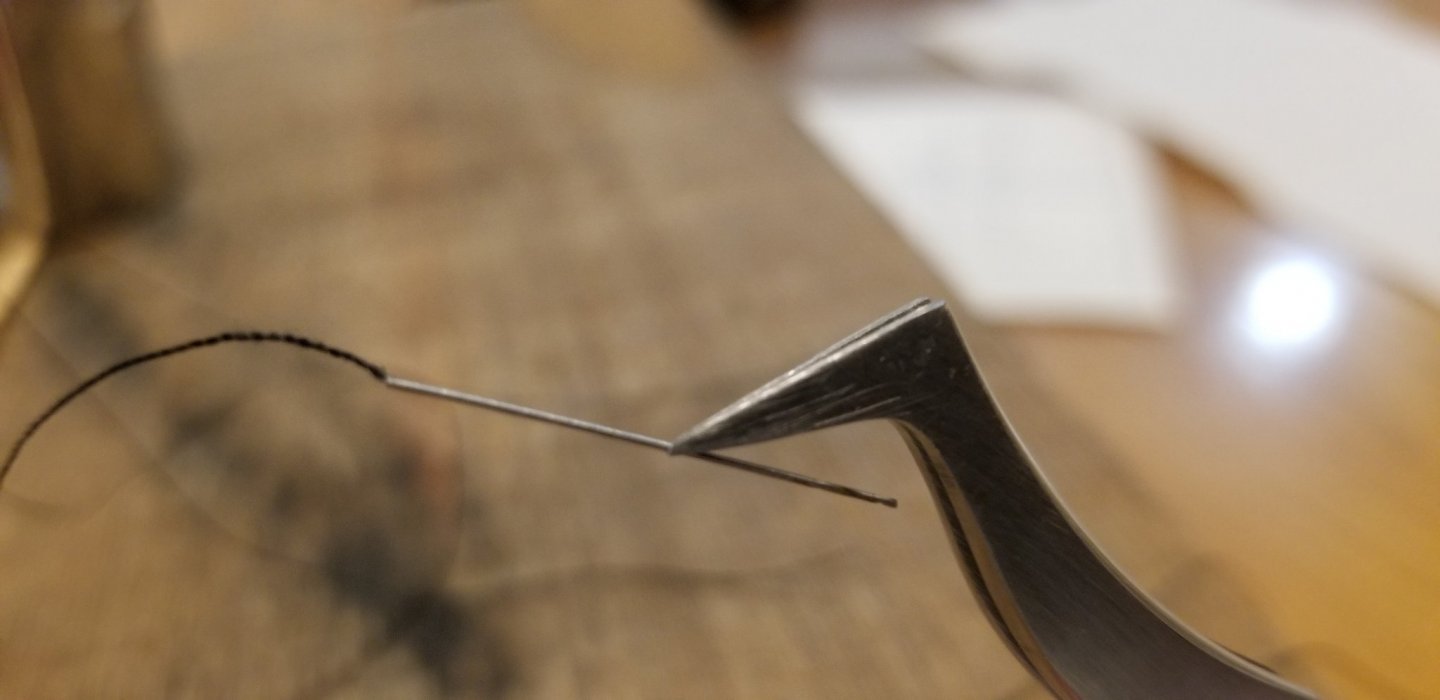
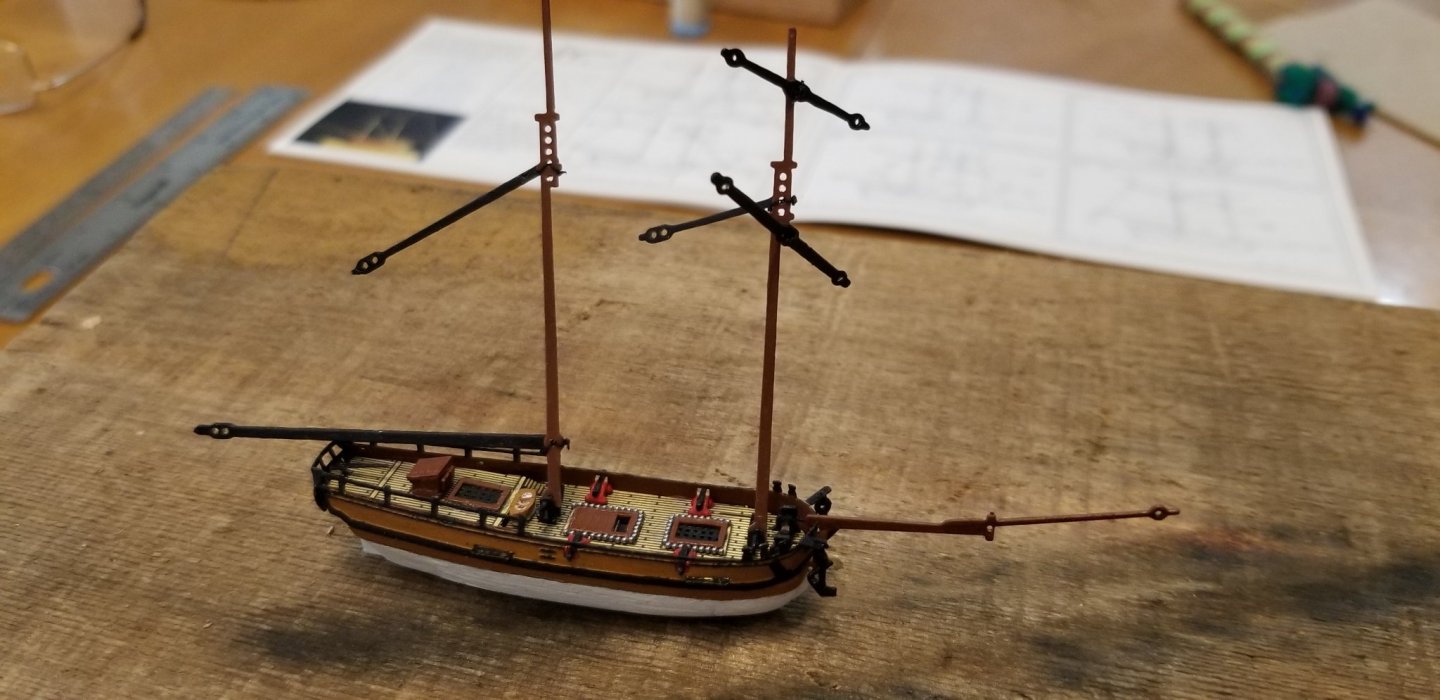
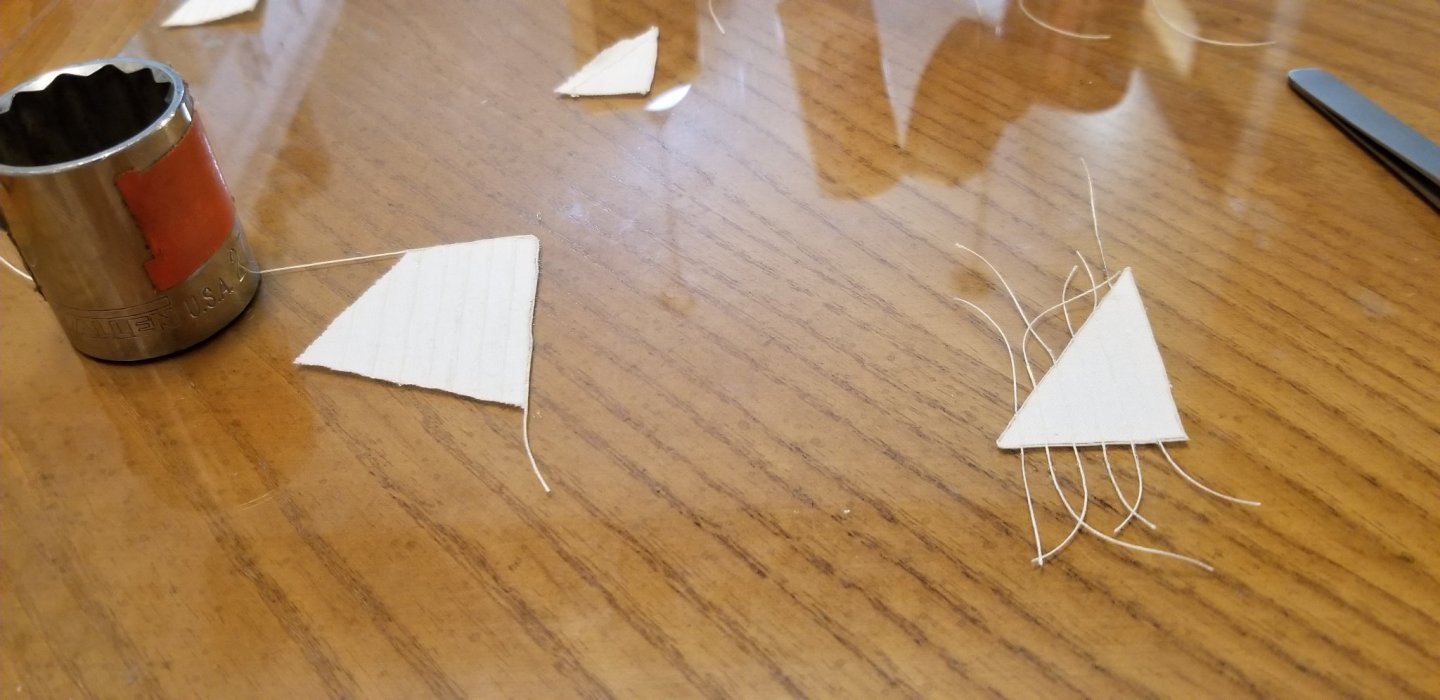
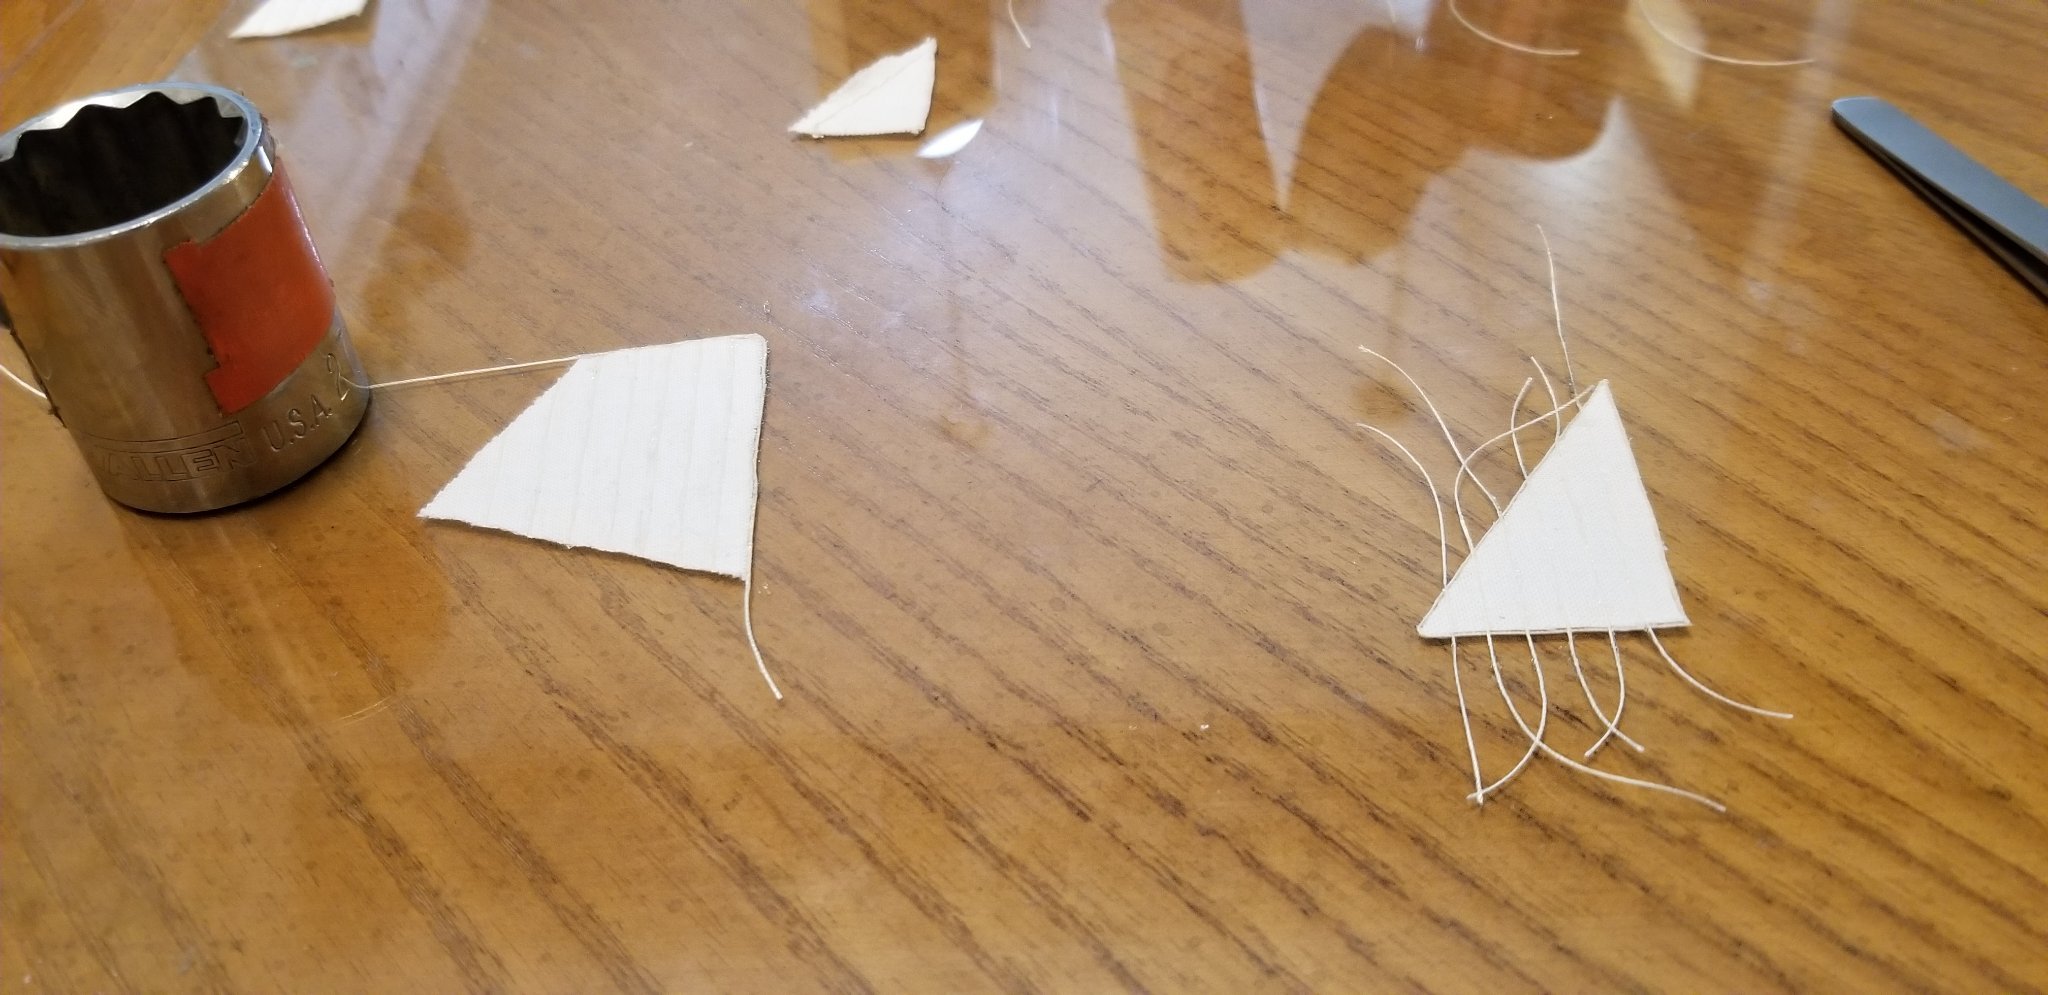
I continue to make slow progress with the rigging. Getting the thread thru such tiny holes is a challenge to say the least. I'm using Guttermann all-purpose thread for the standing and running rigging which is small enough for all the holes but just barely. If I had to do it over again, I think I would drill out the holes just a bit more before putting anything together. Too late now, as I'm not letting a spinning drill bit get anywhere near this ship!
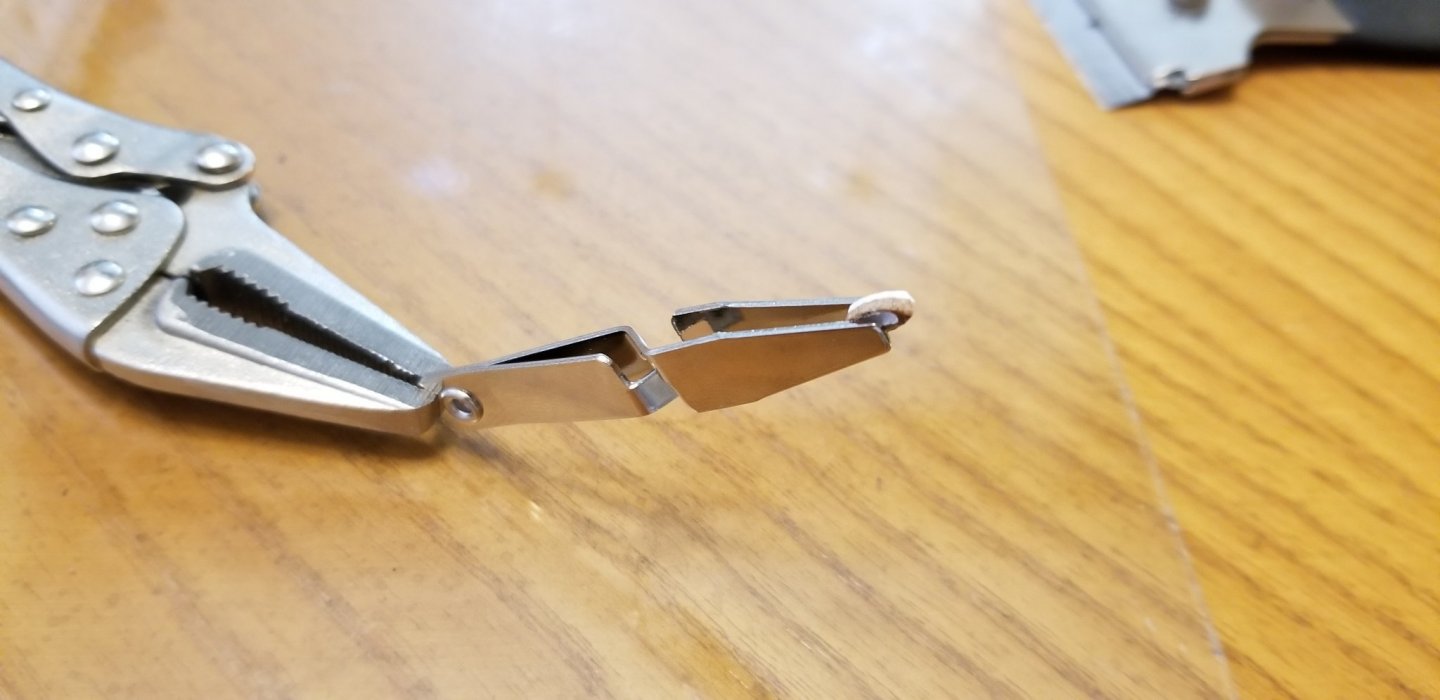
Some times I can get it thru ok but other times it just won't work. So my last resort is to put a dot of CA glue on the end of the thread, glue it to the end of a #78 drill bit, and push it thru the hole hoping the thread stays attached (see pic). It works, but is a pain.
Got a couple more sails strung up plus the shrouds. I'm also making an attempt to add ratlines to the shrouds. For the ratlines, I'm using the white thread that came with the kit because it's slightly thinner than the thread I'm using elsewhere. It's about the same color as the sails so the ratlines are hard to see in the pic below. I'm using fabric glue to attach the ratlines to the shrouds. The spaces are way too tiny for any kind of knot that I could tie.
Will the ratlines survive when I wad everything up to put the ship in the bottle? Who knows. The sea around my ship might be littered with tiny little bits of thread. If I get lucky maybe they will look like whitecaps!

- Eurus, Keith Black, gjdale and 3 others
-
6
-
-
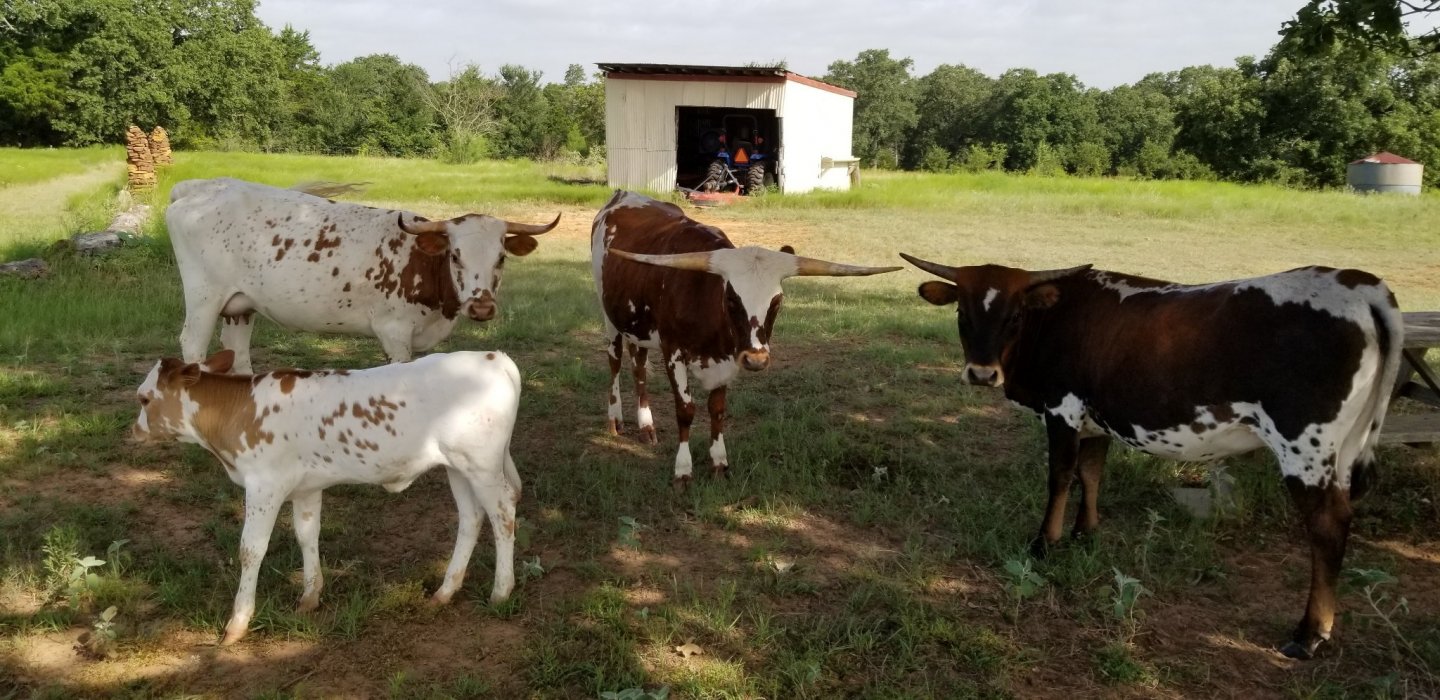
@DelF Those are beautiful animals, Derek! I had no idea there was an English version of longhorns. The one on the right in your picture has remarkably similar coloring as my Sweet Eileen which is the one on the right in my picture.
- DelF, mtaylor and Keith Black
-
3
-
Thanks, Grant! I hope she comes through for you! I'd love to see what somebody with your skills could do with this project.
- Keith Black and gjdale
-
2
-
On 8/11/2021 at 3:48 AM, bruce d said:
I'm late to the BBQ but ... Welcome to MSW from the UK.
@bruce d Thanks for the welcome, Bruce. But I gotta tell you, my babies below DO NOT like to hear anyone saying that word BBQ!!!
- mtaylor, bruce d and Keith Black
-
 3
3
-
On 8/6/2021 at 10:19 PM, Louie da fly said:
Just looked through your build log. Very impressive.
@Louie da fly Thank you, Steven and thanks for the welcome!
- mtaylor and Keith Black
-
2
-
On 8/11/2021 at 1:10 AM, Laggard said:
Go Sooners! Jk. Welcome! 😜
@Laggard Not only do we lose to OU every year, now we get to lose to Bama every year too! I think OU will do a lot better in the SEC than we will and I think I'll be building a lot of ships during football season from now on. ☹️ Regardless, thanks for the welcome!!
- mtaylor, Laggard and Keith Black
-
2
-
1
-
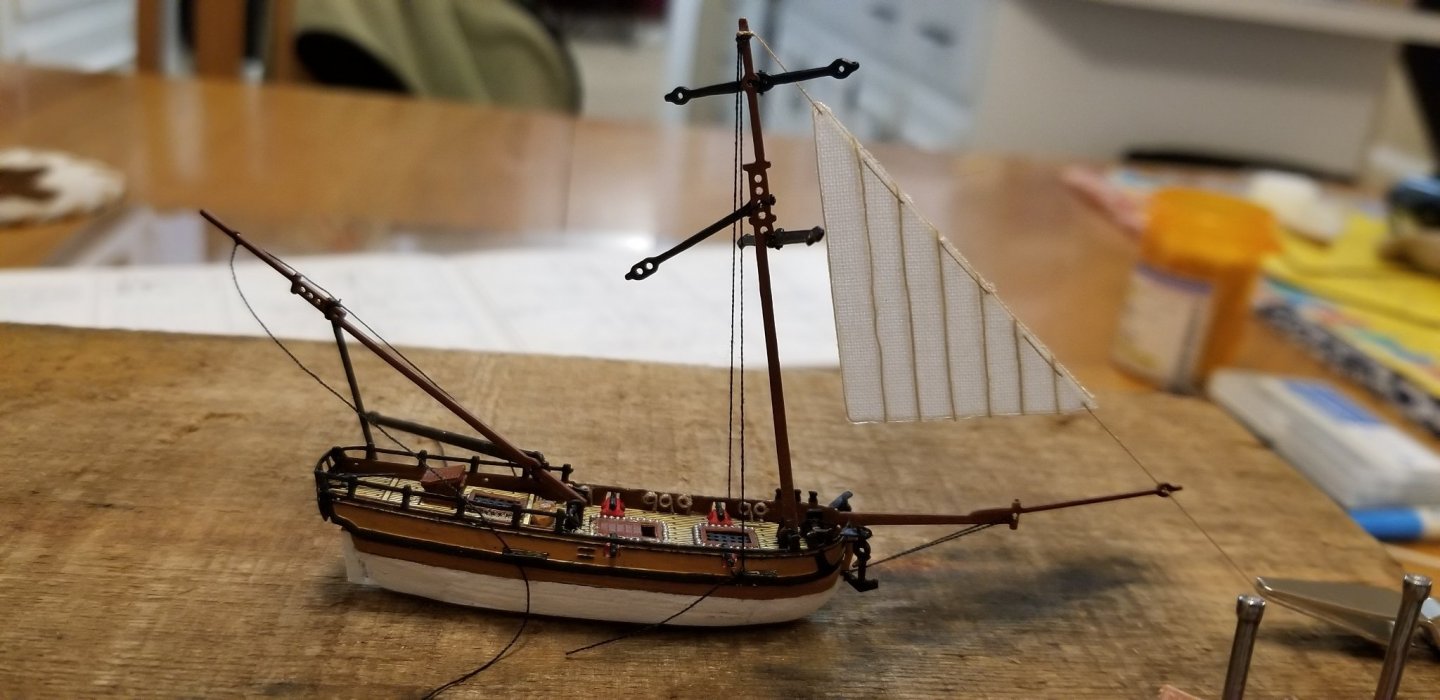
OK. I may have gone off the deep end here but I blame it on all of y'all in this forum and your amazing build logs. Rather than leave well enough alone, I decided to add some rope hanks along the inside of the bulwarks. I'm not sure any of these extras will even be visible once the ship is in the bottle and all the sails are up but what the heck, right?
Also got the flying jib sail hung. Wow, this rigging job is tedious!

-
@Keith Black Thanks, Keith! I can't wait to see what you do with the Alabama when you get started. I'm gonna grab a front row seat for that build!
-
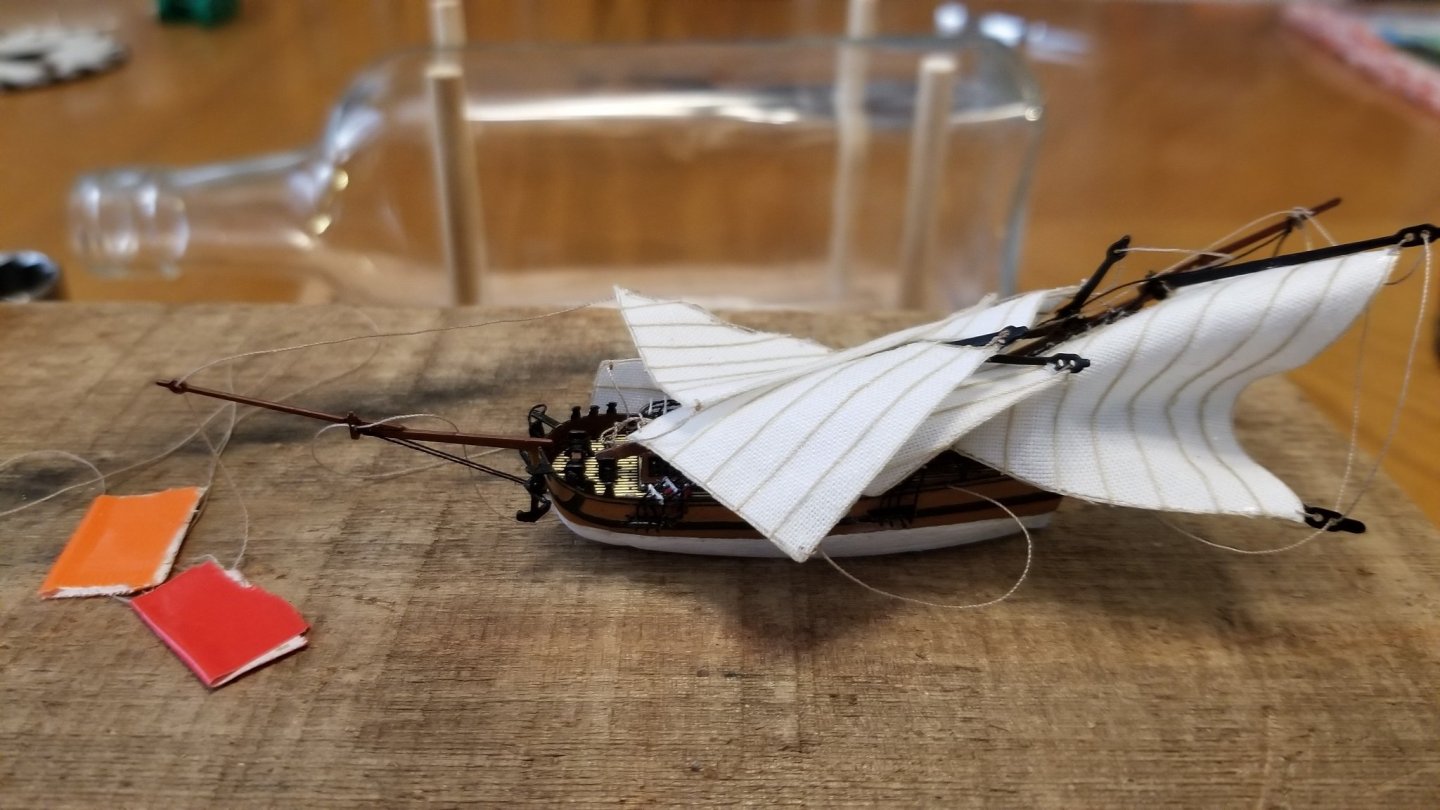
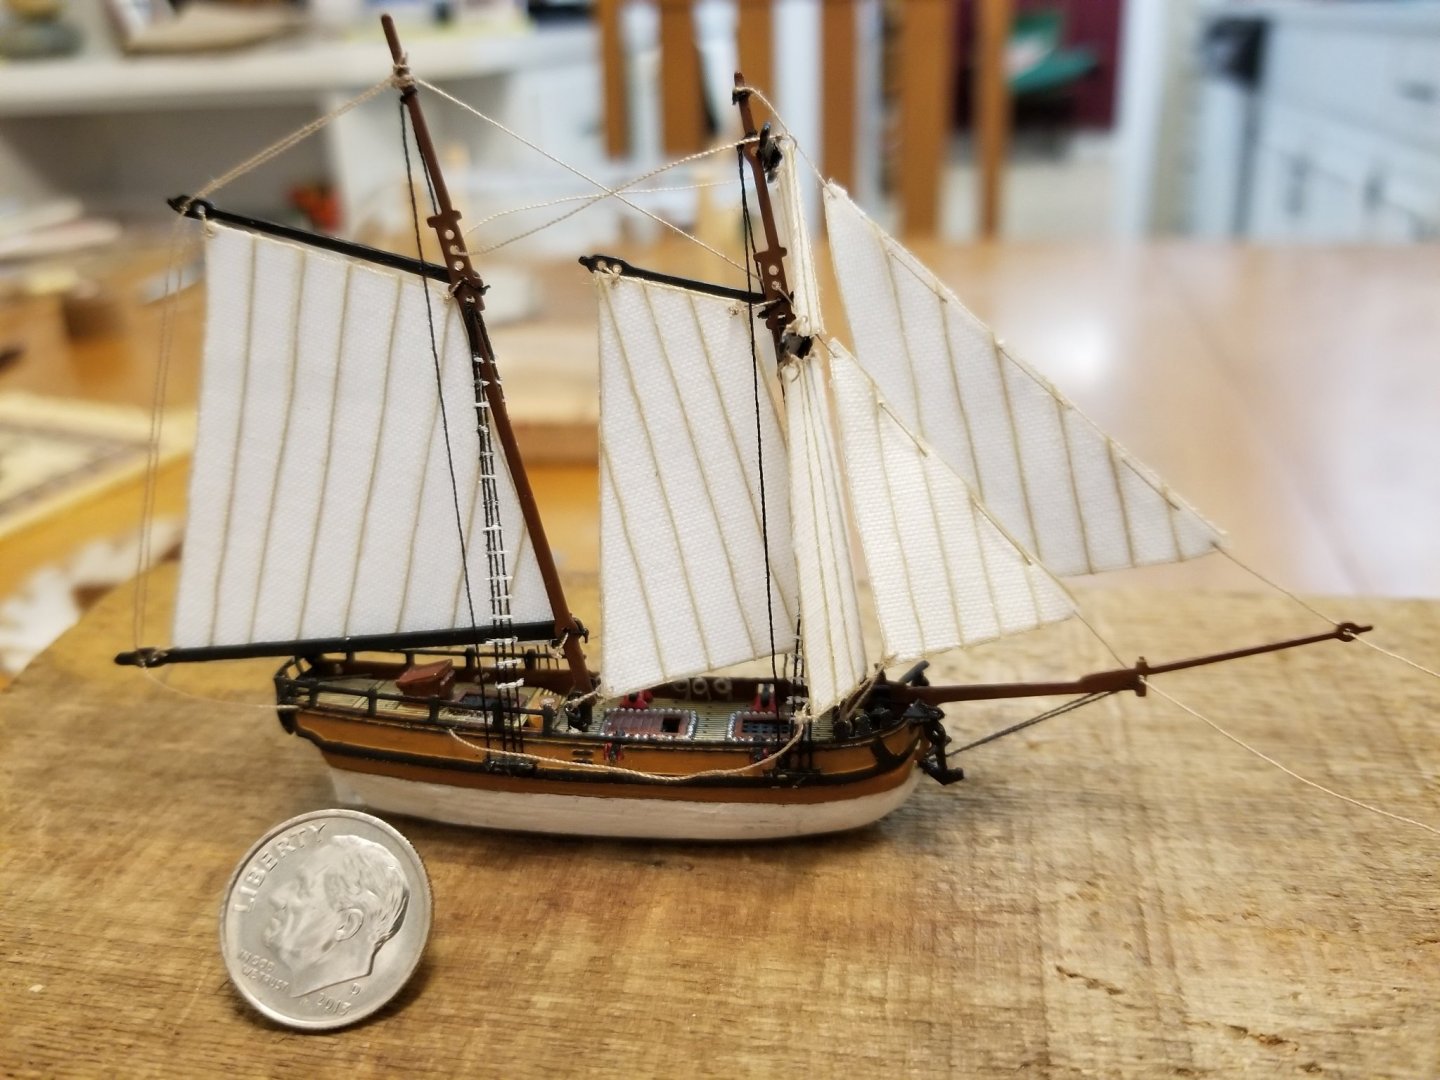
Finally finished the sails and got them looking like I wanted. I also tied the yards, gaffs and boom to the masts and then attached the masts to the deck hinges.
The instructions say to "solder" the ends of the threads instead of tying knots (to avoid an excessive # of knots). I did not like that idea. If one of the soldered ends gave way when the ship is in the bottle and I'm raising the masts, adjusting the yards, etc., it would be game over. So I tied knots and dabbed with a tiny amount of glue. I actually threaded each junction twice for some added strength.

-
-
@Louie da fly Hey Steven - Thanks for the comments and the suggestions. I have not heard of silkspan before. I will definitely investigate that for future builds. Appreciate the education on the rigging as well. As for that build of the Victoria, OMG, thanks for sending the link. That is almost beyond my comprehension!
I also took a bit of time and looked thru your log of the Henry Grace rebuild. What a truly fascinating project (and story). And some very interesting things you've done like using a 3D printer for custom deadeyes. Your sails are simply amazing. I will be checking back in on that one.
- Louie da fly, Keith Black and mtaylor
-
2
-
 1
1
-
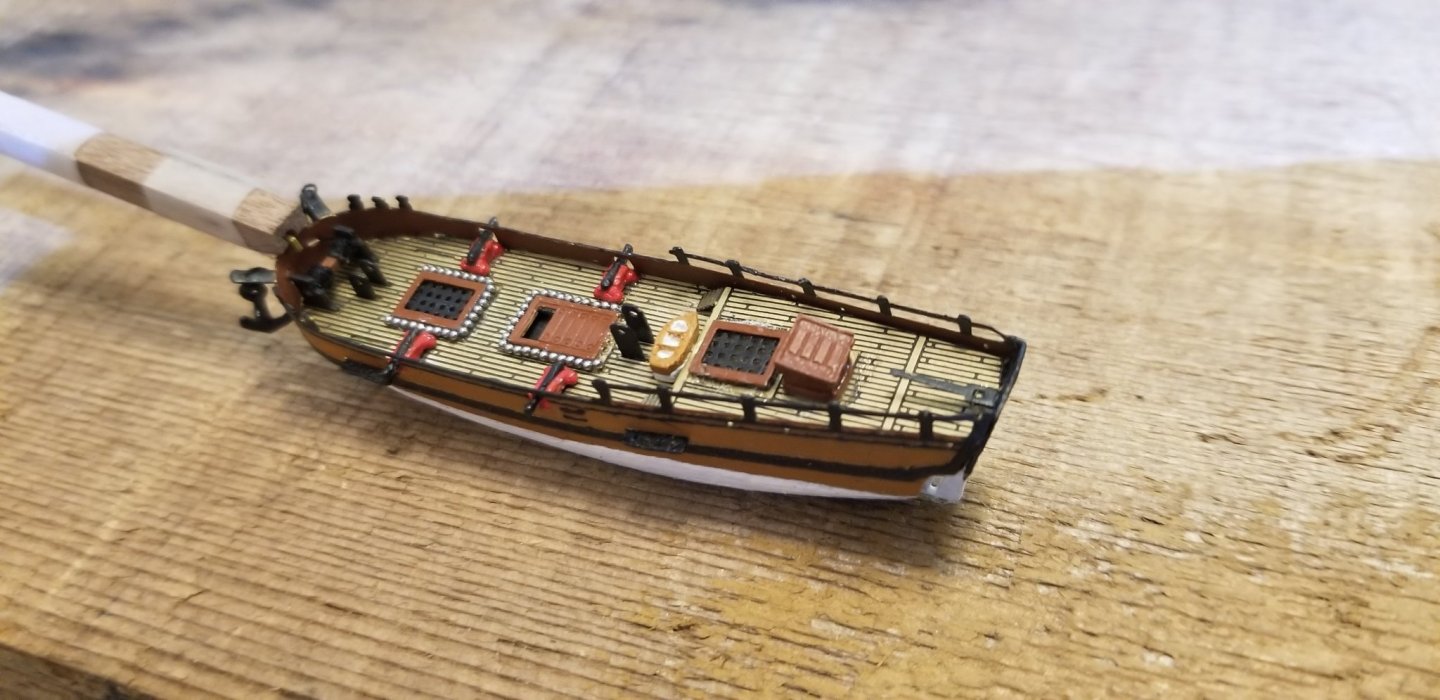
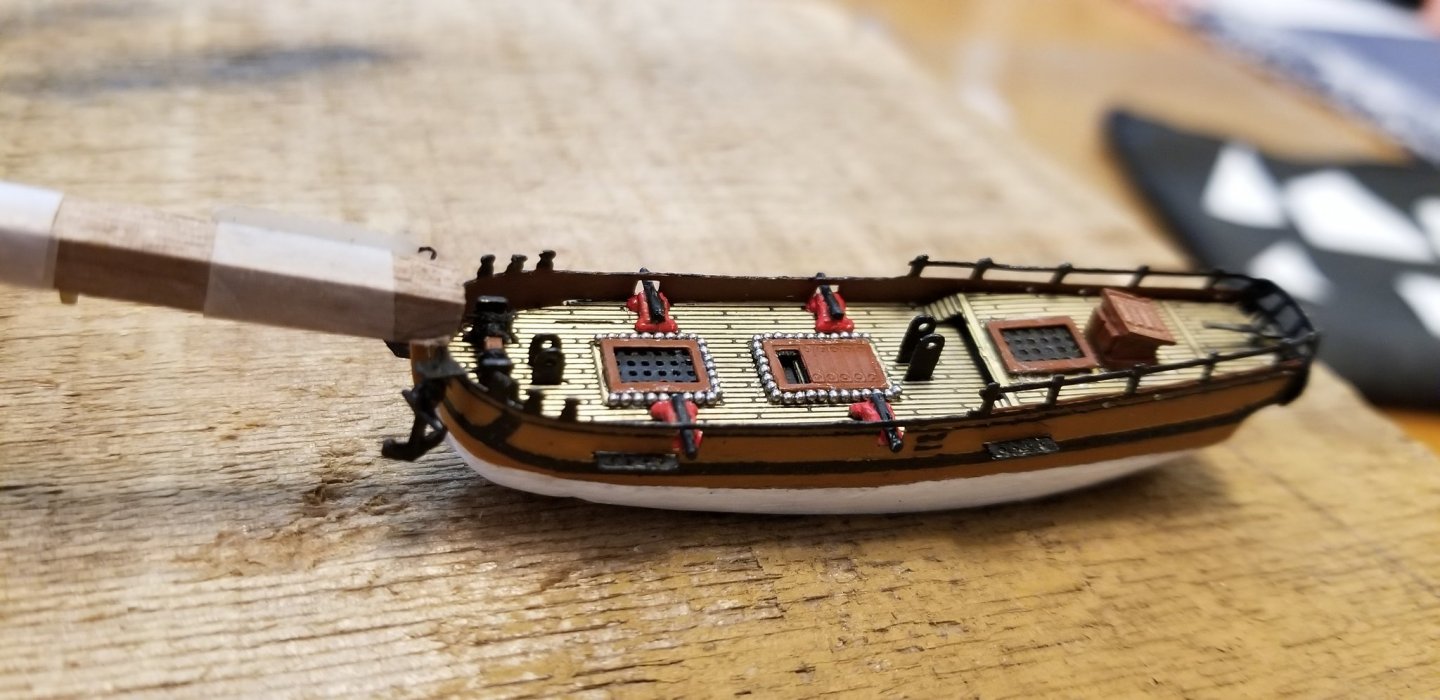
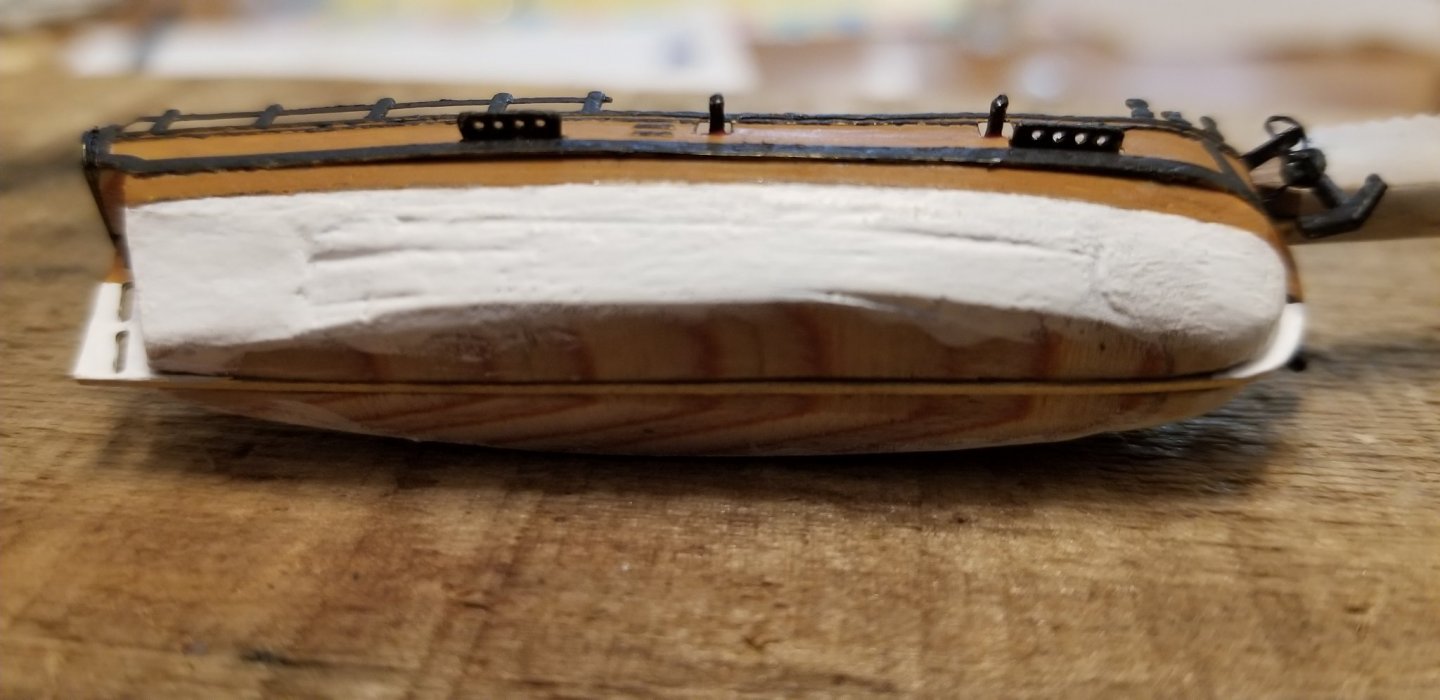
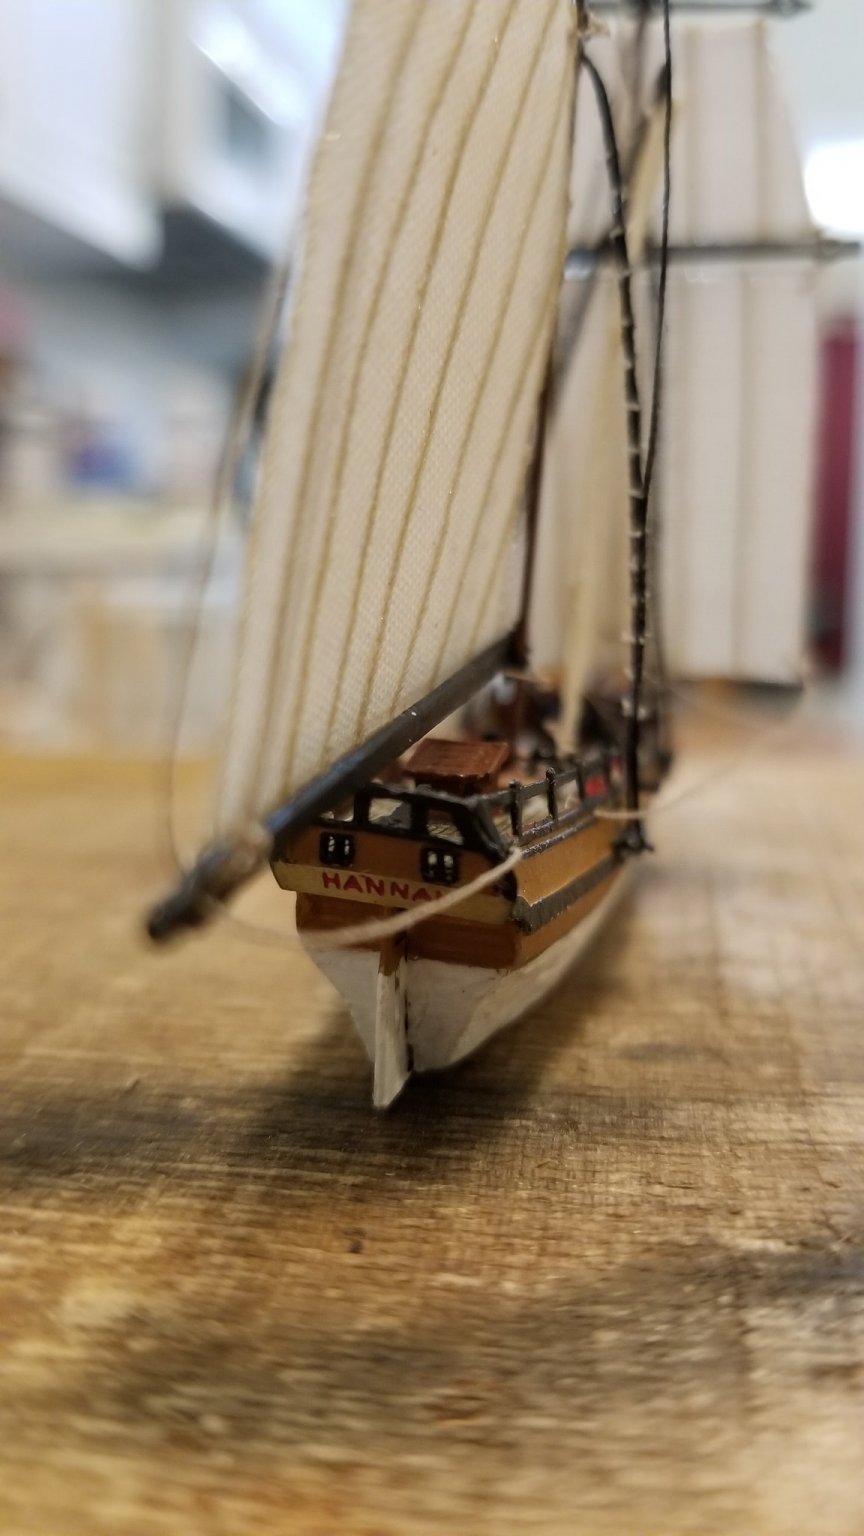
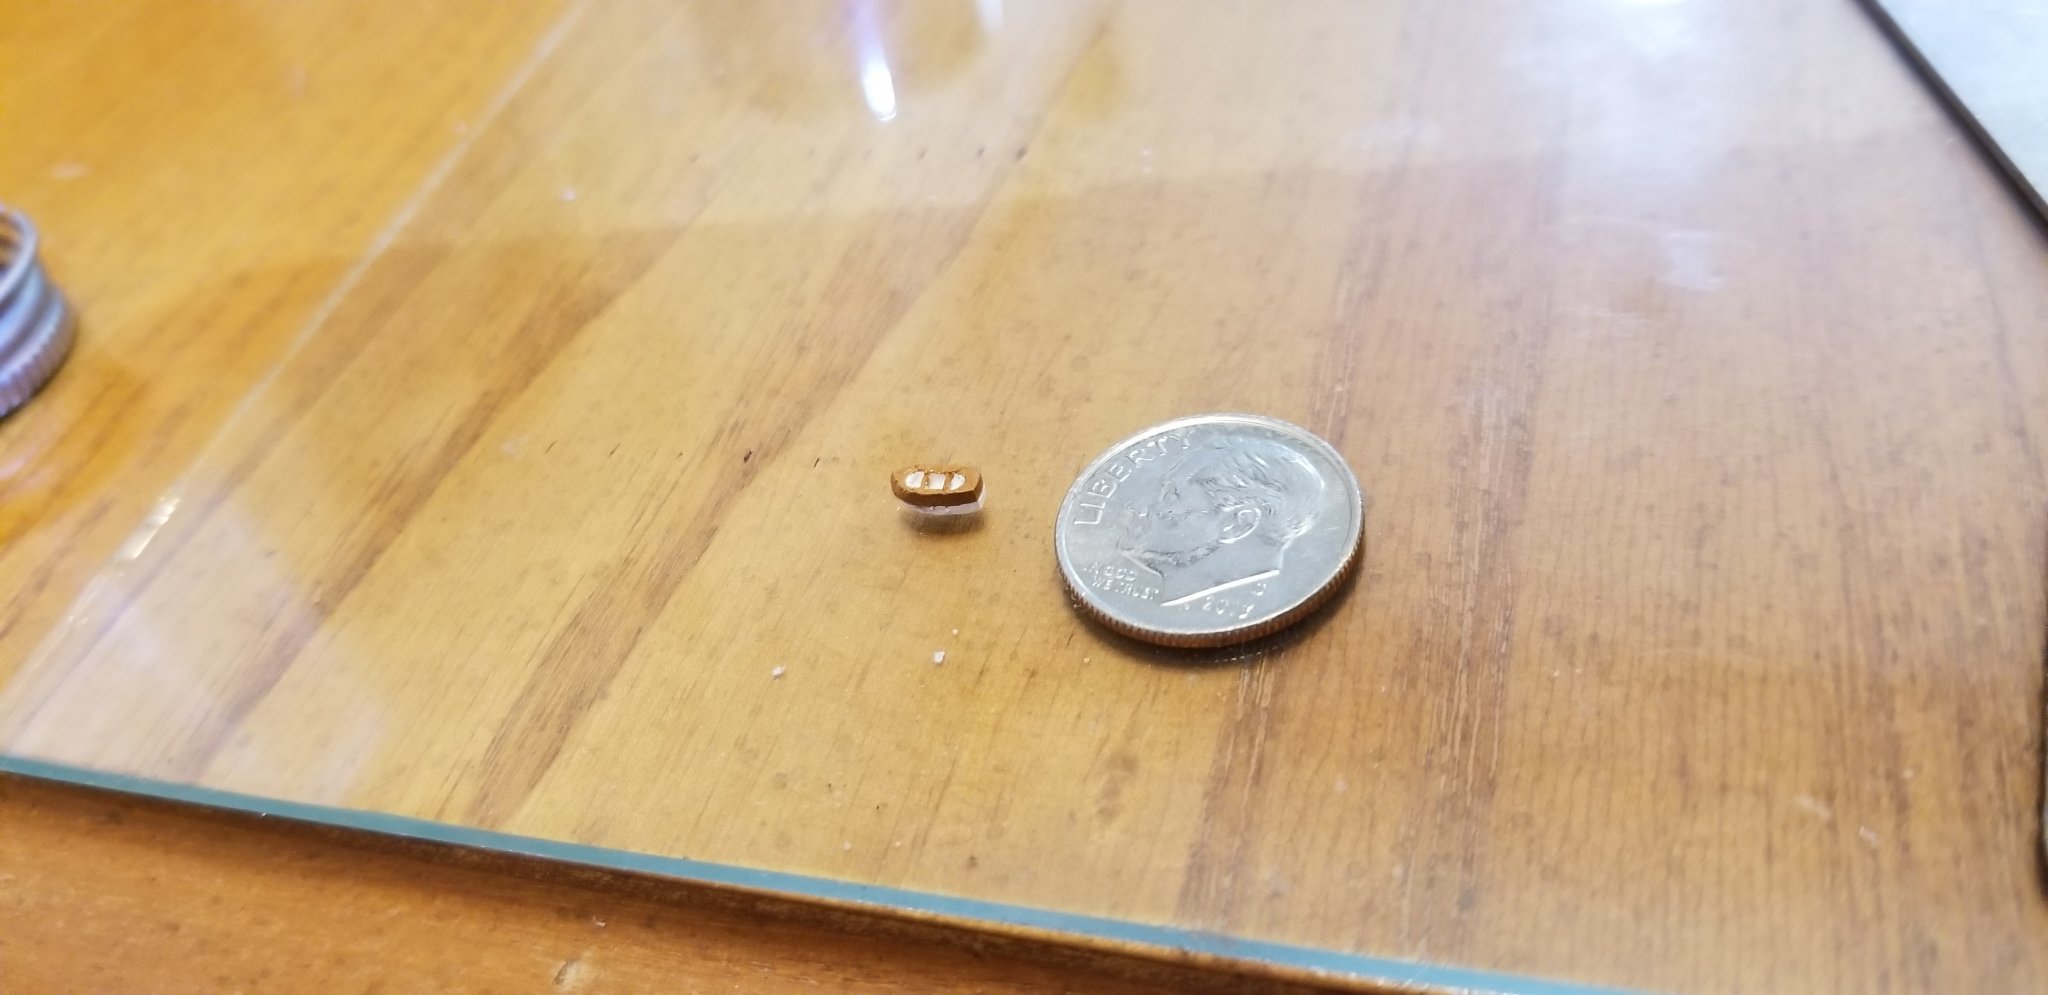
I was also looking at some pictures of a few larger, non-SIB models of the Hannah. I noticed that some of them had a lifeboat stored between the steps going up to the quarterdeck. So I decided to see if I could carve out a tiny one to add to my Hannah. I took the wooden base from the kit (since I'm not planning on using it) and made a very primitive looking lifeboat. But unless you are looking at it with a camera zoom or a big magnifying glass, you don't really see how crude it is! You can't really tell it from the picture, but the brown matches the color of the bulwarks, so it's got the same color scheme as the ship itself. OK, back to the sails...

-
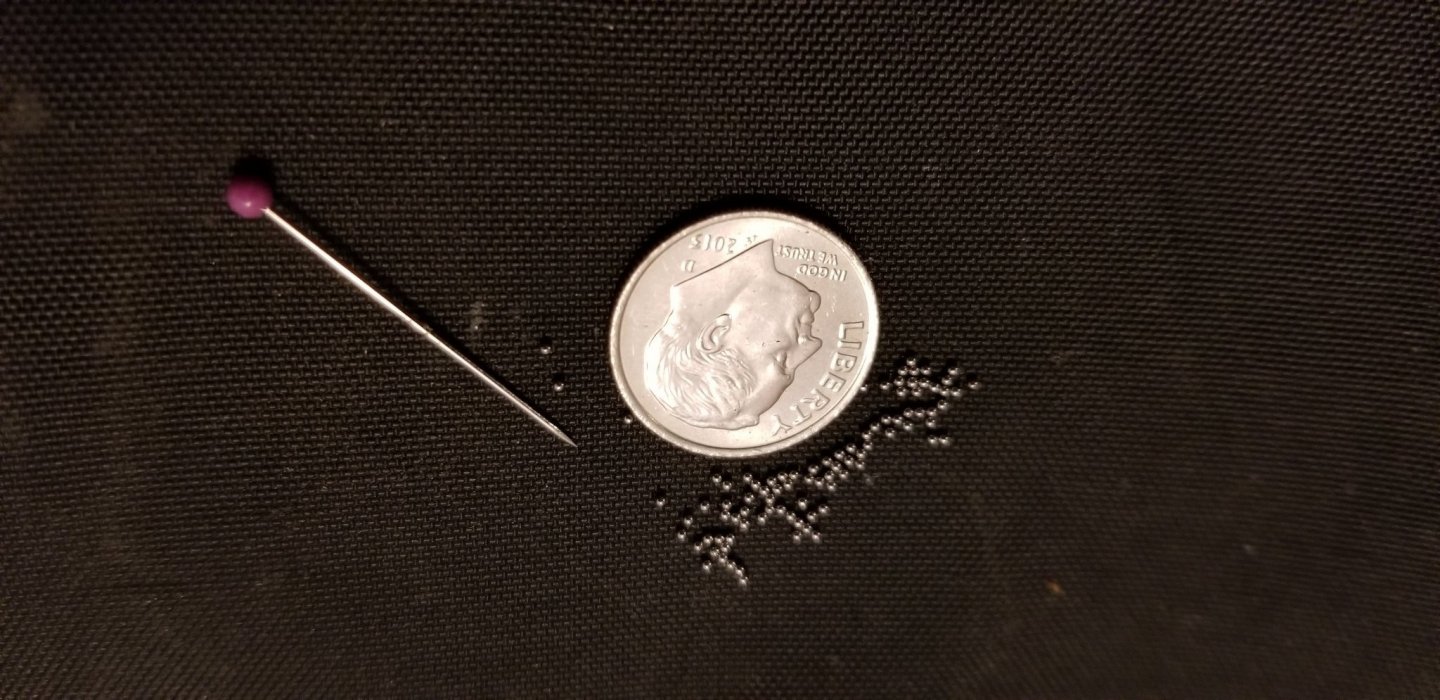
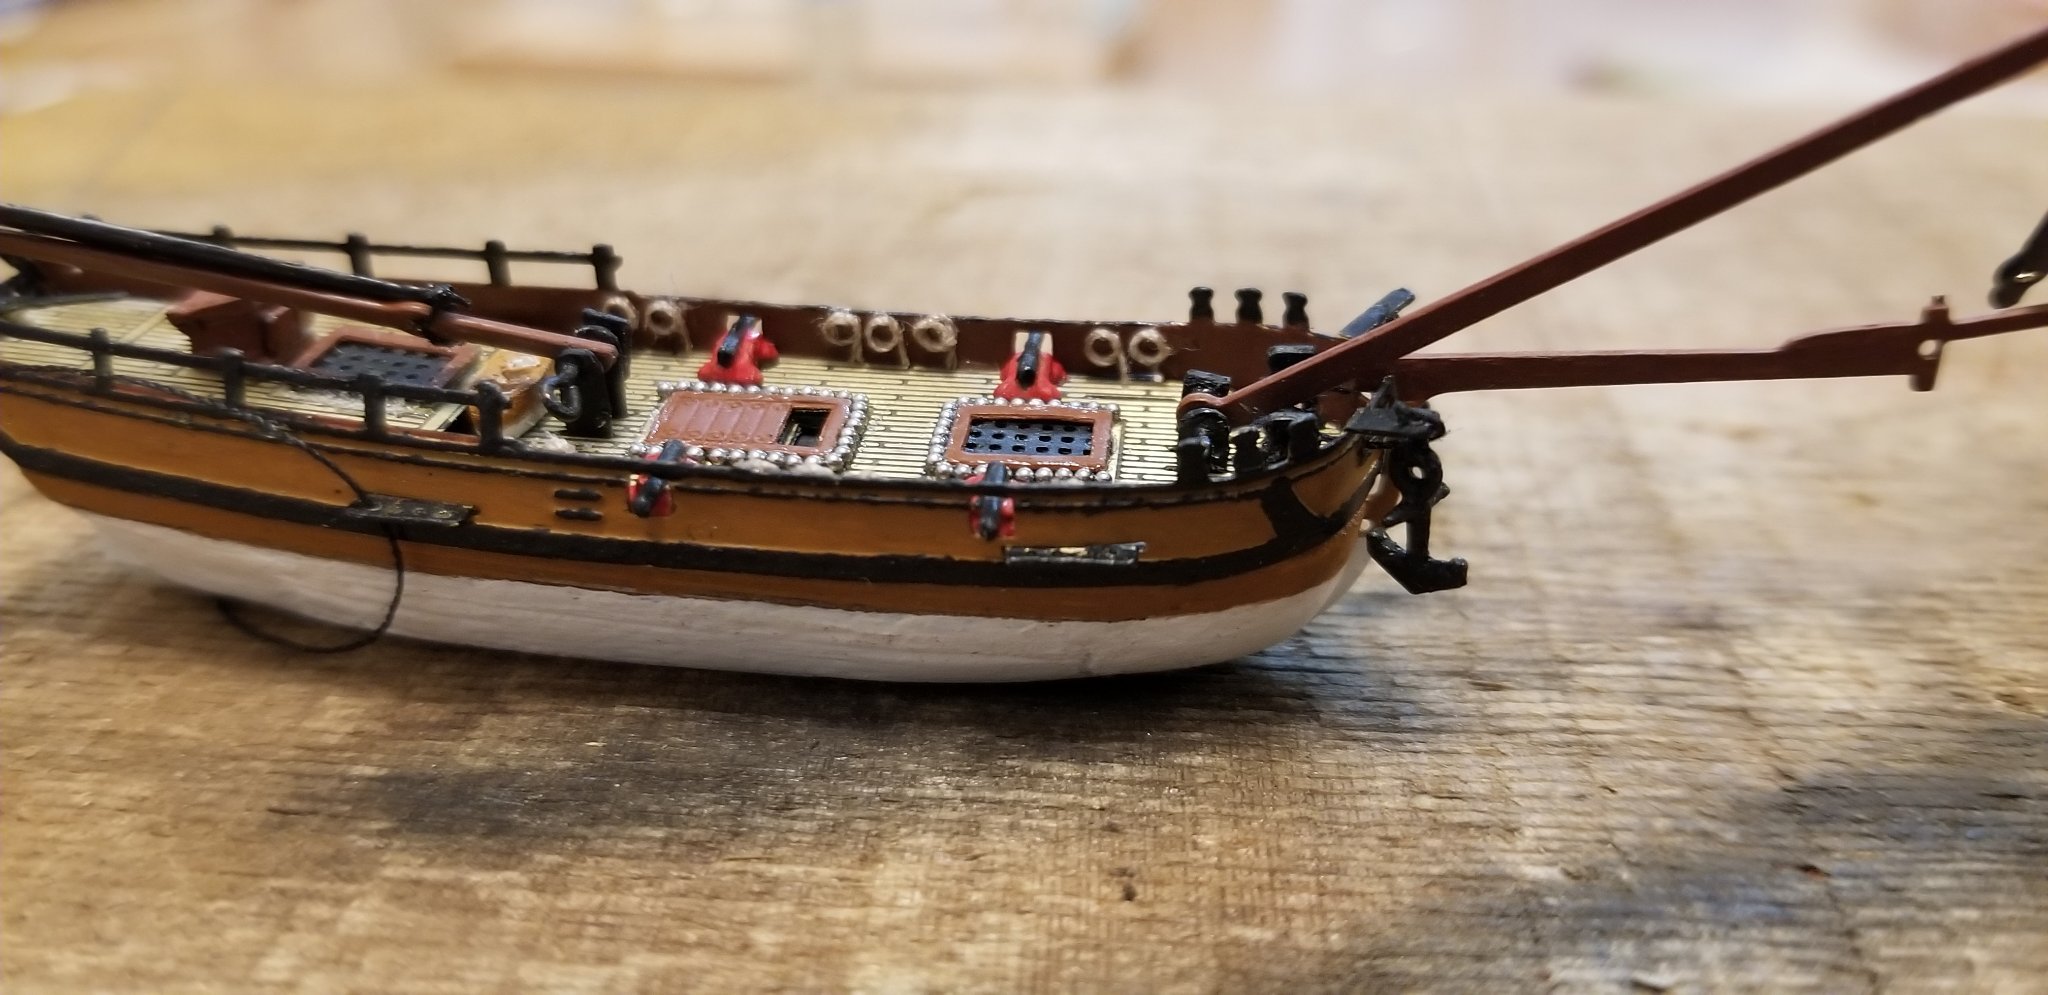
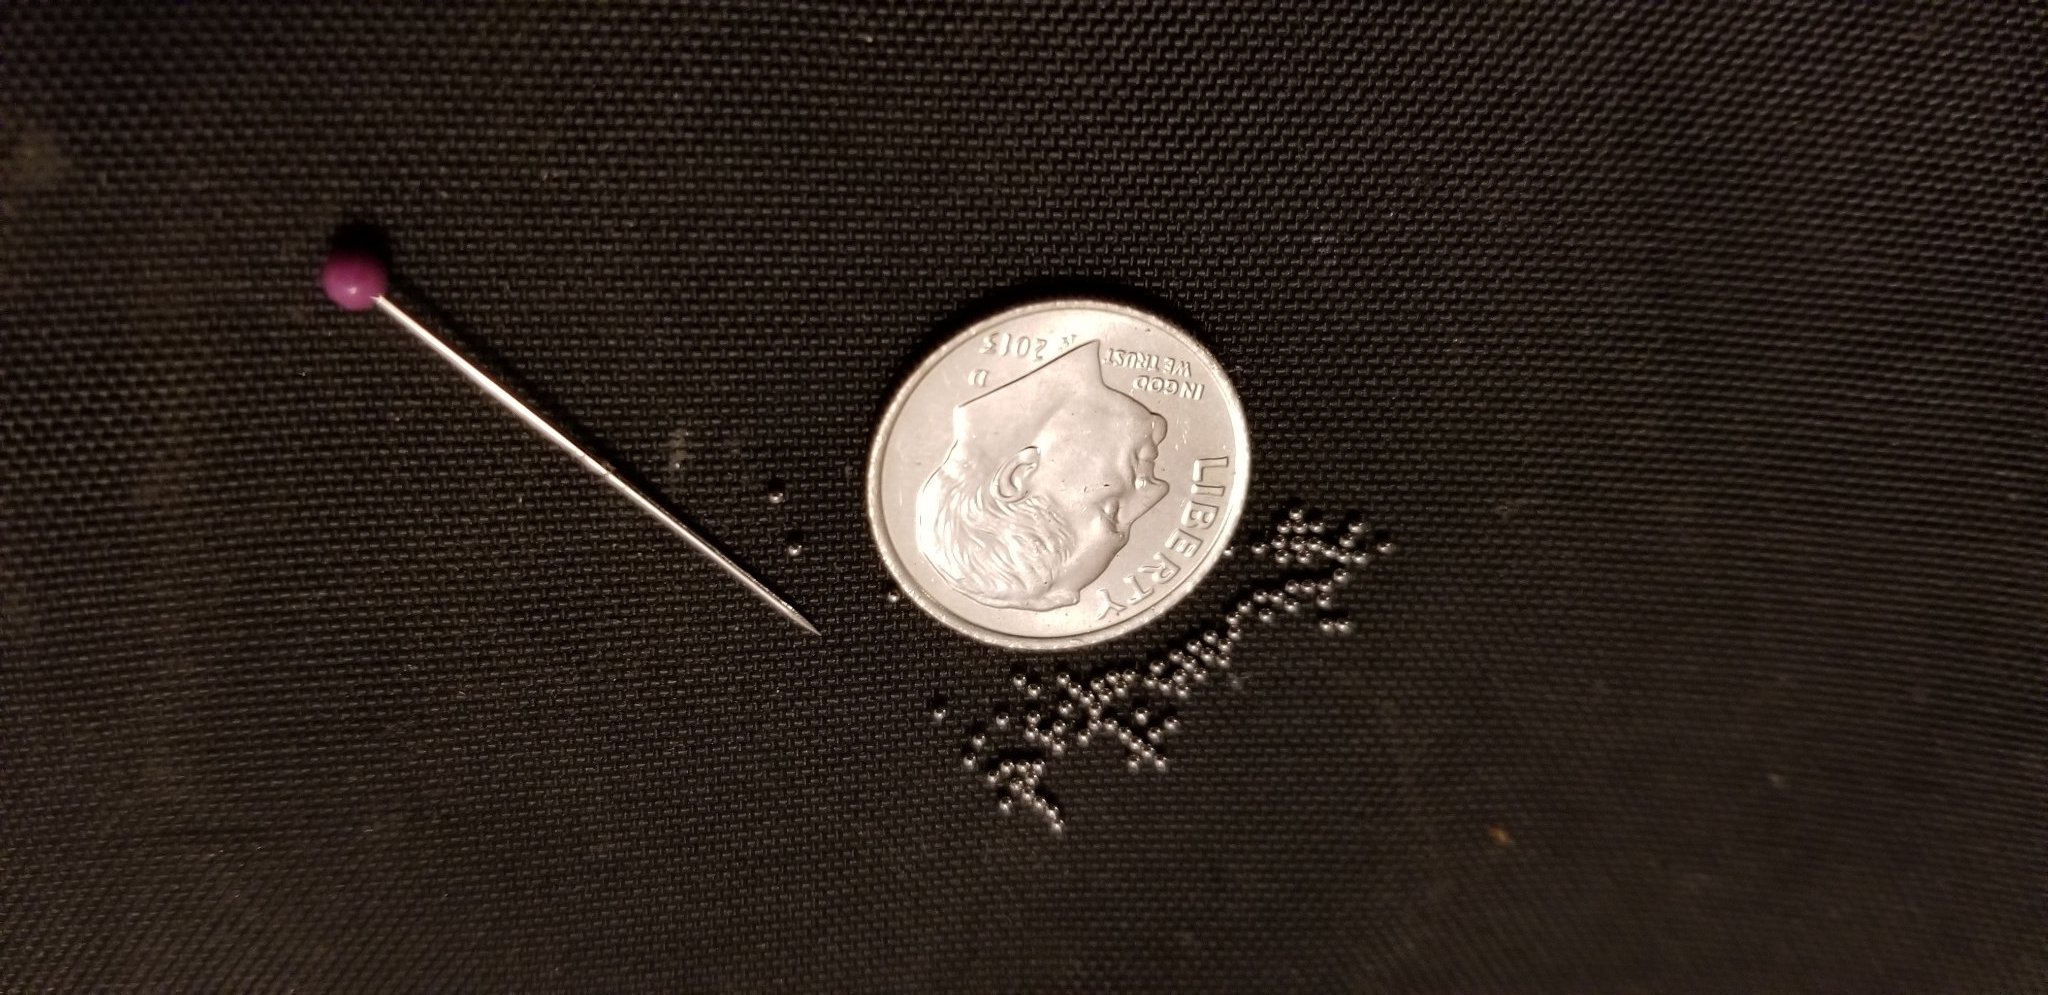
In the meantime, I figured out a couple more things to add to the ship itself. I've decided my own rule for ship building is that if the model has cannons, it's got to have cannonballs. The Mamoli Alabama did not have cannonballs, so I added them and I think it turned out ok. I wanted to do the same for the Hannah SIB. The 1/300 scale of the Hannah makes that a challenge, but I found some .5mm ball bearings on Amazon and put them in place. I know they should be black, but the silver stands out more so I left them that way. I also may have gone overboard on the number but if I'm on that ship fighting the Redcoats, I'd rather have more ammo than less!
-
I finished the sails but decided I did not like them. I want the threads to show a little more - not like the dark lines on the kit sails but I think a light brown thread that makes them stand out just a bit will look better. So I am reworking those.
-
Thanks, Grant. I looked thru your Mamoli Victory build log. All I can say is WOW. What an amazing job and what incredible perseverance. Every time I think I've done something really hard and really cool with this stuff, I look at a build like your Victory and realize that I'm just a boy among men!
- Keith Black and gjdale
-
2
-
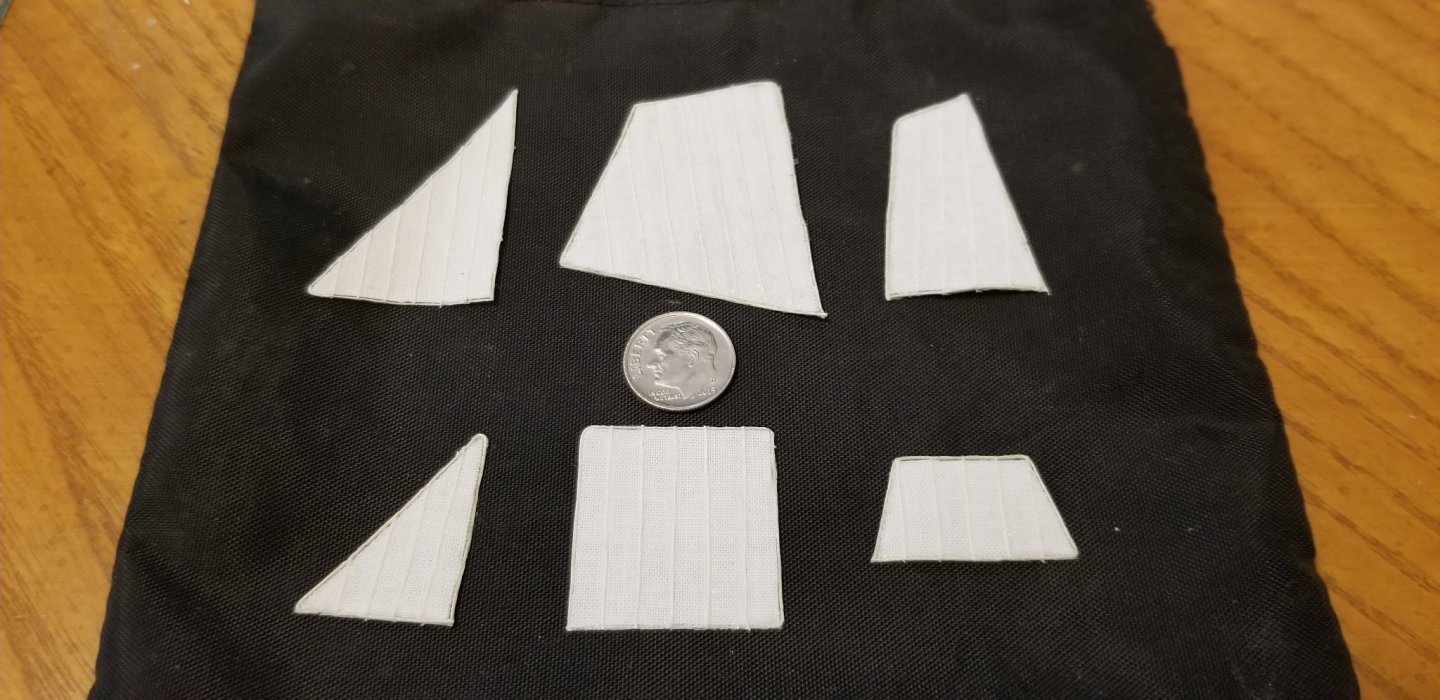
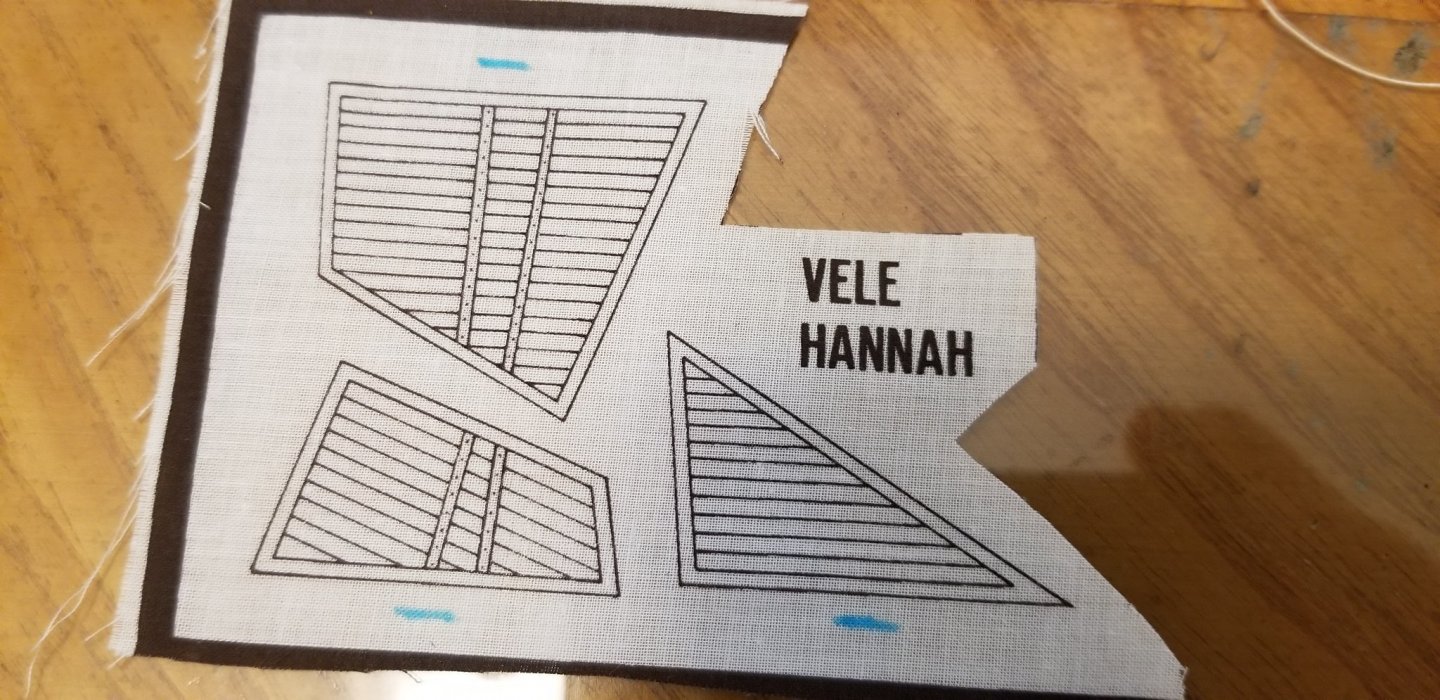
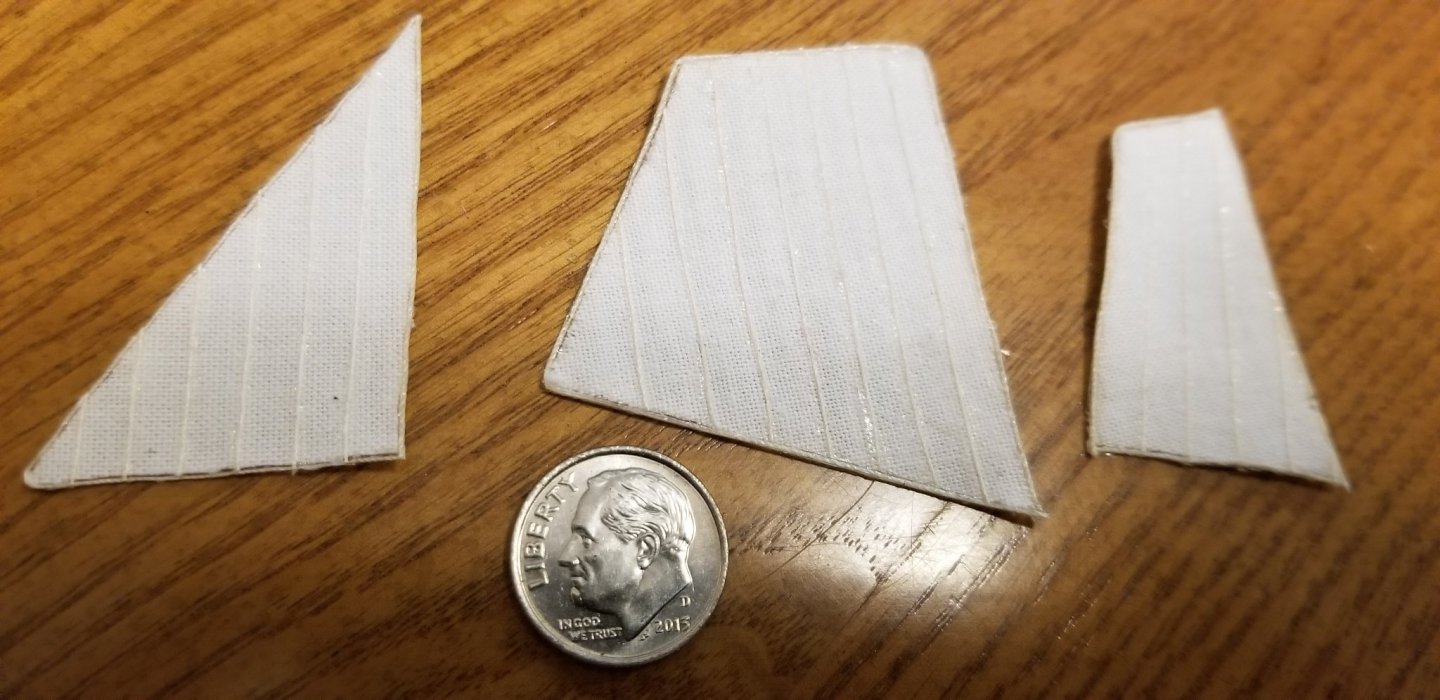
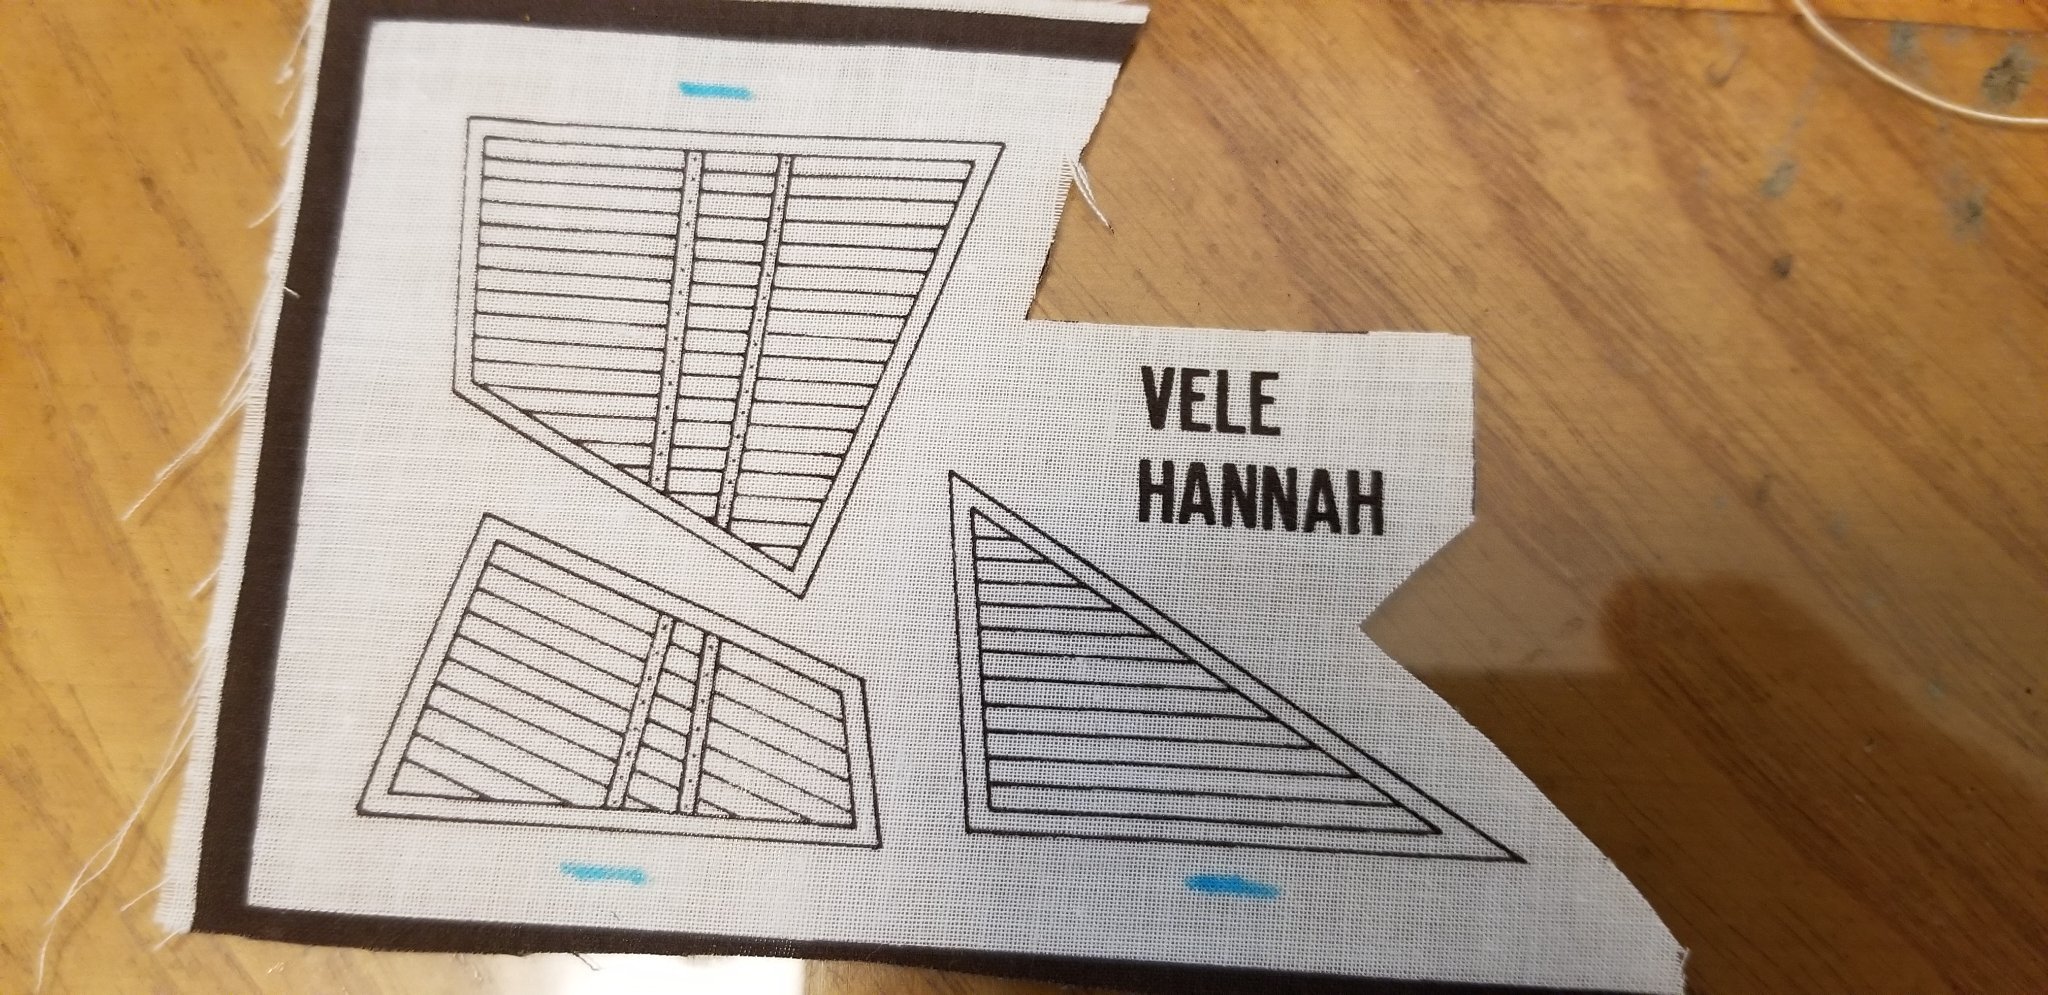
Next step is the sails. I did not like the ones from the kit with the pre-printed lines trying to replicate the seams between the panels. So more kit bashing. I cut new sails from muslin, then used fabric glue to attach silk thread for the panel seams and bolt ropes (thank you to @Keith Black for the Gutermann thread tip). The 3 sails I’ve done so far are still quite flexible, so I think they will be ok when I have to fold them later to squeeze everything into the bottle.
The first pic below shows what the kit sails look like with the pre-printed lines.
And that’s where I’m at for the moment. Probably a few more days on the sails and then comes what I suspect is the first real challenge – bending the sails to the yards and masts and then figuring out the rigging.
- Keith Black, Landlubber Mike, gjdale and 1 other
-
4
-
Here’s where I started to do some kit bashing. My ambitious plan is to have the boat sitting on fake water inside the bottle. Since the keel should not show, I filed it off at the bottom to make it easier to fit inside the bottle’s neck and also lie flat in the water.


Hannah by Glen McGuire – FINISHED - Amati – 1/300 - BOTTLE
in - Kit build logs for subjects built from 1751 - 1800
Posted · Edited by Glen McGuire
The thrill of victory... Today was the day I planned to get the ocean in the real bottle and get the ship in the bottle. For the ocean, I used the 3 thick acrylic paint products in the first pic (mixed roughly 1-1-1). I squeezed the ocean in the bottle without making a big freakin mess like I did on the practice bottle. I used long wooden handled Q-tips to push the ocean around inside the bottle. I used more of the same Q-tips to swirl the ocean around for waves. It came out looking pretty much like I had hoped.