(1)(1)(1)(2).jpg.a128ea4d7b02ebfc5d5eb6547e92106f.jpg)
PRS
-
Posts
372 -
Joined
-
Last visited
Content Type
Profiles
Forums
Gallery
Events
Everything posted by PRS
-
(1)(1)(1)(2).thumb.jpg.792ad774561d3d4f35888704cde27a8e.jpg) Spent the day working on the square tuck. Have it finished and a coat of poly on it. I have a couple spots to fill on the sides yet and am going to do some treenailing at the square tuck and back to get something different before I continue planking.
Spent the day working on the square tuck. Have it finished and a coat of poly on it. I have a couple spots to fill on the sides yet and am going to do some treenailing at the square tuck and back to get something different before I continue planking.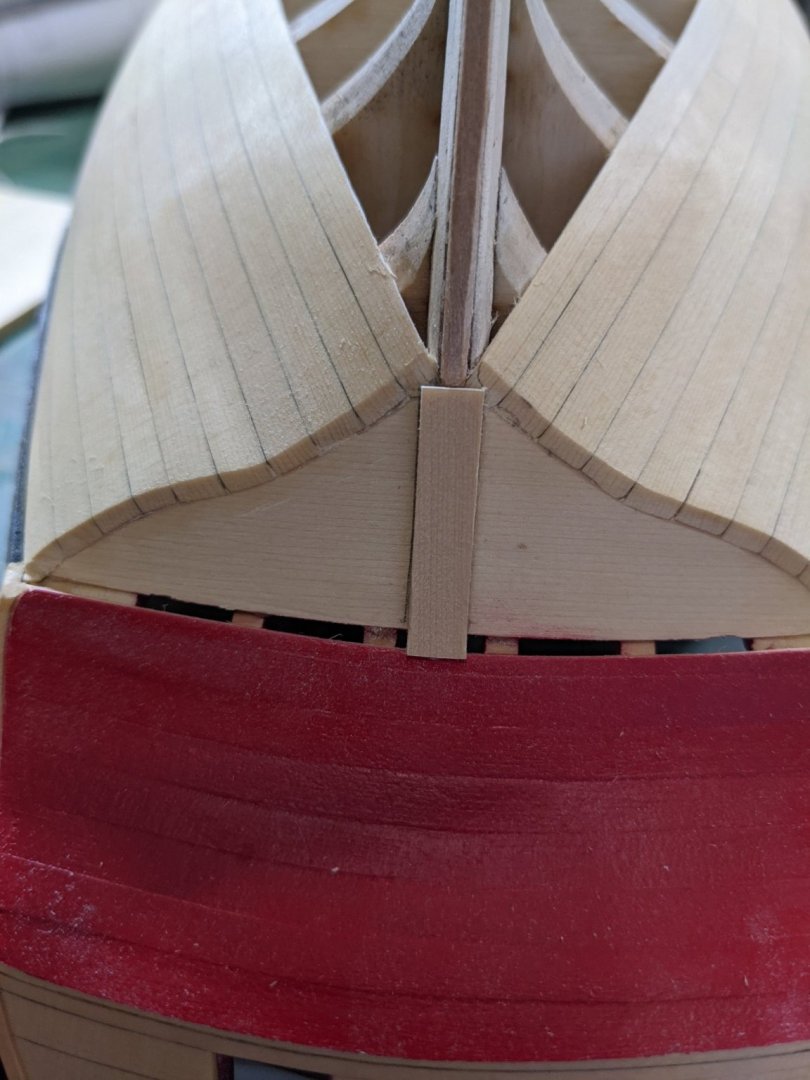


- 274 replies
-
- 14
-

-

-
- Cheerful
- Syren Ship Model Company
- (and 1 more)
-
I have the first ten strakes of planking done so I am finished chapter 4. On to chapter five!


- 274 replies
-
- 8
-
-
- Cheerful
- Syren Ship Model Company
- (and 1 more)
-
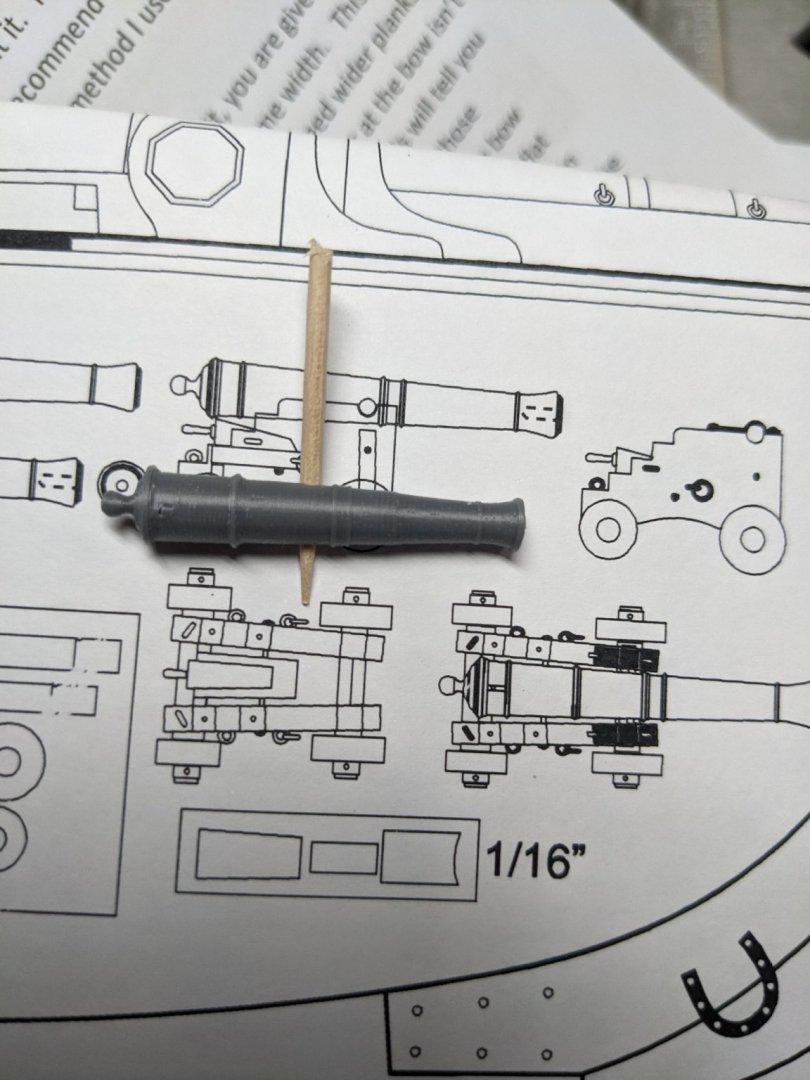
Spent the morning drawing up the small cannons and printed one out. Painted them with Badger black primer to get a feel on how they look.
- 274 replies
-
- 2
-
-
- Cheerful
- Syren Ship Model Company
- (and 1 more)
-
Thanks Glenn. Yes I have Prusa MK3 and they print real well. They are the Byrnes of desktop printers.
- 274 replies
-
- 1
-
-
- Cheerful
- Syren Ship Model Company
- (and 1 more)
-
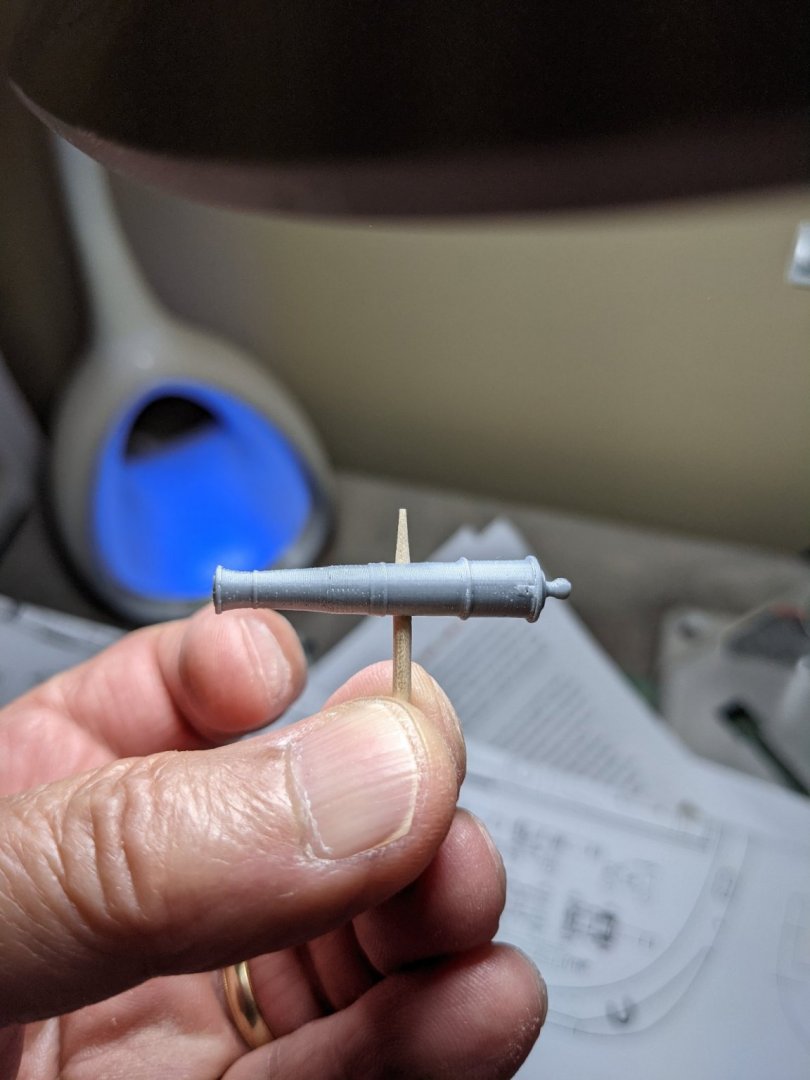
Playing around with printing some cannons. This one was a file I got online and scaled down. Doesn't look too bad once I paint it. Will draw some up in Fusion 360 and see what I can do.

- 274 replies
-
- 10
-
-
- Cheerful
- Syren Ship Model Company
- (and 1 more)
-
I have the first 6 planks done on both sides not and a coat of wipe on poly just so I can see the results. I am planking 2 strakes on each side as I go along and once I got to 6 I sanded it all down as I needed a break from planking. It is a slow process but taking your time is fun when you get a good result. Once I am done to the tenth plank on each side I see I will have to touch up the black where I made some marks in it. Acrylic paint is pretty delicate until it is fully cured which takes a week or so. Listening to crime junkies podcasts now and will need to find another series soon.

- 274 replies
-
- 10
-
-
- Cheerful
- Syren Ship Model Company
- (and 1 more)
-
Planking continues at a slow pace. Making sure I get as tight a fit as possible for the planks. Here are some pictures and it is nice on how far you can bend the yellow cedar before you apply heat without it breaking.

- 274 replies
-
- 8
-
-
- Cheerful
- Syren Ship Model Company
- (and 1 more)
-
Looking good. Yes take your time and it will be easier and better once you go further. Once I learned to slow down and enjoy the build it was a lot more fun and things looked better. Preforming those ply pieces will really help. I only had some issue at the front gunport hole wanting to crack at the top but the planking helped straighten it out.
- 114 replies
-
- 1
-
-
- Lady Nelson
- amati
- (and 1 more)
-
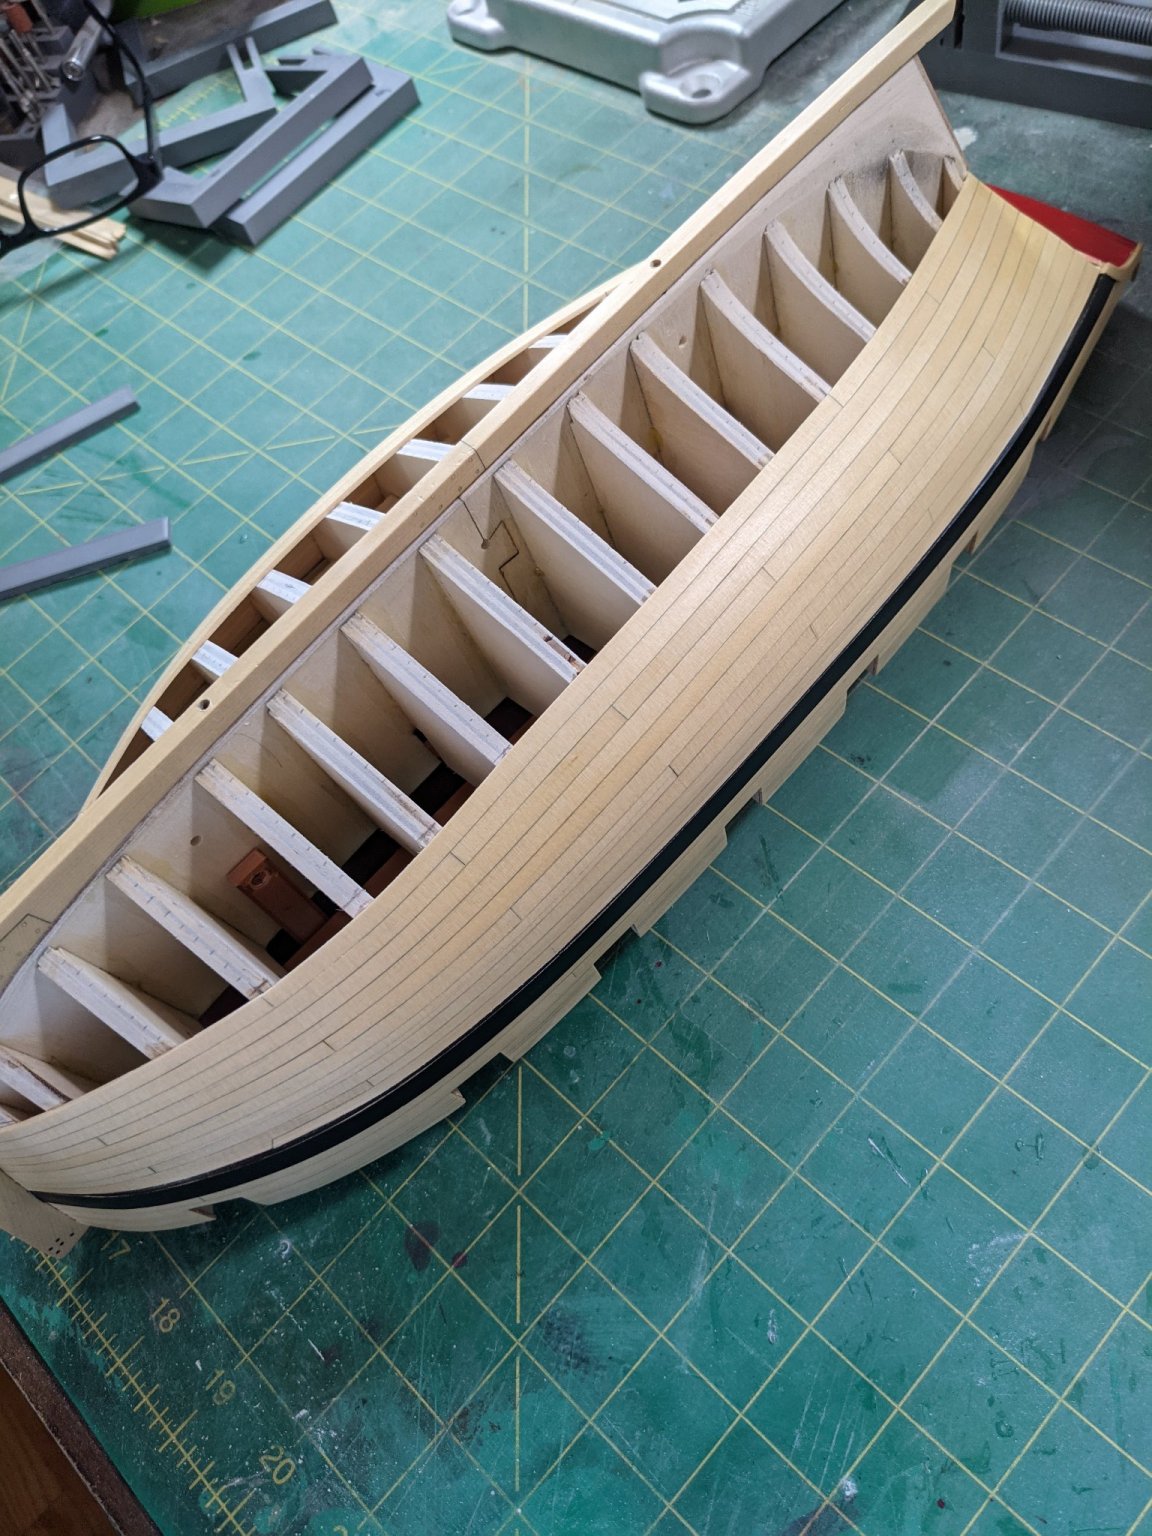
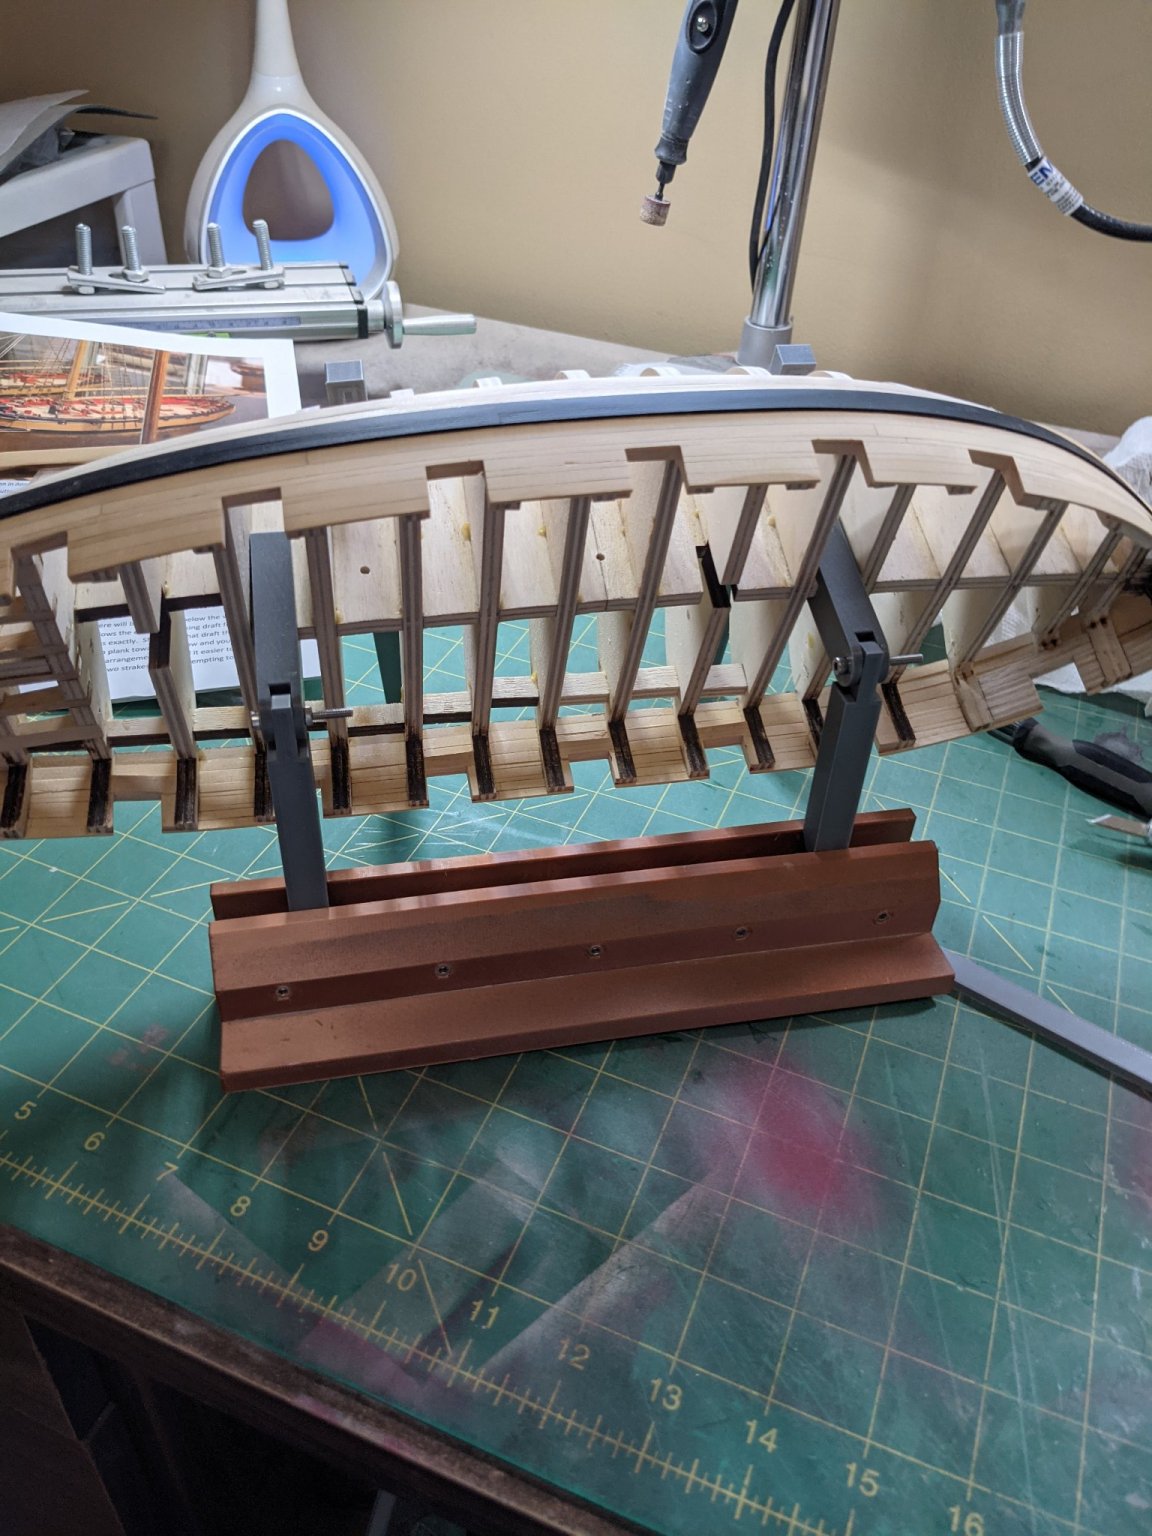
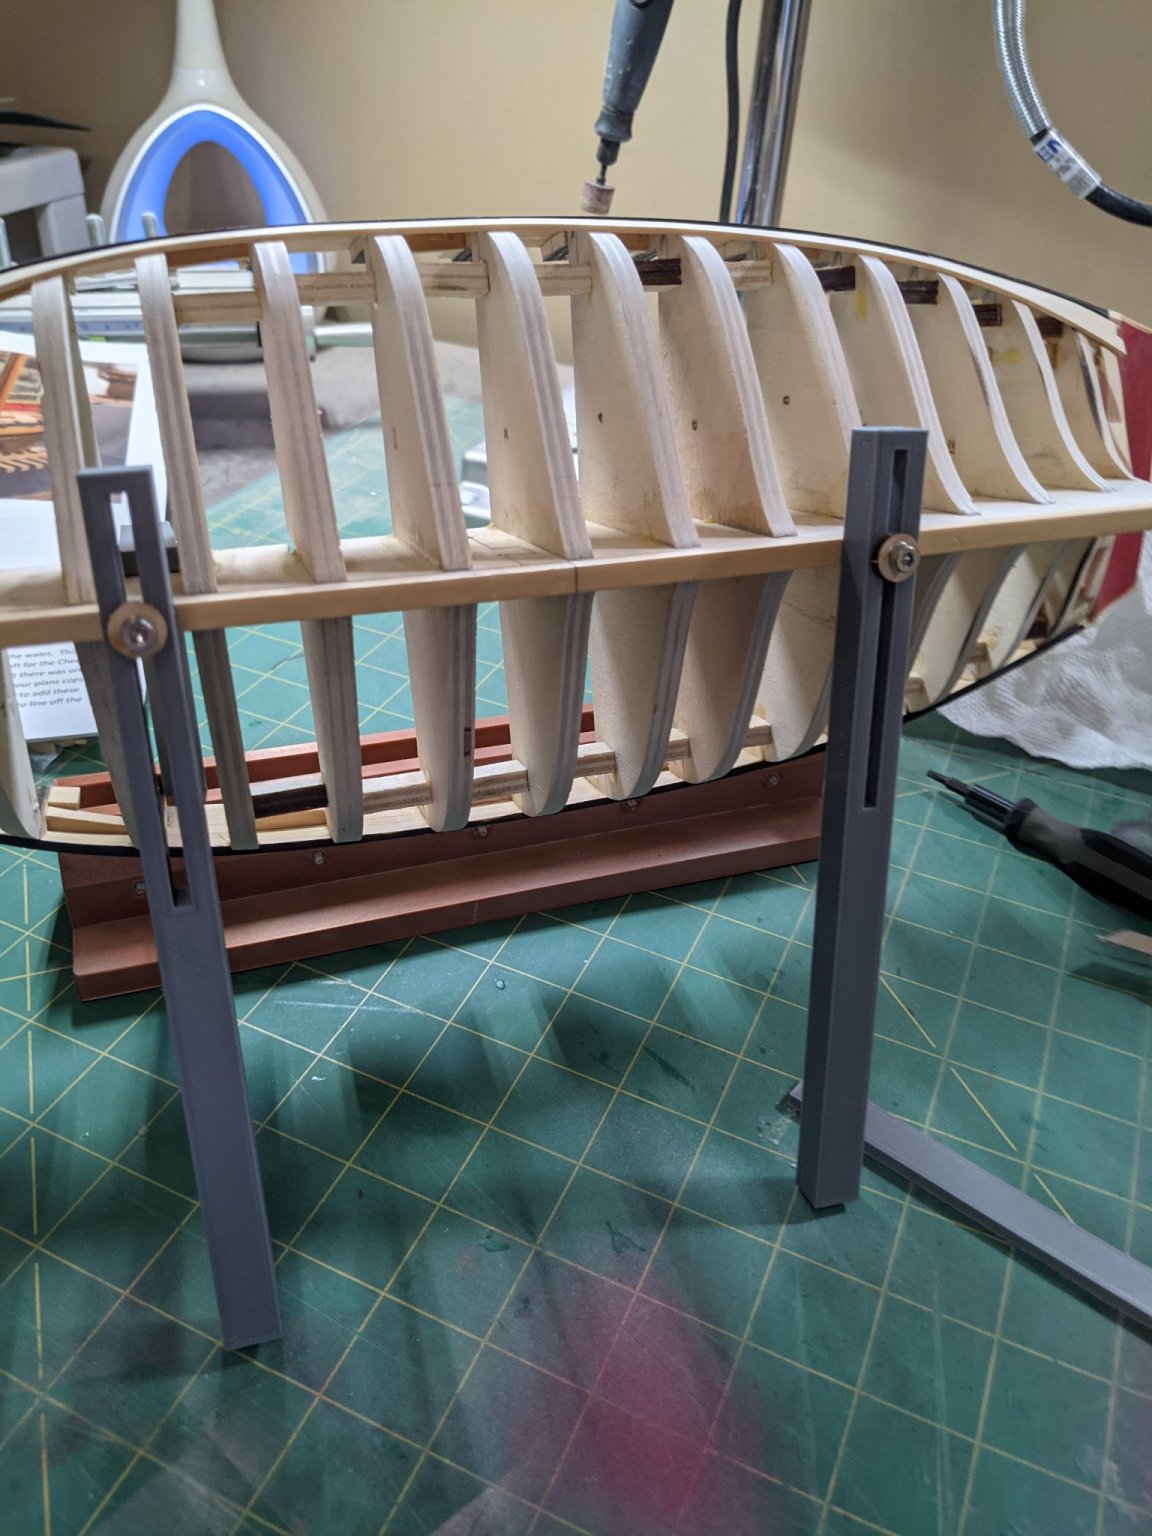
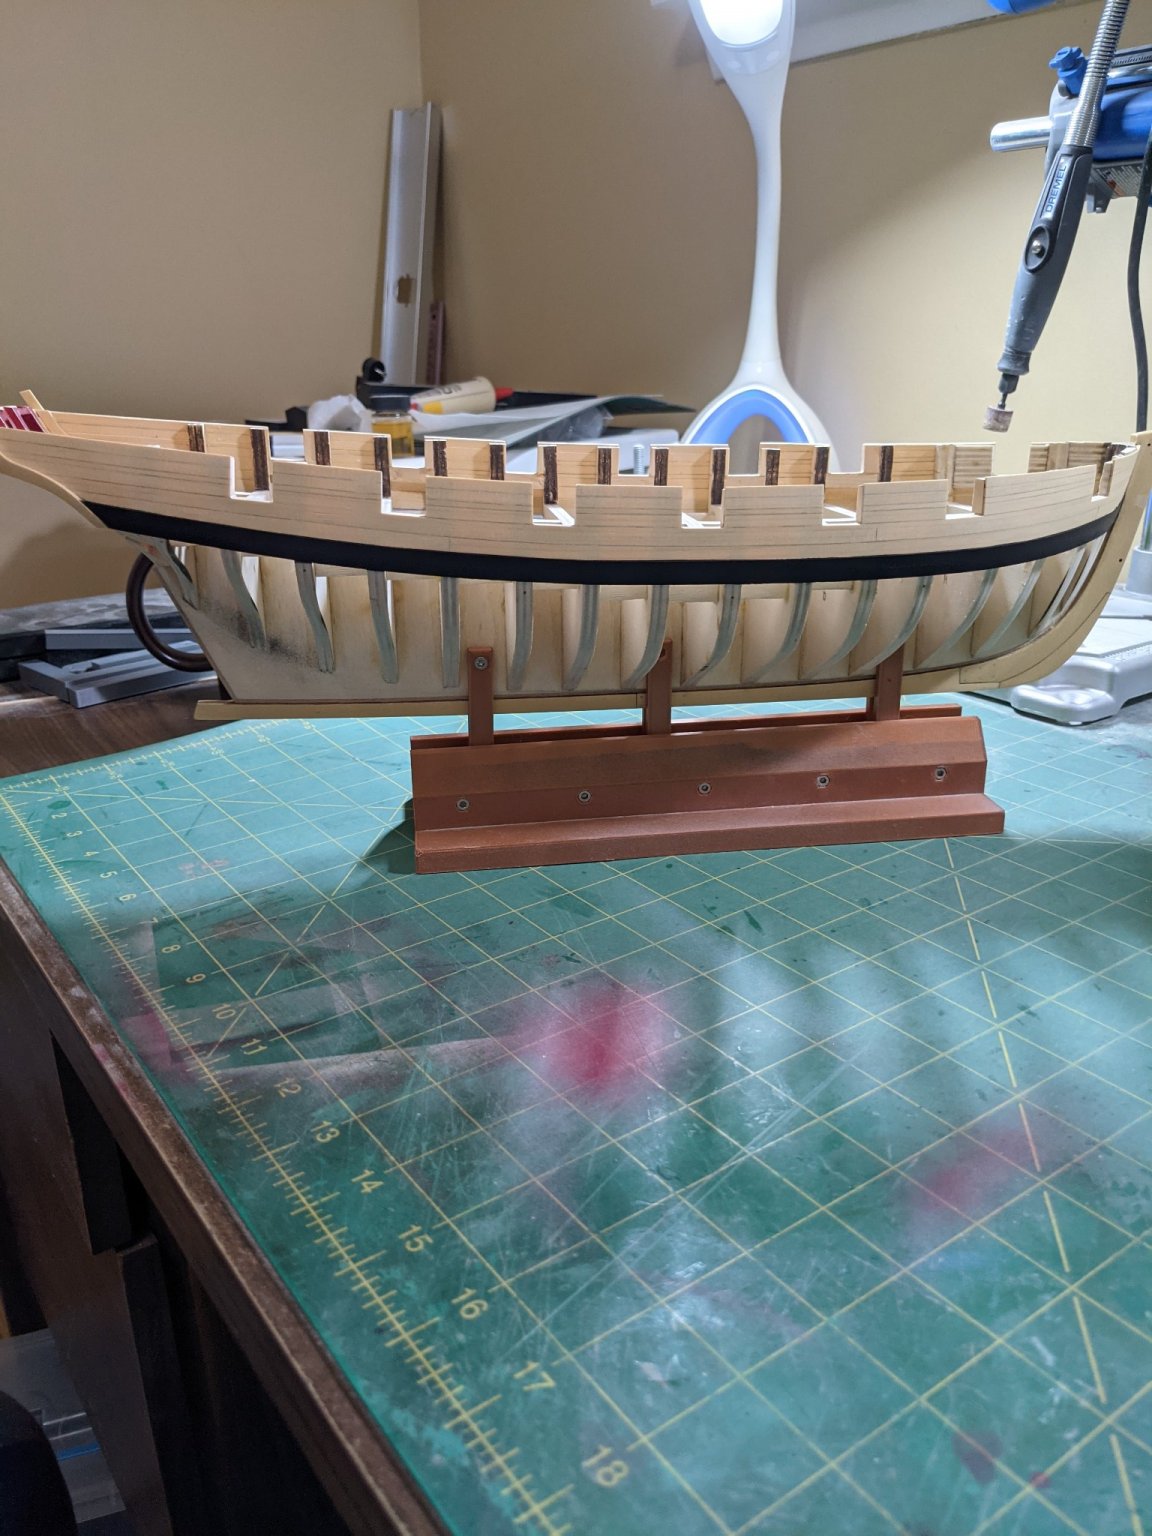
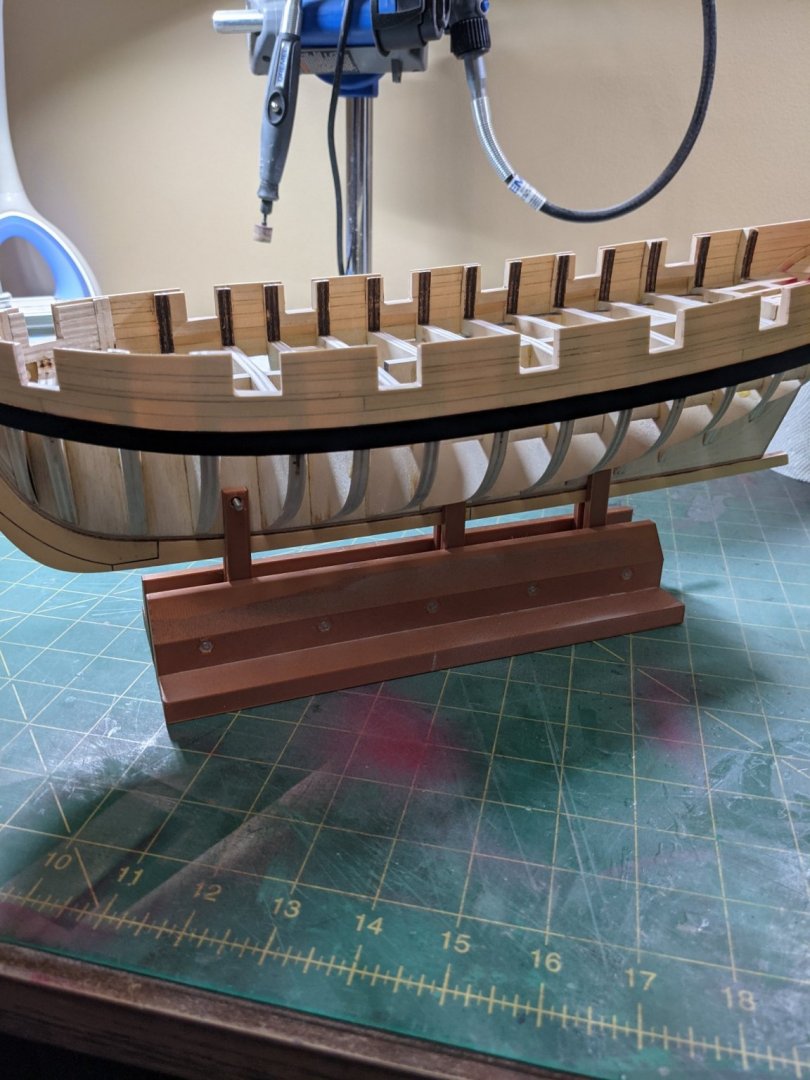
I made up a stand to hold the ship off the table so it is stable for the lower planking. The holes in the keel are the ones I made early for mounting when done. This actually is pretty stable and is adjustable. As you can see I have done the first two rows of planking below the wales. I took my time and there was very little pre bending on these two pieces.


- 274 replies
-
- 12
-
-
- Cheerful
- Syren Ship Model Company
- (and 1 more)
-
I have found the best tutorials for Fusion 360 is Lars Christensen on youtube. How I learned to get into the program is follow his Fusion 360 tutorial for absolute beginners series. It took me a few tries on the first video but once I got that part done it made sense. https://www.youtube.com/user/cadcamstuff/videos
-
I like the look of the tung oil without the sealer first. Seems to bring out the color of the wood better.
-
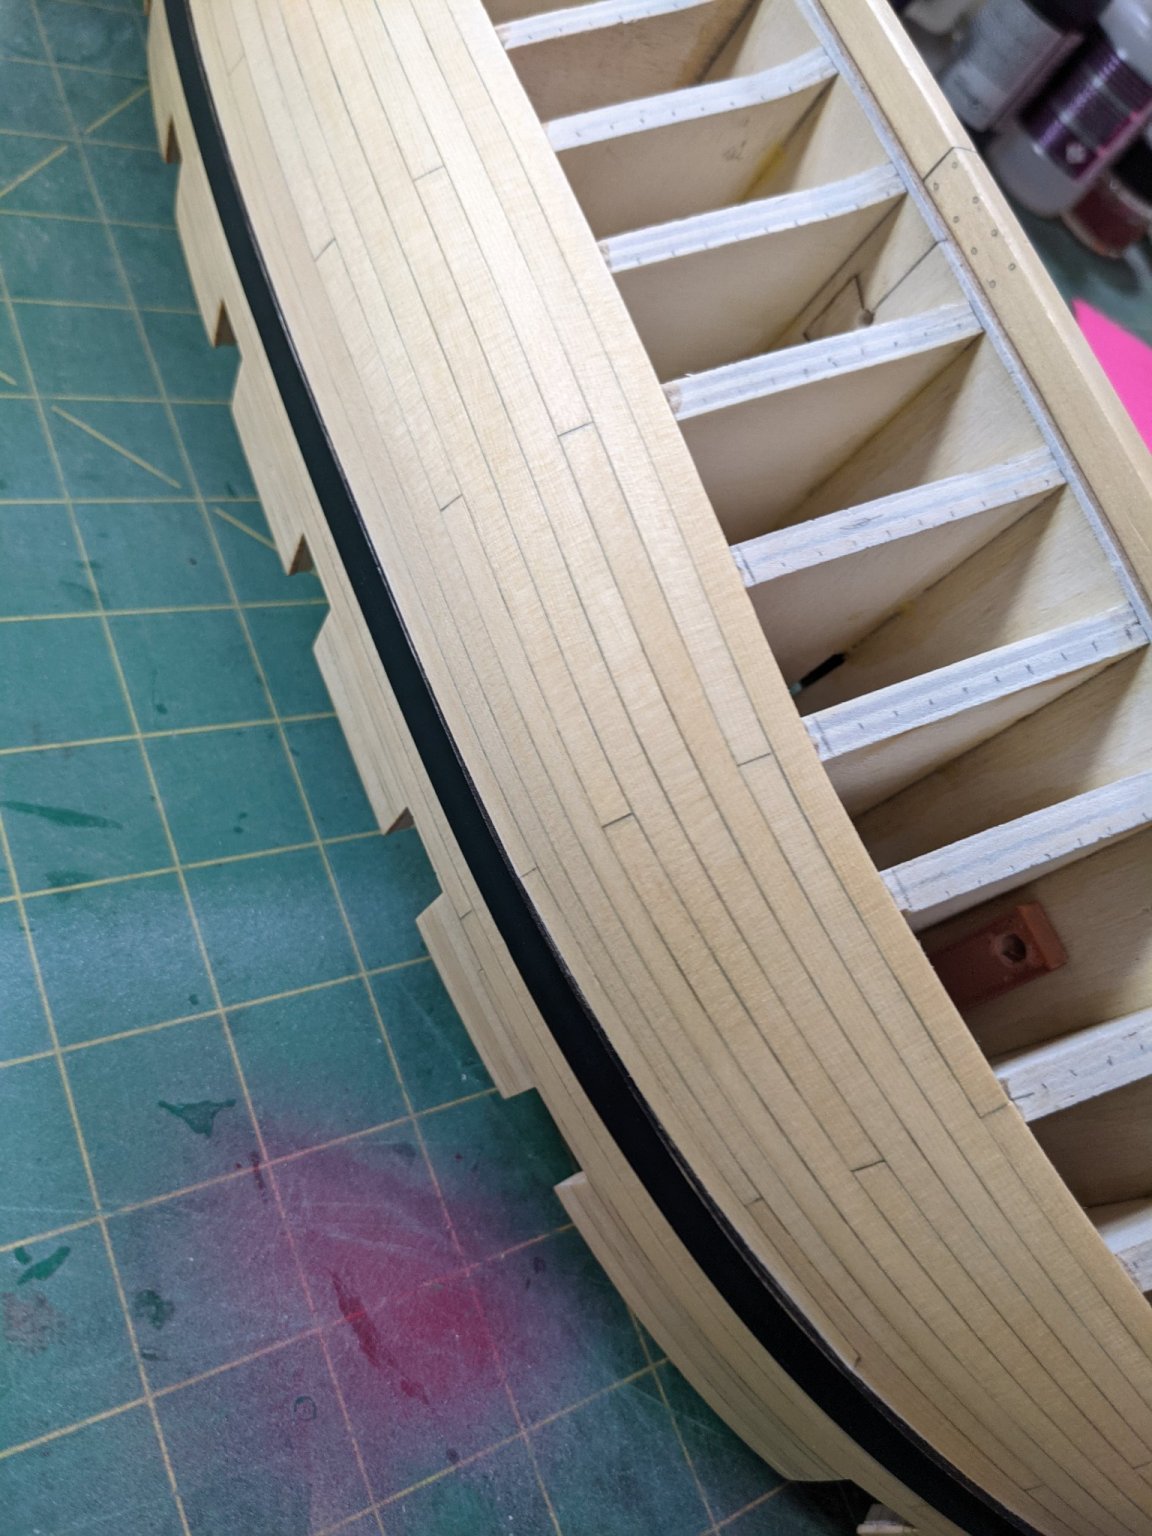
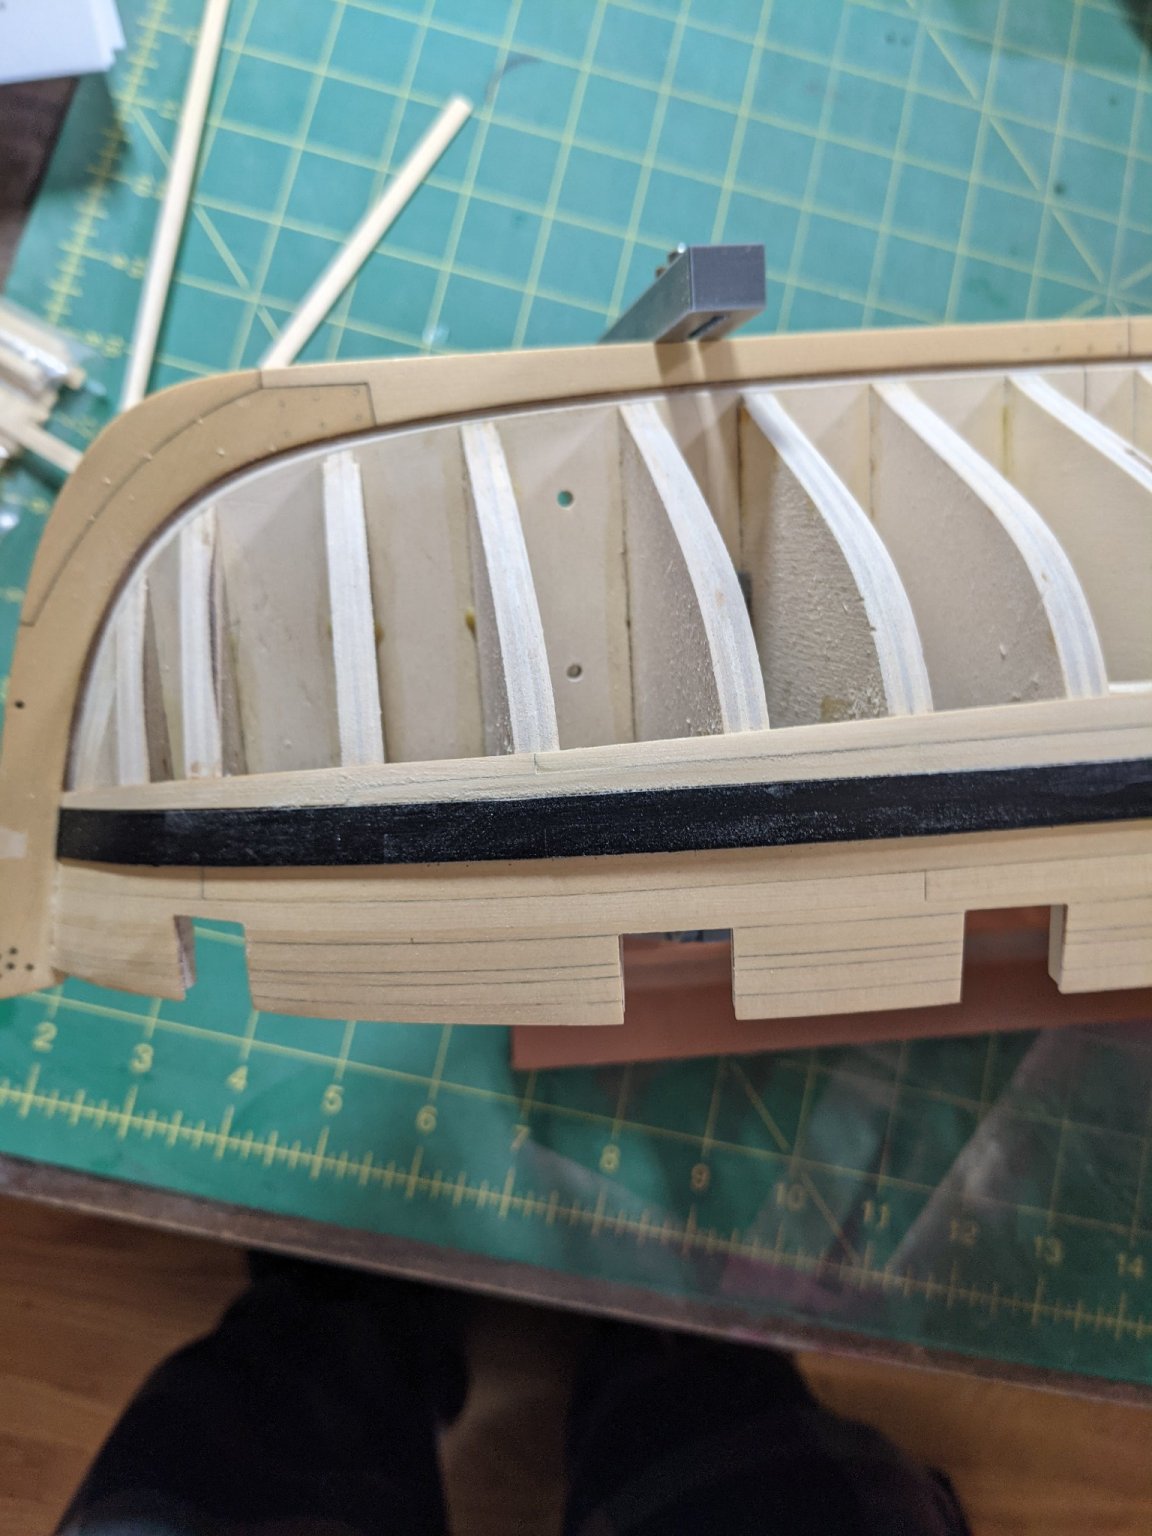
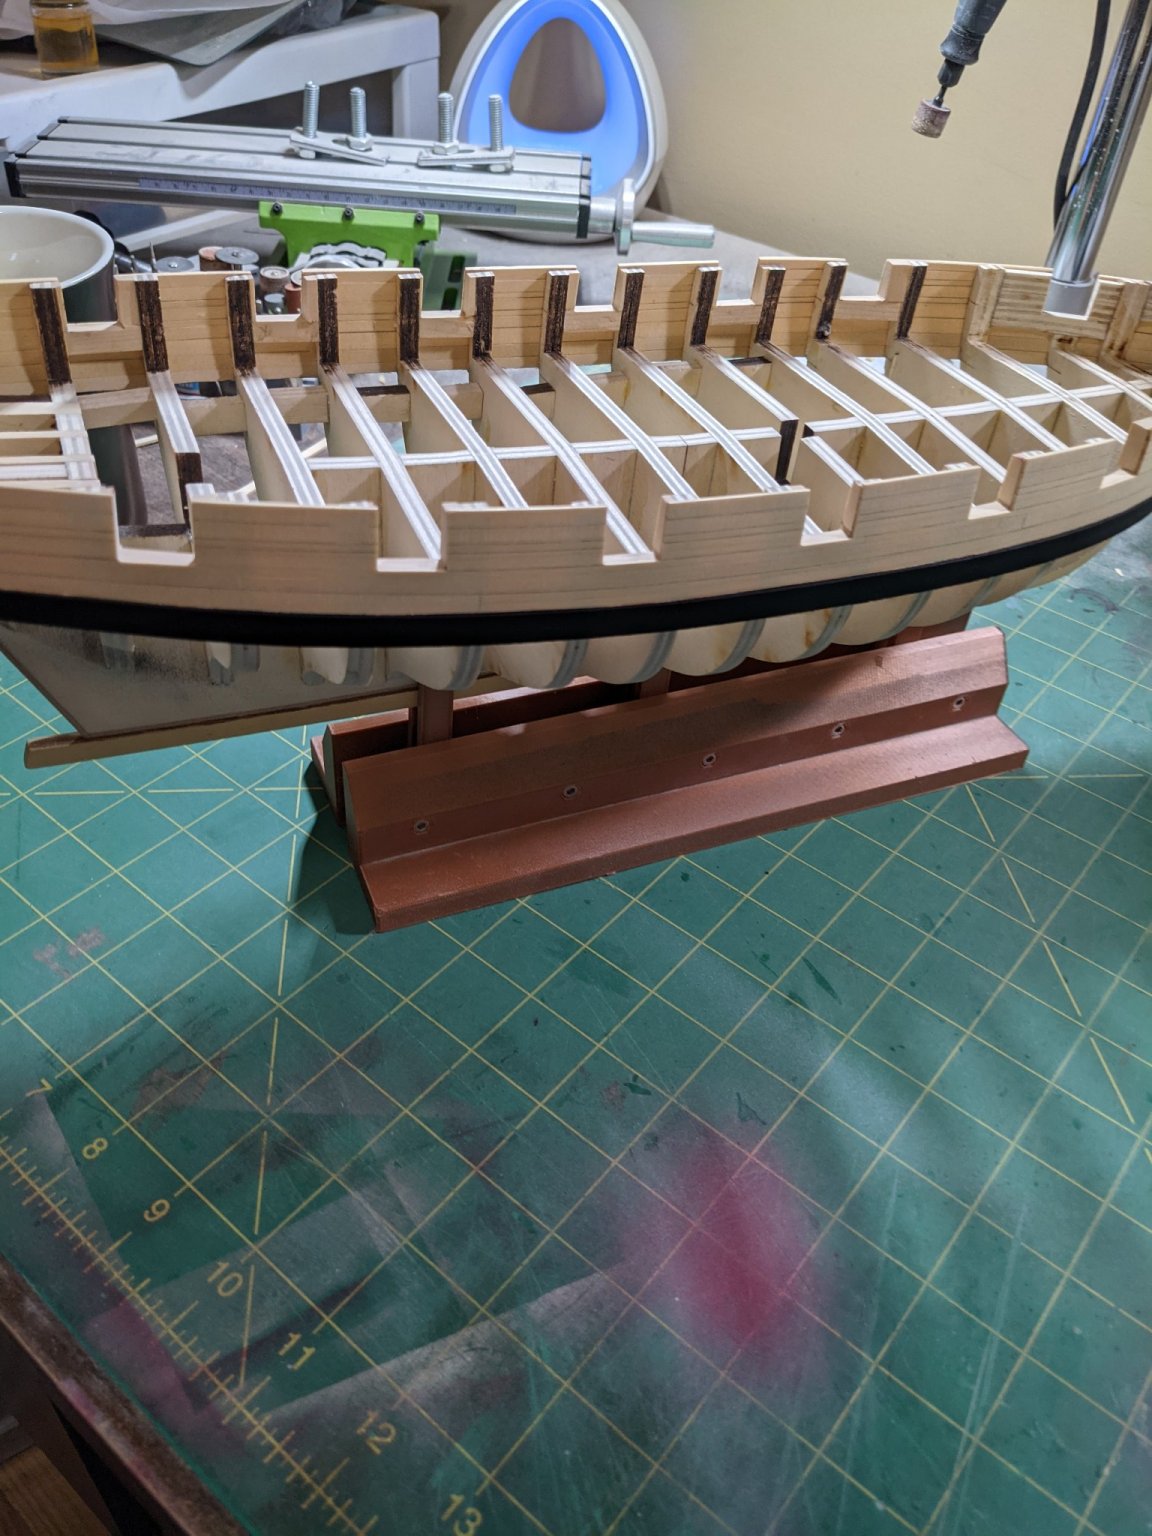
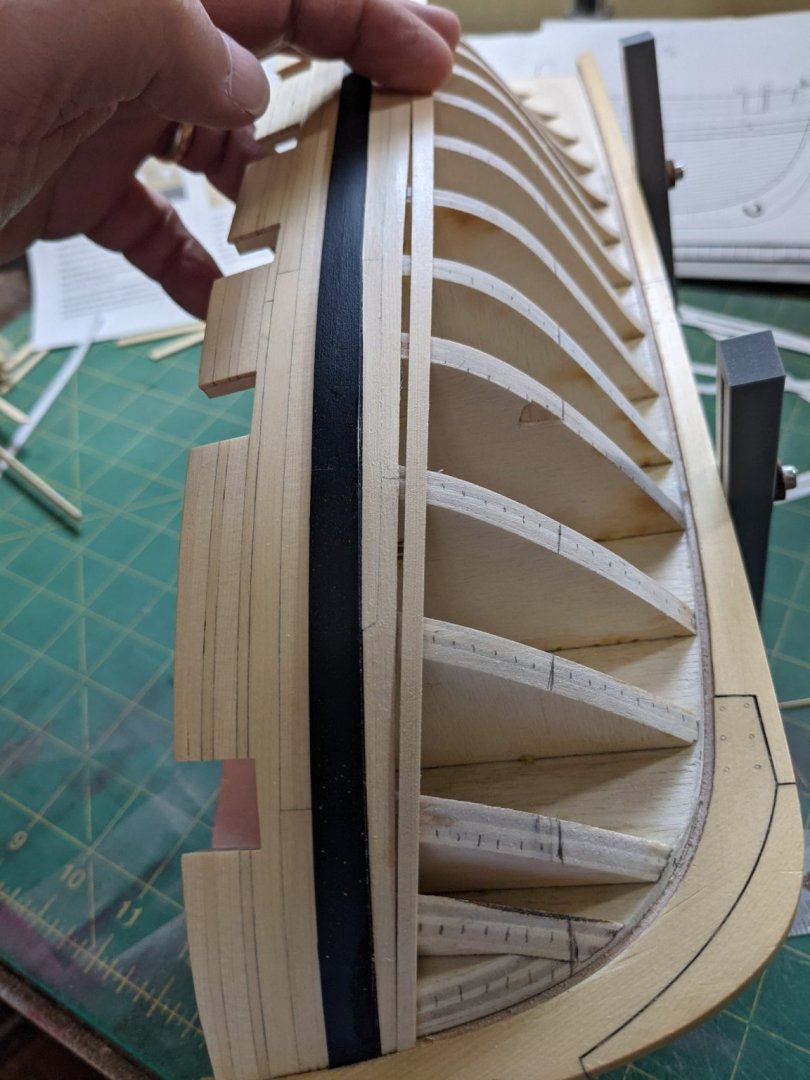
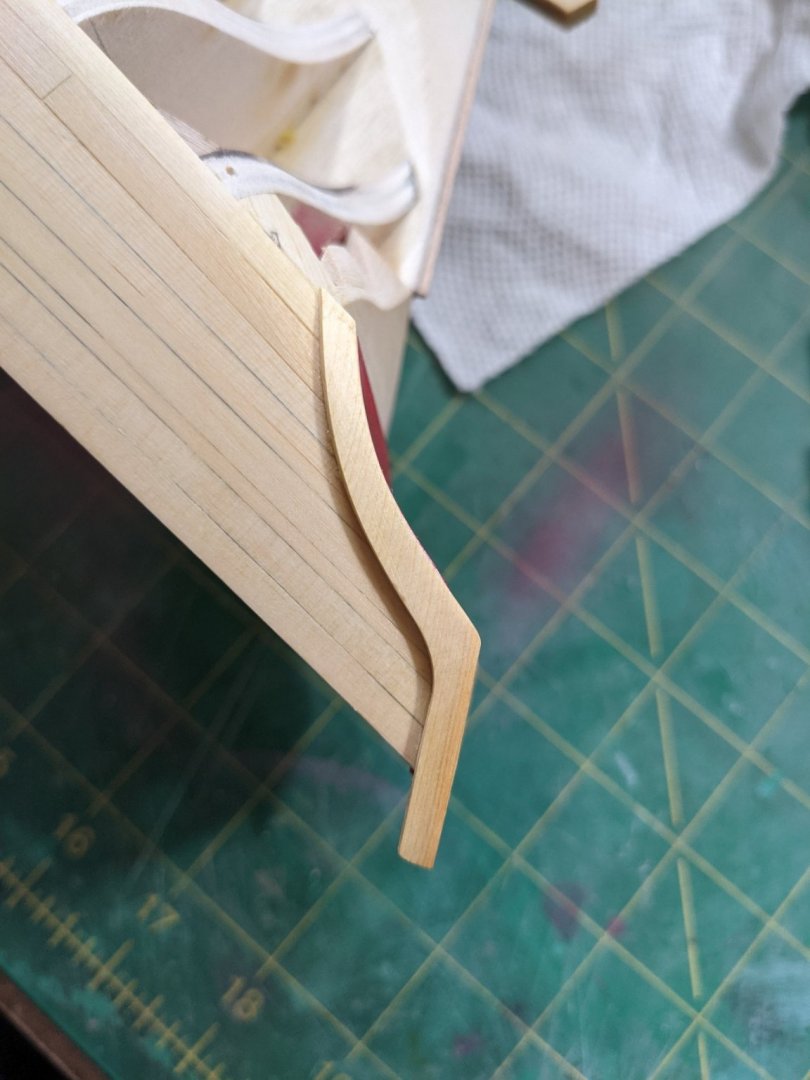
I am leaving the fashion pieces natural for now. I have the wales planked and painted black. since these are 1/32 they went on fairly easy and I tried to get as good a fit as possible at the fashion pieces.


- 274 replies
-
- 8
-
-
- Cheerful
- Syren Ship Model Company
- (and 1 more)
-
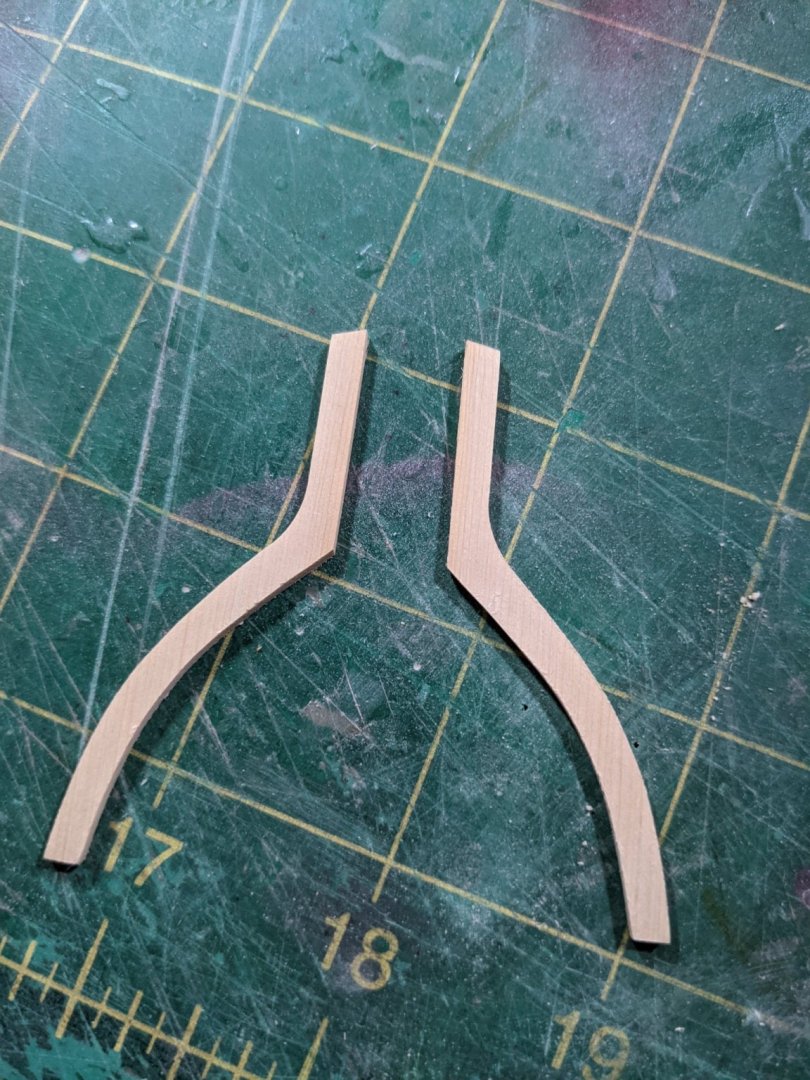
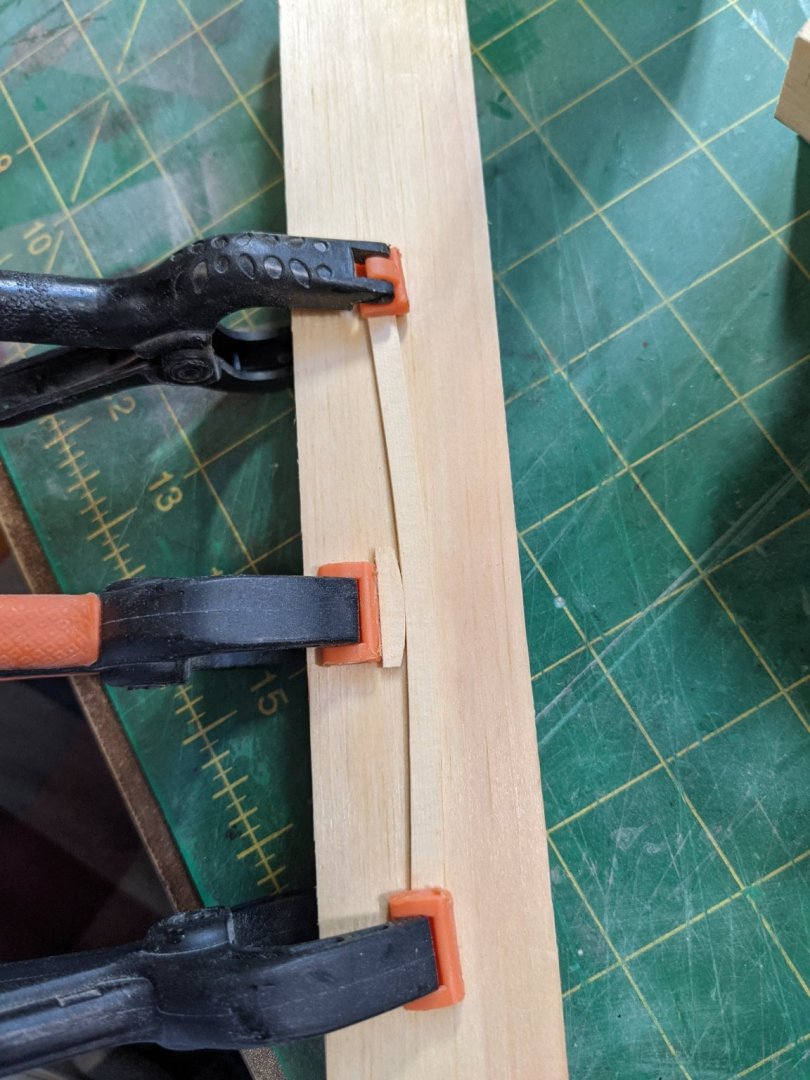
Spend quite a bit of time making the fashion plates. The first set I discarded. These take a bit of time to make and bend properly but it is important to make them fit well. All in all I am really enjoying this build and am working on a slow pace while listening to podcasts. I usually find an interesting series and start at the beginning and play them until I am caught up. Some of my favorite podcasts are Wise About Texas, Swindled, Based on a True Story, and Legends of the Old West.

- 274 replies
-
- 8
-
-
- Cheerful
- Syren Ship Model Company
- (and 1 more)
-
Take a piece of wire or a needle and put it in the end of a piece ow wood for a handle. Drop the glue onto a piece of paper or whathaveyou and use the needle or wire to transfer the glue. Or you can but one of these: https://www.micromark.com/Micro-Glue-Applicator_2?gclid=Cj0KCQjw2tCGBhCLARIsABJGmZ7Zgtk-mkPx__uOxyDtfw0_HTcXHM4zmV6wxwAspHmISVYv1m5bDUQaAp3kEALw_wcB
- 436 replies
-
- 2
-
-
- Syren
- Model Shipways
- (and 1 more)
-
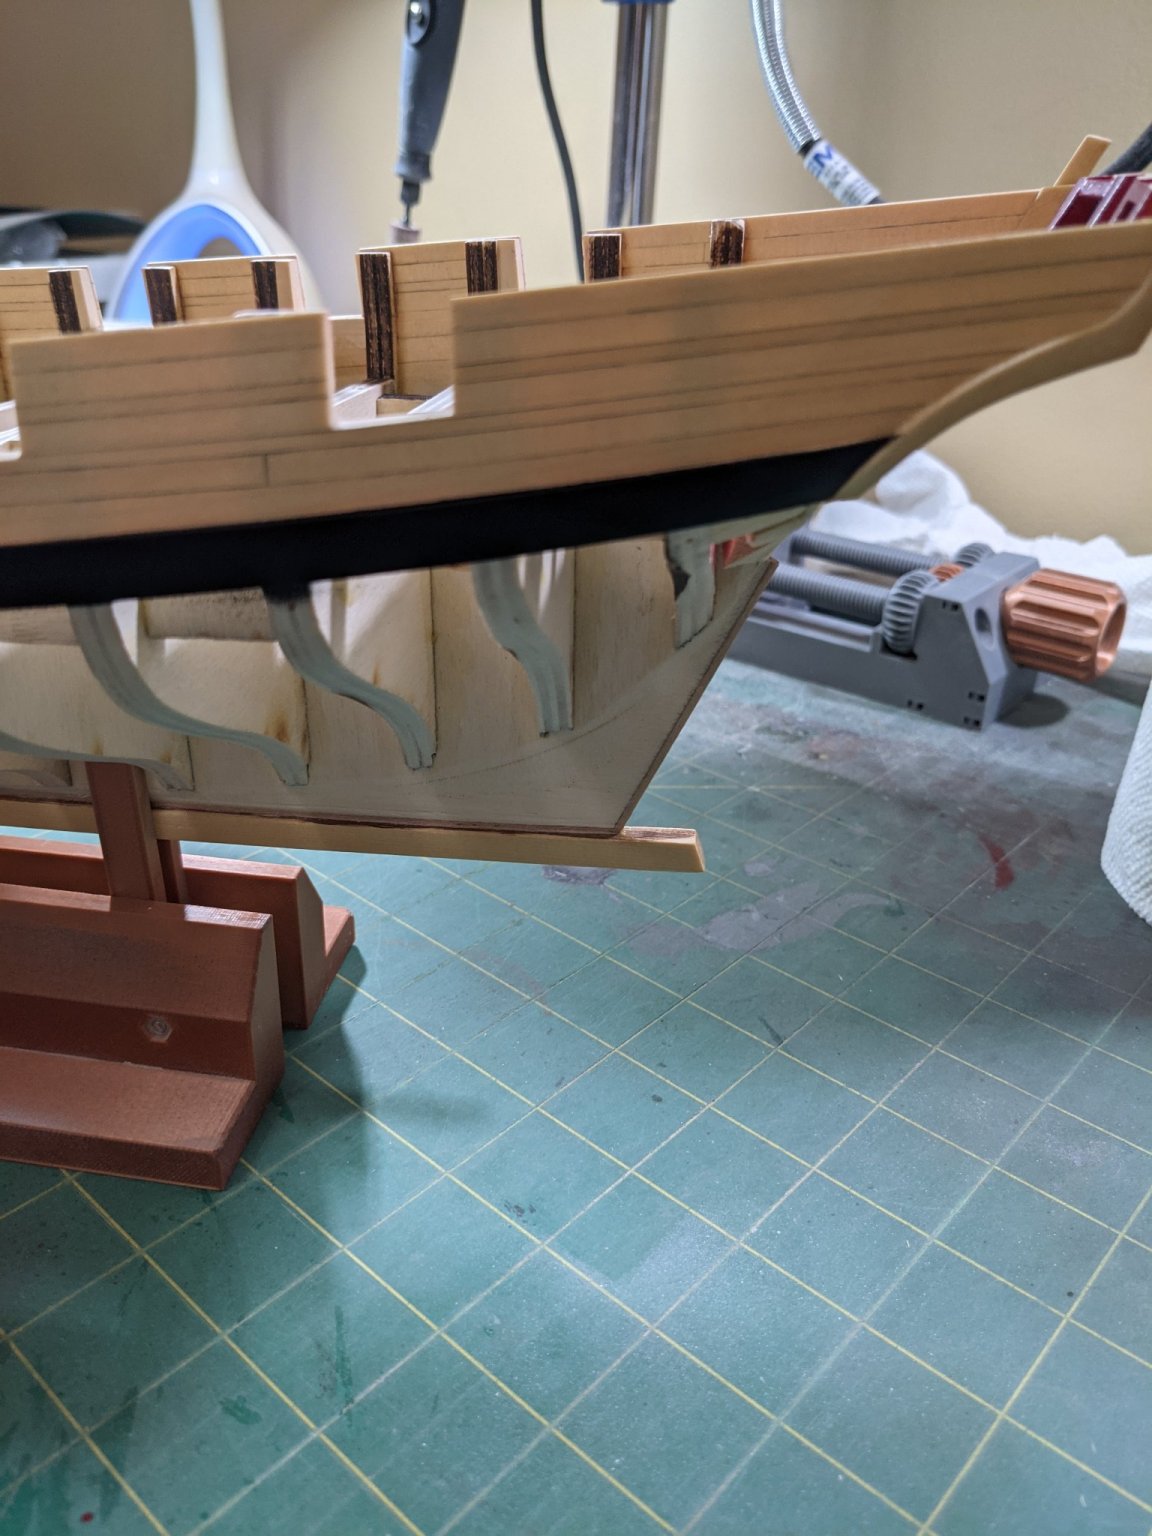
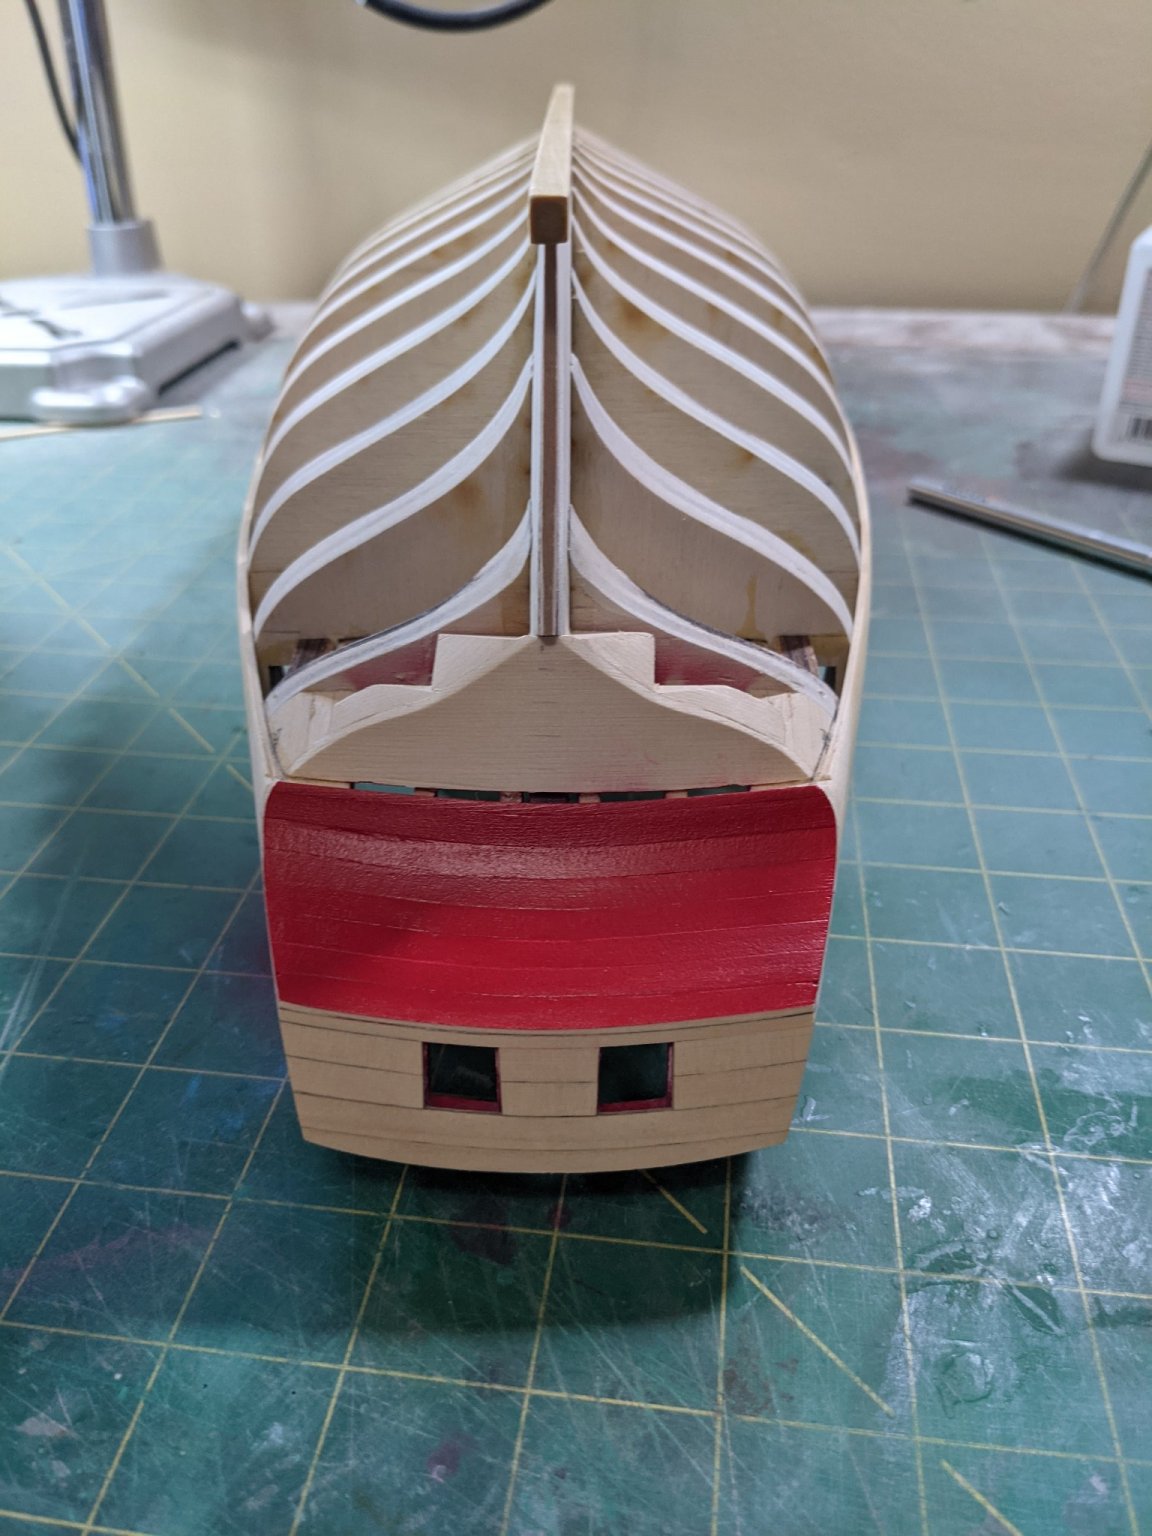
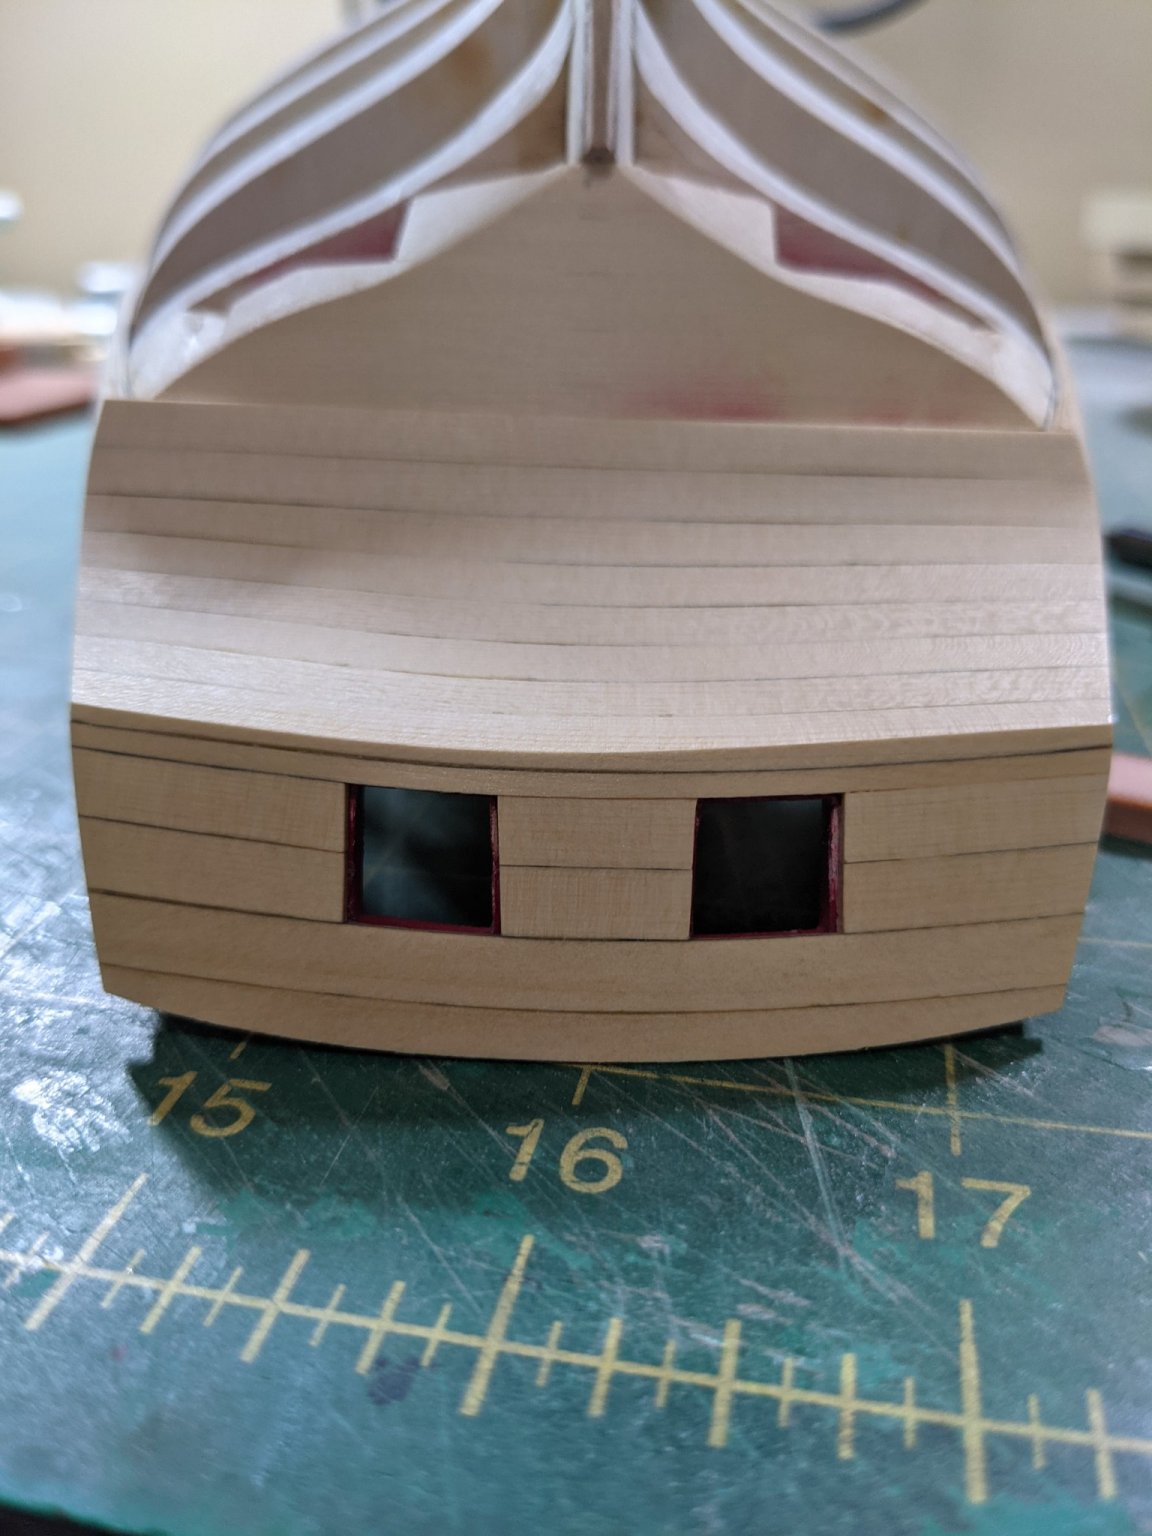
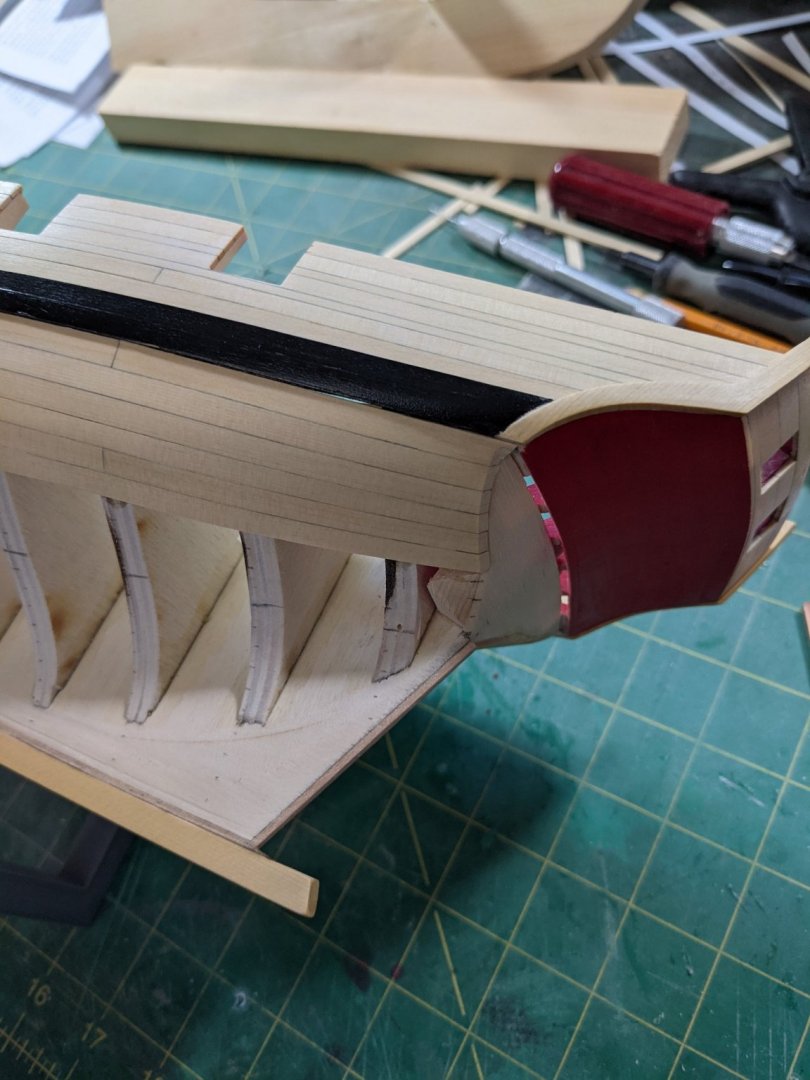
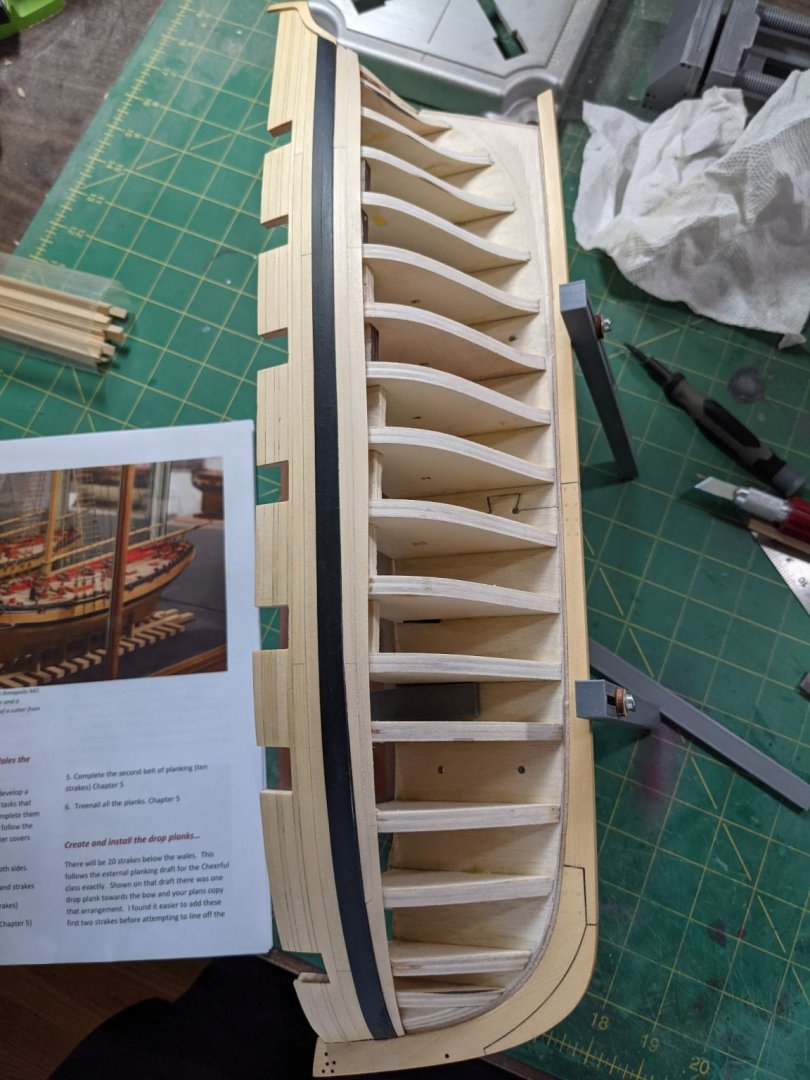
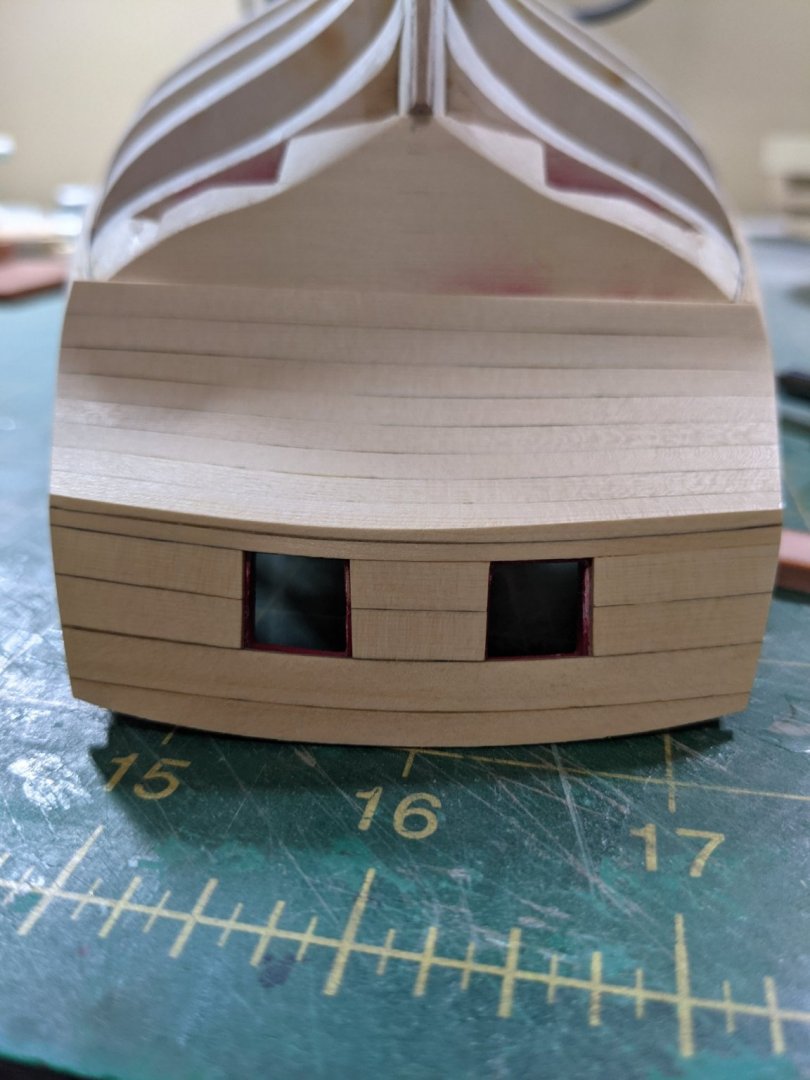
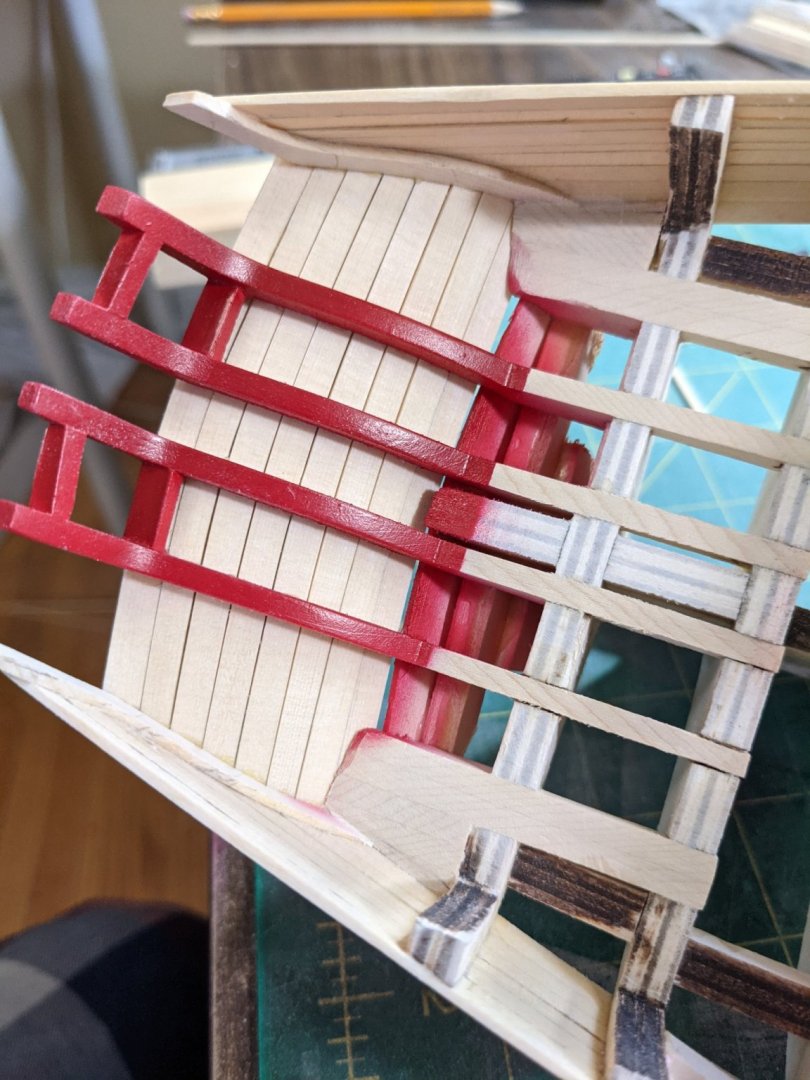
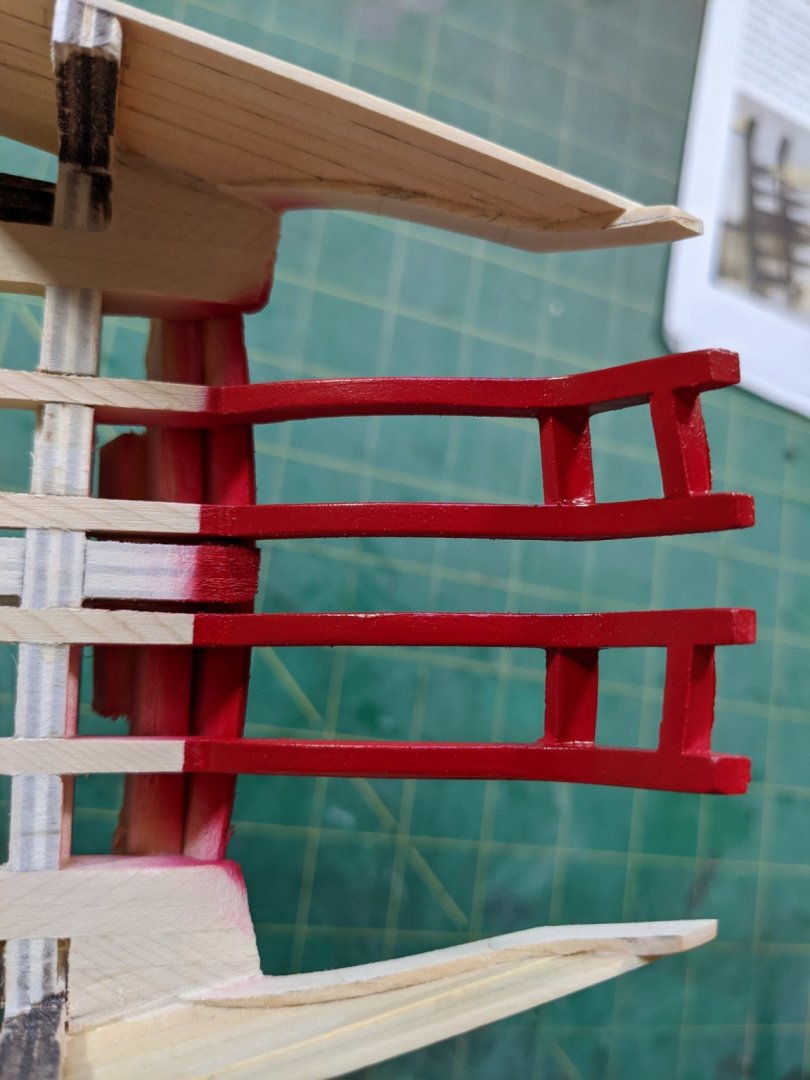
Looking ahead at the build instructions I do see that the transom should be even with the sides. Sanded the transom down to look good.

- 274 replies
-
- 5
-
-
- Cheerful
- Syren Ship Model Company
- (and 1 more)
-
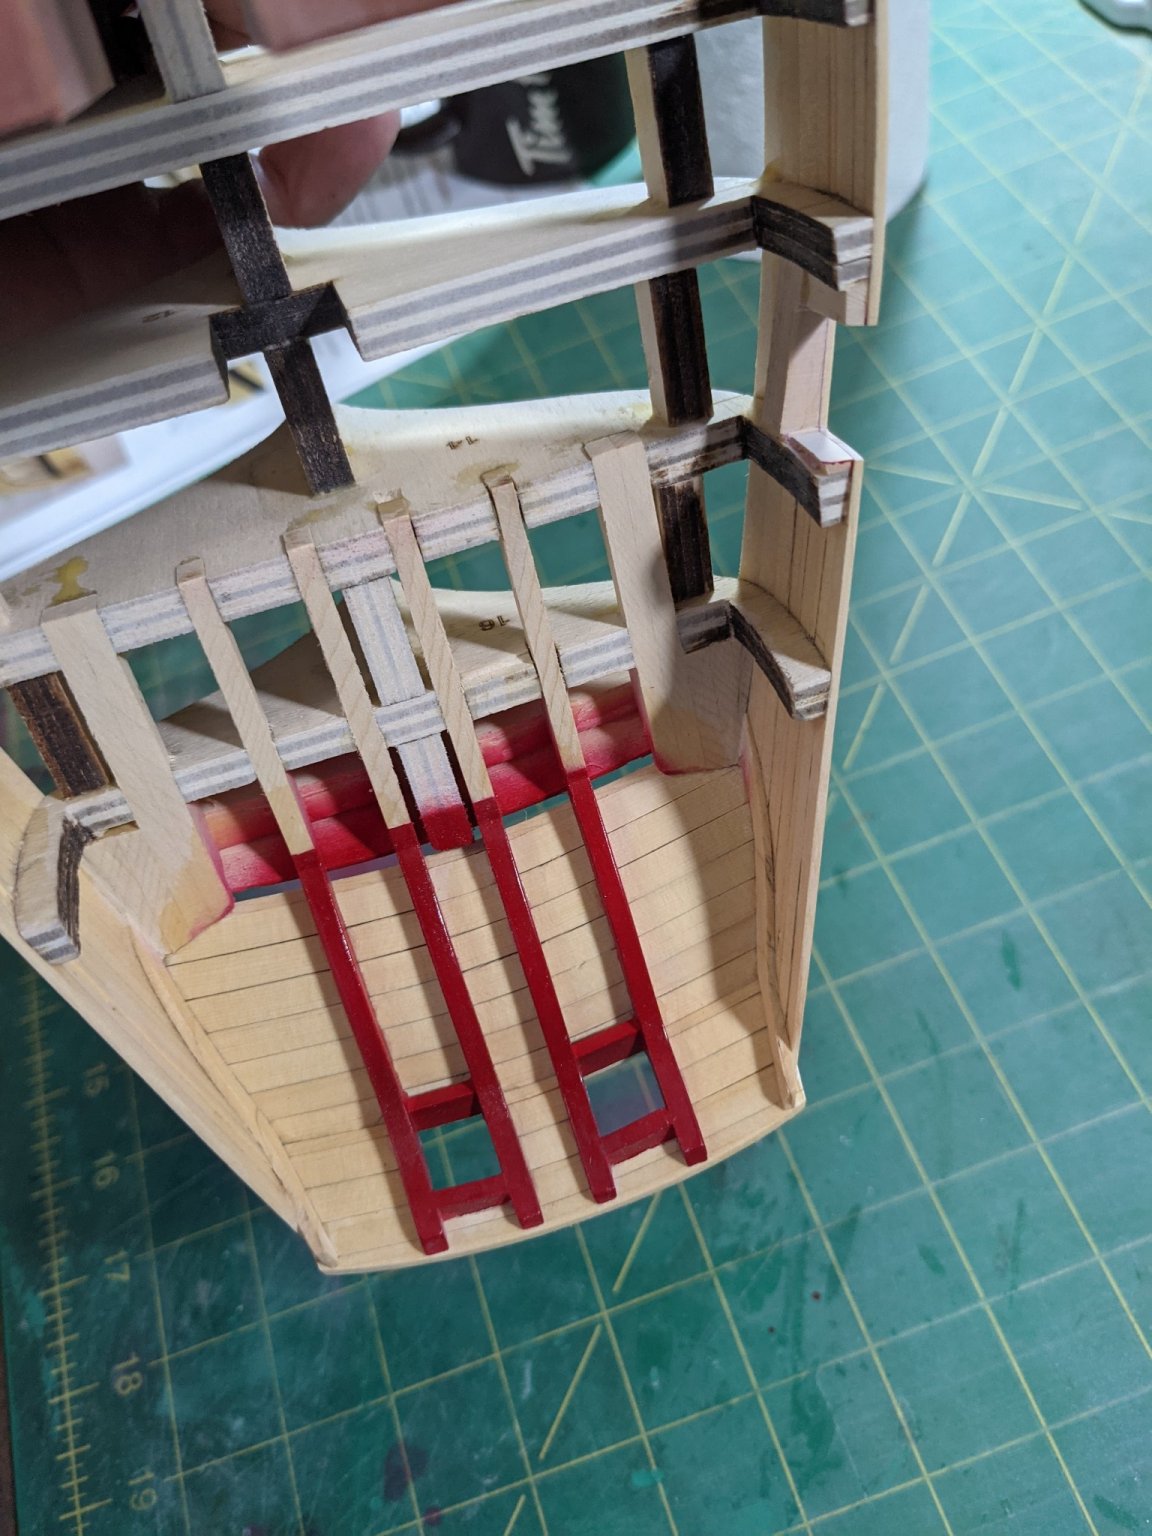
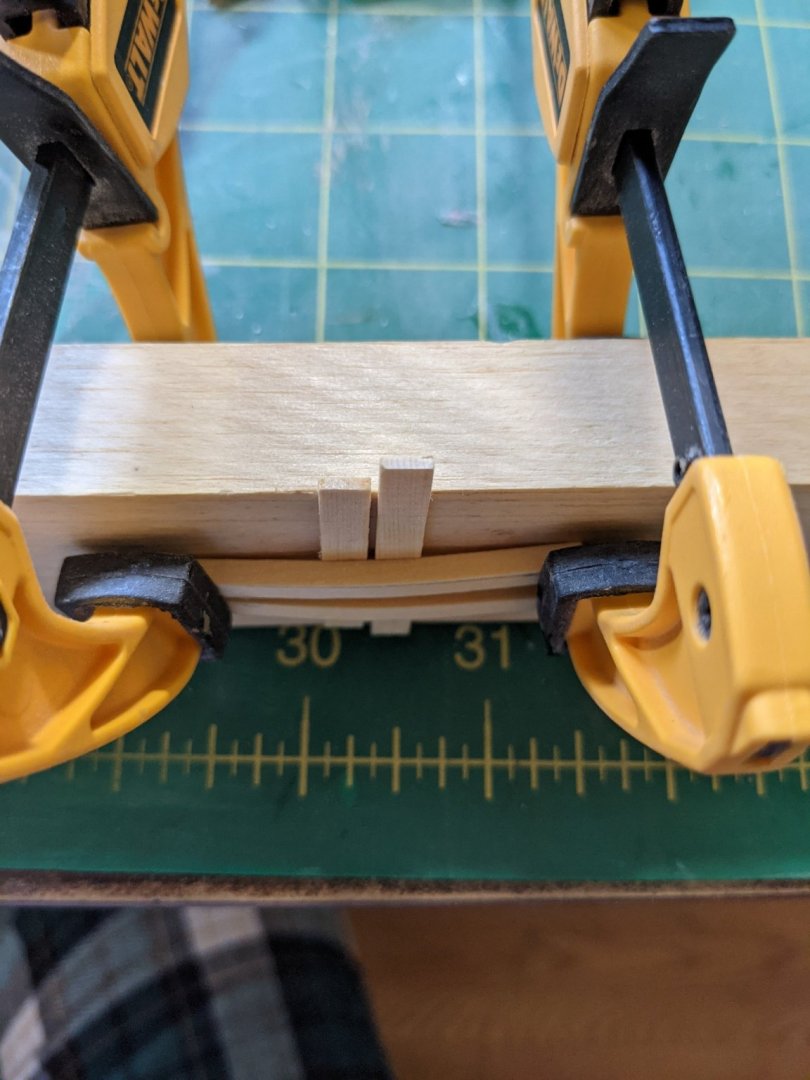
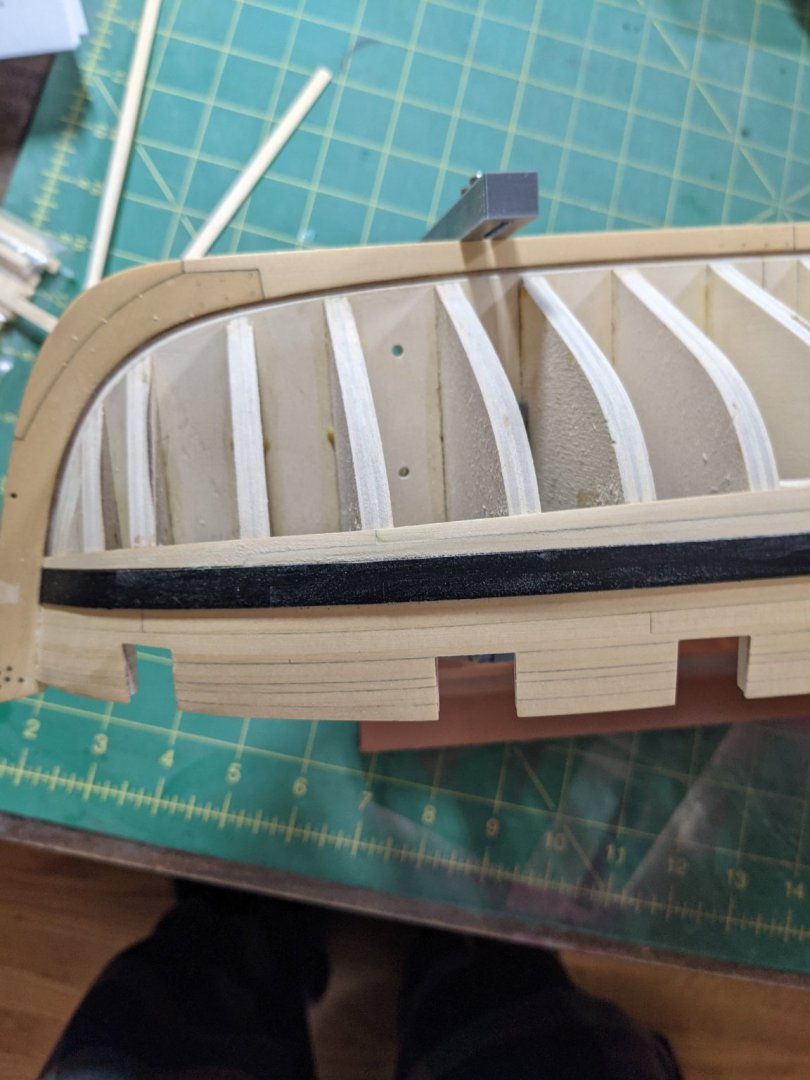
Removed all the planking to redo except the rear most plank. Tired to get new planking beveled as good as I can and sanded and painted again. Now I am noticing that the transom is a little higher than others I see here as you can see in the second photo. Does that look like it will pass or is there some correction I should do?


- 274 replies
-
- 5
-
-
- Cheerful
- Syren Ship Model Company
- (and 1 more)
-
I have this set and they are nice to use. Have to be careful as they are very sharp on the ends. https://www.amazon.ca/gp/product/B07K126S4K/ref=ppx_yo_dt_b_search_asin_title?ie=UTF8&psc=1
-
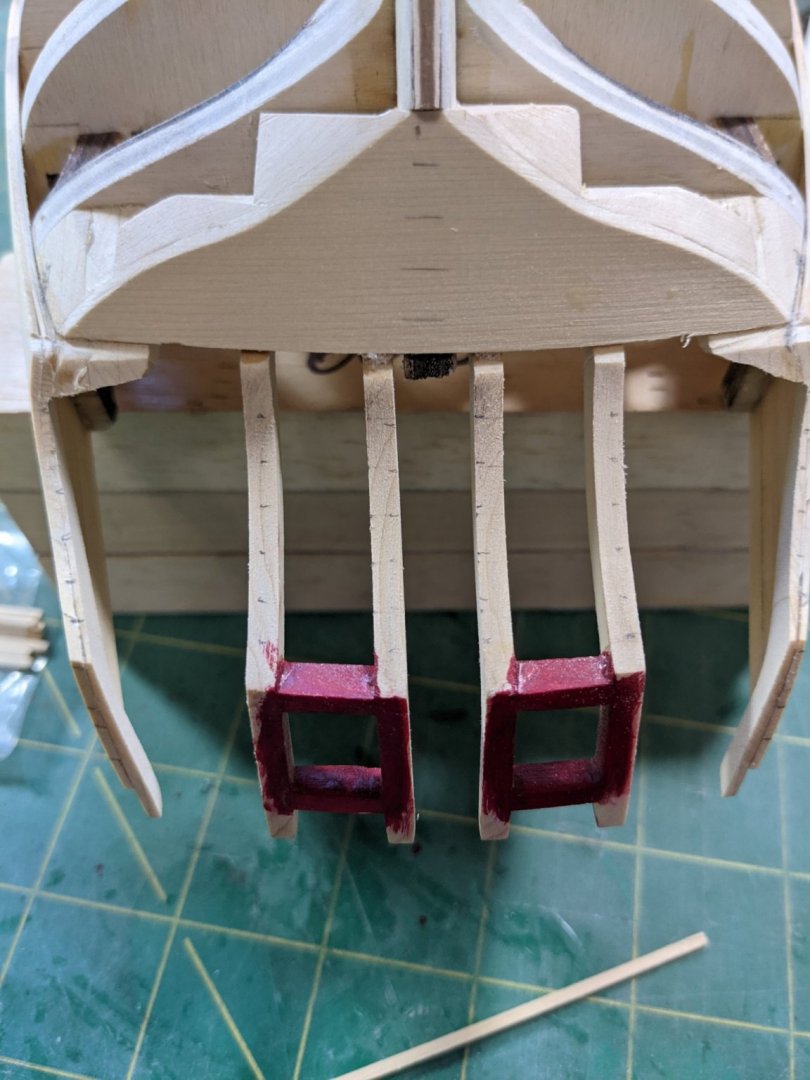
Thanks Chuck and Glenn. I removed all but the rearmost plank and started again.
- 274 replies
-
- 1
-
-
- Cheerful
- Syren Ship Model Company
- (and 1 more)
-
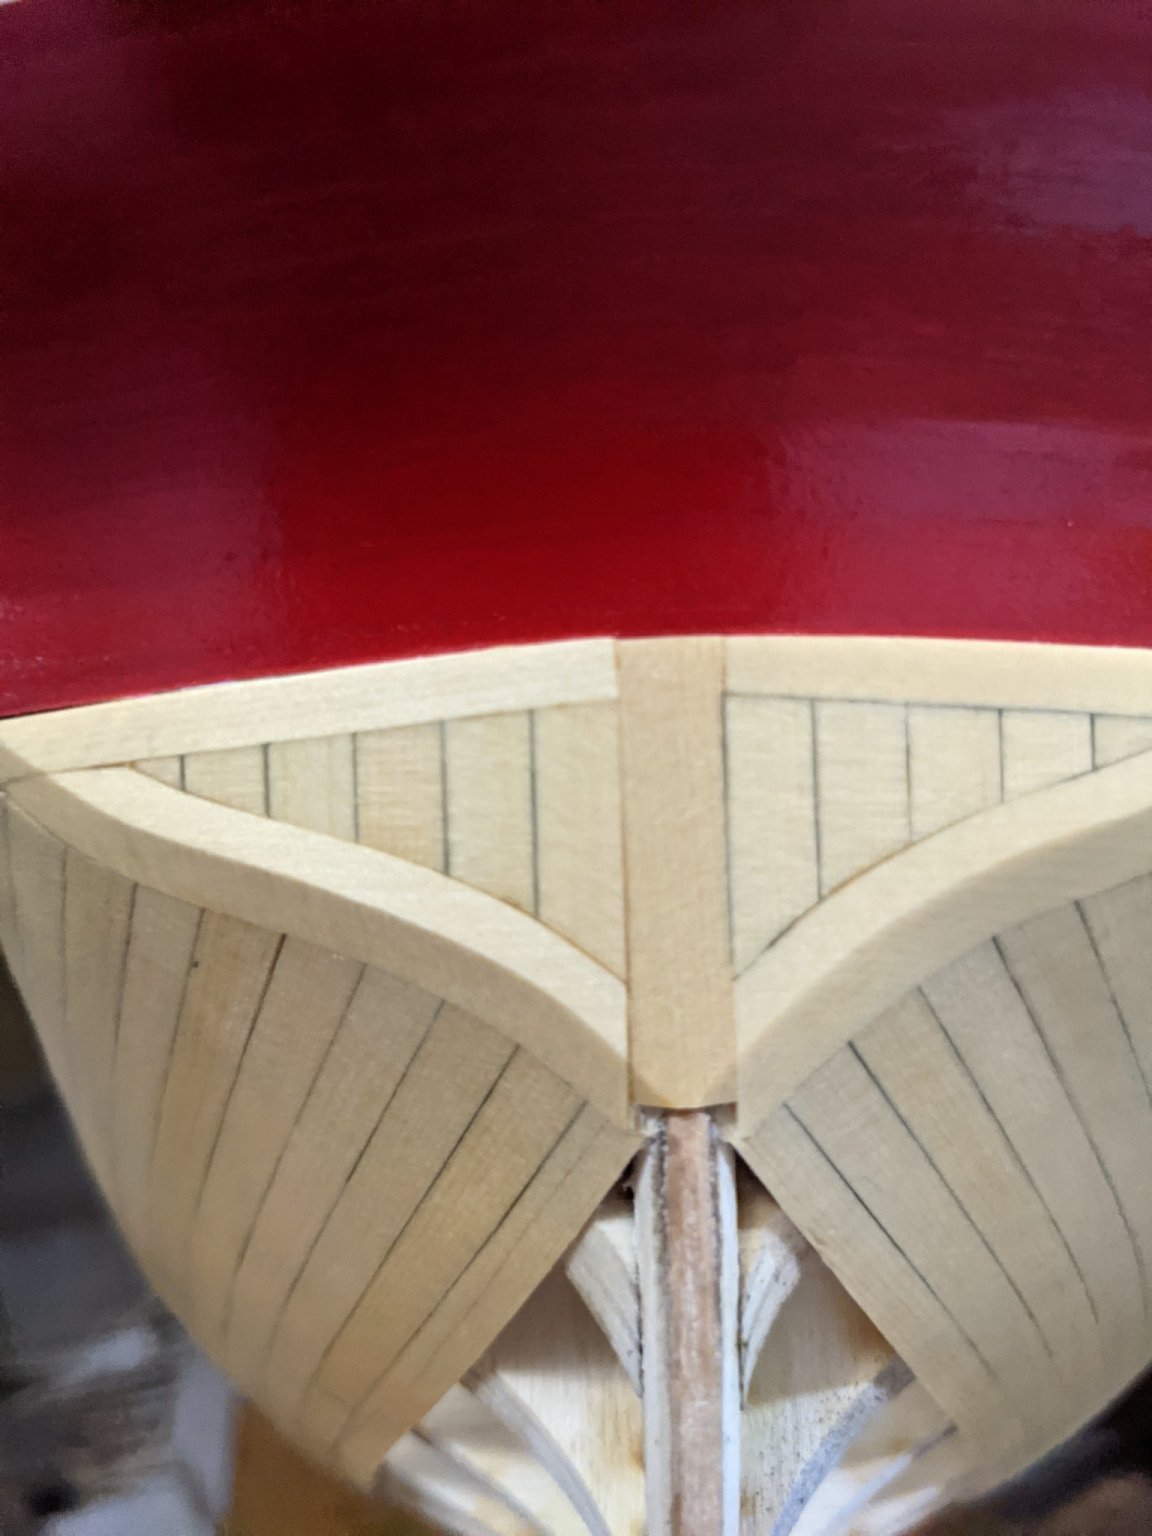
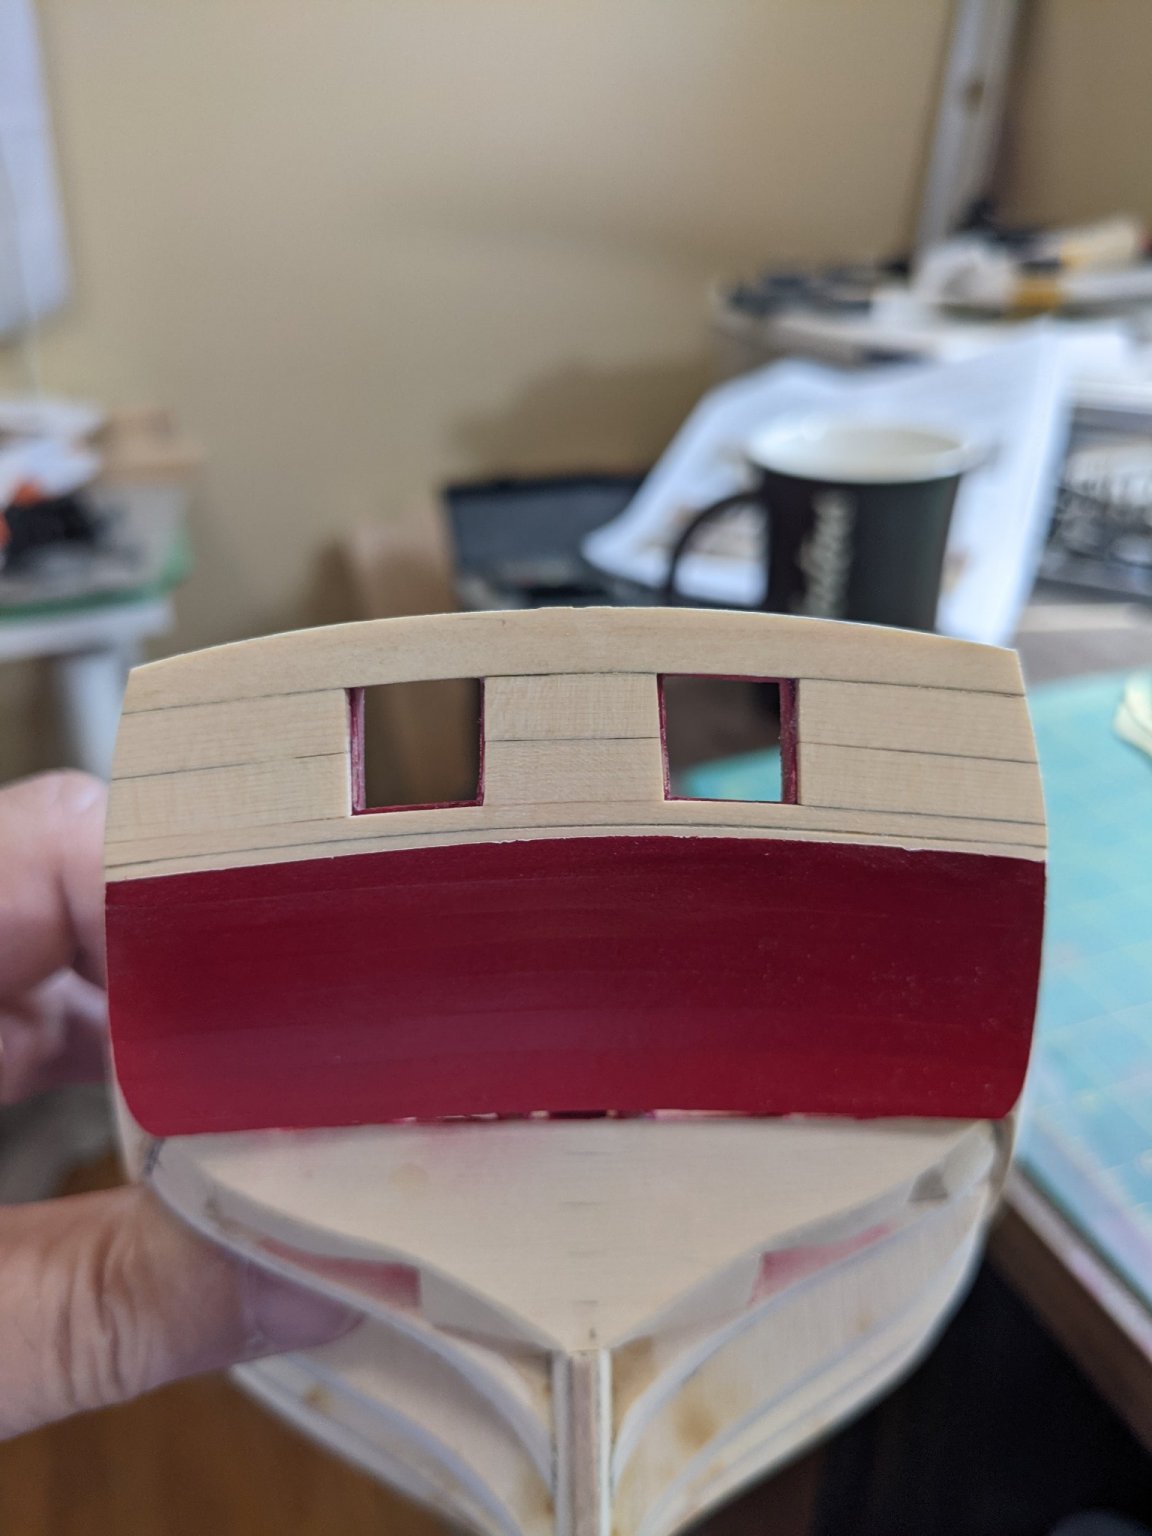
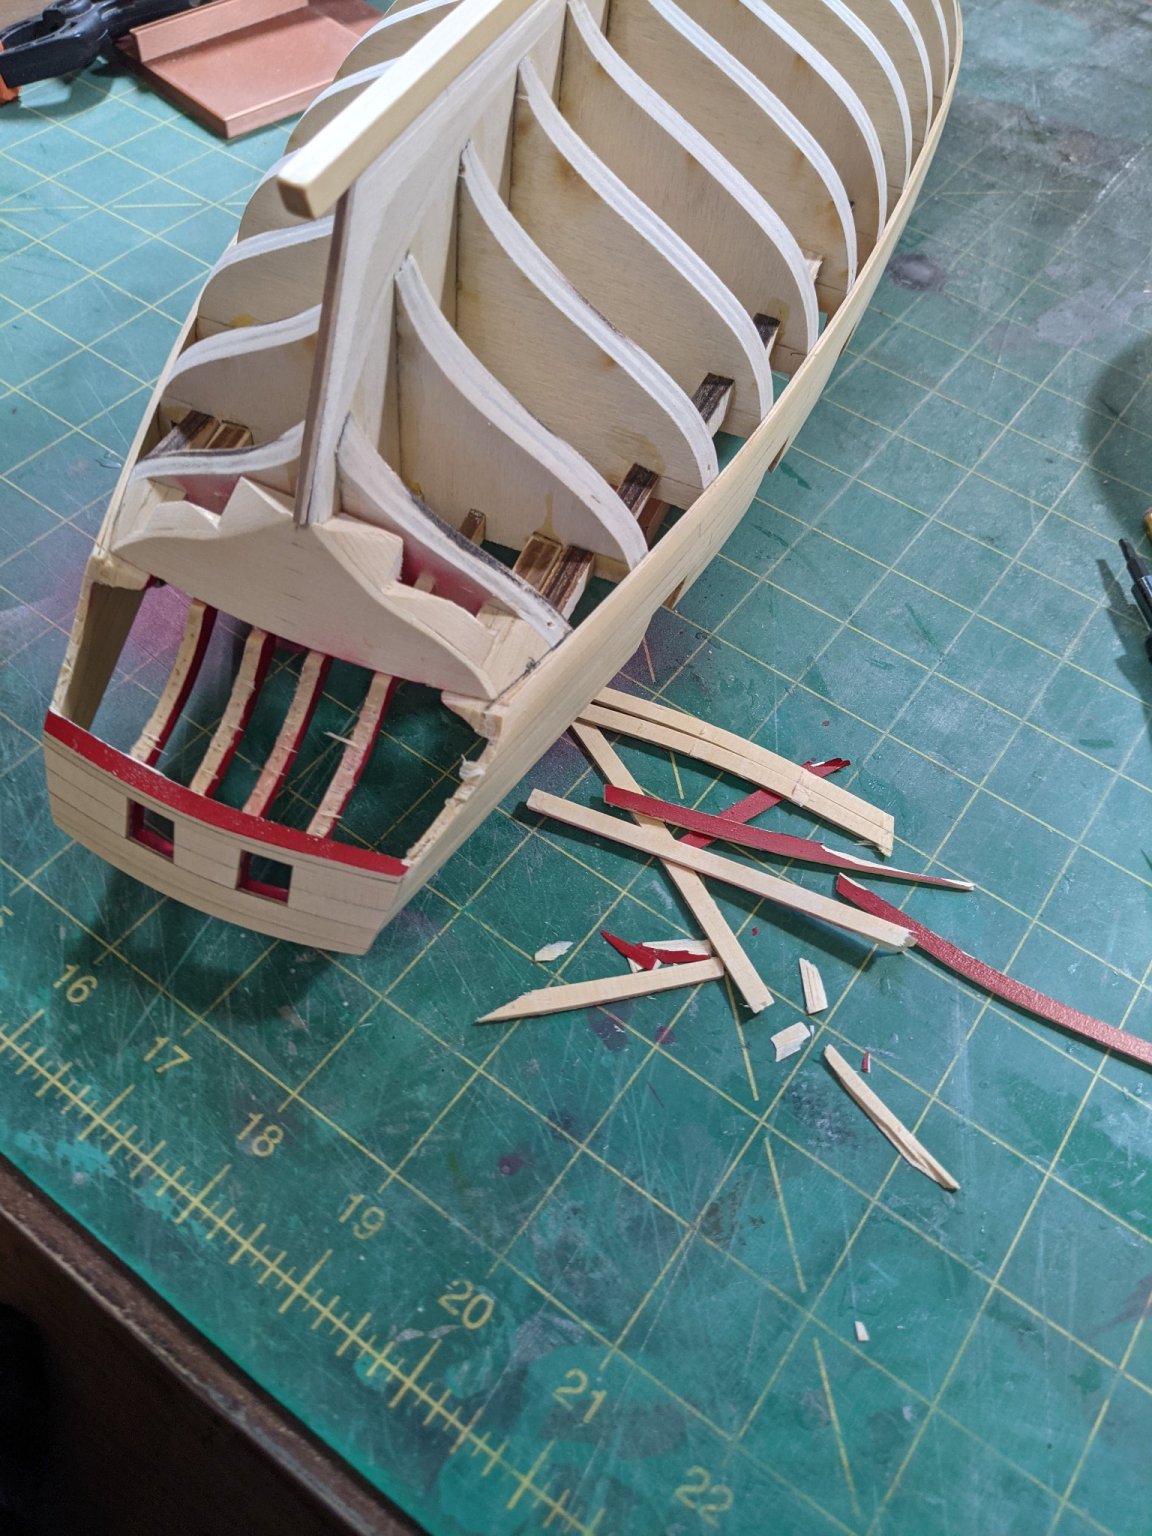
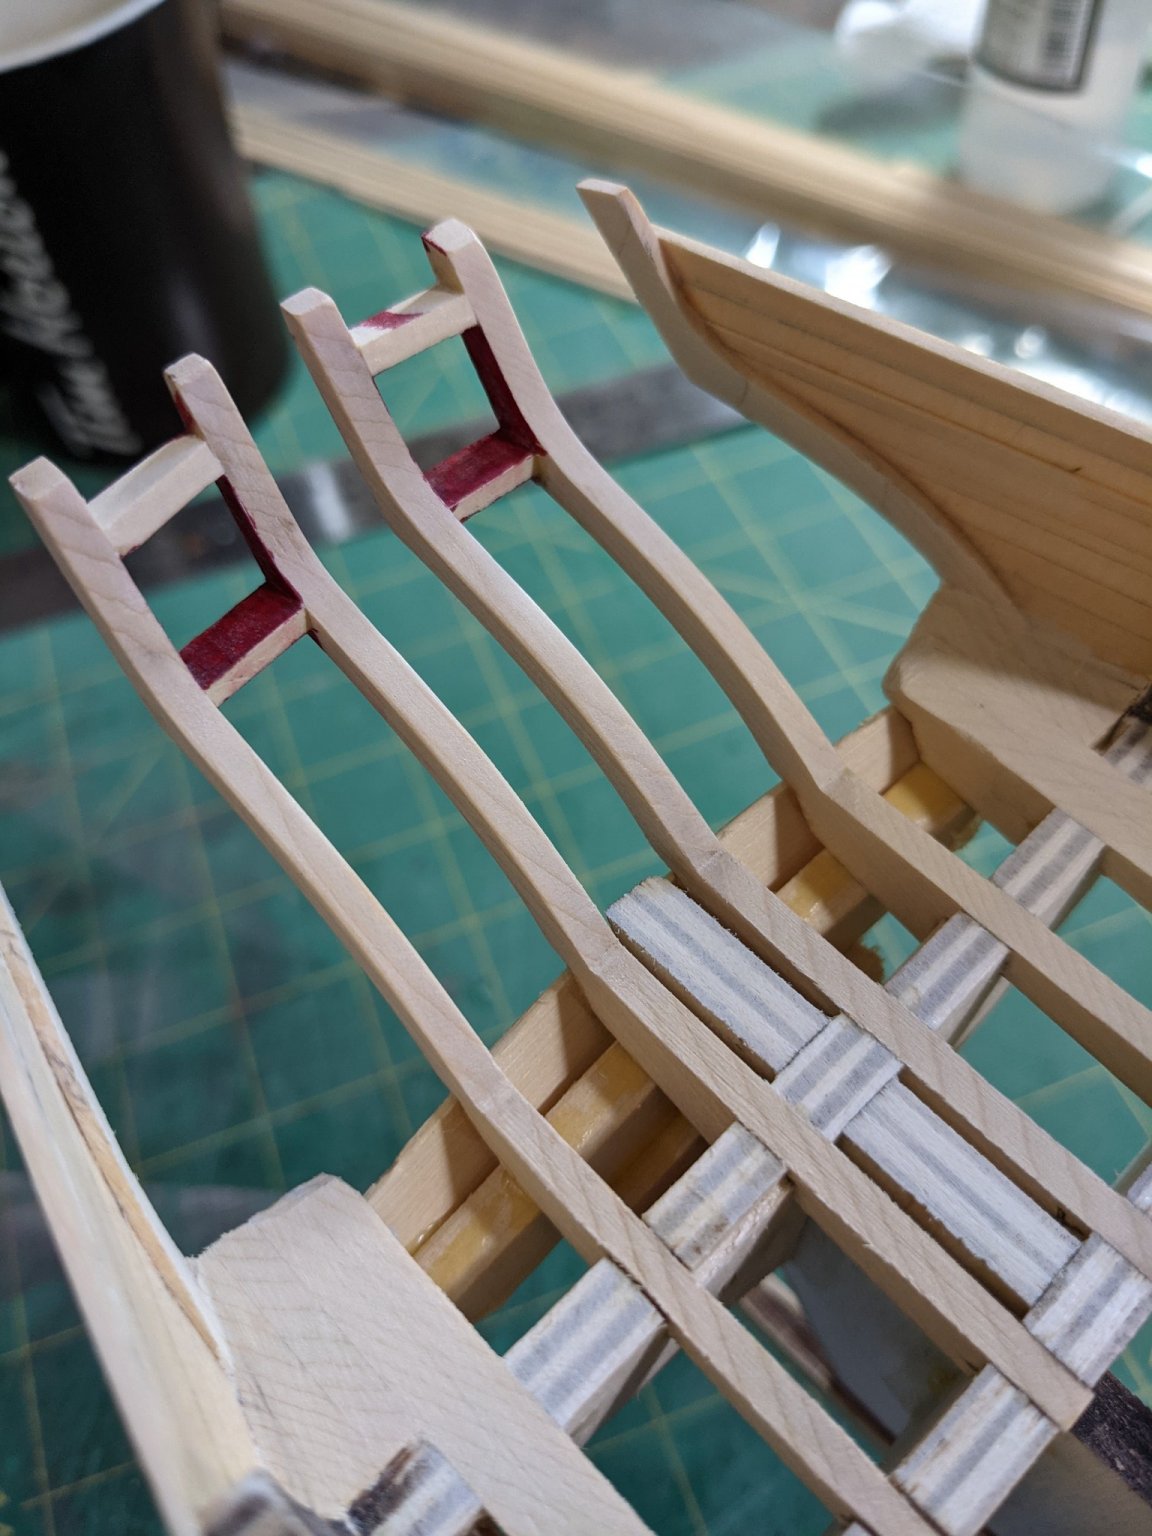
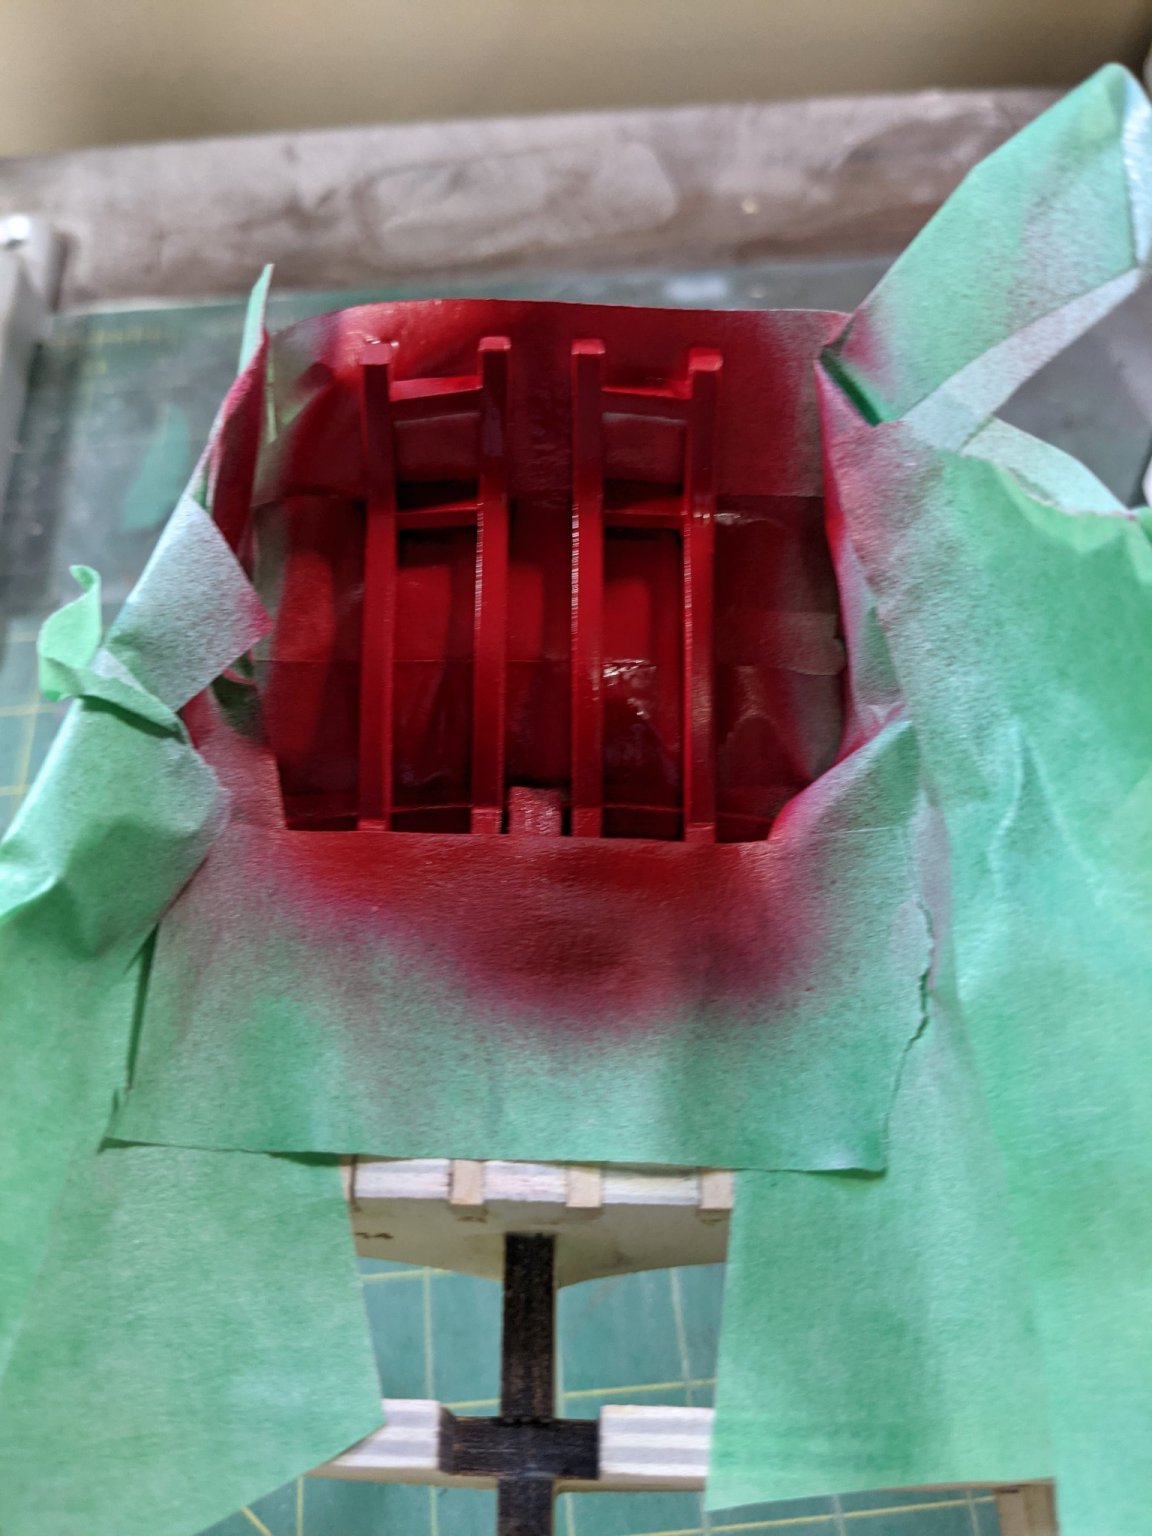
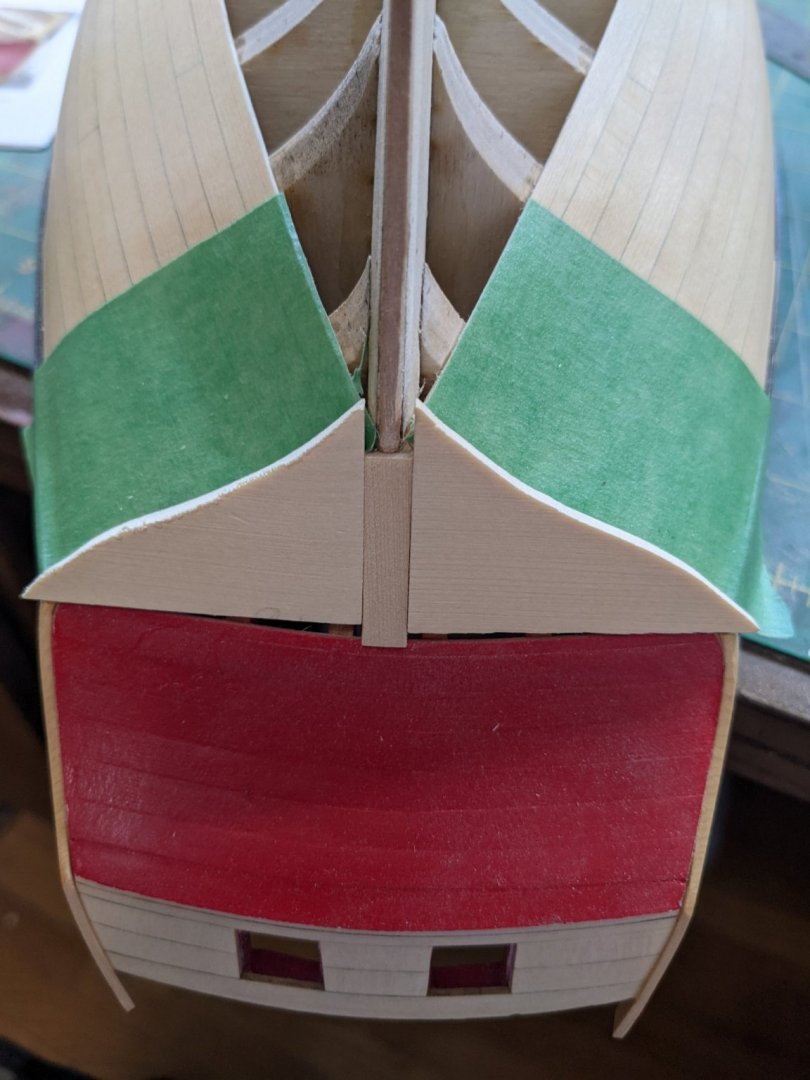
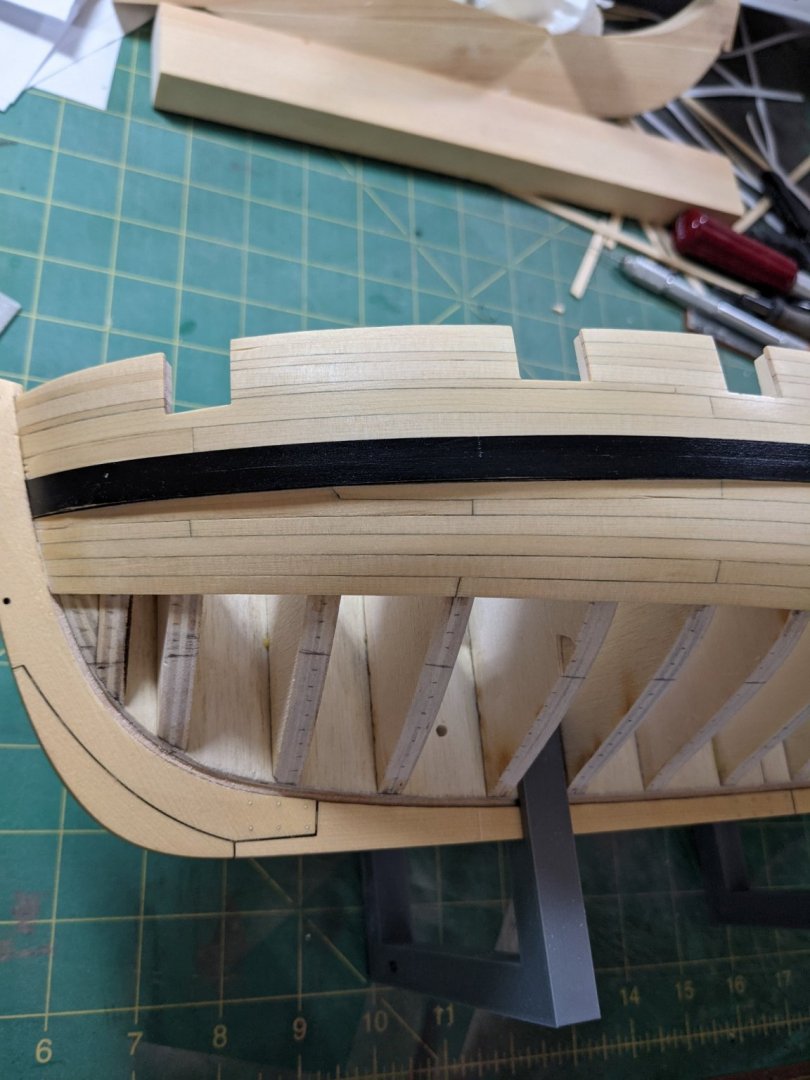
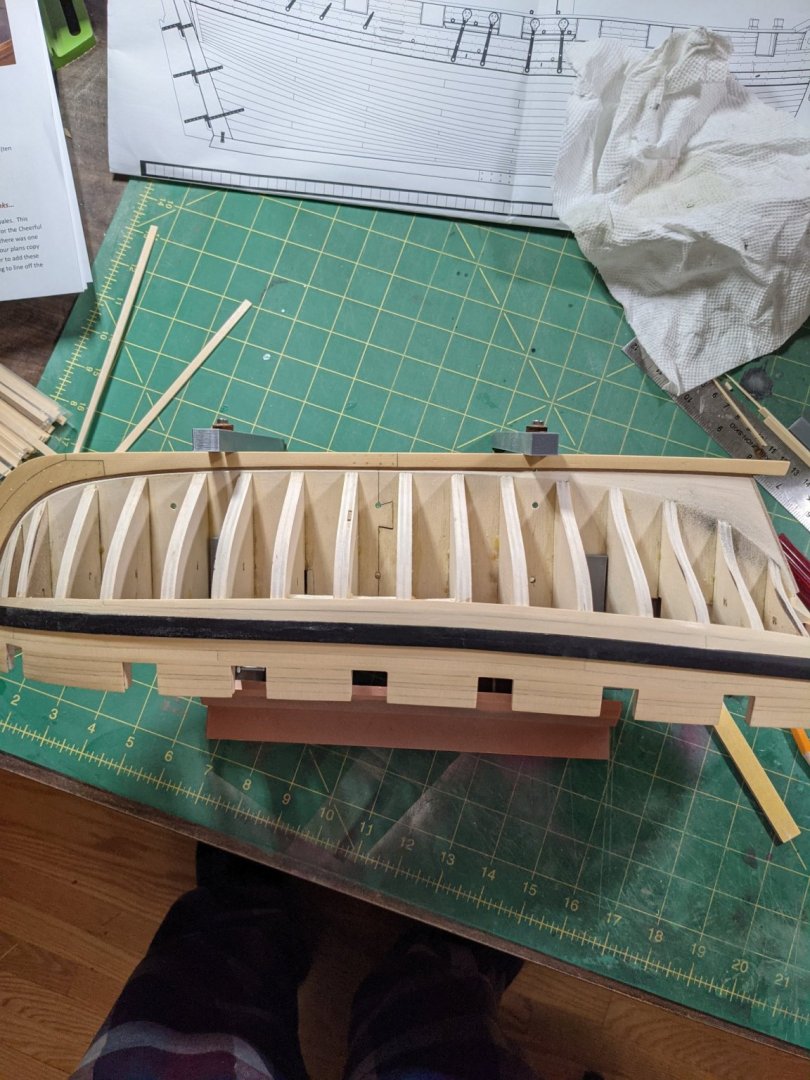
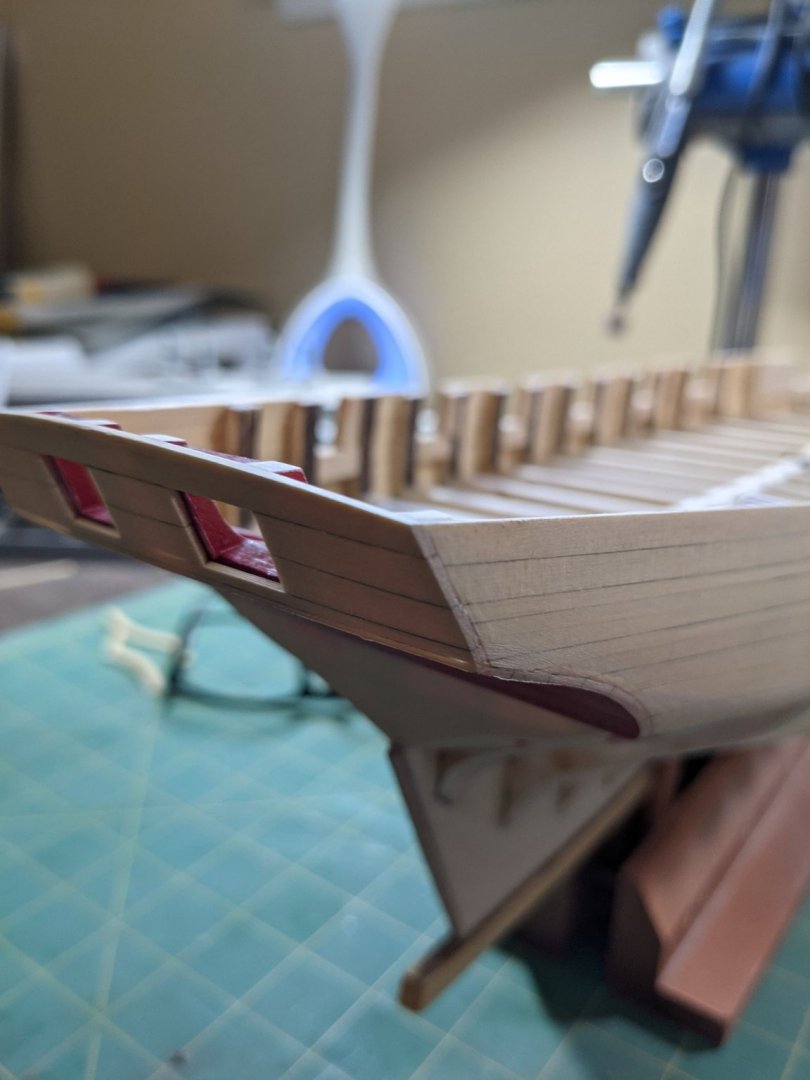
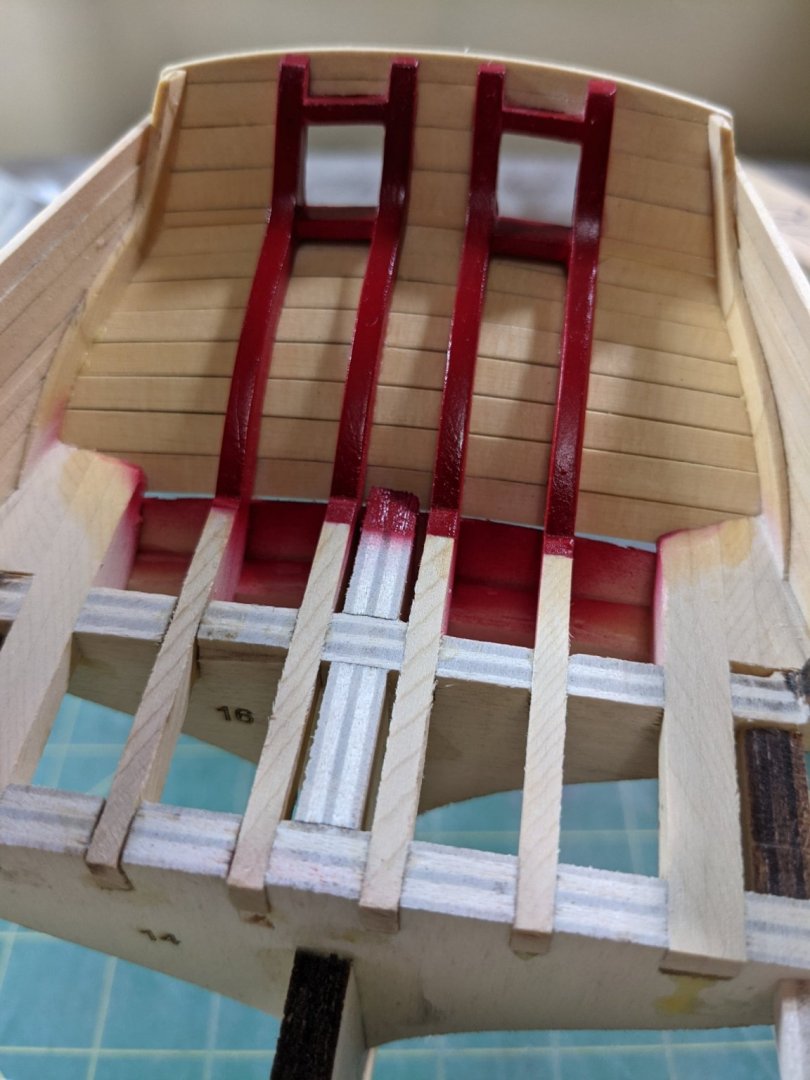
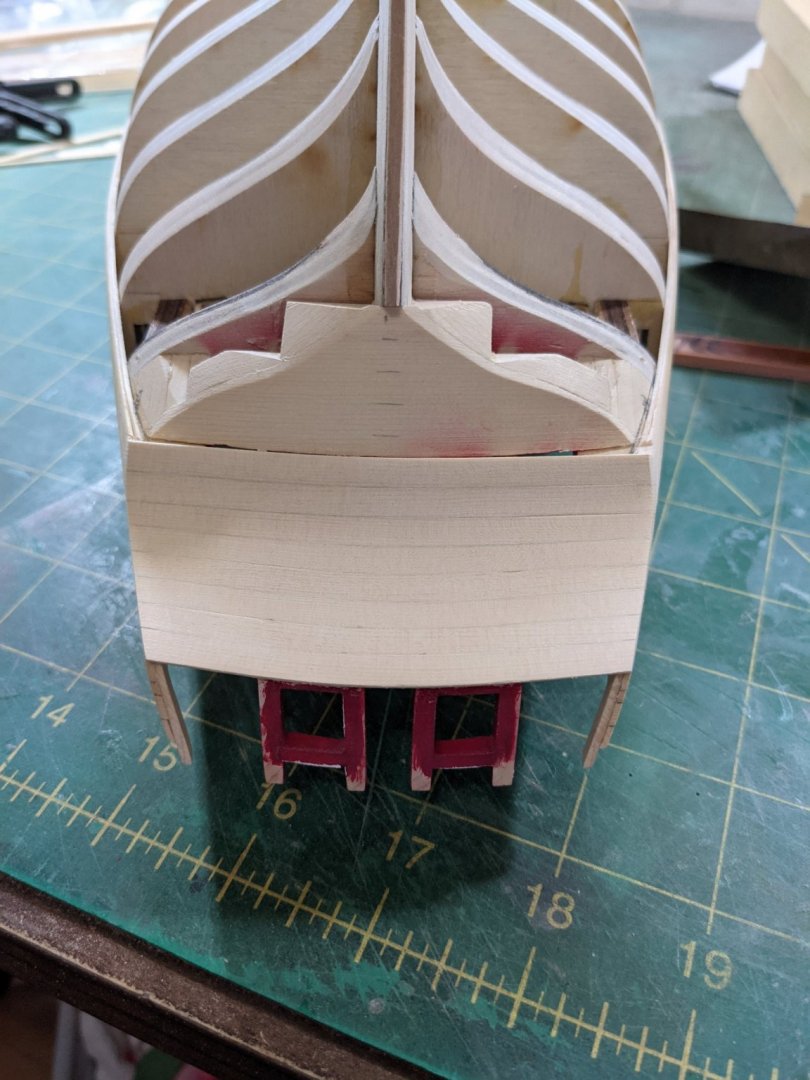
So I finished the planking on the stern and there are huge gaps on the inside! I never thought to look until I was finished. Not sure if I can let it go like that. Looks like a do over to me. And looking at this picture something is wonky with the way it lines up back there. Picture sure show faults. But the paint job turned out pretty good I think I will remove the red part and do it over again paying attention to the inner part to make sure there are not gaps. Since the outer edge is painted if I have some gaps back there I can always fill it but I just need to do better. Funny that I could not see the glaring mistakes until I looked at the pictures. Maybe I need to go see my eye doctor
- 274 replies
-
- 7
-
-
- Cheerful
- Syren Ship Model Company
- (and 1 more)
-
I was looking to see where you got the wood for the base and then I see you painted it. That is amazing!
- 433 replies
-
- 3
-
-
- open boat
- small boat
- (and 1 more)
-
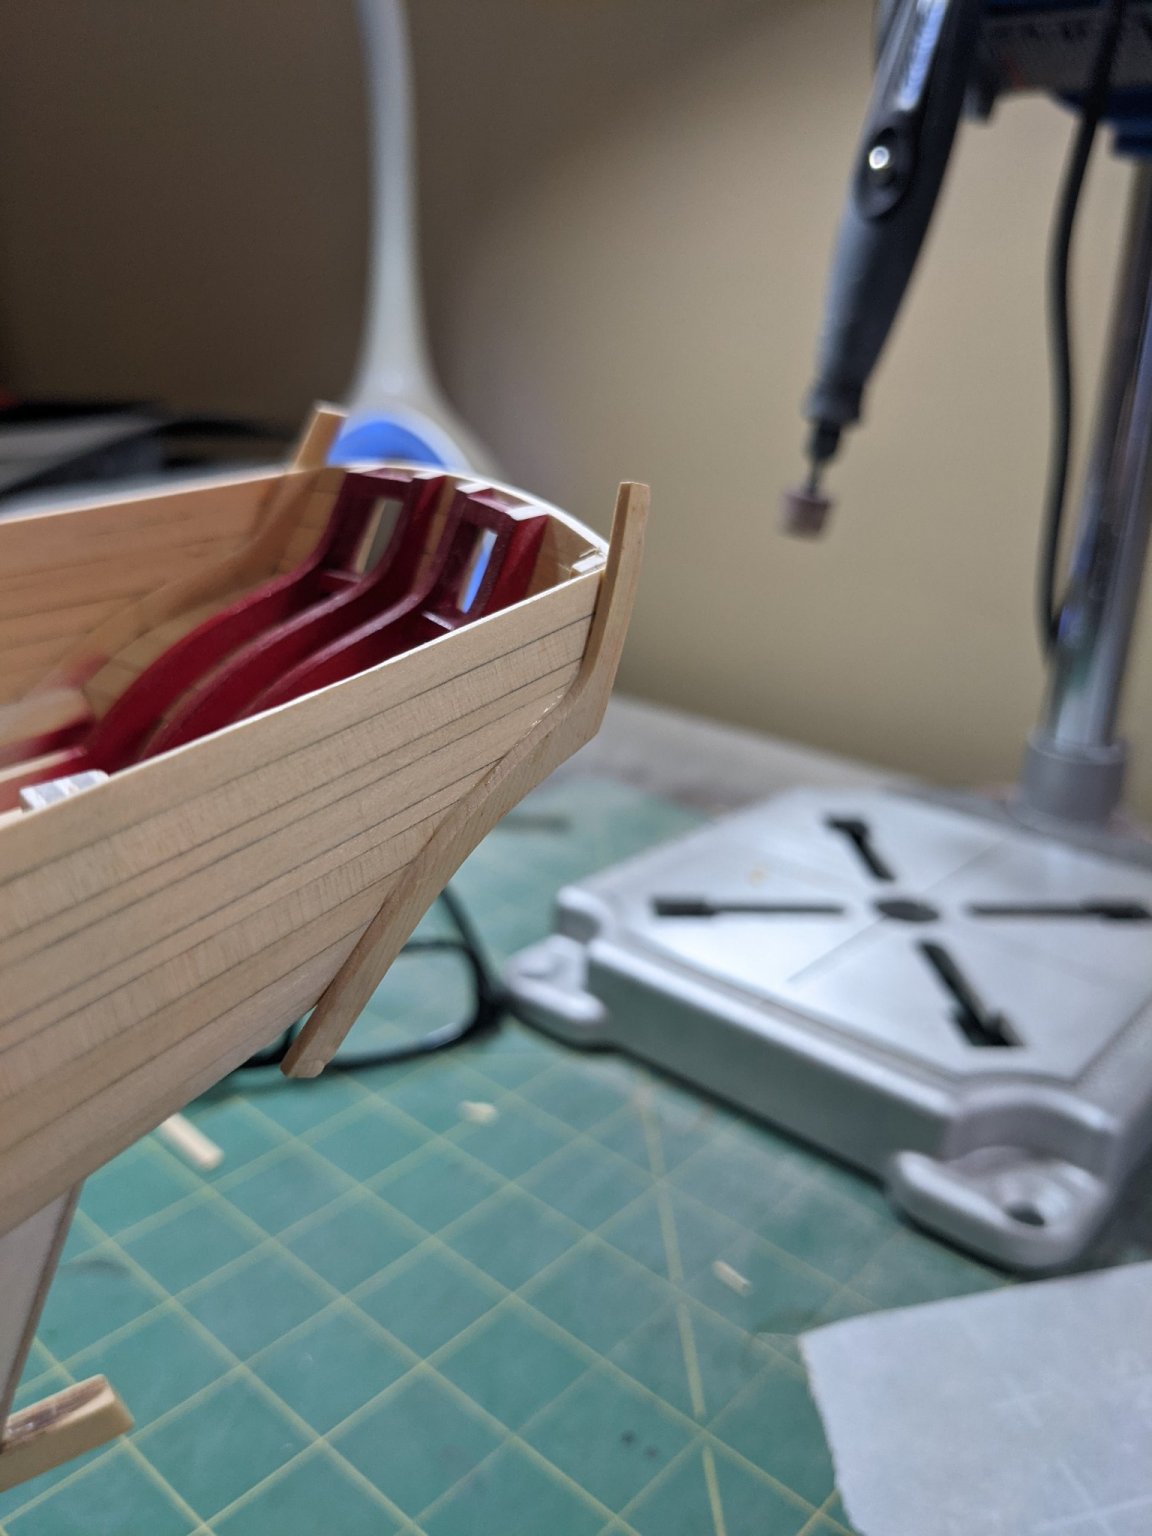
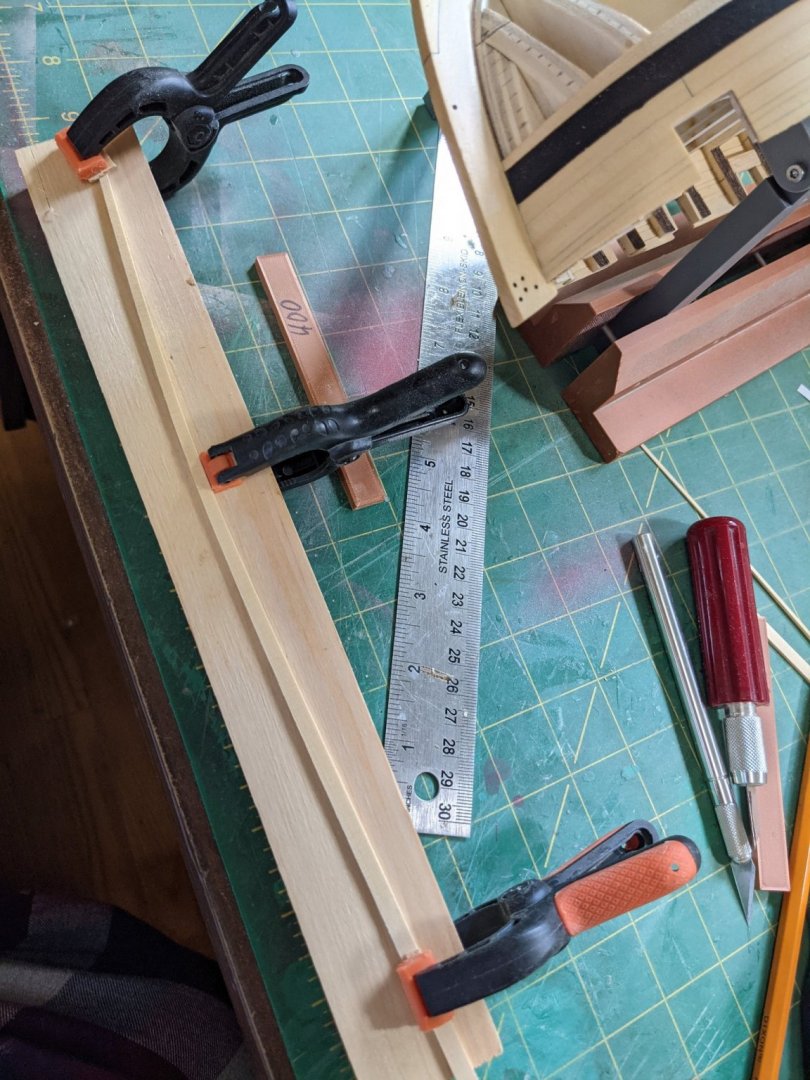
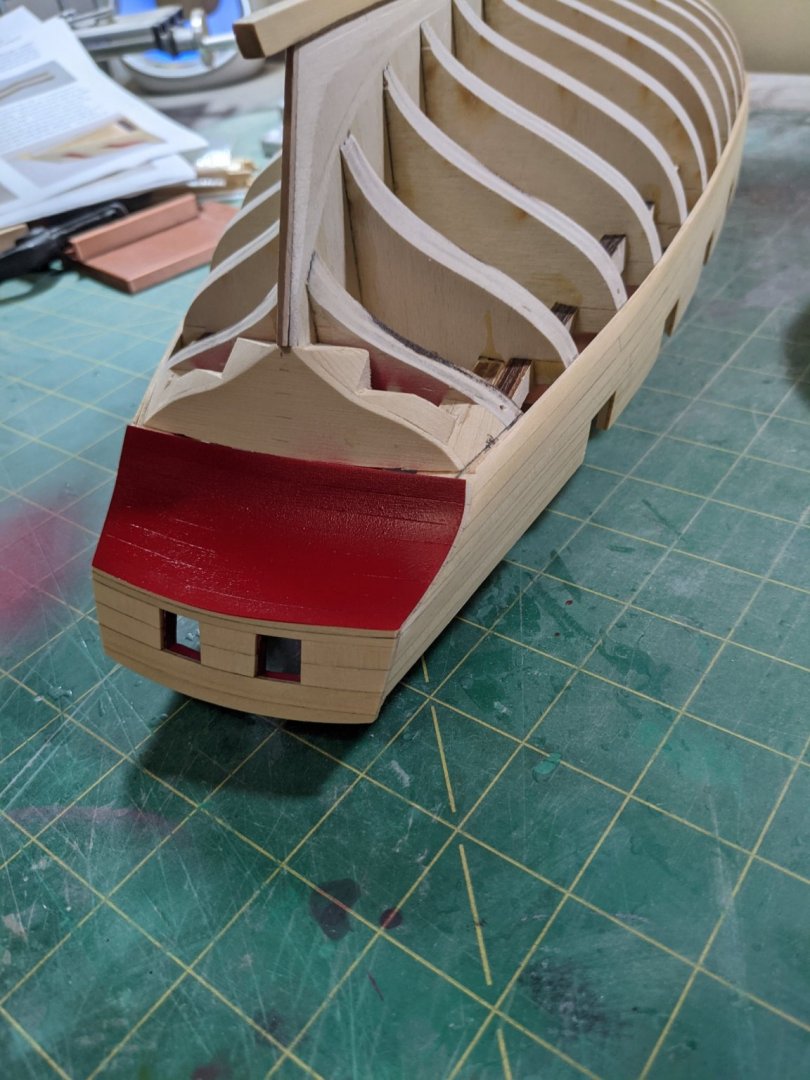
Planking on the stern piece and bending.
- 274 replies
-
- 10
-
-
-
- Cheerful
- Syren Ship Model Company
- (and 1 more)
-
I thinned out the transom carefully with the Dremel and a sanding drum and the some sanding disks. Then I sanded the inside pieces with 800 grit and decided to paint them before doing and planking on the rear.


- 274 replies
-
- 4
-
-
- Cheerful
- Syren Ship Model Company
- (and 1 more)
-
I think it will work out and I am going to wait to frame the gun ports until after the inner planking is done. One thing about Vallejo paint or any paint for that matter is it takes about a week to fully harden. If you touch it before it is truly cured you will leave finger prints in it. Also Vallejo does need primer to make it stick good but their primer is not very good. I find the Badger primer to be one of the best. Vallejo paint is very high in pigments and it is hard to clean out your airbrush. You must use lacquer thinned to clean out your airbrush after using it as it gets in every crevice. The airbrush I use is a Badger Patriot 105 with a .5 needle. This is a larger needle than most airbrushes but it works well with the primer and Model Air paint. You do have to control the amount of paint because you can really shoot out a lot with the larger needle. I usually use 20 psi air pressure and try to get thin coats. I have used airbrushes with a .3 needle and they are good for real fine spraying but you get a lot of tip dry with acrylic paint so you have to be careful or you will get splatter. The Badger does have a fine needle option but I do not have a need for it.
- 274 replies
-
- 2
-
-
- Cheerful
- Syren Ship Model Company
- (and 1 more)