
HOLIDAY DONATION DRIVE - SUPPORT MSW - DO YOUR PART TO KEEP THIS GREAT FORUM GOING! (Only 68 donations so far out of 49,000 members - Can we at least get 100? C'mon guys!)
×


AJohnson
-
Posts
2,034 -
Joined
-
Last visited
Content Type
Profiles
Forums
Gallery
Events
Everything posted by AJohnson
-
 Hi Mike, glad the shipyard is back up and running after Christmas, you have made excellent progress and achieved a lot in the last two weeks. I am impressed with the efforts you are going to with the rigging and the tips you give about the “missing” steps from Caldercraft’s instructions - taking extra notes on that as “Snake” is my next major ship build. Also taking that away for my Caldercraft Bounty build before I fix the masts, phew glad I’m flowing 👍
- 109 replies
-
- 1
-

-
- snake
- caldercraft
- (and 1 more)
-
Hi there HHH, thanks for looking in on my Bounty build, I’ve been taking a look back through your log to see what you are up to, sad to say not seen your log until now! Your Granado build it very good and you are doing very well at this, wouldn’t know this is your second build; my Bounty was my second build and I gave up on it for ten years 🤣. Your planking is very neat and enjoyed following through your build of the various cannons. I’ve clicked the ‘follow’ link so I don’t miss any more of your build; guilty of not looking in often on the 1501-1750 build section, as my interests tended to be later, fixed that. 👍
-
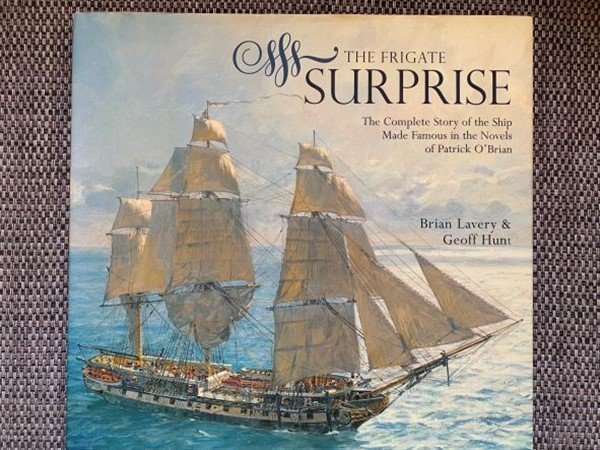
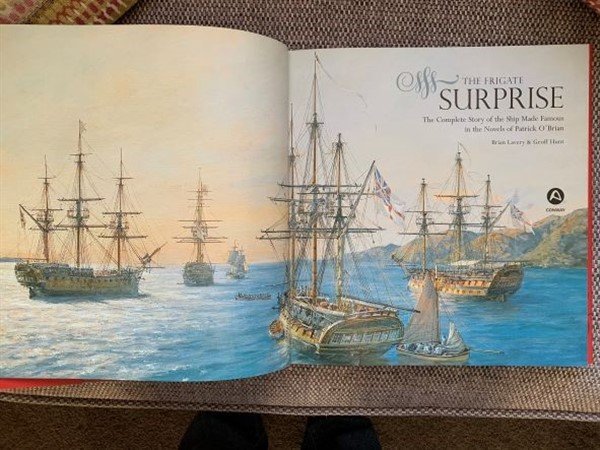
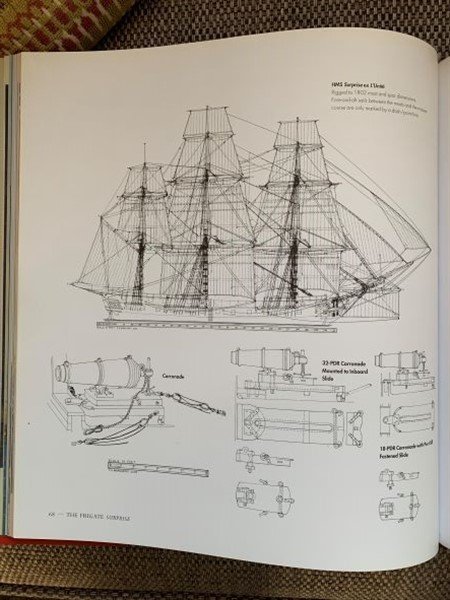
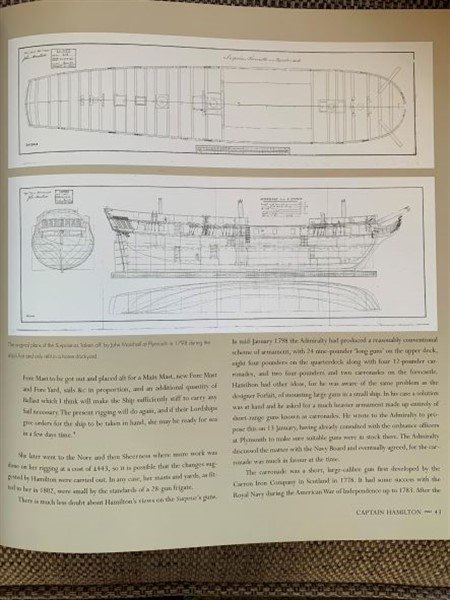
Another book I would recommend if you are an O'Brian fan is "The Frigate Surprise" by Brian Lavery & Geoff Hunt, by Conway Press. Full of background info and history, plans and Geoff Hunt's beautiful paintings.

-
Well can’t be a better example to follow than Dan and BE, but yes you are right sometimes plans and sketches in some sources don’t seem to take into account the crew who worked these vessels, I think ergonomics is the term for it nowadays.
- 419 replies
-
- 3
-
-
- Victory Models
- Pegasus
- (and 2 more)
-
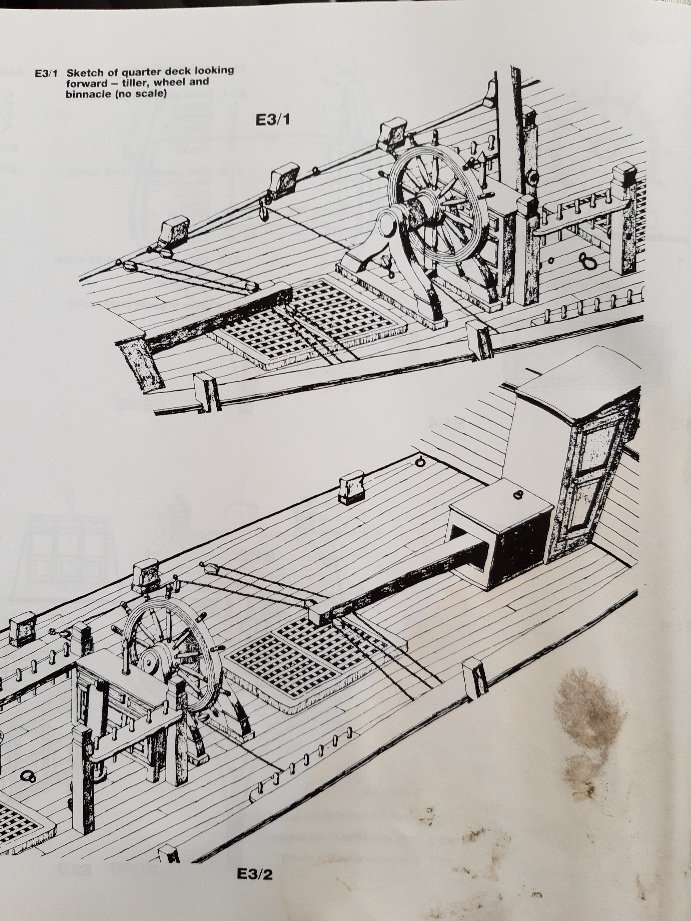
Nice work as usual Bug, like the replacement wheel. 👍 Is the way the ropes are attached to the tiller arm from the plans? Just wondering about the last length going up to the wheel axle at an angle, I have usually seen that rope go through two more blocks under the wheel axle then vertically up to the wheel? Attached the arrangement for the Bounty I am currently building. I know there are variations for this on different ships and i'm no expert, just curious.
- 419 replies
-
- 5
-
-
- Victory Models
- Pegasus
- (and 2 more)
-
Nice save on the Steam winch Will 👍 it was like building a mini kit on its own, though for once I didn't lose or break anything on mine! How did the decals go on Will? I have been thinking about them and how they might sit on wood grain without the decal backing "silvering" on the uneven surface, been thinking of using rub-on lettering? Did your rudder come off, mine not attached yet whilst I have sanding and filling still to do.
- 77 replies
-
- 1
-
-
- Erycina
- Vanguard Models
- (and 1 more)
-
How many kits do you have on the go at the moment?
AJohnson replied to CaptnBirdseye's topic in Wood ship model kits
Guilty as charged! Excluding untouched "stock" those on the crime sheet currently:- 🕵️♂️ Caldercraft "HMAV Bounty" Vanguard "Nisha" - fishing trawler Aeronaut "Ramborator" - modern RC pusher tug. Airfix Hawker Typhoon 1b - car door version (1/24) Along with @Kevin I'm promising not to get/start more in 2022 until the top two at least are done, but as I pre-ordered Airfix's new 1/24 Spitfire IXc, that might be a problem if it arrives too early in 2022, but I should be safe, as Airfix say it's release date is Summer 2022, so therefore Xmas 2022 might be more likely with them! 😂 -
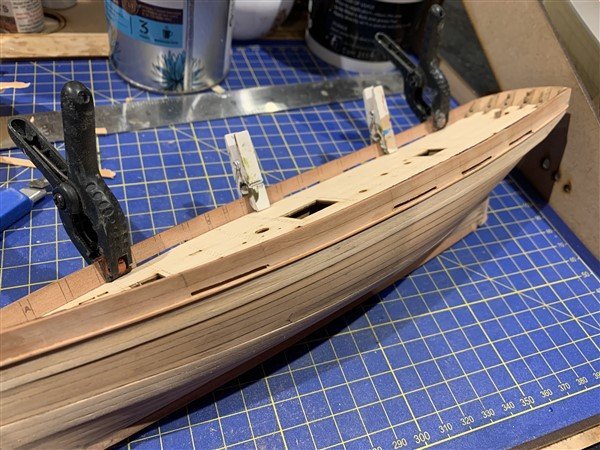
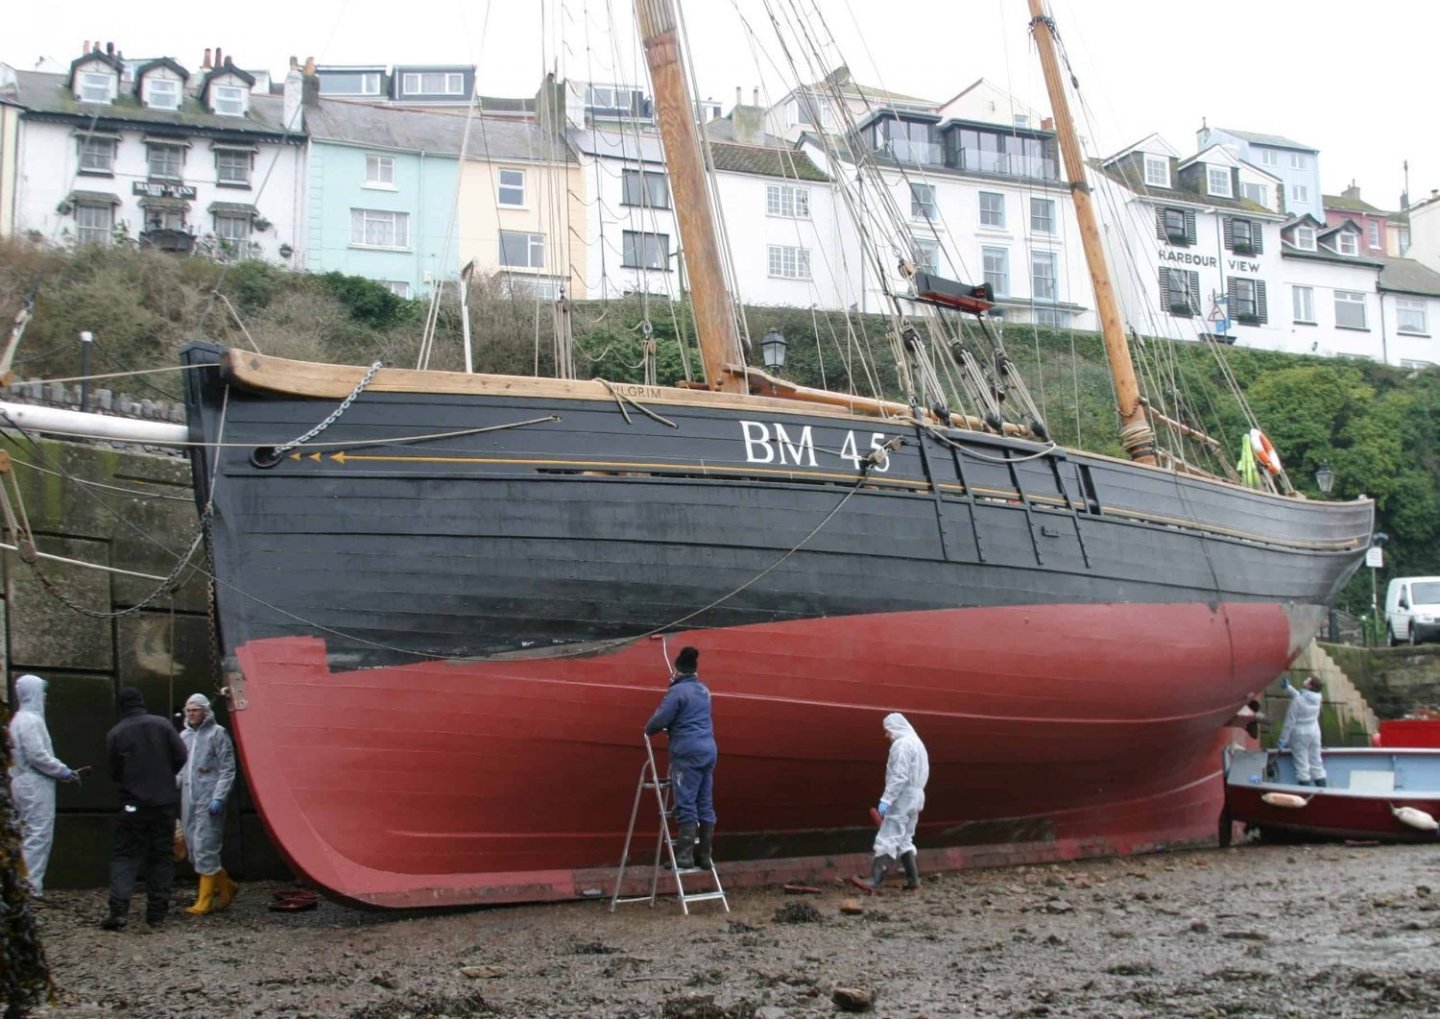
Thanks for the update about your paints Will, I've not come across that brand this side of the pond. But with your comment above you started an itch I couldn't shake when you mentioned the scuppers, as you say very obvious on the "Pilgrim" (BM45) and shown on many of March's sketches and sections, but how to include them? I briefly flirted with trying to reproduce full length scuppers as the picture above, but then thought better of it as this would weaken the bulwarks in the kit too much I thought. So I settled on sectional ones, between bulwark stanchions; that I have seen on some sailing trawlers. So I set to with my Dremel and thinnest file I possess, admittedly my scuppers are a bit too wide, come out probably nearer 2" than 1" at scale, but hopefully not too bad as not full length. Also sprayed on my first coat of primer, apart for the rough 'horrors' it shows up (especially in a close up digital picture!) I think the 'bilge' and 'topside' planking have come out okay and with more sanding etc. think will give me the look I was after.

- 206 replies
-
- 7
-
-
- Vanguard Models
- Brixham trawler
- (and 2 more)
-
Looking great Will, what paints are you using for the anti fouling and green? Like you I like to get all the painting done in one go, or in quick succession, so I can keep on top of the airbrush cleaning. I got some tape from Chris, so I'll be using it on my 'Nisha' hopefully in the not too distant future.
-
Just don't Chris, think my wallet just gave a shudder! 😆
-
Chris, this looks so good, I still struggle to believe these are made with card, they look that good. Love a Spitfire and extra excited today, just learned (and pre-ordered! 😆) that Airfix are releasing a 1/24 Spitfire Mr.IXc 😍 - yeah that Airfix 1970's Mk.1a mould can finally be retired! 🥳
- 130 replies
-
- 11
-
-
Brilliant Chris, once my wallet recovers from Christmas I will be getting a set of fishermen and clutter! Any news on the sail sets?
-
Really neat finish Bug, that cap rail worth the effort I think, finishes it off well. 👍
- 419 replies
-
- 3
-
-
- Victory Models
- Pegasus
- (and 2 more)
-
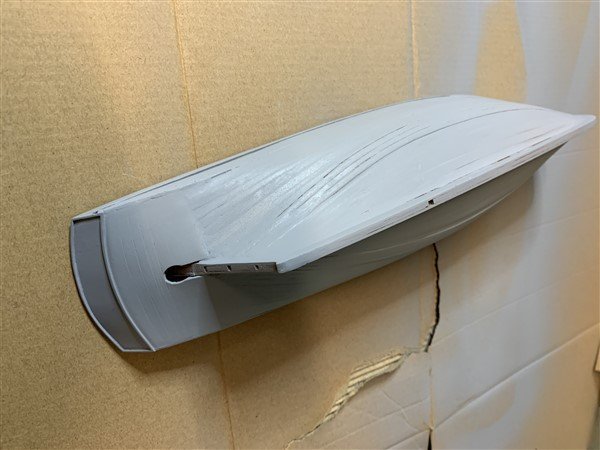
This batch of pictures brings my log up to date with the planking progress, overall fairly happy with it, with the ever present "wish I had done that better" bits. As mentioned on todays earlier post, I am going to need some primer coats to reveal the way my little modifications have turned out, but there are many obvious flaws in the finish that don't require primer that can be attended to first. Out of interest to those who are following my log, the attached picture of the "Pilgrim" being painted shows the look I am after. The 'bilge' planking is visible, the 'topside' planking less so, the subtle but still visible differences in thickness of planking are what I am aiming to replicate. In fact the paint scheme is pretty much what I have settled on for my build, black sides, anti fouling (but no boot topping in white) only difference is the deck edge band will be in white. As a side note I have replaced parts #39 (Stern frame surround) and #42 (bulwark lower rail patterns) with thin strip from the Pear second planking that I cut to suit. Nothing wrong with the kit parts, just a consequence of going down the route of following the Edgar Marsh plans of a thicker 'topside' planking means bulwark lower rail pattern would not sit flat and as a result the stern frame surround also needed reducing in thickness to match. Next update will be me filling / sanding / priming (repeated x number of times) until I am happy or have pile of sawdust to show for my efforts....


- 206 replies
-
- 11
-
-
- Vanguard Models
- Brixham trawler
- (and 2 more)
-
Looking good Andy, glad you got that stern counter on without mishap, think I was guilty of not making sure the clamps were not going to move overnight and think one slipped and dragged my counter sideways, which caused the split in the softened wood. You are making excellent progress and will soon be catching me up! I see from your penultimate picture you are thinking of doing a bit of "kit bashing" with the fitment of an Ejector Seat? 🤣 Assume this is for when the skipper thinks the weather is getting too rough? 🆘 Good work. 👍
- 32 replies
-
- 1
-
-
- Nisha
- Vanguard Models
- (and 1 more)
-
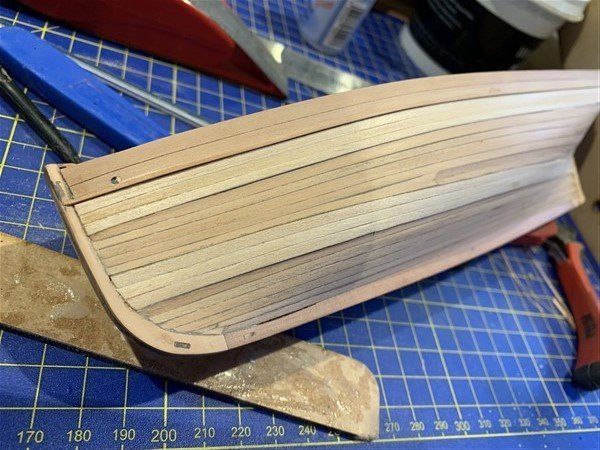
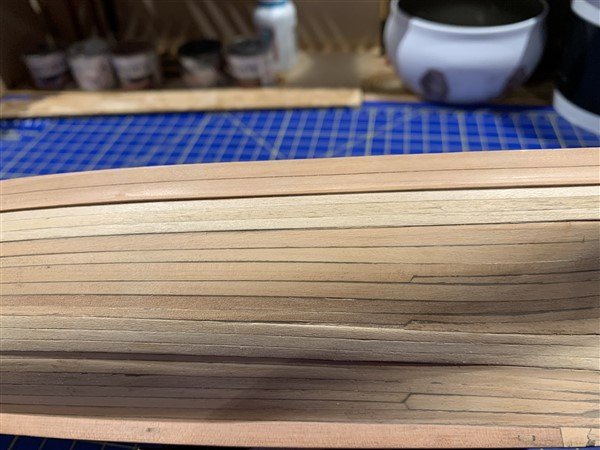
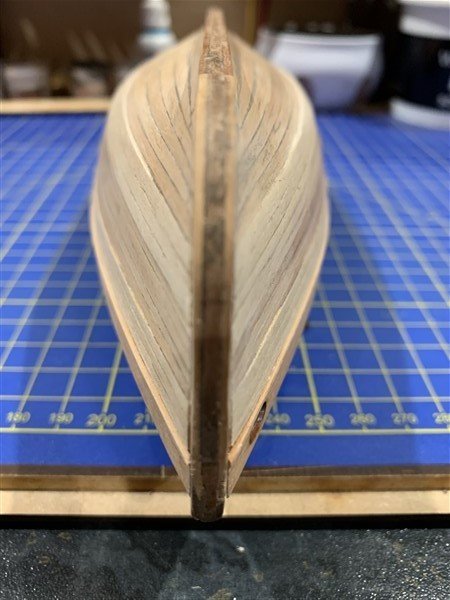
Thanks all for the likes and kind comments, hopefully later today I'll get chance to upload the latest pictures to show the current status. @DaveBaxt 'Nisha' is a two layered kit, second layer is 4mm wide Pear (much easier to work with than Walnut I have used so far in kits.), I just did the thicker 'topside' and 'bilge' planking first so that I could get each side symmetrical, once the second layer of Pear went in-between those they were far less pronounced, still a bit of work to make them look "scale", but as mentioned above I think I will need the assistance of some primer coats to reveal the overall effect. Also when I said "dry" plank bending I did mean Chuck's method of just a dab of water on the top of the plank and let the steam do the work rather than soaking the planks proper. Thanks again all for following.
- 206 replies
-
- 3
-
-
- Vanguard Models
- Brixham trawler
- (and 2 more)
-
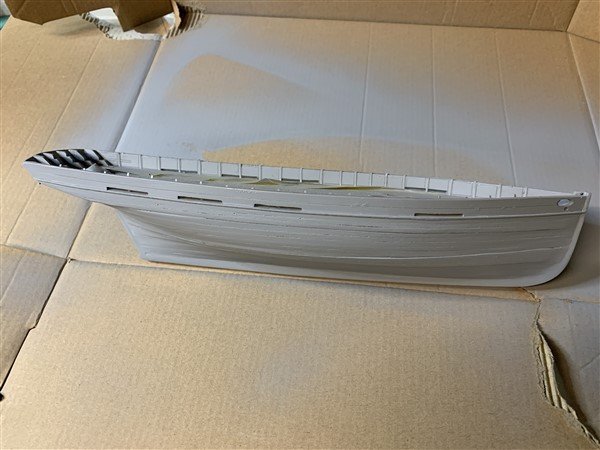
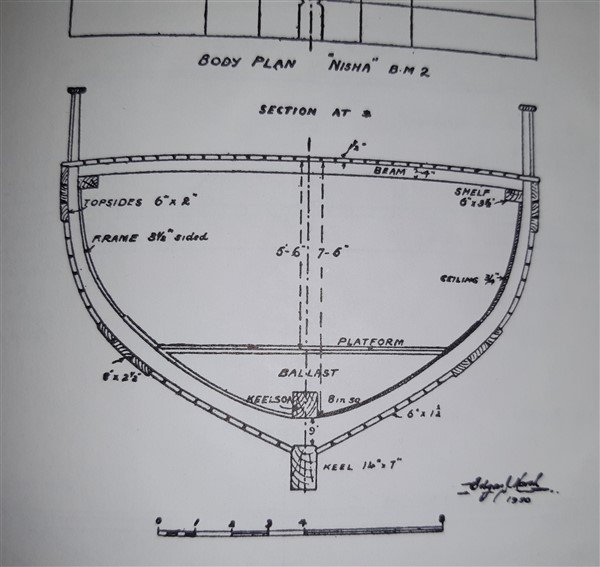
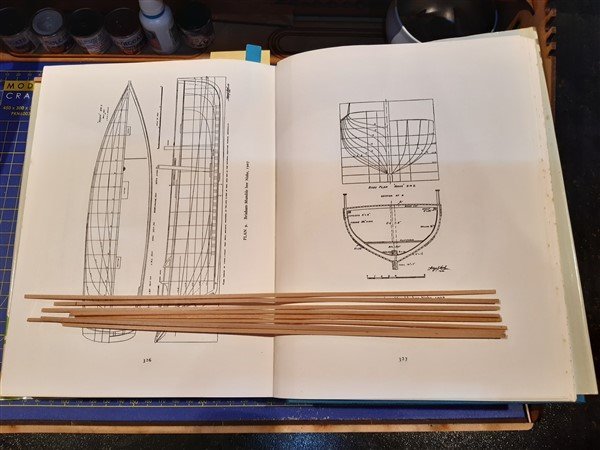
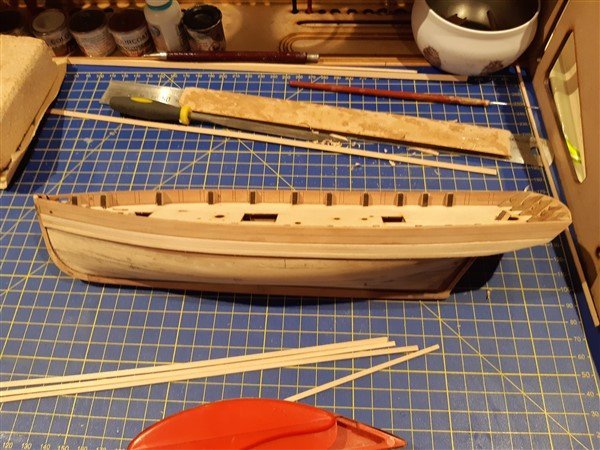
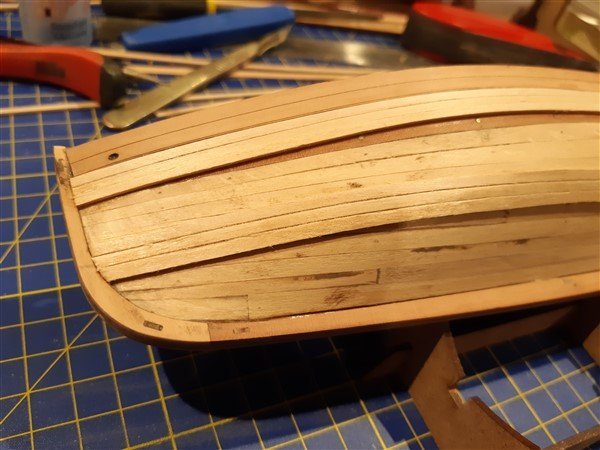
Few more updates on the planking phase on the little 'Nisha' that I have been doing in the last week or so. This is one of the areas I mentioned earlier where my copy of "Sailing Trawlers" by Edgar J. March has come in useful and led me down an uncertain path, resulting in a little bit of 'kit bashing'! 😮 Pages 325 - 327 of March provide elevations, plans and sections of the 'Nisha' and the section intriguingly showed thicker 'topside' and 'bilge' planking. So I have had a go at representing this on my build. The actual difference in thickness at 1/64 is very small, but I thought enough that it might add a bit of interest if I got it at least partially right, I'm not really going to know how it looks until I have a coat or two of primer on the hull, at which point it all might get sanded flat again 😆, but worth a go. I followed the level of the platform Chris provides in the kit for the bilge planking and the topside planking I simply started at the underside of the bulwark parts #43 & #44. I cut some strip I had into thinner widths to get as near I could to scale of the original 6" wide planks, then using Chuck's dry heat method bent them before gluing in place to avoid the edges turning over along the plank lengths. This batch of pictures show the process and the March cross section I referenced. I have just completed the second planking and initial results look okay I think, I will upload these next. Thanks for looking in.


- 206 replies
-
- 10
-
-
- Vanguard Models
- Brixham trawler
- (and 2 more)
-
Hi Will, it does look different in daylight, you certainly have got me thinking about the colour scheme for these trawler’s. I think most of them would have been quite plain looking as they were hard worked and possibly a bit scruffy. From consulting Edgar March’s “Sailing Trawlers” I think my ‘Nisha’ might be finished in plain black sides with no white ‘booting topping’ at the waterline. I do have a build log, link on my signature, or look under the ‘1900 to now’ build log category. kind regards, Andrew
- 77 replies
-
- 1
-
-
- Erycina
- Vanguard Models
- (and 1 more)
-
Hi Will, lovely looking build! 👍 Have you stained the deck? It looks darker in the last few pictures and looks darker than the 'Nisha' deck I have, just asking as I like the look of it a bit darker. 😀
-
And 'most' of the time for many of us! 😆 Keep plugging away Dave, I had similar issues with my first build (Caldercraft's HMS 'Sherbourne') a very similar Cutter to 'Lady Nelson' but what everyone is kindly saying is true, we've all done it, I have ripped planking up and copper plating before, very frustrating initially, but in the long run worth it. 👍
- 362 replies
-
- 1
-
-
- Amati
- Lady Nelson
- (and 2 more)
-
Very nice looking boat there, love the contrast between the deck and inner bulwarks, gives me something to think on with my “Nisha” 👍
-
Hi Marcus, welcome to MSW!
-
Hello James, welcome to MSW from N. Yorks.
-
Nice to see another "Nisha" up and running, good start!
- 32 replies
-
- 1
-
-
- Nisha
- Vanguard Models
- (and 1 more)
-
Accurate copper plating
AJohnson replied to allanyed's topic in Building, Framing, Planking and plating a ships hull and deck
Although I have not seen them in person I think the Amati and Vanguard copper plates have a far more refined appearance than the Caldercraft “dimples” which I have used and won’t be using again. Hopefully someone on MSW has samples of them to show compared to other makes mentioned.


