


AJohnson
-
Posts
2,053 -
Joined
-
Last visited
Content Type
Profiles
Forums
Gallery
Events
Everything posted by AJohnson
-
 Good fix with the little shim, I found that on 'Nisha' also when doing the first planking - and you got the stern counter on without splitting it in two like me! 👏 😆
 -
I don't blame you Chris, those ones you have done look super, I can only imagine trying to roll and bend card into those intricate shapes! Hope the glue supplies are in stock for you. 👍
-
That desk is a testament to your industry! 😁 Or you could claim you are "trendy" and have upcycled some distressed furniture, very "in vogue" nowadays. 😆 Btw. you should see my workbench! 🤐
-
Theme display
AJohnson replied to Blue Ensign's topic in Using the MSW forum - **NO MODELING CONTENT IN THIS SUB-FORUM**
I Like the new look! 👍 -
Regarding leaking paint from under masking tape, one little trick I use sometimes if the subsurface is a bit uneven (like most wood strip!) is to run a light coat of Matt varnish along the edge before you paint, this will help seal the edge hopefully against paint ‘wicking’ along wood grain etc. Also be careful if comparing your build to the plans, the plans for my “Nisha” had been unintentionally reduced by 15%, not sure if that is the case with the Lady Eleanor plans.
- 42 replies
-
- 2
-

-
- vanguard models
- lady eleanor
- (and 3 more)
-
Well it would be rude not to pull up a chair! 🍿
-
That looks lovely Dan, well done, those rubbing strakes look nice and parallel, as to the positioning and the holes that you needed to cut out for they don't look bad at all. All part of the learning curve. As for C-A, yes it can be unforgiving, it will destroy most paints and undercoats, it doesn't adhere too well to paint anyway, so I usually scrape away down to the underlying wood/metal for gluing, fiddly process and yes get plenty of C-A smears where I don't want them. A small applicator is good for applying C-A, I use an old needle where the eye has been cut in half and dip that into a drop of C-A I put the needle point first into an old paintbrush handle to hold it.
- 42 replies
-
- 3
-
-
- vanguard models
- lady eleanor
- (and 3 more)
-
Welcome to MSW Alex, looking forward to seeing your “Pickle” log when you get up and running. 👋
-
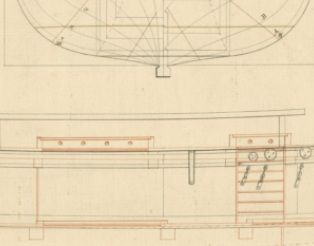
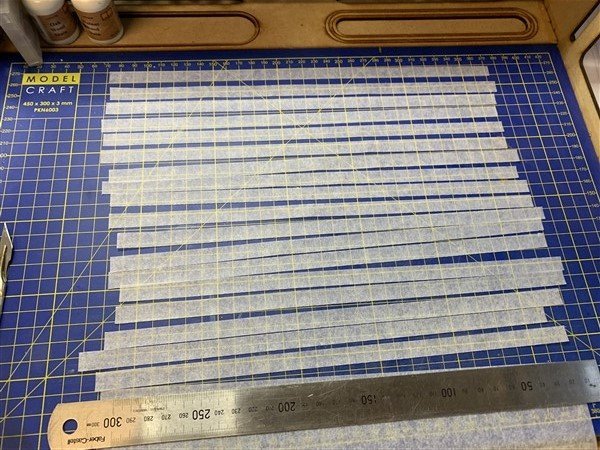
The sails have progressed better than I had hoped, I got into something of a 'production line' mentality and tackled one edge of each sail at a time, first gluing on the edge strip of a side for each sail, then letting those dry, then iron them in place, then onto the next edge and so on around each sail. Next I temporarily glued the edge wire in place with C-A, again tackling one edge on one sail at a time. Then the same for folding over and gluing the edge strip to trap the wire, then ironing to seal and flatten each edge. Really enjoyed the process actually, time just flew past, very Zen. ☺️ Without getting ahead of myself (I haven't yet got them rigged onto the model!) I am daring to dream I might be able to add sails like these onto my "Bounty" build! 😲 Next step is give these sails a 'rusty red' spray tan. I'm also considering what to do about the bolt ropes, if anything. Not sure I'm up for trying to sew something on, maybe I could glue some thread on the edges, or perhaps at 1/64 scale just paint the edges hemp/tan colour to simulate the bolt rope, or ignore it all together. Not sure yet, my prototype sail may serve yet for one last experiment on this question... Until next time, thanks for looking in.
- 206 replies
-
- 14
-
-

-
- Vanguard Models
- Brixham trawler
- (and 2 more)
-
They were an actual feature on HMAV Bounty (see extract from the Admiralty plans) and they are on my Bounty by Caldercraft. As they are drawn in RED along with the shelves for all the plant pots we can safely assume they were added for a reason when the RN purchased "Bethia" for her transformation into "Bounty" and her voyage to collect Breadfruit plants, the air scuttles above the great cabin being another addition. I assume the botanists advising the Admiralty suggested that adequate ventilation and water/light (the additional "skylights" Bligh mentions in his log and the lead lined cabin for the plants) were needed to successfully transport live plants instead of seeds? So Trond is right to have these holes, but as to if they were lined with brass/bronze, open or glazed I have no idea. Or how if open they were made water tight in stormy weather; perhaps battened tarpaulins? Great progress Trond, keep at it! 👏
-
Absolutely, love those late Victorian warship lines, Ram bows and tall skinny funnels. Reminds me of the front cover of Jeff Wayne’s Musical album cover “War of the Worlds” with the valiant HMS Thunderchild taking on the Martians. 😁
-
Morning Dave, as a general rule paint and glue are not good friends. The paint acts as a barrier often and the glue has nothing to adhere or fuse into, to make a bond. Also some glues will eat into paints and cause them to wrinkle (though that is more a problem for plastic and weld type glues.) So your initial comments are correct, glue before paint where you can and mask everything else where you can’t (unless you have a a really steady hand - I don’t ☹️) I often paint small parts first, then have to scrape the paint off in the contact surfaces to apply to a model. Hard work sometimes and yes I often (okay very often) have to do local “touch-up” painting. You are not alone in this Dave, but it just one of the little challenges of model making, really don’t think that there is a short cut.
-
Just beautiful Keith, lovely detailing. 👏 I have soft spot for this era, the Screw Corvettes and pre-Dreadnaught warships that were a hybrid of Sail and Steam, they look so interesting to me. I have an ambition to build a series of models based around a RN ship (with a slight family history) that has had five incarnations from Sailing sloop to Screw Corvette, Protected Cruiser, WW2 light cruiser and finally a modern Frigate. Your log giving me the idea of doing a scratch build for the Screw Corvette one. 🤔
-
A lovely sense of achievement isn't it when you have the second planking done! Are you going to paint the good Lady Eleanor, or leave her with the natural planking showing above the waterline? Just mentioning that for the colour of the wood filler above the waterline. Great progress. 👏
- 42 replies
-
- 3
-
-
- vanguard models
- lady eleanor
- (and 3 more)
-
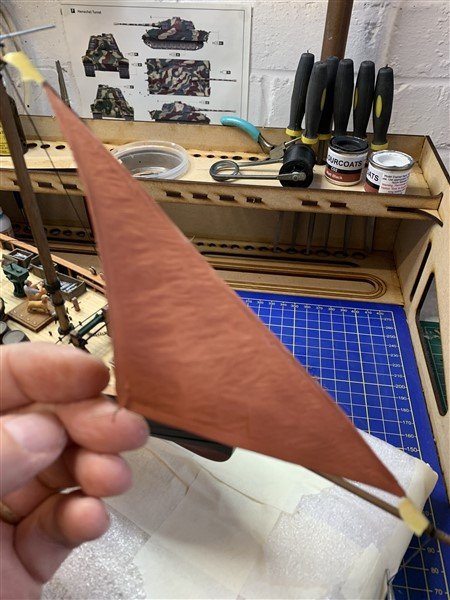
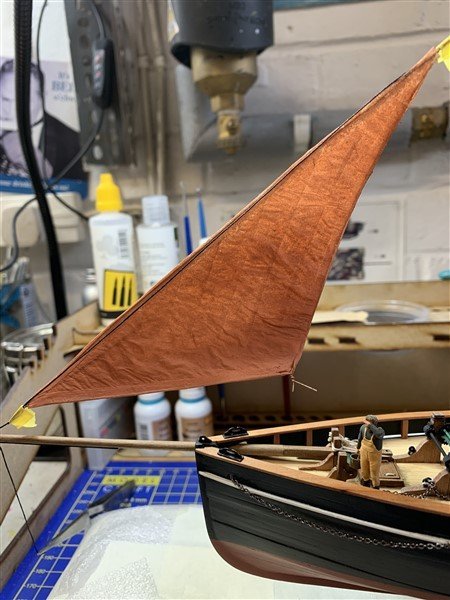
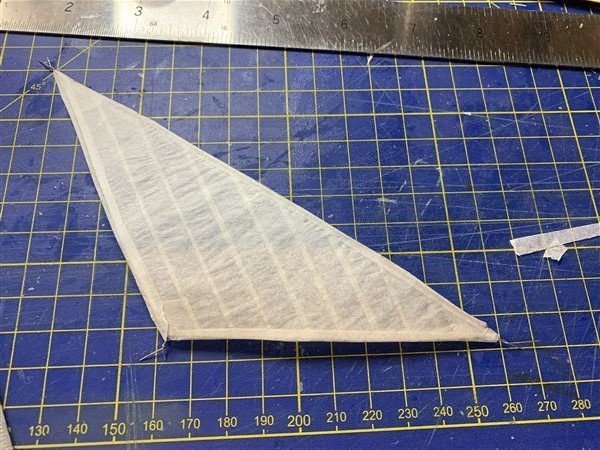
Progress update on the sails this evening. As mentioned earlier the prototype sail, was not what I wanted for the final model but was good enough to carry on to experiment with airbrush painting to see how it would come out. I mixed some old enamels I have for plastic aircraft modelling to something I hoped would look like the classic "Trawler red/brown" sails found on those craft. I sprayed of several light and fairly dry coats so as not to soak the paper and cause even more wrinkles. Quiet happy with the results so far. Now gone on to what I hope will be the final sails that I'll attach to the "Nisha", having messed about with dilute PVA glue and spray glue; the first causes too mush wrinkling of the paper and the second is well just too messy! I settled on using glue sticks! Those of you with kids, go raid their art supplies as it worked! 😂 I didn't mention in my previous post that I am using baking parchment paper and this has a slight sheen, so I needed to apply glue to both the backing template and the thin strips that I cut. But this slightly shiny surface means I had chance to position each strip before it grabbed for good. To make sure of a good fix I then iron each sail between two sheets of cartridge paper. As I am cheating a bit and only applying 'panels' to one side of the sails; to keep them as thin as possible, I am applying the reinforcement corner patches and luff reinforcement bands etc on the opposite side so that side also has some textural interest to it and relying on the still semi translucent appearance for the panel bands to show through when the lighting conditions allow. Edgar Marsh shows "Nisha" with two reef bands on the main sail and one on the foresail (but admit I have no idea how to rig that!) so I will add these, so next update will hopefully have those and the wire edging done. Thanks all for continuing to follow and comment/like.

- 206 replies
-
- 12
-
-
- Vanguard Models
- Brixham trawler
- (and 2 more)
-
Phew, thought I had missed your log. Well when you have finished your "Nisha" put some pictures up in the "Finished Gallery" if you have chance, so we can all have a look! 😁
- 206 replies
-
- 2
-
-
- Vanguard Models
- Brixham trawler
- (and 2 more)
-
That is a lovely looking model Craig, did you do a build log I have missed, I usually hunt out the Vanguard trawler builds, you have slipped under the radar!
- 206 replies
-
- 1
-

-
- Vanguard Models
- Brixham trawler
- (and 2 more)
-
Hi Brian, how’s your Granado build going, have you attached any of the details you have been painting? The stern decorations looks nicely detailed, good painting 👍
-
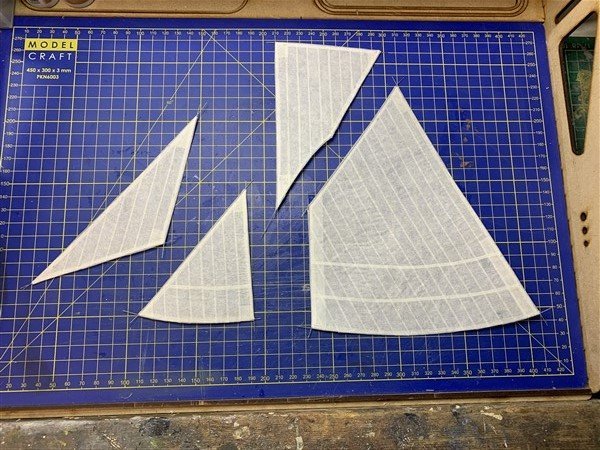
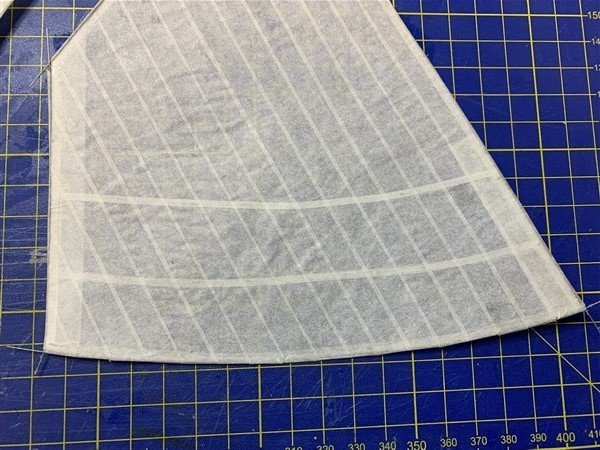
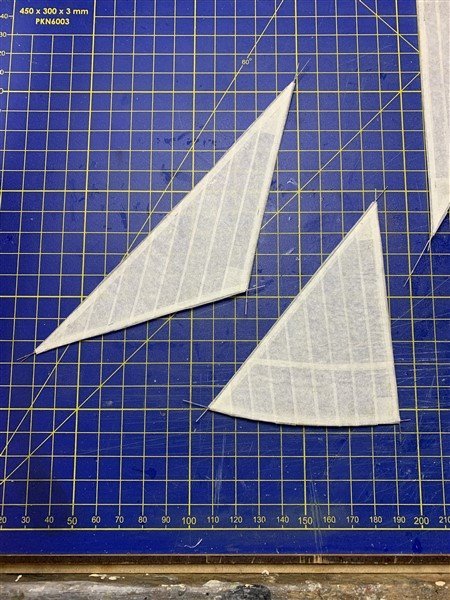
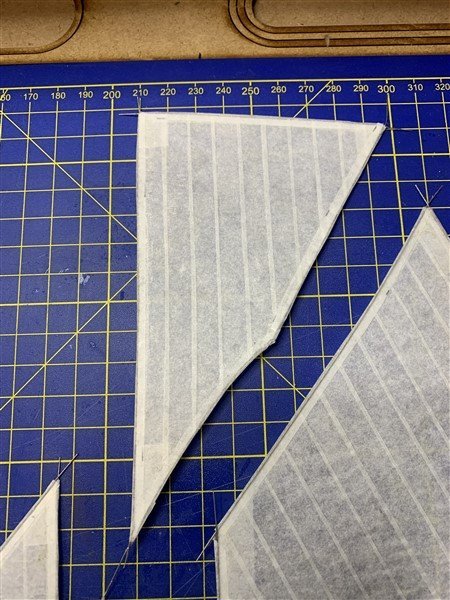
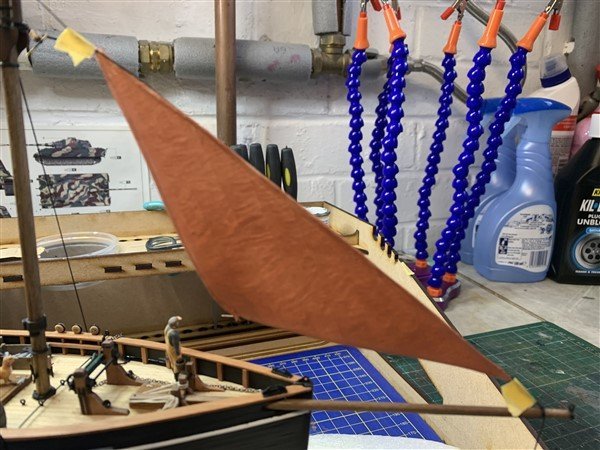
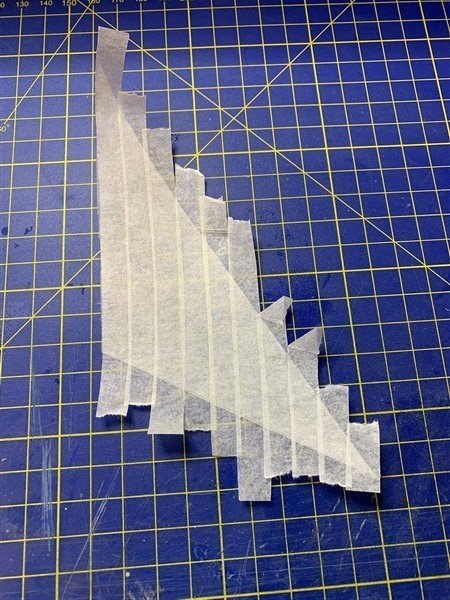
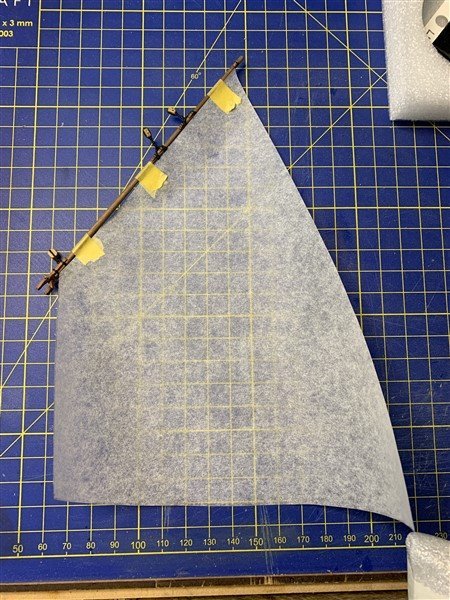
Small update of progress so far making some sails, pictures below of my prototype. I am following in the footsteps of some master sail makers here on MSW using paper, and shamelessly copying them! 😆 I Started out by cutting a backing template and then gluing strips onto this to simulate sail panels and corner reinforcements using dilute PVA. Next I glued edging strips to wrap around some thin wire; this wire was spun in a drill to make it straight and stiffer than off the spool. The lessons learned so far is that I think a spray on glue, like board-mount/photograph mounting spray, might be better as the thin paper might wrinkle less - I will try this next. Also getting the wire to stay still is a challenge as you try to trap it with the edge strip, so I am going to apply a few dabs of C-A to hold it first. This sail is not going on the model, a few too many mistakes on it (a bit rough in places), but I wasn't entirely surprised as it is my first sail. But it won't be wasted, as I will use it to experiment with spraying paint on it. I'm going to try thin light coats to see if I can preserve some of the paper translucence, even with the brown/red colouring I intend to use. I was pleased the thin wire does hold a nice "blown" shape in the sail when gently bent into a curve. More instalments soon. Also thinking of adding a Trawl beam and frames, maybe even the net! But thinking on that, whilst tinkering with sails.

- 206 replies
-
- 9
-
-
- Vanguard Models
- Brixham trawler
- (and 2 more)
-
Don't worry Andy I broke those as well initially, good job there was a spare! 🤐 It s a nice touch that Chris provides spares for the little PE and smallest wood parts. He must be well aware of the voracious appetite of the "Carpet Monster" 😆 Or our collective incompetence - one of the two anyway! 🤣 Good progress again Andy, I hope to get back to my Nisha soon, been off it a bit recently, but have been reading Edgar Marsh's book on trawlers, which is a dangerous thing it keeps pointing out things I could add if my skills allow!
- 32 replies
-
- 4
-
-
- Nisha
- Vanguard Models
- (and 1 more)
-
Hi Andy, thanks, yes the colours are my own choices, though based on other contemporary models and details that mention common colours, red and plain black also options for the steam winches and dummy posts. The overall black hull seems to have been the most common appearance based upon the reference book by Edgar Marsh I’m using, but that doesn’t mean all were that. Depends if you want to see the natural wood planking, some greens and cream colours were used but less common.
- 206 replies
-
- 2
-
-
- Vanguard Models
- Brixham trawler
- (and 2 more)
-
Hi Dave, Vanguard do have optional Sail sets for their models. I am just trying out various "paper" types as an experiment, as there are some wonderful examples on MSW that look stunning. My first attempt using model a/c. tissue did not go well, think a bit too thin, so moving on to parchment now. If all fails I can get a sail set from Chris. 👍
-
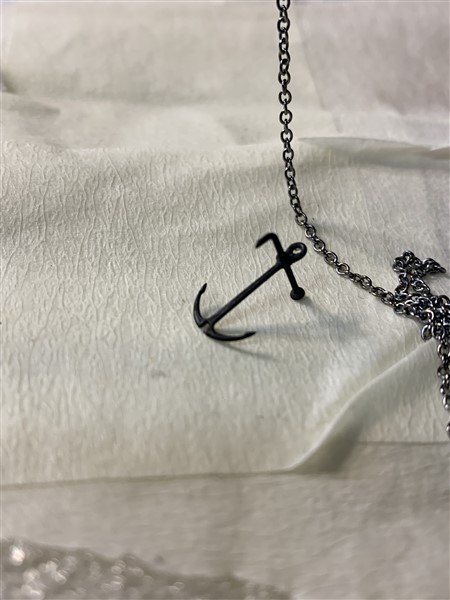
Quick question to those more knowledgeable than me on such matters:- the anchor chain from it emerging out of the chain pipe, in the Marsh reference sketches appears to go down the side of the winch; where there is a ring bolt stated to be for "anchor lashing", then out to the anchor. A/. - Would the chain go around the winch whelps - or was this just used for the trawling gear? I assumed so as a chain would damage a timber winch? B/. - The anchor lashing, is that to the chain or the anchor? It is just of all the reference pictures in Marsh, the anchor when visible tends to be near the bulwarks, I assume lashed somehow to a bulwark stanchion. Also a few pictures show the anchor cable draped on the outside of the hull, I assume this was only the case when the anchor was about to be used -it looks good and workman like, but would have thought this would damage hull paint etc. pretty quickly! Made myself an anchor from a bent pin, eyelet and spare larger boat grapnel. Also finished stropping blocks to the gaff and made a template main sail. Thanks all for your continued comment/likes and following along. 😄

- 206 replies
-
- 7
-
-
- Vanguard Models
- Brixham trawler
- (and 2 more)