

Robp1025
-
Posts
259 -
Joined
-
Last visited
Content Type
Profiles
Forums
Gallery
Events
Posts posted by Robp1025
-
-
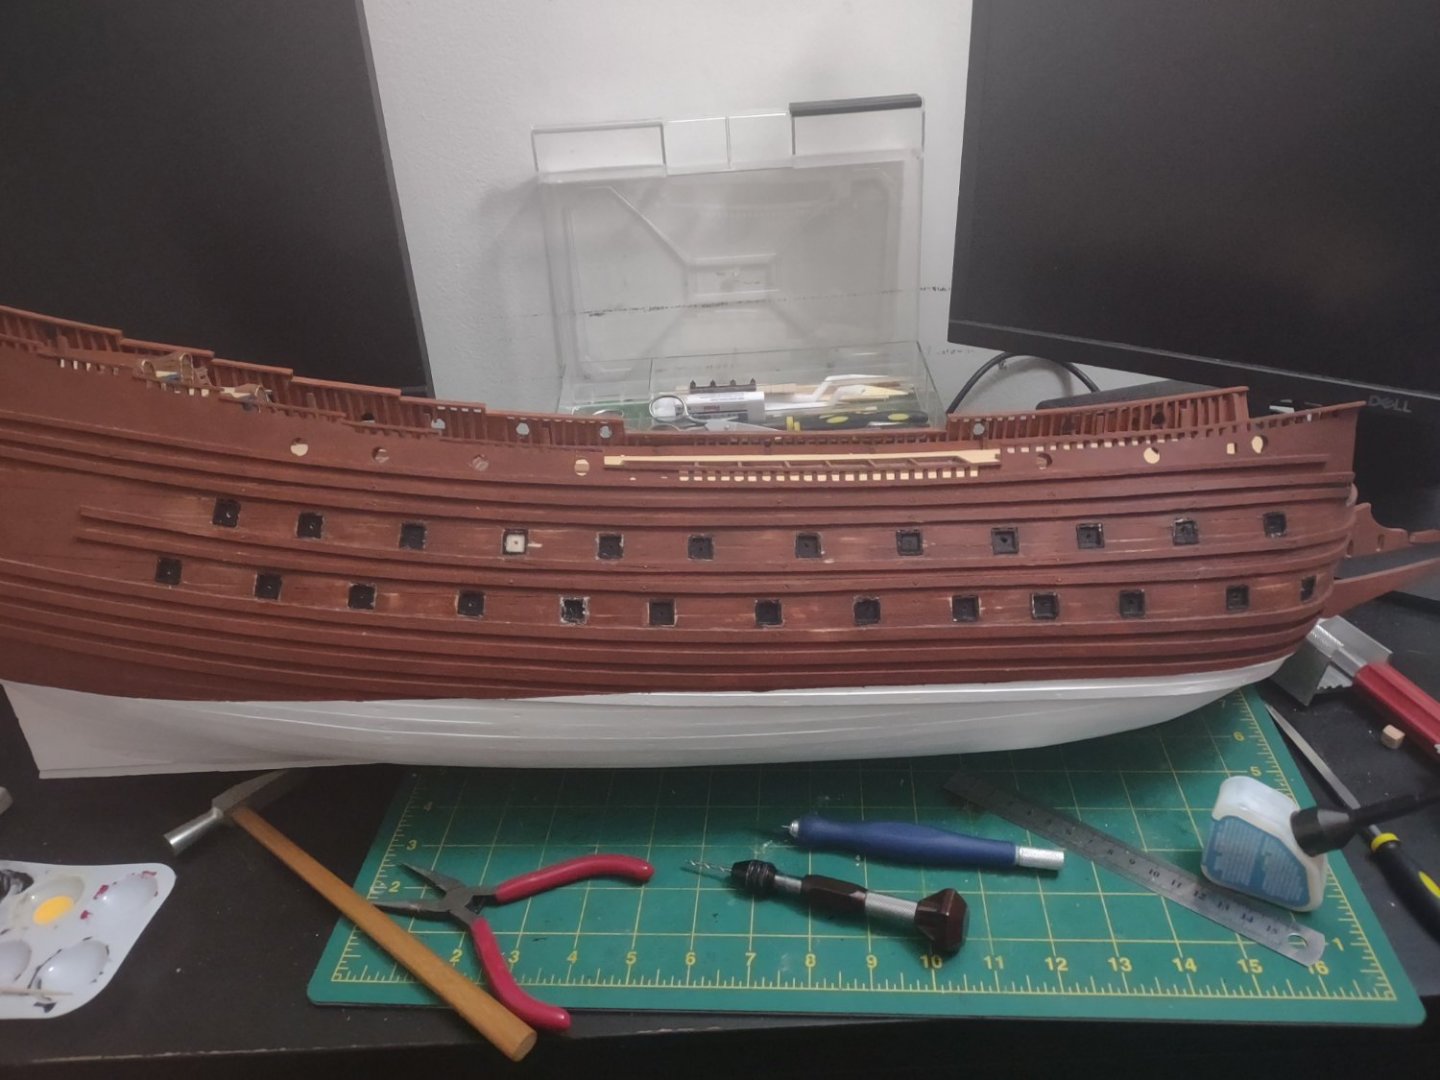
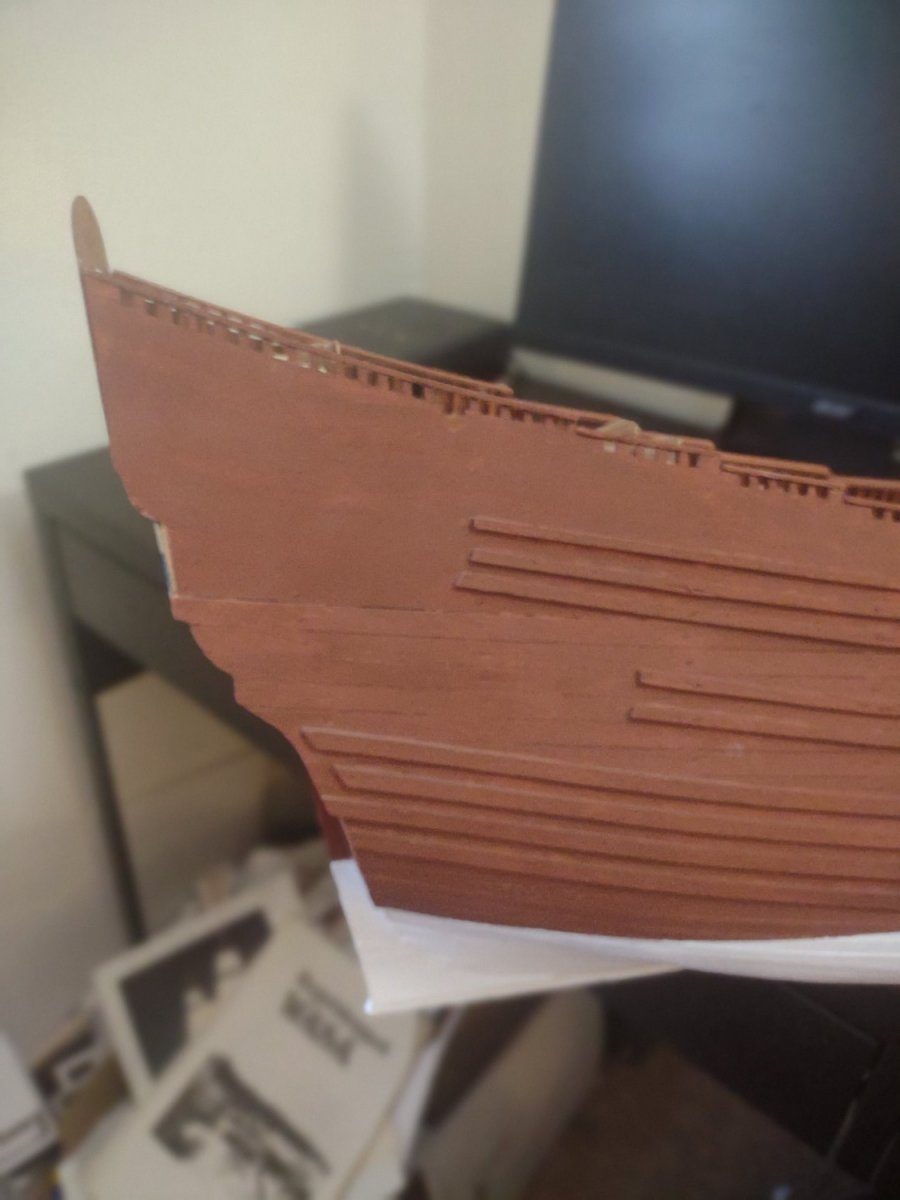
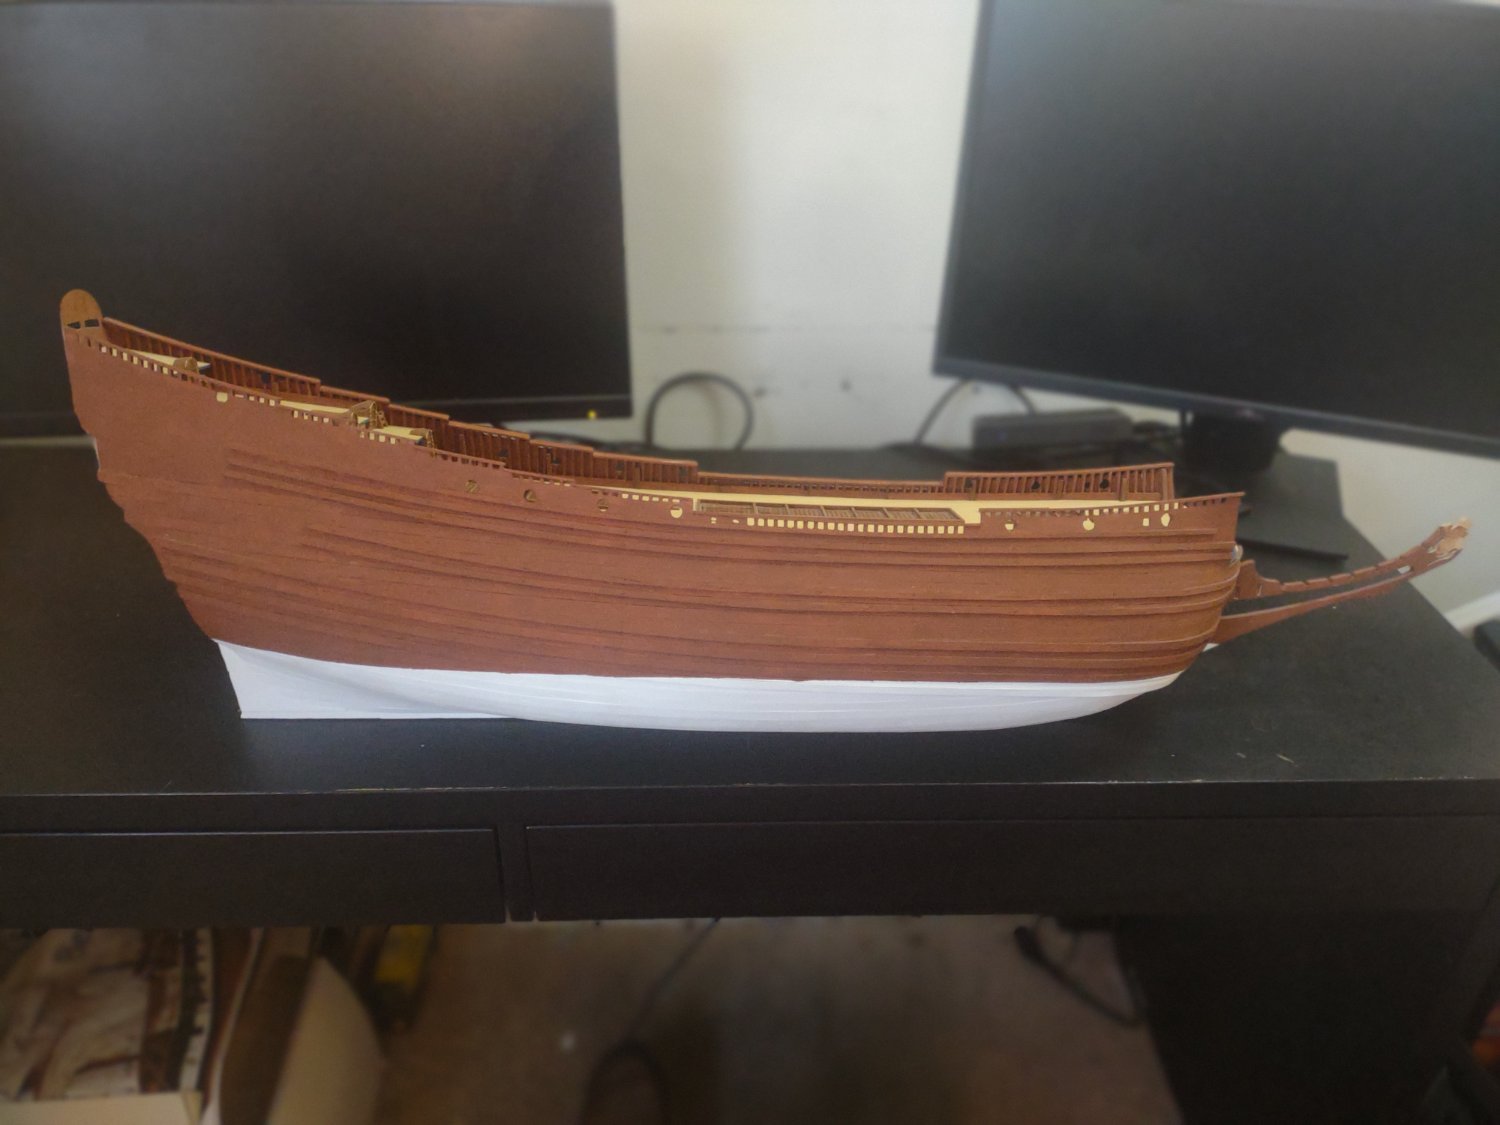
So one side complete beside a matte coat and some touch up on n the black, but I feel like I got what I was going for. One more side to do then it's off to the races with working on the intricate poop deck and captains quarters and all.


- Ian_Grant, Wintergreen, Keith Black and 2 others
-
 5
5
-
Dean you are doing a fine job for sure!! It's not about if you do it better than anyone but that you enjoy yourself and learn every step of the way. I only have done 1 build (cept the fact that I have like 6 lines to run of rigging then I'm done but waiting patiently on the rope to be sent out) I made lots of mistakes but always will be striving to do better on each build. Keep up the amazing work!!
- The Gimps Chimp and Dean77
-
2
-
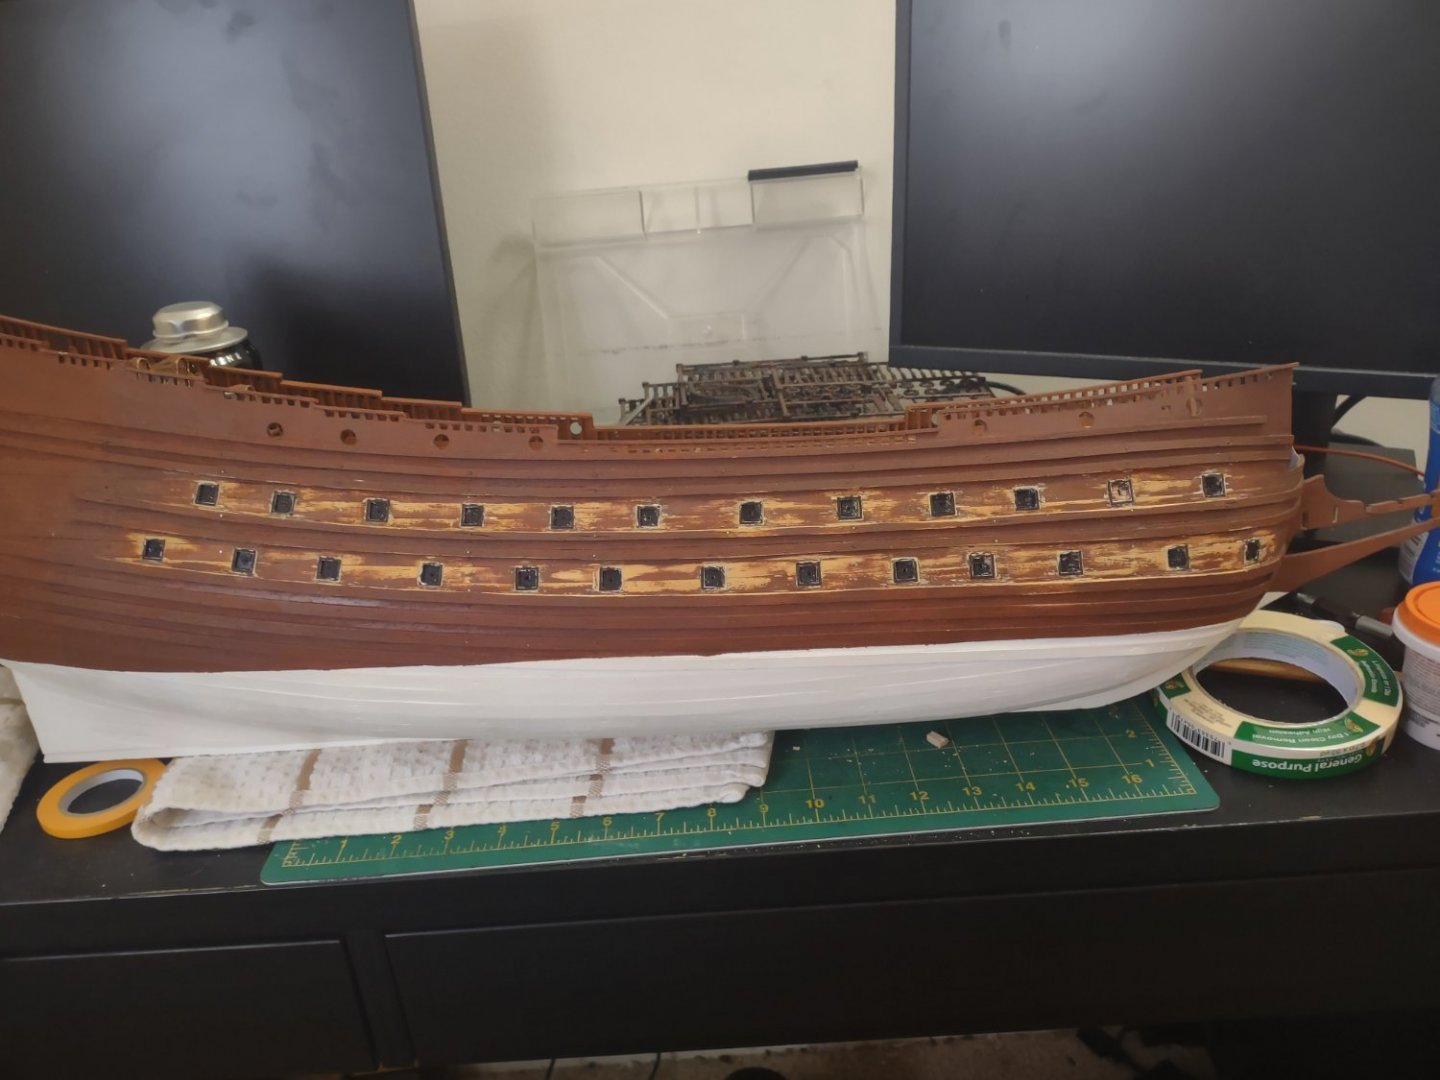
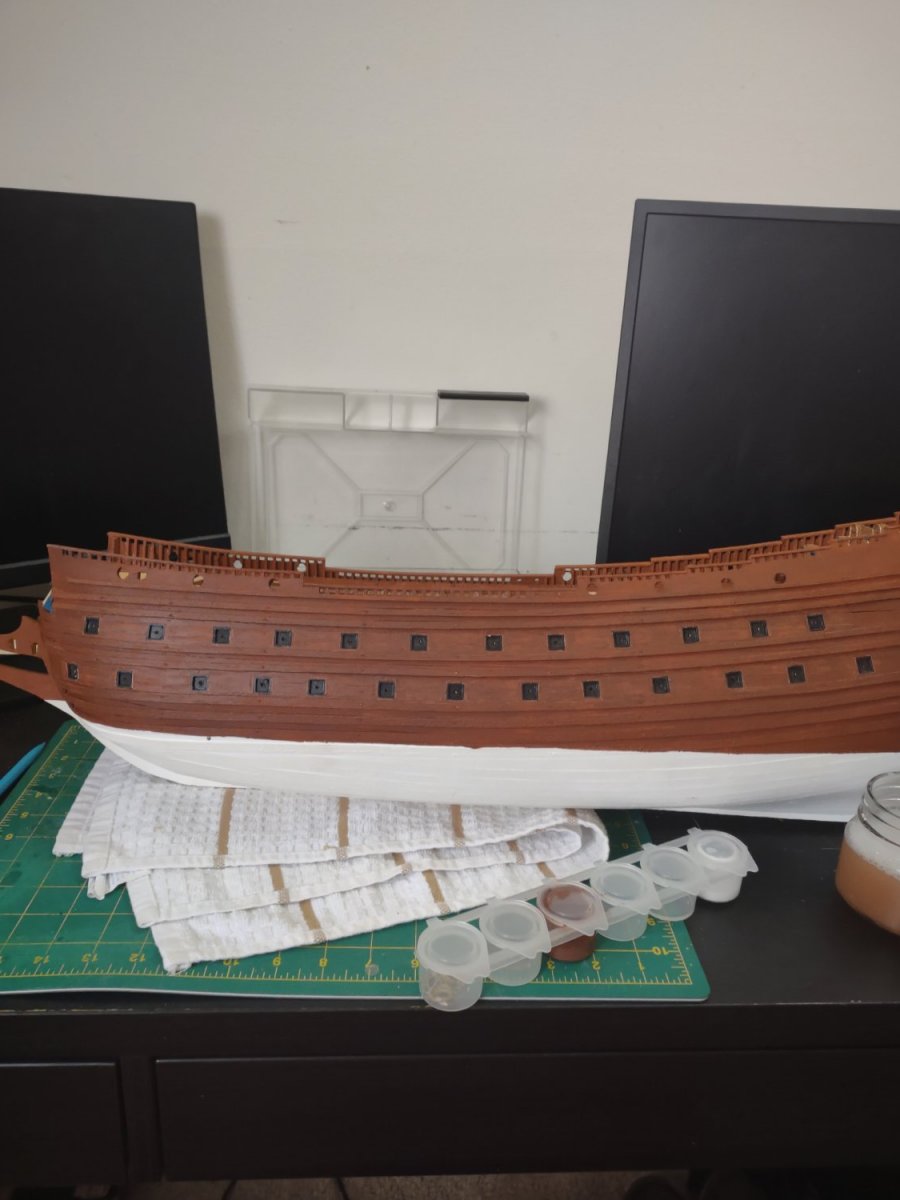
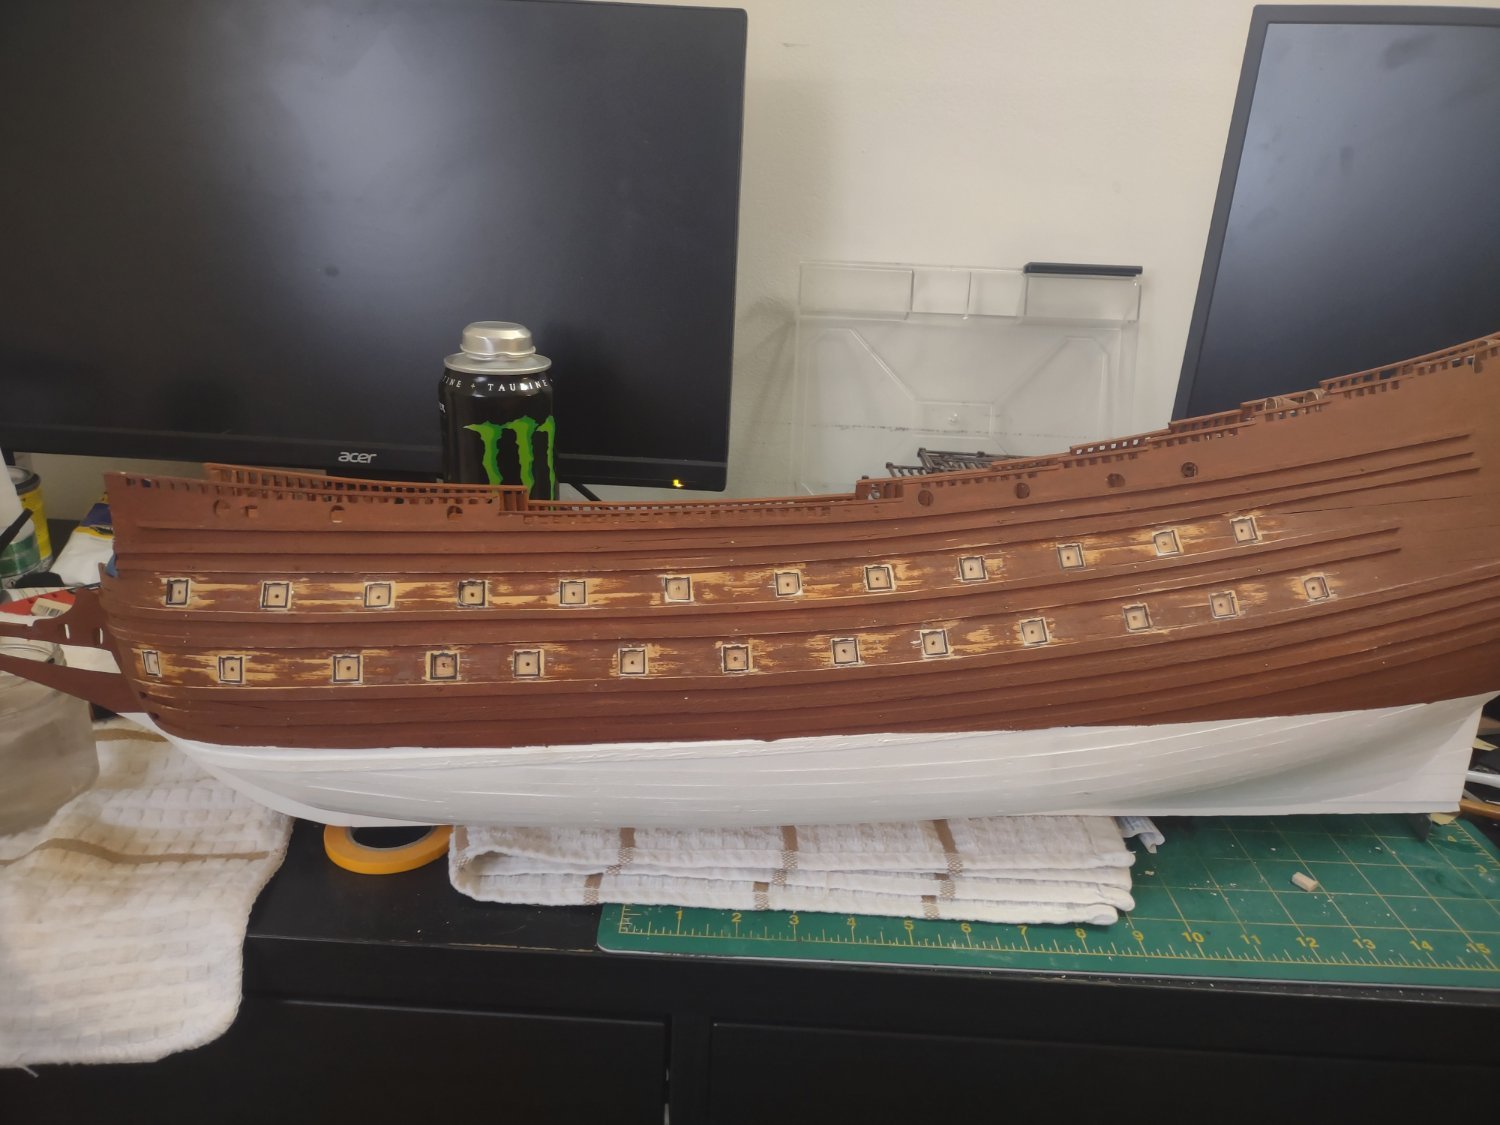
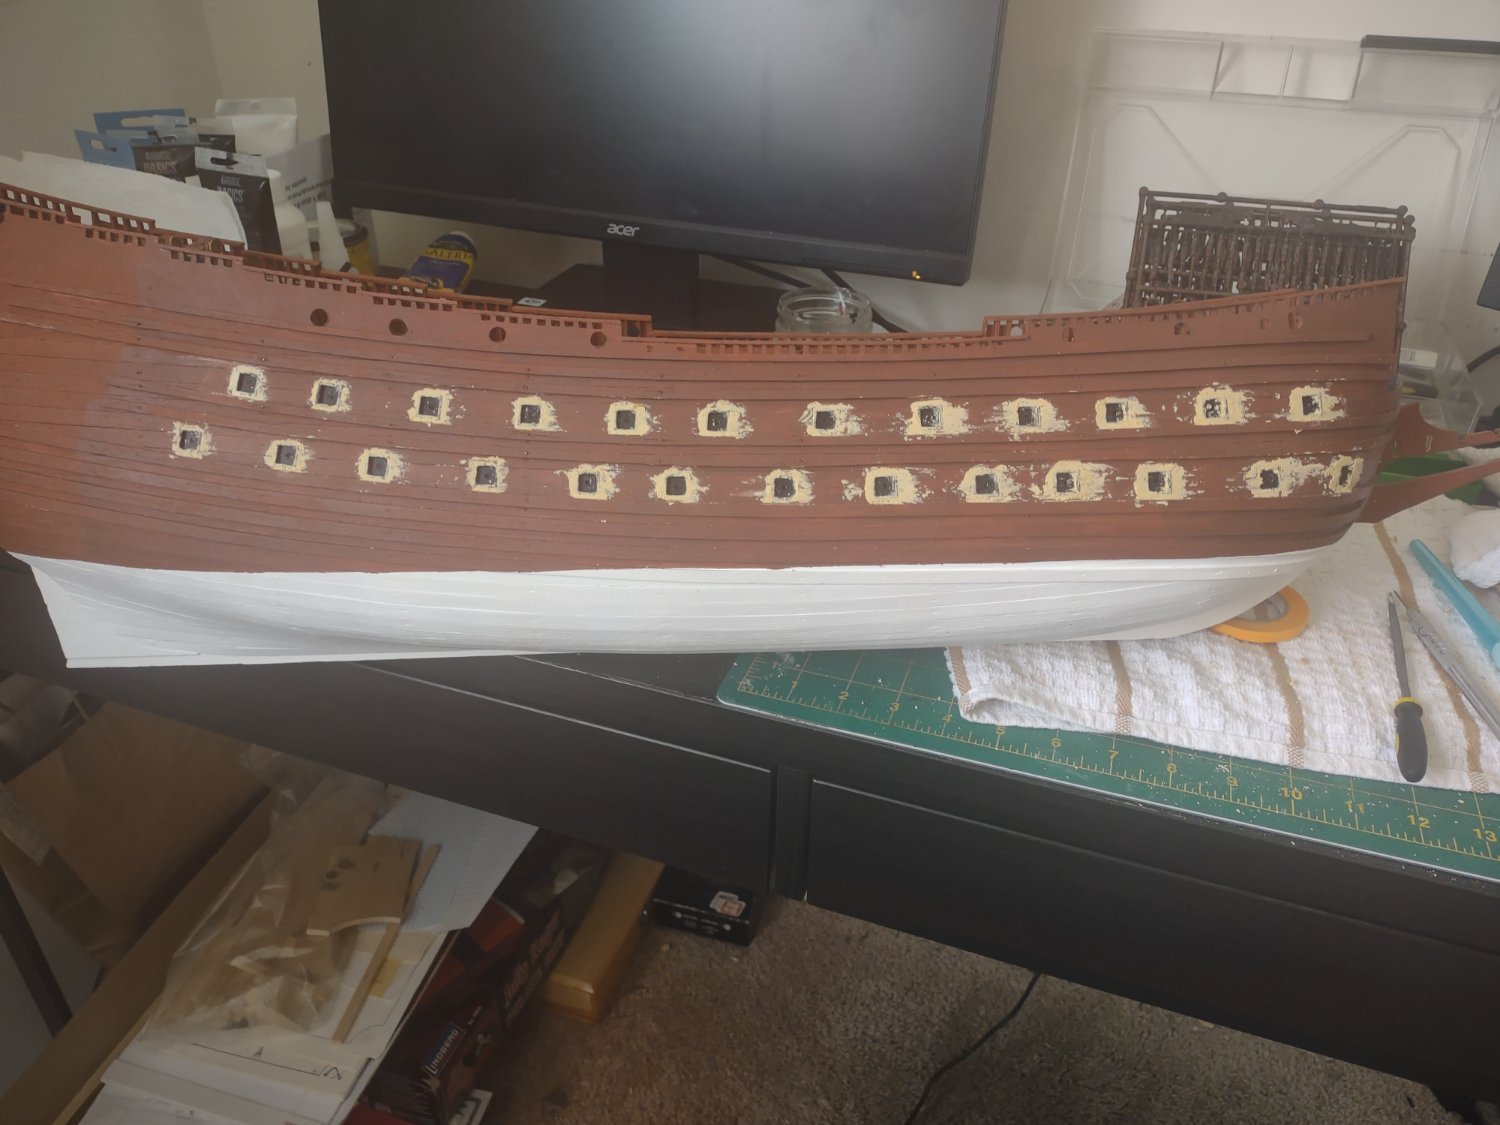
Alright and now both sides are ready for some paint after they dry up from the water wash. Looks beat up because of the sanding but I'm trusting the process lol. For sure feeling a lot better about the whole process so far. One thing I have noticed is that I am missing one frame for the cannons. So I'm going to make two for the back so they look symmetrical and just live with it. I did counts before so it's on me because I had 52 at the start of the cannon project.

- Wintergreen, Keith Black, Baker and 1 other
-
4
-
Because of how the other side came out so nice I was too convicted about the "ok" job I did on the other side that I decided we are going to attack that side with a better method lol..... So yea going backwards but tis the life of modellers....
Could I have left that side. Sure I could have... But I couldn't look at that for this whole build process and be ok with it. So if I got to go backwards then backwards I go.
- GrandpaPhil, Baker and Keith Black
-
3
-
2 hours ago, Baker said:
Not sure if you've found this site yet. But there is a lot of information to be found
http://www.wasadream.com/Index/indexenglish.html
Yes I have seen this site and also some more info as well thanks to posts from past builds. But thank you for sharing it I appreciate that!
-
4 hours ago, Wintergreen said:
Looks good Rob!
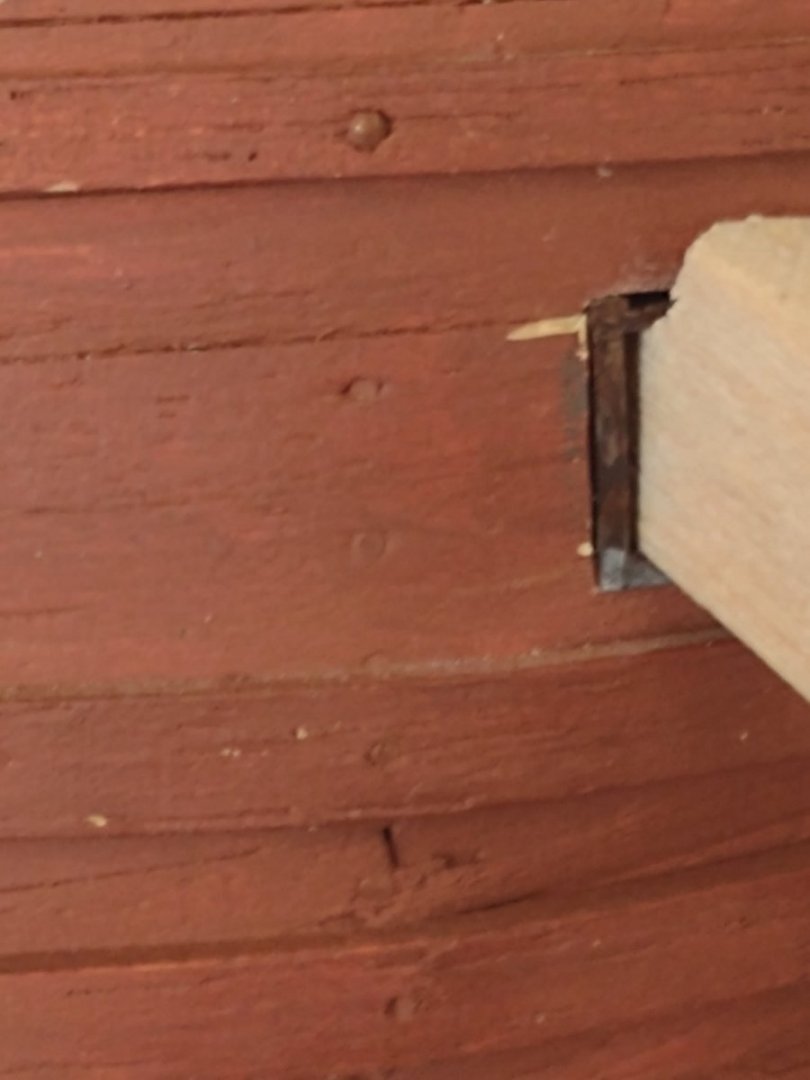
What are your thoughts about the nails used to pin the outer strakes?
When I bought my Wasa I did the same, nailing and then leaving them in. But now, I would try to remove them if I have a go at a refurbish of my old build.
Keep it up!
So if I was to remove the nails it would create a lot of issues because I don't think wood glue was used to hold these planks in place so I think I will leave mine in plus it adds a little realism to it I think.
-
So I got some progress on the other side. I am liking this a lot better do I might copy this sanding on the other side. I am going to work on painting and getting her in shape. Nice flat surface and equal to the other side as well.

- Baker, GrandpaPhil, Keith Black and 3 others
-
6
-
4 hours ago, DonSangria said:
Yes, the hammocks... I don't like them in this kit. Since it is my first build, I realized too late, that these should depict hammocks. For me it was just a decoration of the bulwarks. It is too late to change, since I'm in the process of rigging.
Yes I agree with you I wish I could have done more with the hammocks as well but I only learned after doing research and being further on the build then it at point.
-
-
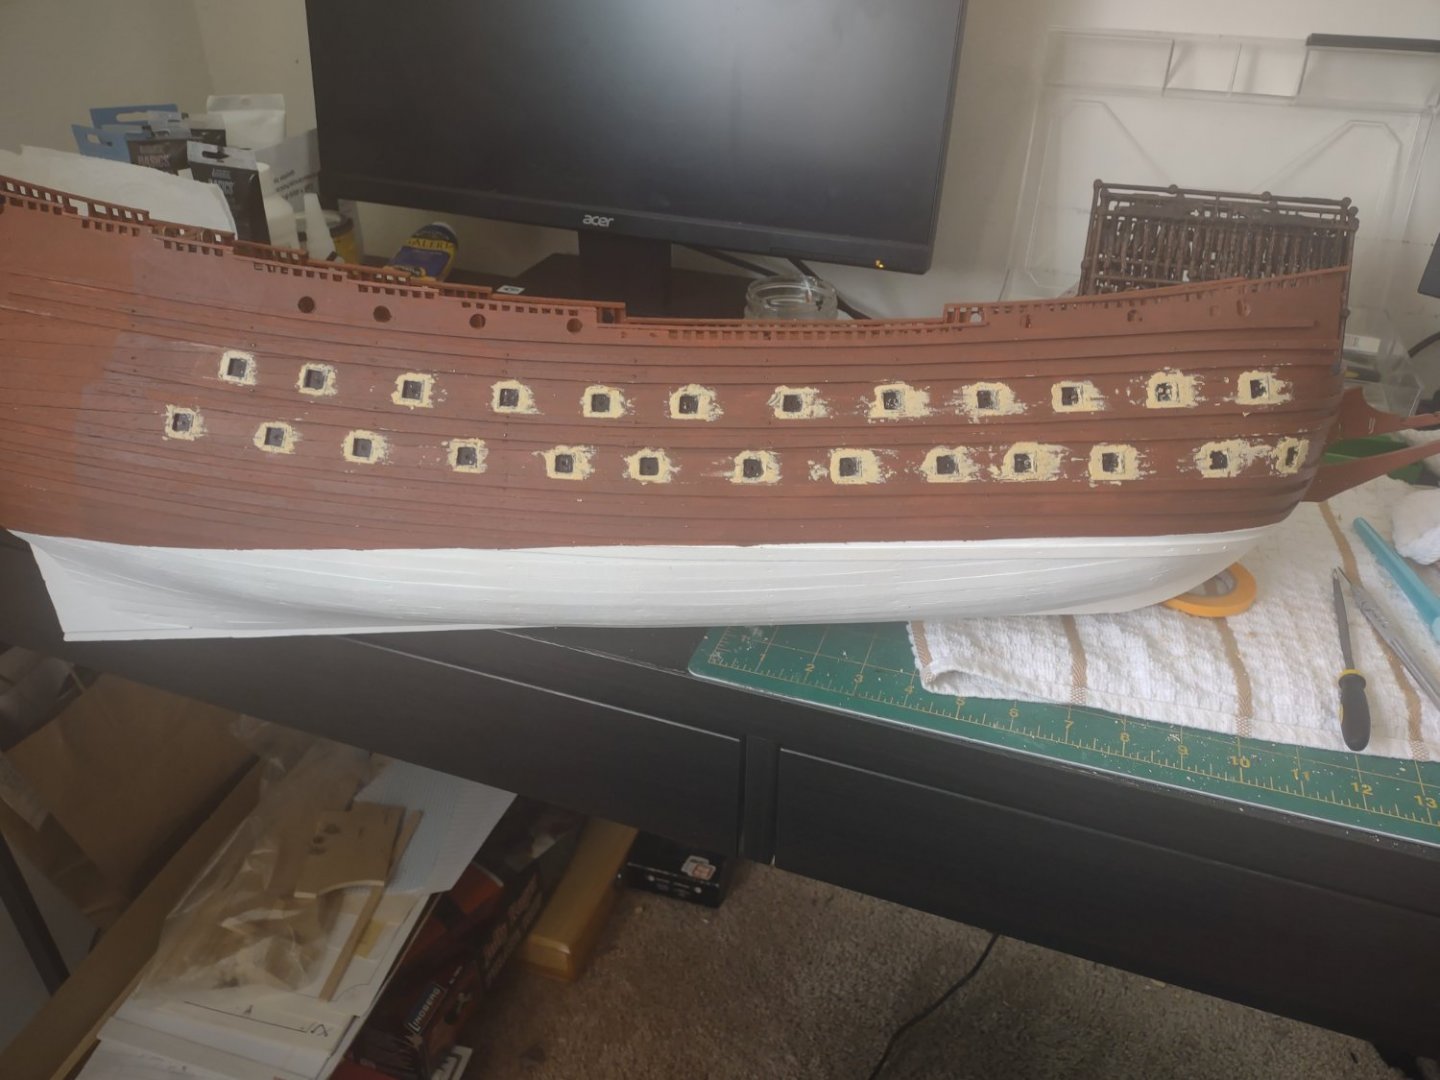
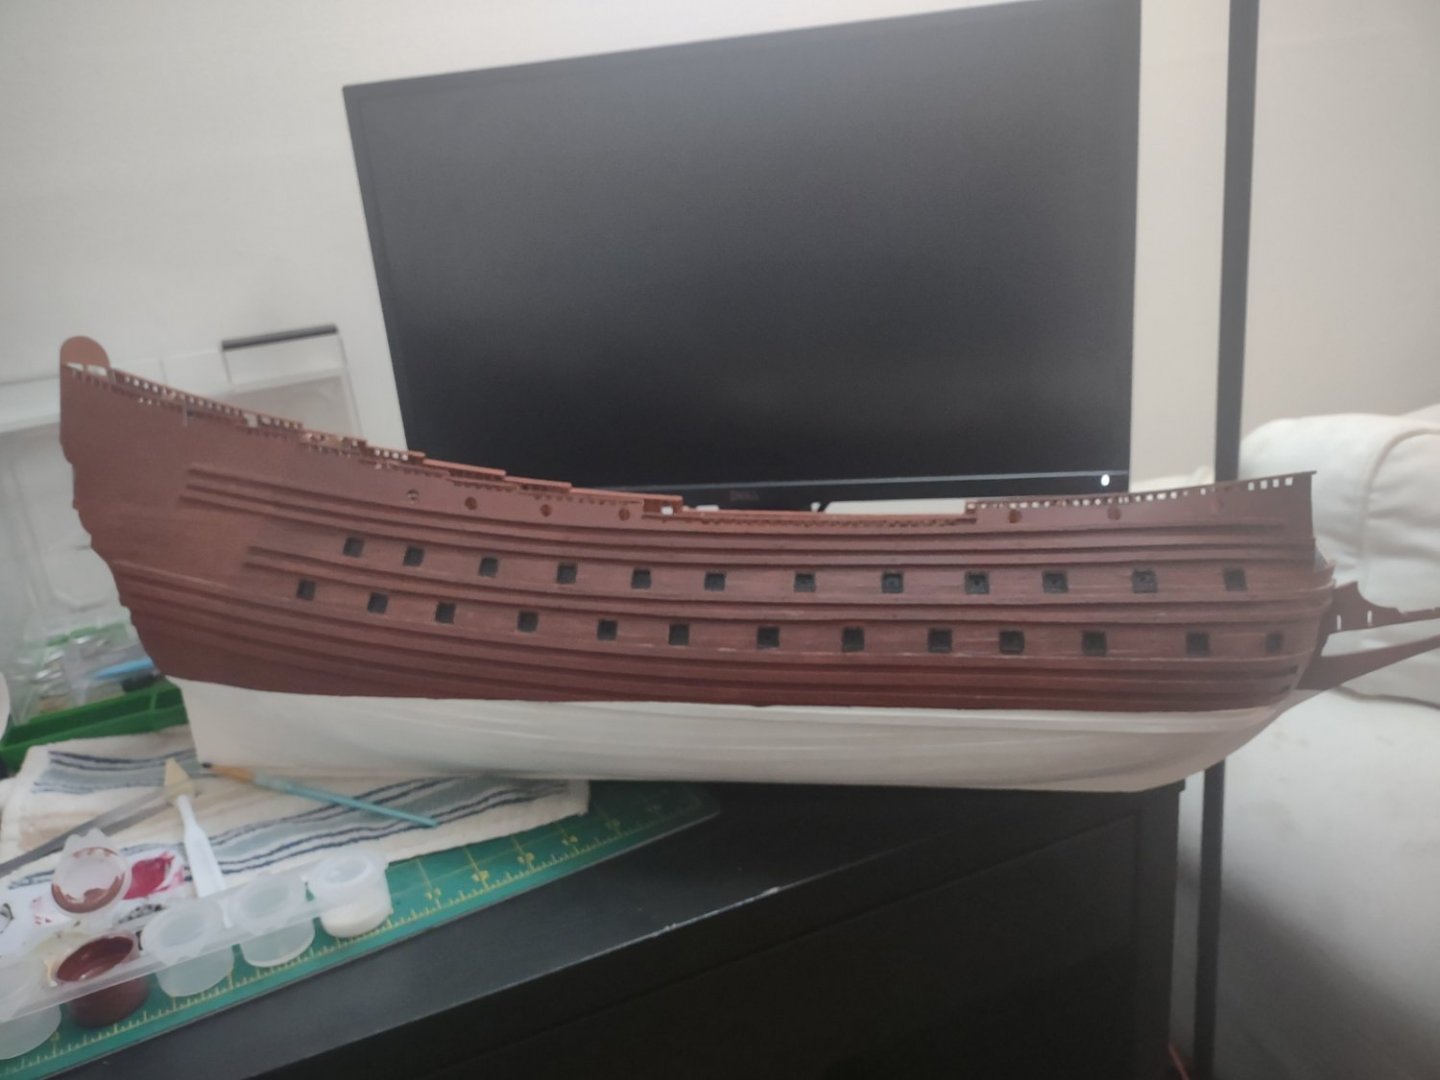
Alright so cleaned up and good for this side now on to the next side but feeling better about all this for the most part.

- Keith Black, GrandpaPhil, Ian_Grant and 1 other
-
4
-
If you have not I would drill out the hole for the bowsprit now before painting because it's messing if you have painted already.
-
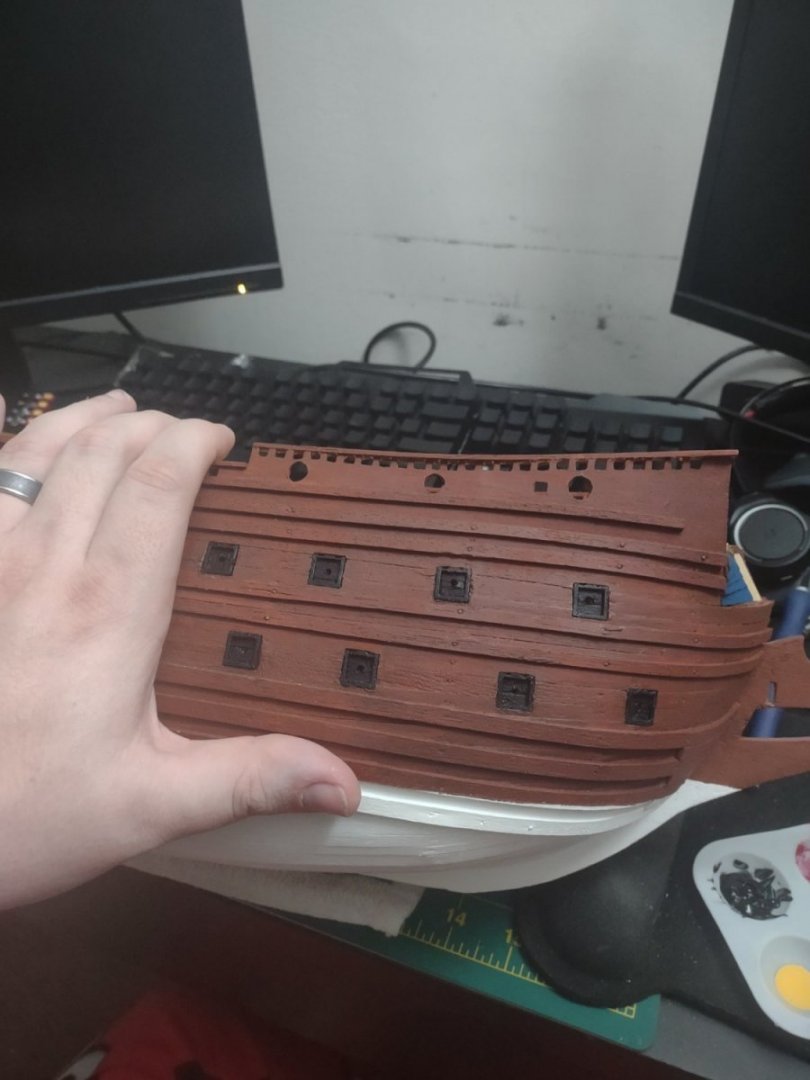
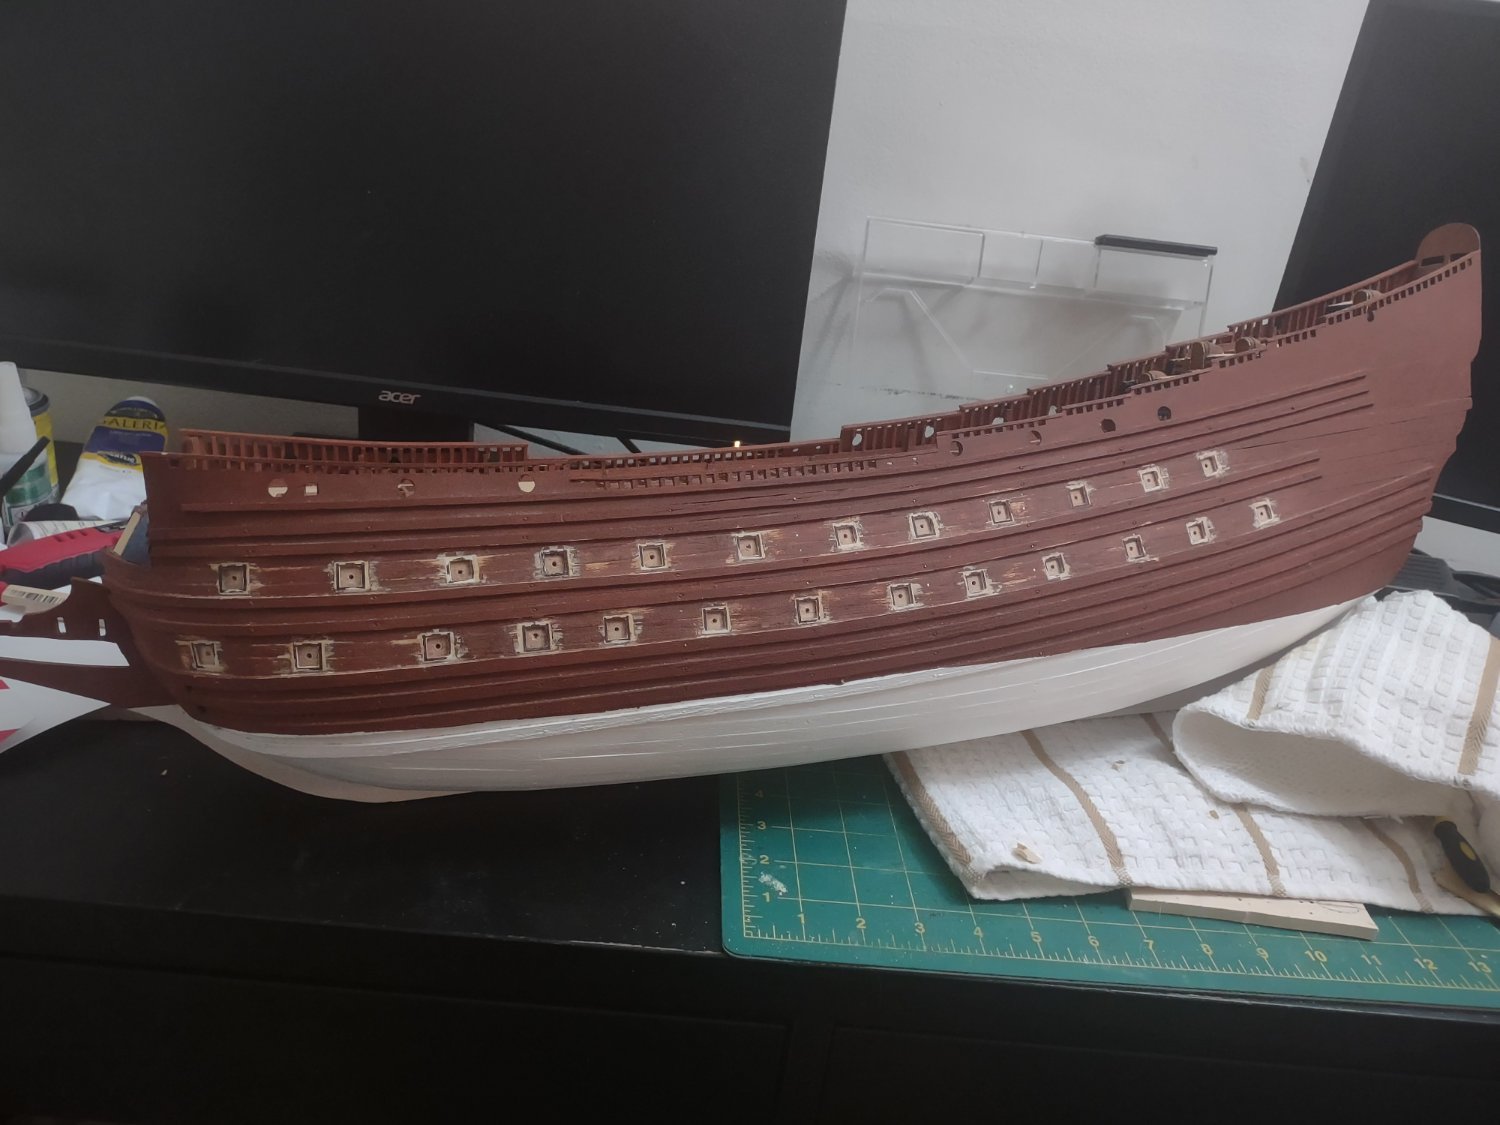
Alright so I wasted a lot time doing steps that I did not need to do yet and then struggled because of the fact that this is a single planking. I'm only posting this because of the fact that I want to make sure I'm honest in this build log. I think seeing the ugly will make the finished product all the more commendable lol. Also did a lot of painting with the lions which was a interesting project in how well I can paint.
Also I will not use plastic gunports ever again...they just bend and have a hard time holding their shape when fit into place.
I got a lot of clean up and re painting but it's done and feeling good about the placement and all. Also learned a lot for the other side.
- Baker, Keith Black, GrandpaPhil and 1 other
-
4
-
You could cut down and glue some balsa and shape it like a filler block since your doing a second planking.
- Keith Black, mtaylor, Gregory and 3 others
-
6
-
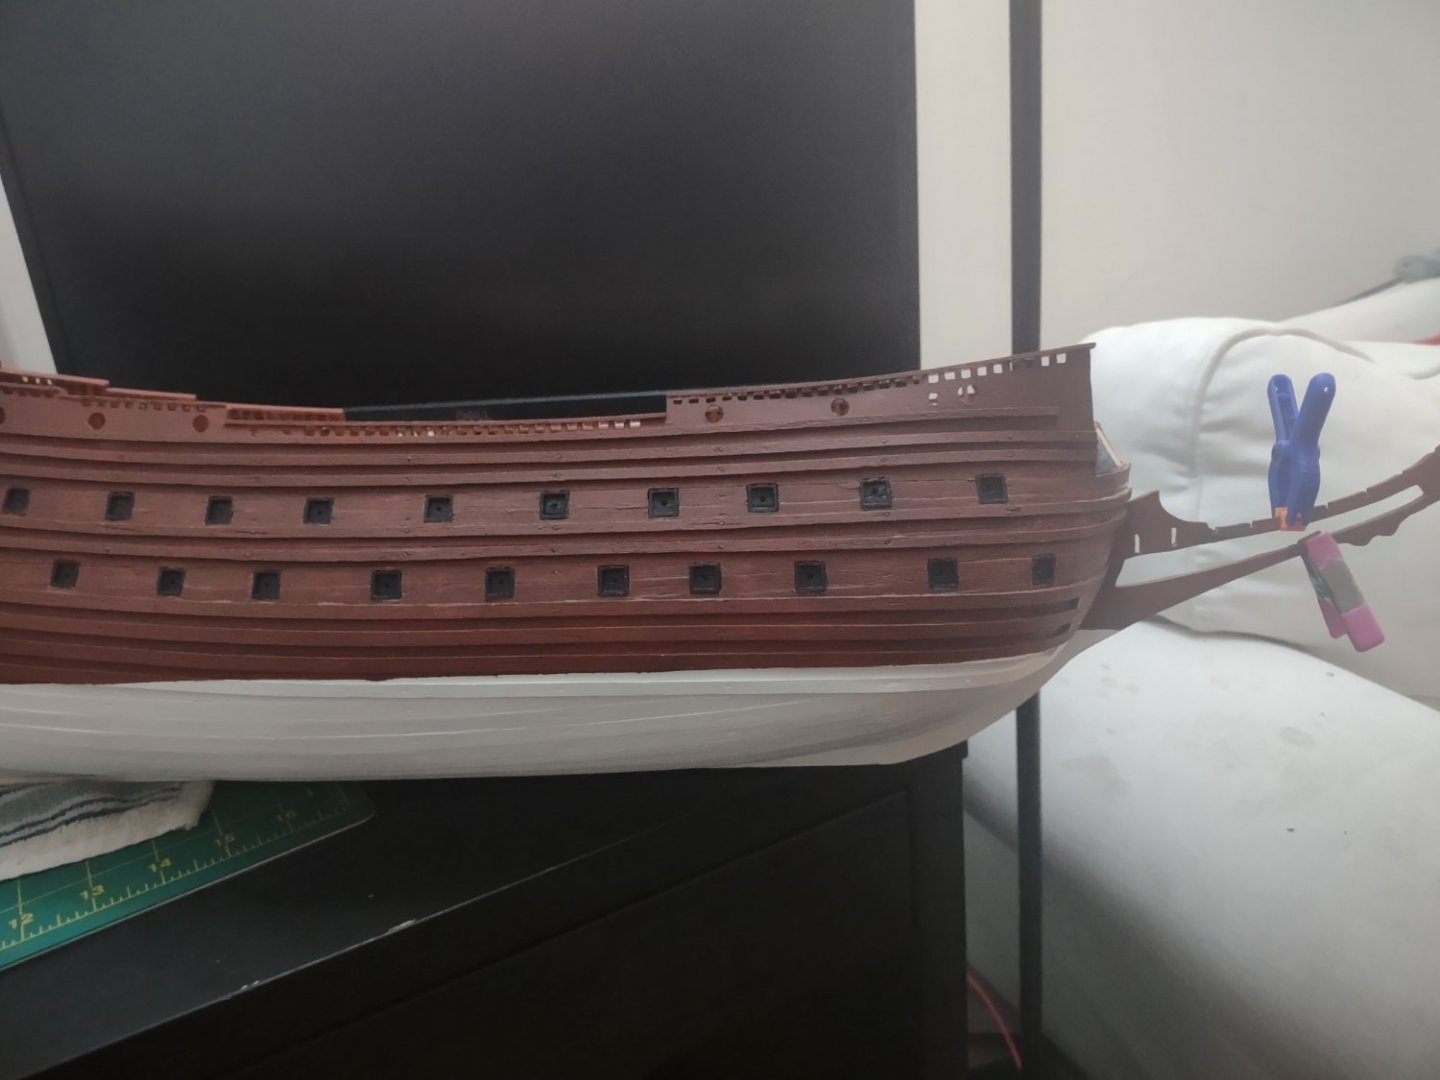
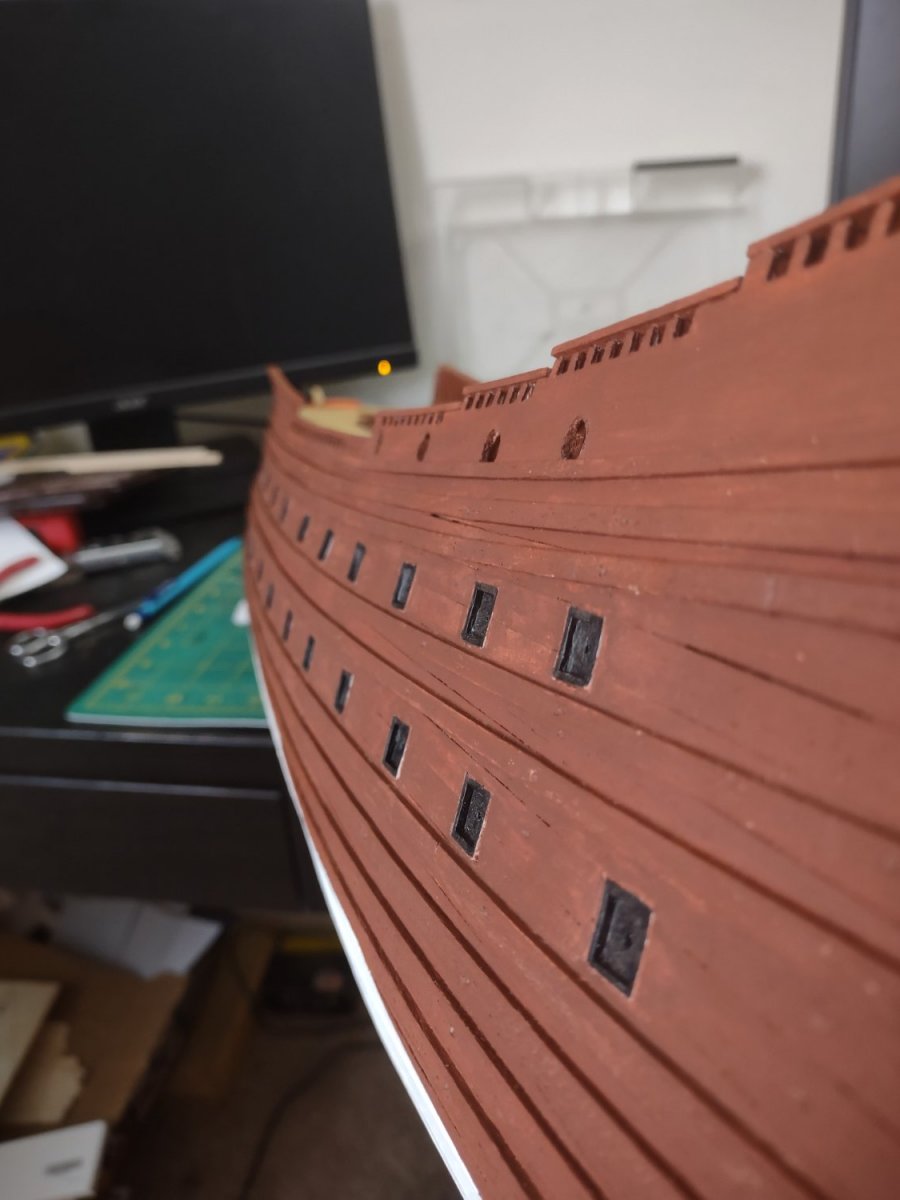
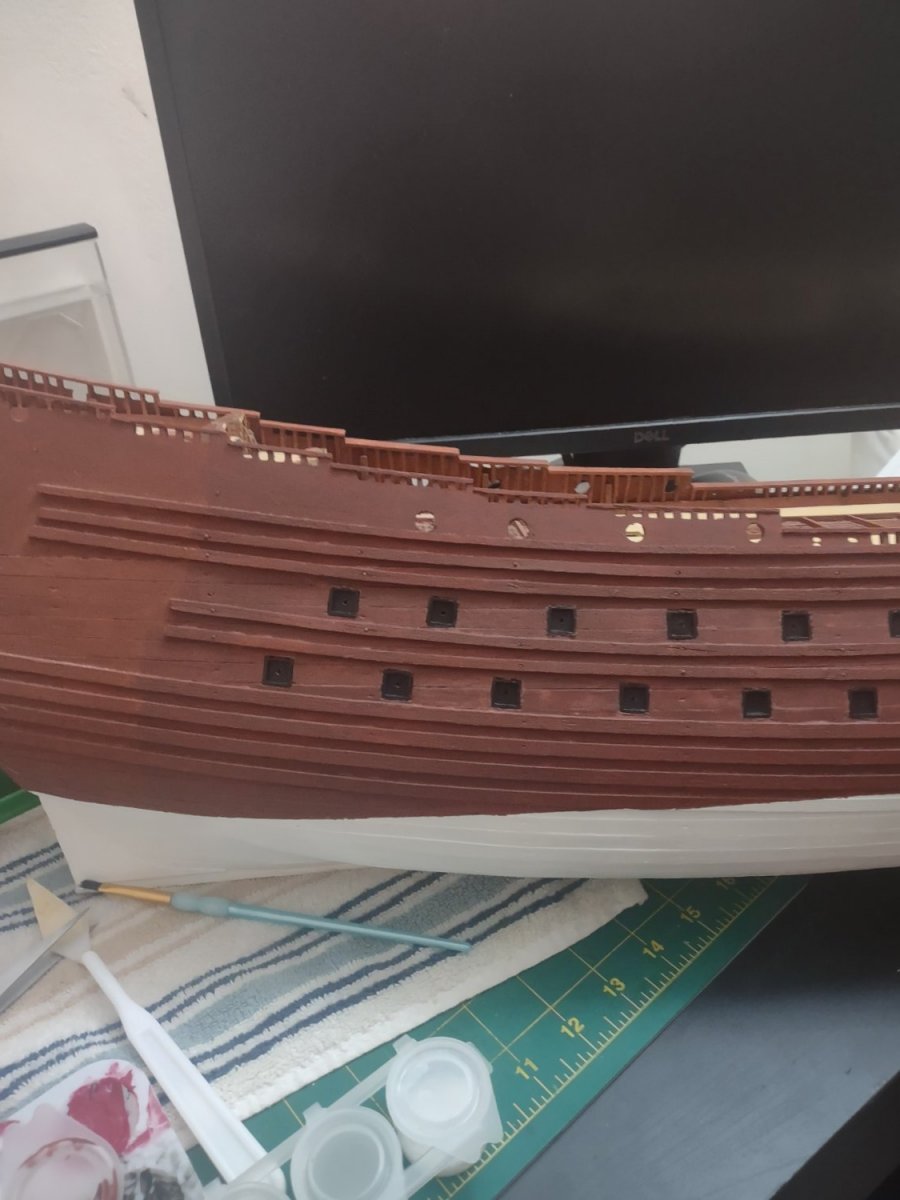
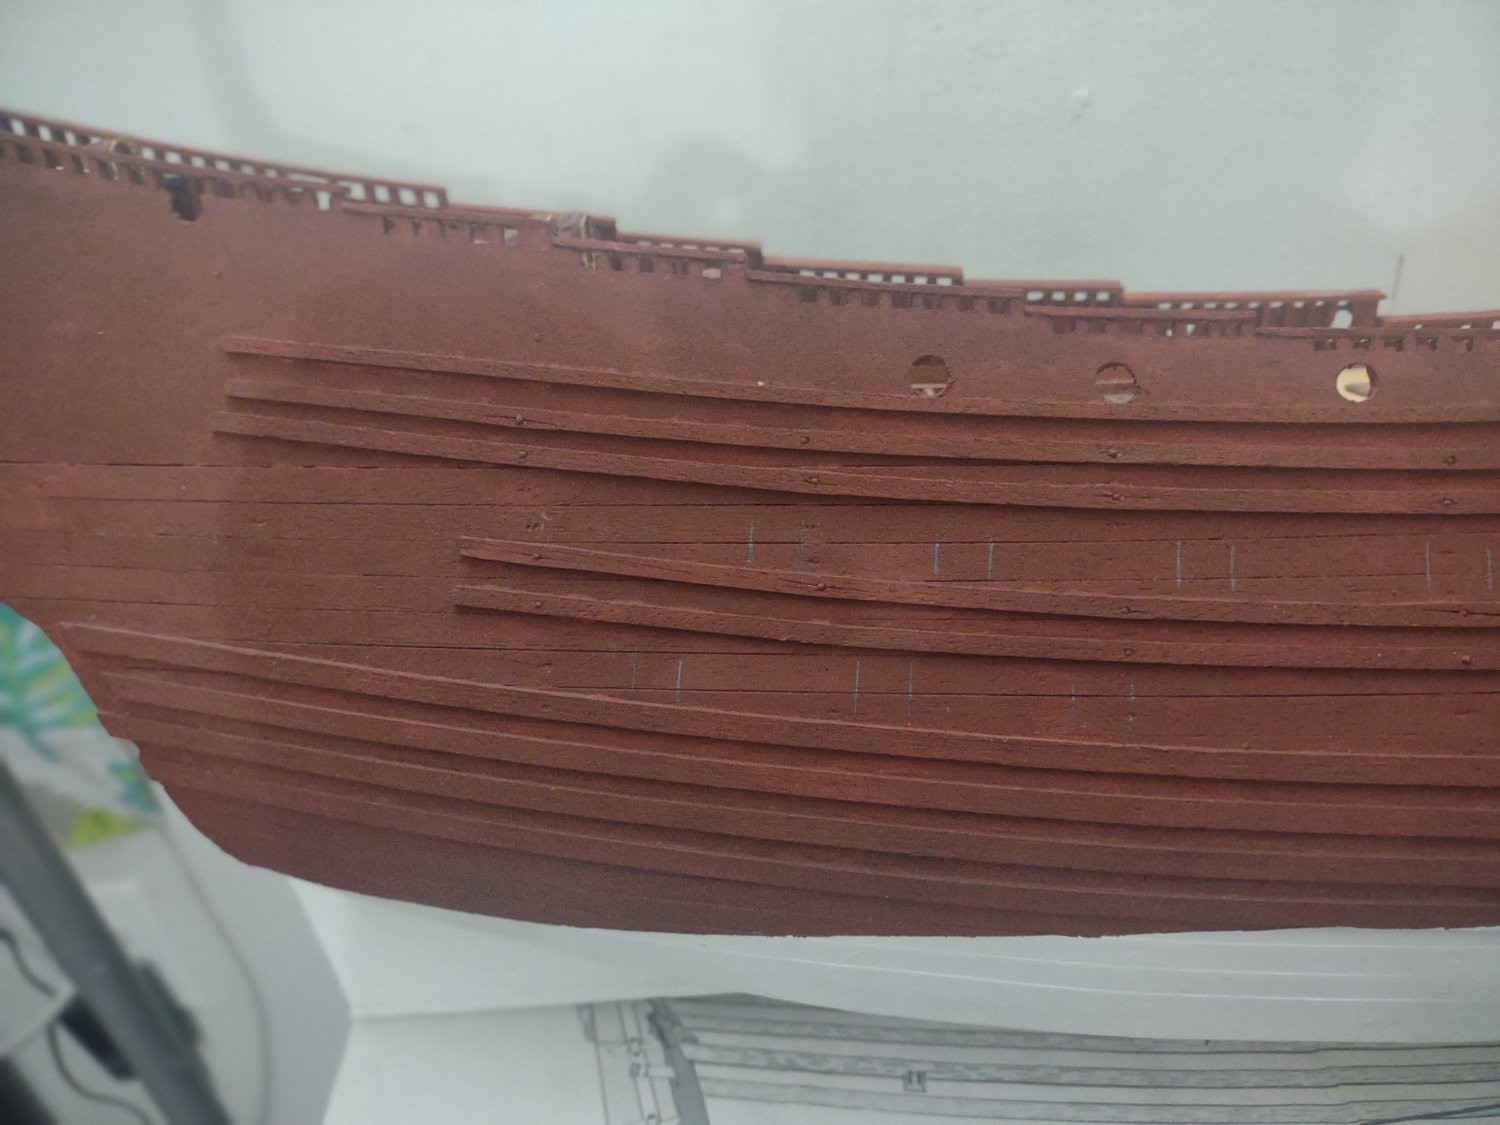
Got some work done on the gun ports which is nice. Now it's time to buckle down and get them all done. Fit some cannons in and they were sturdy so I'm happy with the result
Only part I'm worried about is making sure all the cannons are same height up and down but I will attack that when the time comes.
-
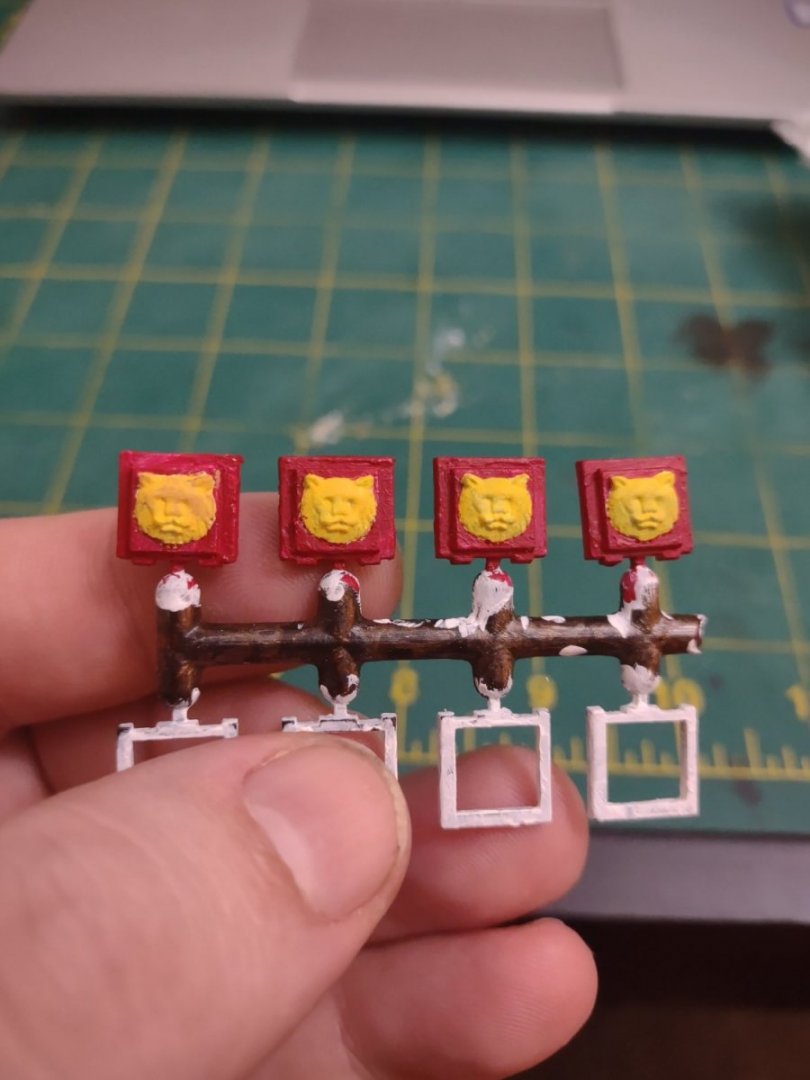
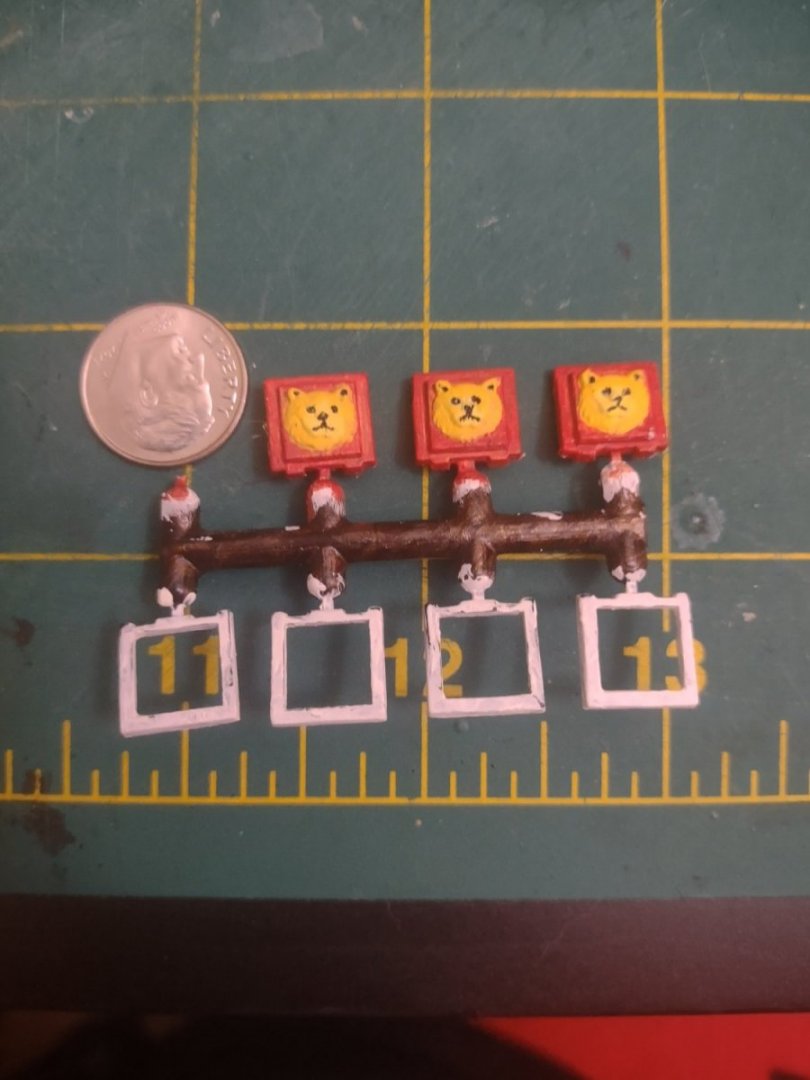
So I slept on the paint job I did with the lions and came to the conclusion that with the black it looks like the doge meme soooo yea here is the fixed lions that I will do from now on. Less is more and I have to remember that
- ccoyle, Keith Black, GrandpaPhil and 1 other
-
4
-
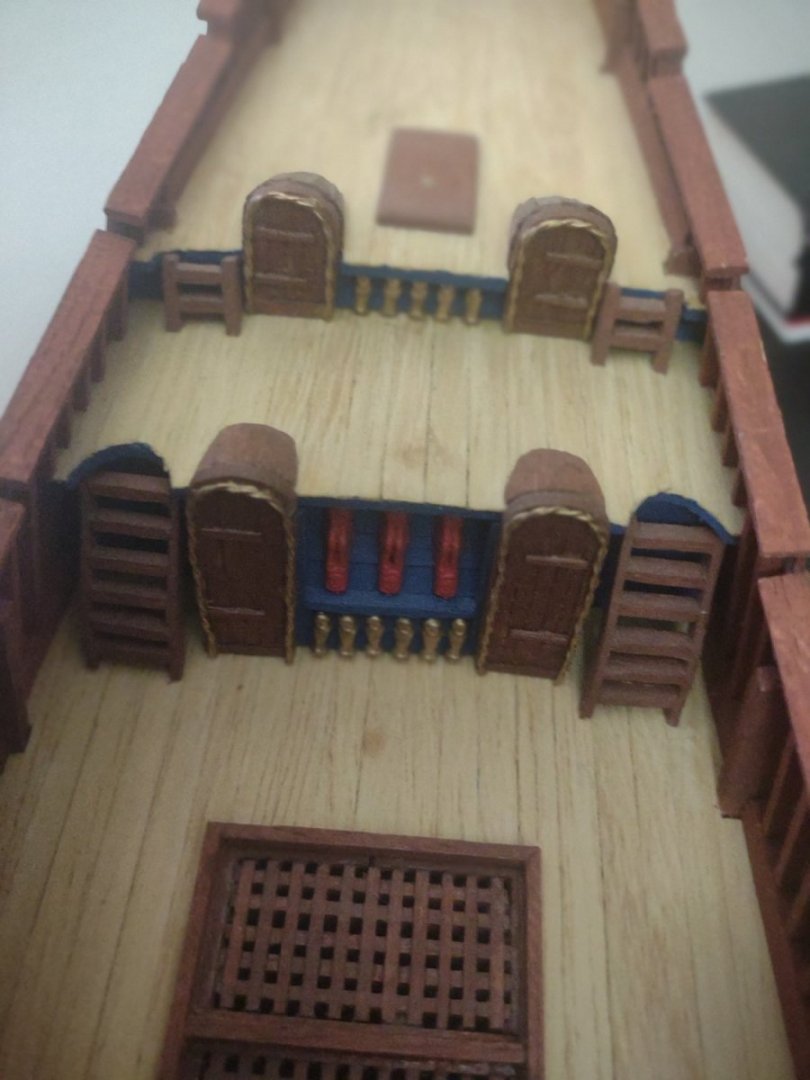
Since this build is all about the details and the painting I have done some work on the painting.
Still deciding between brown gunport or something like black or something like the ship color. Half the gun ports are done as well which is just the first of many projects on this build.
-
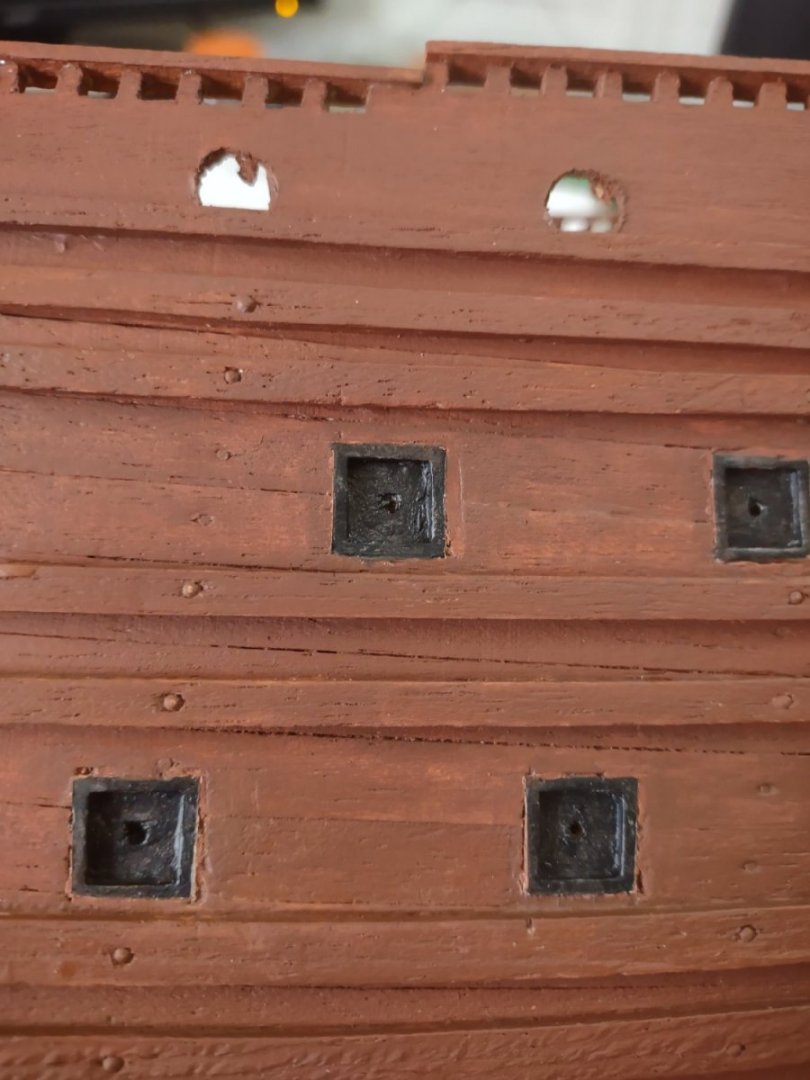
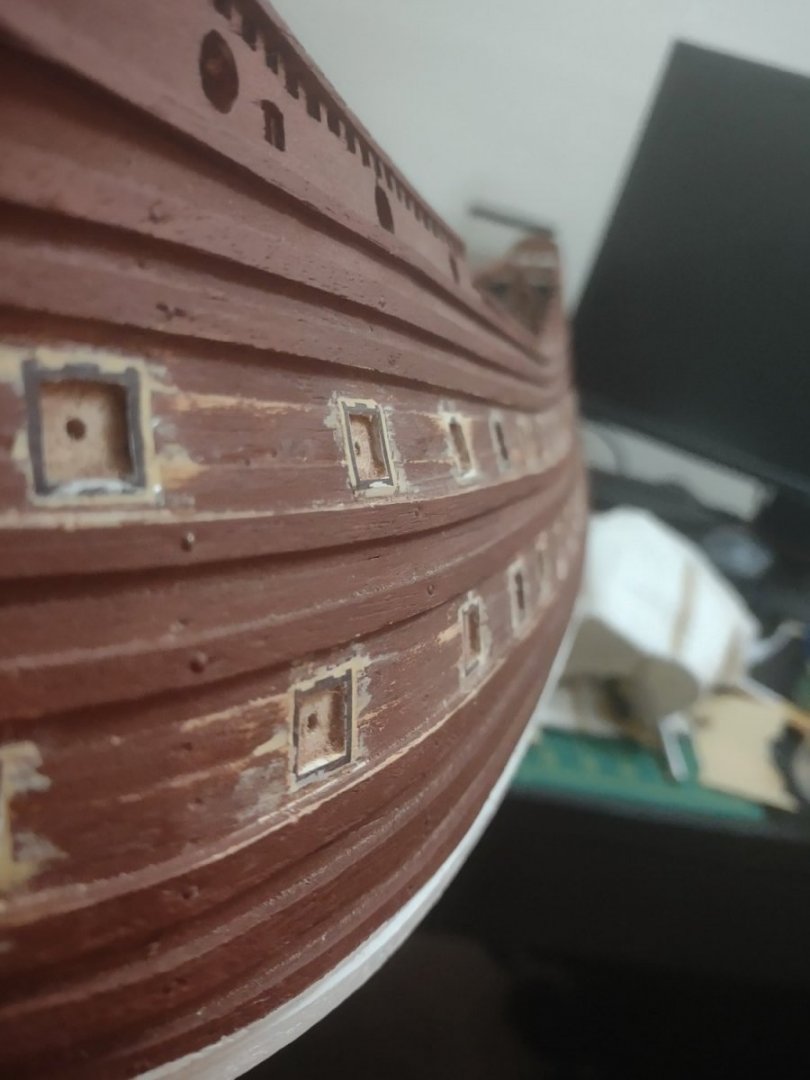
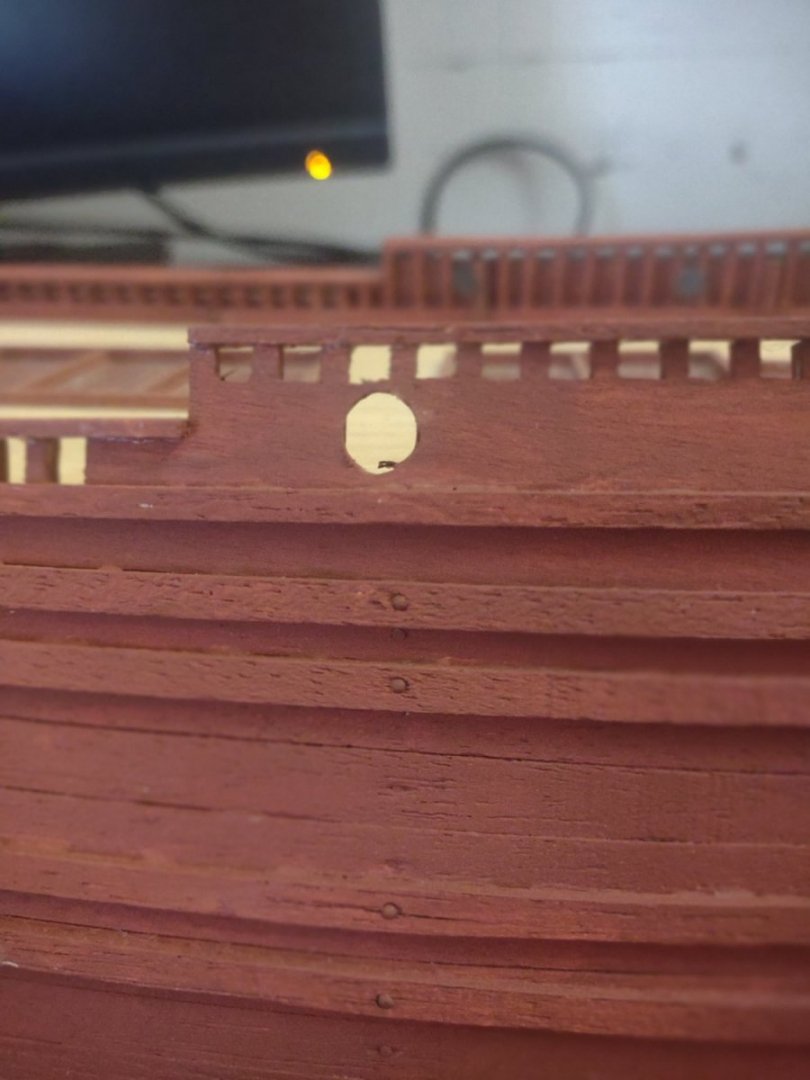
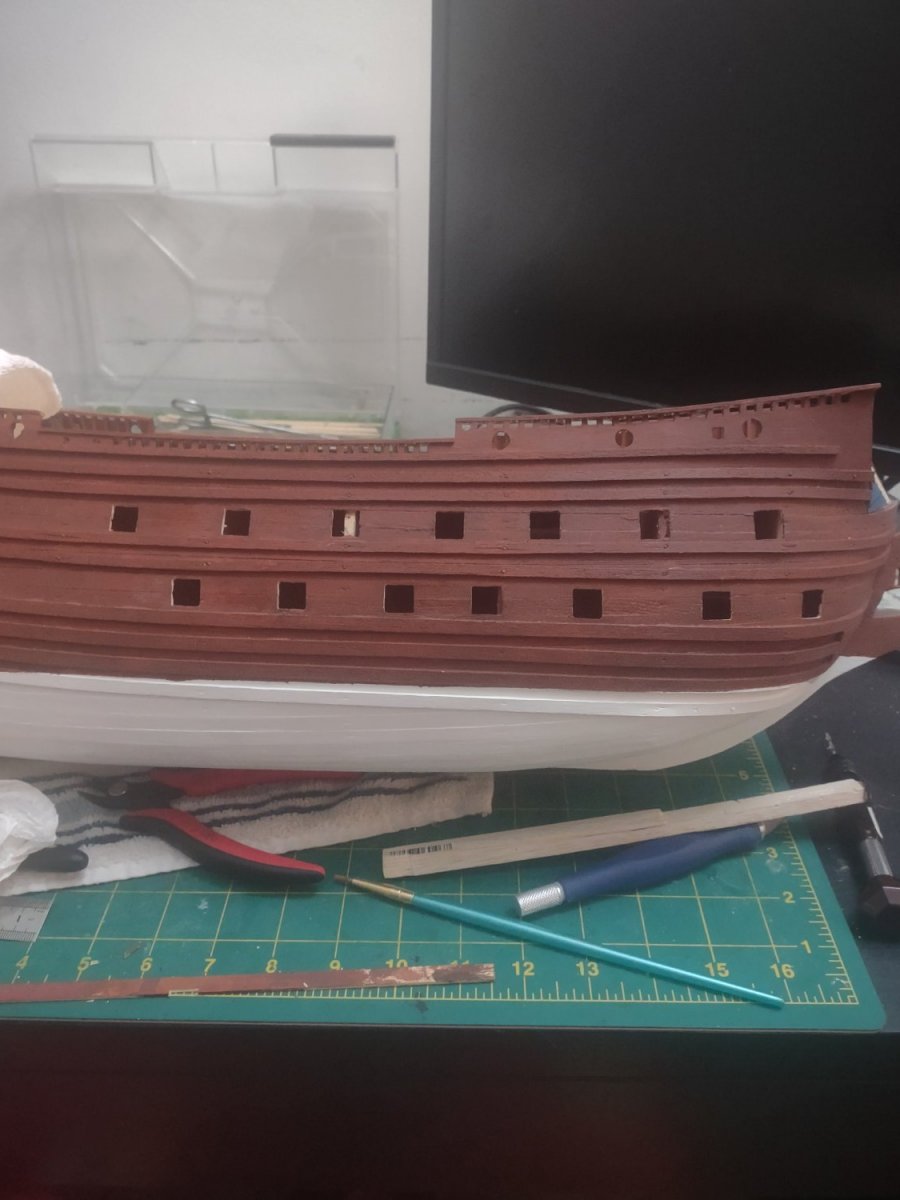
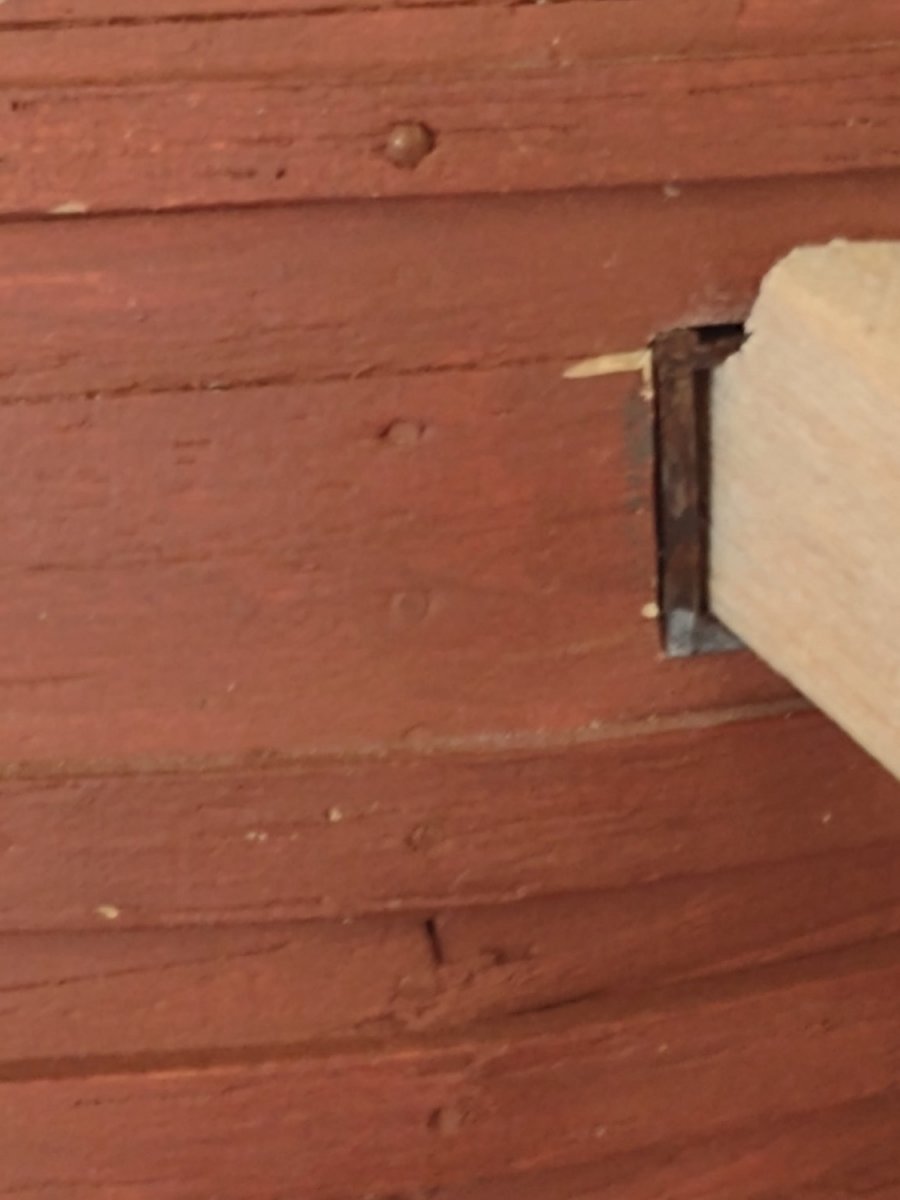
Did some work on the gun ports and found that a lot of this wood is fragile so taking my time to make sure not to do too much damage on the single planking. I'm also securing the loss planking with CA to make sure that all the planking is secured.

I'm going to need to figure out what I am going to do with the bulkheads that are in the way of 6 of the ports but shouldn't be too hard. I found I can't put supports in because the space is too tight. I'm going to just do the balsa and make it's glued real good.
I also primed all the gunport liners and lions heads and will start working on them.
- Keith Black and GrandpaPhil
-
2
-
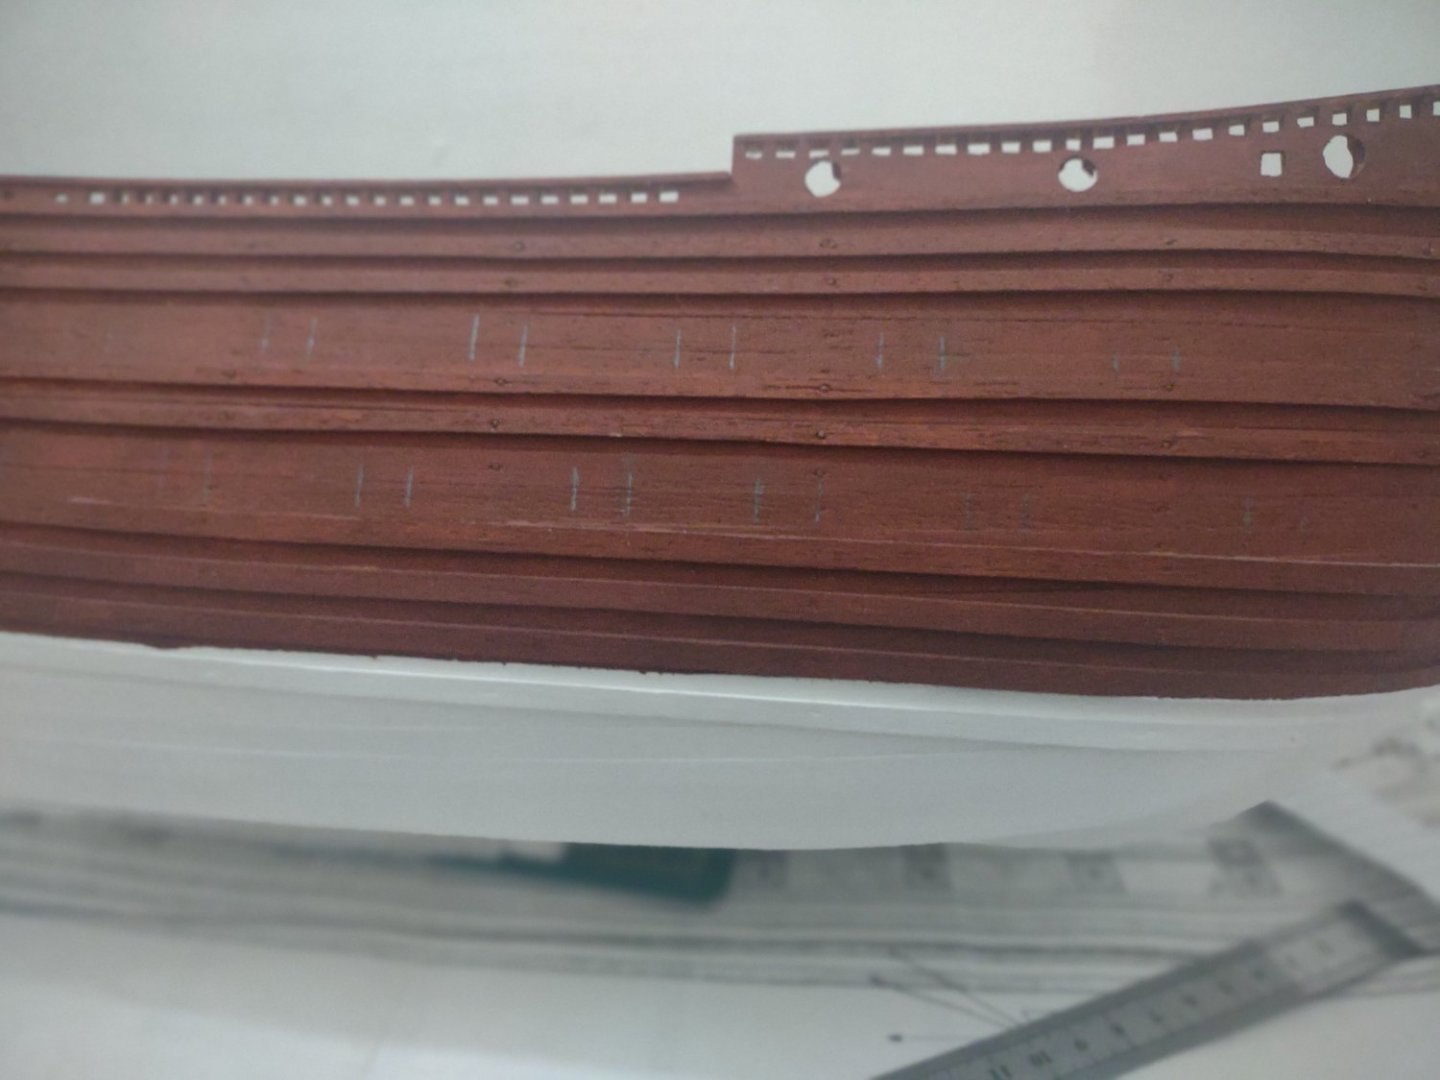
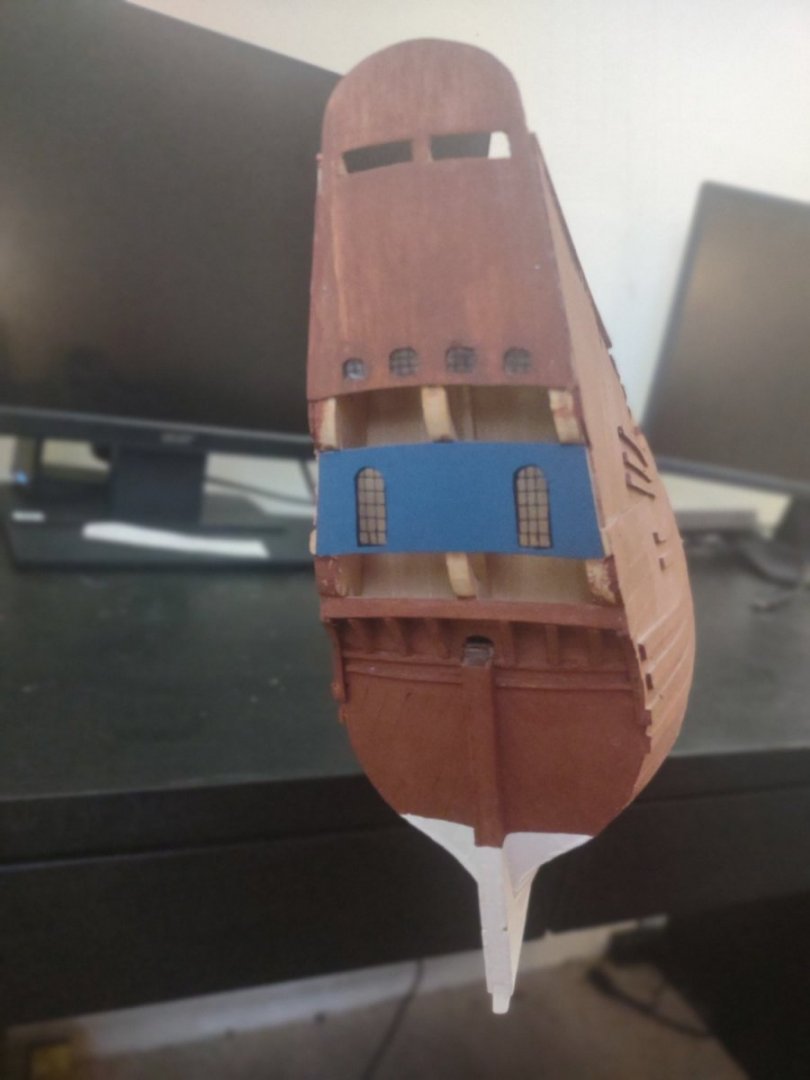
So I am finding no information of some of the color aspects of the ship because everything is dedicated to the ornate decorations. I get it but I would like to have some idea to go off of. The Hull color is a wonderful Indian red so I feel like I will keep it that color as I feel it's like the pictures of the vasa. But the deck is not really spoke about so I am going to post some stains. They are single coats at the moment so I could build on it
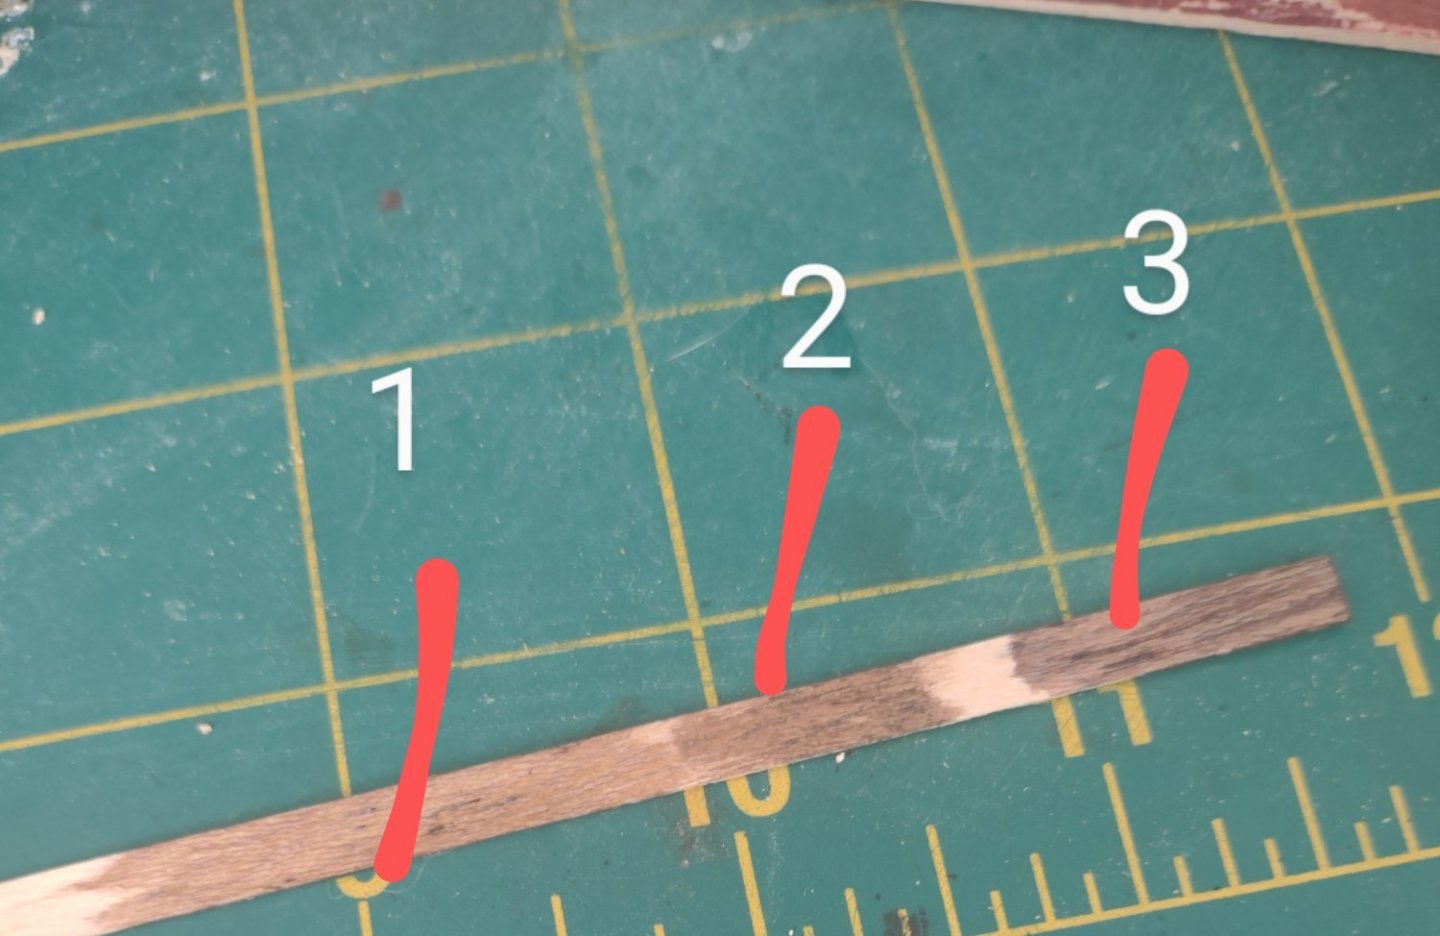
Number 2 is an antique wax I found and 1 and 3 are both stains. If you have any suggestions besides these I would love to hear as well. I have not tried weathering mixtures so would be curious on that as well.
-
1 hour ago, Backer said:
My idea, without obligation
Glue the platic port on a piece of plywood (or wood or thick plastic). Port and plywood must have the same dimensions
You can then drill a hole in it where you can glue the cannon (drill the hole before gluing the port / plywood on the model.a sketch
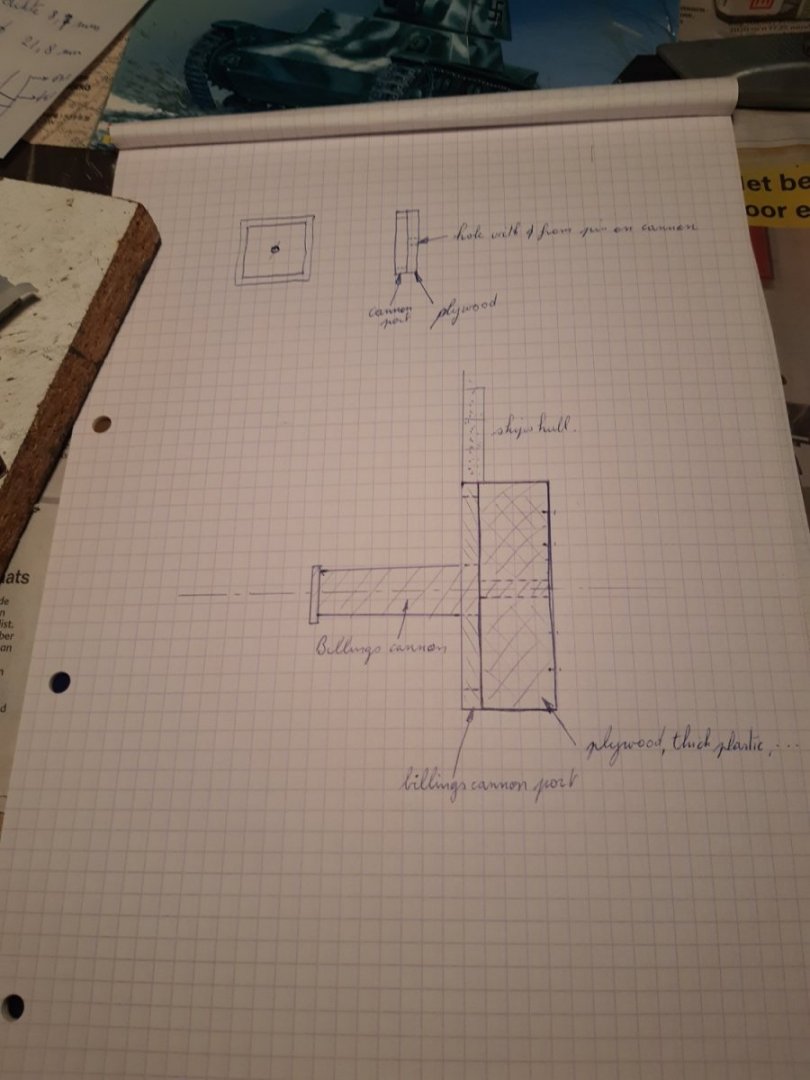
I used almost the same method

Result

That was my thought but I want to make sure the cannons don't collapse into the hull. I might try to line the inside with some supports so the glue has more places to stick.
-
Didn't do so well on the first port because I slightly over filed. So I am going to use a very small bit of wood putty to fix the up but for my second ship I'm gaining confidence with each one I do.
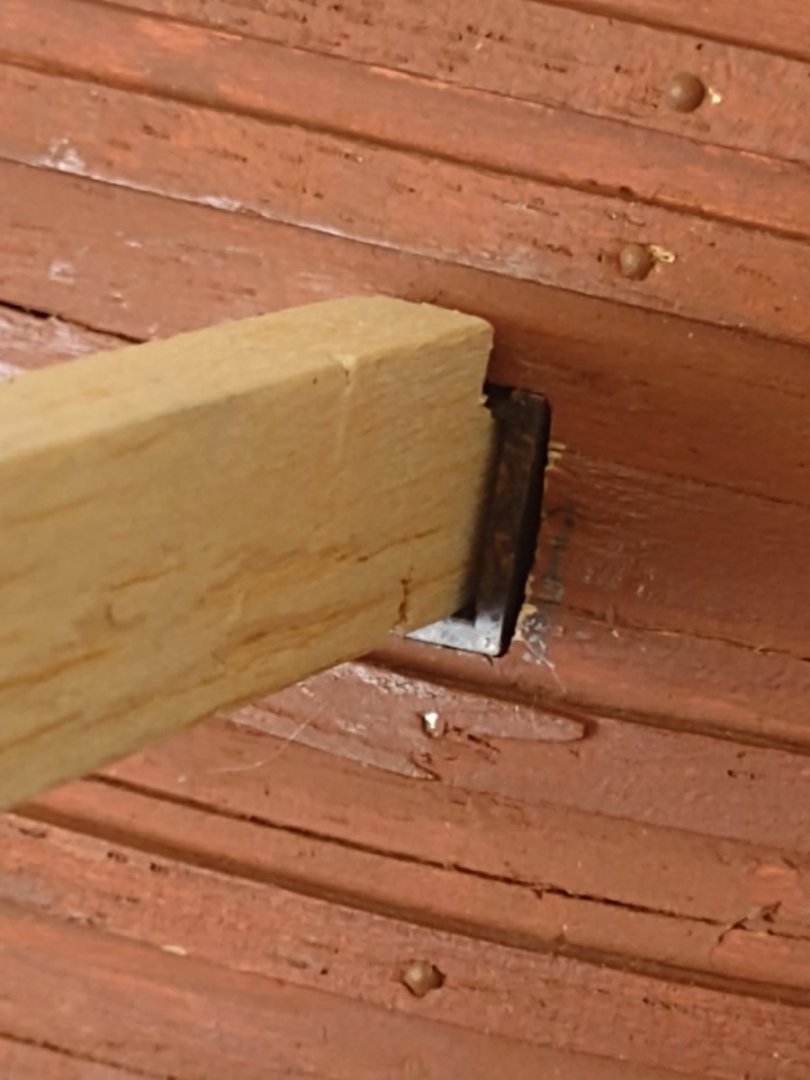
 thats the first one that I slightly over did
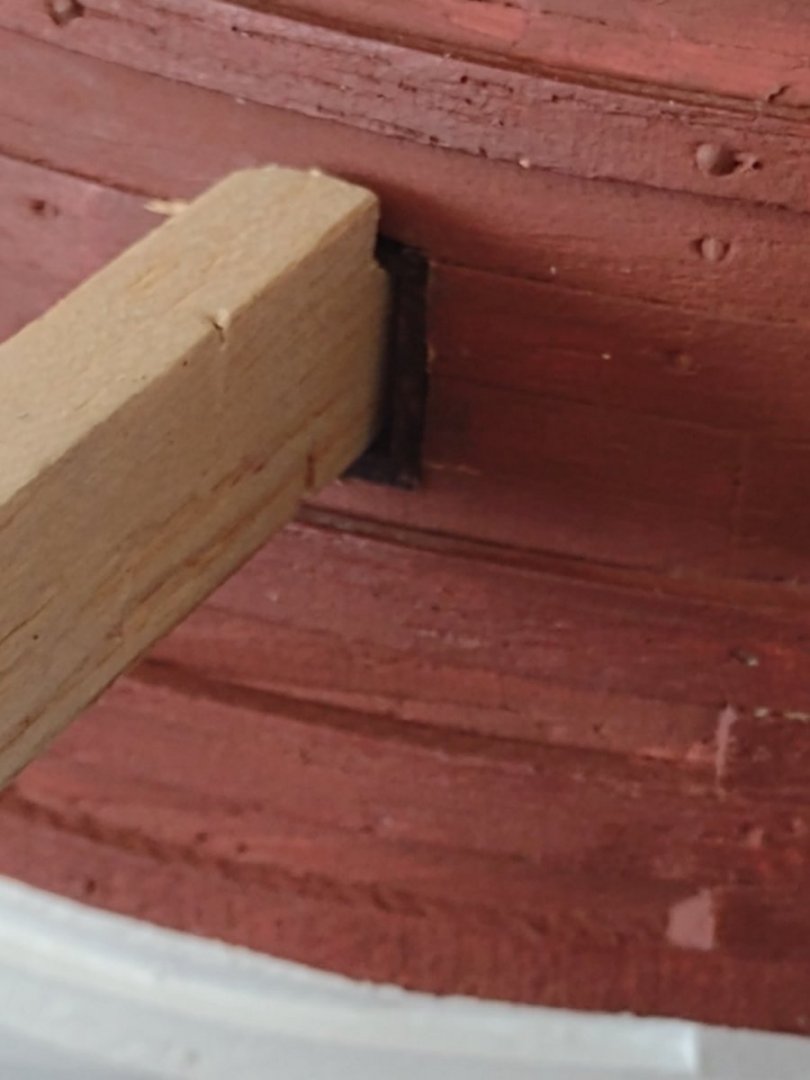
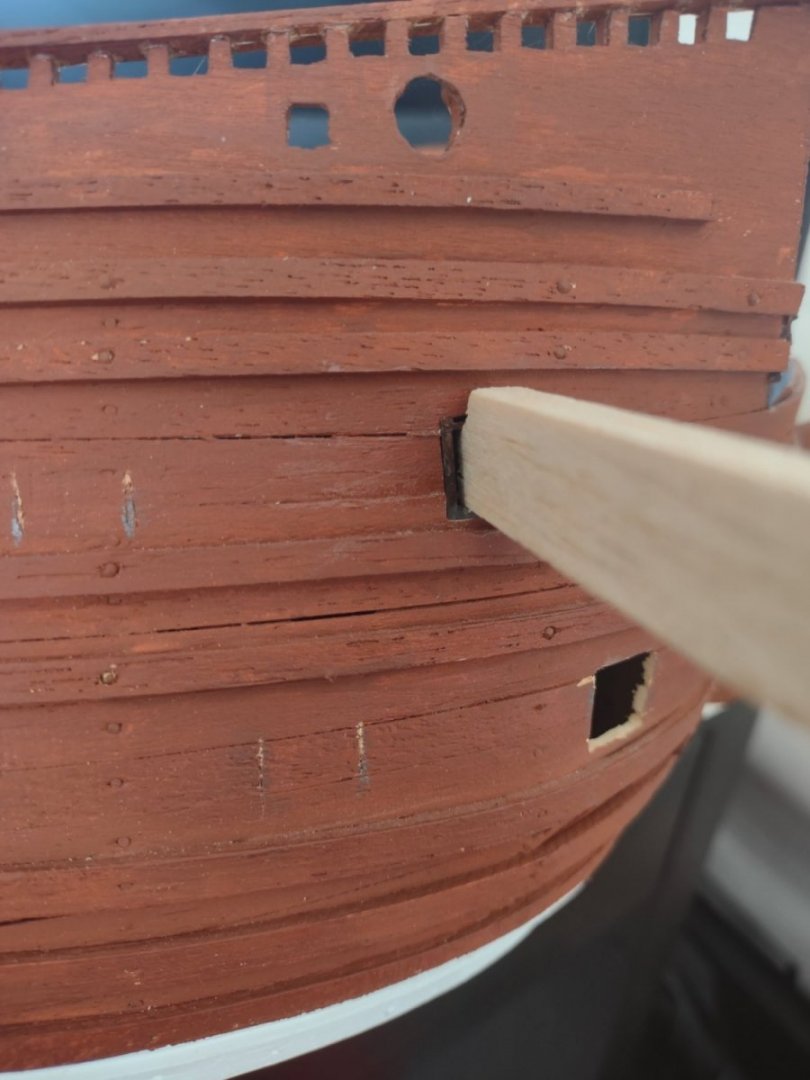
 this is the second that I got better on. It's going to be a process but between working on these ports and then doing some painting cause the is a lot of detail paint I need to get going so I think doing back and forth on all this won't make it too over bearing.
- GrandpaPhil and Keith Black
-
2
-
4 hours ago, Backer said:
Be careful making the openings the planking is quite thin.
I have an idea for your cannons, but no time today to make a sketch of it.Ok I will for sure and I started cutting one out to see using the drill to get me started with a smaller size hole then using my file to shave down carefully. I know there is going to be bulkheads in the way so I'm going to need to take that into account as well.
-
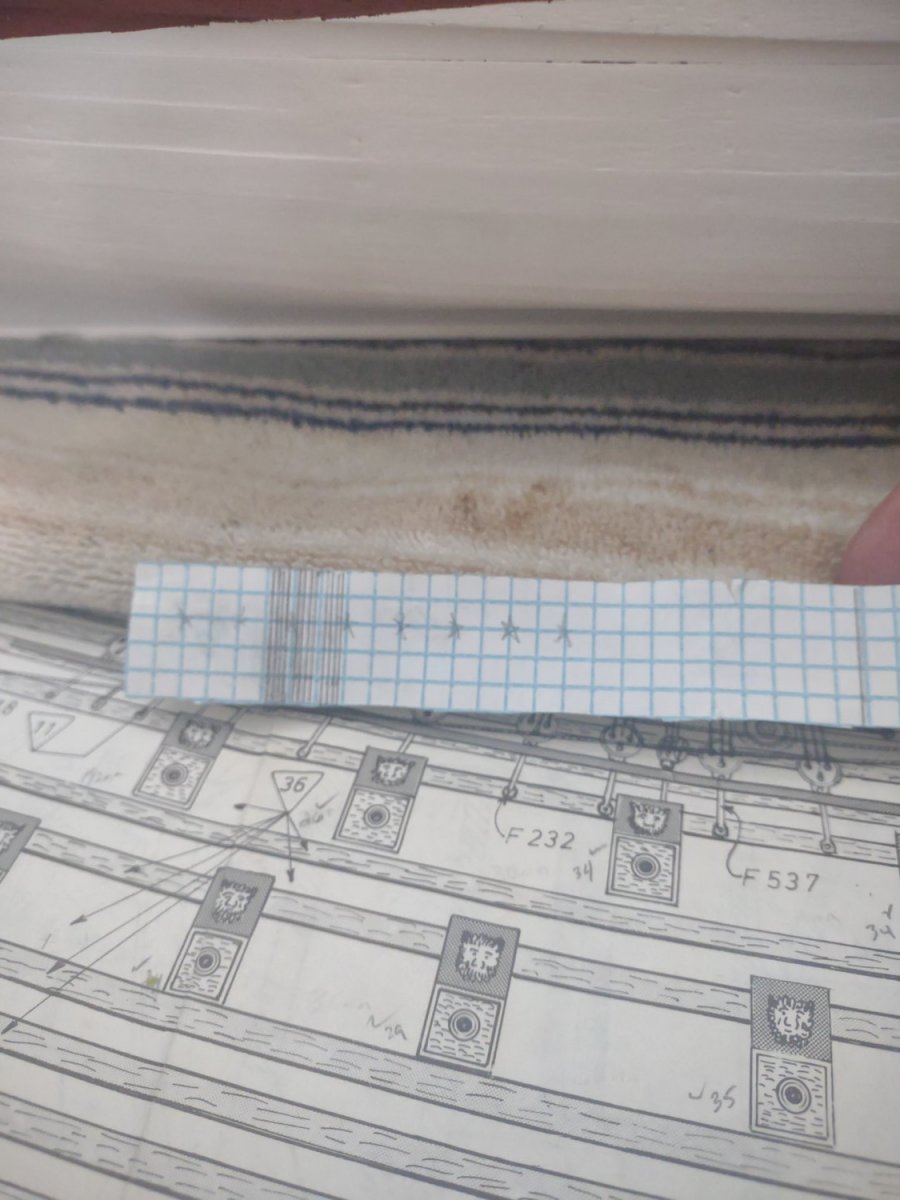
Alright so after doing some measurements and going over the plans I have found everything to be with in 1-2 mm so I decided to tackle the gun ports. I am going to need to do some painting and work on figuring out how to get the gun ports handled. From looking over the plans the previous owners plan was to measure off of the 1-1 plan and measure out each port on the hull. So I went over the measurements and lined them with my tools and interpretation of how to measure between the plan and the hull.
I made this to measure over the curvature of the ships hull and marked between 25-40 mm
This is my markings for distance between the ports and what I used to do the markings on the hull.

the plastic squares are 10-10 mm so will measure this out and start to cut out the ports and get to figuring out how I will mount supports behind the port opens to hold the cannons.
- GrandpaPhil, Azzoun and Keith Black
-
3
-
Hello everyone,
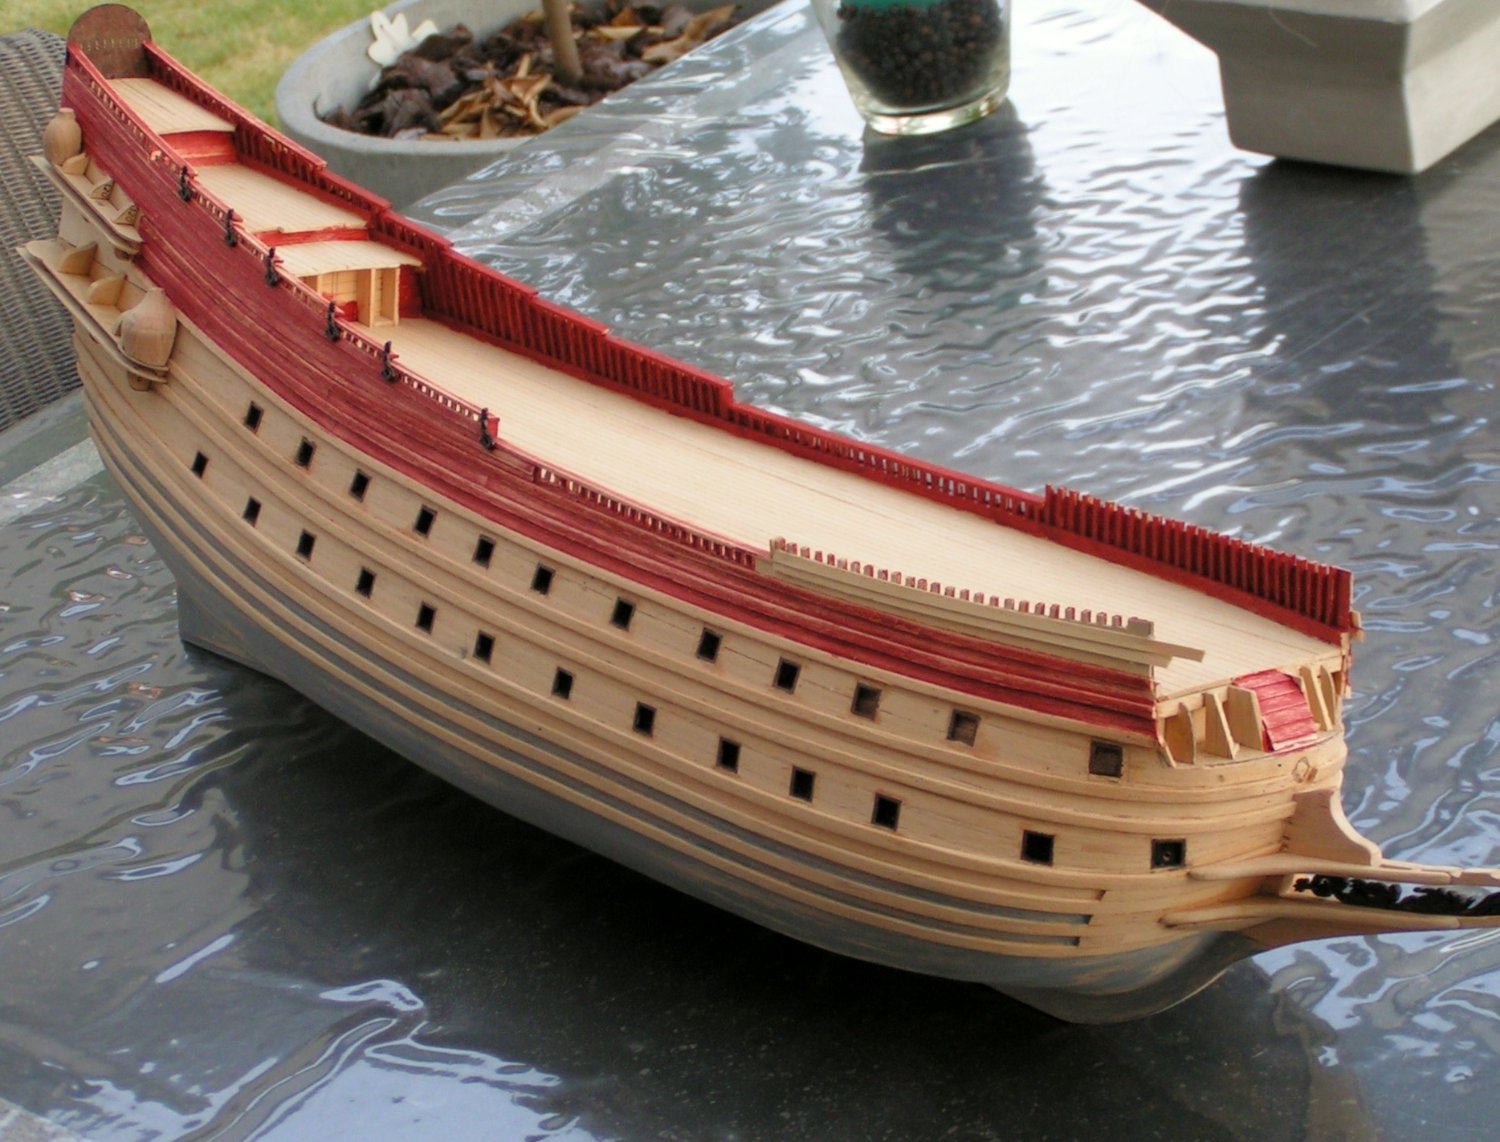
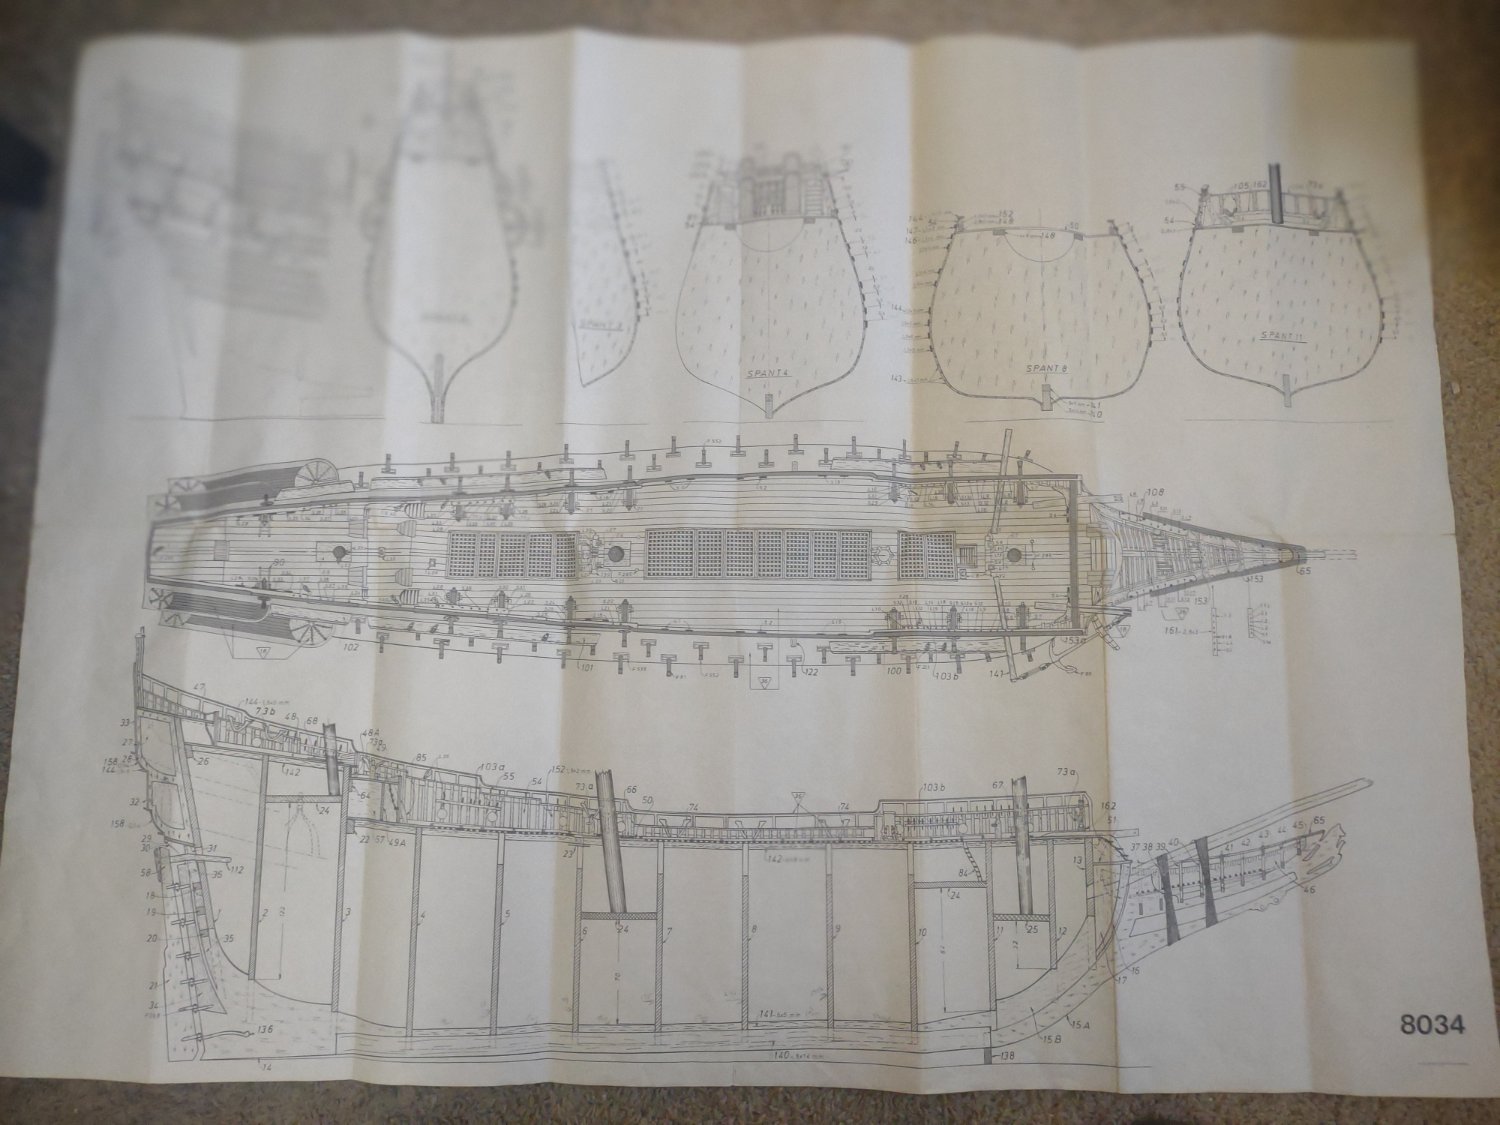
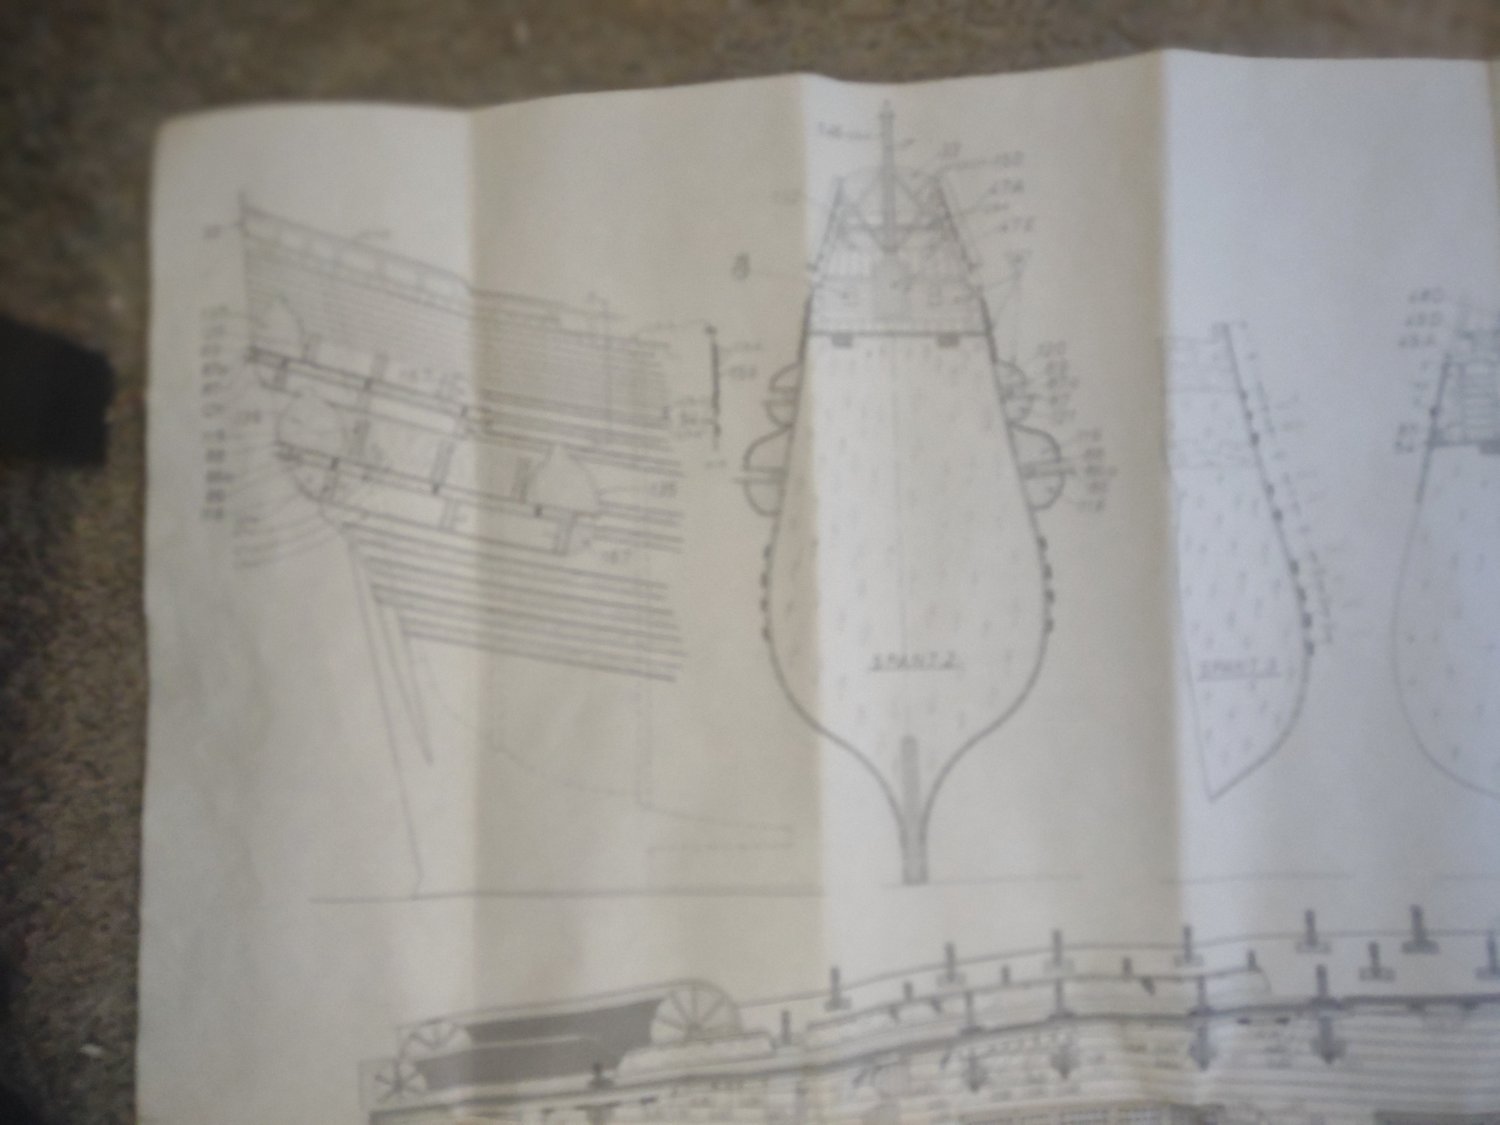
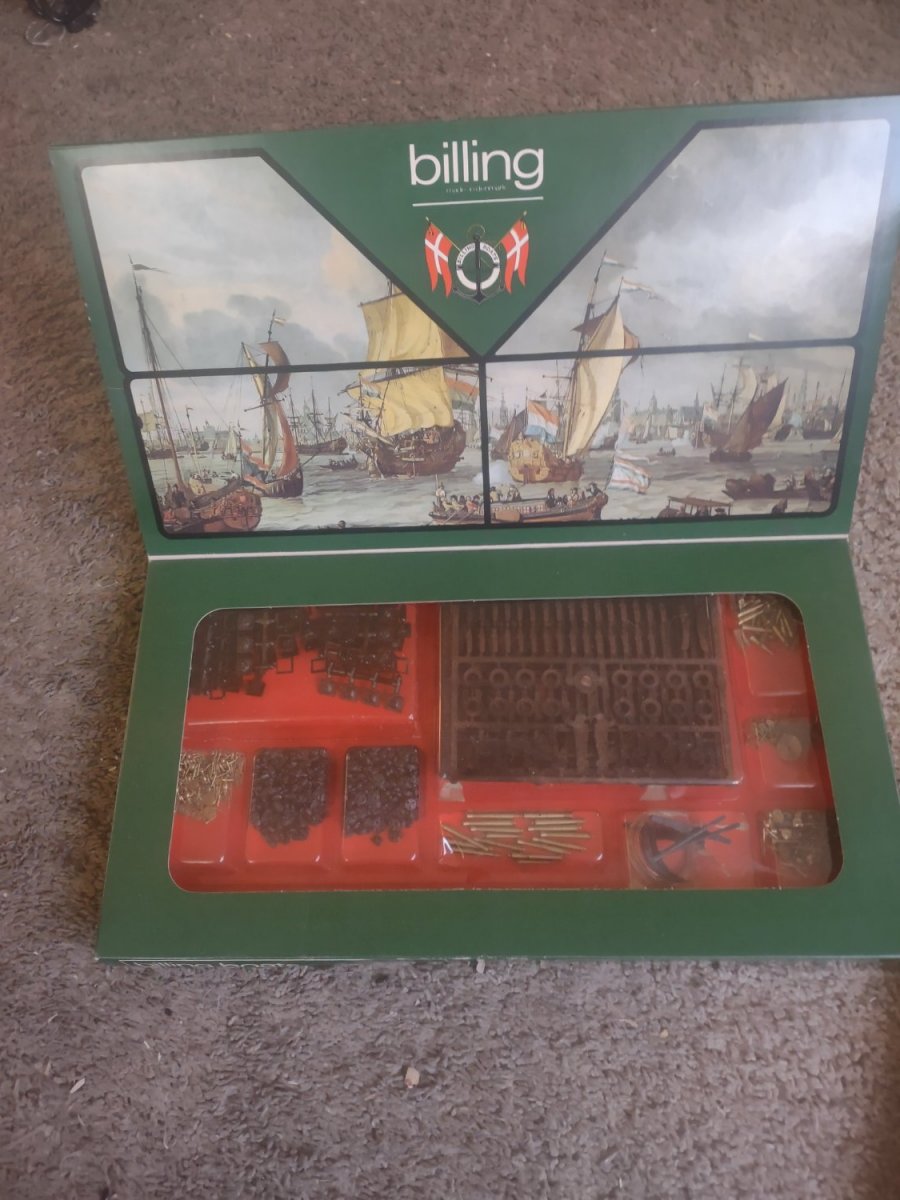
So I have been able to receive a wonderful opportunity of continuing to a beautiful ship. The Wasa by Billing Boats. It's quite an old kit but we'll preserved and treated with much love. Right now I get to show it off and I want to try and do the best I can for this build. I will for sure take my time and really dedicate the proper time and effort into this to do my best and look for help as I travel this journey.

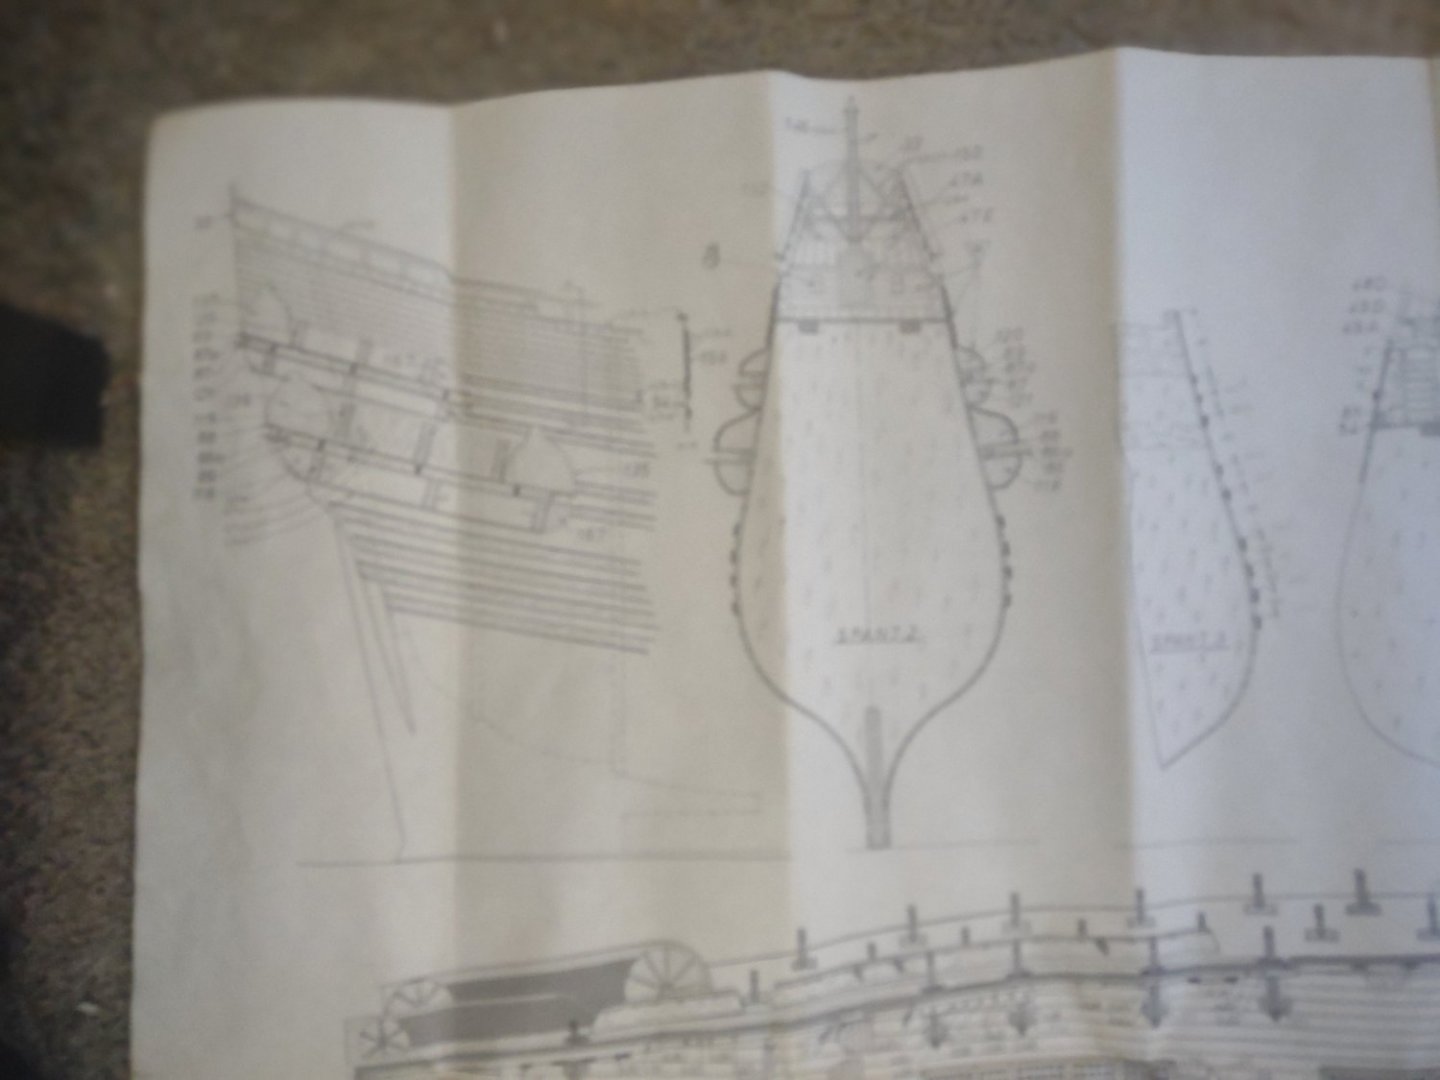

this is some pictures of the plans and also came with it's instruction manual that is in good condition as well.

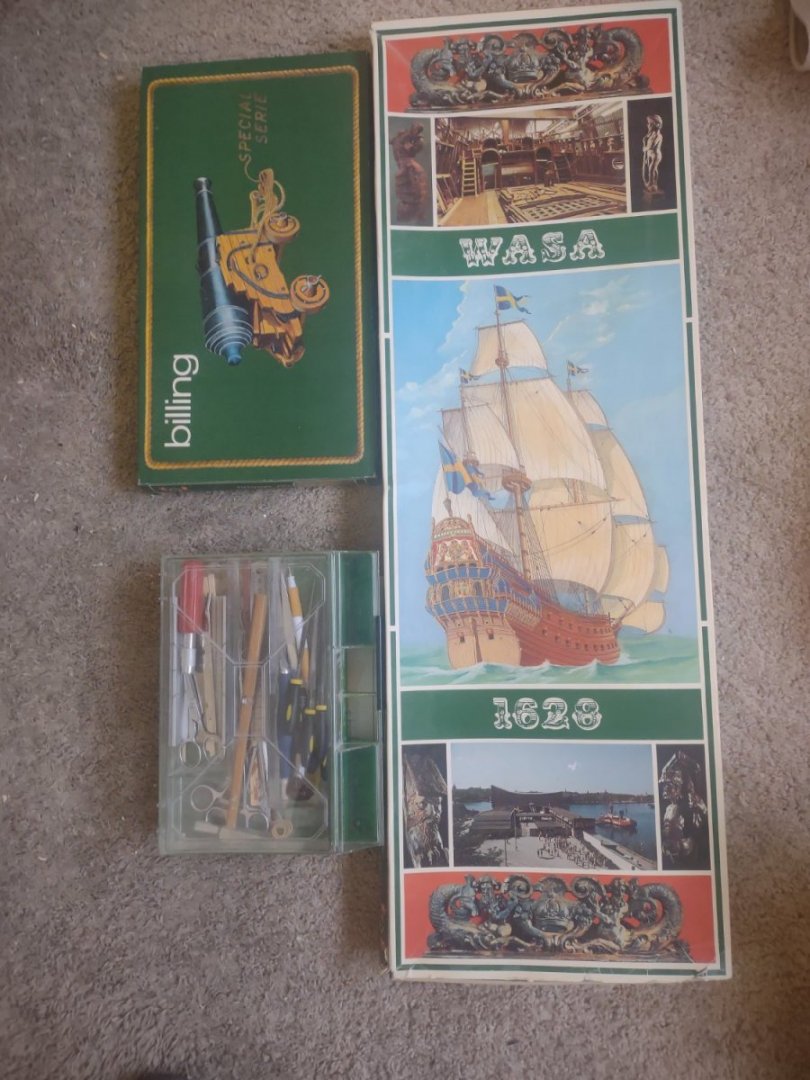
this is everything that came in. I am excited to see how painting on all the plastic comes out because I haven't done that so I am going to need some advice on this for sure.


I need to check up on all of these measurements because I feel the strakes are too long and my first starting point I decided is going to be finishing the construction of the base part of the Hull and making a good solid stand to hold the hull as I work. Hopefully you guys can join me and I hope to get some help because I am sure going to need it!!
- Keith Black, Baker, Bill Morrison and 4 others
-
7
-
I'm sorry you had so many issues with this build. I am glad you were able to realize it though and to recognize it and thank you for your honesty. I will be on the look out for your Surprise build!!
- Ulises Victoria, Baker and chris watton
-
2
-
 1
1


 thats the first one that I slightly over did


Wasa 1628 by Robp1025 - Billing Boats - Scale 1:75
in - Kit build logs for subjects built from 1501 - 1750
Posted
I wish I was more confident because I feel like it should be so much better. But I know it takes time and practice to get better.