

Robp1025
-
Posts
259 -
Joined
-
Last visited
Content Type
Profiles
Forums
Gallery
Events
Posts posted by Robp1025
-
-
2 hours ago, Keith Black said:
Rob, the blocks are not to scale, smaller blocks are required. Pull is through the hole/sheave, the exact opposite of what you've done. Also, the hole/sheave, should where the line is running on top of the block/sheave and not at the bottom. Study the drawing in post #108.
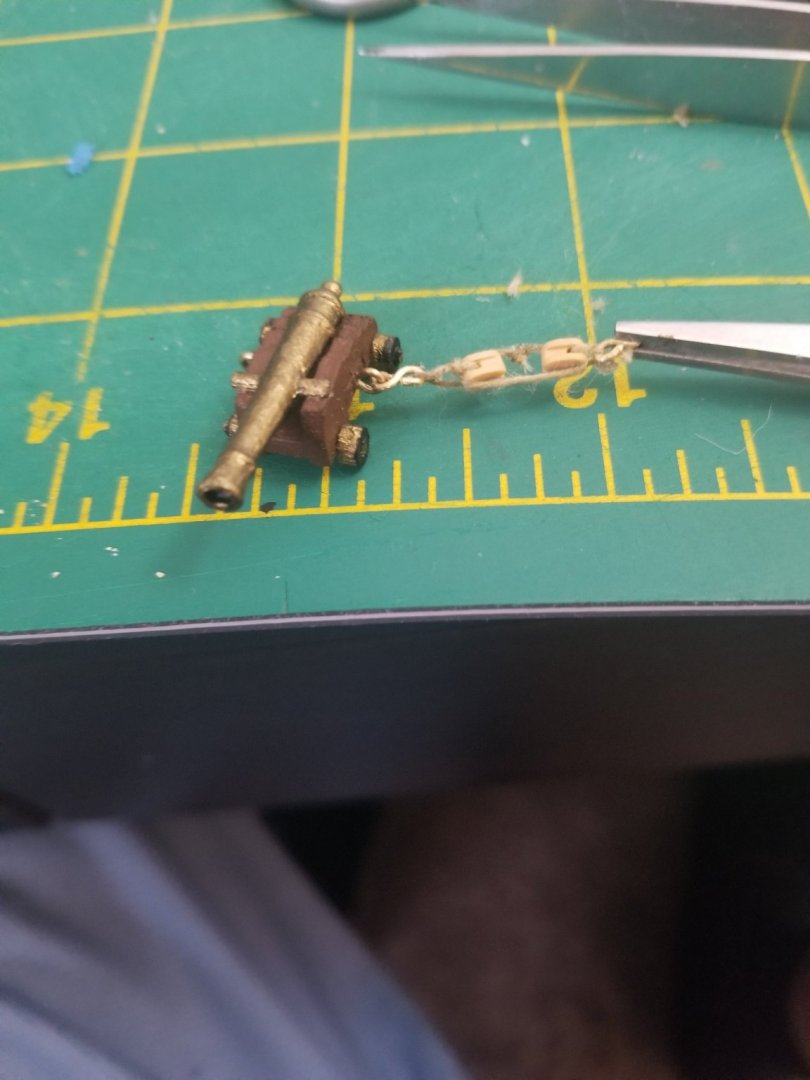
Hrmmmm that sucks alright well I'll need to wait till next week if I want to go this route 😕 I'll try to push ahead and mount the cannons once I have all the pieces with correct scale but I want to mount these right. It's part of learning and I want to learn not just breeze through.
- Keith Black and Cathead
-
 2
2
-
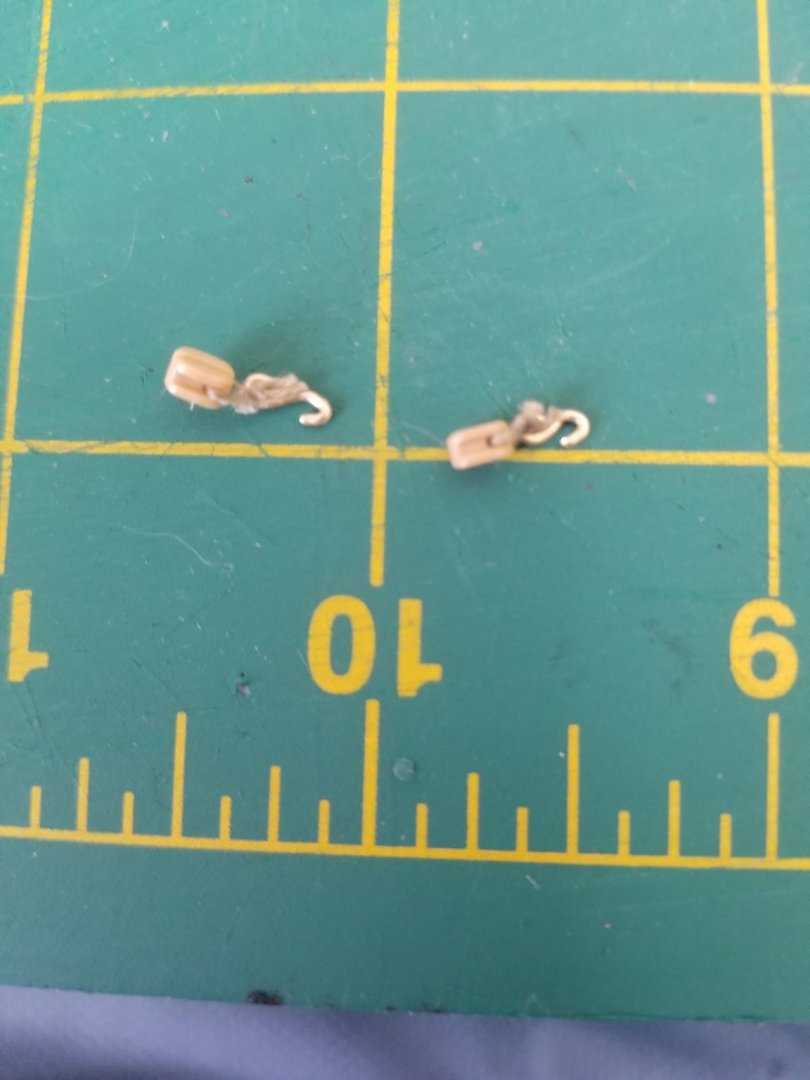
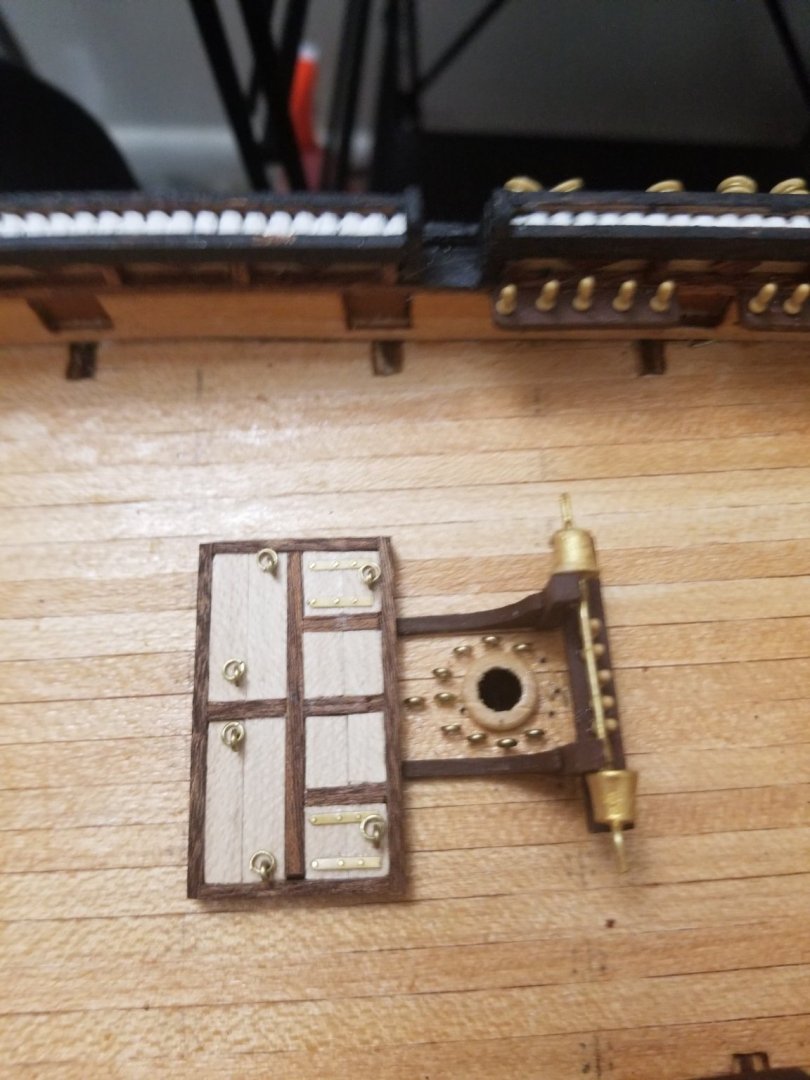
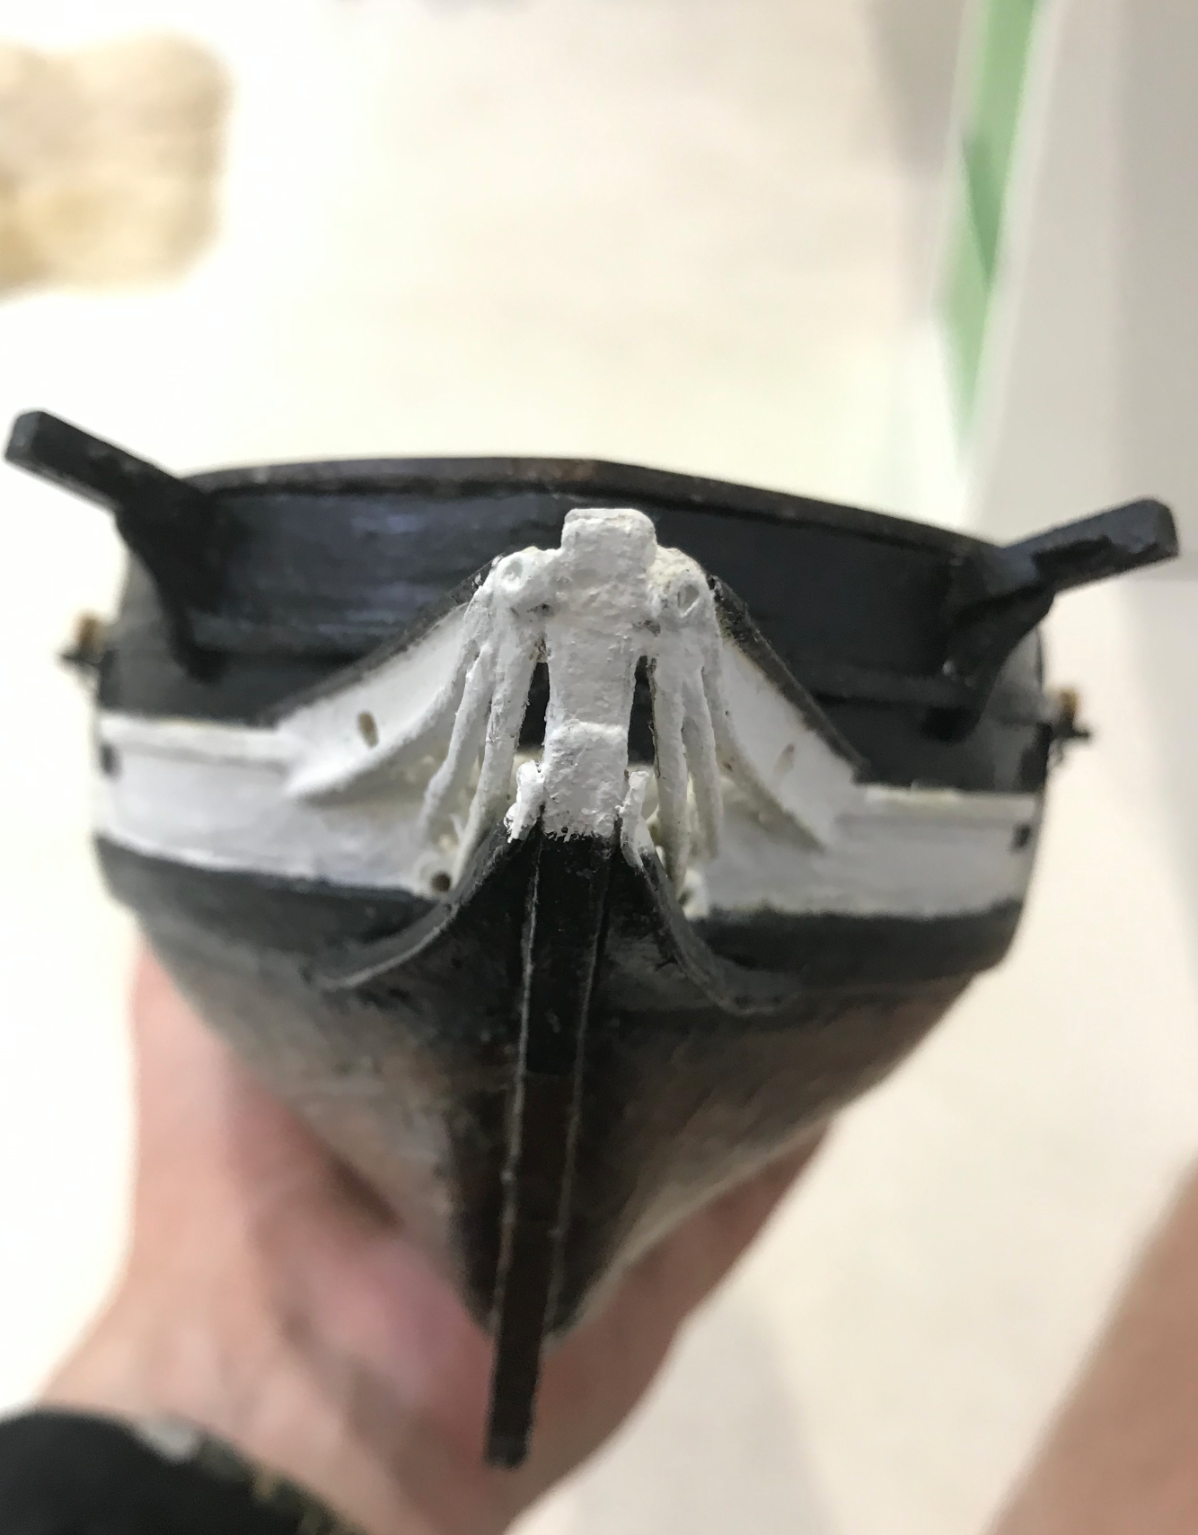
So this is my attempt at the connecting two single sheaves to use for tacking down the cannon. I'm going to have to put pins a lot farther from the cannons but it looks nice. What do you guys think? Do I need to possibly not worry about it and order smaller single sheaves because it looks too big?
Also is there a good knot to use when trying to work with connecting the two sheaves with a loop of string? Tried to look it up with no luck.
-
I would like to make an addendum because well I'm an idiot sometimes.
But now I need to fix the foremost cannon slightly as per these new developments. I wont be able to make that one 100% but I'll be using the single loops on the cannons on the deck to make it as real as I can.
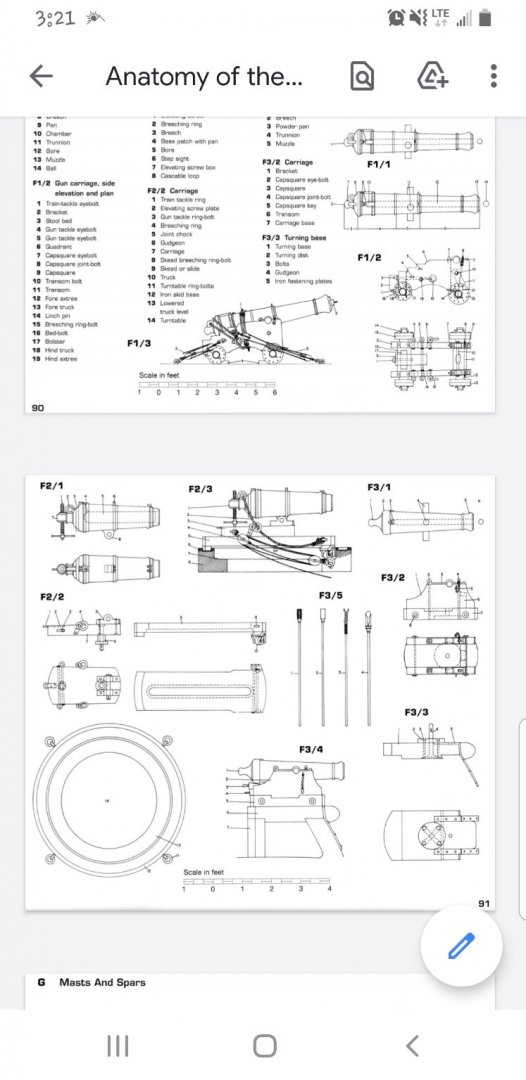
@LucienL if this is accurate I would love to hear incase the book is a little off.
- Keith Black and Dean77
-
2
-
So think towards more realism how would the cannons actually be tied down? Would there be slack on the ropes? And how would it be arranged if there was? Because I dont think that the way the instructions have it is how it was done.
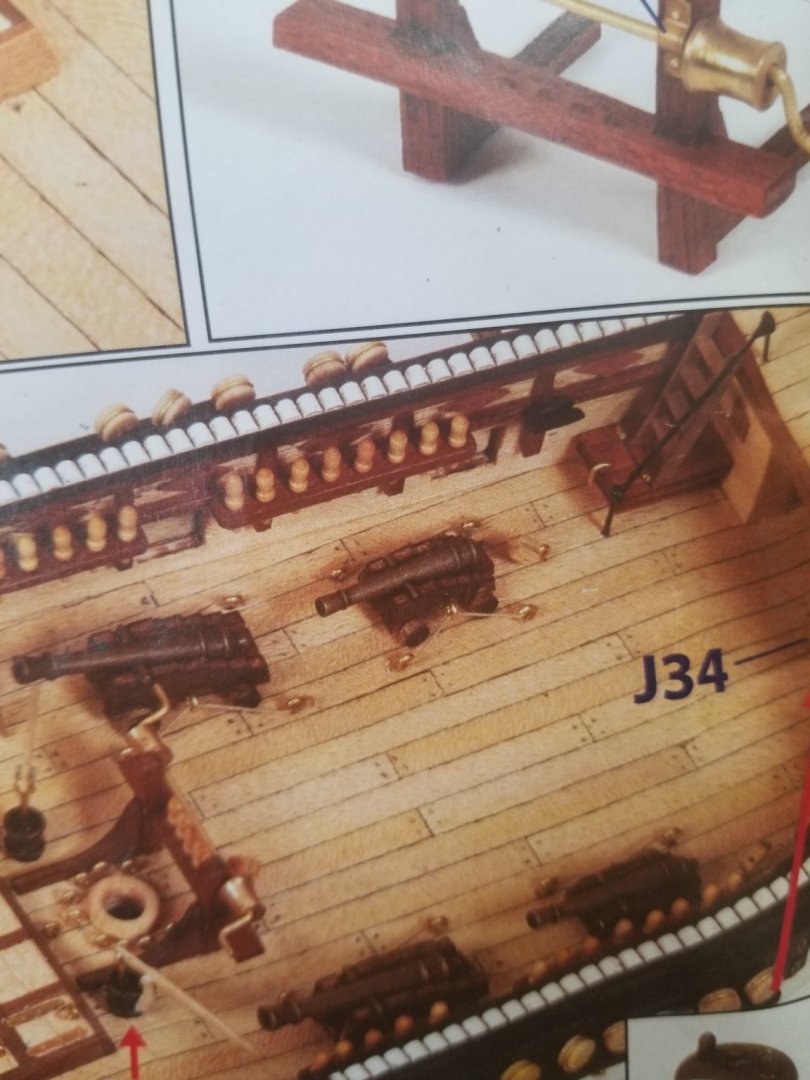
I didn't see anything in the AOTS book that I down loaded. (anatomy of the ship) @LucienL I know your more knowledgeable on the beagle them I and all I read is that they actually removed a good bunch of the cannons since it's a surveyor's ship. Anyone else's opinion would be appreciated too
-
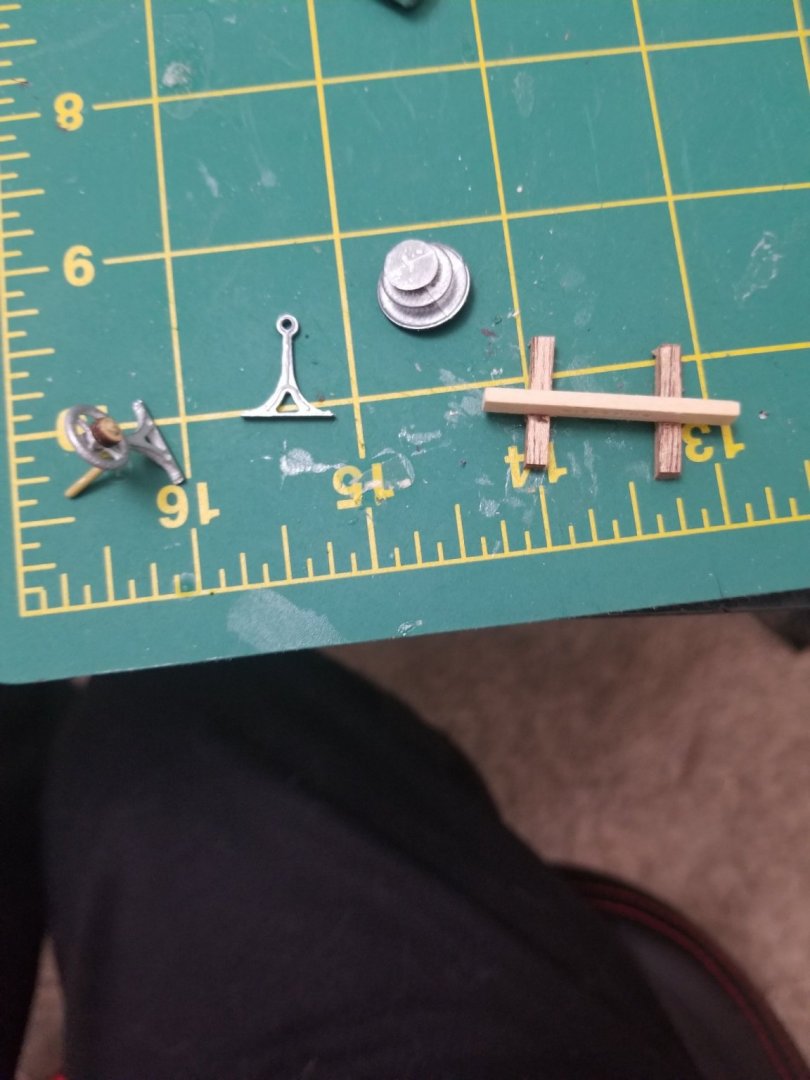
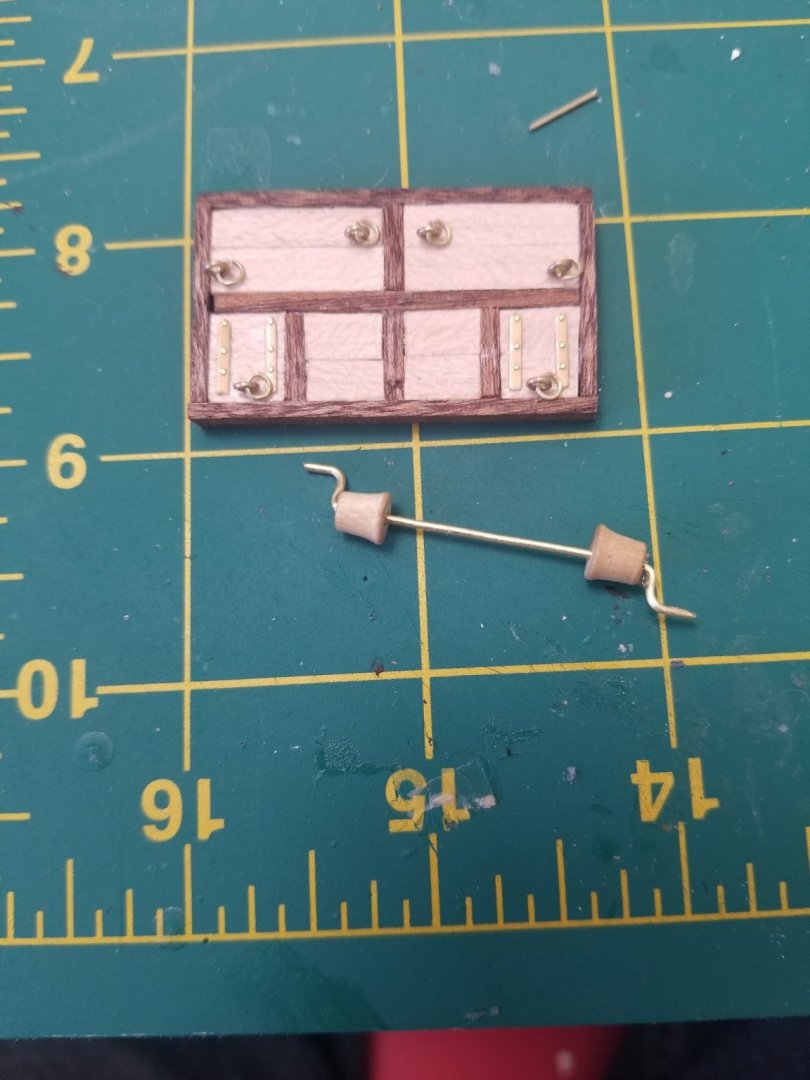
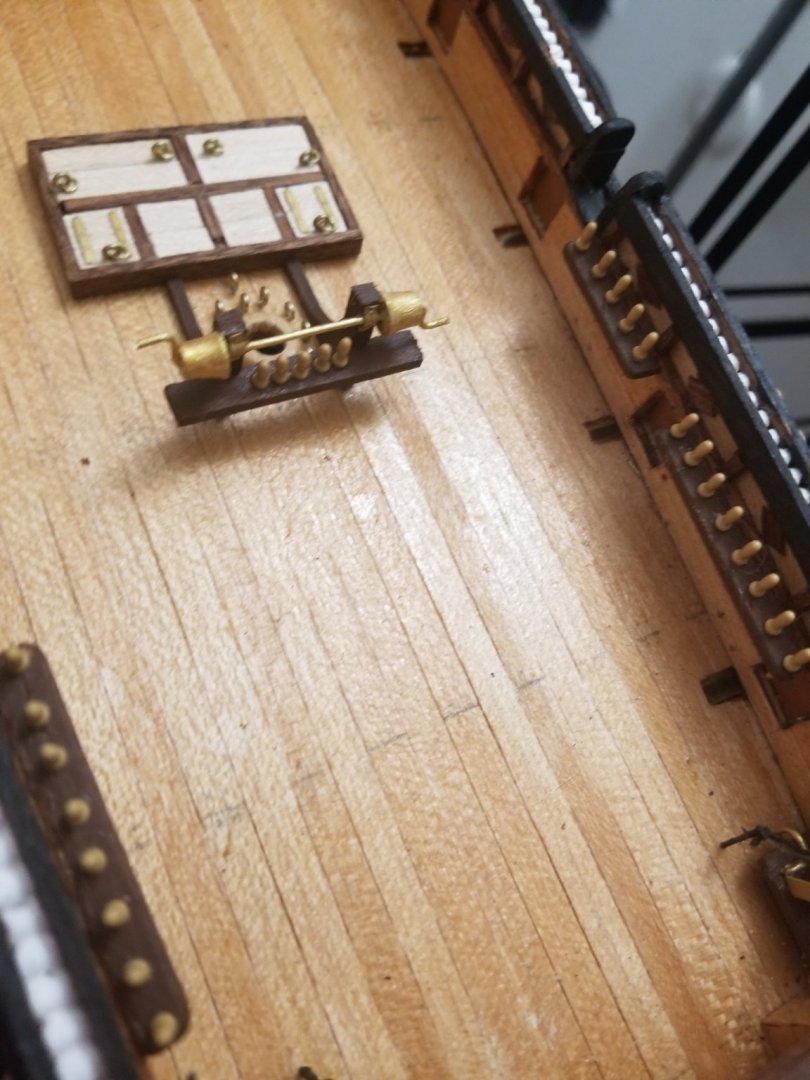
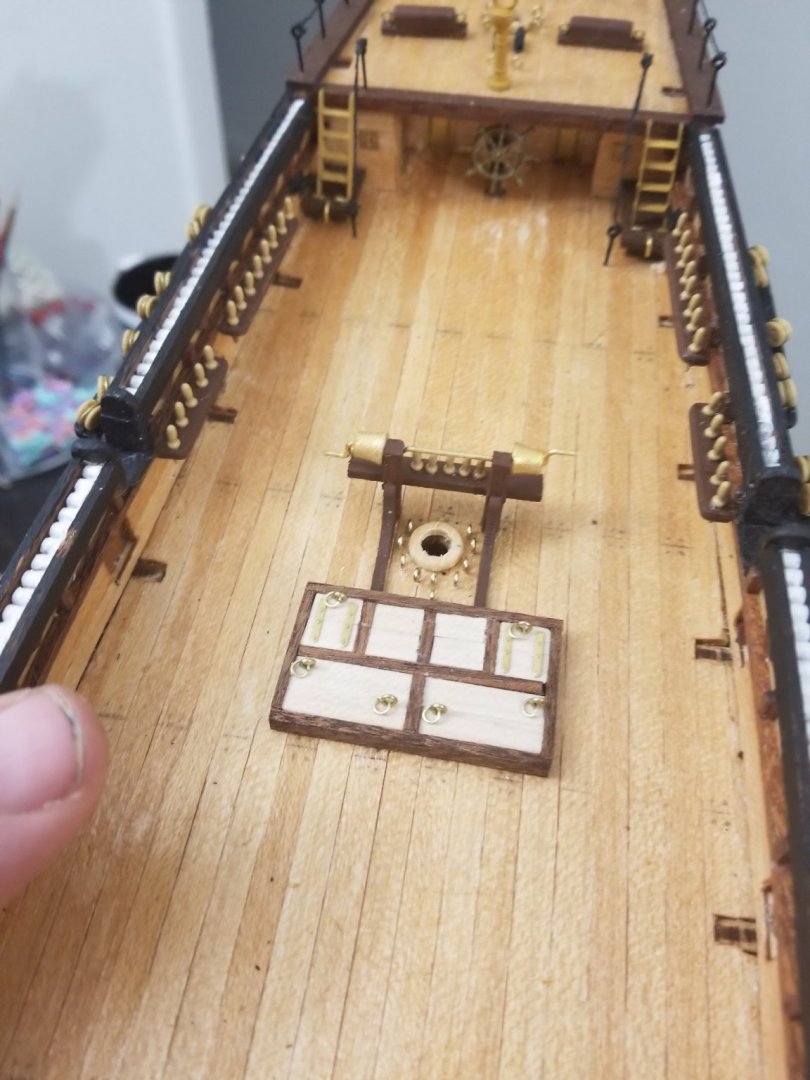
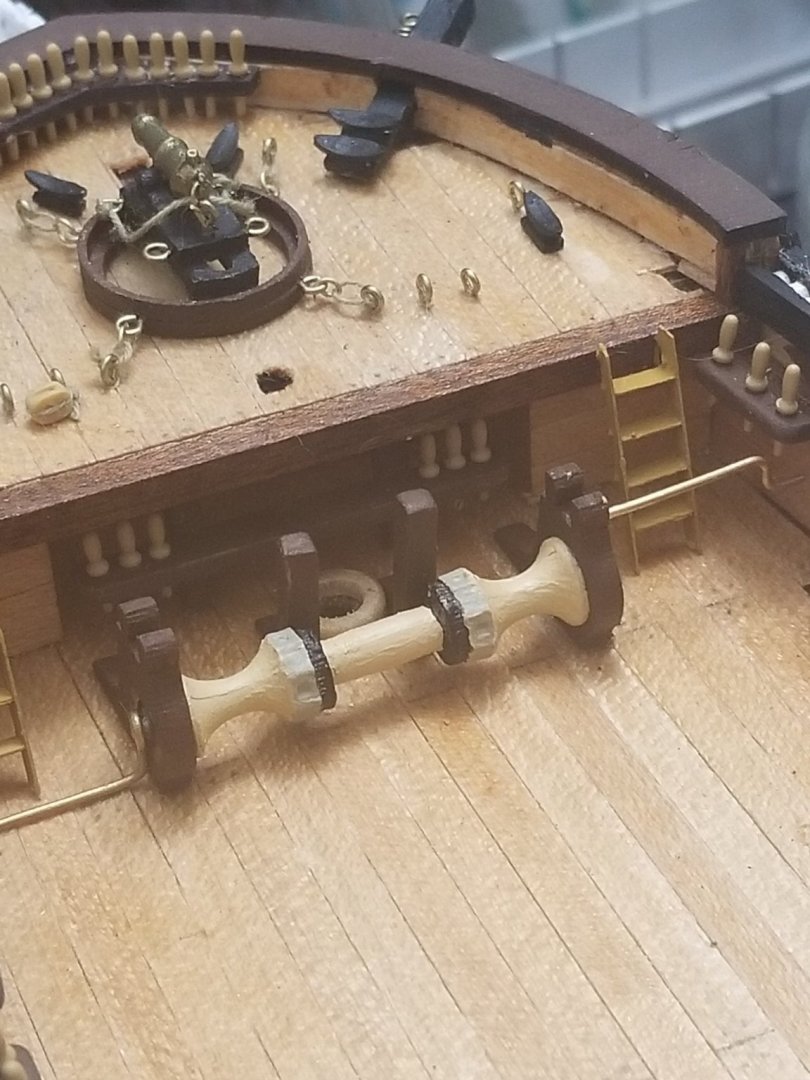
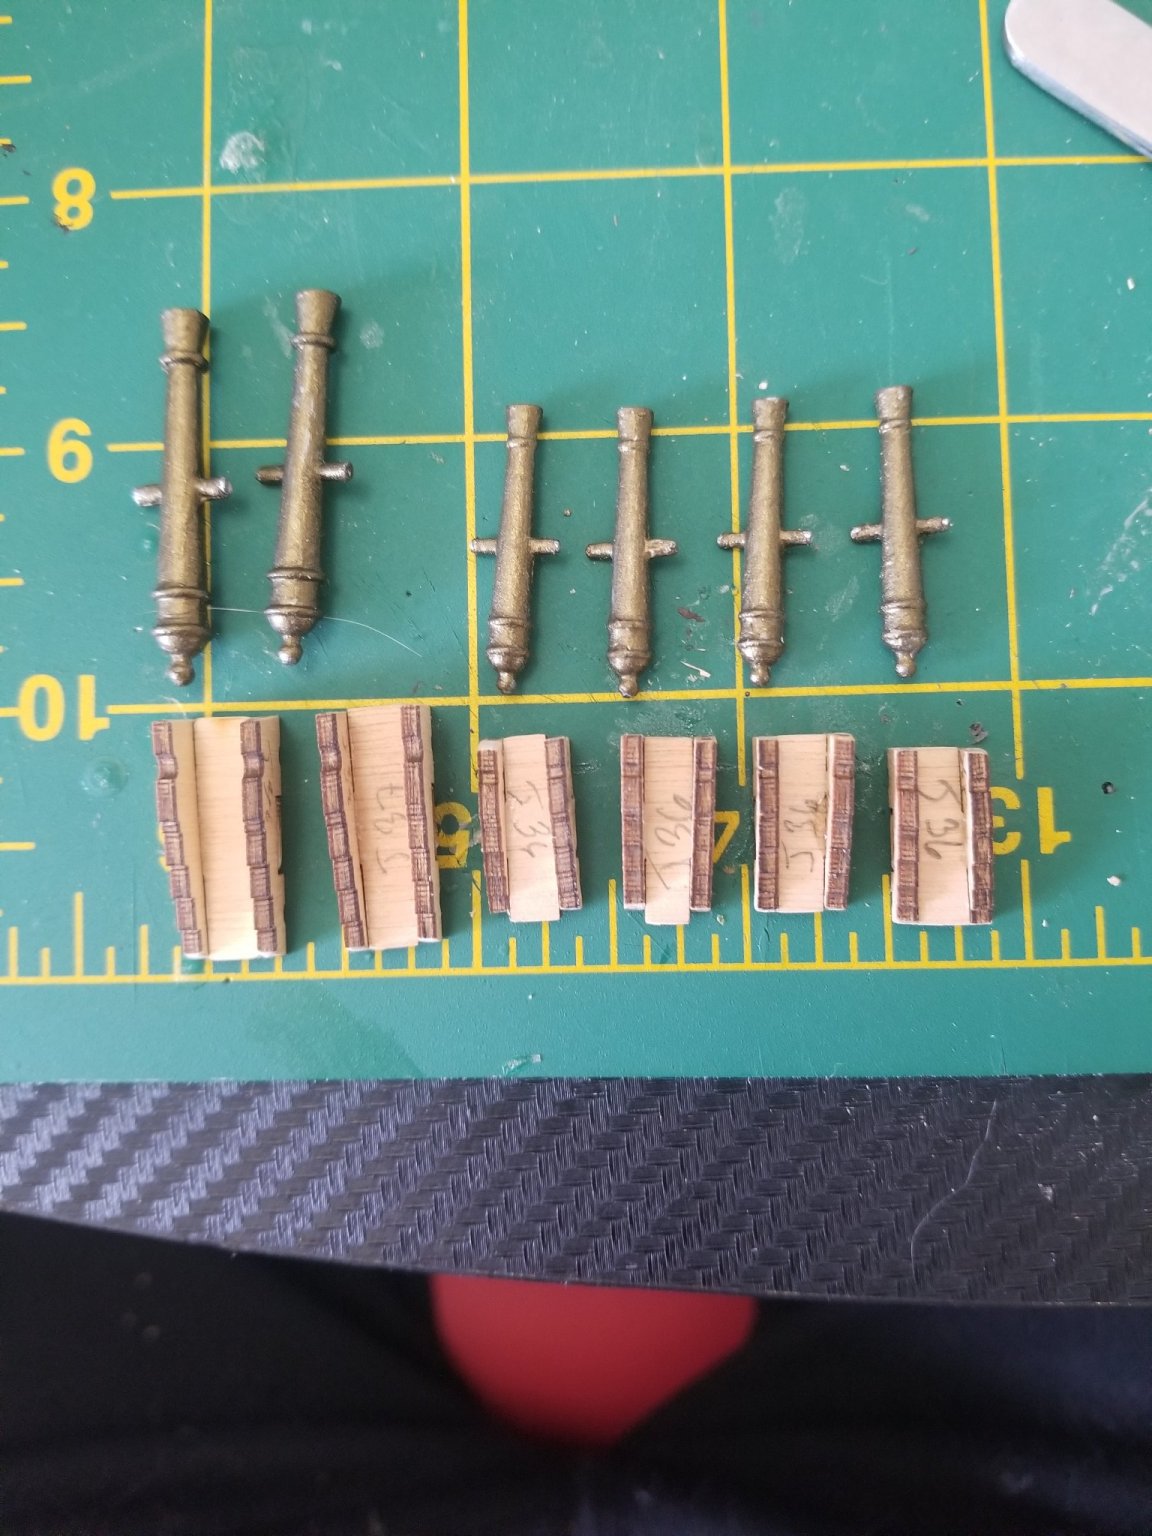
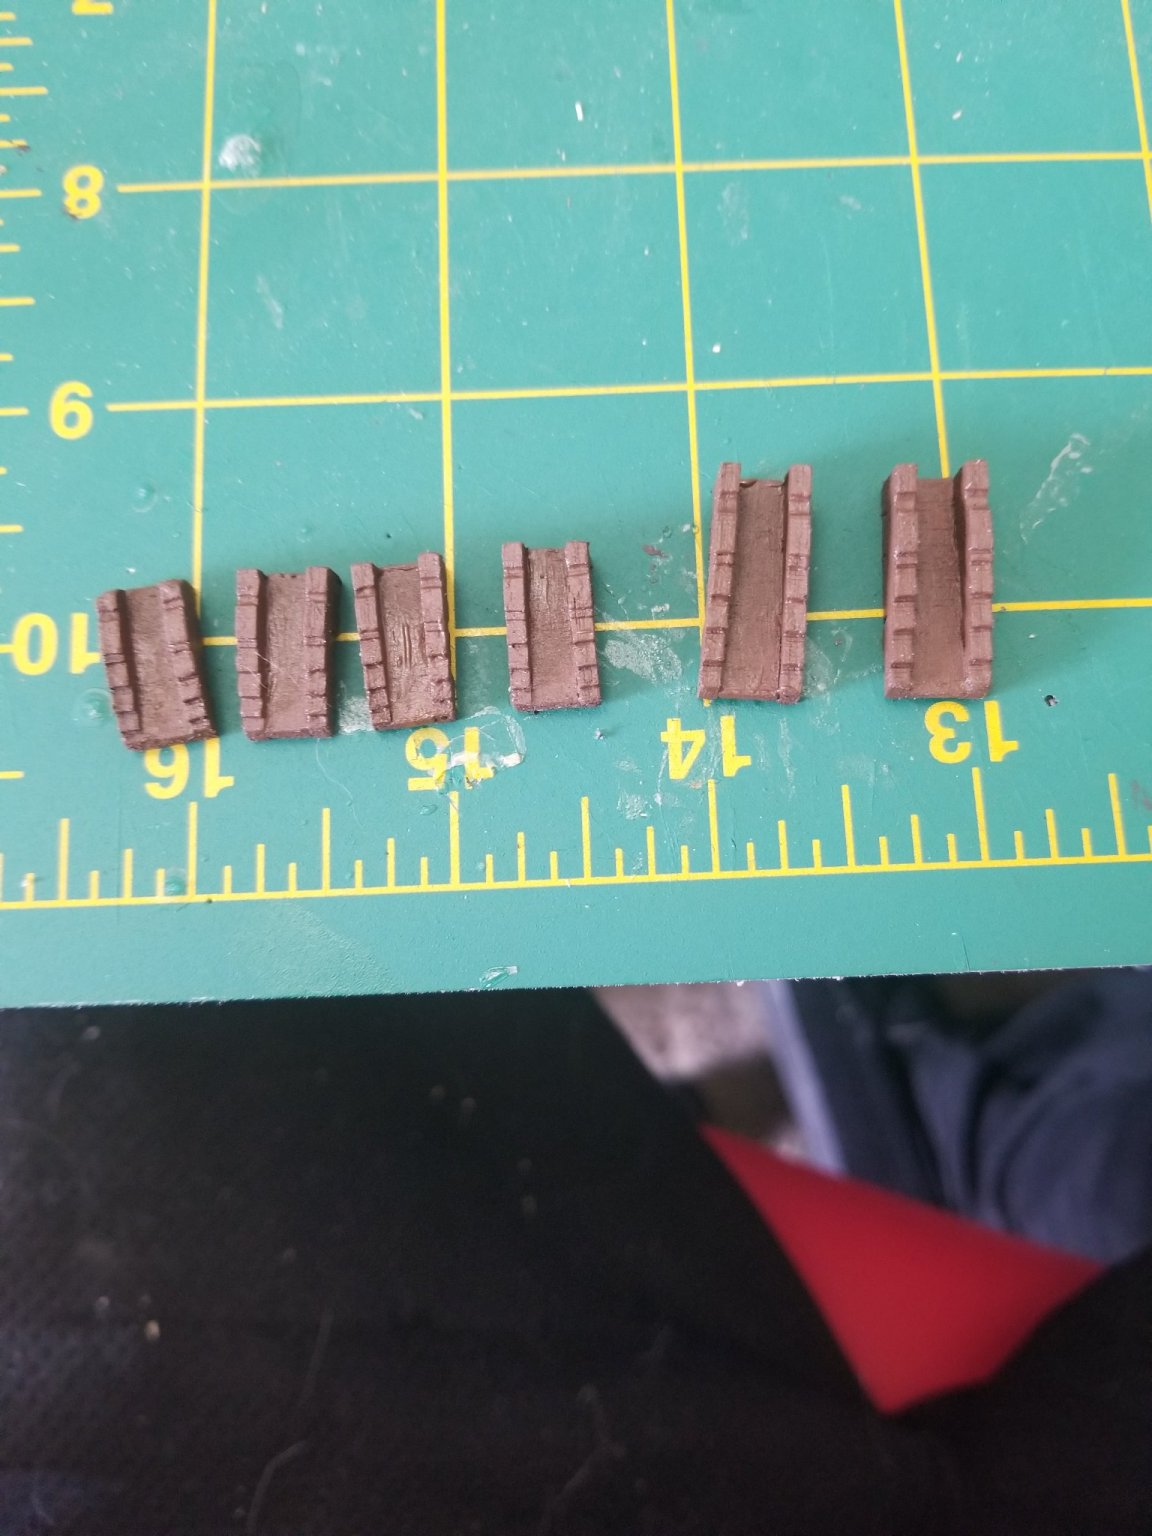
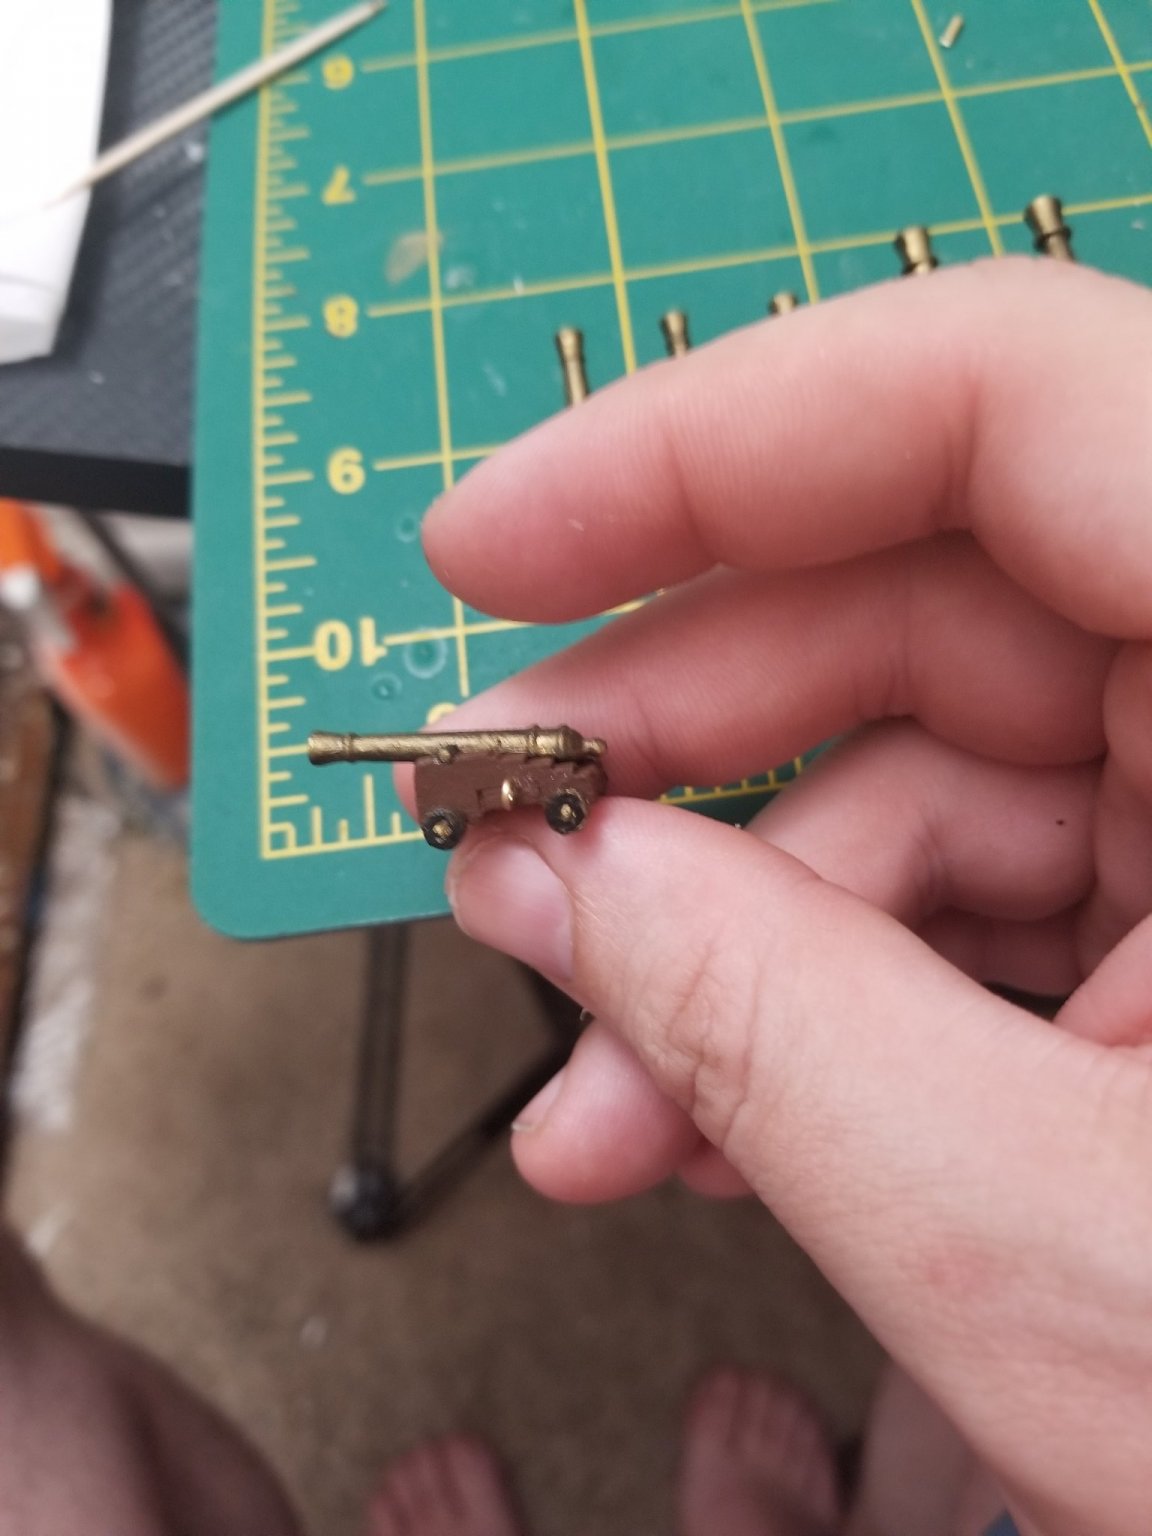
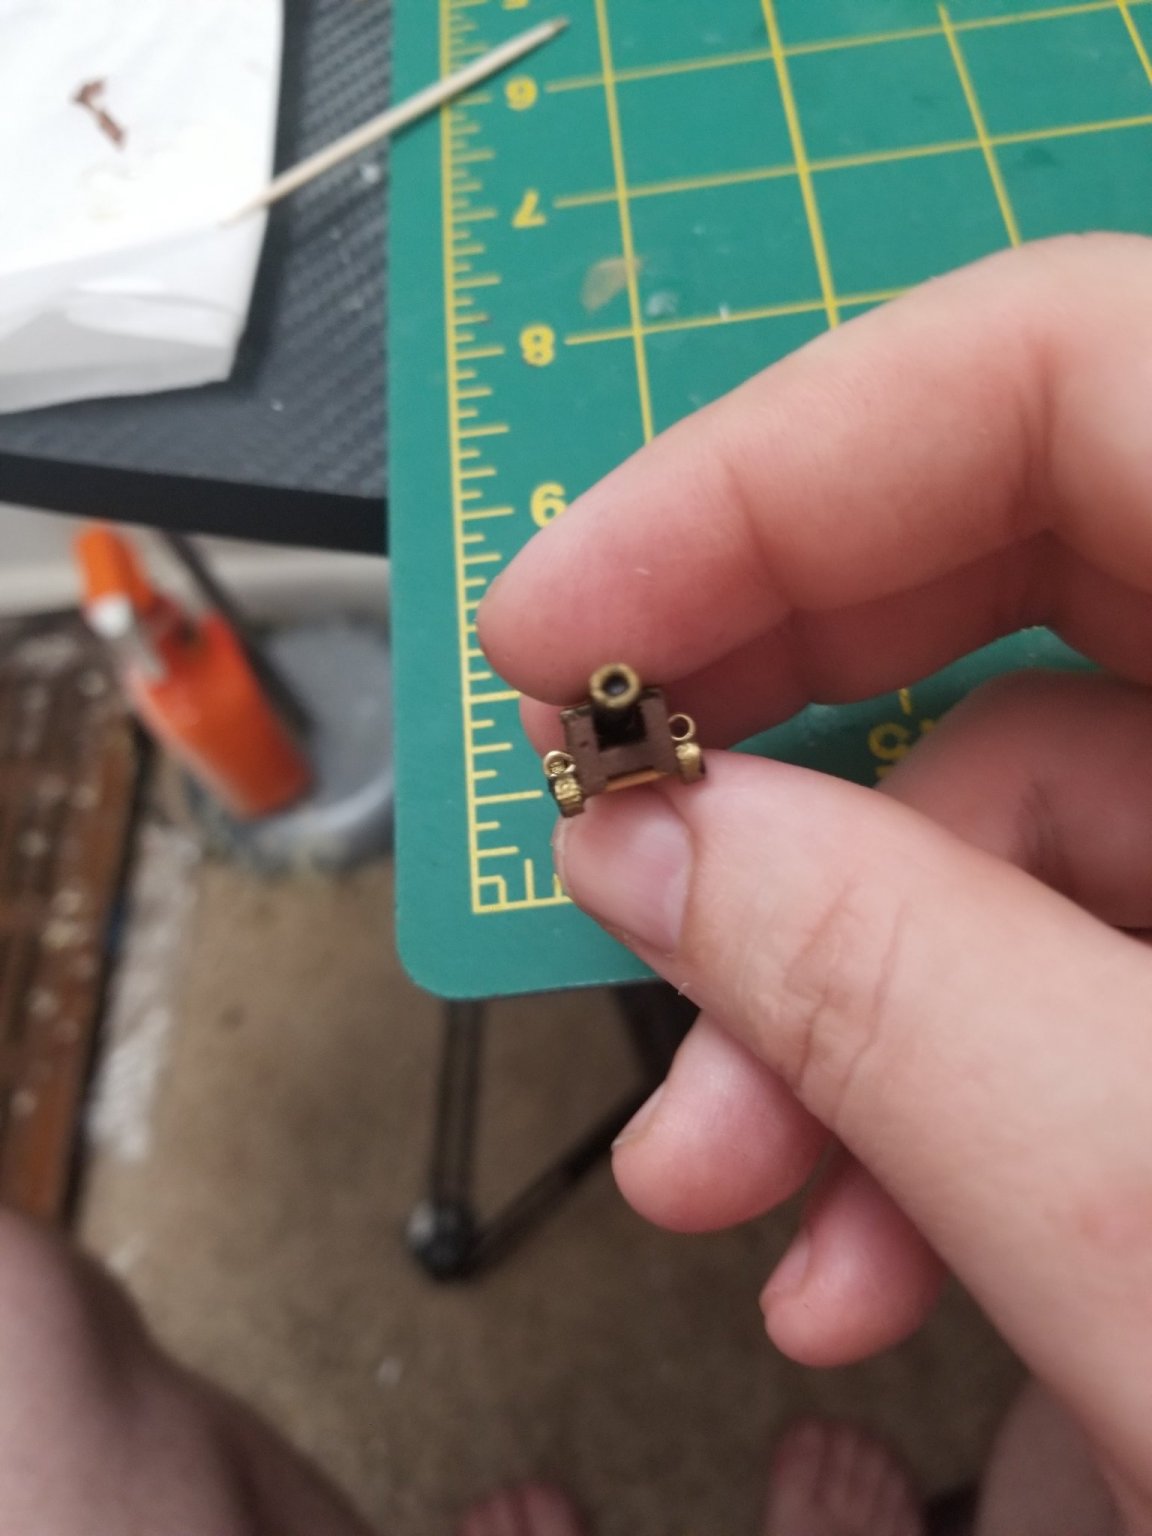
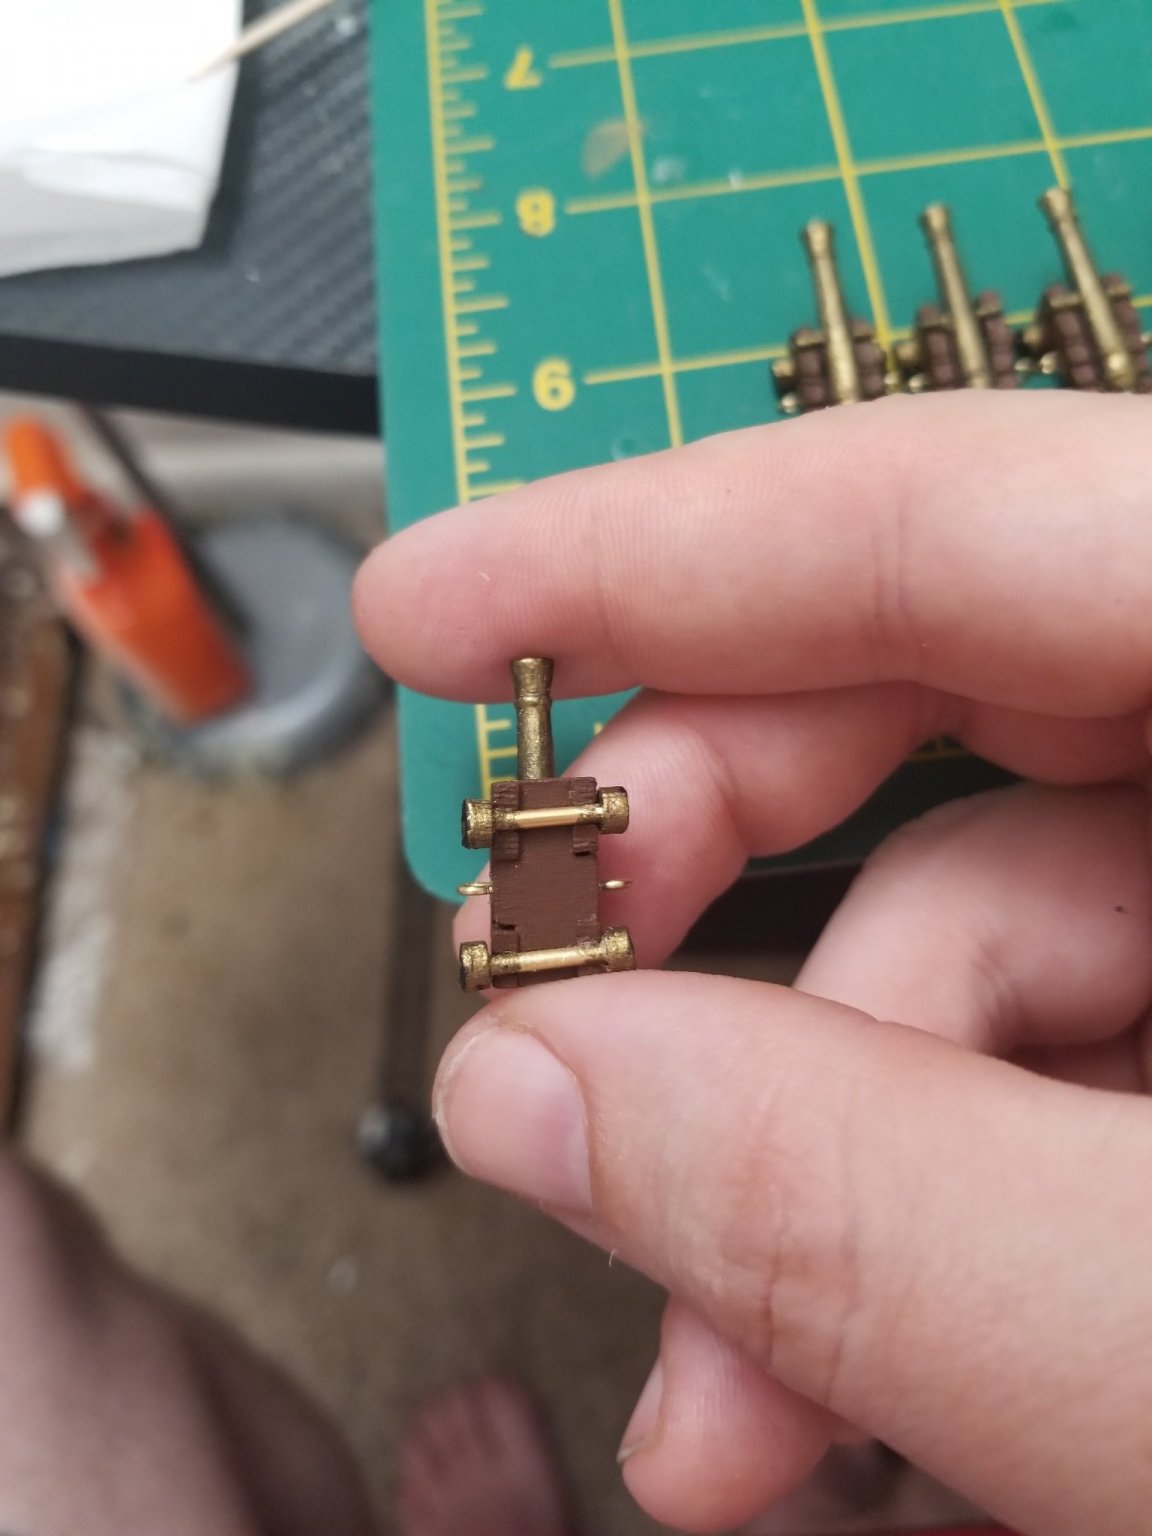
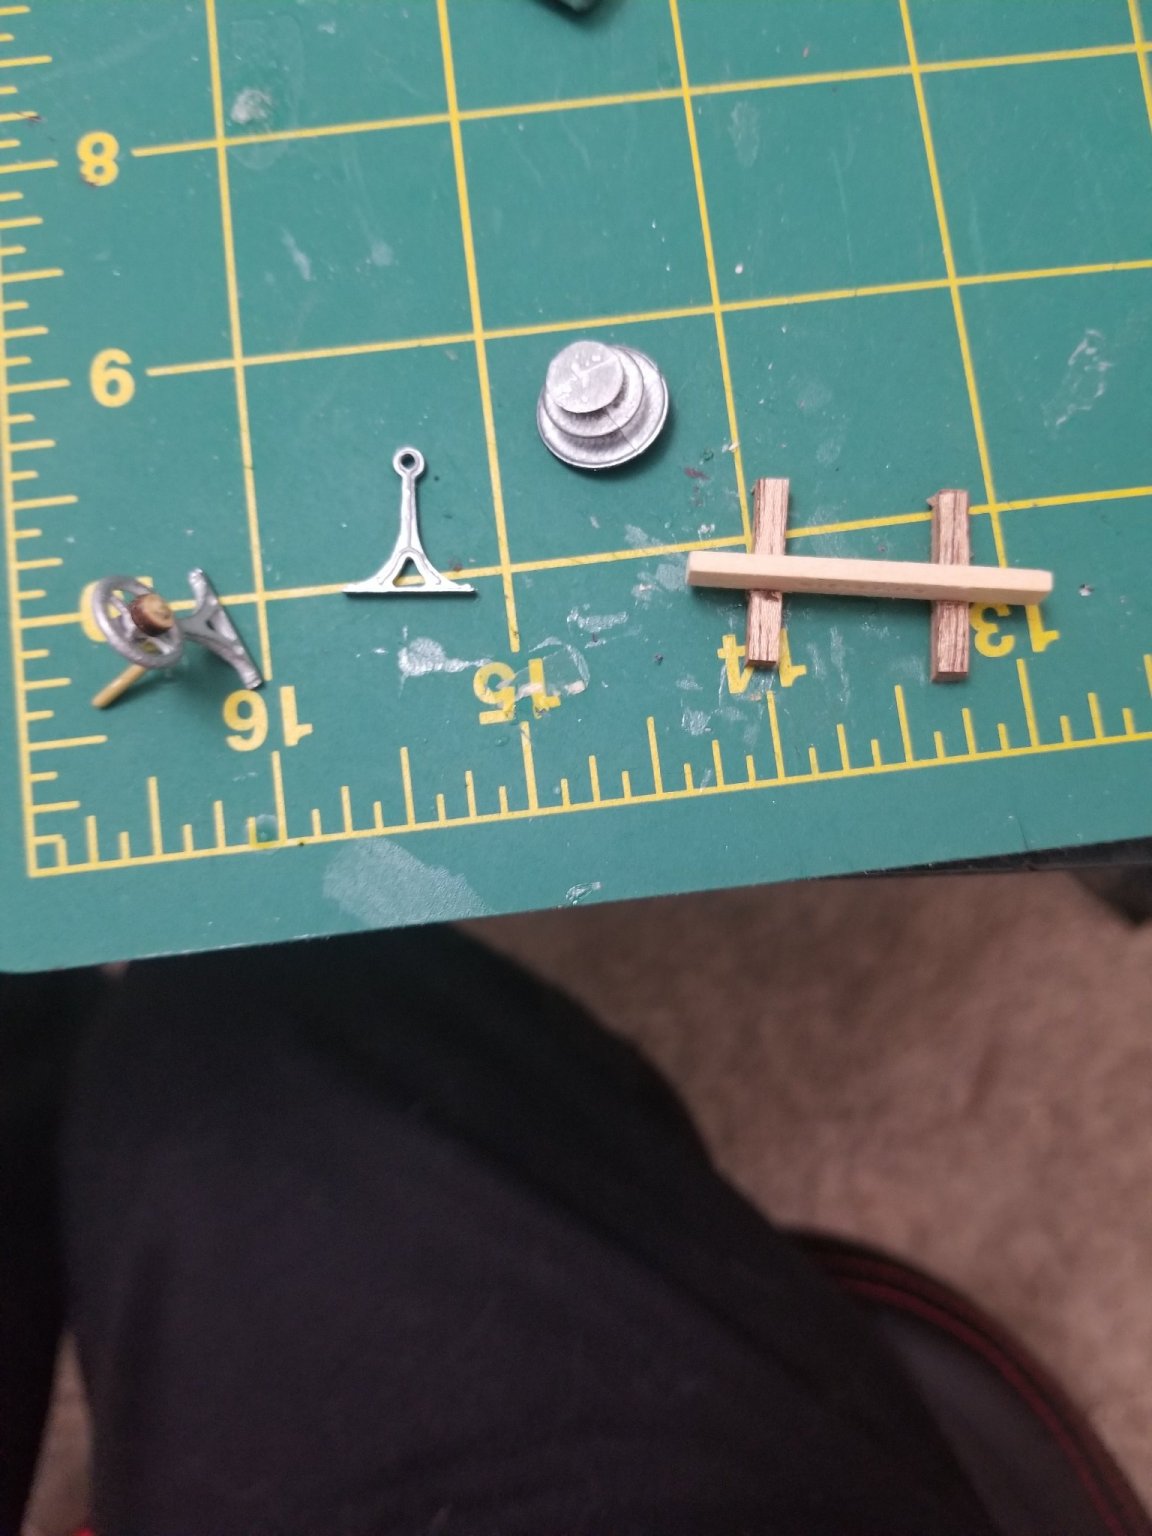
Alright so we got cannons done. That was fun and got quicker as I kept going. Started with getting the bases built and the cannons painted with a blackened brass color.
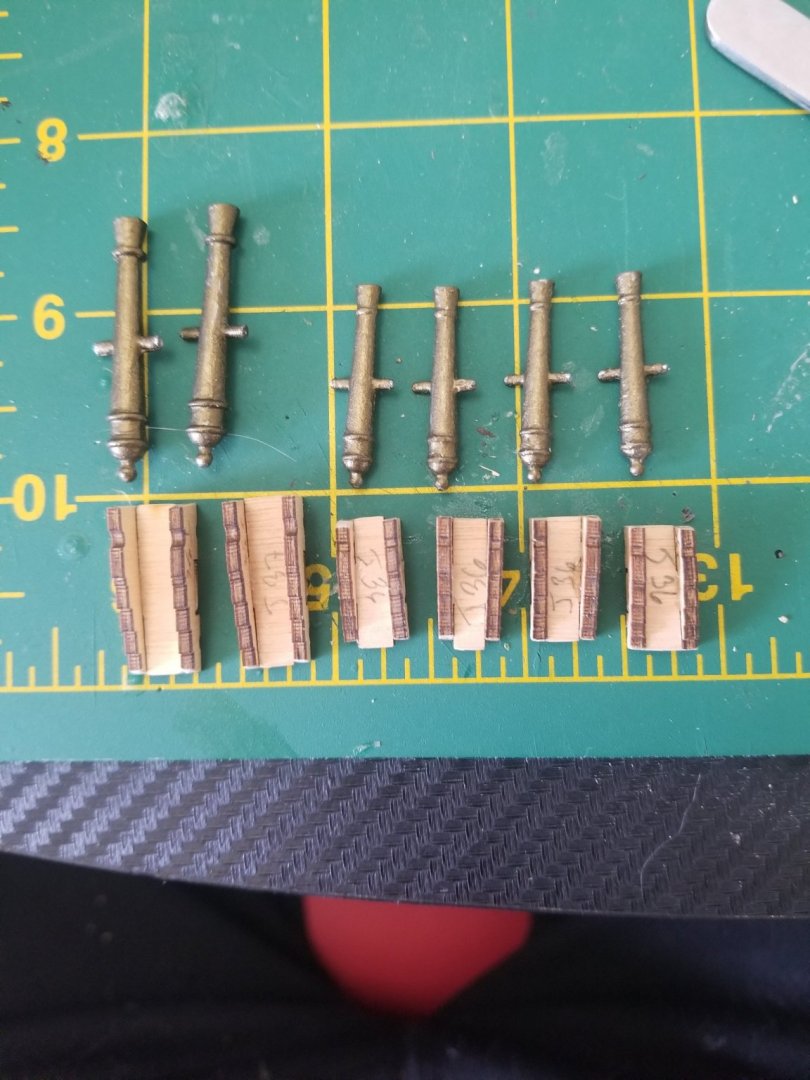
Then its onto painting the bases its color and getting them ready for the next steps.

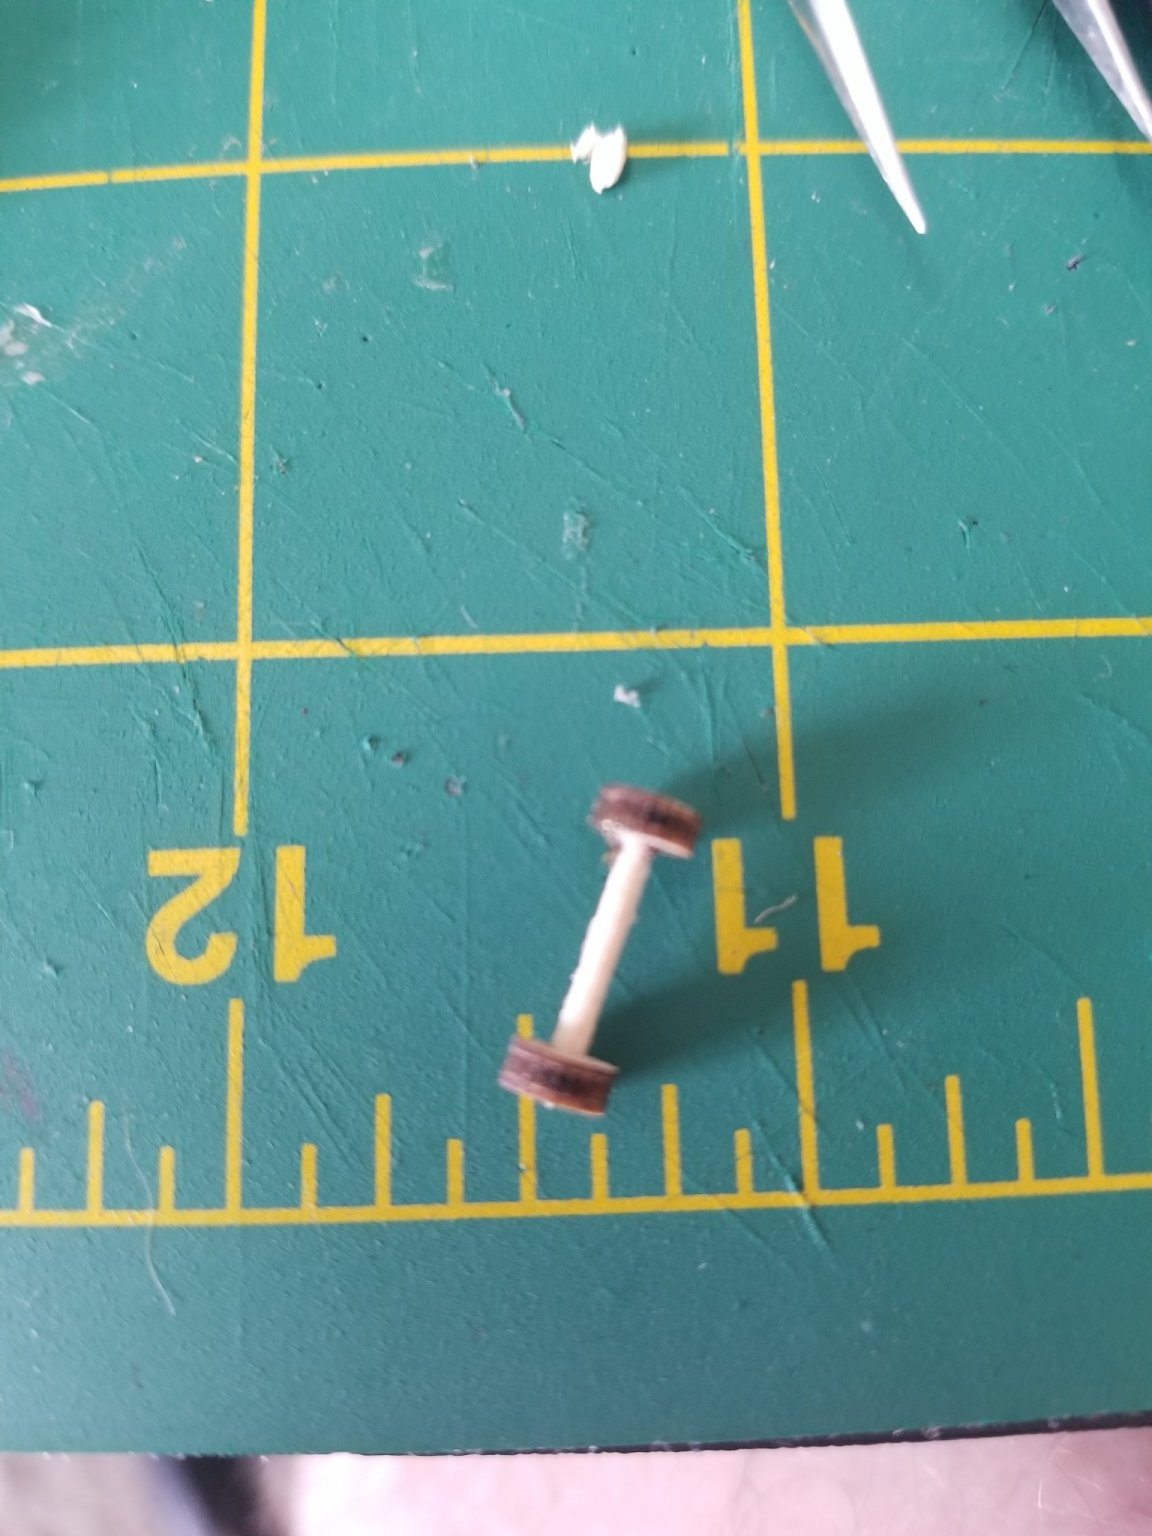
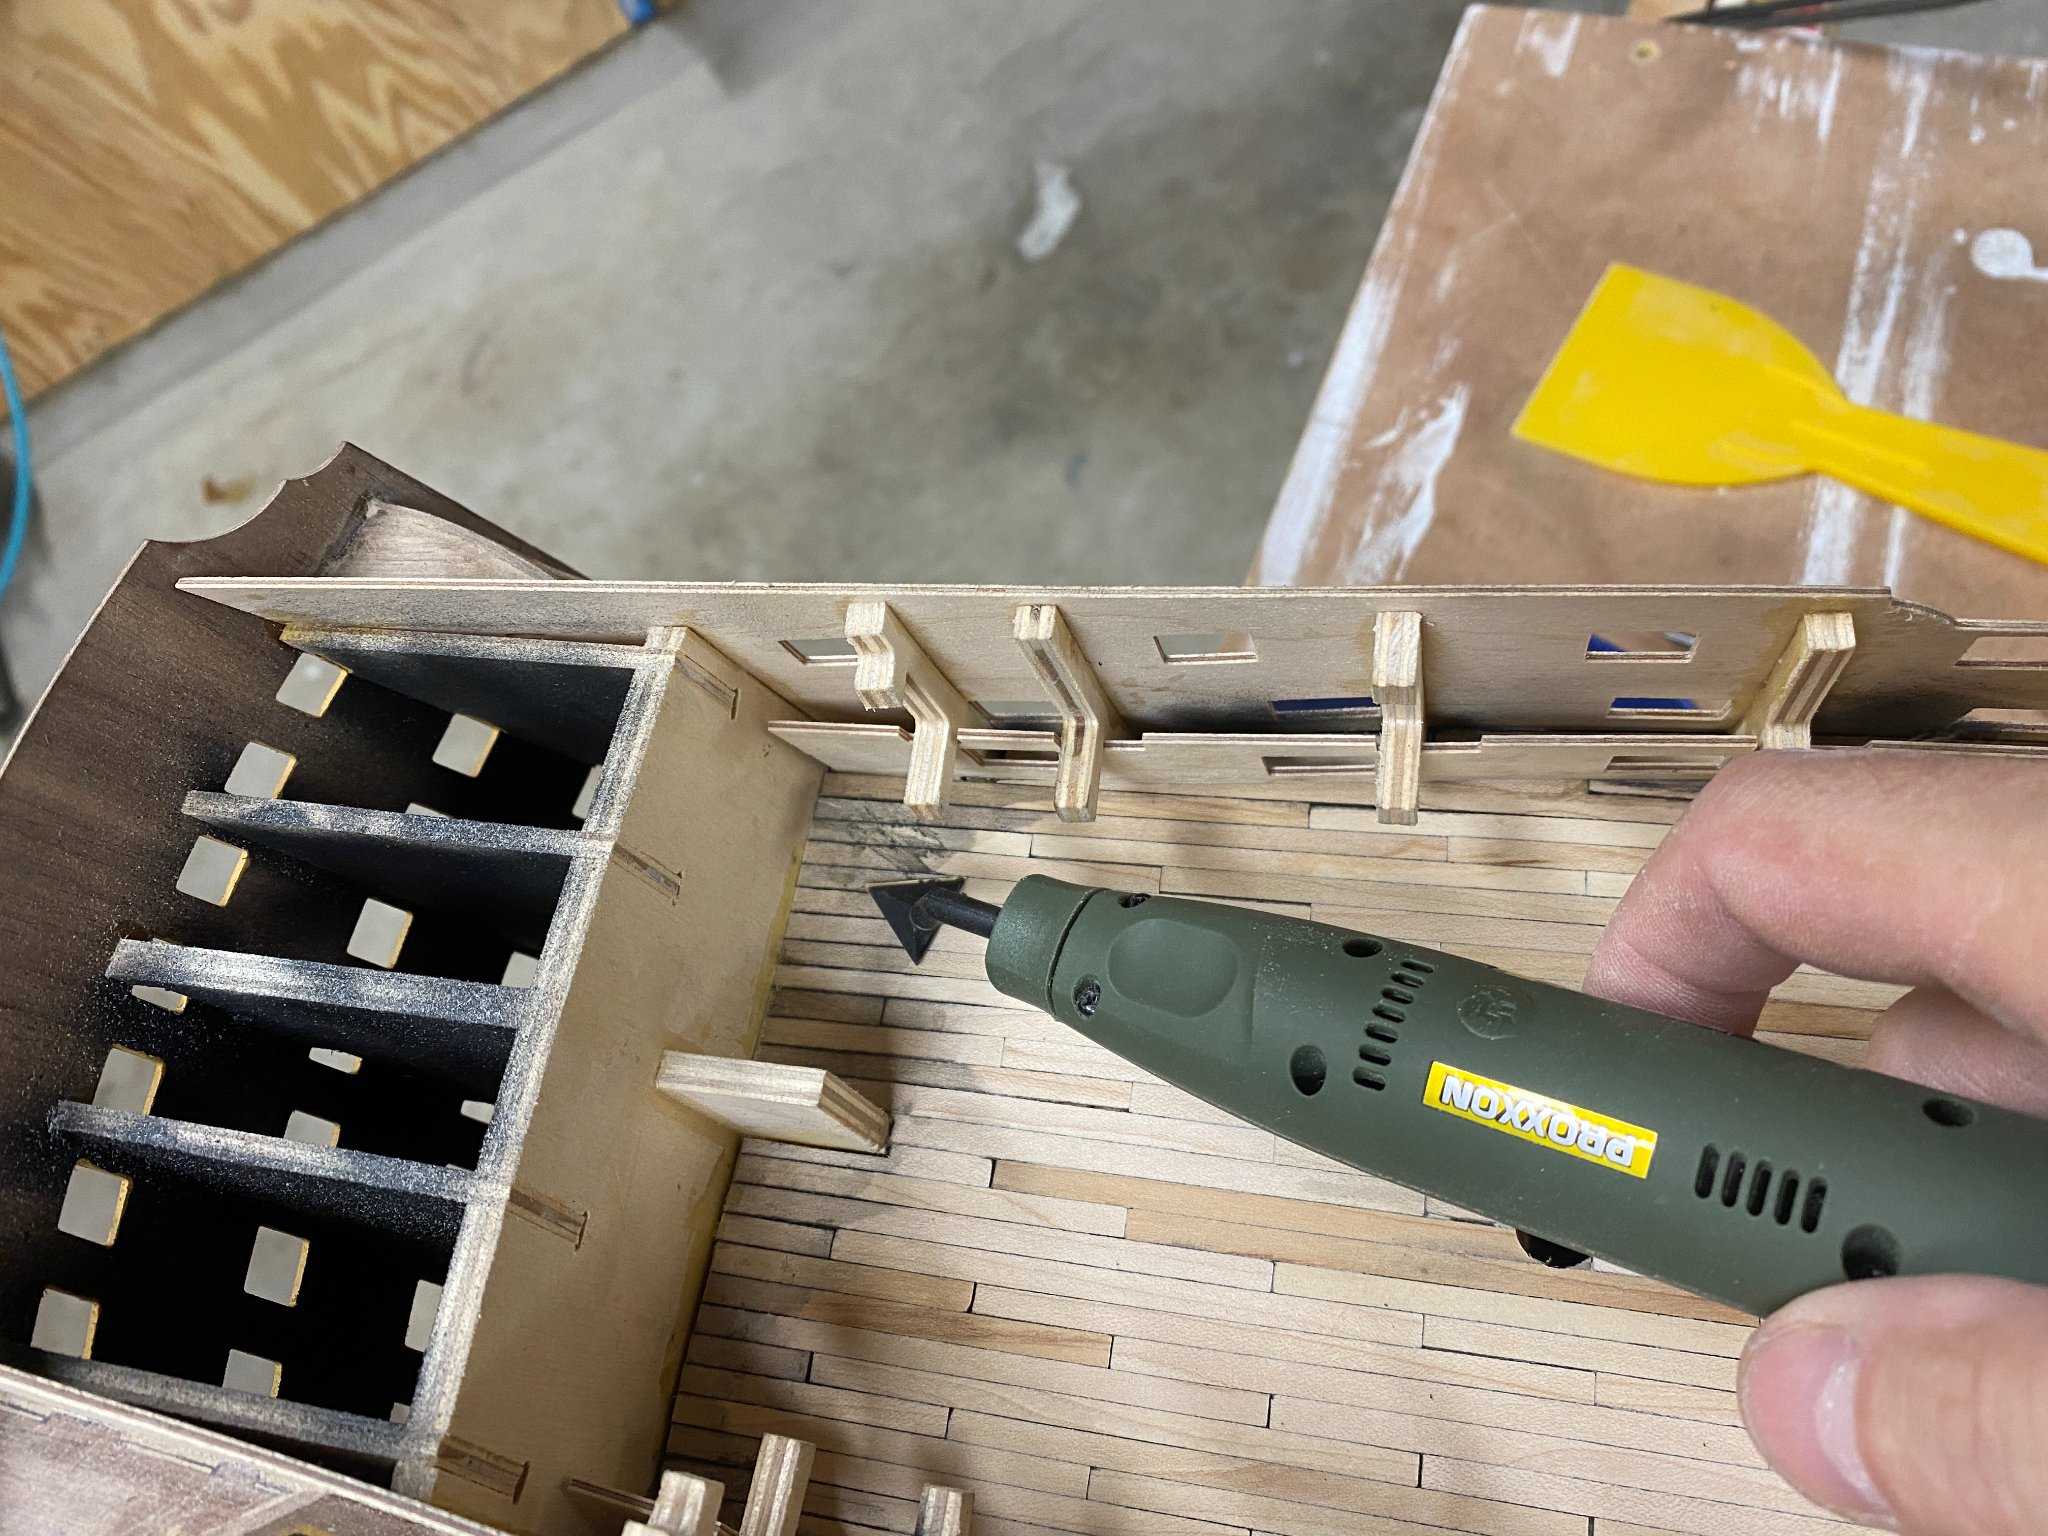
Did some measurements and found out that I dont have enough 1.5mm cause i used some on the stern ornaments to try and save on 1mm brass. So i did some whittling of spare dowels i have already purchased to make some spare axels.

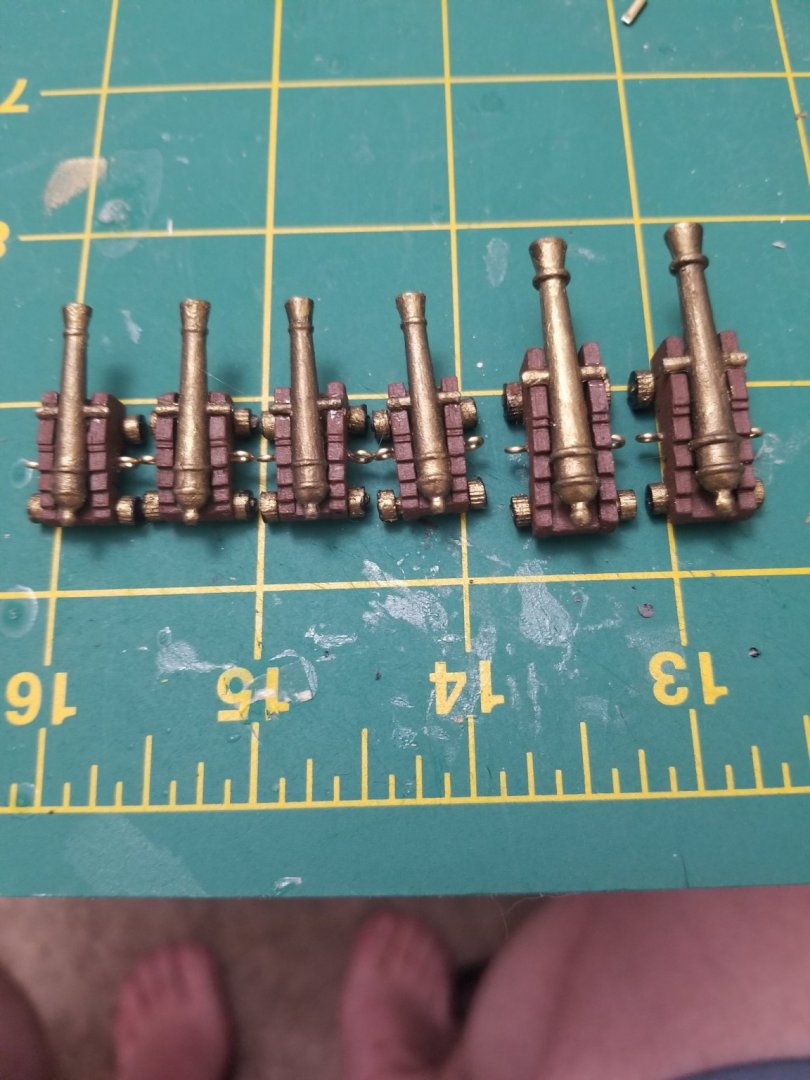
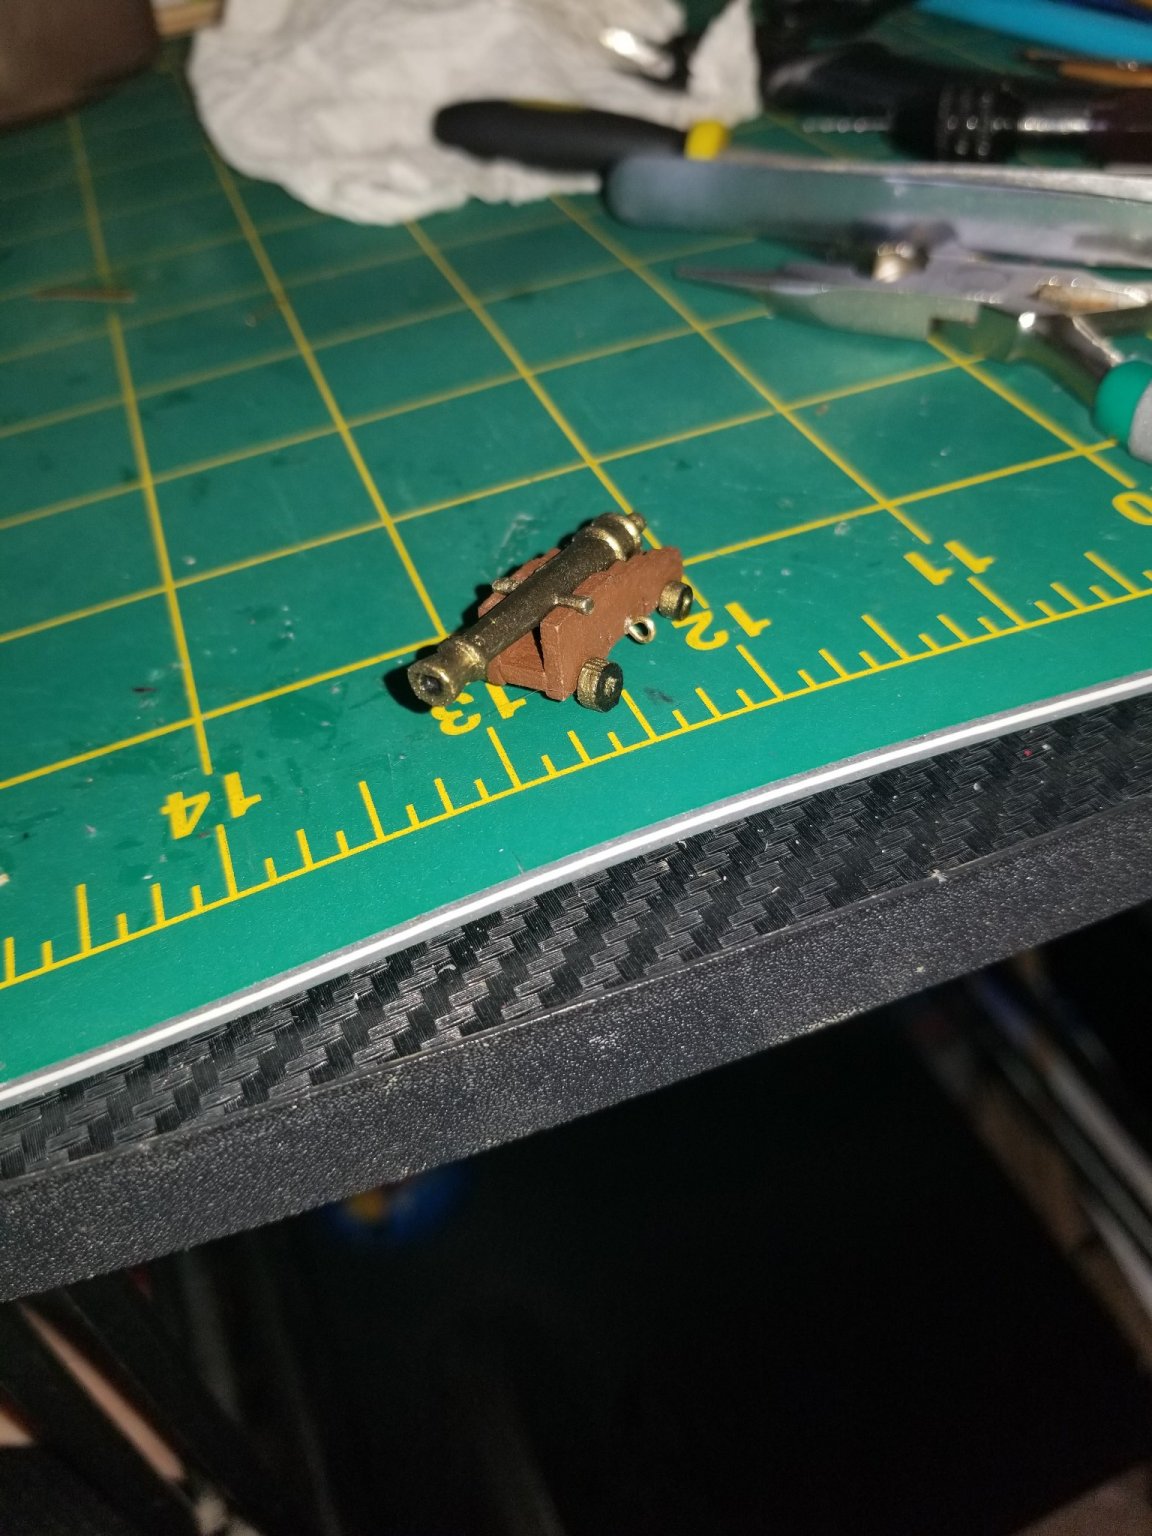
Now after painting and some detail of showing the axel in the wheel instead of just making it pure black (dont have pictures of this step) then I assembled the first cannon.

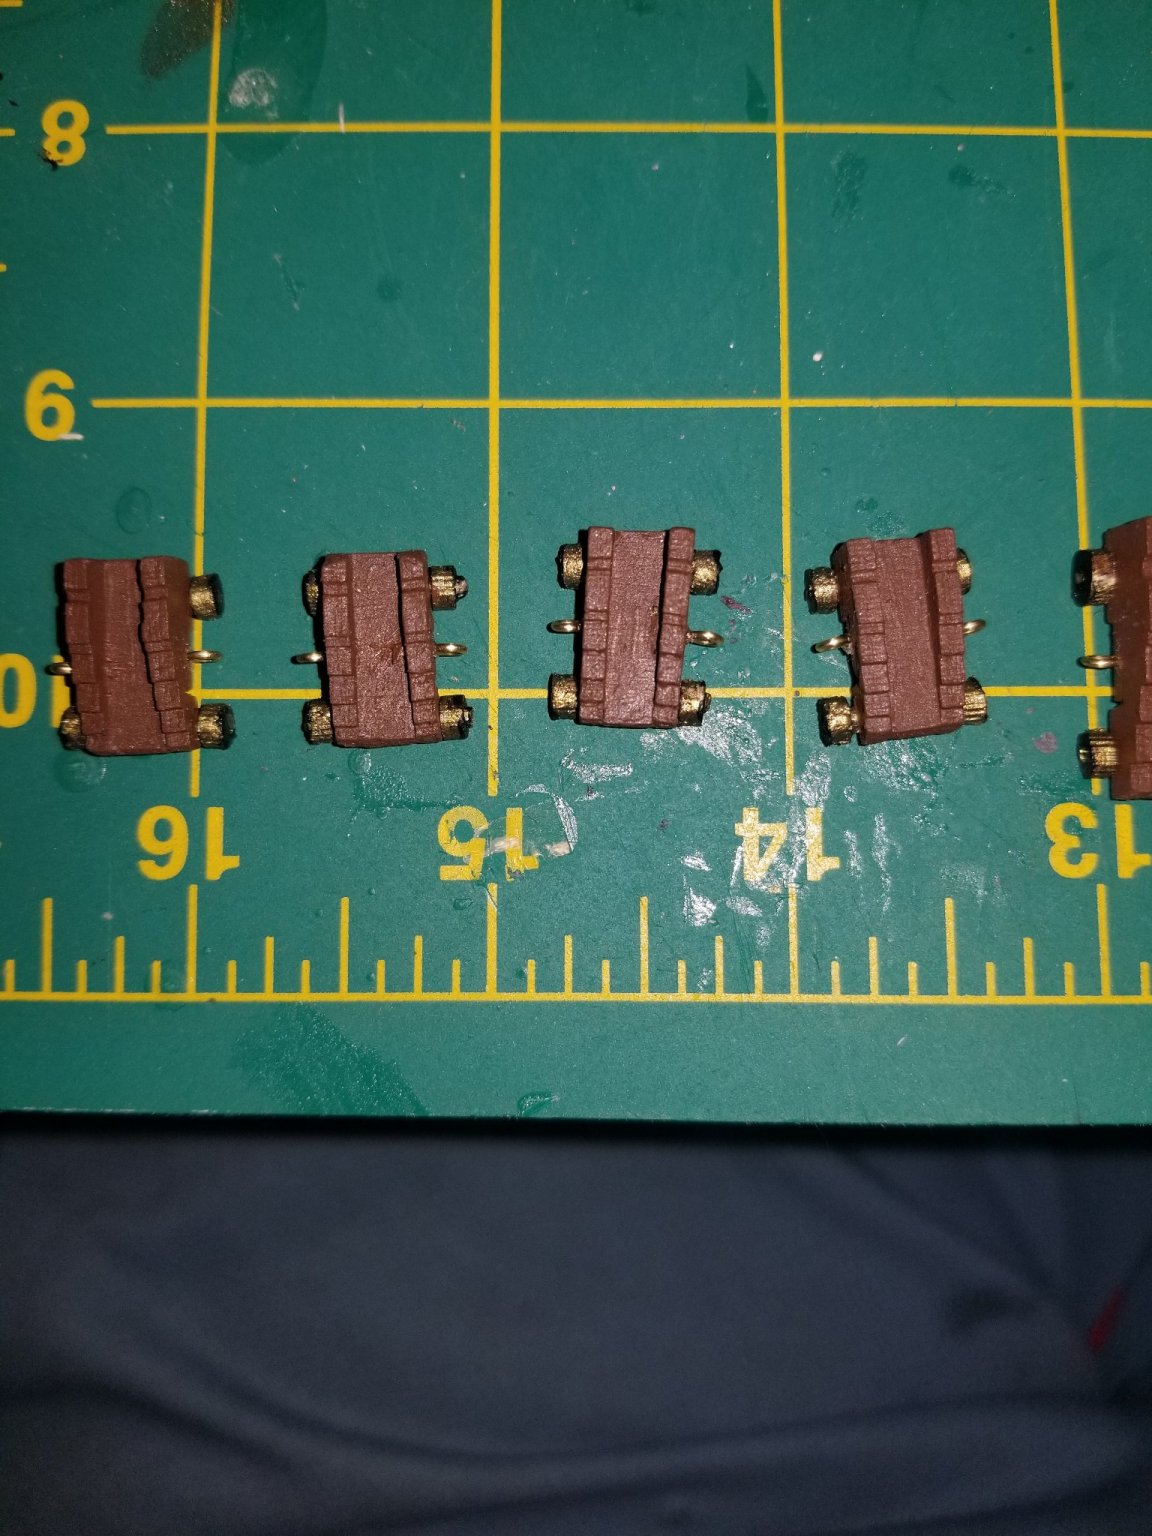
After being happy with the turn out I did the other 5 and here we are.


- Cathead, Dean77, Keith Black and 1 other
-
4
-
11 minutes ago, LucienL said:
When I only knew a little bit about the imperial system, I knew it was based on 12 for conversions and things, which I could respect, because 12 is objectively a better number than 10 when you want to divide things. But then as I was working on my first kit, the bounty’s launch from model shipways (American), I was exposed to that darker side of the imperial system. Does 1/16th or 3/32 of an inch mean anything to anyone?
It means the super fricken small lines on a ruler and it's such a pain to measure with them. Makes me want to pull my hair out one piece at a time.
-
2 hours ago, Keith S said:
Wow! I would love to pay OCCRE a visit at their factory, and show them all the little pieces in their parts-store that would have made life easier for those building their "Terror" model. I see lots of "Beagle" parts that would be nice to have on "Terror". For example, those warping drums with the hand crank. The "Terror" is festooned with those things, but not one included in the kit. Also the windlass barrel: the "Beagle" kit has double pawls, which would have been much more correct for "Terror" also. Instead, we "Terror" folk have had to make our own by turning down bits of dowel!
It has its ups and downs currently working on cannons and had to make some of the wheels axels from dowels and I feel more achieved and that I have a better fit with it being crafted by hand instead of just given to me.
- Pete D and Keith Black
-
2
-
-
6 minutes ago, ccoyle said:
Technically, the US uses a system called US customary units. Although similar to imperial units, the two systems are not 100% identical. I only know this because I am a science writer and have to be careful regarding naming conventions and such. 😜
But yeah, we all knew what you meant. 😉
I appreciate the clarification and what ever it's called the United States need to not try and always be different lol.
-
2 hours ago, LucienL said:
I still have 30 cm of 1 mm (3 rods), I just had another look, I will not need that much, maybe my kit just had a bit more, I'm not sure, I can't think of anywhere where I may have saved brass. If I'm missing something, I still have my 0.8... aluminium that I used for the scroll. (it's in some imperial unit🤮).
Might have another go with the paint, thank you.
Also, no offence to people who do use imperial, I am just not a fan
I've grown fond of metric but it's hard to find things in the US that isn't in imperial lol. My kit only came with 6 brass 1mm rods so you might have gotten more probably. You need about 8 pieces in total as far as I can tell so you should be more then fine with 30cm.
-
2 hours ago, LucienL said:
Sorry for the break between posts, just been dealing with a hectic couple of weeks and haven’t had much time for boat related things.
It took some fiddling, but I did eventually get the bow details the way I wanted. I added another scroll at the bottom

Also, there is a little confusion between the photo instructions, videos and materials list regarding the sizes of the wire you’re supposed to use. The videos indicate that they should all be 1 mm, but the parts list says some of them should be 1.5 mm. I went with the parts list as I figured this would be the best way to avoid running out of material.
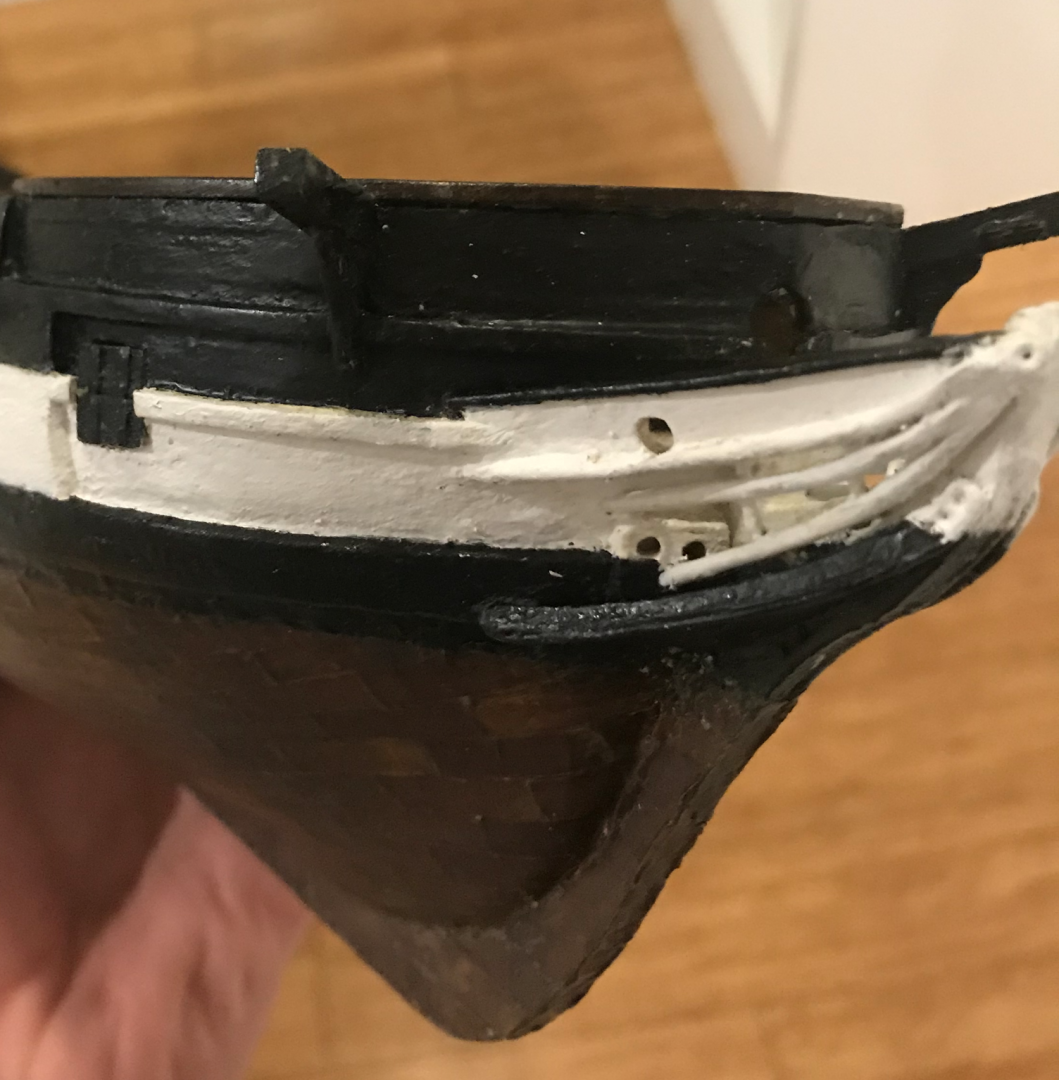
I also used some filling putty to connect the rails to the boat and make it look a bit more like one piece. As with all my metal work so far, it started out a little scruffy, but I’ve been working on slowly tidying it with a Dremel and a blade.

Unfortunately even with me being frugal I still ran out of 1mm brass. Its inevitable so if you dont have any available I would order it now before you get to page J where you will definitely run out.
Also had the same issue with the paint looking clumpy and someone suggested watering down the acrylics so help it be more smooth and clean looking.
-
9 minutes ago, Techtonic said:
I had already glued the thread to attach the yards to the mast. It really just needed the yards to be removed from the mast, flipped around and refitted. But that would removing and redoing the glued thread. When I finished up last night and noticed the problem I wasn't in the mood to backtrack like that. But today with a fresh mind I decided to go ahead and do it.
Good I'm glad you fixed it so it was rigged right.
-
So got some smaller pieces going and installed which is nice. Got my brass rods in the mail which took much longer than I wanted. So just got a couple photos but still want to make sure you are all updated.
Hopefully you all are wanting to see the small updates but if you want it a little more spread out I can do that. I can also do more pictures so you can see more steps. Let me know so I can make this more interesting.
-
That's some good advice I didn't know if CA dried in the air if its puddle since I never tried it. What do you do just dip the tool in then apply it to spot or is there a chamber that's filled?
-
-
Welcome to the fun and exciting world we all live in.
- JeffT, Old Collingwood and Keith Black
-
3
-
1 hour ago, Will Ferris said:
Mailba, Good call! Even if I were to do just the ones on the main gun deck, they'd still be just more things to break during the copper, liners, wales, etc.
Thank you Sir!
Your quite welcome my friend 🙂🙂
-
1 hour ago, LucienL said:
Hey Maliba, my guess is that it would be easier to make the ladders out of wood than re-do the brass ones. I thought the brass ones looked a little flimsy anyway and am currently working on some wooden ones. It's a bit fiddly but would be easier than having to cut some brass, wood is a bit more forgiving with the glue and cutting.
Might be a good idea. I can always make any brass out of wood and paint it to try and make it look as real as I can. Thank you for the idea!!!
- Pete D and Keith Black
-
2
-
1 hour ago, Will Ferris said:
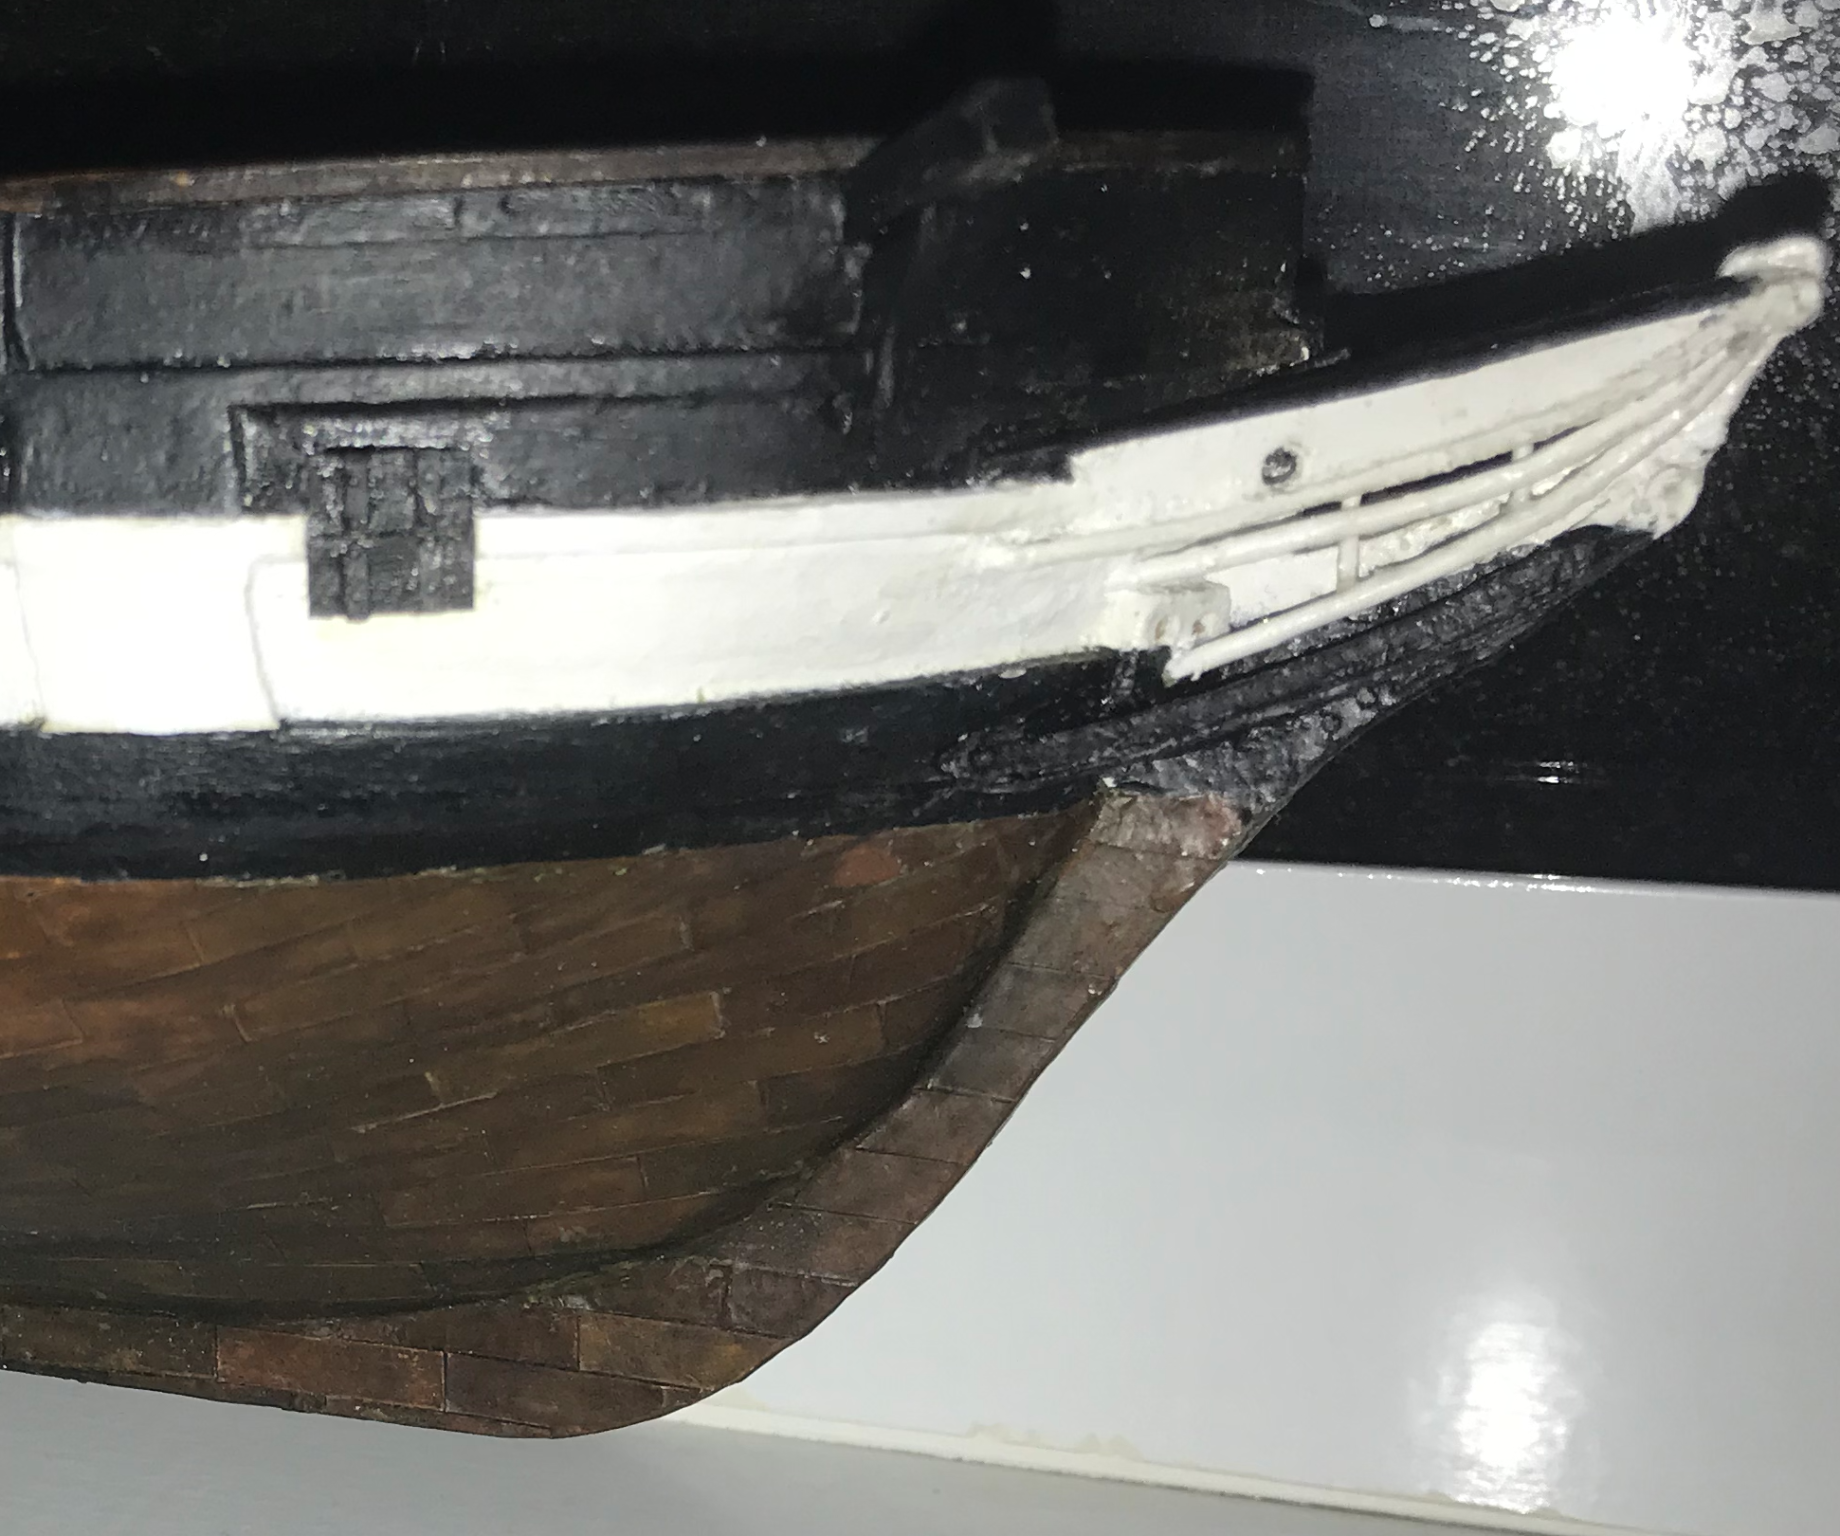
Caldercraft HMS Victory build Update
After gluing down the rest of the upper gun deck planking, I removed the majority of the smudged graphite by scraping it off with a bit of broken glass (For the uneven spots & corners - Thank you Lucien) and a razor. (For the field - Thank you Keith)
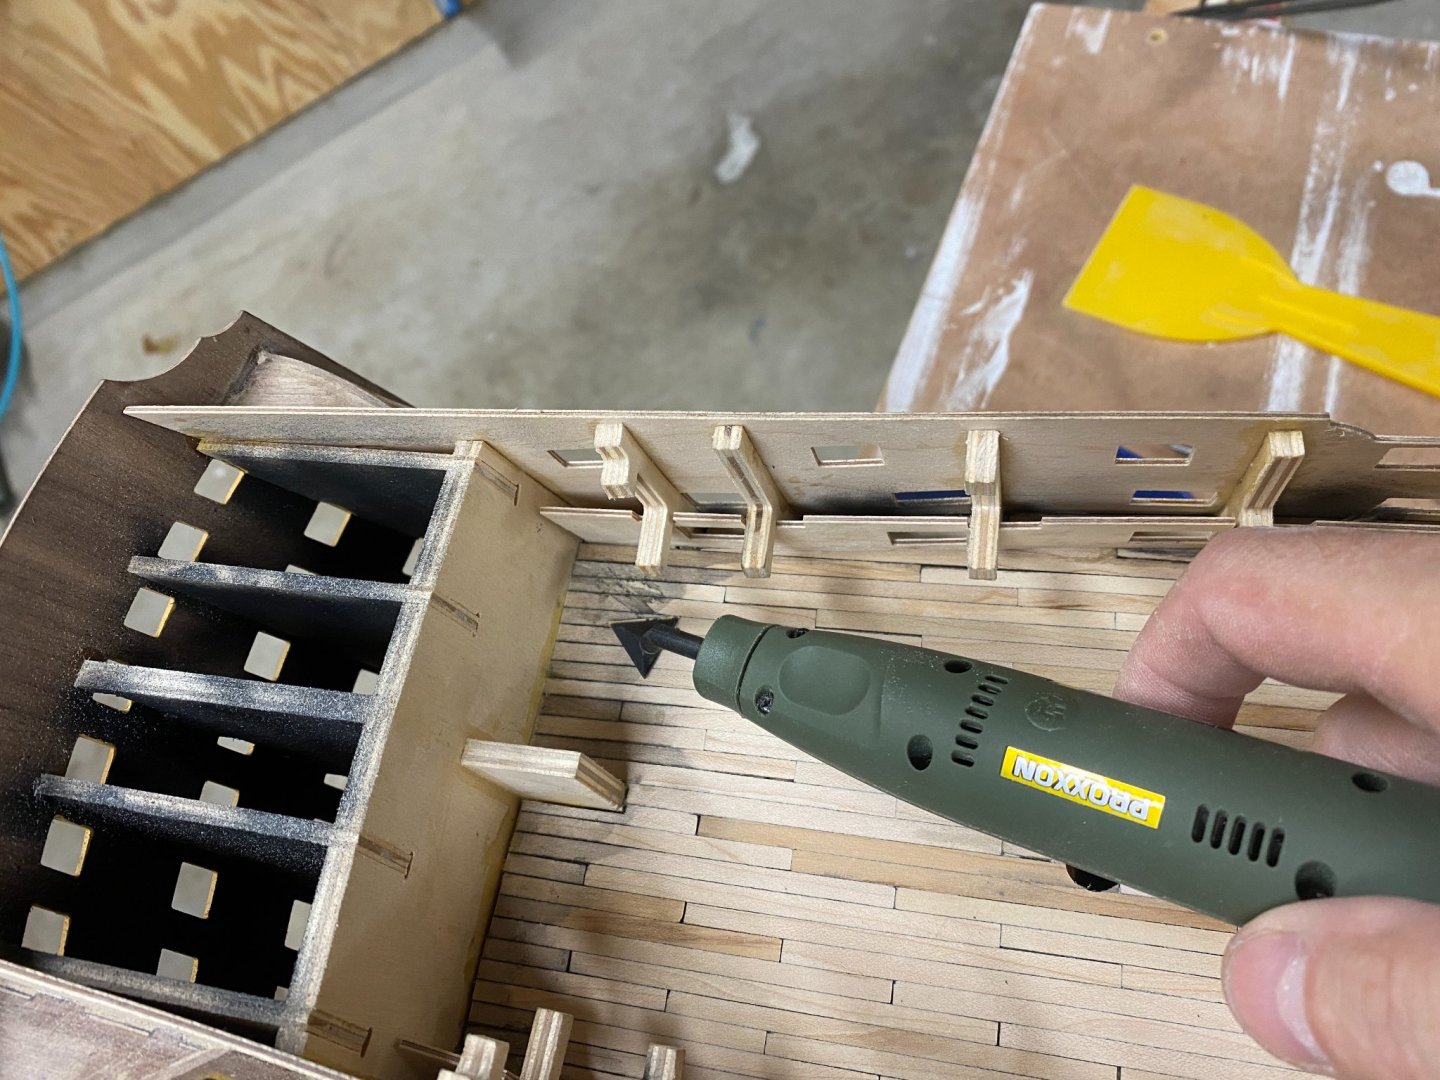
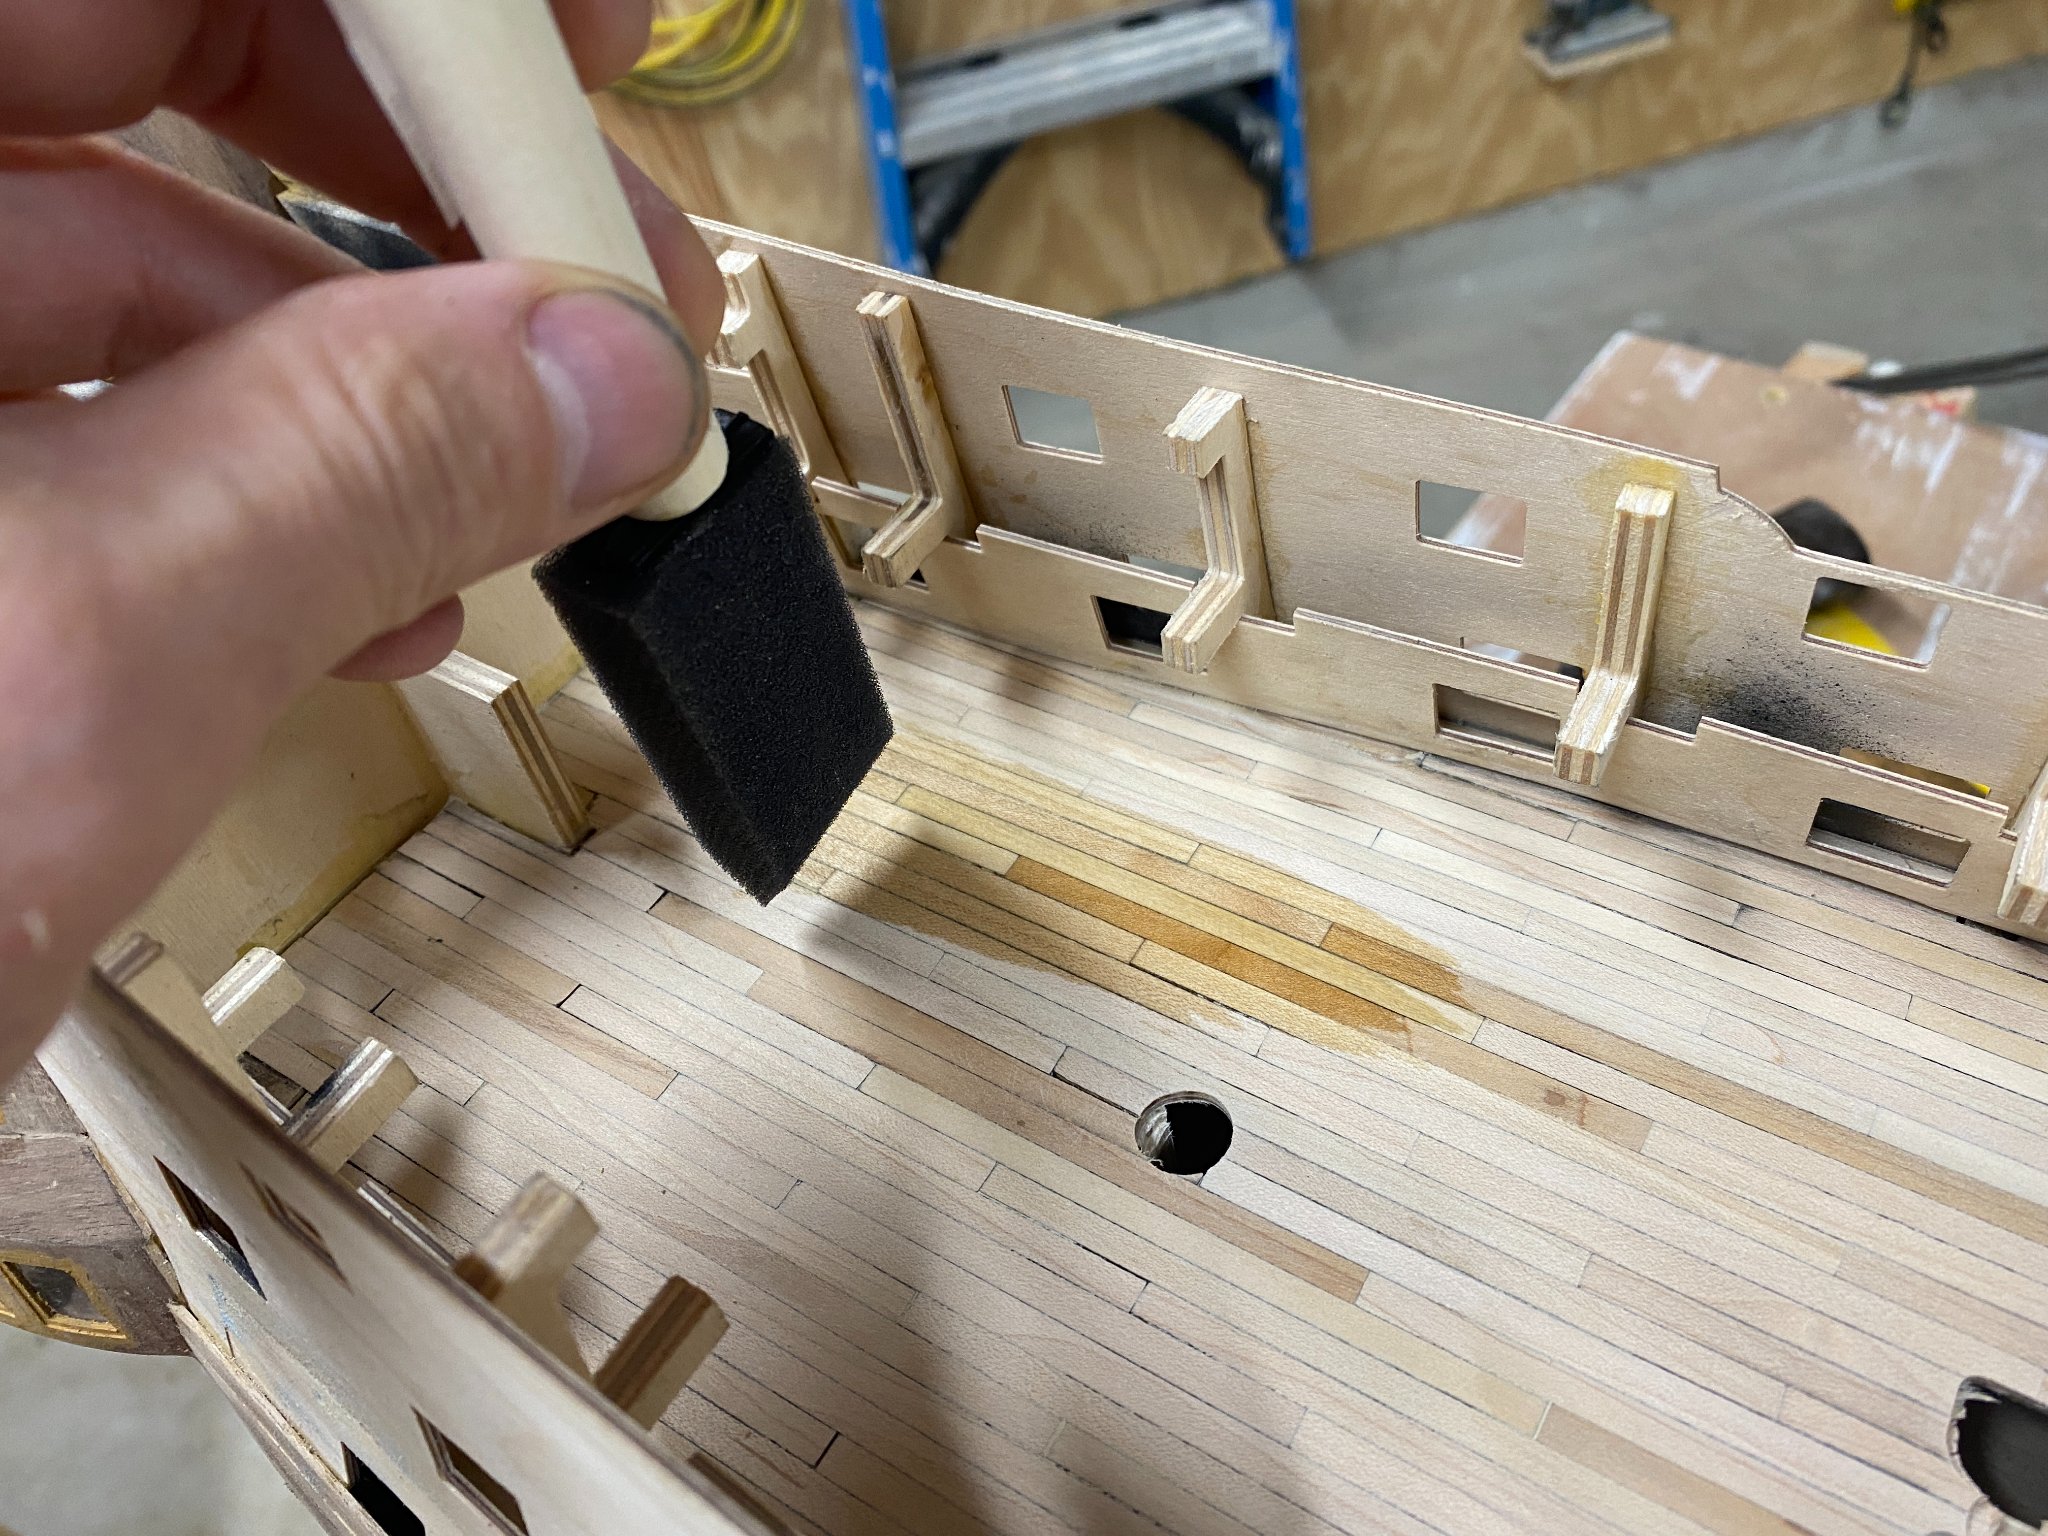
I then sanded going from 150# to 400# with a combination of multi-tool, Proxxon detail sander, and hand-sanding.


This was followed by four applications of a vinegar-steel wool stain. After about three treatments, I noticed that the planks were not darkening anymore. I was looking for a more weathered silvery grey like I had seen on so many other wonderful builds (Anyone who has not checked out Gil Middleton's Victory log should do so asap!) but after viewing the gun deck portion of a walk-through video on Youtube, I felt a bit better, and the color actually started growing on me a bit.

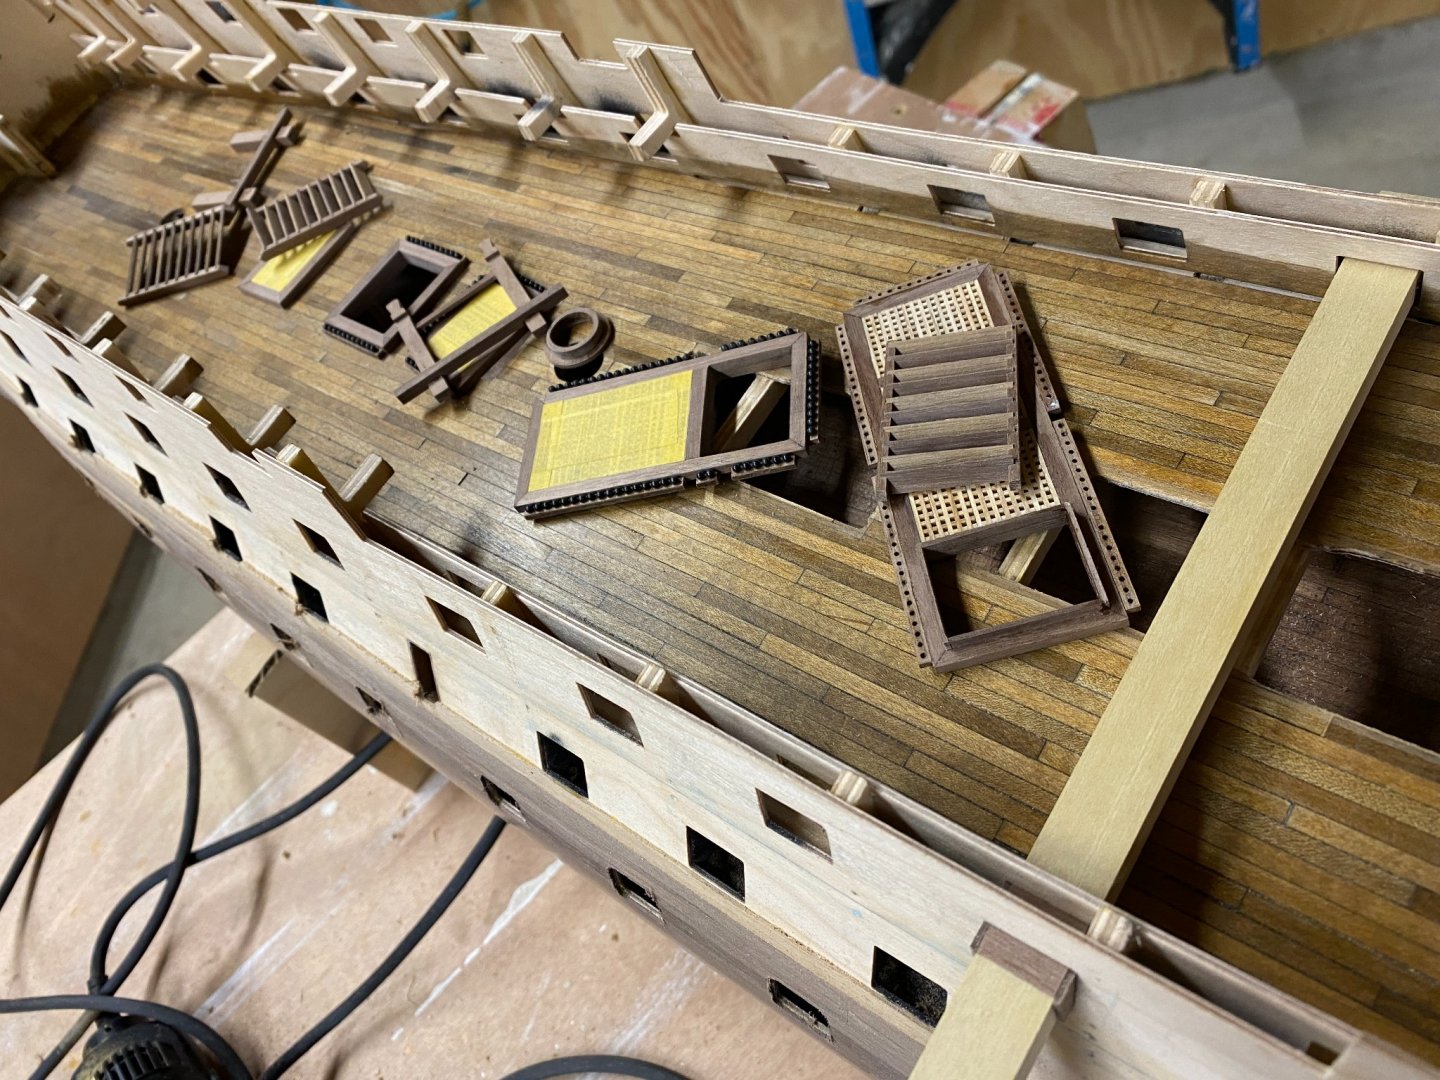
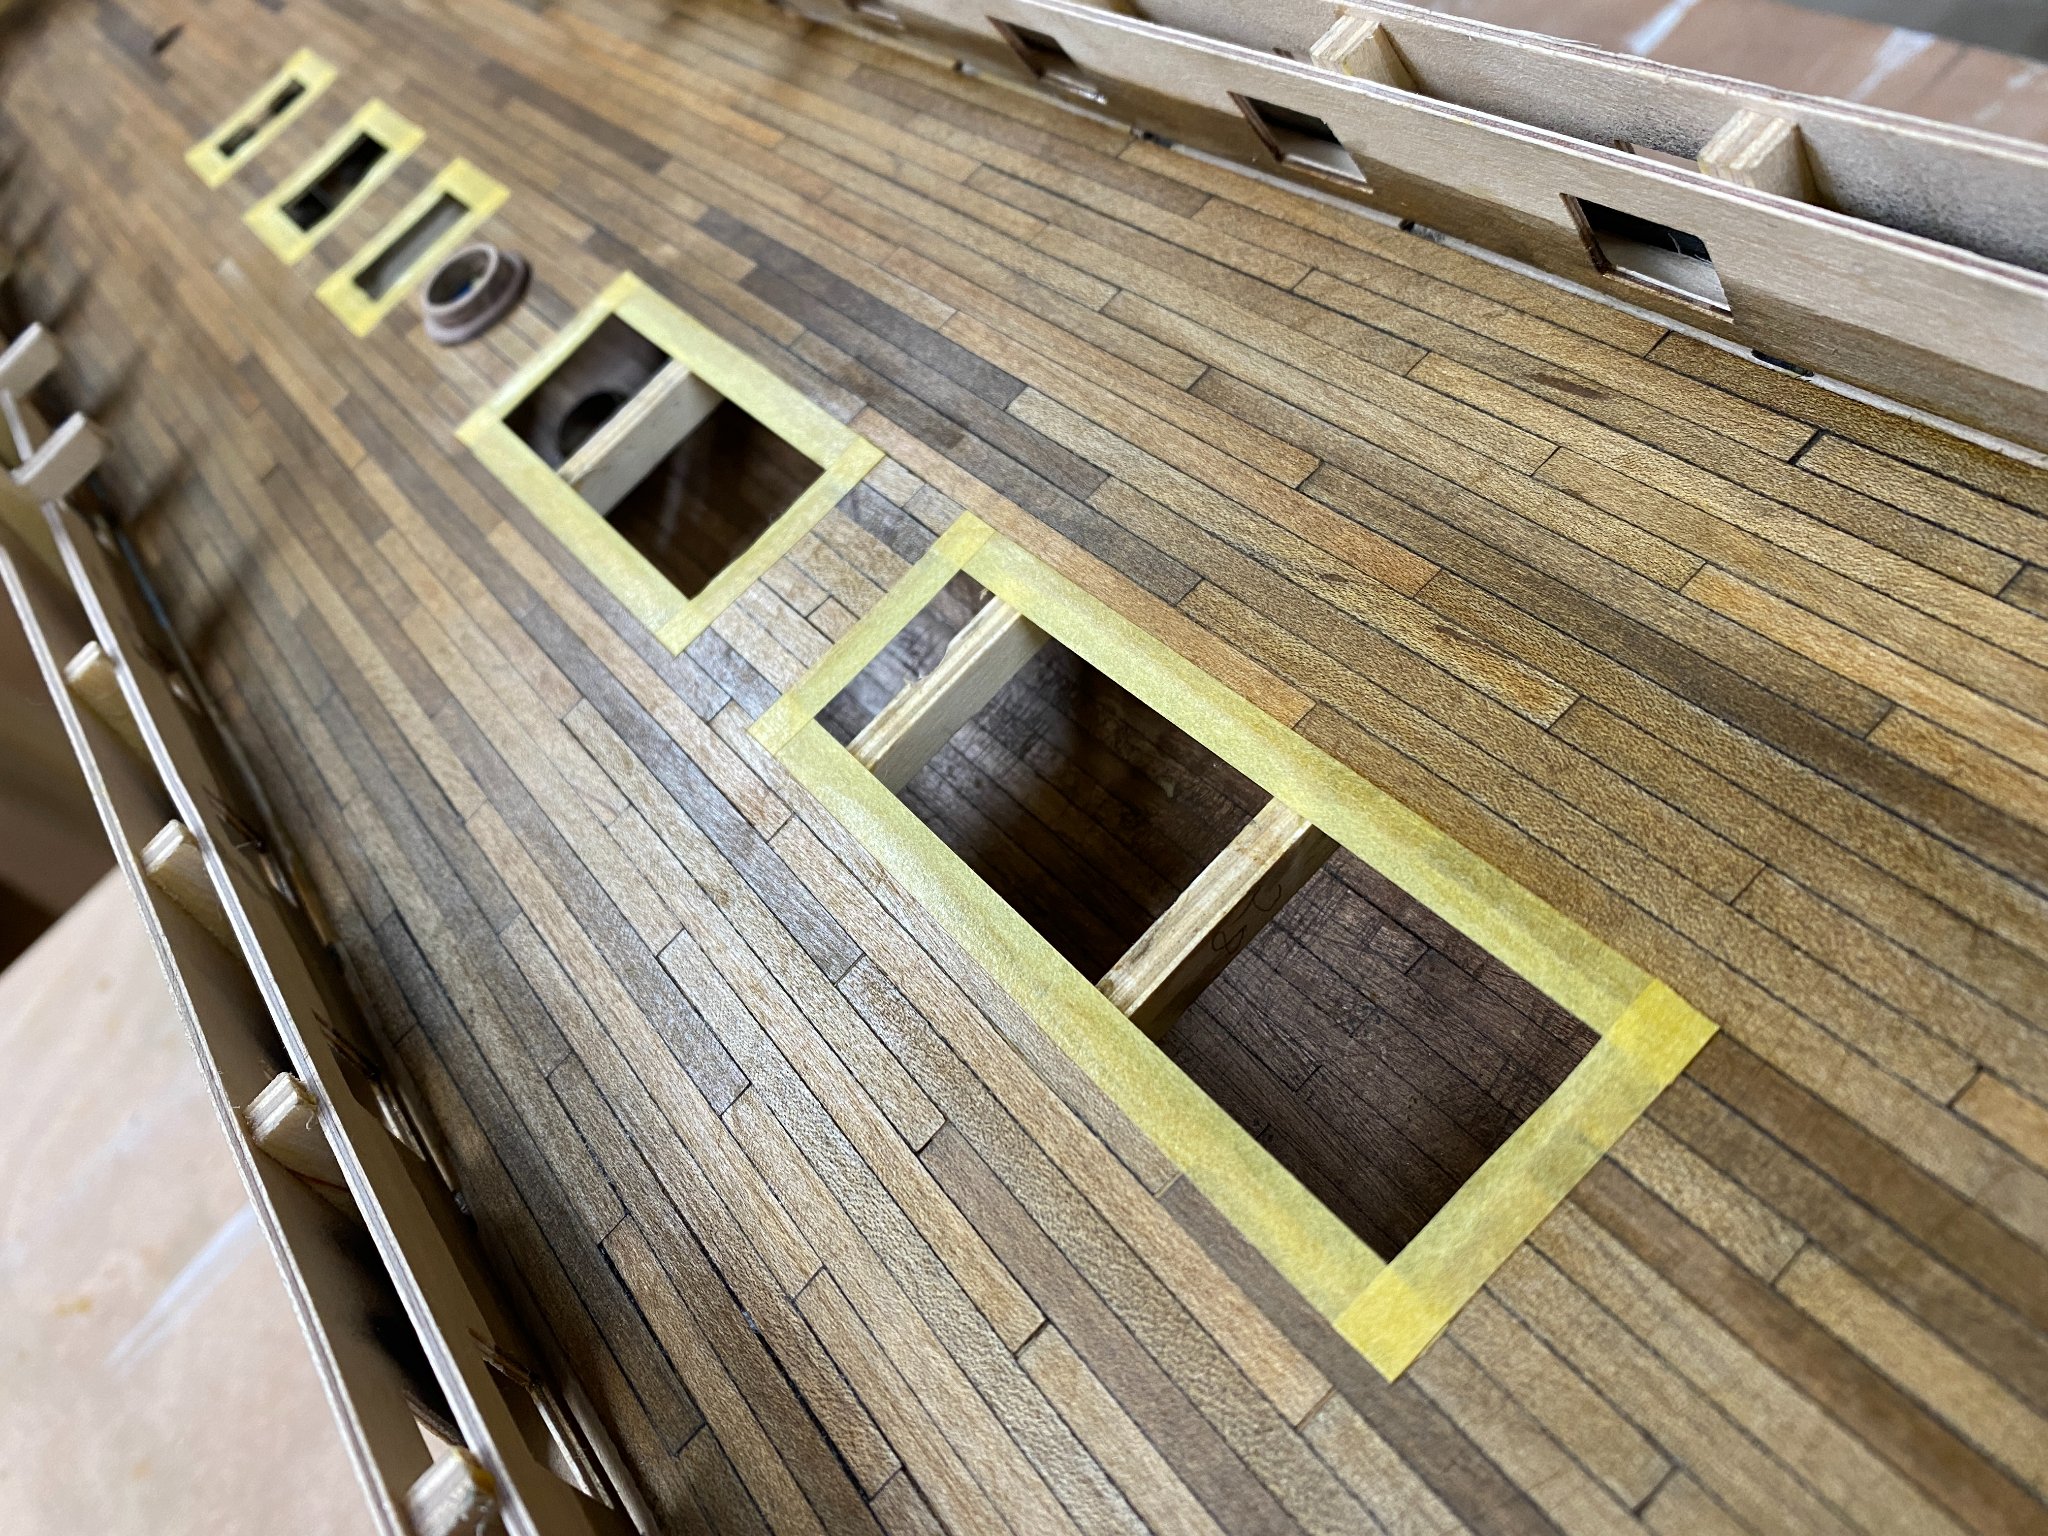
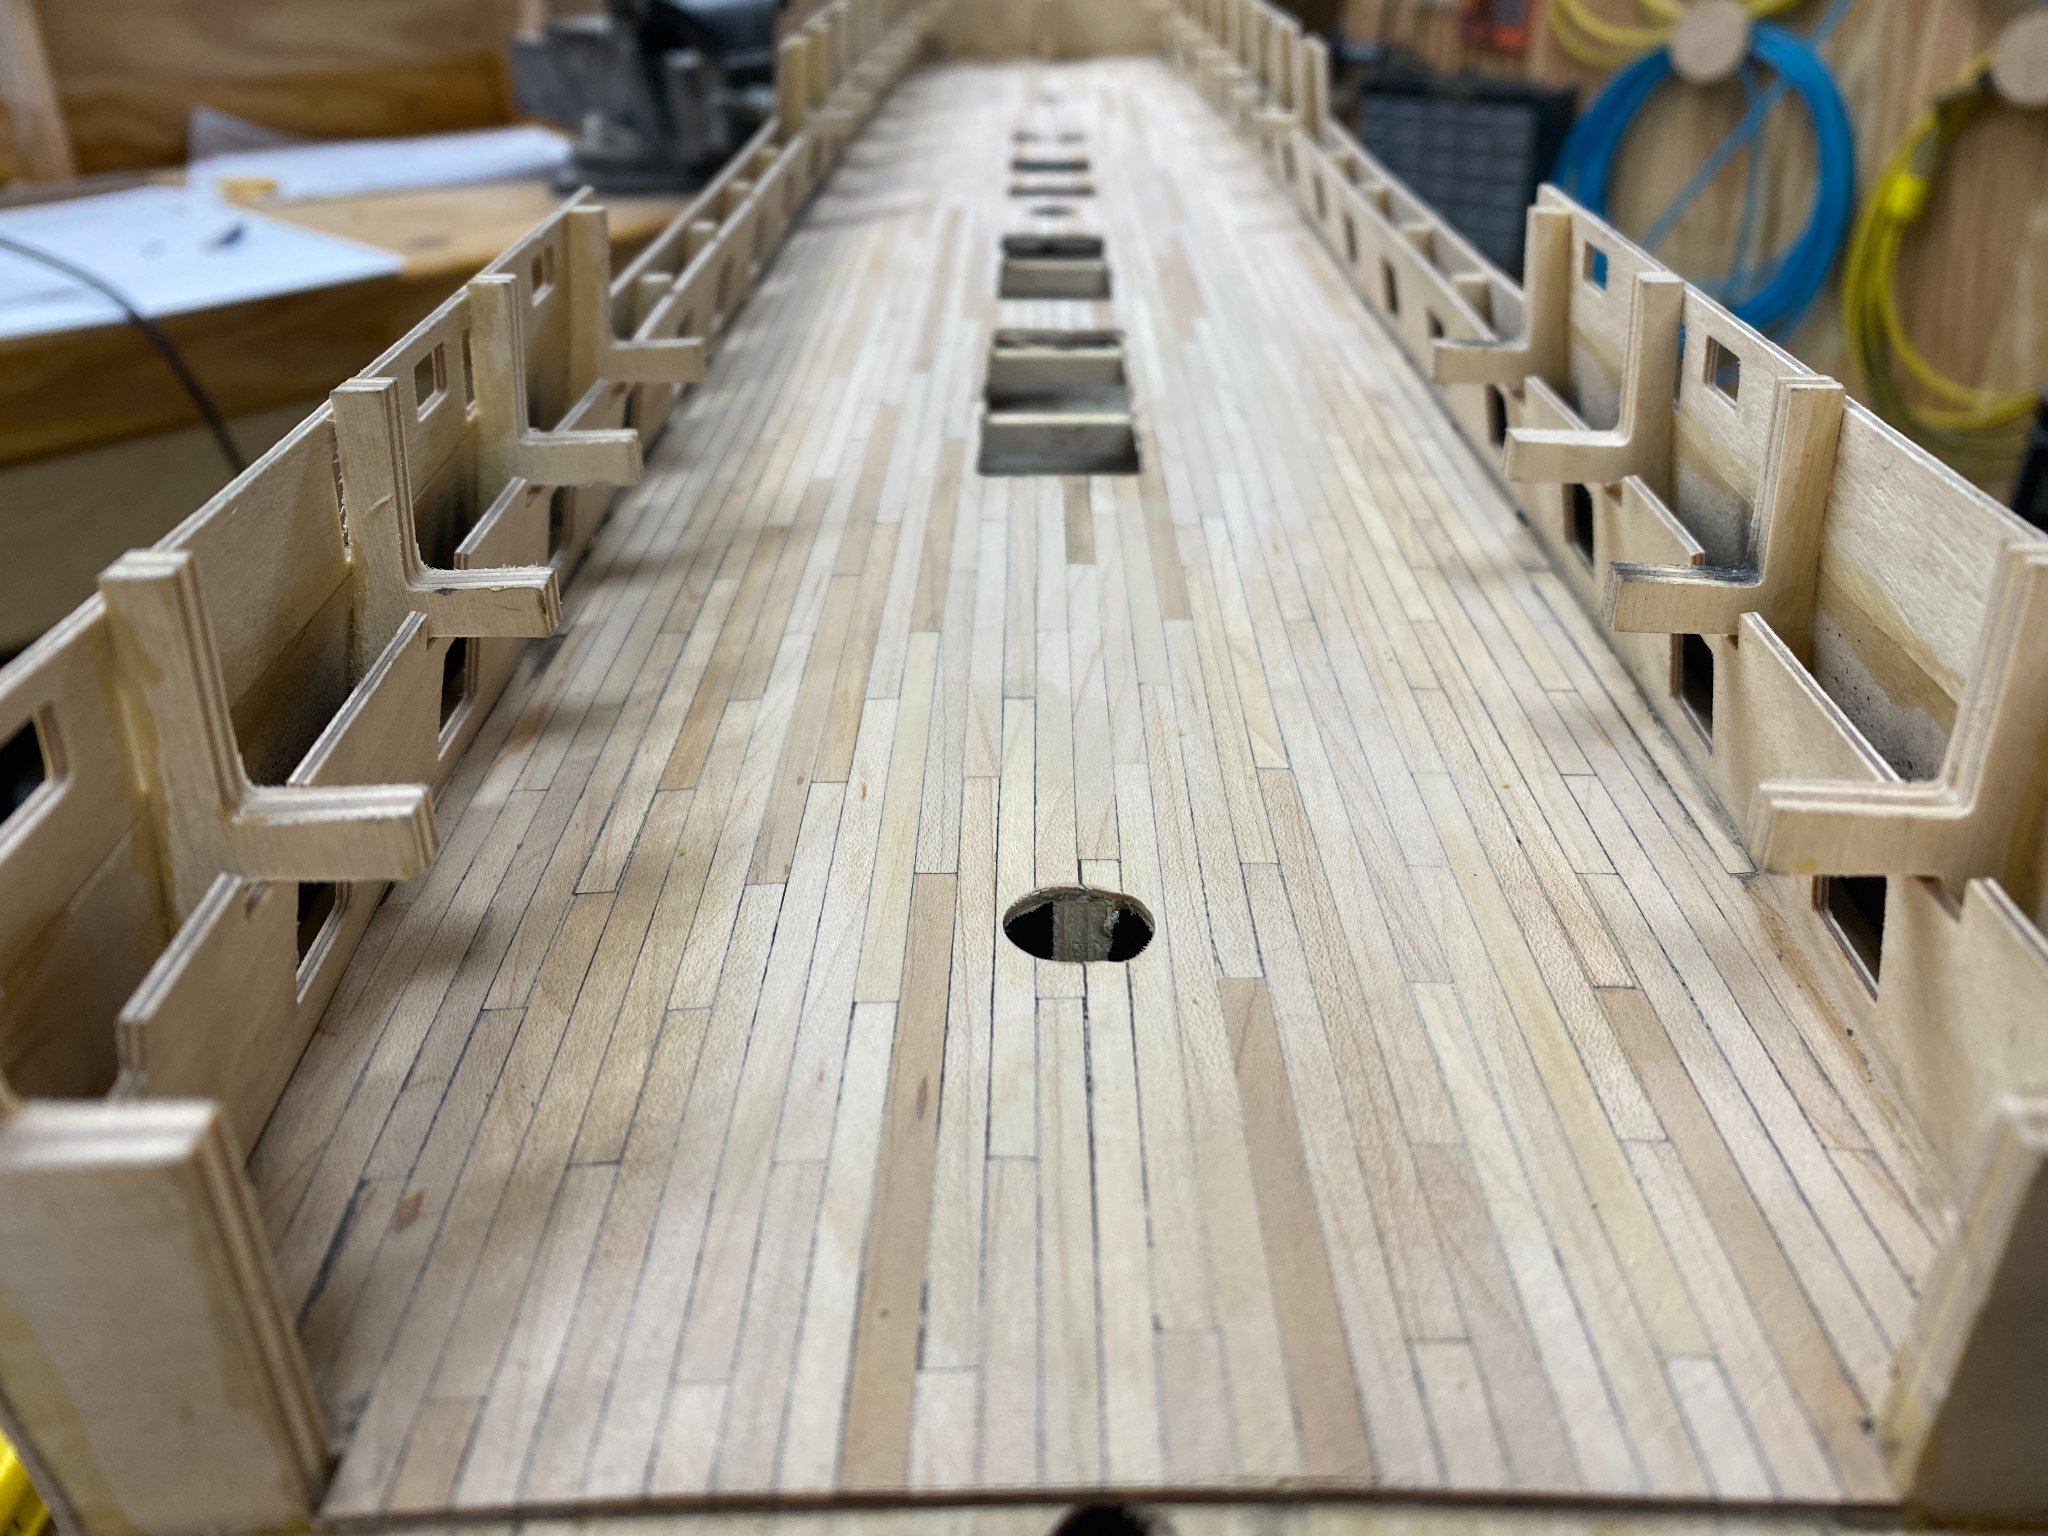
I then assembled all of the grating, stairways, shot garlands, etc. that comprise the upper gun deck fixings. I wanted to be able to accurately mask off these areas before applying a final finish to the planking. I learned the hard way that cannon balls are best glued in last just before painting. It's not a good idea to work with them over shag carpeting either. Not all of the holed planks on the sheet where the shot garland boards are found are meant for cannon balls; quite a number of them are actually meant for bitt pins. (I'm already set up to assemble the garlands, so why not get all of them out of the way, right?) I ended up having to acetone-soak off more than a few.
I then applied two coats of hand-rubbed oil base polyurethane sanding with 400# after each coat. (Final hand-sanding with 1500#.)

I am now in the process of hashing out how to install the eight gun port liners per the manual (See rectangular rod stock "installation" tool in photo below.
At this point, I could probably go in a number of directions:
Up next:
- Start experimenting with a brass blackening agent I ordered for the cannons. (...and other brass stuff.)
- Is there any reason I can't finish all the gun port liners now? (No, I obviously didn't learn my lesson from my cannon ball screw-up.)
- Install all fixings, stairs, railings, etc for the main gun deck. (Or should I wait until after coppering the hull for this step?)
- Wales installation.
- Copper tiles installation - Still researching adhesives and installation tools. Gil's copper job with tape is immaculate, but I'm going to try to stick with the tiles that came with the kit.) I have been told that I need to apply any aging (patinating) solution to each individual tile before installation. Why? I would think a far better result (not to mention faster) would be obtained by treating the copper after it has been installed, not before. Any one have any thoughts here? Am I going to screw myself somehow by coppering the rudder now as well? (The manual doesn't address this until much later in the build.)
- Painting as needed.
Any insight, imparted by people keeping an eye on me is most gratefully heeded, but unfortunately not necessarily followed due to a sporadic propensity for stone-headedness on my part.
I really appreciate everyone's help!


I'm not too super knowledgeable about doing models but my vote would be to get the copper and hull itself done before doing fittings for the main deck. That way your not fighting with fragile pieces and possibly messing something up with your moving the hull around to get all the copper on.
- Keith Black and mort stoll
-
2
-
Yea its gonna be an experience cause I need to find somewhere that ships out sheets and idk how I'm gonna cut it. I need to do some research cause like the ladders I only have enough for one ladder. It's all I could save lol I do have some pieces though so it's not all bad.
-
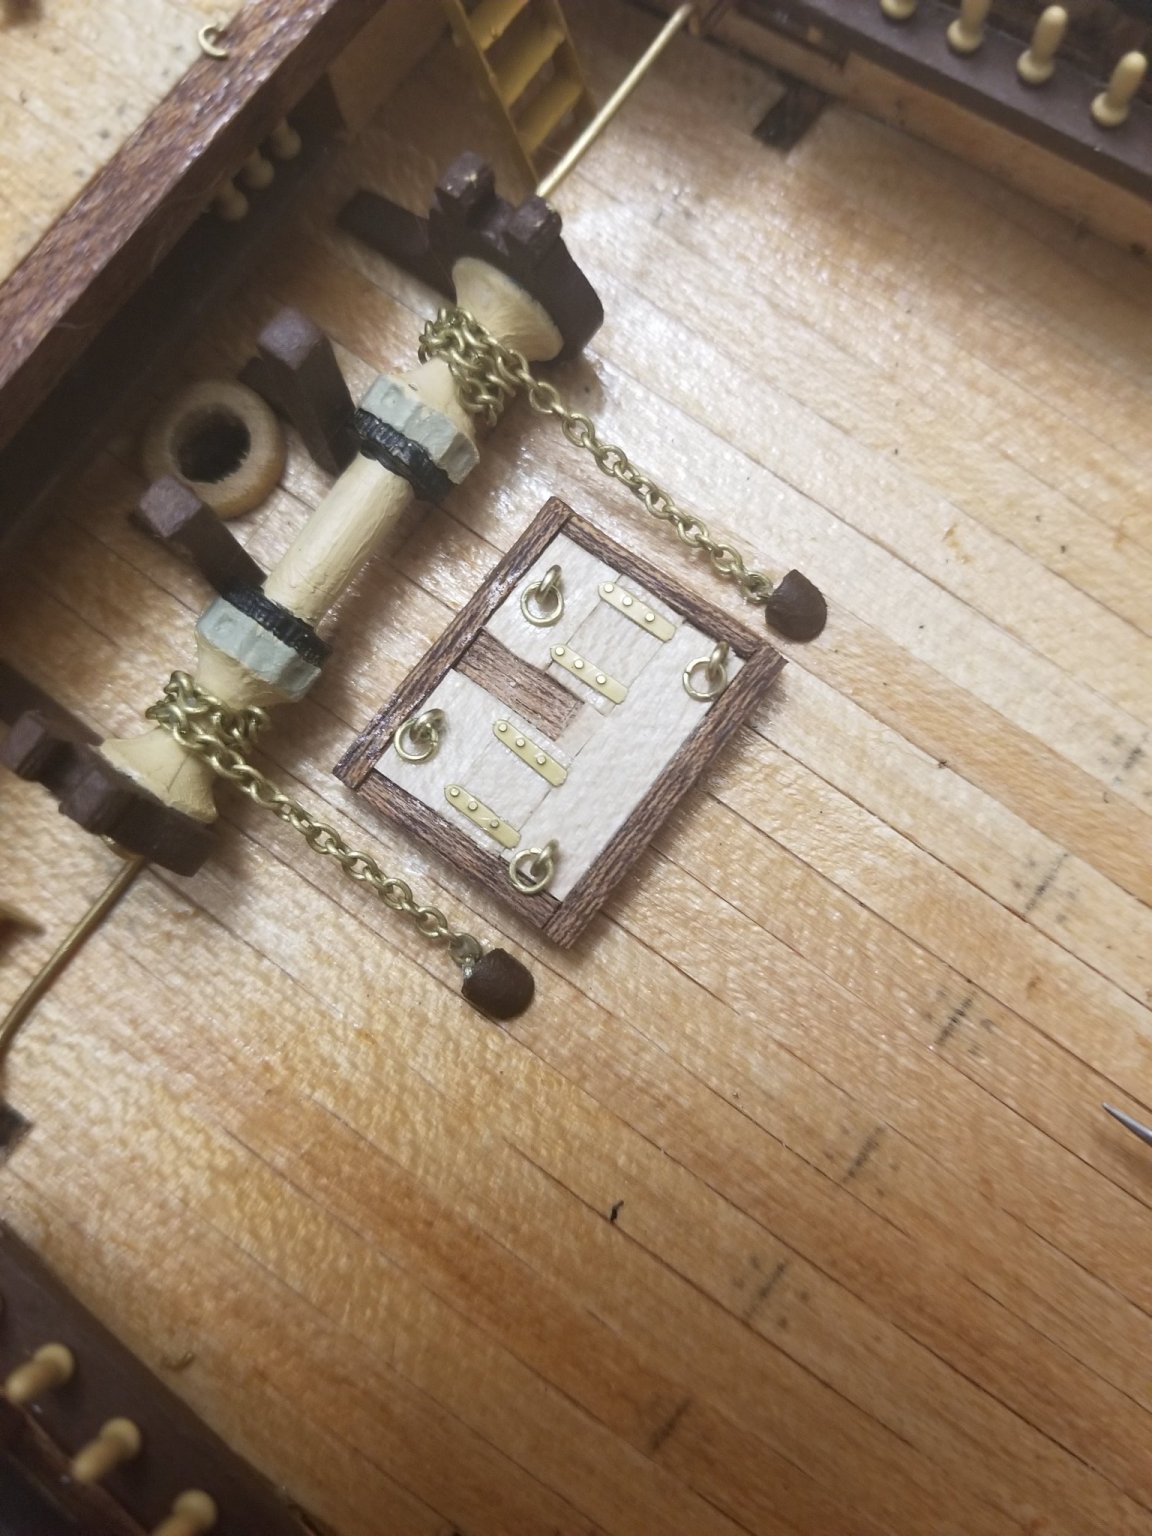
Got atleast the chain and this first part on the page done.

- Pete D, Keith Black, Cathead and 2 others
-
5
-
On 4/21/2021 at 2:14 PM, Chuck said:
Probably pretty difficult. If you dont buy any laser cut parts you will need everything...
Scroll saw, Table saw, just to name a few. If you buy the laser parts for each chapter then you will only need to mill planks from wider sheets. So a table saw like the Byrnes saw is an absolute must have.
Sounds good just wanted an idea might be better to just stick with kits for now. If I did join in I would be getting laser cut pieces for sure. Hopefully if my luck changes a little I'll join in on the fun.
- Penfold and FrankWouts
-
2
-
Well some stupid crap happened and well a bunch of the brass got ruined and bent up. A lot of the pieces got lost because I work in an area with a carpet and well I cant find crap lol. So looks like some of the brass details will have to get hand made. So while I try to find either a replacement brass etched sheet or a super thin brass spare segment I can use to make stuff I'm gonna have to hold on on doing those pieces and fit them on once I get them. But here is what we look like with the windlass and the finish of page I.
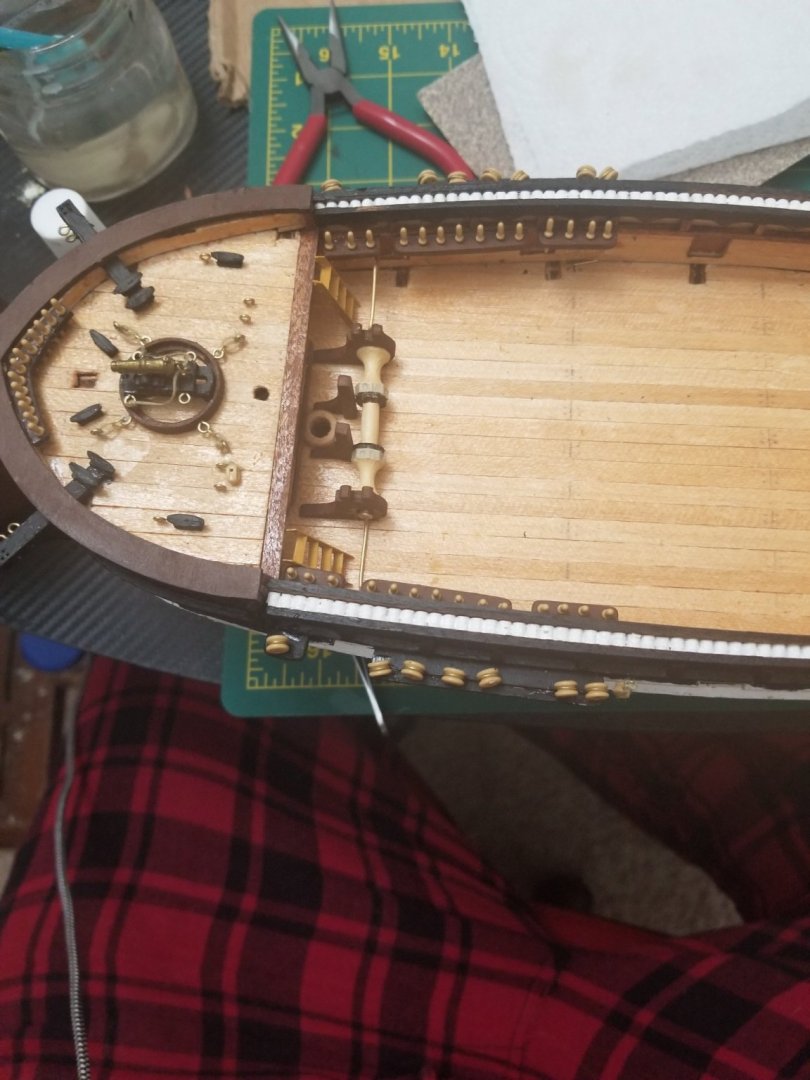
it's not looking bad though I feel atleast.
- Keith Black, Cathead and Dean77
-
3
-
How feasible would it be to do a scratch build with no power tools...me and my wife are in an apartment so space is tight for any power tools (unless there is a small and less loud version of atleast a mill that someone has a link too) just thinking for future. I feel like this project would be the perfect way to get my chops wet when it comes to scratch builds. I dont see a house in the next 5 years of my life because it's my income only and wife is disabled. I would love to do atleast one of these builds though at some point.


HMS Beagle by Robp1025 - OcCre - 1:60
in - Kit build logs for subjects built from 1801 - 1850
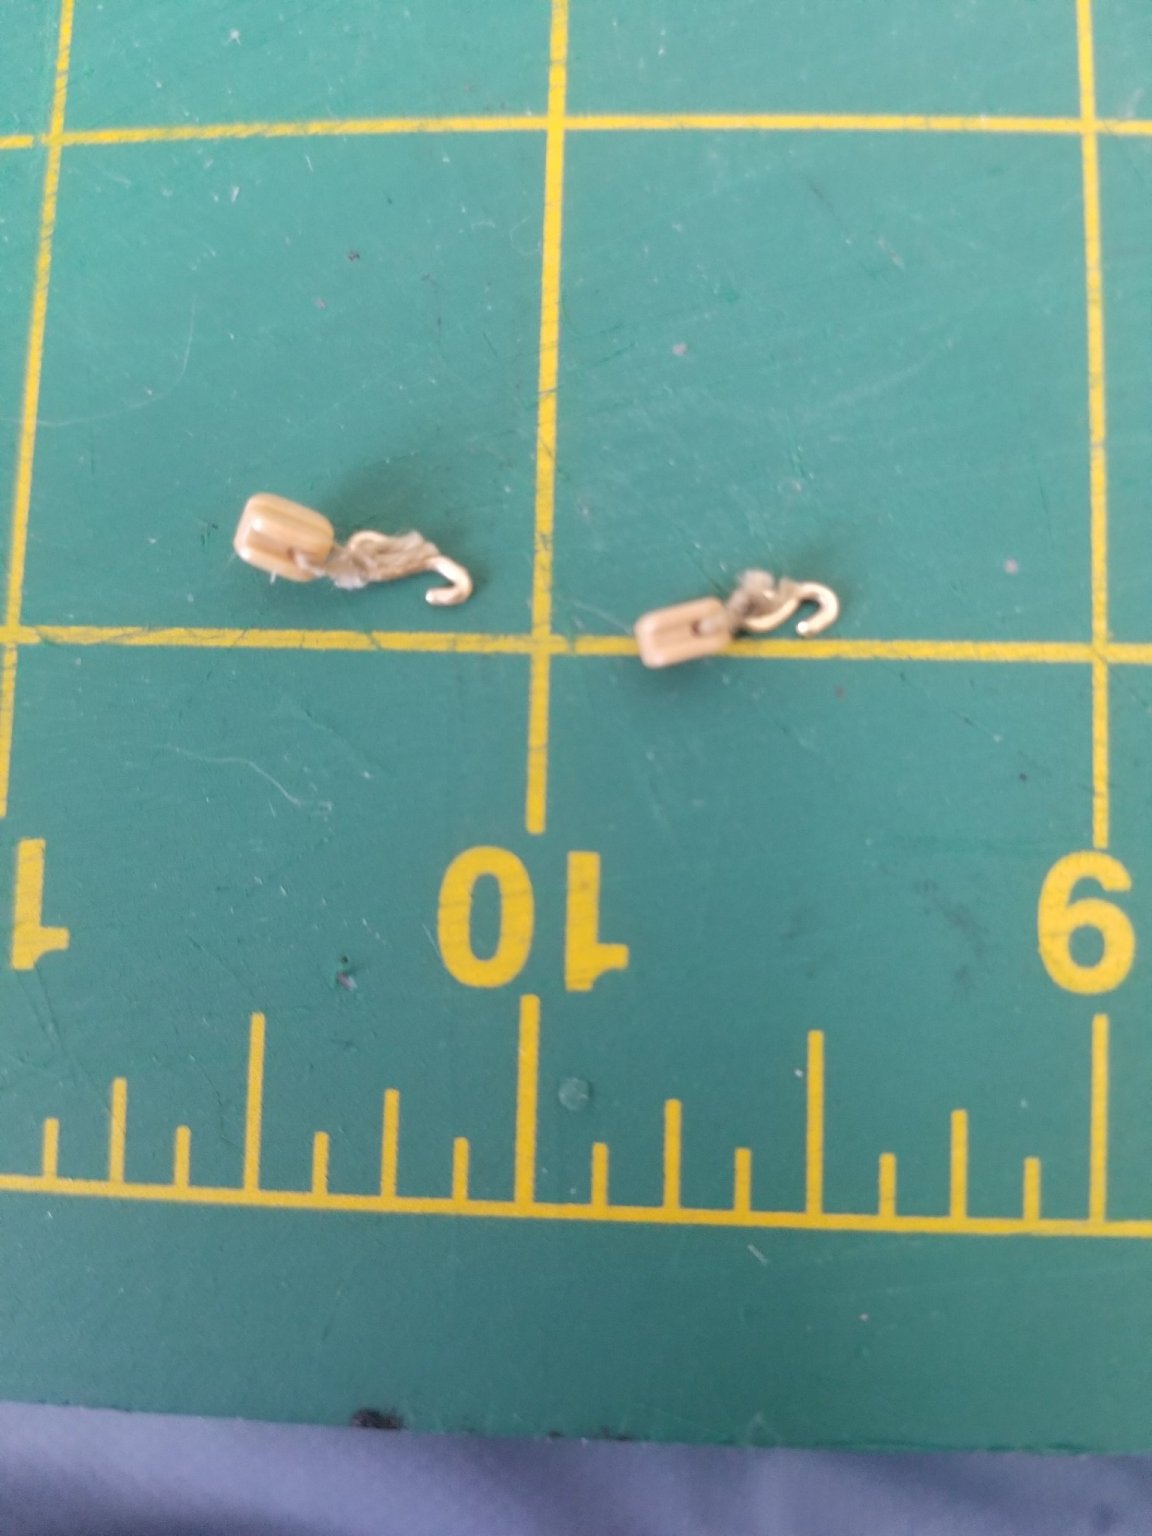
Posted
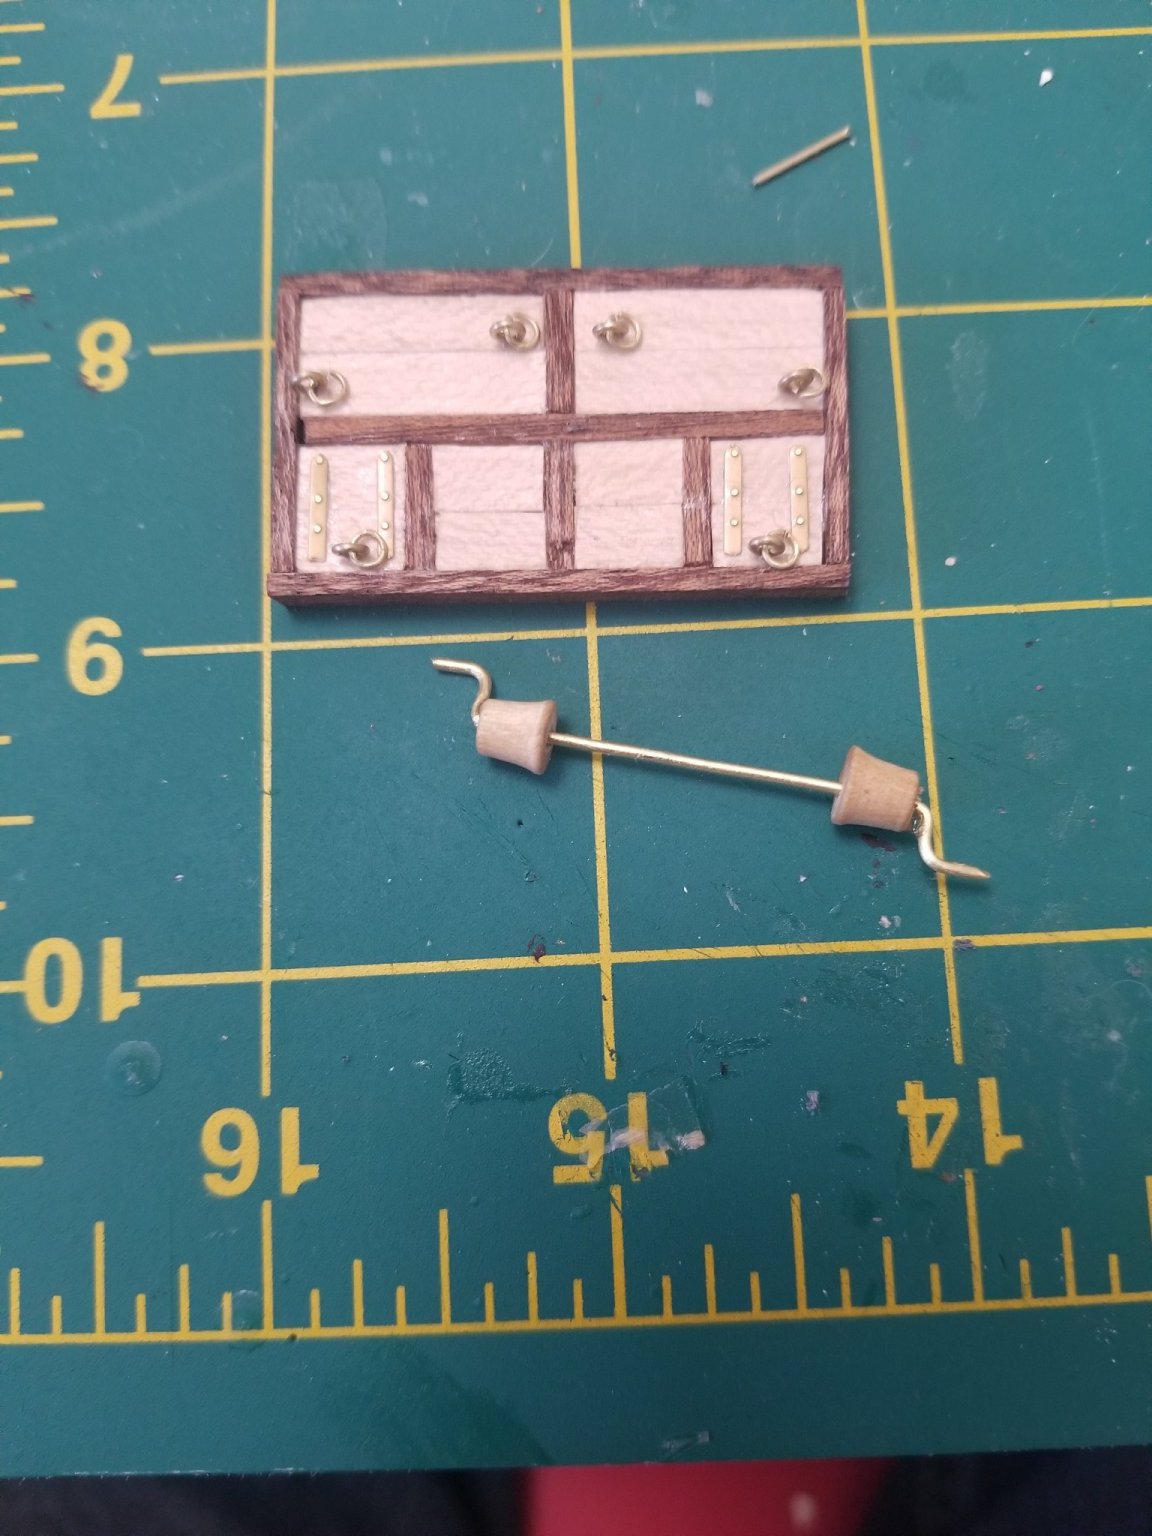
Wait there is a hook that is suppose to be on the inside part? Cause none of these blocks I have has tht.. hmmmmm I'll try to find these. It really does help a lot more thank you.