Dan Vadas
-
Posts
3,261 -
Joined
-
Last visited
Content Type
Profiles
Forums
Gallery
Events
Everything posted by Dan Vadas
-
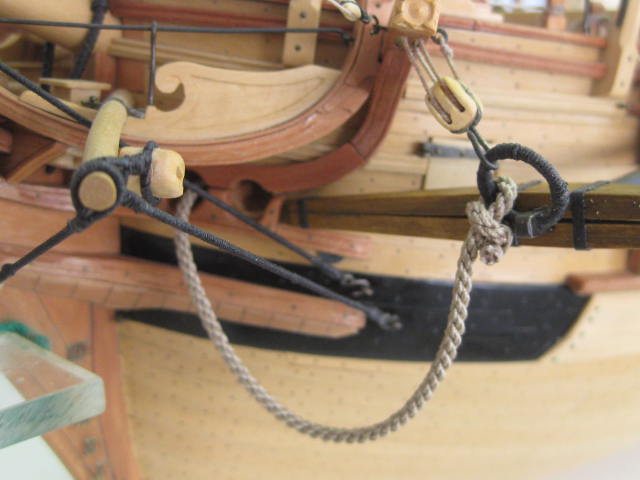
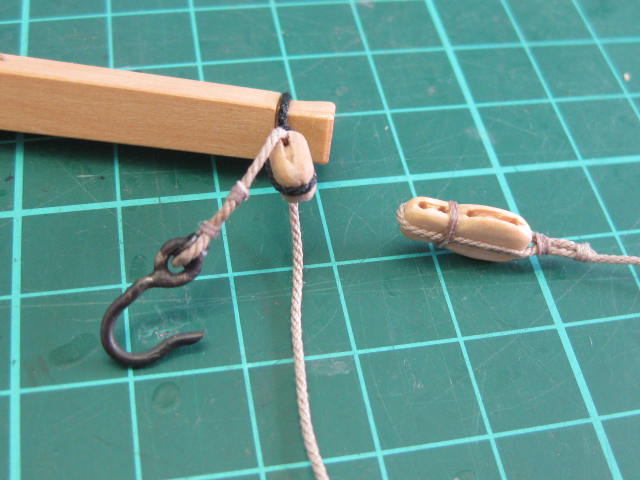
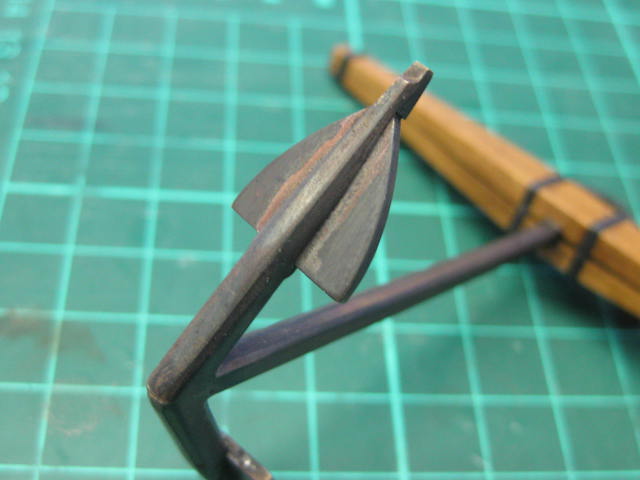
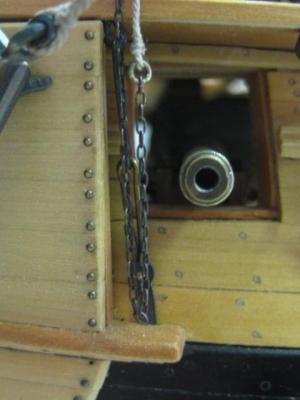
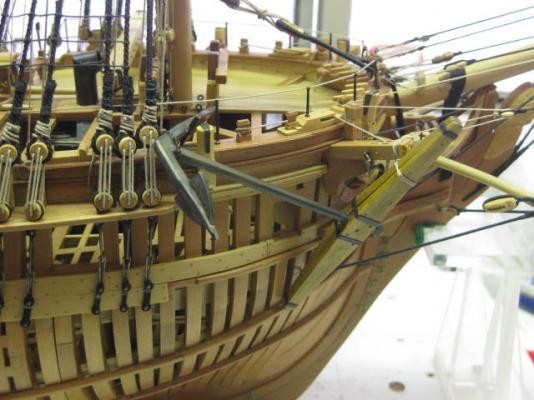
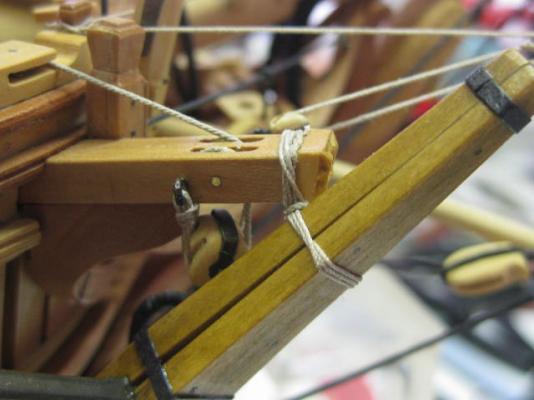
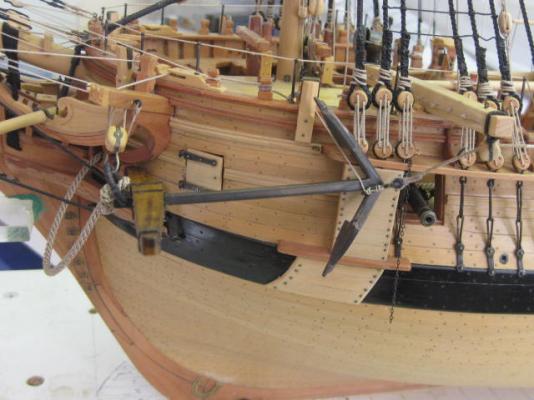
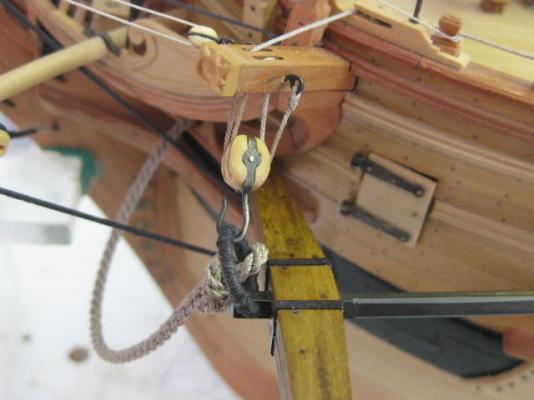
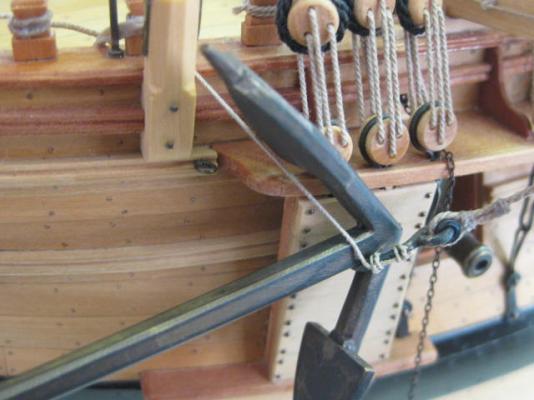
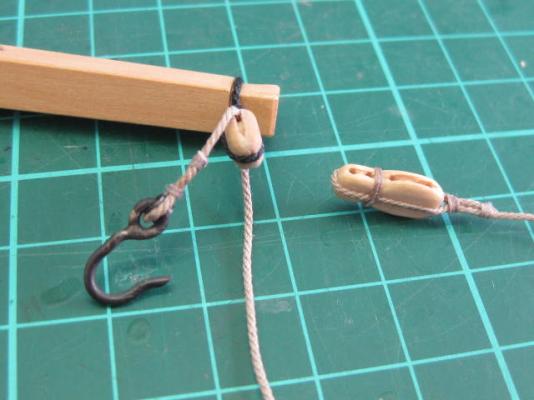
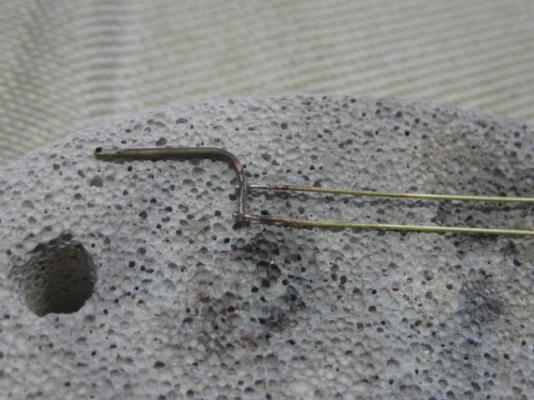
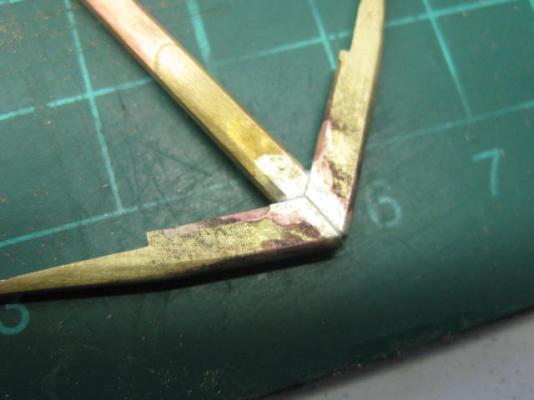
Thank you George and John, much appreciated. George - here are a couple more pics of the Fish Davit which might make it's fitting a bit clearer : The inner end goes through the Spanshackle Ring : I had to shorten the fish davit considerably from the length shown in TFFM, as it would have finished way too far outboard (it's probably still a bit too long). TFFM's fish davit is on HMS Resolution and fits forward of the foremast and is a rather different setup. The last thing to fit on both anchors is the rope seized to the Shankpainter Chain, which was fitted at the time the Channels went on. The rope is 0.45mm in diameter and was too large to fit through the chain link, so I made a small ring to which I seized the rope : The port side anchor is shown as Stowed. The shankpainter chain loops around the shank of the anchor and belays to the timberhead forward of the fish davit block : The stock is belayed to the cathead. I had to "be my own captain" when stowing the anchors - feel free to tell me I've got it wrong, but they don't fit any other way : Some more pics of the port anchor : Danny


-
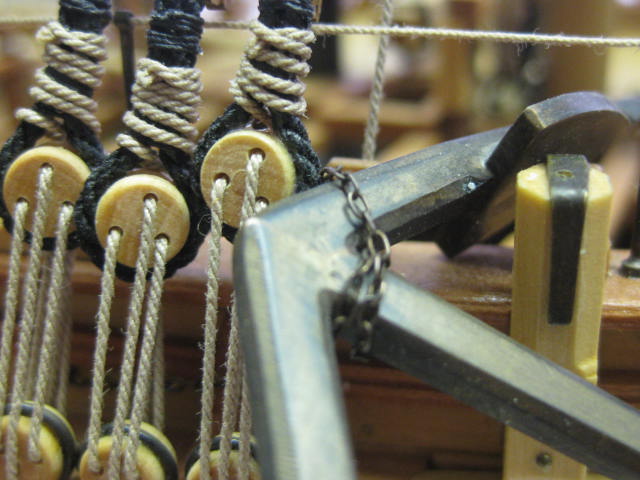
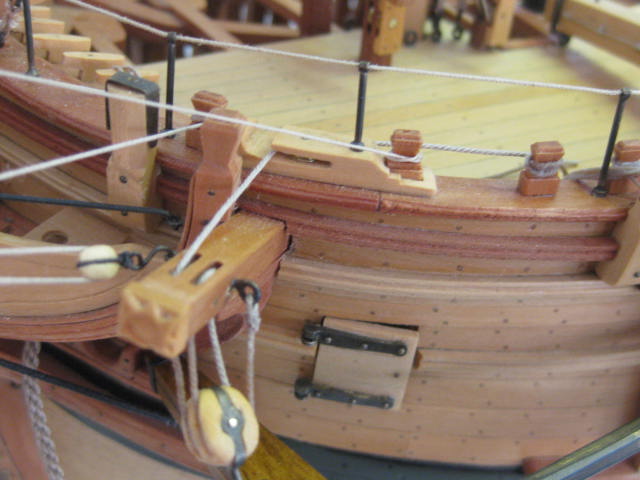
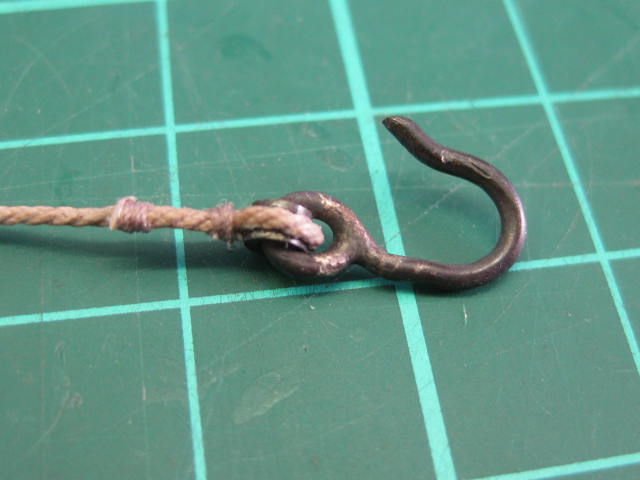
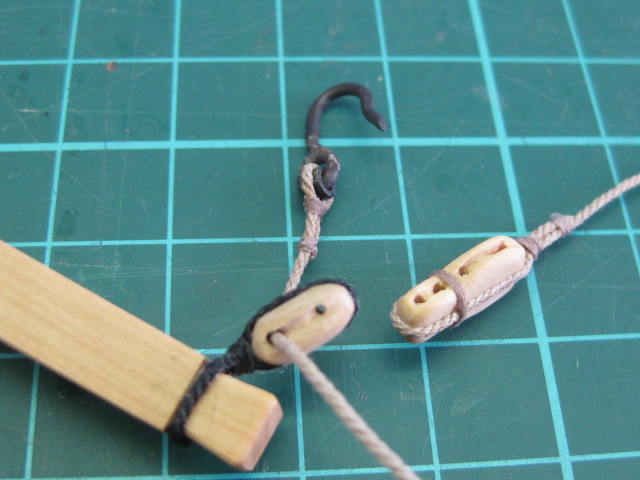
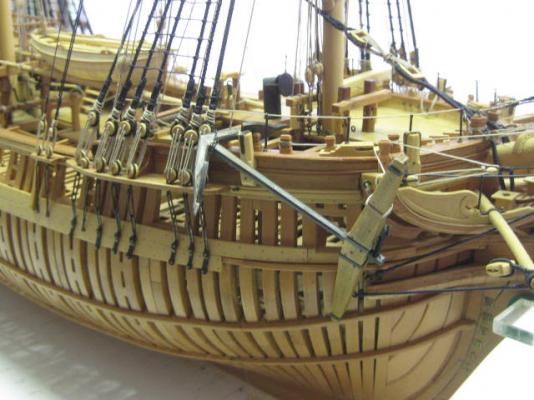
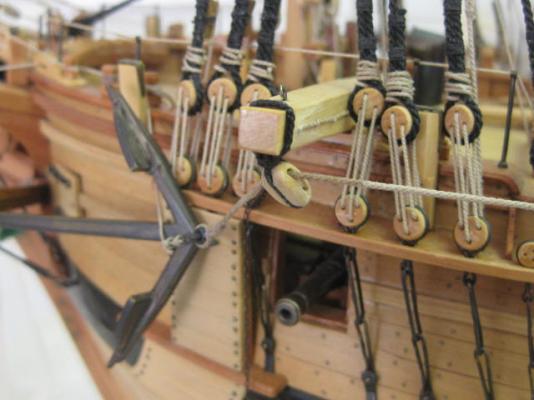
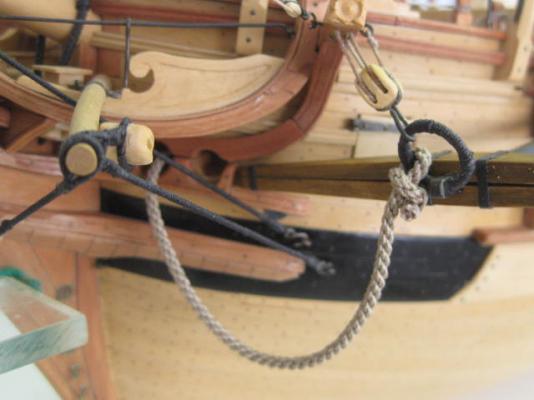
Thanks George . I've rigged the port side anchor. The pics are fairly self-explanatory : Note the Fish Back, a small line seized to the hook to enable it to be manoeuvred over the arm of the anchor : The fish tackle is hooked through a ring and eye in the main channel, and belays to the timberhead above it : Danny


-
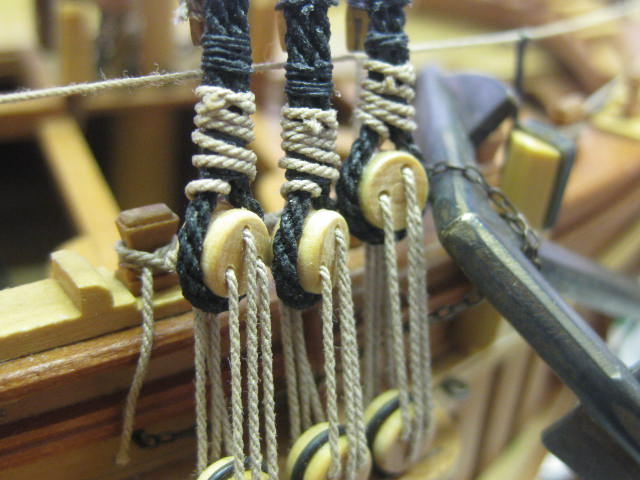
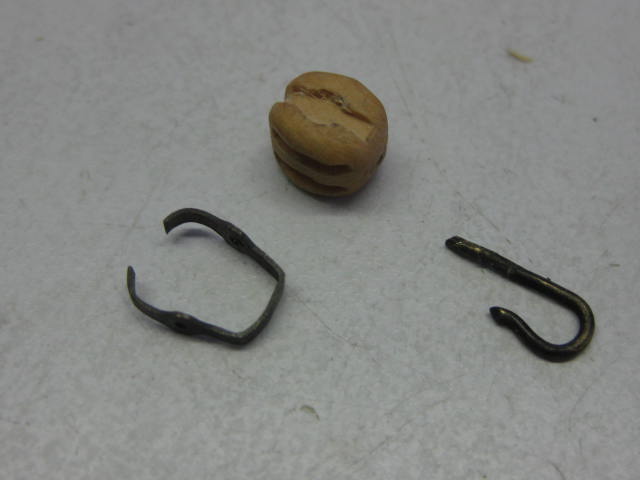
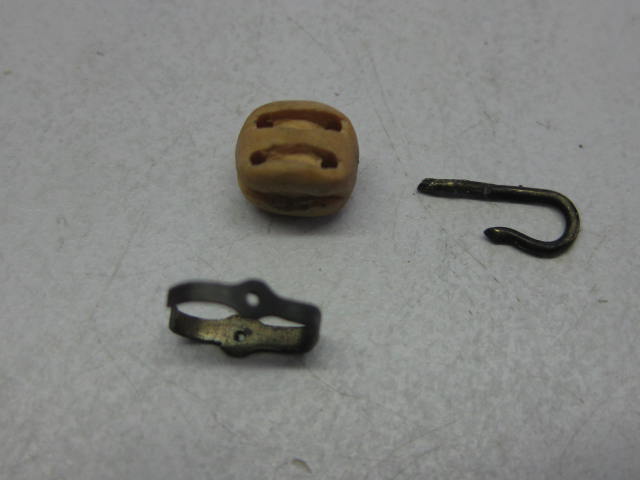
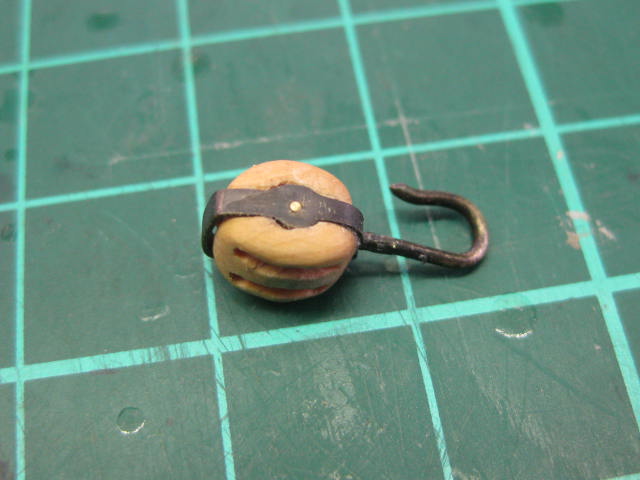
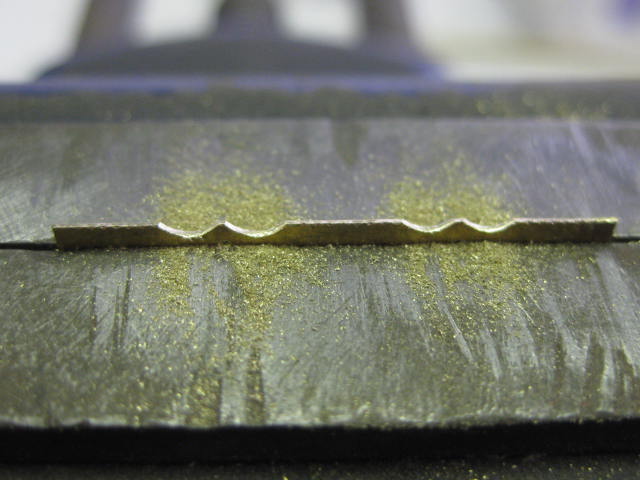
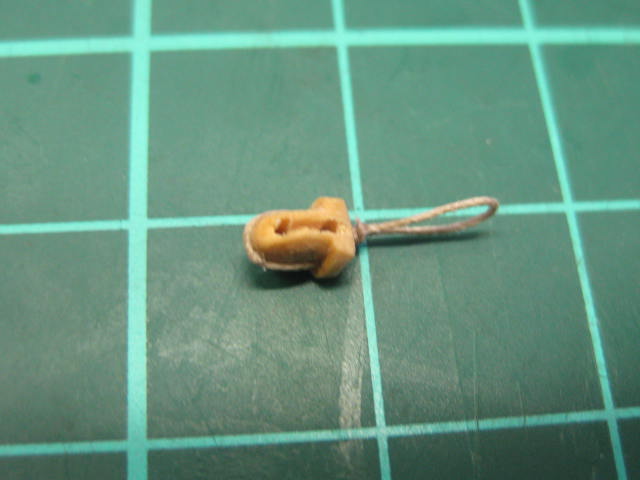
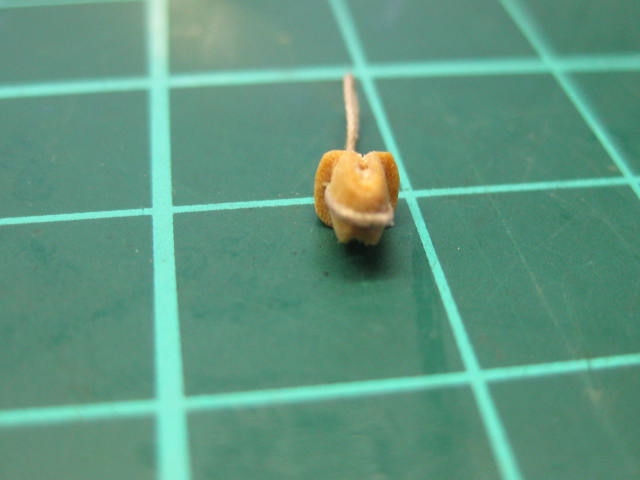
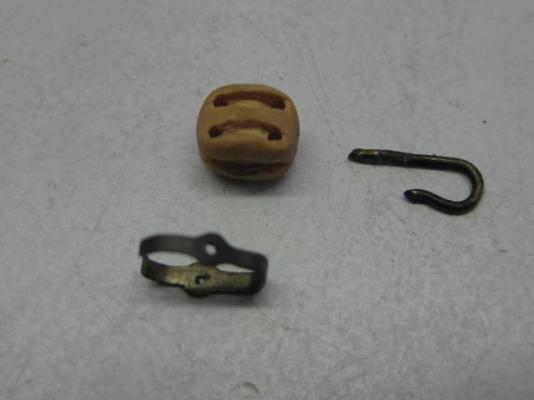
Thanks for the comments Grant, Greg, George, Dave, Keelhauled and Laman . I have a model of Norske Lowe to finish off for a guy who's dad was building her before he passed away, and then it will be a Ship in a Bottle. Anchor Rigging I am going to rig the two Bower Anchors in different ways. The starboard one will be stowed, and the port one (shown here) is "About to be Stowed". This will make use of the Fish Davit and all it's associated rigging. First I made all the various blocks needed. The two Cat Blocks are interesting - they are iron-bound and double-sheaved. I made the "iron" straps from thin brass sheet. After working out the length required (by trial and error) I drilled and filed a strip in the vise : The three parts of the block, which is recessed to accept the strap. The hook is drilled into the block, and the strap is Epoxied on. The join in the strap fits against the hook and is invisible : The Fish Tackle Hook is very large, as it needs to pass around the anchor arm. Note the Thimble in the eye of the hook : The Fish Tackle block and a violin block for the fish tackle : Danny


-
I made my own Turntable from an old Record Player. I stripped out the excess parts and added a flat top made from MDF to cover the various holes in the disc. Cost - $0.00 as the record player no longer worked anyway . Danny
- 440 replies
-
- 5
-

-
- niagara
- model shipways
- (and 1 more)
-
How I make Clue (Clew) Blocks by Dan Vadas
Dan Vadas replied to Dan Vadas's topic in Masting, rigging and sails
....... continued Once the glue has dried I trim off the tails of the seizings with sharp sidecutters. The tails of the "splice" in the strop are cut with an Xacto knife : Danny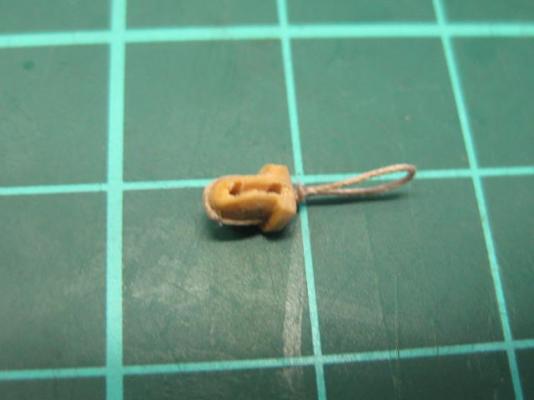
- 6 replies
-
- 13
-
-
How I make Clue (Clew) Blocks by Dan Vadas
Dan Vadas replied to Dan Vadas's topic in Masting, rigging and sails
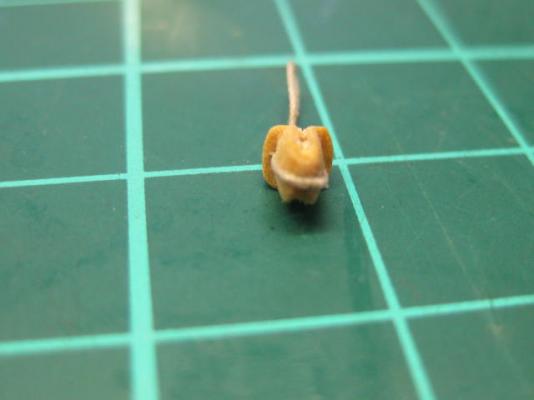
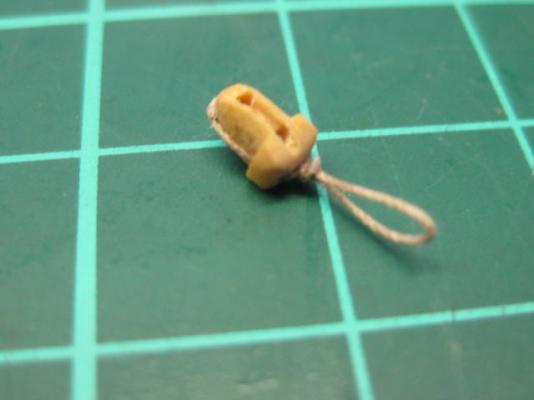
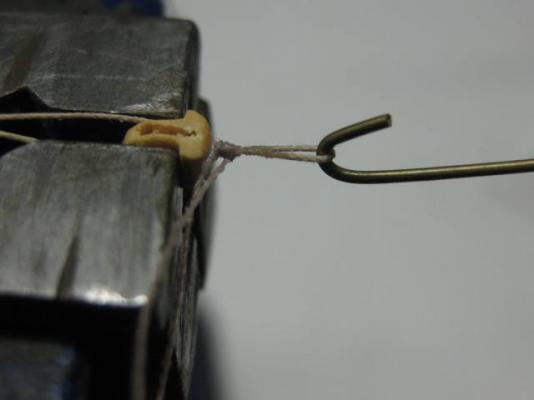
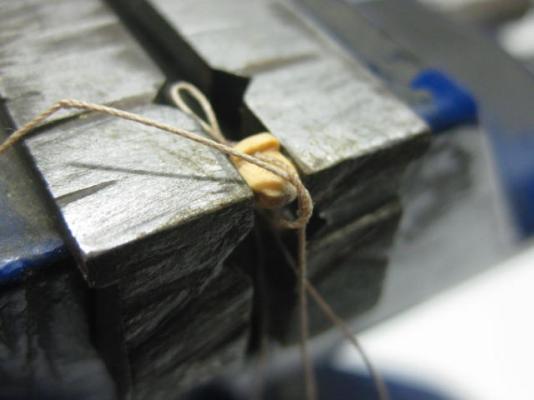
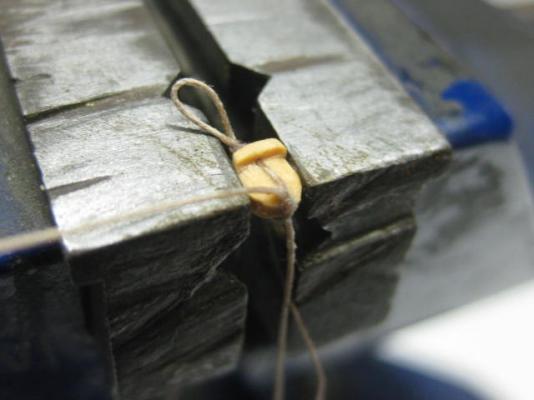
This is how I tie the strops to the clue blocks. Below is a pic from TFFM on the configuration of the Clue block, Sheet block and Tack at the foot of the sail. Note that the clue block strop has a large eye to enable it to turn around the eye in the boltrope : First step is to tie the seizing for the eye. Here's the setup I use. The wire hook gives me more room to work the seizing around the strop : I start by tying the seizing with a single knot around the strop : Then I apply some dilute PVA and tie 2 half-hitches around the strop. This gives the effect of a siezing and won't come undone later on : Next I turn the block/strop assembly around in the vise and tie a single knot around the **** of the block : More PVA is applied to the knot and I pull it tight : Continued in next post ........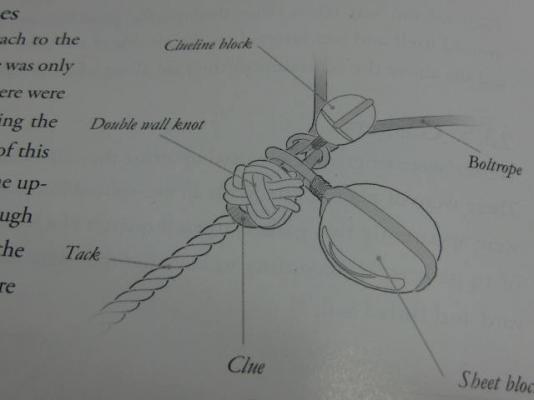
-
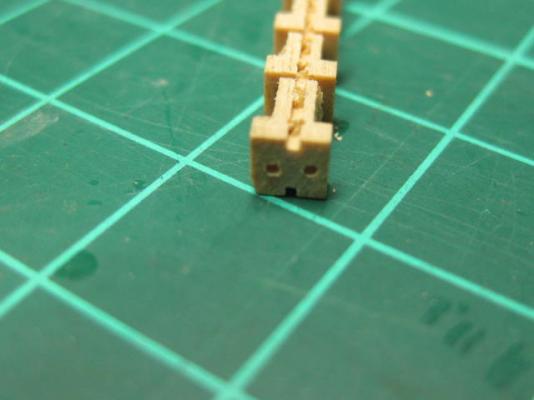
Hi all, Here's a small "tutorial" on how I make the rather tricky Clue (aka Clew) Blocks. The ones here are scale 9" blocks and are just 4.5mm long in 1:48 scale. I'm also making 8" and 6" blocks using the same techniques. I start by cutting the stock for as many as I need from English Box. I find this the best wood to use for these as it has no grain and is very dense, important features on something this small that requires a number of holes. Next I set the 0.020" kerf blade on the table saw to cut a shallow groove for the sheaves. Then I drill the sheave holes using my mill - saves a lot of time and ensures accuracy, but it can be done using a Dremel or Pin Vise. Here's a pic up to this stage : Back to the table saw again, and I cut the various steps required : Using a very narrow chisel made from an Xacto blade I clean up the holes and round off the shoulders of the "sheaves". This not only improves the look of them but makes the line pass through them more realistically. The two blocks on the right in this pic have been shaped : Next I drill the two holes for the strop through the head of the block using a Pin Vise : A sanding stick fitted with 240 grit paper is used to shape the head of the block in both planes, and I cut the **** of the block with a sharp Xacto. The sides of the block are rounded with a small flat needle file : Once detached from the stock I tidy the rest of the block up with the sanding stick, and also cut a notch for the strop (that stops it from slipping off the block later on). Here's the finished article, the coin measures about 19mm in diameter : I use most of the above techniques for making all my blocks, the only real variation to these is the shaping of the head of the block and the drilling of the two strop holes. On normal blocks I use the table saw to cut a 2nd shallow groove in the stock for the strop. Danny


- 6 replies
-
- 26
-
-
Thanks for that John, I was just about to reply when I saw your post . I do indeed use paper, actually thin card from a manilla folder, to make the bands. I stain the card with black wood stain. Here's a LINK to my build log where I'm making the anchors. Why not Michael? A lot of us use paper or card and regard it as a valuable and legitimate material. When you think about it paper is MADE from wood . Some builders make entire ships from paper. Take a look at some of Doris's work - unbelievable workmanship, and you'd never tell that it's not wood. Remember this - if it LOOKS right it IS right . Danny
-
That's excellent planking for a seasoned model builder, let alone a novice Erik. Well done indeed . Danny
- 222 replies
-
- 4
-
-
- 18th century longboat
- model shipways
- (and 2 more)
-
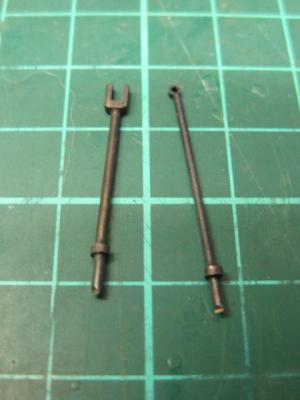
..... continued The "bolts" were the last things to add. I started with two long pieces of wire and soldered them into the holes : I cut the inner bolt flush as drilling both holes will be nearly impossible. One pin will suffice to hold the stanchion in position until the epoxy dries : Finally the cranes were blackened : Danny

-
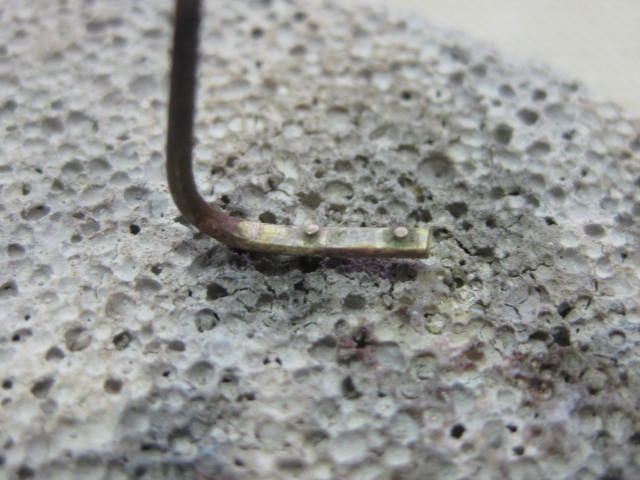
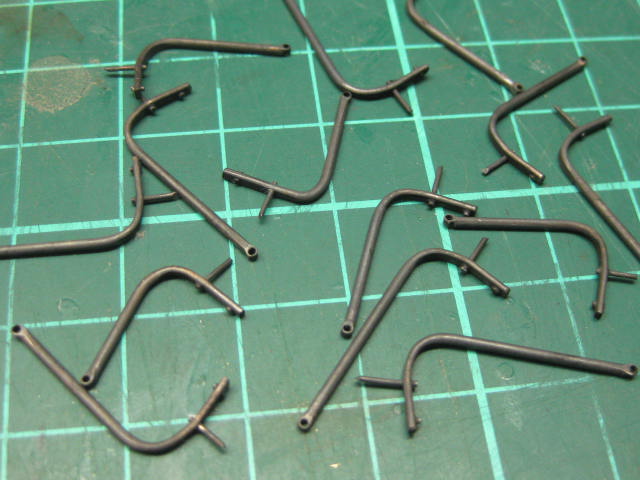
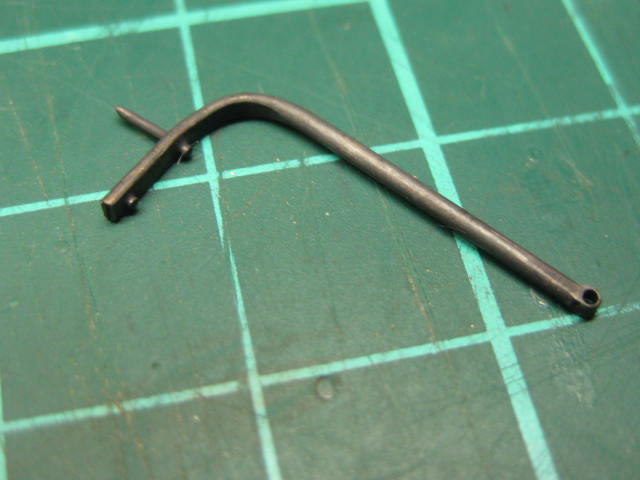
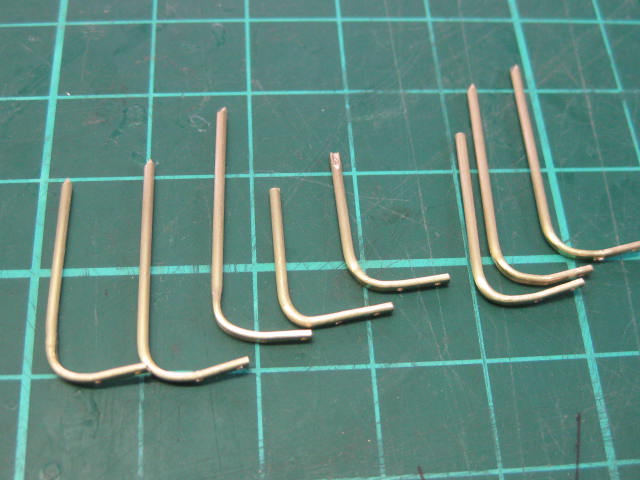
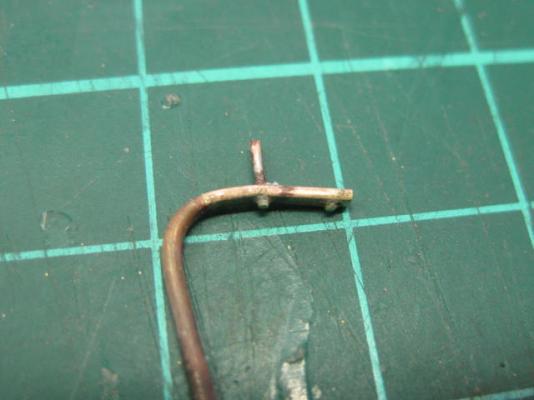
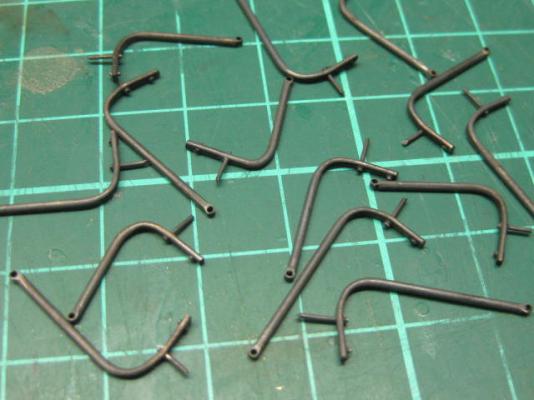
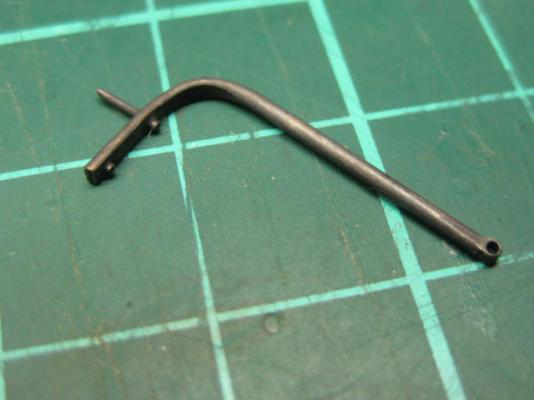
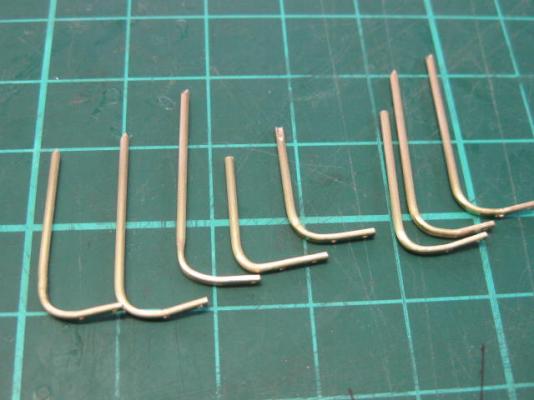
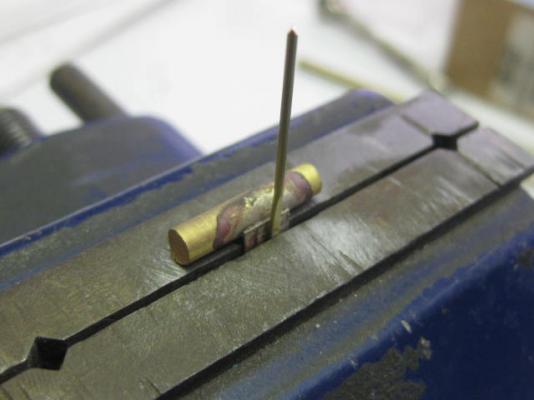
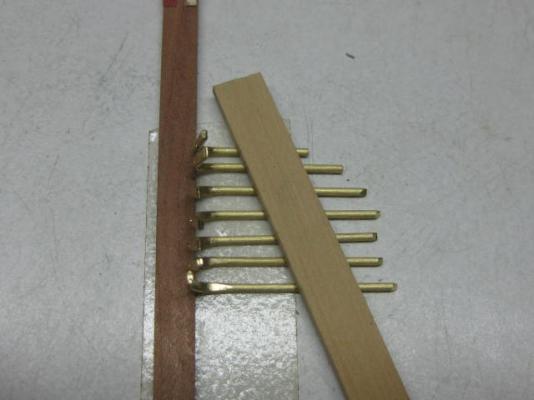
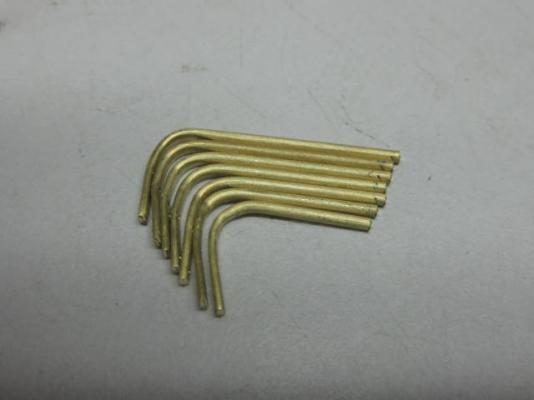
Hammock Cranes The Hammock Cranes are J shaped and are bolted to the quarterdeck planksheers with two bolts. The holes for these will be a trick to drill with the quarterdeck rail and shrouds already in place. I should have done this a LONG time ago . I started by flattening the section above the planksheer and drilling the holes on the mill. The posts are all overlength for now : Next I made a simple jig that fits into my vise to get an even bend into each post : The posts are all of varying heights, with the longest ones forward. To cut them to size I taped the pieces to my bench and drew a pencil line at the point where they needed trimming : Some of the bends are not quite right, but this doesn't matter at this stage as they will probably finish up getting bent a bit when fitting them. Final adjustments will be easy enough to do after fitting : Short pieces of tubing were silver soldered on next. These will take the passing ropes. Making them oversize made it easier to solder them on straight. An easy job to file them flush later on : Continued next post ....


-
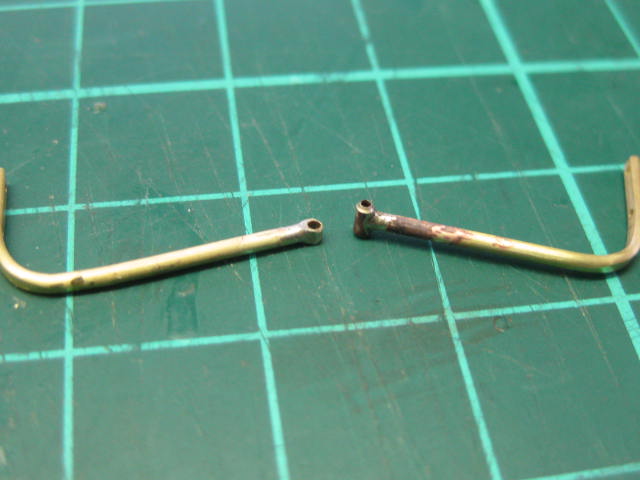
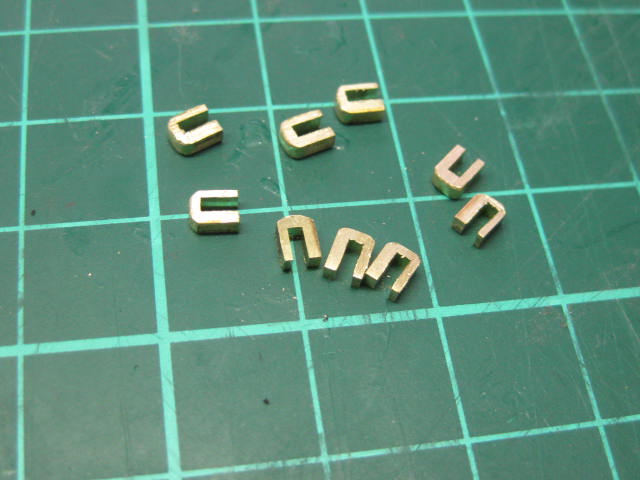
Thank you John. Waist Rails I have a fair bit more "Iron" work in front of me. The first are the stanchions for the Waist Rails. The rail itself is timber. It sits inside U shaped brackets atop the stanchions. I cut the brackets from sheet brass using the table saw and soldered them to the wire posts. The uneven thicknesses on the sides of the brackets were filed to size after soldering : There are also two stanchions that take the entry ropes. I soldered a piece of small tubing to the tops of them to form the eyes that take the ropes : Danny

-
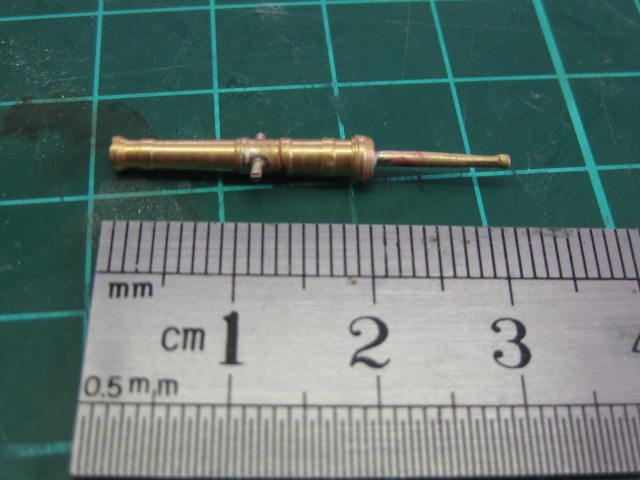
George, Nenad, Pat, John, Greg, Carl, Nils, Richard and Mohamad - thank you for the kind remarks, and also to those who "Liked" my swivel guns . Pat, that's a discoloration caused by either heat or flux, I'm not sure which. It disappears with a bit of wire-brushing, and also when I apply the Blackening. Greg, it all comes with time and practice. Also using the right techniques, most of which I've learnt from others on MSW . Actually Carl it's only 1.2mm at the widest point . That's one reason Nils. The other is the far greater strength that silver has over soft. And there's virtually no cleanup of excess solder when using silver. Sorry Richard, I didn't bother taking any this time. Here are a couple of (very rough - sorry) pics I took when making the Carronades on my HMAT Supply : That's merely a trick of the camera Mohamad - the white background in the 1st pic fooled the camera into making them look a lot blacker. Danny
-
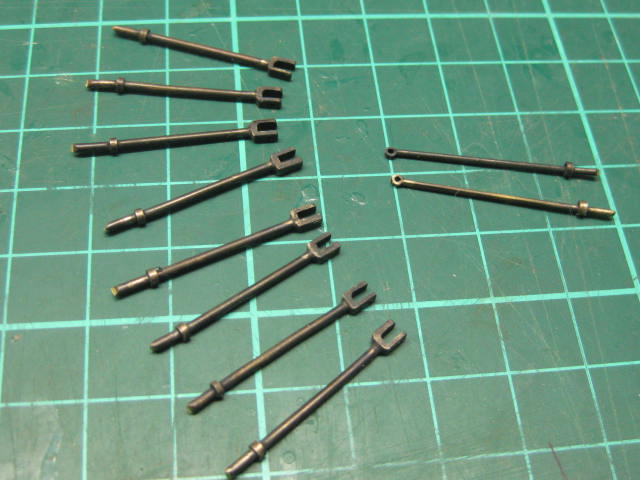
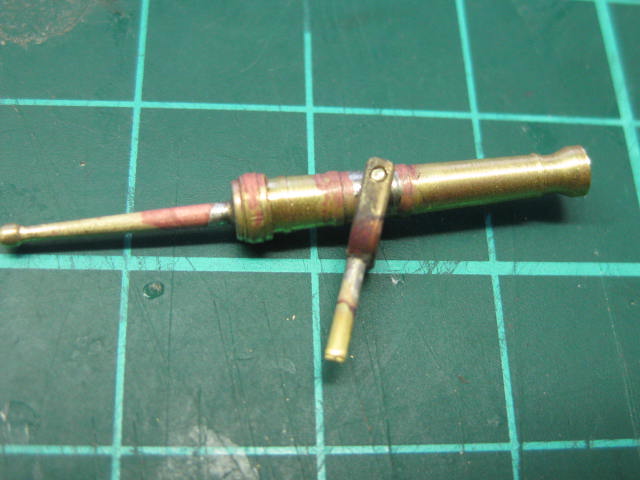
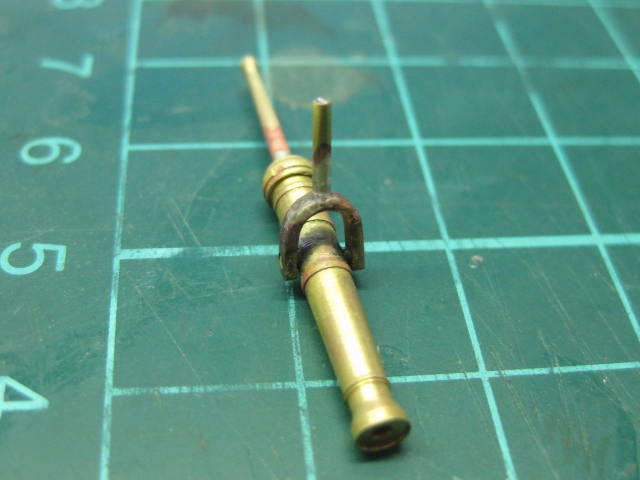
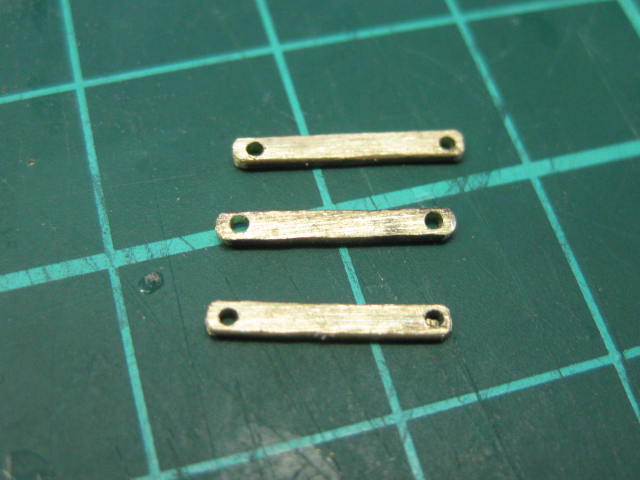
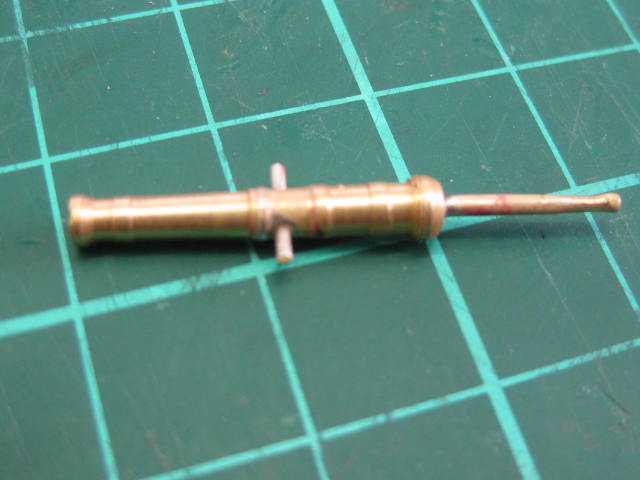
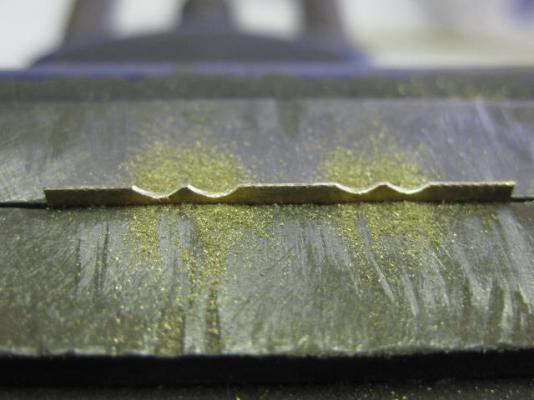
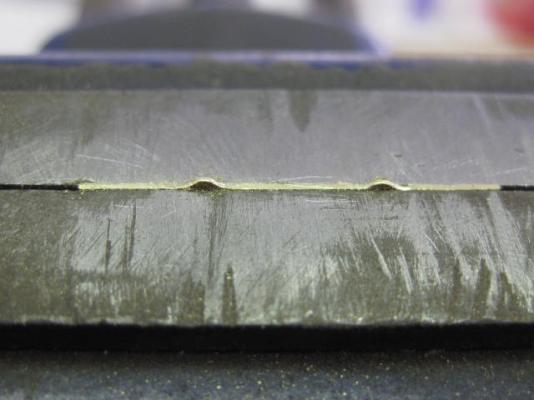
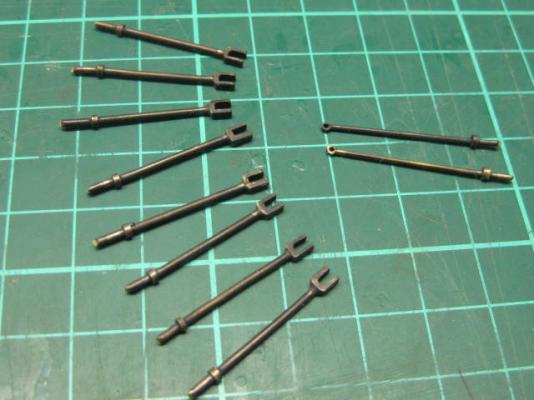
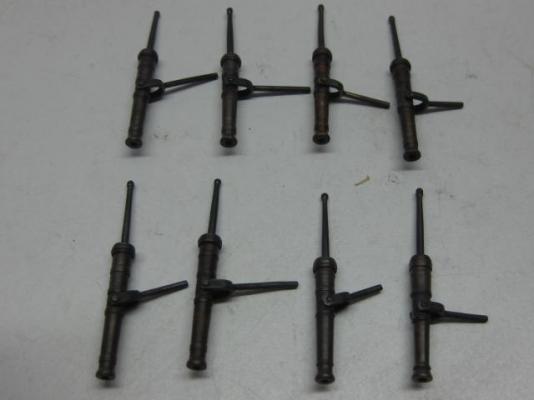
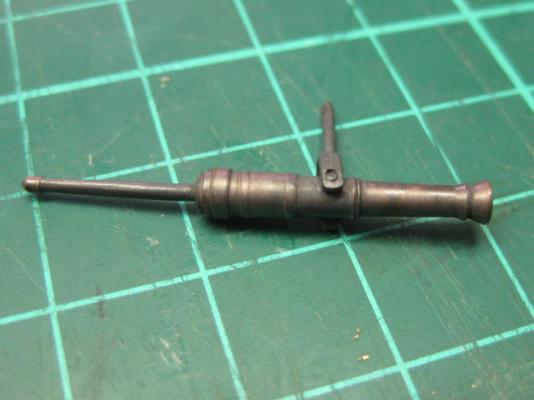
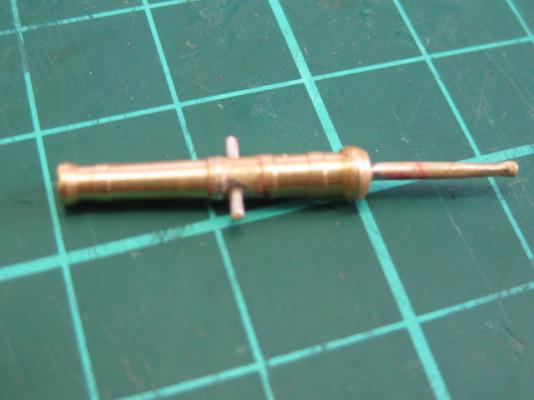
.... continued To make the swivel brackets I flattened some 1.2mm wire. This would have been easier with 1.6mm x 0.8mm brass strip, but I didn't have any. To get some meant a 2 hour drive, and I flattened the wire in a couple of minutes : Next I drilled 0.85mm holes 9mm apart and cut the pieces to length. The ends were rounded : I partially bent the strap using needlenose pliers : A piece of 1.0mm wire was soldered to the strap and then the unit was fitted to the trunions. This was not as difficult as I'd feared. The guns can pivot up and down as the straps aren't soldered to the barrels : Finally the guns were blackened : Danny


-
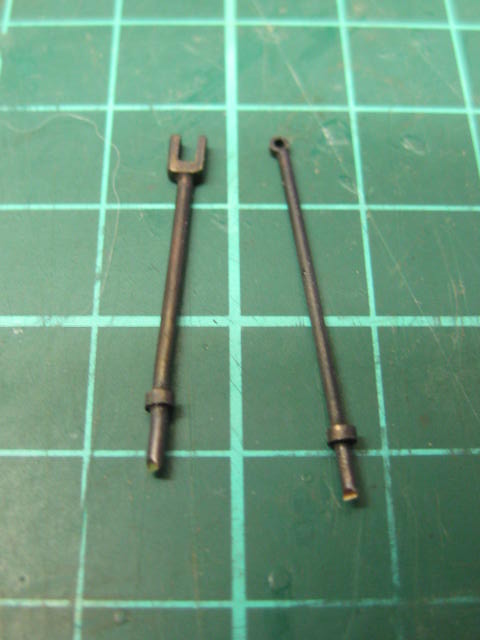
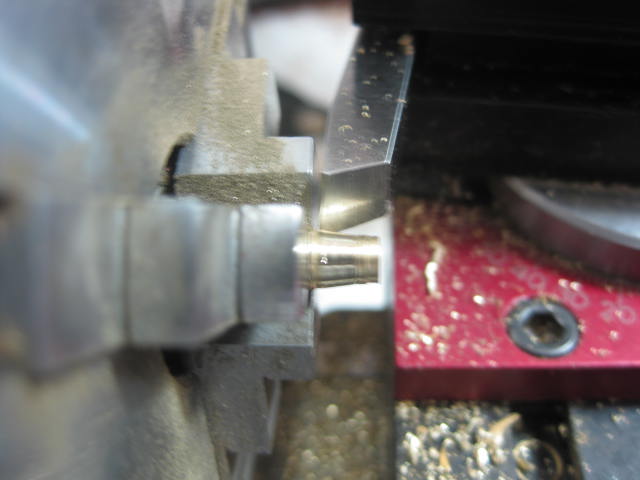
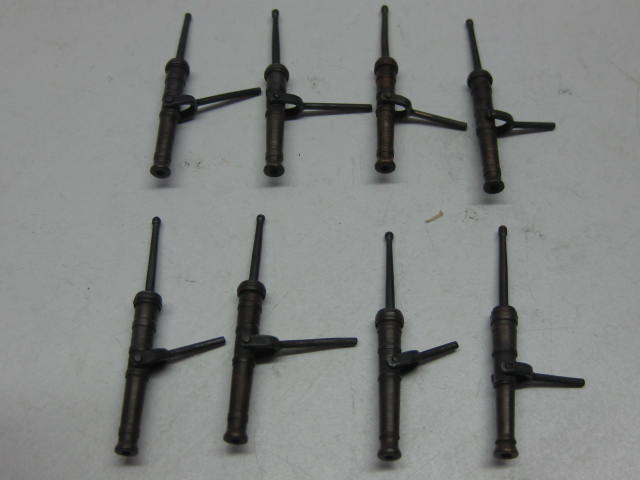
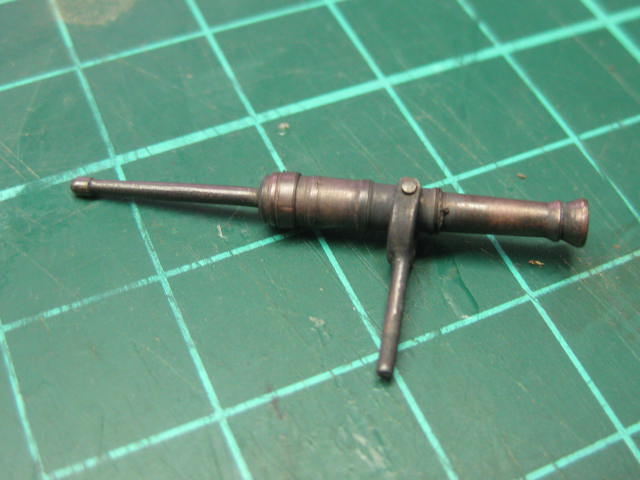
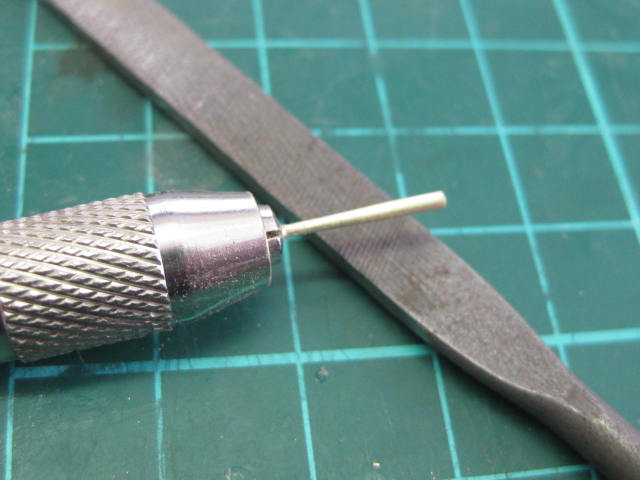
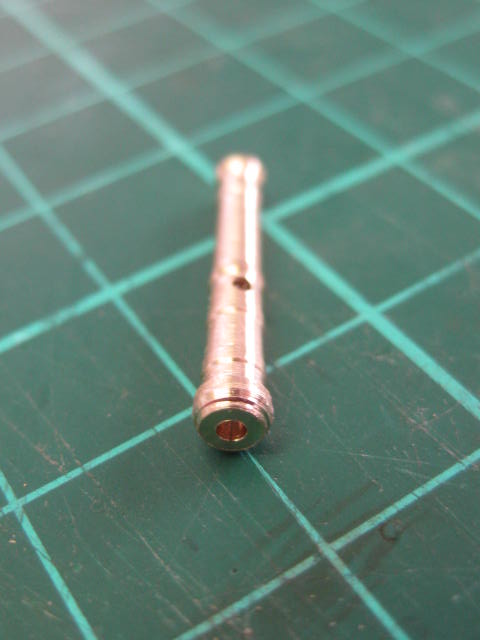
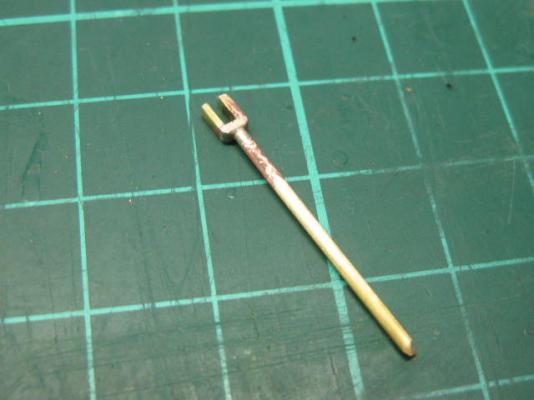
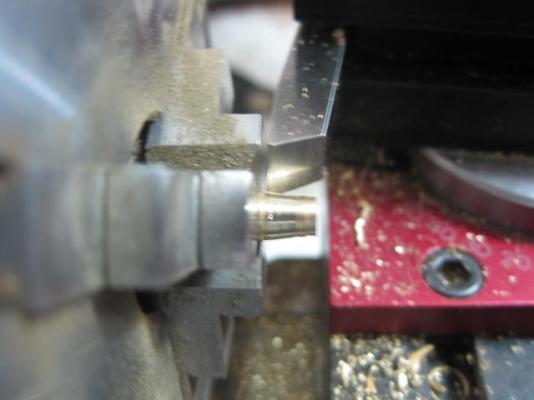
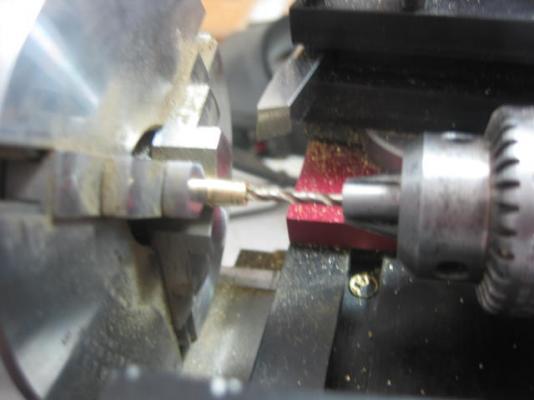
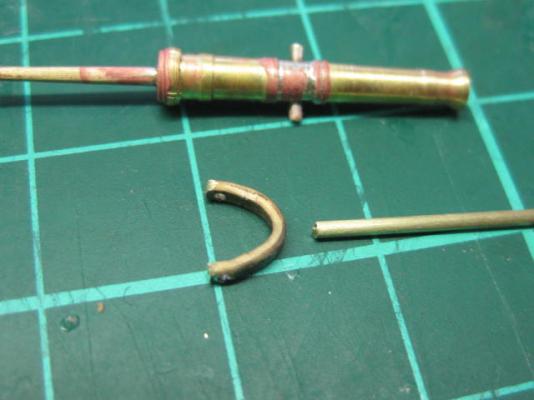
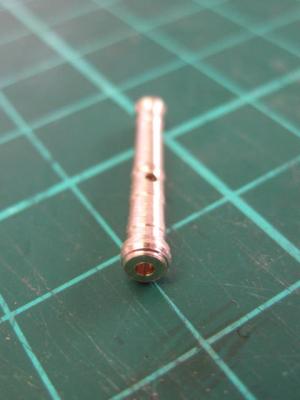
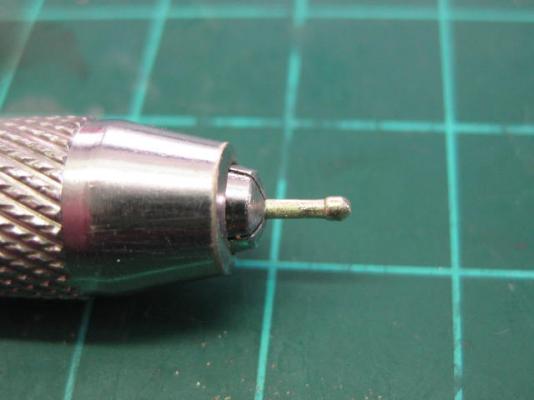
Swivel Guns There are 16 1/2 pound Swivel Guns on the Quarterdeck and Forecastle. I am only going to fit the 8 on the port side. I turned the barrels on the lathe using the tapering attachment. A 0.9mm hole was drilled for the Bore, and another 1.2mm hole for the handle. Then I drilled a 0.8mm hole for the trunions : To make the handle I found it easier to file the taper and knob than to try and do it in the lathe - my wire was too soft and the attempt at cutting it on the lathe took 1/2 an hour and still didn't come out right. Filing them took 5 minutes each. I started by tapering the shaft first : Then I cut the piece to length, reversed it in the pin vise and filed the knob to shape : The handle and trunions were then silver soldered in : Continued next post ......


-
Michael, I use diluted PVA whilst I'm doing the actual belaying as it holds the line in place without unravelling. It dries invisibly. If any future adjustments are needed the glue can be softened with Isopropyl Alcohol and the belaying undone. Danny
-
Well done Toni. I agree with Maury - the cover does look a little odd the way you've built it. It seems to dive inward a little at the bottom. Danny
-
Thank you Greg and John. Quite correct Greg - there is only the one Fish Davit (at least on smaller ships such as Vulture), which is used on the side of the ship that is raising the anchor. When not in use it is stowed away, probably with the spare spars in the waist. Danny
-
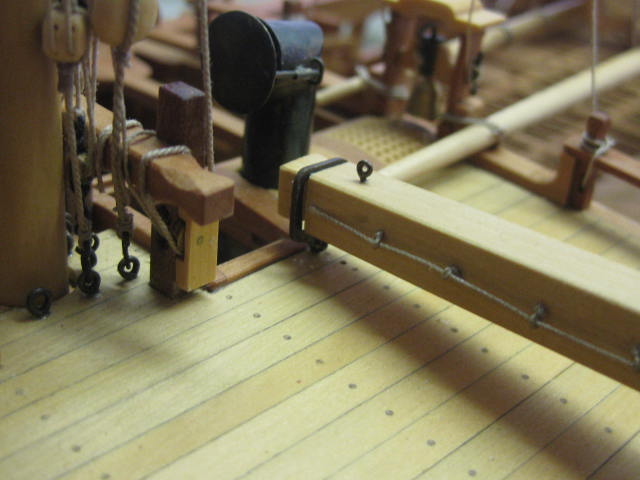
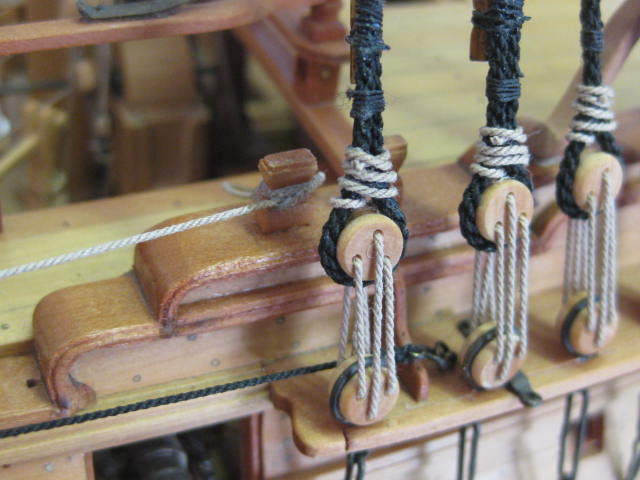
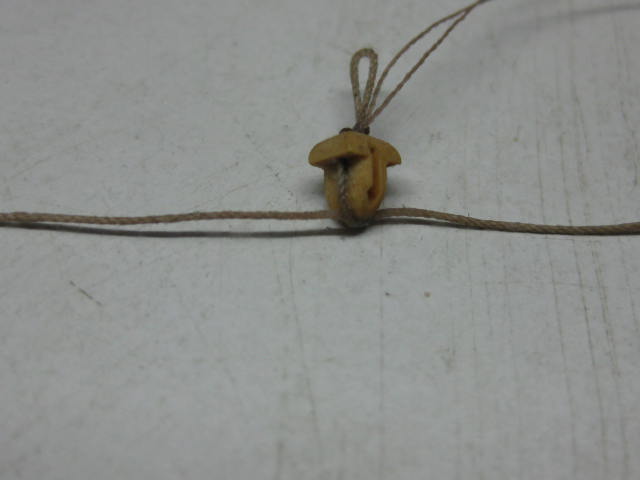
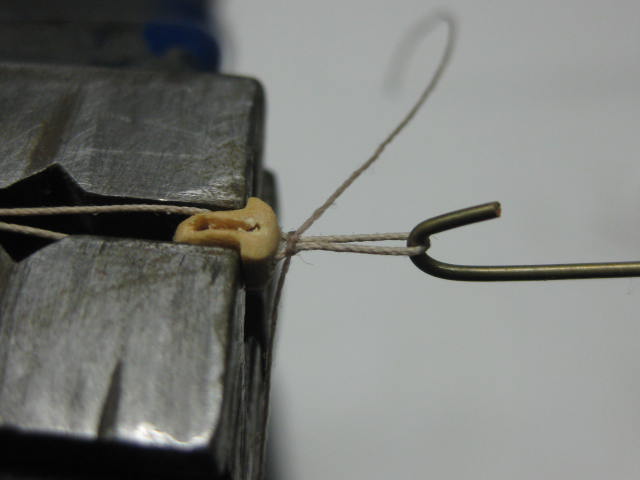
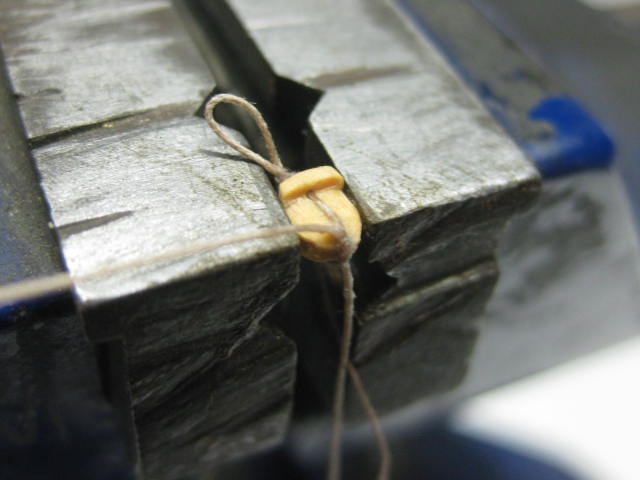
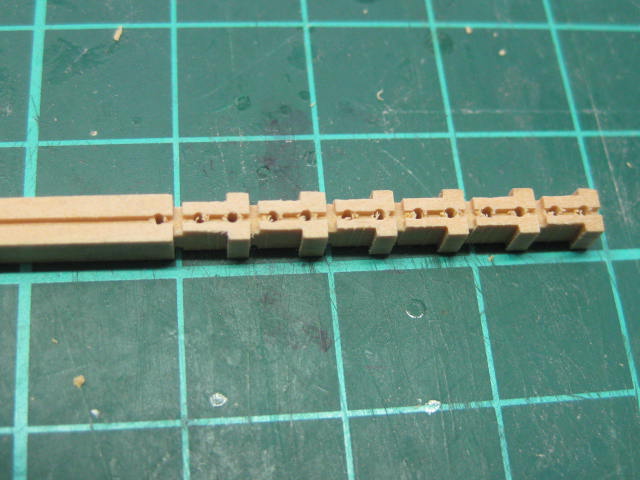
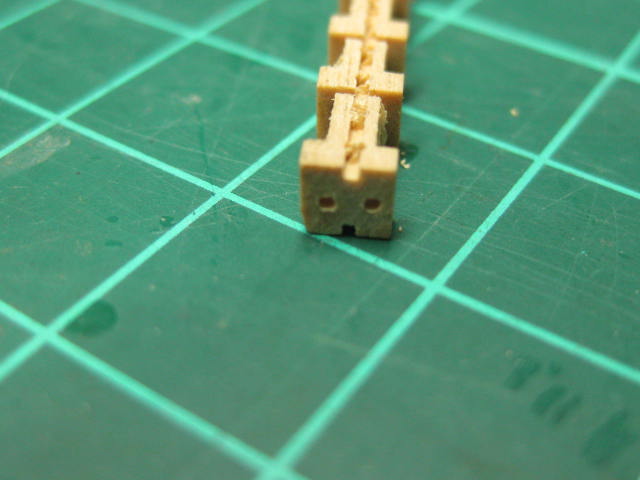
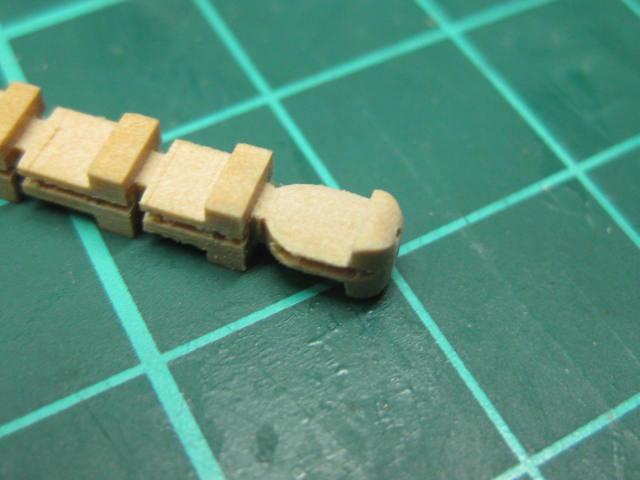
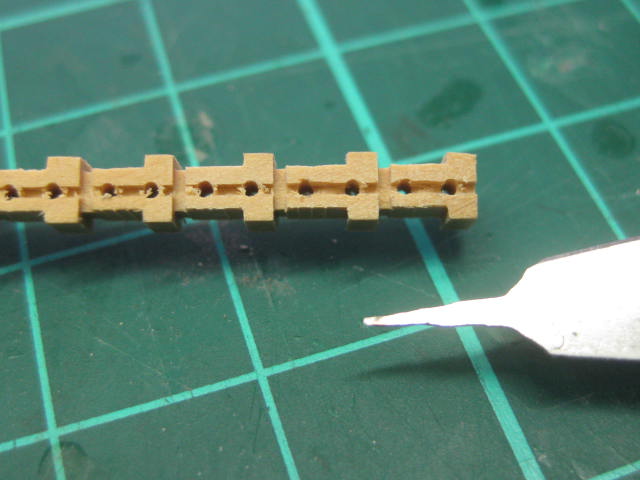
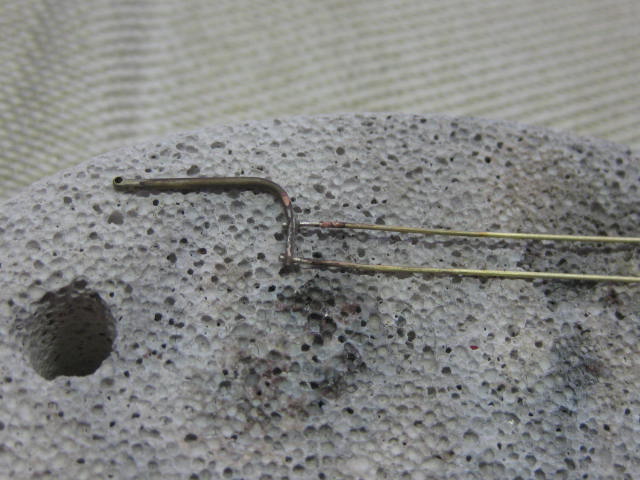
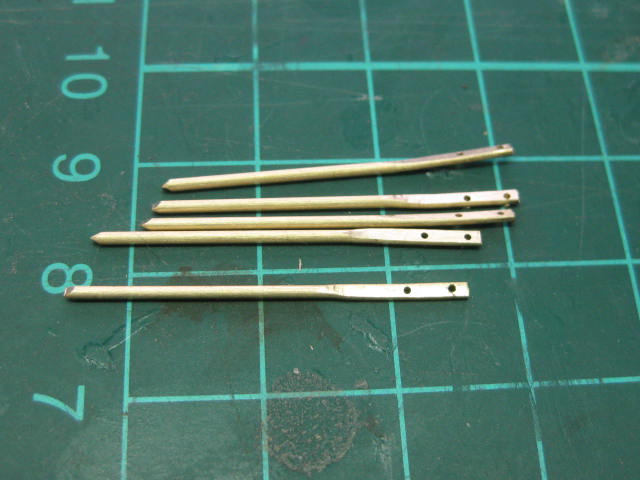
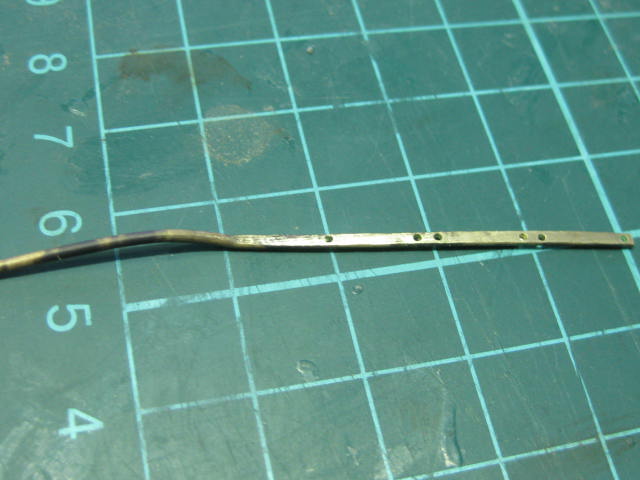
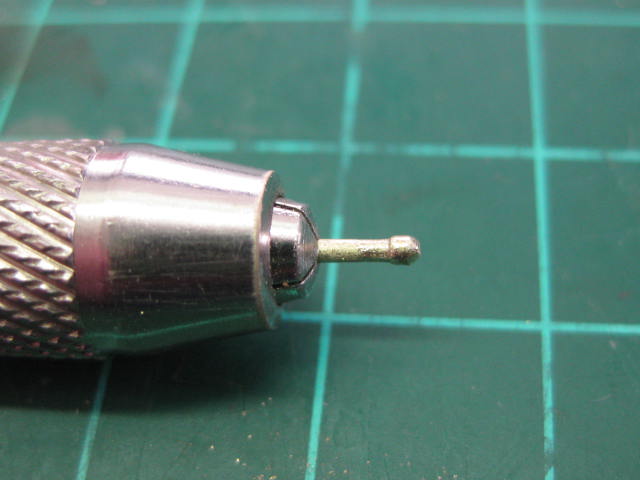
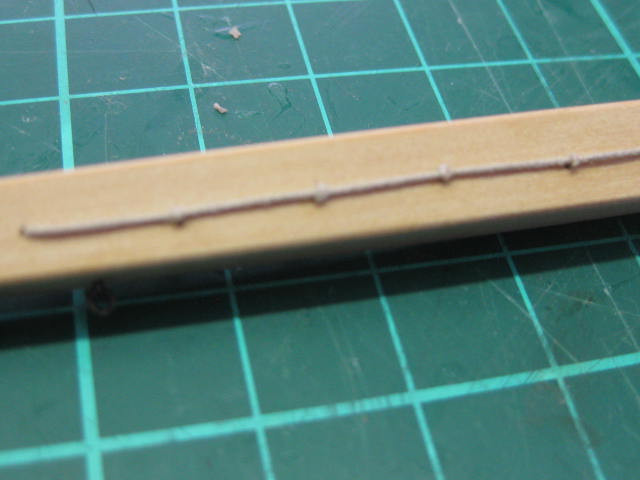
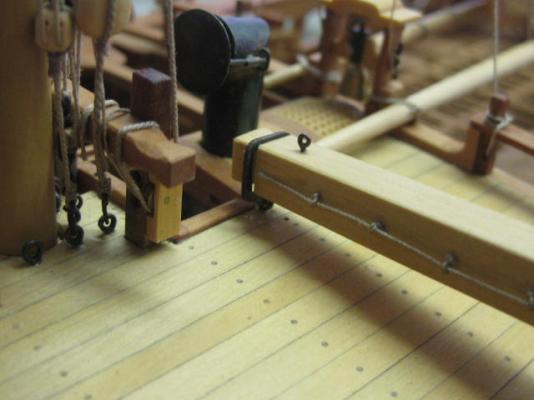
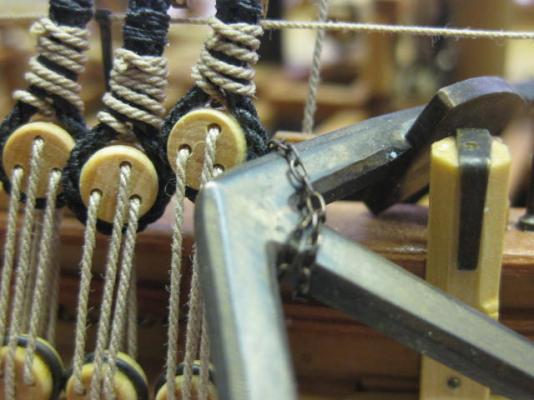
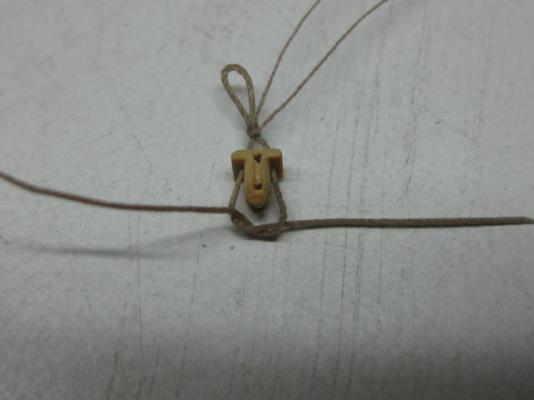
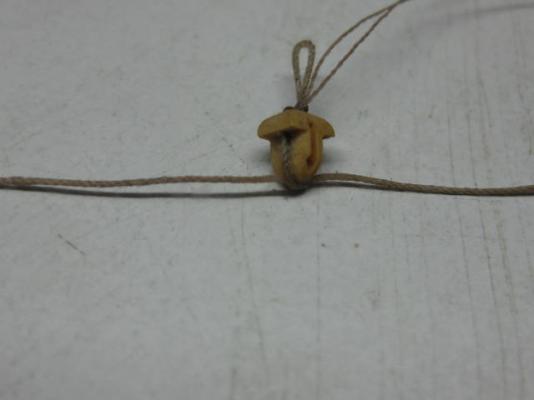
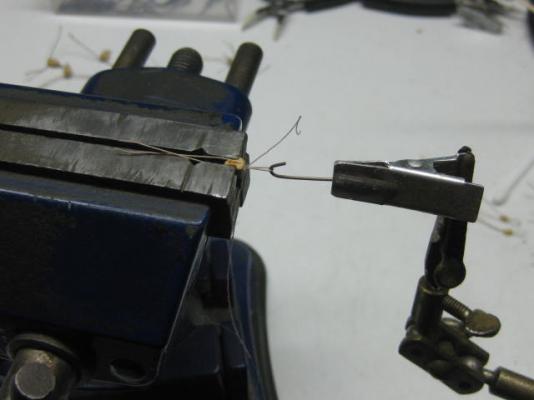
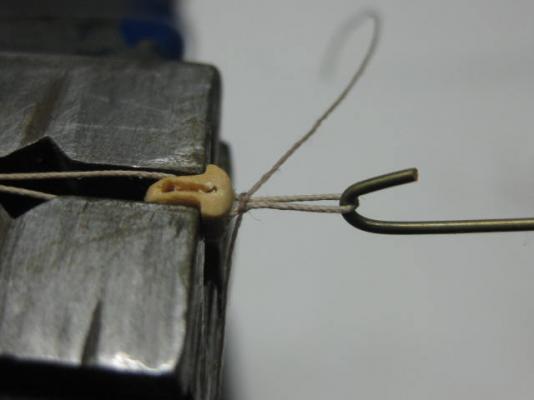
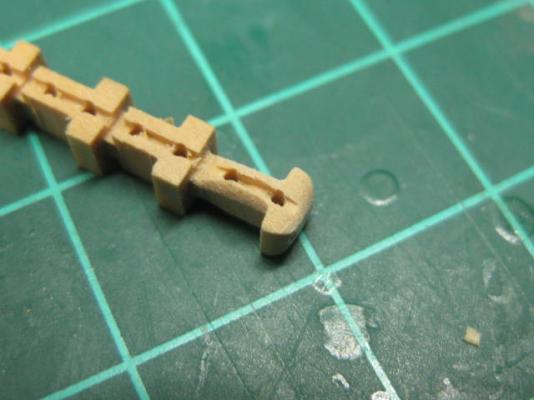
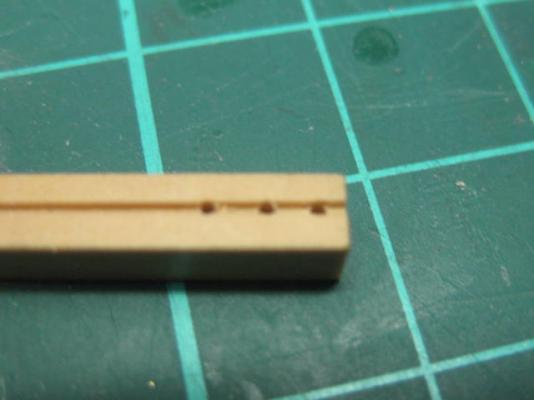
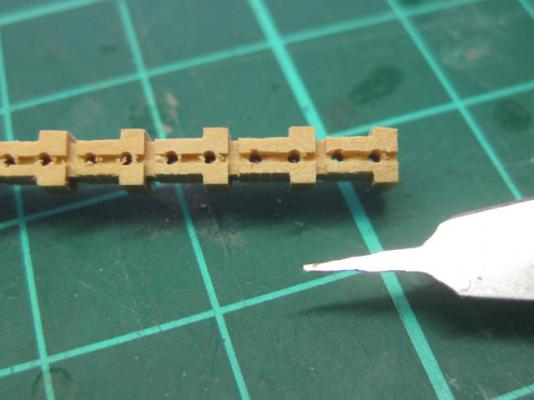
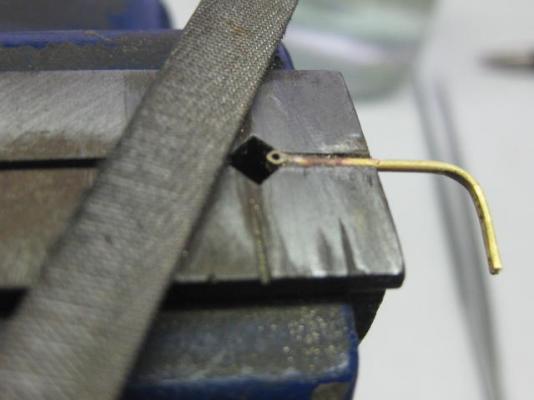
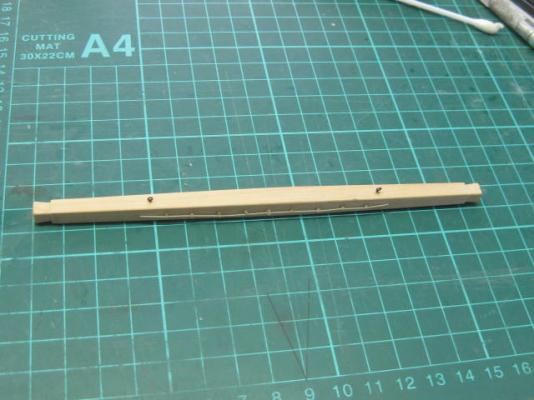
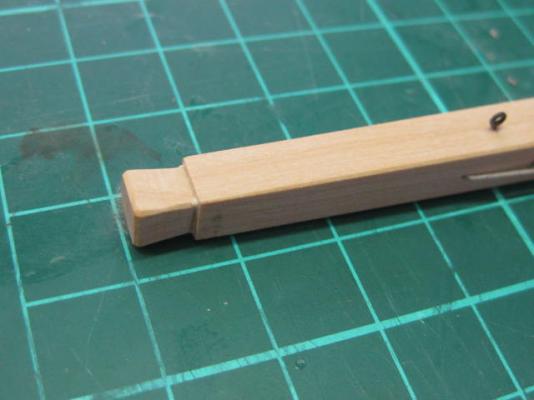
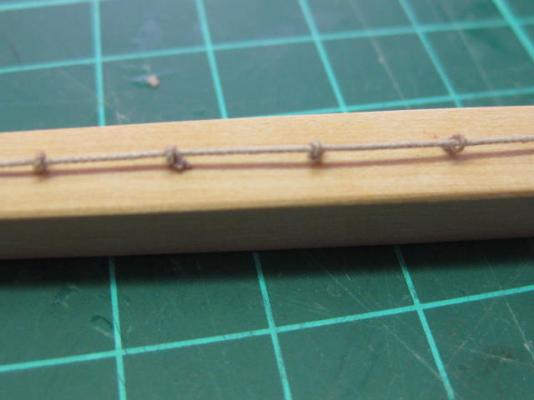
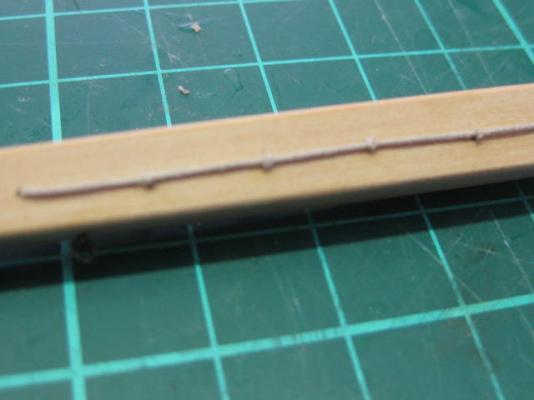
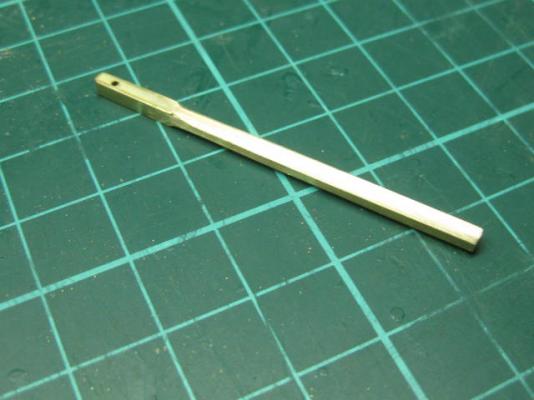
Fish Davit The Fish Davit is used when pulling up the Anchor. The associated tackle literally is used to "fish" the anchor around the flukes and then haul the crown end up ready for stowing. The davit is tapered by 3 scale inches on all four sides. A stop is cut into each end : A handrope is fitted to enable the davit to be manhandled into position. Nine eyestrops hold the two ropes together by passing through the centre of the davit. These were a whole lot of fun to fit, as they have an eye in one end and the other end doubles back into the hole. A drop of PVA glue holds the doubled end in place : Danny
-
ROYAL CAROLINE 1749 by Doris - 1:40 - CARD
Dan Vadas replied to DORIS's topic in - Build logs for subjects built 1501 - 1750
Doris, that collection of models is simply amazing . Are you sure there is only ONE of you? That looks like the lifetime work of a few dozen builders . Your work makes mine seem amateurish in comparison. Well done!! Danny- 883 replies
-
- 9
-
-
- royal caroline
- ship of the line
- (and 1 more)
-
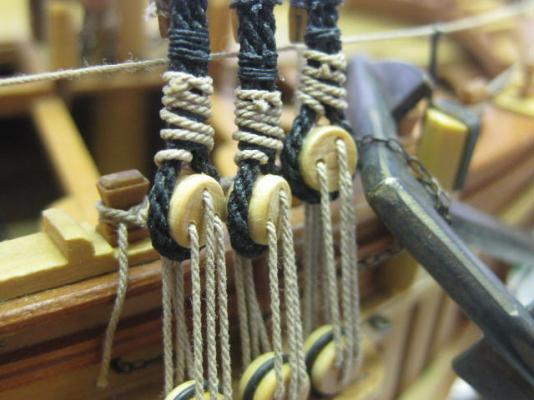
Thanks John, George, Pat, John, Christian, Greg, Grant, John and Paul. Your comments are appreciated . It's a bit of a learning curve George, but doesn't take all that long to get results. Main things to watch are - make sure all parts are very clean, and are a tight fit together. Silver solder doesn't fill any gaps. Yep, pretty fiddly all right Pat . I used copious amounts of PVA to stop the rope from unravelling. I could only do about 3 or 4 turns, apply glue and wait for it to start setting, and then continue on. I used 0.2mm for the puddening and carpet thread for the lashings. Christian, I wanted to simulate Oak for the anchor stocks. They look a lot better in "real life" than they do in the pics - you can't really tell they were stained. That was a marathon effort Paul. Welcome aboard . As George and Mark mentioned, TFFM stands for "The Fully Framed Model", a series of 4 books written by David Antscherl and Greg Herbert. They are both members of MSW as well. The books can be bought from Seawatch Books and the plans from Admiralty Models. Danny
-
Here's a tip Erik - stack about 10 or 12 planks together and tape the ends tightly. Then edge sand the lot together . Replace the tapes to do the last bits. Danny
- 222 replies
-
- 5
-
-
- 18th century longboat
- model shipways
- (and 2 more)
-
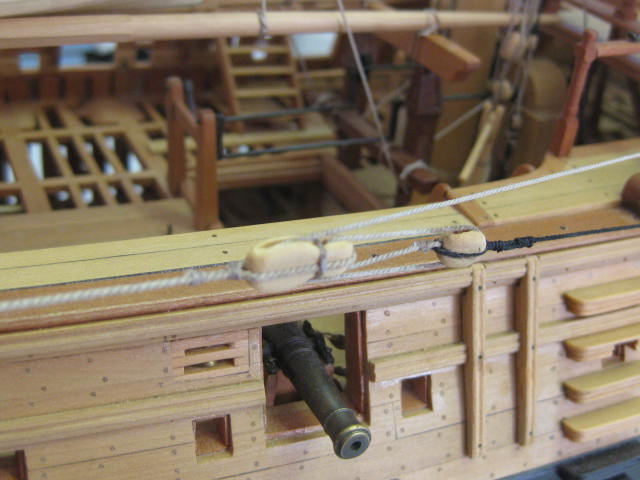
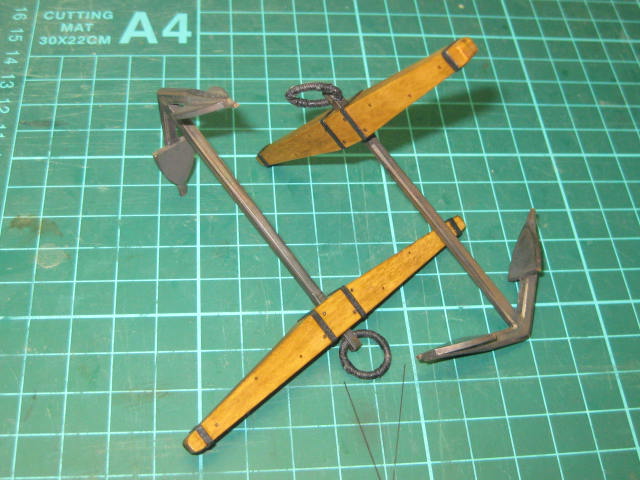
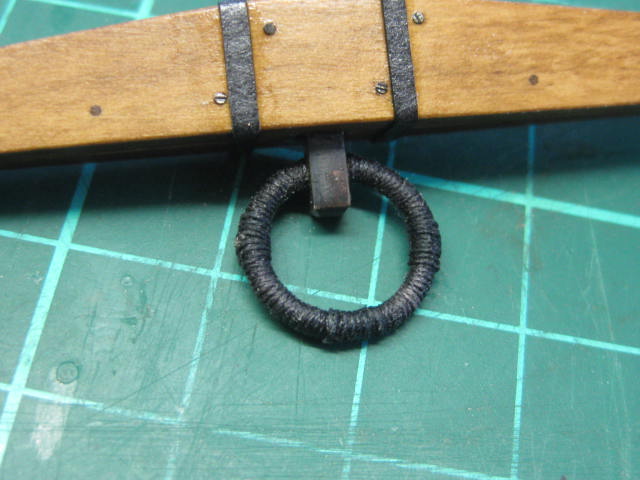
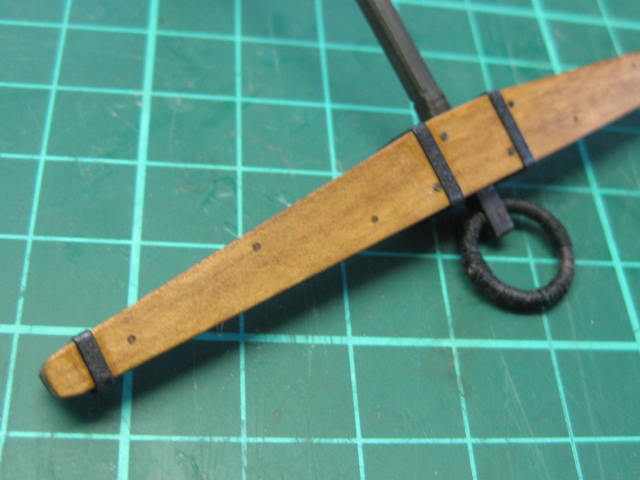
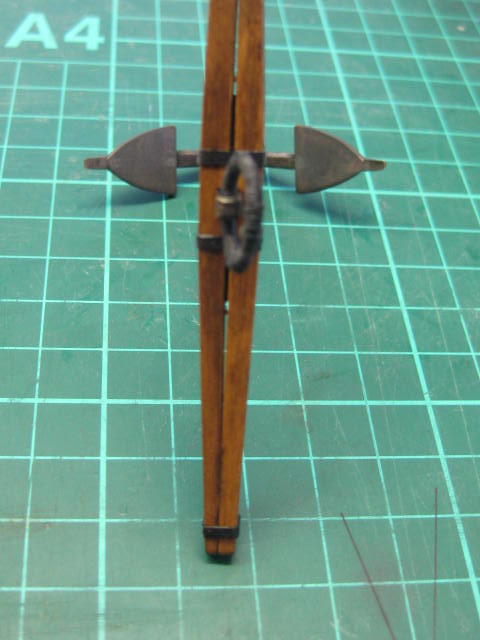
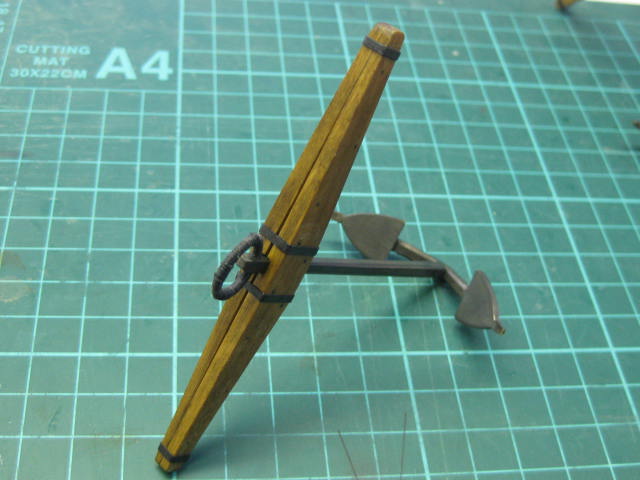
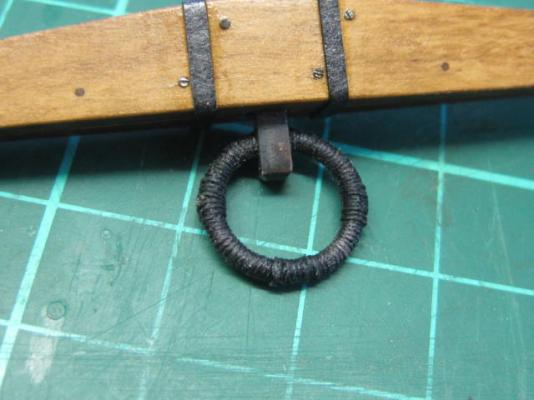
....... continued The completed anchors. The straps are dyed card. I stained the Castello with Oak stain to give them a more weathered look : The Ring is Puddened : Danny


-
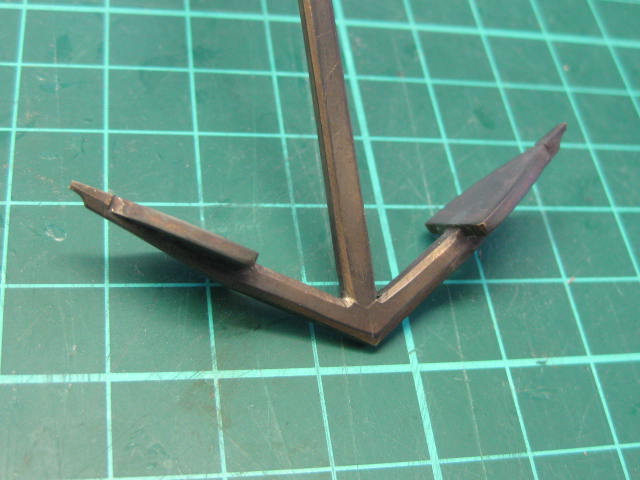
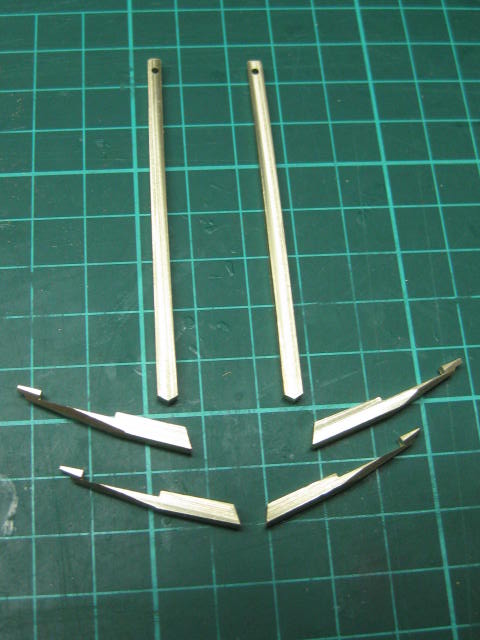
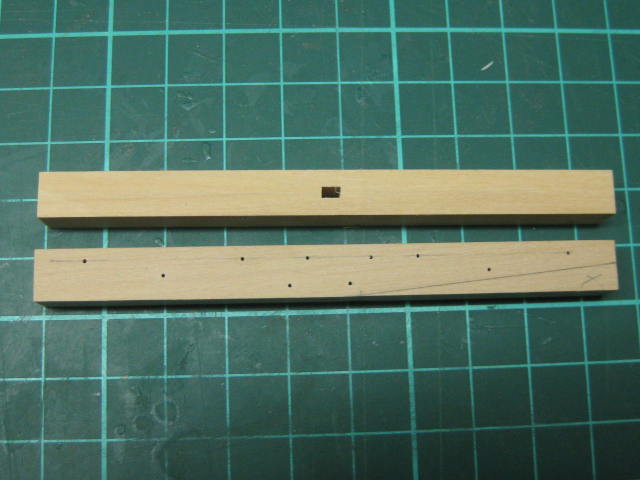
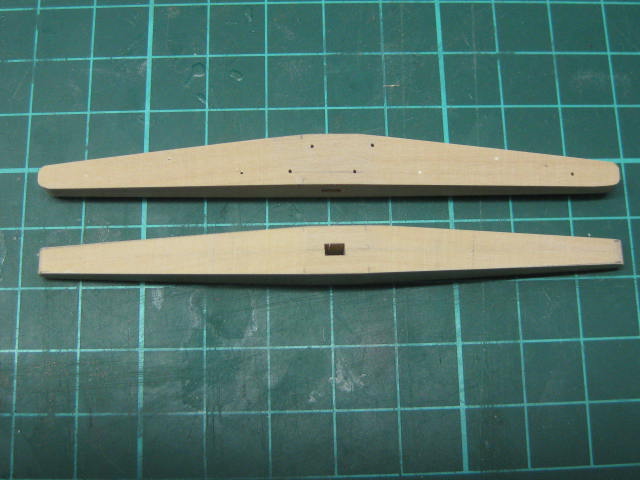
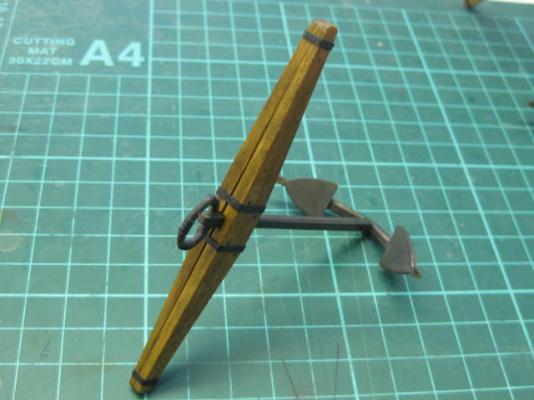
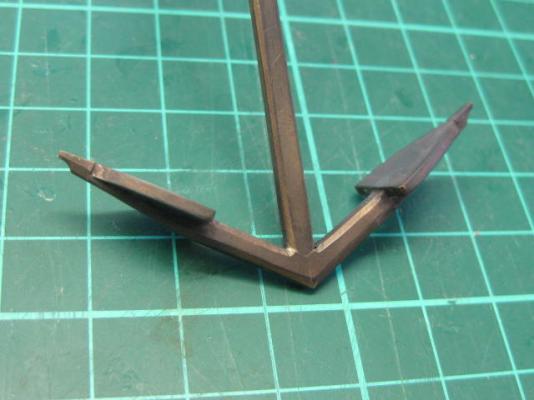
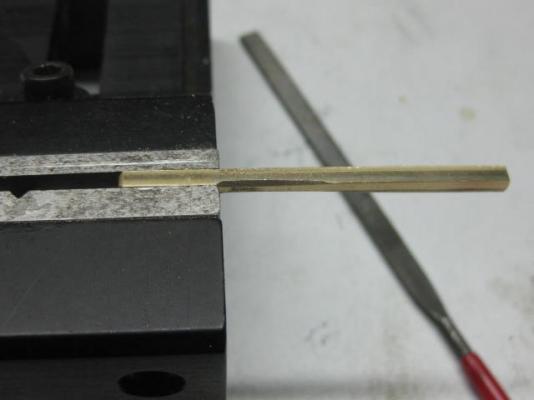
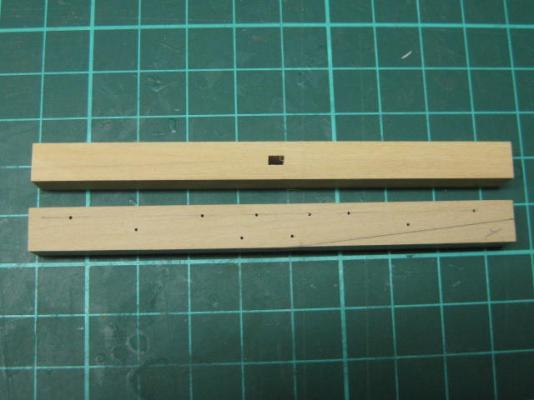
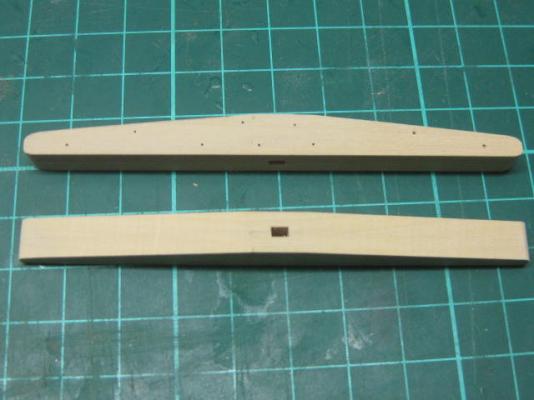
And thanks again Greg, Christian, Mark, wyzwyk and mhegazi . Anchors Work begins on the Anchors by filing the bevels into a piece of tapered brass stock for the Shank : The Shanks and Arms after milling and filing to shape : The arms are silver soldered to the shank : Then the Palms (or Flukes) are cut from flat brass stock and soldered to the arms. The assemblies were then blackened using Jax Black - I'd run out of Birchwood Casey Brass Black and was having difficulties importing some more, so Grant Dale very kindly sent me some of this. Thanks again Grant, it seems to work quite well . The Stocks are made from Castello in two pieces per anchor. This will allow for a small air gap between them to prevent rot. They were tapered on the disc sander and finished with a fine sanding stick. I spot glued the two halves together before sanding them to shape to ensure they were pefectly similar. The holes for the bolts and treenails were also drilled before assembly to the stocks, and then the pieces were dropped into a jar of Isopropyl to separate them : Continued next post .......


-
Well done Erik . Make sure there are no errors anywhere else along the rabbet - this is critical to getting a good start on the planking. Danny
- 222 replies
-
- 1
-
-
- 18th century longboat
- model shipways
- (and 2 more)