Dan Vadas
-
Posts
3,261 -
Joined
-
Last visited
Content Type
Profiles
Forums
Gallery
Events
Everything posted by Dan Vadas
-
Hmmm ..... mine are scattered over four workbenches, two shelves, two bookshelves and three sets of four-drawer cabinets . AND .... I know where everything is . Well, ALMOST everything . Danny
- 1,215 replies
-
- 3
-

-
- sloop
- kingfisher
- (and 1 more)
-
And about time you found this Log too John :D . "Pretty Reasonable" eh? On a scale of 0 to 10 that would probably rate as a 4. I totally agree . Actually David, it's being done in the carport attached to the van - more room and excellent lighting (the sun ). The "no power tools" bit was a minor challenge - I discovered a few new skills on how to make do without them . Thank you Jack, and yeah so do I. At least his daughter will have something else to keep in his memory. Thanks Nils, and no way will I stop until I'm finished . Thank you too Karl (?) - there are a few "Restorations" on MSW (I've done another which was lost in MSW 1.0, and I have two more coming up after I've finished this one). I might start adding "RESTORATION" in the Build Log Titles of all those I find so the Search will find them all. Druxey - YES . Thanks for the kind comment. Danny
-
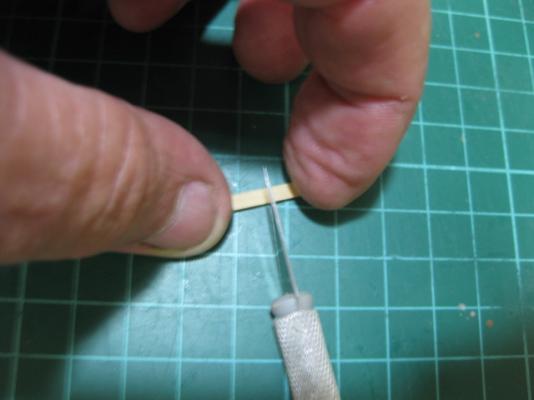
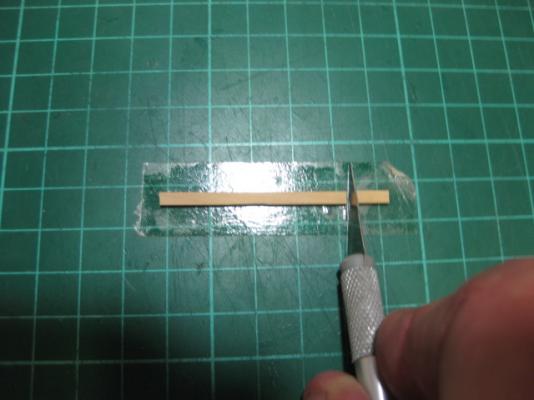
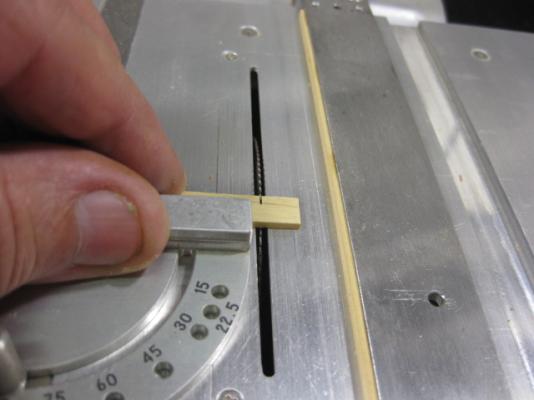
Hi Sherry, "Spindles" = "Balusters" . Here are a couple of easy tricks to prevent your Balusters from becoming part of the carpet. 1. Hold BOTH pieces between your fingers when cutting. 2. Use a piece of double-sided tape. This will need replacing every so often as the glue gets dirty. 3. (no pic) Set up a box (open end toward the piece to be caught) lined with something soft like cotton wool or crumpled tissue behind the piece. This should at least give you a target . Danny
-
Hi Peter, The Victory is at my holiday van, to which I won't be returning for at least the next three weeks. Give me an idea of the actual parts and I'll see if I can remember if there actually ARE any useful dimensions - most parts had very useless "dimensions", like 65mm for the length of a spool of rigging line (that's the measurement of the cardboard tube, NOT the length or diameter of the actual line ). You may have to wait until I go back up there, but I'll be glad to help out if I can. Danny
-
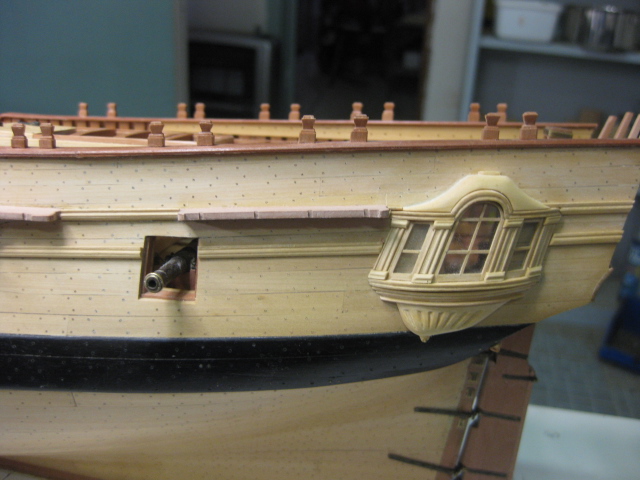
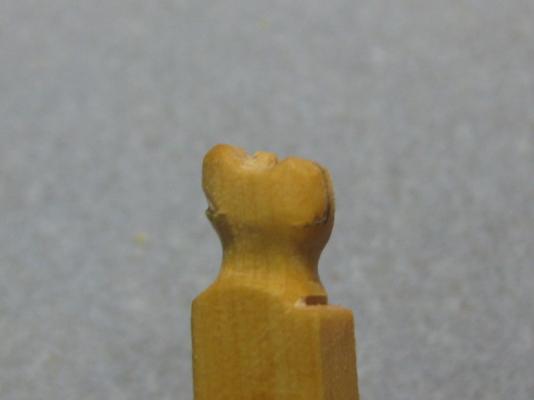
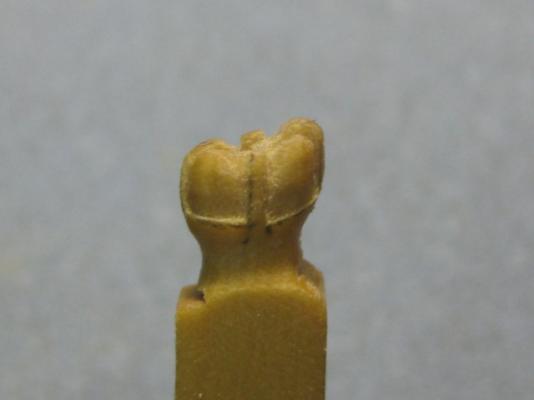
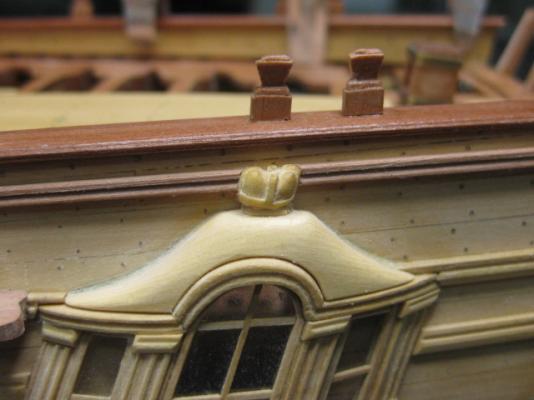
Thanks John, Christian, Ben, Adam and Nils . I've finished fitting the Channels, Standards and Drift Rails to the Port side : Quarter Badge Crown I've also carved the Crown for the Upper Finishing on the Quarter Badge. It's certainly not up to the standard of some of the great carvers on this site, but I'm happy enough with it. Here are some pics from the rough-cut blank to the finished article. I used English Box - it took me about 3 hours work. It measures 6mm wide by 4mm high : Danny


-
It was just a piece I had lying around, about the same thickness as the fence. There's no reason it couldn't be taller. Danny
-
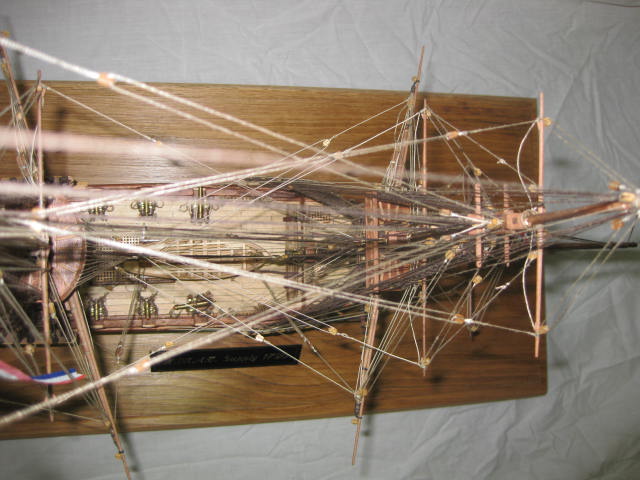
A third thought (jeez, I'm full of them today ). What's the hardest part about Rigging? GETTING THE BASICS RIGHT. By which I mean things like: 1. Tying Blocks to a line or eyebolt. 2. Doing Seizings. 3. Belaying a line to a Pin. 4. Threading line through a Block or Deadeye (use a Needle Threader ). 5. Tying Ratlines (easy when you know how). 6. Getting a Footrope to hang "naturally". 7. Shaping Masts and Yards. There are a few more that don't spring immediately to mind, but you get the picture. Buy yourself a few GOOD QUALITY Blocks, some GOOD QUALITY Rigging Line and some Fly-tying line and PRACTICE the basics. Use the Tips readily available in the Masting, Rigging and Sails section of MSW to get the idea of how to do each bit. Same with the Masts. Ask questions on specific details if you can't find the relevant info in the forum. Once you have a good idea of all the above, start on one of your models. Some may look very complex, but that's only because there more lines to rig - everything else is basically the same. Danny
-
Hi again Brad, After writing the above post I came up with a rather unique idea. Why not buy one of the Solid Hull Kits out there (take your pick on how complex you want the Rigging part to be). Fashion the hull into a "Silhouette" of the real thing, without going to the detail of planking the decks, hull etc. Paint it black. Then add the necessary pieces that the Rigging will attach to like the Channels, Bitts, Eyebolts, Belaying Pins etc but do these "properly" if you wish (you could also paint them black). Then proceed with the Masting and Rigging. I've never seen a model done like this ANYWHERE (it was just an idea that popped into my head) but it would save you a LOT of preliminary work making the decks, hull etc. And it would CERTAINLY be "one of a kind", highlighting JUST the Masting and Rigging . Danny
-
Brad, I'm sure there are probably a few Builders out there who would sell (or GIVE ) you a model that they got to that stage and were scared off by the thought of all those "sticks and strings" . Not ME though - I love the "S & S" . I wish you luck in your search. Danny
-
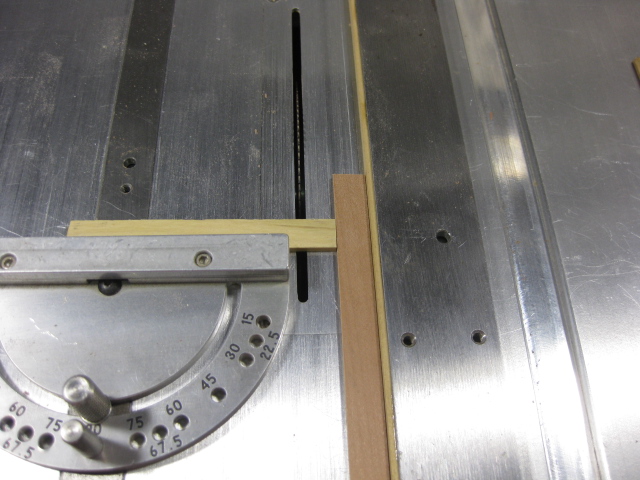
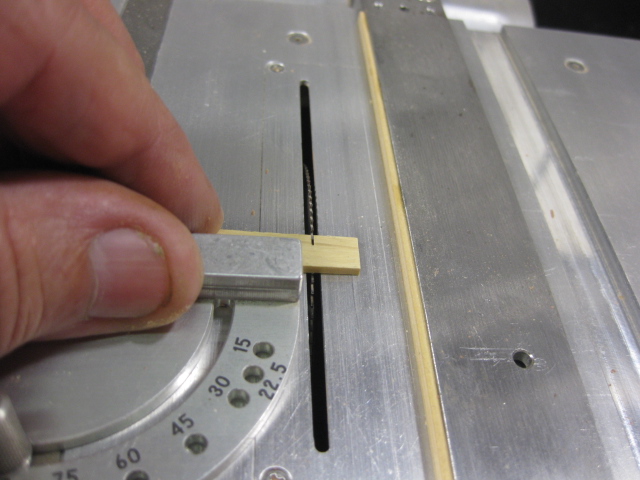
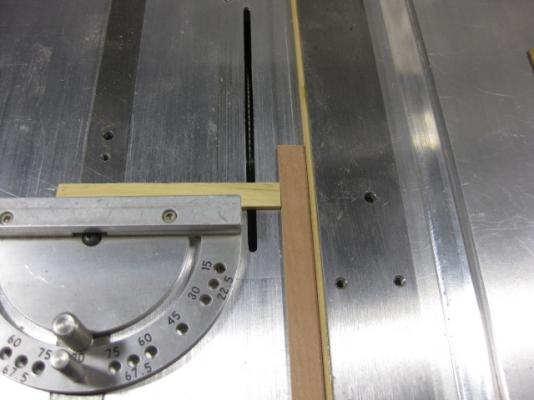
Never operate the saw after having alcohol - even one beer or one glass of wine. But, but, but ..... I'd never get ANYTHING done after lunch . I just get MORE careful. Serious now. I've read some comments about NEVER crosscutting using a Mitre Gauge and the Fence. There is a simple and safe way to do this - I use it when cutting multiple lengths to the same size. See pics below : Simply use a piece of planking or similar that is about 10% wider than the piece to be cut. Place this against the Fence, set up the piece to be cut hard against it, align to your cut mark by moving the fence, then REMOVE the spacer piece and cut. Being that much wider than the piece being cut, even if the blade catches a corner of the piece it won't jam against the fence and get spat out. For the next piece replace the spacer, set the piece to be cut against it, REMOVE the spacer and cut again. ETC, ETC, ETC. BTW - you may notice I've CA glued a strip of wood to the edge of the Byrnes Saw's fence. This is set at virtually zero clearance from the Bed to enable me to cut VERY thin stock - down to a couple of thousandths of an inch. The Byrnes Saw's fence has a fair bit more clearance from the Bed, and very thin pieces can slide under it. Danny
-
Thanks for the compliments Bindi. There are no strangers on MSW - just a whole bunch of "like-minded" people . I guess you could say we are the biggest Ship Modelling Club in the world . Be aware that I deviated from the kit instructions in several areas, mostly as far as "build sequence" goes (I have my own views on how a model should go together, if you think the kit's way is better for you then use their method). I also Scratchbuilt quite a few parts that I wasn't happy with in the kit, like some of the Ply pieces for the Deck Fittings etc. I think I remembered to note any deviations in the Log. My kit actually didn't - they'd forgotten to pack him . But a phone call to Modeller's Shipyard soon had him at my door at "no charge" . Danny
- 147 replies
-
- 1
-
-
- norfolk
- modellers shipyard
- (and 1 more)
-
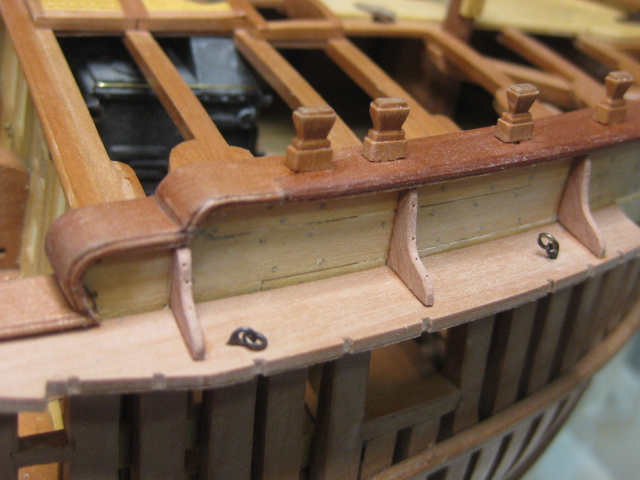
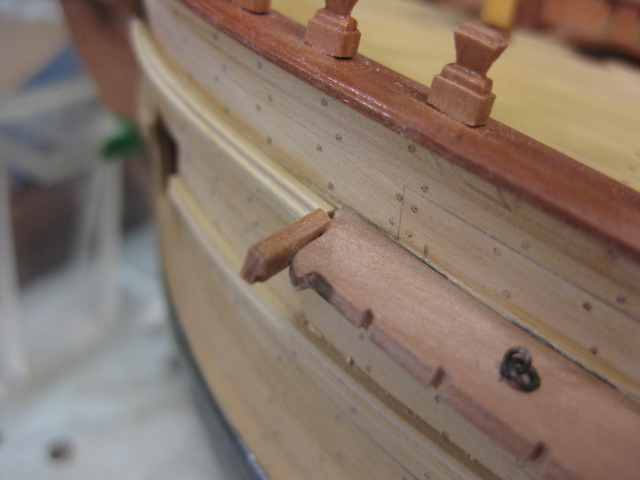
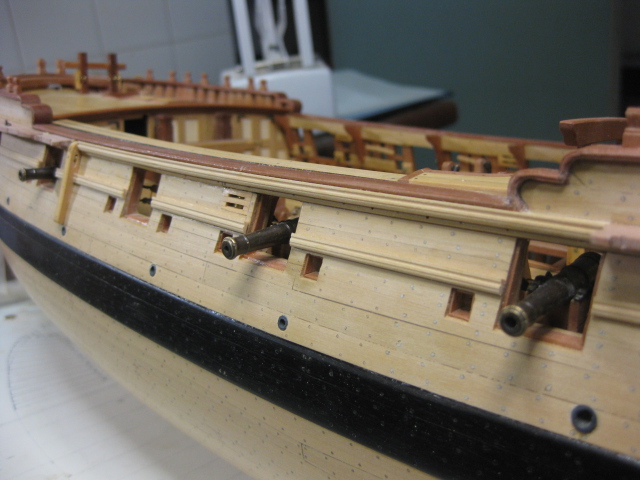
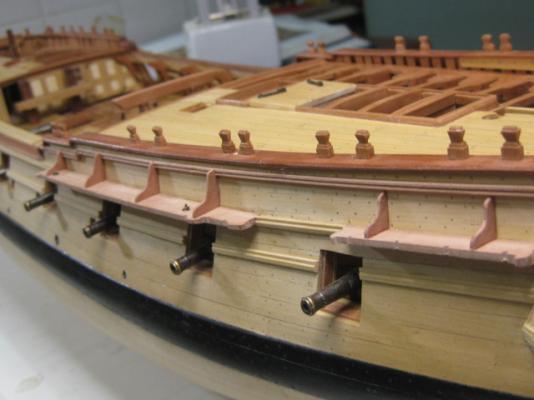
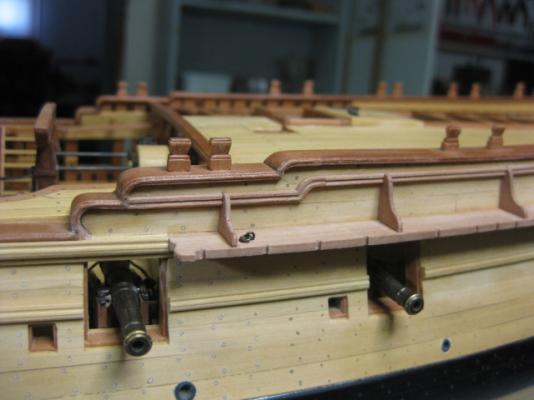
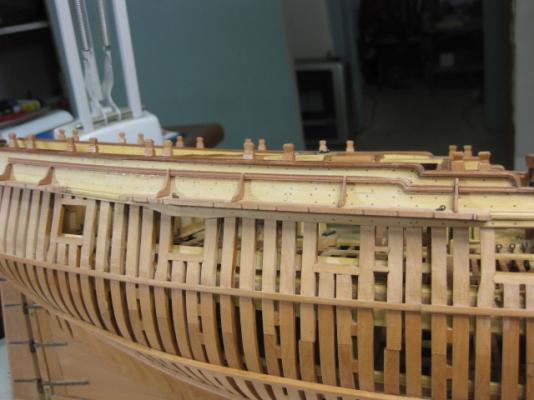
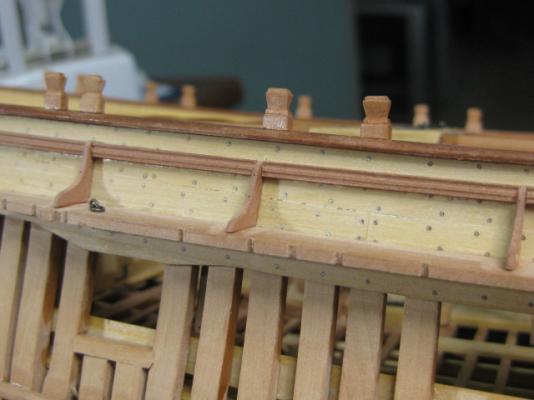
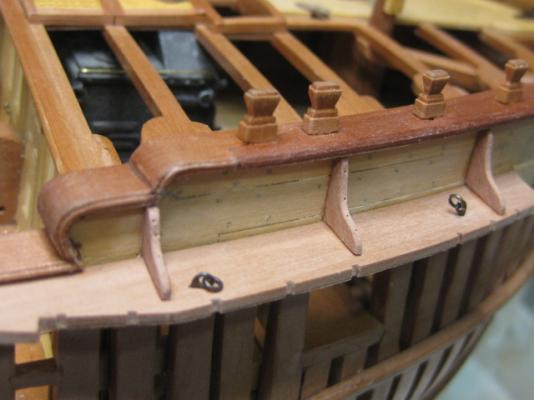
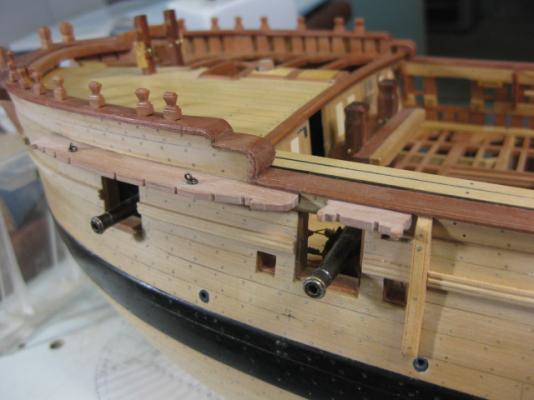
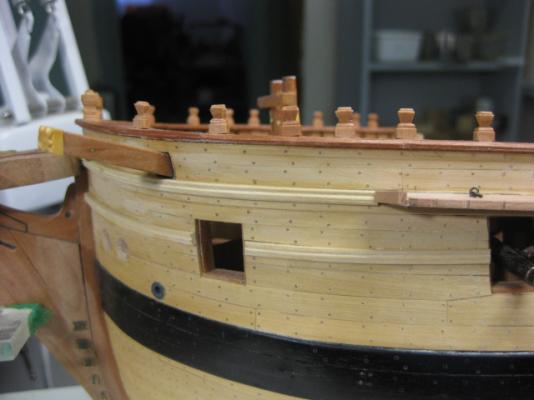
Drift Rails The Drift Rails are the uppermost ones. I used dark Swiss Pear as they are a continuation of the Planksheers in the Waist : They cut in over the Catheads : Danny

-
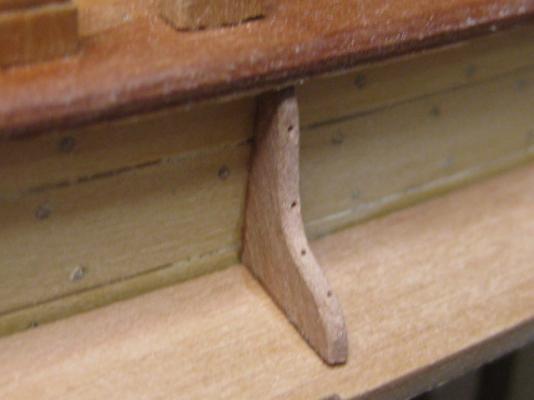
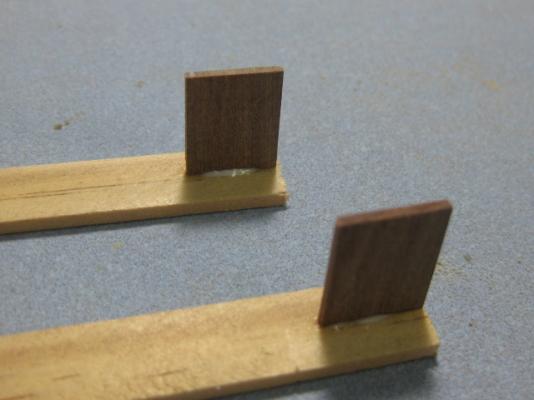
Standards The Standards are small upside-down knees which support the Channels. They are 2" thick in real life, 1.06mm at 1:48 scale. There are three on each foremast channel, four on the main mast and two on each mizzen. These had to go on before the Drift Rails, which are intersected by the standards. I simulated the small bolts that hold them by using an awl : Danny
-
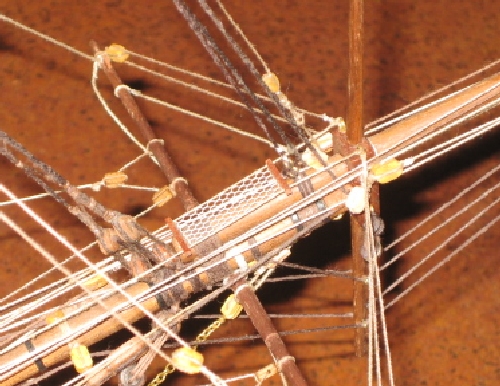
TULLE, used in Bridal Veils among other things, makes very good Netting. It comes in a variety of shapes, sizes and colors : Danny
- 396 replies
-
- 11
-
-
- Idea
- Bright Idea
- (and 1 more)
-
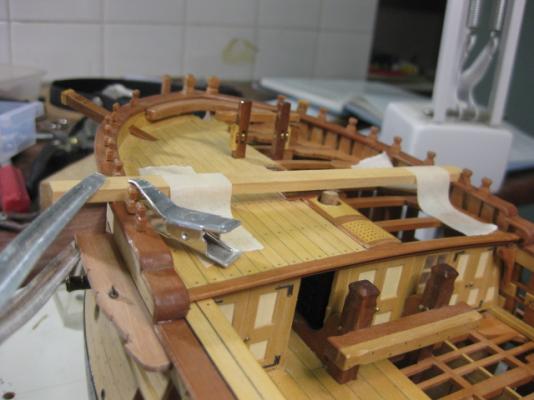
Thanks Sherry. My method also gives you something to clamp the Channels to. This prevents them sagging downward whilst the glue dries, if you can't position the hull so they point straight up. Danny
-
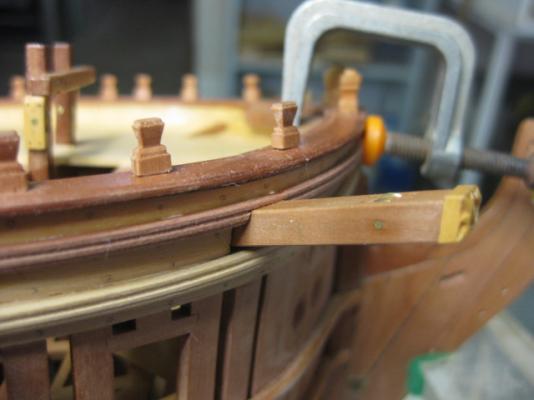
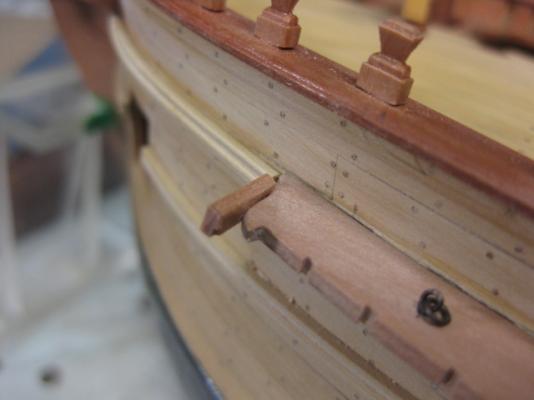
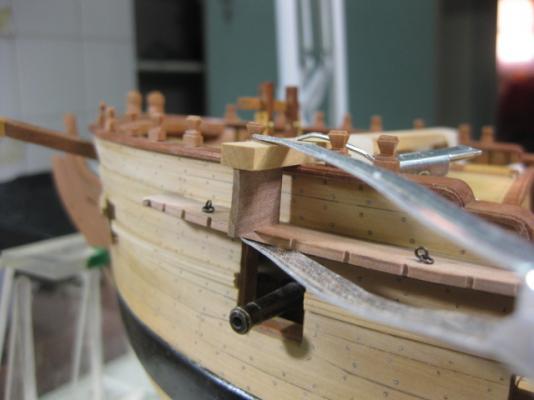
Yeah John, I'm full of them (it??? ). Here are a couple of pics of the Channels fitted to the Port side : Sheer Rails The Channels intersect the Sheer Rails, which is why the channels had to be fitted first : An unusual way to hold the end of the sheer rail whilst the glue dried - clamps were ineffective in this situation, so I've temporarily glued a piece of scrap to the end of the channel : Danny


-
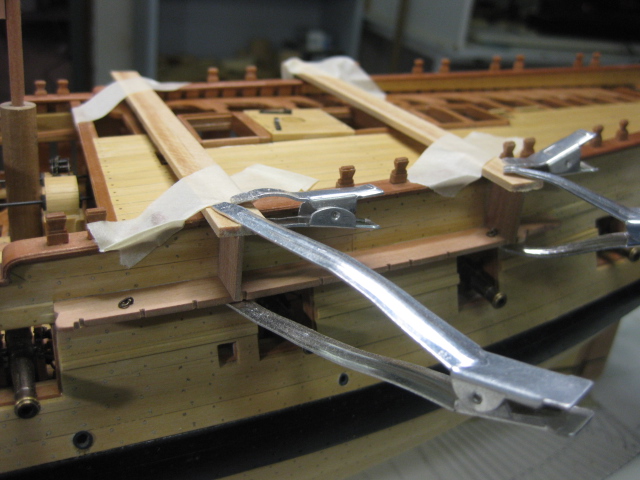
Thank you very much John, Colin, Doris and Popeye . Fitting the Channels perfectly horizontally was accomplished by the use of a couple of specially made "jigs" that sit on the planksheers from one side to the other. Masking tape and clamps hold the jigs firmly in position. The leg glued to the underneath of the horizontal member was measured at the inboard edge and cut square. Danny

-
As well as Daniel's aforementioned masts for small ships, BAMBOO BBQ SKEWERS are also the perfect material for making Treenails. A pack of 100 skewers costs about $2.00 and will make about 80,000 treenails (rough estimate ). Using a sharp Xacto knife, split the skewer lengthways into as many strips as possible - depending on the quality of the bamboo used (which varies between brands and even individual skewers) you can get up to 8 or 9 thin strips. Pull these through a Drawplate until the desired size is reached - 0.024" is perfect at 1:48 scale. Use pliers to pull any stubborn strips through the drawplate - bamboo splinters are almost impossible to get out of your finger . Trim the end as needed. One finished piece should yield about 100 "nails". Danny
- 396 replies
-
- 8
-
-
- Idea
- Bright Idea
- (and 1 more)
-
Hi again Mark, Ah .... then the gunports won't be such a big issue as the framing under them won't be seen - if you finish a bit short on a frame or two you can always pack them. I'm no authority on French ships - as a matter of fact I know nothing at all about their construction apart from a few things I've picked up from your Log and a few others, so I won't be able to give you any useful advice in that regard. As far as building tips go, that's a different story , and I'll be glad to help in any way I can. One thing I thought of a few minutes ago - in English ships of the latter half of the 18th century (my area of expertise ) the Port Sills are horizontal athwartships. Does the same apply for French ships, or are the sills the same angle as the deck camber? Danny
-
Hi Mark, I'm betting it will - why do a Full Frame model and cover it all up??? Once you have sorted the issues with the Hahn framing plan, and the first few PERFECTLY MADE AND POSITIONED frames go in ...... well ...... If you were going to fully plank the model - why bother starting over ??? If you decide to go ahead with ply bulkheads I can already see what will happen - halfway through building the hull you'll get dissatisfied with the "shortcut" and start on Licorne v3.0 . A word of advice - DON'T. There are minute variations in the height and angle of sheer on EACH frame. No amount of careful measuring and cutting will get them EXACTLY right. There will be gaps that stand out like the dog's proverbials when you come to fit the Port Sills. A better strategy is to leave the frames at least 2mm too long and trim them to size with a sanding stick that goes through to the opposite port after at least the Deck Clamps go in (I left mine until after I'd planked the deck). Leave out the Toptimbers above the ports until the lower sills have been trimmed. Same goes for the other Toptimbers - leave the final trimming until MUCH later in the build. And .... what TimC said above about planning . Danny
-
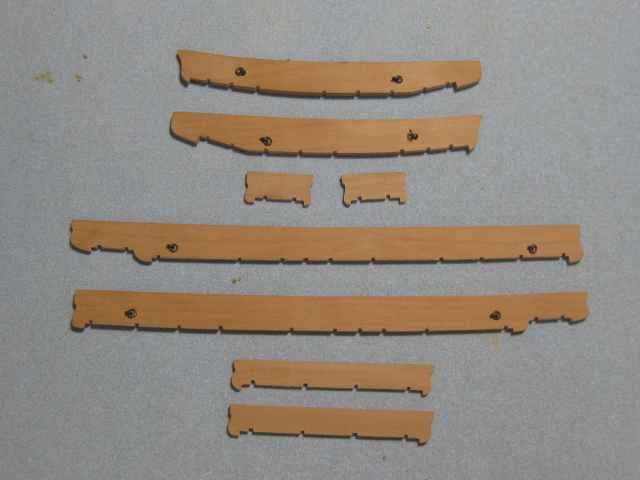
Thank you Marc and Duff - you're building a Vulture too? I can't seem to find a Build Log of her . Here is the full set of Channels. Now I need to fit them to the hull and make some Standards for them. Danny

-
Sherry - you're fibbing. There is NO line visible, even when I enlarge the pic . Great repair job! Danny
-
No way a "normal" felt pen will work Crackers. Apart from what Druxey mentioned about the color fading as soon as you put PVA anywhere near it, it will bleed and stain the timber . Danny