Paul Le Wol
-
Posts
1,060 -
Joined
-
Last visited
Content Type
Profiles
Forums
Gallery
Events
Everything posted by Paul Le Wol
-
Eric,this is very interesting. In the track plan above, there is a duckunder that leads to the staging area. Do you need to access that area for operation or is the switching automated / controlled from a central location?
-
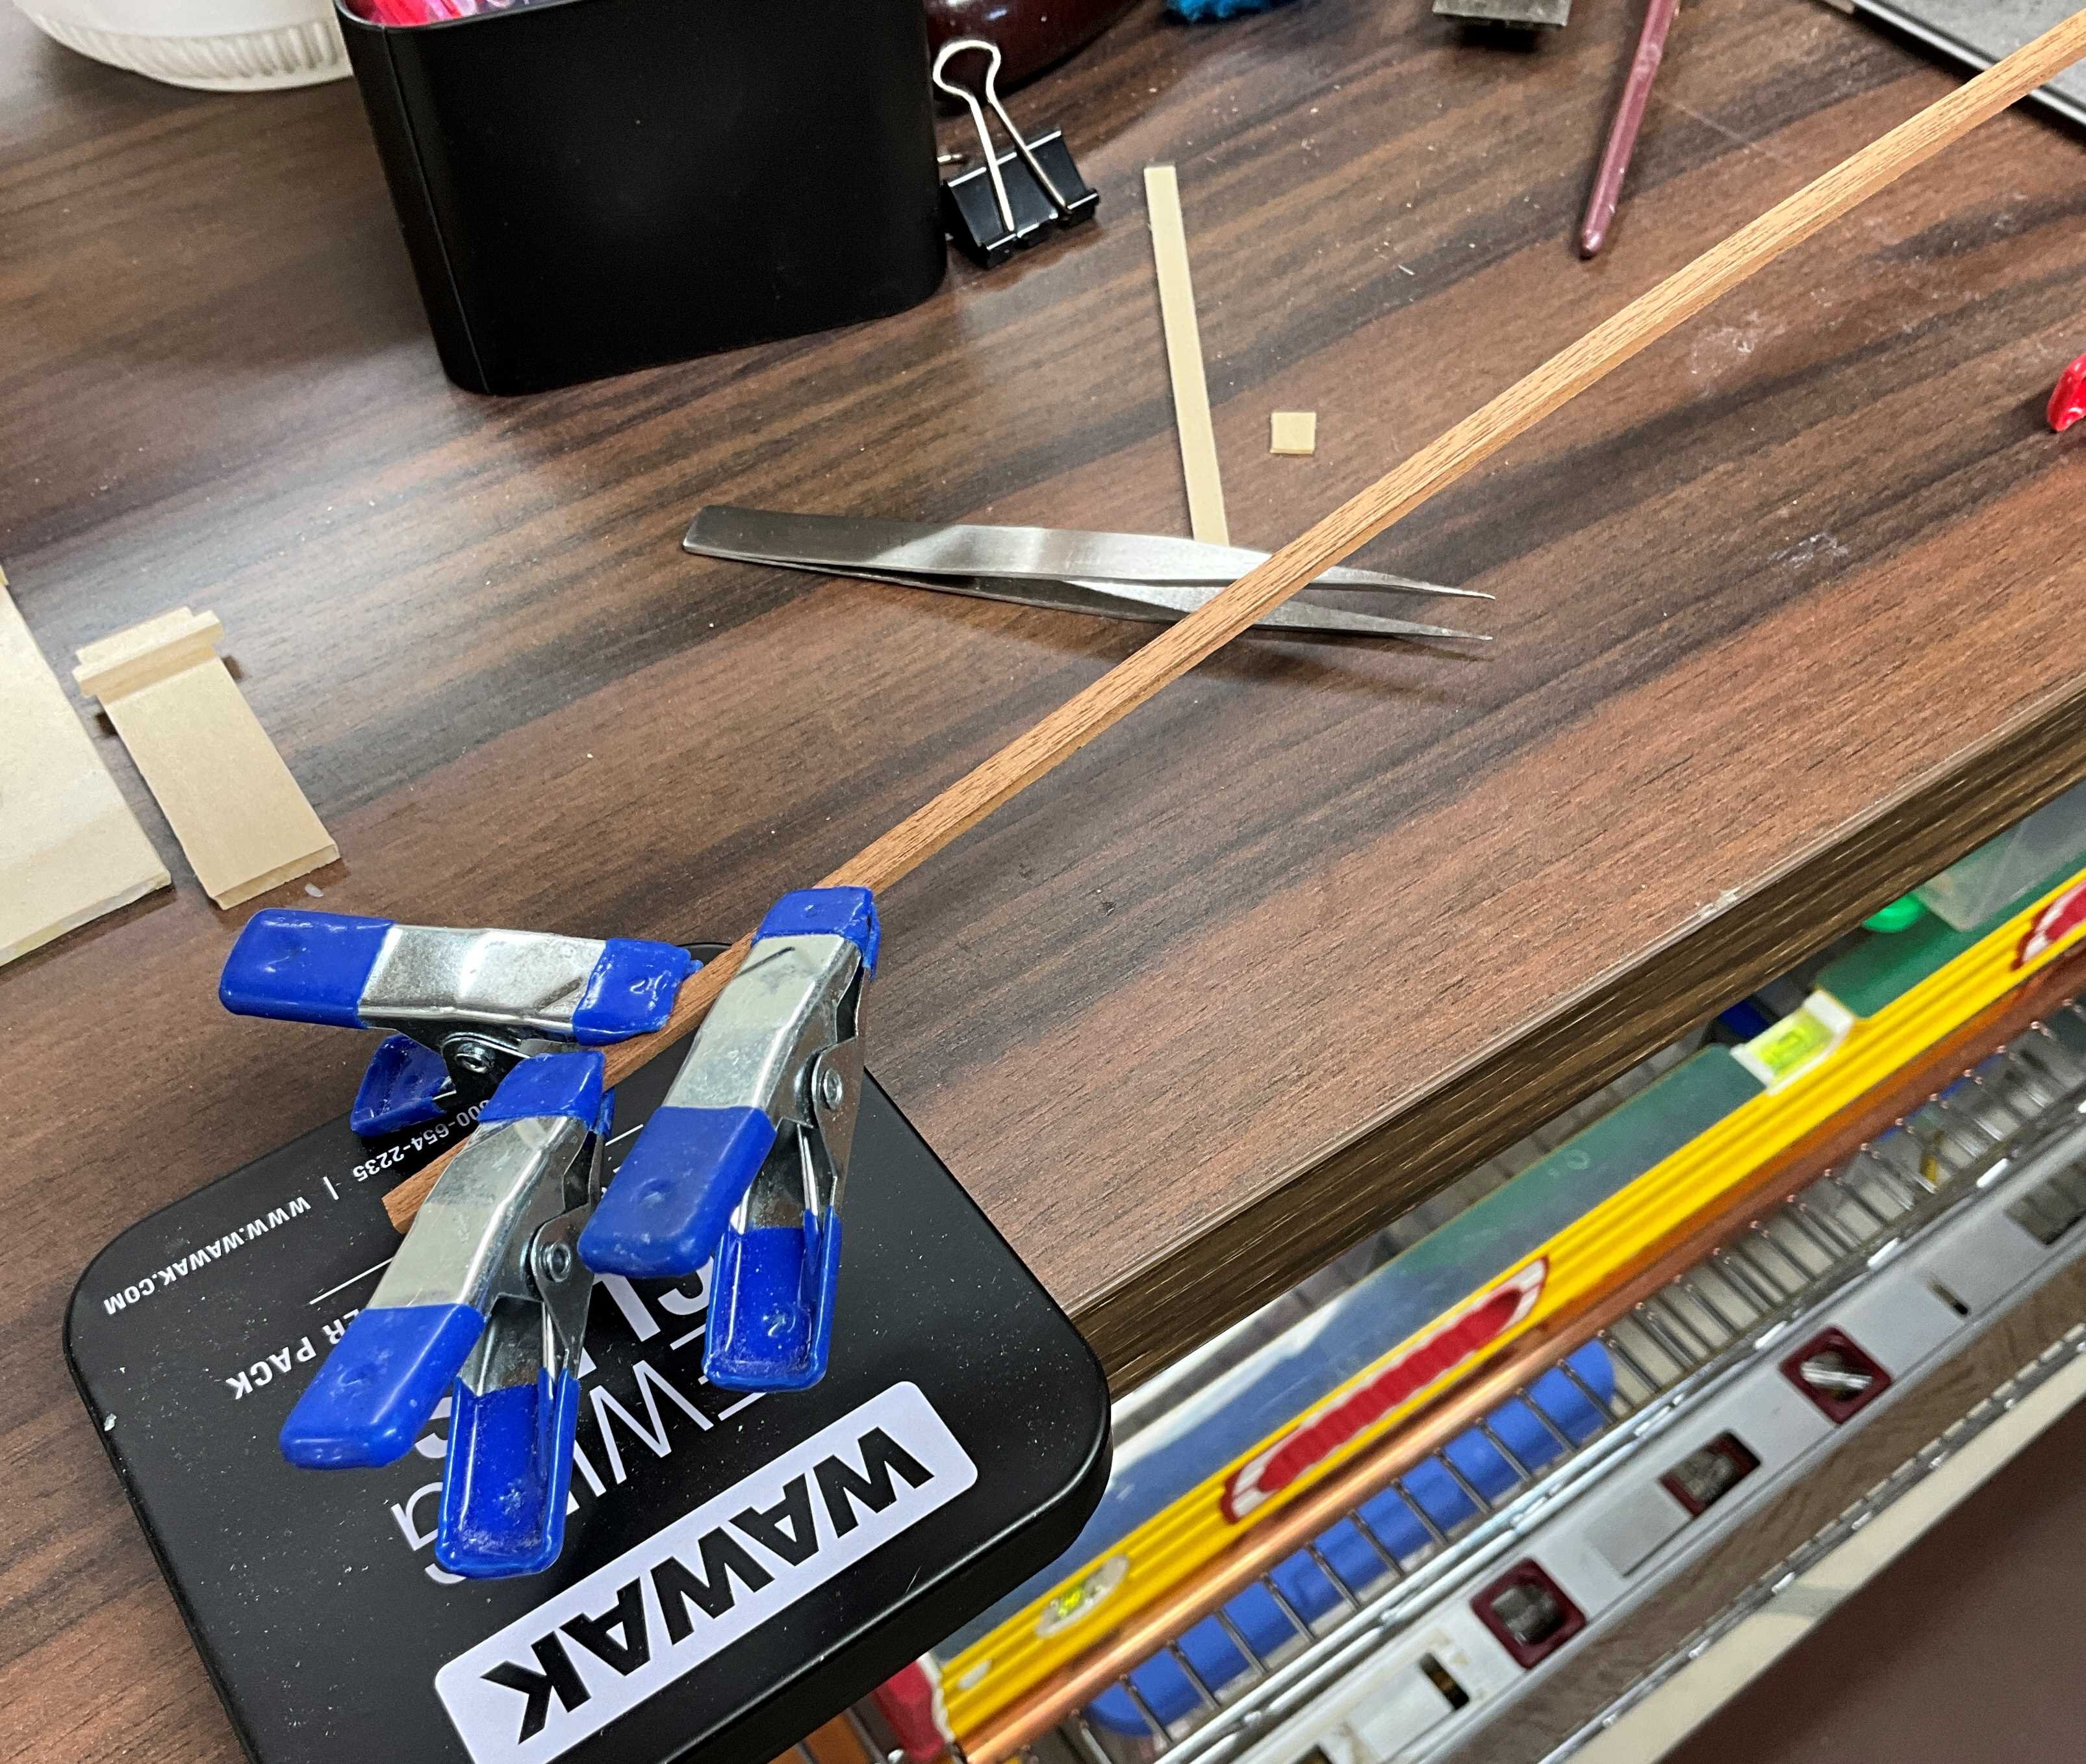
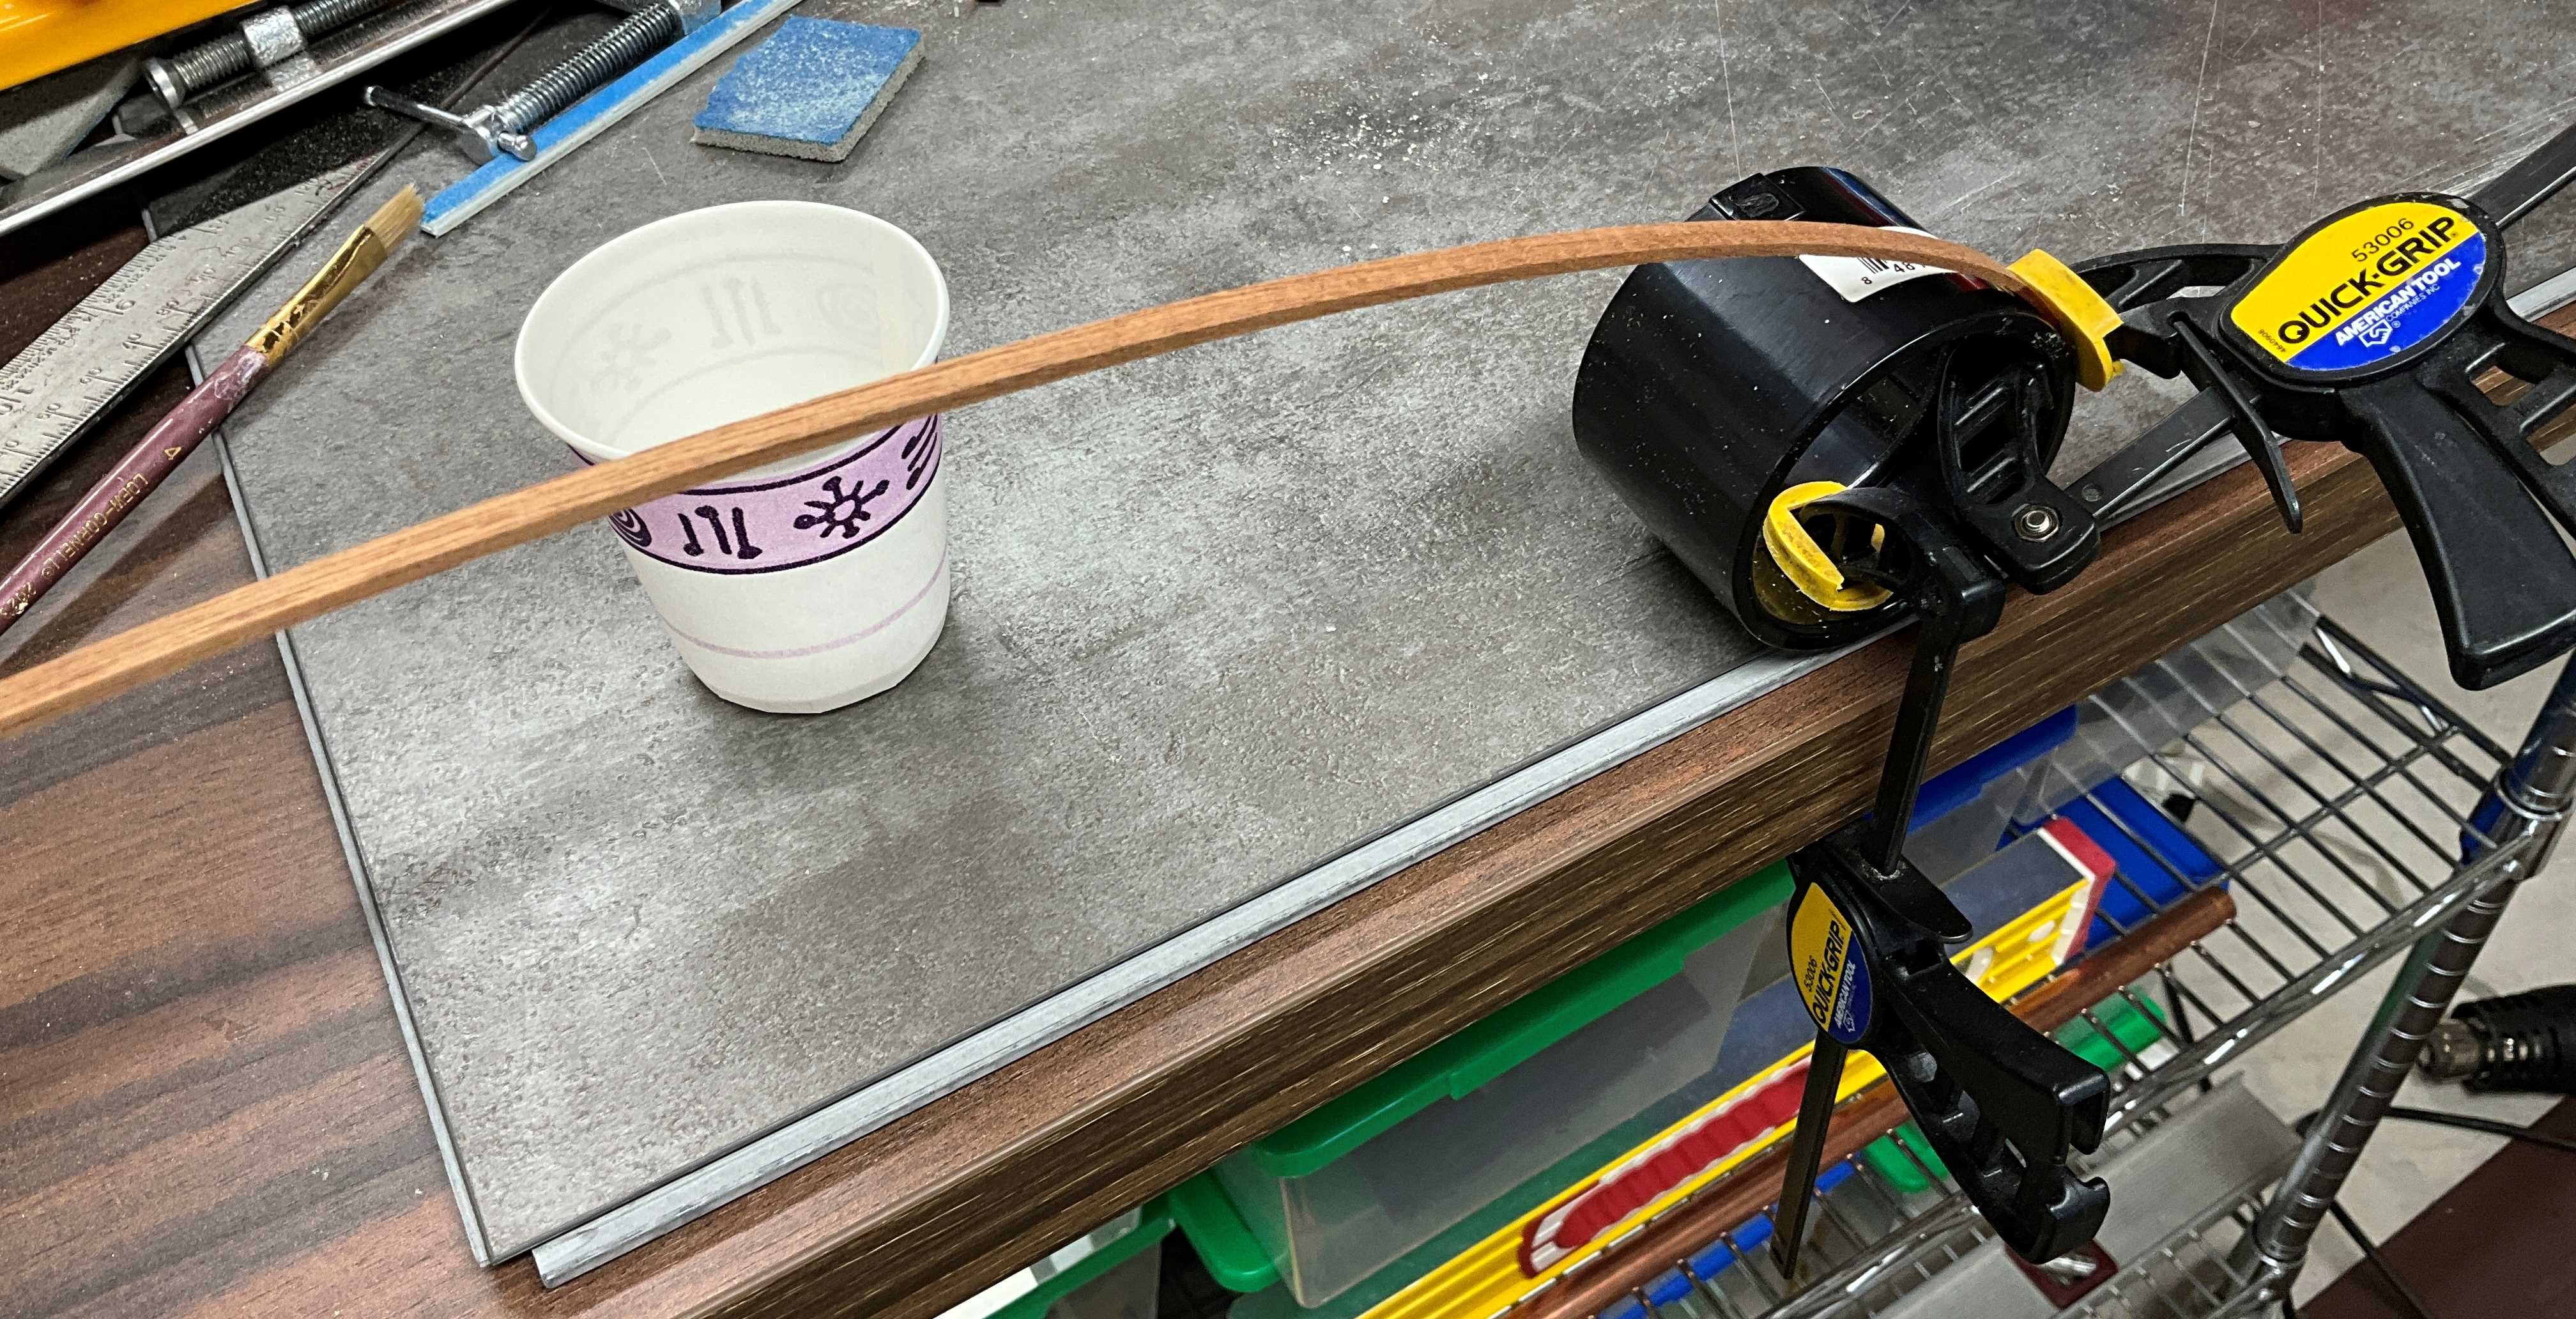
Mohogany plank bending
Paul Le Wol replied to Bontie's topic in Building, Framing, Planking and plating a ships hull and deck
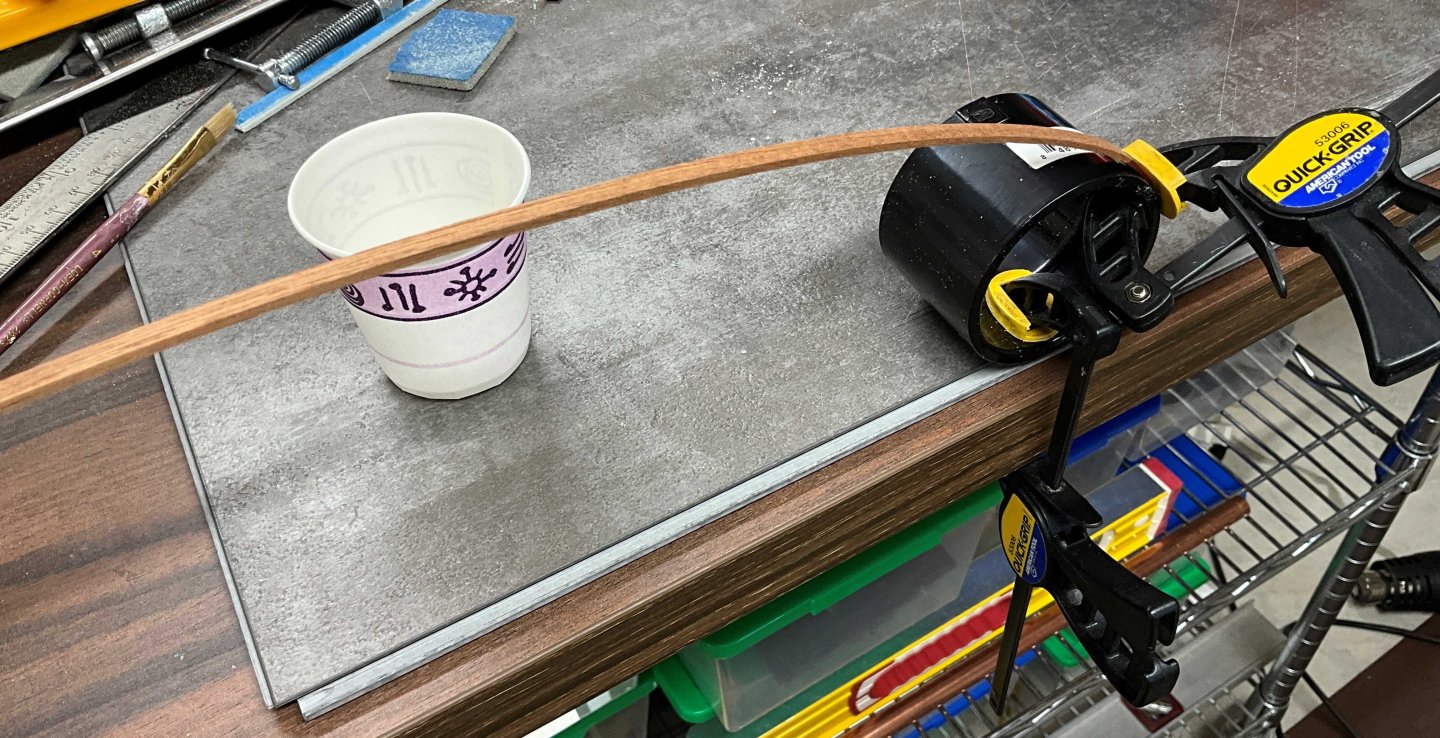
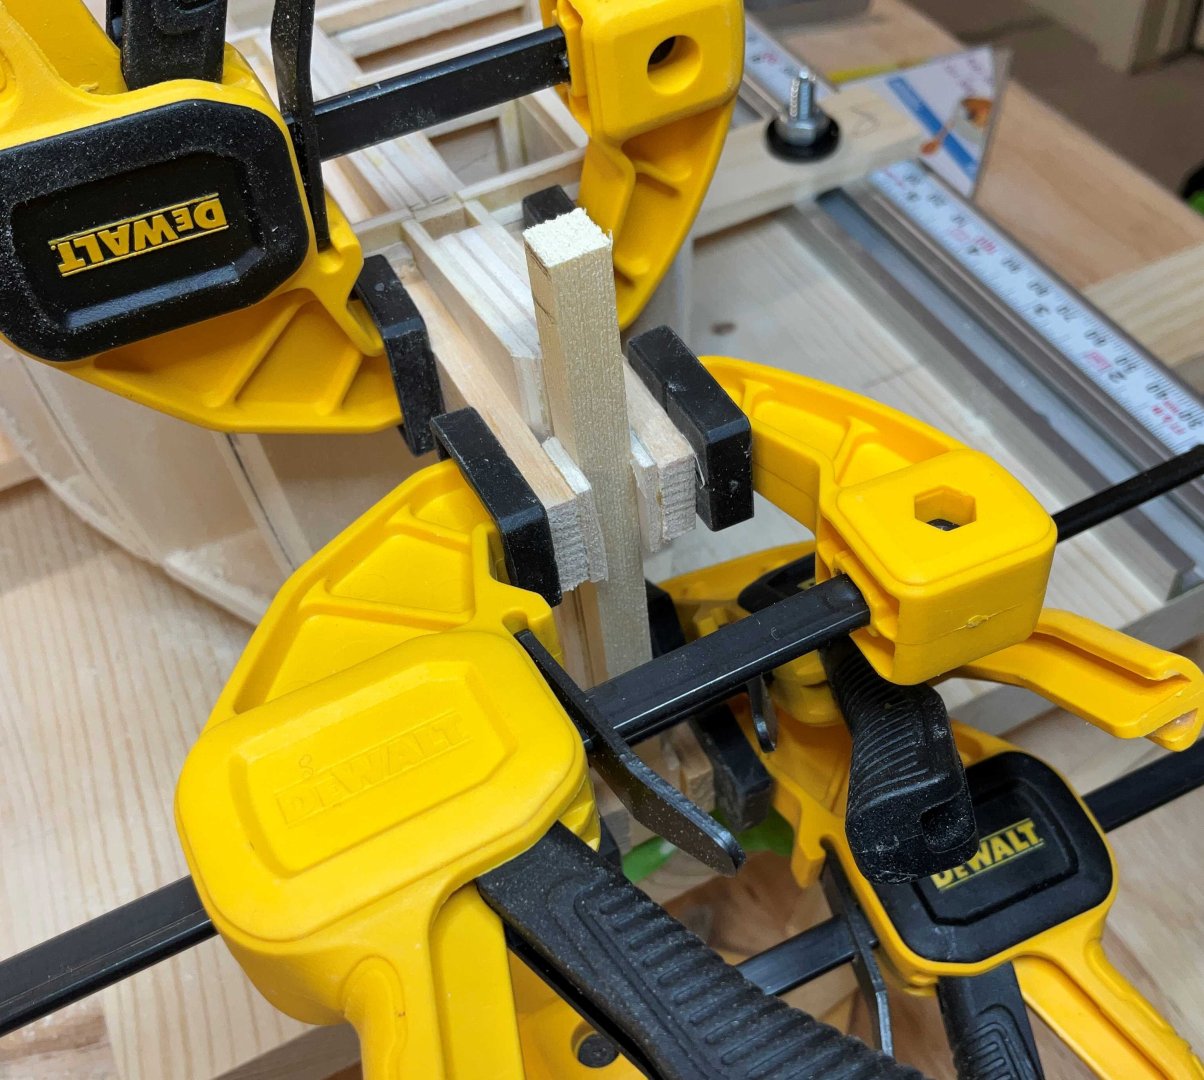
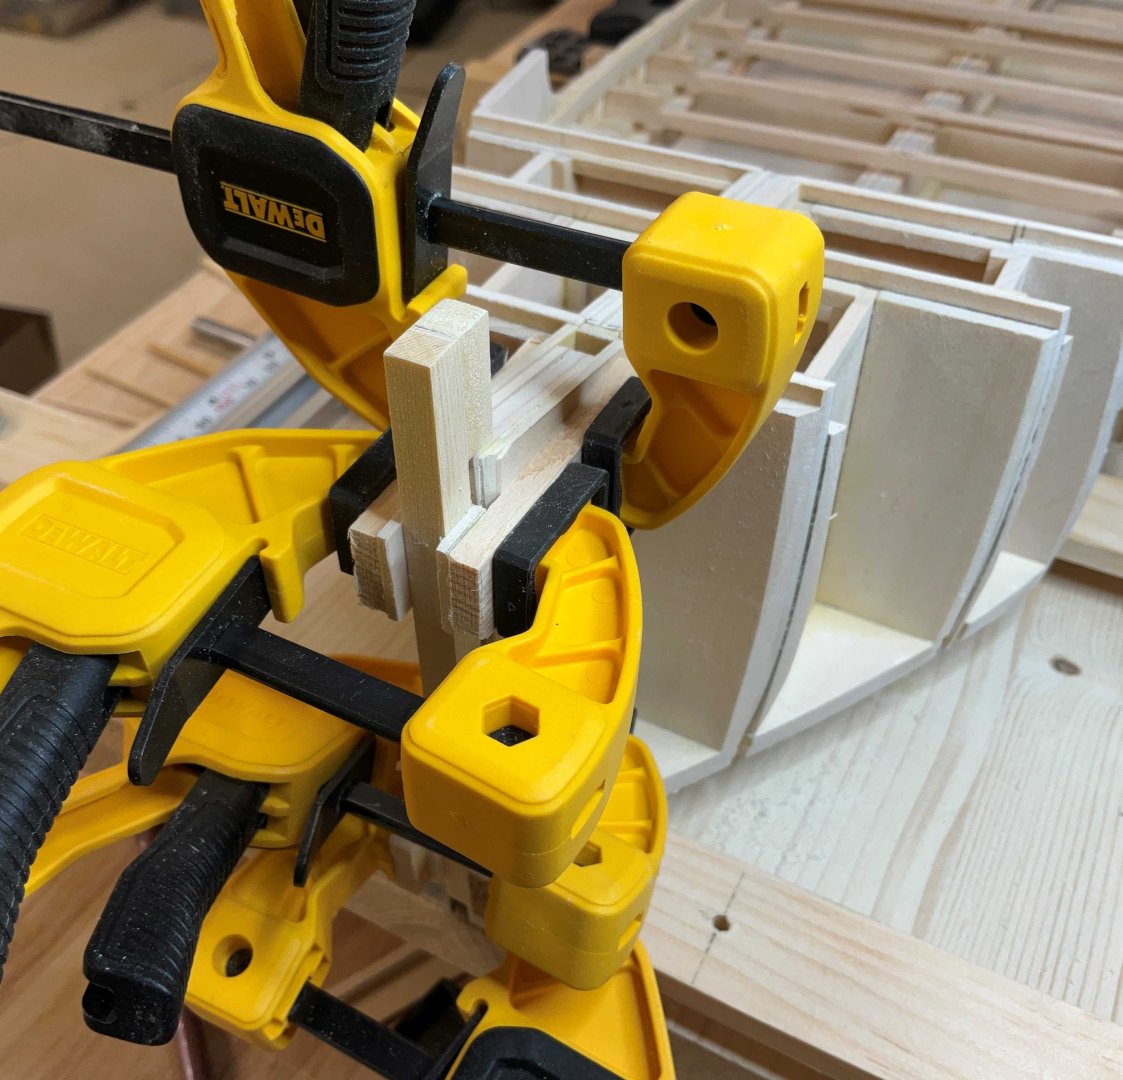
Hi Bontie, before you use boiling water you could try using a heat gun set on Low and room temperature water. I've been bending a fair bit of Alaskan Yellow Cedar lately so while I have everything set up I got out a strip of 2mm x 5mm mahogany and clamped one end that had been sitting in a cup of water for a few minutes to an ABS coupling. The other end is weighted with mini clamps. Applied heat to the strip of wood while every so often brushing on more water. This result took about 5 minutes. If you are edge bending you can still use a heat gun and water but in a bending jig. Good luck with your project.

-
Buying Filler Blocks
Paul Le Wol replied to mikiek's topic in Building, Framing, Planking and plating a ships hull and deck
Very true. -
Buying Filler Blocks
Paul Le Wol replied to mikiek's topic in Building, Framing, Planking and plating a ships hull and deck
Hi Mike, if you decide not to use filler blocks you could try an alternate method that I have used and still use. Glue small pieces of offcut planking to the backside of the planks to keep them in line. If you dry fit the plank after shaping and/or bending you will be able to see where they need to be placed. I then glue to the bulkhead and edge glue with white pva. After a while you will be able to figure whether the tabs need to be attached to the previous plank or the plank that you are currently working on. Good luck with your build.
-
Hi Jacques, I really enjoy using my Ultimation hand operated disk sander and wondered why someone doesn’t make a similar spindle sander. There are lots of sites online about making your own treadle powered lathe. Something like that would be nice and quiet.
- 139 replies
-
- 5
-

-
- ancre
- Bateau de Lanveoc
- (and 2 more)
-
Hi Nils, happy that you are able to to get some build time in. Your Elbe 1 is looking great!
- 313 replies
-
- 5
-
-
- lightship
- Feuerschiff Elbe 1
- (and 1 more)
-
Yves, the gun decks are a work of art!
-
Keith, it’s been fun to look at the photo of the real Lula and find the things you’ve been pointing out. Great work!
- 732 replies
-
- 4
-

-
-
- Lula
- sternwheeler
- (and 1 more)
-
Hi Keith, it’s going faster than I expected. Glad it came off the build board without any grief
-
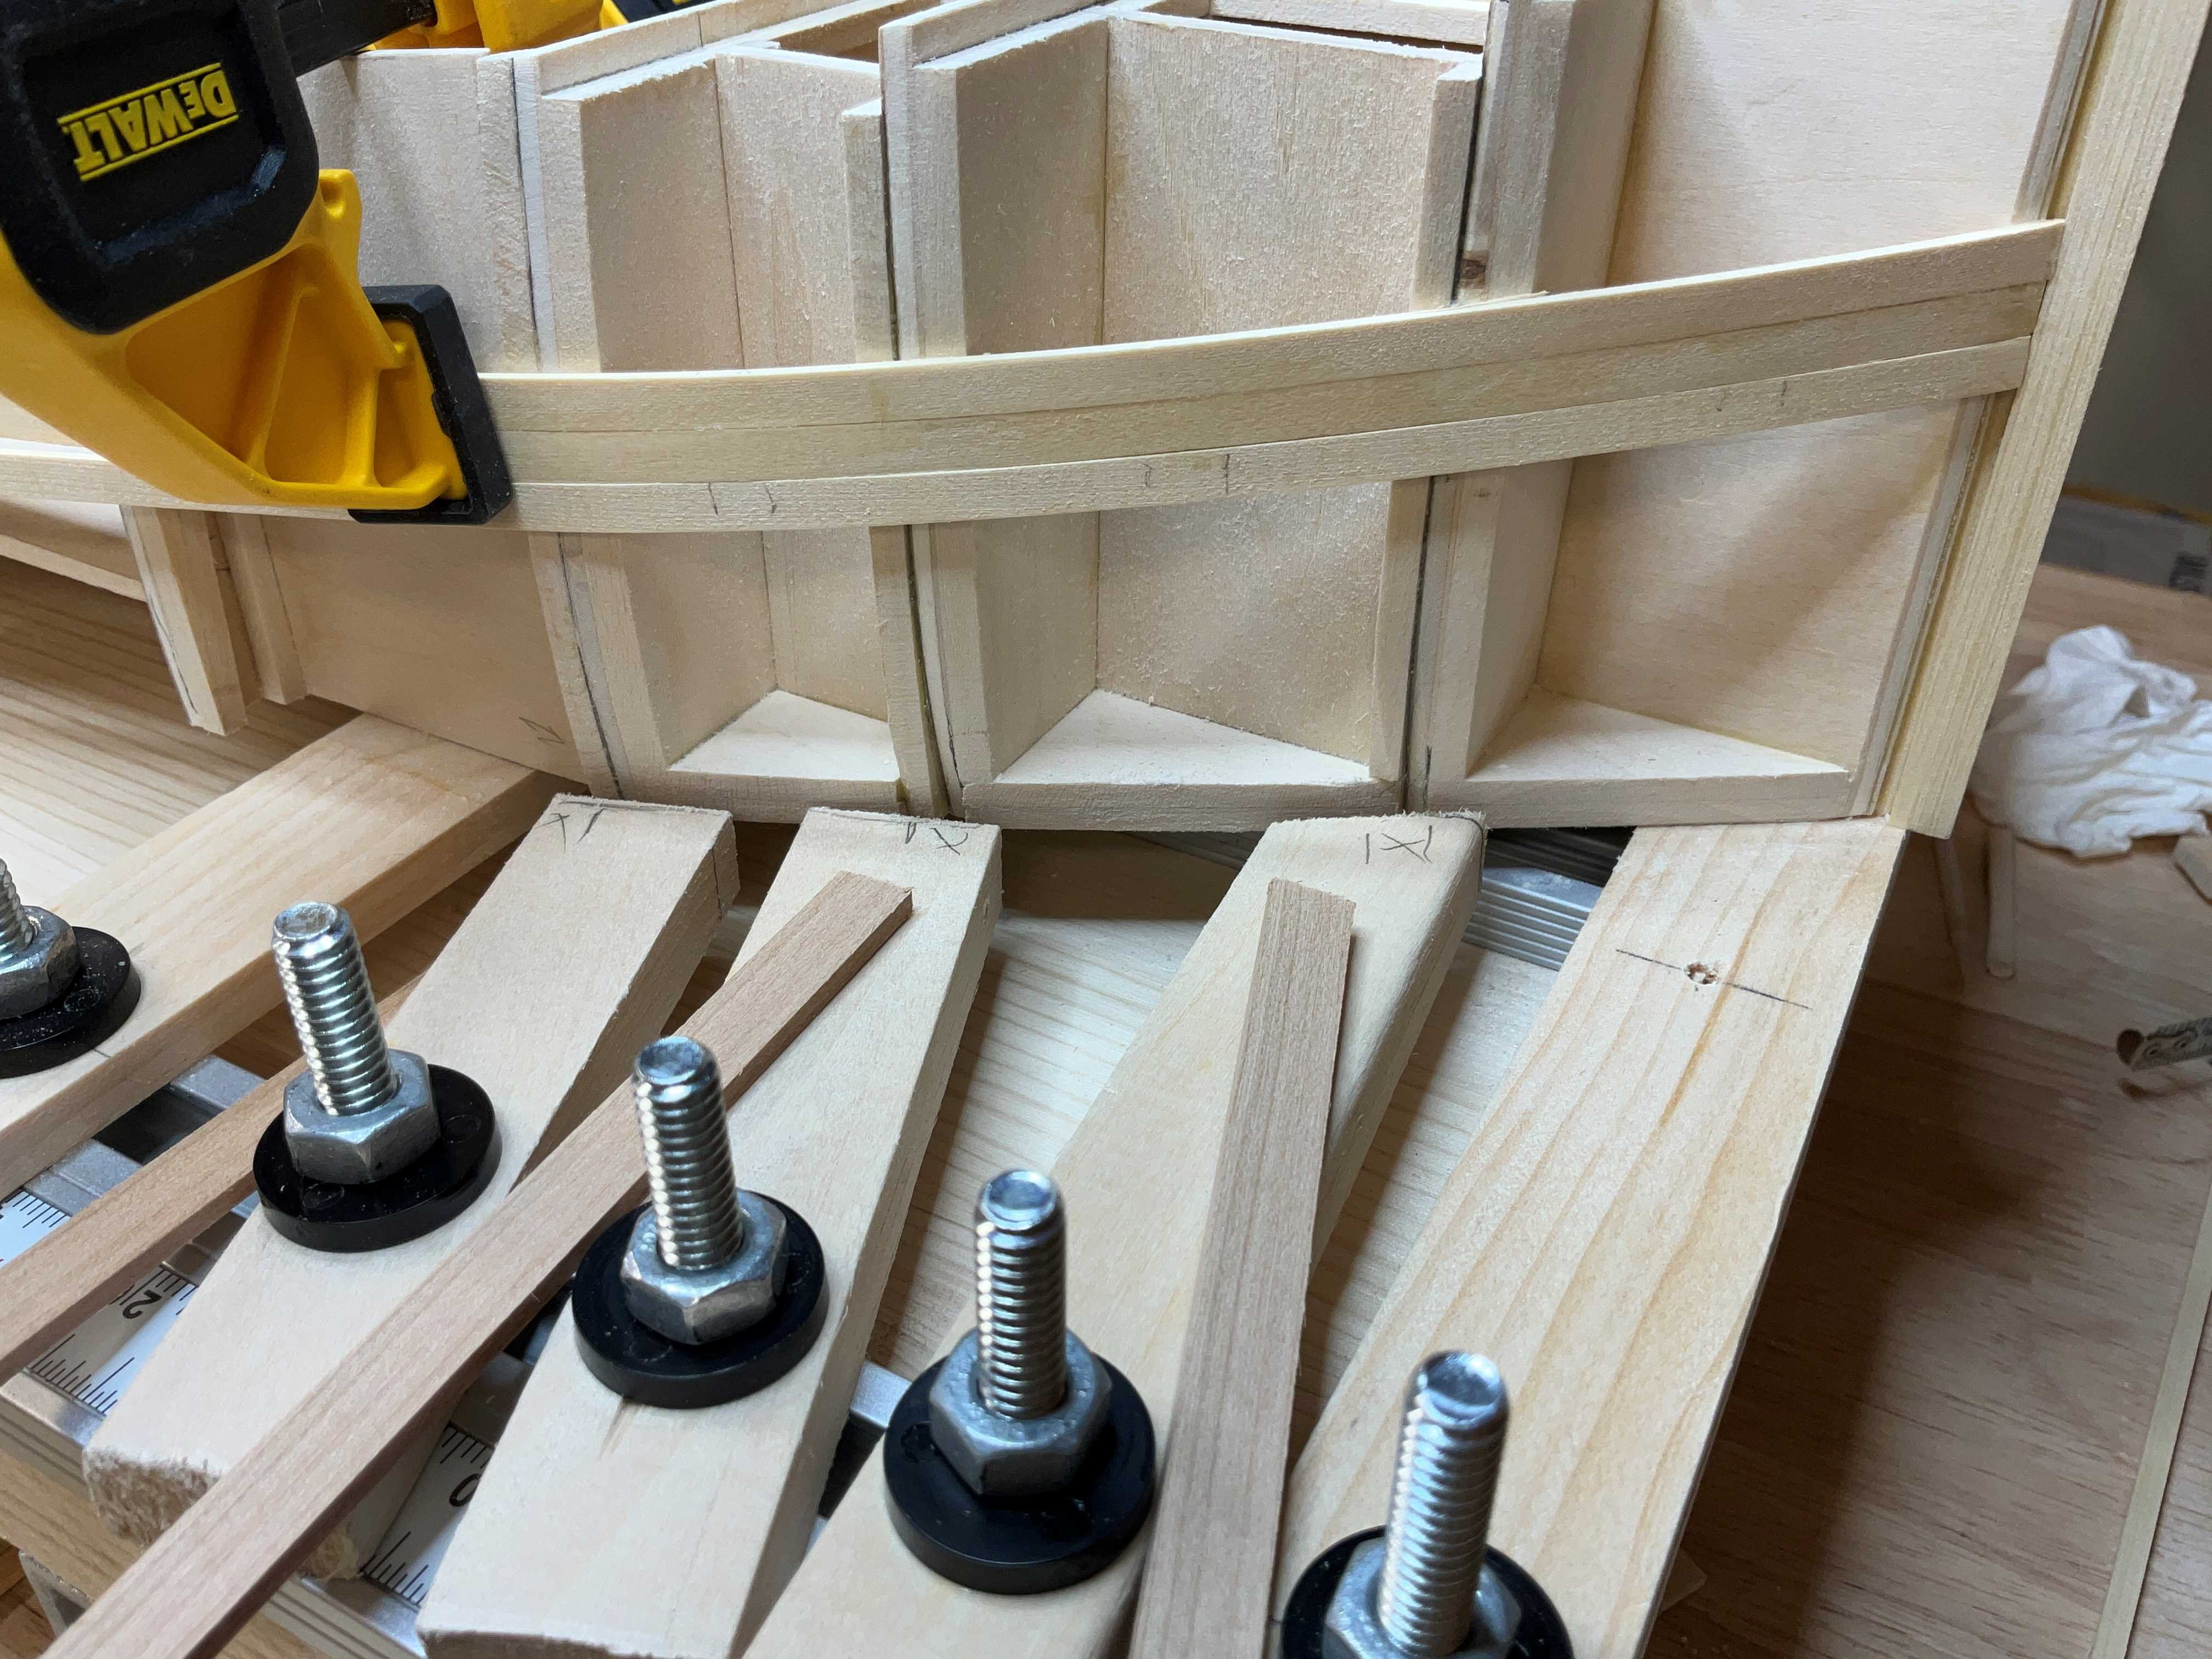
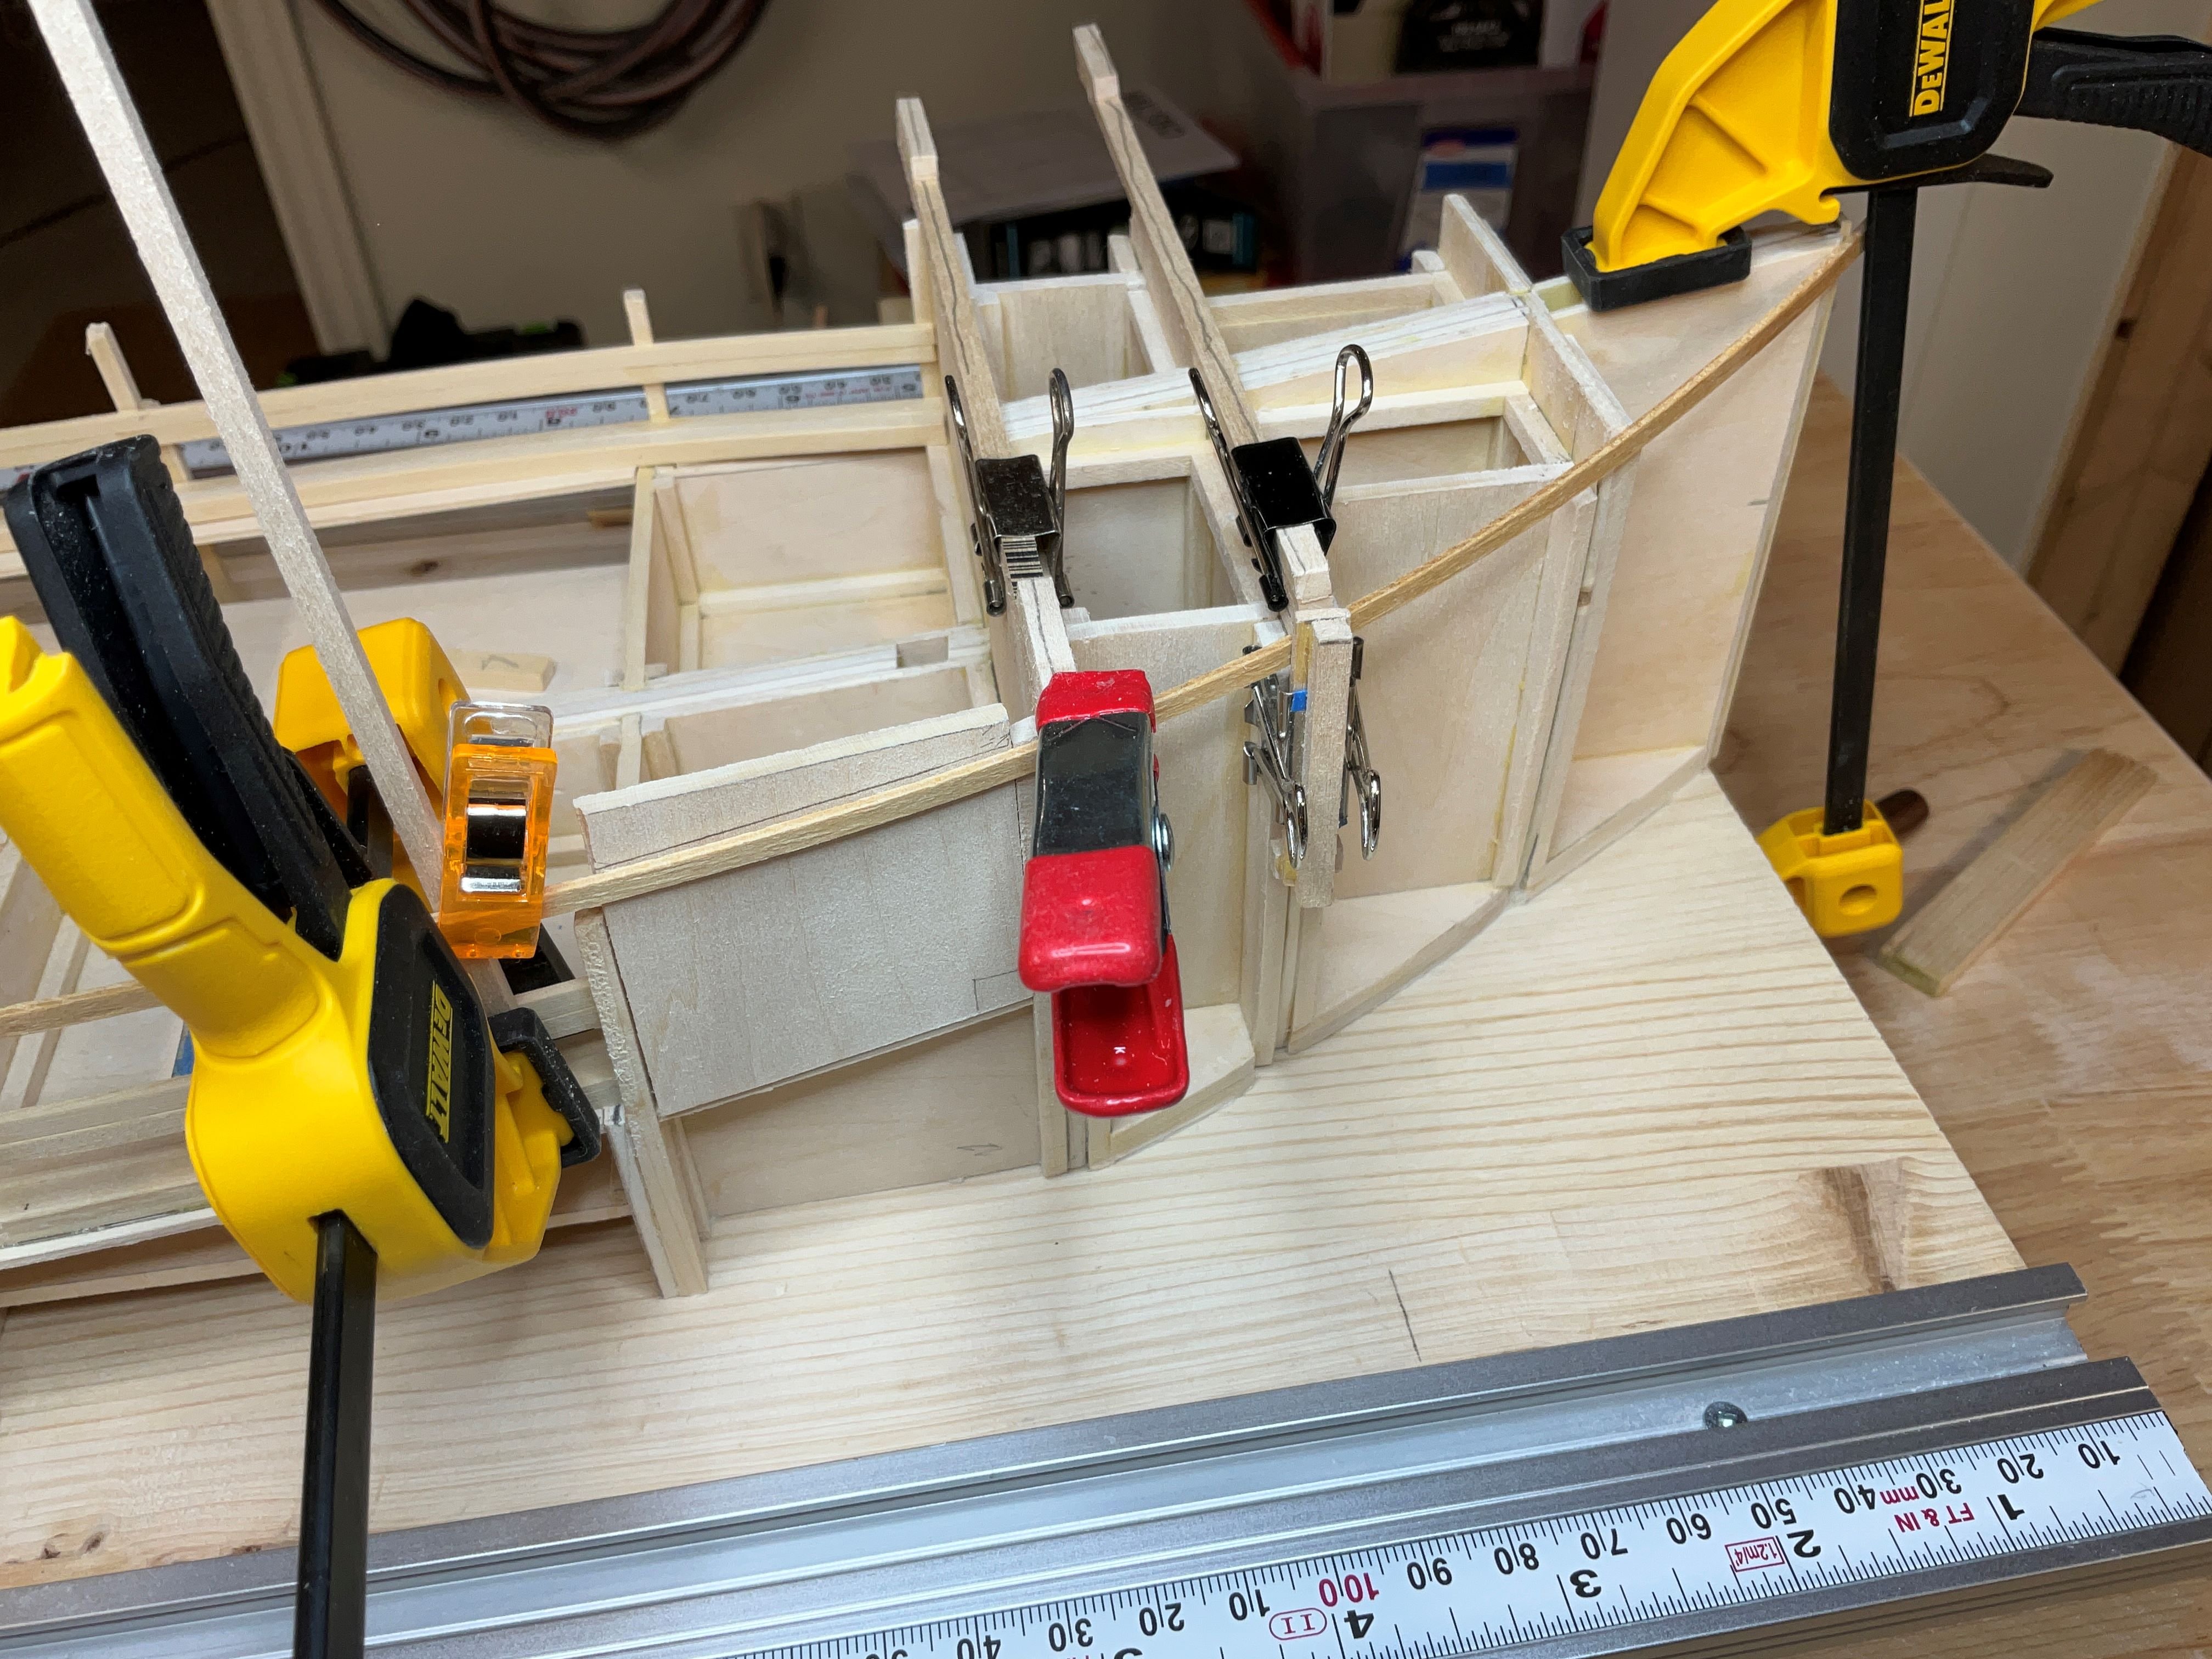
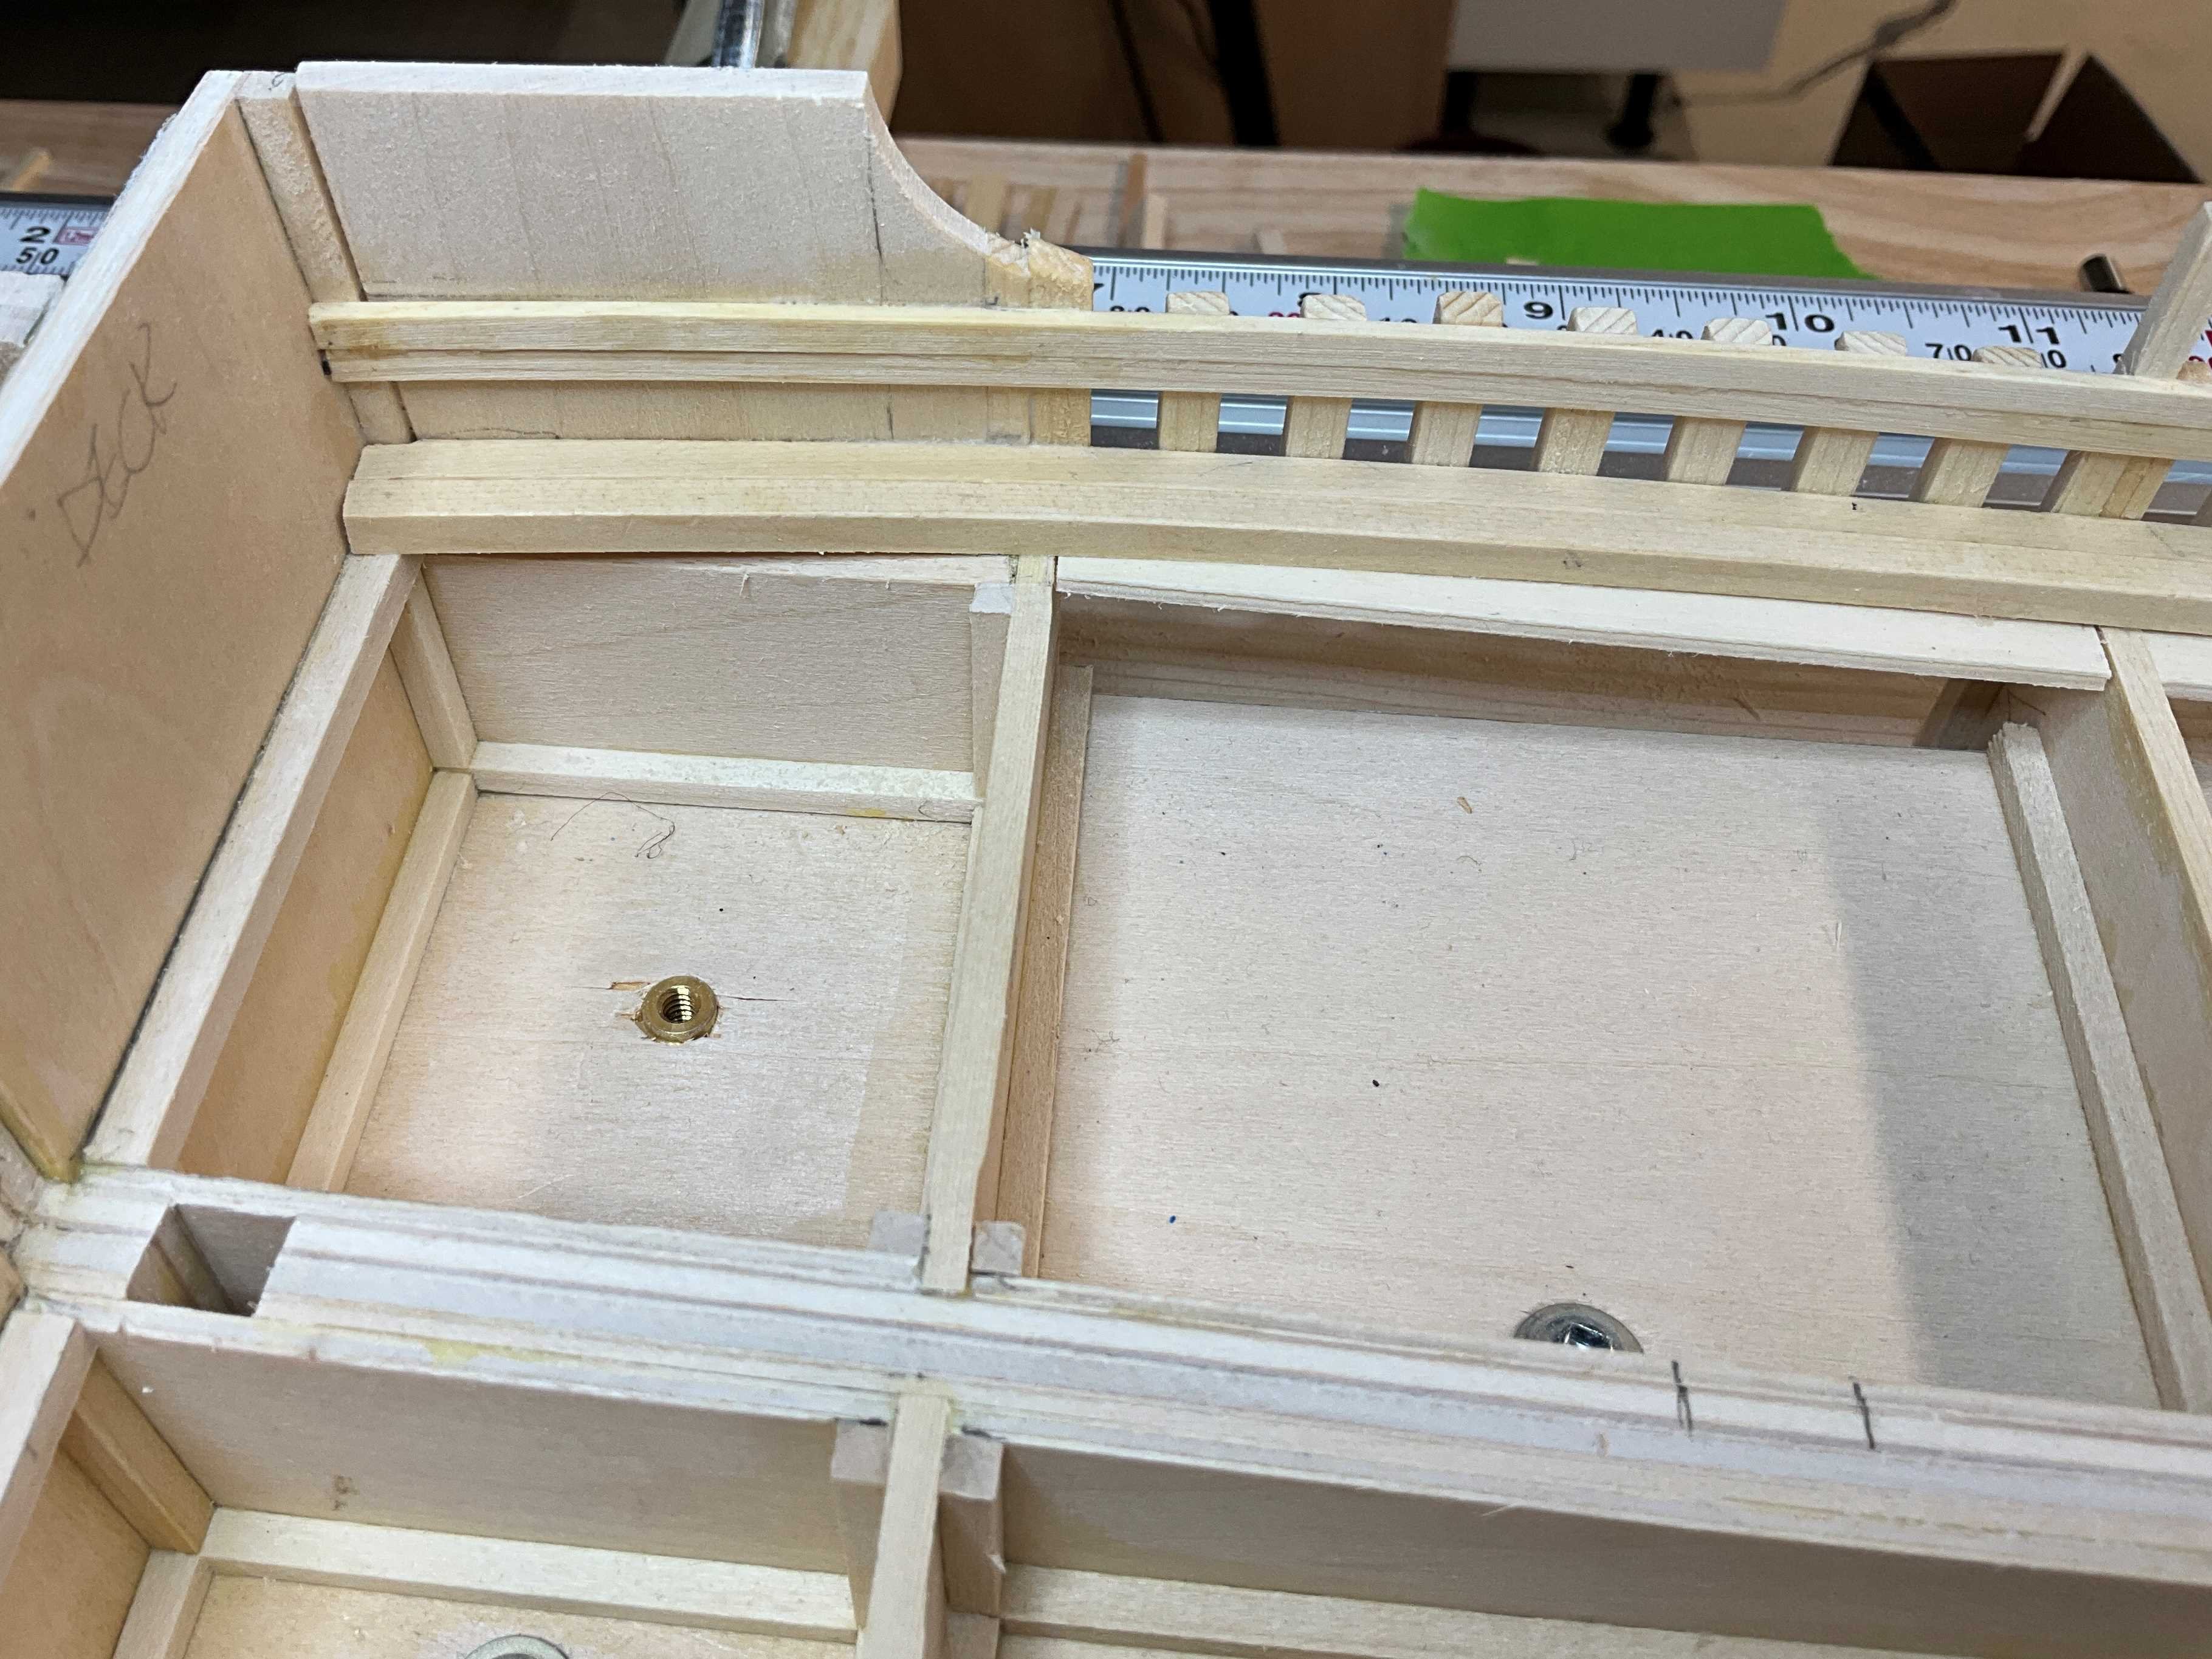
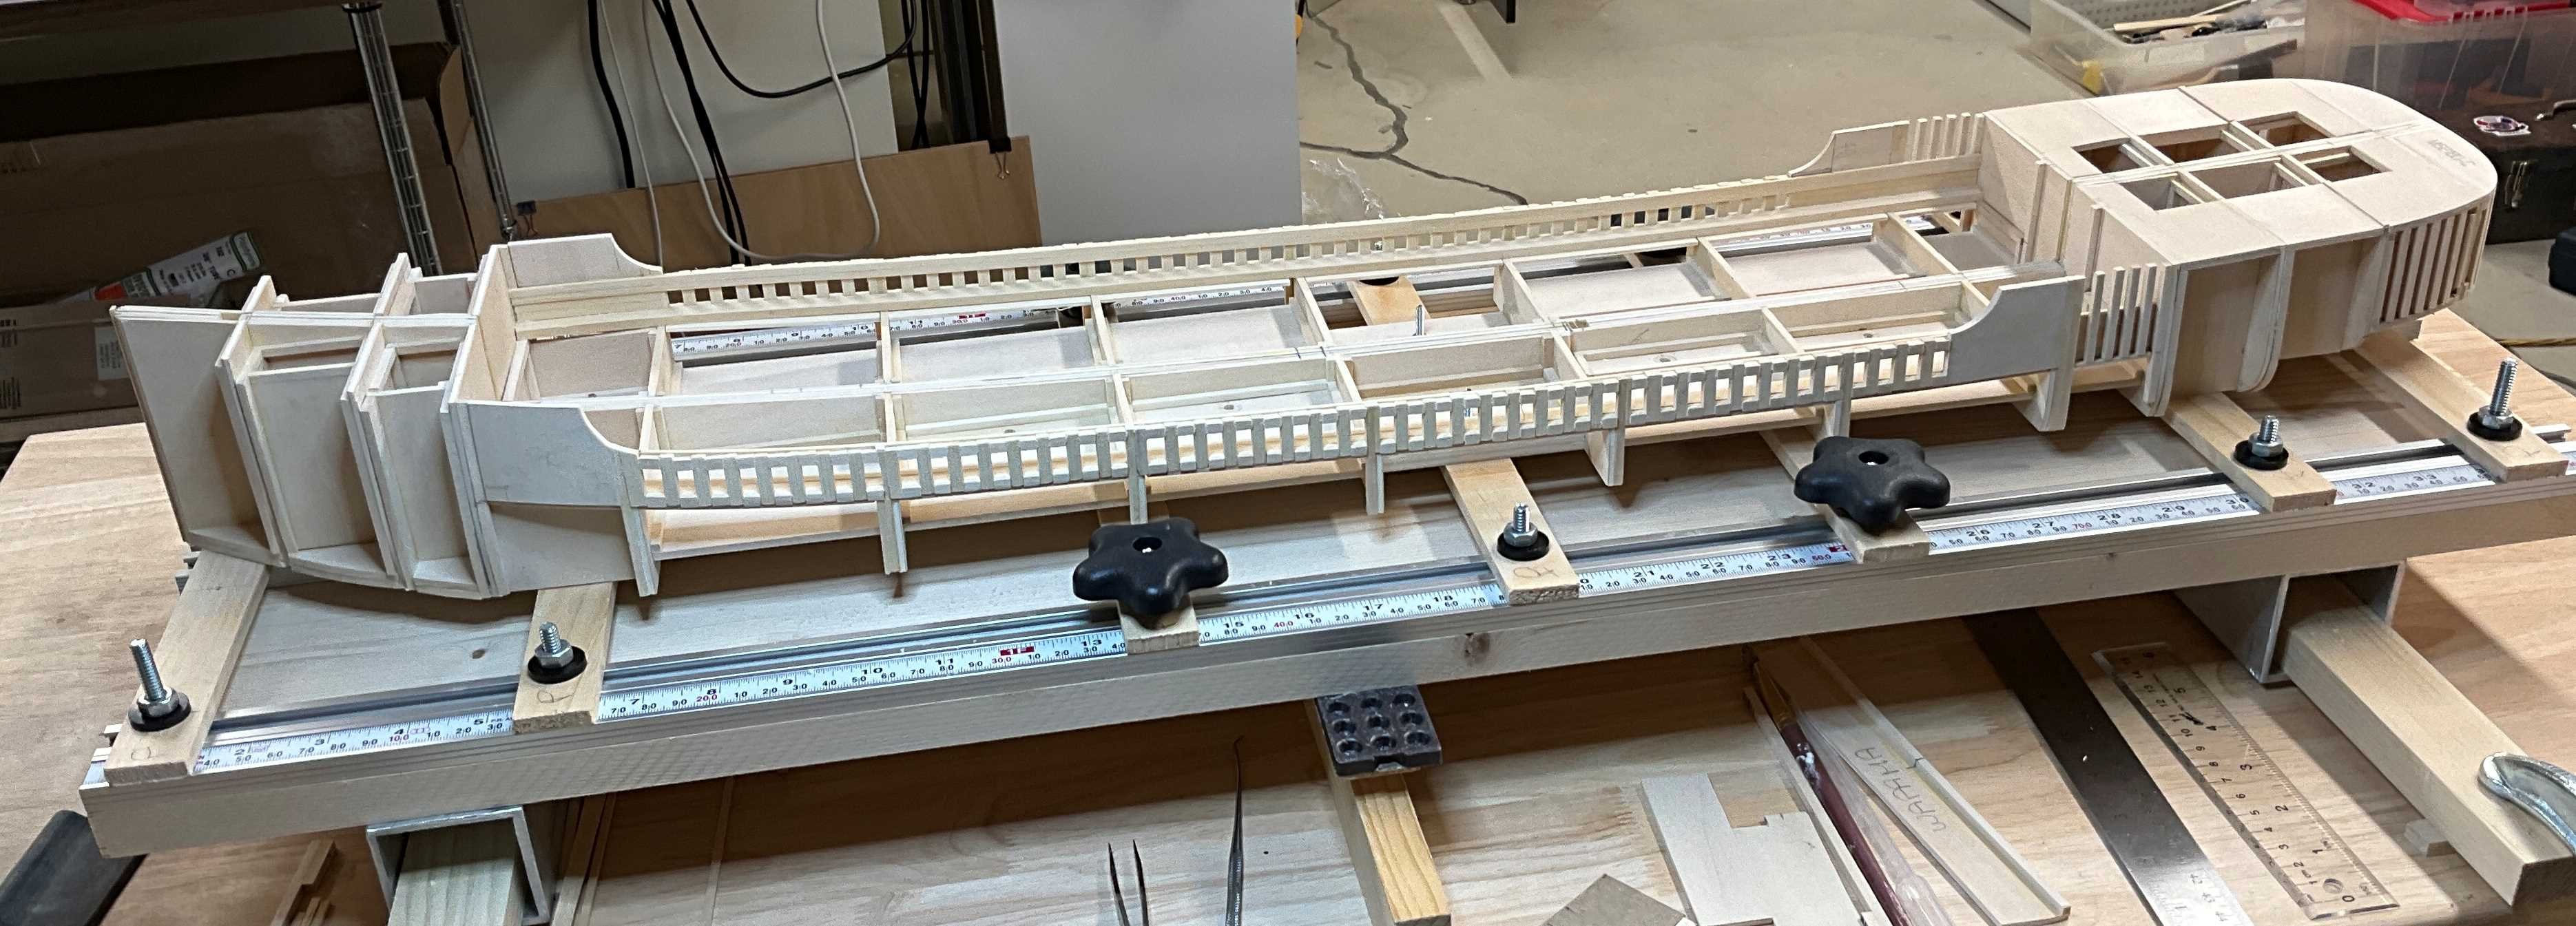
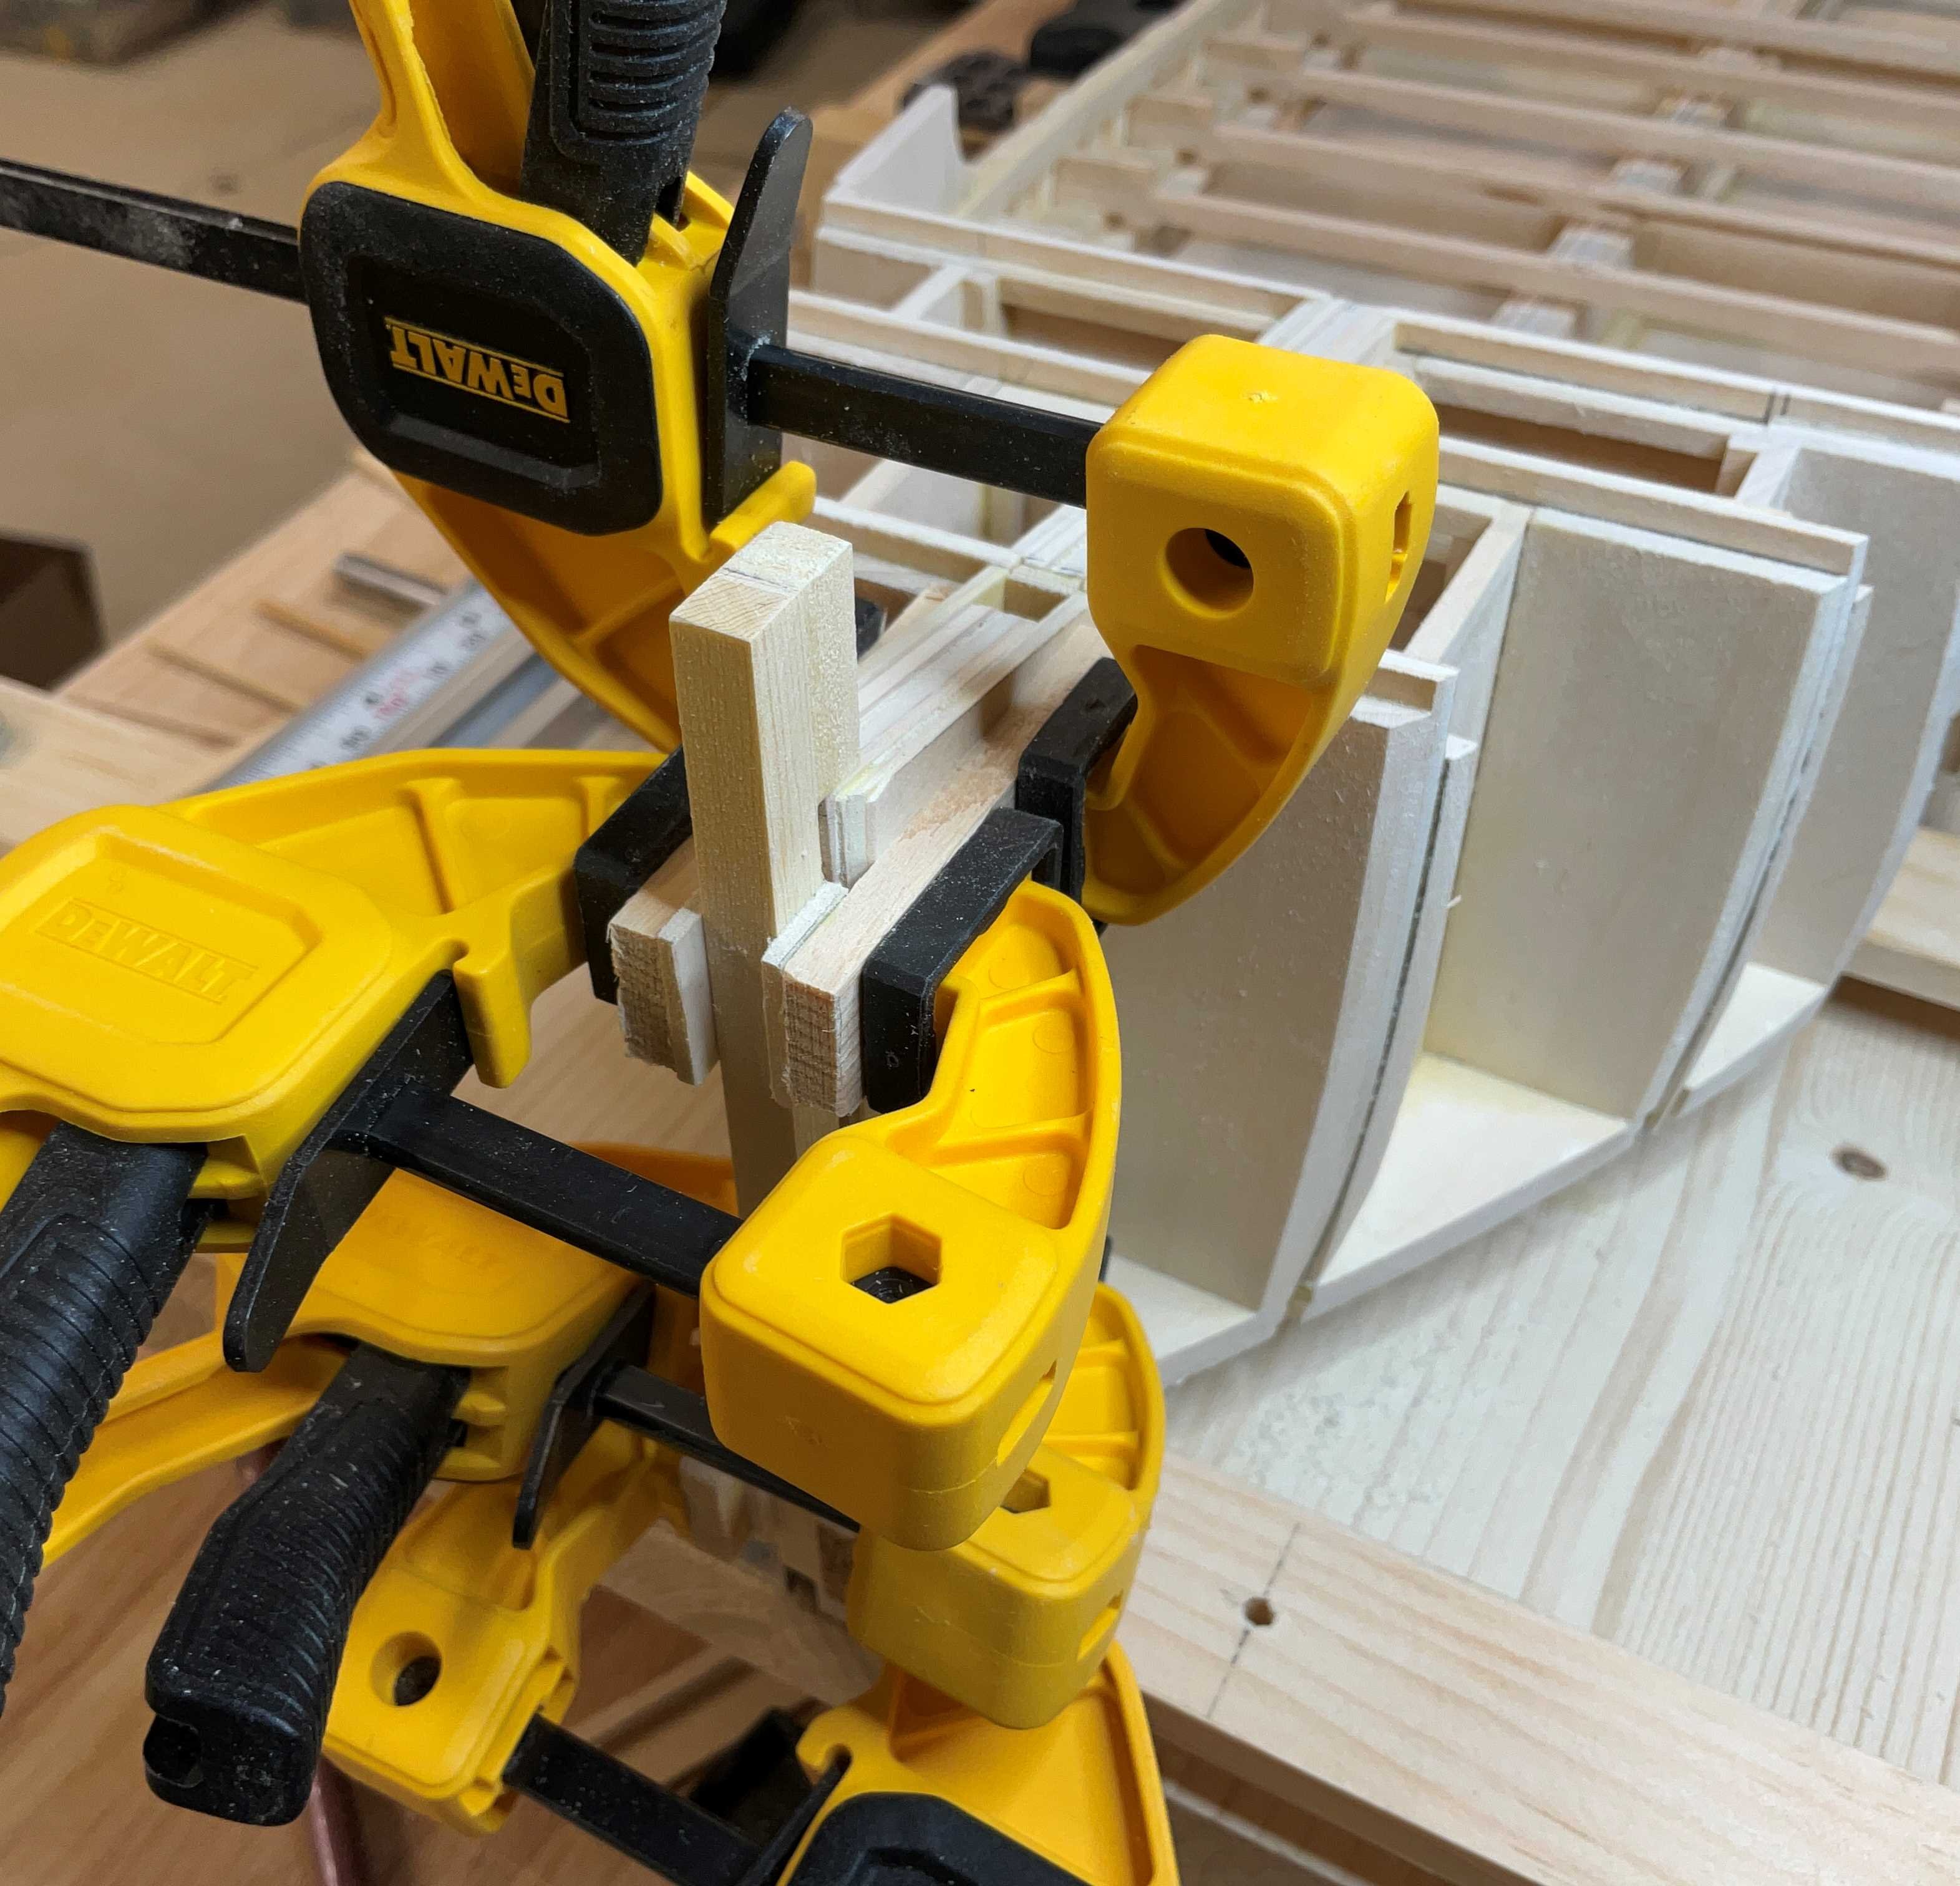
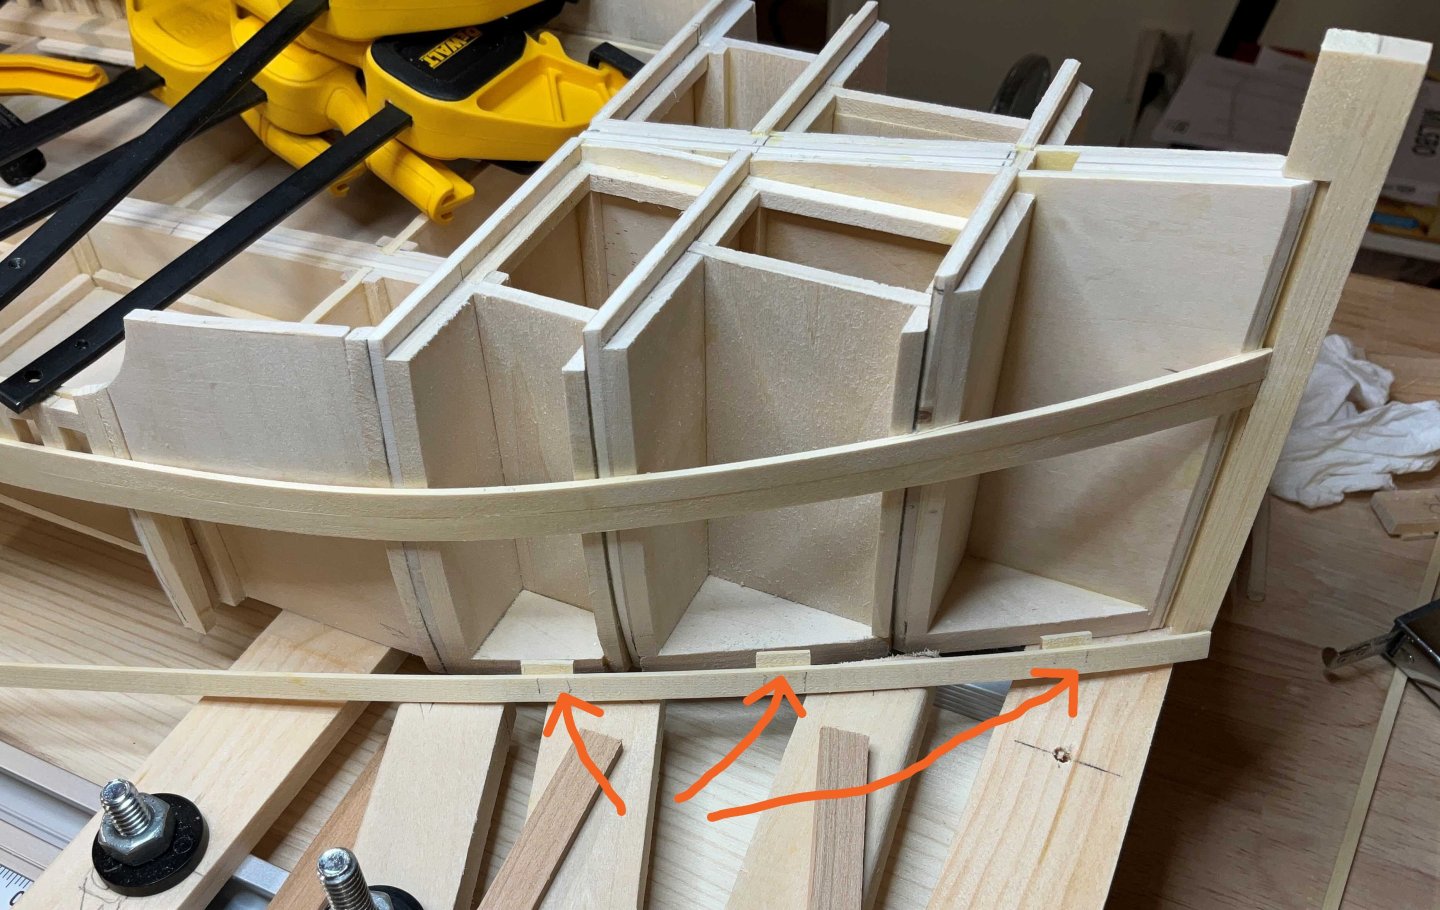
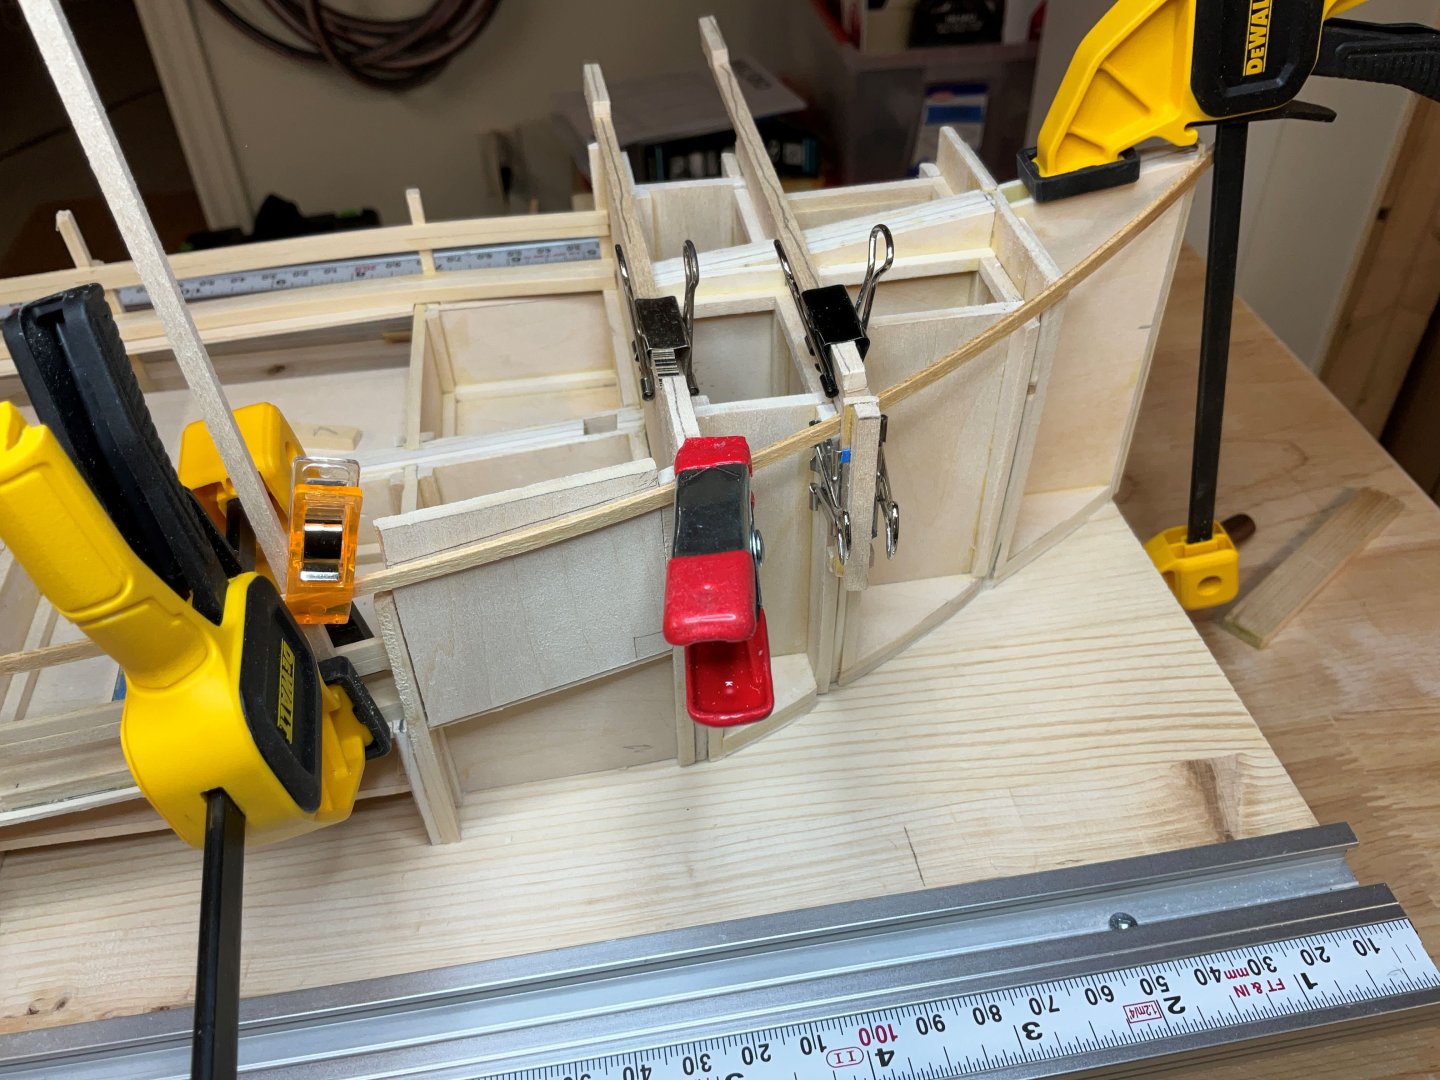
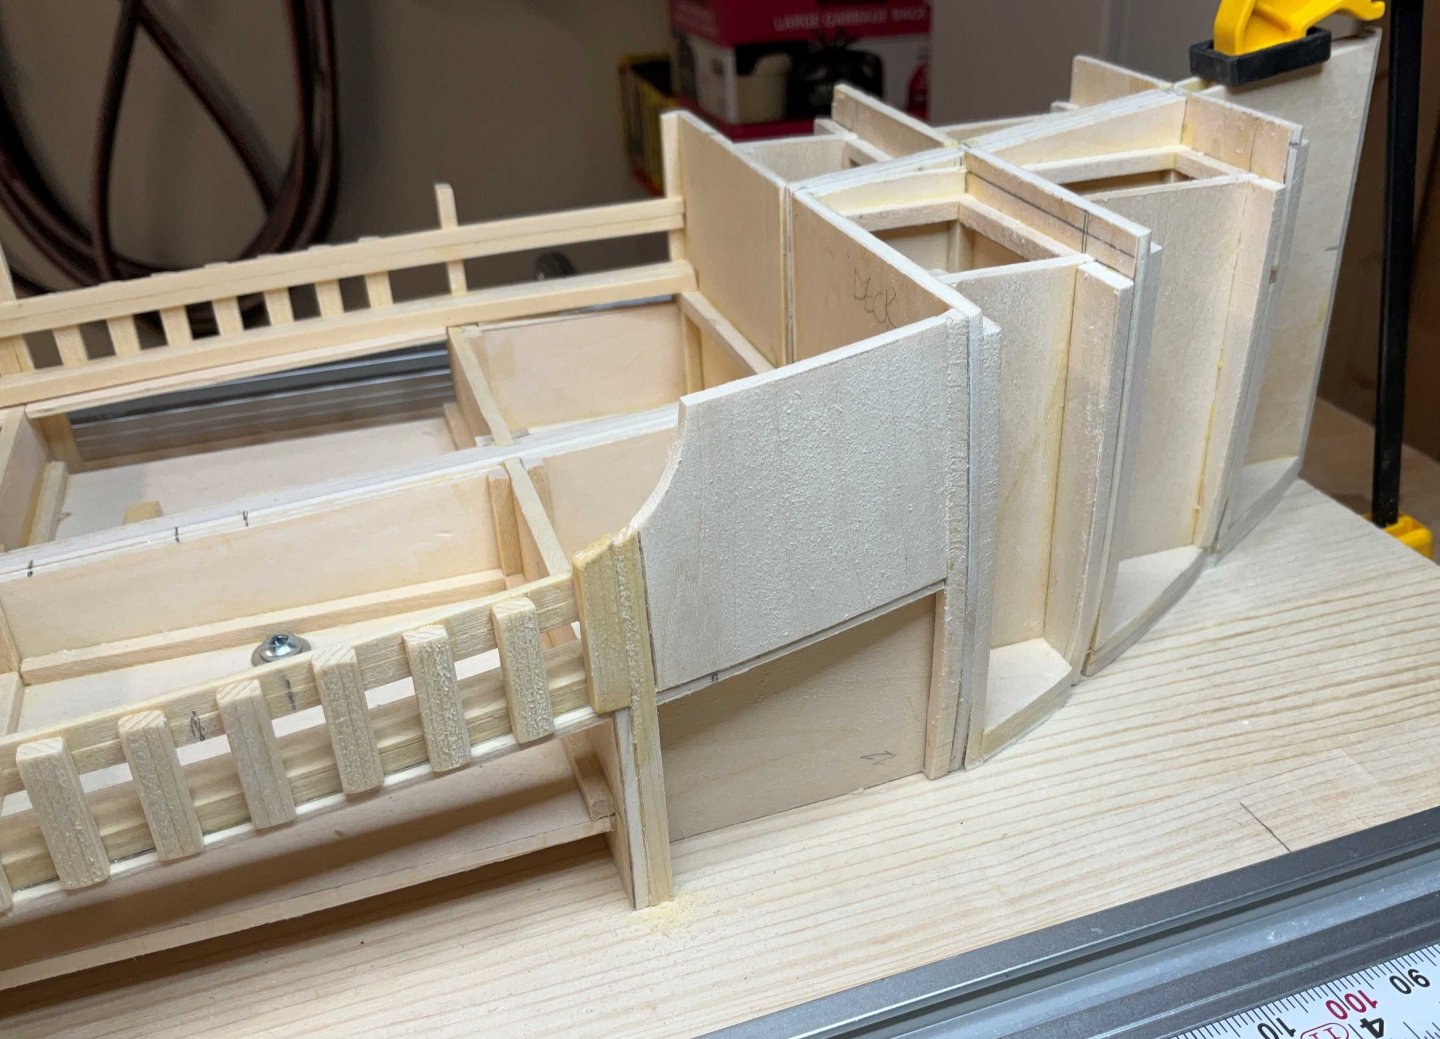
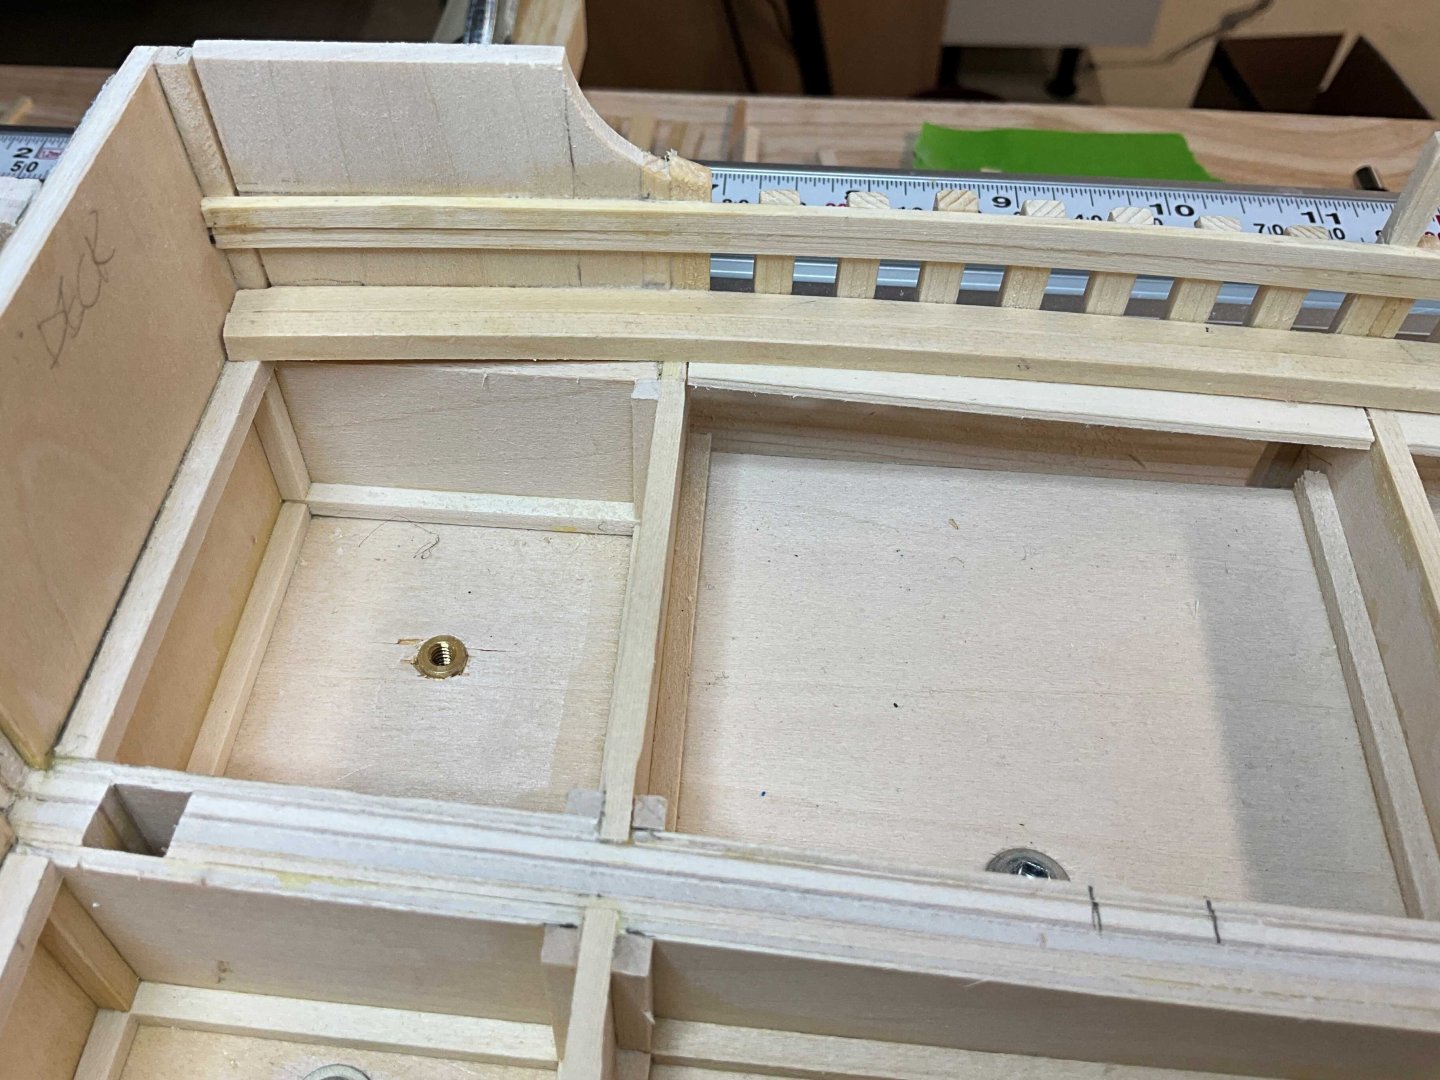
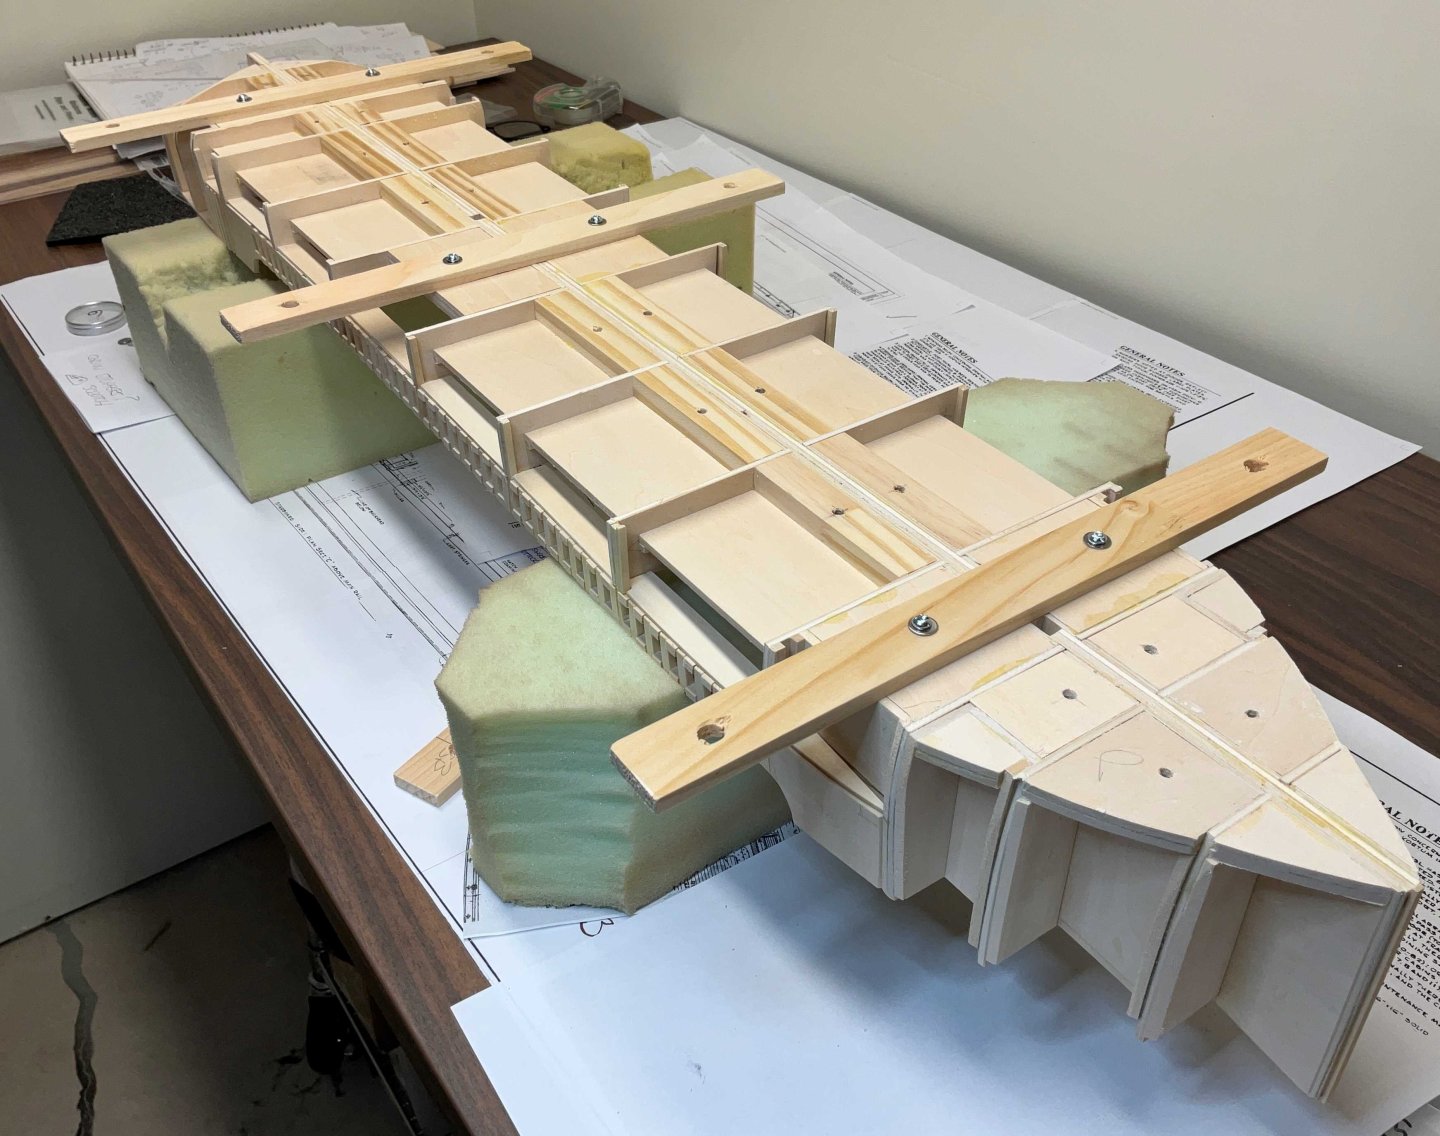
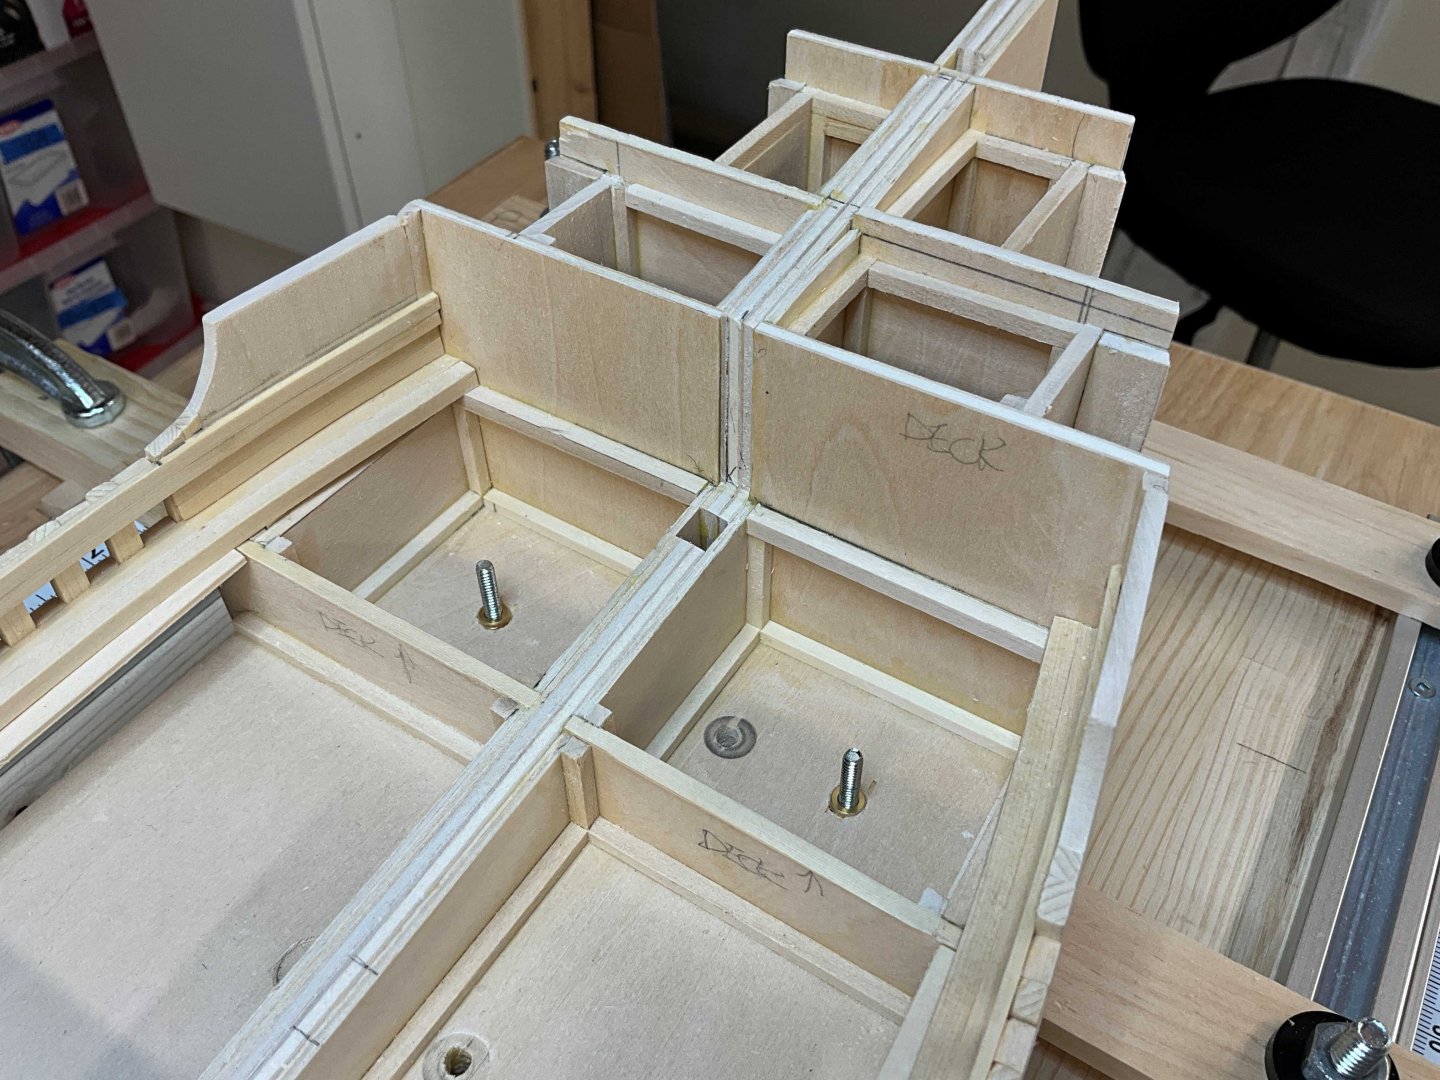
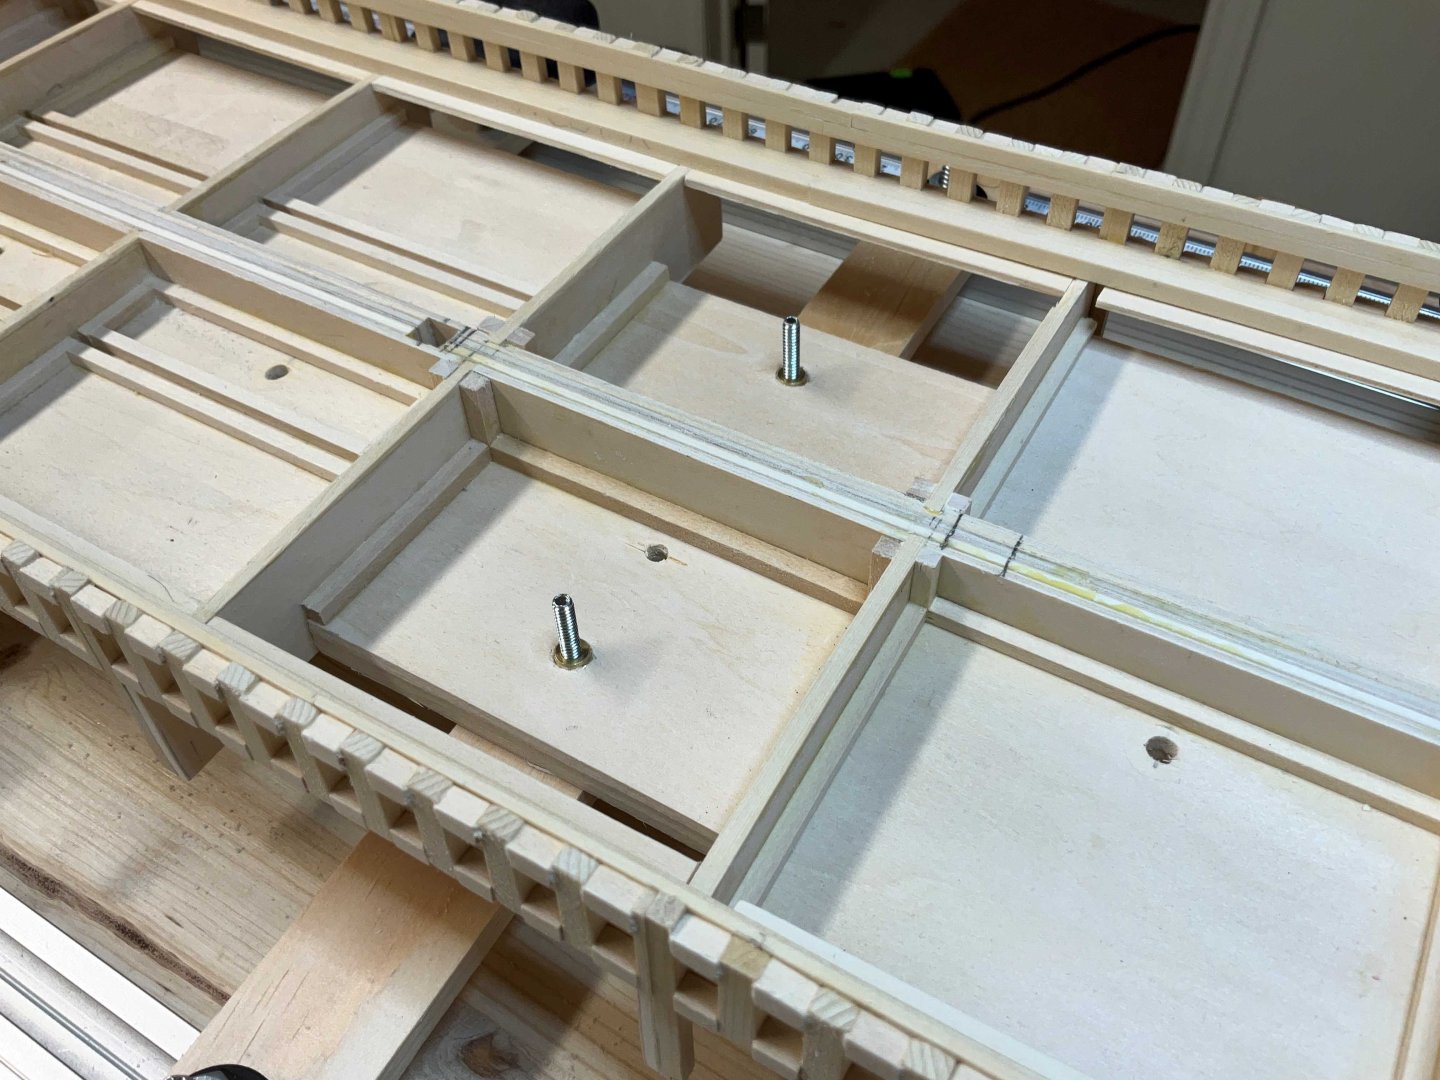
Hi Everyone, I hope you are all well. Thank you all very much for your support. The bulwarks have been completed. The model was unscrewed from the build board and three standoffs were attached to the hull with #6-32 machine screws. The other four supports are moveable under the hull. The stem is 1/4" x !/4" AYC , It was attached next. After a bit more fairing the planking will begin at the stem with 3/16" x 1/16" strips of AYC. The top of the first strake will be level with the top of the waterways. This plank should be 5/32" but I don't have that size available. My thinking was that a wider plank will probably make it easier to get a nice curve along its length. I've been wetting one end for a few minutes, clamping it and drying it with a heat gun with a few clamps pulling down the far end. I let it sit like that overnight. This could take a while but there's lots of other stuff to work on.


-
Congratulations Dave on finishing your Halberstadt. A fine job indeed. Happy to hear you’re doing better!
-
Looking for ideas for work area
Paul Le Wol replied to Desertanimal's topic in Modeling tools and Workshop Equipment
The table for the build board is 24” x 48” and the other two are 24” x 72” which are just those wire racks from Costco with an 1 1/4” countertop slab mounted on top. -
Looking for ideas for work area
Paul Le Wol replied to Desertanimal's topic in Modeling tools and Workshop Equipment
Hi Chris, I have three work tables. One for drawings, one for the build board and one for fabricating. I always stand while working so the tables are all 42” high which is about elbow height for me. The build board and fabricating tables sit in the middle of the room so that all sides are accessible. If I get tired of standing I have a roll around drafting chair with the seat sitting 30” off the floor. I find that this works for me because I don’t like having to climb out of a chair if I have to go get something which is quite often. I never put anything in cupboards because once the door is closed I can’t remember where it is or if I even have such a thing. Each table has an led shop light hanging over it and an articulating magnifying light clamped to it. And lastly I invested in a good shop vac that doesn’t scream when you turn it on. Good luck with your new shipyard 👍 -
Hi Henry, I have just downloaded the file and and opened it on an iPad. Tested some of the links and they worked. Hope you can get it to work!
-
Hi Jacques, your rigging is really looking good. If you are making hooks and eyes with the coated annealed wire and it gets scratched you can burn the coating off with a mini torch or a lighter. It will turn a dark grey colour and won’t need to be painted.
- 312 replies
-
- 3
-
-
- Chile
- Latin America
- (and 6 more)
-
Bob, congratulations on finishing your excellent build of The Duchess of Kingston. 👍
- 207 replies
-
- 3
-
-
-
- vanguard models
- Duchess of Kingston
- (and 1 more)
-
Thank you Ian, always glad to hear from you.
-
Thank you Glen, I’m happy that you can make this voyage!
-
Love the last symmetry photo Glen. Very nice!
- 301 replies
-
- 3
-
-
-
- Constitution
- Bluejacket Shipcrafters
- (and 1 more)
-
That’s a good looking machine Keith. I’m still getting used to mine. Funny thing is that even if I’m using a repeater most times I still double check the measurement. Must have trust issues 😀
-
Hi Phil, your offer is very kind. Thank you. I agree, these HAER drawings are very detailed. I spend a lot of time just looking at them and discovering new tidbits. The notes on the drawings are aiso full of great information.
-
Thank you very much Jacques. They are great if you have lots of cuts to make. The blade on this one only cuts square on one side so you still have to square up the end of the strip you are cutting from before making the next cut. I don’t think it is much more precise than a miter box and a stop but when it came to cutting the cover boards which were 5/32” x 5/32” x 7/32” long basswood it made a big difference just being able to pick the pieces up with tweezers and glue them into place. The cut on the piece you are using is straight, clean and doesn’t really need to be dressed.
-
Thank you Keith. I think I would have been struggling a bit without it.