

DB789
-
Posts
413 -
Joined
-
Last visited
Content Type
Profiles
Forums
Gallery
Events
Posts posted by DB789
-
-
-
Thanks Ronald. I do like the Vanguard kits, they’re absolutely excellent!
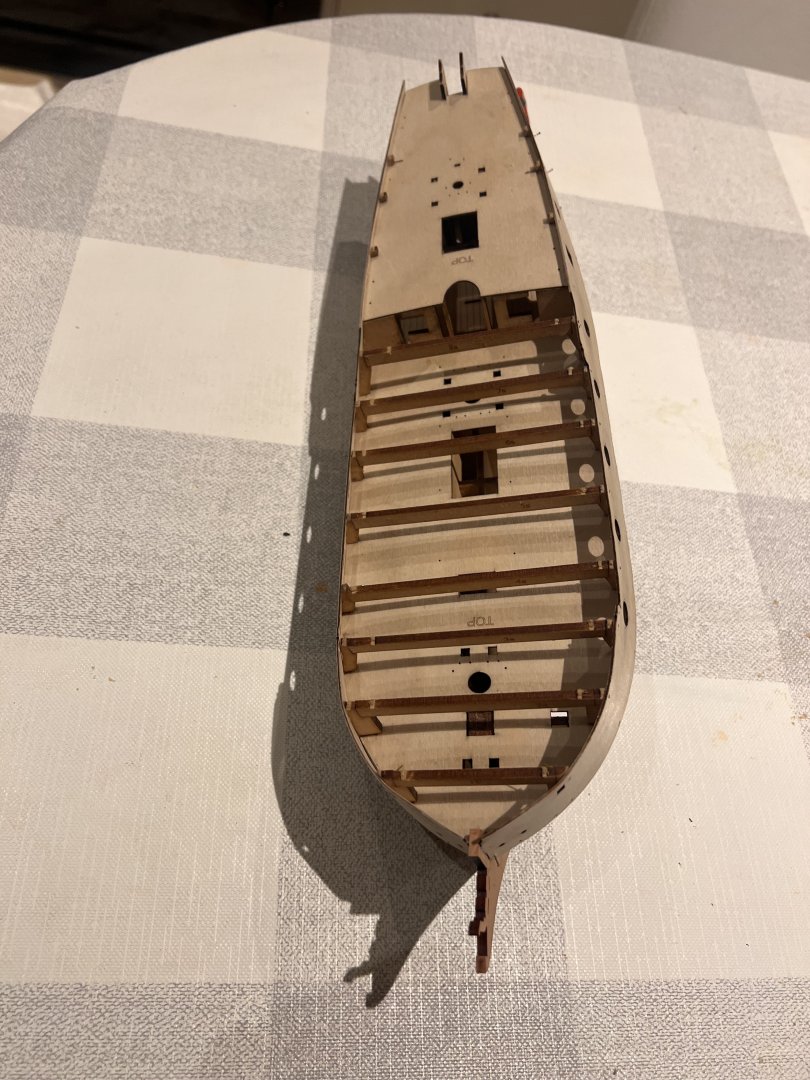
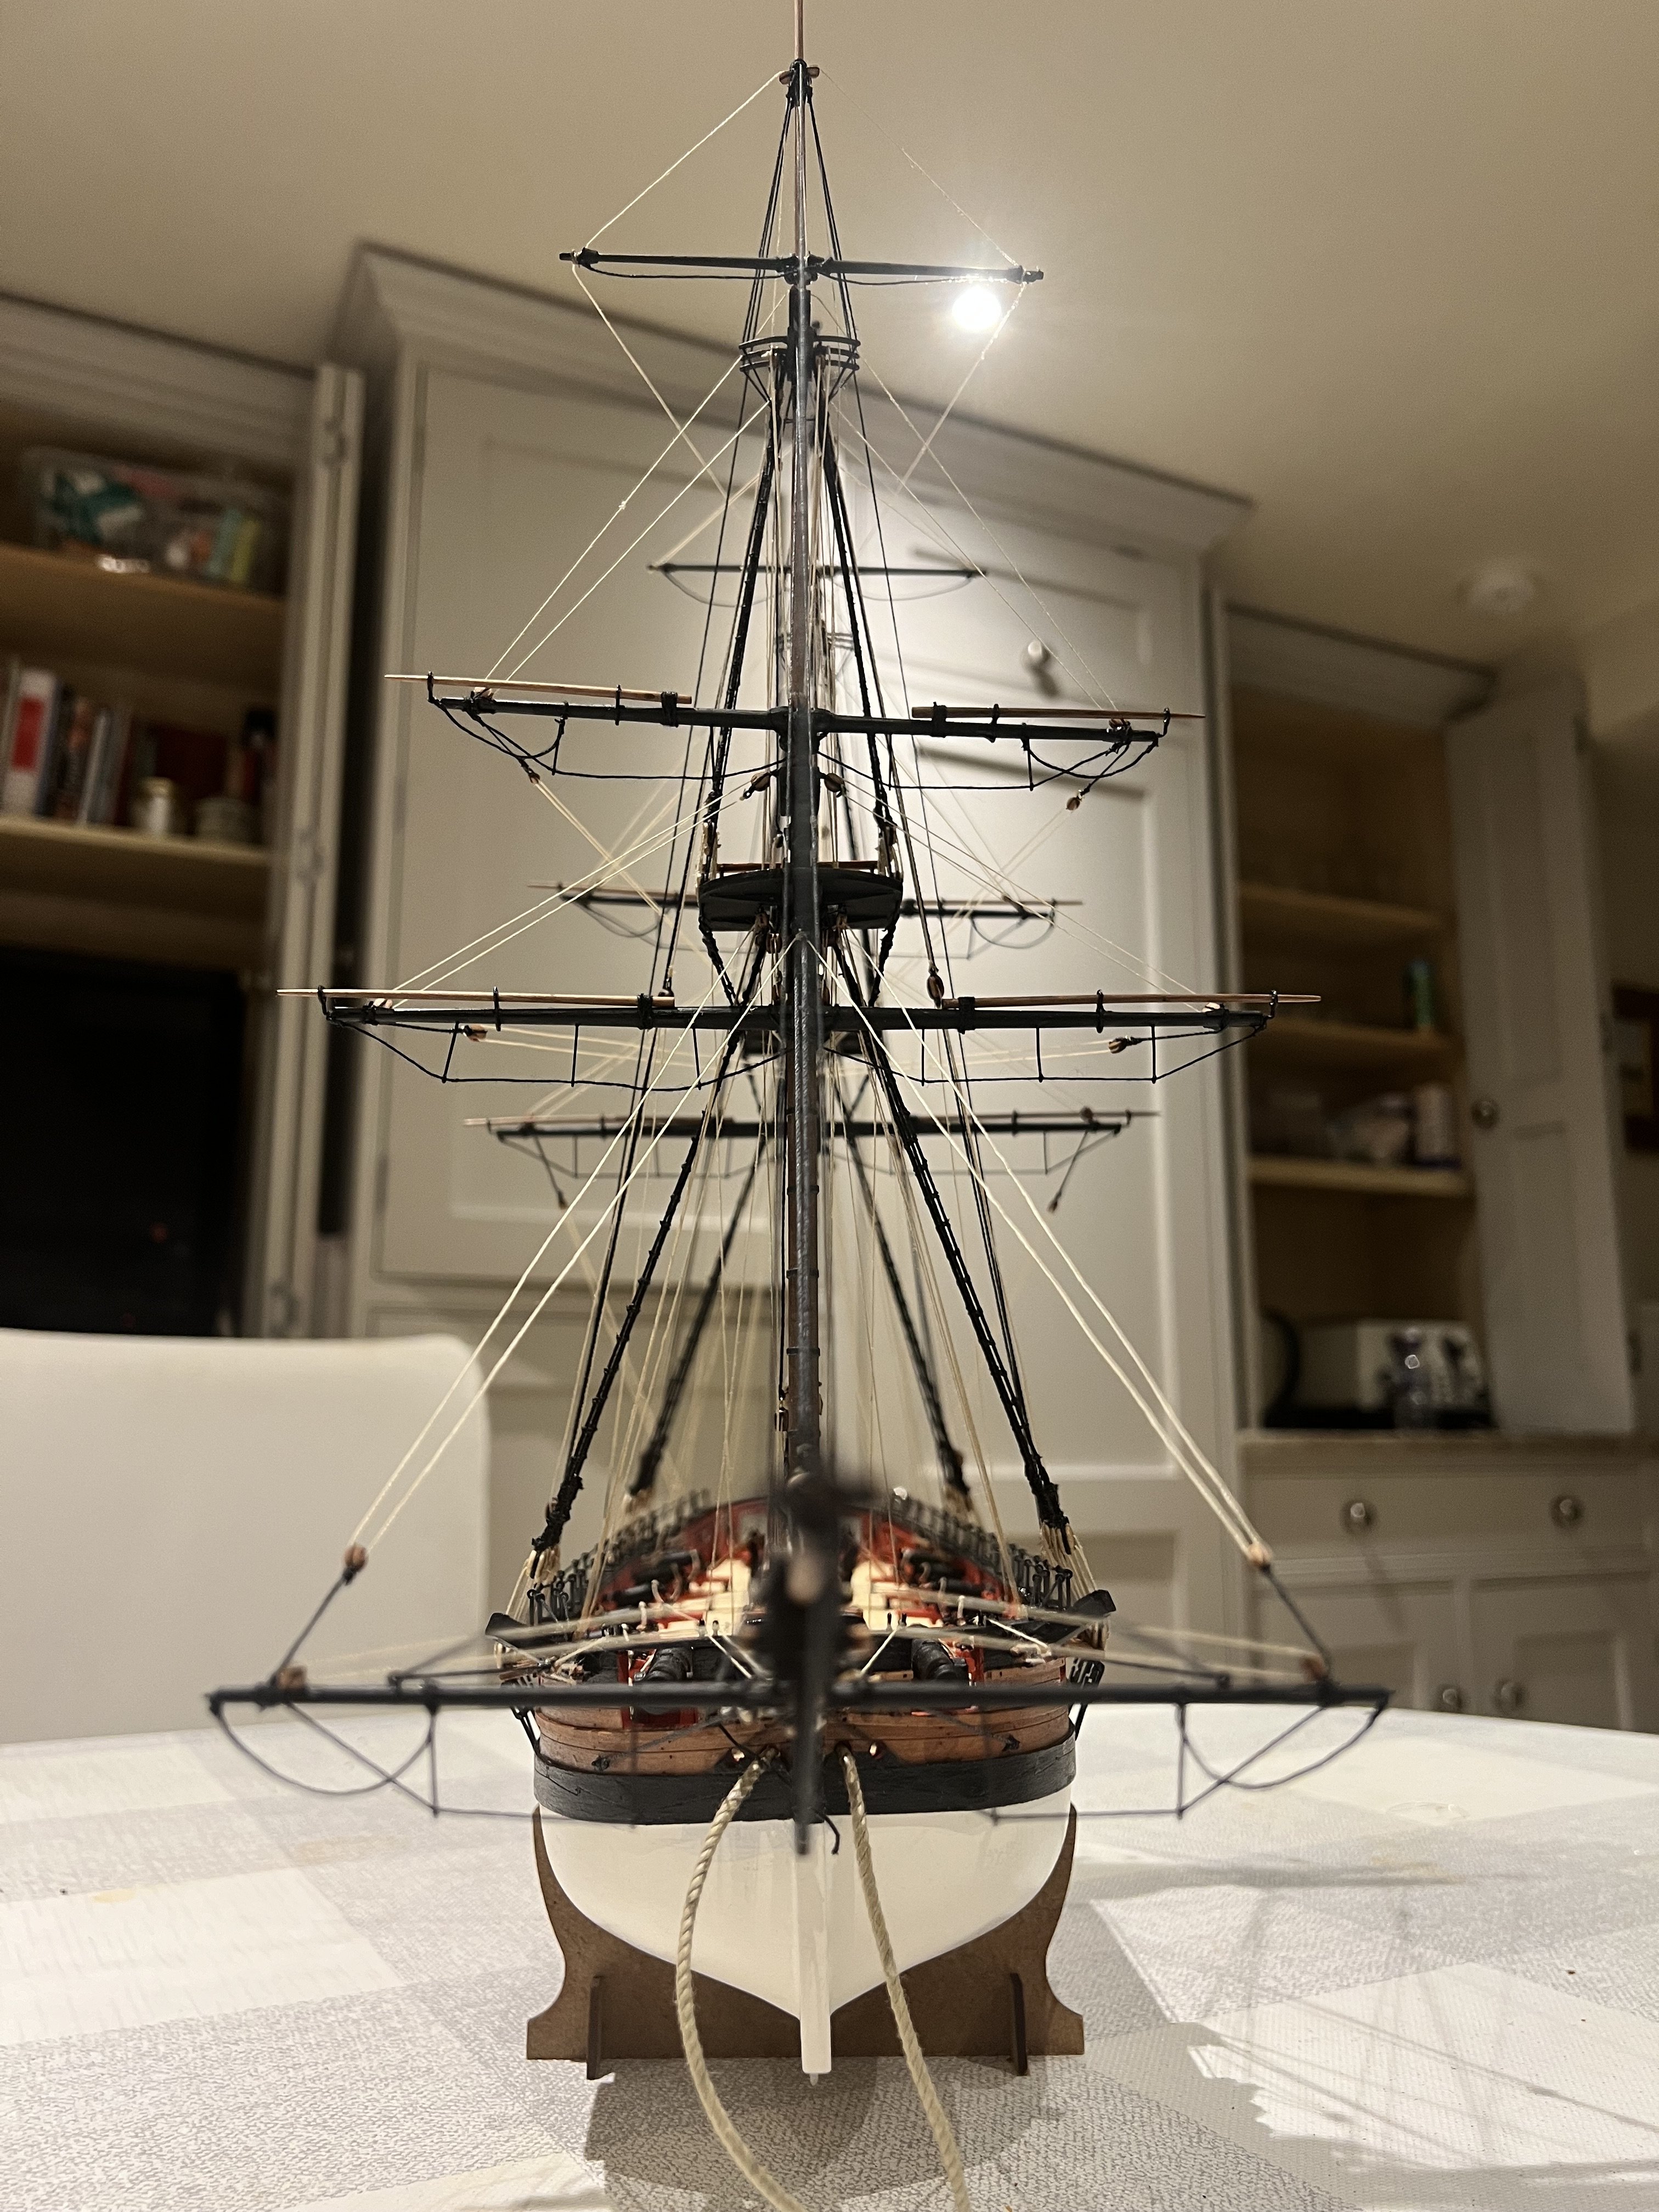
Fairings of the hull is now complete. I’ve run strips along the hull to confirm that they lie flat across all bulkheads. The bow pattern was added after fairing.

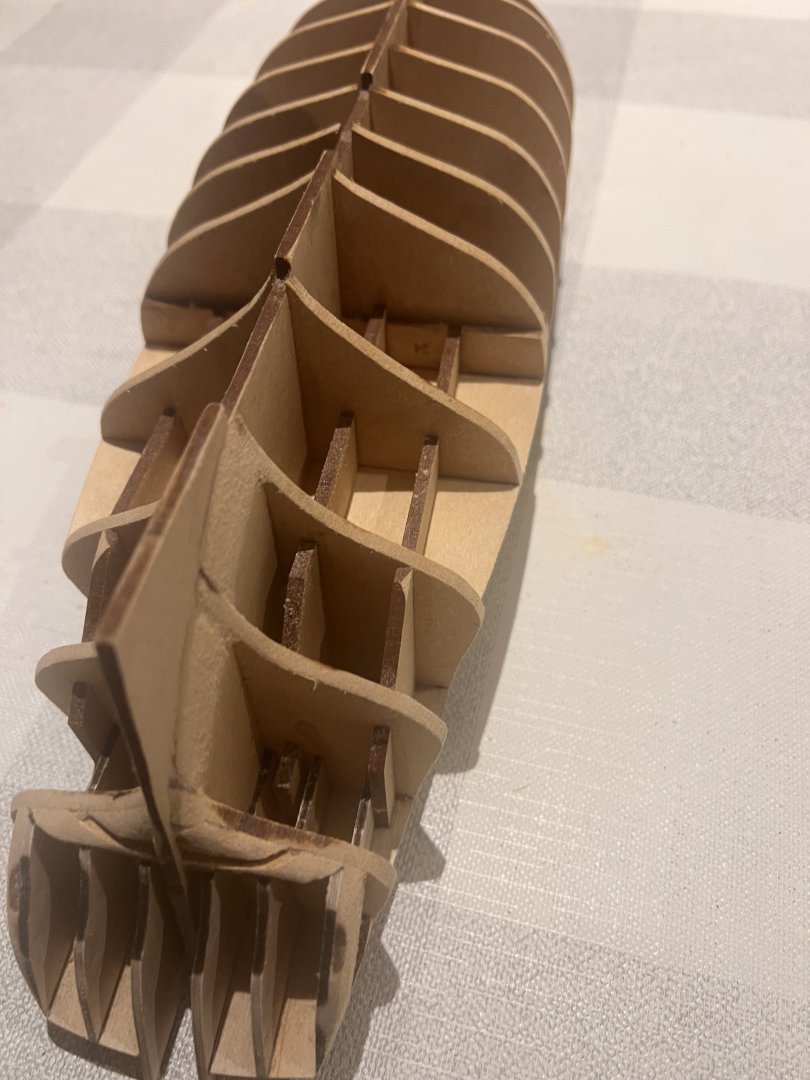
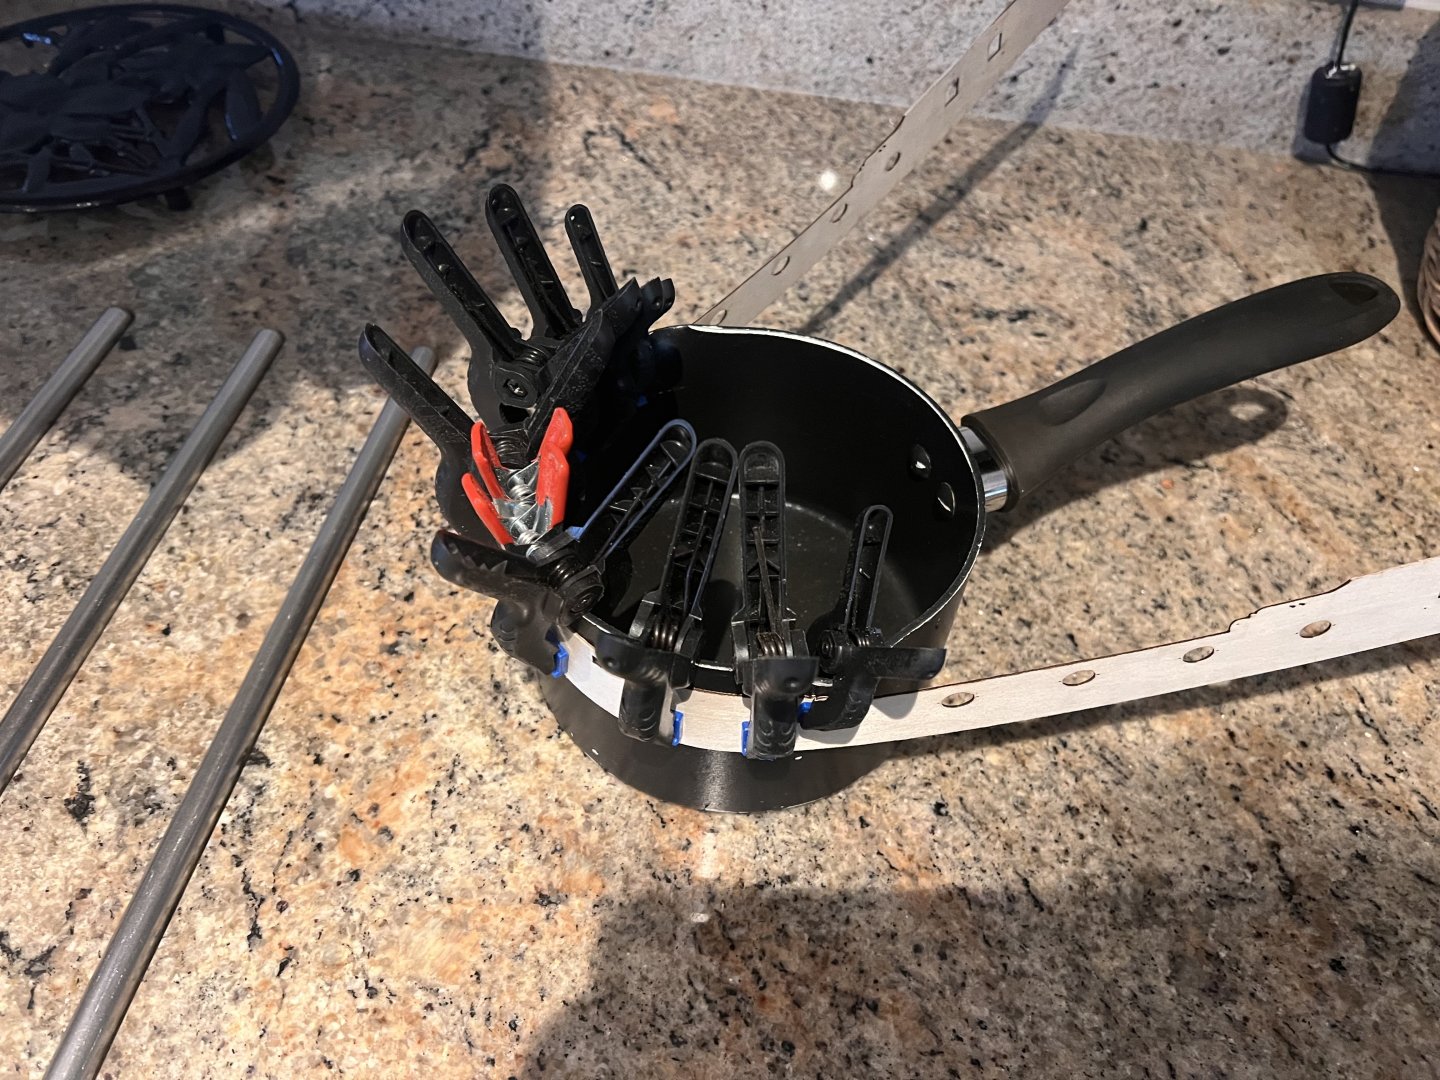
Next the ply bulwarks were soaked for 30 mins in hot water and then bent around a saucepan to achieve the curve at the bow. Left to dry for 24 hours.
Then fitted to the hull as per the instructions with holes drilled through the ply for pins to hold in place.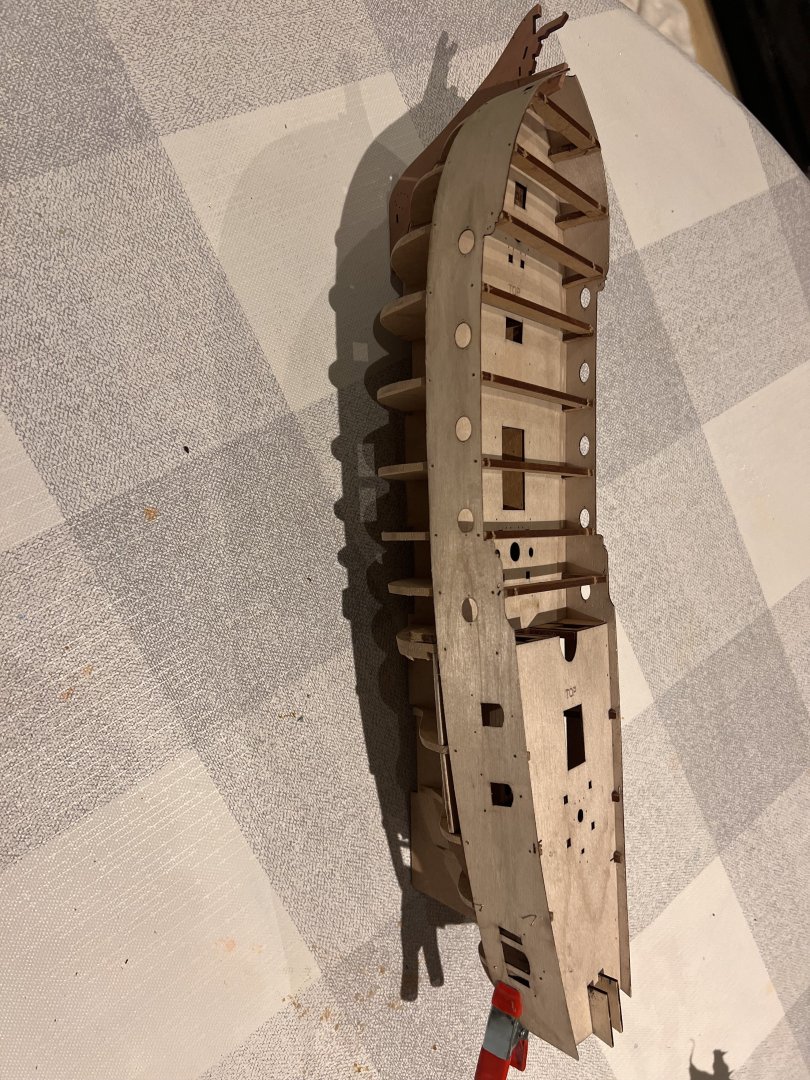
Starting to look like a ship now!
The outer edge of the bulkhead ears have a very slightly concave shape so I’ve used a plank bender (soldering iron type with a big round head) to try and get the dampened ply to adopt this shape. It’s only very gentle but I think will add to the lovely lines of this ship.
Apologies for the orientation of these photos - I can’t change them on my iPhone.

Onto first planking next. Need to build a new plank bending former as my last disintegrated…In the meantime I’m scanning the large number of excellent build logs for the best way to glaze her cabin windows. Ideas so far range from black paper behind, Krystal Klear, Fantasy Film, Glue n Glaze to leaving them unglazed. Any advice much appreciated! Many thanks
- Ryland Craze, ccoyle, Knocklouder and 4 others
-
 7
7
-
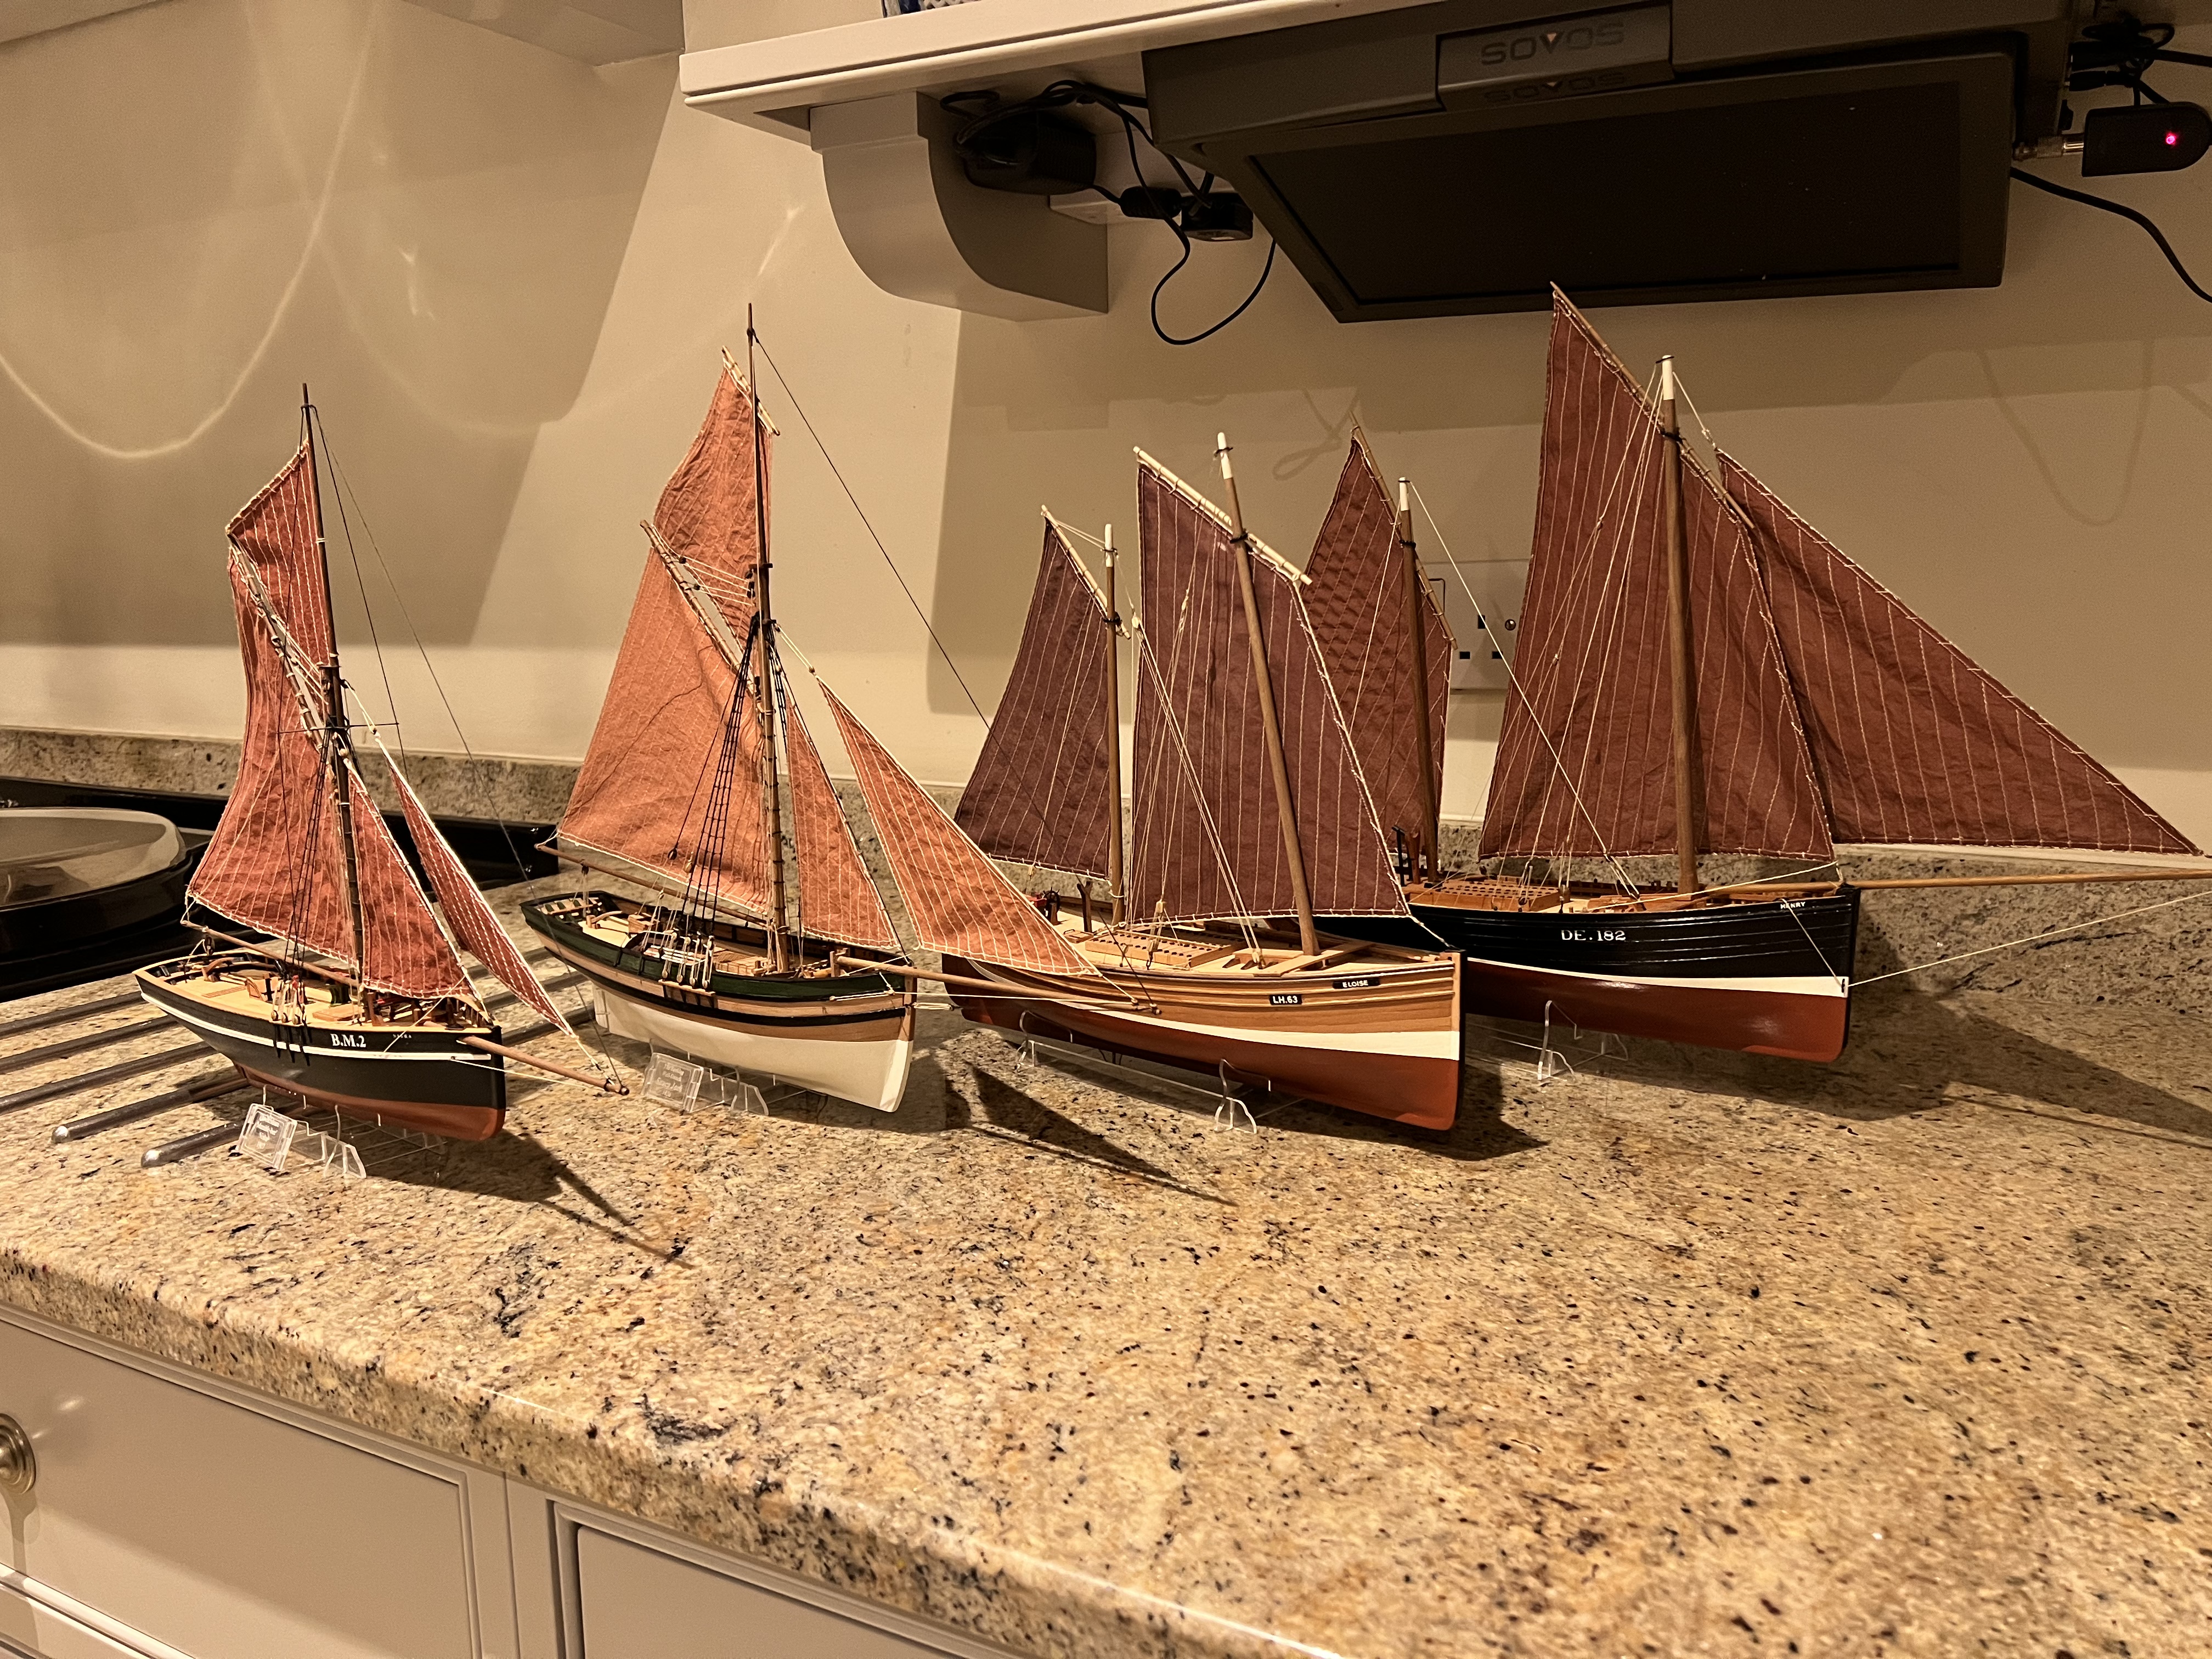
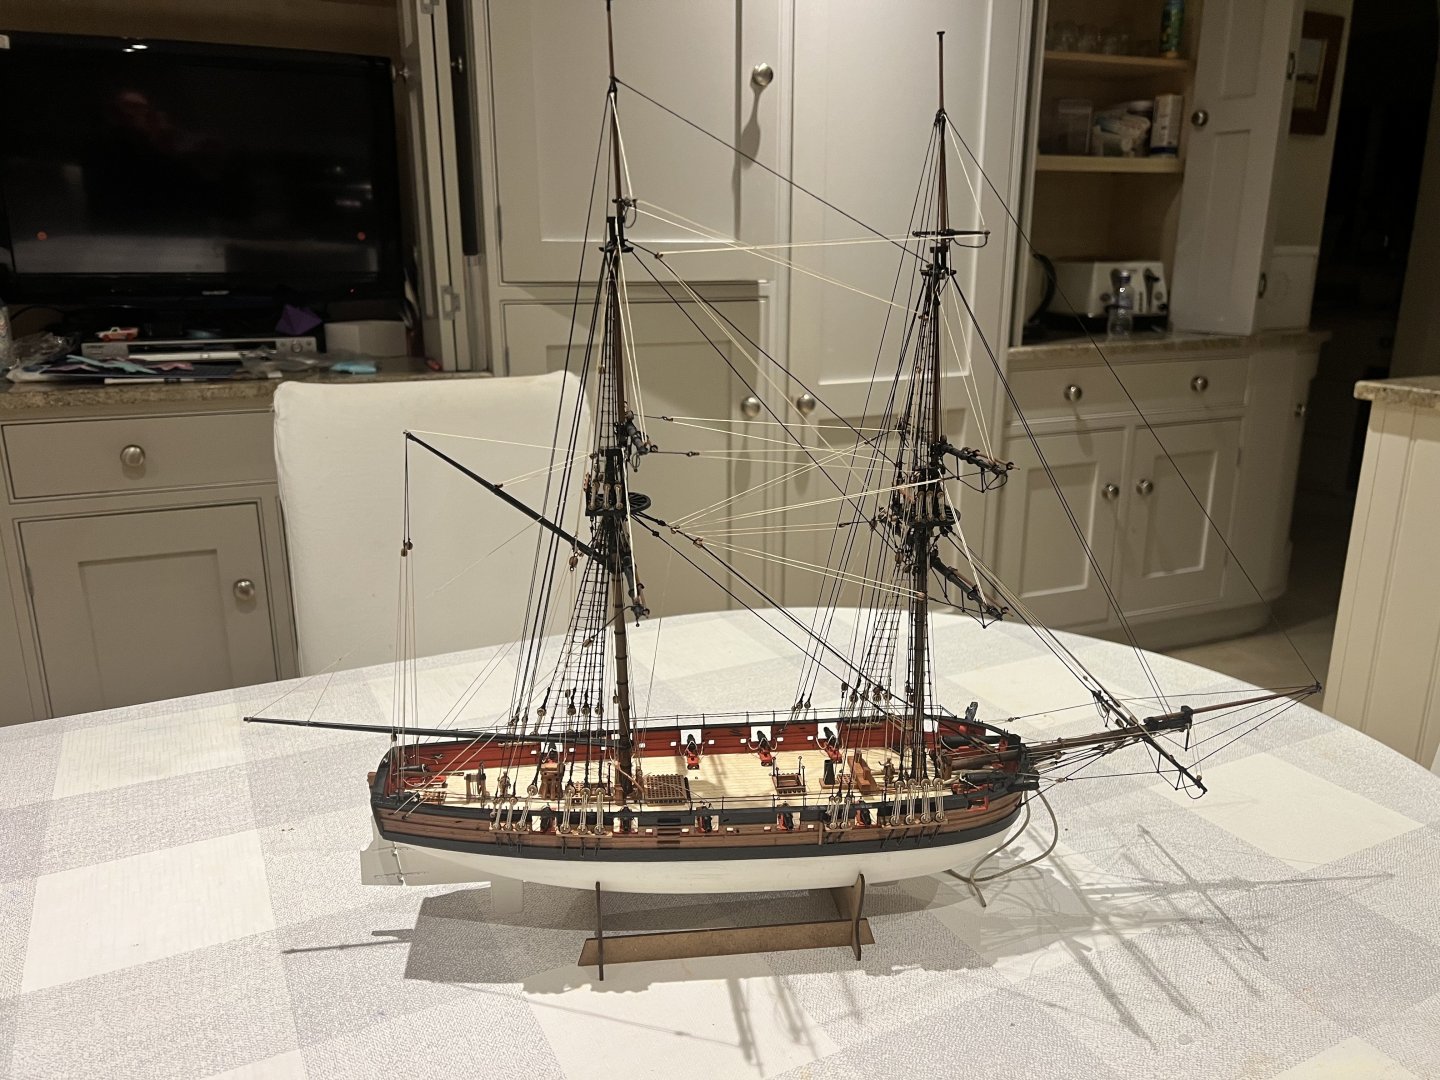
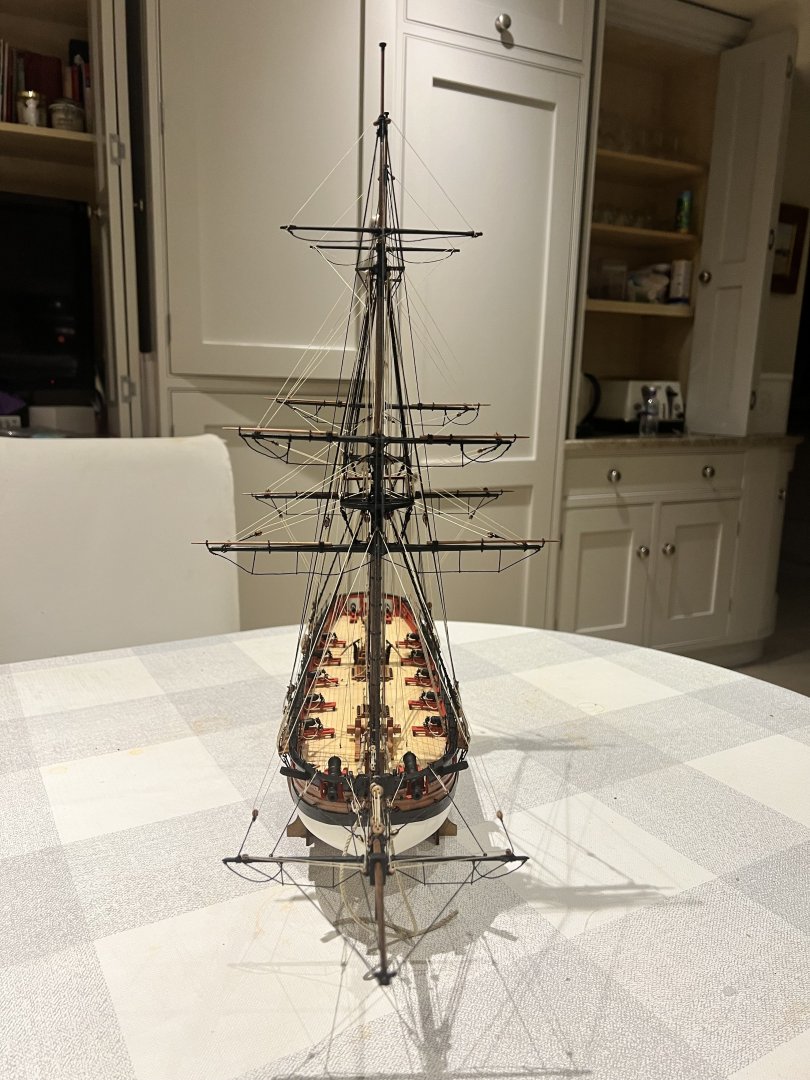
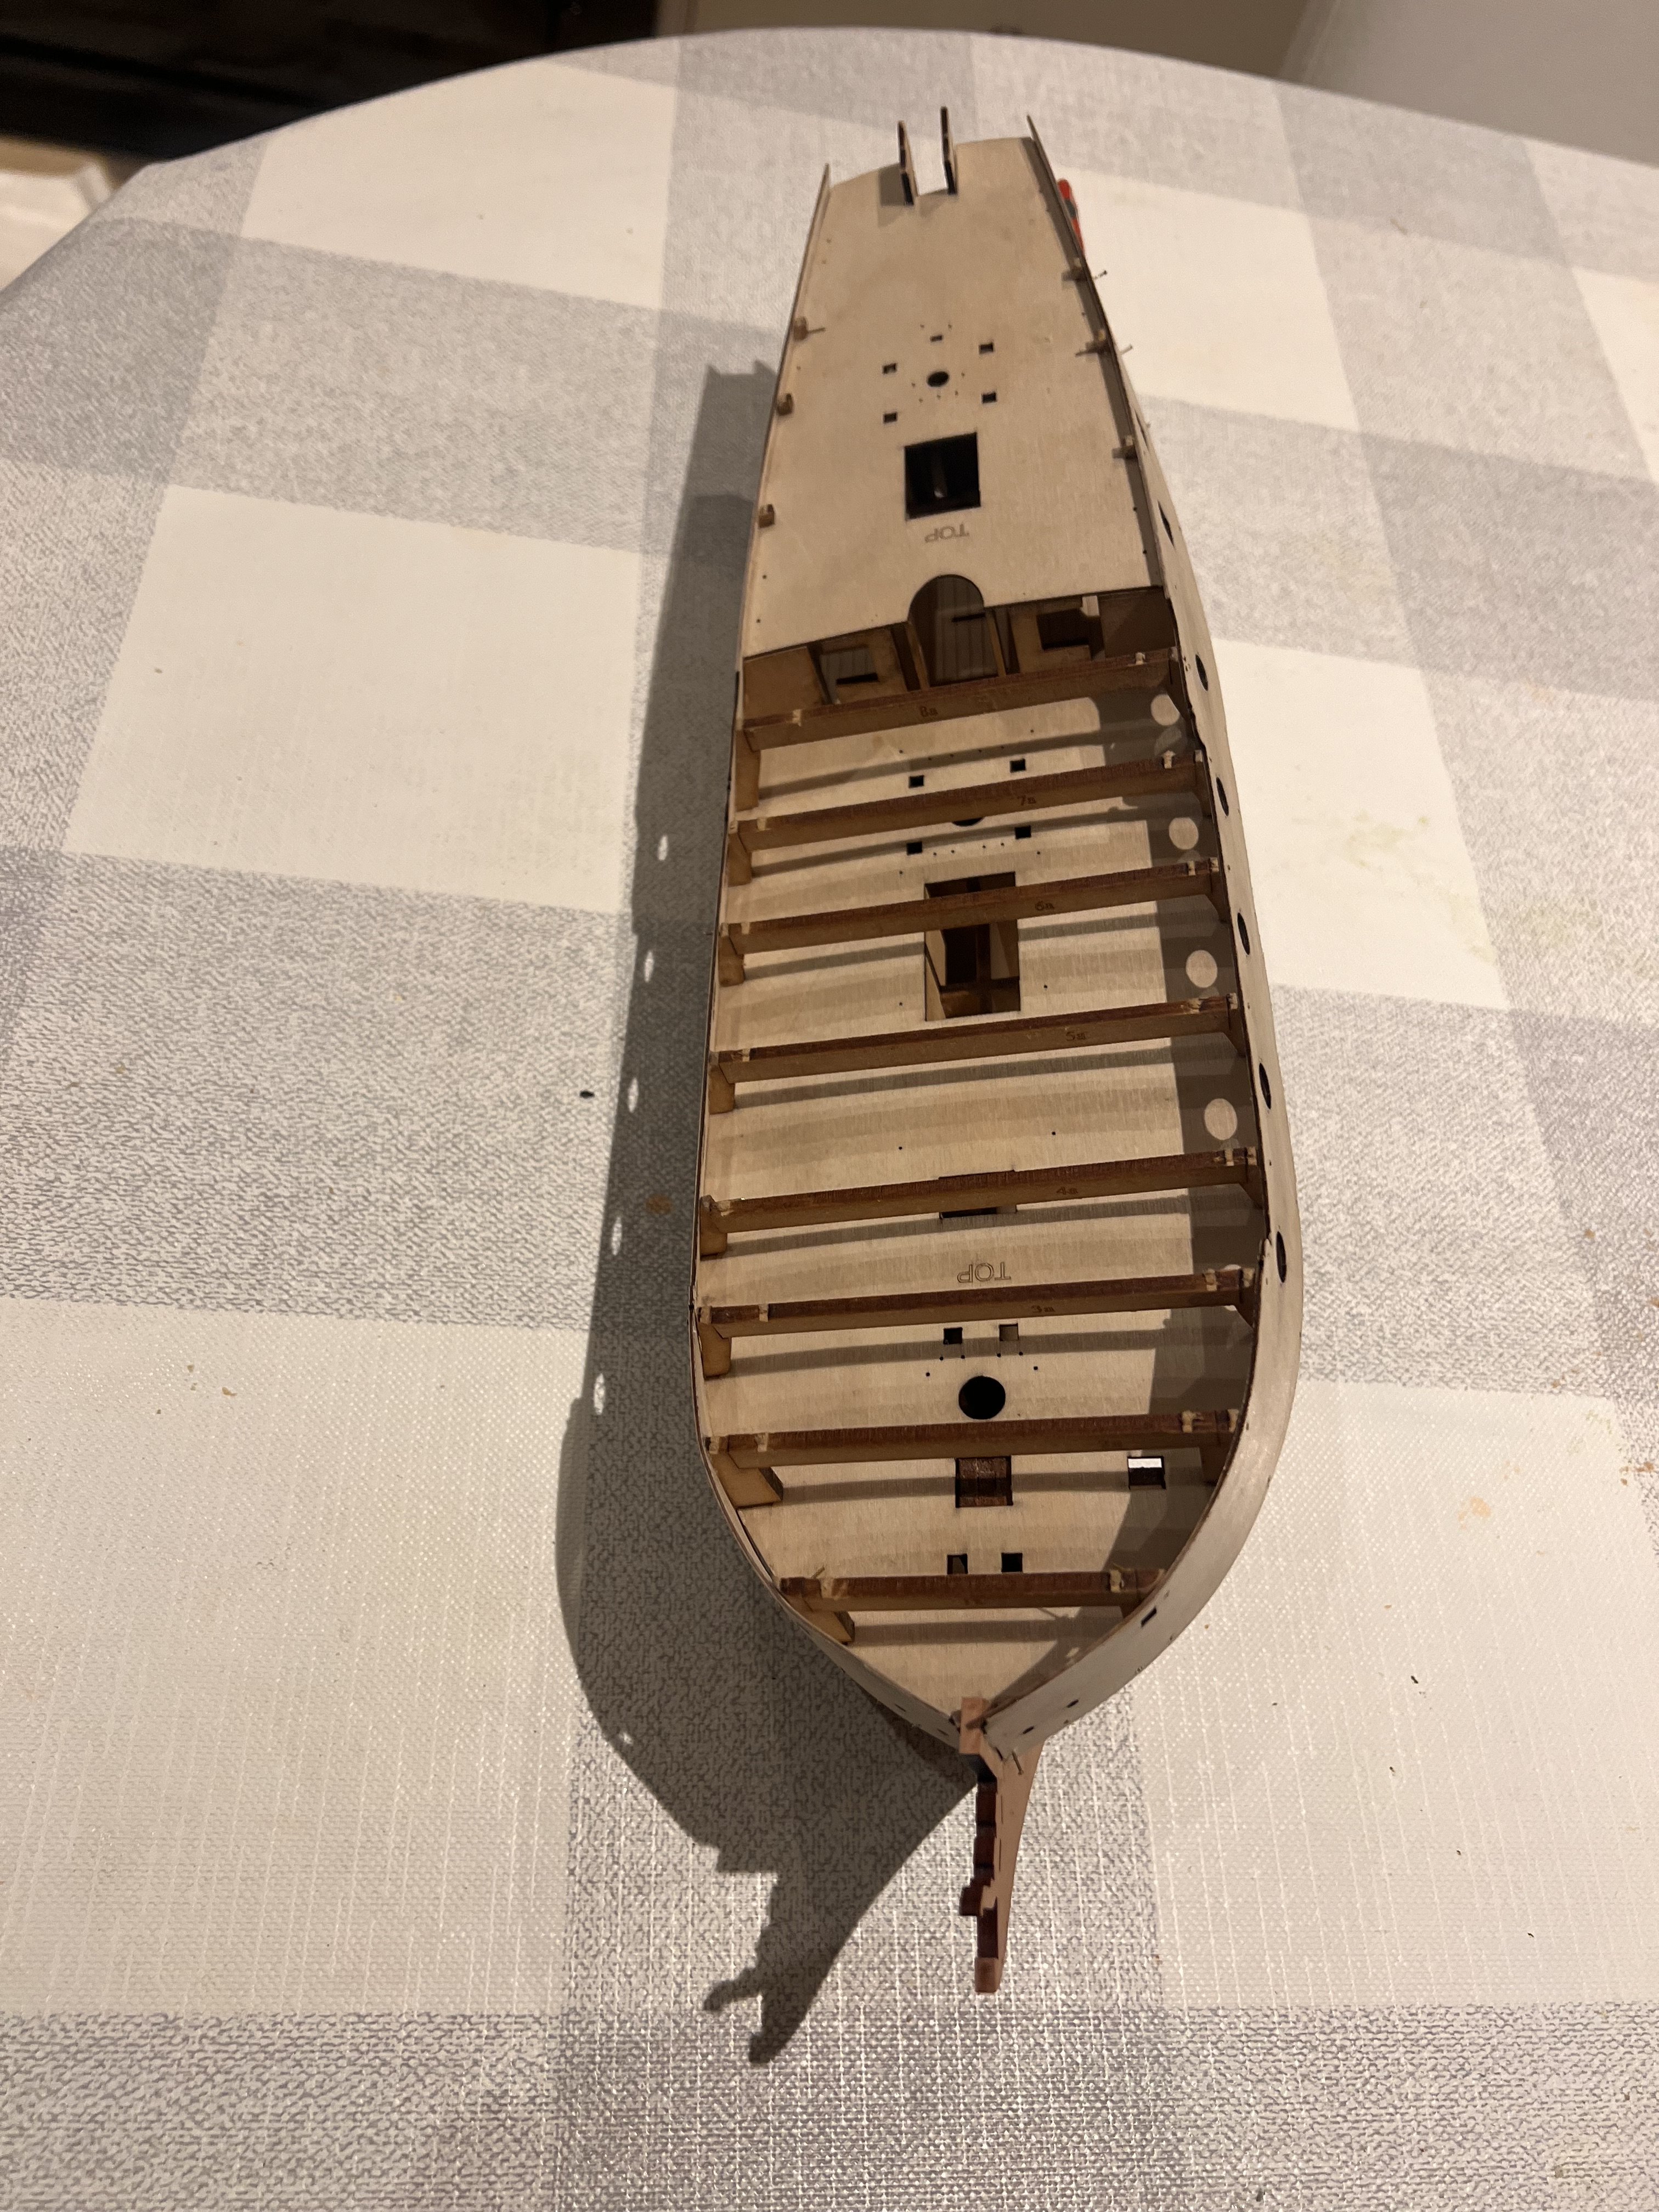
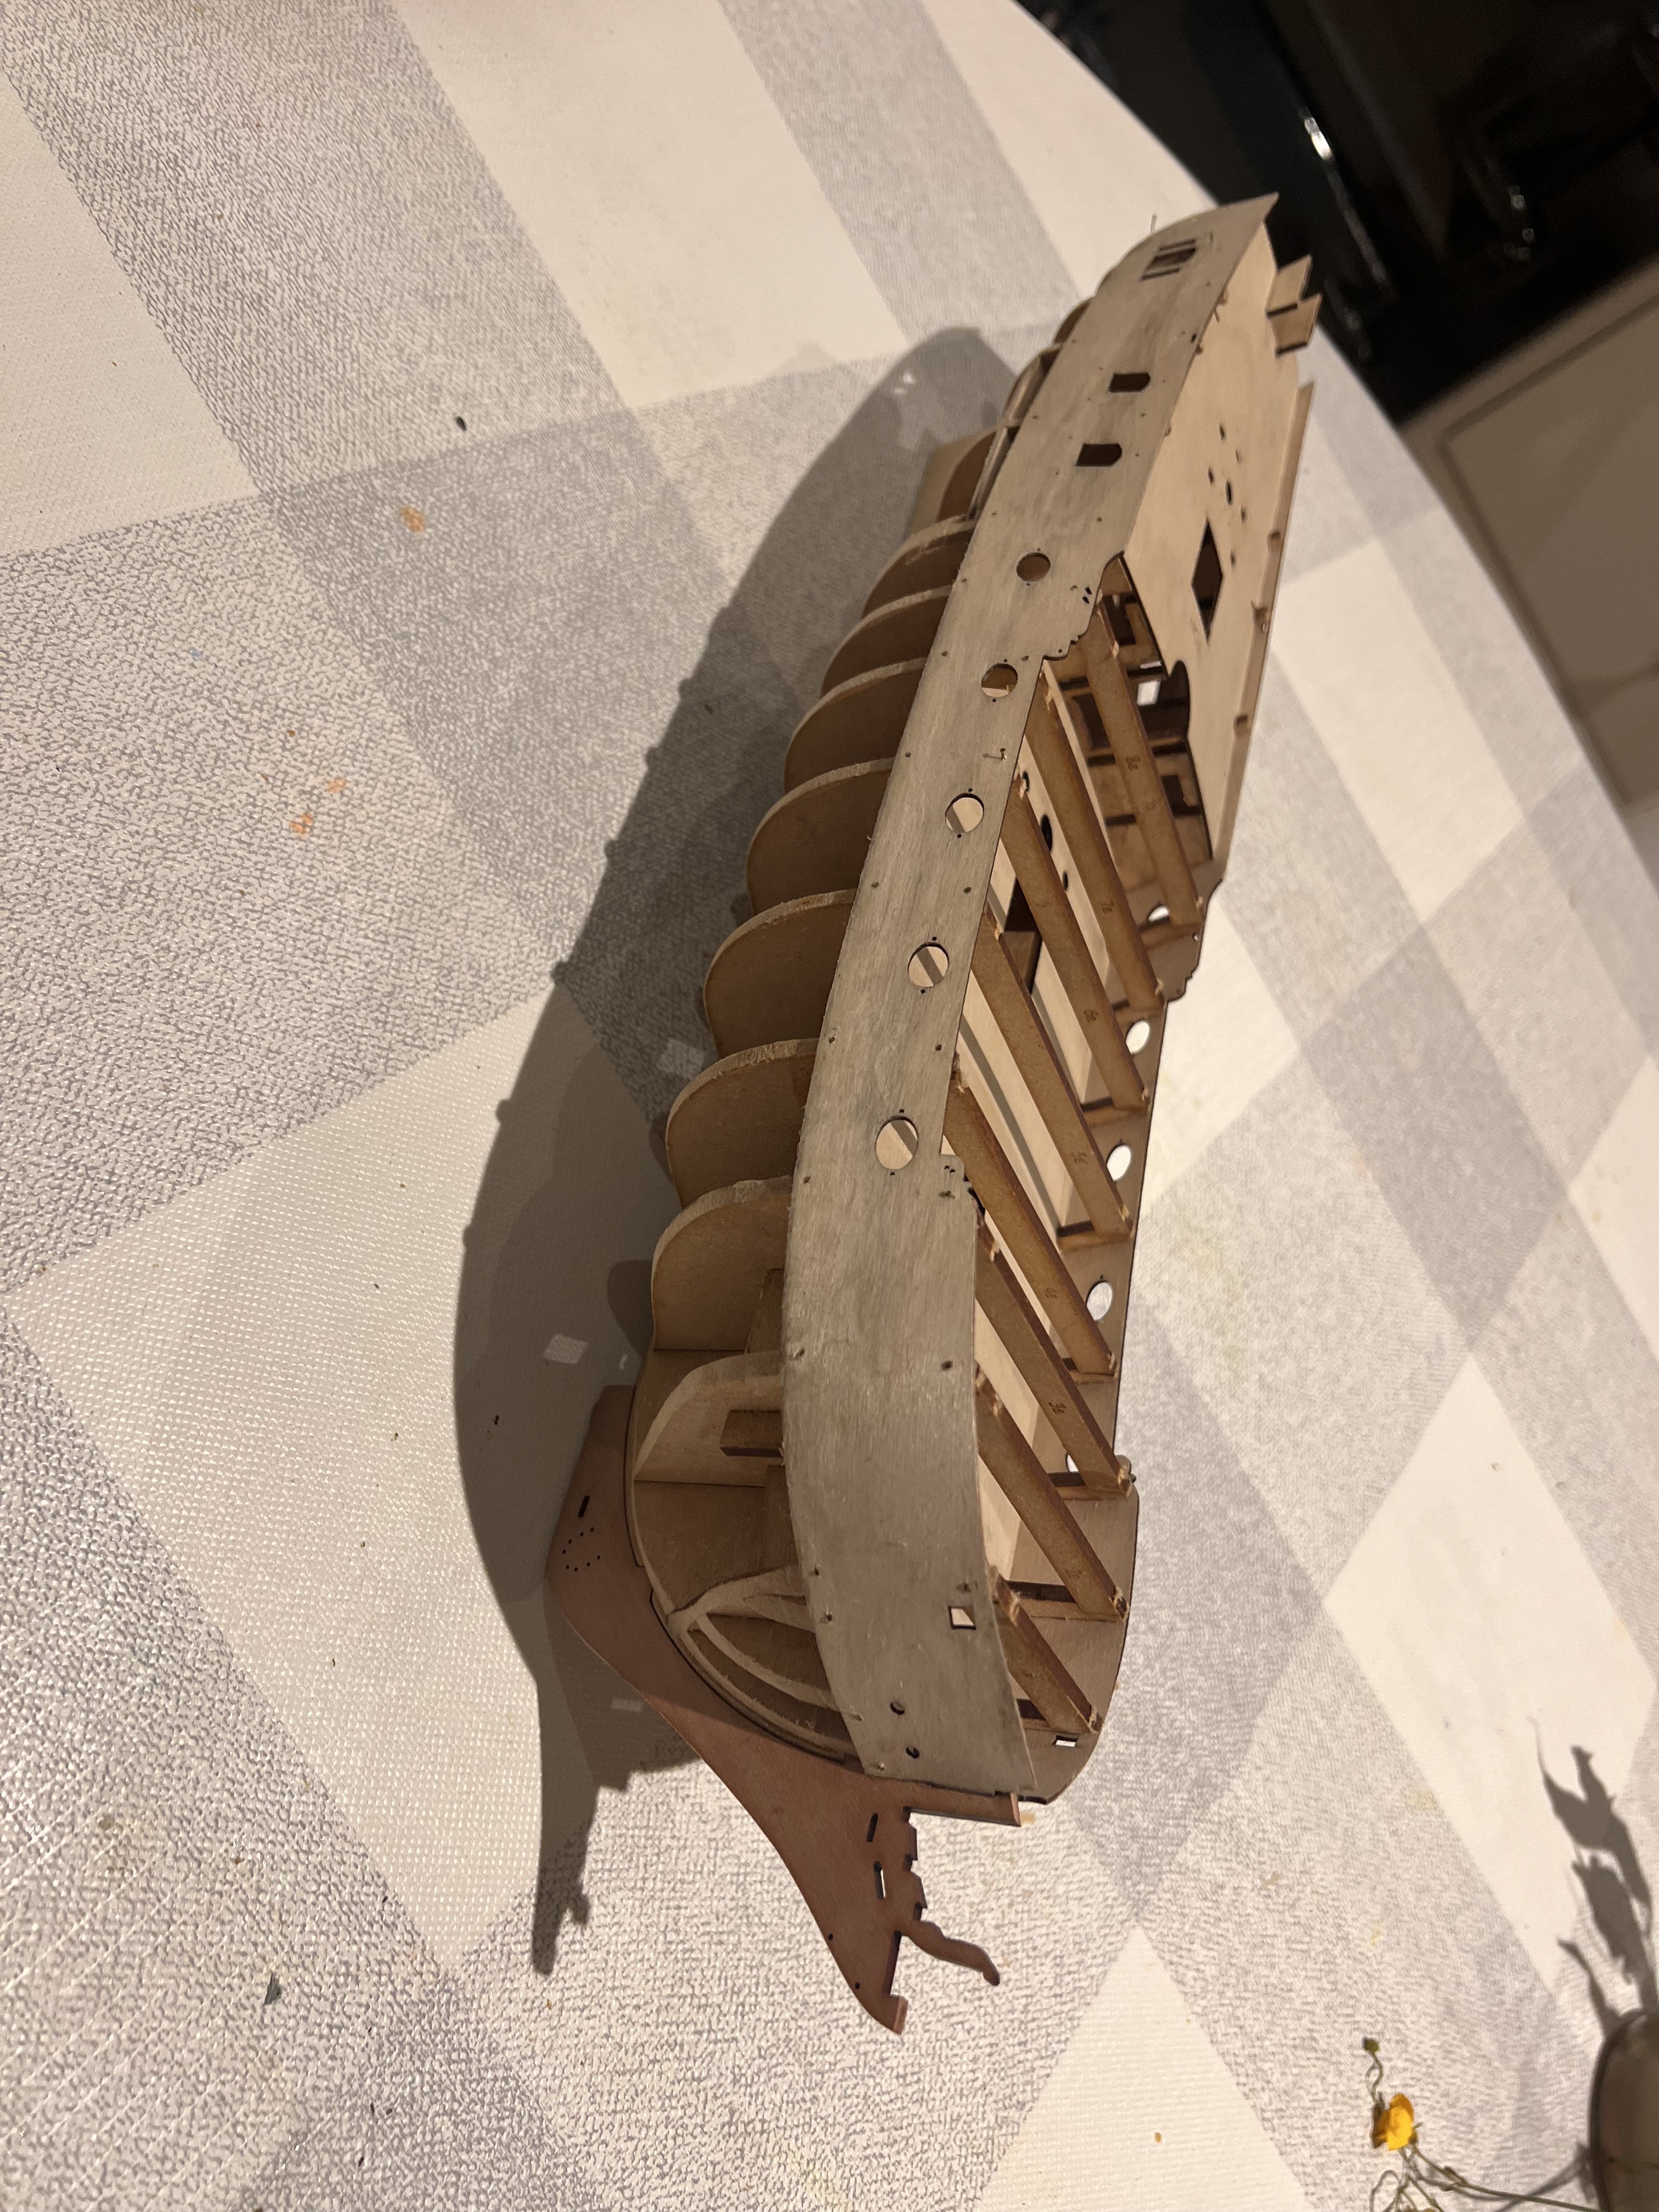
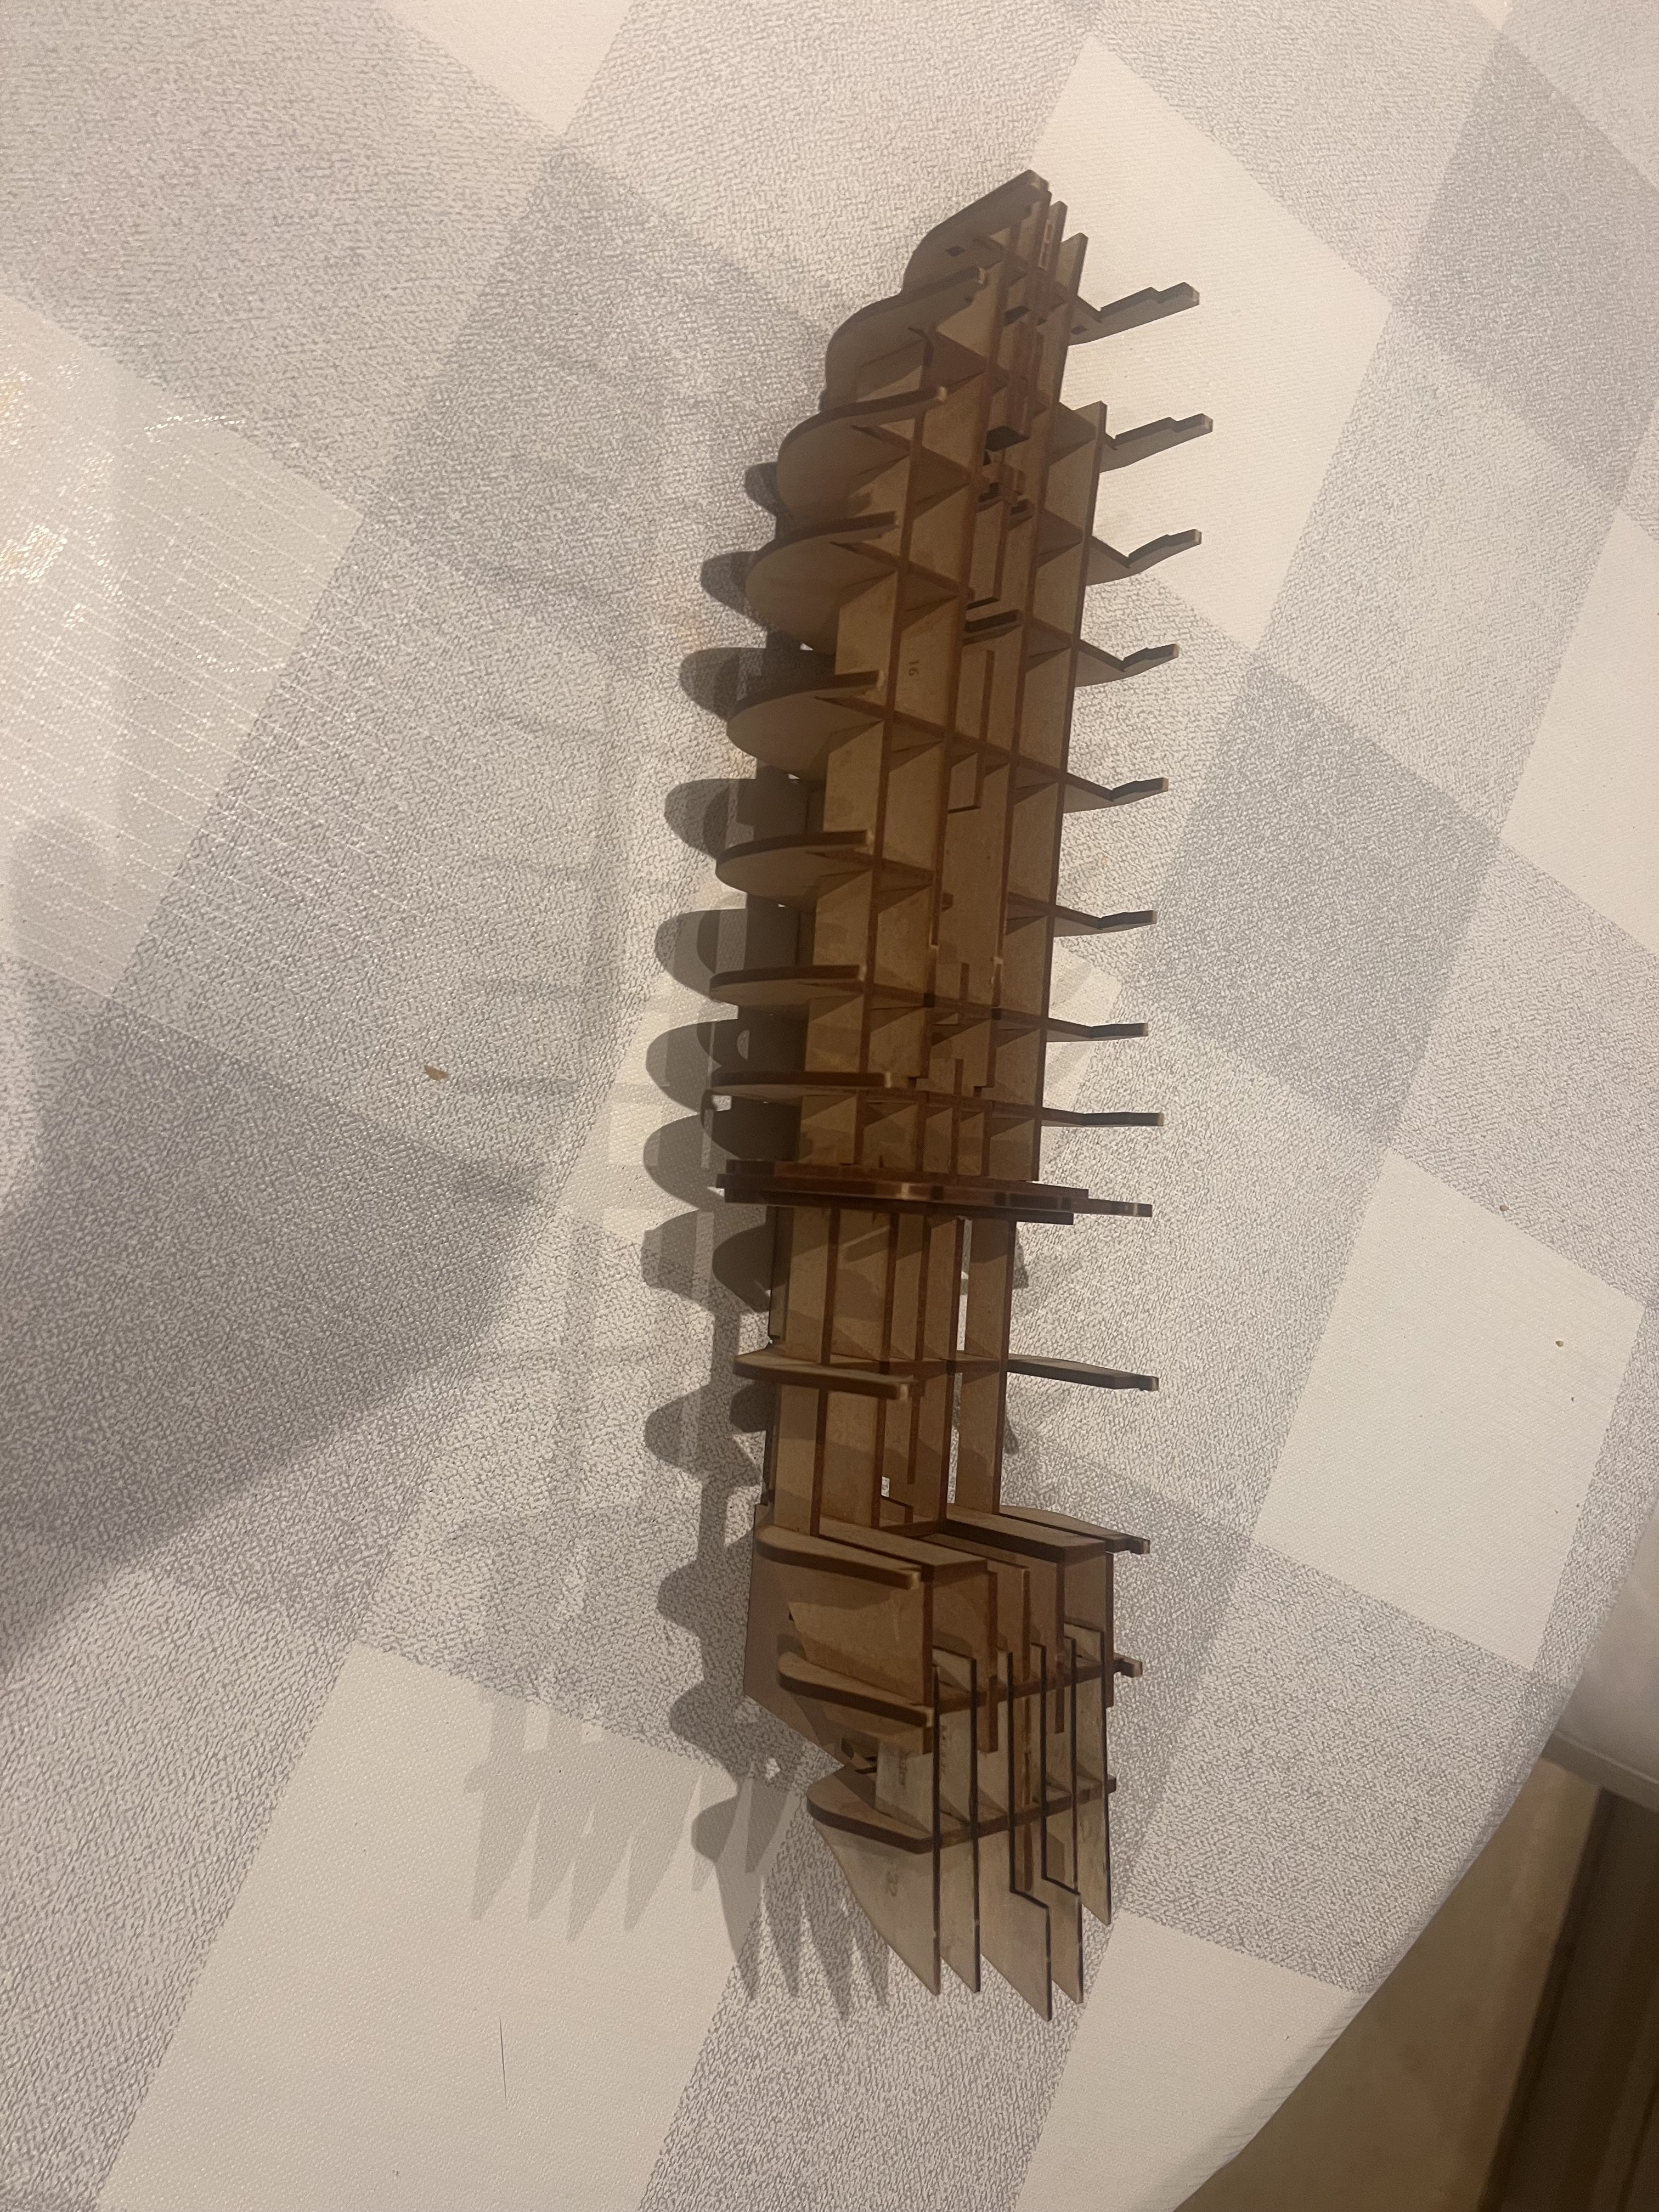
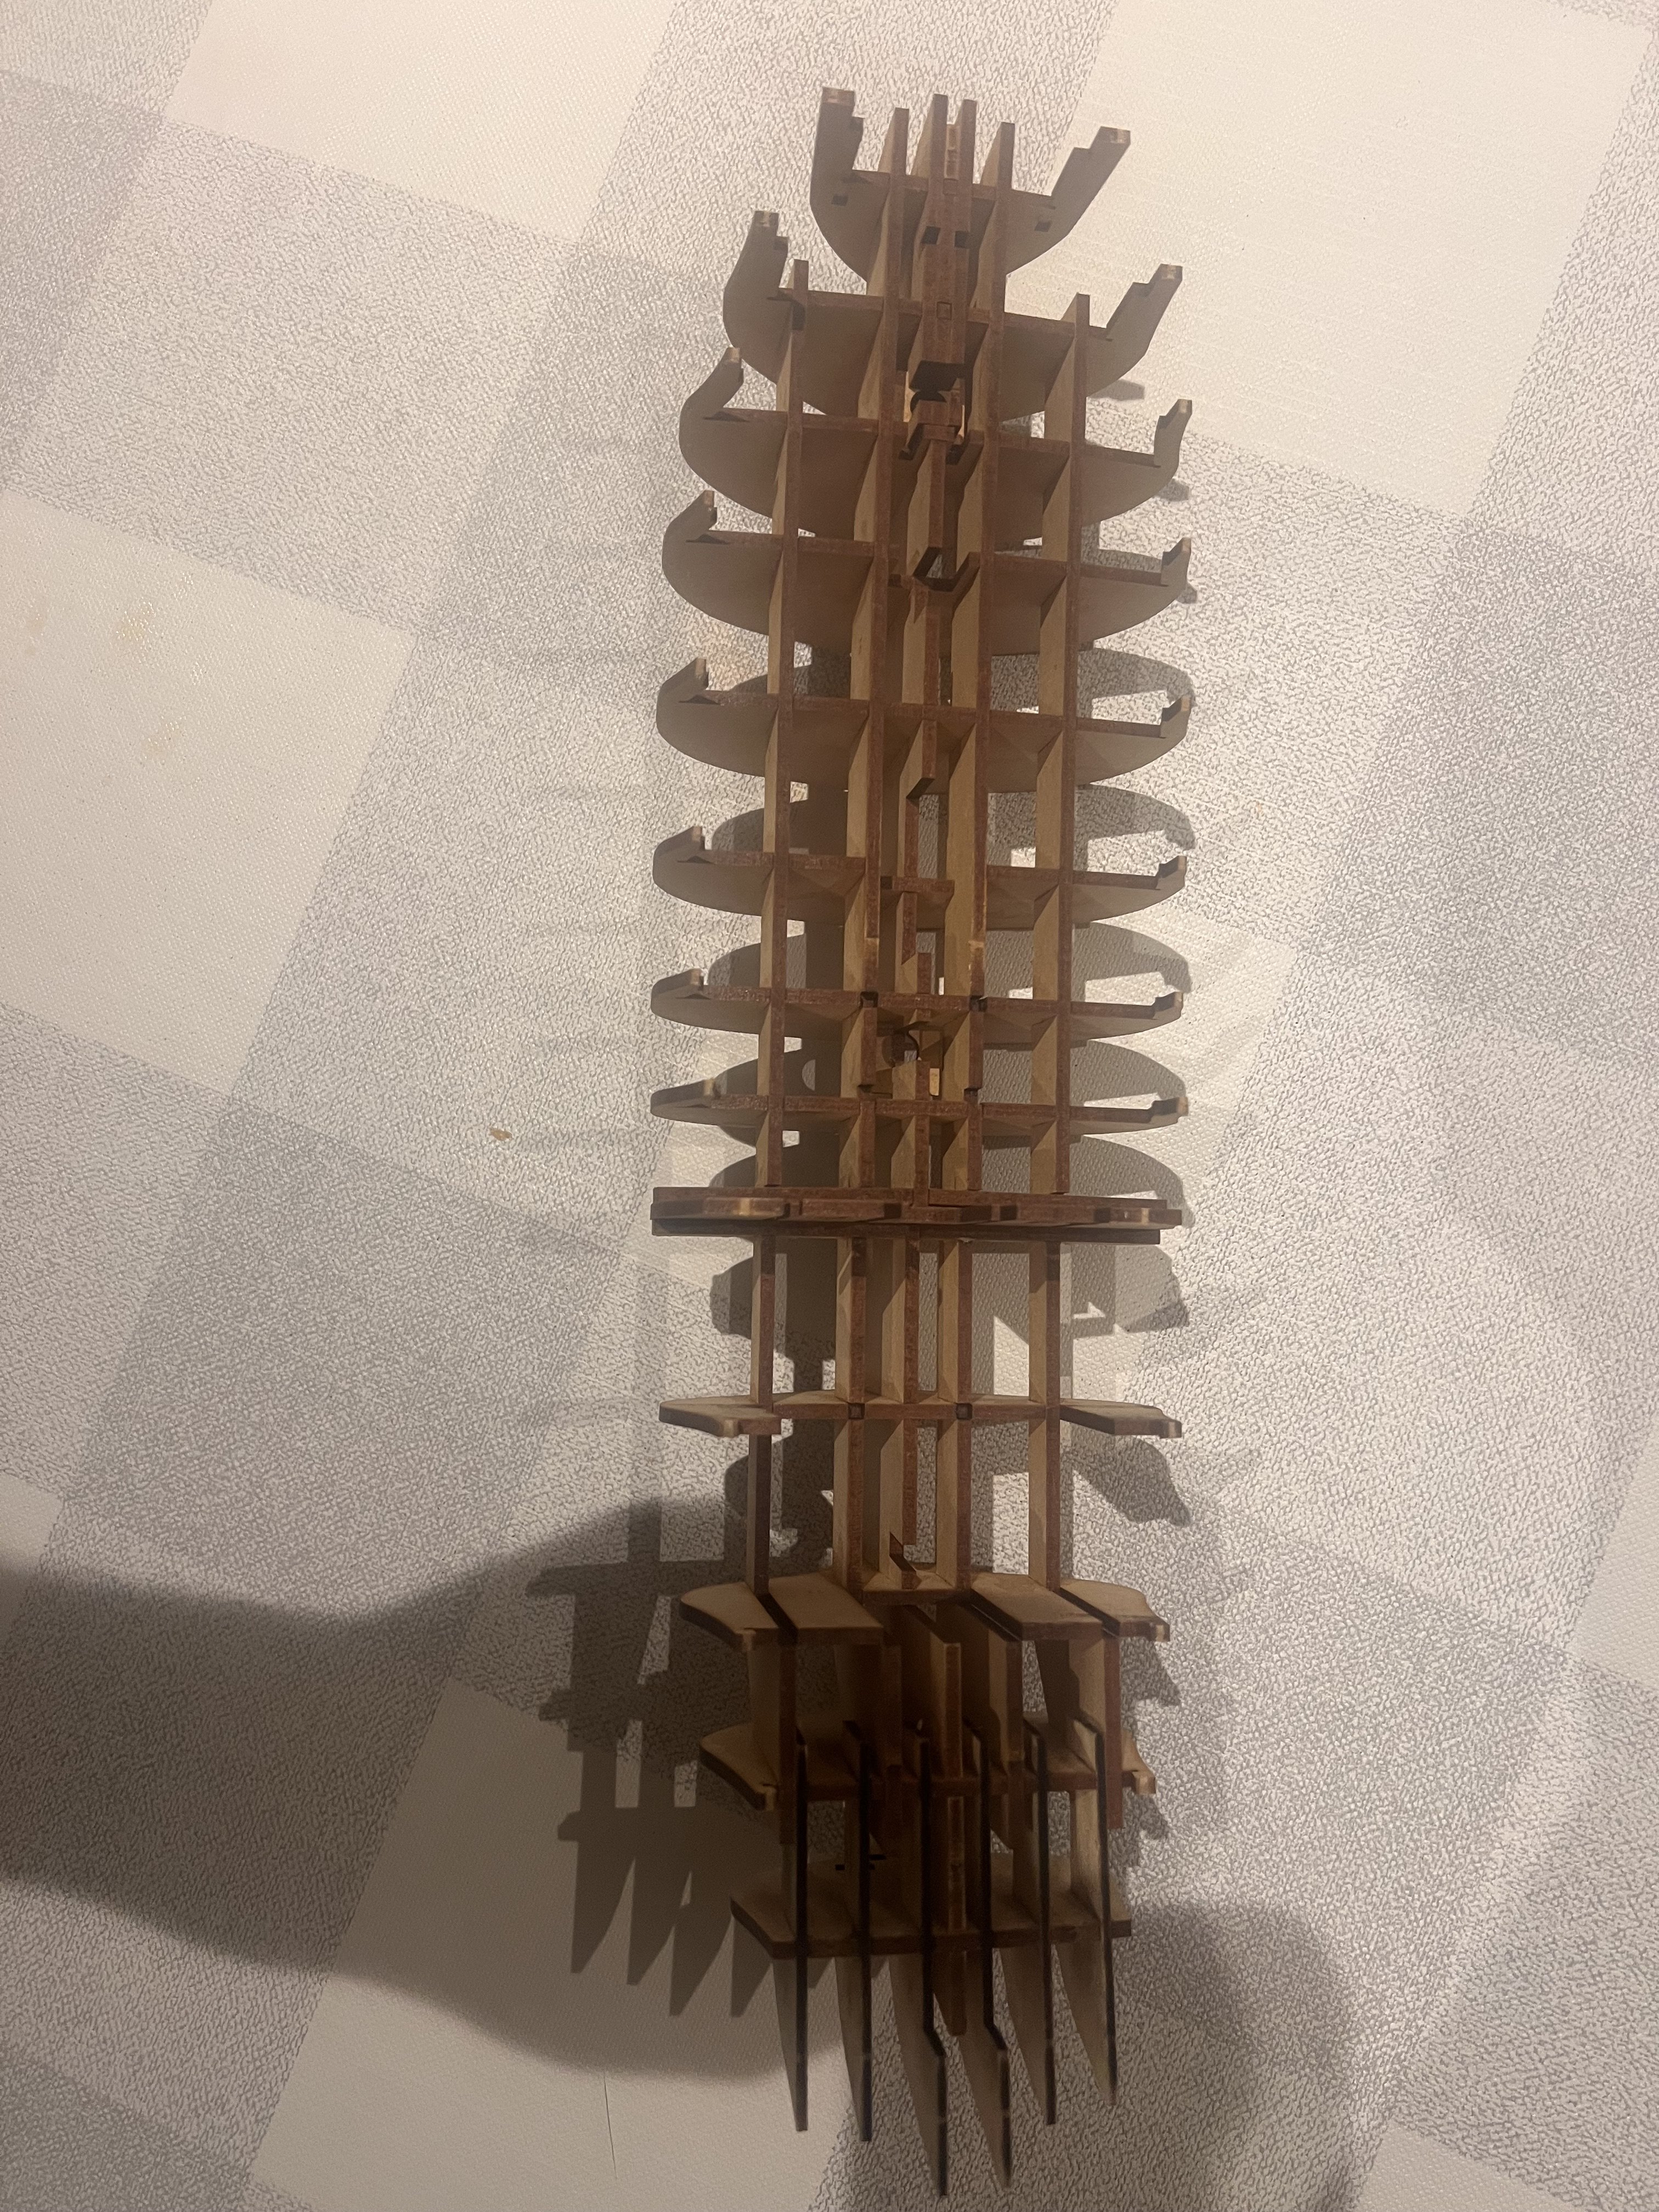
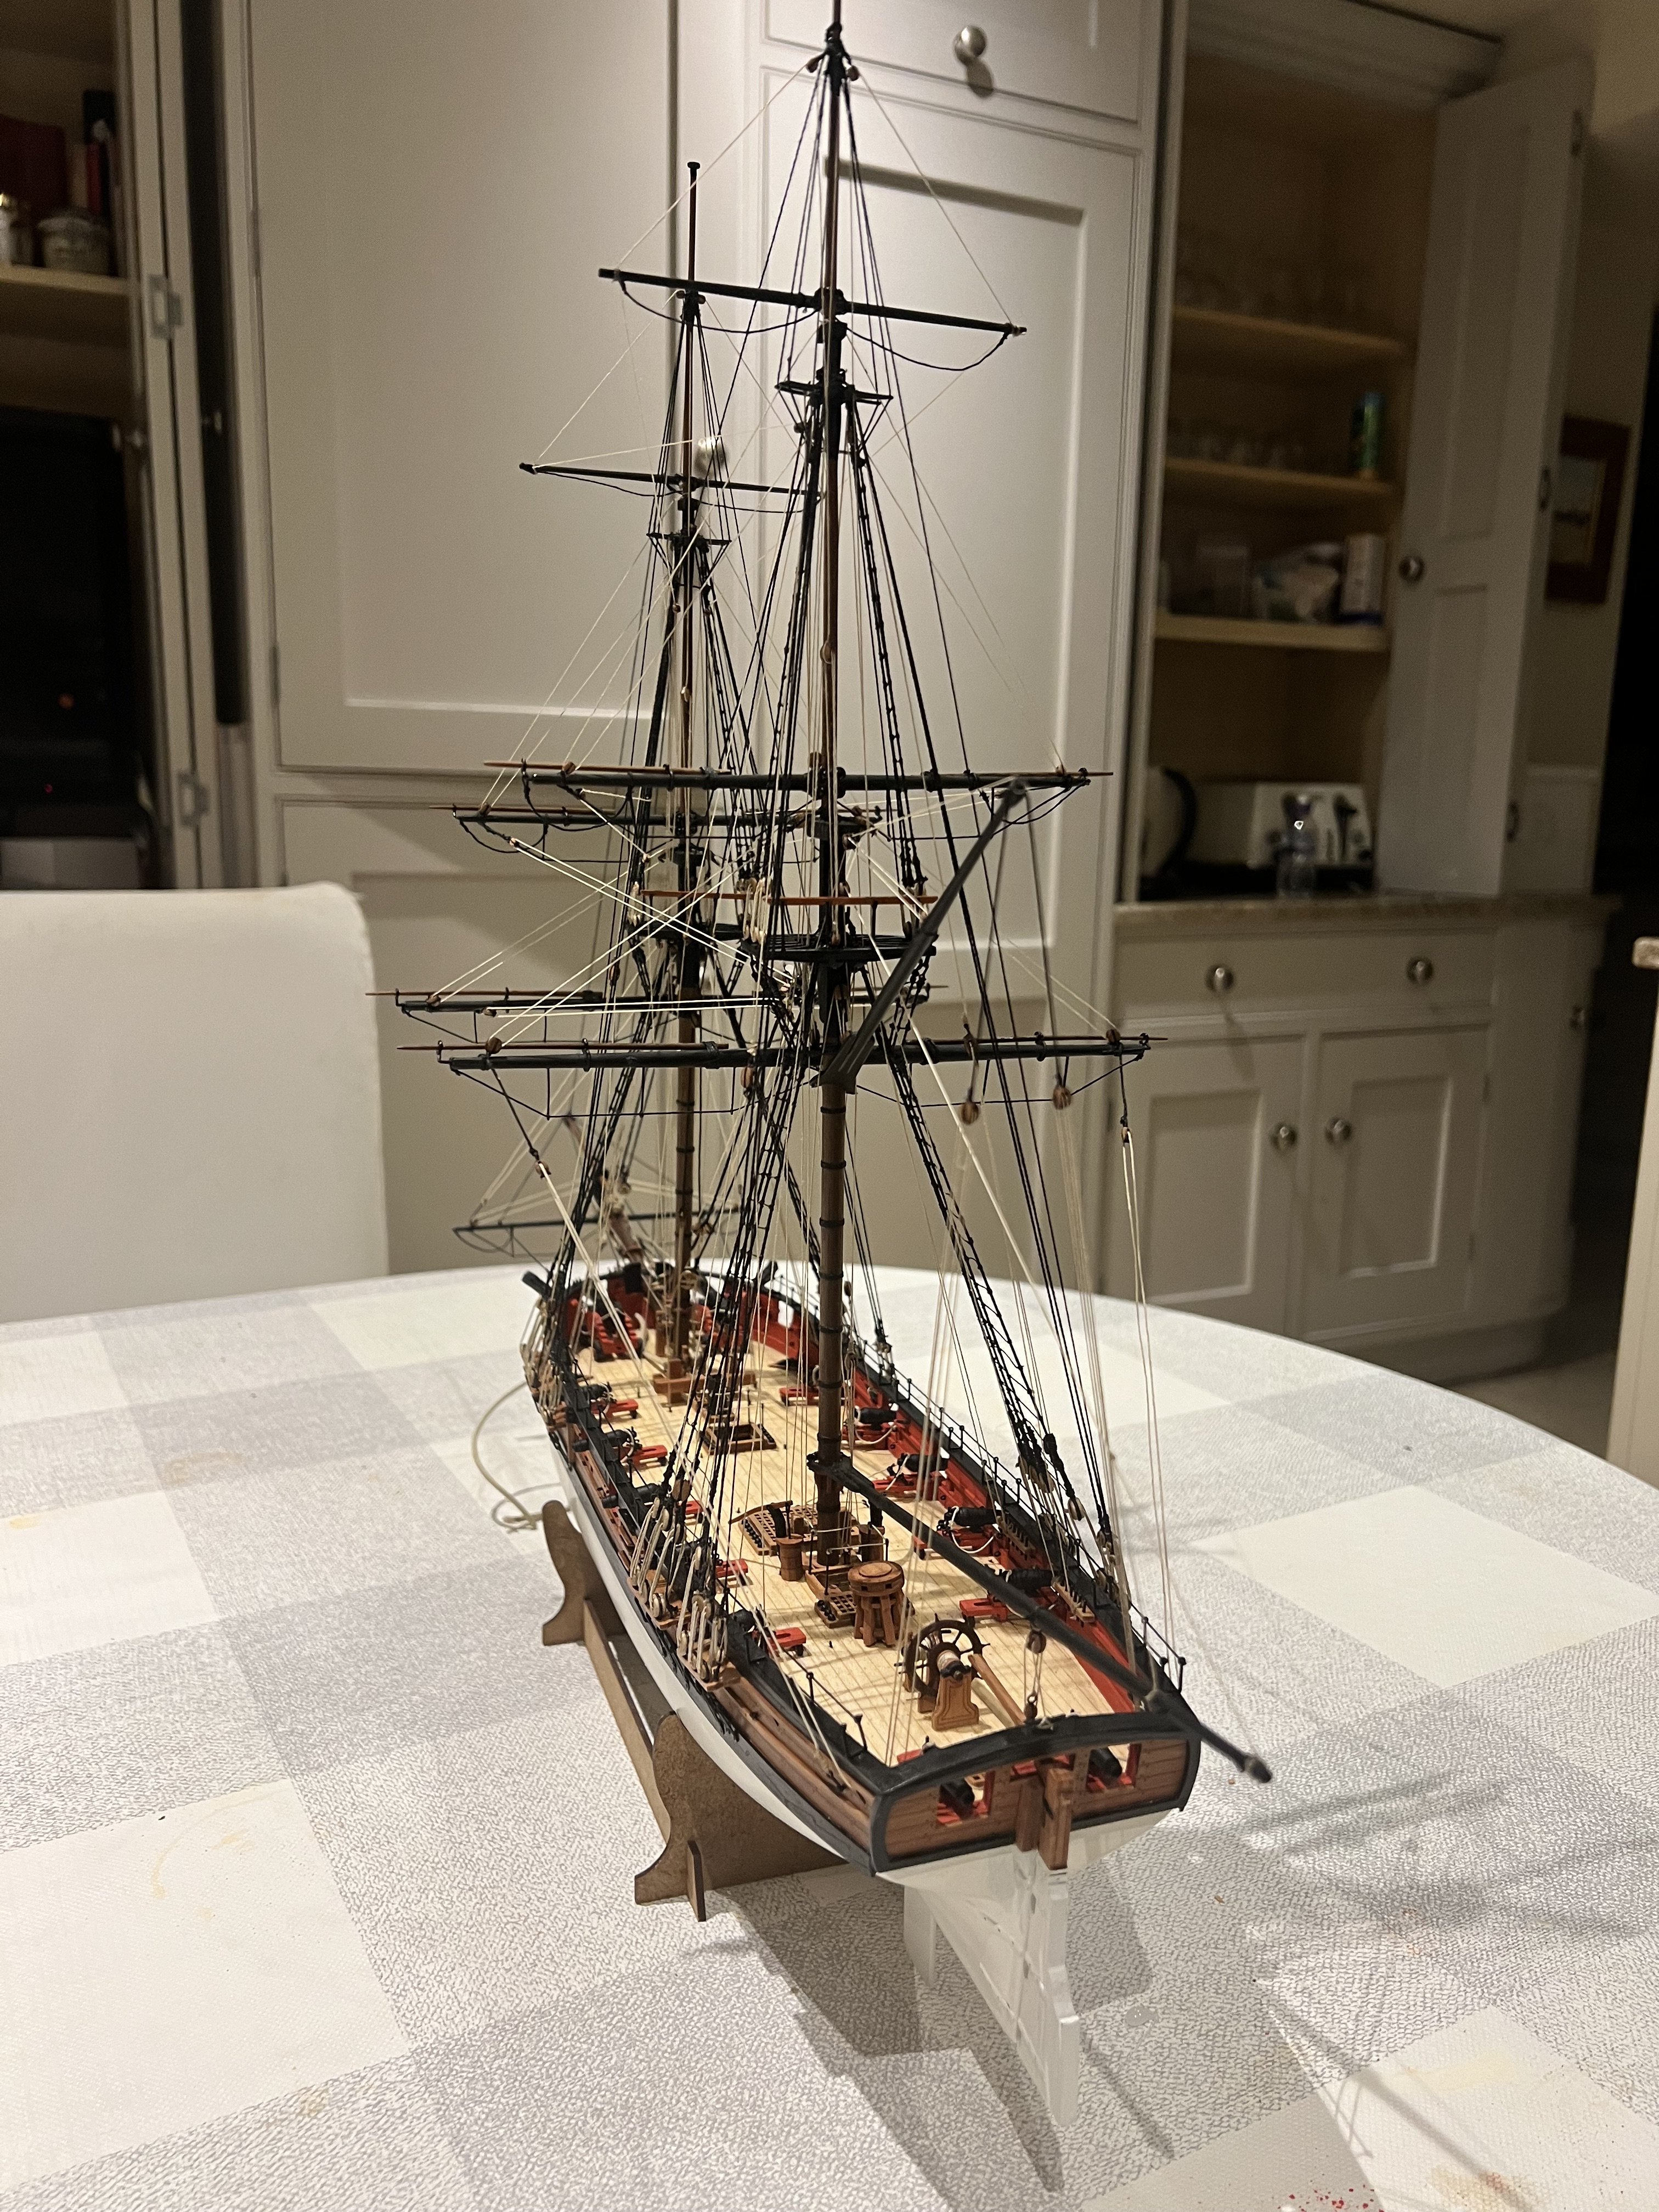
Started DoK last week. She’s another superb kit from Vanguard. The usual incredibly high standard of materials, plans and instructions as I’ve come to expect from Vanguard. This is my 10th boat and 10th kit from Vanguard. DoK is my first ship-rigged vessel and three-master.
I haven’t shown the kit opening and contents as lots of others have already done so. There’s lots of excellent build logs for DoK from much more experienced builders so not sure this one will add much.
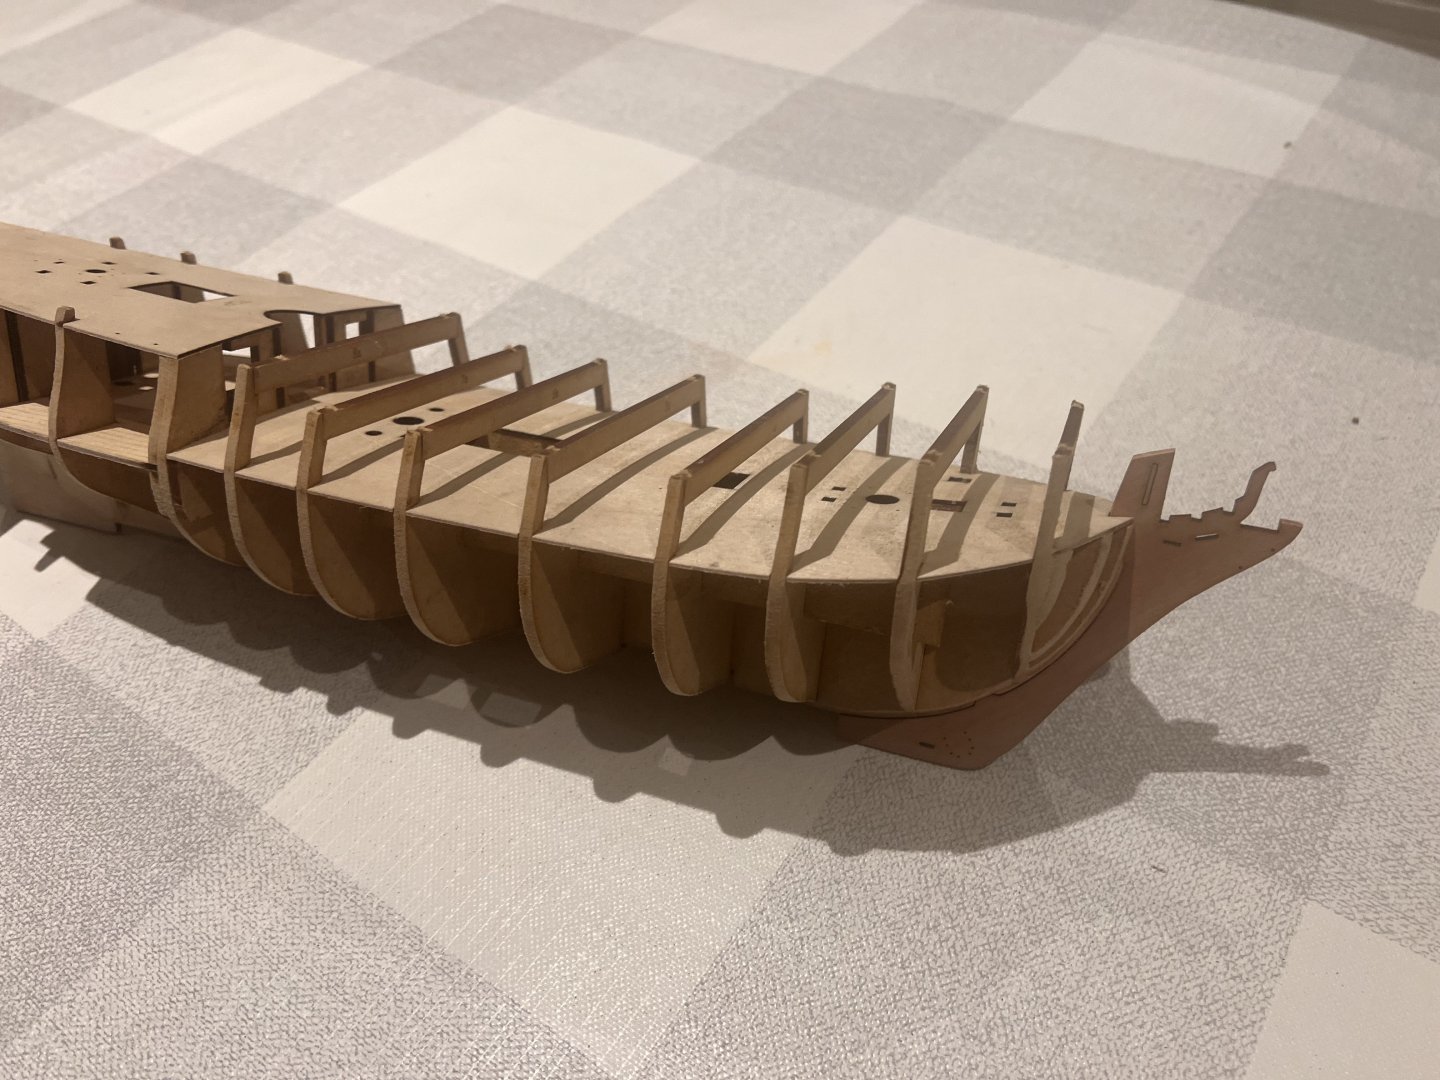
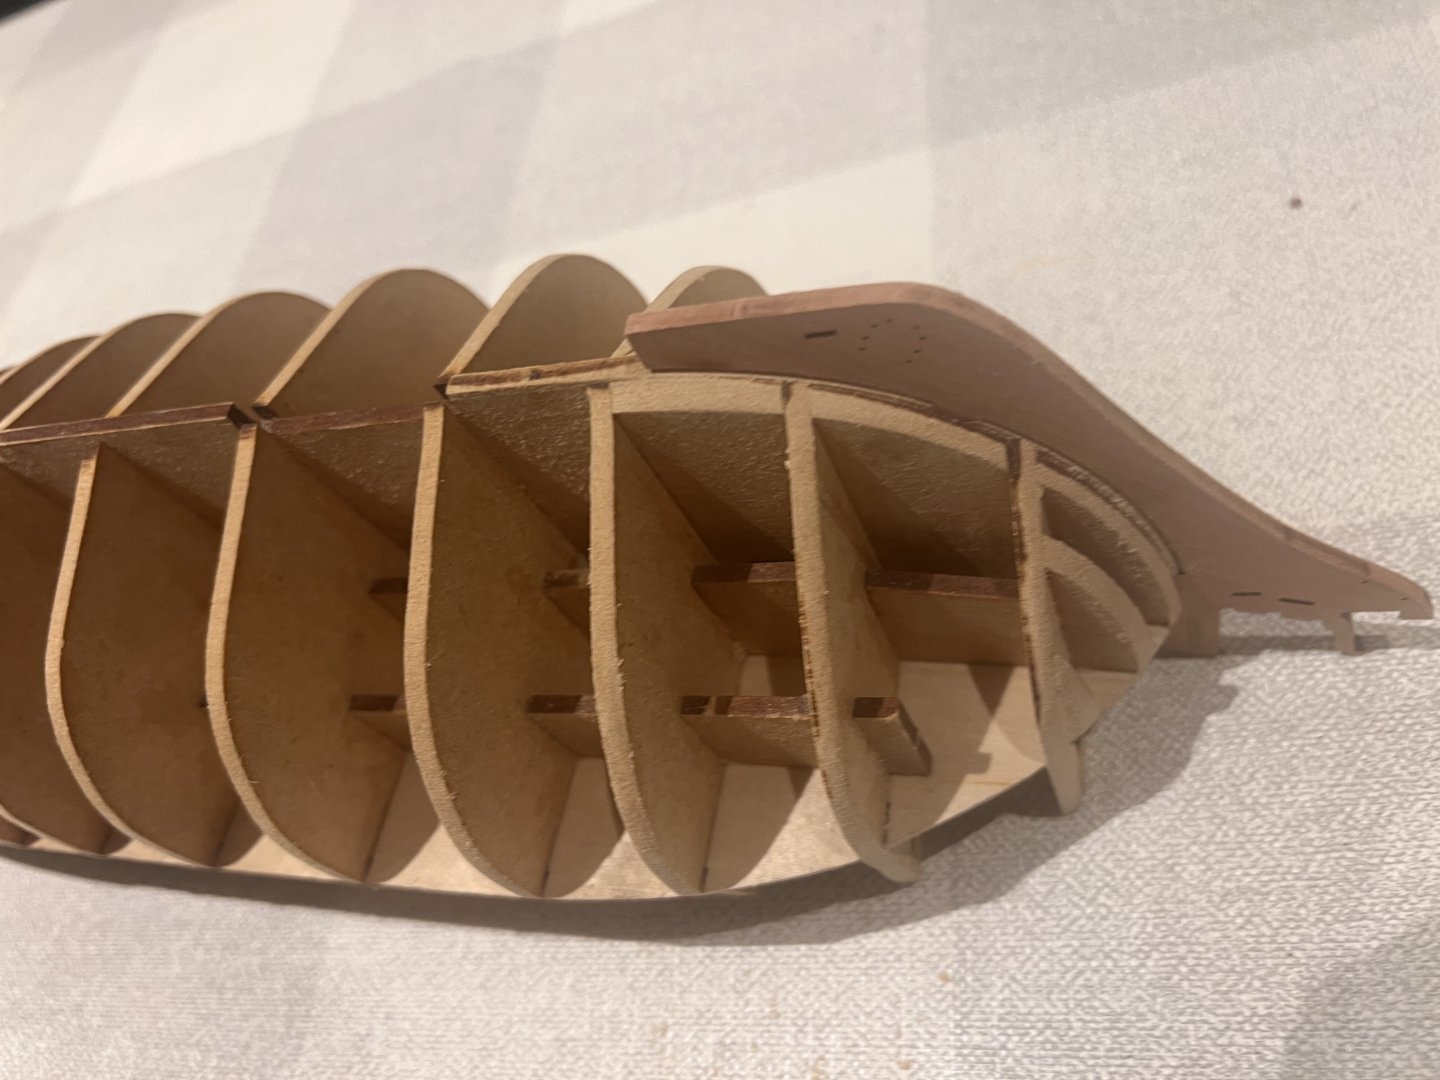
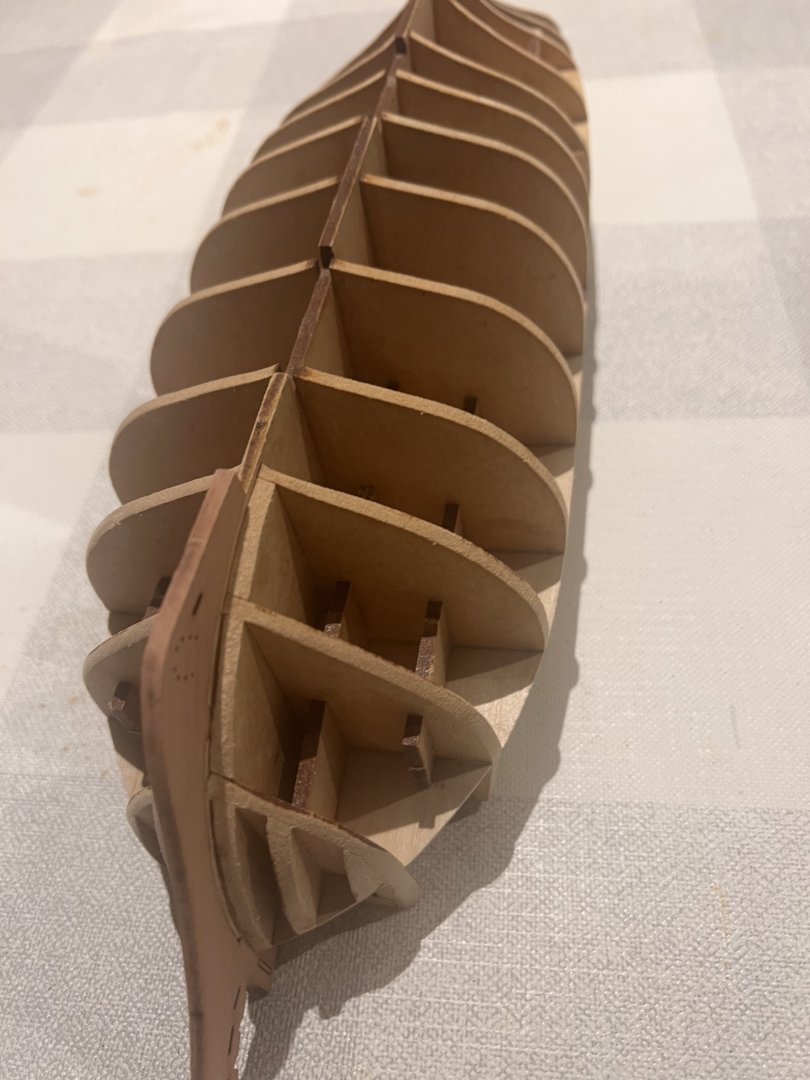
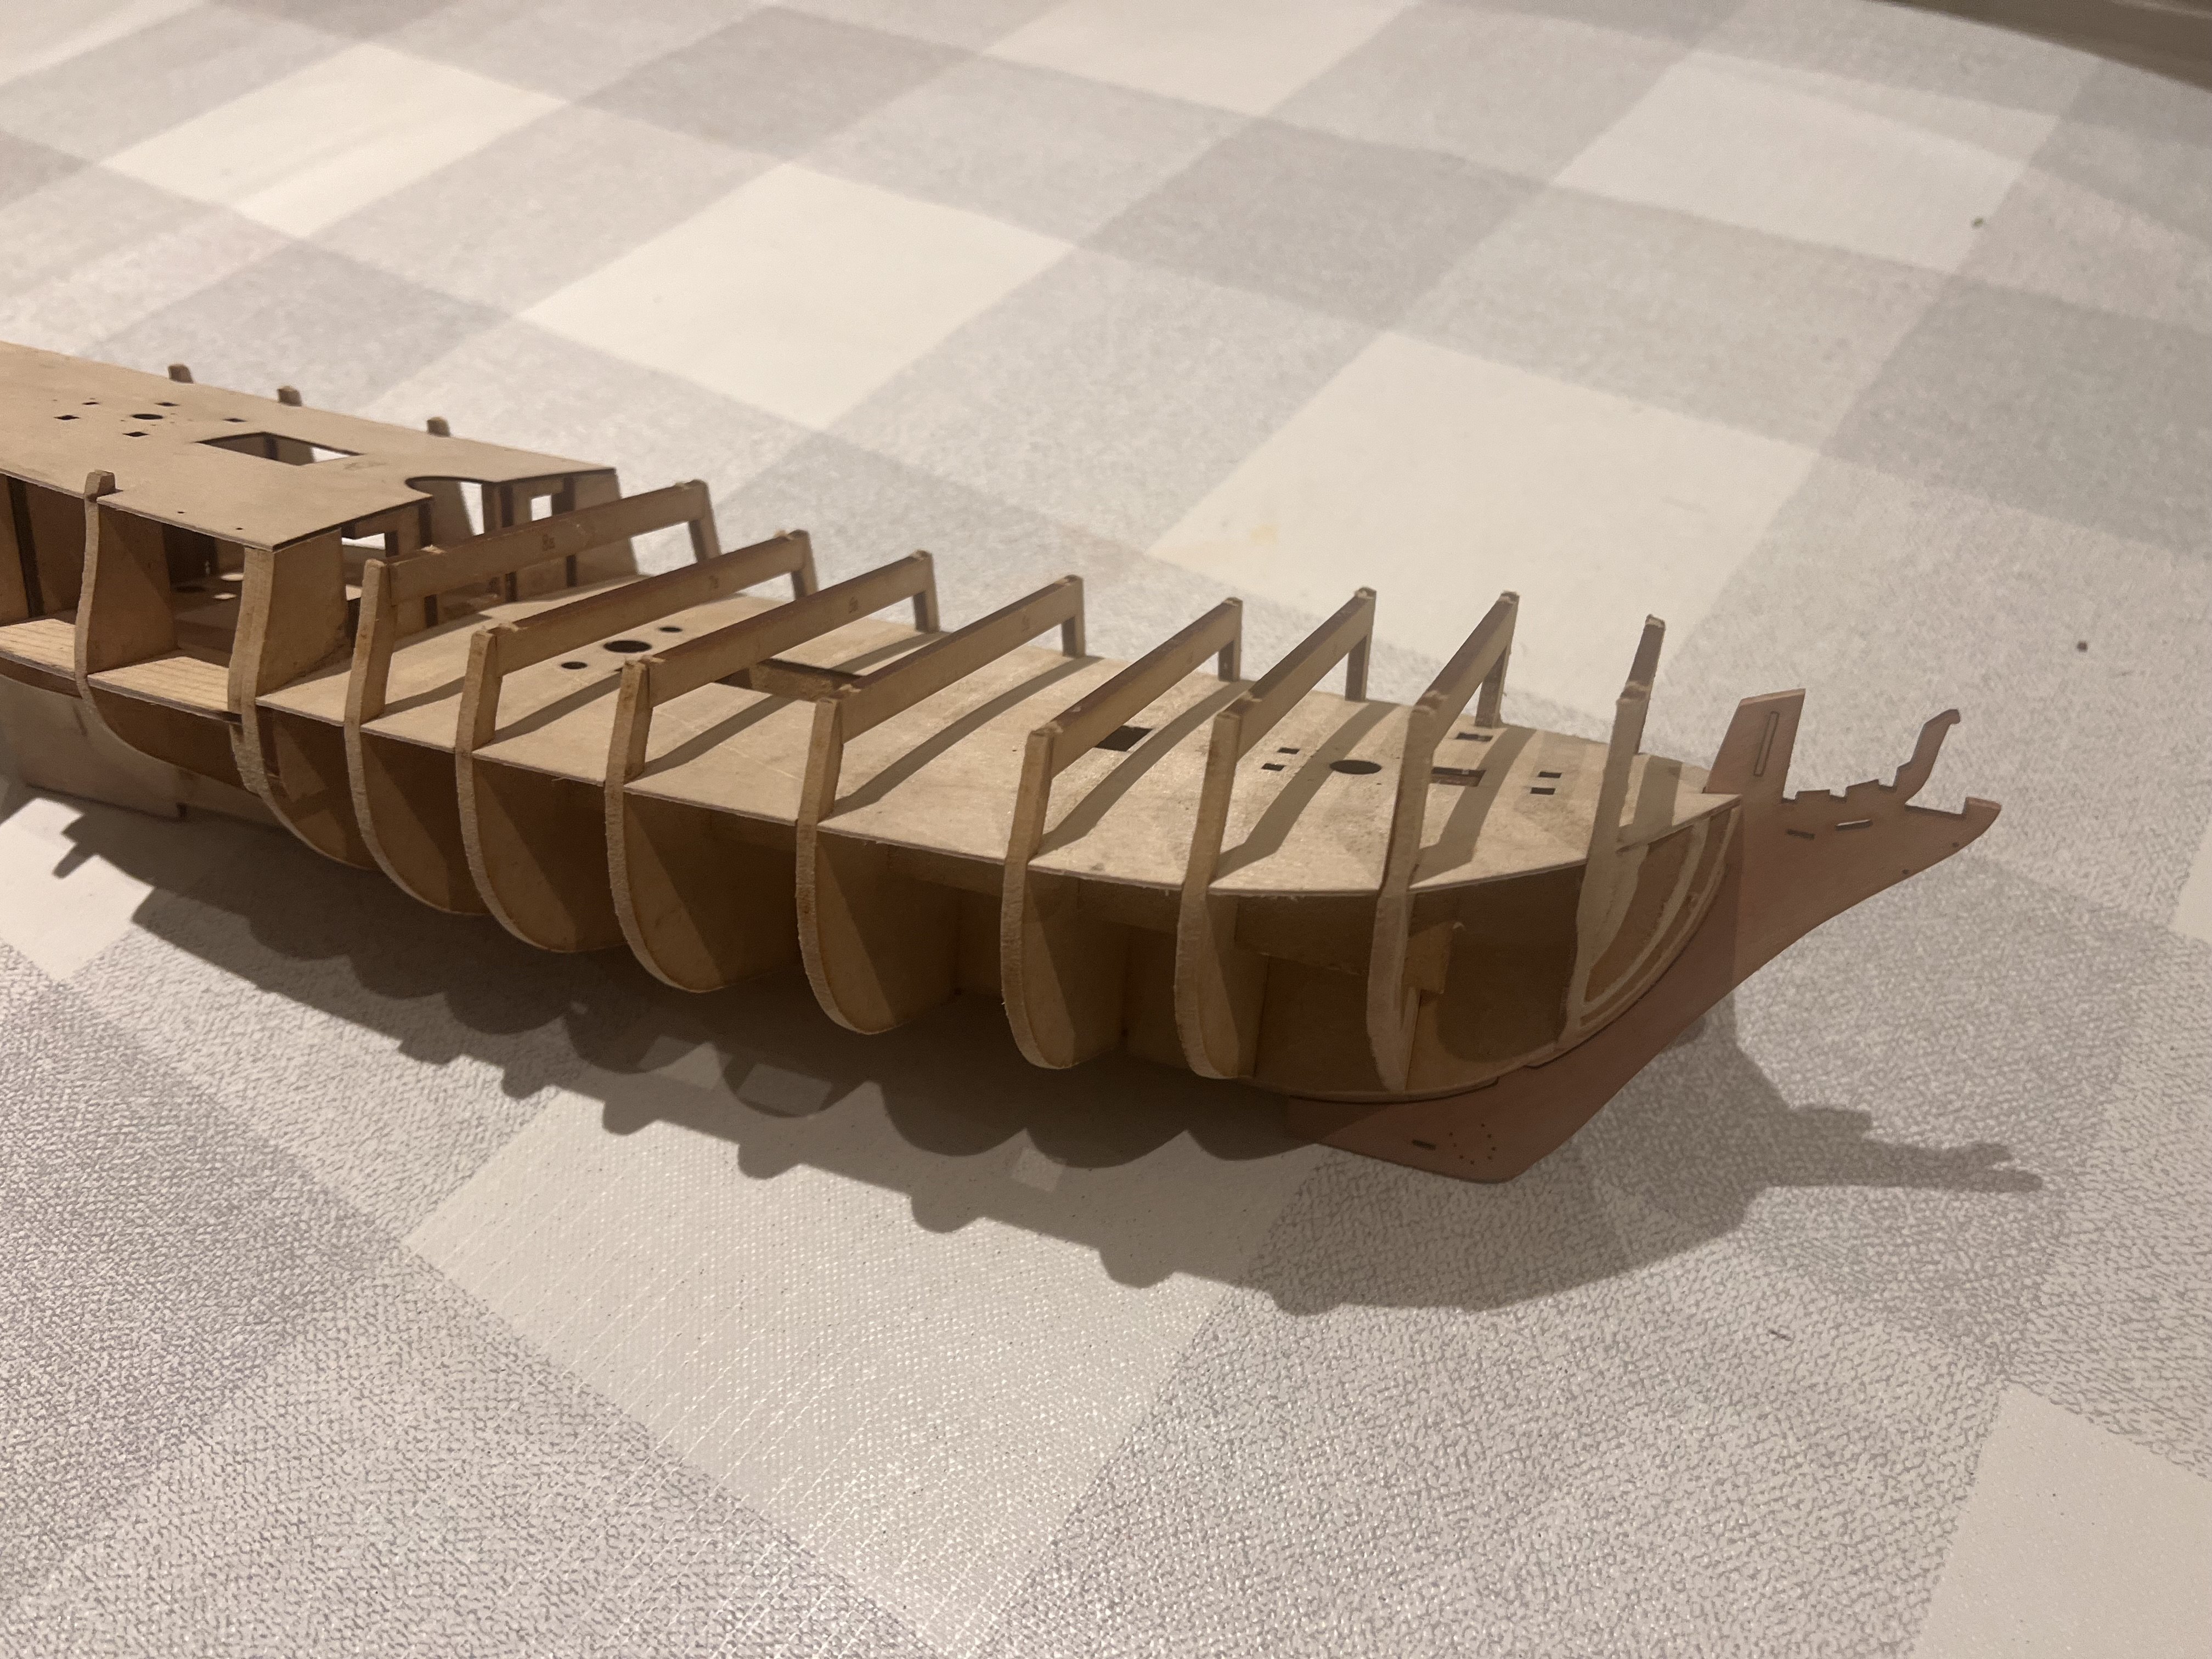
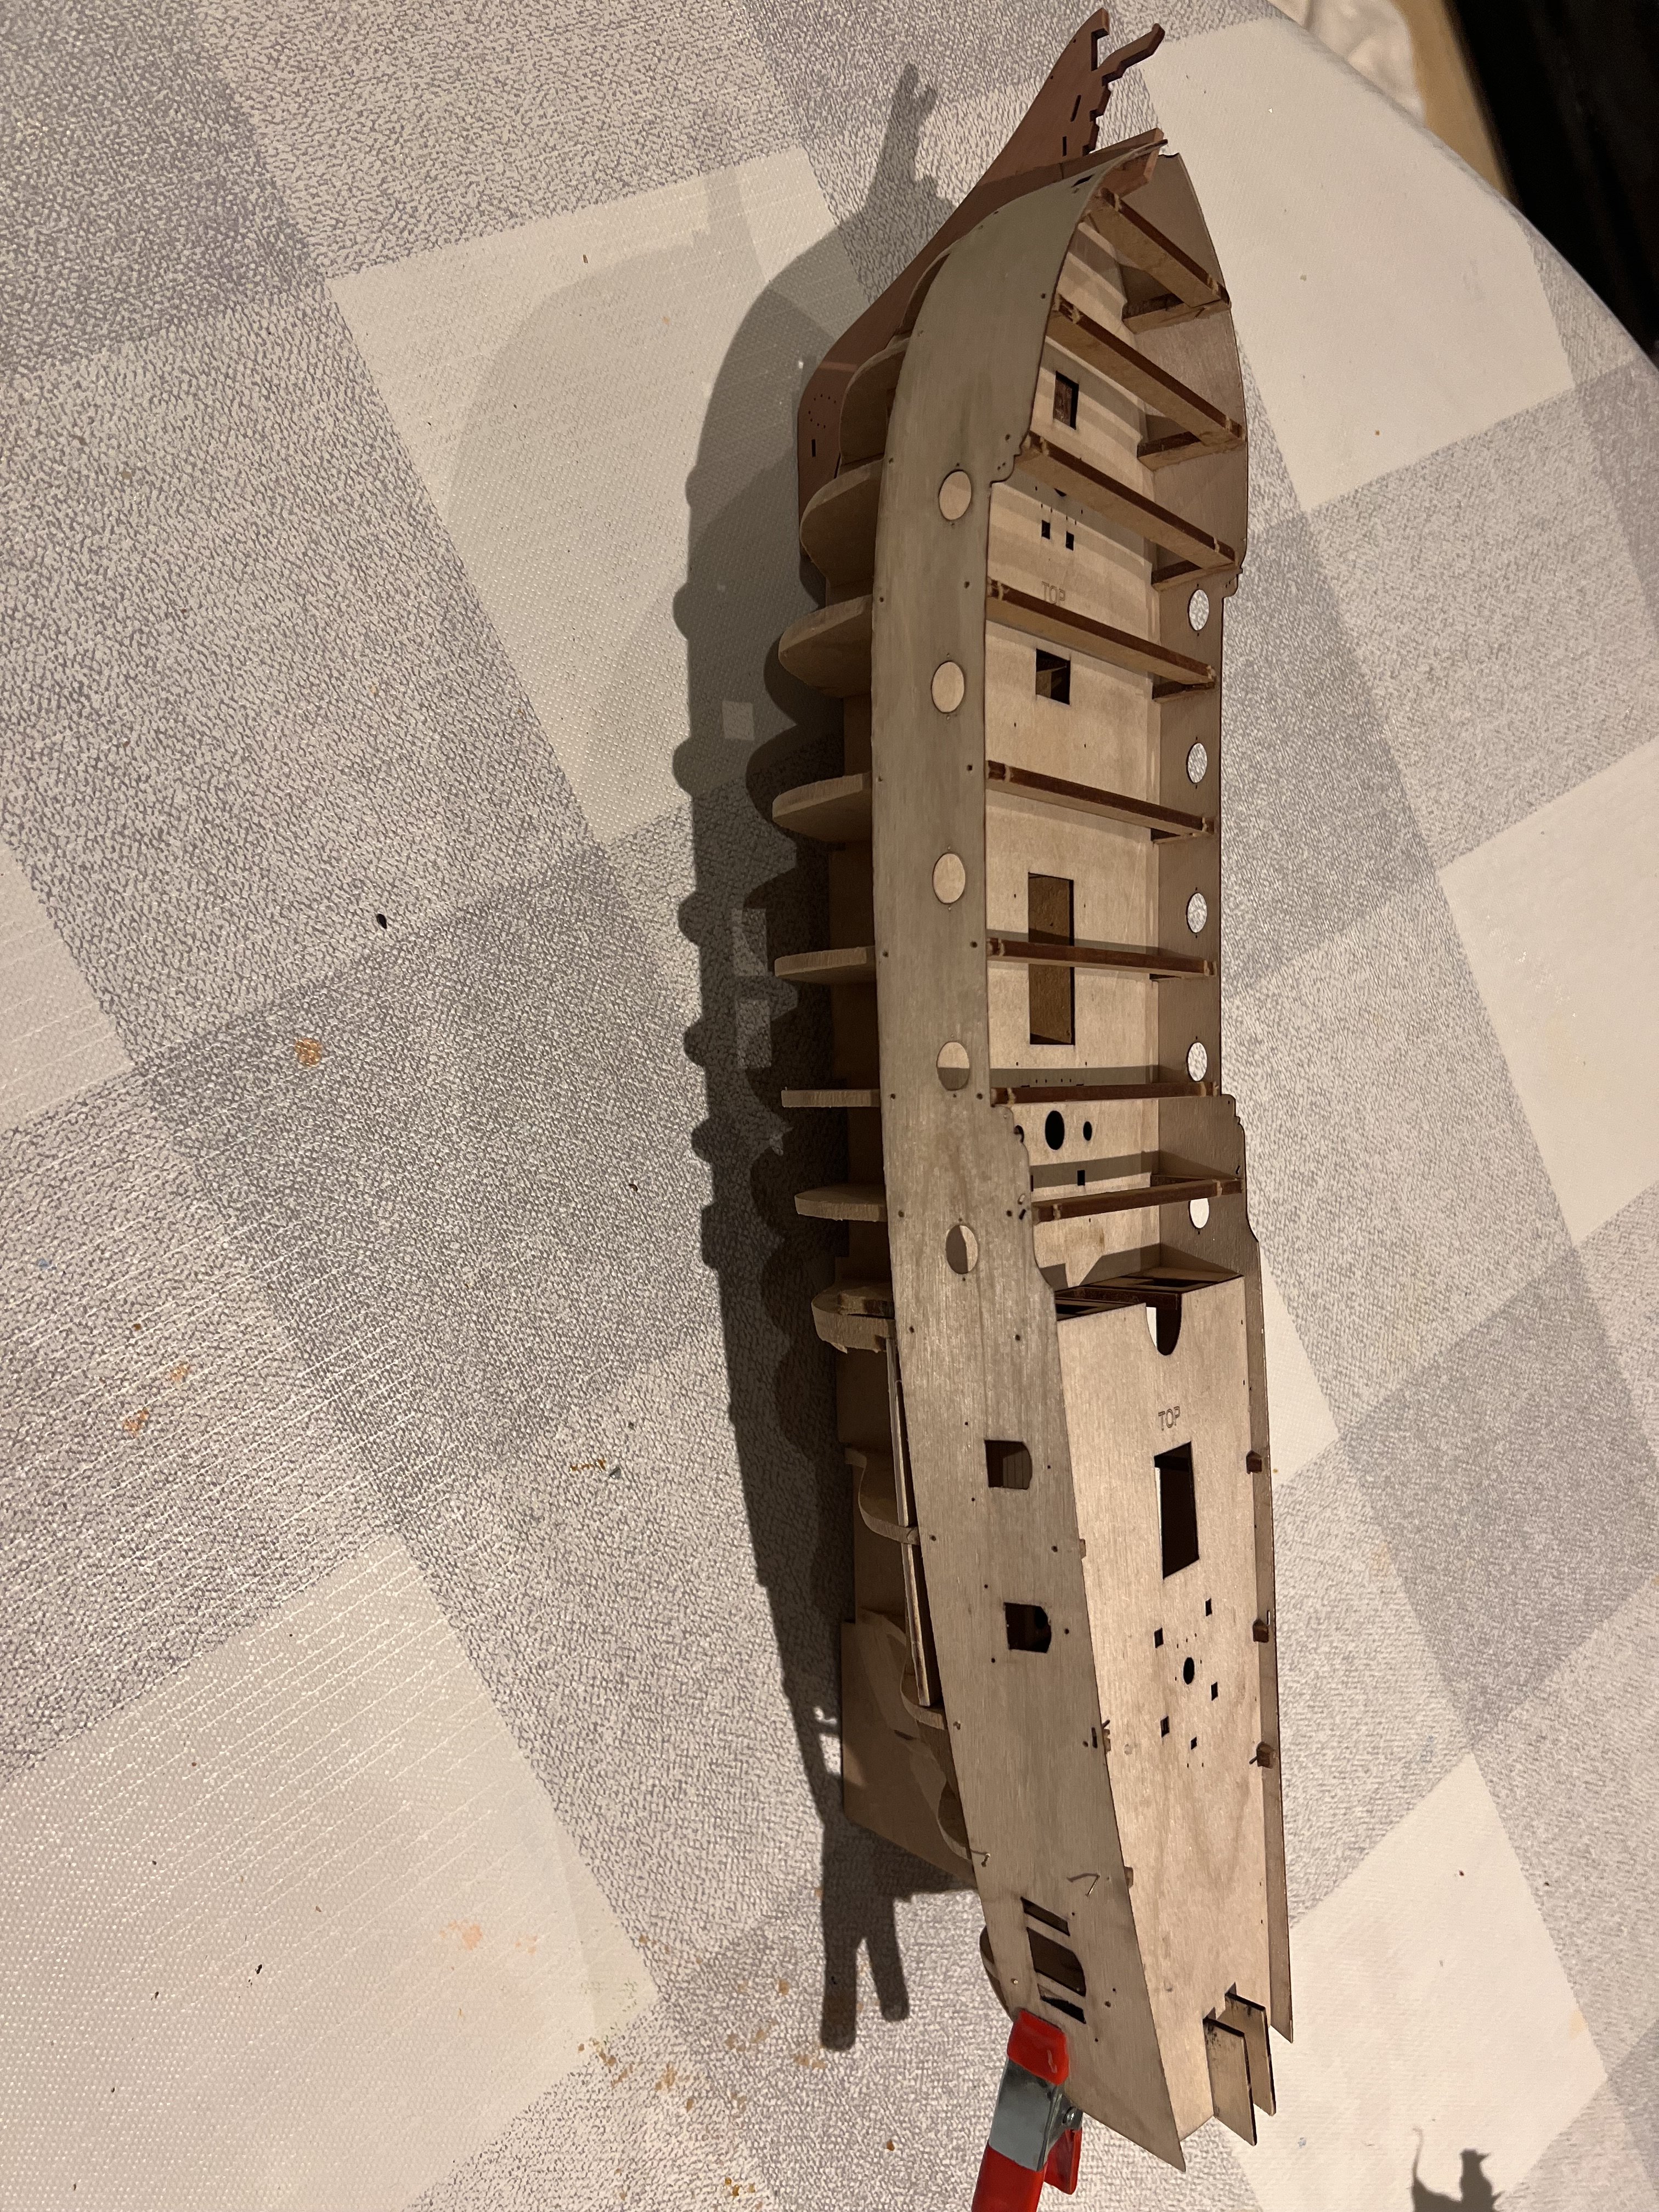
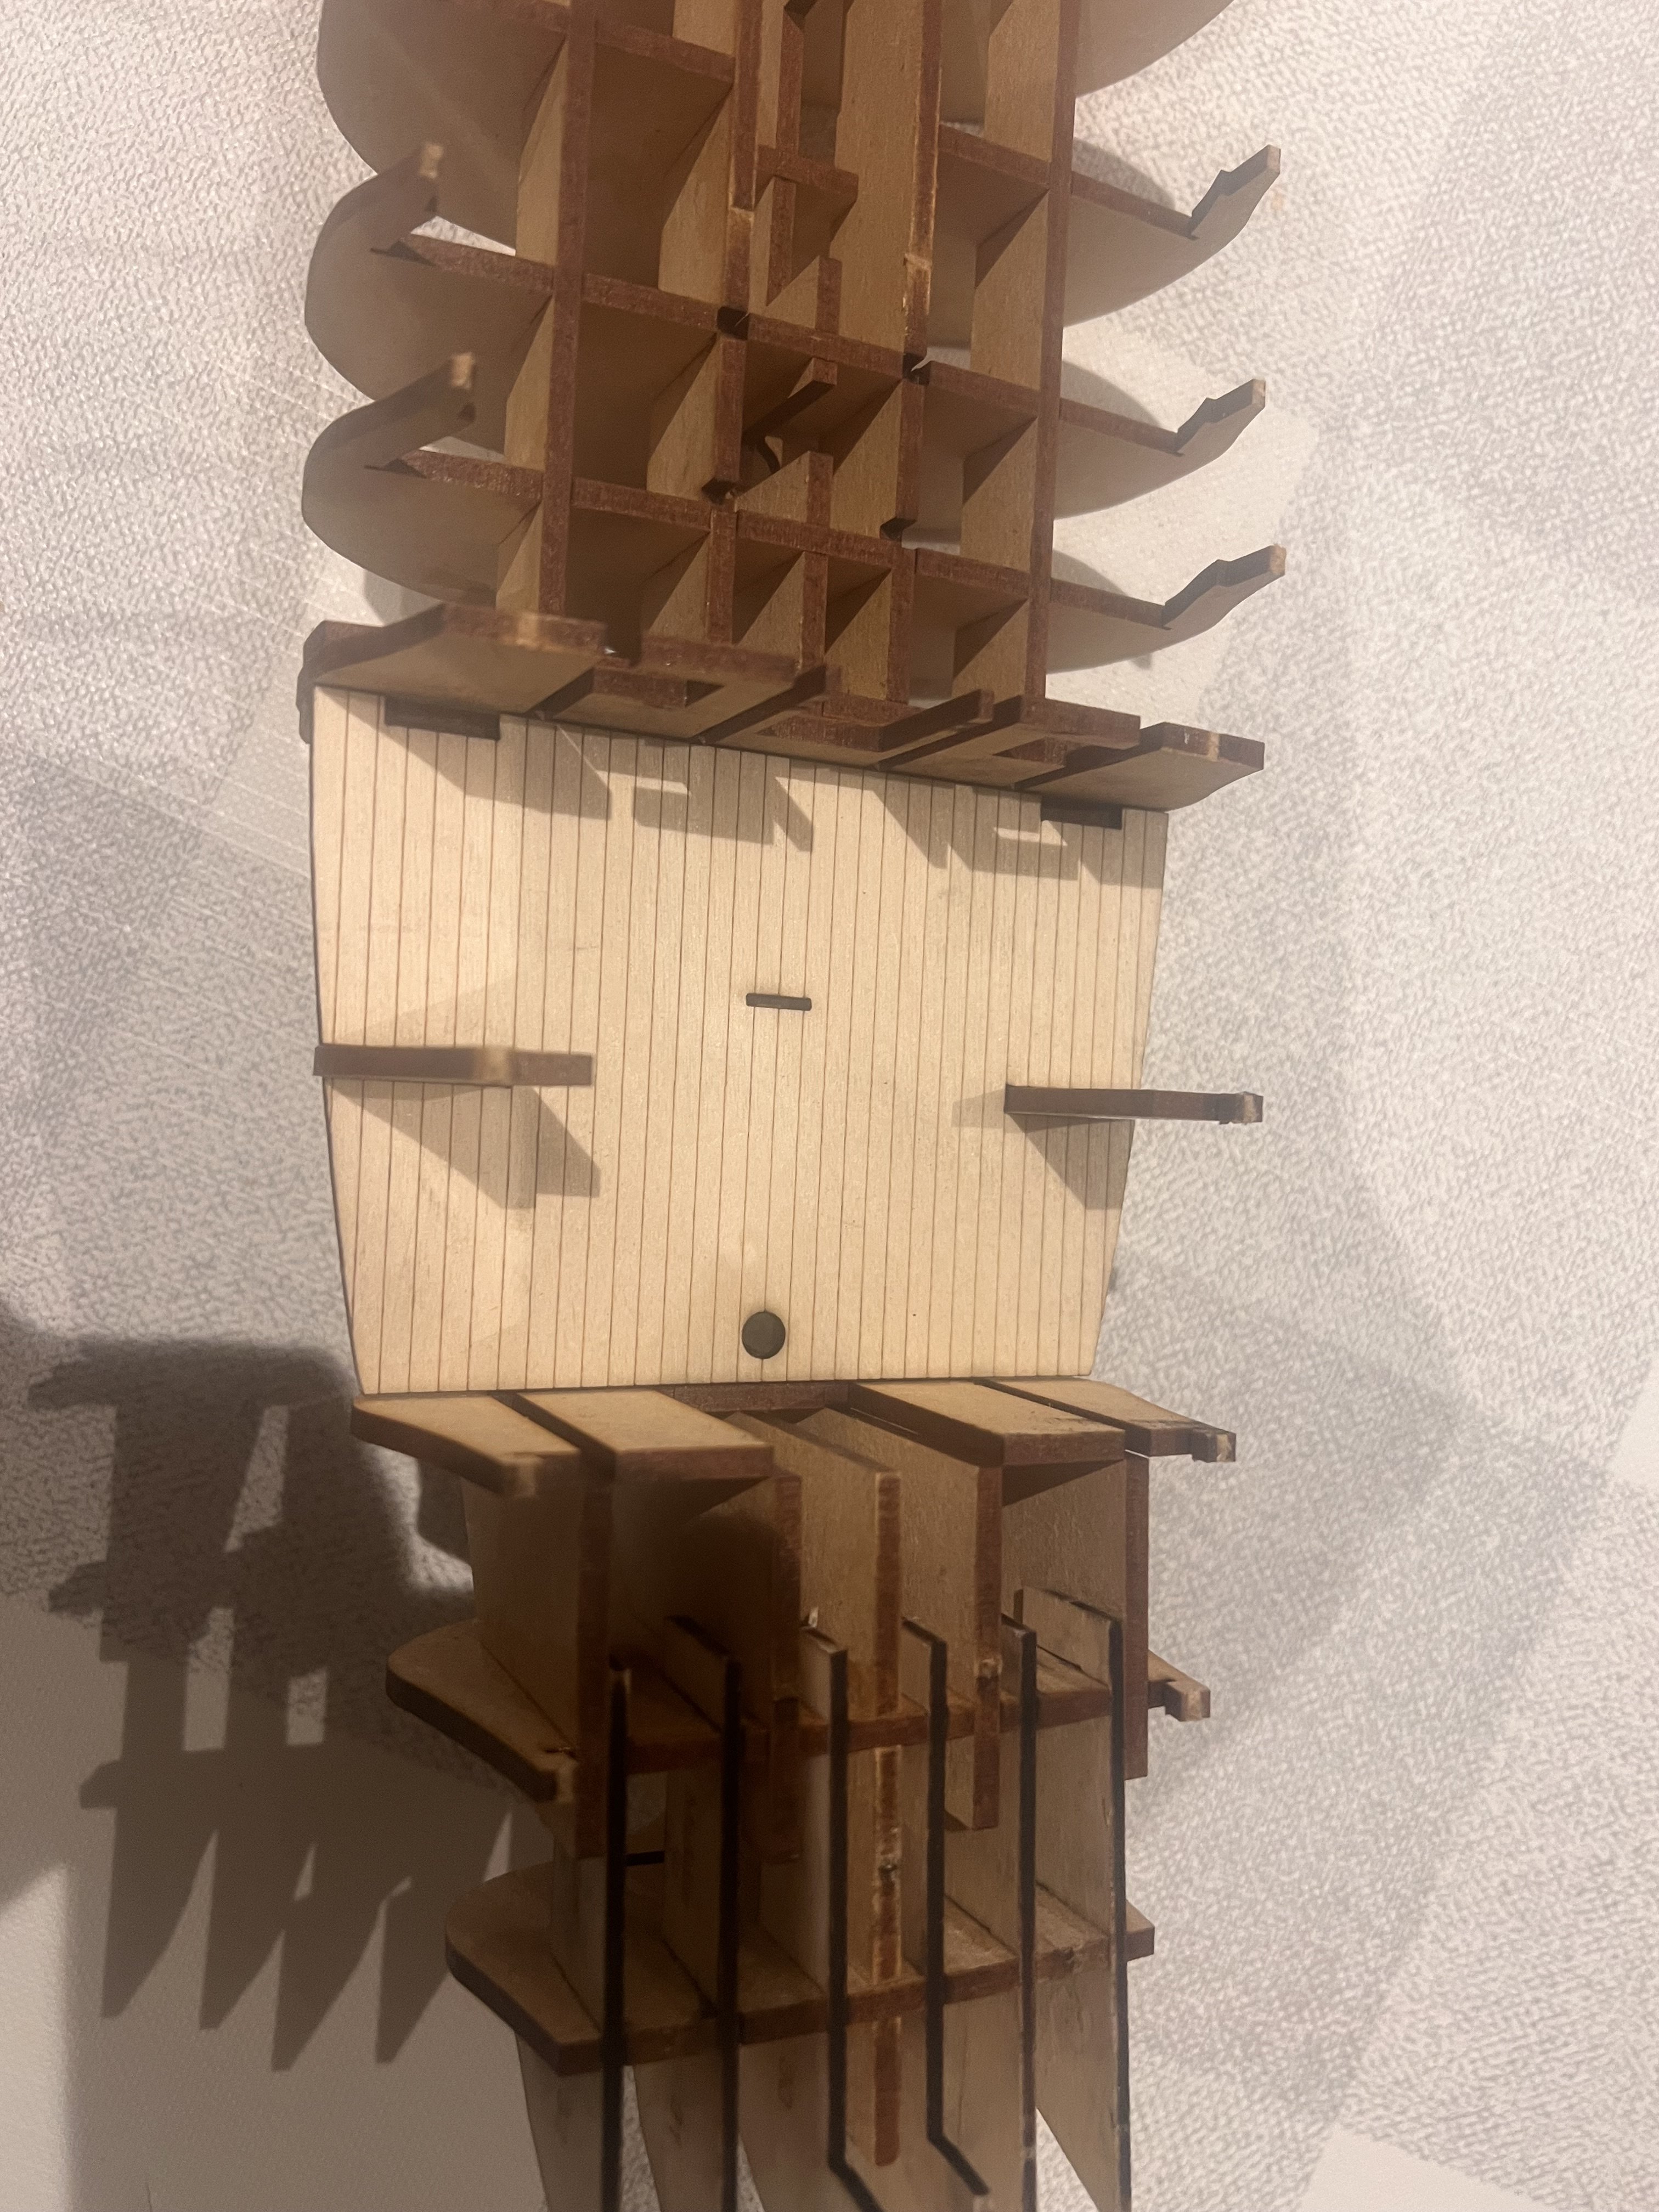
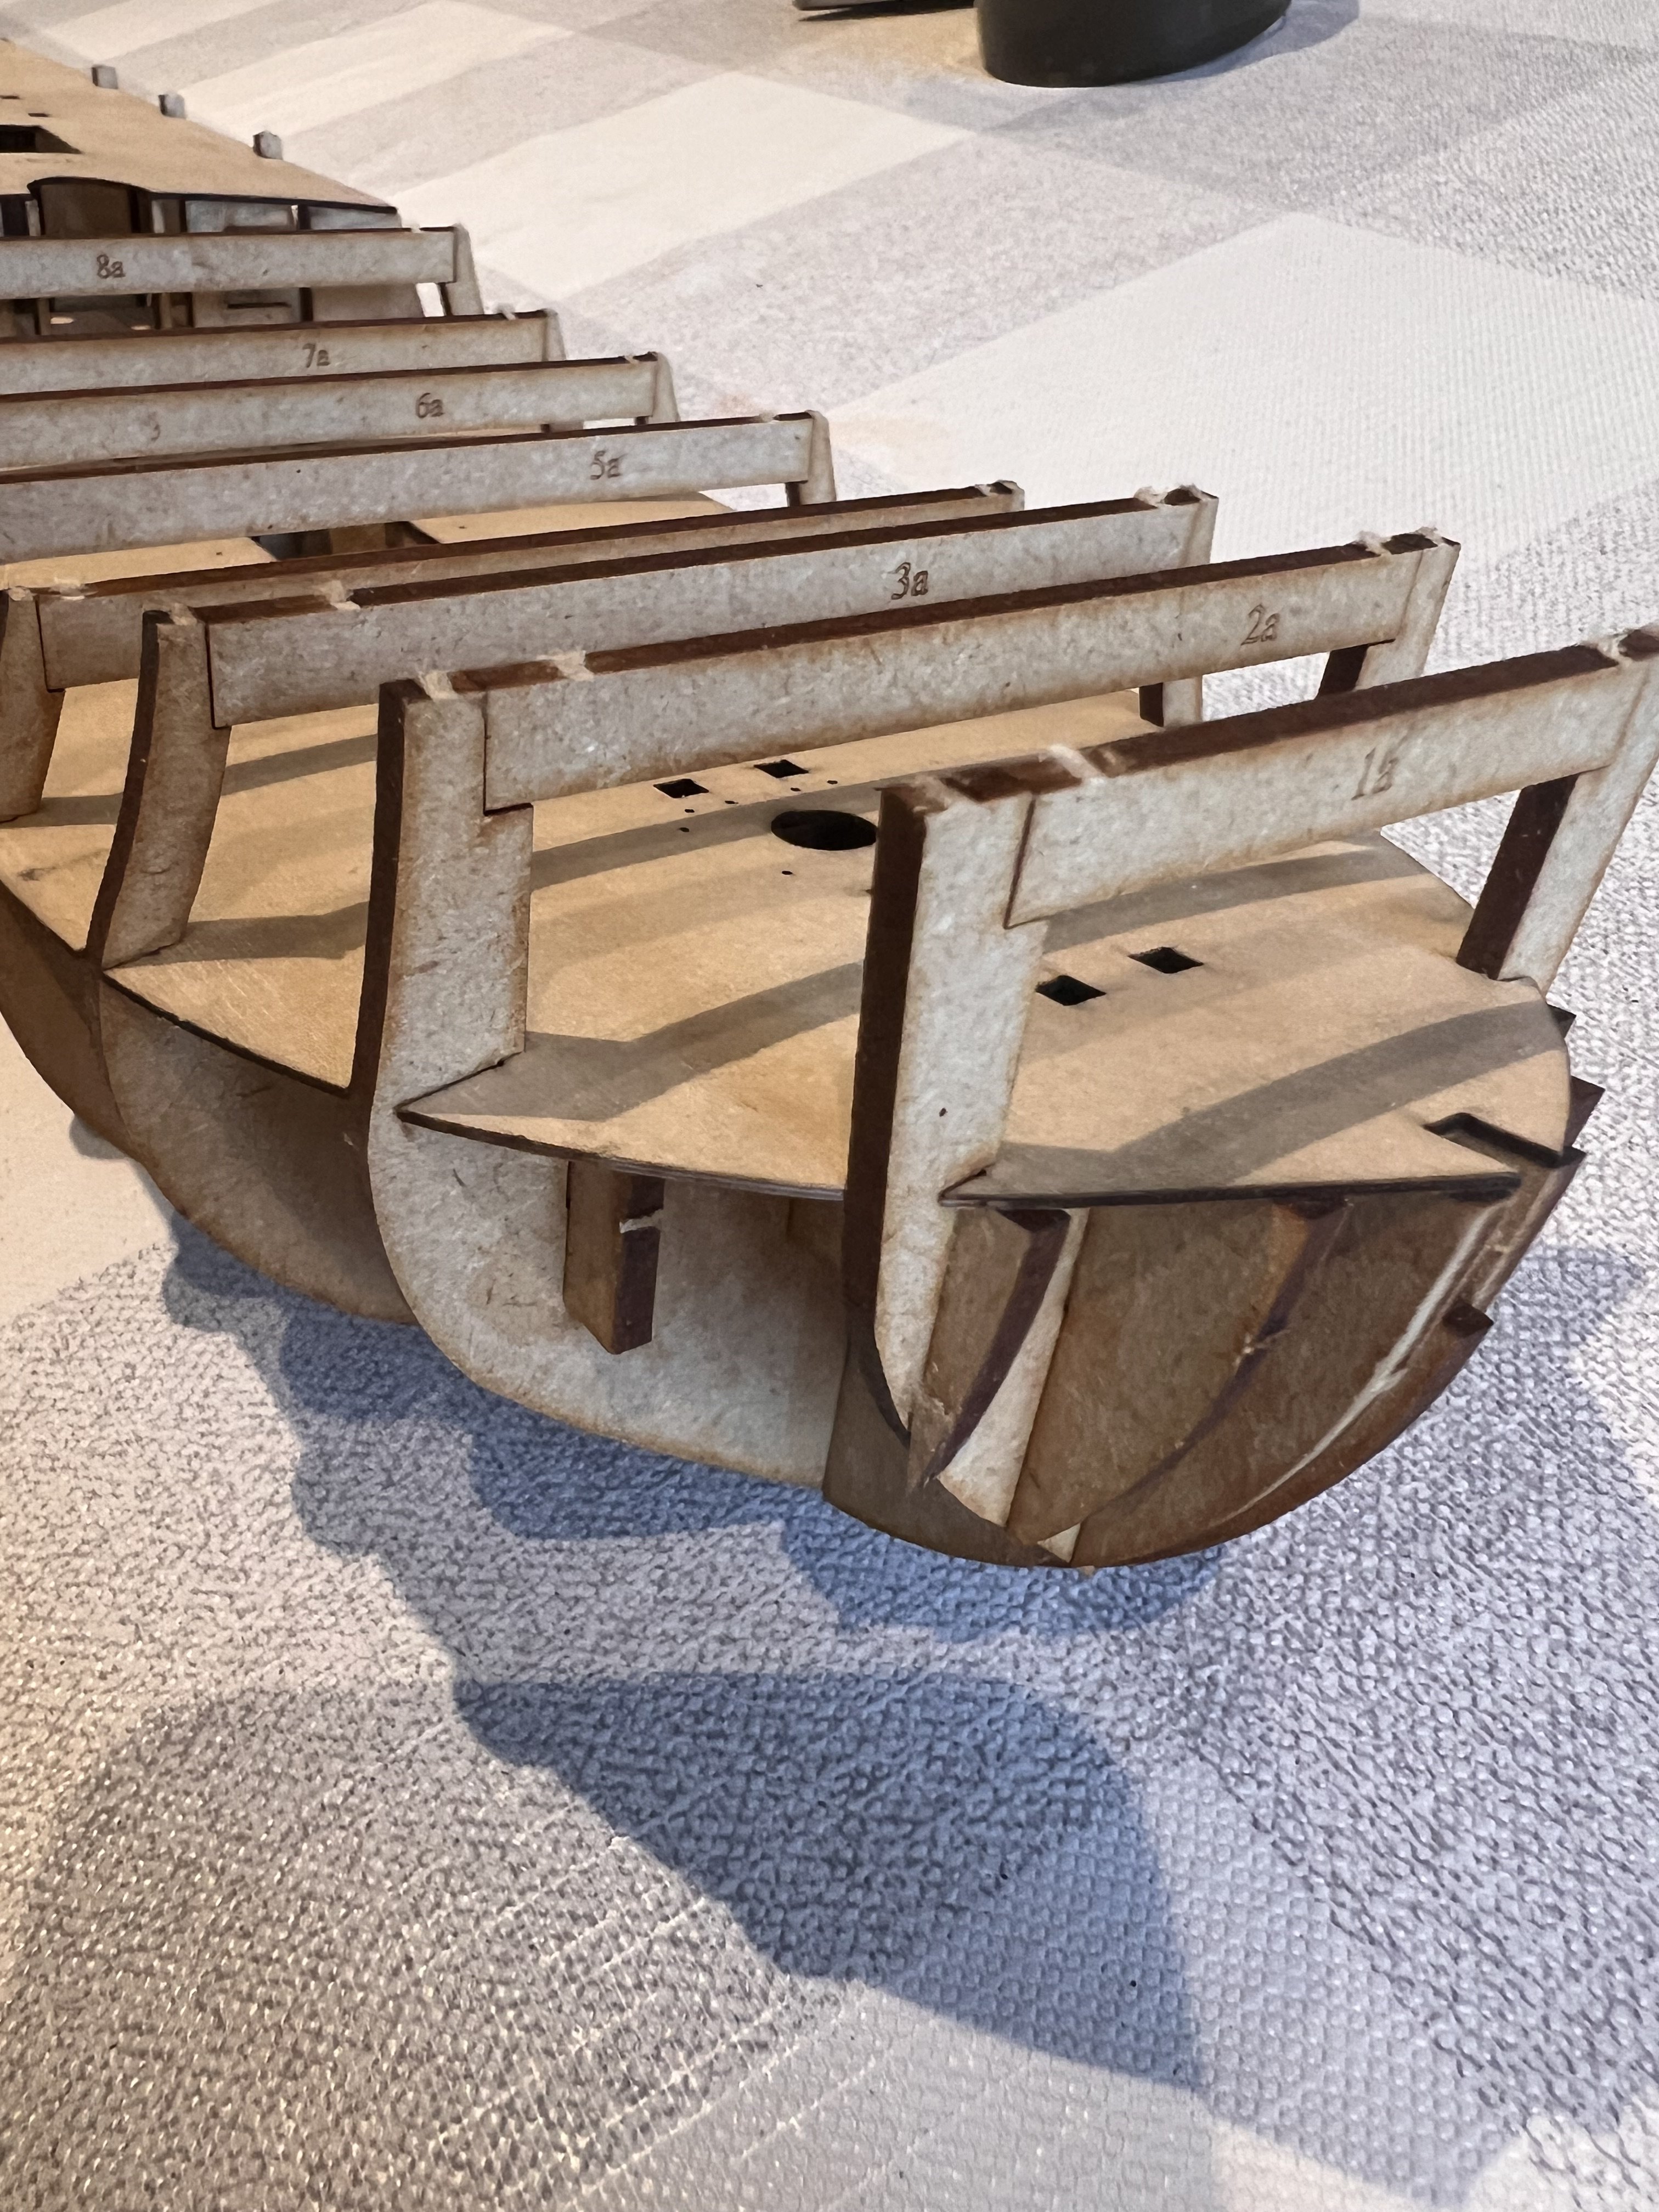
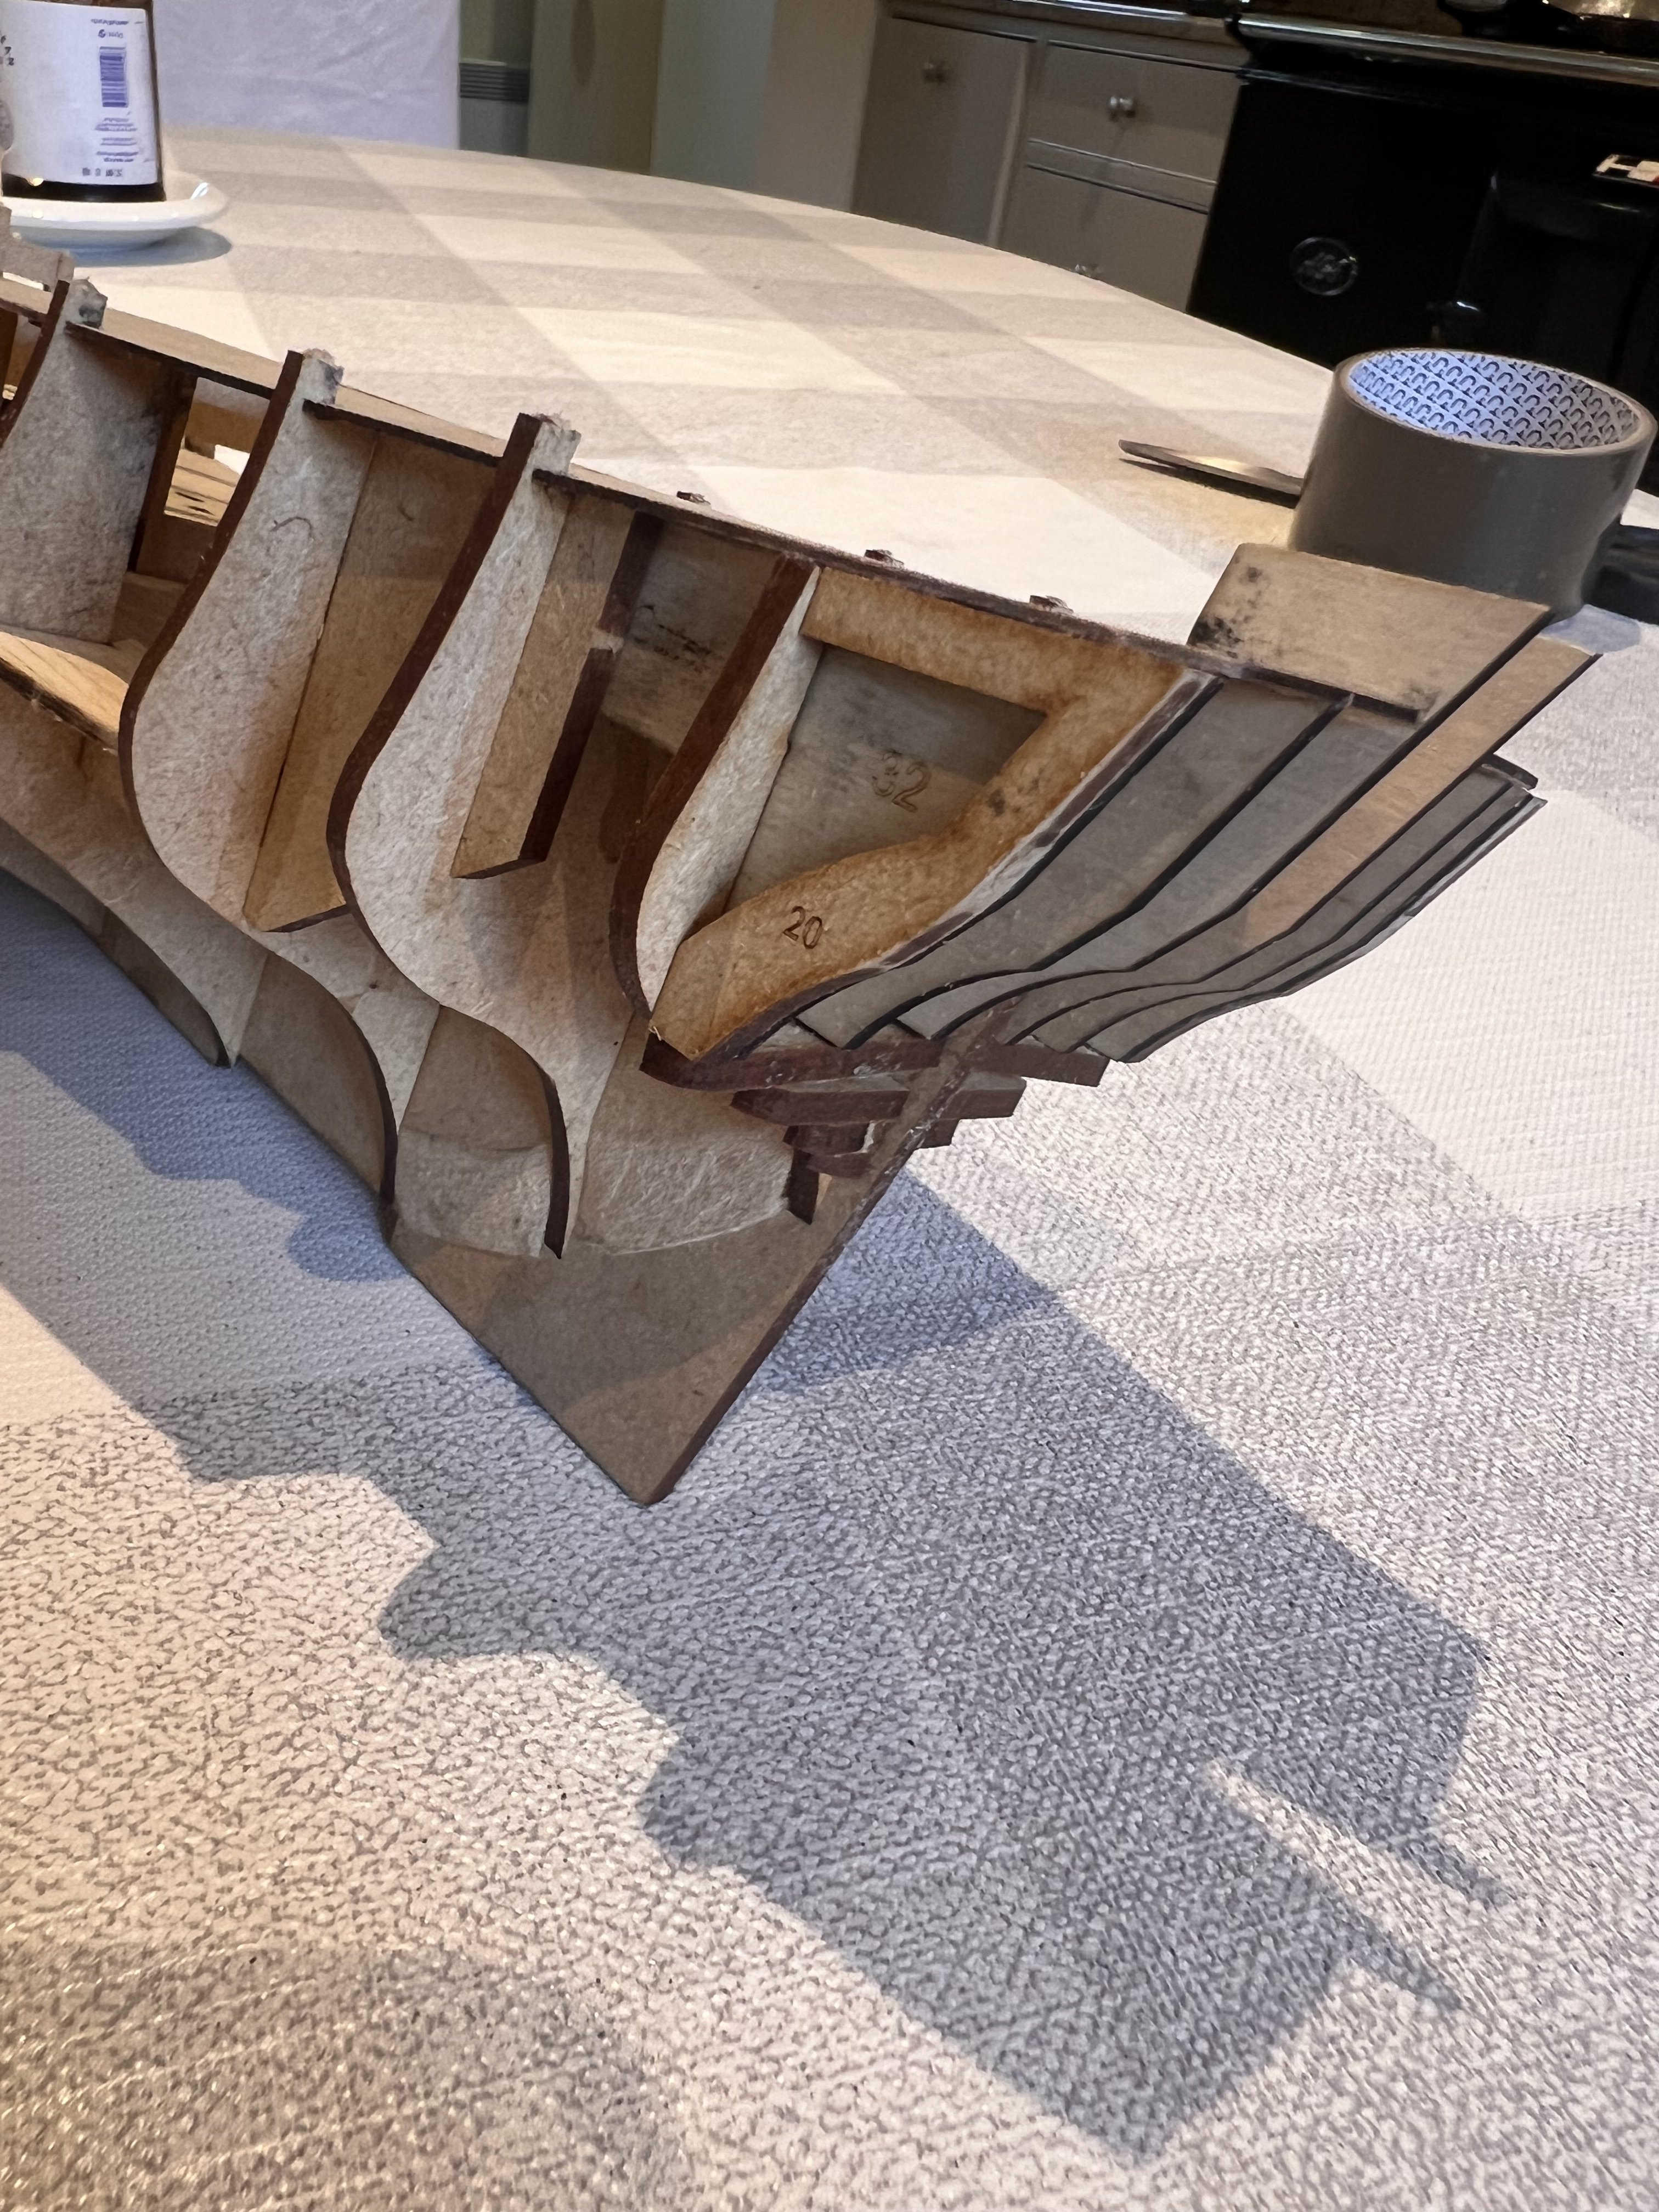
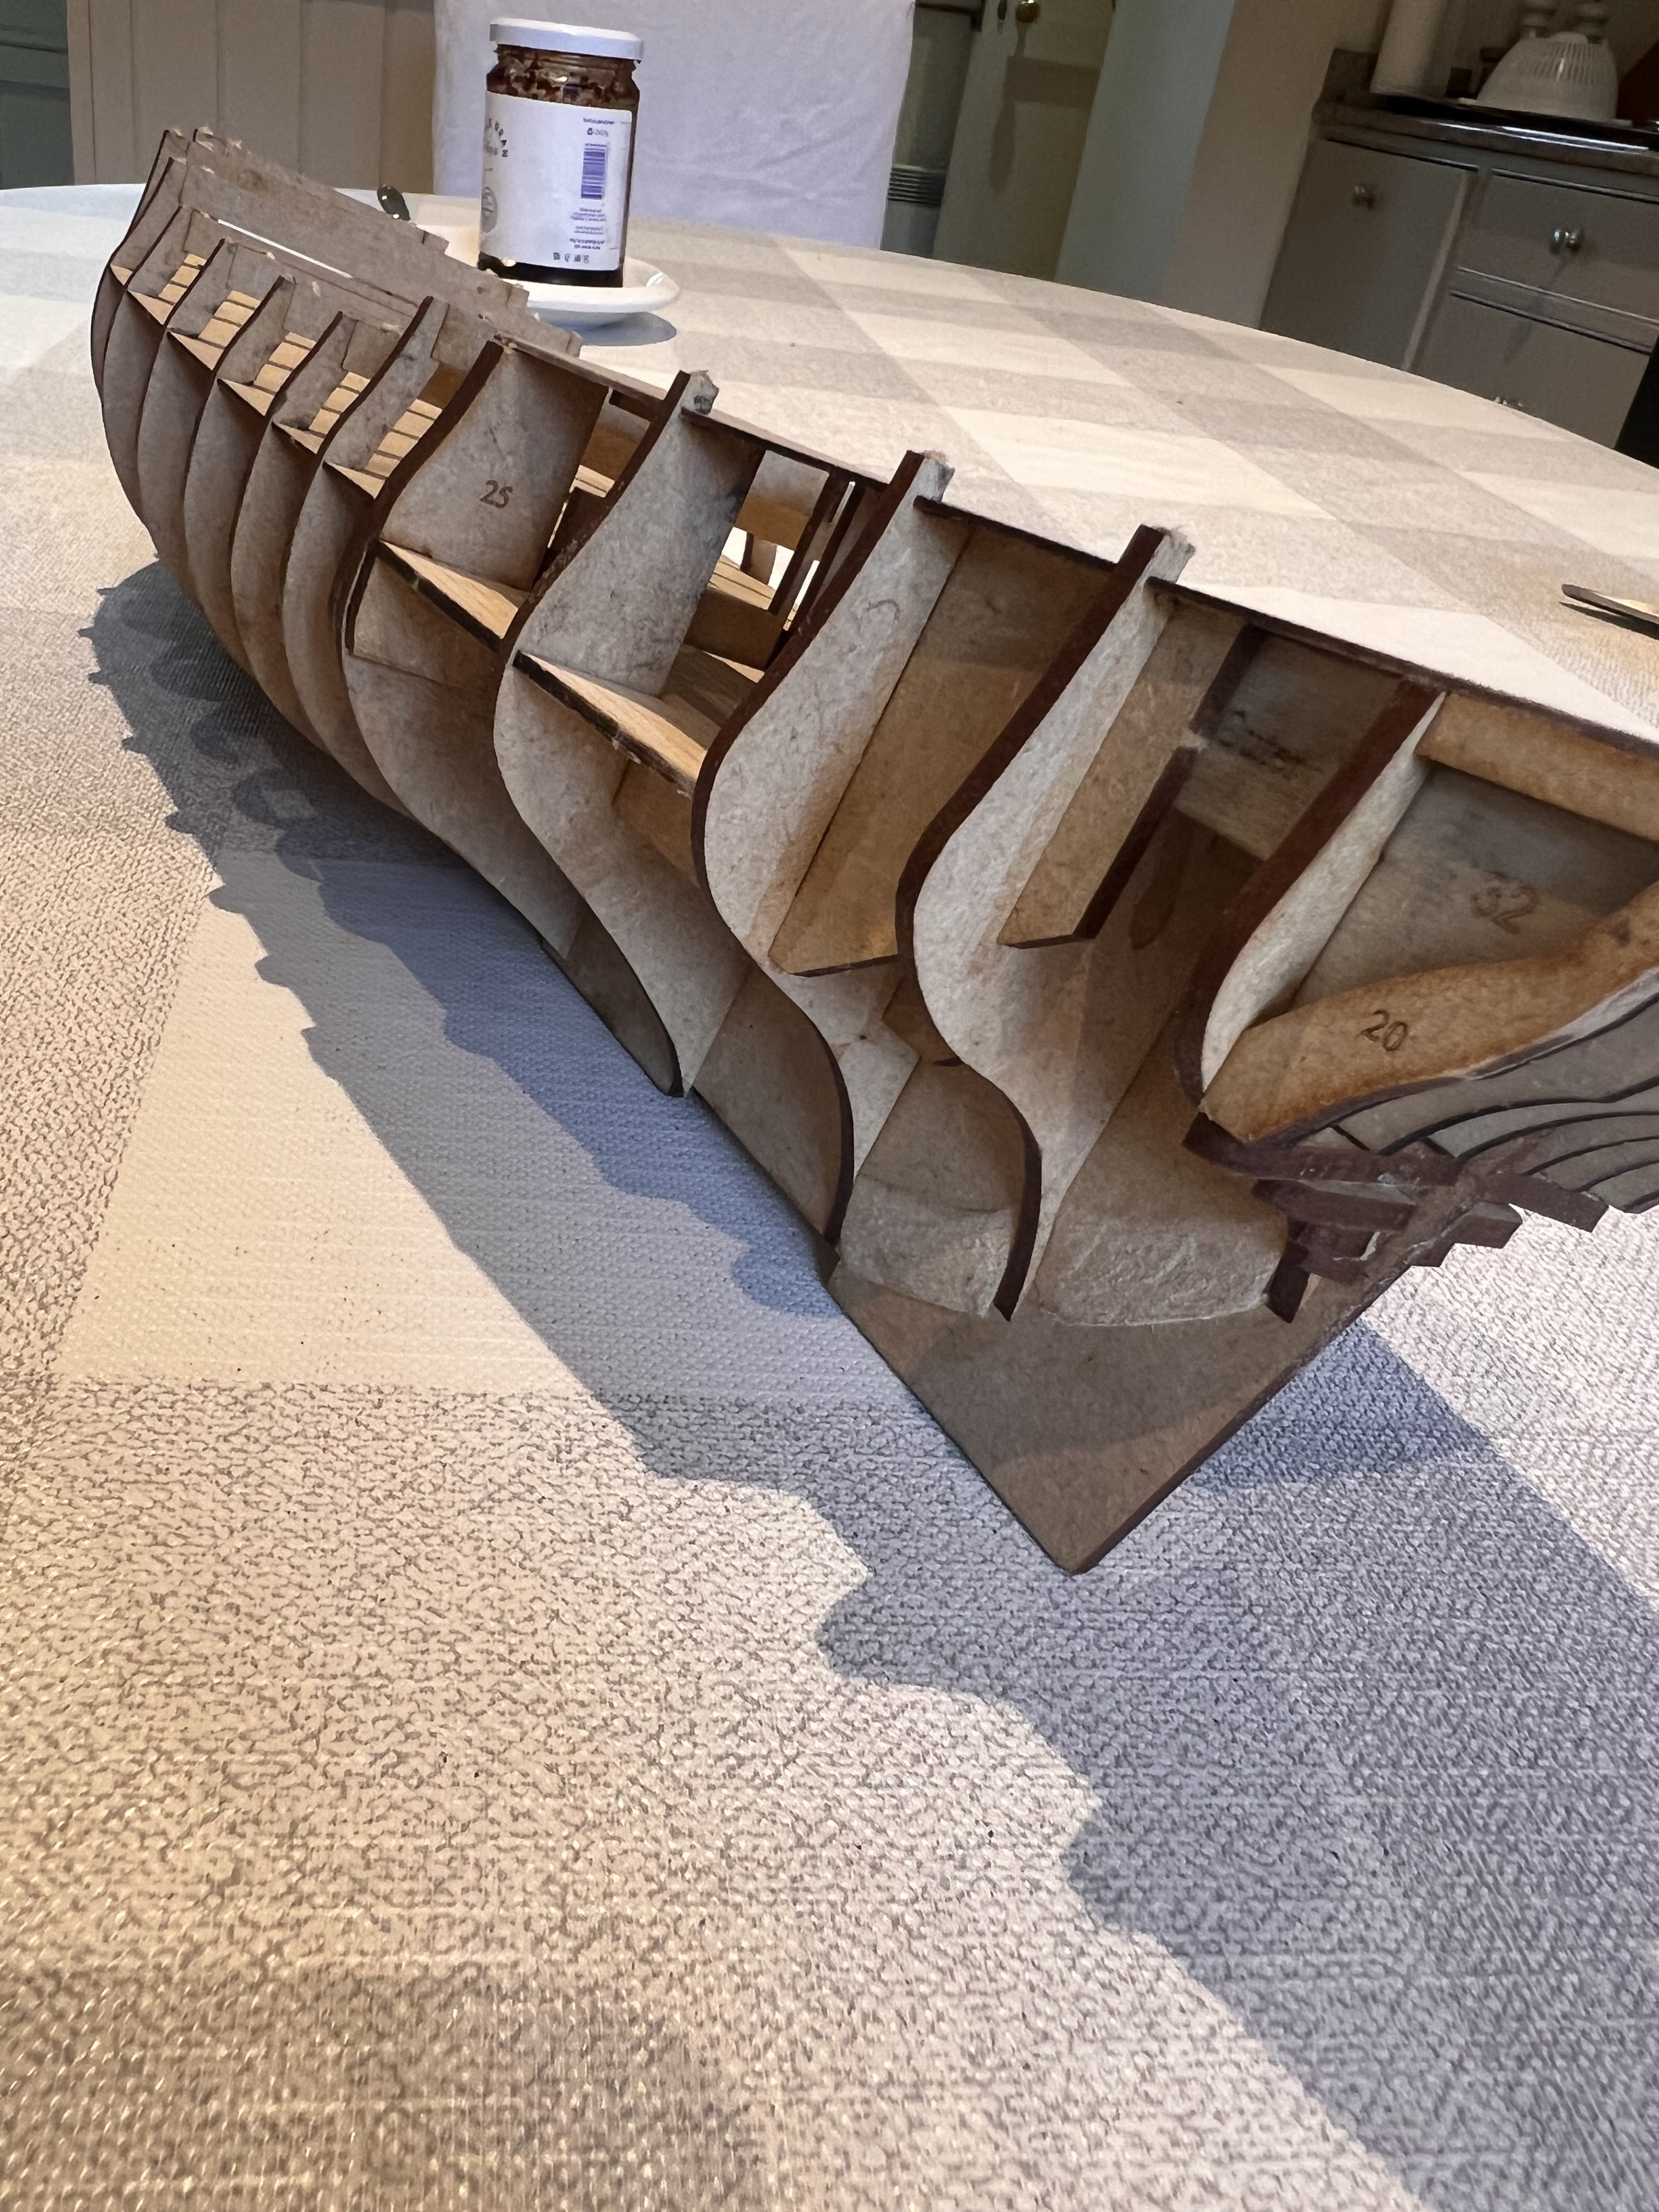
The skeleton structure for the hull is extremely well reinforced with longitudinal pieces and there’s barely any chance of the keel bending or bulkheads not being square.

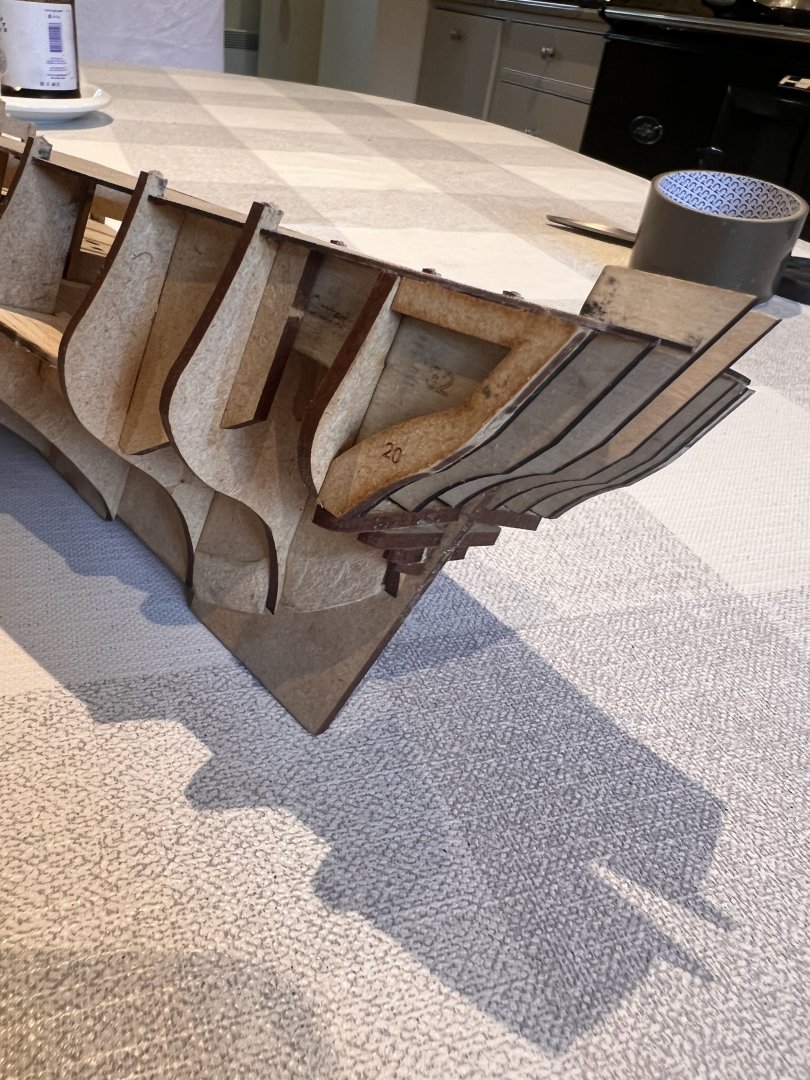
The stern frames on this kit are plywood which makes them much stronger than MDF and less prone to breakage.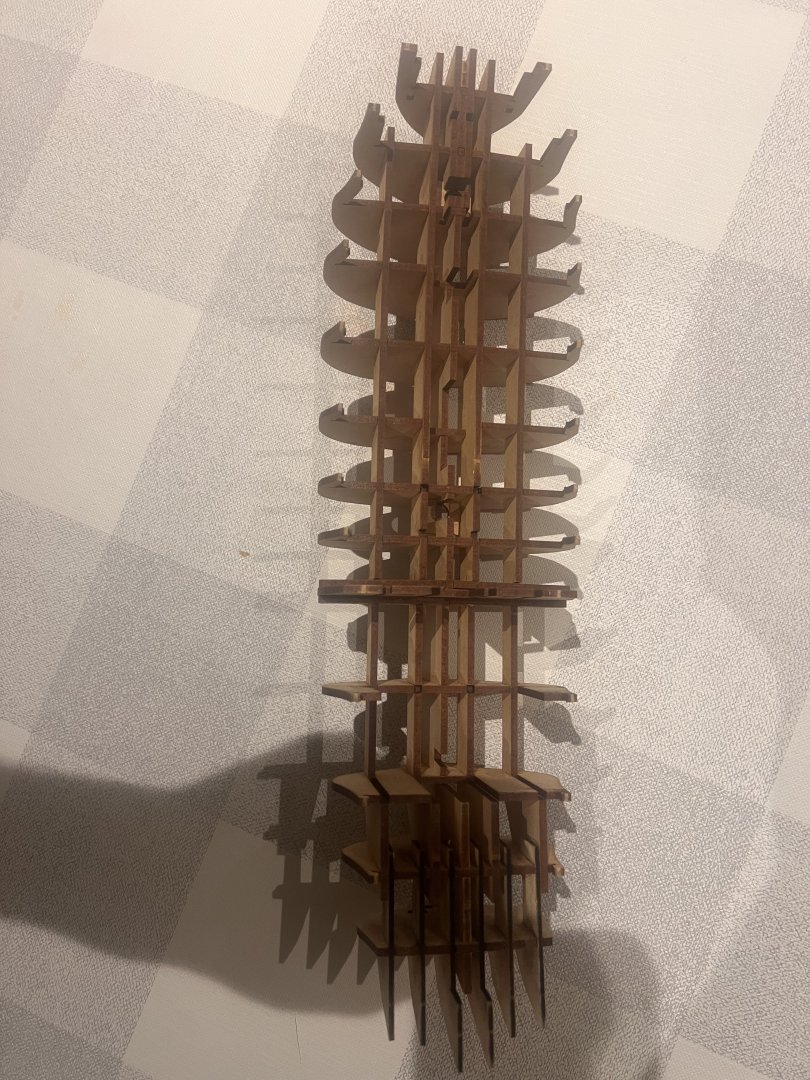
The stern frames on this kit are plywood which makes them much stronger than MDF and less prone to breakage.
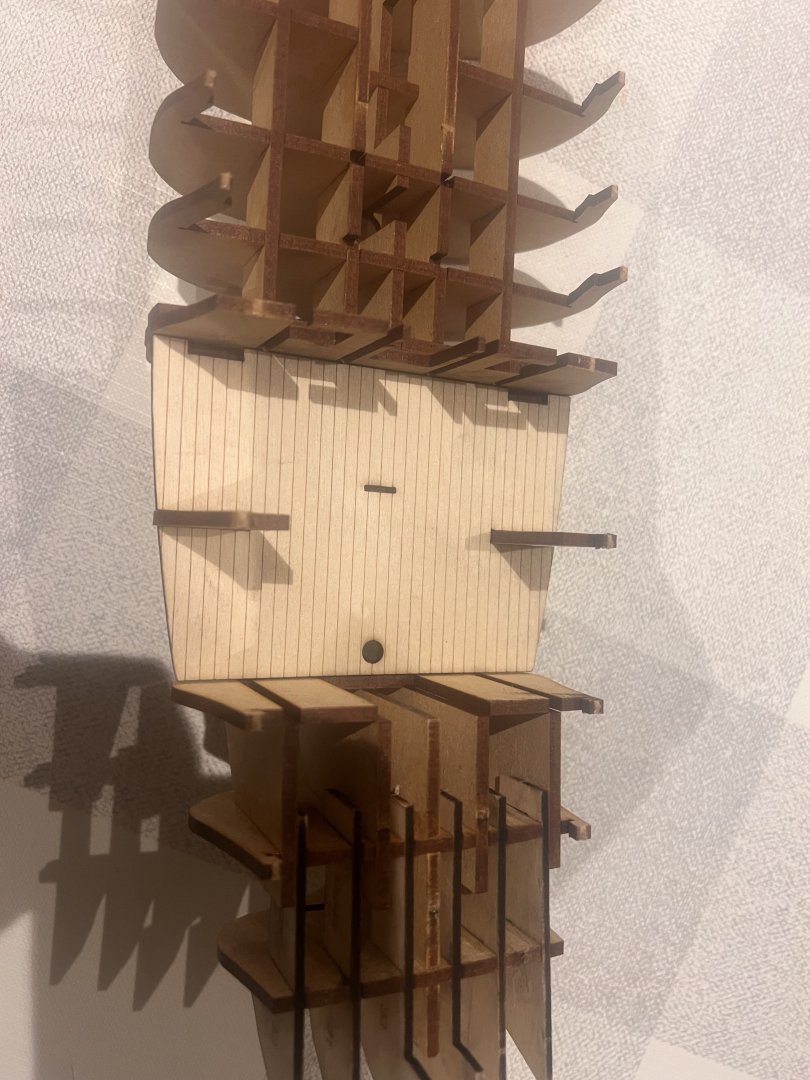
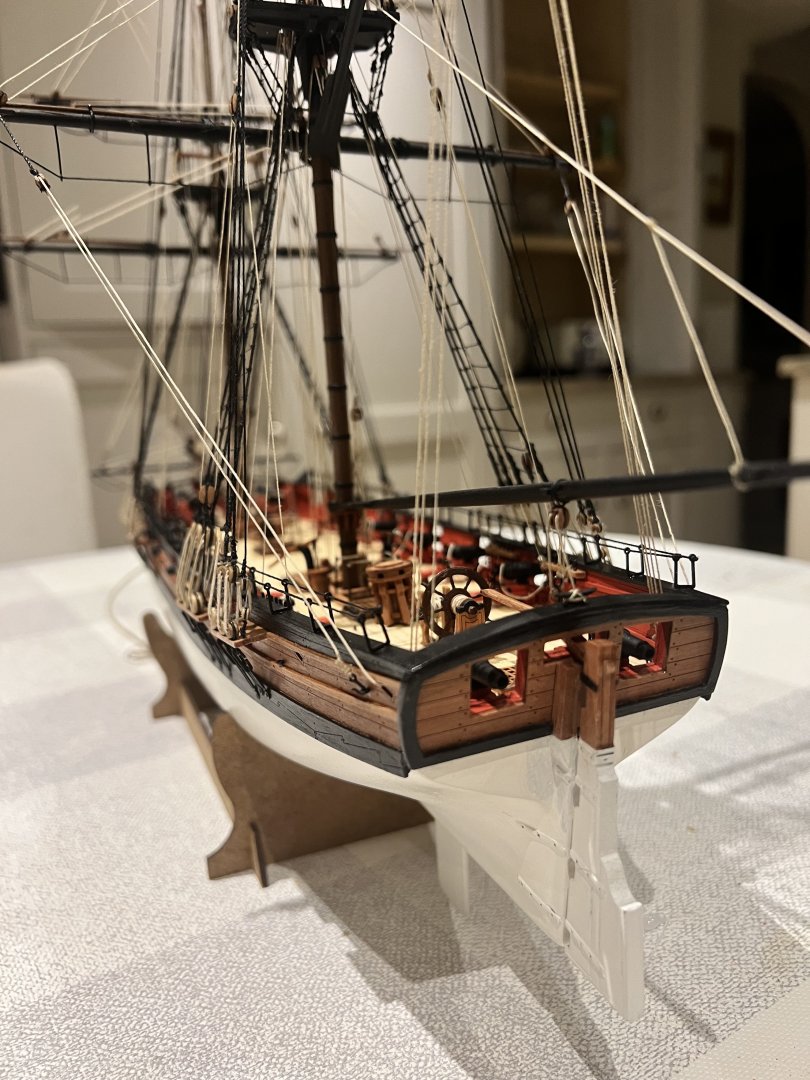
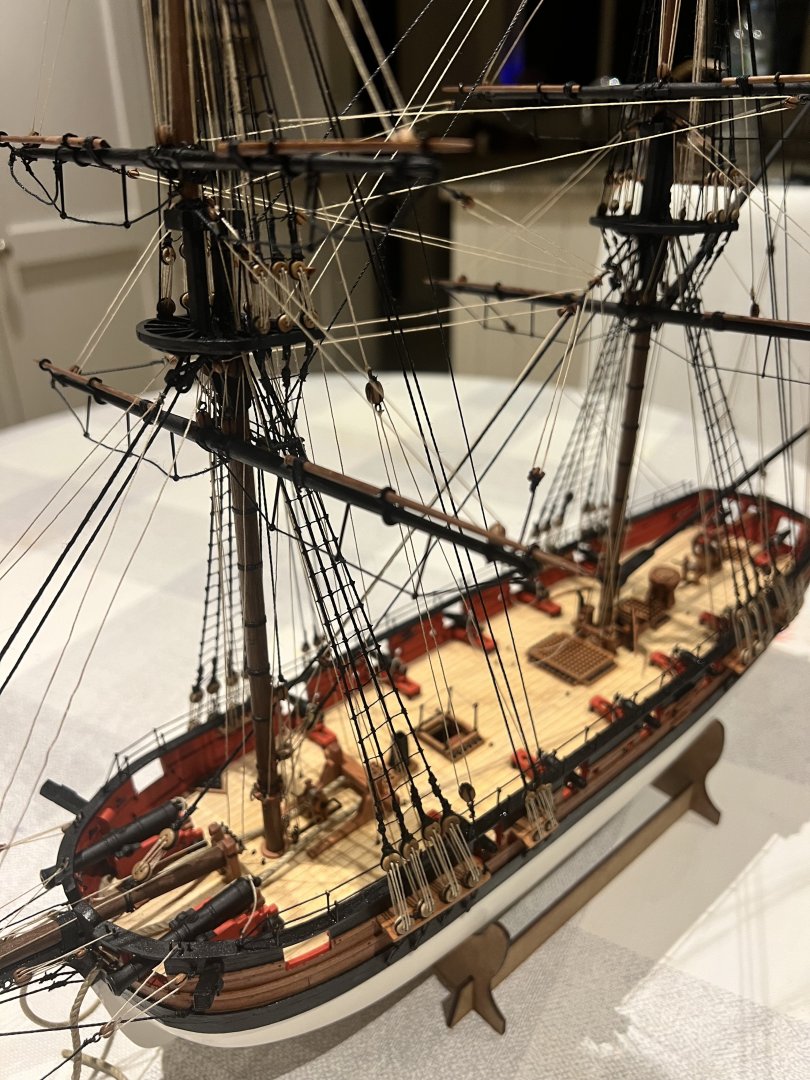
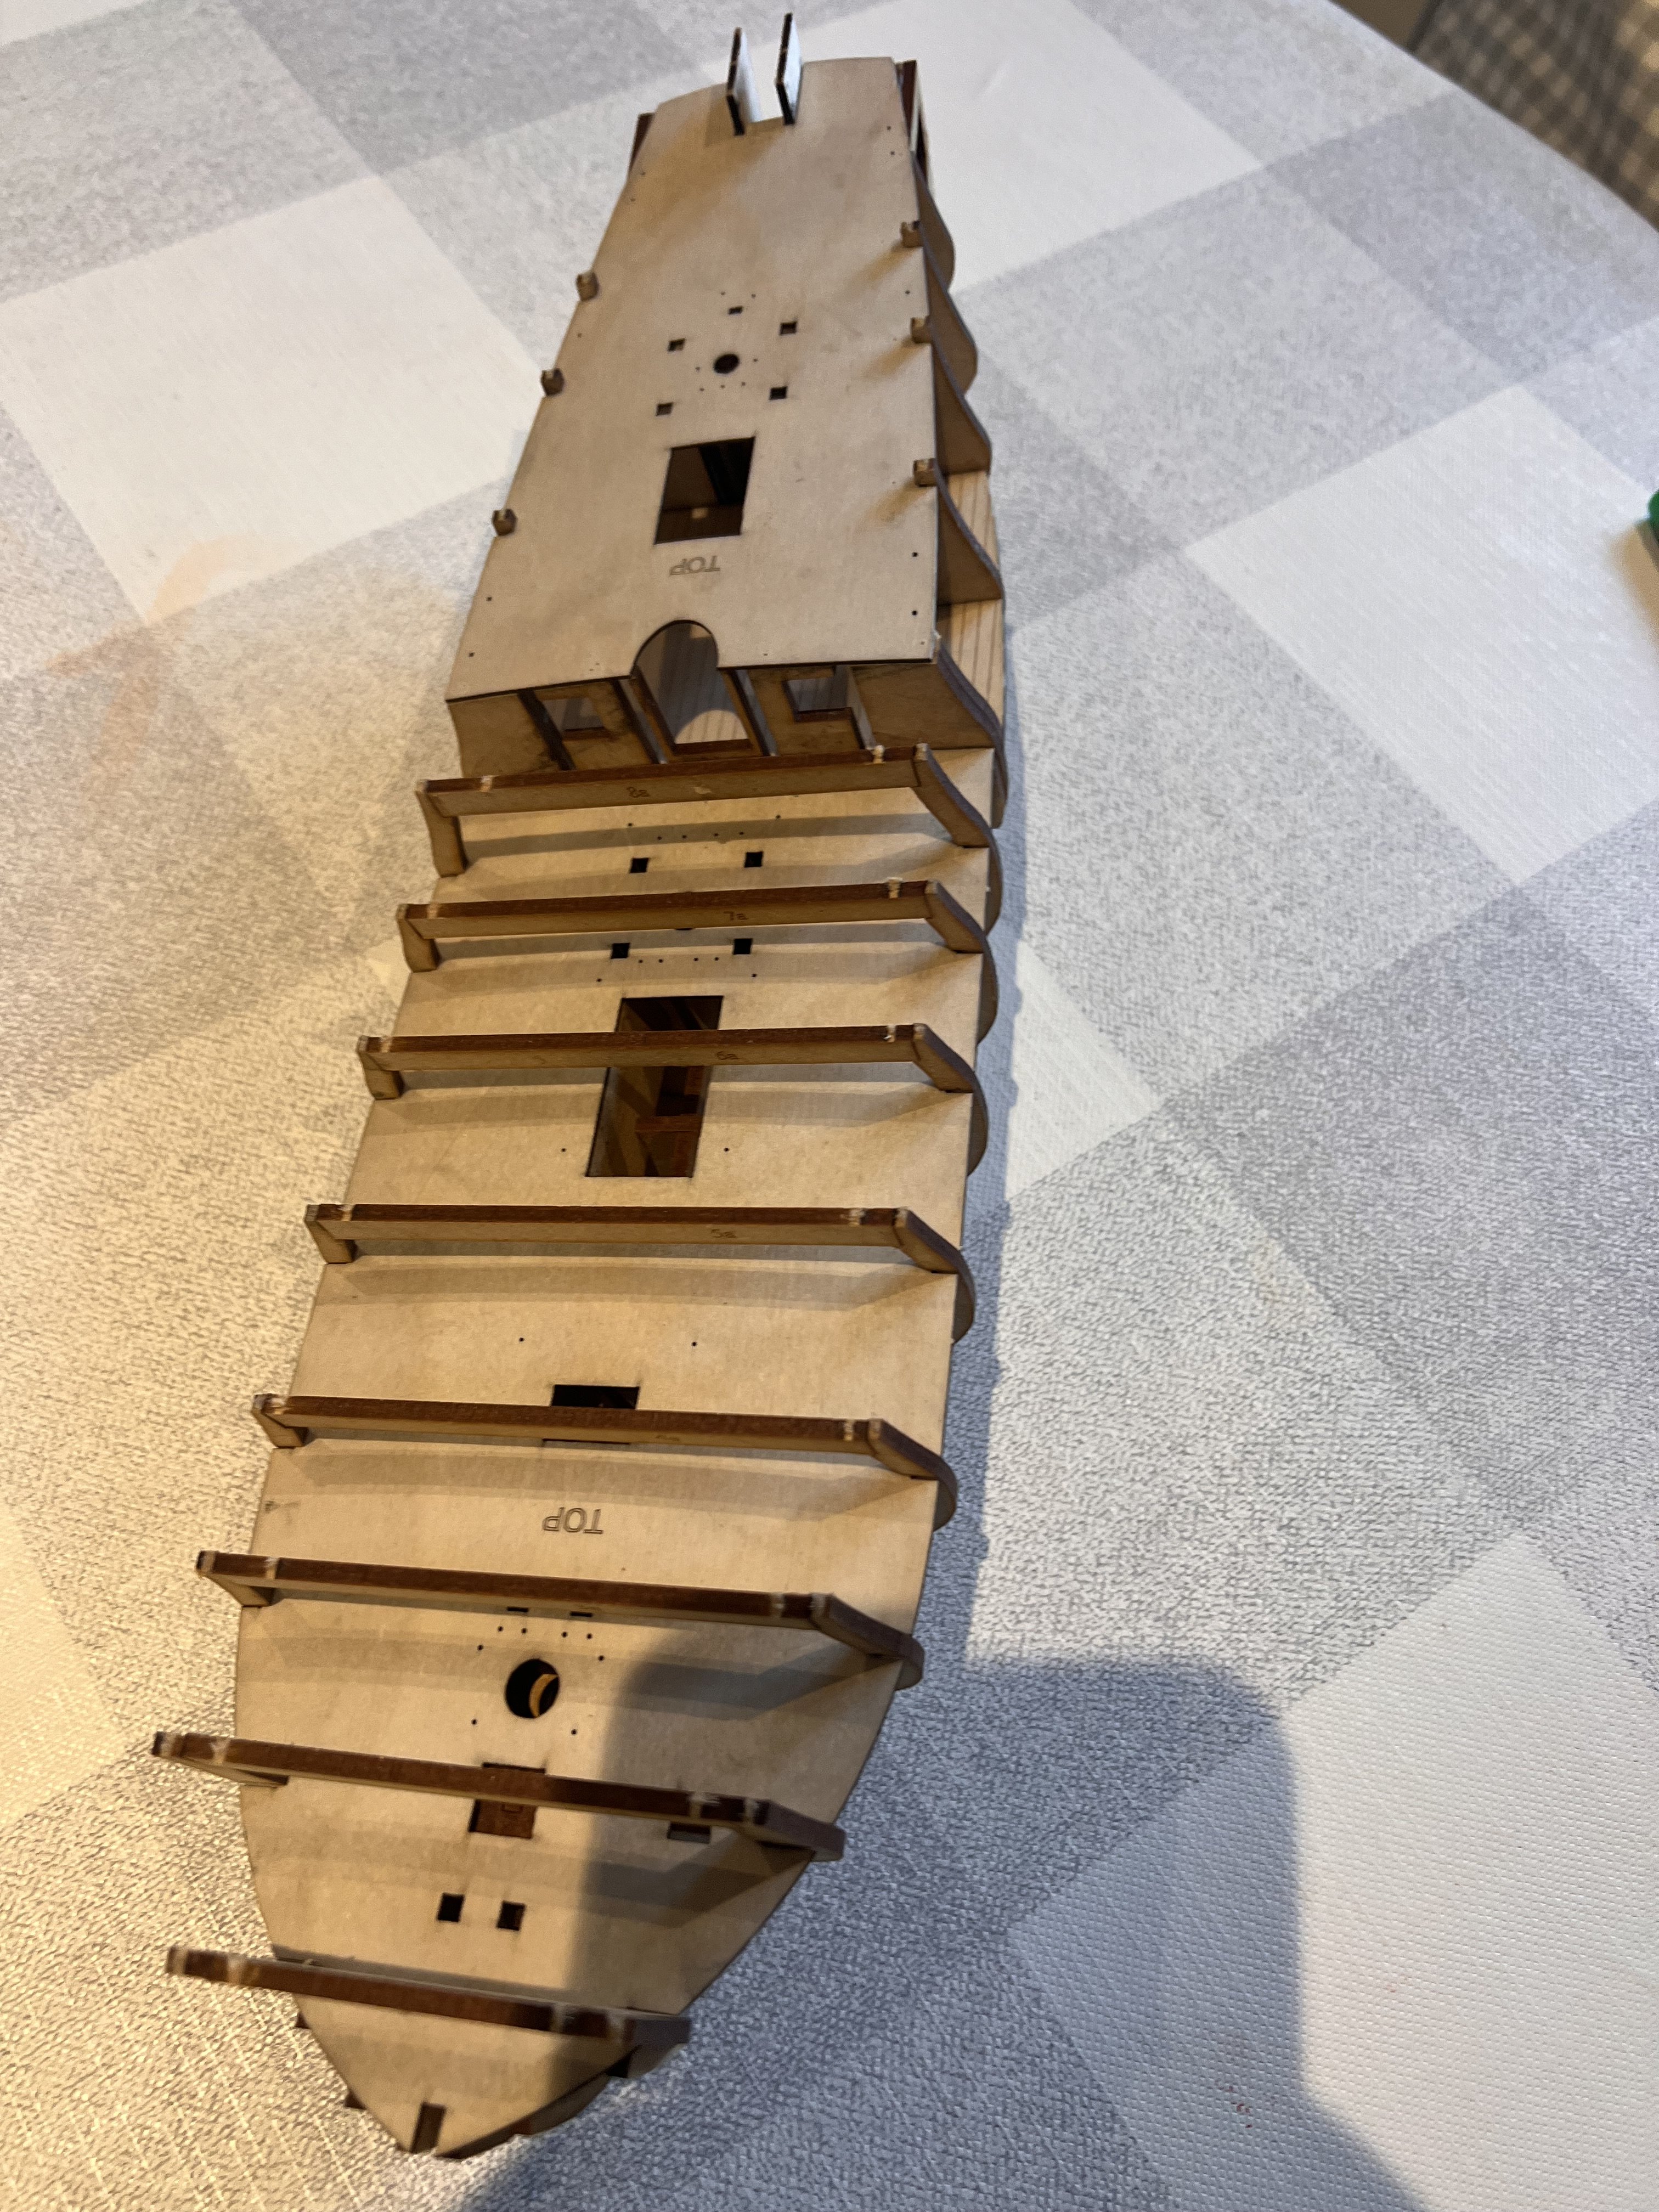
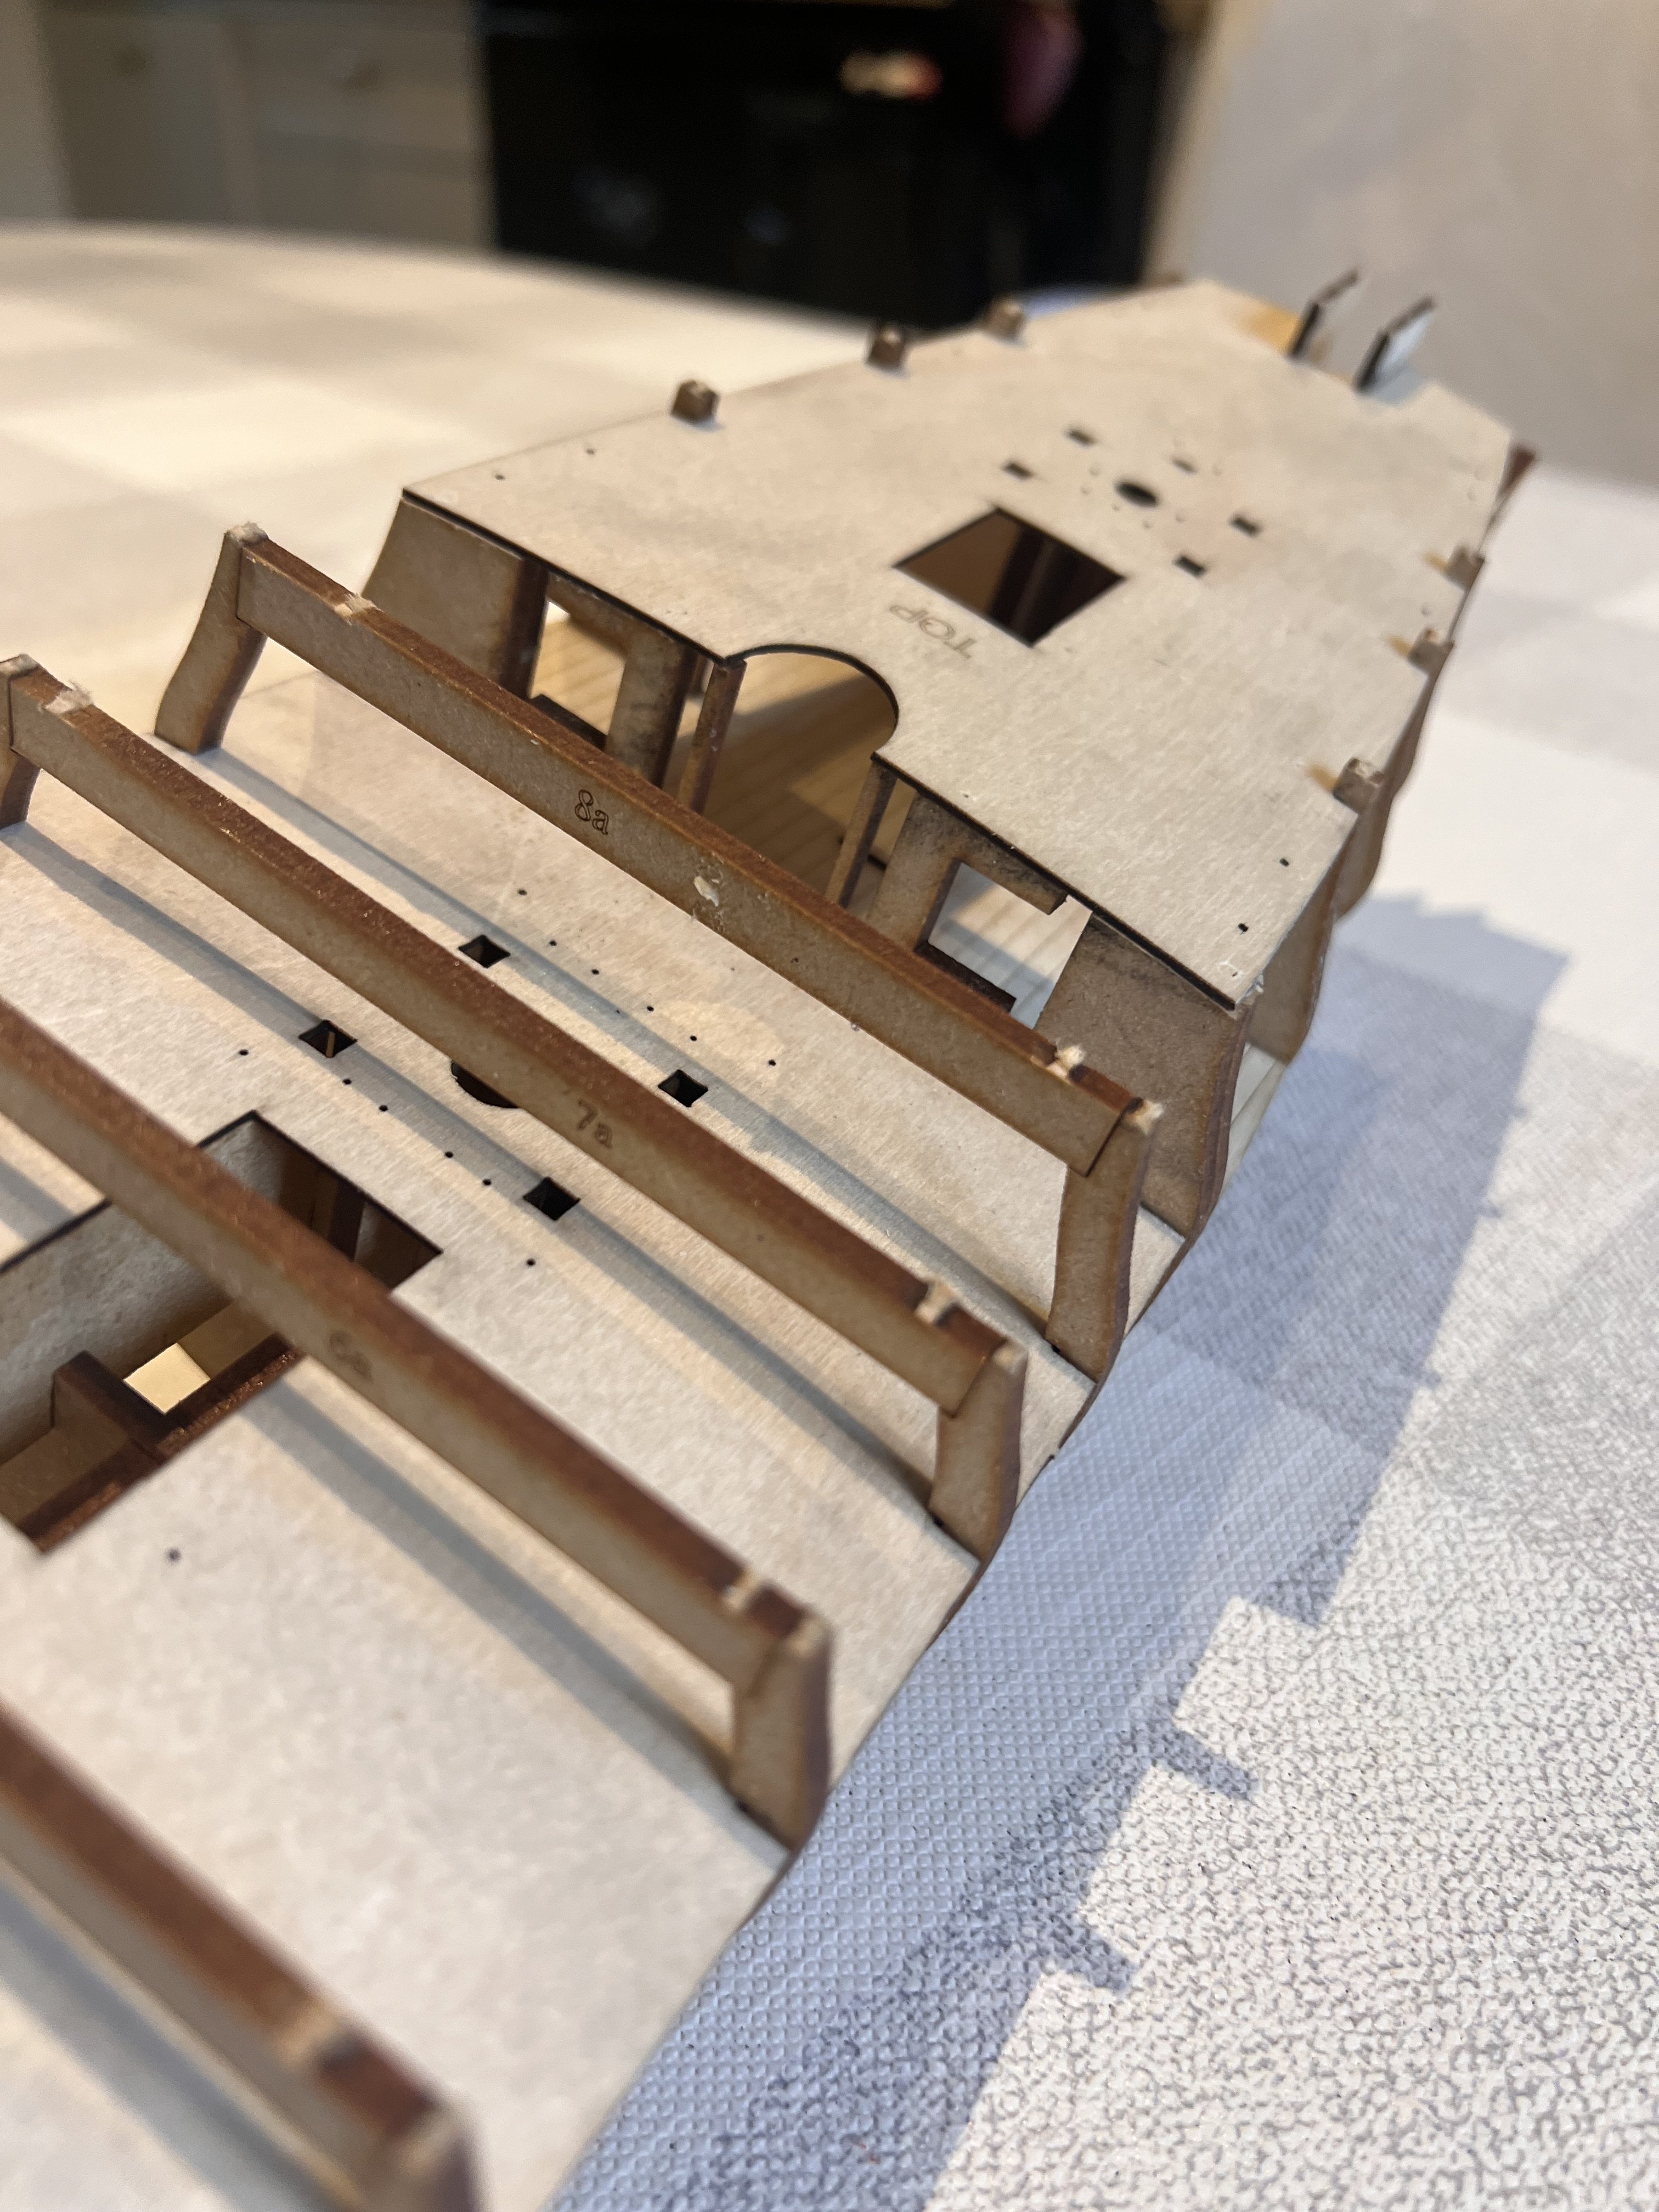
The lower aft deck is engraved ply and fits perfectly.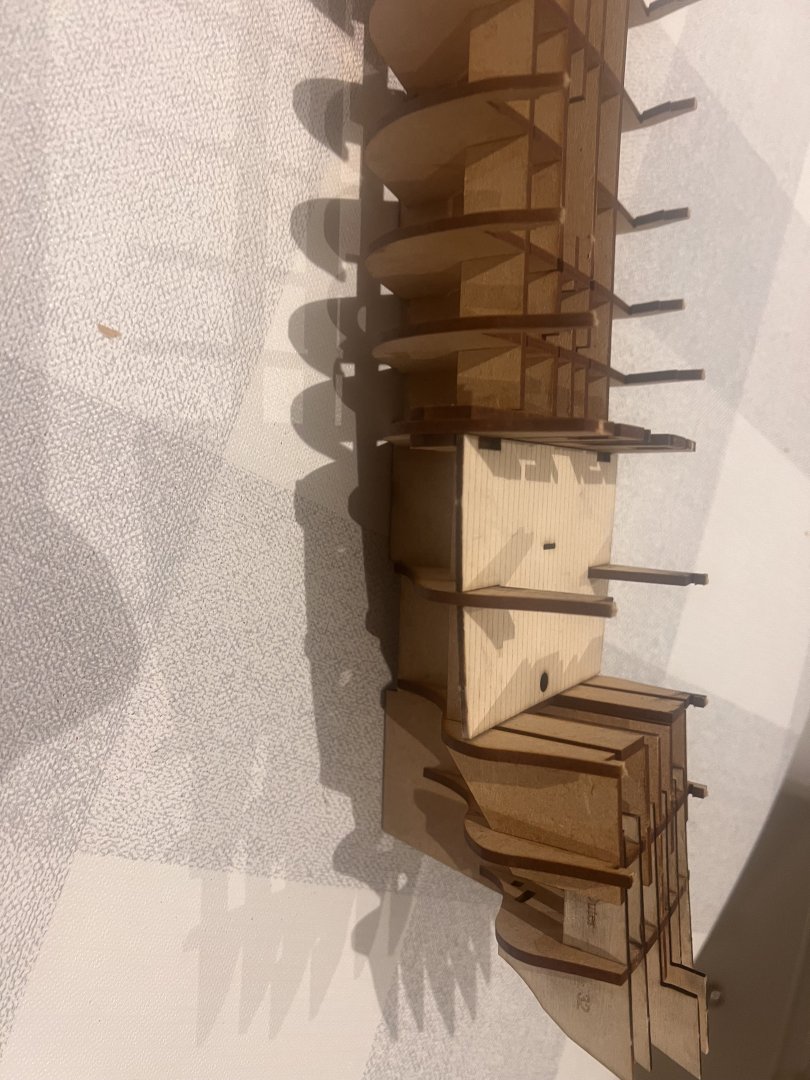
The foredeck bends into place, on the notches the deck fits perfectly too.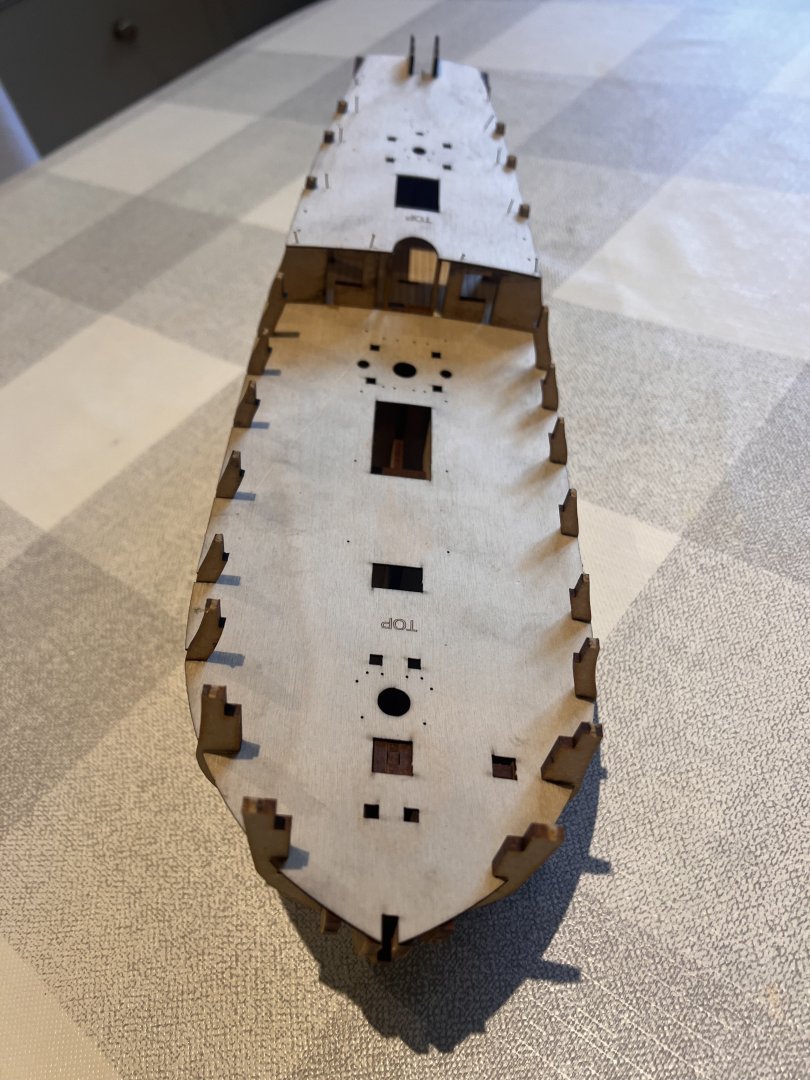
The aft / poop deck fits well too and I held in place with pins whilst the glue dried.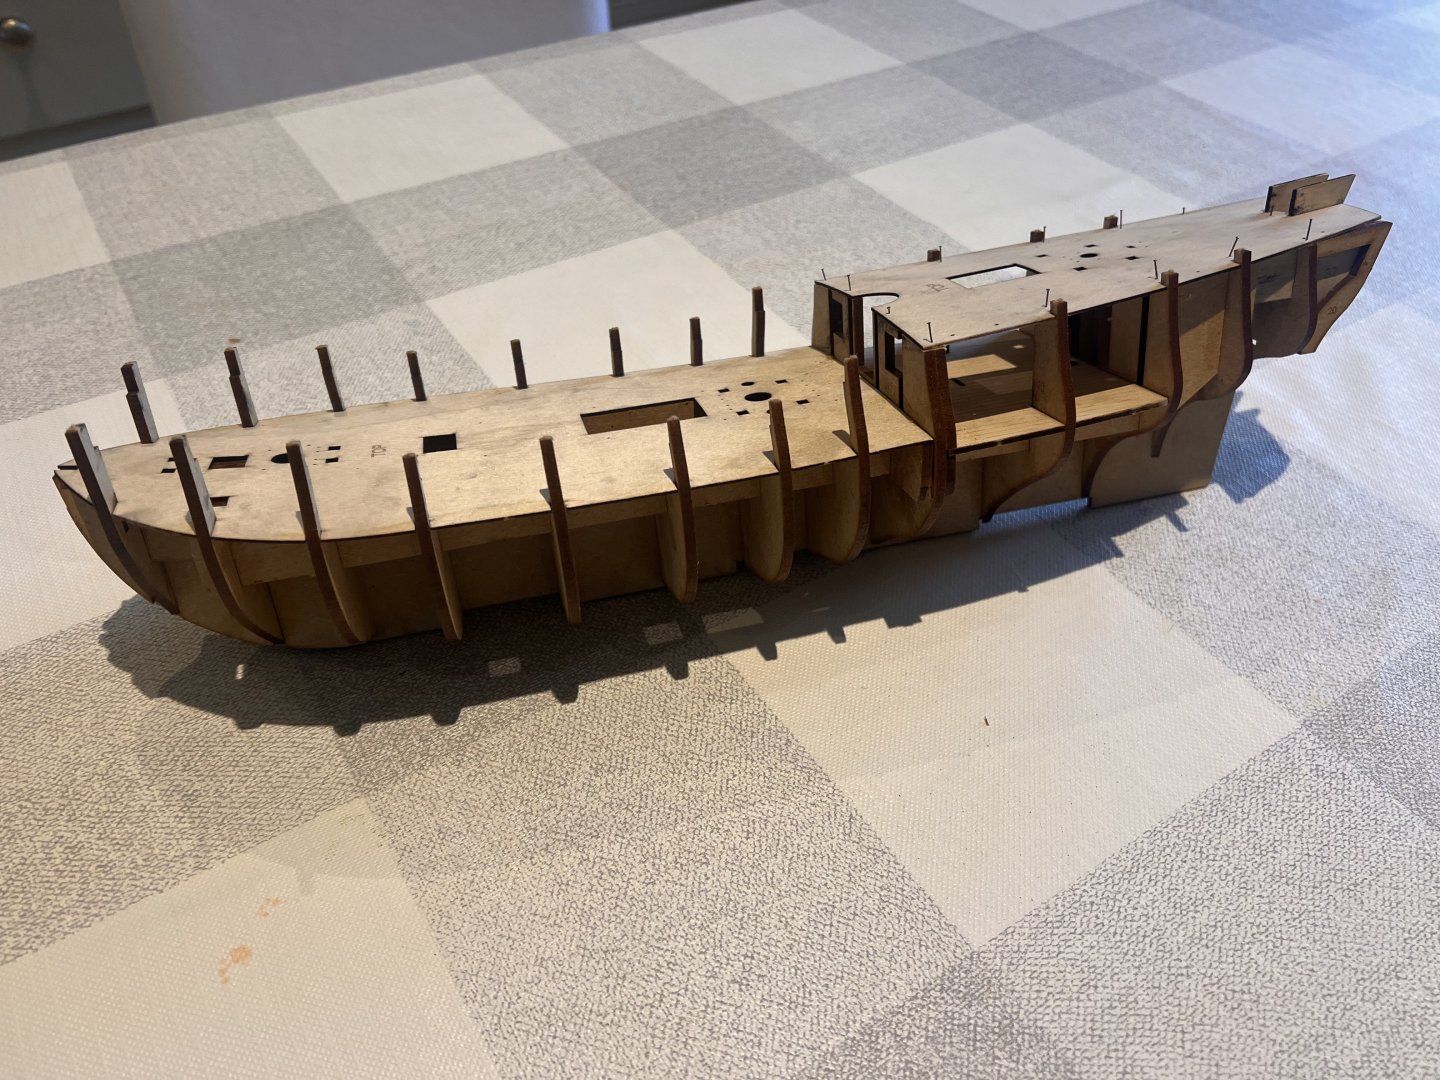
The bulkhead ears are weak so Chris has an ingenious way of strengthening them with cross beams that like the ears are sacrificial.


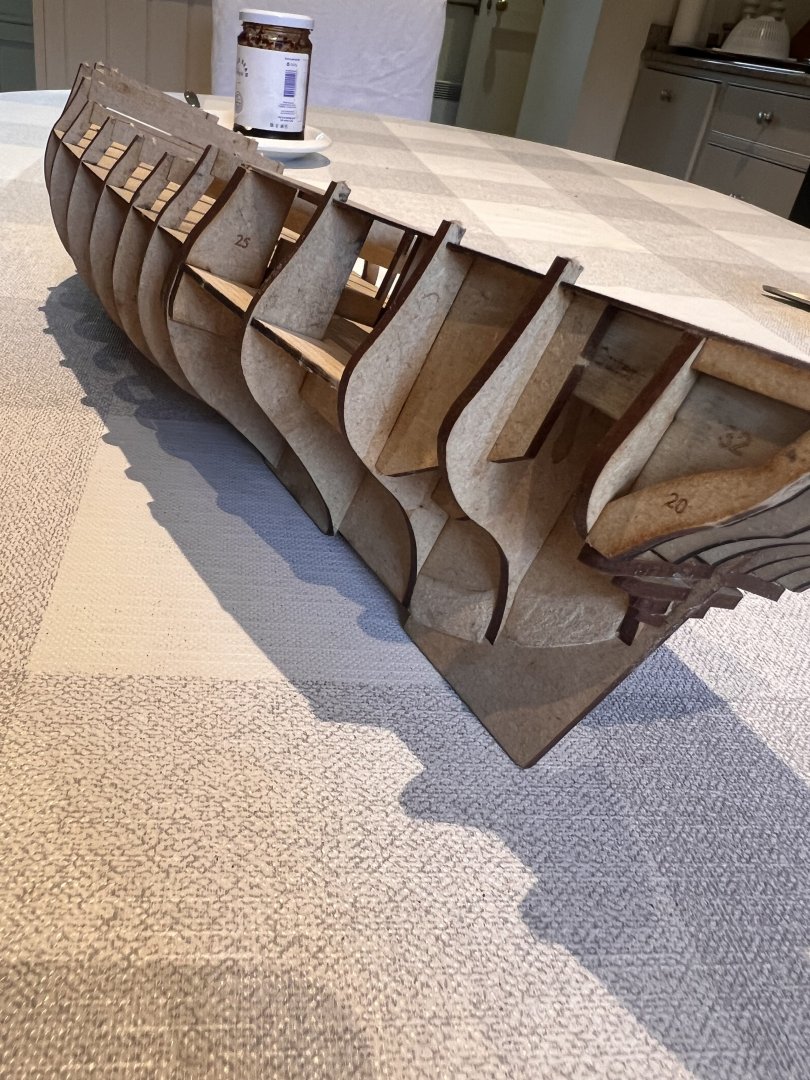
The only departure from the instructions so far has been that I haven’t pre-bevelled the bulkheads before fitting them to the keel. On most of Chris’s later models he has added an engraved line to bevel to, but not this one so I decided not to risk overdoing the bevelling and to do all the bevelling on the hulk.
- Desertanimal, ccoyle, Mr Whippy and 10 others
-
13
-
Amazing sails and build Andrew, she’s coming along beautifully.
On 9/11/2024 at 8:49 PM, Thukydides said:Potentially also try diluting it more and maybe add some flow aid. It will look less wet and fuzzy then
Thuky - is there a flow aid product you recommend? Thanks
-
Thank you Ronald, Eck, Uwe, Chris, David. Much appreciated.
I have had a good look at DoK's plans vs. Speedy and as Chris says there is more rigging for DoK, but to do the full rigging for Speedy looks considerably more complex. So DoK next it is. I'm hoping to build Speedy after DoK with all the running rigging in place, but if that is too difficult I will fall back on a similar rig to Adder as Chris suggested, In terms of lines included on DoK it looks similar to those included on Adder with the addition of crows feet which will be a new challenge. The hull / decor looks like a big step up, but that is my favourite part of the build so I'm looking forward to it! As expected DoK is the same absolutely excellent high quality kit that I have got used to from Vanguard. I probably will have a break and start building her in a few weeks time.
-
Andrew, Ron, Thuky,
Thanks for all the comments and praise, much appreciated.
Dan- AJohnson and Thukydides
-
2
-
55 minutes ago, chris watton said:
I have said this before, you do not have to add any rigging relating to sails. You could rig Speedy exactly as you did for Adder, omitting the clews, jeers and bowlines etc.
Duchess is slightly easier as there is no flying jibboom and associated rig for that (And sail related rig omitted altogether) – but more shrouds and ratlines, being ship rigged.Thanks Chris, when I get to Speedy I’d like to add all the extra rigging if I can. The more familiar I am with the basic rigging, the easier I’ll find it to add more…
Duchess sounds like the more sensible next build. Shrouds and ratlines are a touch dull, but they’re not difficult.
1 hour ago, Glenn-UK said:I think you'll find the DOK the better option. It is bigger than Speedy so there is more room to access the belaying points. Also it is not a copper bottomed model. There is much more detail to add to hull.
Thanks Glenn, size will really help too, more confirmation for the Duchess.I’m away a couple of days but when I’m back I’ll look through Duchess’s plans more thoroughly and make a final decision. Strongly suspect that it will be for Duchess.
-
Thanks Andrew, Bob and Glenn!
Andrew - my next build was always going to be Speedy (my stash is strictly kept at 1 kit) but I found Adder’s rigging a challenge and for Speedy adding all the extra rigging going under the tops and belayed below seems a little daunting. I think it’s an extra 3-4 blocks for each side on the main and fore yards…
So I’ve bought Duchess of Kingston too, which I understand has less of the running rigging - albeit not without her rigging challenges either (3 masts, crows feet, etc) and there’s a lot more detailed painting to be done.
I’m going to have a good look at the rigging plans of both and decide which should be built first.
Chris, if you’re reading this I’d be very interested in your view on which is the more natural progression after Adder? I’m not worried by either hull, it’s just the rigging.
Many thanks for any advice.Dan
- chris watton, AJohnson and Oboship
-
3
-
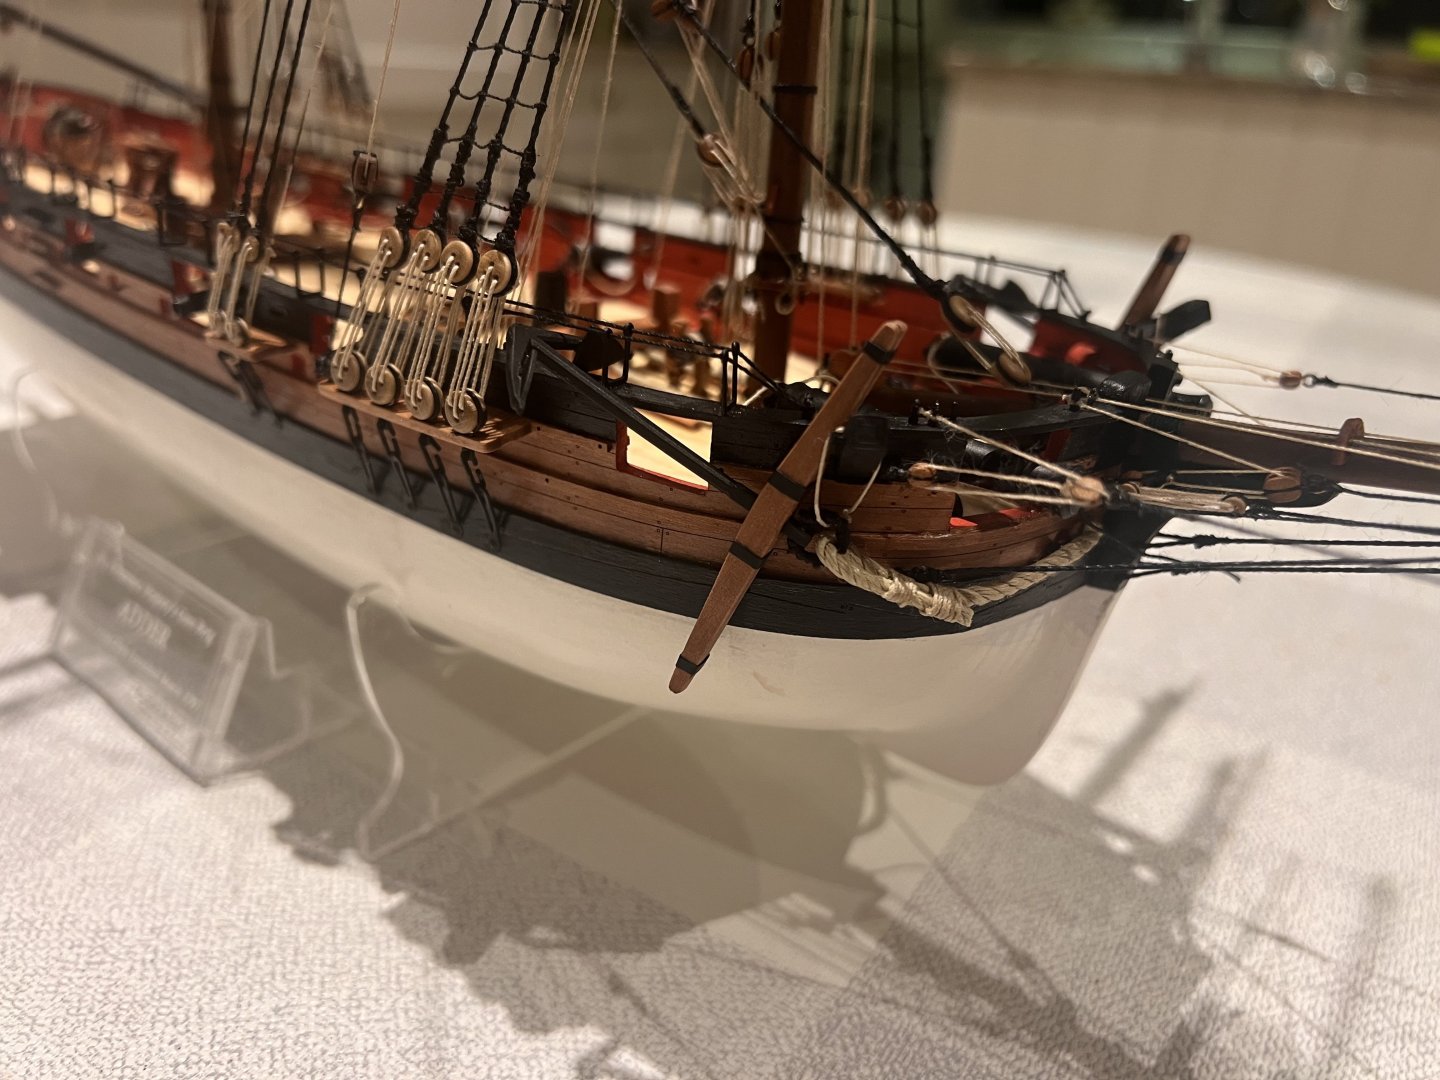
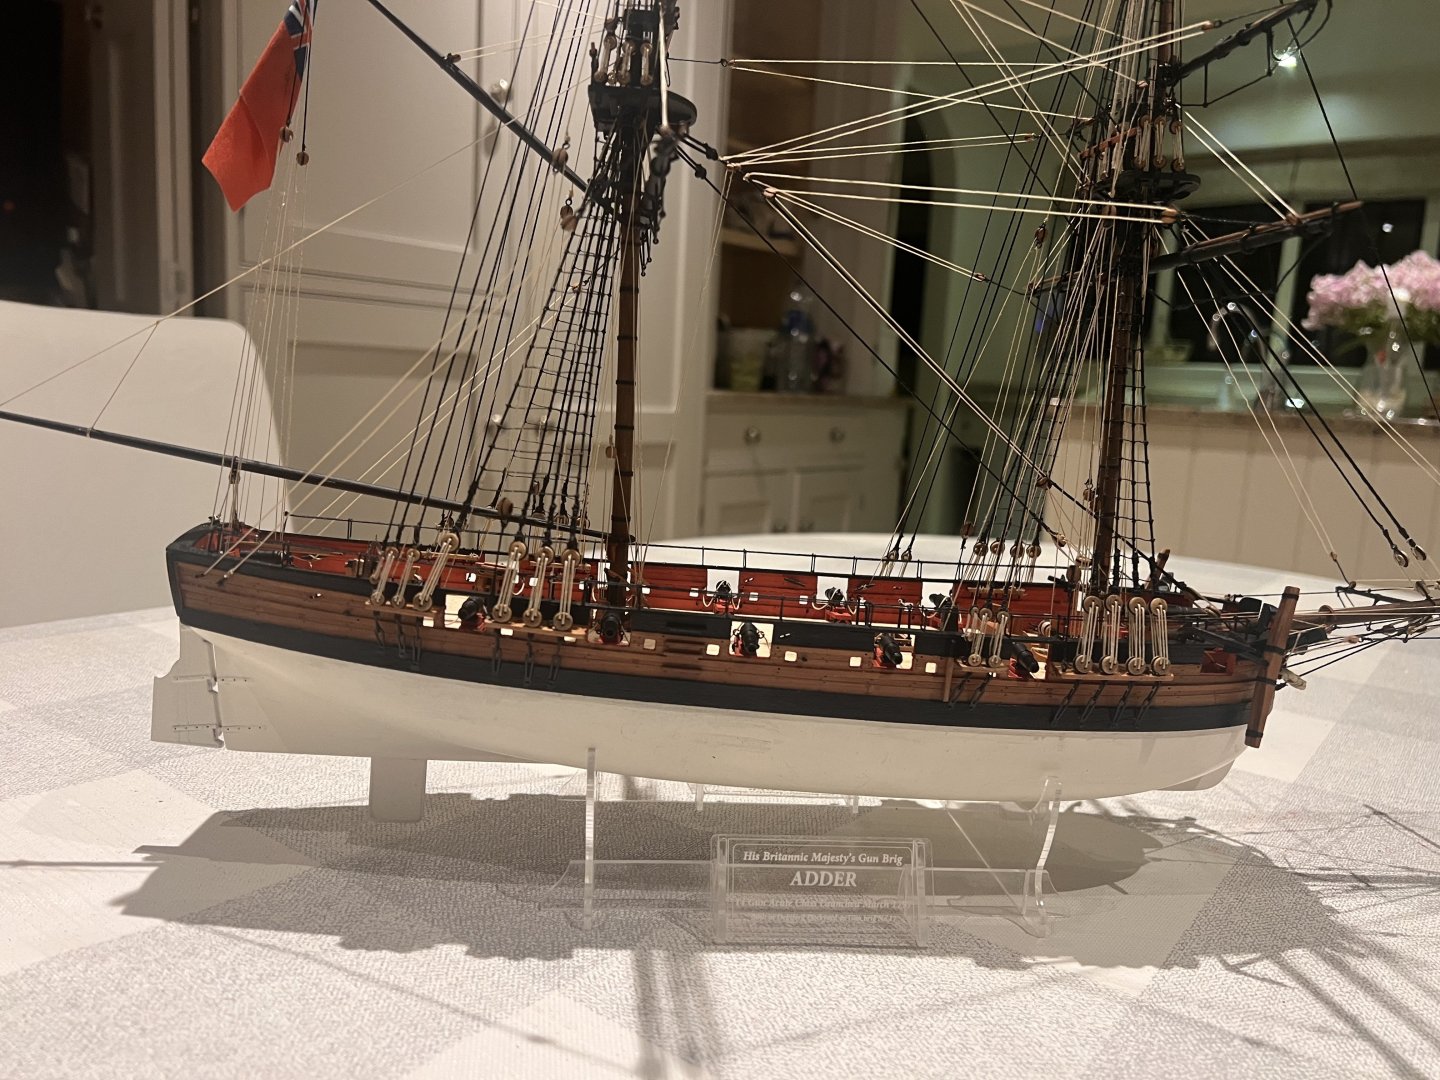
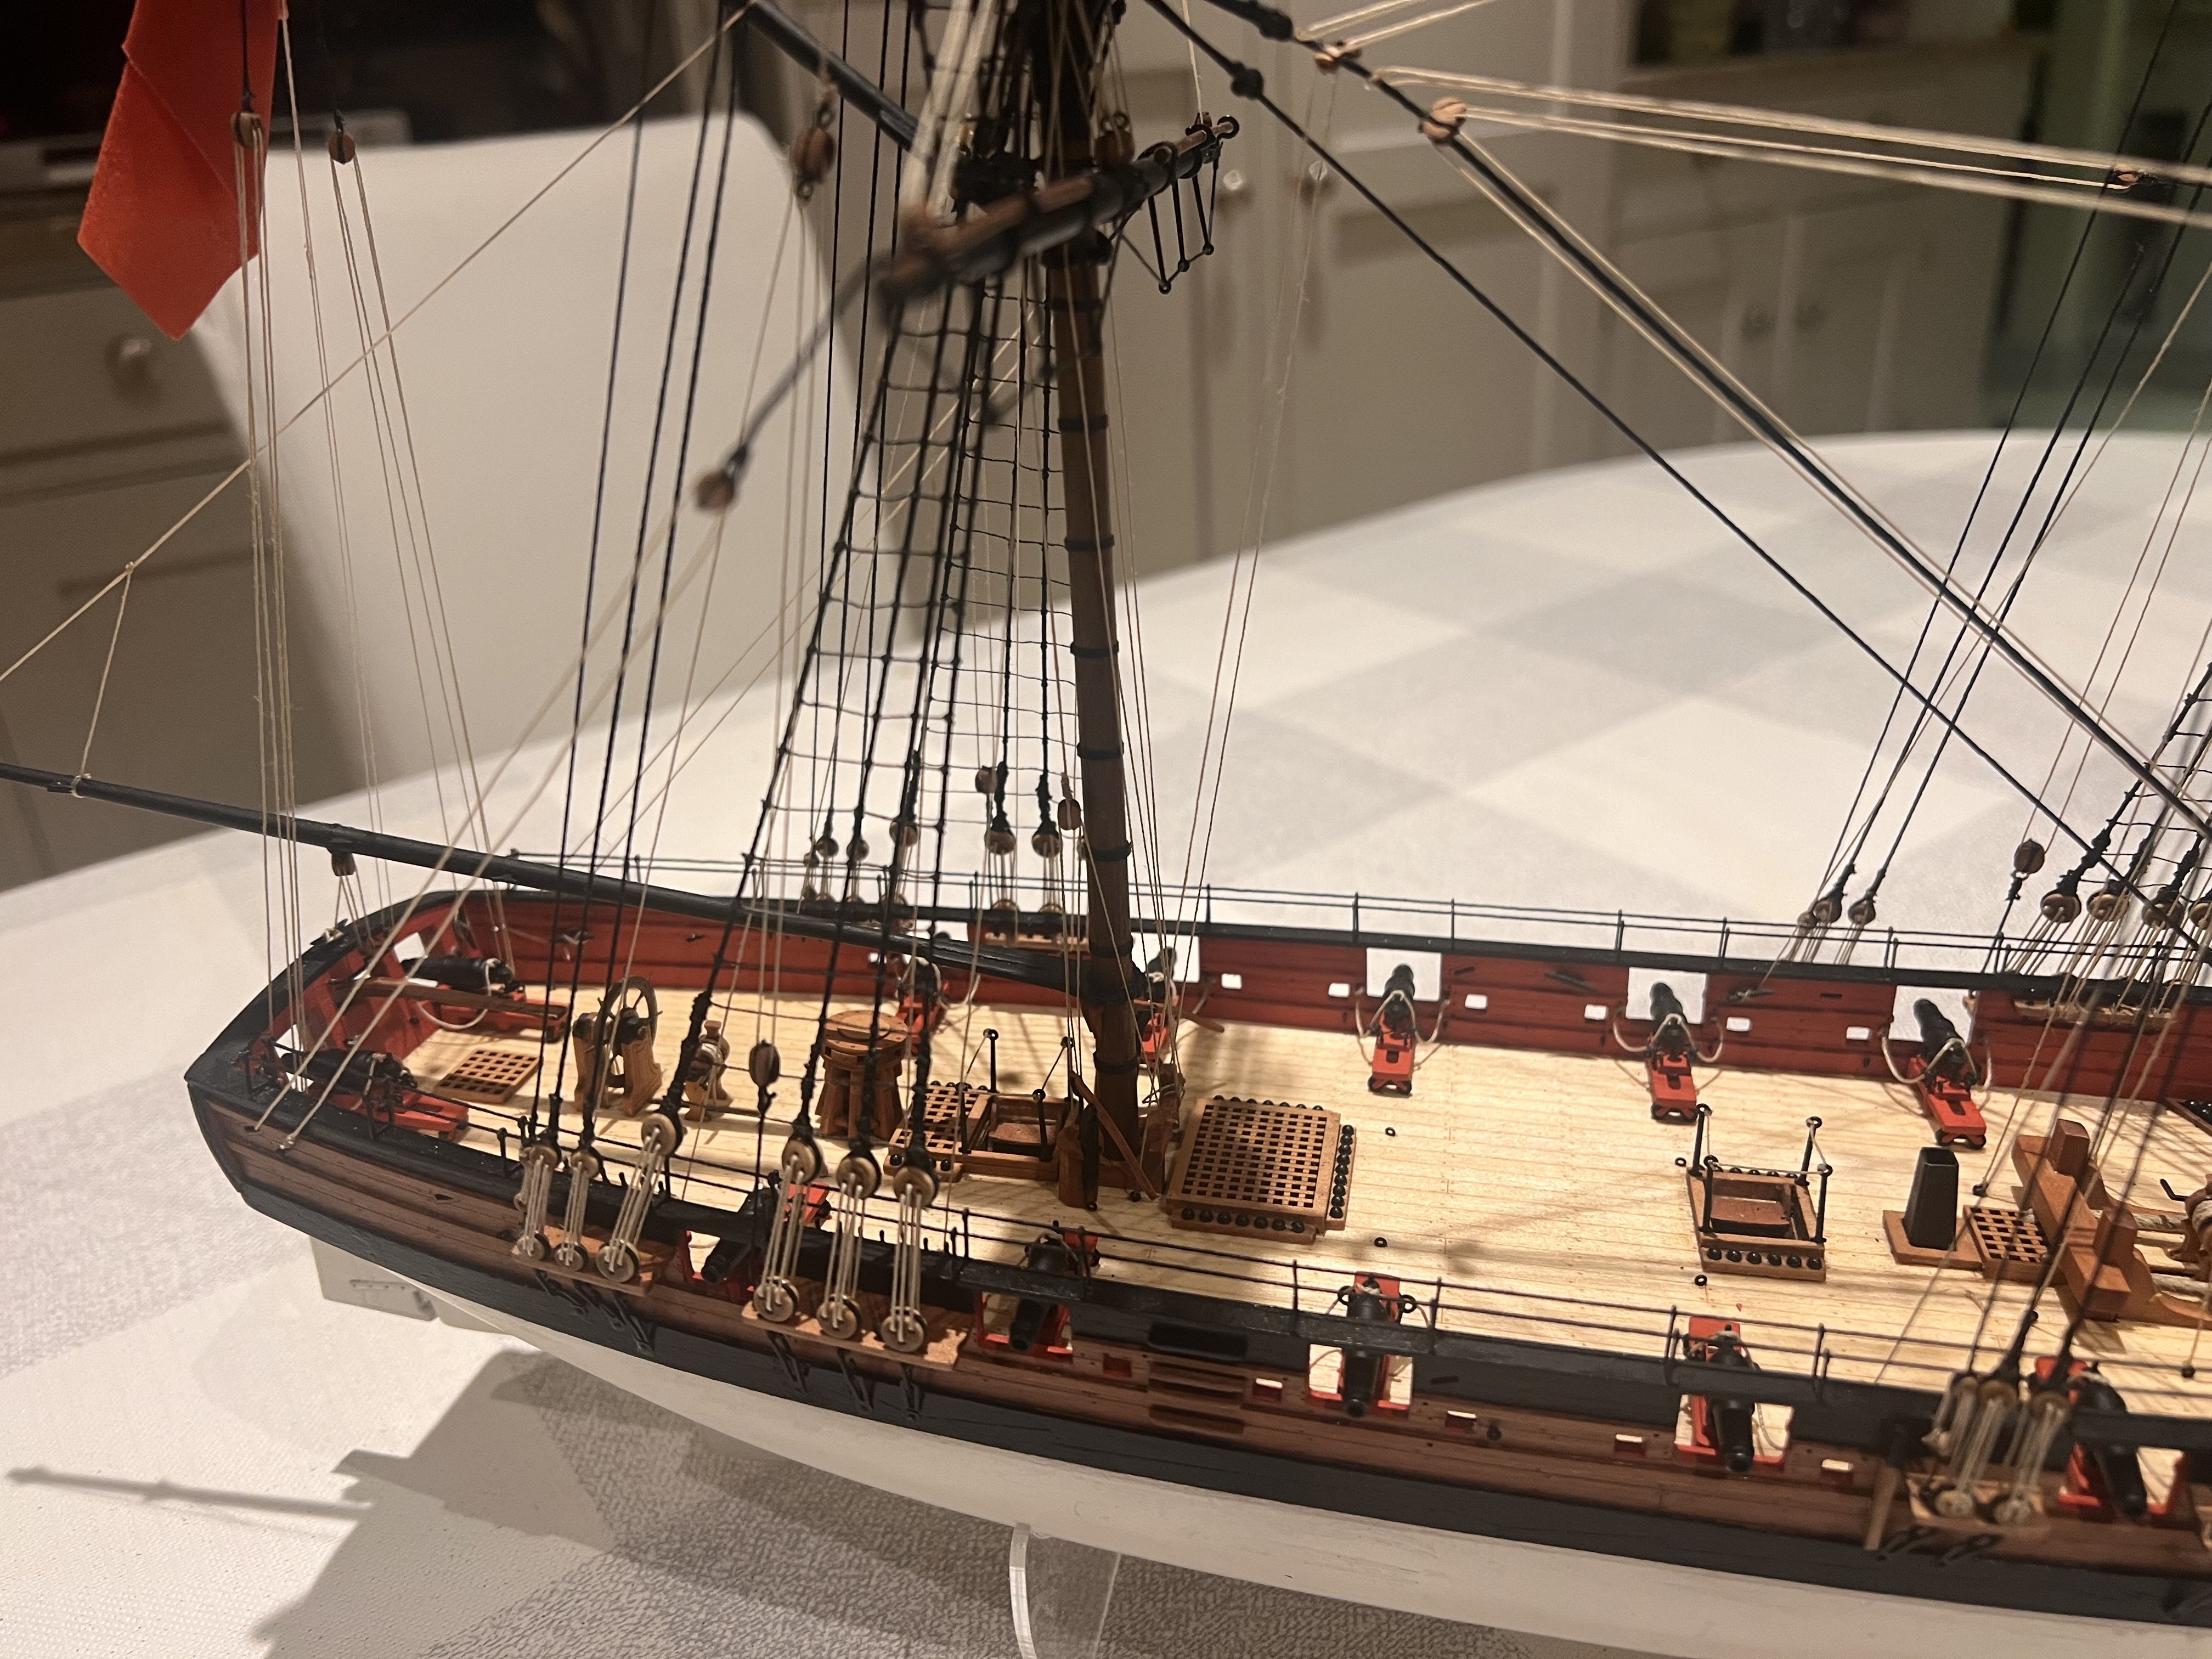
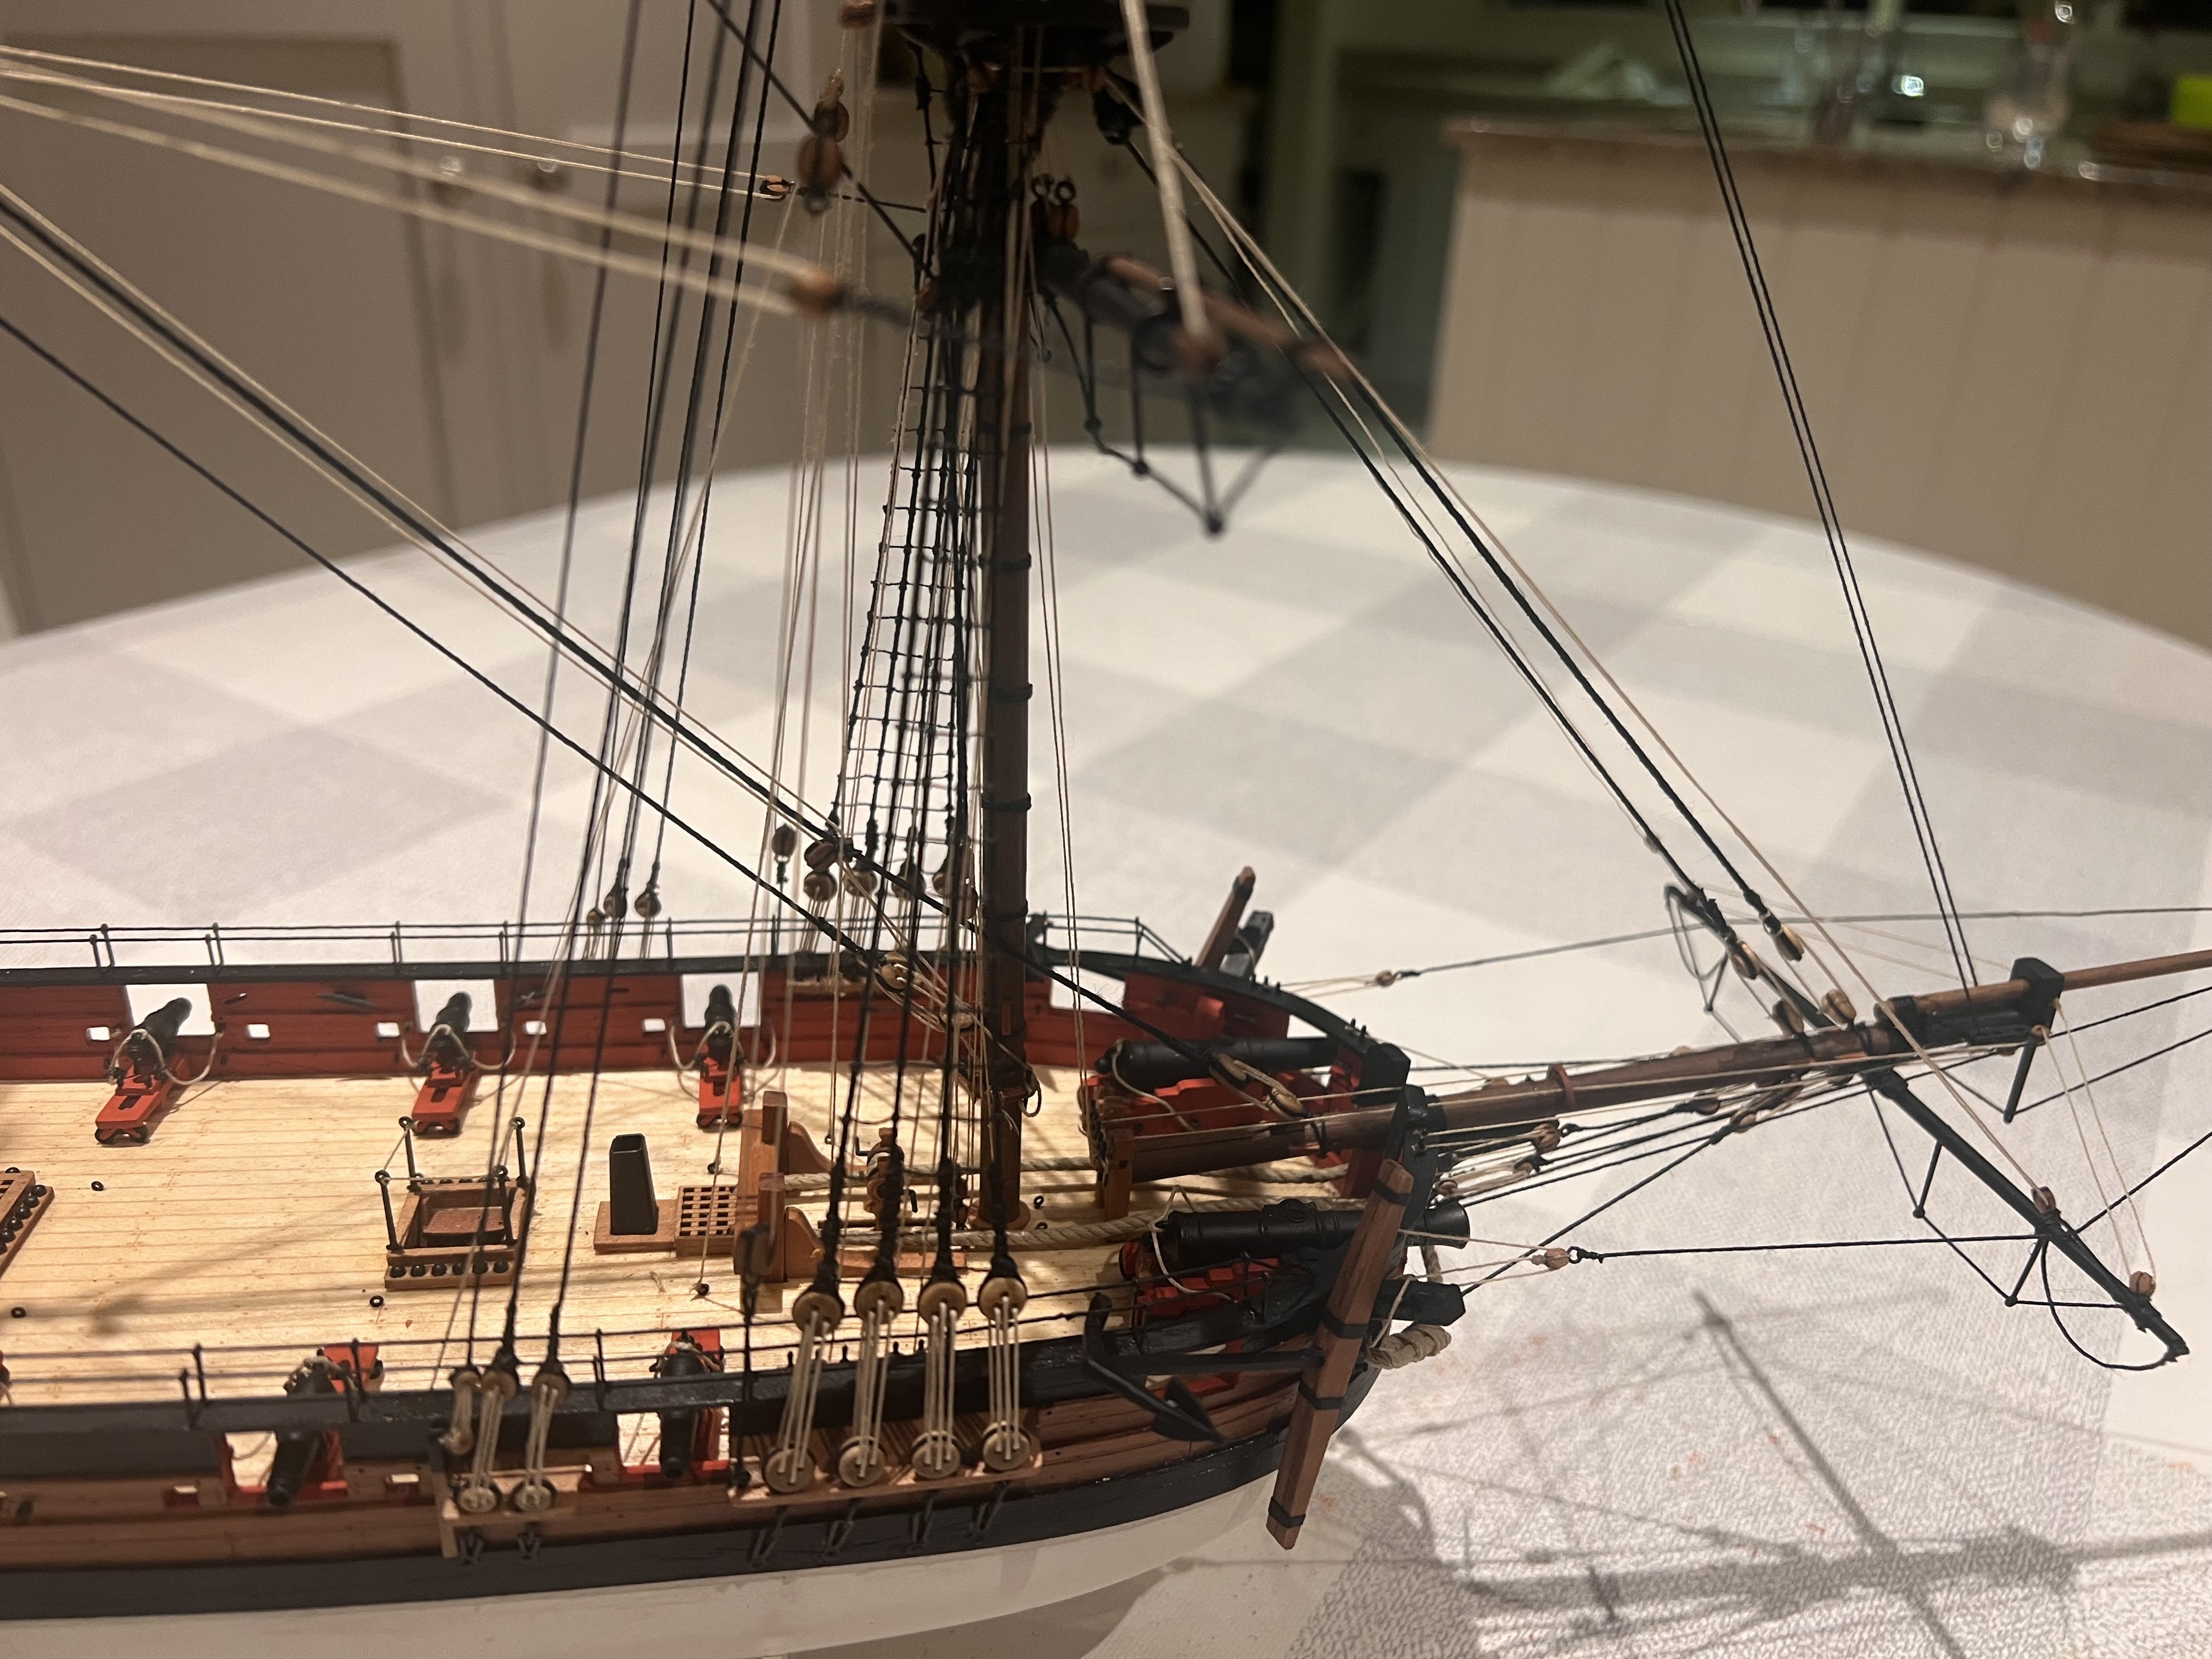
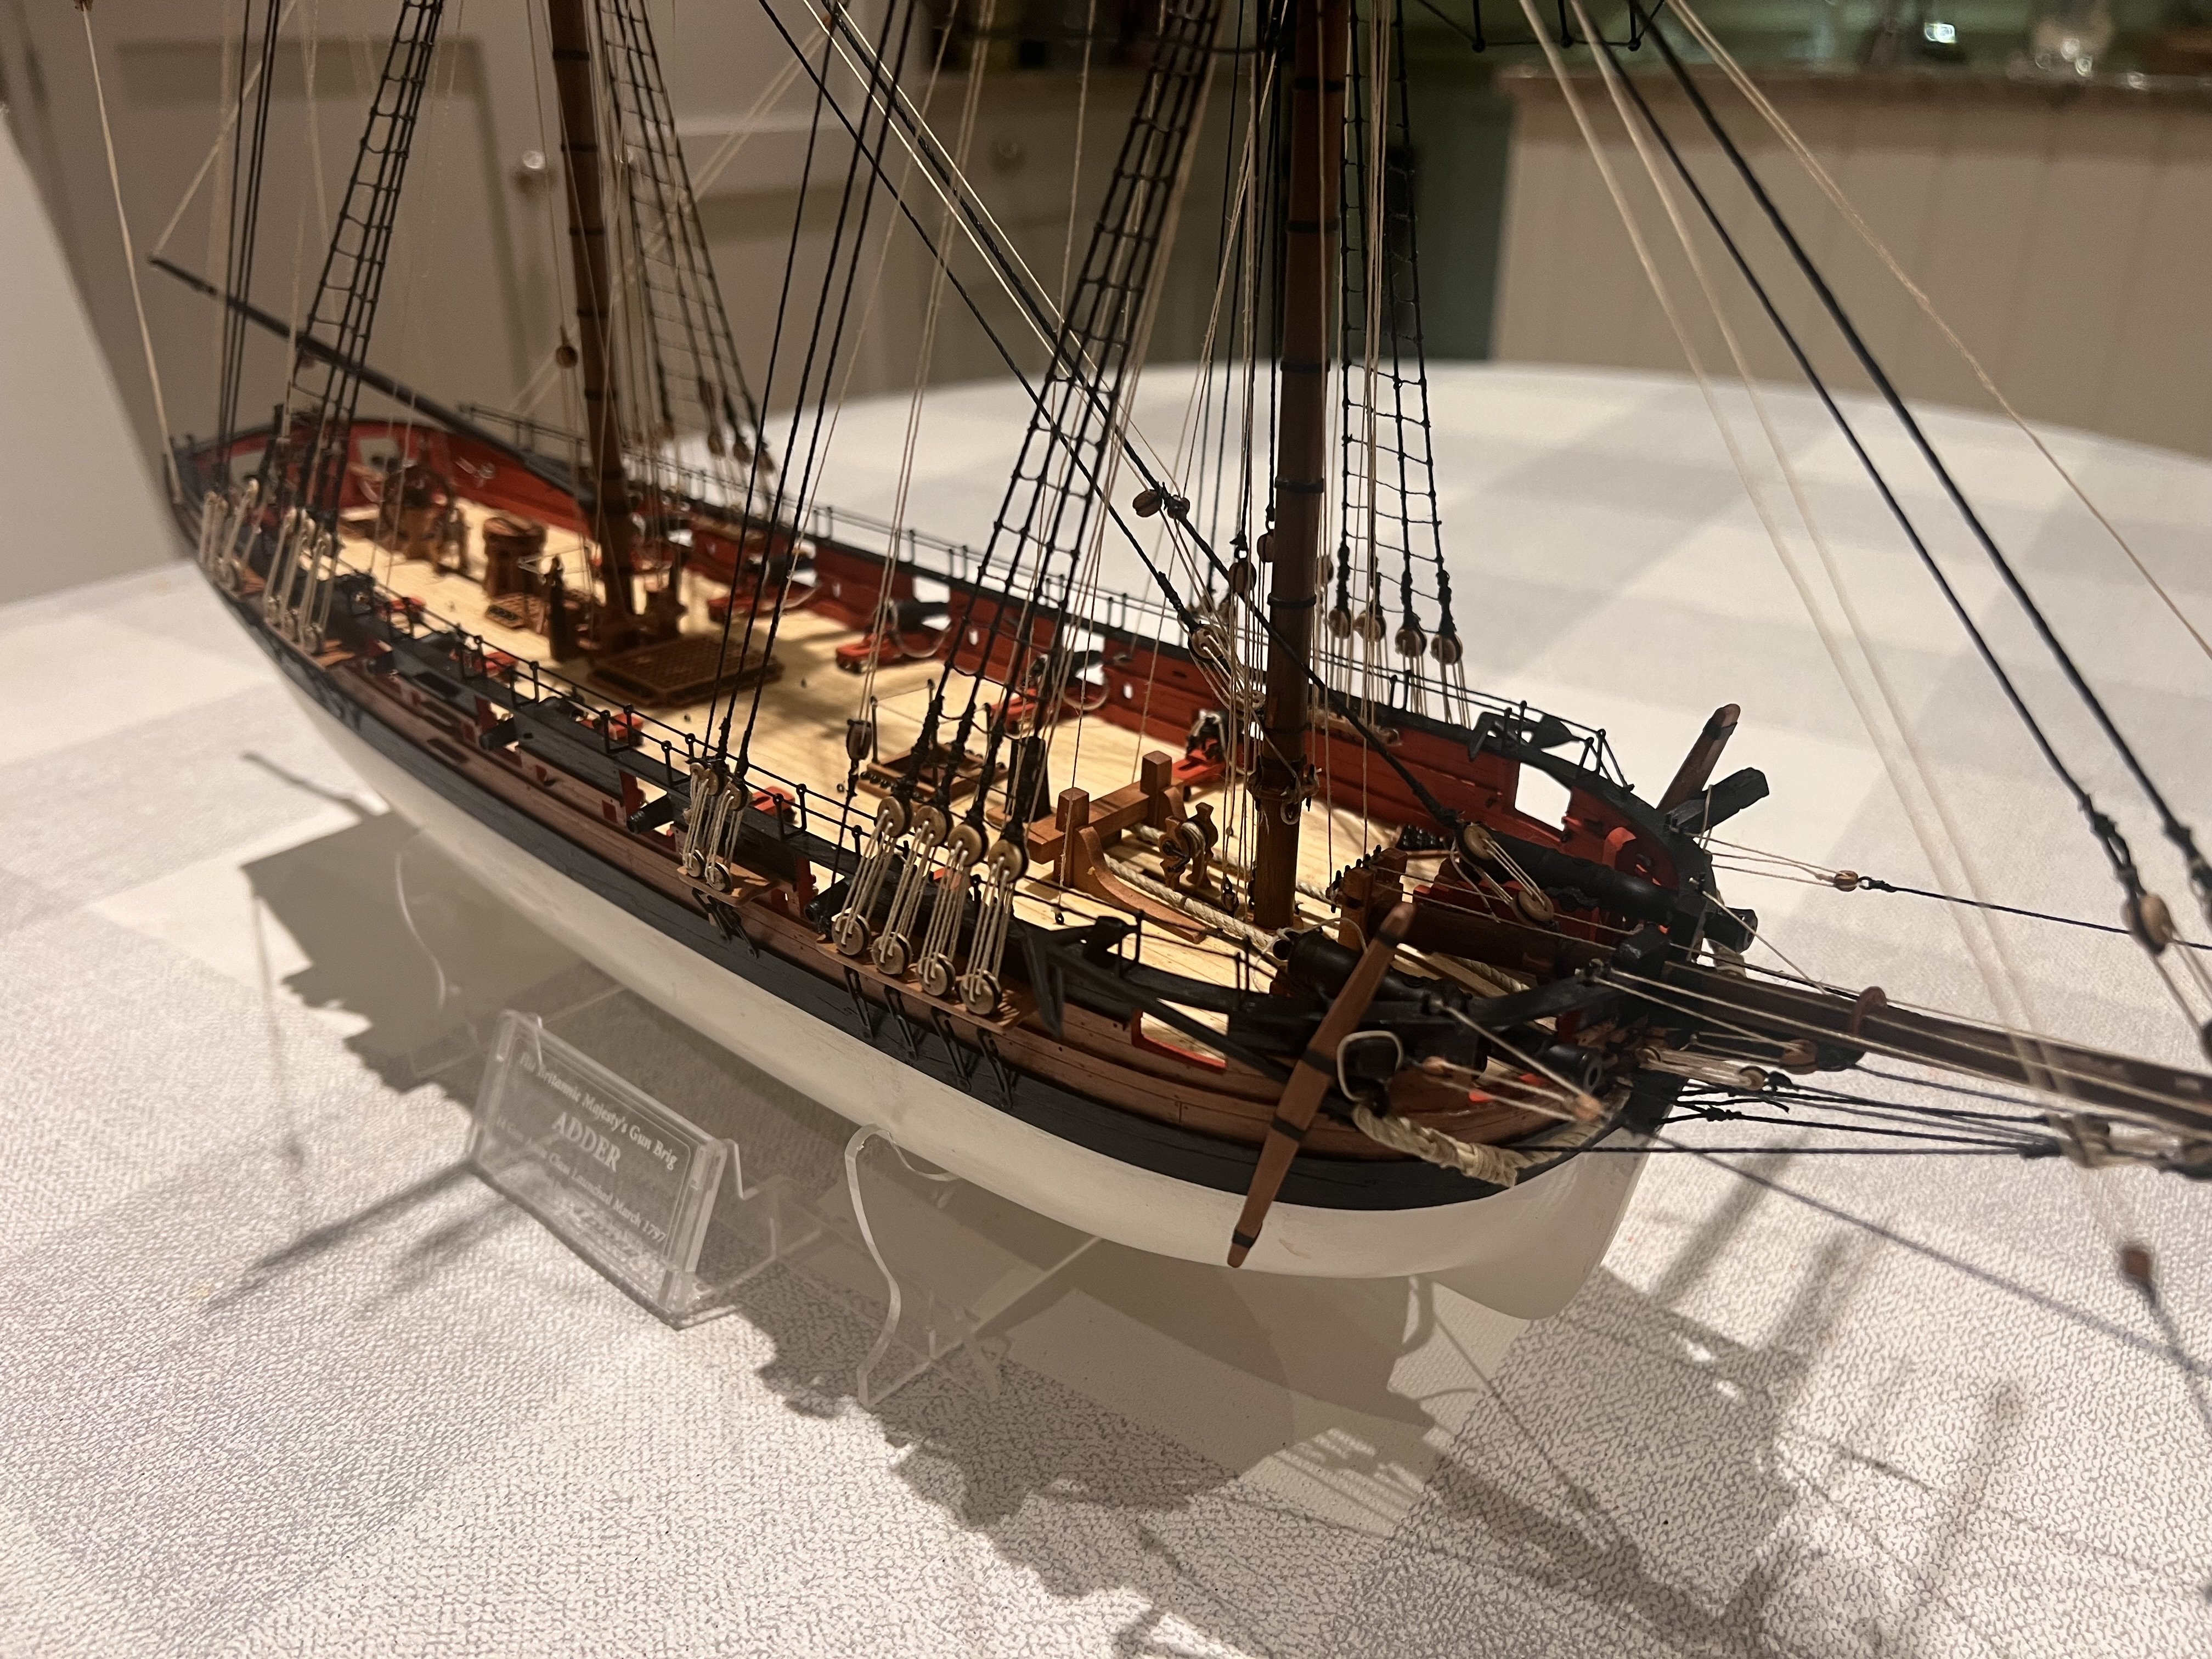
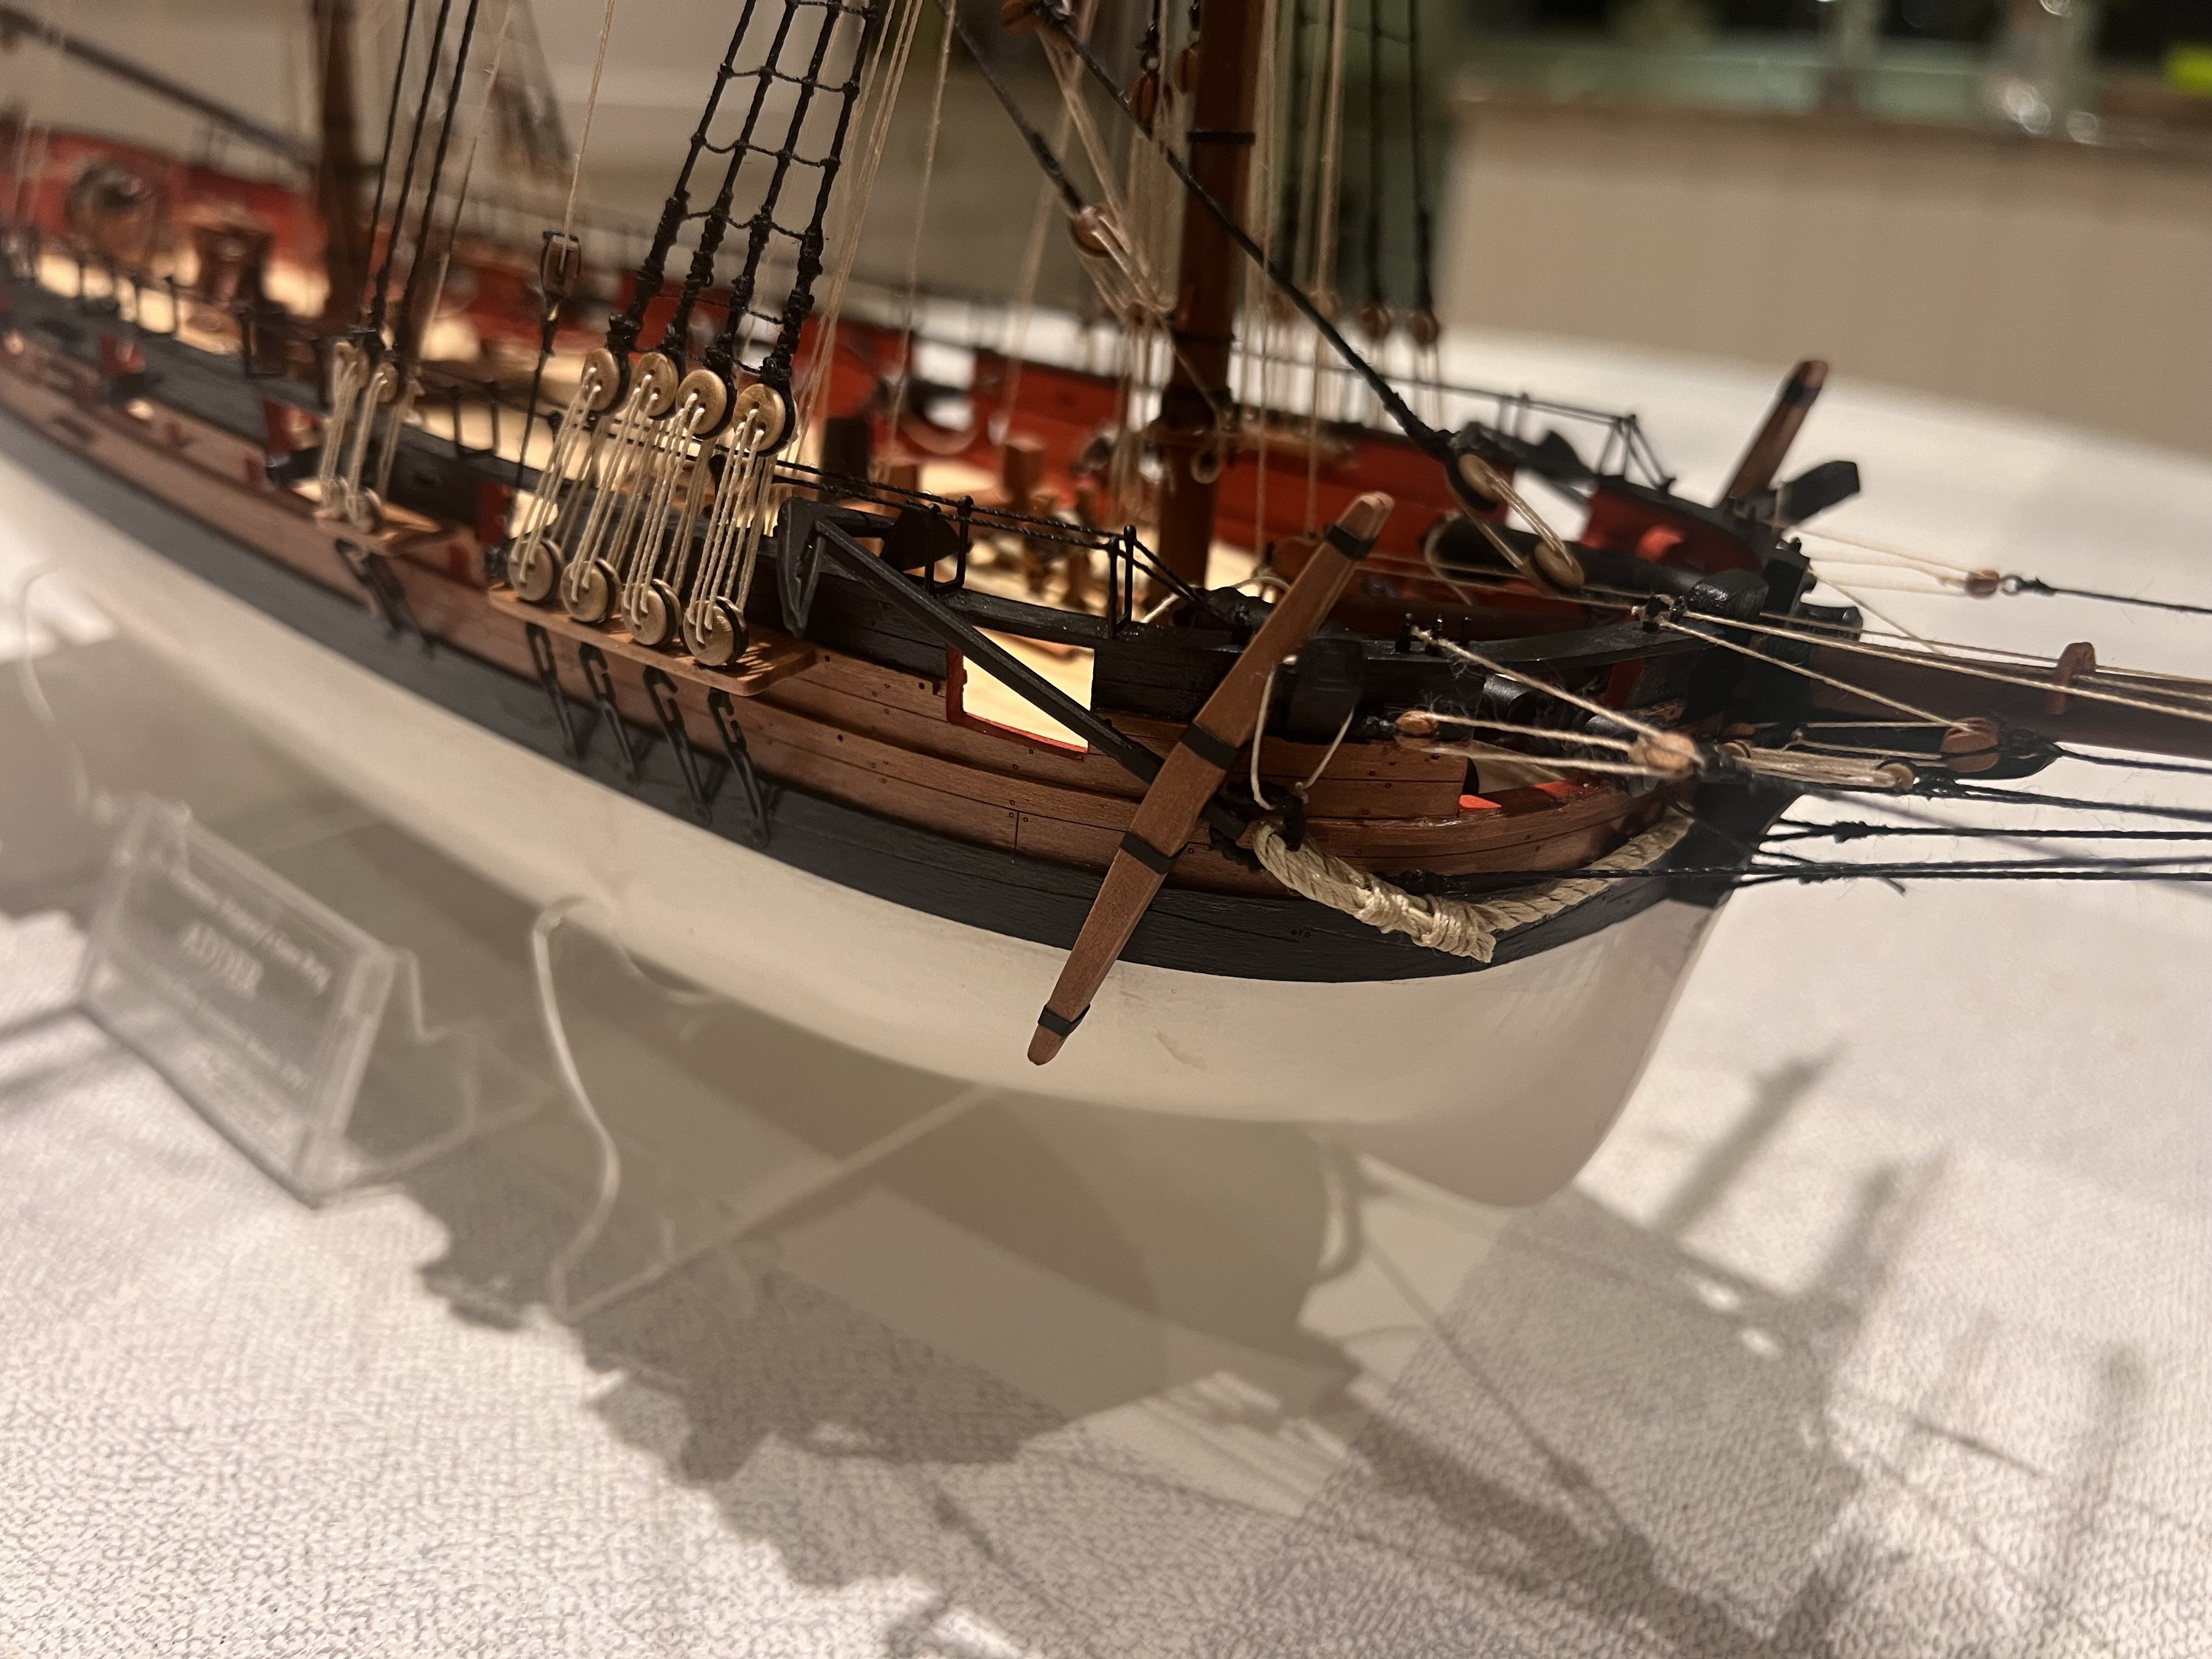
Adder is now finished. Another absolutely superb kit from Vanguard. Even more so than on previous Vanguard kits Chris has really innovated and made this ship as easy as possible to build whilst in no way compromising the finished outcome which I think looks superb (despite my building skills). I can’t Adder recommend enough.
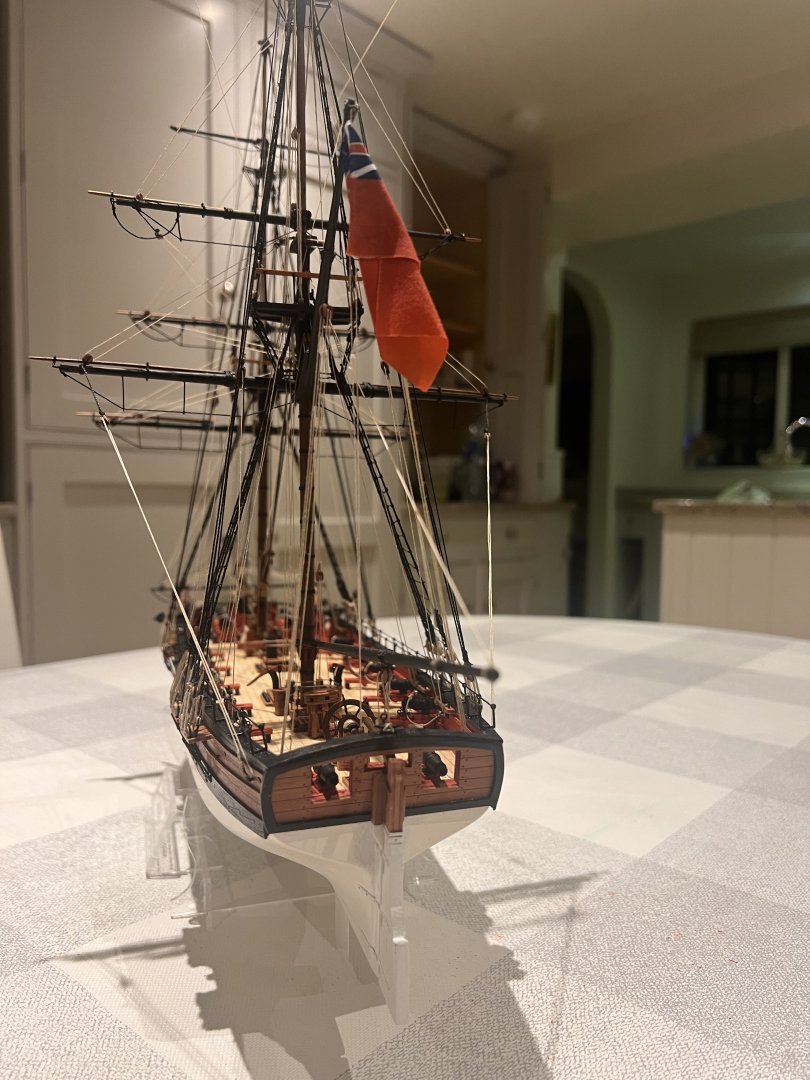
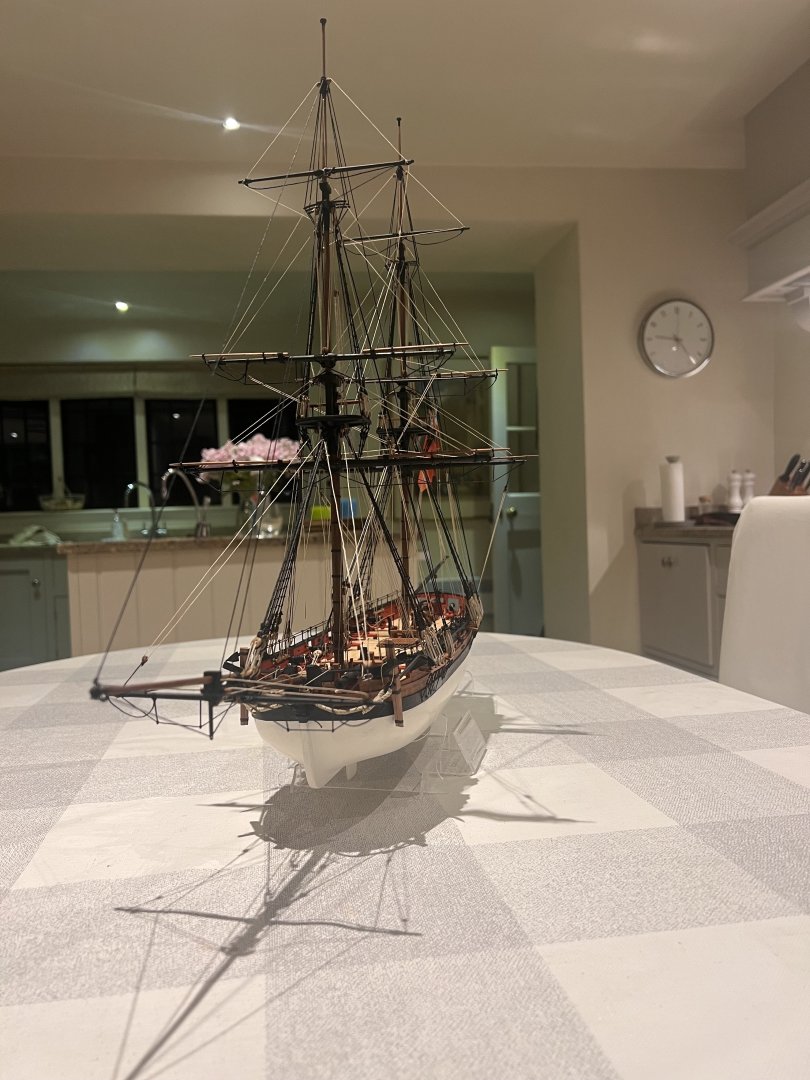
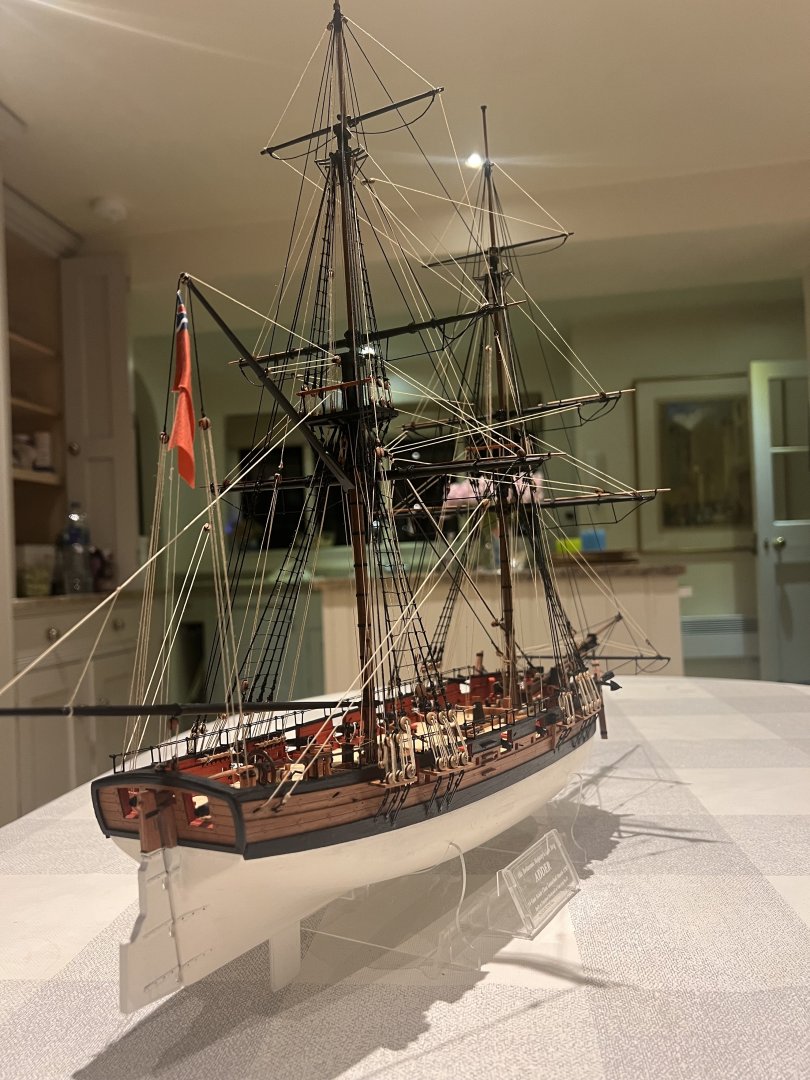
Adder was a step up in terms of complexity for me over Grecian and Alert in two areas. Firstly rigging a square rigger, the plans were excellent and very clear but just tying off the lines to belaying pins and feeding them around and through the tops was very fiddly (and that’s on a slightly simplified rig than other kits such as Speedy/Flirt). Nonetheless this was the ideal first square rigger for me to build and will prepare me well for my next build. Secondly the bow planking would have been a challenge if I’d wanted to have an unpainted lower hull, but the cleverness of Chris’s kit is that all the planking is below the waterline so it didn’t really matter what the planking looked like so long as it was smoothable with sandpaper and filler. Other than those areas I found her to be a very straightforward and accessible build. I have barely strayed from the kit and made very few adjustments such as drilling out the carronades and breach rigging the cannons and carronades.
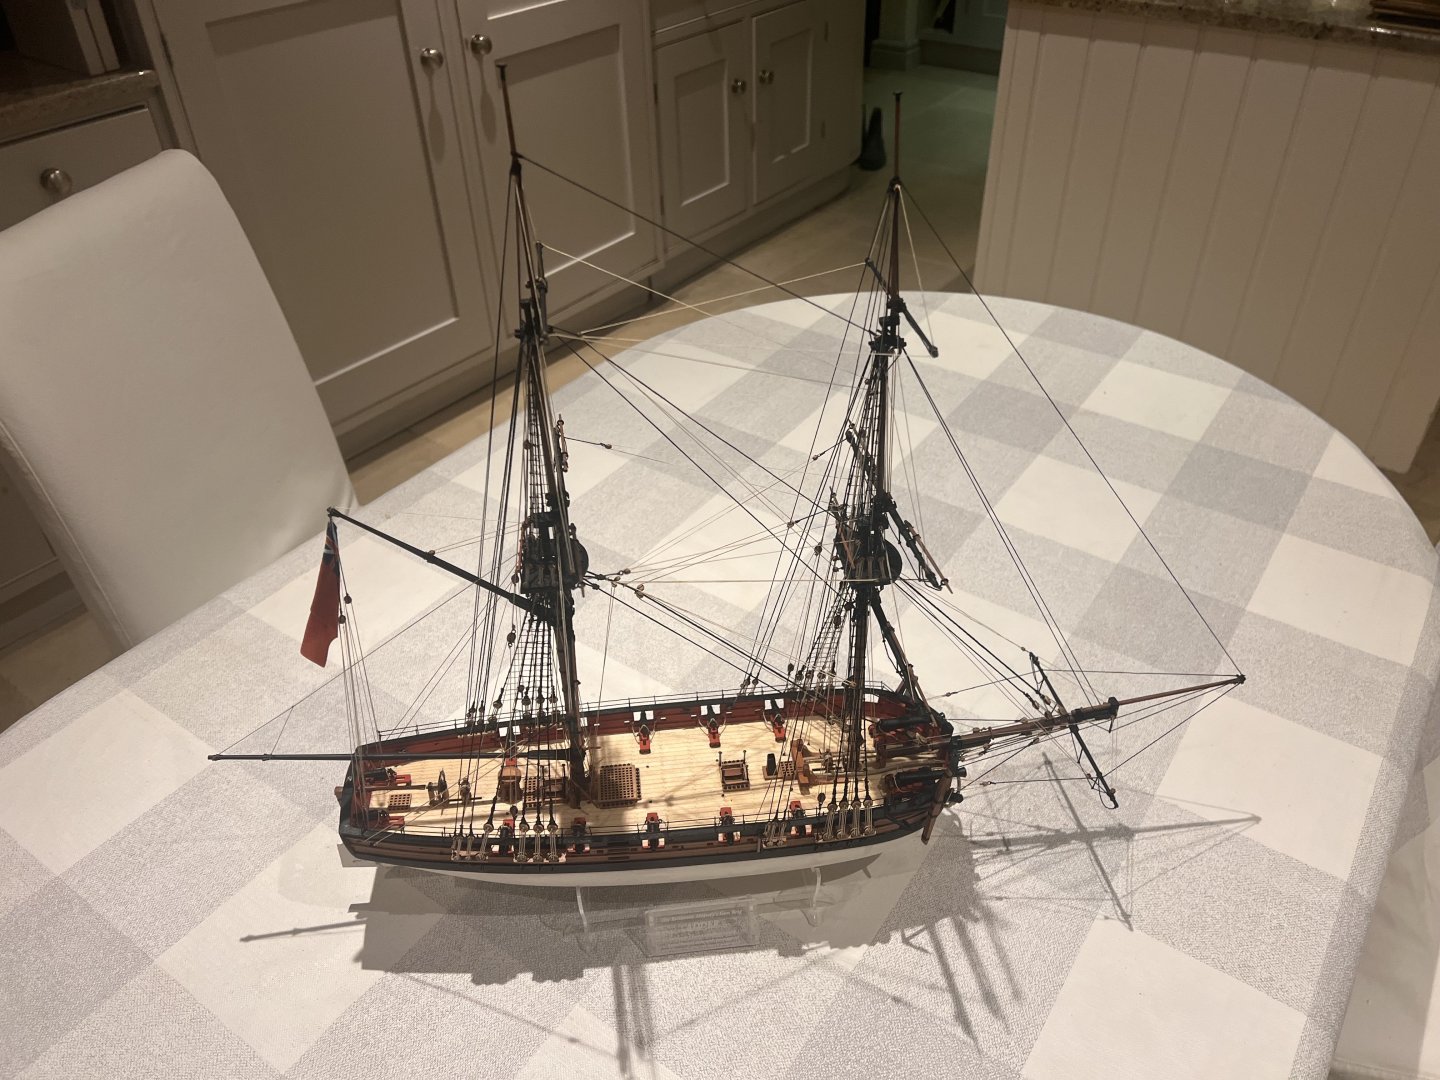


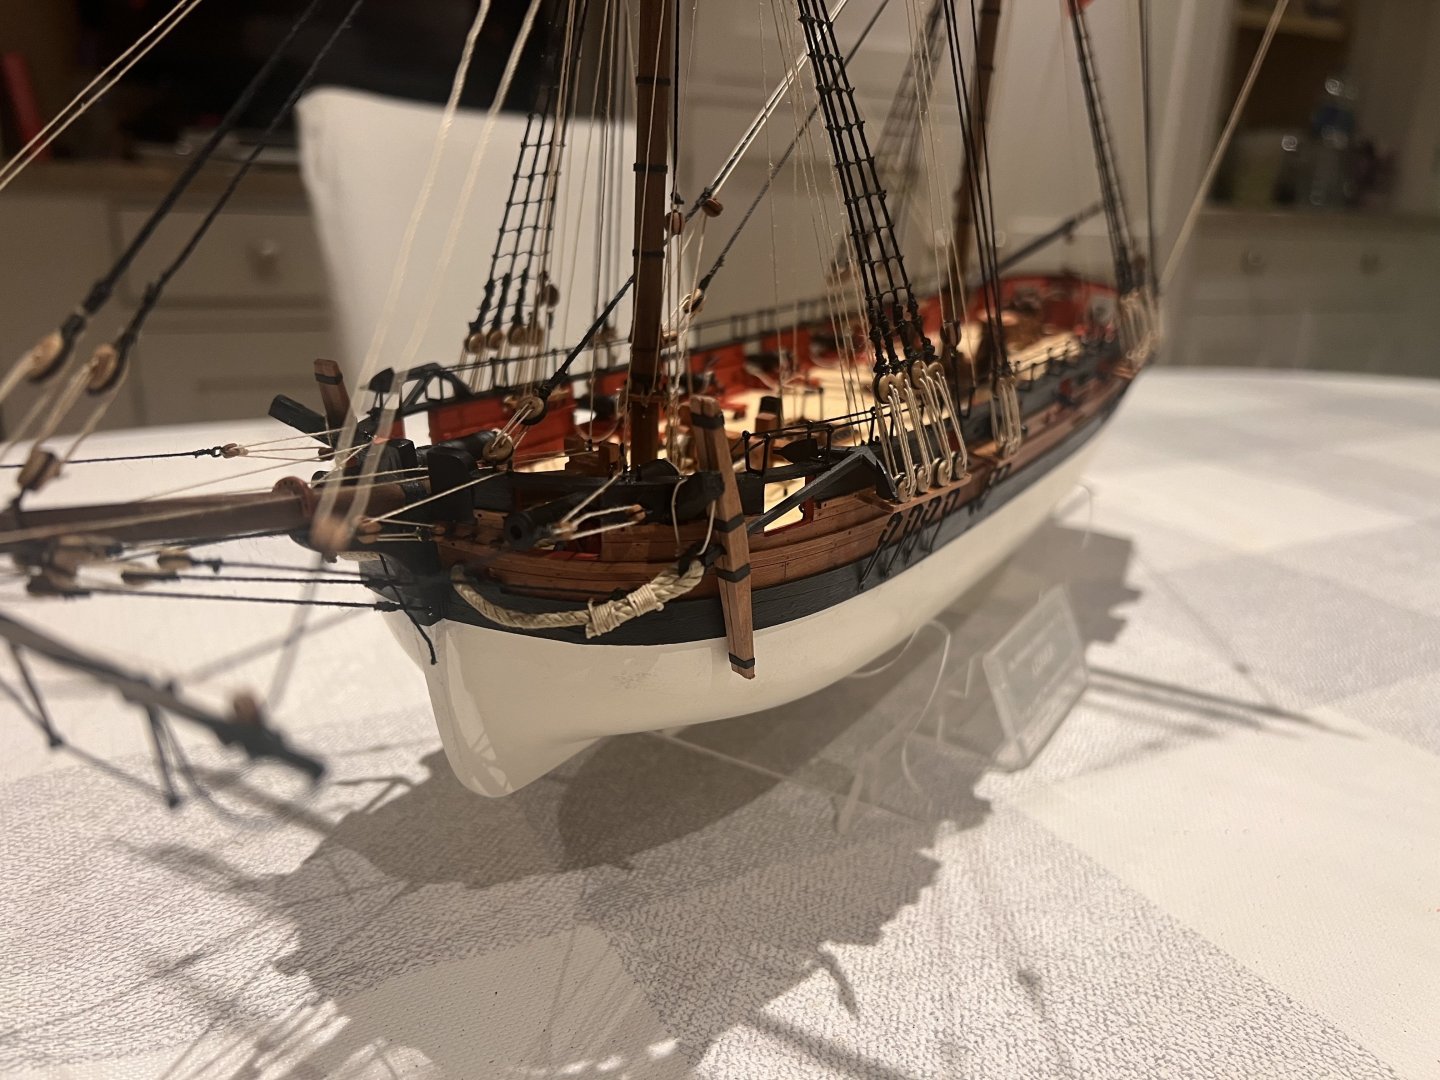

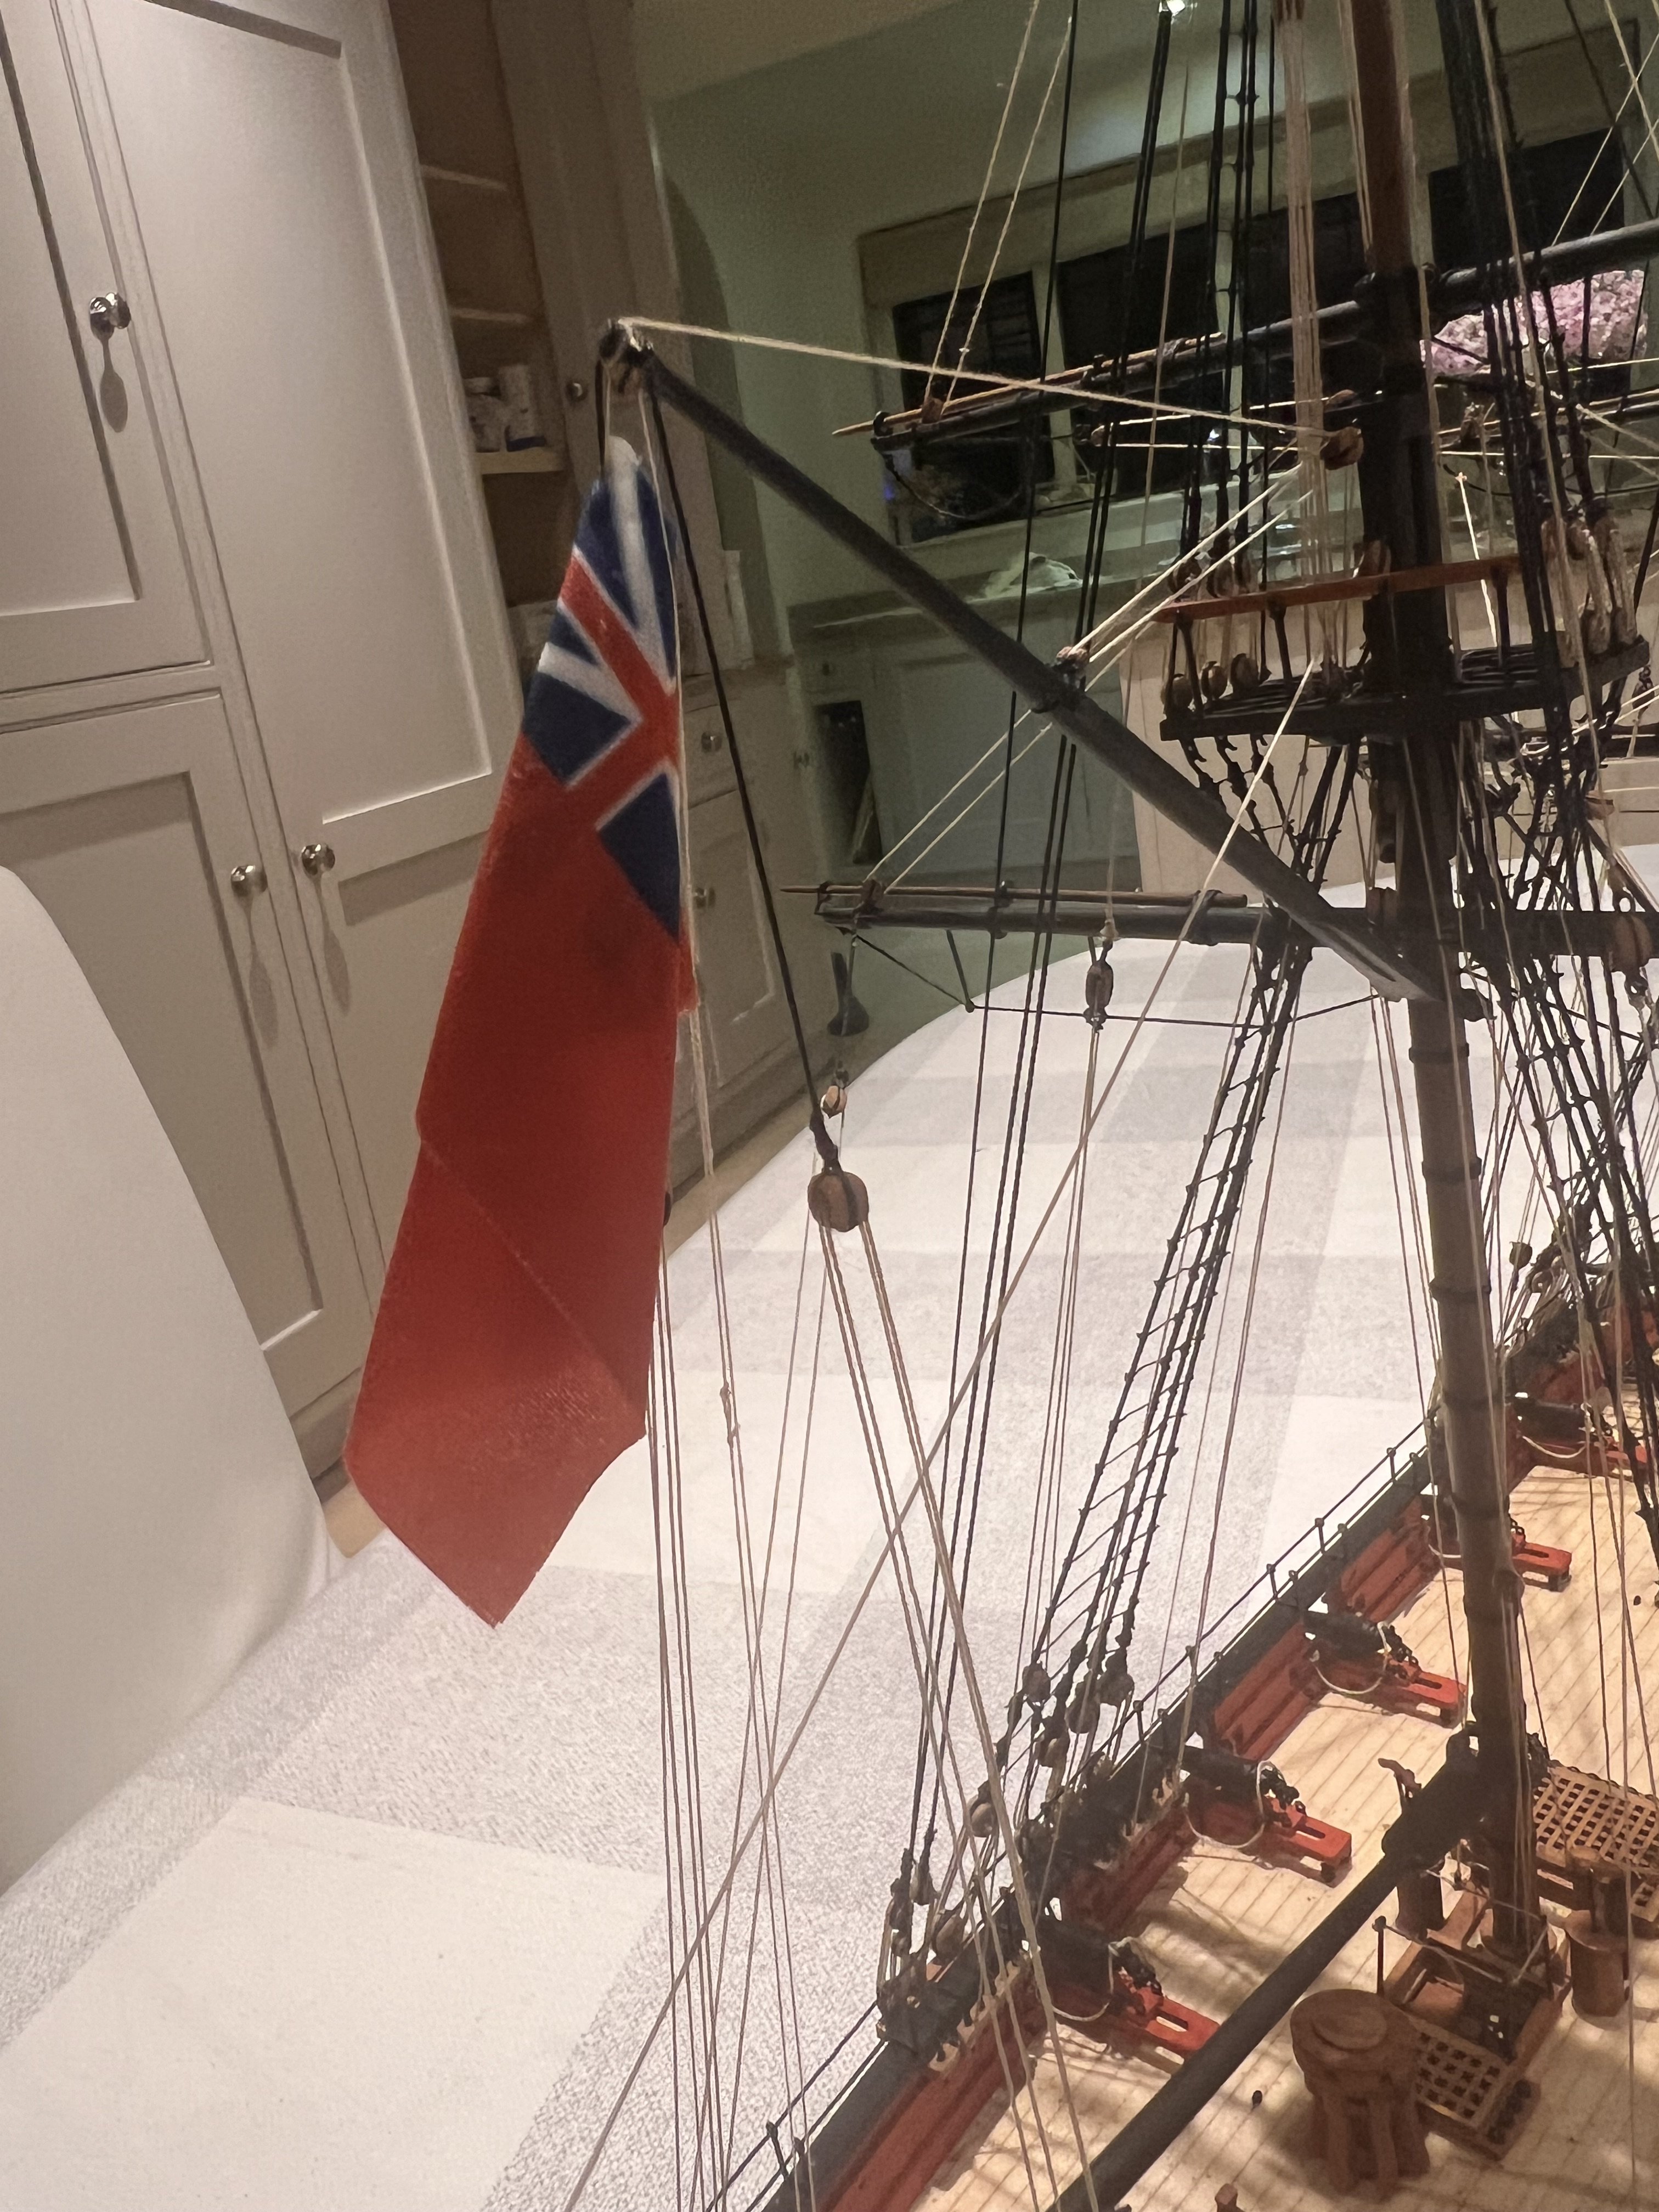
I’ve added a red duster. The ensign is a flag from BECC and isn’t very high quality. It’s heavily shown up by the American ensign I bought from Vanguard for Grecian which is made on a much higher quality material, with better printing and a lower propensity to fray at the edges. Unfortunately the ensign sets that Chris sells are too big for a small model such as Adder. Chris any chance you could sell some high quality small ensigns? I used the same process as on Grecian for shaping the ensign with a fabric stiffener and weighting with crocodile clips, this ensign needed a fair bit of CA to hold its shape too.


Thanks to Chris for another super kit and for everyone else for the advice, likes and encouragement.

- chris watton, hollowneck, rcweir and 16 others
-
13
-
 6
6
-
Ron and Uwe, thanks so much for the advice. I’ll definitely order a copy of that book. I’ve done plenty of sailing on modern fire and aft rigged yachts, but certainly don’t understand how square rigged sailing ships were handled.
Andrew and Eck thanks for the comments.
- AJohnson, hollowneck and Oboship
-
3
-
-
7 hours ago, hollowneck said:
I address this running rigging challenge by attaching small alligator clips to the falls (or halliards) temporarily on one side (say, Starboard), then I proceed on the larboard side with the complimentary lines and adjust these by hand and eye so there is visual symmetry and tighter runs for the opposing ropes - especially the lifts, braces and clew lines. In other words, I don't tie-off (secure) many rigging lines until both sides are nearly fully-rigged. I hope this description helps. I wish there were an online video on this process; I'm not aware of one.
Thanks Ron, that’s very helpful, it’s roughly what I did so I’m glad I’m on the right track, although the lines did start to tangle up towards the end!
7 hours ago, hollowneck said:The "main yard" (also called a "course" whether on the fore or main mast), was fixed and wasn't raised or lowered while at sea. The topmast and topgallant yards were raised and lowered while sailing, but typically, these upper yards usually stayed fixed in their fully raised positions; their sails were furled (gathered and secured at the yard) or reefed (partially "reduced" or gathered) depending on the wind conditions.
That’s a really helpful explanation, thank you. Do you know why we typically depict the topmast and topgallant yards in the lower position on the masts if they were usually raised? Was that their position in port?
I really appreciate the advice, thank you.
- Cjames, chris watton and AJohnson
-
2
-
 1
1
-
Thanks for all the comments and encouragement.
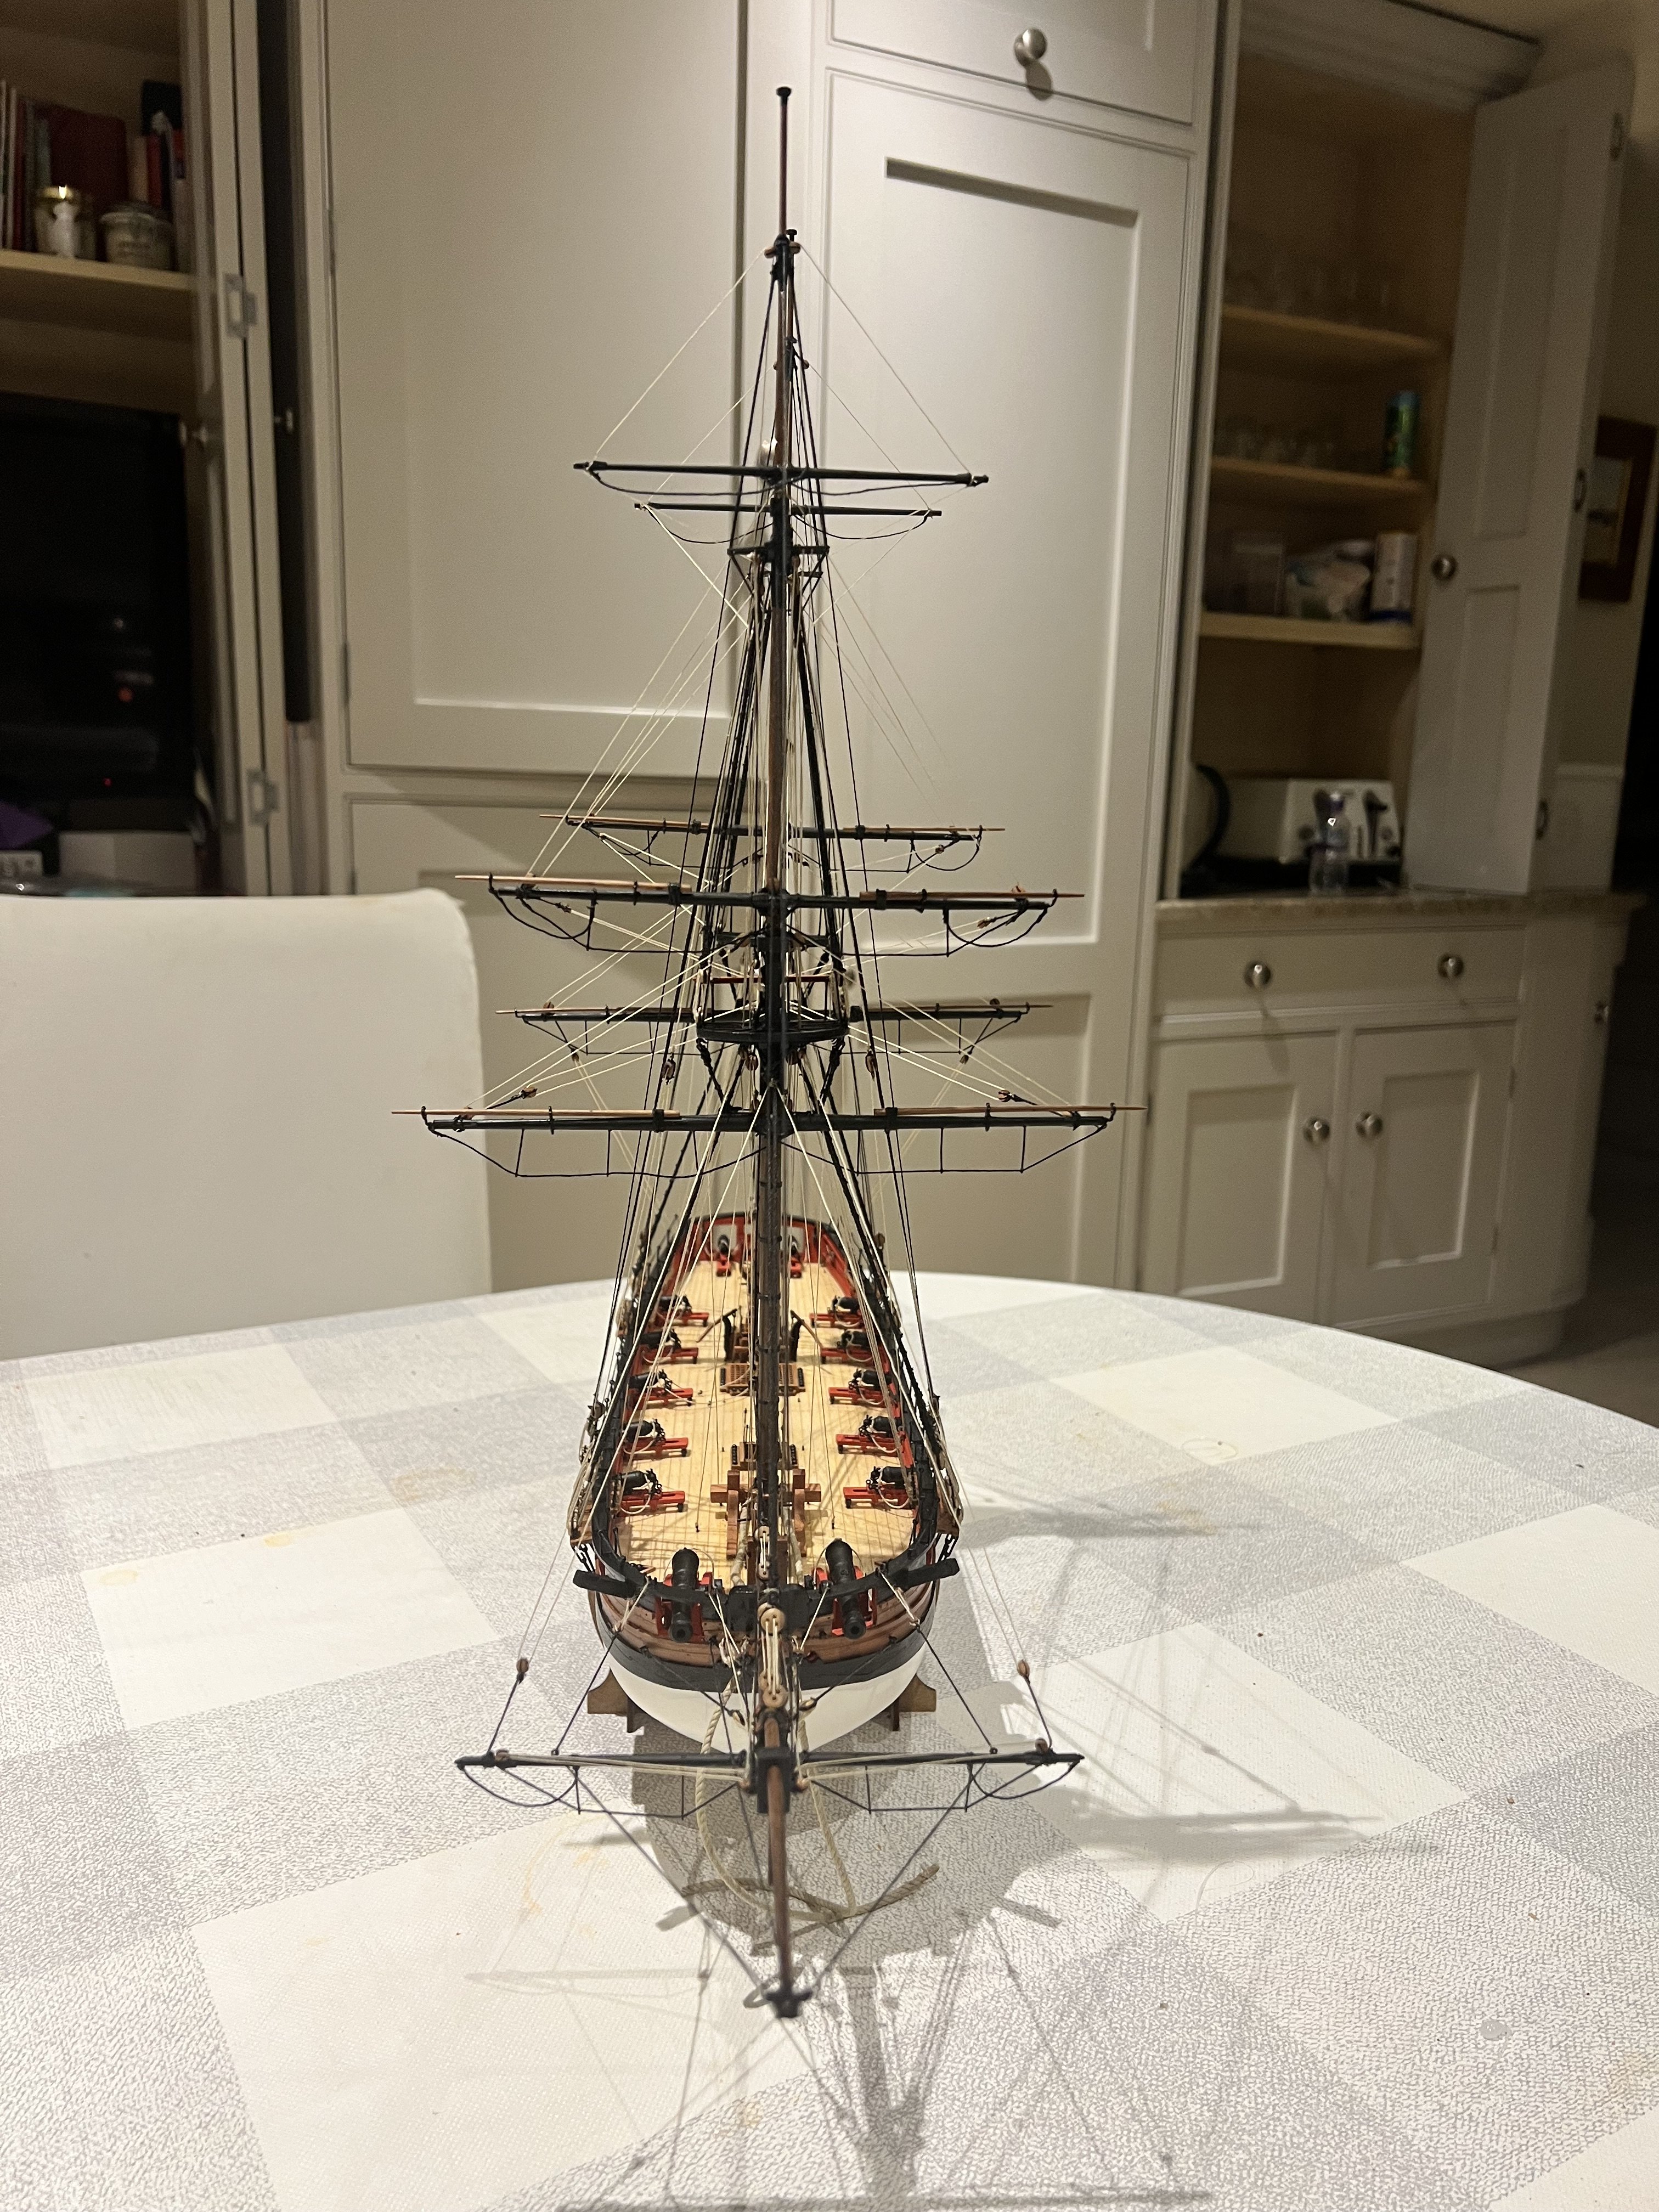
Adder’s rigging is now complete. Rigging Adder has been a steep learning curve for me. I liked Adder as a subject but the kit has been an ideal stepping stone for me as my first square rigger. I’m very glad I followed Chris’s advice to build Adder before Speedy as the latter has more running rigging too which for me would have been too much.
Chris’s plans are excellent but I haven’t found it easy. A few of the lines aren’t belayed to the correct points as I couldn’t get them around the belaying pins, but otherwise I think pretty true to the plans.
One thing I find very hard is keeping as many as possible of the lines not tied off so I can adjust the rigging and don’t end up with slack lines where the tension has changed from other rigging ropes. I’d be interested to know how others deal with this? I use CA glue too much on the rigging I think which is almost impossible to undo, but I’d struggle to do the rigging without it.
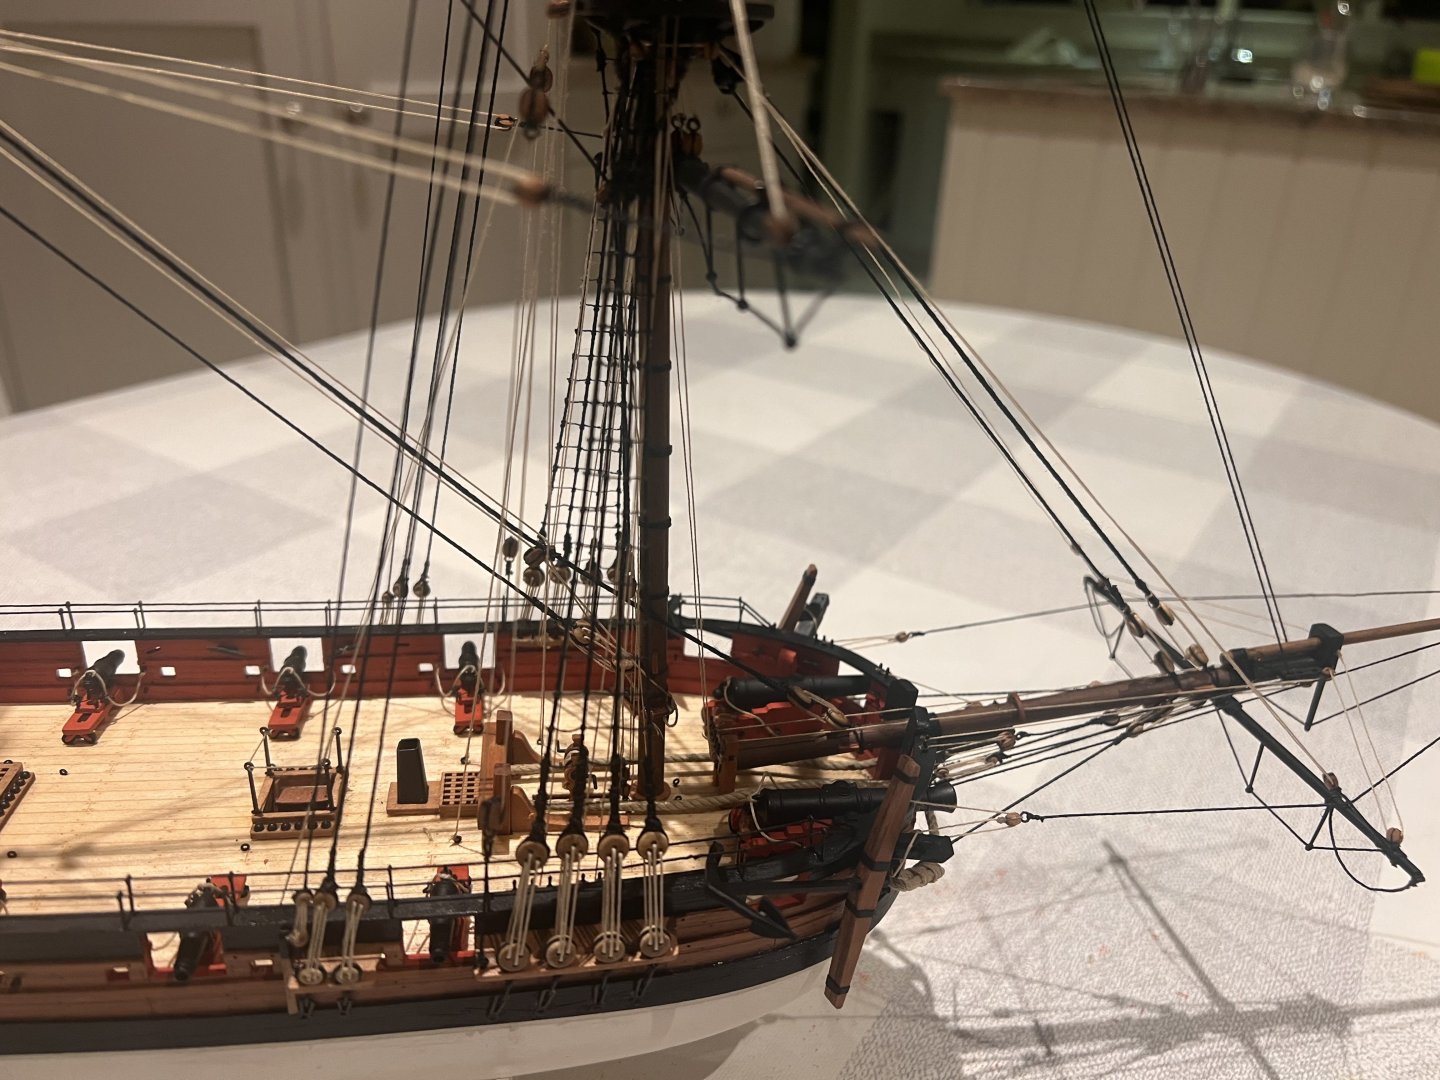
All that’s outstanding now are the anchors, refitting a carronade that has come loose, putting some matt varnish on the shiny parrel beads and mouses, and the stand. There maybe a few very small touch-ups too. I may add a red ensign too.
I understand that these gun brigs were primarily used as a form of coastal assault vessel. It looks to me as though most of the bowsprit rigging and the spritsail yard would need to be dismantled before the forward 24-pounders could fire.
One other generic question about square riggers (and showing my ignorance) but all the kits show the vessels with the main yard raised to the top of the lower mast ie in the position where it would be if a sail raised. Whilst the top and topgallant yards are both at the lowest position on their masts. Was this just the way square riggers had their masts in harbour in real life?
-
-
-
-
-
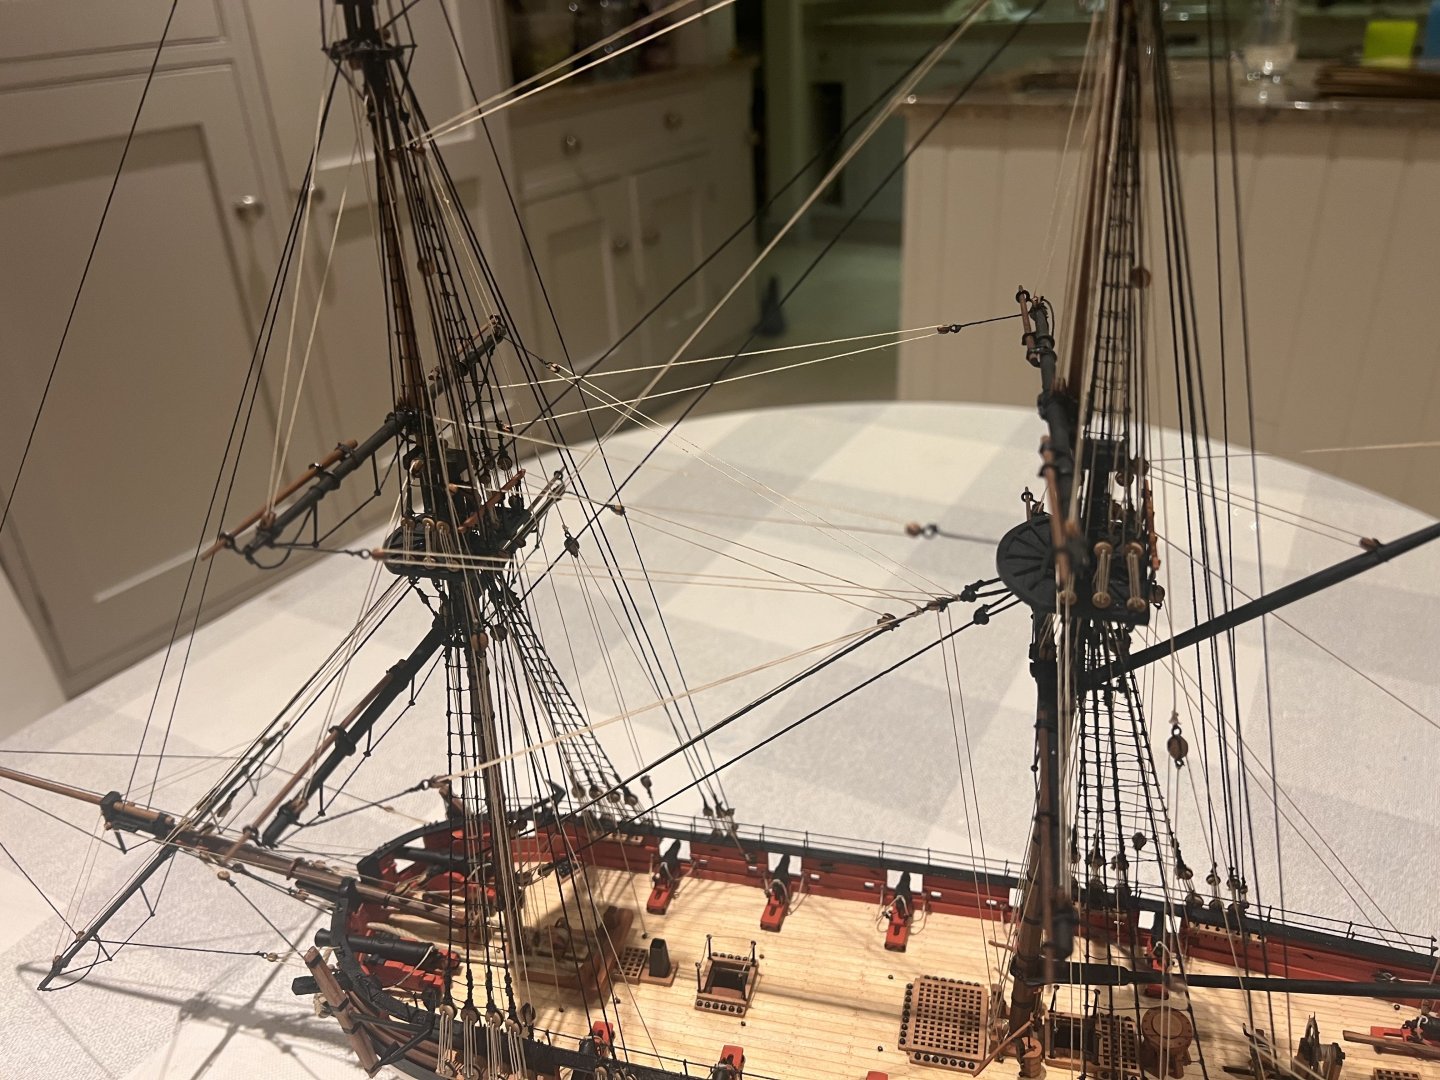
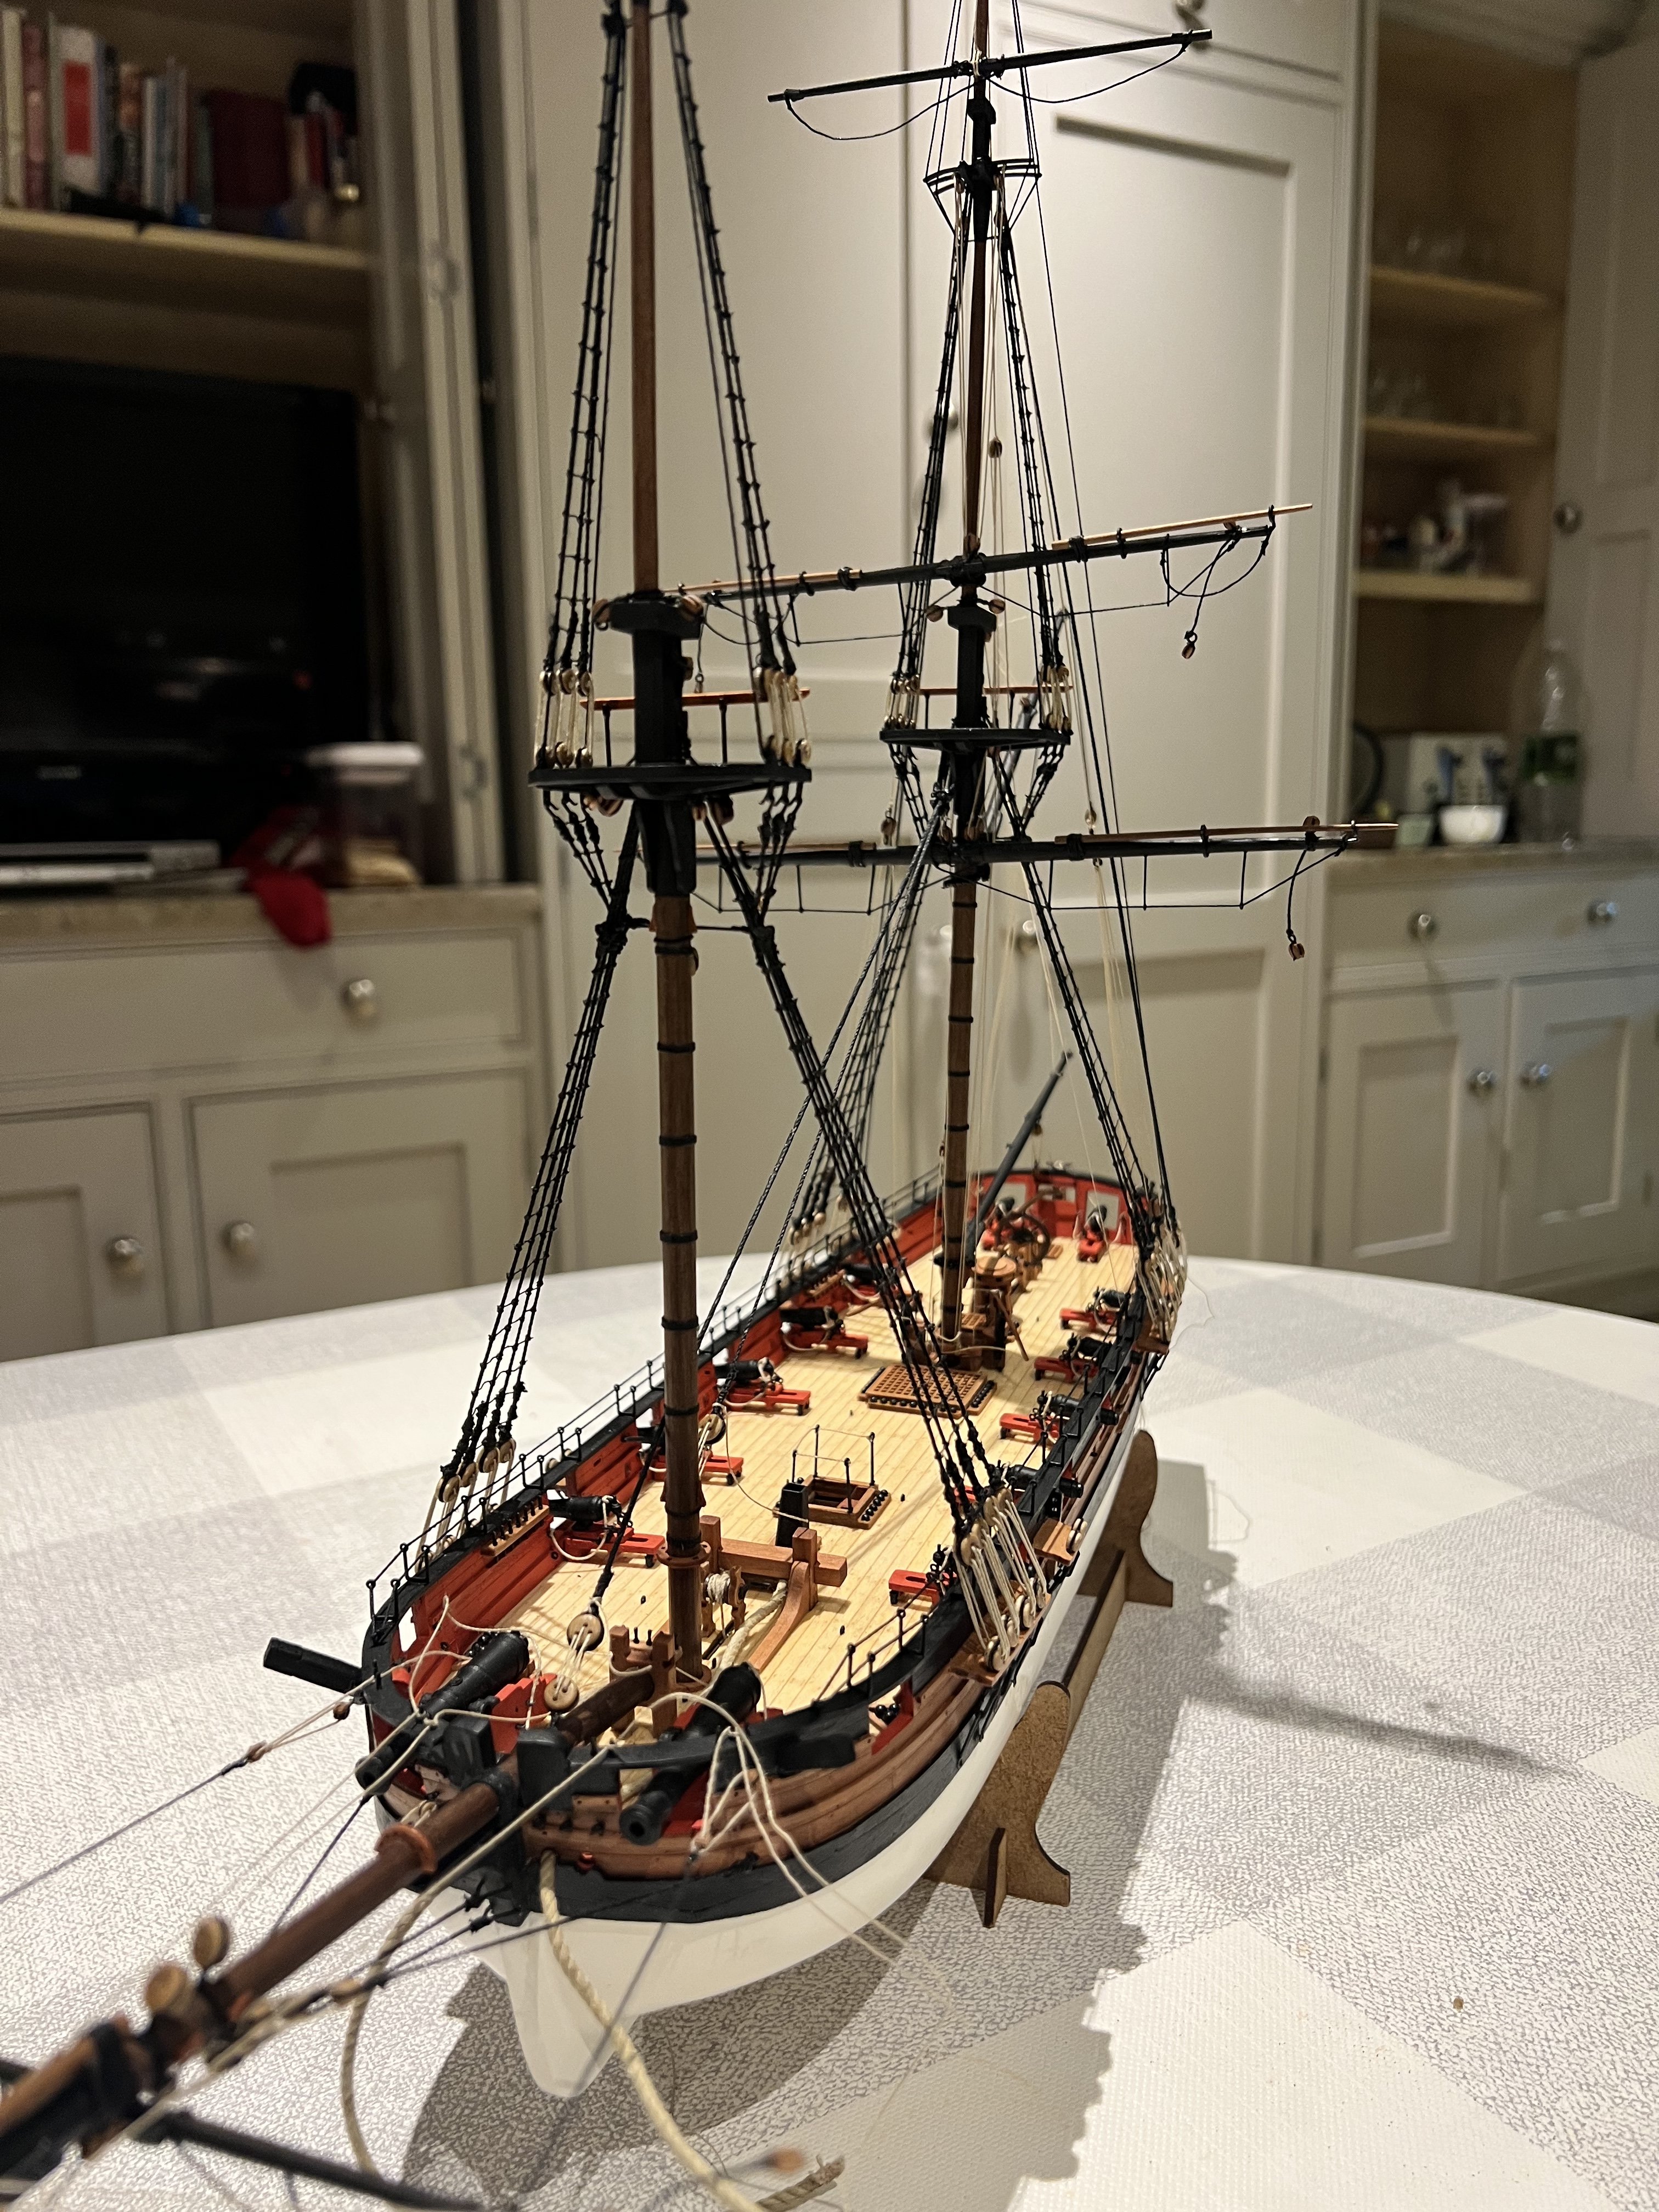
Adder’s rigging is progressing. Most of the main mast rigging is in place except for lifts, braces and any stays to the foremast that would get in the way of adding the yards to the foremast.
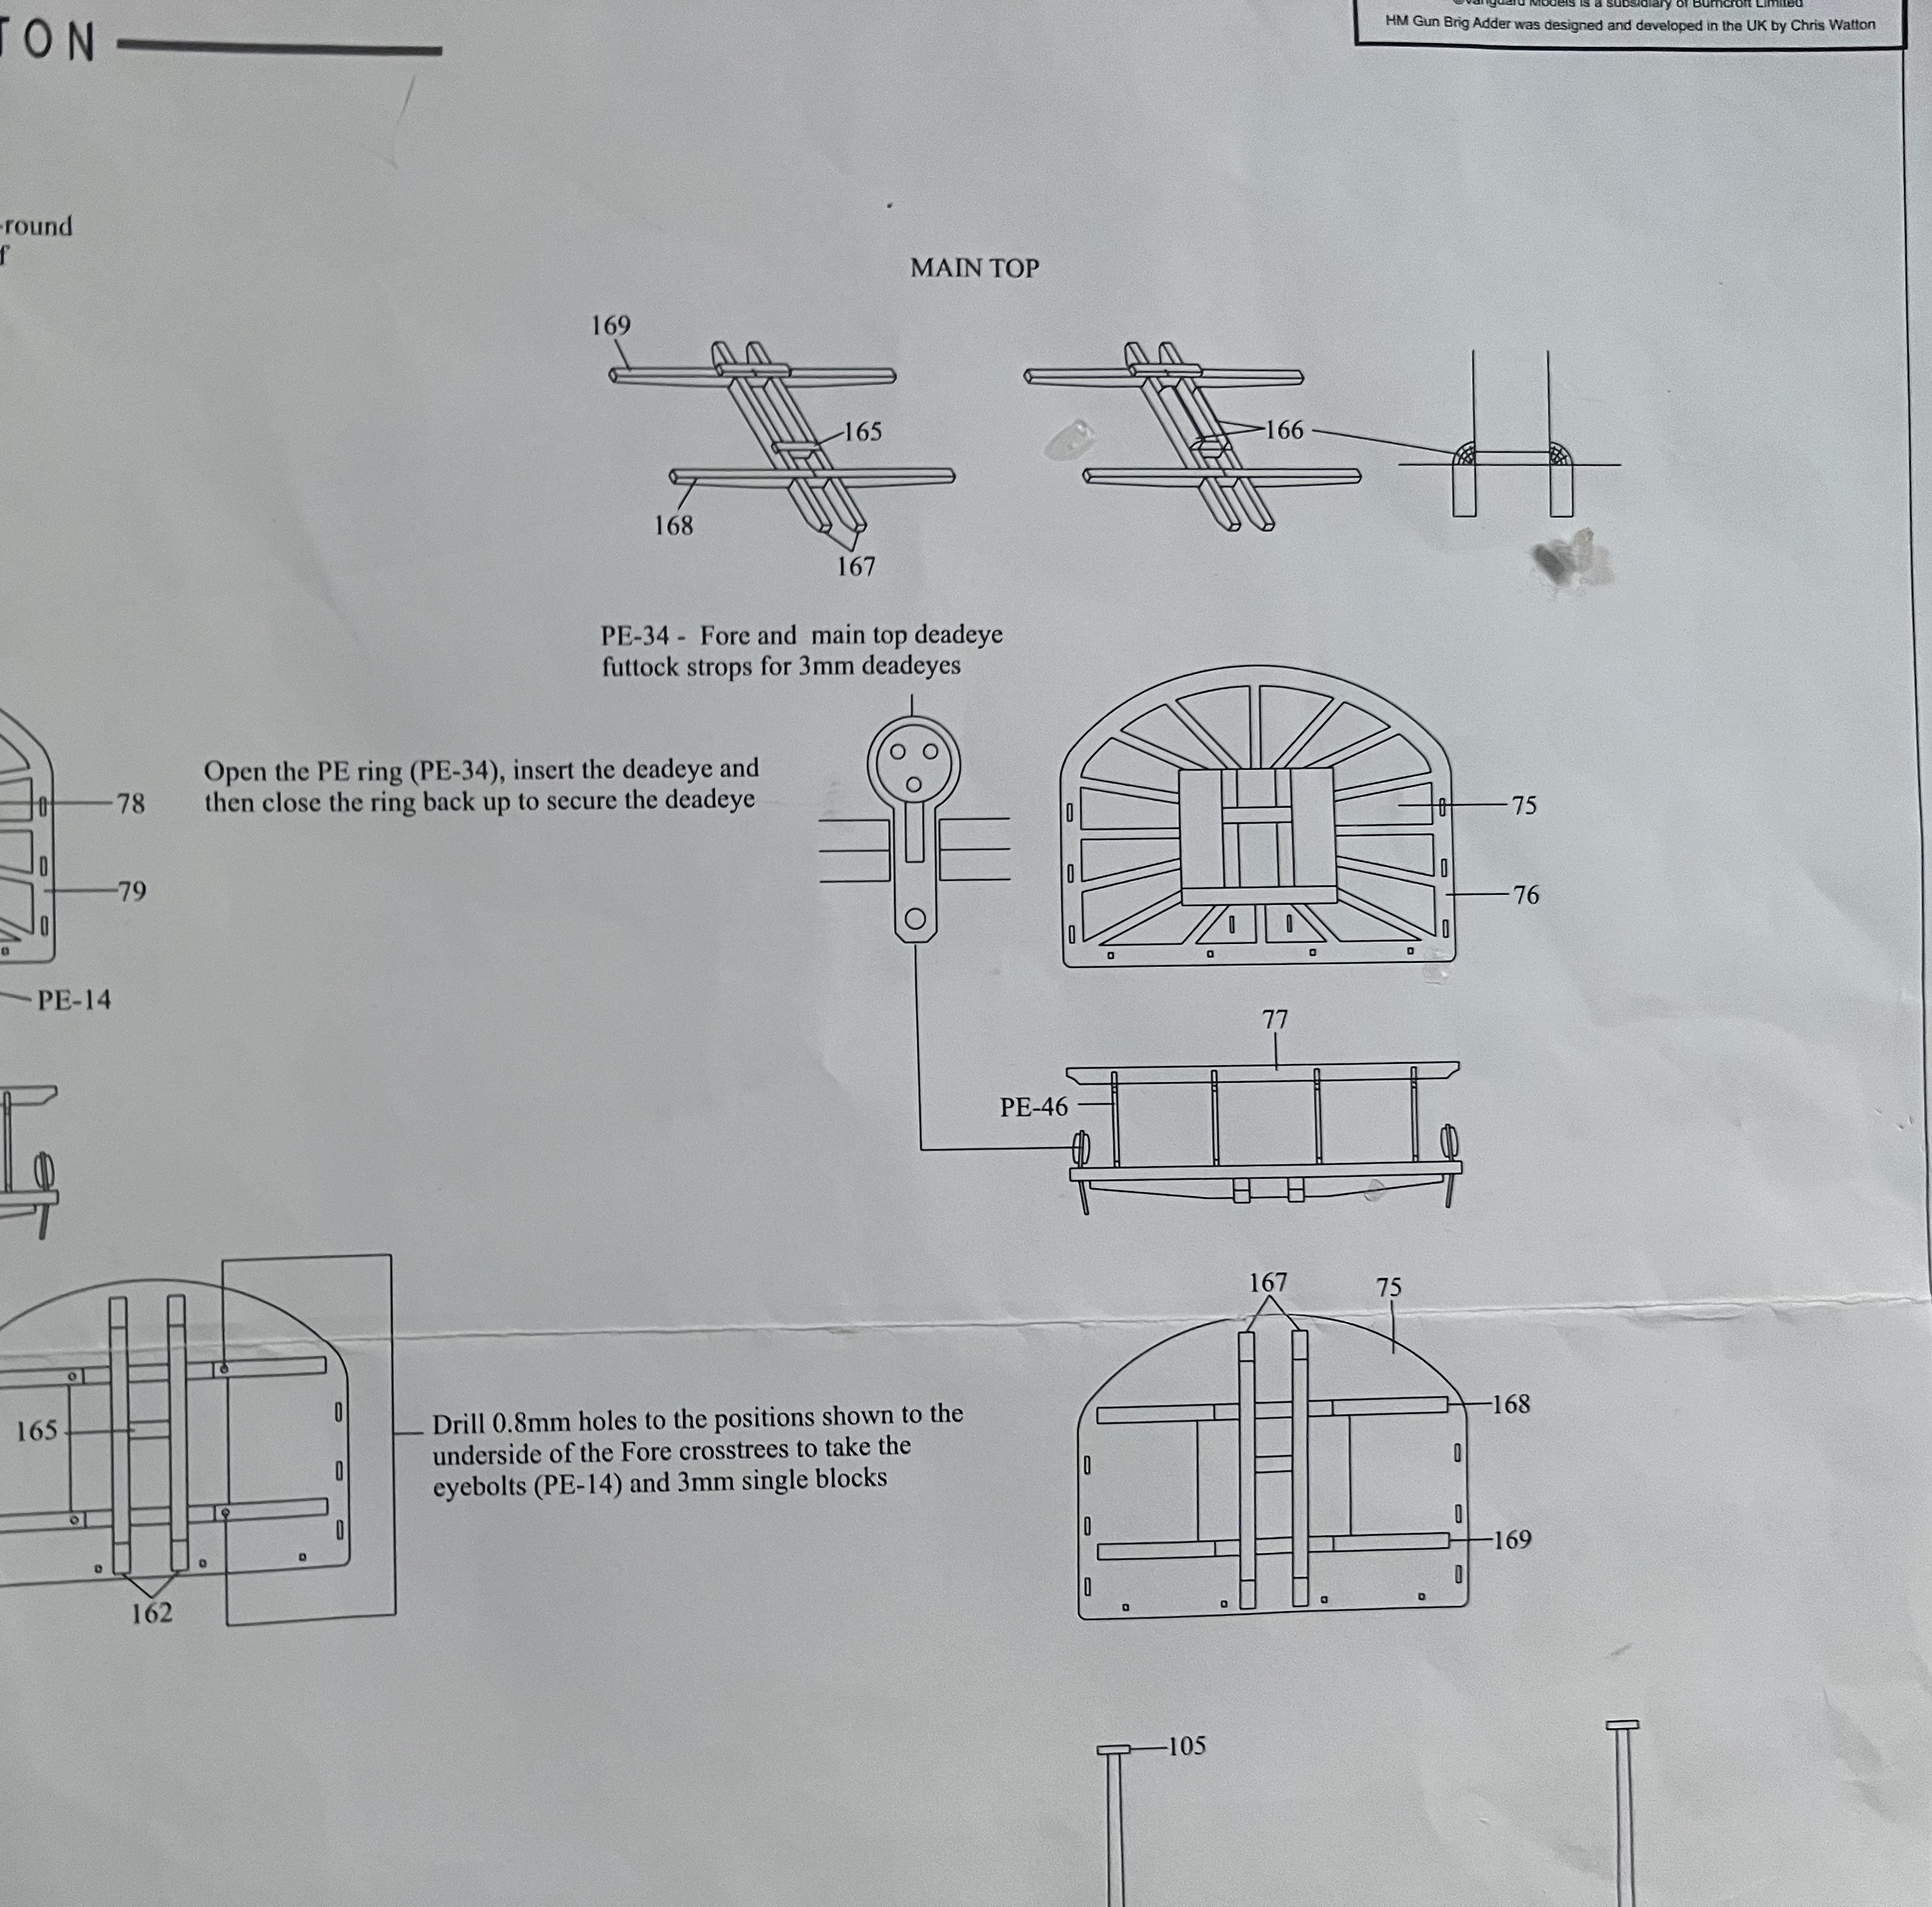
The access problem to add eyebolts to the maintop was resolved by removing the wooden railing at the rear of the maintop. I’ll need to do the same for the foretop.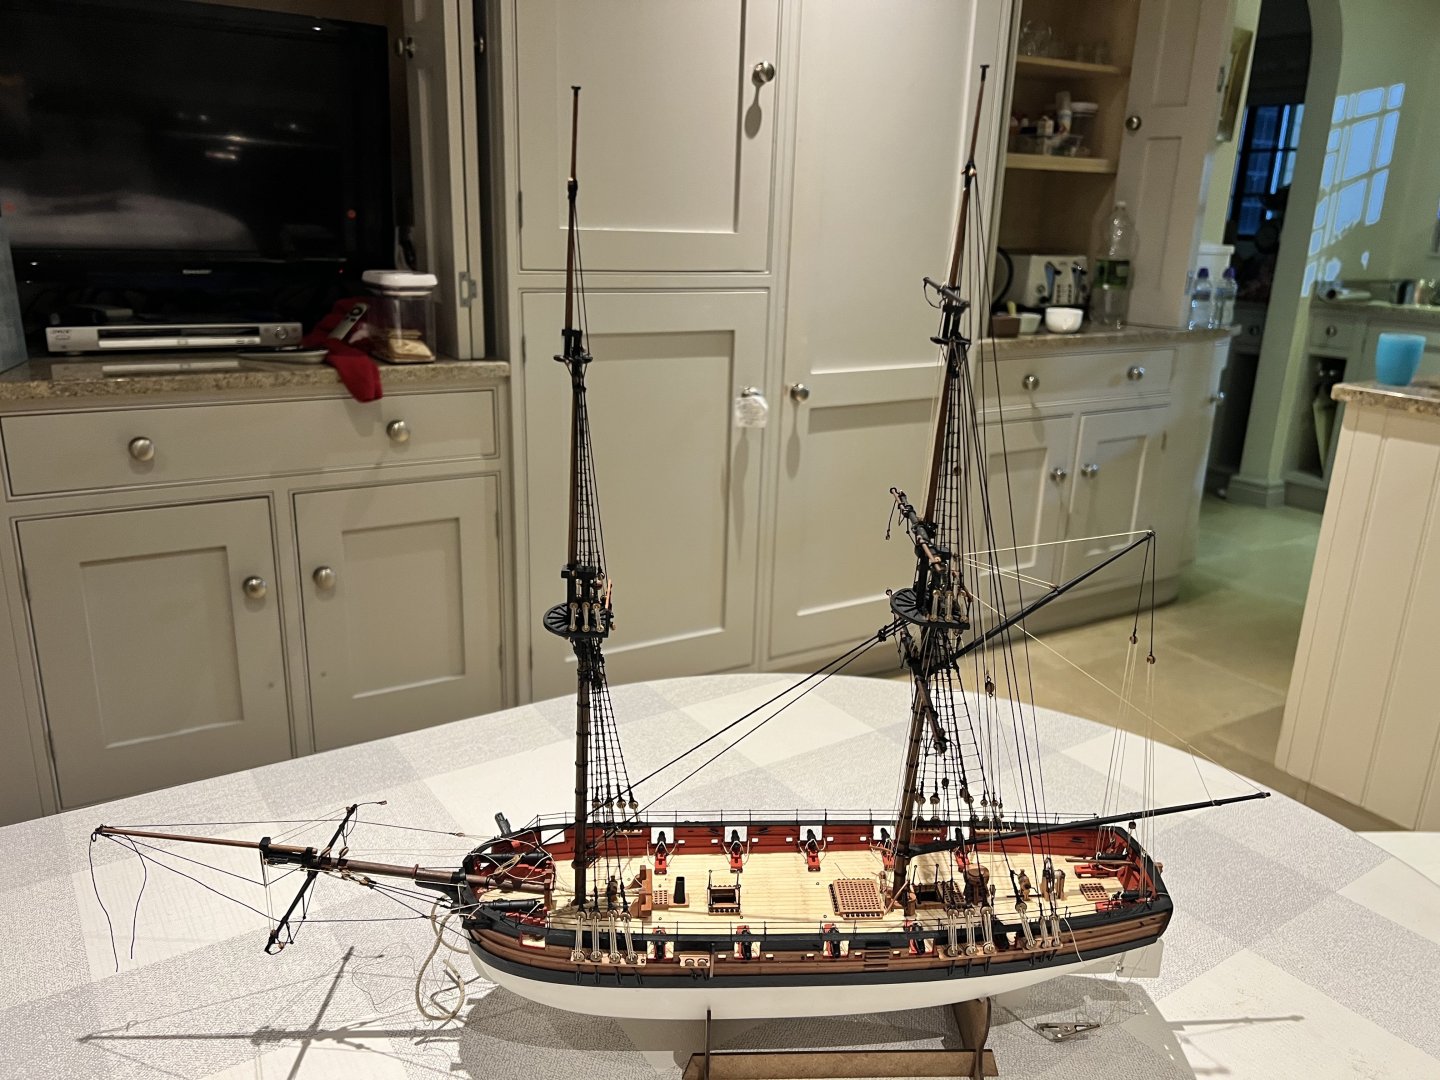
I haven’t gone into any detail on the log of how I’ve gone about rigging, I’m sure it would just be a guide of how not to do it and the use of too much CA glue.

The yards aren’t aligned properly yet and will be when lifts and braces are added.
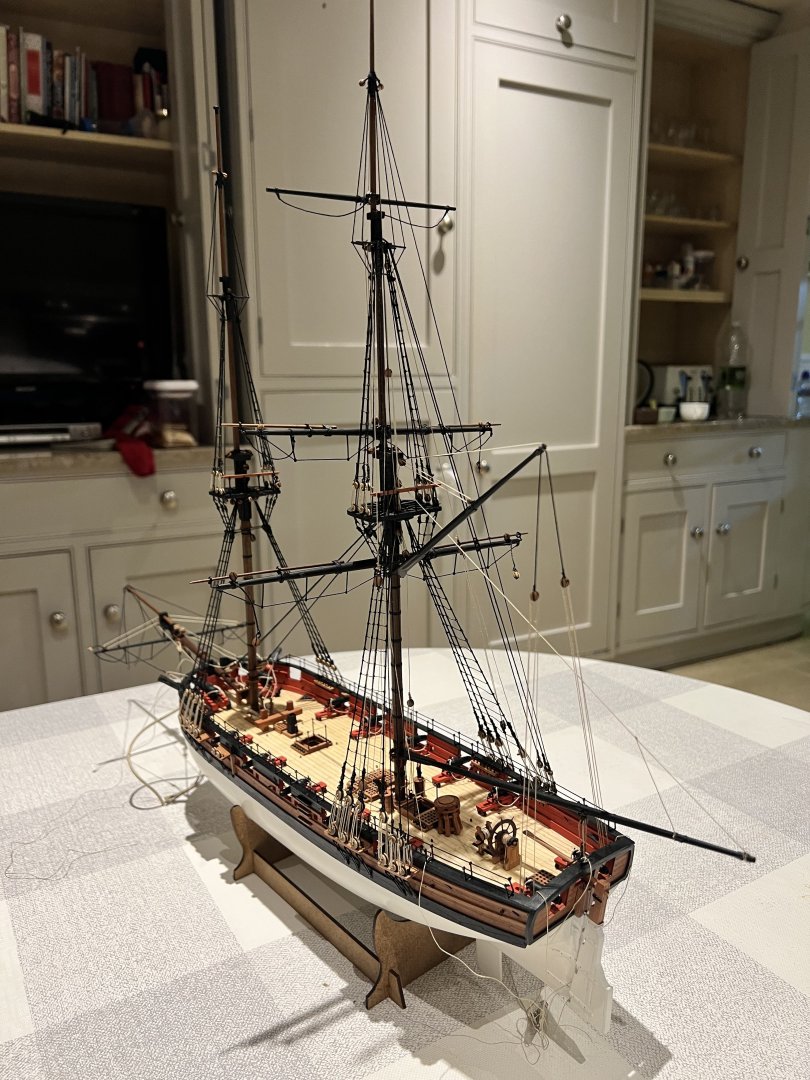
As far as possible I’ve tied lines off or crocodile clipped them rather than glued so I can tension them later if need be.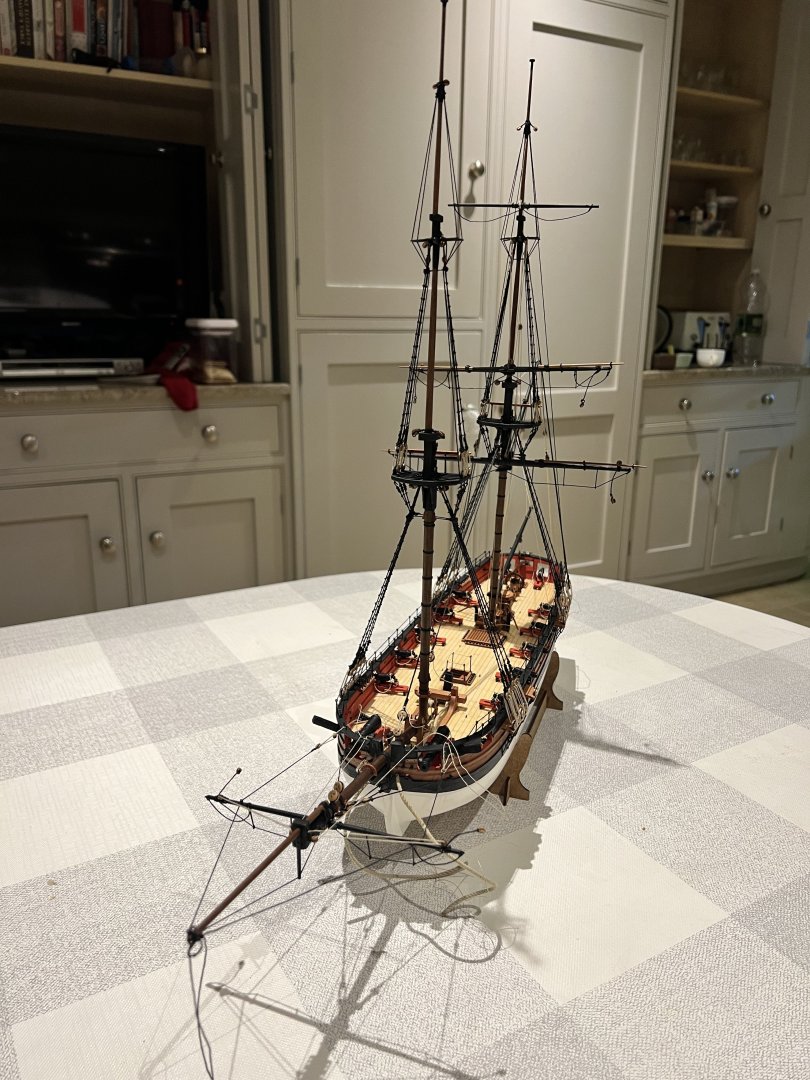
I won’t be able to work on Adder much, if at all for the next 3 weeks, but after that will be back on the case.- ECK, Yann Kermeur, Glenn-UK and 8 others
-
11
-
She looks super. Well done!
- BrochBoating and AJohnson
-
2
-
Congratulations on an amazing model. I wish I had your skill (and patience)! I’ve really enjoyed following on and learnt lots from your build. Thank you.
- Thukydides and Ryland Craze
-
1
-
1
-
Glenn, Eck,
Thank you both. Really appreciated. I’ll try and get the eyebolt in there with block attached!
Best wishes
Dan
- rcweir, hollowneck and AJohnson
-
3
-
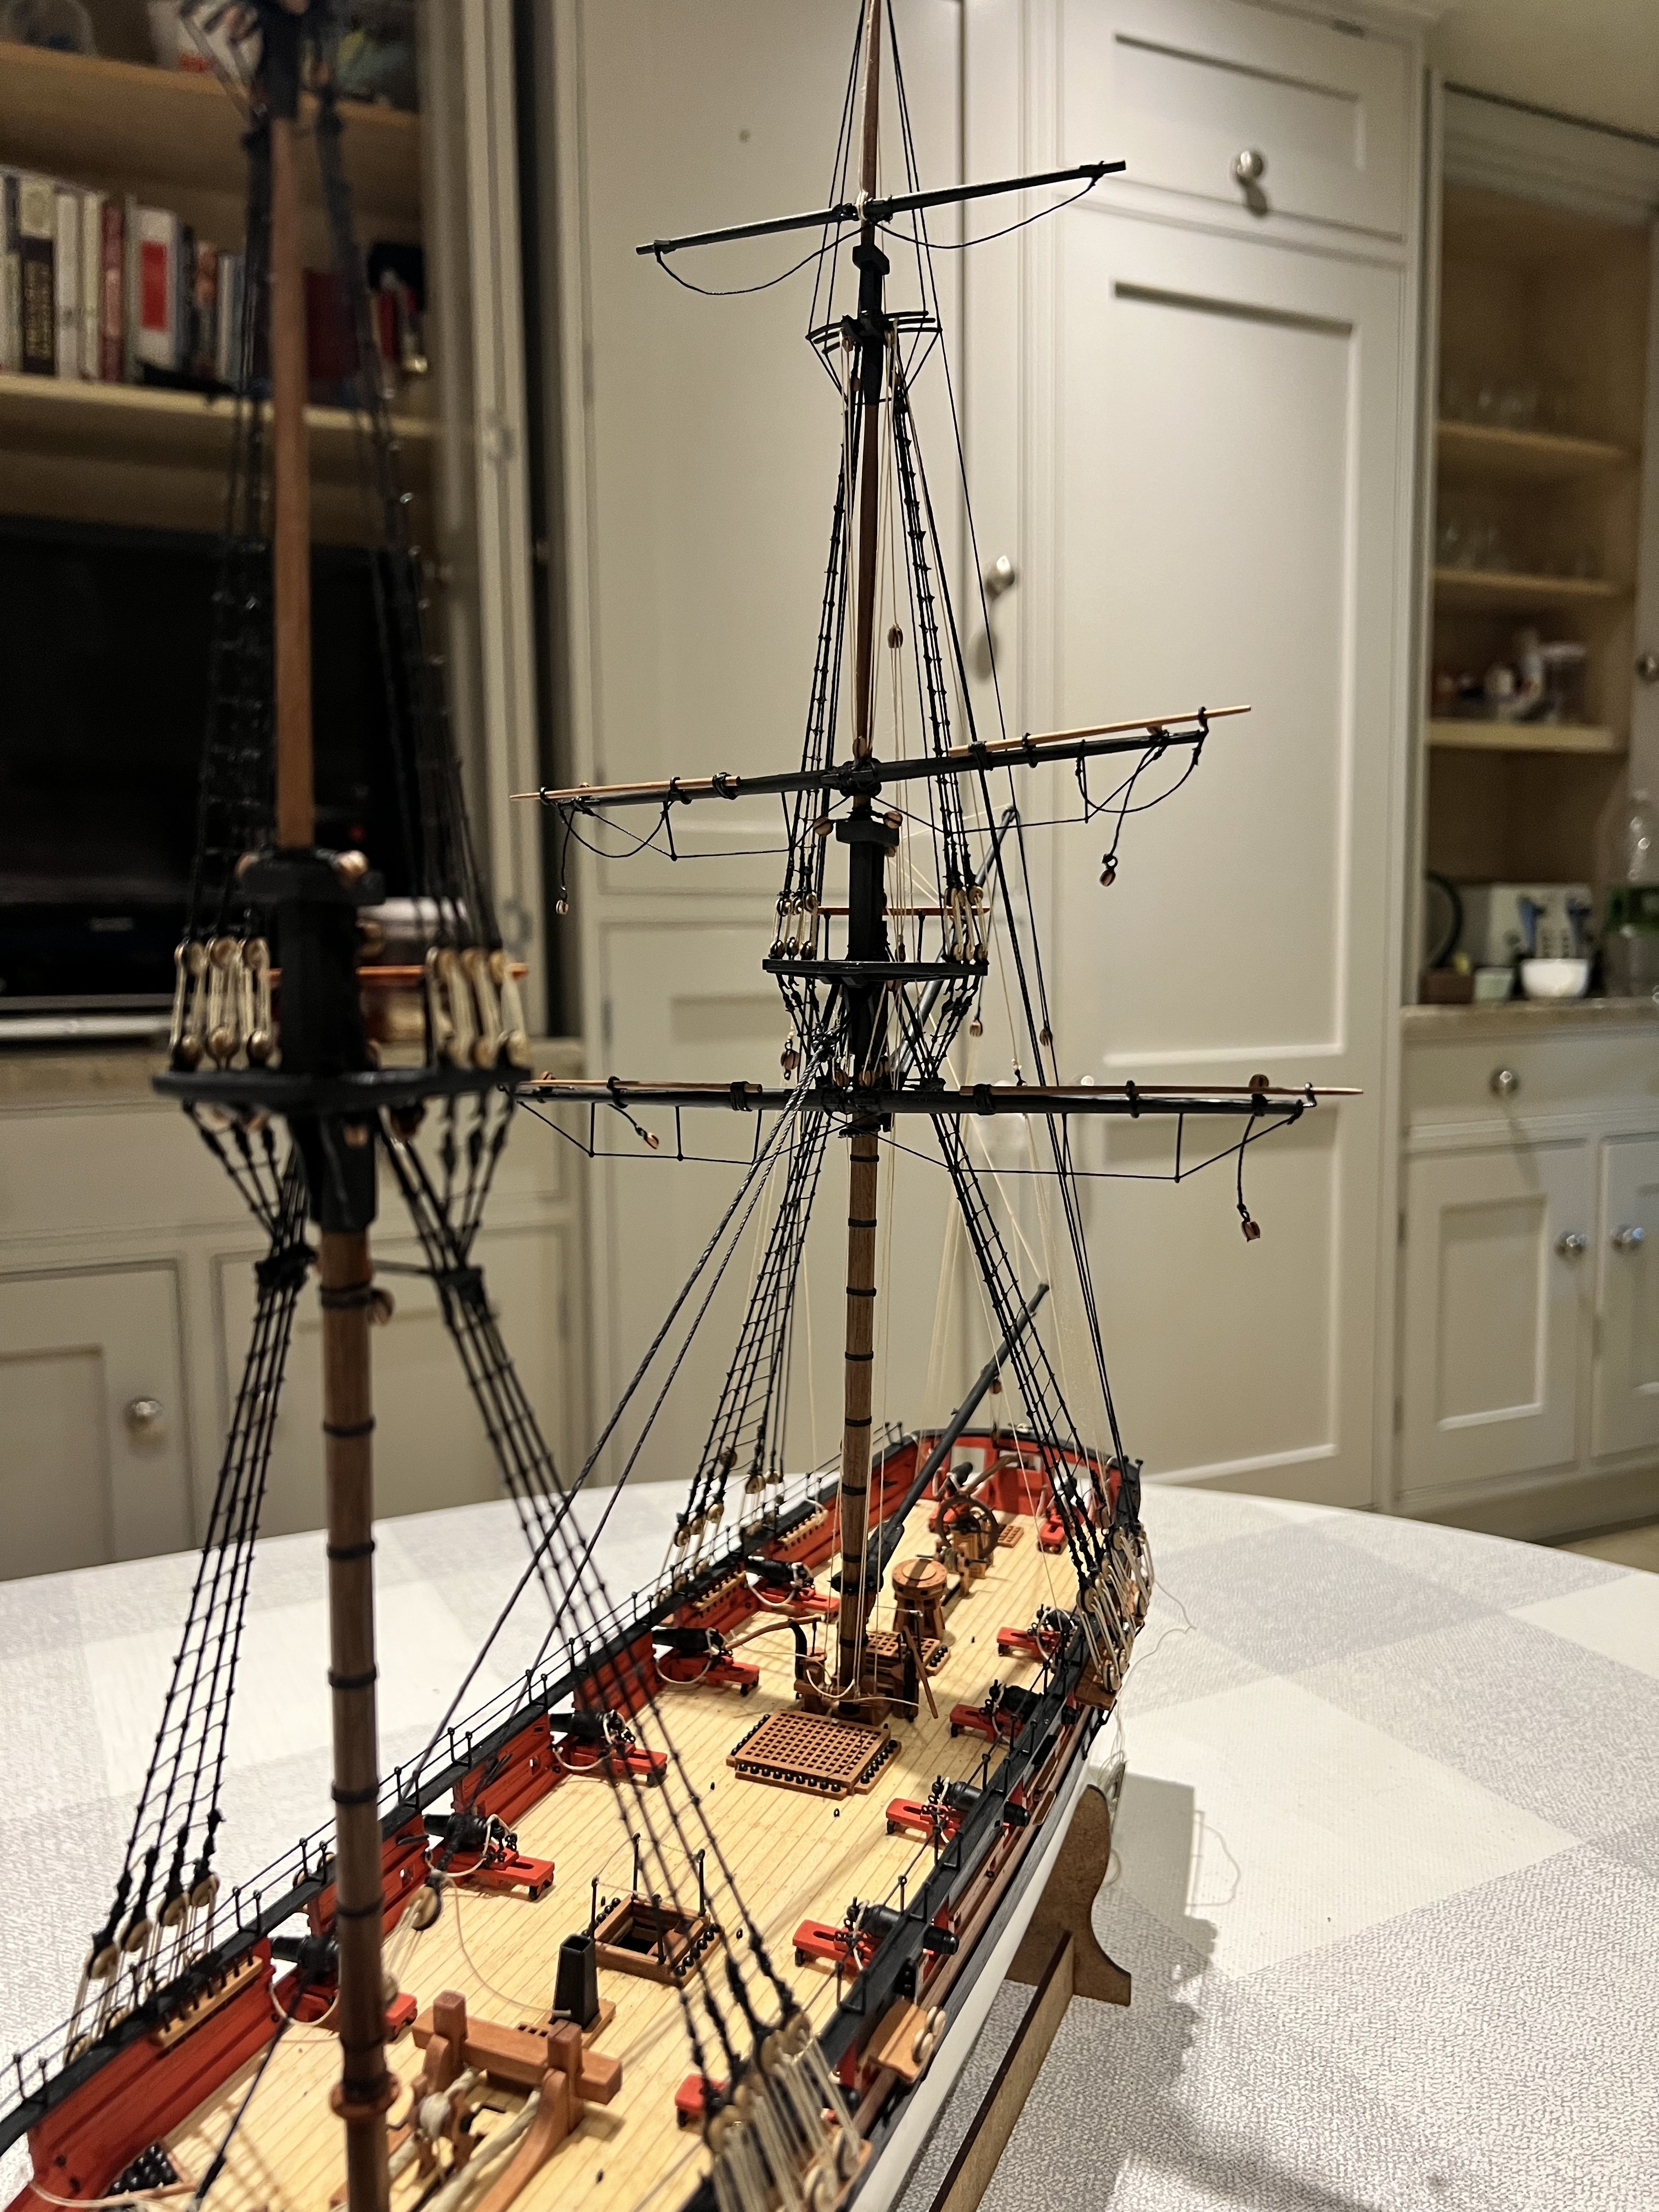
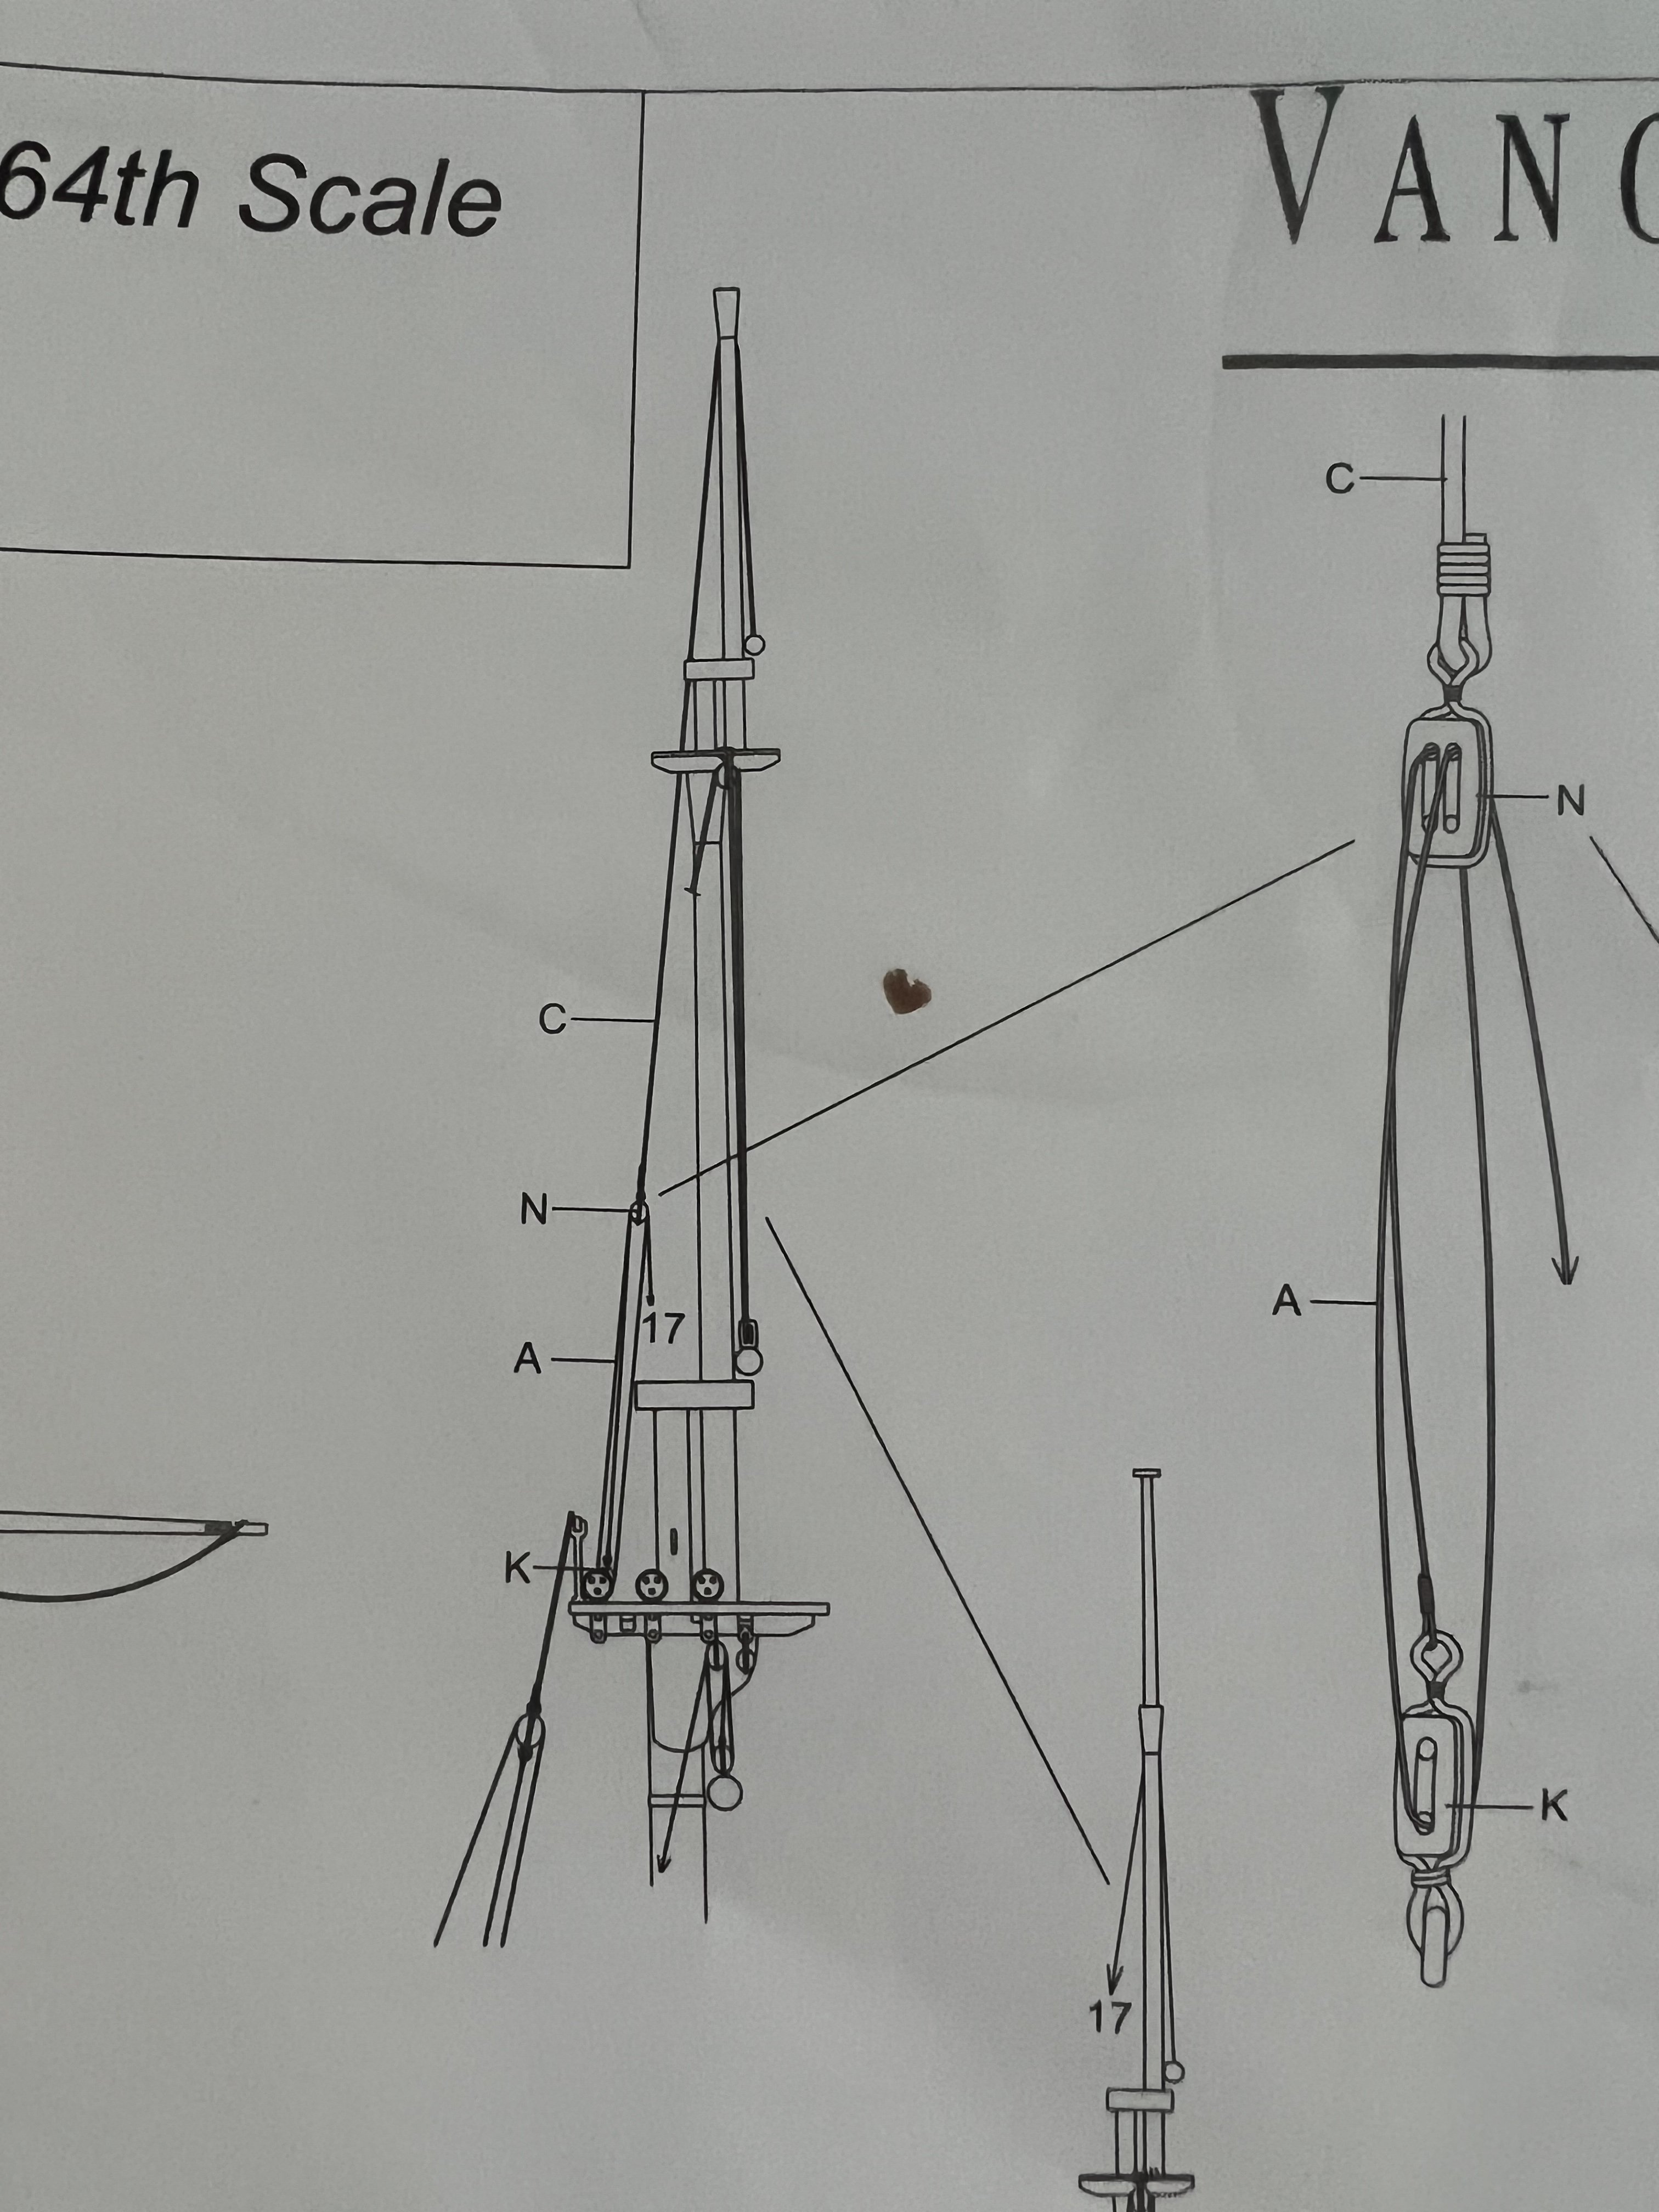
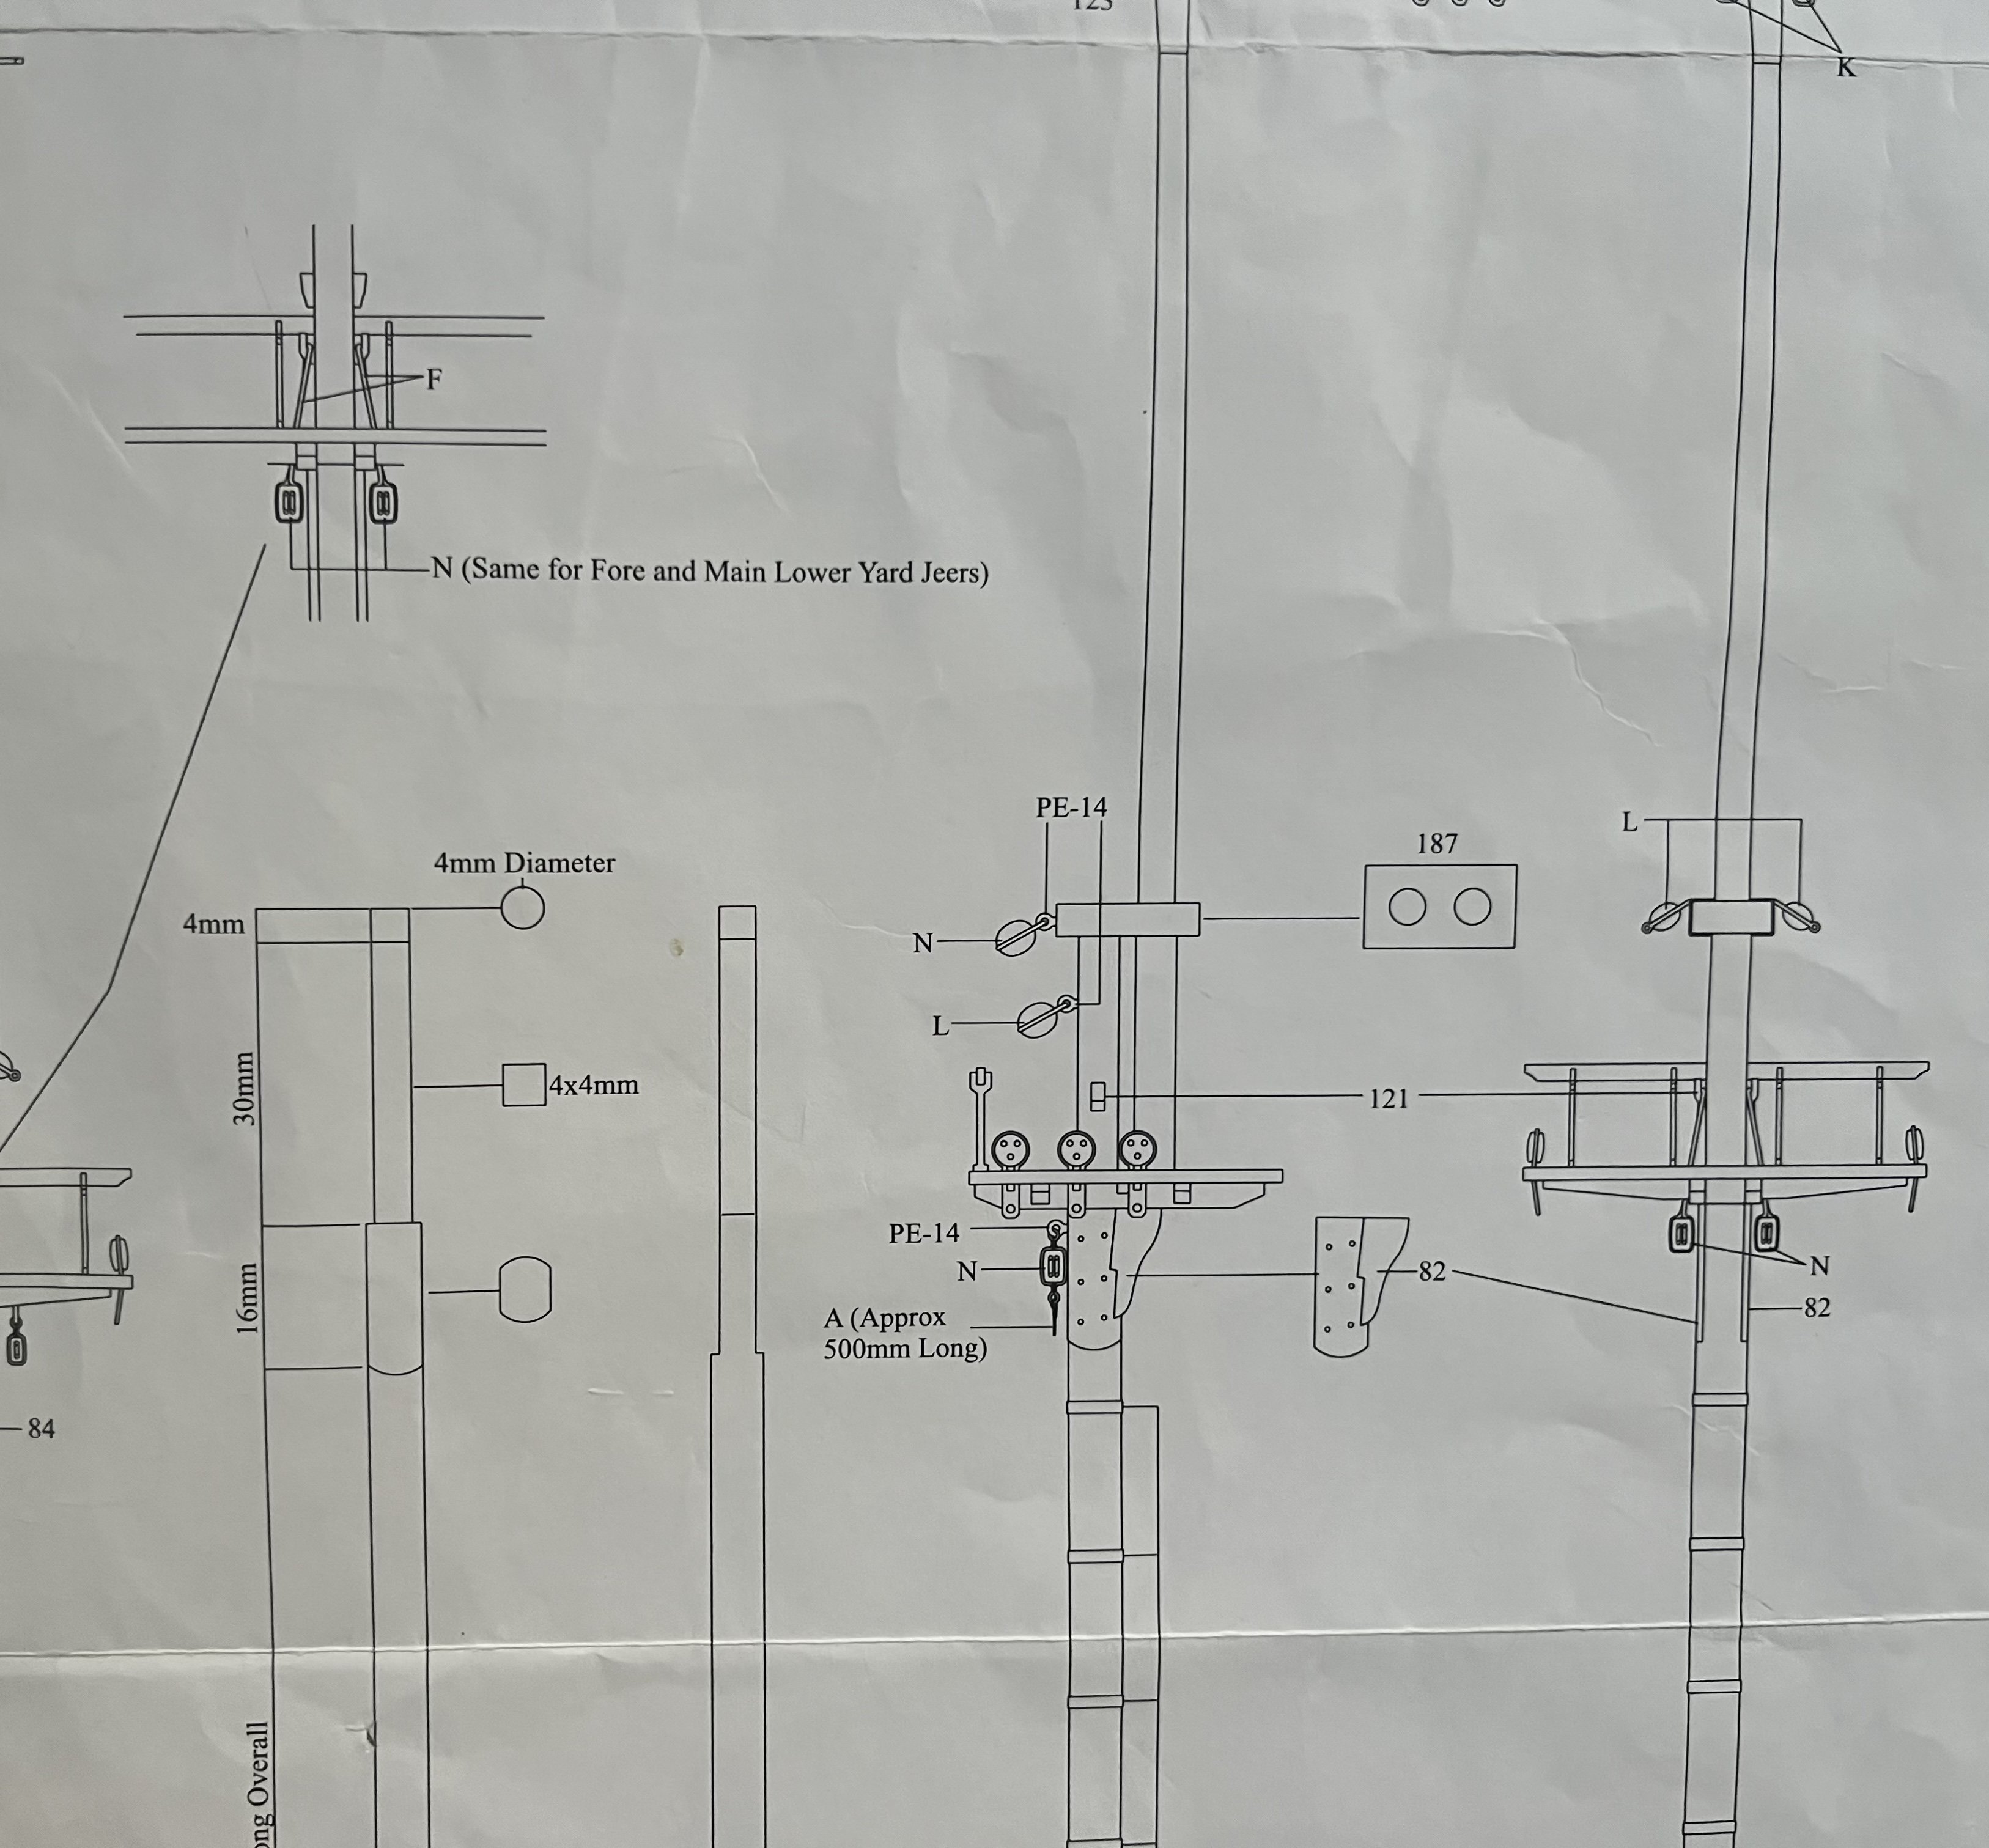
I’d love some advice. I’m fitting the yards to the main mast.
I can’t work out from the plans how the line that goes through a hole in the topgallant mast and holds up the topgallant yard works - not sure if this is called a tye or a jeer? I’ve checked the Petersson book I have but it’s not clear either.
The plans appear to show this line “C” tied to a block “N” which in turn has lines running to a block attached to the maintop “K” (single 3mm block) on the plans. And then back up to the “N” and then belayed to the aft port belaying pins rack at “17”.
The letters actually refer to the size of blocks and thickness of line, but I’m using them to illustrate my question.
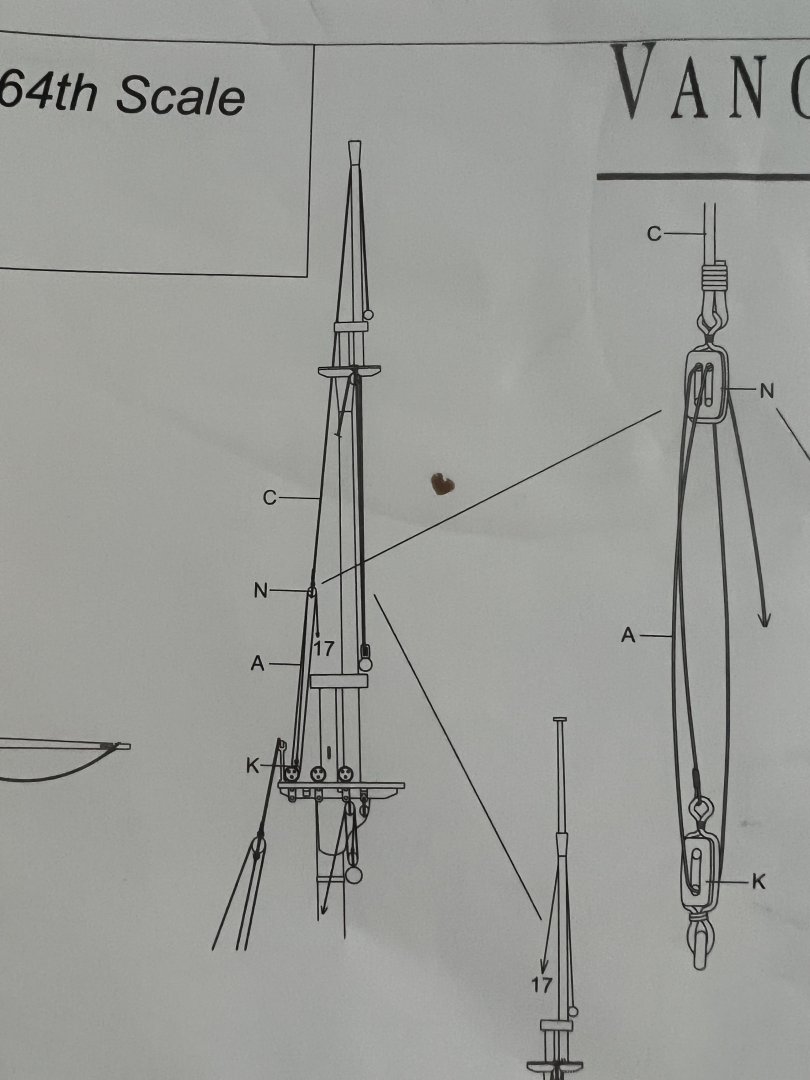
How does the block “K” attach to the maintop?
When the maintop was built there was no indication of needing a block or eye pin at the aft of the maintop (RHS below) although there are two small line running fore and aft that could be eyebolts with hindsight.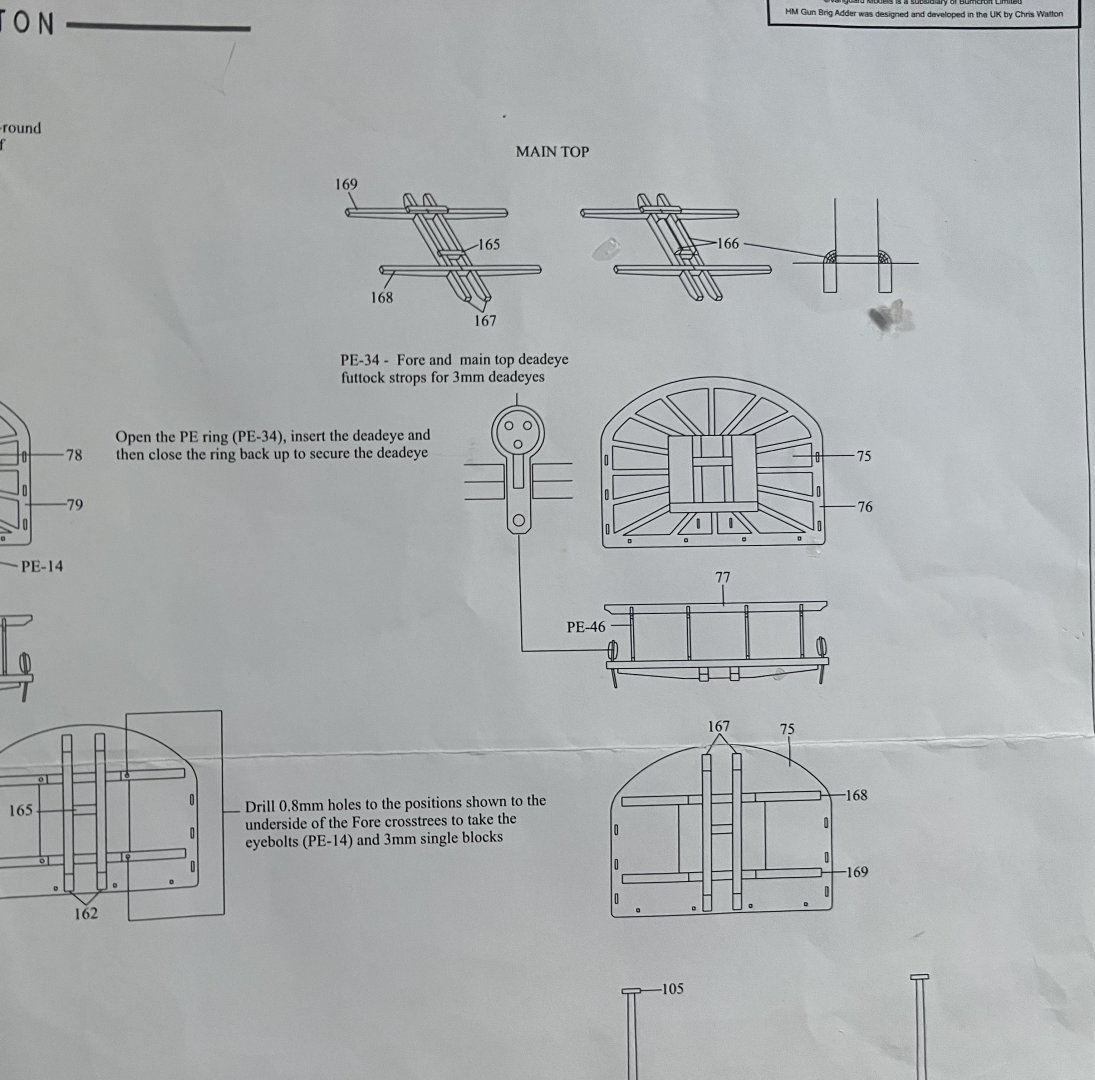
Chris, I hope it’s ok to post a few small segments of plans on here?
The manual suggest doesn’t mention any eyebolts here either, but there’s a photo in the manual which shows two eyebolts in that place where my messy yellow arrow points.
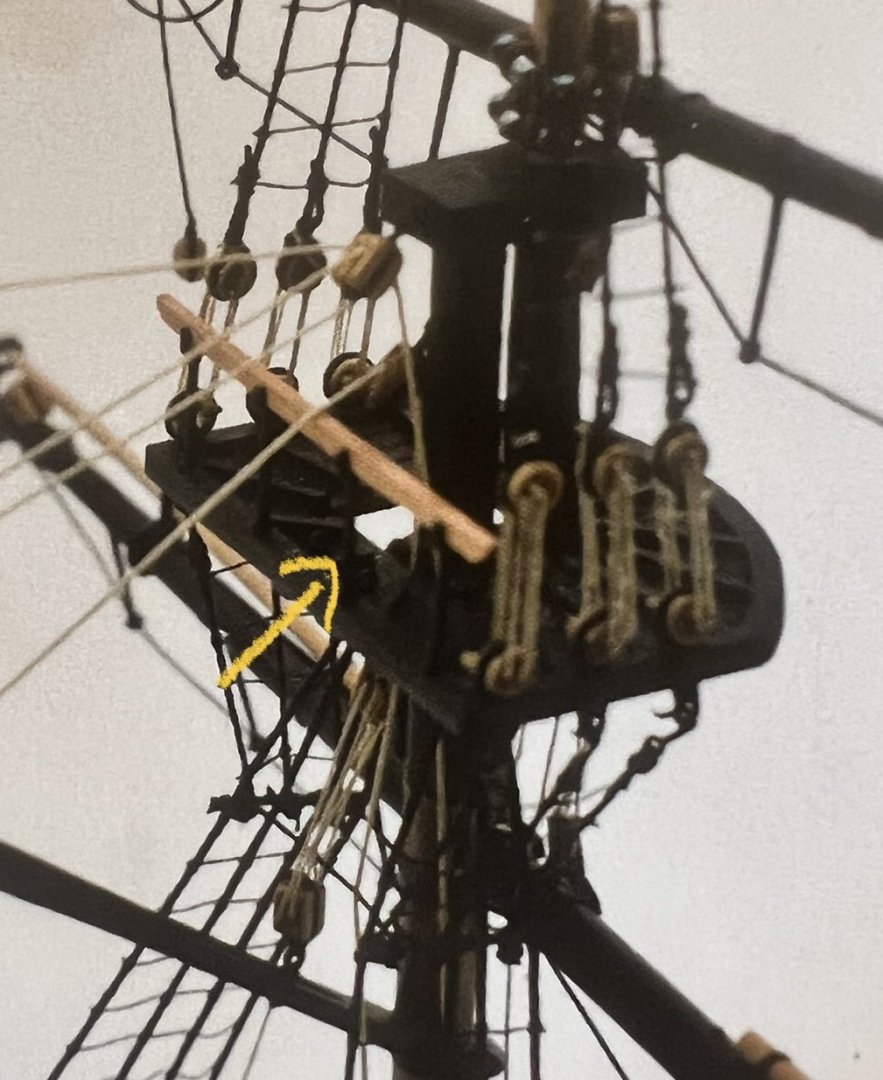
I’m guessing that’s what I should be attaching a block to, but I don’t have the access to drill a hole and add an eyebolt and block anymore there as there’s so much rigging around it. Could I get away with adding a block to one of the stanchions at the rear of the maintop instead?
I think I’ve worked out what should happen for this line, but not sure how I’ll actually be able to fix it!
Any advice greatly appreciated.
Many thanksDan
- rcweir, Thukydides, chris watton and 3 others
-
6
-
-
Thanks Glenn, much appreciated.


HM Cutter Trial 1790 by AJohnson - FINISHED - Vanguard Models - 1:64th
in - Kit build logs for subjects built from 1751 - 1800
Posted
An absolute masterpiece, Andrew. Those sails are so realistic. Enjoy Adder.