

DB789
-
Posts
352 -
Joined
-
Last visited
Content Type
Profiles
Forums
Gallery
Events
Posts posted by DB789
-
-
Grecian is looking super, such an unusual but great looking boat. I think very likely my next build after completing Alert. Maybe Ranger beforehand in the highly unlikely event I complete Alert before the Grecian kit is launched. Grecian looks an easier step up than diving straight into Speedy/Flirt.
Thanks for another excellent prototype build log James. I’m missing not having one of yours on Alert!
-
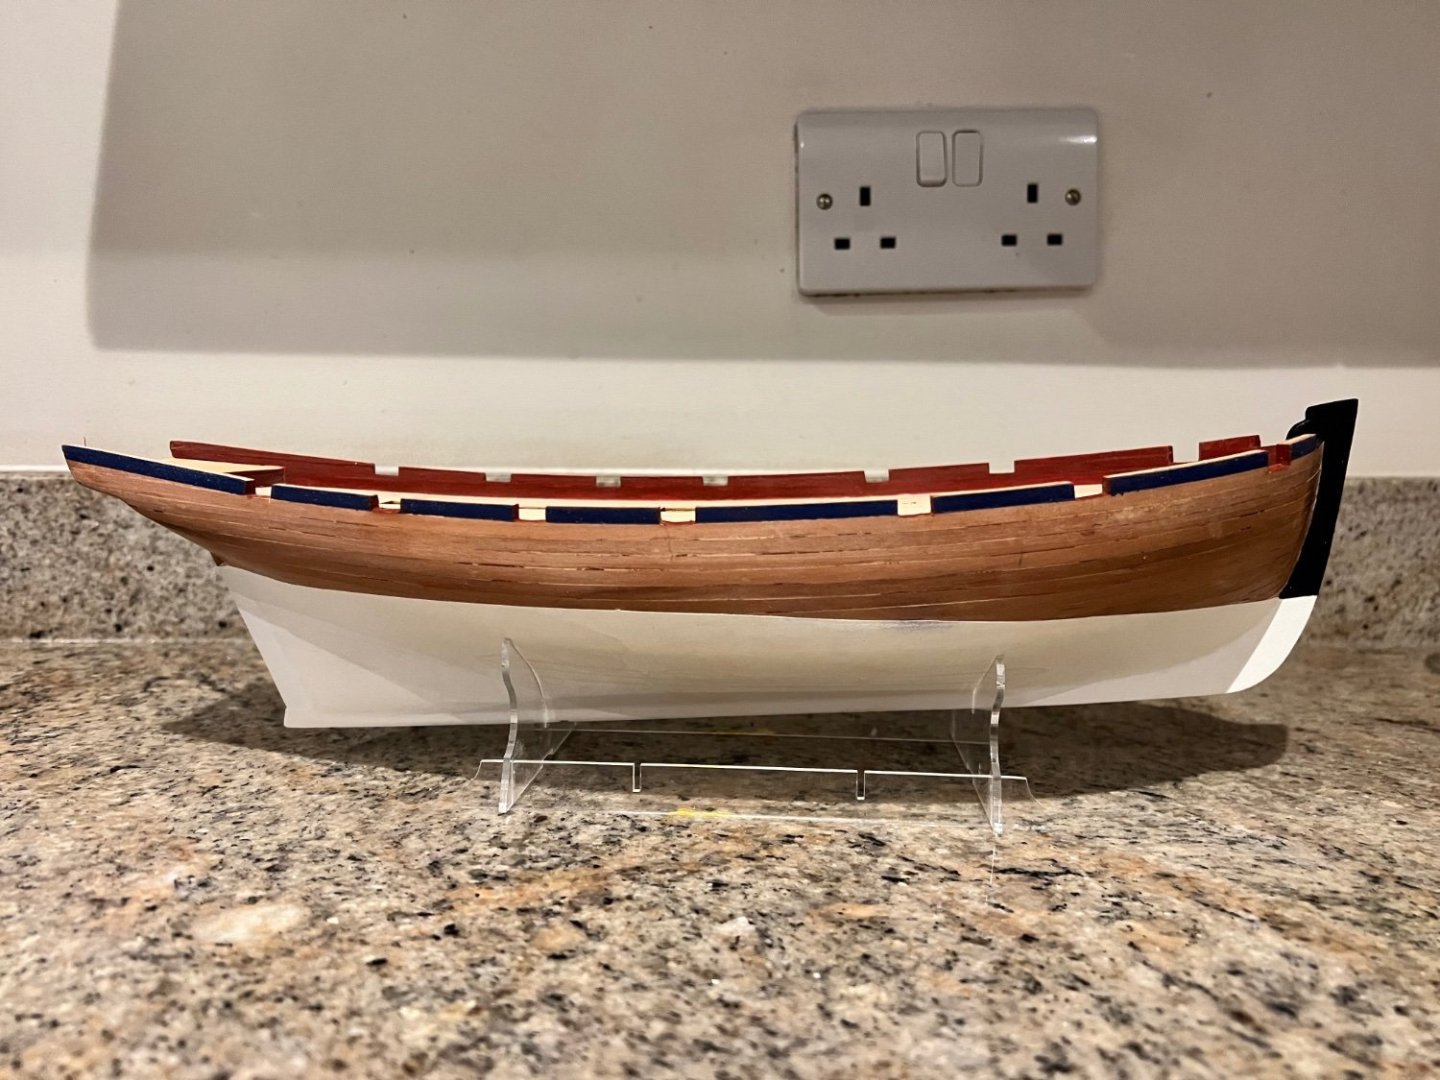
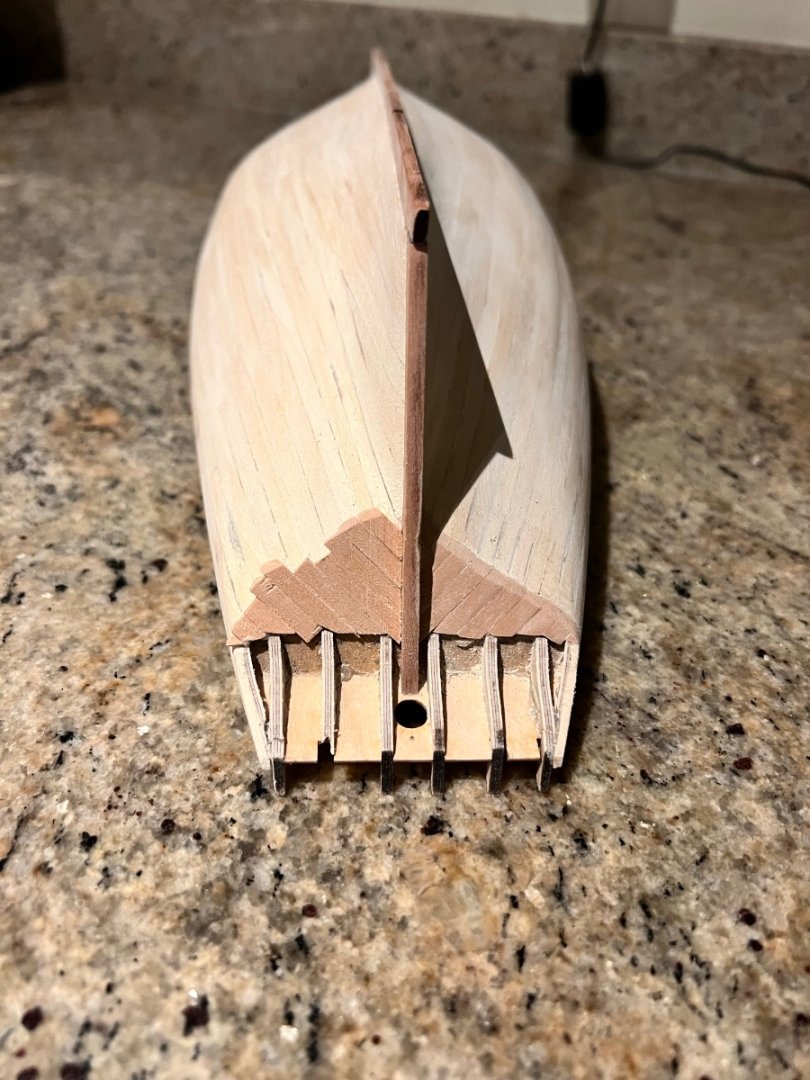
The problem at the stern that Thukydides has highlighted is that the bulkheads aft are too low where it joins the stern board and the rough tree rail is then too low.
There’s also the problem on my build that the deck area is too high at the stern for the gunports pushing the stern board even higher.

I would like the stern ports, are they gunports? To be at least level with the deck, so I’ll need to add a plank lower than the stern board and raise it a bit higher.
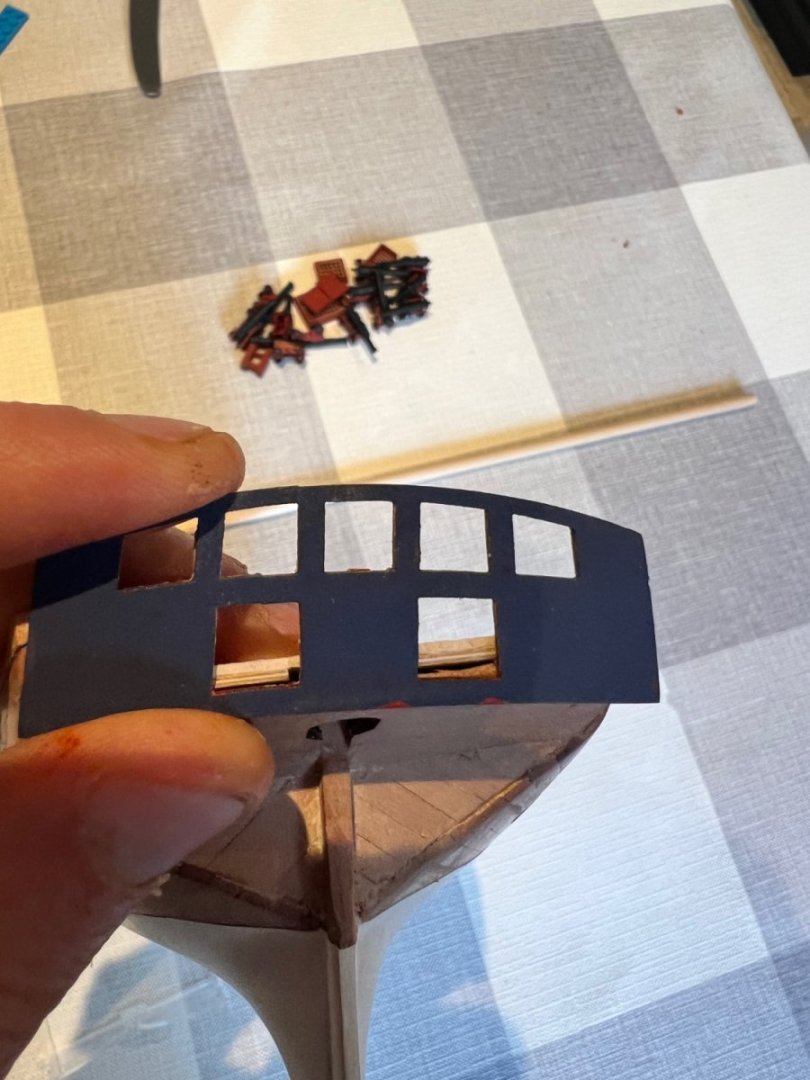
These are the wedges I’ve added to compensate. Probably could have added more!
Also painted the blue area between the gunports. It’s one plank wide except for the new wedges which I’ve needed to estimate.
-
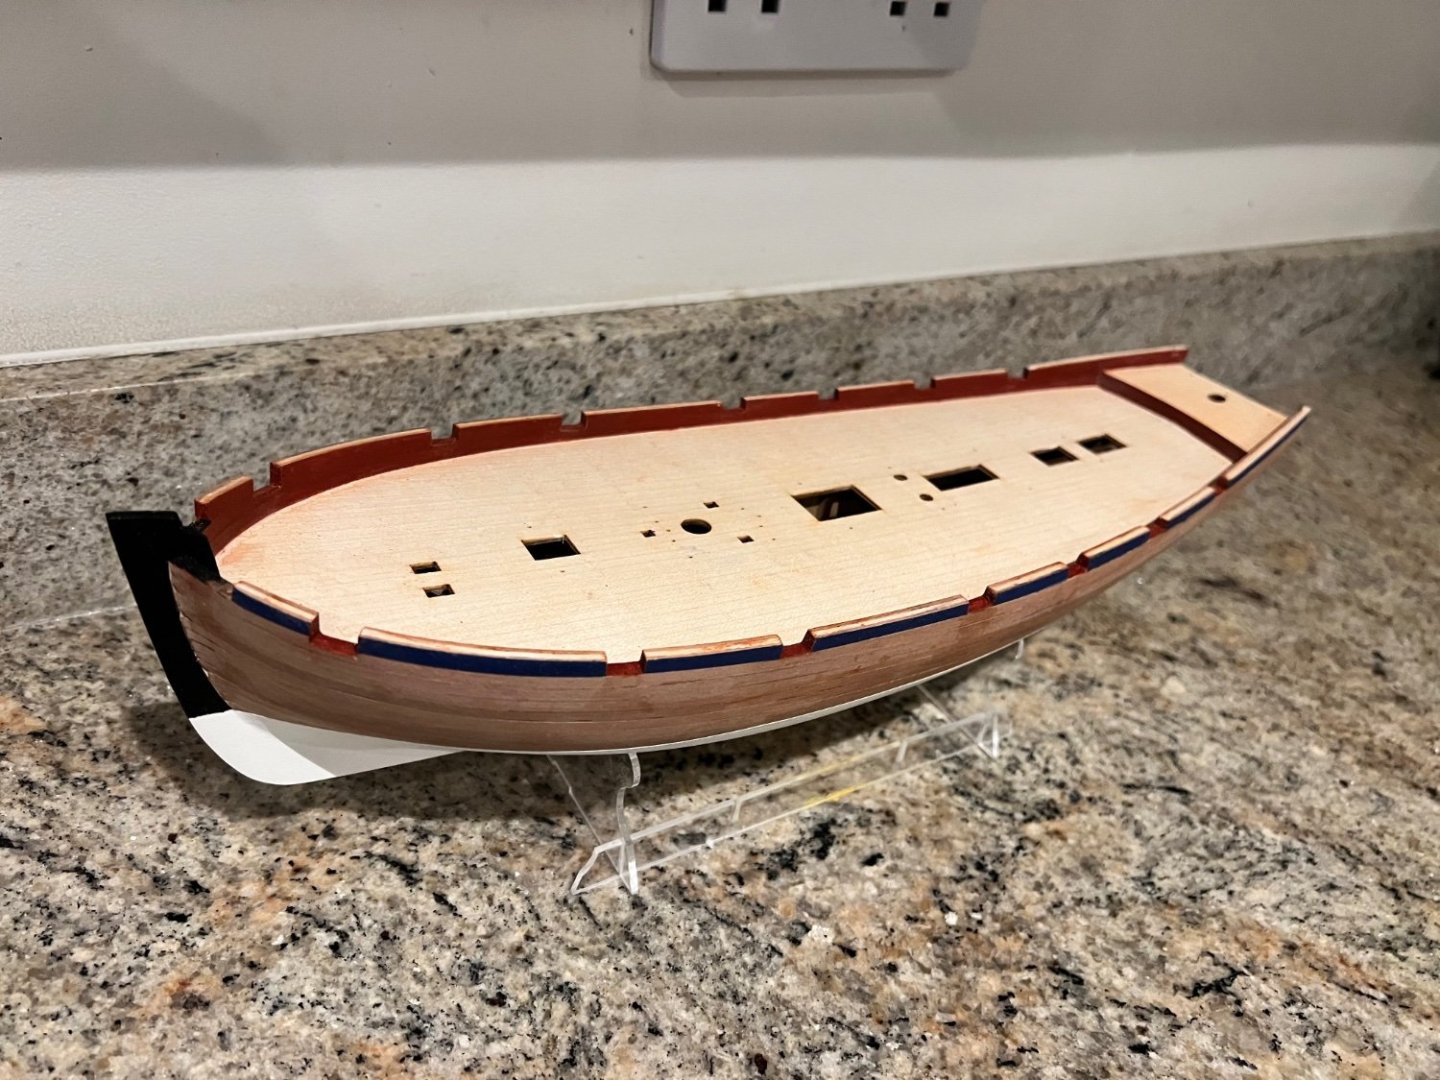
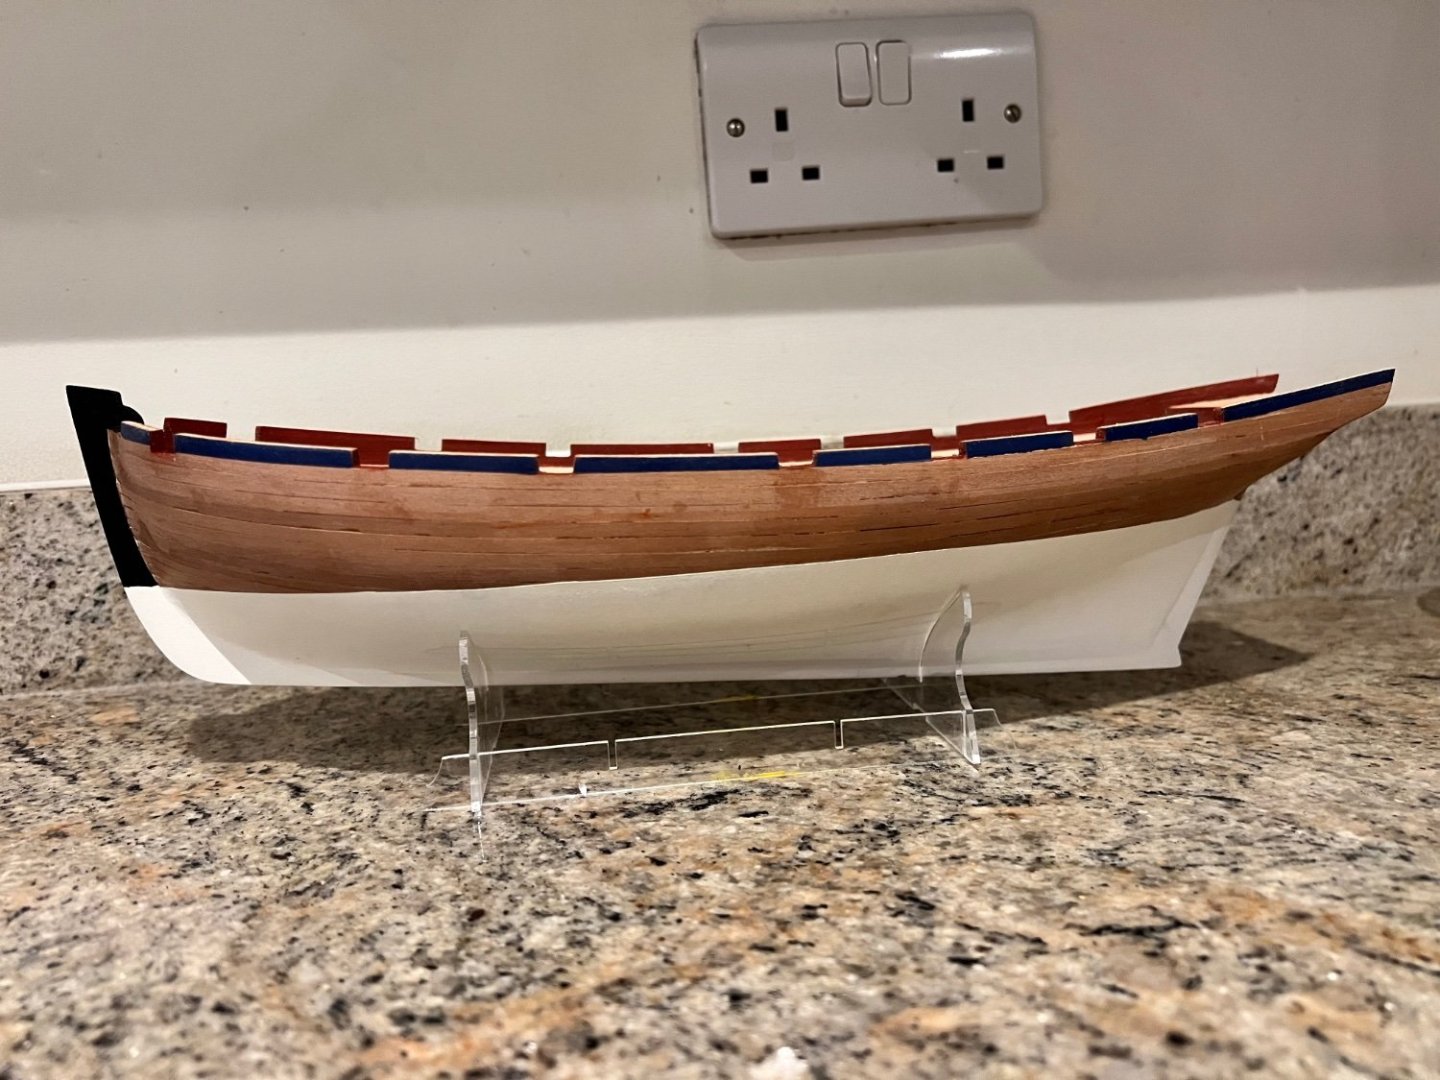
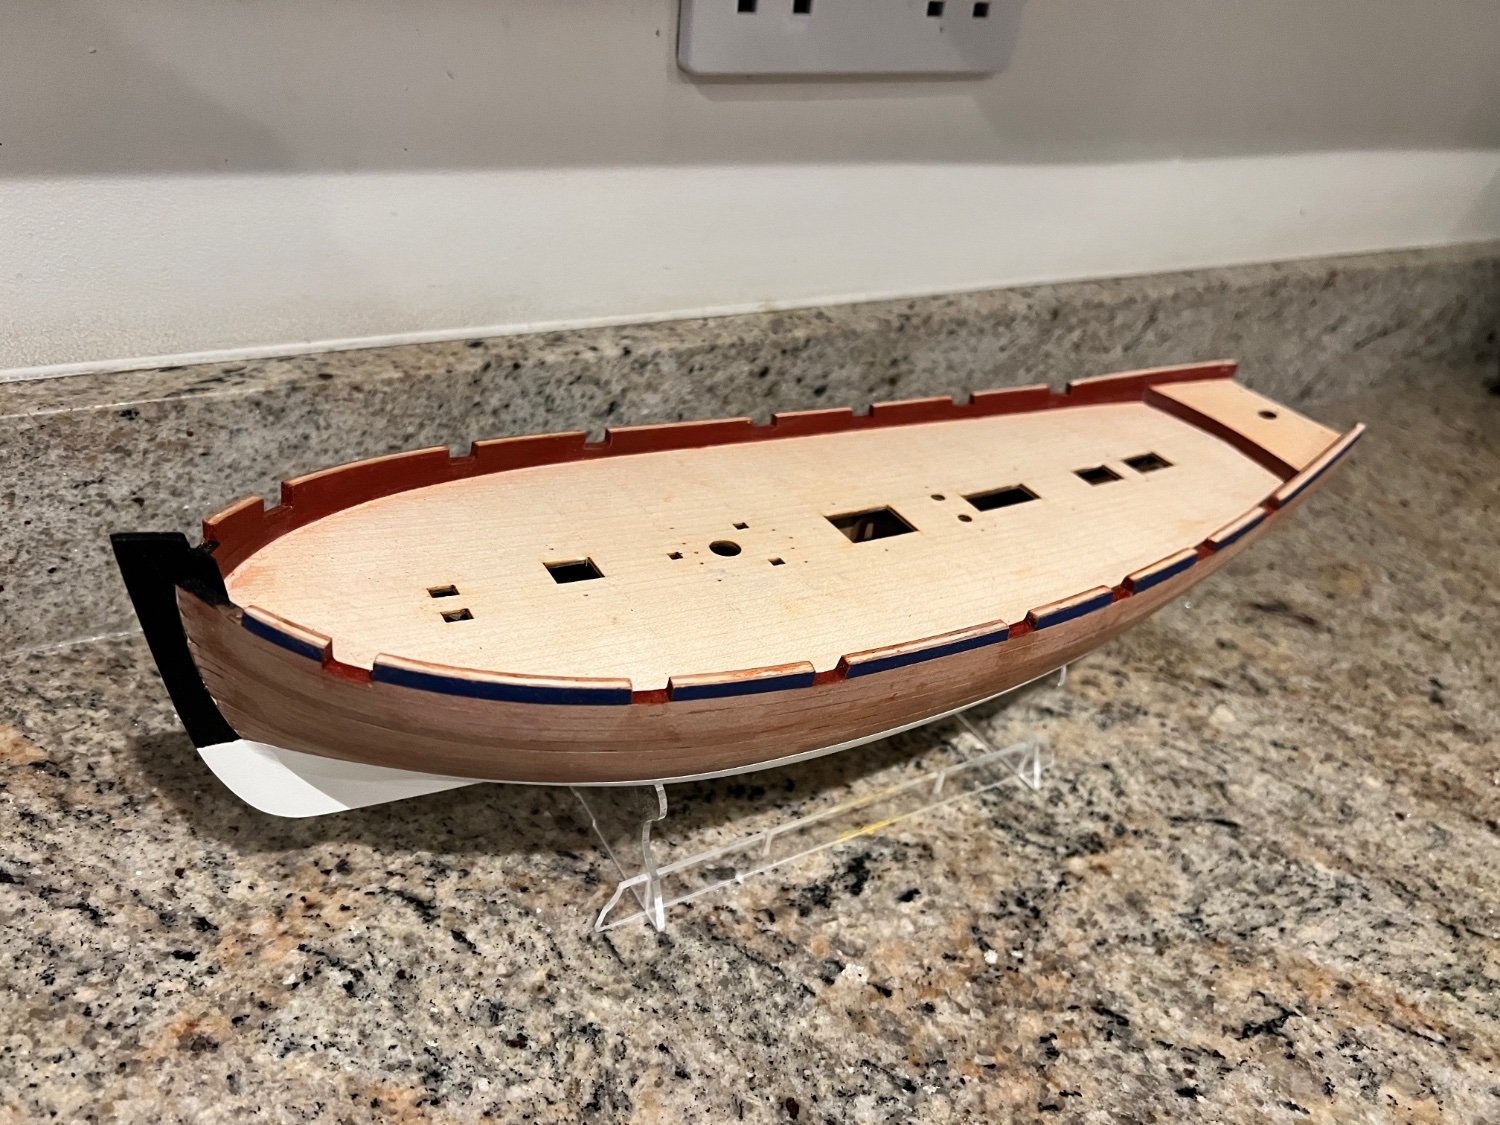
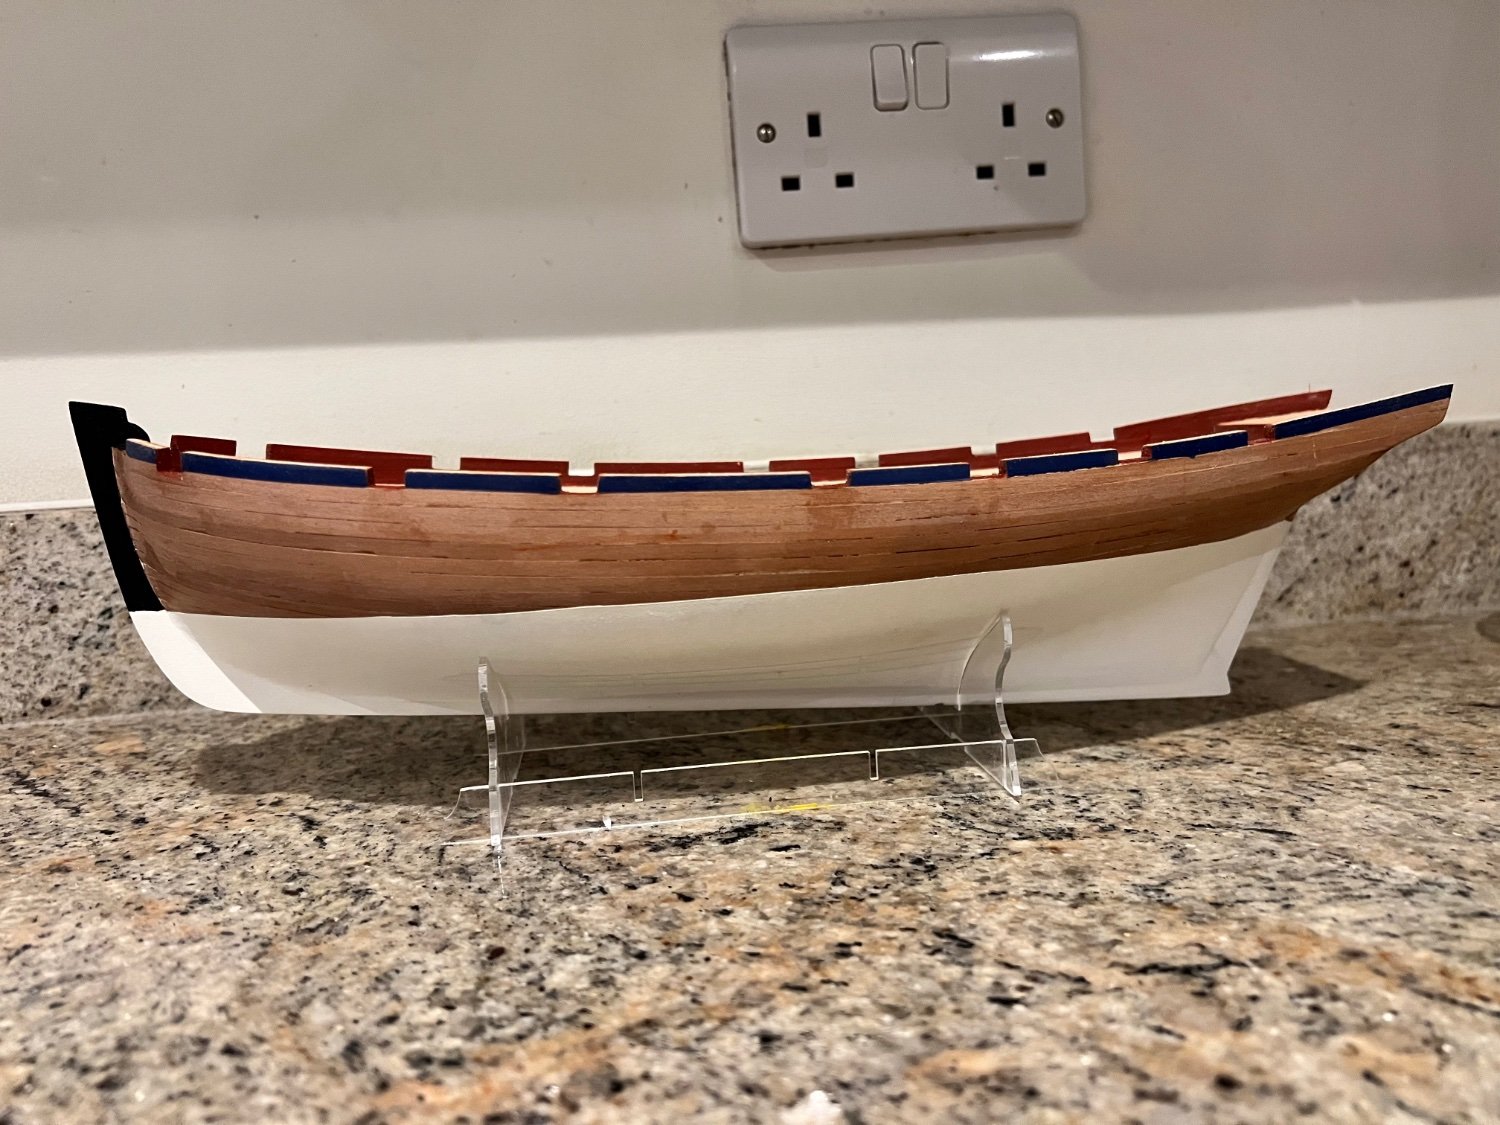
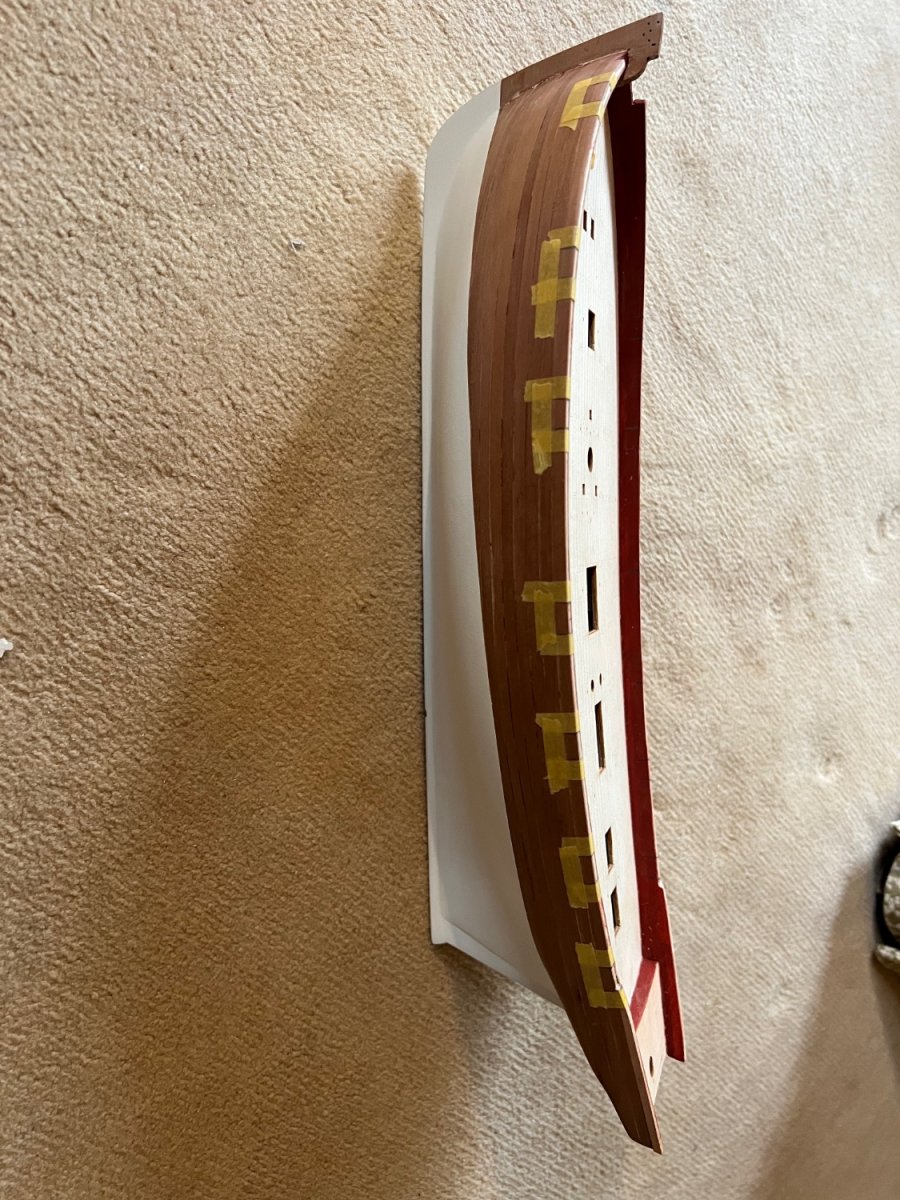
Hull painted white. Not perfect but as good as I’m going to get it!


At the stern I’ve added small wedges to the stern bulwarks to make them a bit higher as per Thukydides’s build log. I’ll come back to this in a moment.
Then added the rest of the inner bulwarks, painted red.

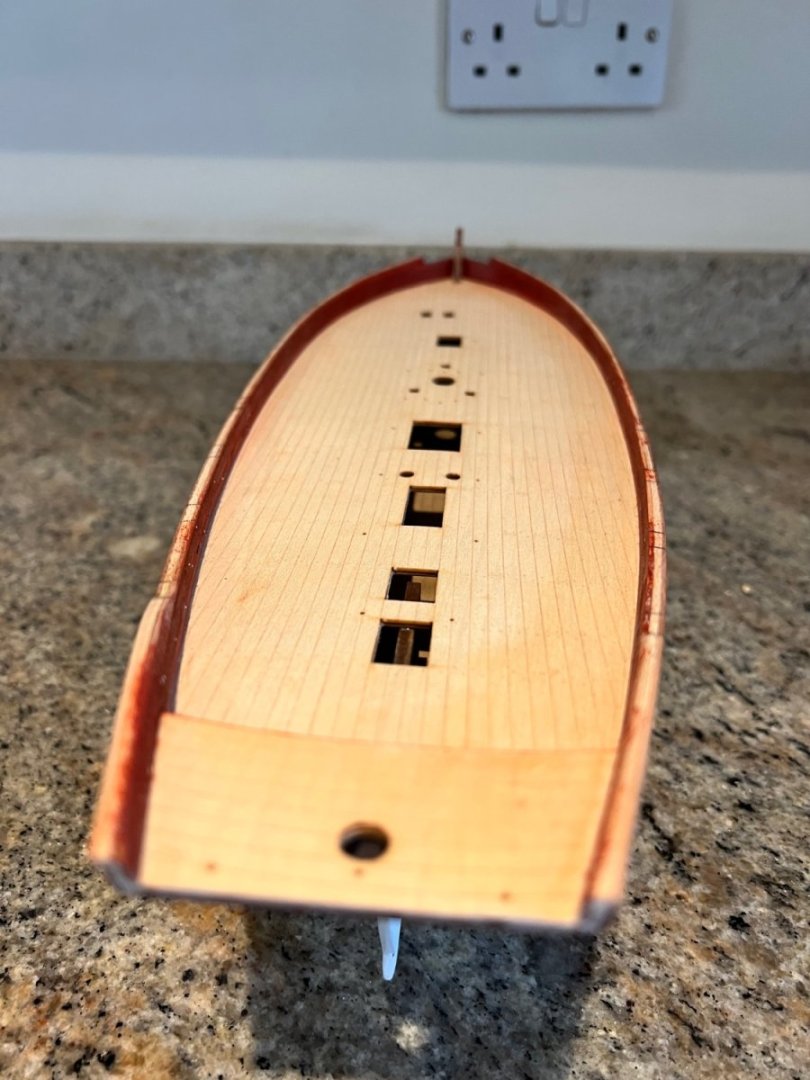
Seems a pity to cut gun ports into the smooth, flowing lines of Alert’s hull. But needs must. I’ve been dreading this job, but following the other build logs on here I’ve used Glenn UK’s method of taping the ports before cutting them which worked well. The job was much easier than expected. MSW is a fantastic resource!Taped and ready to go.
Port side complete. Starboard side underway. Once cut out vertically with a razor saw I used a scalpel for the horizontal cut and filed the edges clean.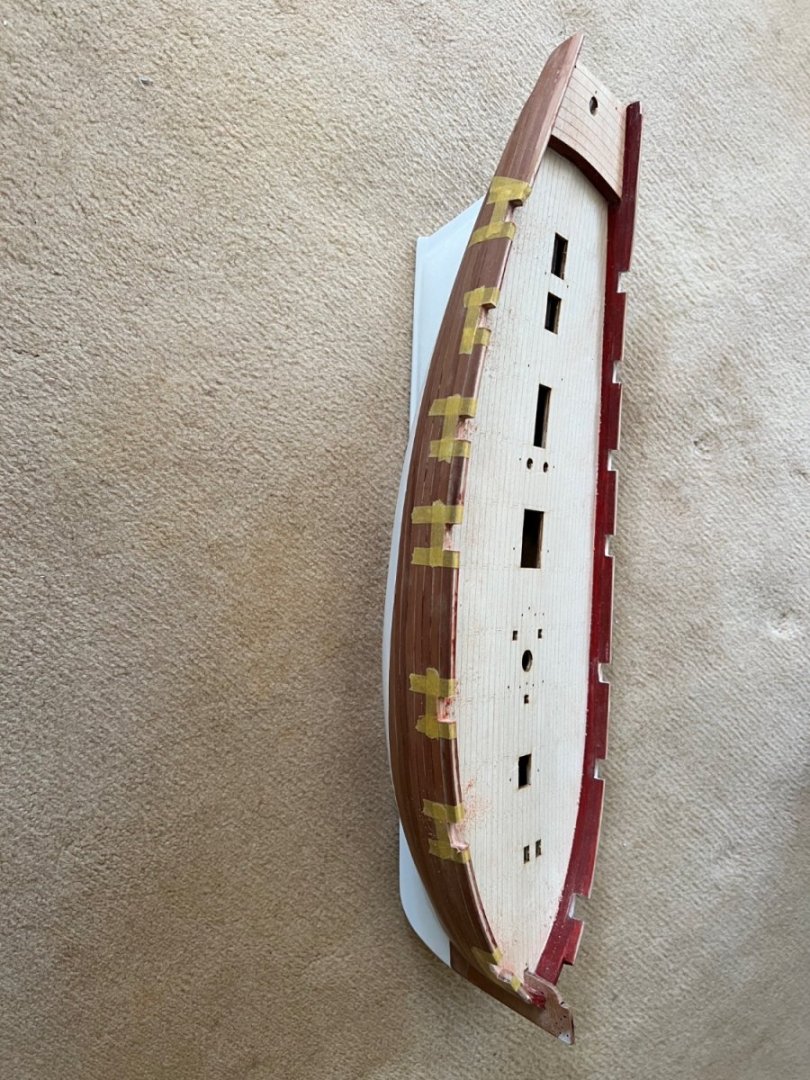
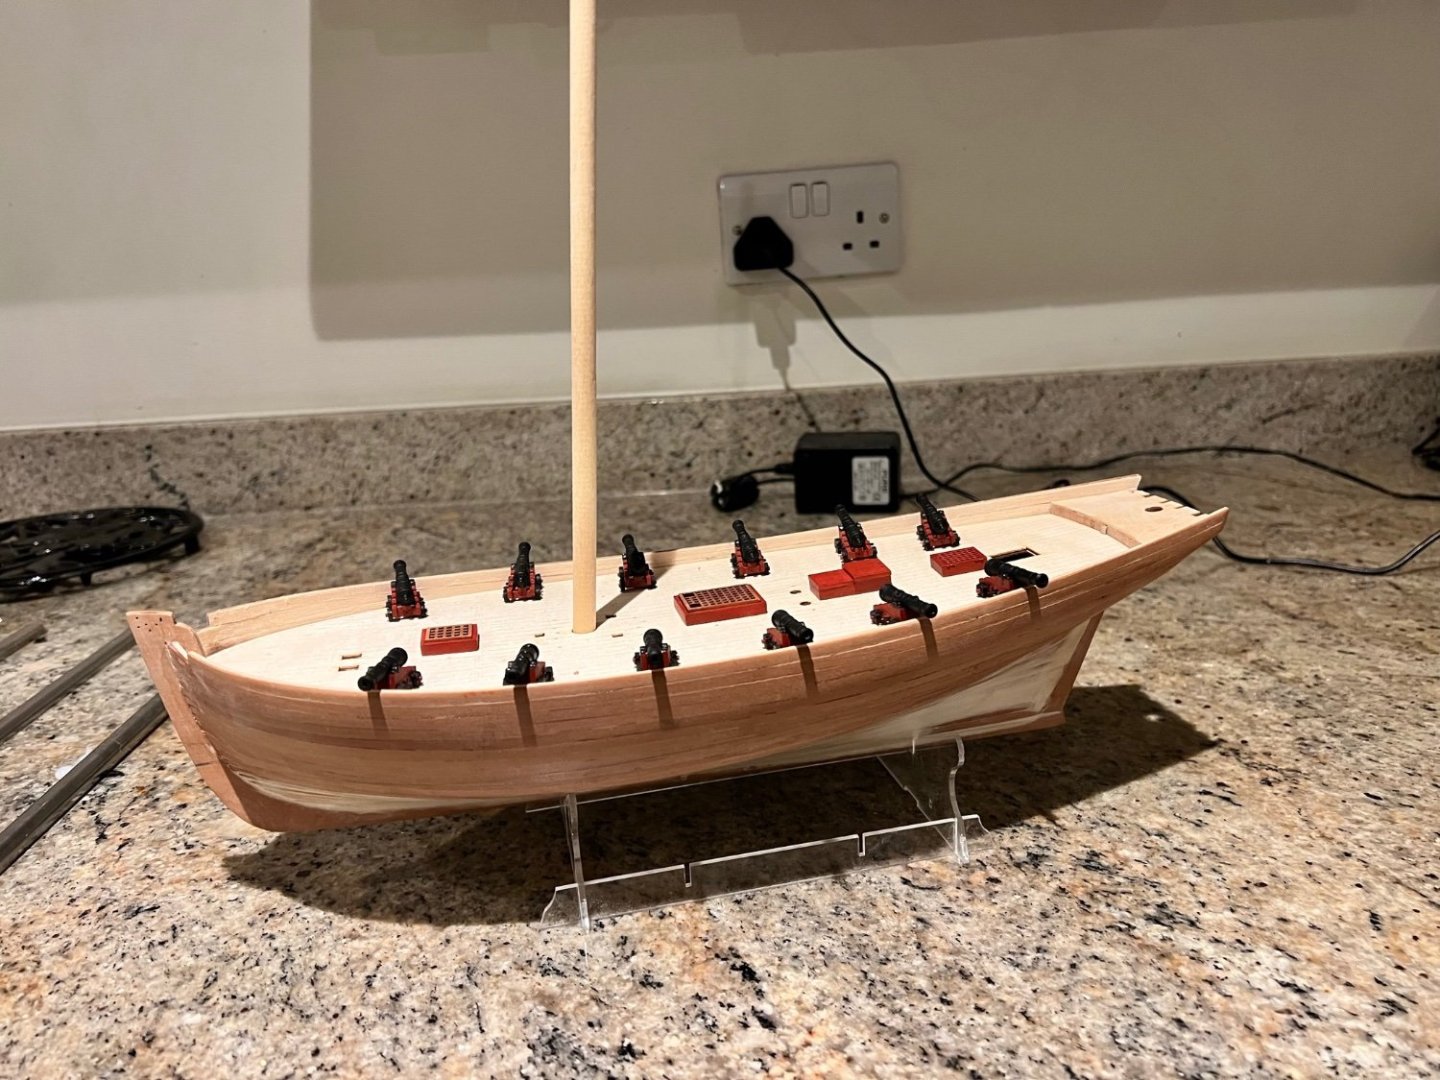
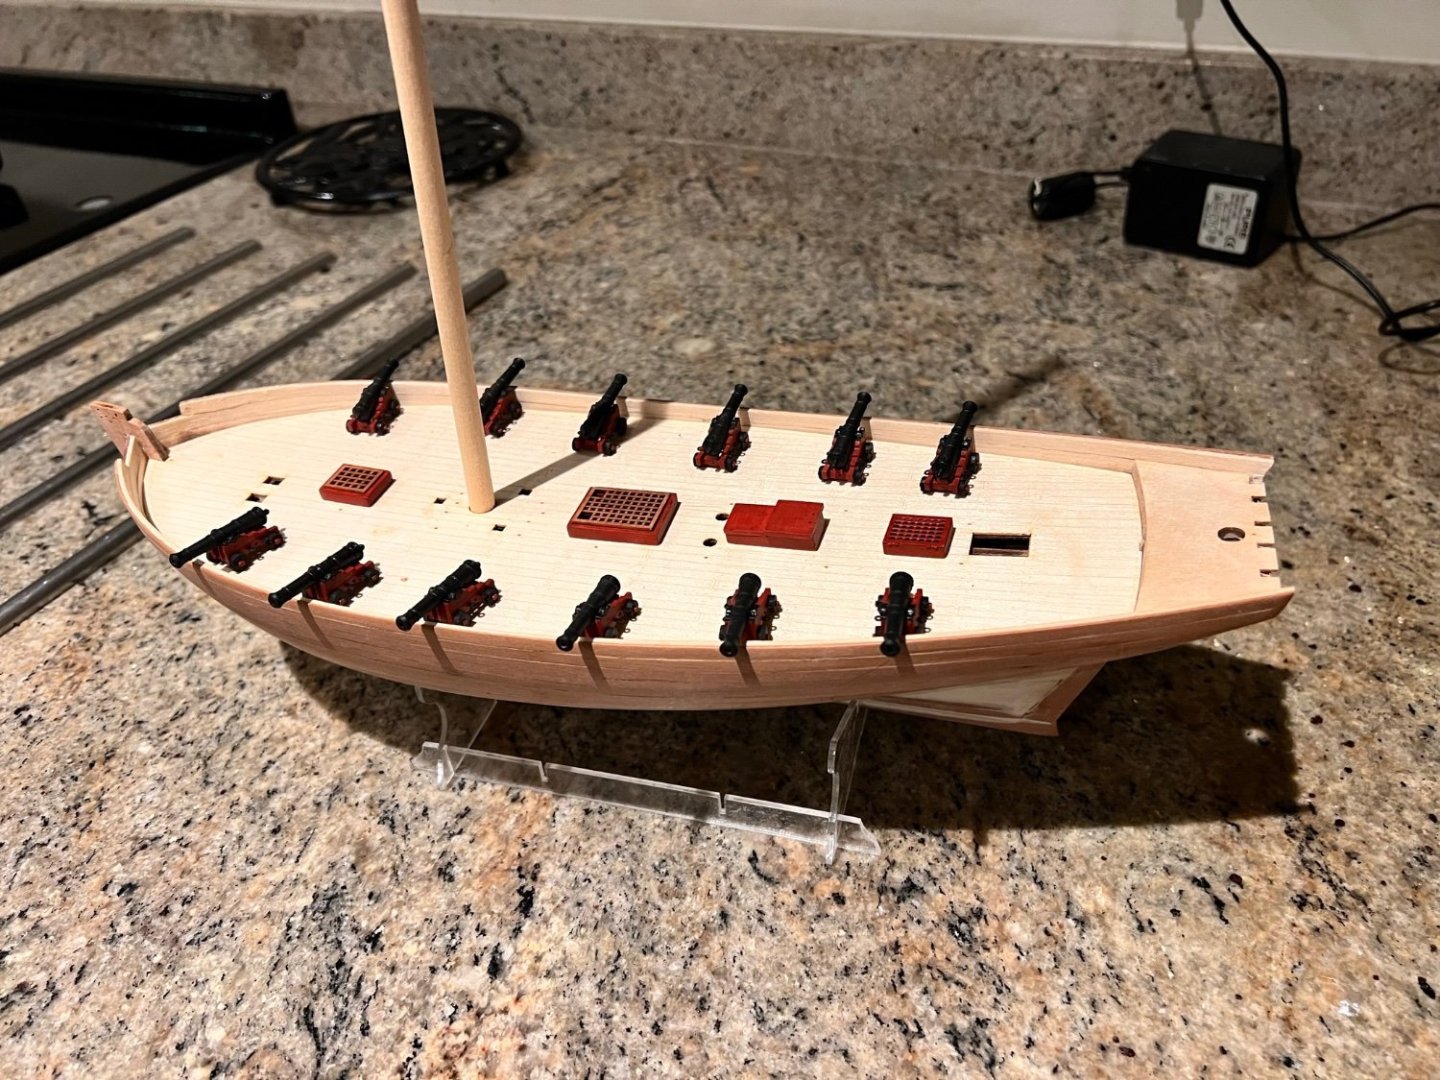
Gunports complete.
Starting to look more like a warship.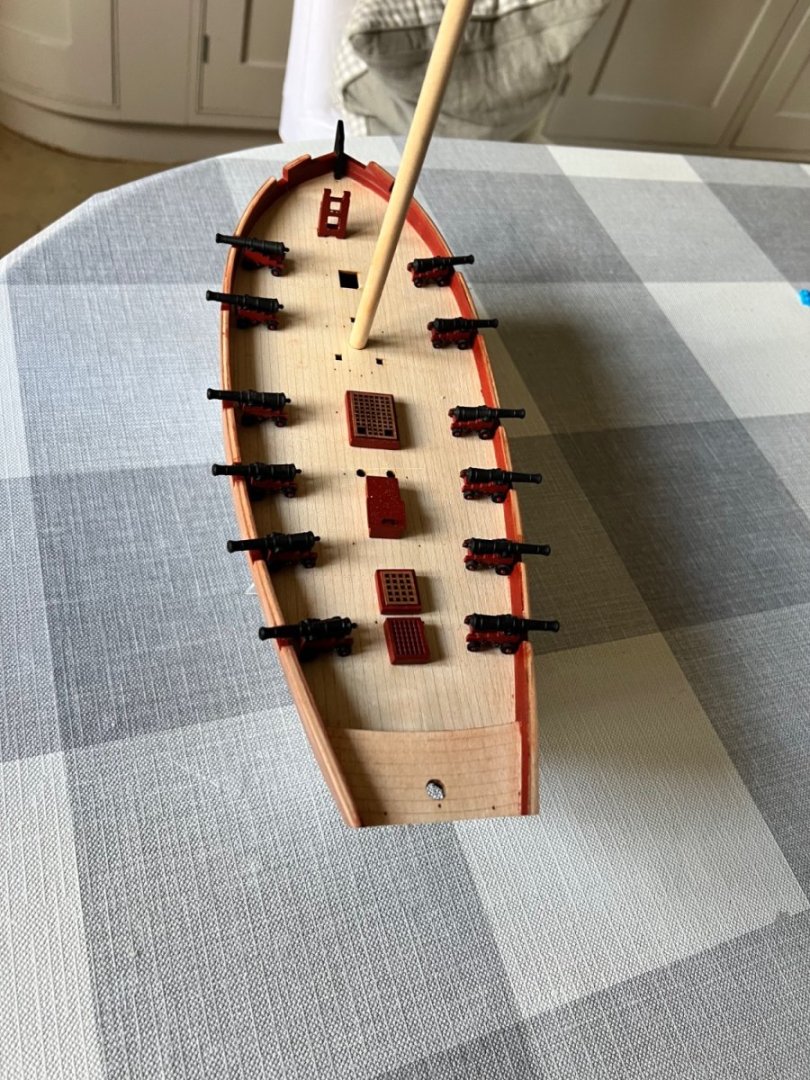

- Ryland Craze, jpalmer1970, dunnock and 4 others
-
 7
7
-
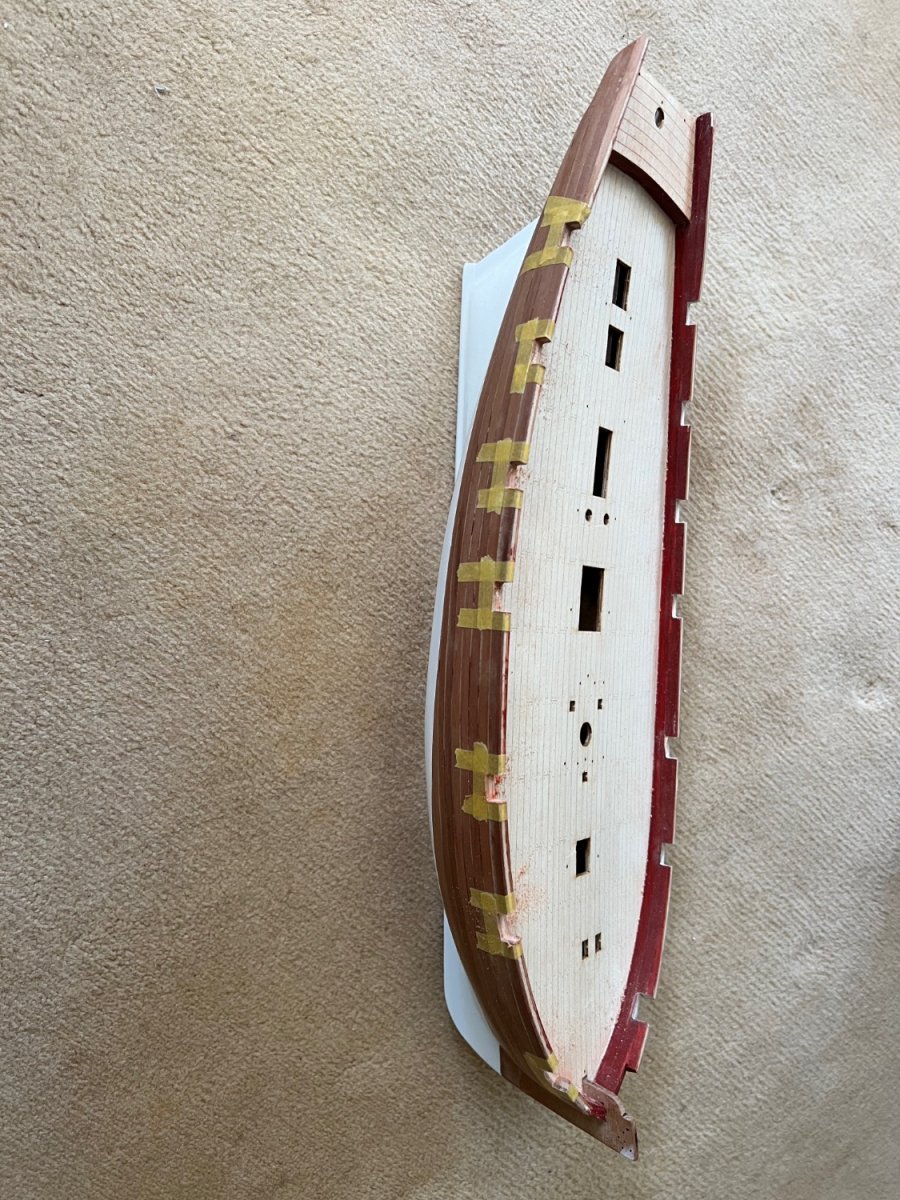
I managed a little time ship building recently.
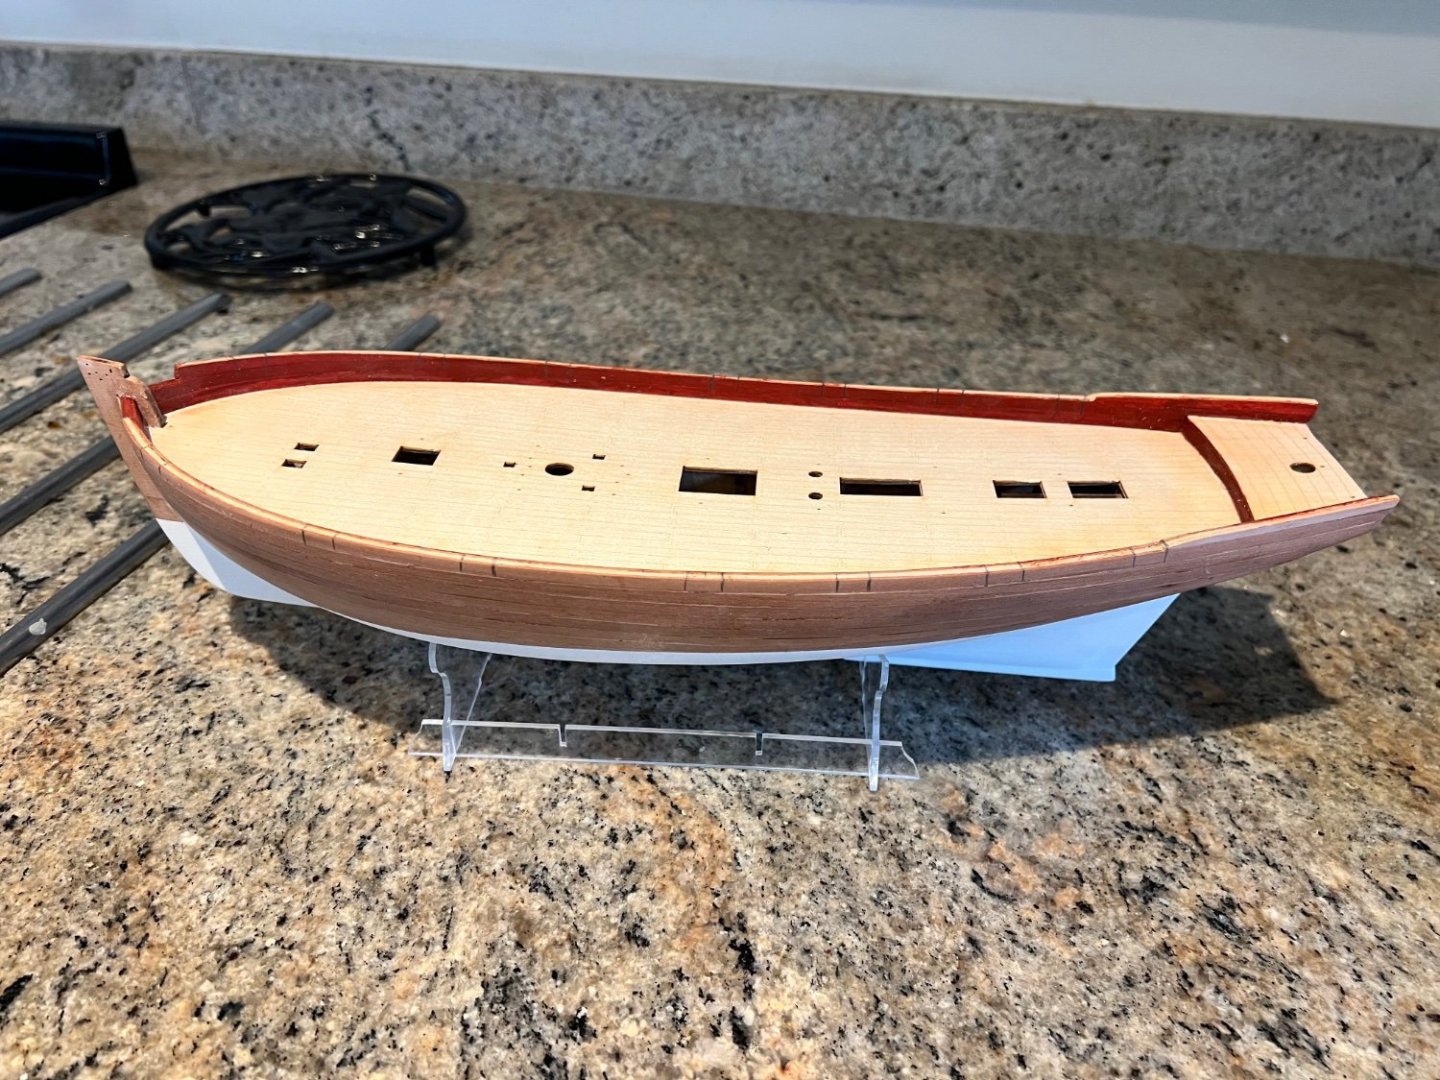
Main deck clamped and glued.
Inner bulwarks started. Shaped to fit, then painted red and glued.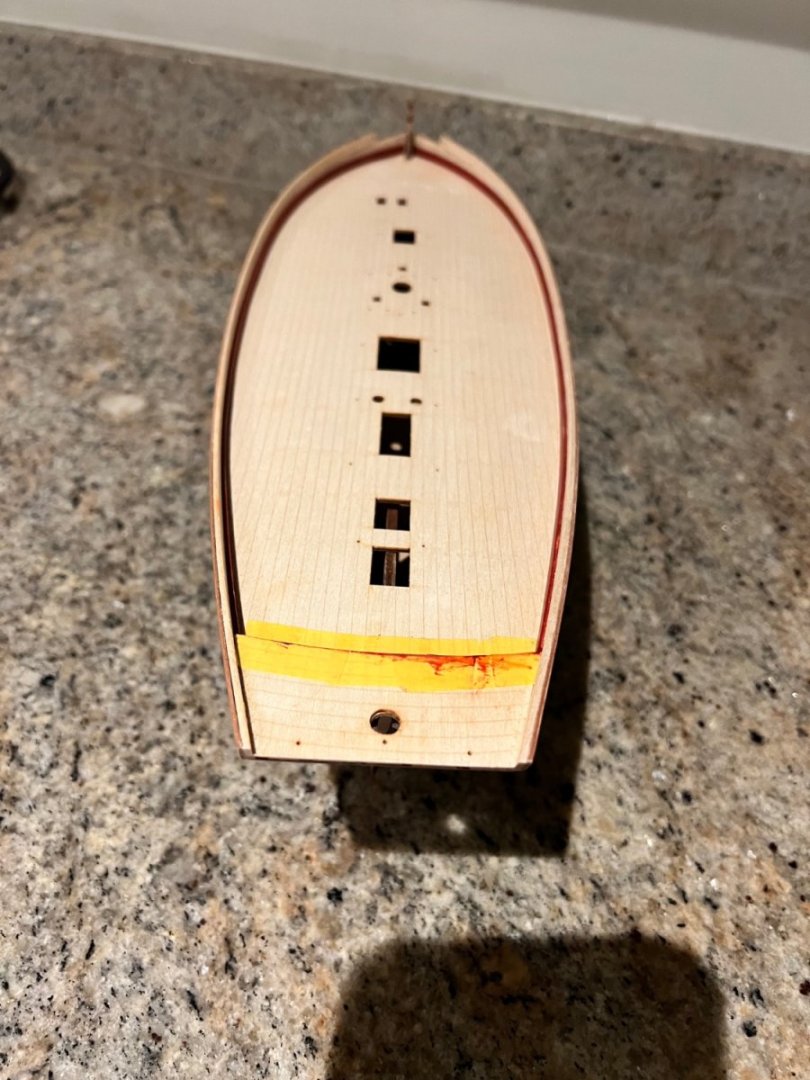
Also painted the step below the tiller platform. annoyingly some of the paint has bled under the tape and instead of waiting for it to dry and scraping off I’ve made the schoolboy error of trying to remove it whilst still wet and it’s spread across the tiller platform. Fingers crossed it will sand out.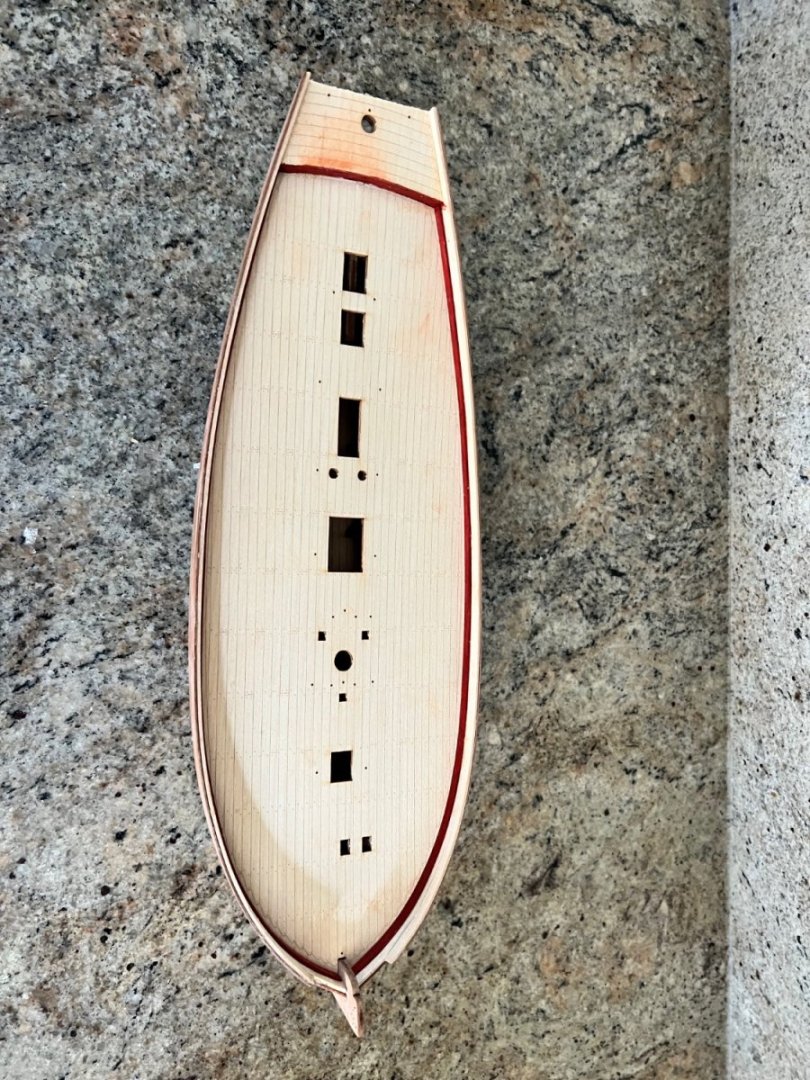
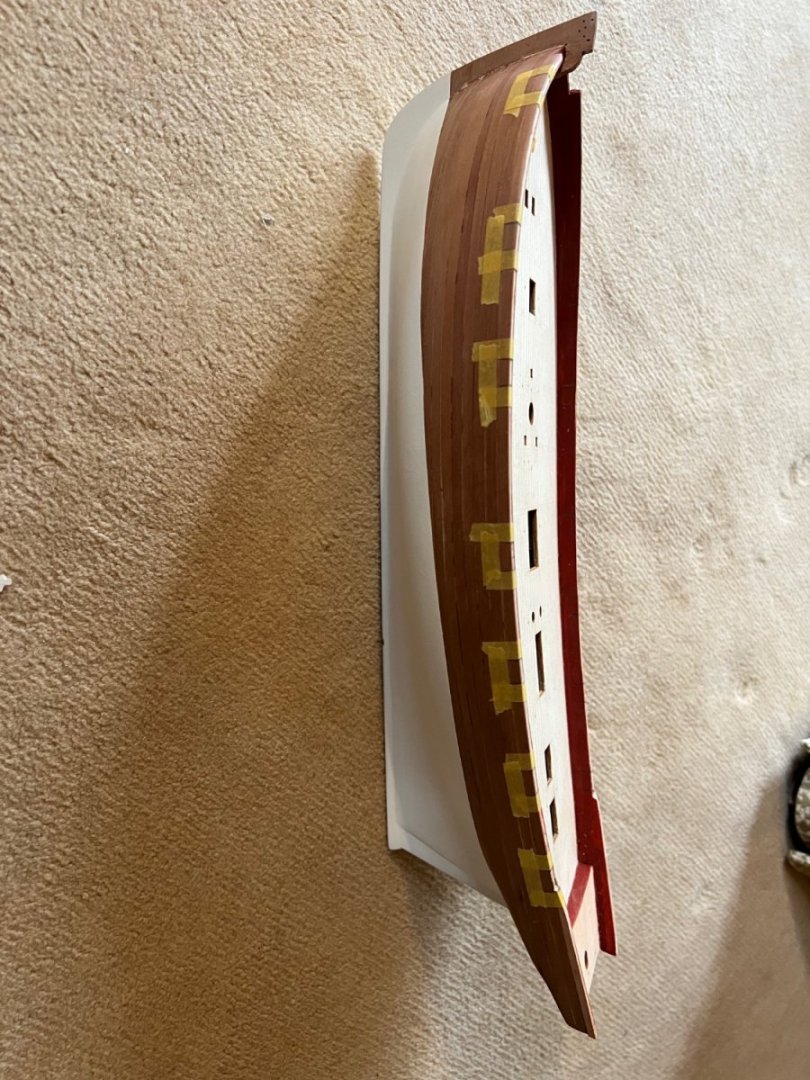
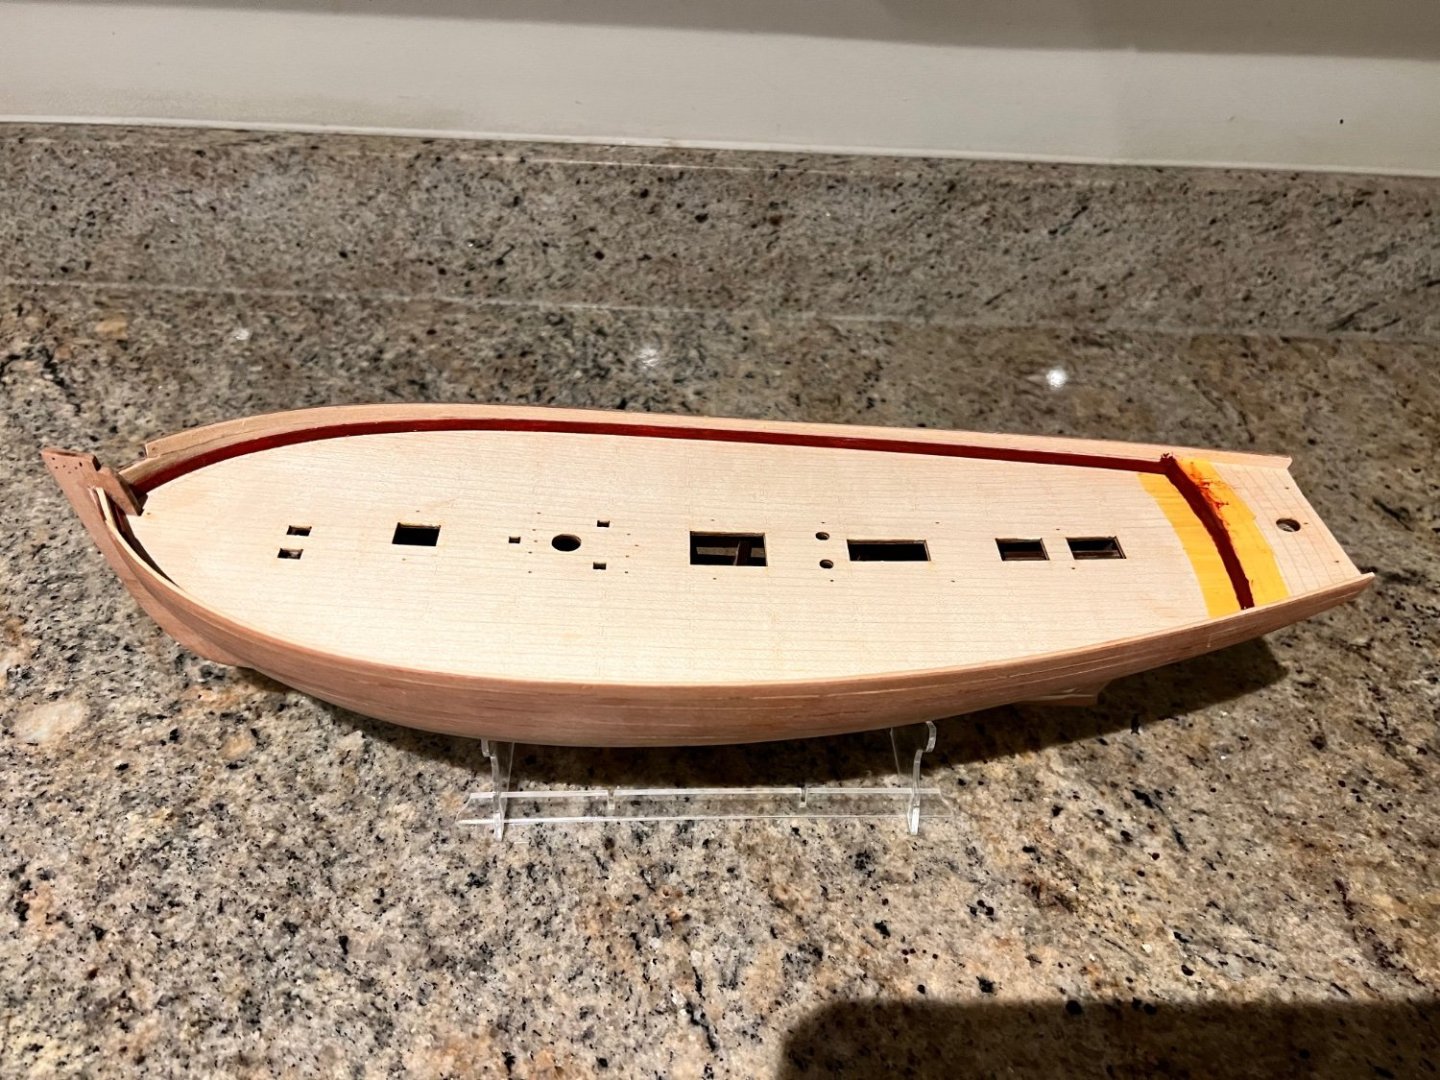
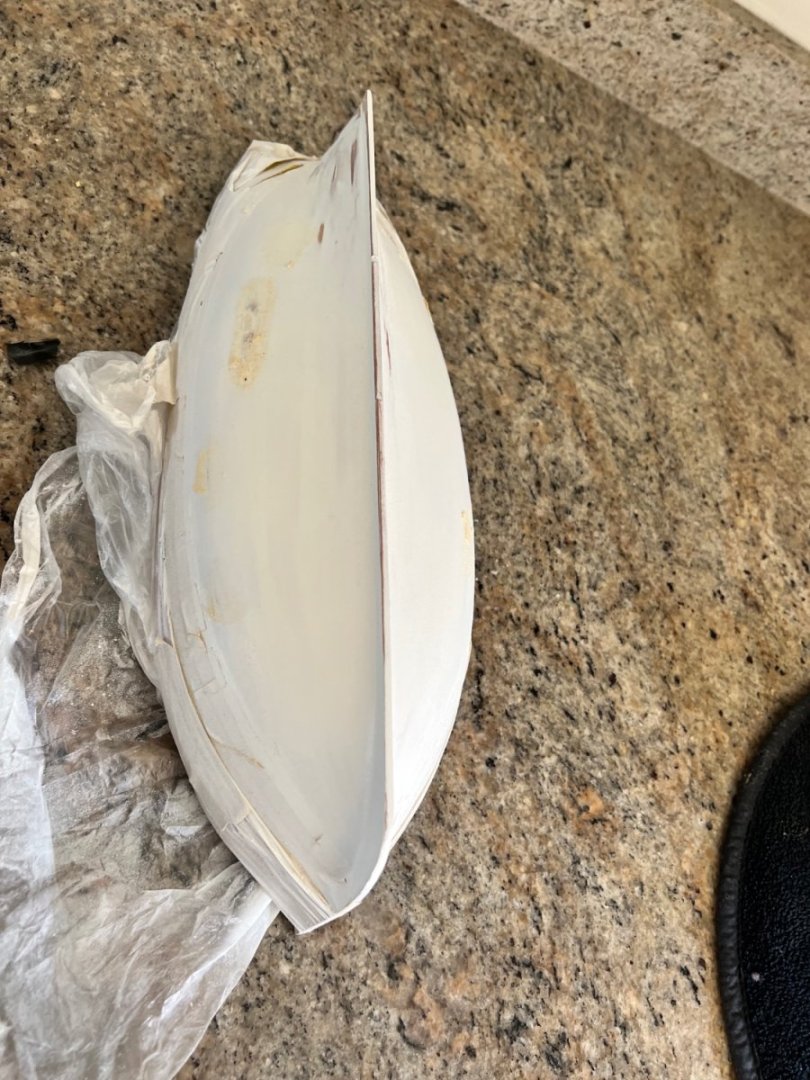
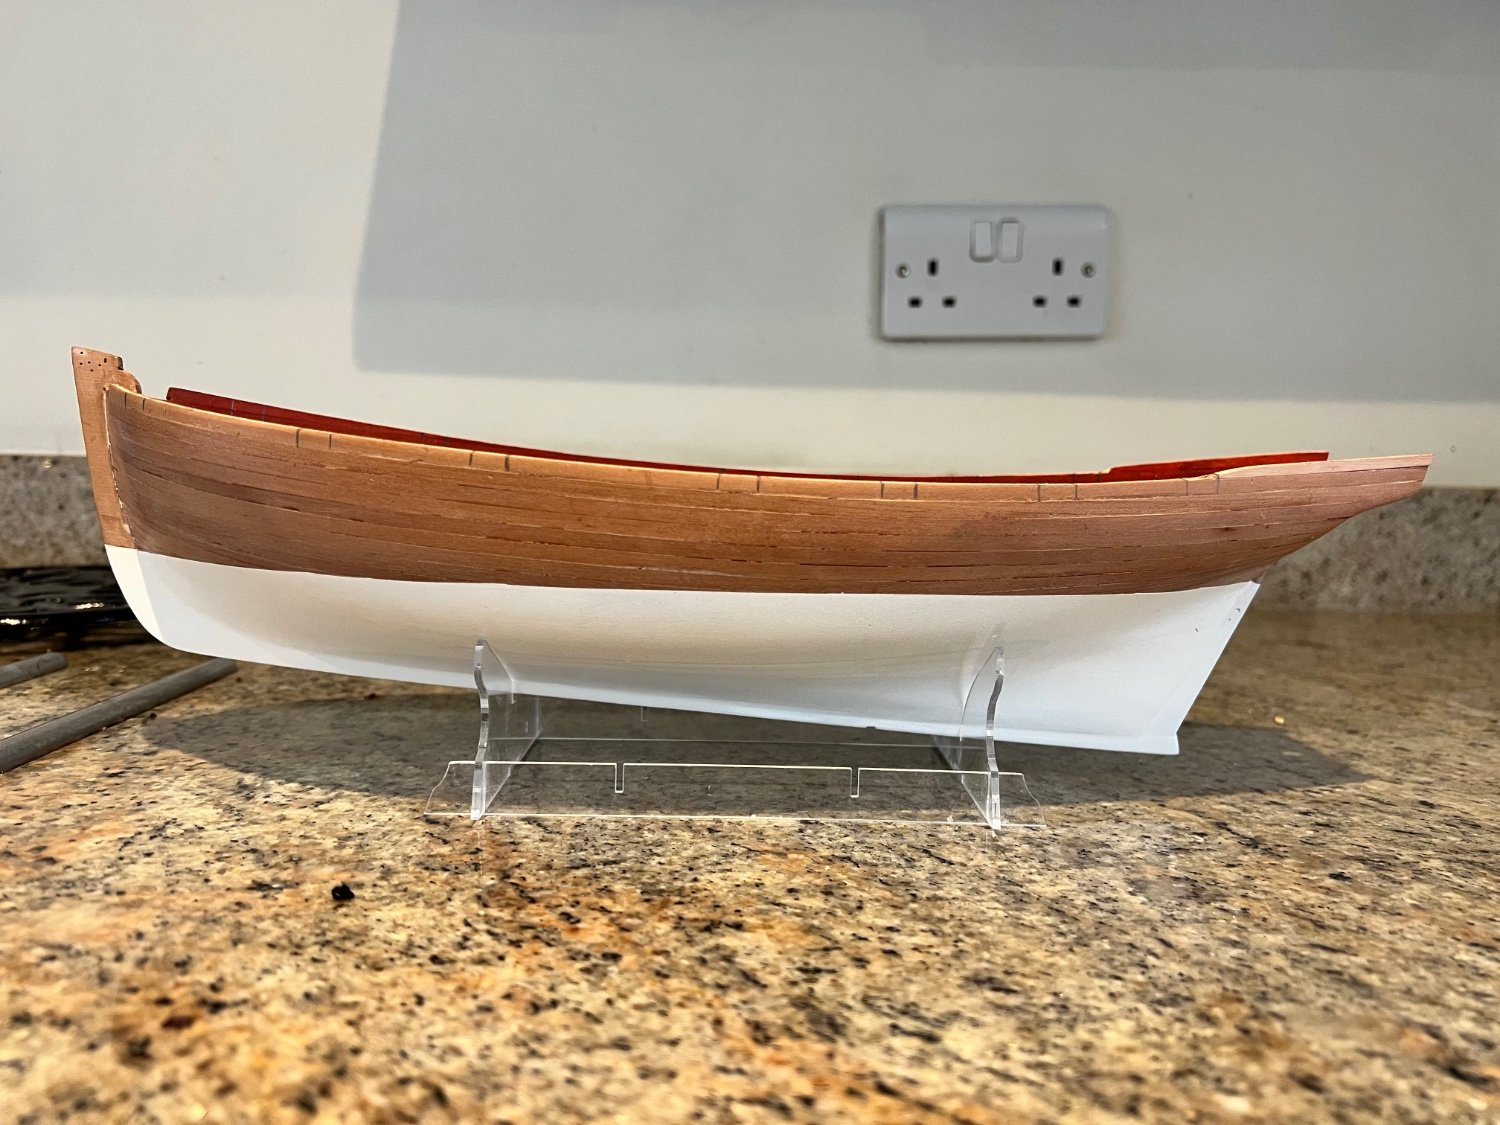
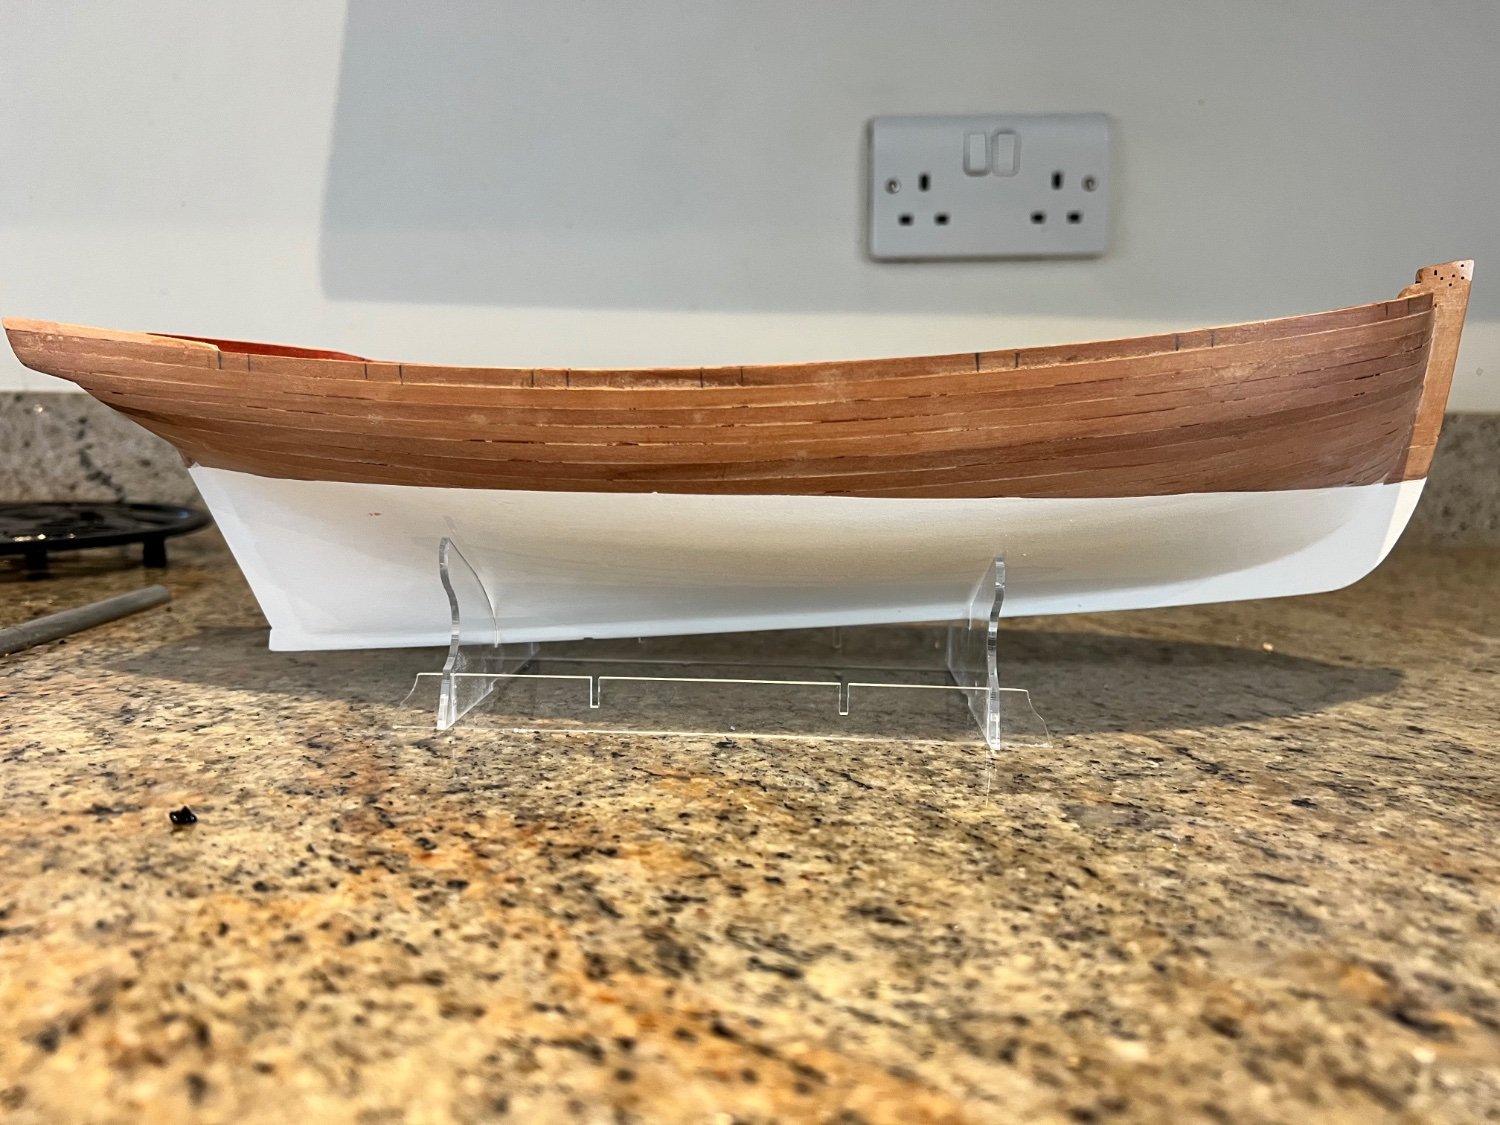
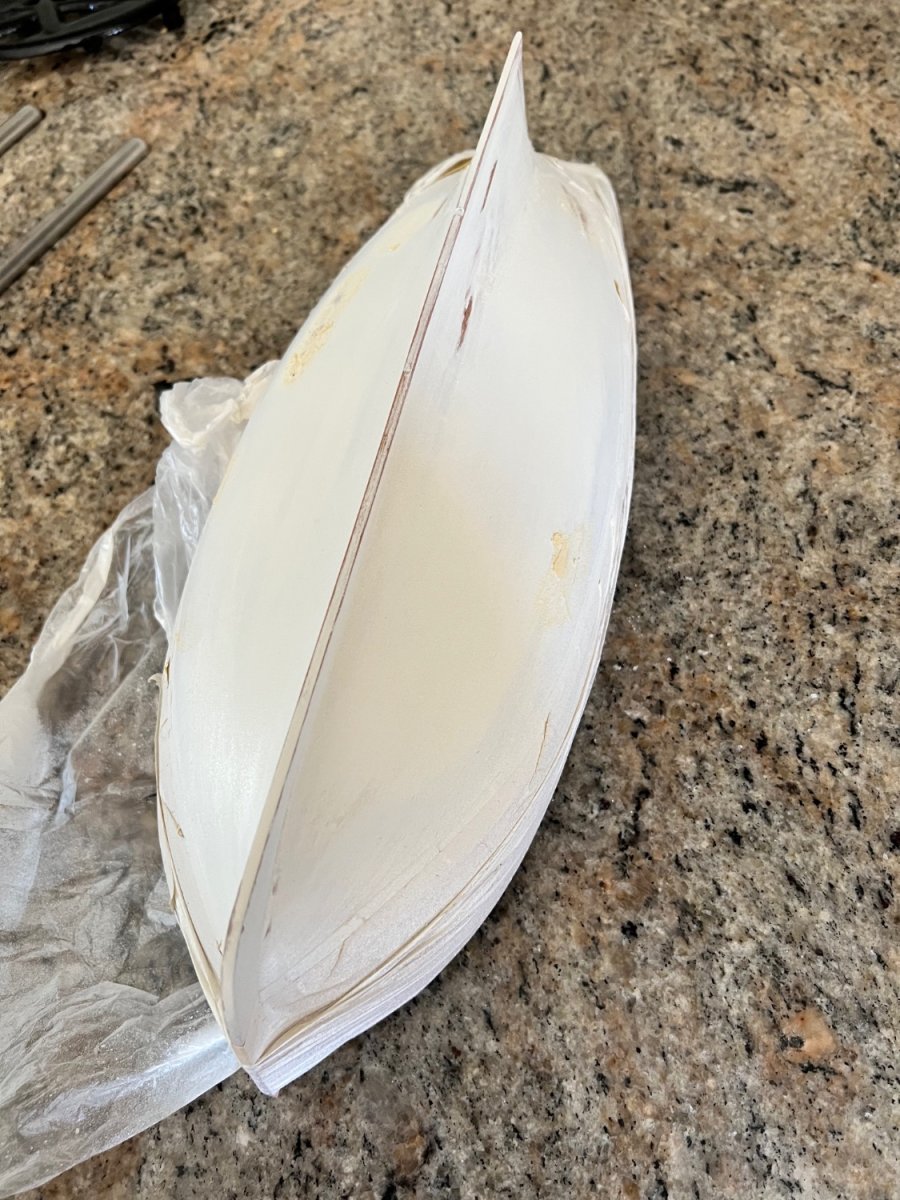
Concurrently I’ve marked the waterline and added masking tape.
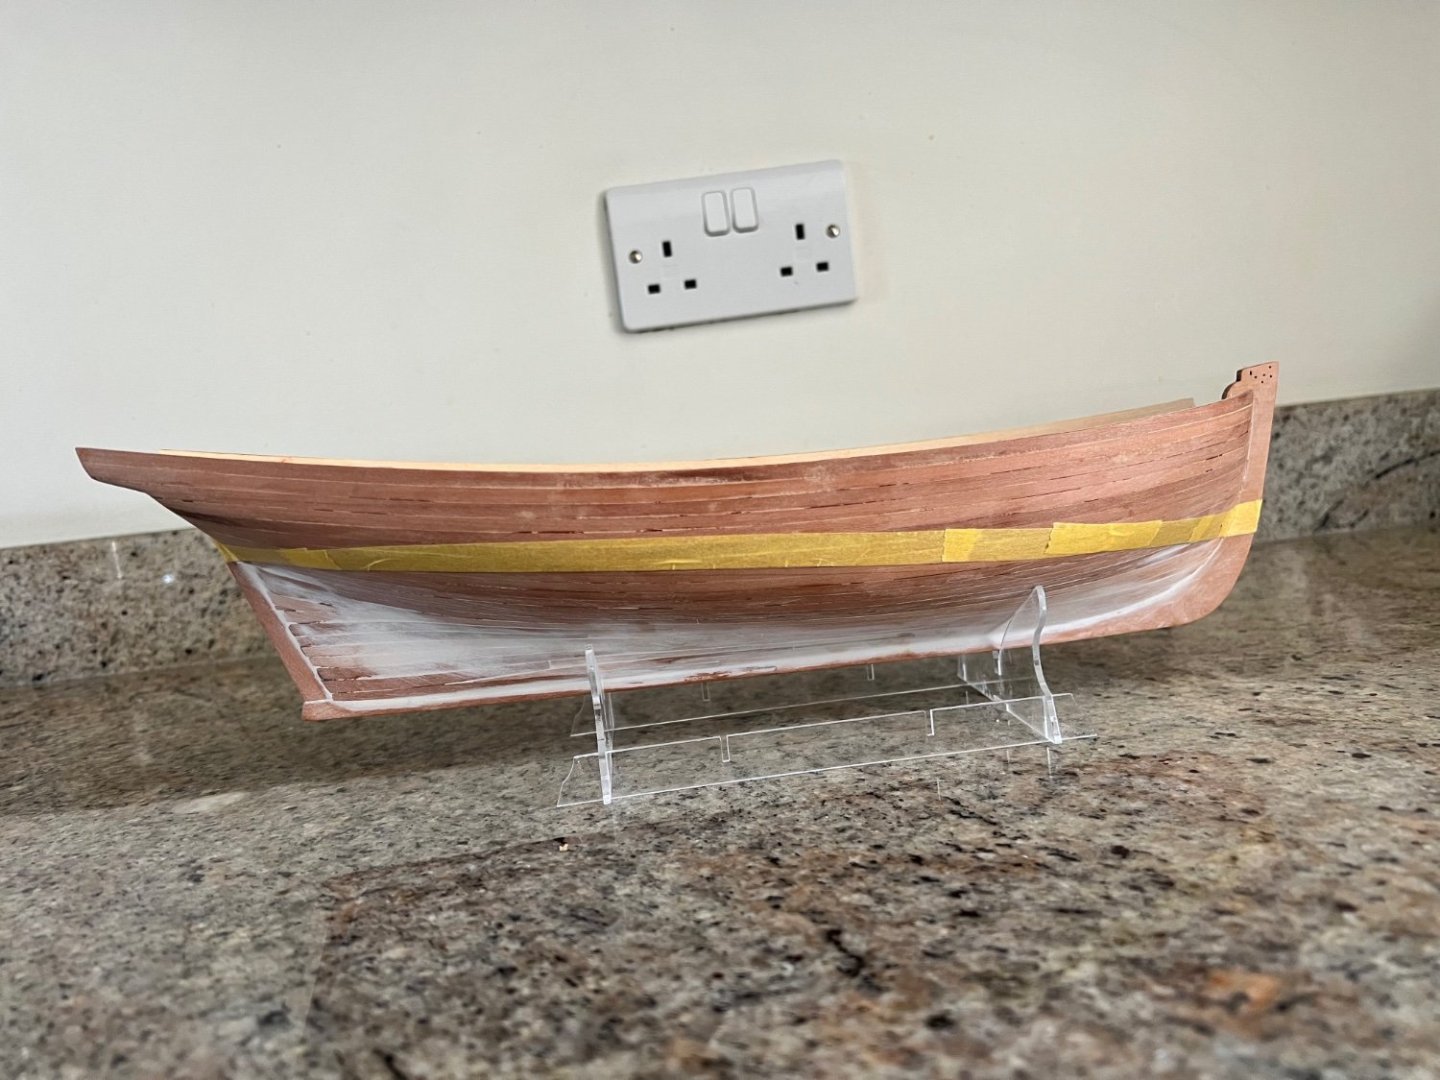
I’ve used the Tamiya tape with polythene attached to protect the rest of the hull. First spray of white paint shows up a lot of imperfections.
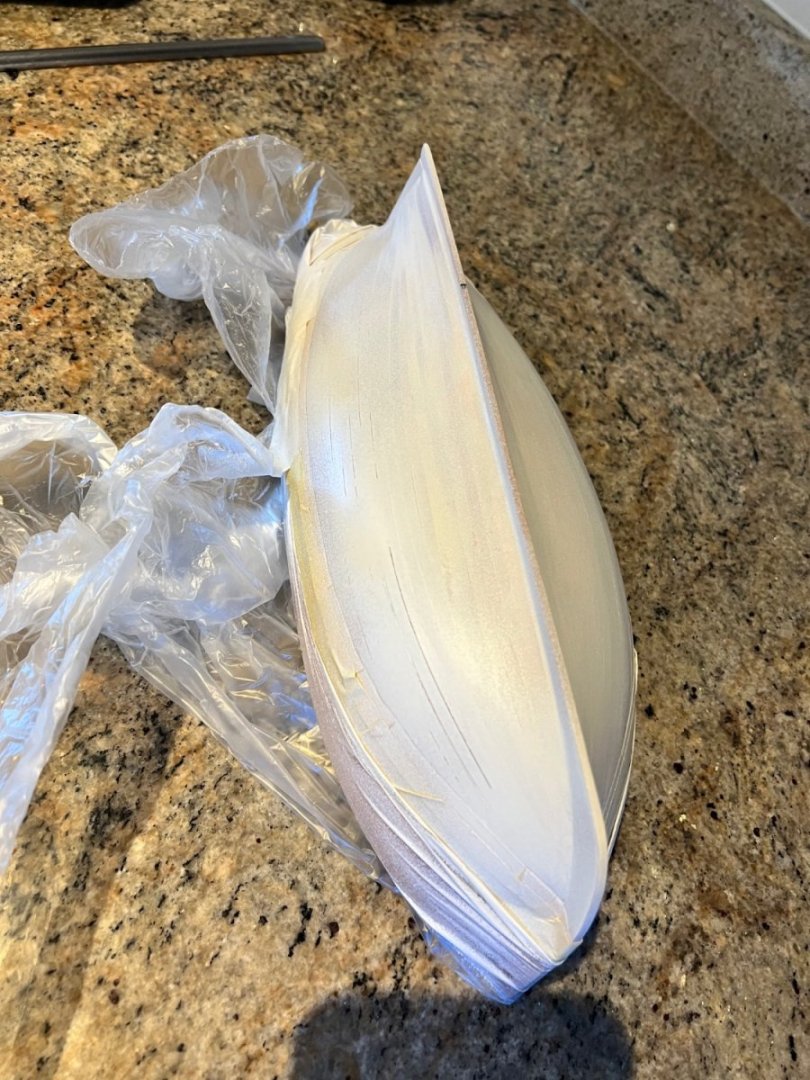
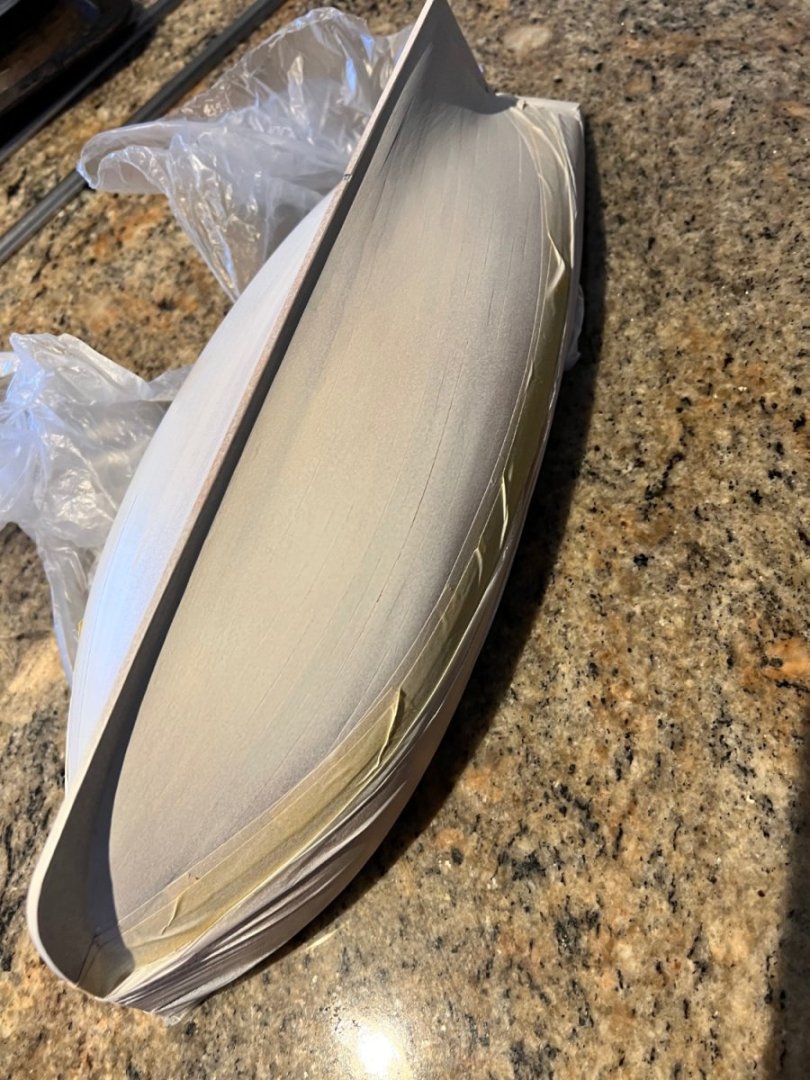
Several layers of white paint, filler and sanding later, still not done. More painting and sanding to do. I’m not after a perfect finish and it’s getting closer.
- KARAVOKIRIS, Diver, jpalmer1970 and 3 others
-
6
-
5 hours ago, Gus M said:
Looks⁹ great, so beauty work!! Congrats.
This is one recomendation for beginners @chris watton advice me, but I decide start with Saucy Jack, other recomendation
Gus, I’ve built both Nisha and Saucy Jack, both are lovely kits to build. Nisha is slightly easier due to a less curved hull shape and a little easier to rig as the belaying pins at the foot of Jack’s mast are fiddly - not a great deal in it though. Enjoy!
-
3 hours ago, AJohnson said:
Looking good! 👍
Thank you!
-
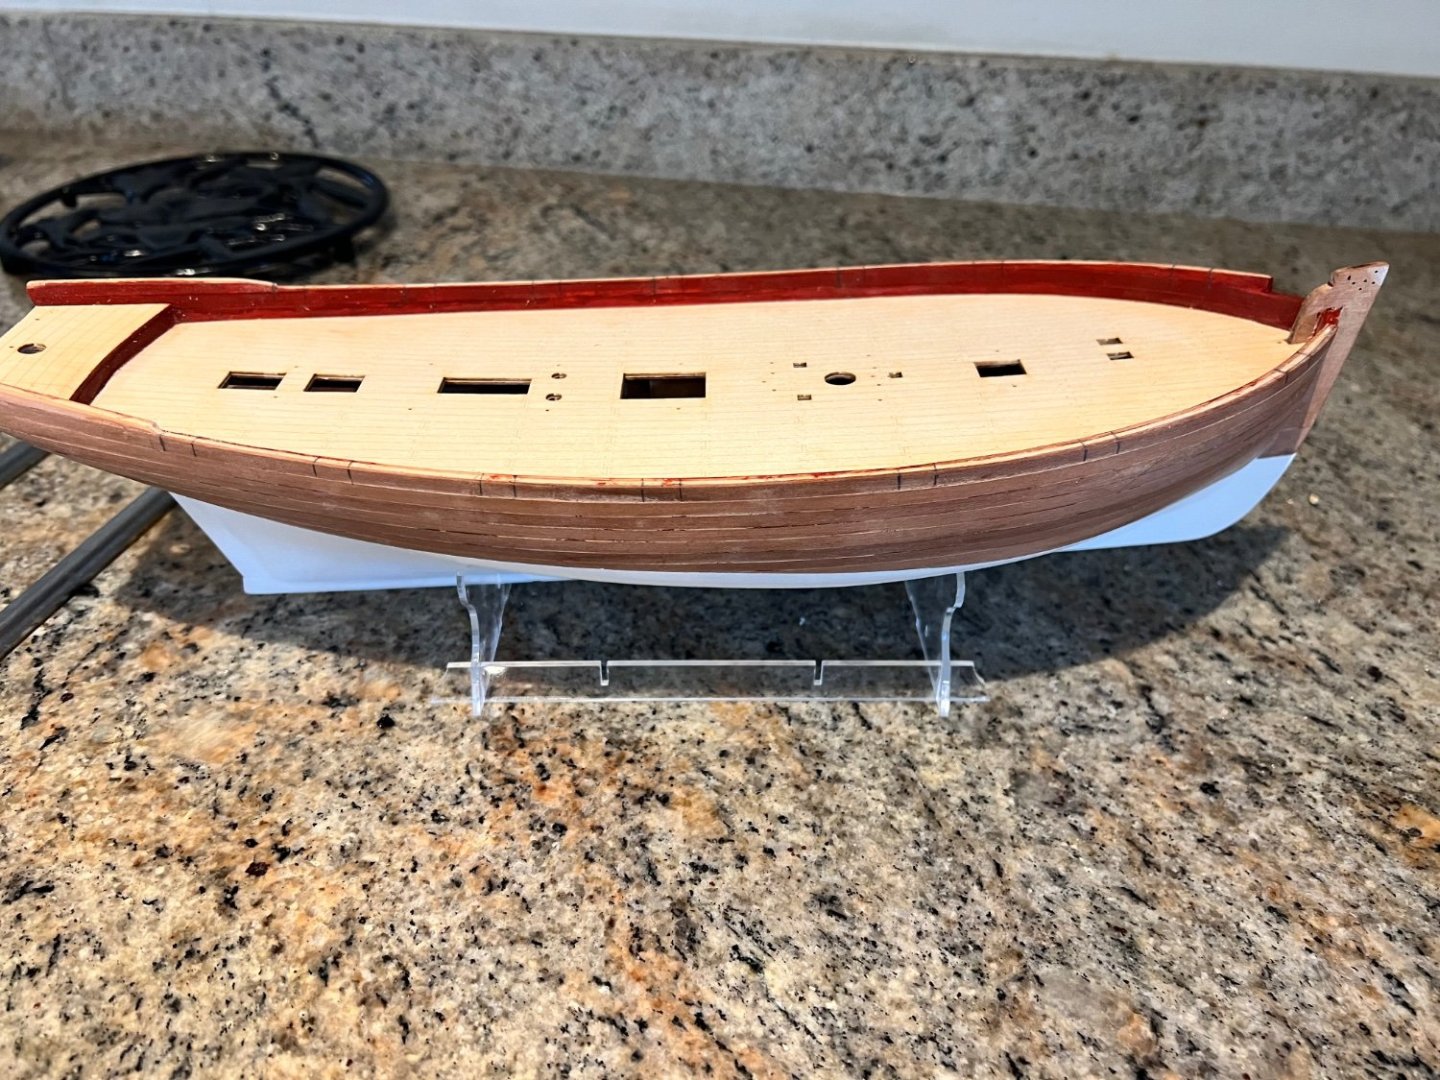
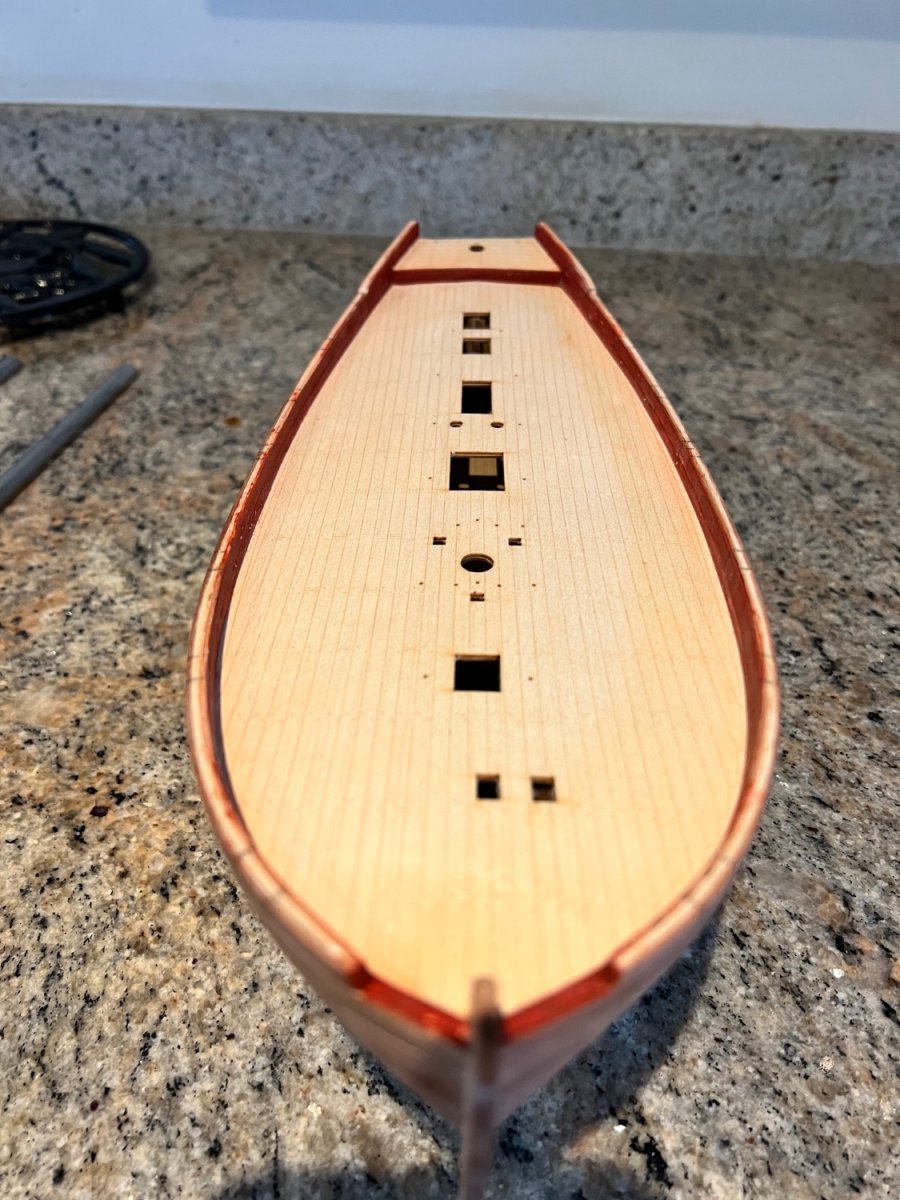
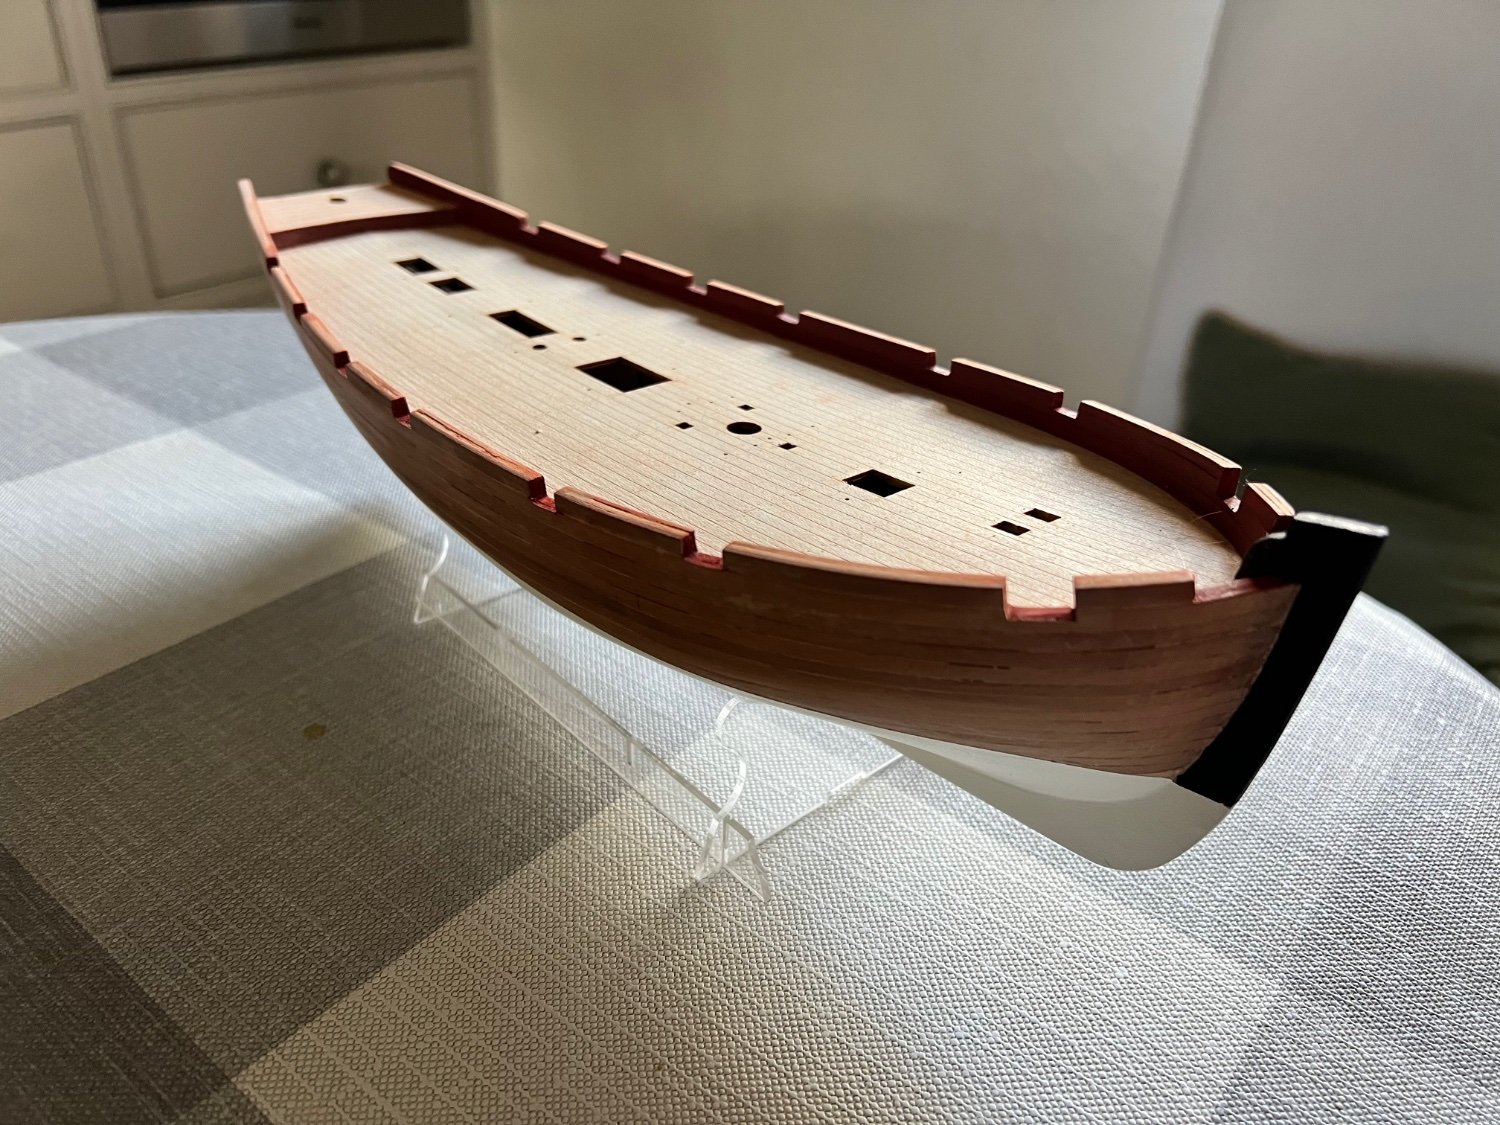
Bulkhead ears and stern timbers removed. The etched main deck is fitted and not glued yet. The tiller deck not fitted yet. More sanding of the hull still to do.
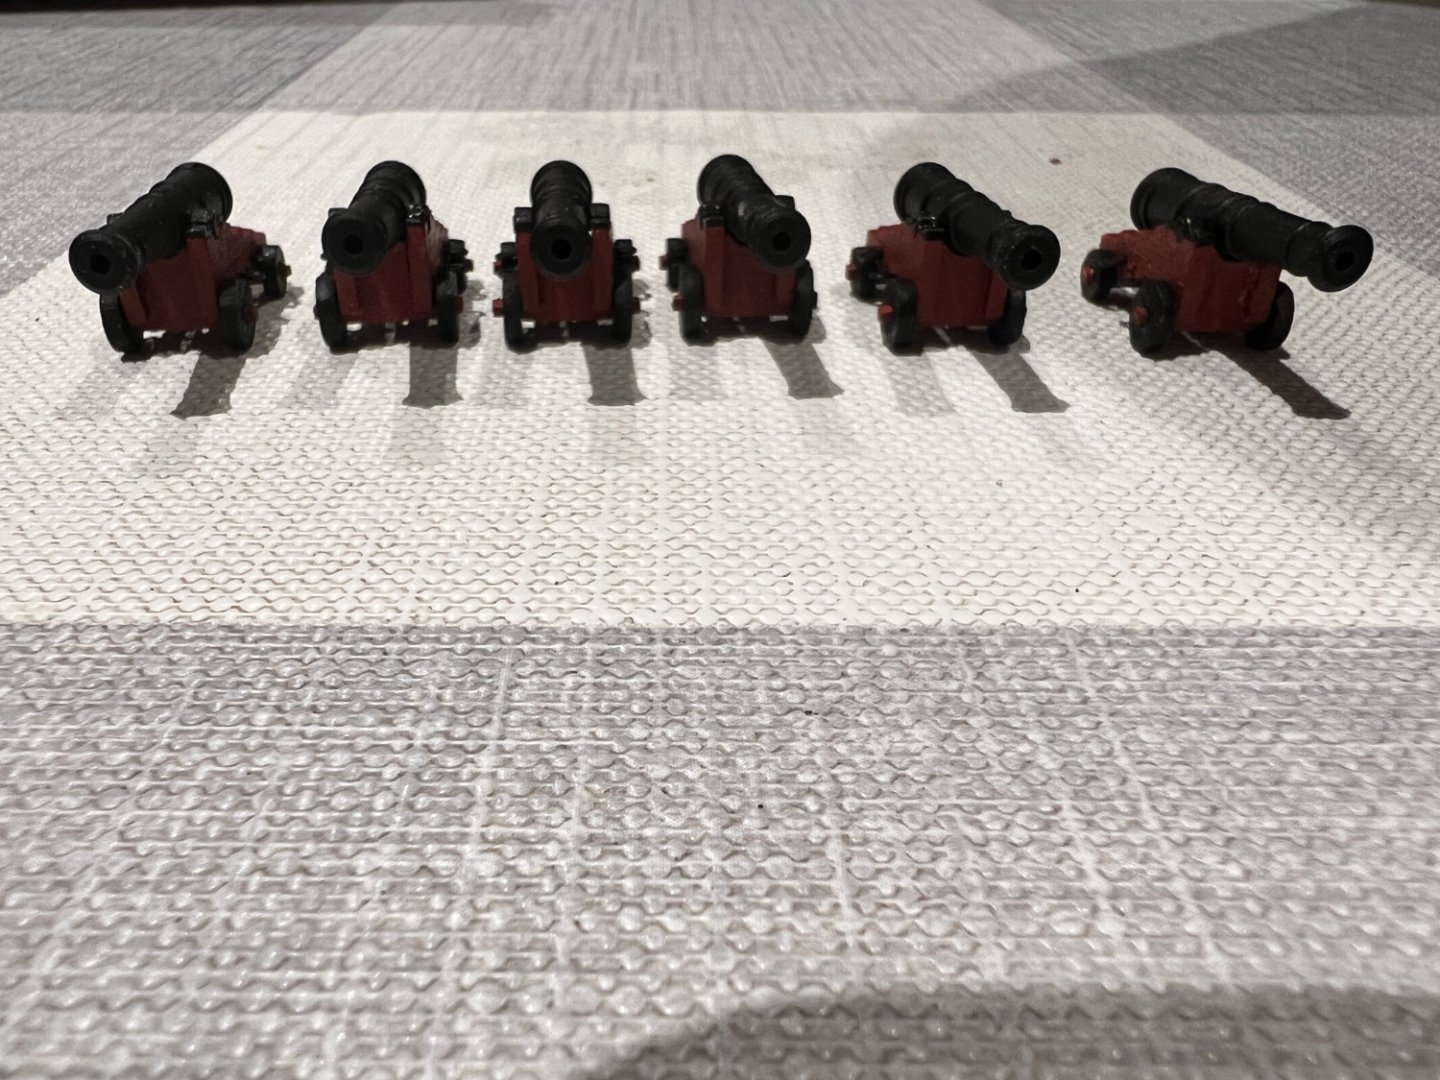
Second set of six cannons built together with most of the hatches. Inner bulwarks planking next - then time to cut the dreaded gunports!
I doubt I’ll have any time in the shipyard over the next fortnight. School holidays so busy with the kids!
- dunnock, ccoyle, KARAVOKIRIS and 4 others
-
7
-
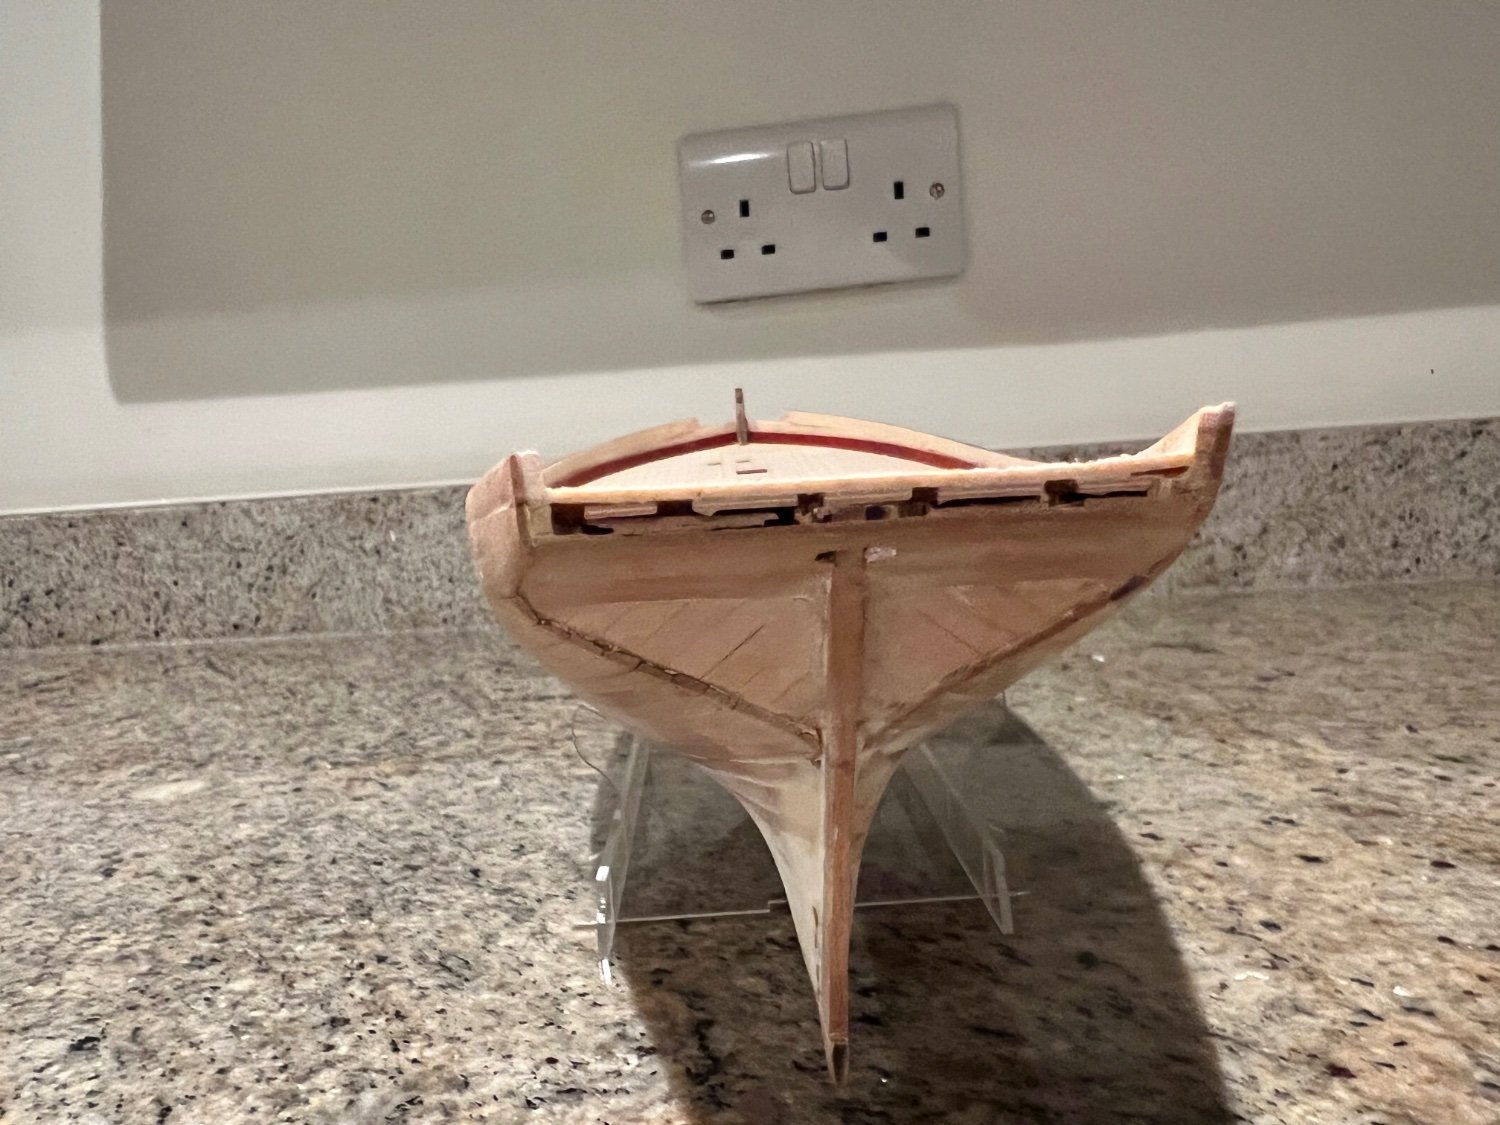
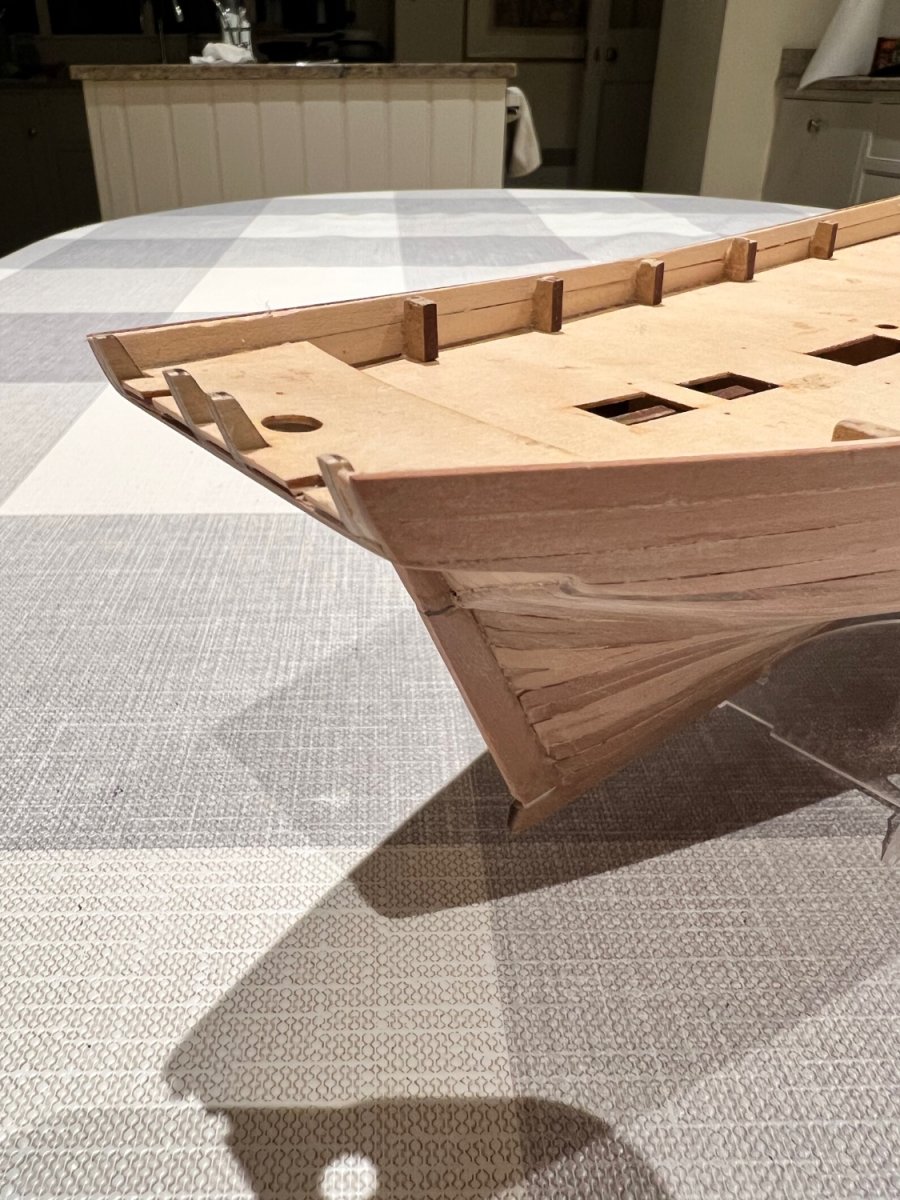
8 hours ago, Thukydides said:
Looking good. Make sure you tape off the keel and stern post with painters tape before you sand or at the very least be careful. I was not watching what I was doing and significantly thinned my stern post. It may be the perspective, but it looks like you have sanded the stern post a bit (like I did) so if you have more sanding to do here watch you don't think it anymore.
Thanks for the warning Thukydides. You’re right, I have thinned the stern post slightly. I’ll make sure not to do so any further.
- Thukydides and AJohnson
-
2
-
Thanks Bowline. Pale Moon, great to have you aboard, Alert’s hull is a lovely shape. I strongly recommend this kit, although if you’re a complete beginner to modelling with no skills, like I was very recently, I suggest a Vanguard fishing boat would be a touch easier.
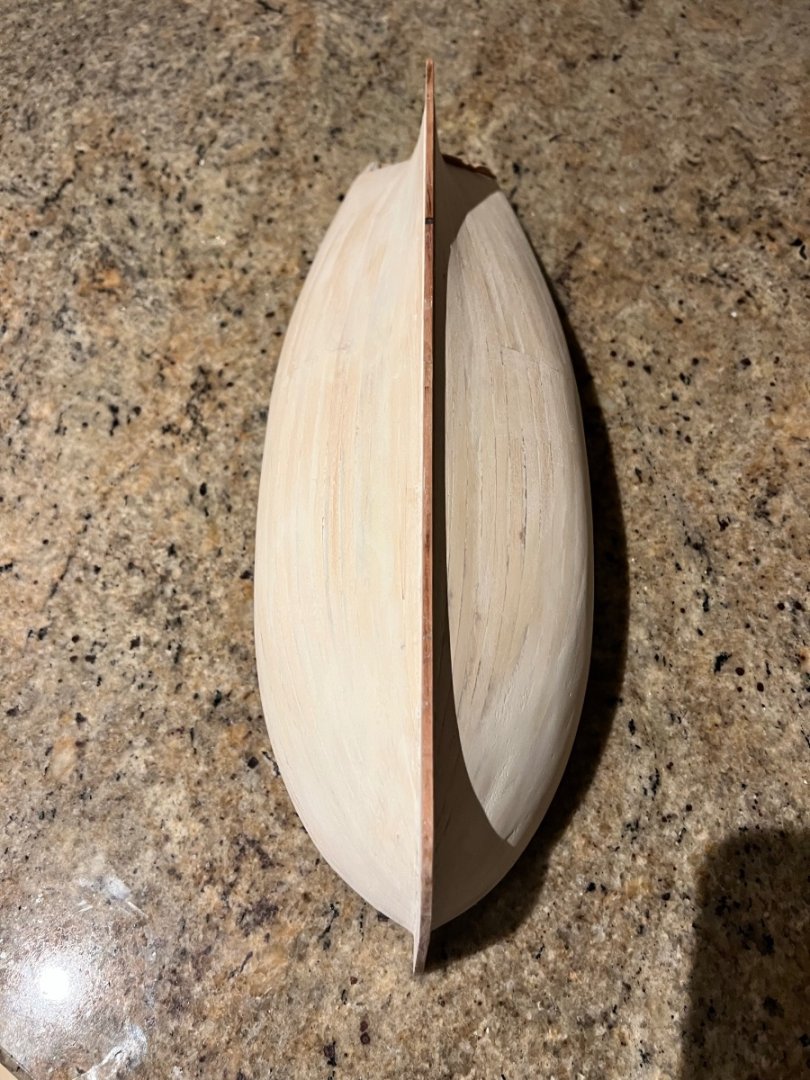
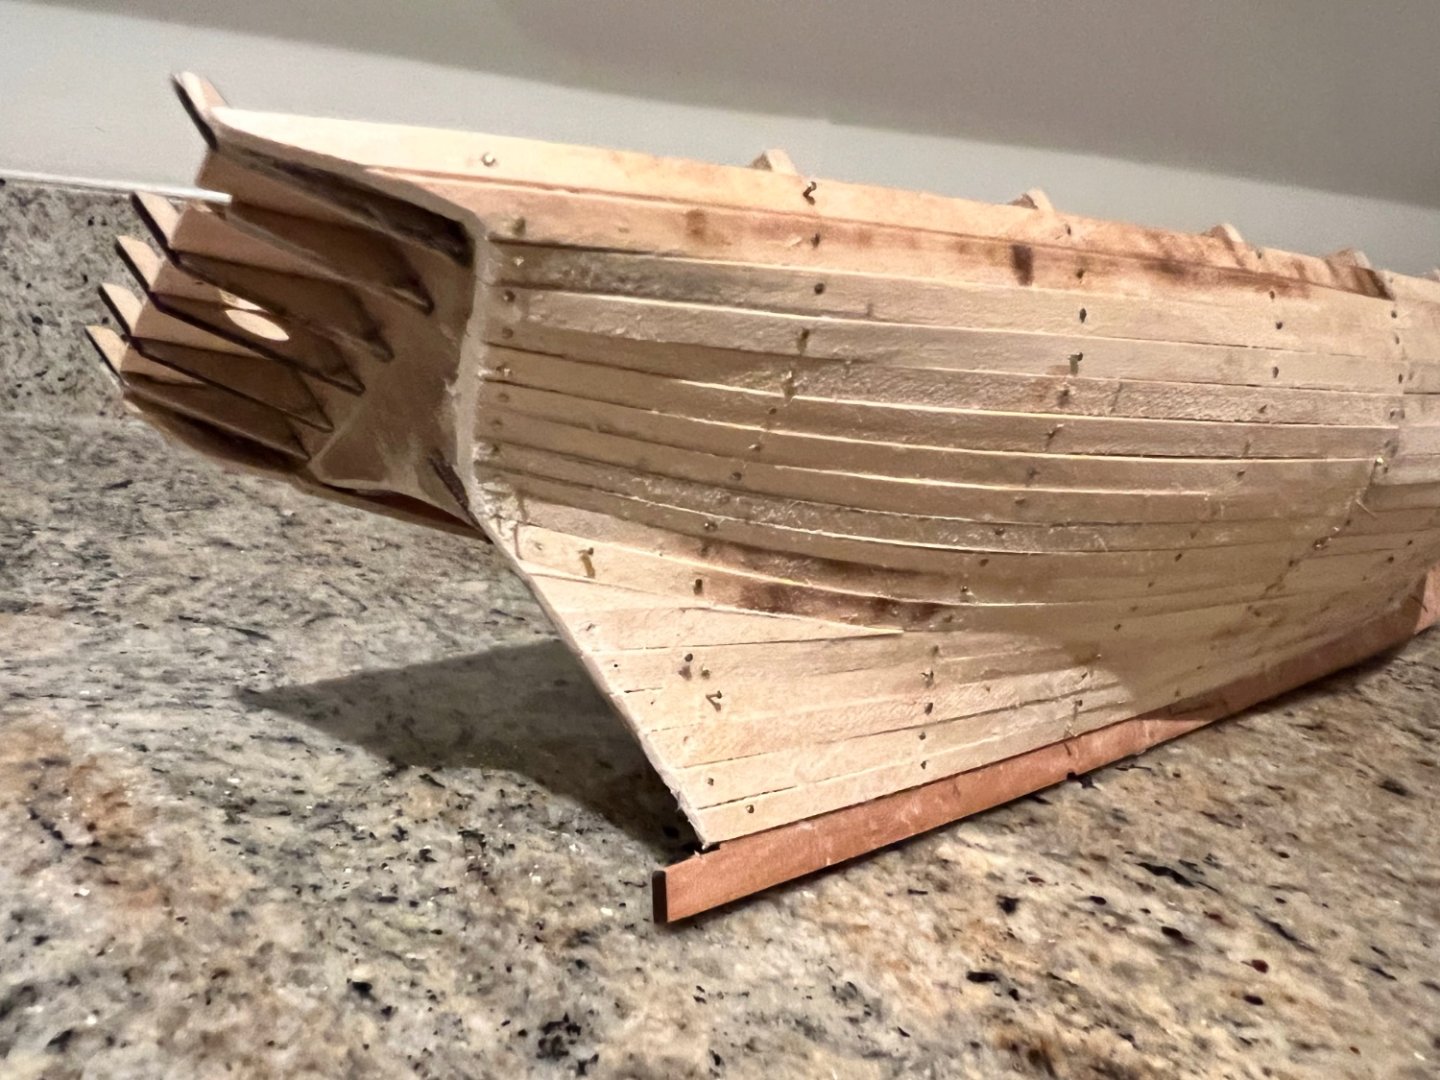
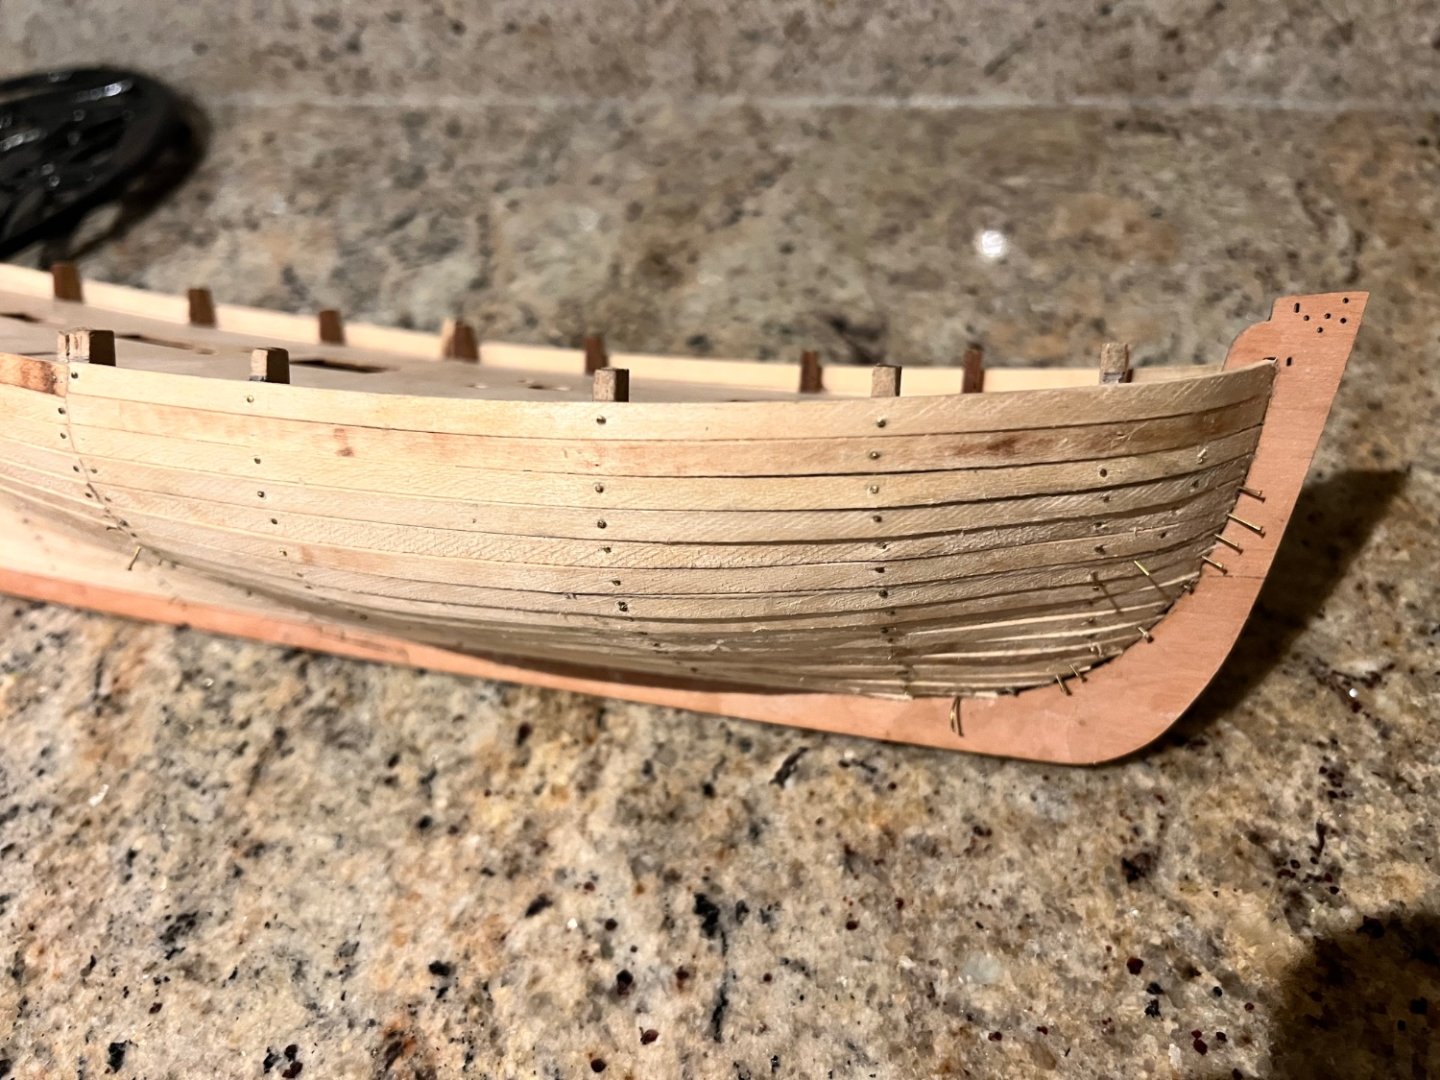
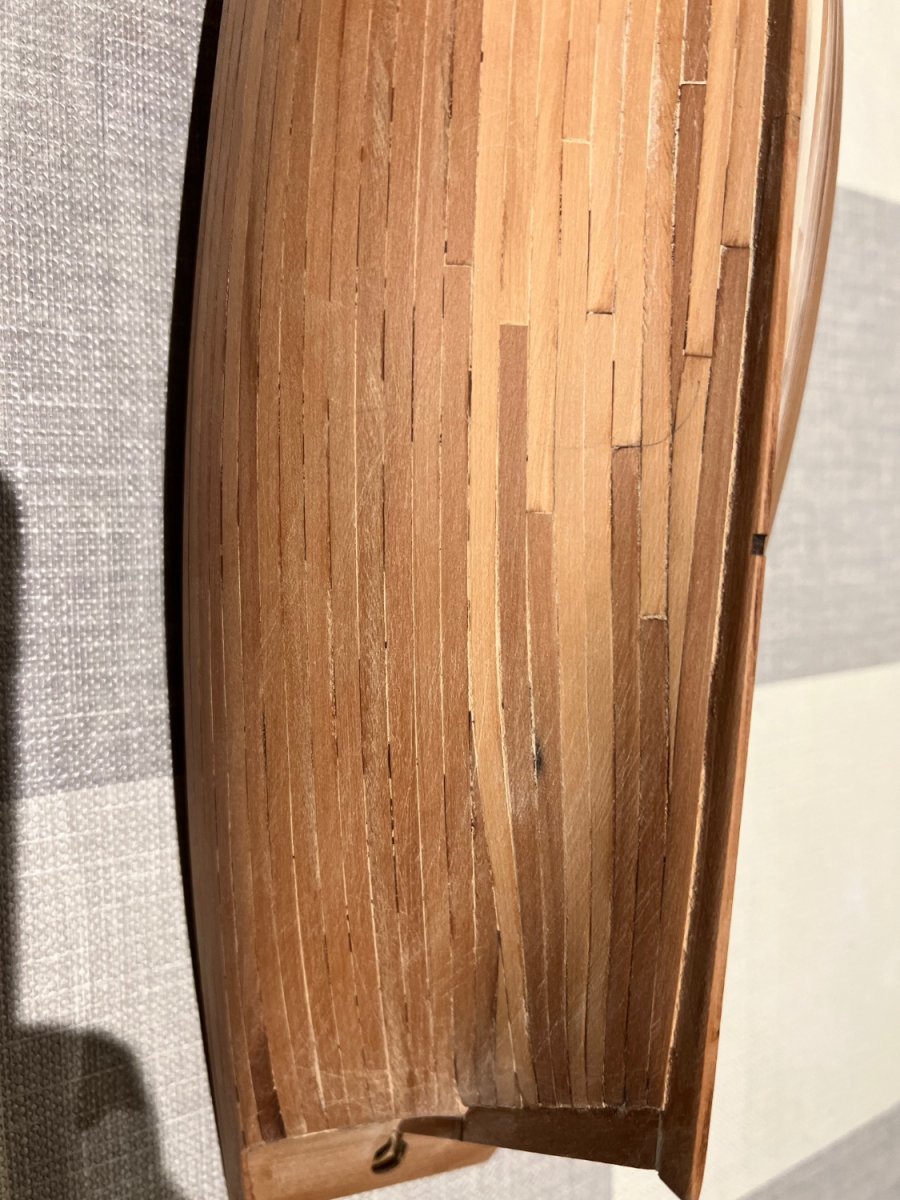
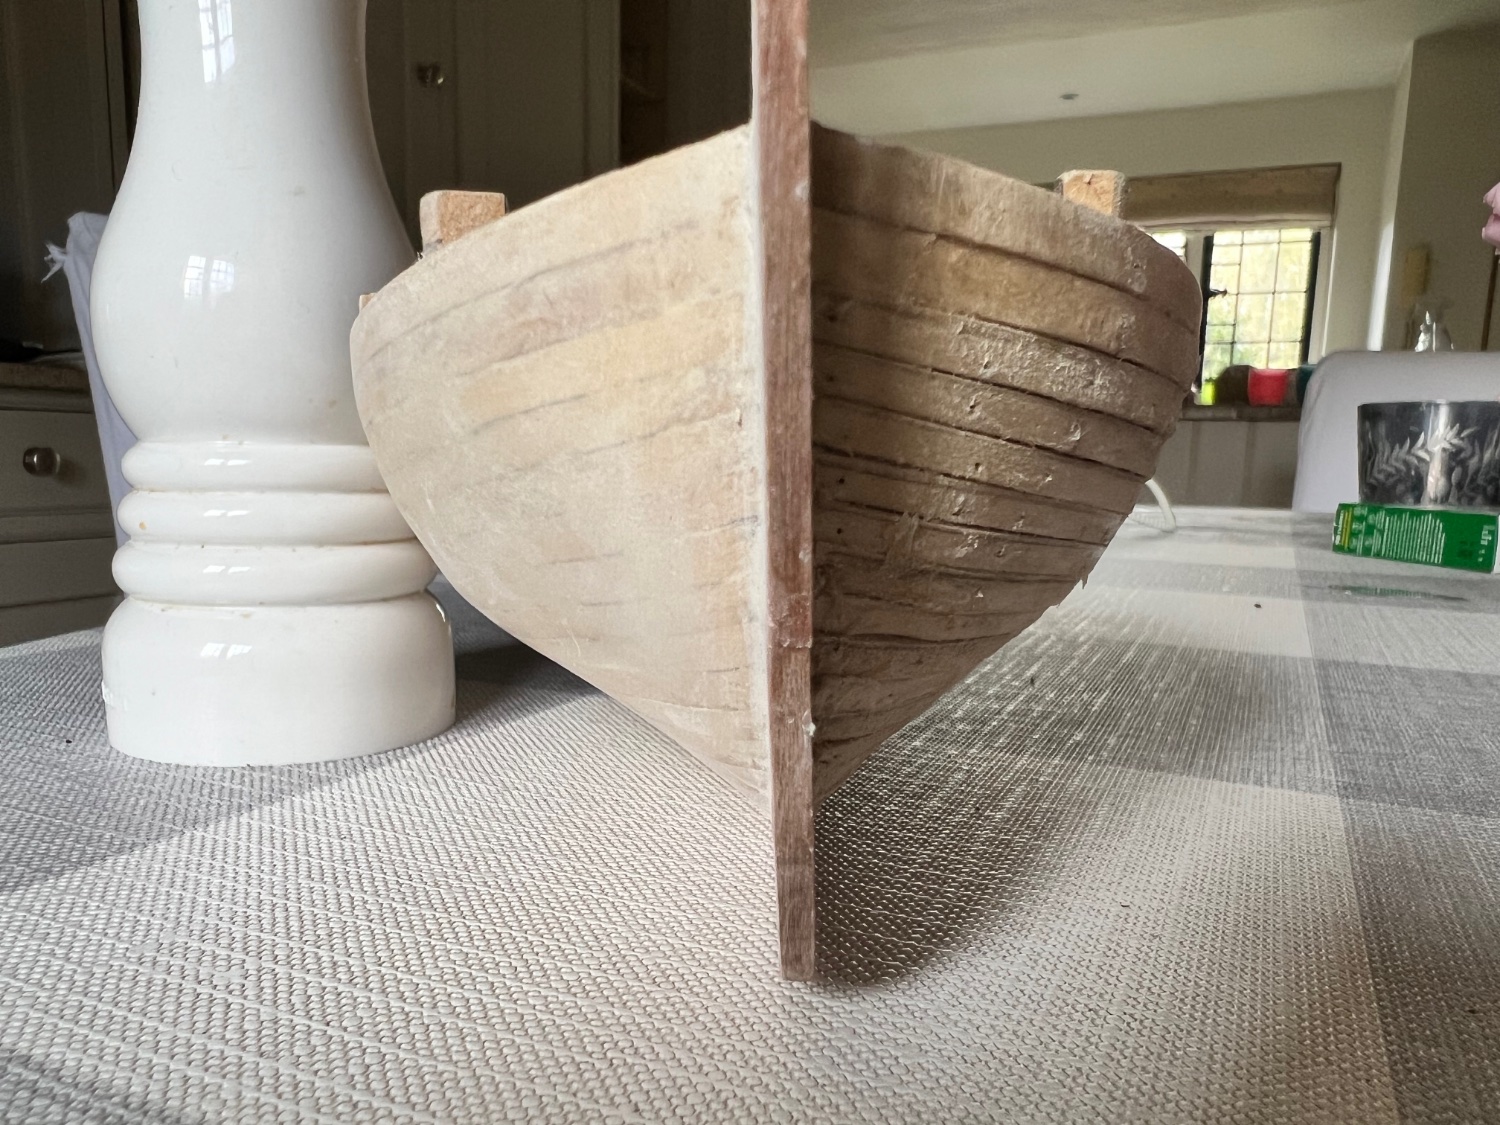
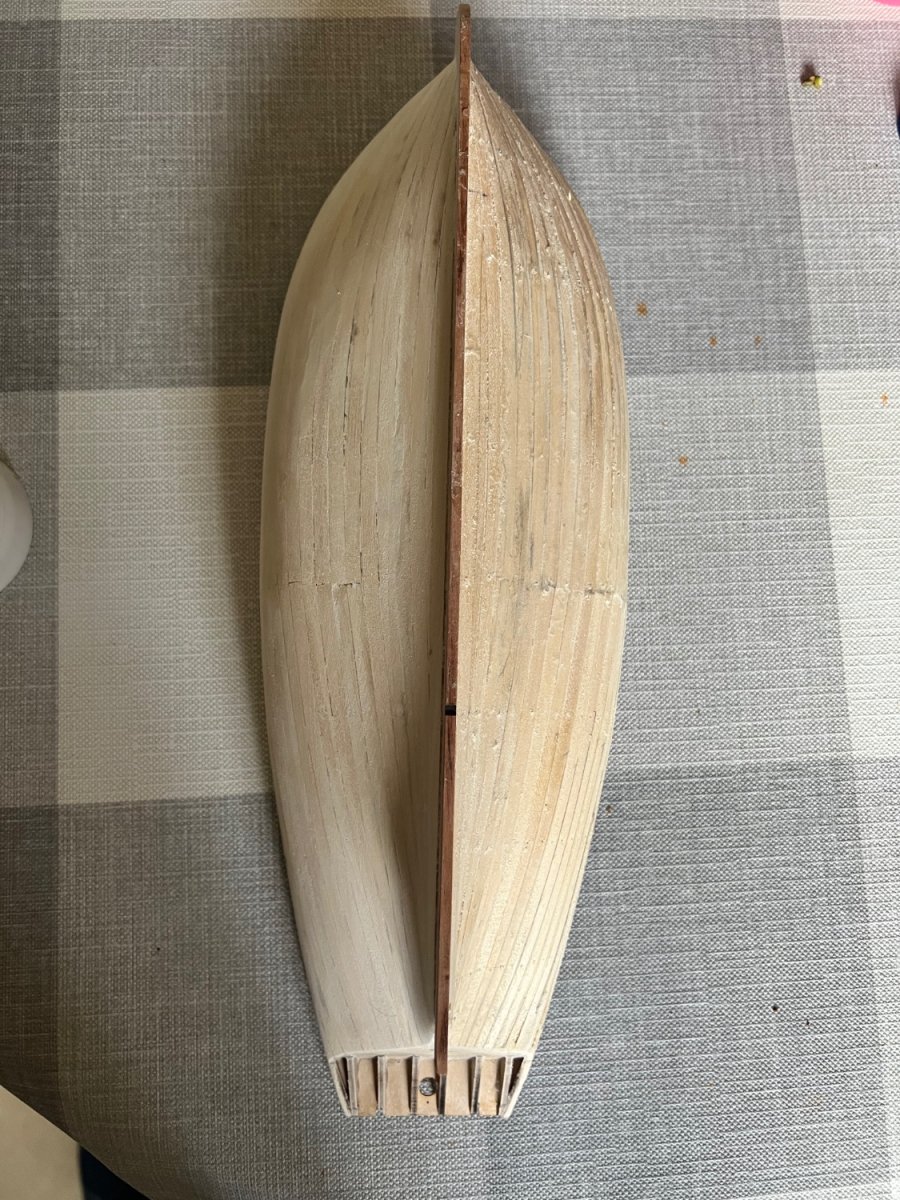
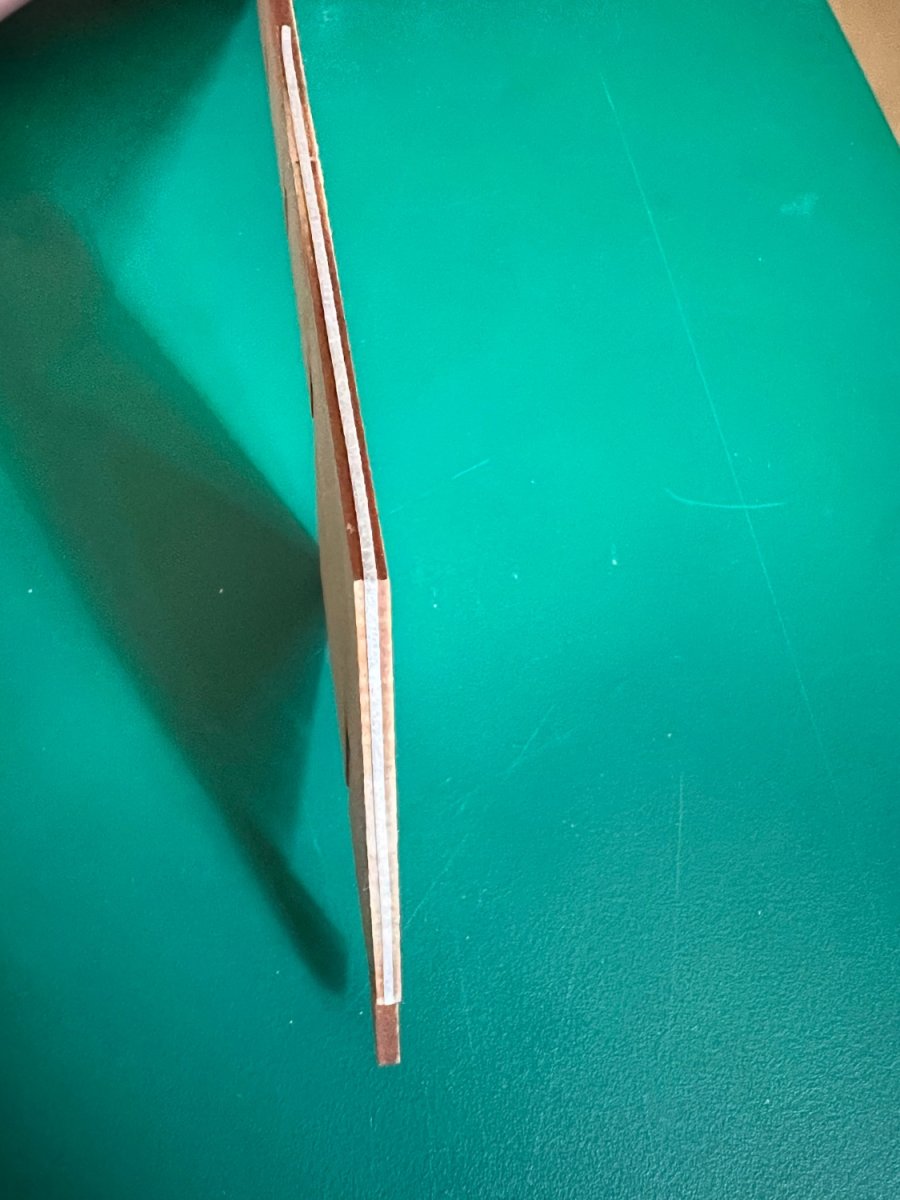
The second planking is now complete, it’s reasonably tidy above the waterline, less so below where thankfully it will be covered in paint. Failures all mine, not the kit’s!
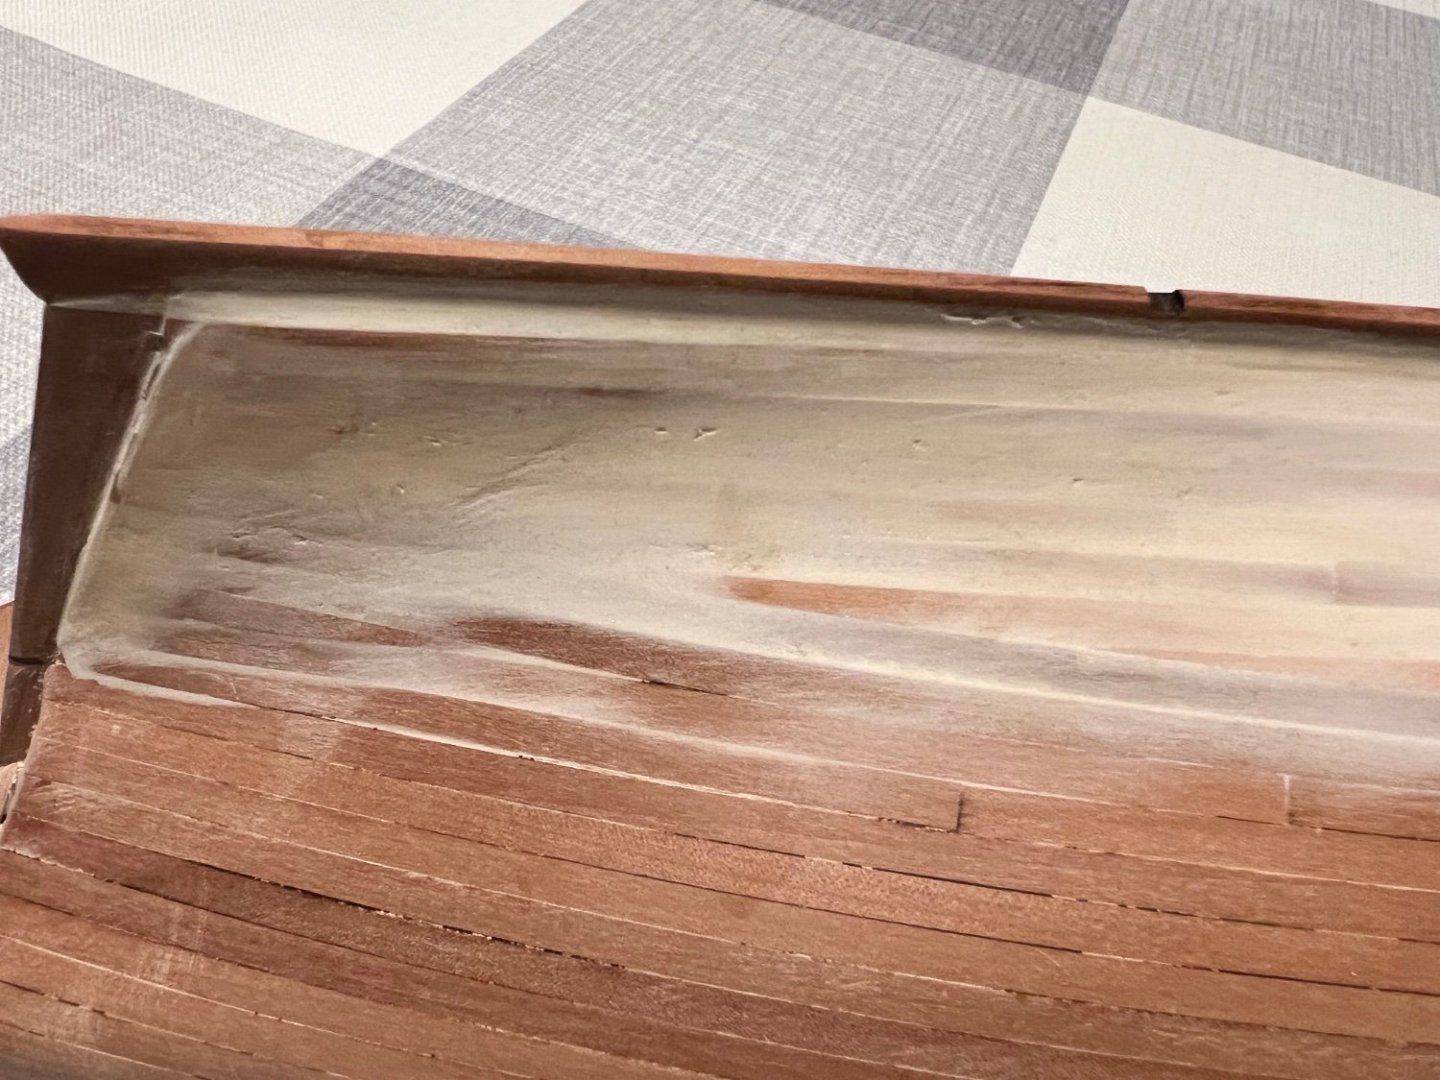
The next two photos show the port side filled below the waterline and sanded whilst the starboard side has had preliminary sanding but no filling yet.

I’ve tried different patterns of planking below the waterline. I struggled to get a garboard plank to fit and plank up from it (port side) so lots of filler required. On the starboard side I added the garboard plank at the end and it worked better for me. Once painted they’ll look largely the same.
I think the problem was towards the stern where I had thinned the first planking to the rudder post to create a rabbet, I hadn’t thinned the first planking further forward to accommodate this and the planking bulges a tiny bit. Lots more filling, painting and sanding to do here.
Also worth noting that the planking strips vary in colour. I had plenty of darker pear planks to plank the visible upper planking, but wouldn’t have had enough paler pear planks so glad I checked before starting planking.
You can see the light and dark planks mixed in below the waterline in the photo below.
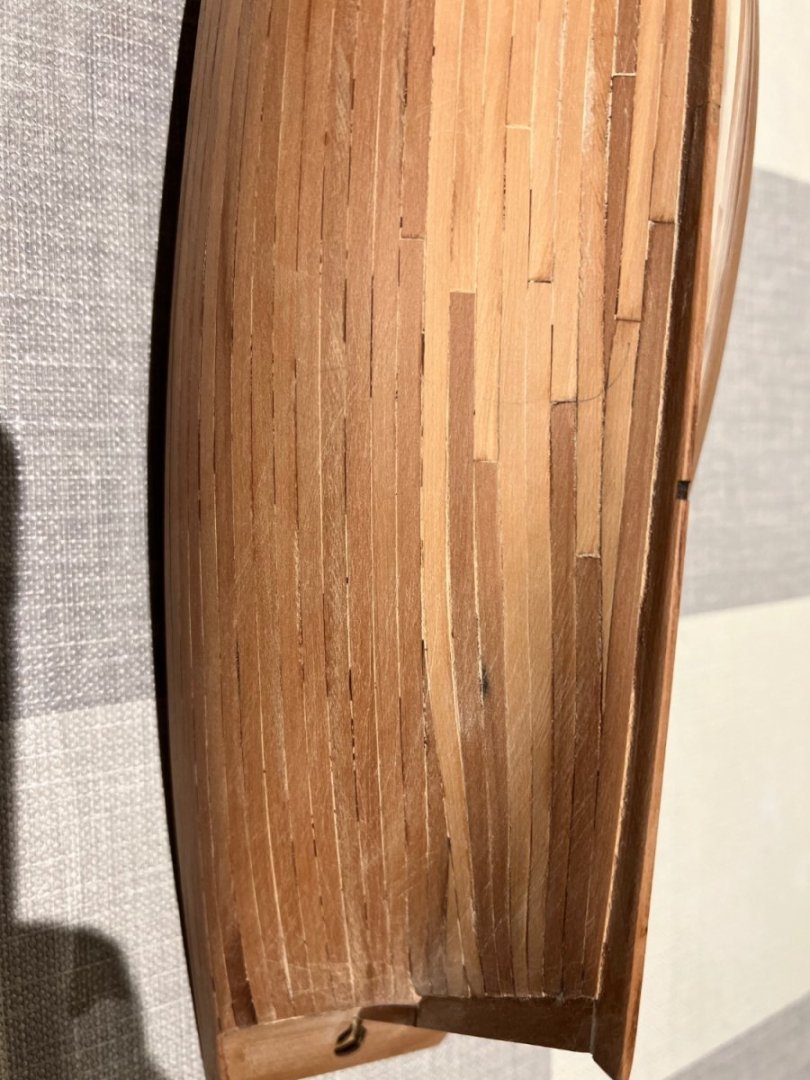
She is starting to look very nice though.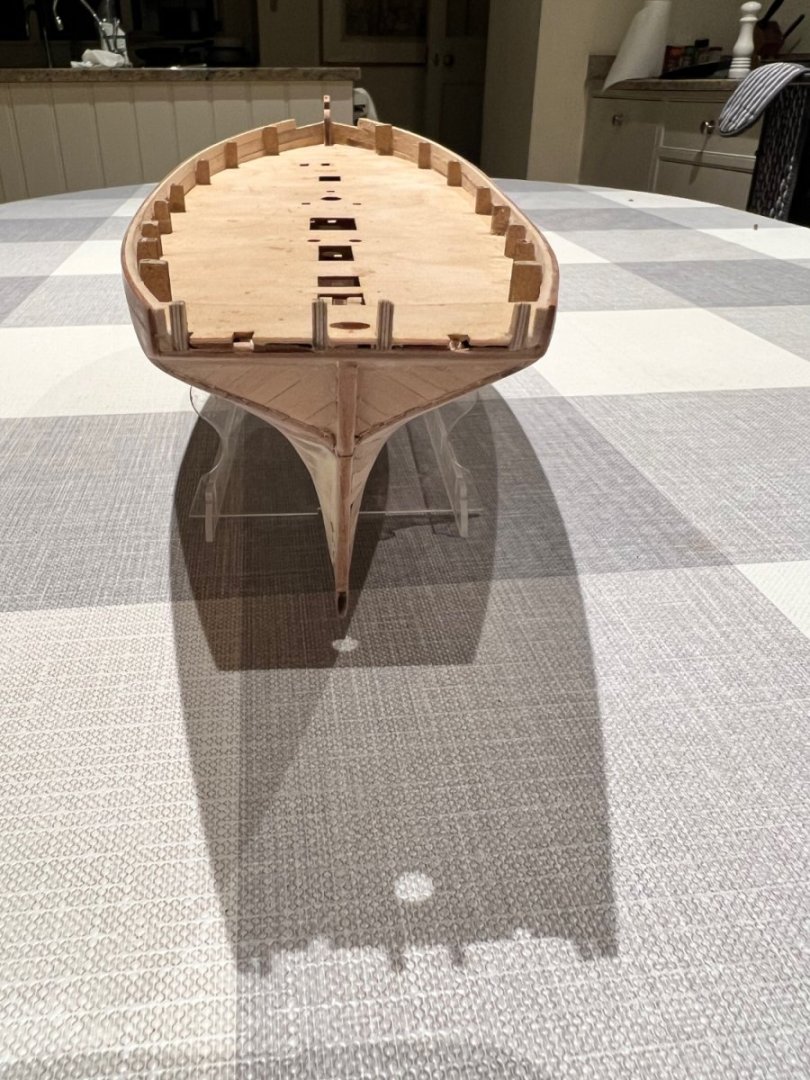

Two of the stern timbers have broken off. But the planking is now sanded in line with these and my next job will be to remove these and the bulkhead ears.
- Thukydides, CiscoH, KARAVOKIRIS and 2 others
-
5
-
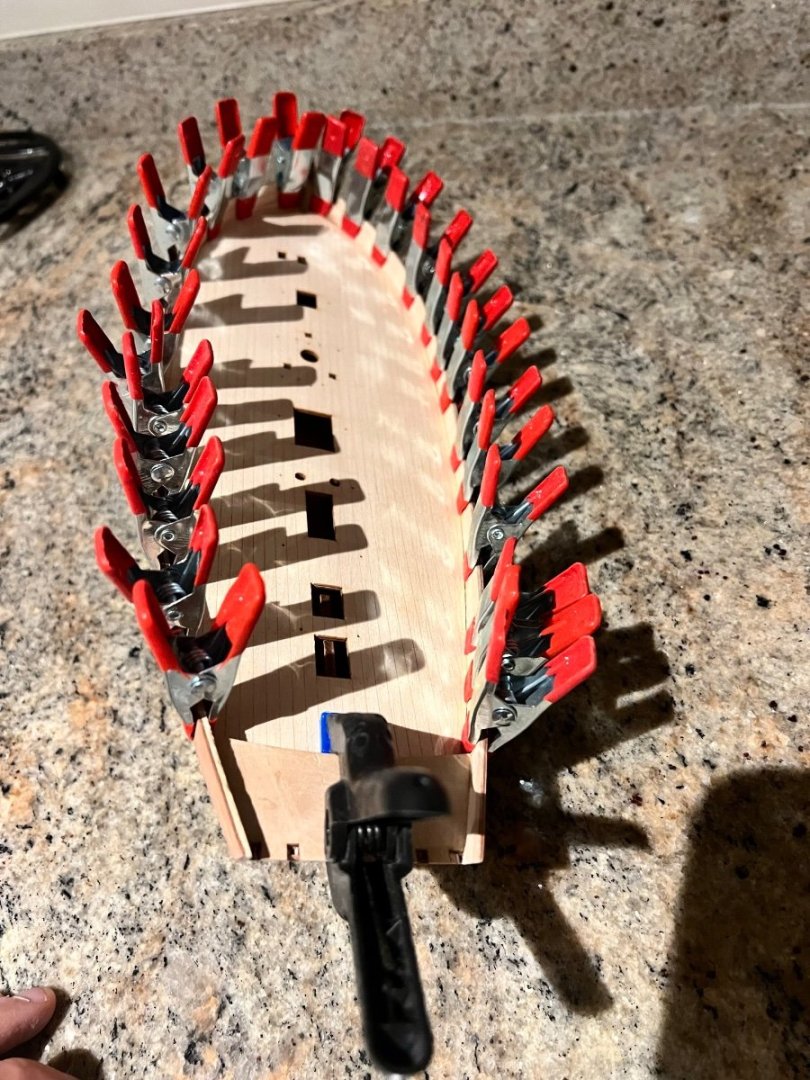
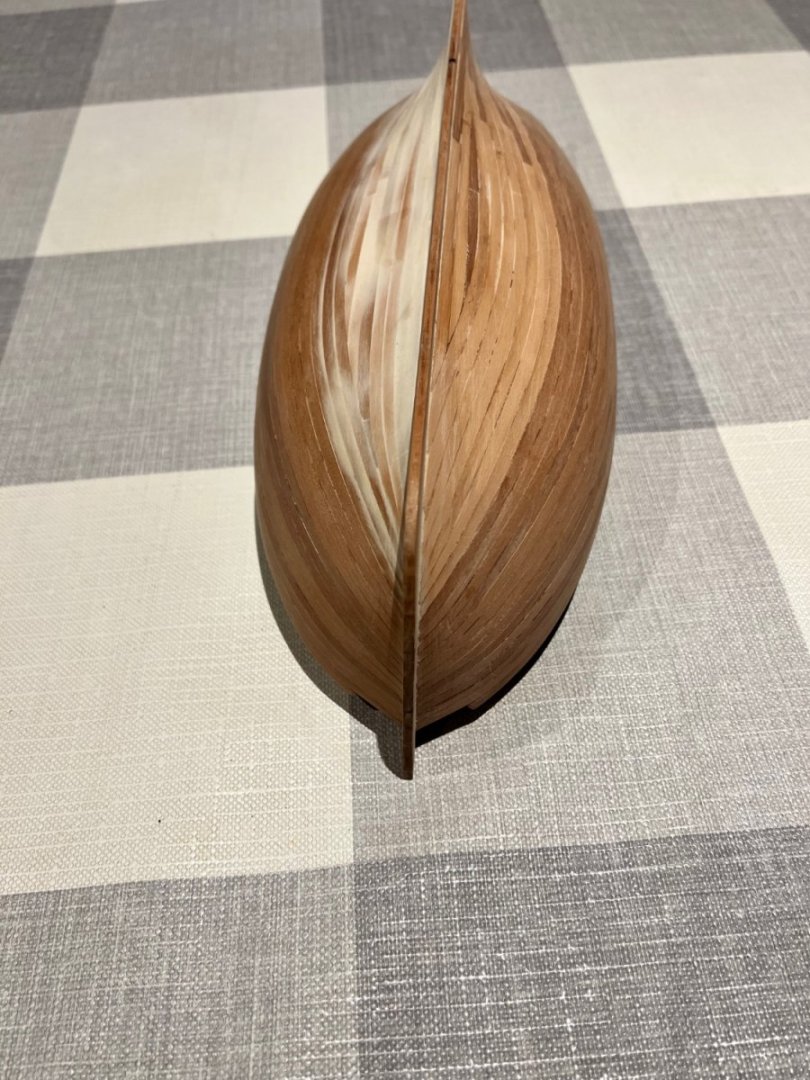
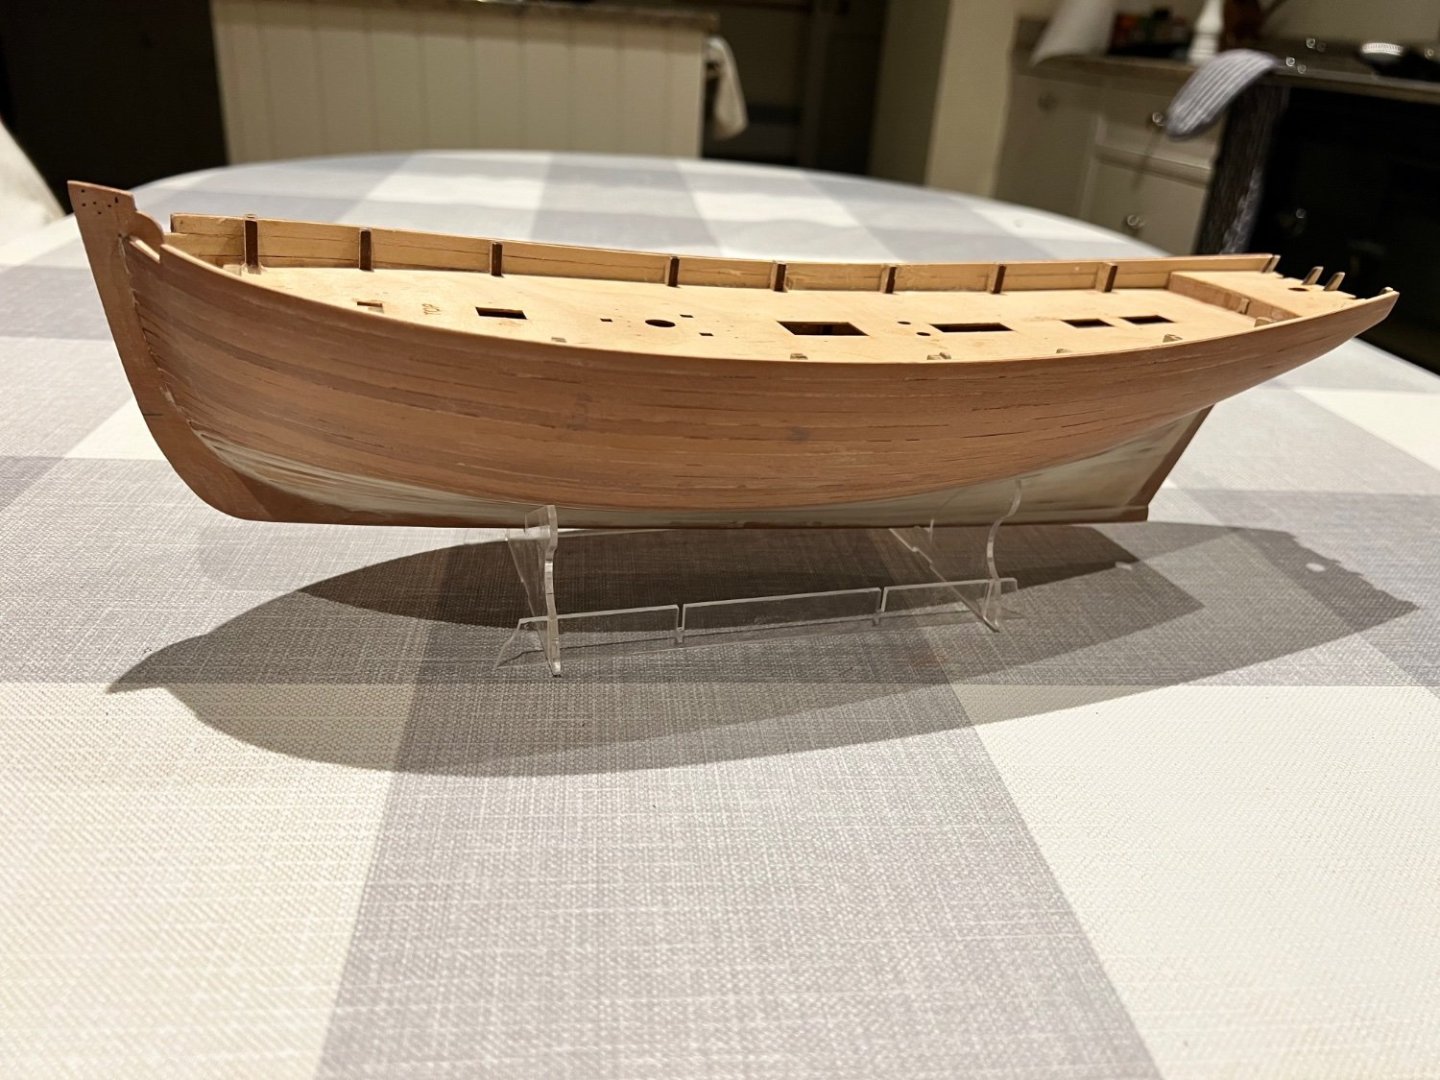
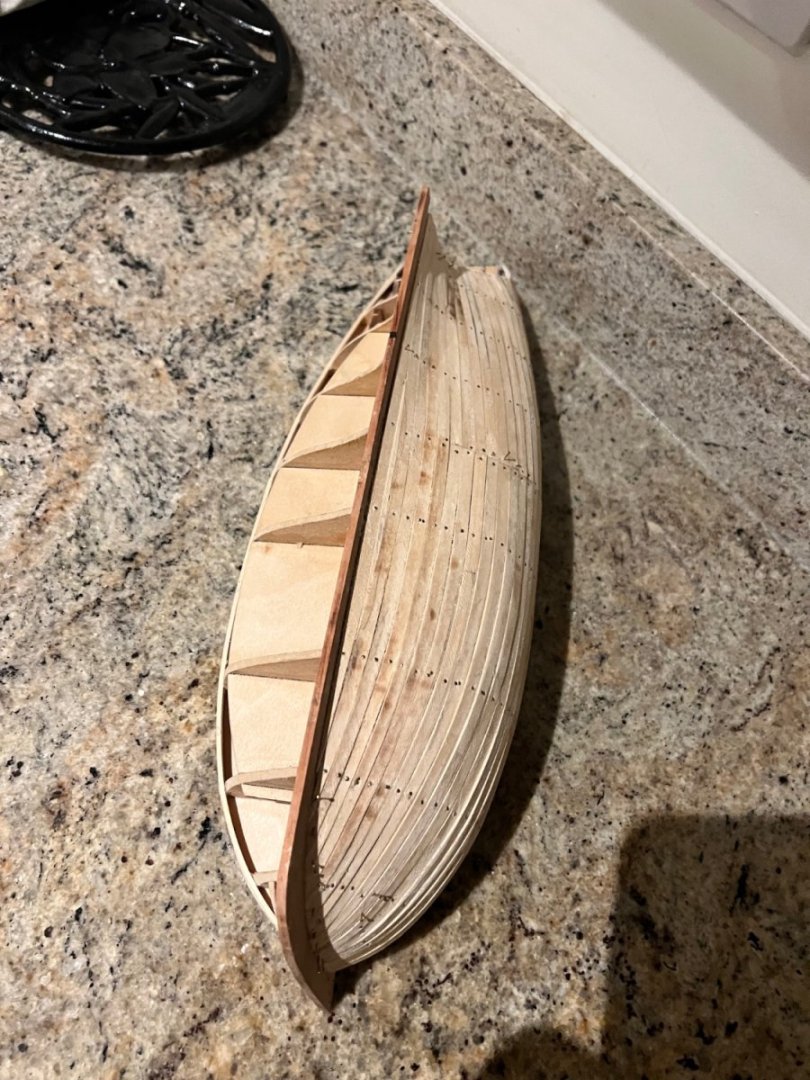
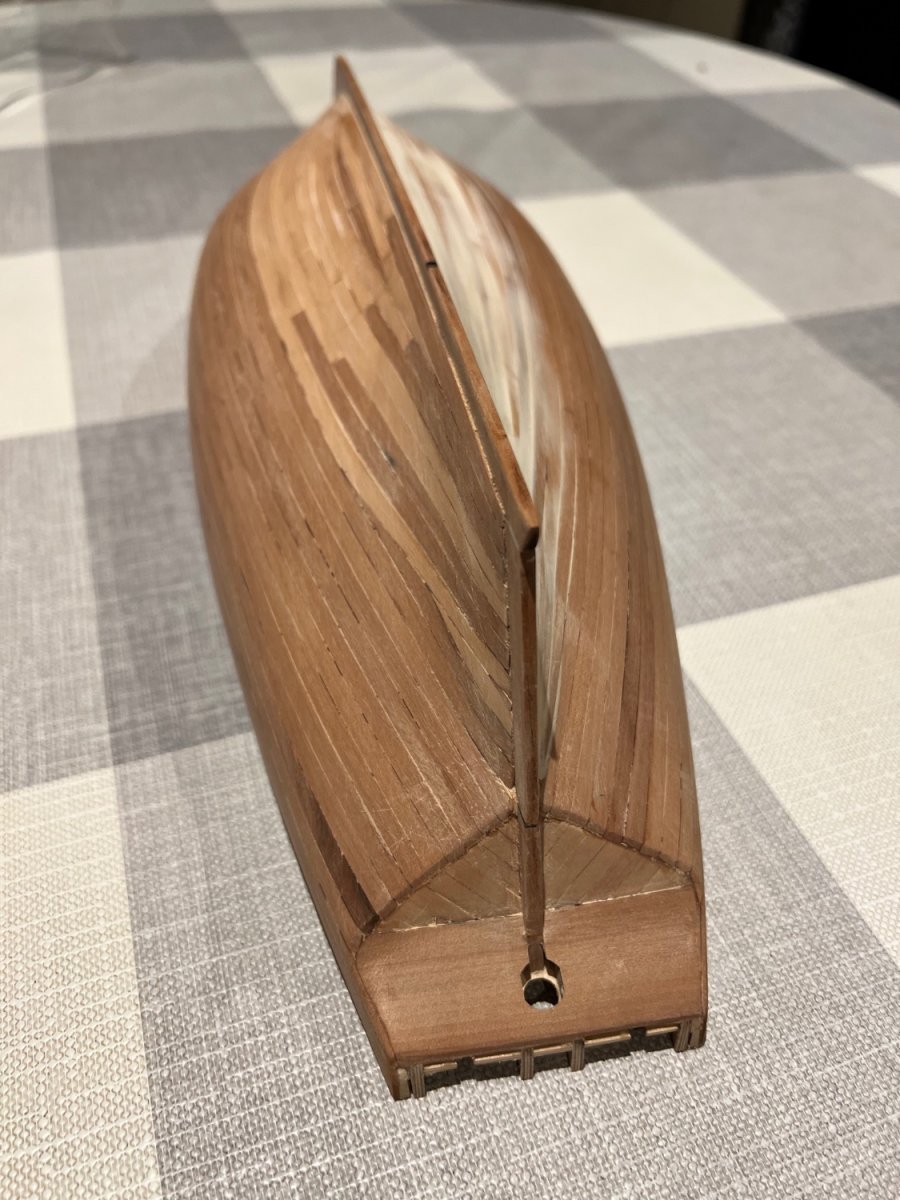
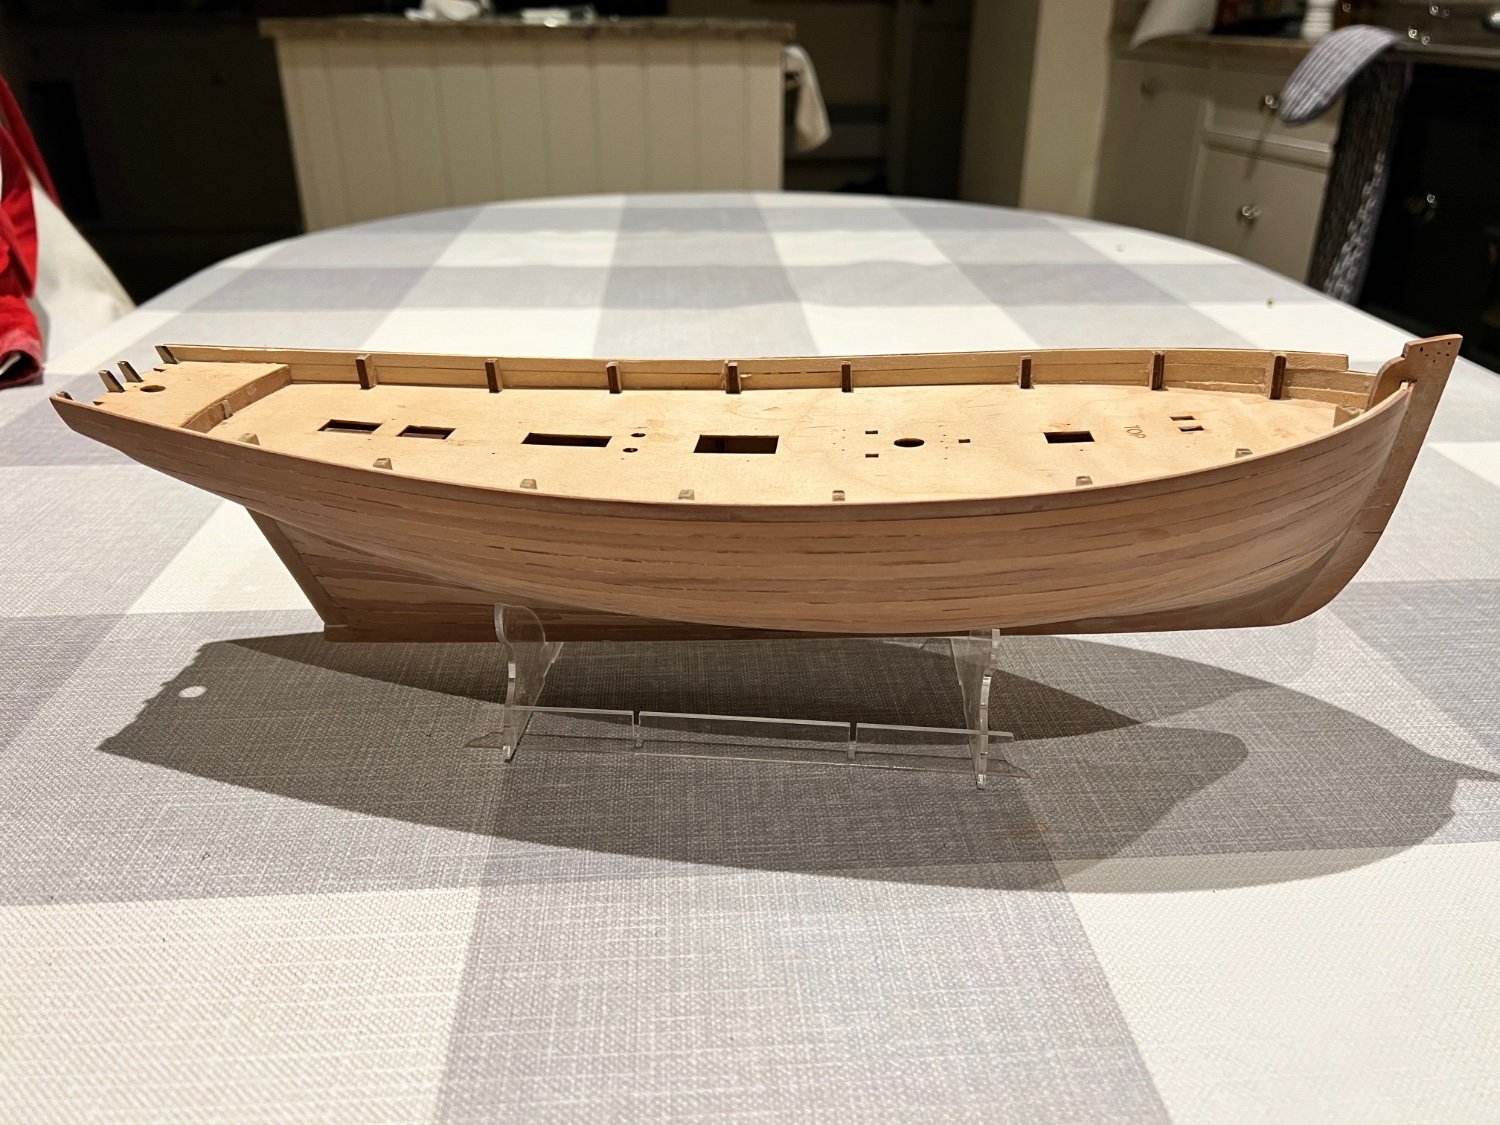
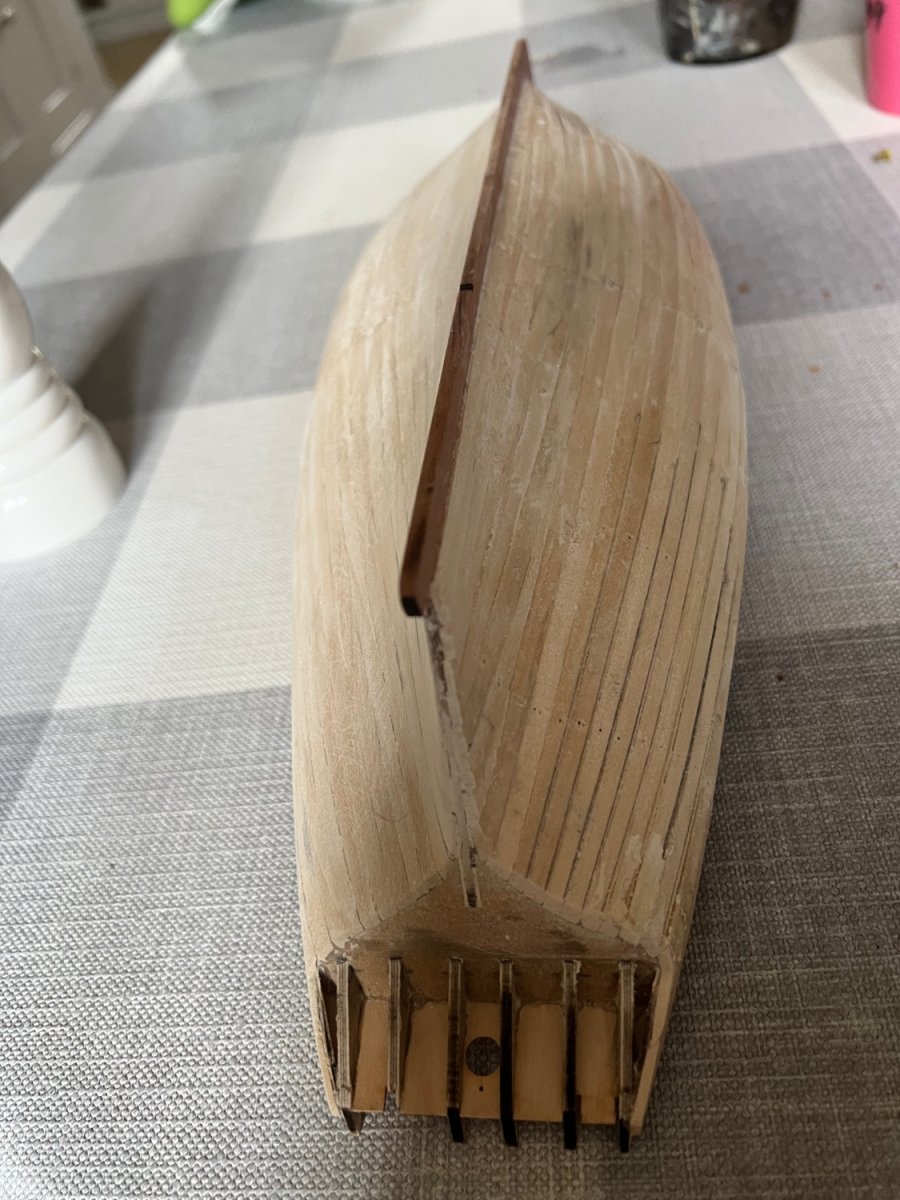
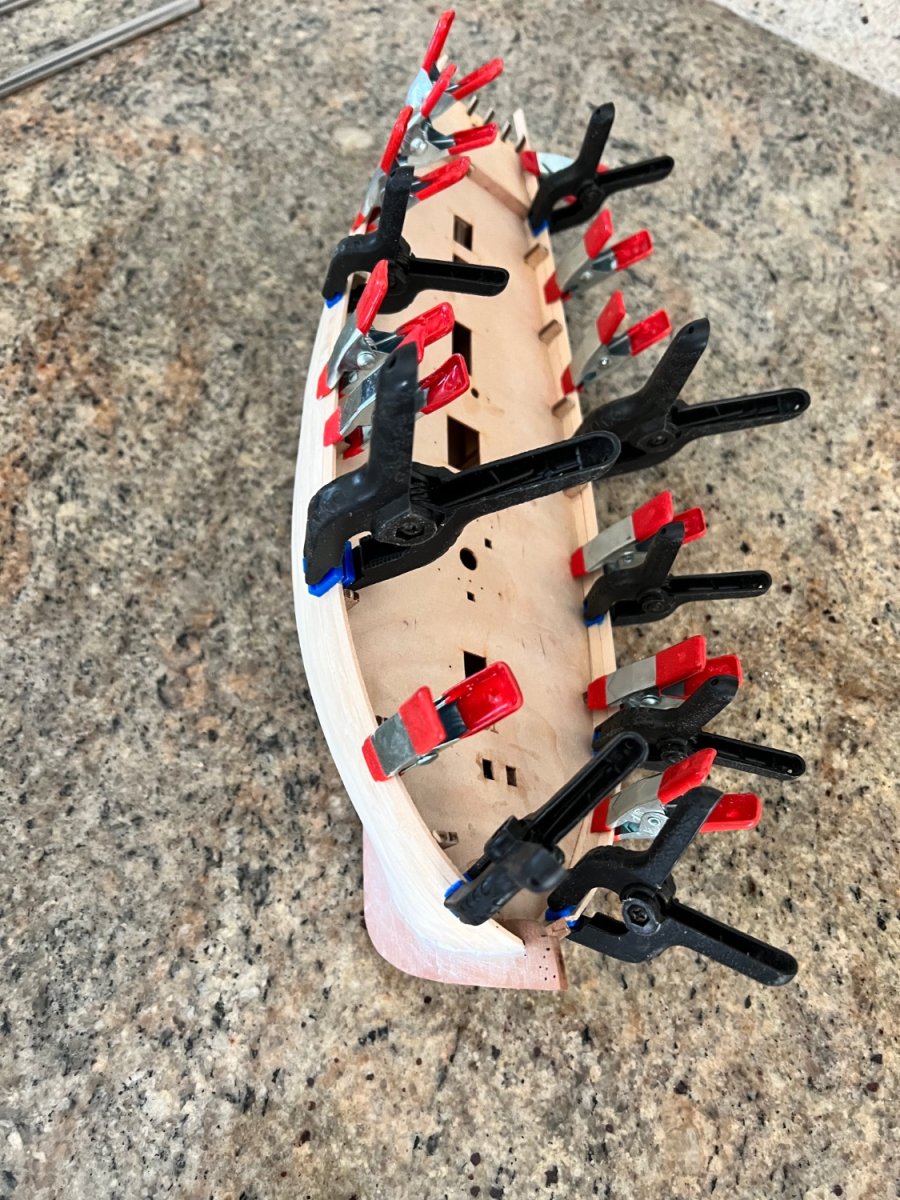
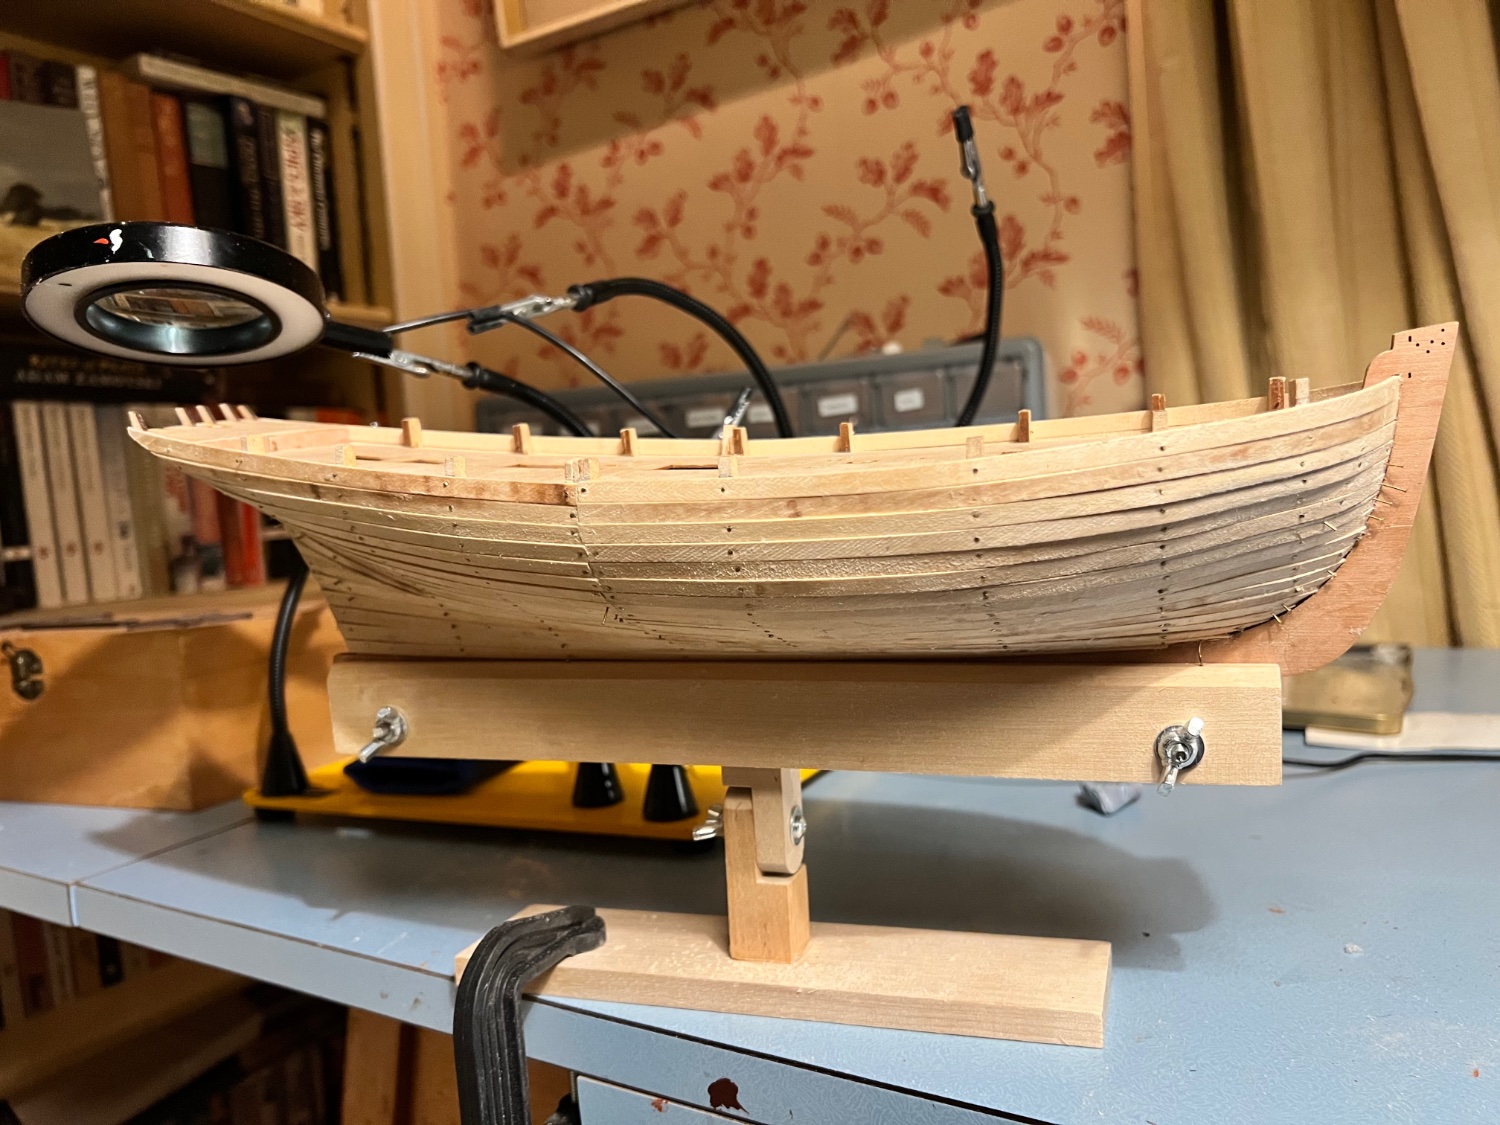
First planking now complete. I reverted back to the travel iron and jig bending tool for the port side so no scorching of the wood this side.
Starboard side is filled and sanded a couple of times. Port side pre-sanding and still clinkered in appearance.

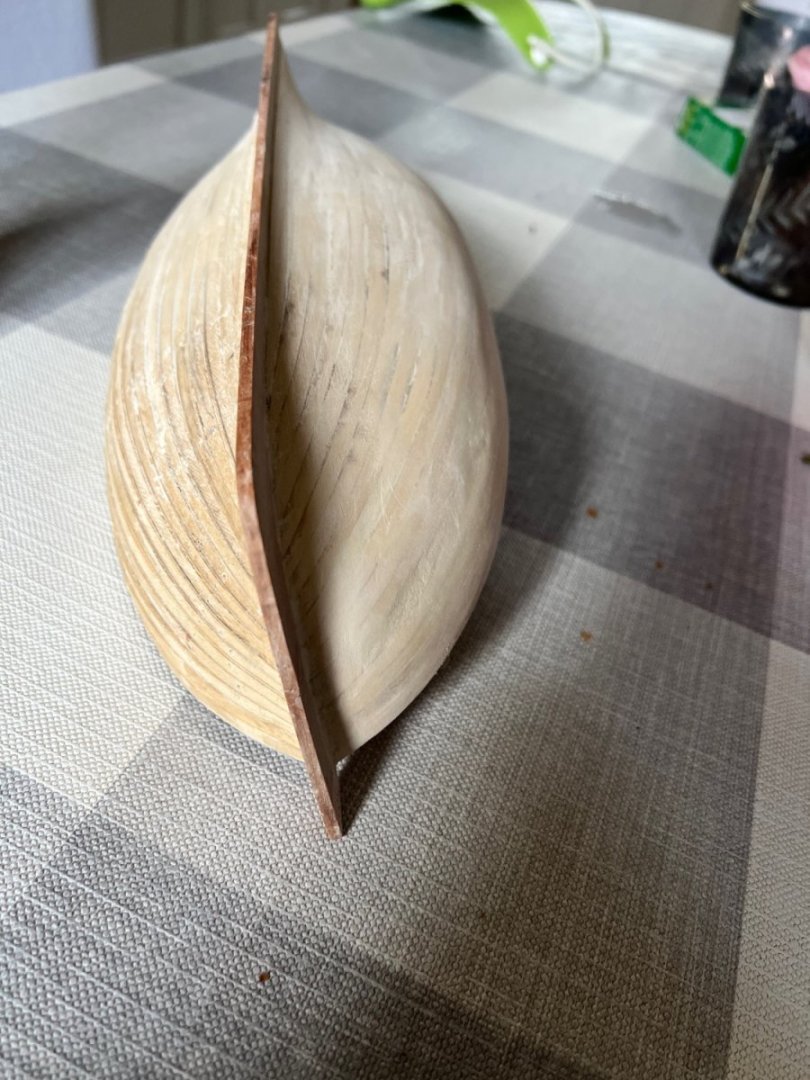
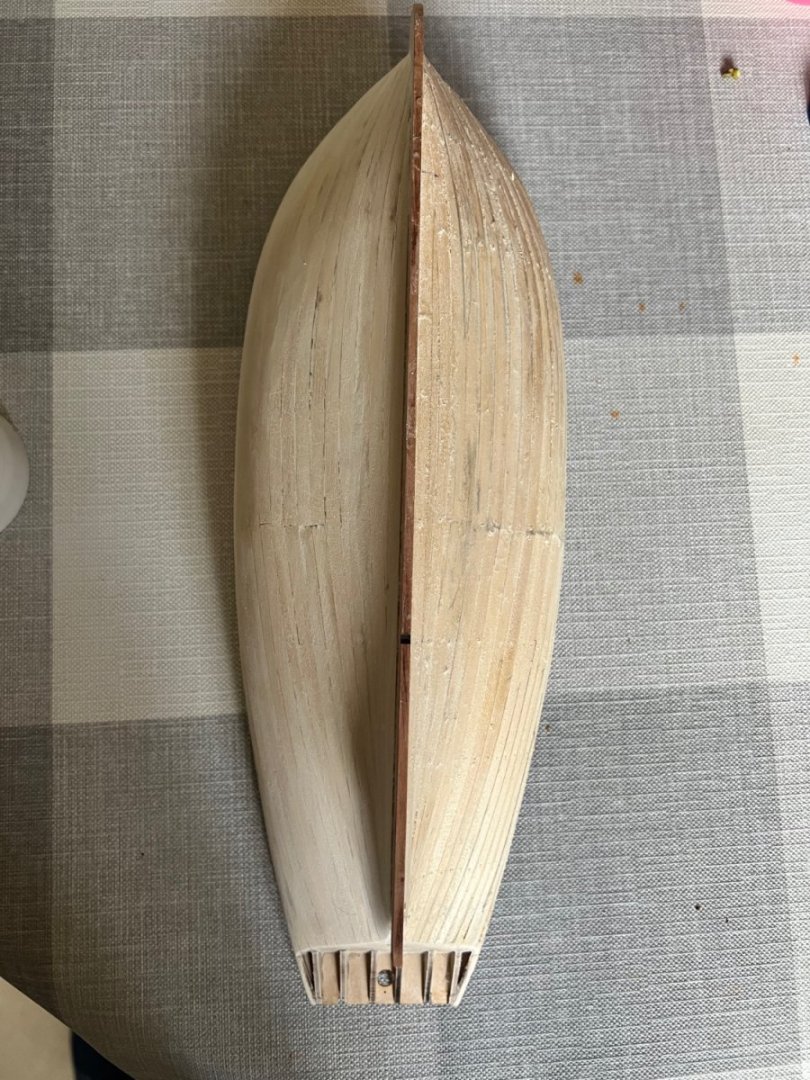
Both sides now filled and sanded. Very smooth but maybe one more fill and sand as there’s a couple of low points.
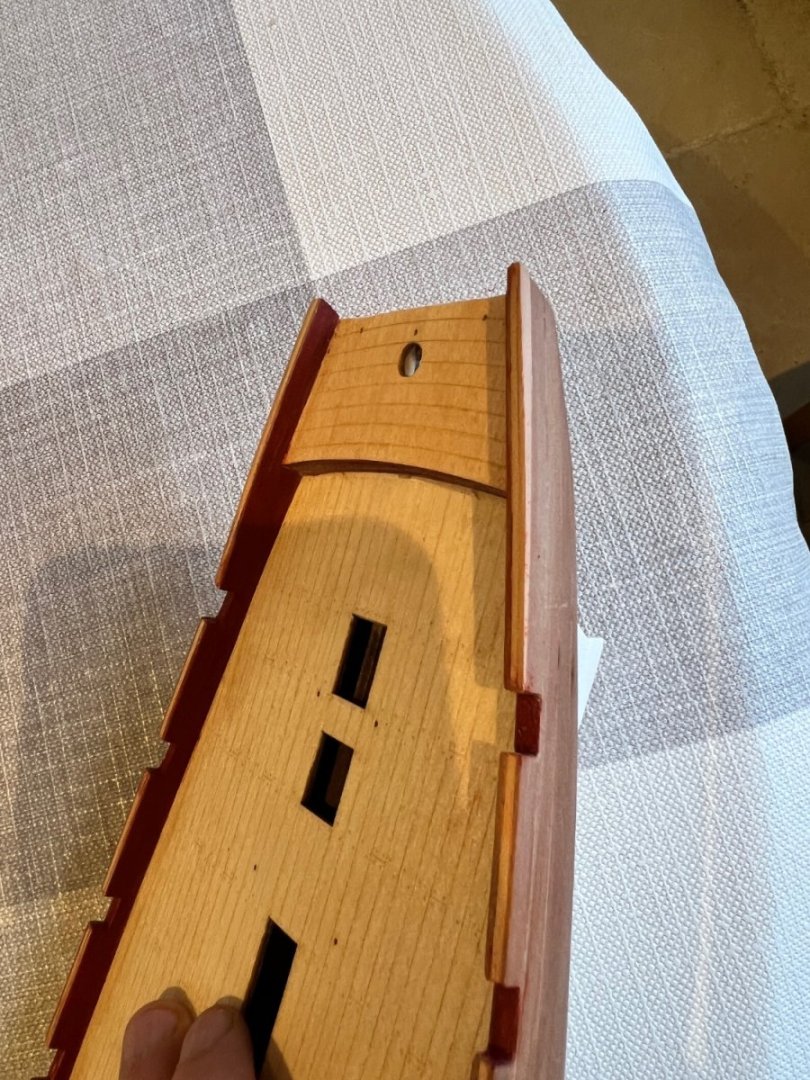
Stern post fitted and diagonal planking on the aft bulkhead.
Top 4mm plank was soaked in hot water for 30 mins and then clamped in place without glue and left to dry overnight. Then glued and filled and sanded once dry.
Stopping the front plank short of the stem post was one of those things that I was dreading, but was quite easy with this technique and clamps.

Stern planking complete and stern counter fitted. As per other builds I’ve curved this a little to match the side trim that will be added later. The counter was also soaked in hot water and clamped in place whilst it dried to help it adopt the curved shape.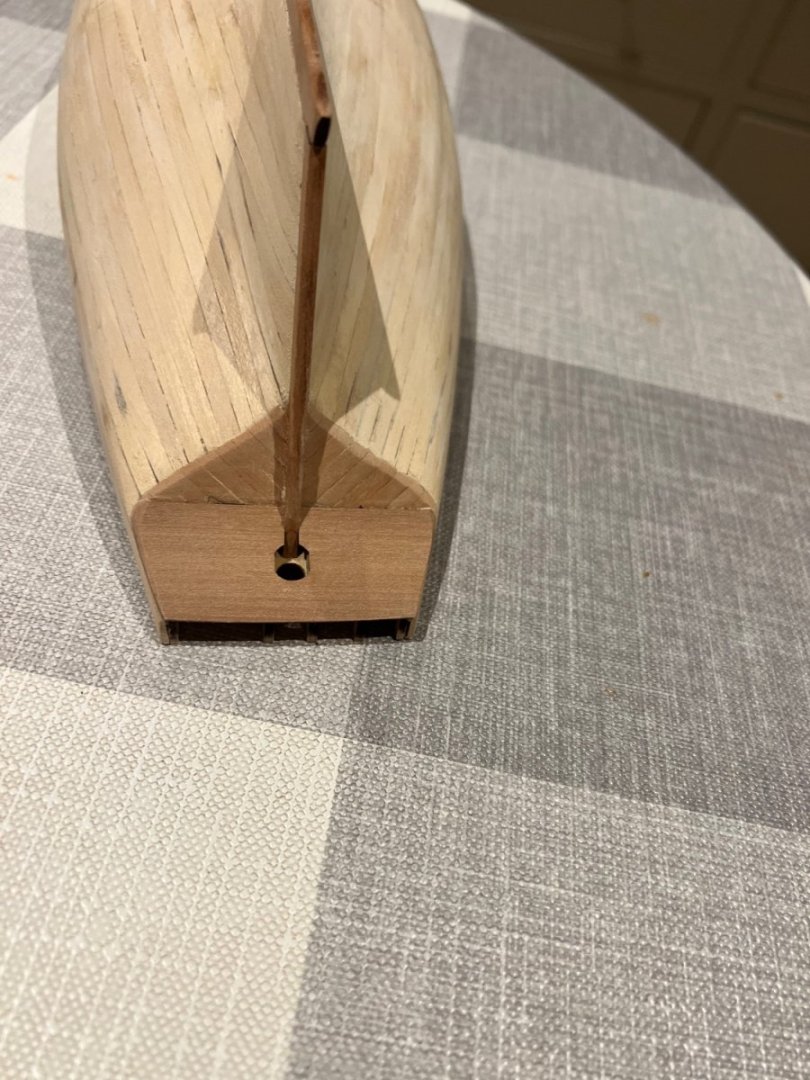
Pretty much ready for the second planking I think. Starting to look like Alert!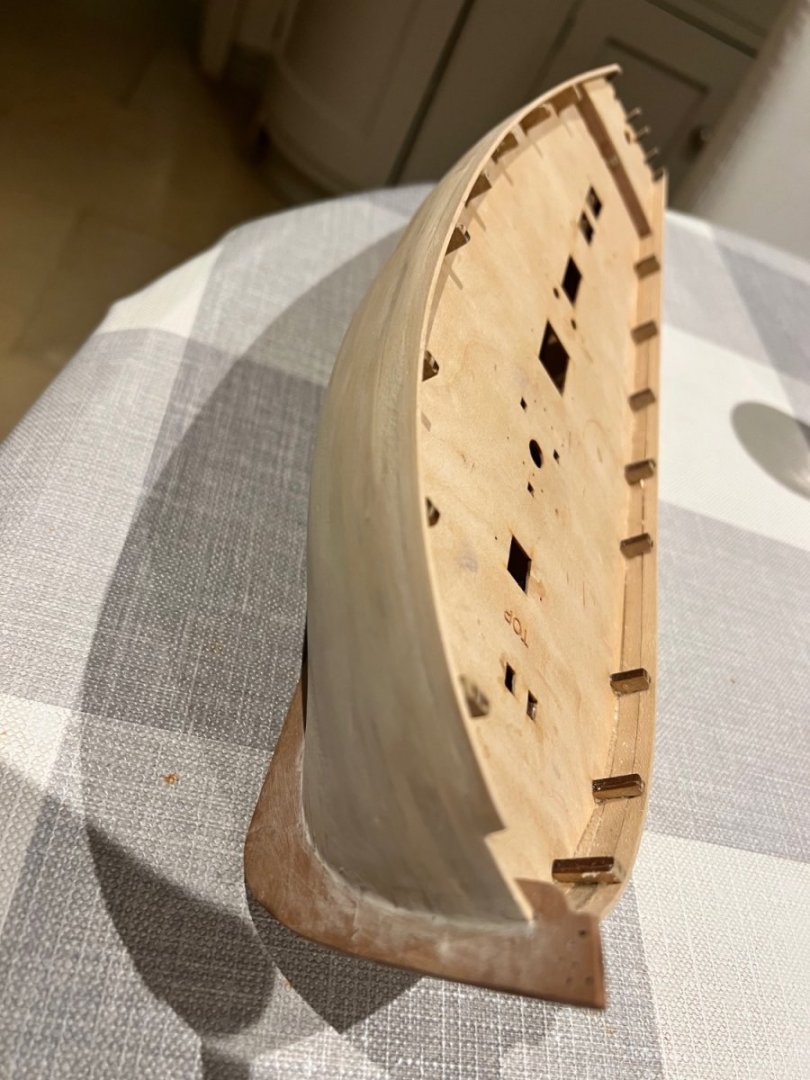
- rcweir, CiscoH, Thukydides and 9 others
-
12
-
On 2/15/2023 at 11:17 PM, Oldsalt1950 said:
Dan,
For plank bending try this method from Chuck Passaro: Chuck's plank bending tutorial. You are going to have a hard time pulling some of those pins out of your strakes. Don't drive them in so far if you have to use them. Chuck's method should get you bent planks that don't need to be pinned in place.
Jim
Hi Jim,
Thanks so much for the advice. Believe it or not I have watched this before and use a plank bending jig based on Chuck’s. I don’t do the lining off for tapering - I lack the patience - and taper as per the method in the instructions. Where I’ve strayed further from Chuck’s method this time is first bending on this jig with a travel iron and then using the soldering iron type bending tool to bend the plank around the hull - watching Chuck’s tutorial again I see that I should be able to achieve the shape of plank I need using just the first jig and travel iron. I’ll try that for the port side and it should avoid the scorching too. Chuck makes the bending look so easy, but I find judging where to bend and how much tricky.
The pins will come out fine with a scalpel and it’s only the first planking, I don’t mind what it looks like if together with filler and sanding it provides a good base for the second planking.On Alert I have doubled up the fifth bulkhead with additional MDF to enable me to split the first planking into bow and stern sections. On some of Chris’s fishing boats he builds up the middle bulkhead for this purpose, so I’ve copied that method here.
Thanks again for the advice, it’s still a big learning curve!
Best wishes
Dan
- Oldsalt1950 and CiscoH
-
2
-
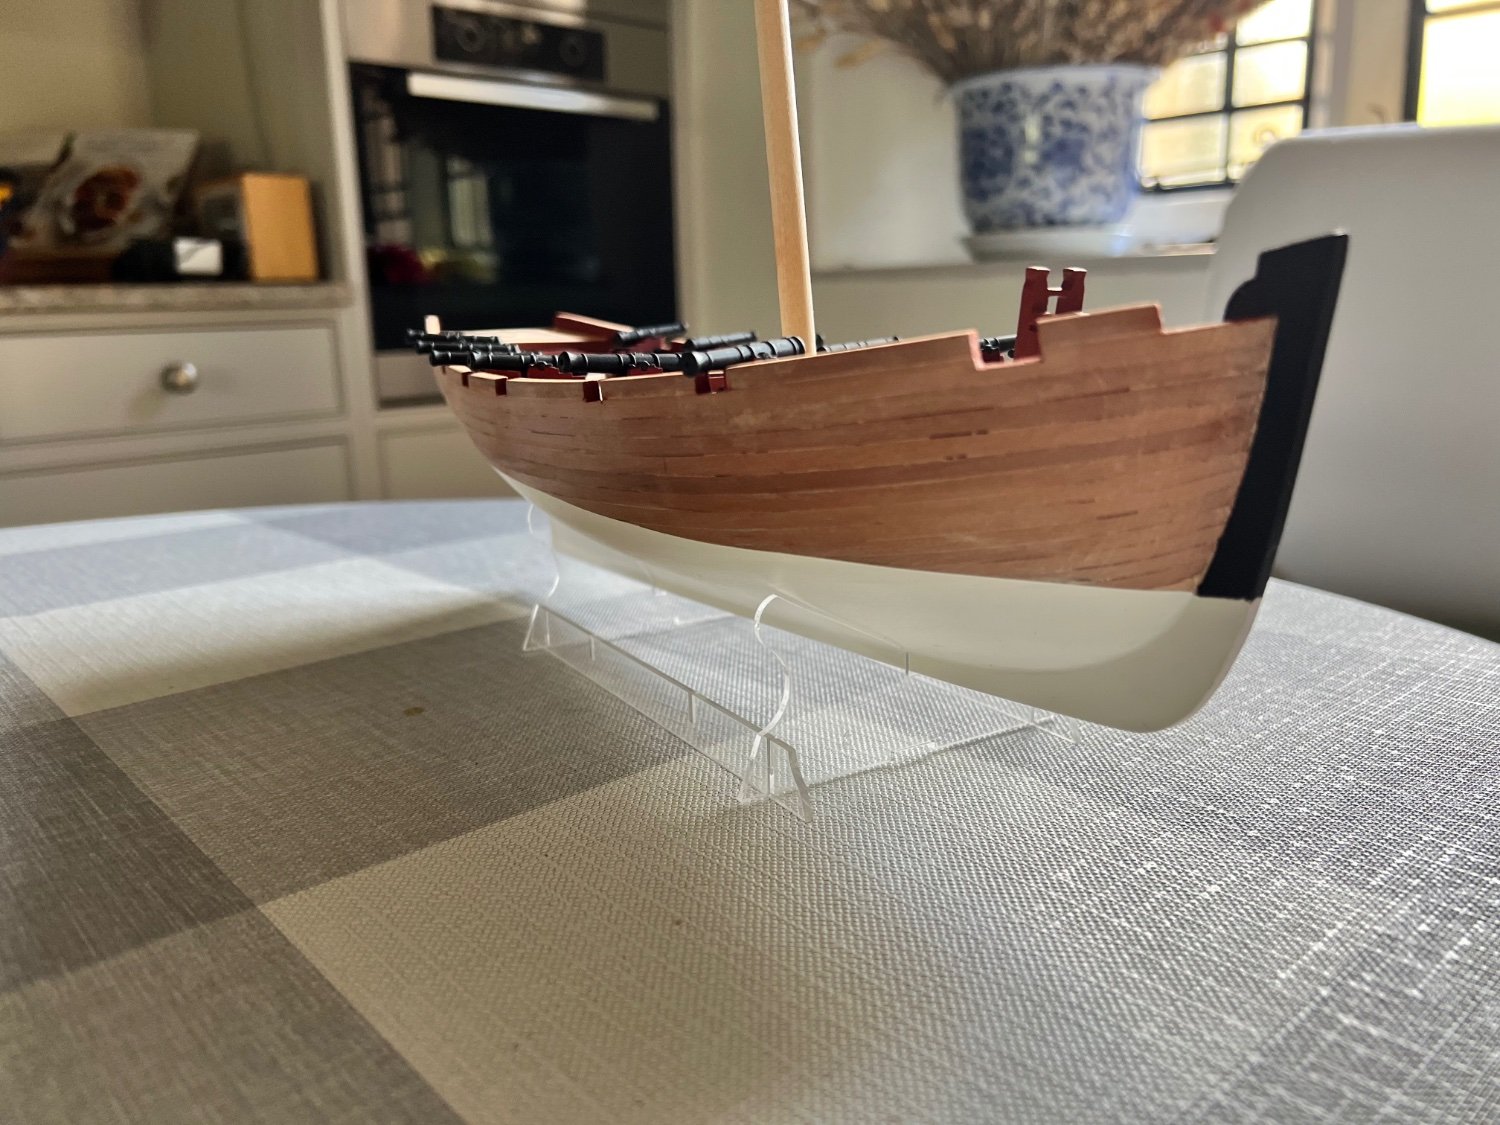
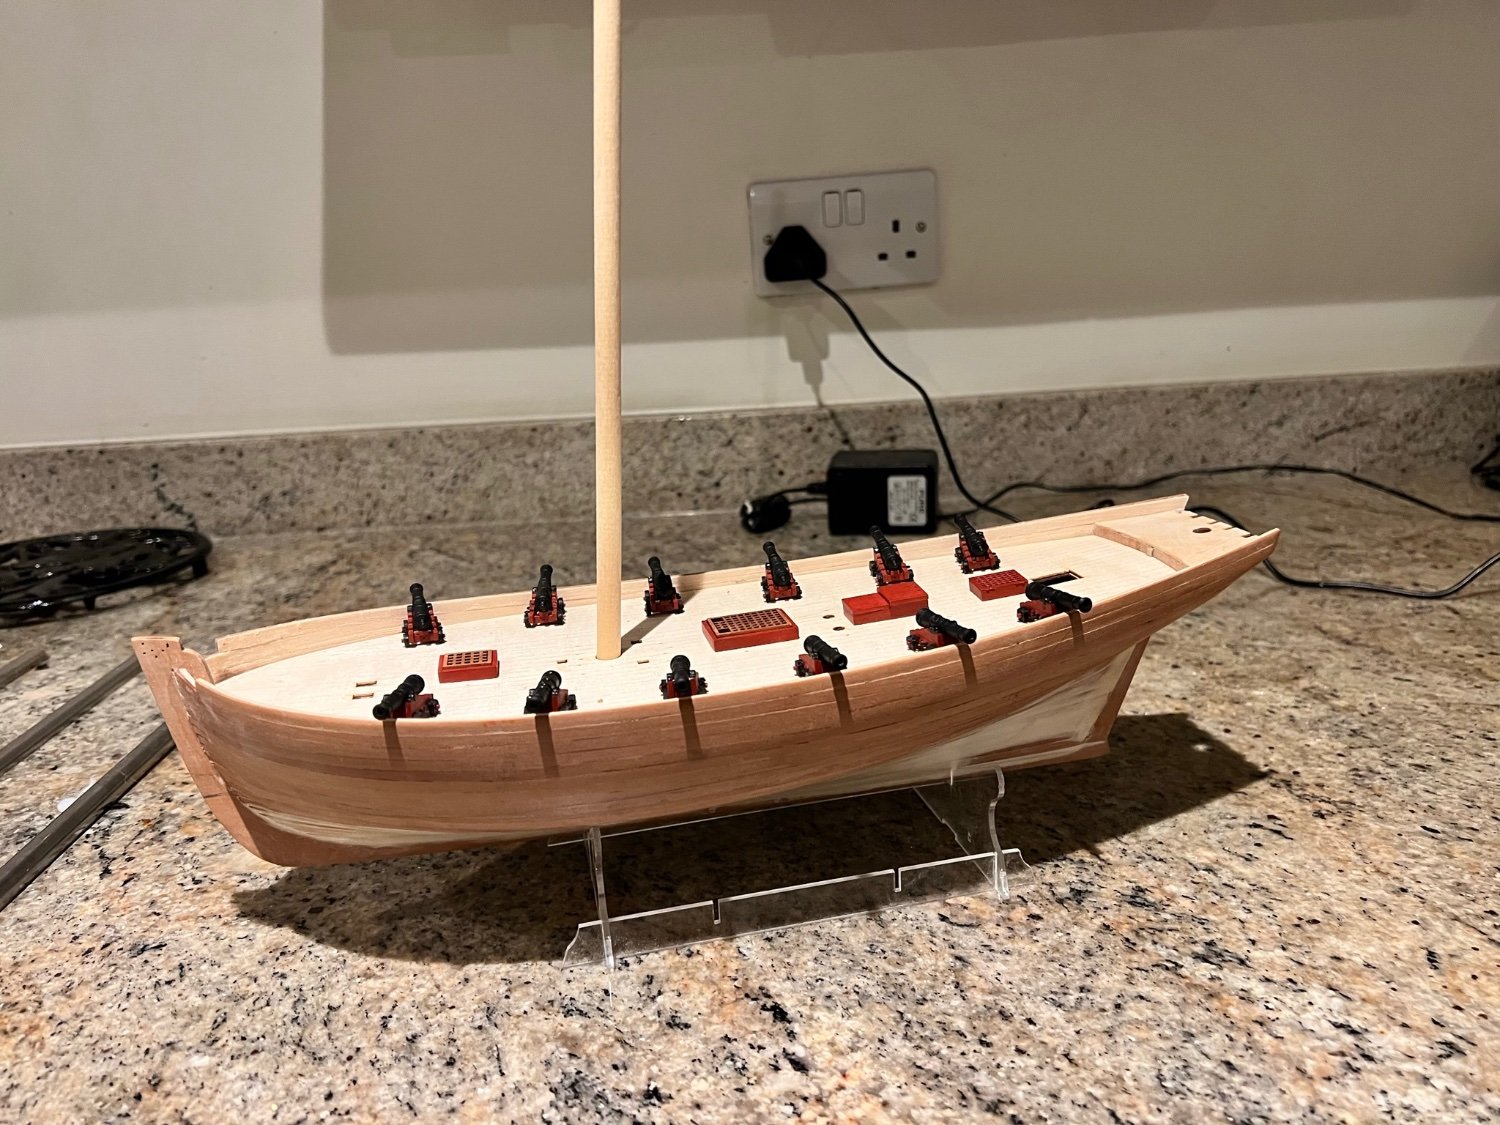
A little progress on Alert. Thanks for the advice on further fairing, I think it’s paid off.
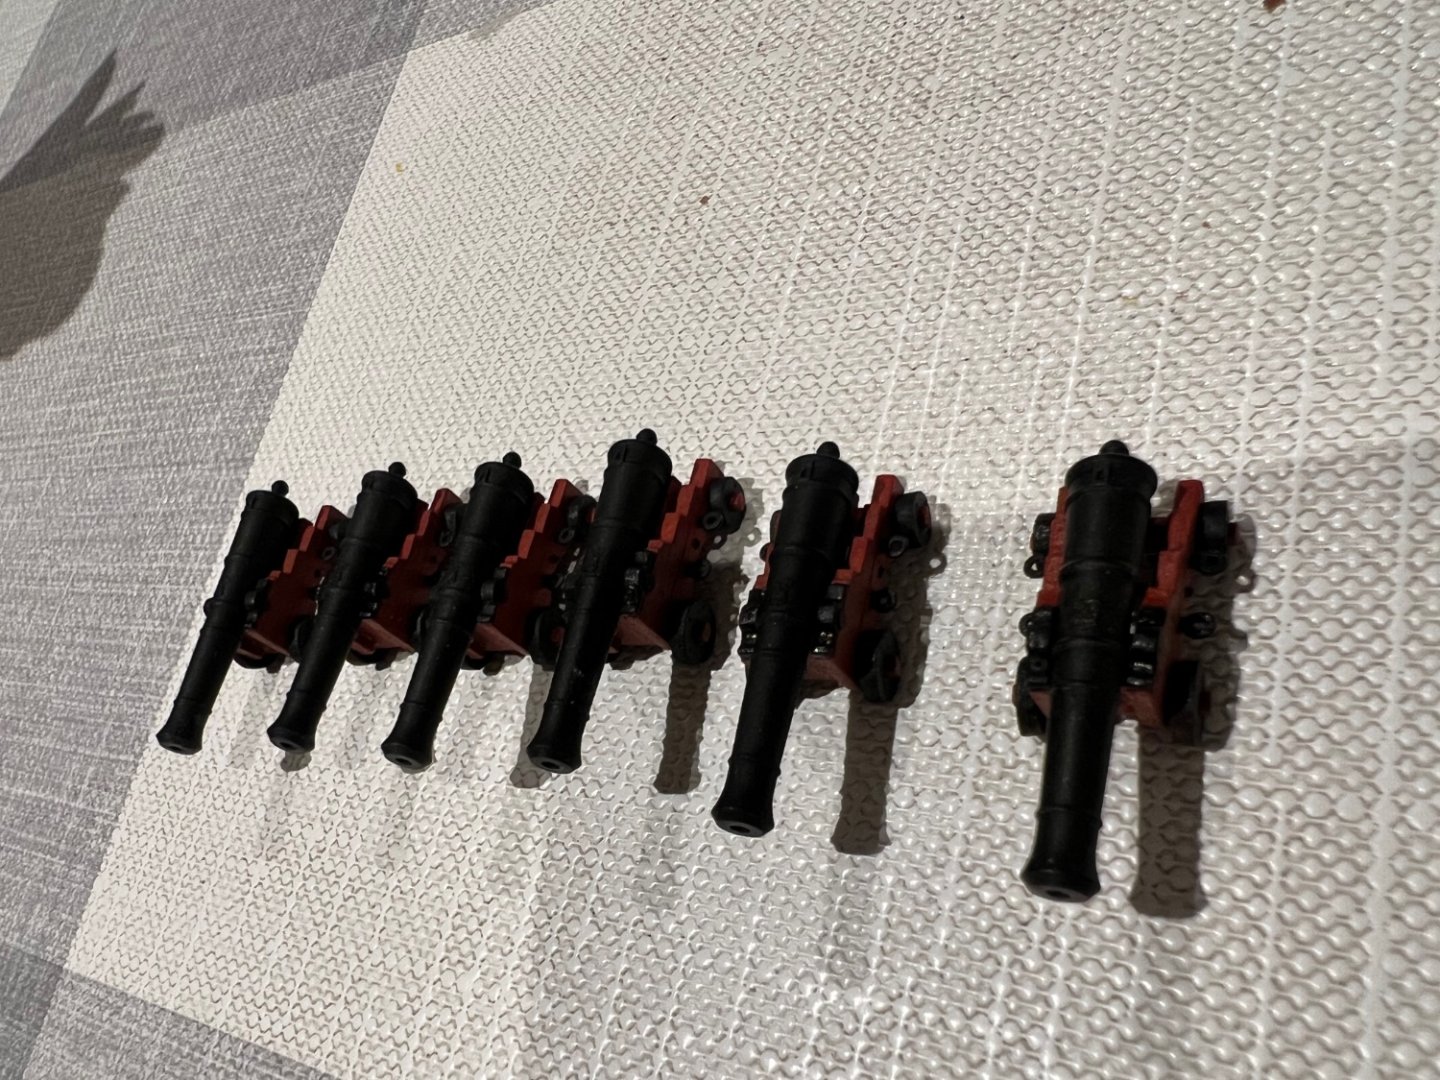
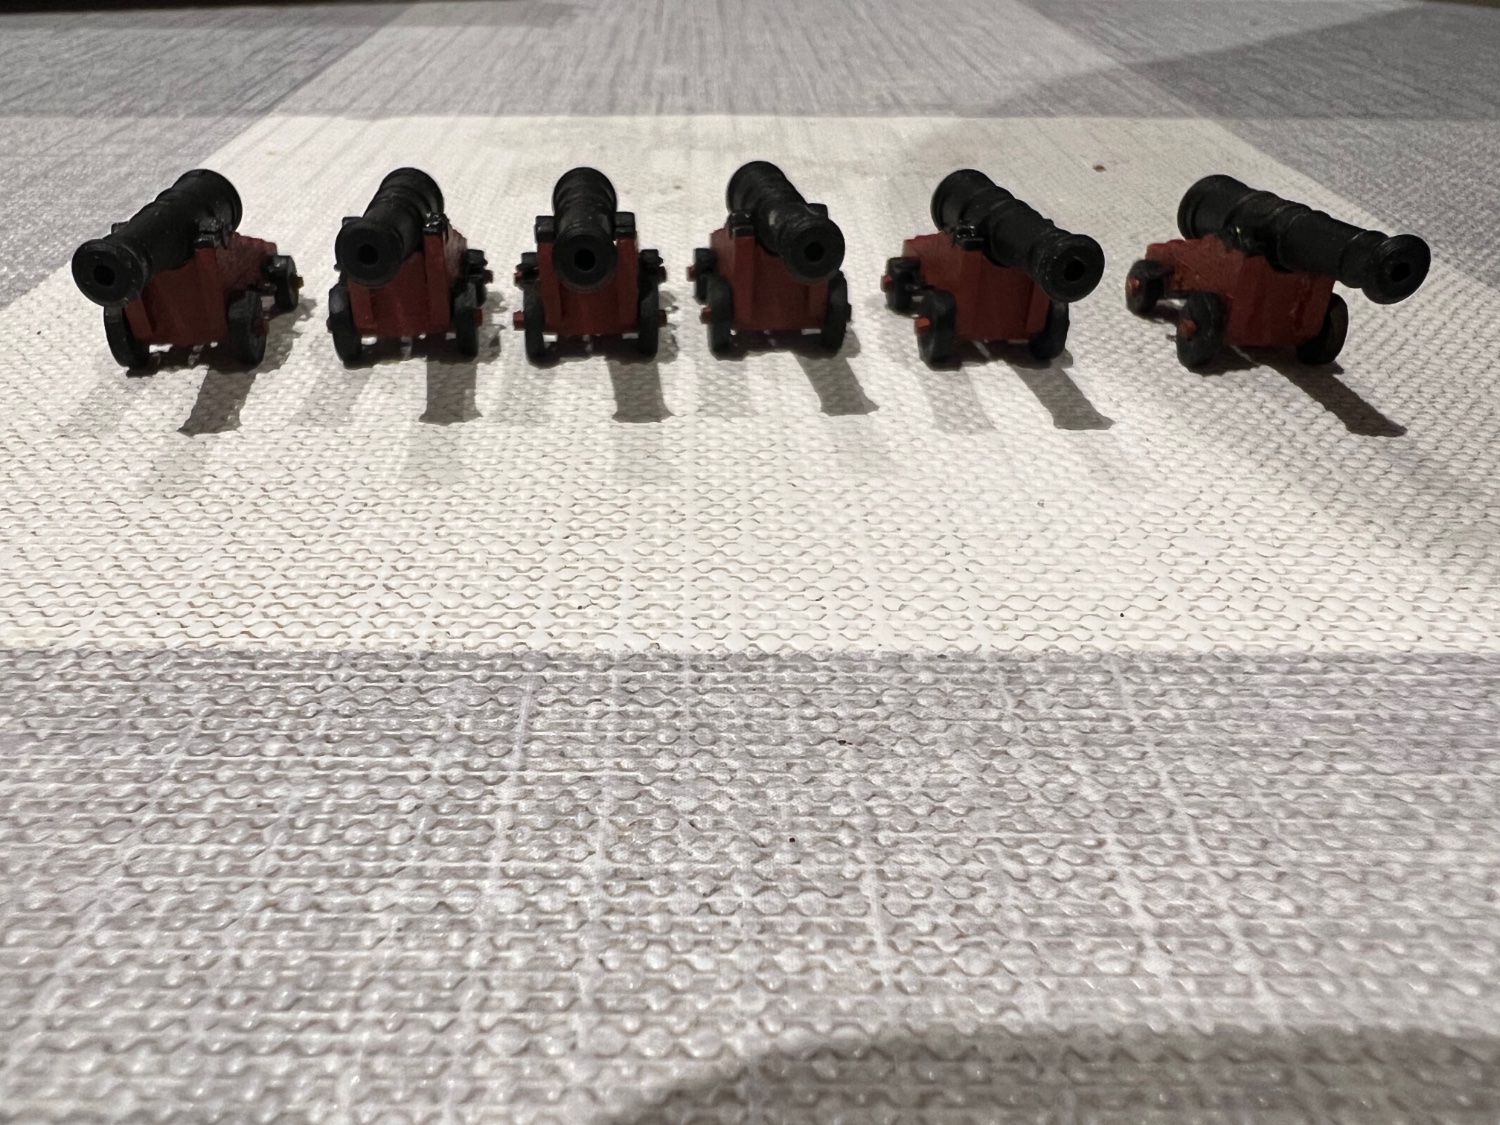
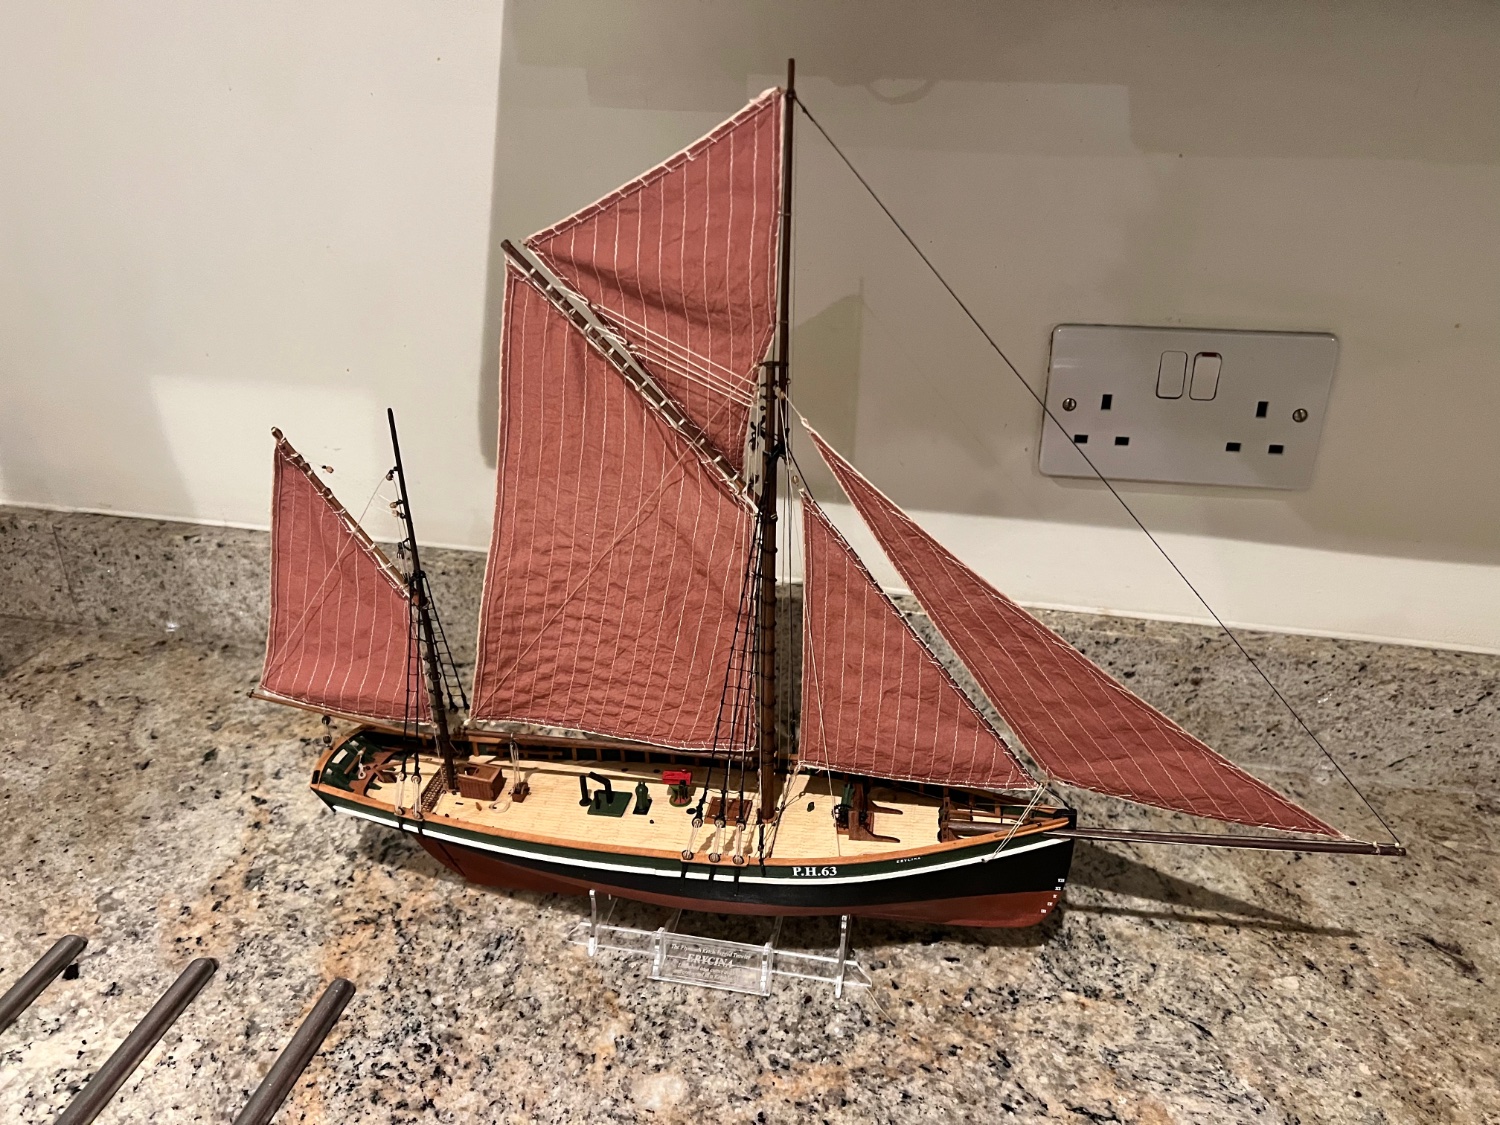
First I couldn’t resist making some cannons as I haven’t done so in a previous build (not being a standard fitting on a fishing boat). The first six are complete and temporarily aboard Erycina to keep them safe from the children and to stop my son “borrowing” them to play pirates.
I’ve also been building some of the hatches and gratings for the deck, but I’ve got a query in to Chris about these, so I’ll update more when he’s had a chance to get back to me.
The first planking is complete on the starboard side. It’s not beautiful and there’s some clinker. The main difference I found here over the fishing boats is that the lime strips are 1.5mm thick instead of 1mm which makes them harder to bend and more likely to snap when doing so. I needed to damp the planks and bought a plank bender of the soldering iron type with a bulbous end on it to do so. This worked well but gets very hot and in places has scorched the planks (they’re the dark patches). Fine for the first planking, wouldn’t look good on the second planking above the waterline. Need to find a different solution for that.
Because the planking is harder to bend (even testing to see where the heat and damp applied bends should be) I found myself manhandling the hull more with the inevitable consequence that I broke off the forward starboard bulkhead ear and also two of the stern timber frames. The outer timber frame and the bulkhead ear glued back on OK using liberal applications of titebond. They’re all sacrificial so won’t matter longer term and seem to be in the right places at the correct angles.
I even bought a keel clamp to hold her better.

The benefit of the 1.5mm strips is that the overlap is greater between planks and it should be more forgiving to sand. I’m pretty confident this will sand down to form a nice base for the second planking. She looks better in real life than the photos!
Port side next.
- ccoyle, Thukydides and CiscoH
-
3
-
Andrew, your build of Nisha is amazing. I’m very envious of your skill in adding all the details and those sails are so realistic. My Nisha looks bare and unfinished in comparison! Been fascinating to follow you building her, thank you.
- king derelict and AJohnson
-
1
-
 1
1
-
-
26 minutes ago, Oldsalt1950 said:
It is starting to take shape well, Dan. You will find you still have some fairing to do, we all always do, so take your time with it. This isn't a race. I actually kind of enjoy fairing and coaxing out the final hull and bulkhead form. I also use to enjoy doing body work on cars too. A good flexible straight edge and some deft fingertips running along it along with sighting along it will get you there.
Jim
Thank Jim, will follow your advice. Plenty more fairing…
-
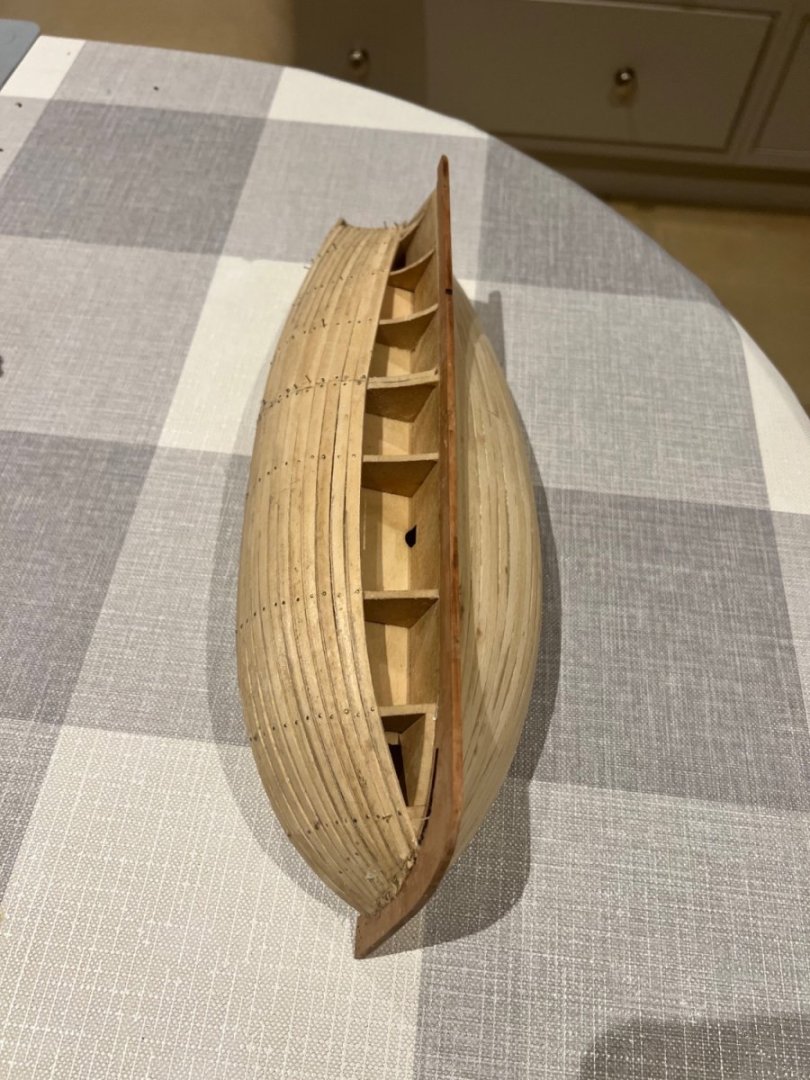
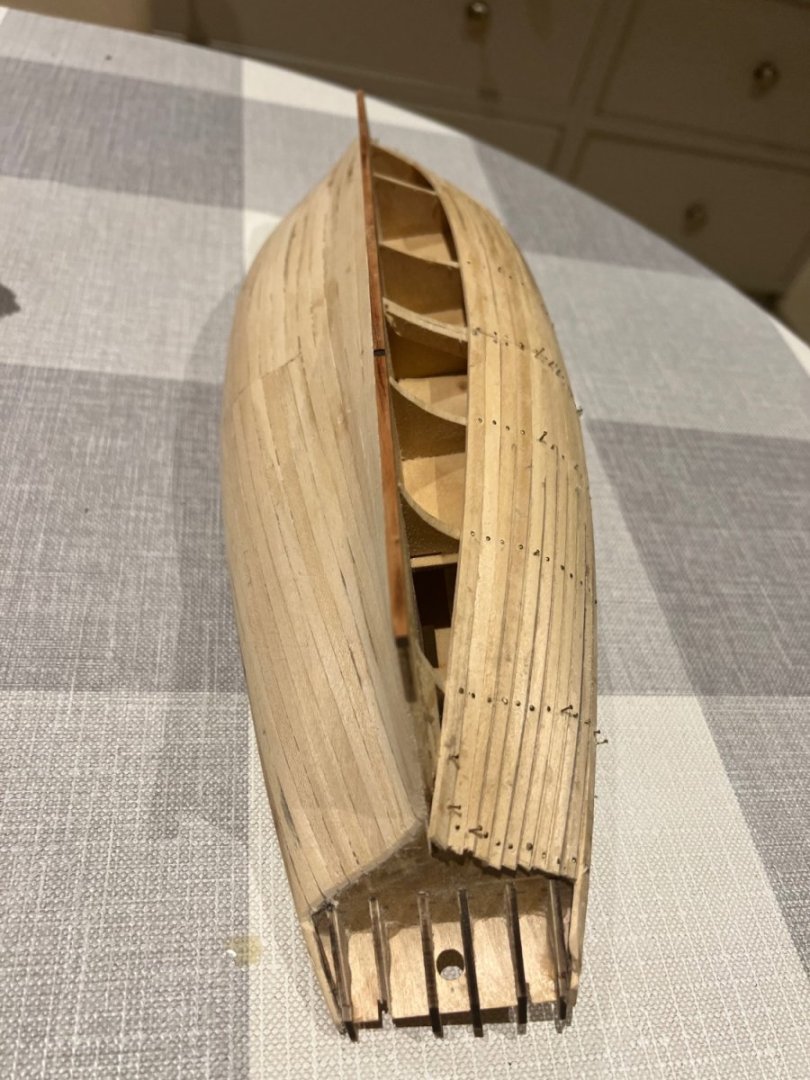
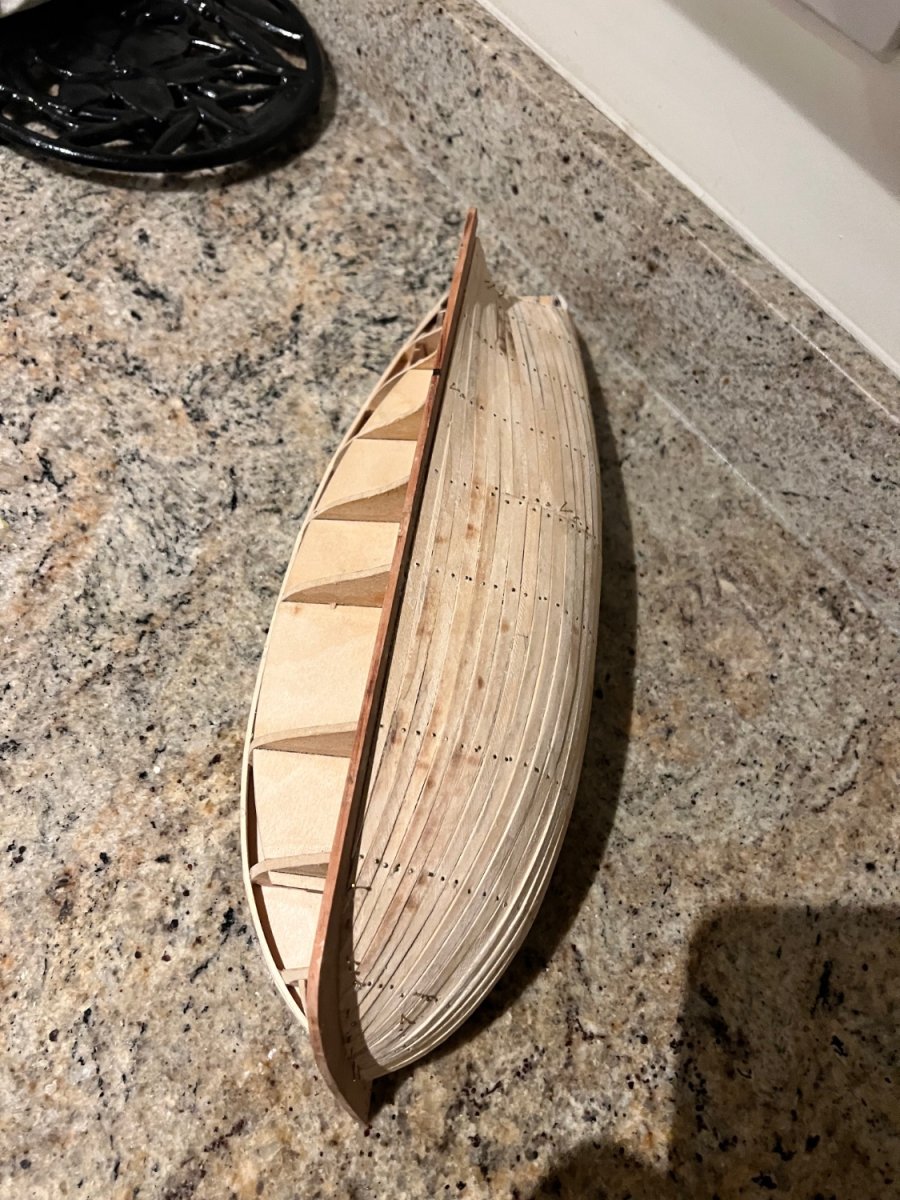
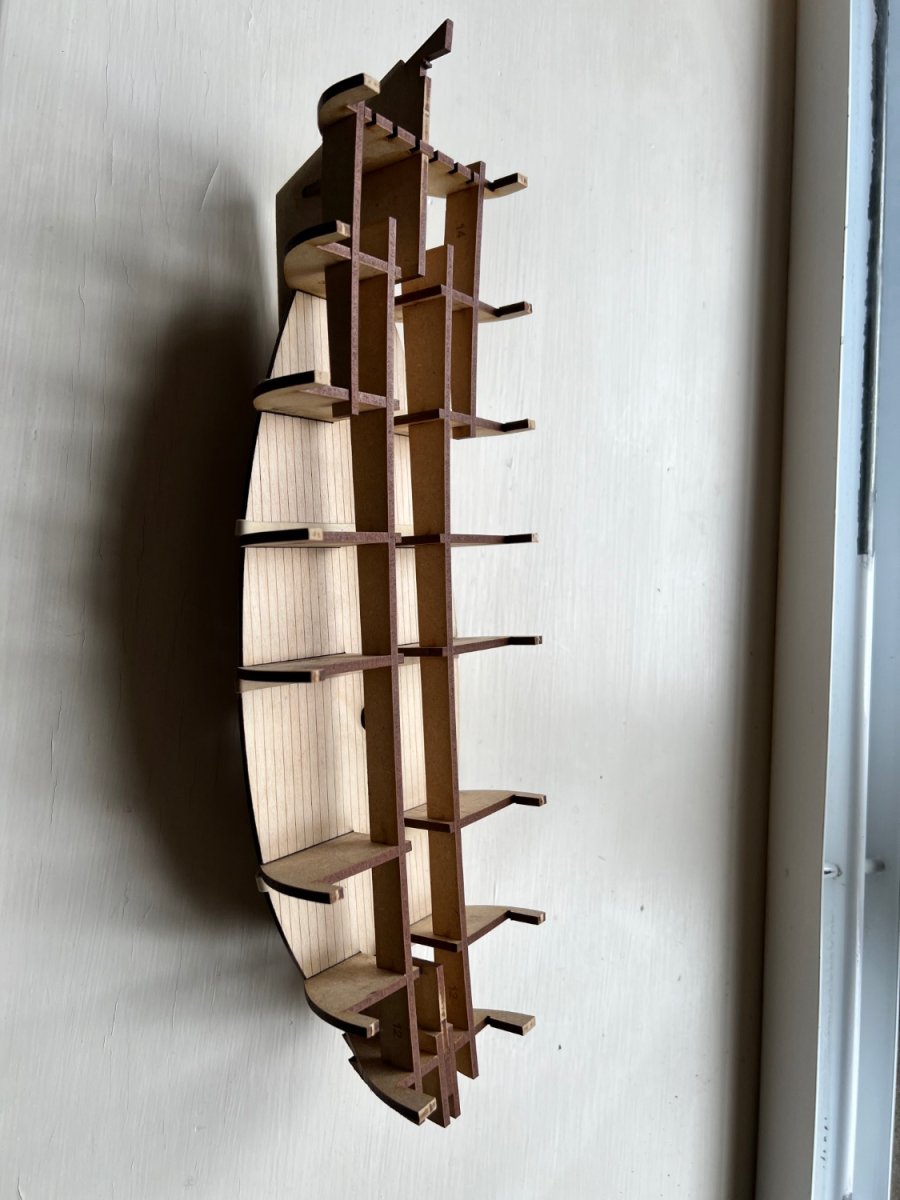
I’ve made some progress.
The longitudinal frames and stern timbers were added together with bulkhead 10. I realised I did need to add this after all to get a smooth faired hull.
As other logs have forewarned, the outer two stern timbers (parts 19) don’t quite line up with their slots, but forewarned I gently bent them into the slots.
Then added the main deck, rudder platforms and the small bulkheads to the rudder platform.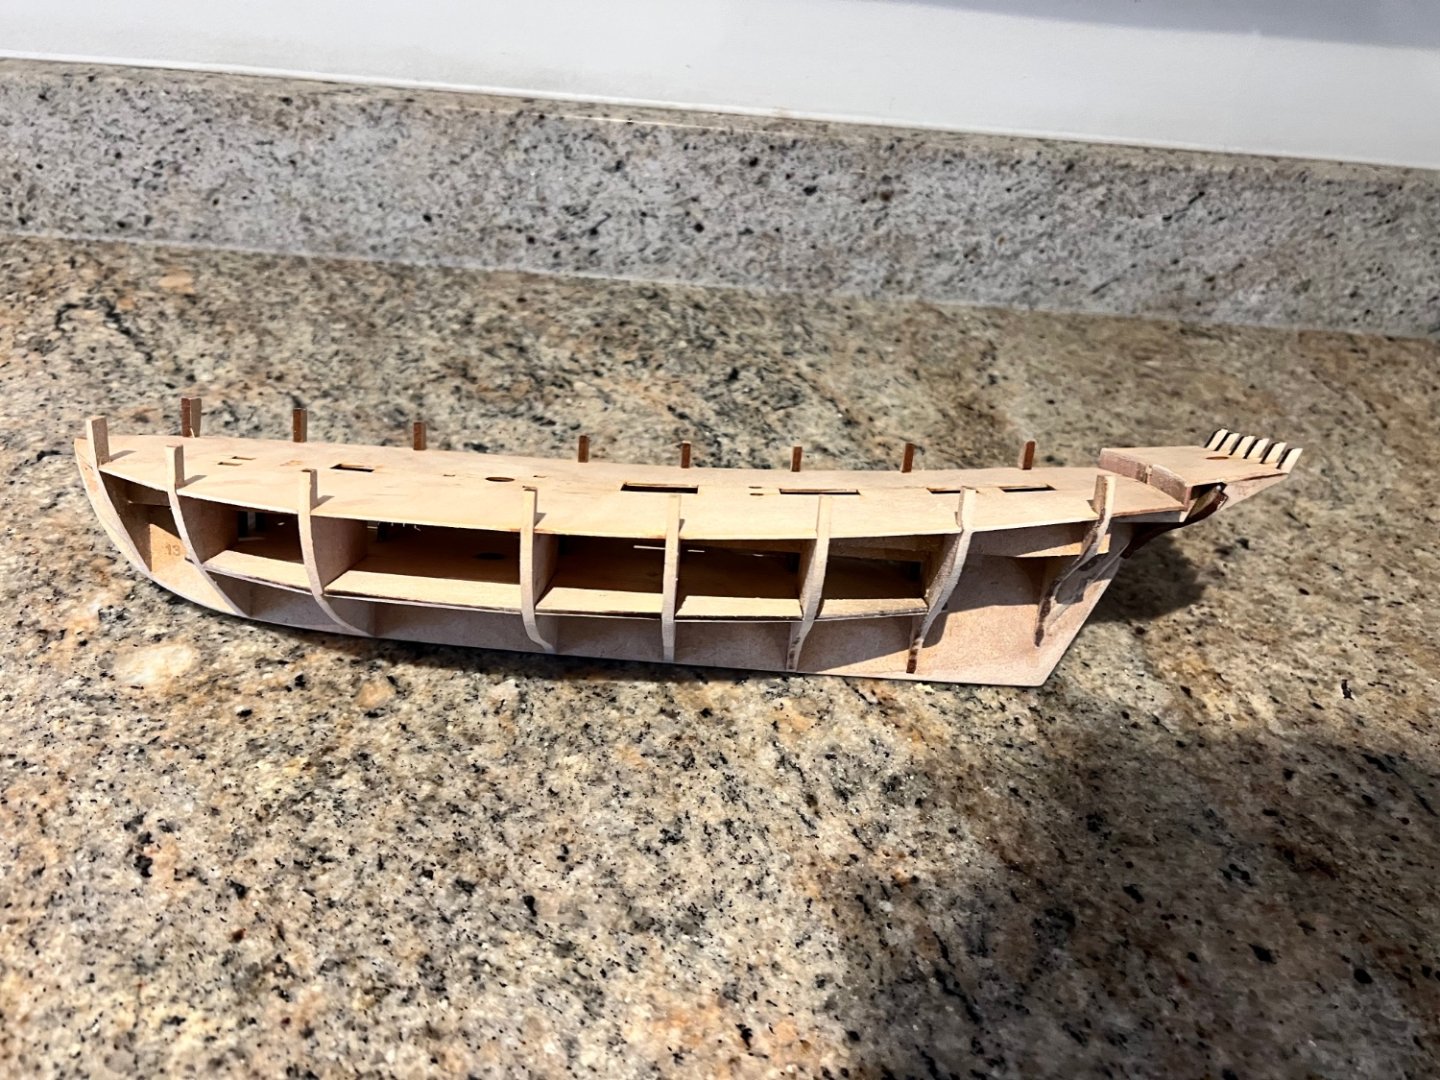
I’ve started fairing the bulkheads, but quite a bit more work here required, especially towards the stern.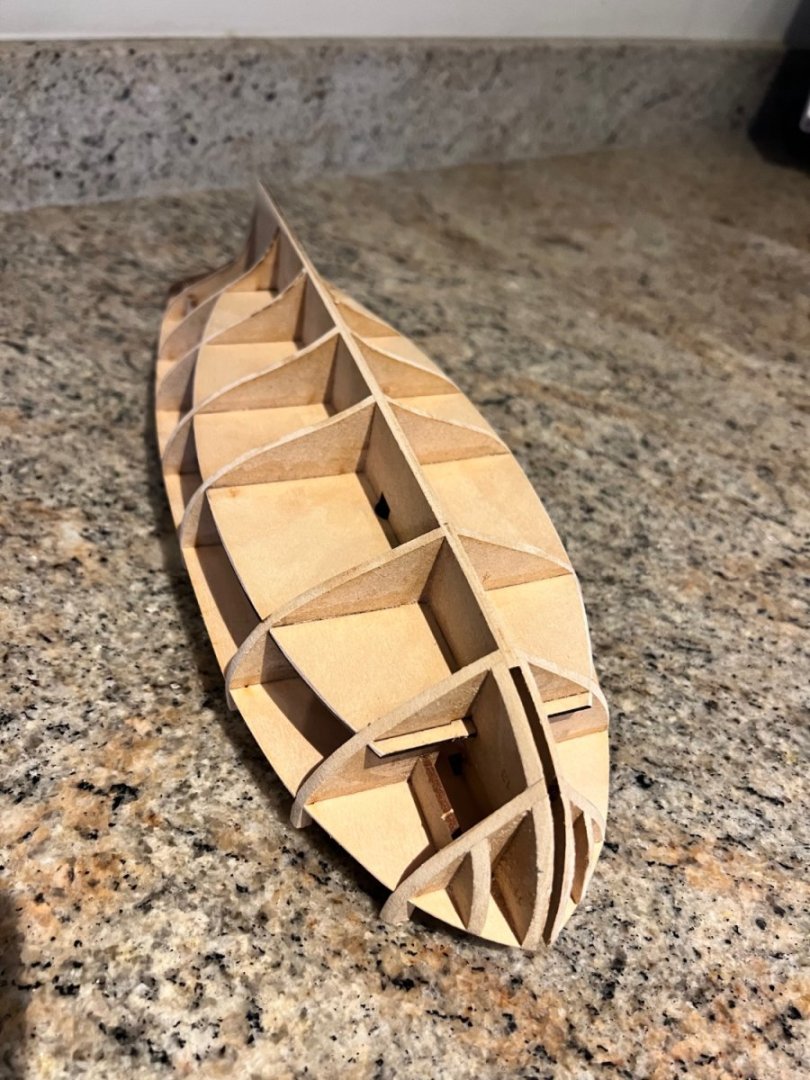
Outermost stern timbers (part 20) needed to be shaped to fit flush against bulkhead 10 and be at an angle to the main stern timbers.
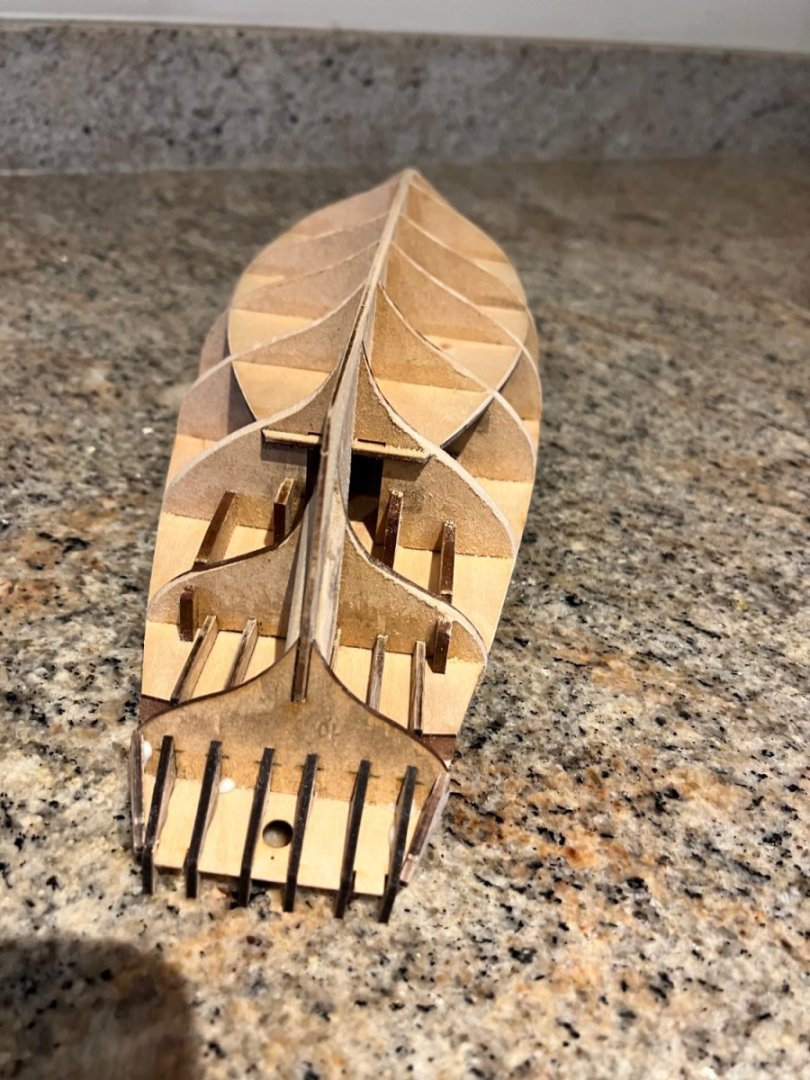
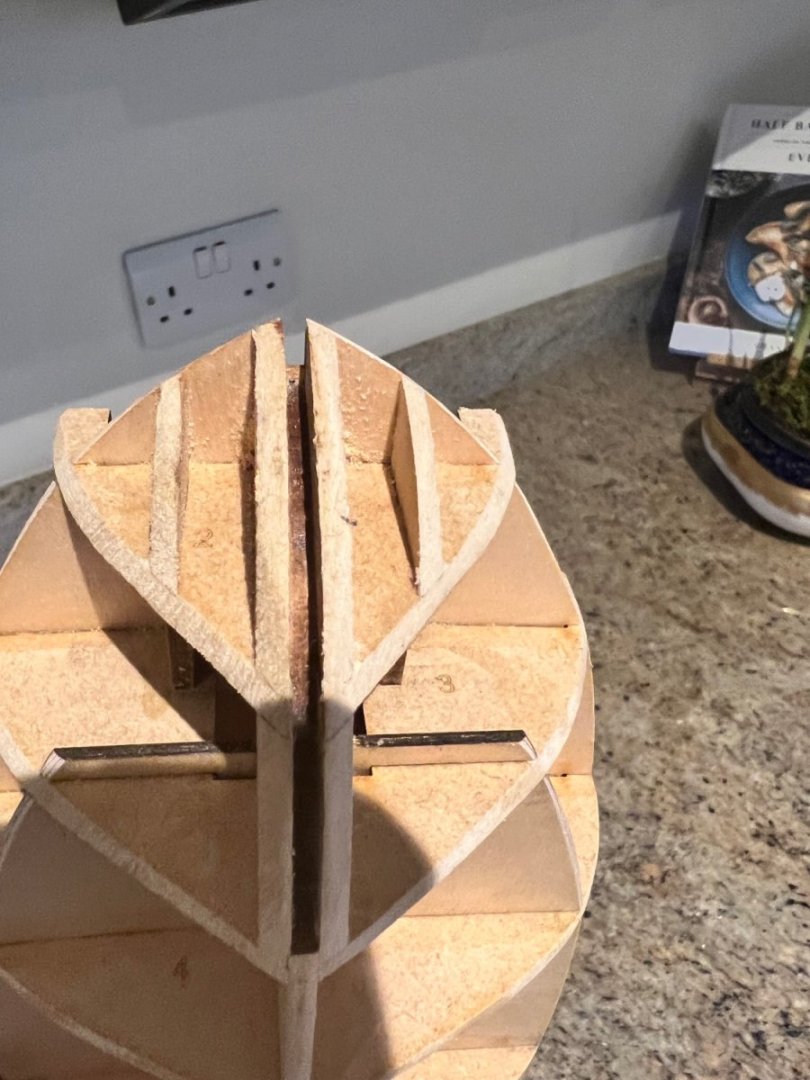
Despite being careful I still managed to break off one of the outer stern timbers. But it’s glued on fine for now and is cut off latter.
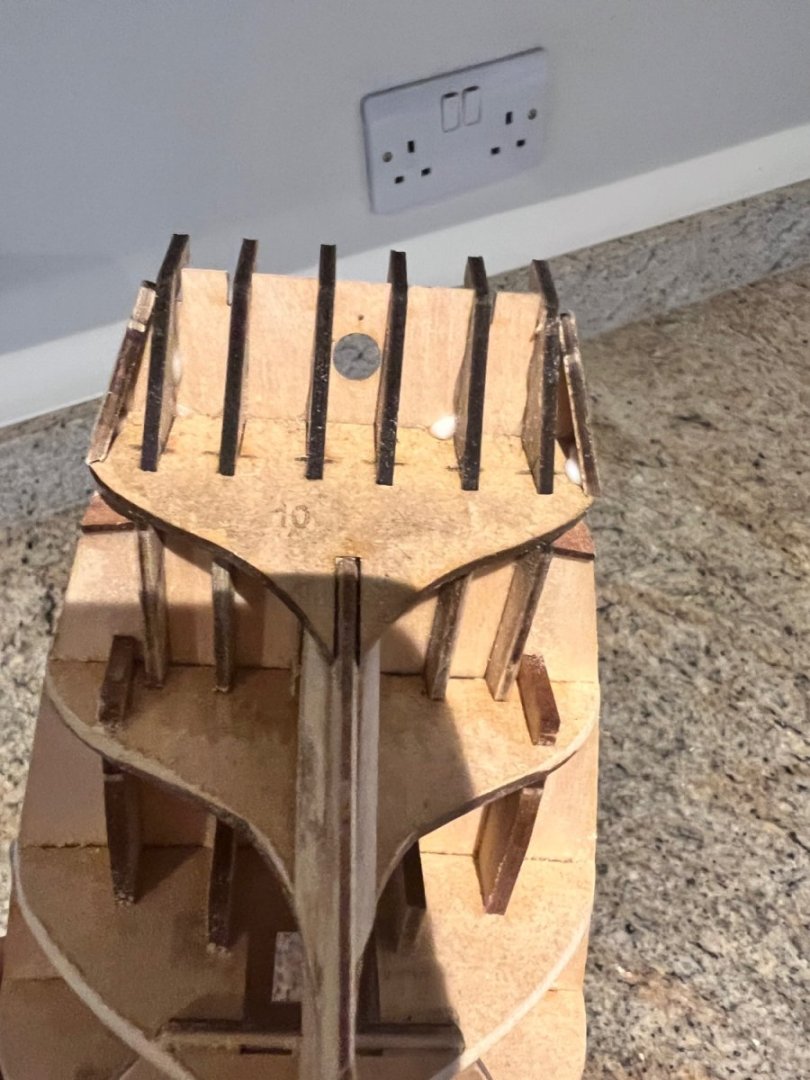
As with the other Vanguard boats, this hull construction is very well thought out and creates a strong, solid hull base for planking whilst ensuring the bulkheads are lined up and the keel straight.- Diver, Knocklouder, Oldsalt1950 and 2 others
-
5
-
Thank you all for the advice.
That makes sense, I couldn’t see if I was missing a trick here as all the version 2 build logs were using the PE and I couldn’t see why they weren’t using the wooden ones. Now I understand!
-
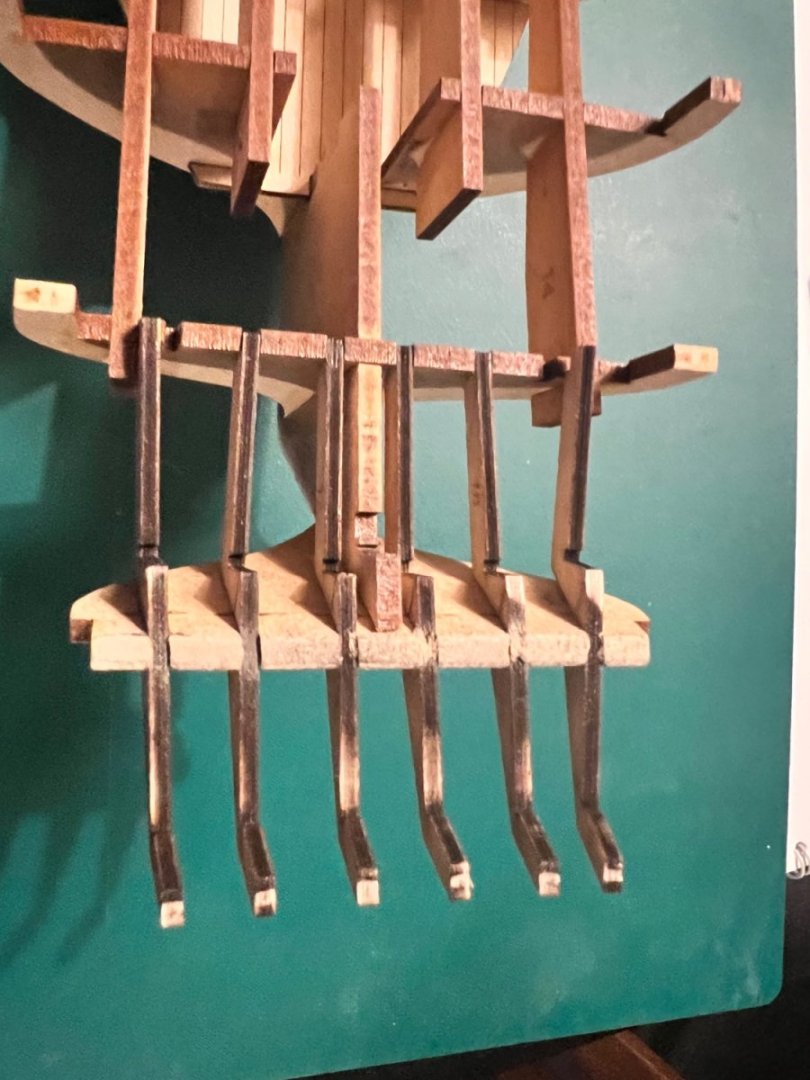
Whilst the hull dries I thought I’d make a start on the cannons, having never made one before.
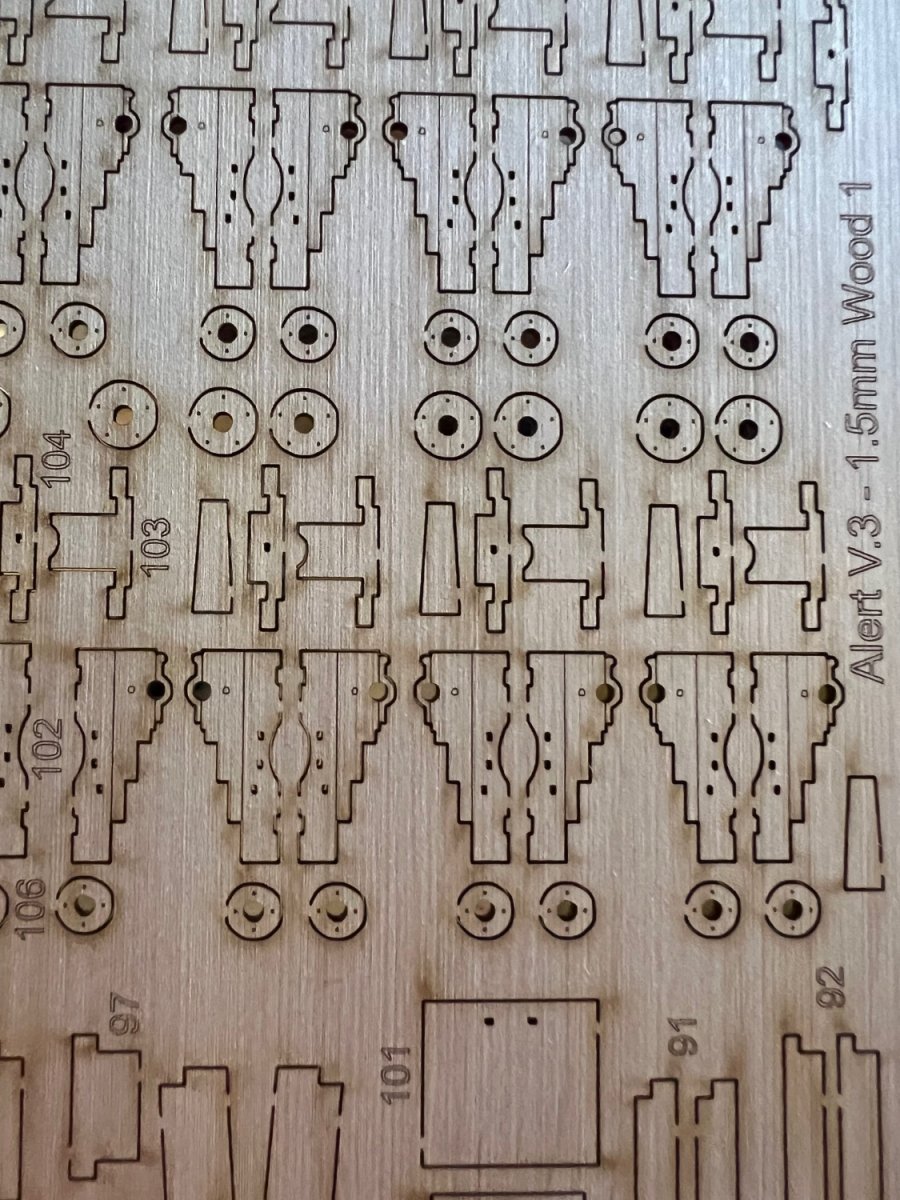
I’ve a query for anyone who has built the second edition of Alert. The instructions show a piece of PE (PE-50) across the top of the carriage over the barrel’s trunnions.
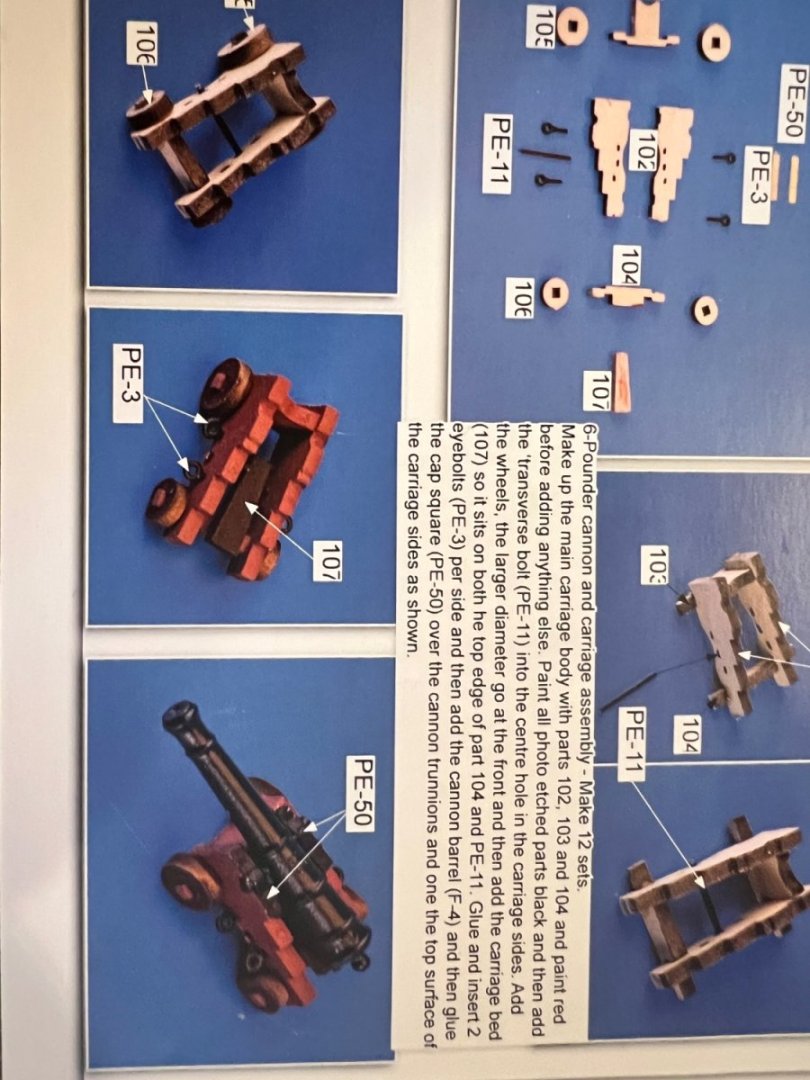
The kit has a wooden hole in the side of each carriage (photo below). Should I use the wooden holes for the trunnions or cut this off and use PE-50? Not sure if this is a difference between the two editions of Alert?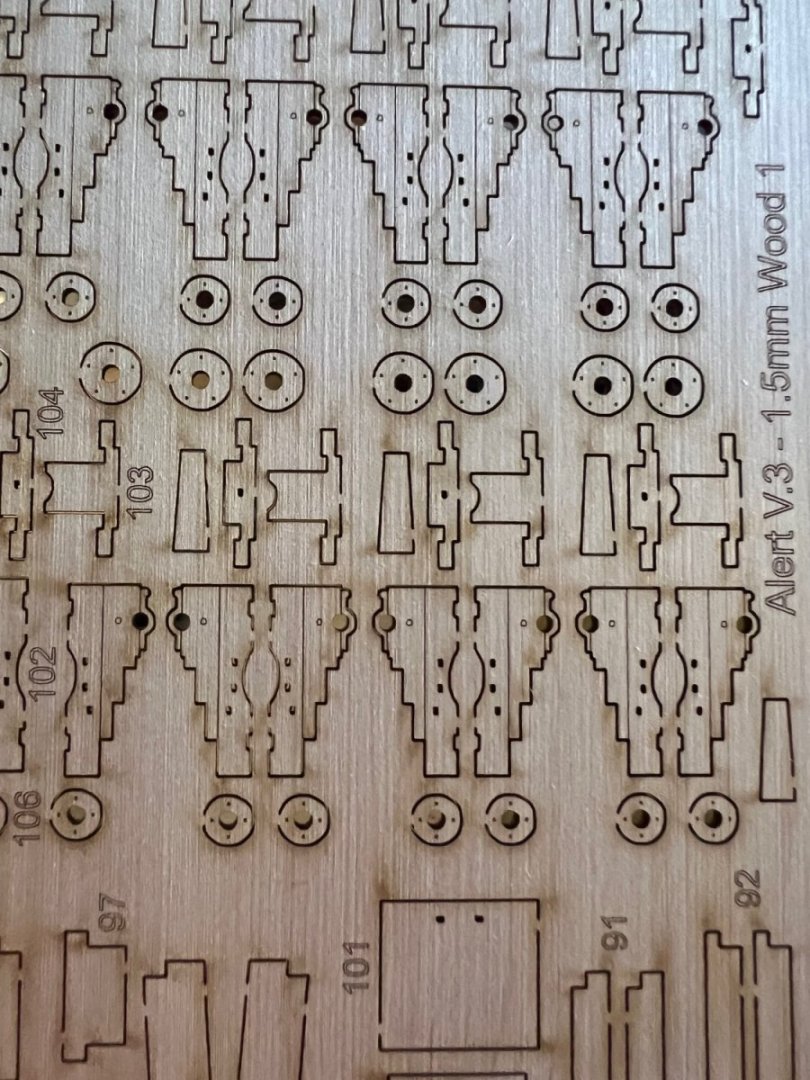
To me it makes most sense to use the wooden holes, but this will change the sequence of building the cannon as the barrel will need to be added before the carriage is fully assembled, not afterwards.
Any advice much appreciated. Many thanks
-
Thanks Jim and Bowline. Please do, I’m sure I’ll make lots of mistakes to learn from.
-
3 hours ago, Dave_E said:
Very nice Sir indeed! 👍👍😀
Thanks Dave!
-
This will be my sixth build and all from Vanguard. That makes me sound experienced - I'm not - all the other five have been from Vanguard's excellent range of fishing boats. This will be my first warship, first at least partially square-rigged ship, first cannons, etc.
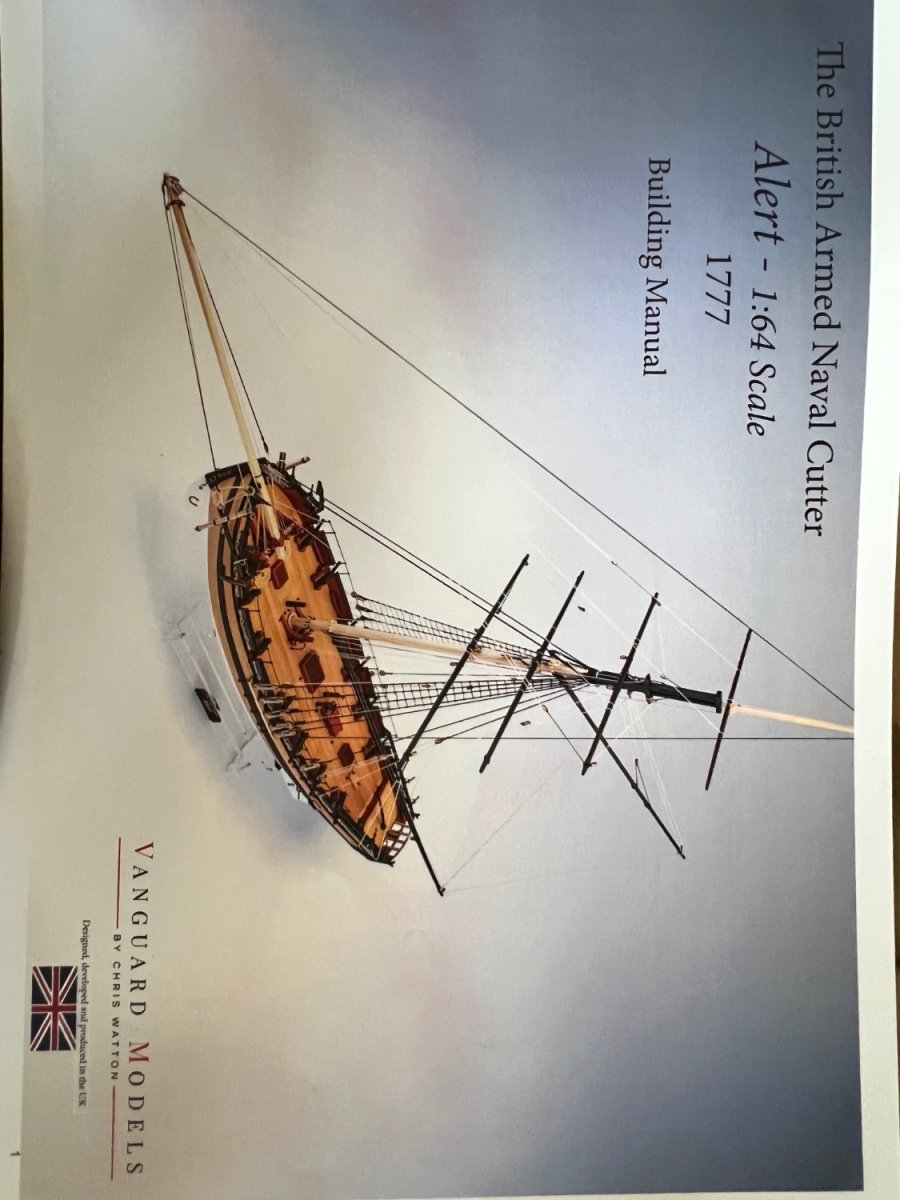
There's some excellent logs already on MSW on Vanguard's Alert, so I won't bore you with a box contents post and instead will dive straight in. First impressions are that this is another excellent kit. This is the second edition kit with some improvements.
I like the huge manual with the plans bound in. Will save me lots of time later trying to find the correct plan.

The keel needs to be shaped where it meets the rudder post to leave room for planking. I’ve followed the procedure in lots of other logs and used a 1.5mm strip of masking tape to ensure the sanding is to the correct depth.

Bulkheads and lower deck fitted and glued with diluted PVA.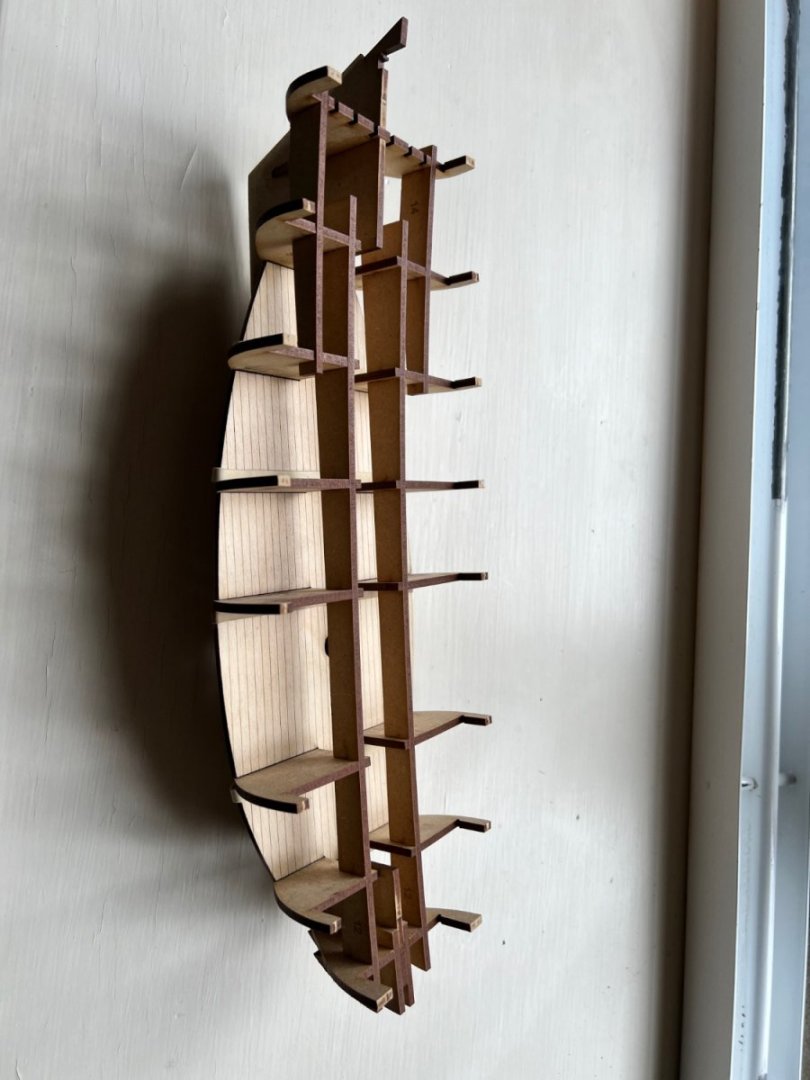

I haven’t glued the longitudinal beams yet. They’re dry fitted to keep the bulkheads square. I haven’t added the aft bulkhead 10 yet as without the rudder post only half the slot is there. I may do some fairing of the forward part of the hull before adding bulkhead 10 and the stern frames to lessen the chances of breaking one.
- mort stoll, Ryland Craze, ccoyle and 3 others
-
6
-
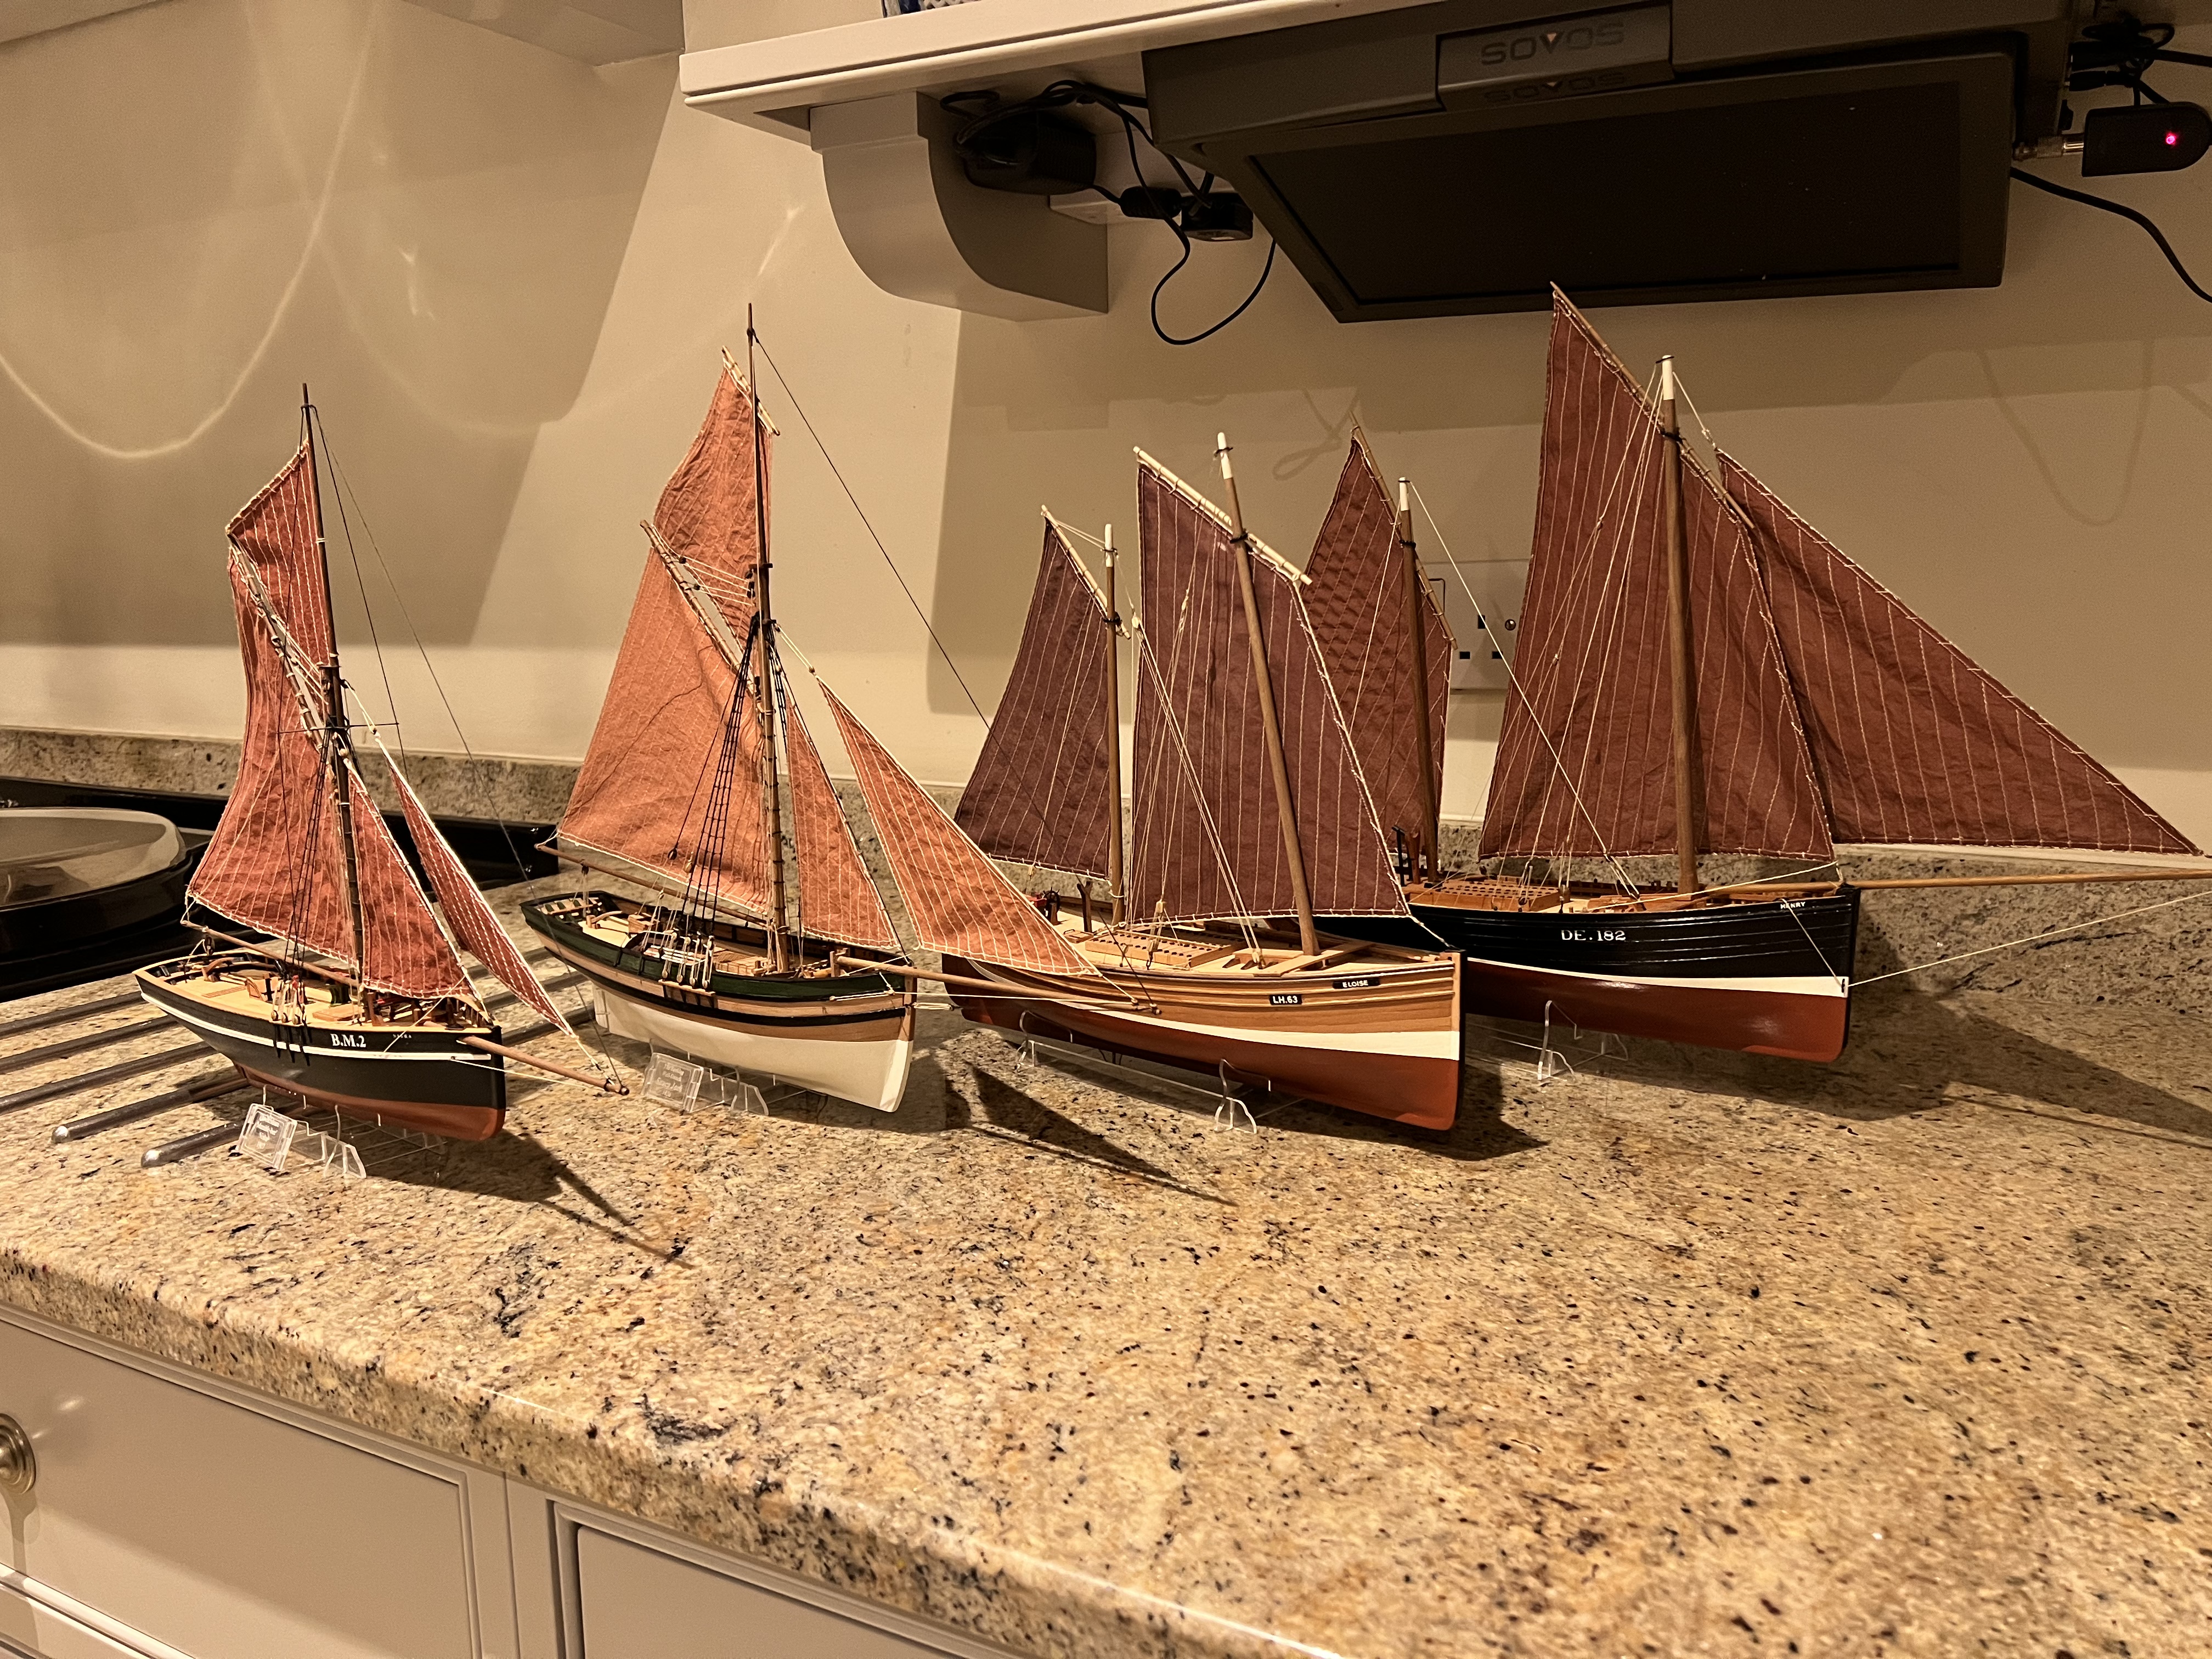
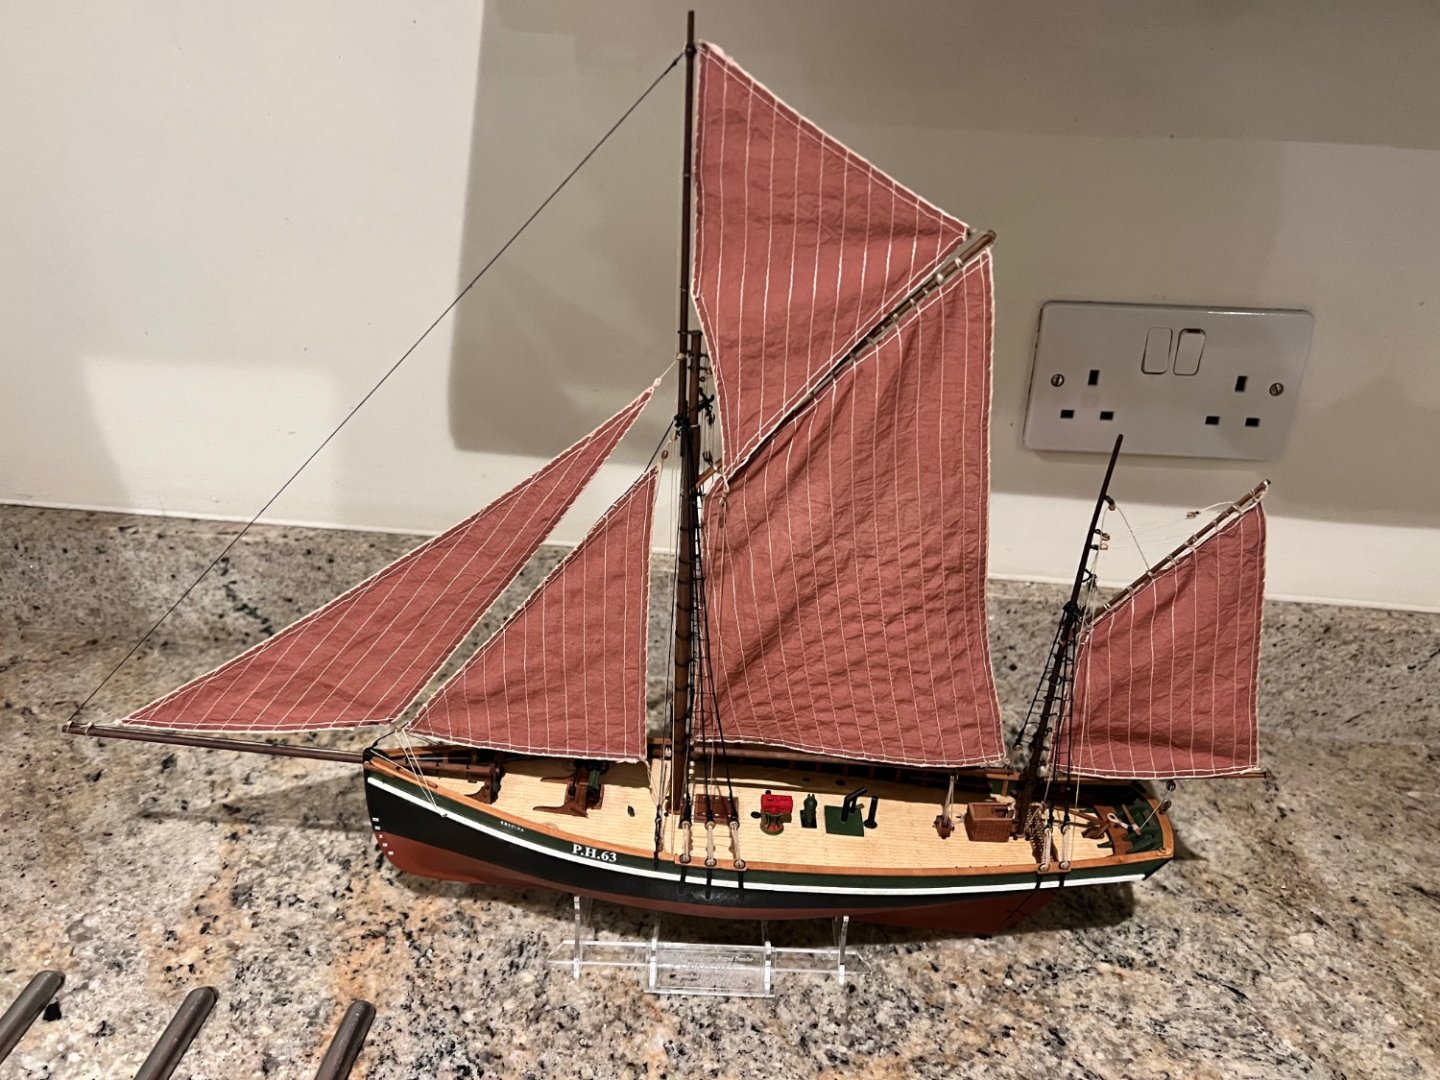
Last couple of photos. Erycina is finished.

-
-
11 minutes ago, Diver said:
What a fine collection of vessels. I am in the process of building the Medway longboat by Syren. When complete I have decided to try my hand at the Lady Elanor.
Thanks, I really enjoyed the Lady Eleanor, I thought that she was the easiest build of the Vanguard fishers. Good luck with your build!


HM Cutter Alert by DB789 - FINISHED - Vanguard Models - 1:64
in - Kit build logs for subjects built from 1751 - 1800
Posted
Thank you both. That’s great advice, I’ll do that.