
HOLIDAY DONATION DRIVE - SUPPORT MSW - DO YOUR PART TO KEEP THIS GREAT FORUM GOING! (Only 75 donations so far out of 49,000 members - C'mon guys!)
×


allanyed
-
Posts
8,149 -
Joined
-
Last visited
Content Type
Profiles
Forums
Gallery
Events
Everything posted by allanyed
-
 Love the looks of your kit. I have great admiration for Vanguard bringing out models that are quite different than the few choices available for so many years before Vanguard. The passion that goes into designing these is quite evident. Allan
- 146 replies
-
- 5
-

-
- Adder
- Vanguard Models
- (and 1 more)
-
What kind of wax? There is some discussion on wax here at MSW. One thread can be found at https://modelshipworld.com/topic/34942-black-rigging-wax/#comment-1027227 According to the American Bee Journal, bees wax has a pH of 7 so is neutral thus a safe choice. Others have stated that it is below 7 thus acidic. https://americanbeejournal.com/beeswax/ Paraffin is on the alkaline side of neutral with a pH of 9 to 10 so maybe not a great choice. There are proponents and detractors of using wax. It will waterproof the rope but if you use poly rope I am not sure there is any benefit. Allan
-
Had to do more than checking off just a "like" ....... truly fabulous build Daniel. Allan
- 562 replies
-
- 7
-

-
-
- vanguard models
- alert
- (and 2 more)
-
Hi Marek Regardless of the kit instructions, did Spanish ships have wooden hoops on top and bottom of the wooldings so they would not slip on the mast? This was always done on British ships so I thought this might have been the case for other nations as they would have had the same problem without them. Allan
- 158 replies
-
- 1
-
-
- San Felipe
- Panart
- (and 1 more)
-
This alternative might help. https://www.rmg.co.uk/collections/objects/rmgc-object-86227 The painting you posted appears to have a similar offset sprit that lies next to the stem not on top of it. Allan
-
ECK, Thank you for the compliment but I owe it all to others, and especially one in particular. I do not remember 90% of this stuff and it gets worse with age, but I do have a decent library that I have built up over the years that I use daily. I had only a few books back in the day then had the fantastic opportunity to visit with David Antscherl and saw his library of books. The light bulb went on and I started the accumulation of useful books lo these many years. For me, the research is as enjoyable as the build itself. Allan
-
Glad to see you signing on board with this motley crew!!! Allan
-
Hi George, The Ferret 1711 was not a Bermuda rig, but rather a cutter rigged sloop built at Deptford, not Bermuda, so may not be apropos for your project if you want a Bermuda rig vessel. Allan
-
Erik, Ed Tosti (author of Naiad and Young America) went into detail on LoS in his build logs at MSW and books and made a convert out of many, myself included. I still use brass if I need hard material, but copper whenever I can. Allan
-
According to James Lees in The Masting and Rigging English Ships of War, page 2, on the lower masts the wooldings were made of rope and the hoops on the top and bottom of the wooldings were wood that was about 1.5" wide. The rope wooldings and wooden hoops were superseded by iron bands on ships built starting in 1800, which went under the cheeks and rubbing paunch if they were present. In addition, when the use of iron bands began there were also, 3" wide iron hoops and these went over the cheeks, but under the paunch if present. By the same token, there always seems to be exceptions so perhaps Flirt was indeed an exception. Allan
-
Keel holder/clamp recomendations
allanyed replied to Mike Shea's topic in Modeling tools and Workshop Equipment
You are welcome Mike. Your comments on research are spot on! There are great articles here at MSW in the Articles Database that will be helpful. In addition to the great planking article by David Antscherl in the database, you may find the four part video series by Chuck Passaro on planking using strip materials (if that is what is in your kit) beneficial. https://www.youtube.com/watch?v=KCWooJ1o3cM Allan -
Hi Sid I have a friend that builds railroads and full blown villages. When he was building some new trestle bridges and buildings he bought poplar boards at Home Depot and he brought them to me to cut into various stock sizes on my mini table saw. Took less than 20 minutes and he had enough for a year. Hopefully someone with a small table saw is near you. Check out if there are any ship model clubs in your area. Sorry I can't be of more help. If you are anywhere near SW Florida come on over and we can get it done. 🙂 Allan
-
Beautiful metal work Erik. You mention painting these black which is a good choice as is blackening the brass before installing the pieces. Some have gone to copper instead of brass as it can be blackened after being installed with liver of sulfur without discoloring the surrounding wood. Check out McMaster Carr for sheet and strip stock of brass and copper. https://www.mcmaster.com/products/strips/?s=brass+strips https://www.mcmaster.com/products/strips/?s=copper+strips Allan
-
Boxwood, Castello, Swiss pear, holly and Alaskan cedar are favorites for many builders. Basswood is OK, but is relatively soft compared to the others so does not hold an edge as well if care is not taken. There are more, but these are just to name a few. Where are you located? There are suppliers around the world but a US supplier will not work so well if you are in a different part of the world. Not sure what you mean by a variety of sizes. There are thousands of pieces and sizes on any given model. The hull alone will have nearly a hundred strakes on a larger ship, everyone of which is different when tapered and pre-shaped by heat bending or spiling. The best kits these days seem to have all of these laser cut, but if you are scratch building you will need a few cutting tools from saw to chisel to scalpel. Allan
-
Laser cannon bracket
allanyed replied to mediocremodeler's topic in CAD and 3D Modelling/Drafting Plans with Software
Hi Gregory I have no idea if this was a traditional thing or there was some "scientific" reasoning behind this. Lees mentions cable laid versus shroud laid rope regarding shrouds but gives no information as to why cable laid was sometimes used. If they are indeed interchangeable, I would guess there is little, if any, effect. Hopefully some member will have some historical information. Allan -
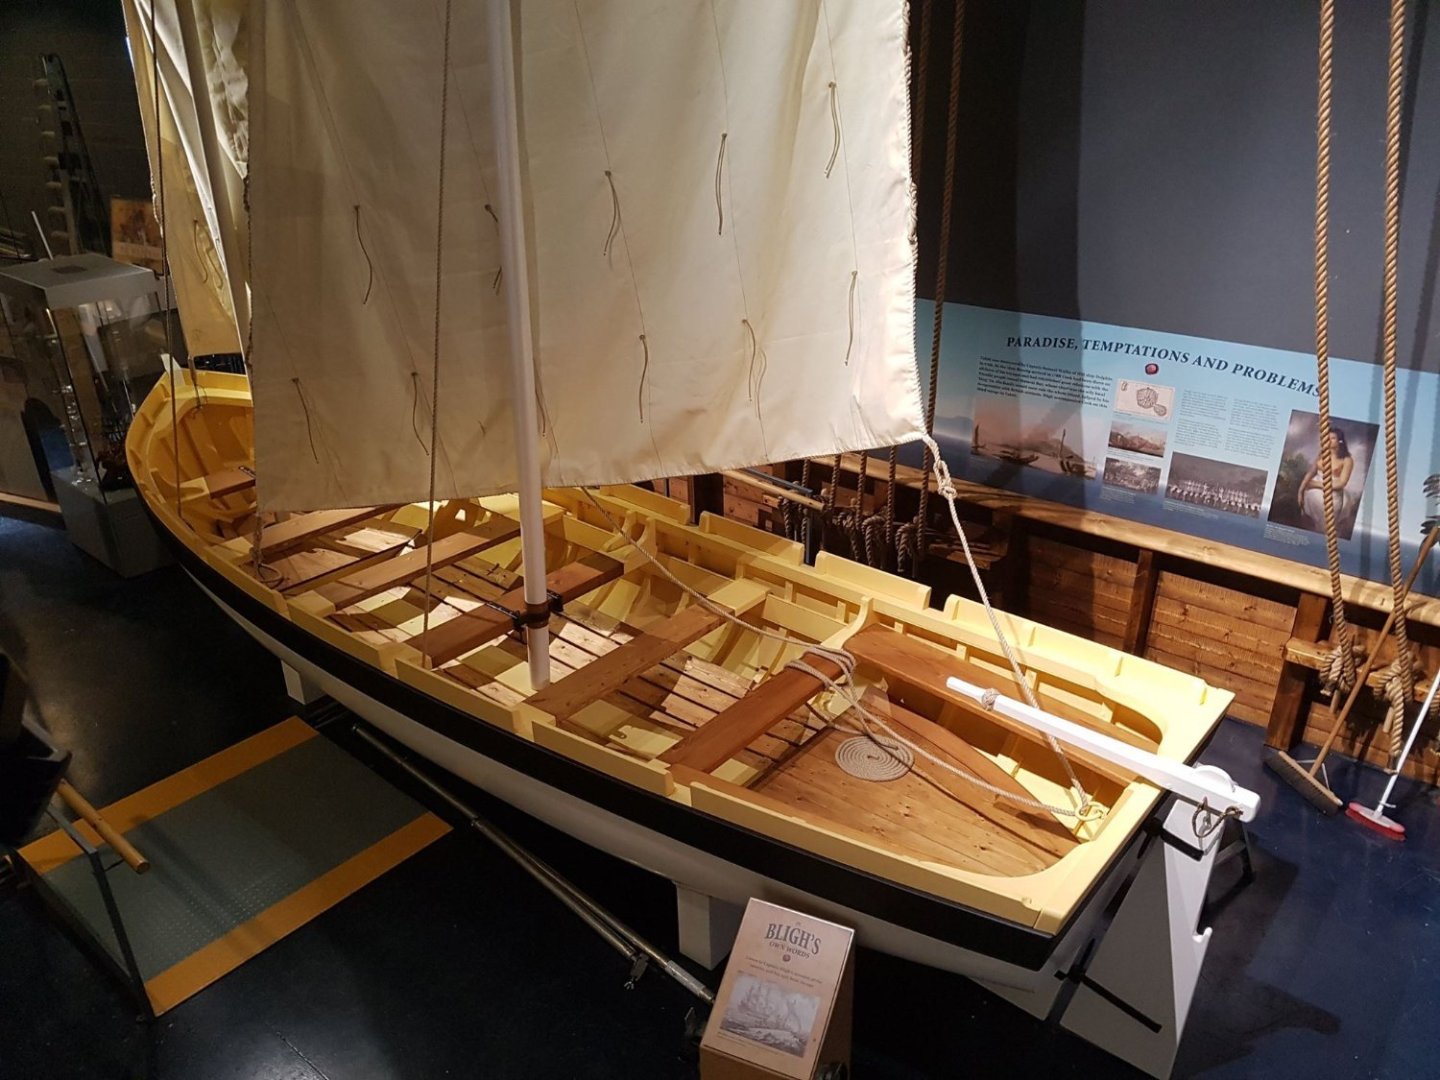
Hi B.E. Understood🙂. Hopefully this would be an easy fix for them. The below is the Bounty launch replica and the keelson is pretty visible, but I doubt the majority of viewers of your model would notice this feature. Great model, great build log, thanks again for sharing. Allan
- 648 replies
-
- 2
-
-
- Indefatigable
- Vanguard Models
- (and 1 more)
-
That is a really fine looking boat. I realize it may not be all that important and it is a kit convention but I do wonder why there is no keelson on which the mast steps would sit rather than on the footwaling. For the late 18th century/early 19th century for a 32 foot pinnace the keelson would be about 11 inches broad by 1 1/4" thick according to the scantlings given in The Boats of Men of War by May where as the footwaling would be closer to 3/4" thick and not as broad. Early 18th century keelson for a 32 foot pinnace was about 8"X1.5" and the footwaling 4"X1" (The Boats of Men of War, page 53.) Whichever the case, there is quite a difference between the keelson and footwaling breadth and thickness. There are some cross sections of boats at RMG where this can be seen. One example follows. Allan
- 648 replies
-
- 4
-
-
- Indefatigable
- Vanguard Models
- (and 1 more)
-
Laser cannon bracket
allanyed replied to mediocremodeler's topic in CAD and 3D Modelling/Drafting Plans with Software
FWIW, confirming Greg's observation, all the breech rope in the drawings in Caruana's The History of English Sea Ordnance are right hand twist rather than cable laid. Allan -
Keel holder/clamp recomendations
allanyed replied to Mike Shea's topic in Modeling tools and Workshop Equipment
While you have an interesting kit, as this is your first build, you might want to consider setting it aside for now and get at least one or two high quality beginner kits such as the from the three vessel series at Model Shipways designed by master shipwright David Antscherl. They will teach you techniques and more that will last a lifetime. Allan -
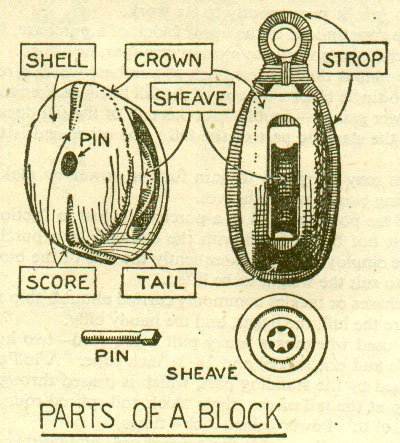
TJ You can see from the drawing that there is no room for the line between the sheave and tail piece, only between the sheave and the crown. For our purposes, holes on both ends are fine at most scales as the line will block view of the lower hole. Allan
- 152 replies
-
- 2
-
-
- Flirt
- Vanguard Models
- (and 1 more)
-
Overall VERY neatly done! You may want to redo the blocks under the tops as they appear to be upside down so the line would rub against the tail rather than over the would be sheave. It may be easier to just drill the upper holes rather than unrig and re-rig. Allan
- 152 replies
-
- 3
-
-
- Flirt
- Vanguard Models
- (and 1 more)
-
Not sure if you were joking, but there are hundreds at RMG. One example..... https://www.rmg.co.uk/collections/objects/rmgc-object-257672 Allan
-
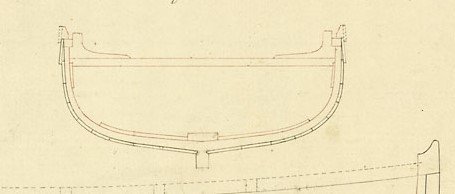
The inboard profile plan actually showing one example of the side half door lids and the remaining four with no lids seems a little unusual when looking at other sets of profile or inboard profile plans the majority of which show no types of lids. Maybe it is shown because it is a side half door lid rather than the more common single lid hinged at the top. Peter Goodwin mentions that the side half door lids were sometimes used as they gave a certain extent of protection to the shrouds and deadeyes from heat and sparks discharged from the guns. Then again, maybe all the ports had side opening lids and the example is to show that feature. I for one am curious and hope someone has an answer based on contemporary sources. For an interesting drawing see ZAZ 5578 of the bomb vessel Grampus. It shows both three piece incendiary and escape port lids and a drop lid. https://www.rmg.co.uk/collections/objects/rmgc-object-85369 Allan
-
The barrels look super Srenner. Allan
-
The Vanguard kits really are superior and yours looks great. Would the Flirt have had wooden hoops nailed to the mast on the top and bottom of the wooldings or were the wooldings just nailed to the masts to keep them in place without the hoops? Allan
