


John Murray
-
Posts
58 -
Joined
-
Last visited
Content Type
Profiles
Forums
Gallery
Events
Posts posted by John Murray
-
-
12 hours ago, druxey said:
Some thought on your dilemma:
One, is that really lime wood? The appearance is very different to lime I've used in the past, where the grain is almost invisible.
Two, your workmanship is fine - that is not the issue.
Three, I note that the grain on some of your futtocks does not run at a tangent to the piece (e.g. photo below 'glue in with titebond'). Avoid cross-grain as much as possible.
Four, fit temporary cross-spalls across the toptimbers to maintain designed width. This was done on full sized frames.
Cheers for that. It is English lime. That is what it is called in Australia. What its botanical name is though?
Thank you on the workmanship.
Re that image, I tried to avoid the cross grain as much as I could. That example has the timber extending out of site, however, I shall keep a closer eye on that.
I shall be restraining the top-timbers movement from now on to prevent this issue recurring.
-
5 hours ago, dvm27 said:
Holy cow, John. If that first frame fit the template perfectly six weeks ago and looks like that now your wood is certainly alive! Was it cut just before you started the model? Has it had time to acclimate to the workshop? About the only solution I can offer is to glue battens spanning each frame directly after the frame it is completed and fits the pattern perfectly. Either across the top or on the fore face would be fine. That should keep them from bowing in or out. Once you've completed all the frames you can fair them then add the wales. After this they should be held in place fine and you can remove the battens. Or you can make a Hahn-style jig and build the model upside down as this locks all the frames in place.
Hi Greg, Yup, it was a shock to me. I bought the English lime in Adelaide South Australia from a specialist wood supplier for furniture and specialised woodworking needs. I believe it has been dried. I would be very surprised if not. The English lime block was ripped into sizes I can handle several months ago by a community woodworking outfit. From there I band-sawed into 10mm thick planks.
The temperature on garage varies through the day from very warm to quite cool to cold in winter +40c to 0c. I have had the timber around 3 months. It was sawn around 8 weeks ago.
I wasn't sure if the Titebond II glue I used has "crept" in the garage after curing.
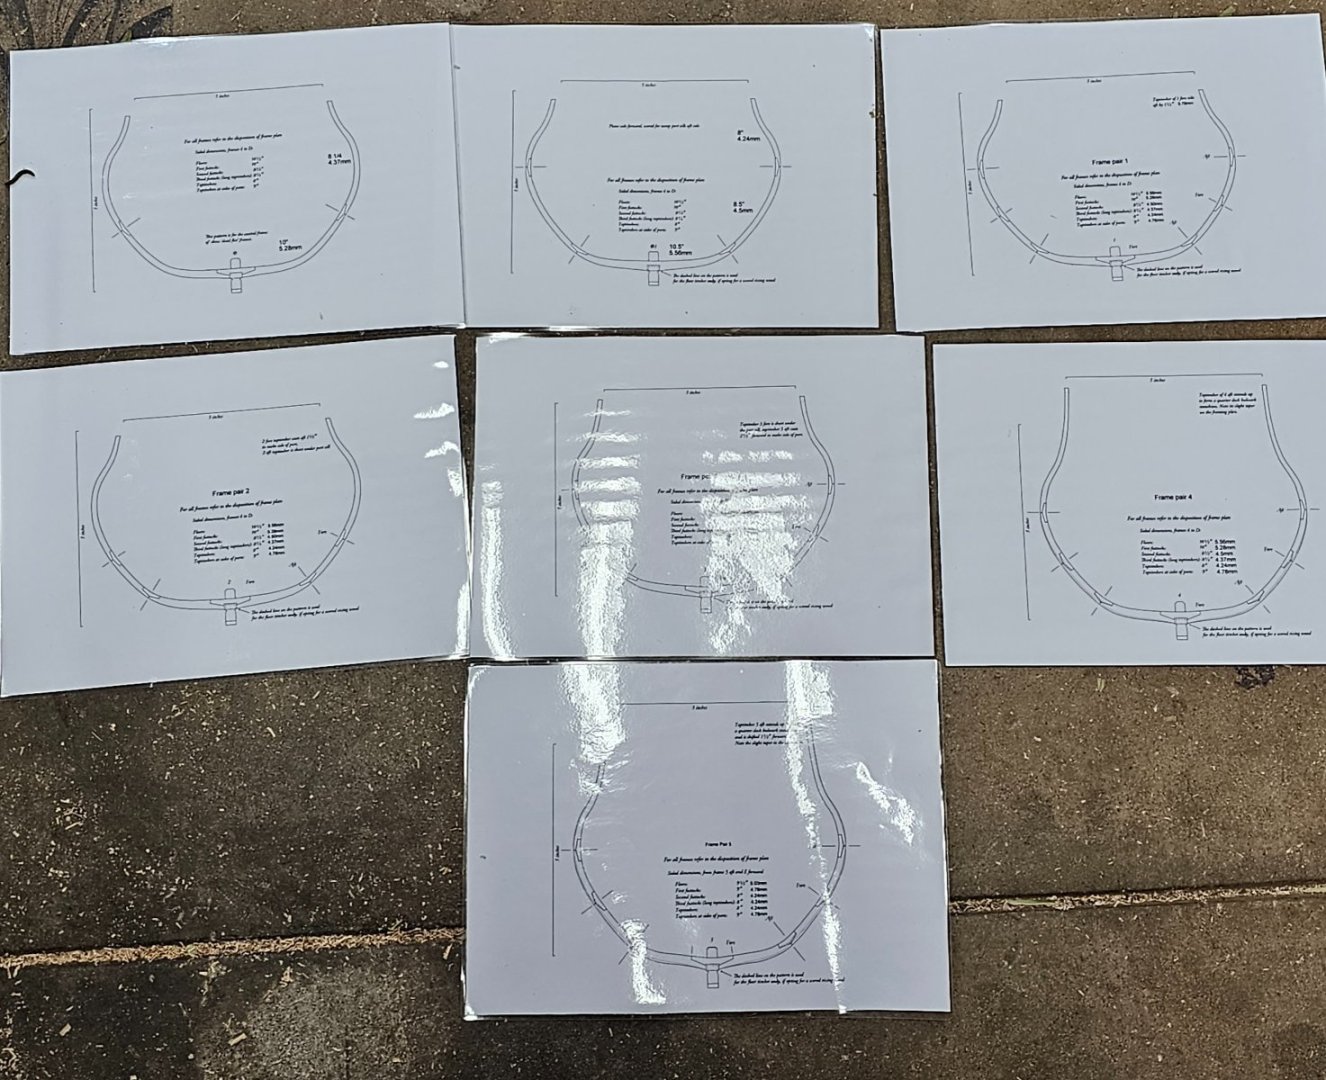
I think I shall print more paper of each frame, glue each to a piece of Masonite, then pin each frame over the relevant print so as to hold each frame securely until it is time to assemble.
I think I will need to fit the cross section out. Are plans or parts available to plank, deck, etc this model? Just in case it starts creeping out over time.
I will be remaking the dead flat #1 and shall be considering this issue.
Thanks for your thoughts. I very much appreciate it.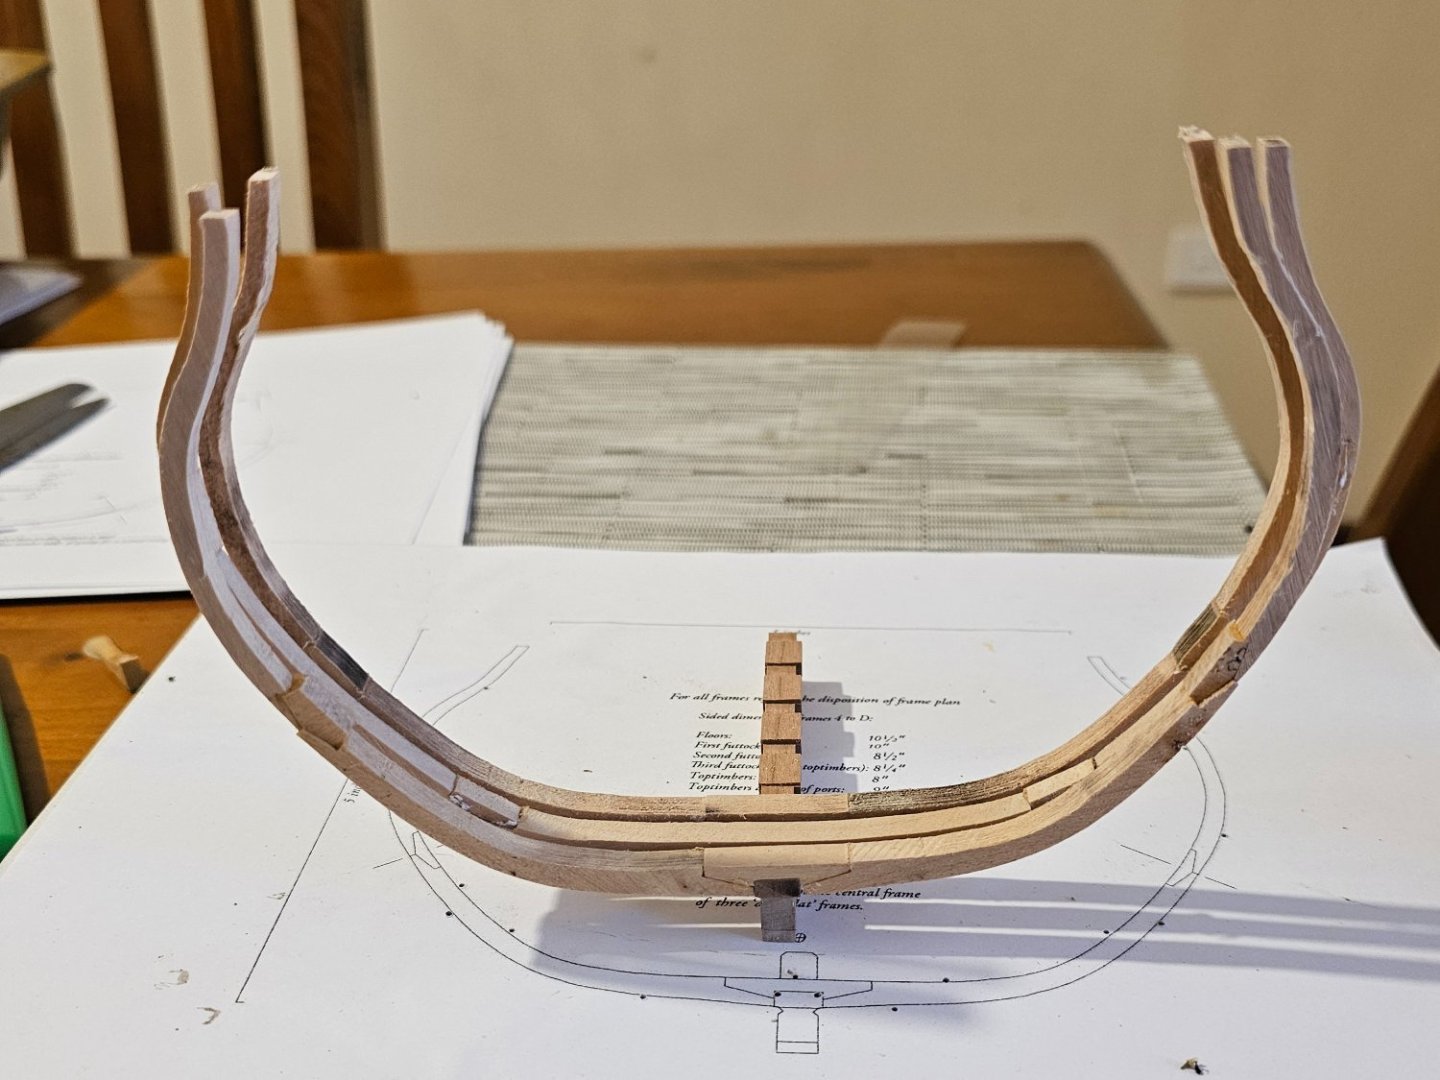
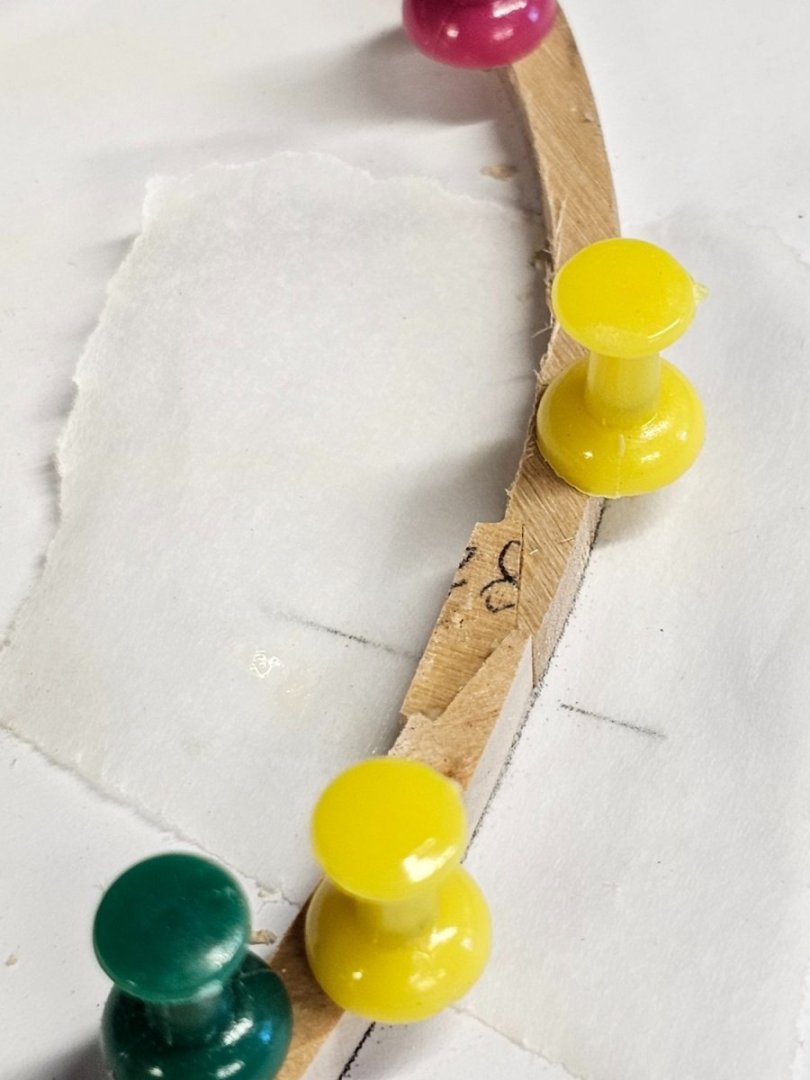
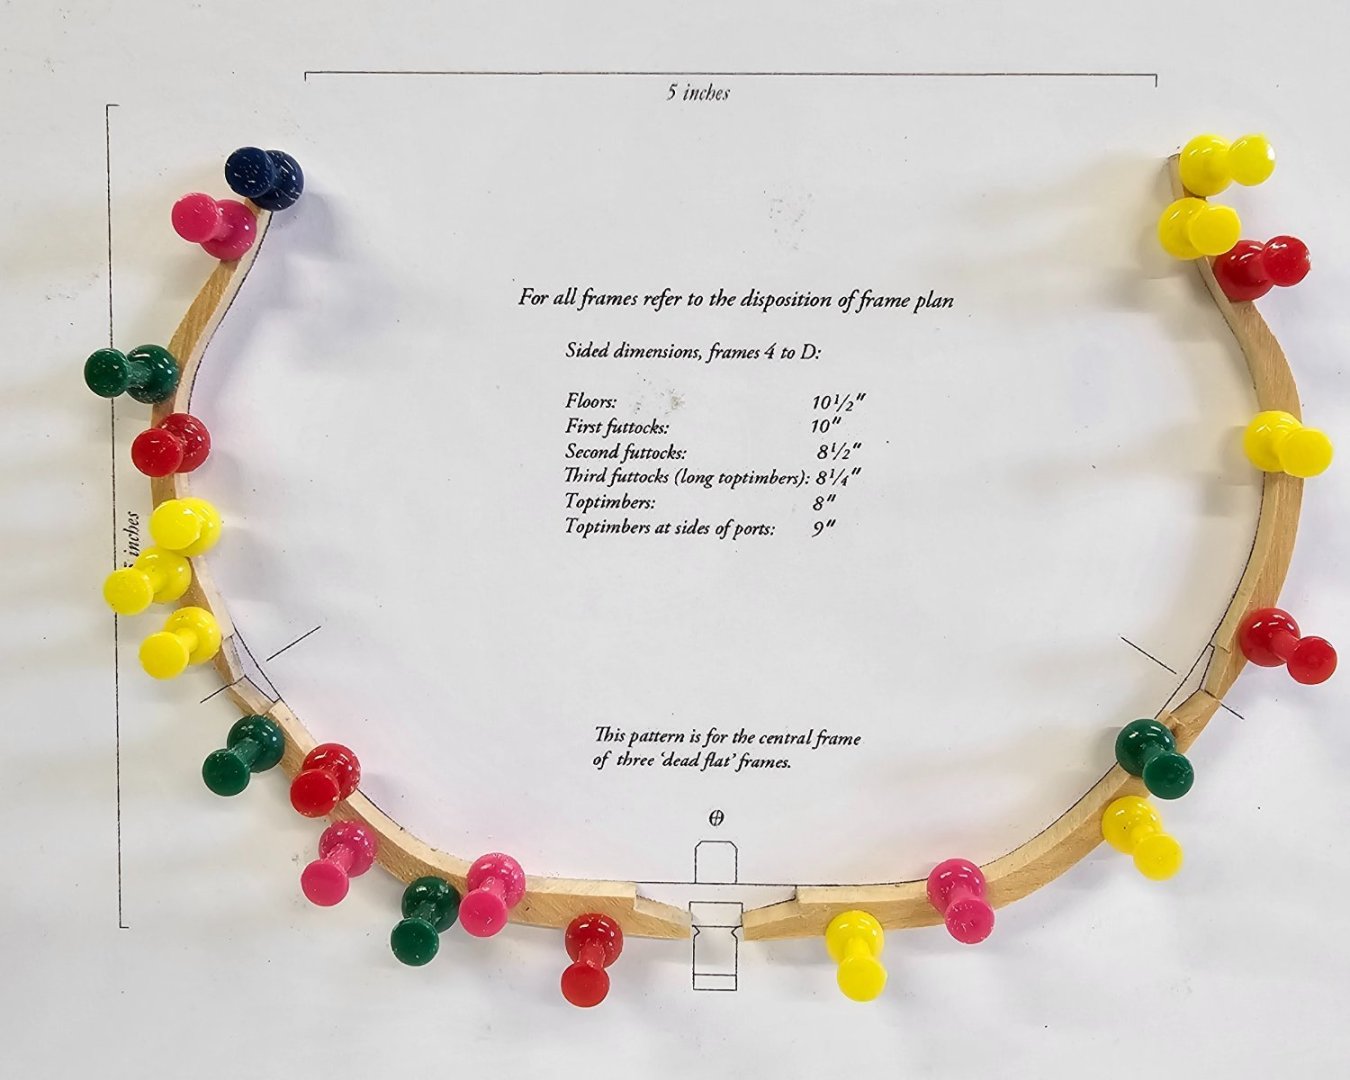
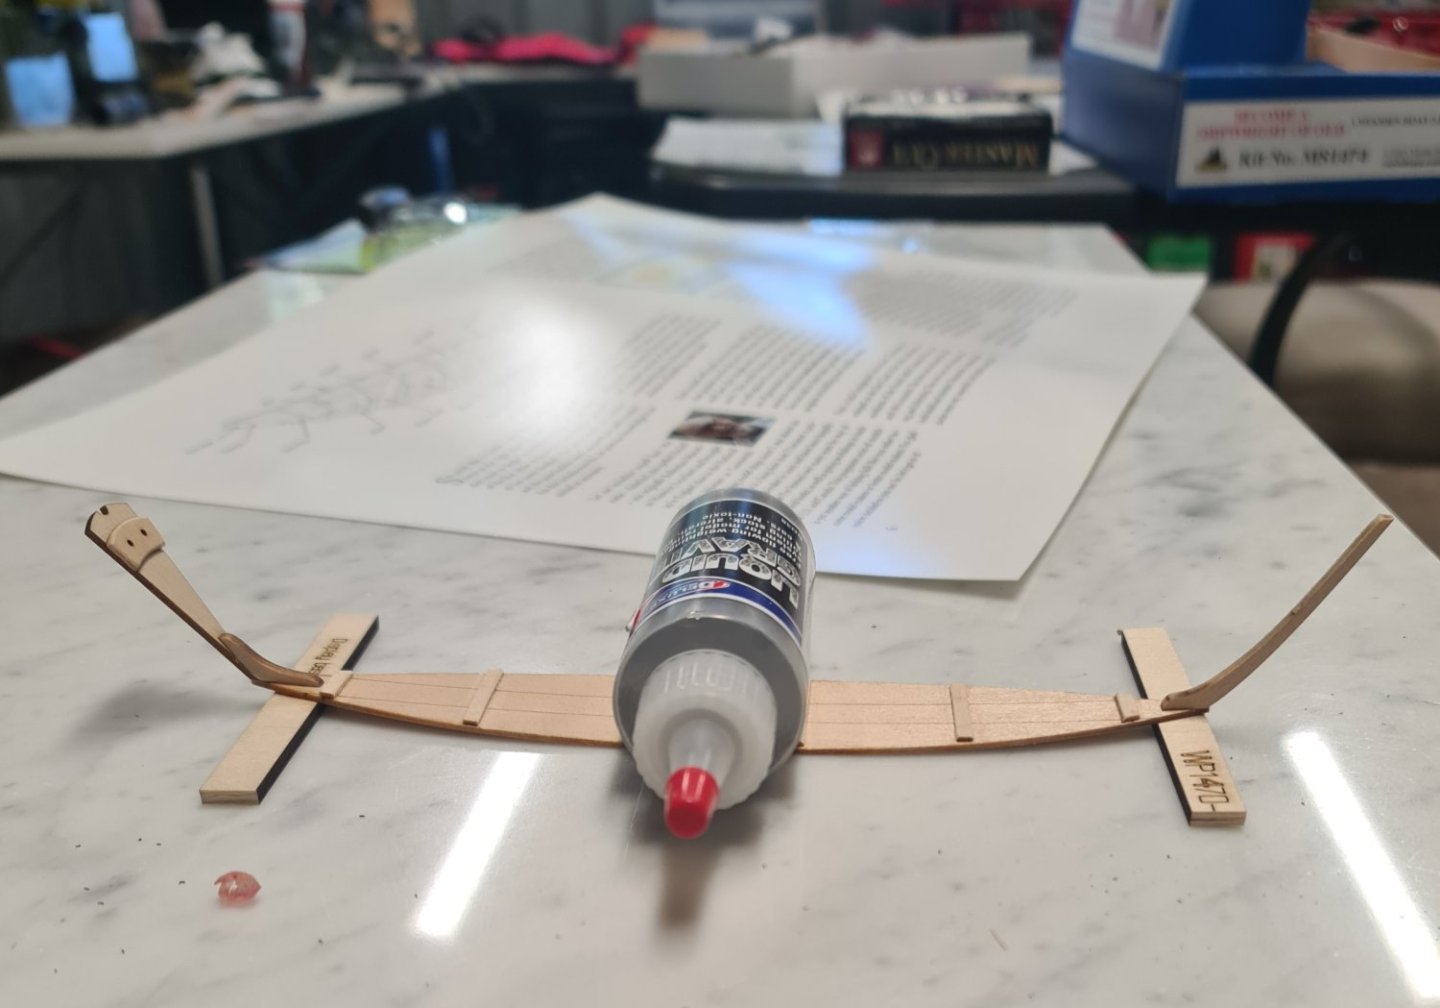
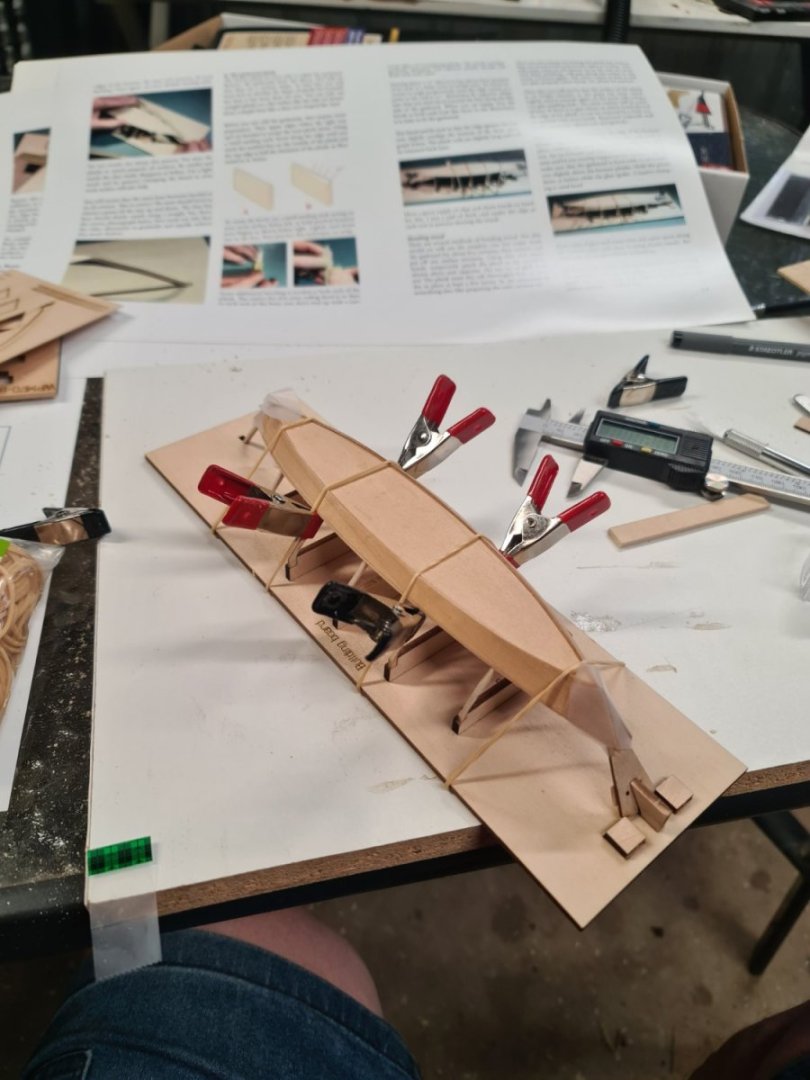
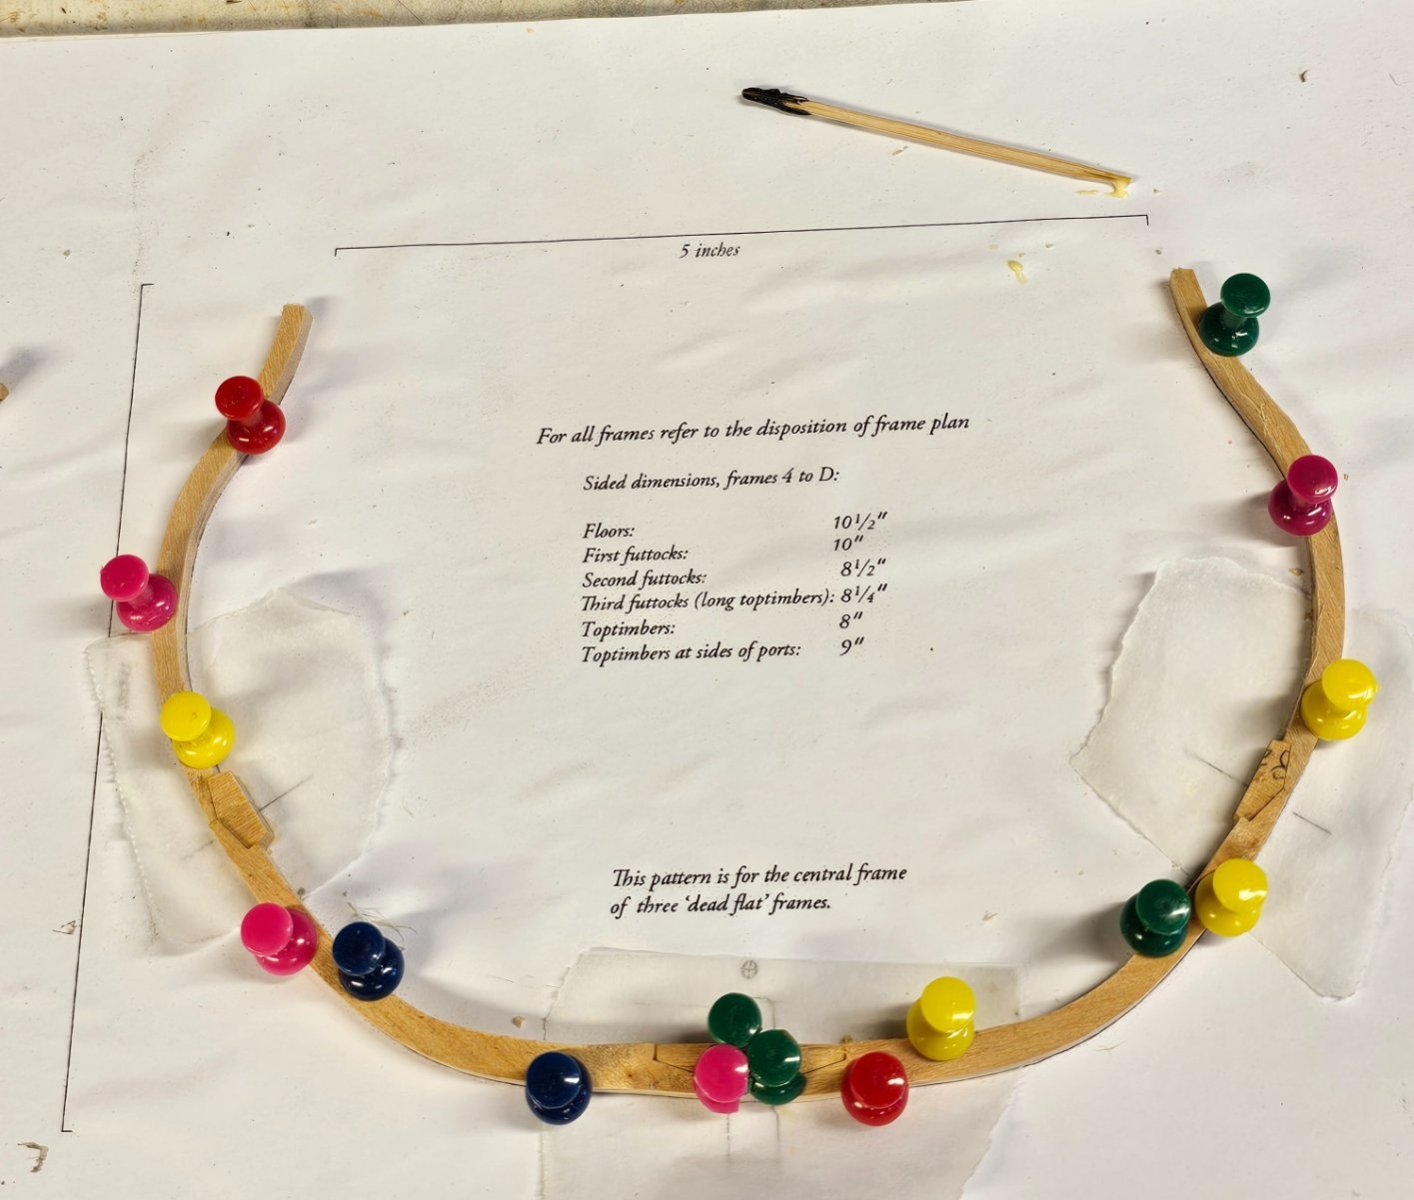
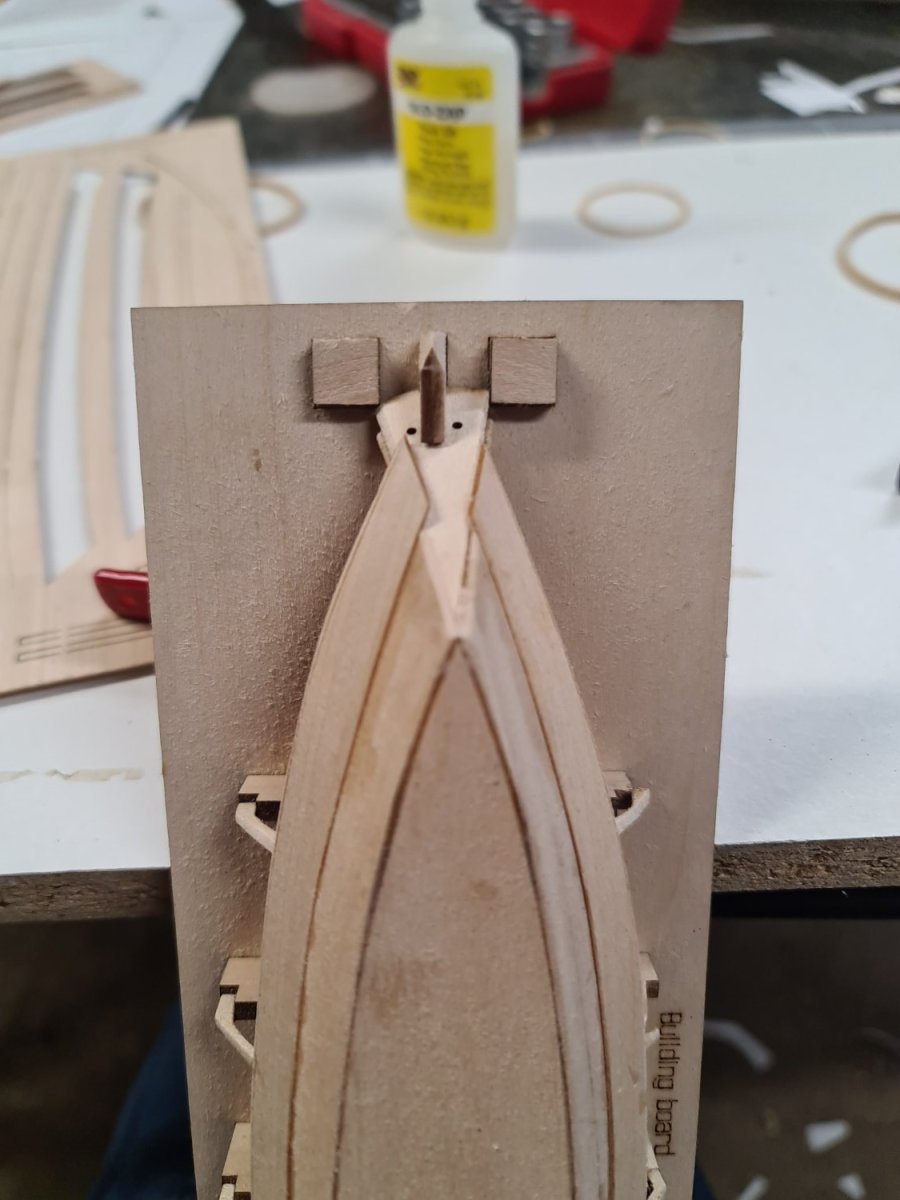
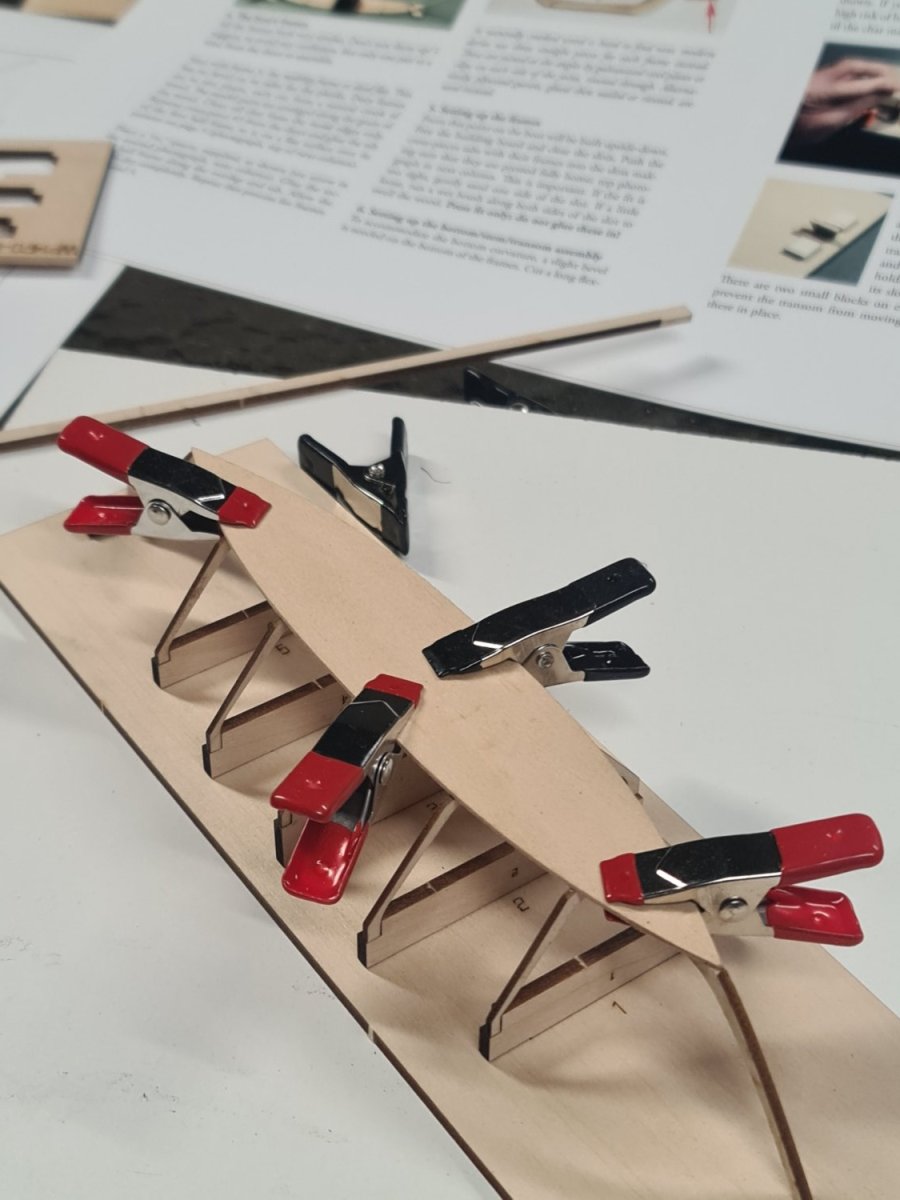
These are only sitting in place. Not fixed but just to illustrate the issue. The middle on was done around 6 weeks ago. The other two within the last two days.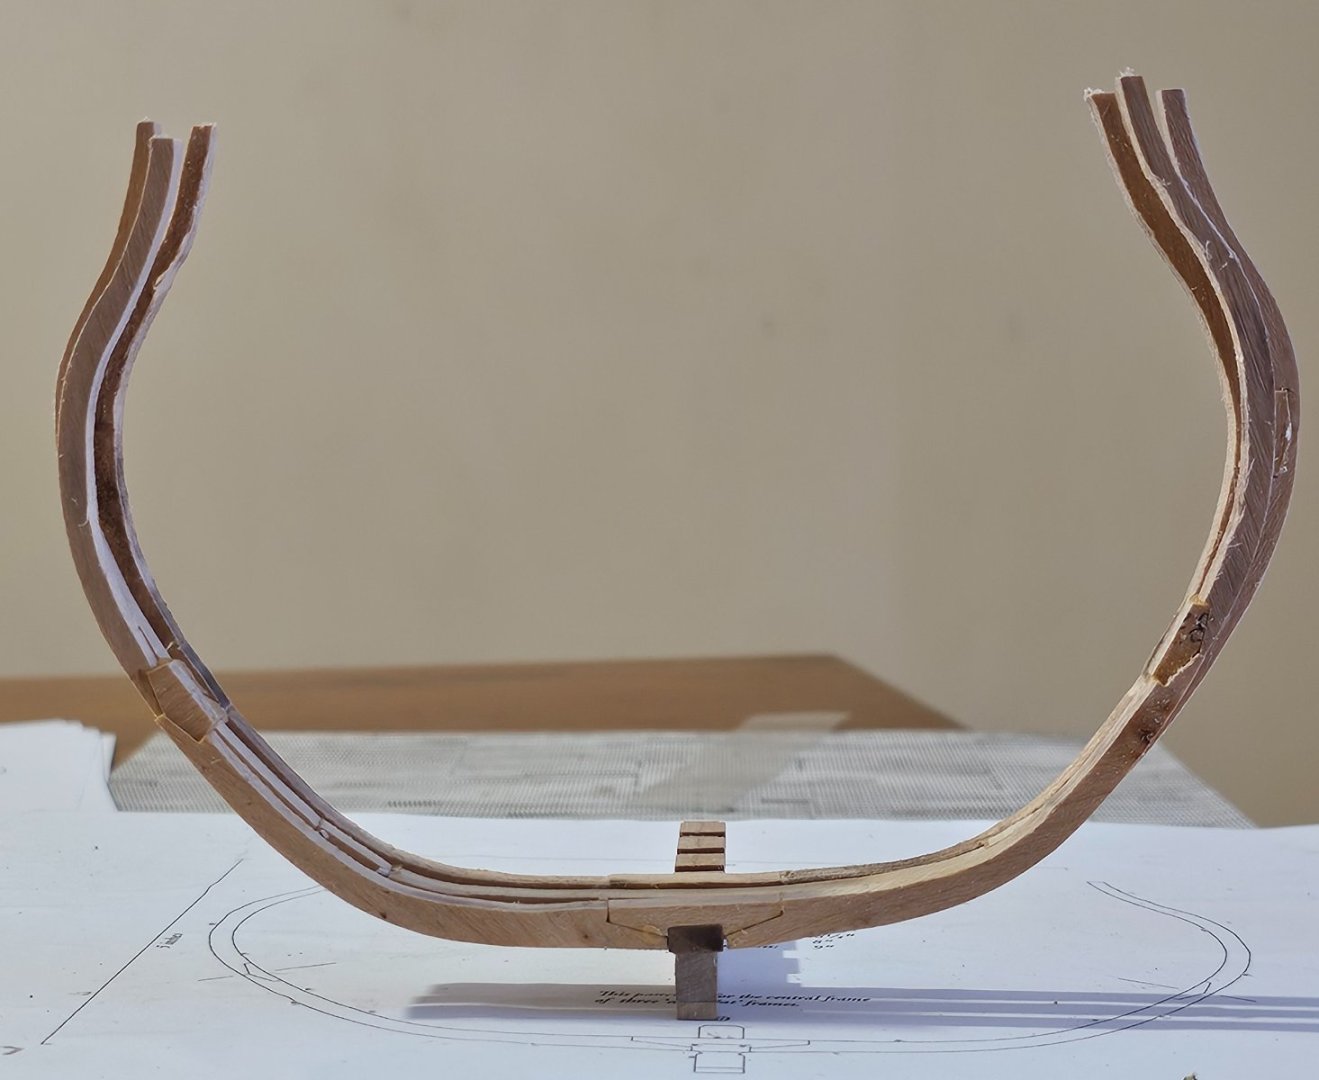
- ccoyle, GrandpaPhil, JpR62 and 2 others
-
 5
5
-
Afternoon all.
After a layoff of around 6 weeks due to xmas, these last few days had me remaking the dead flat on my HM Sloop Echo cross section. I made the dead flat #1 6 weeks ago. I have distortion of the 6 weeks old frame. I did not seal it it occurs to me. Should I do that when it is made and assembled?
I describe the issue further here.Thank you.
-
After a break of around 5 - 6 weeks, I resumed making frames. I needed to remake the dead flat. The dead flat #1 fit well and so was going to keep it.
After making the dead flat again, I spent the last several days gluing it up.
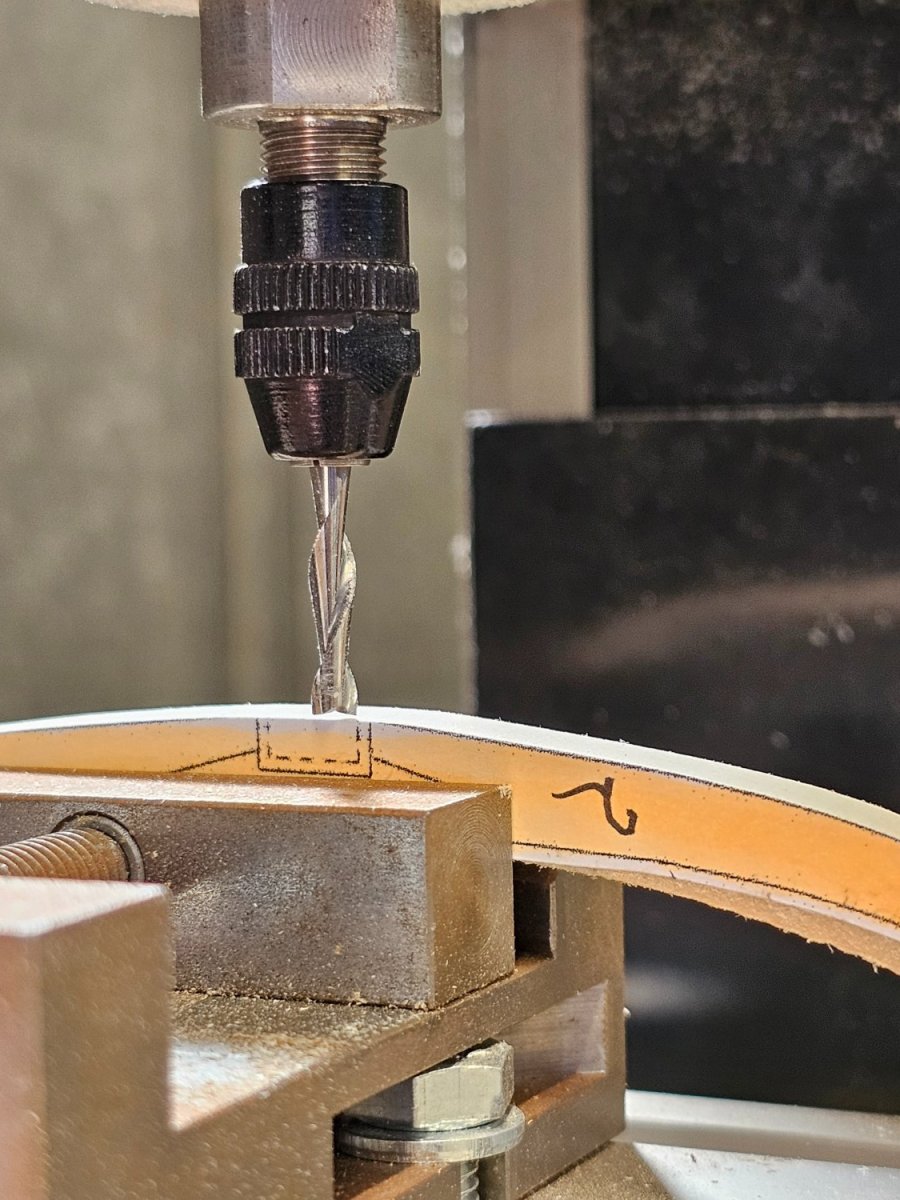
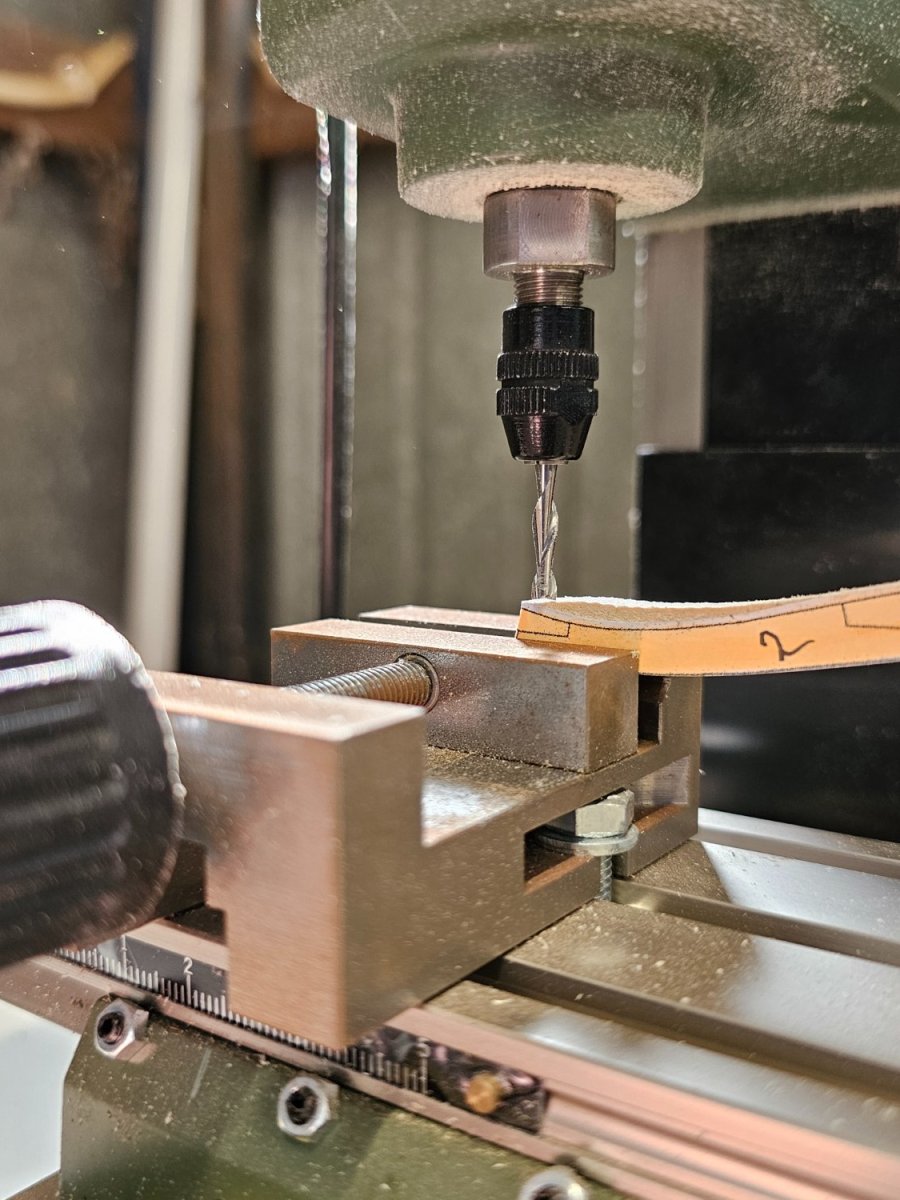
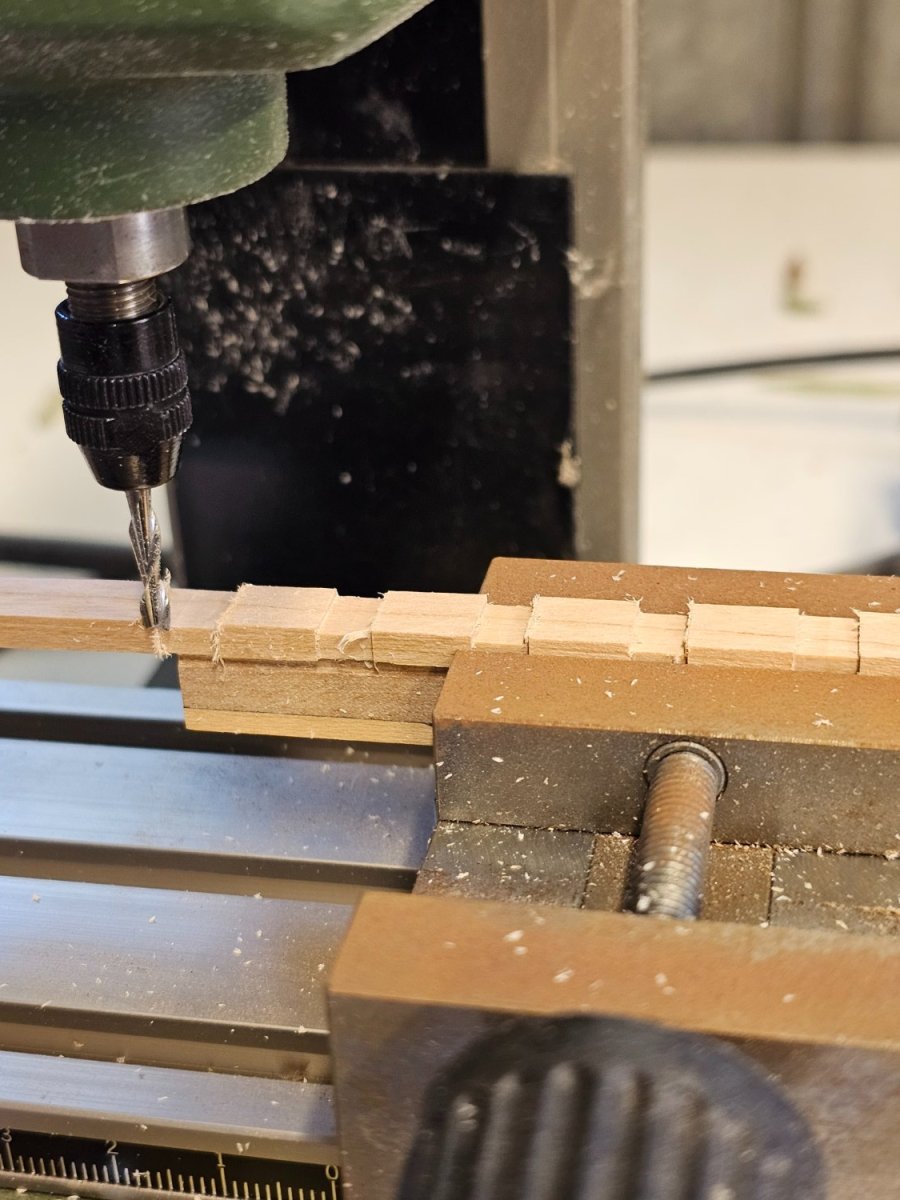
This time, I use my proxxon mill to cut the slots for the chocks. I am able to get square joints now instead of rounded.
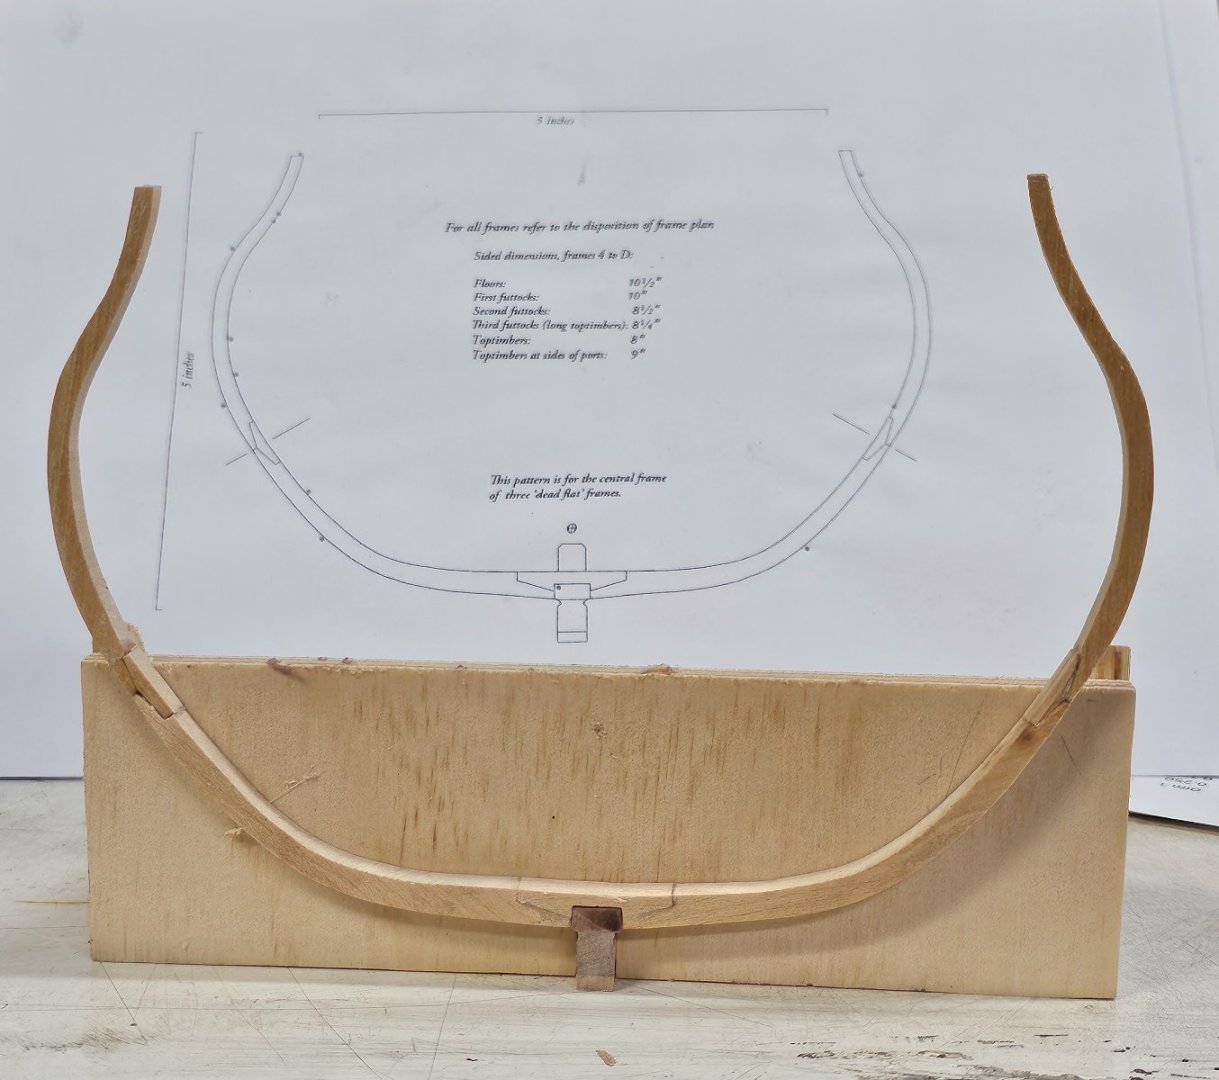
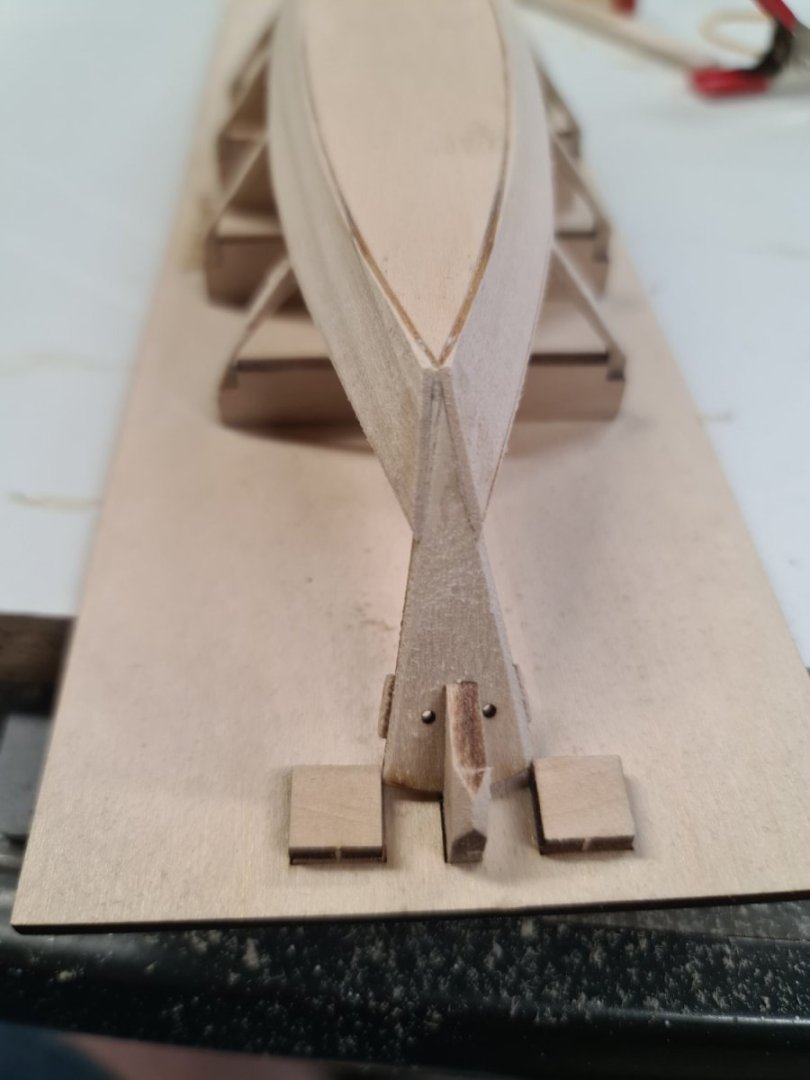
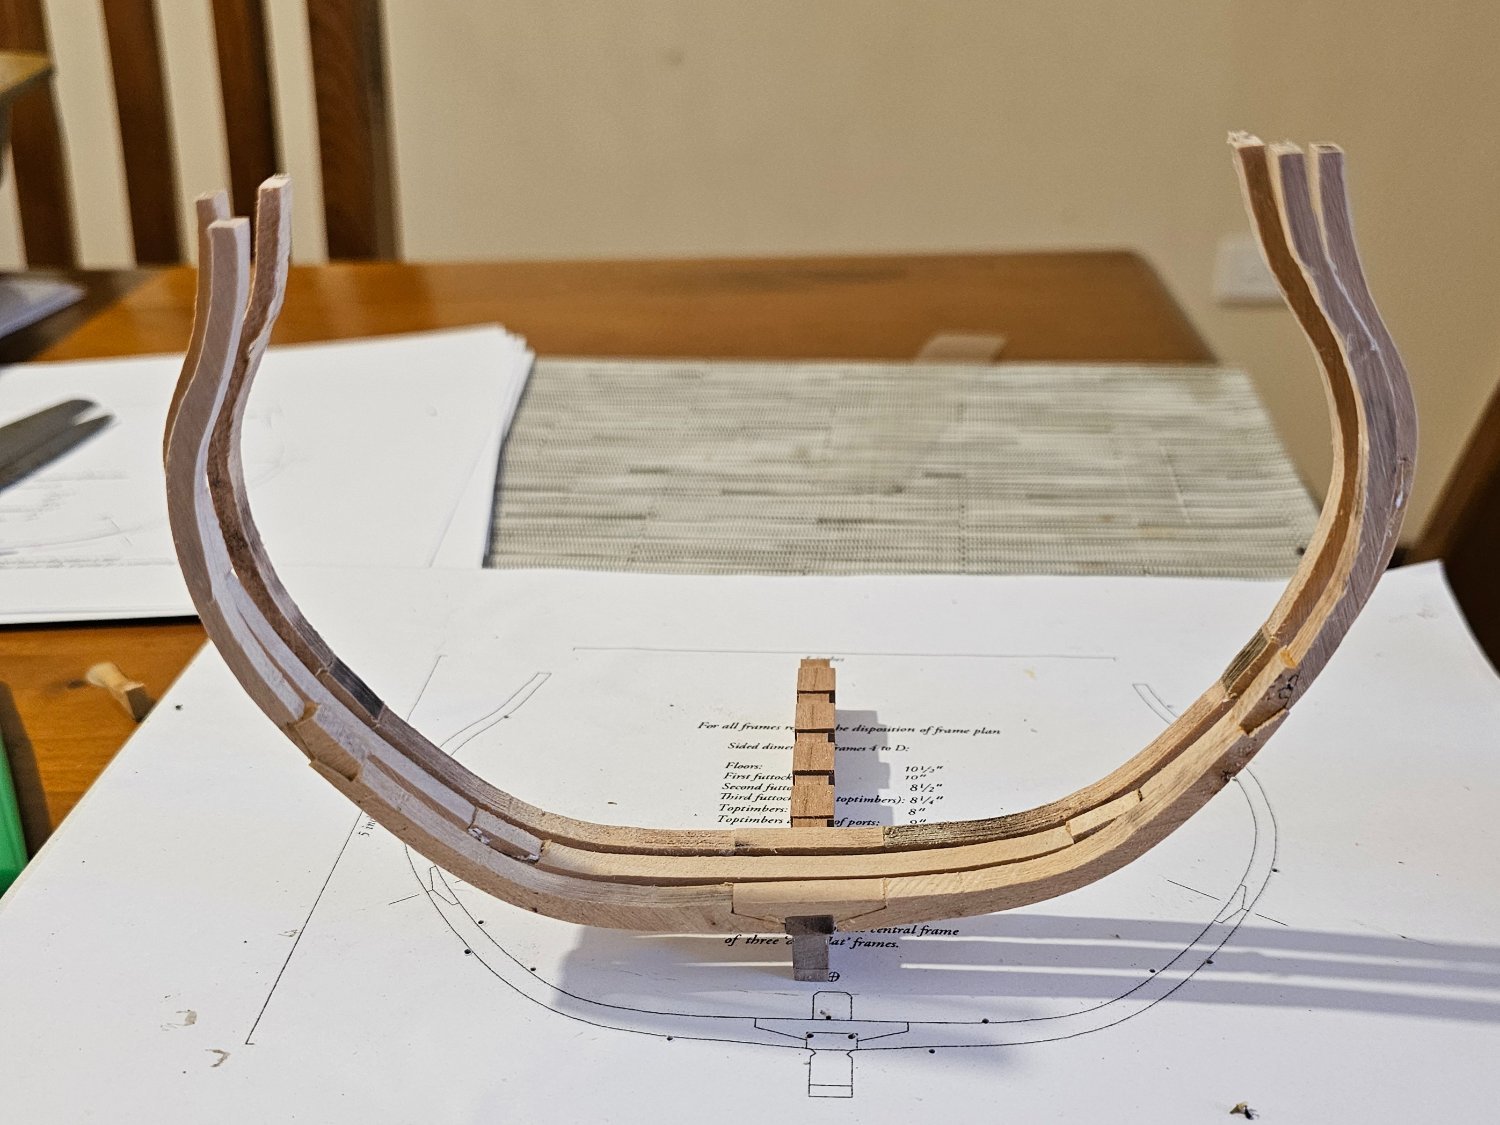
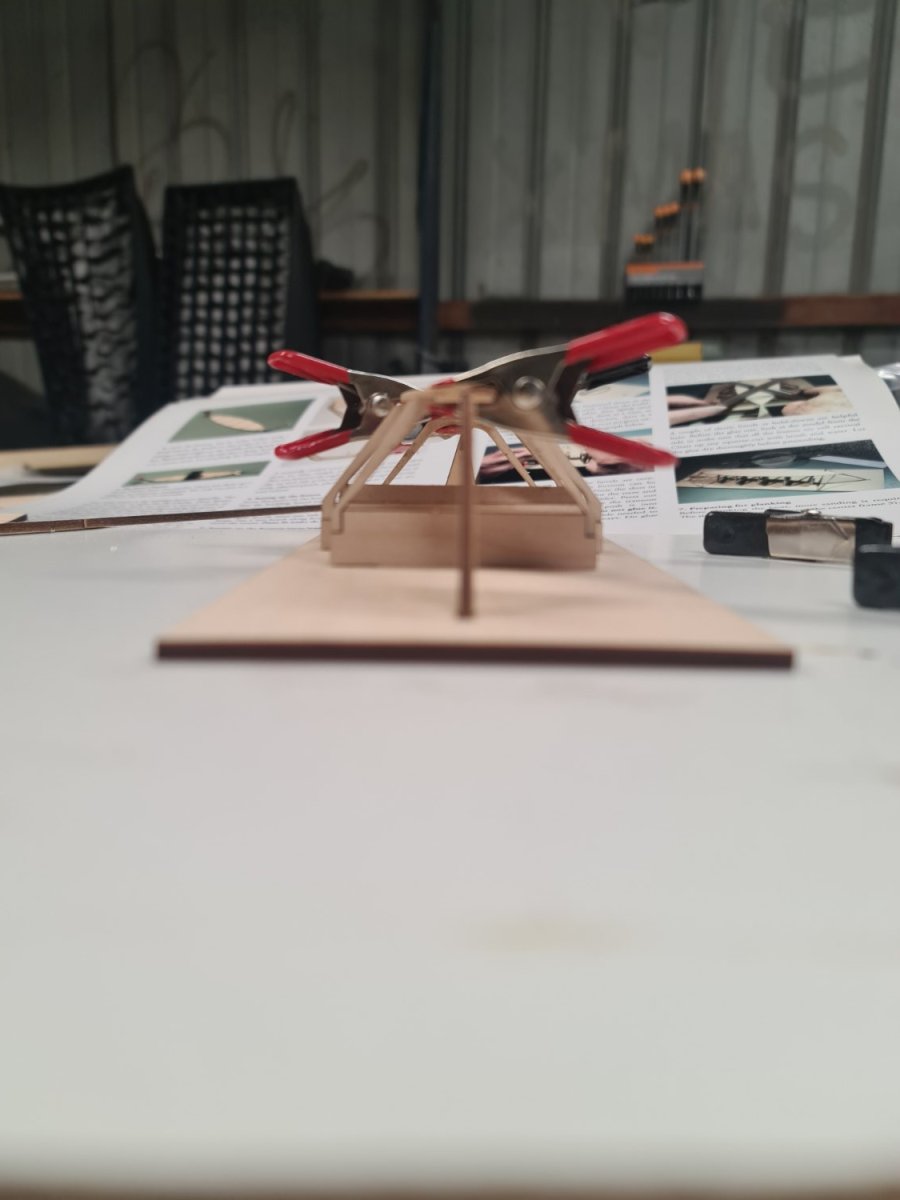
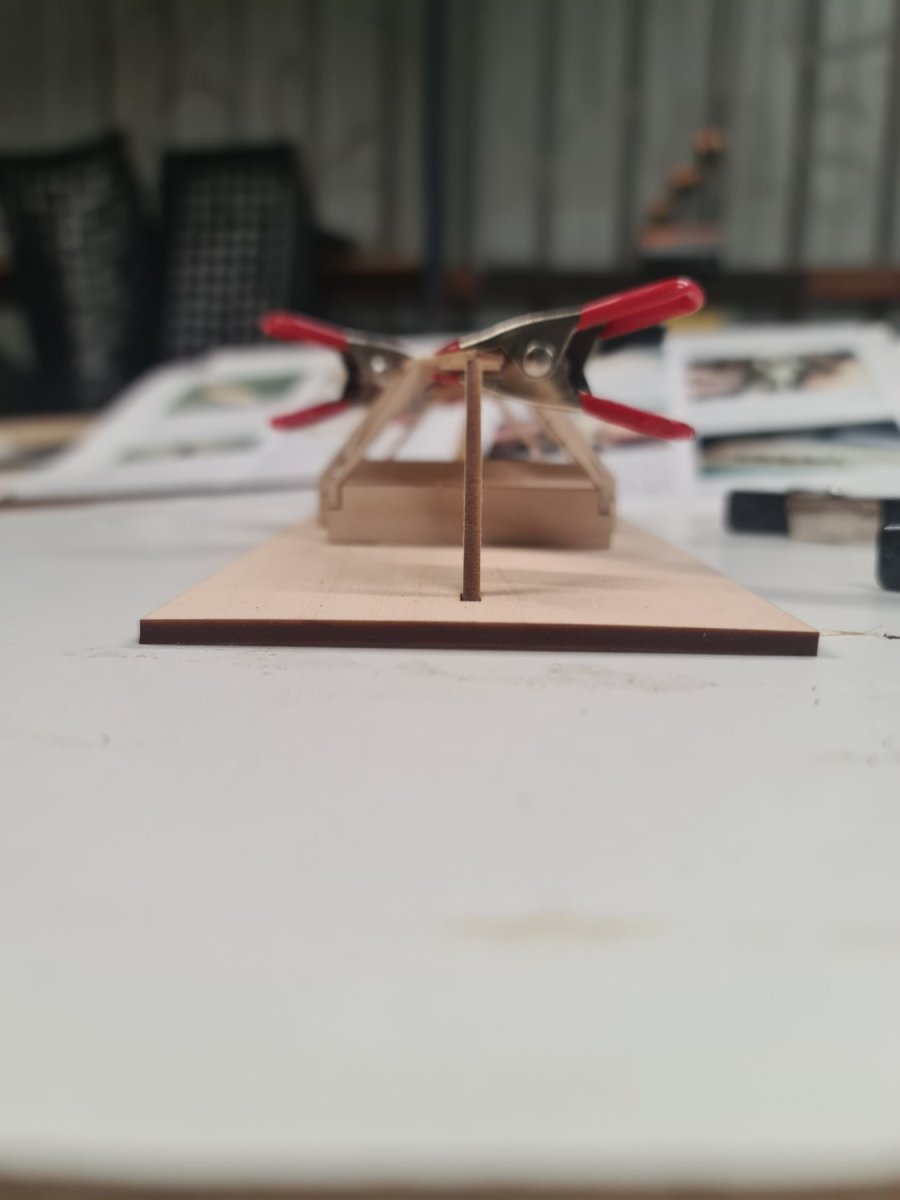
After I removed it from the jig, I placed it on the keel and placed the dead flat #1 on as well to check alignment etc. I was surprised to see the two were different at the top. After investigating, it seems the dead flat #1 has the top timbers moved outwards. If I spring them in around 1/4" each side, they fit the dead flat # 1 template.
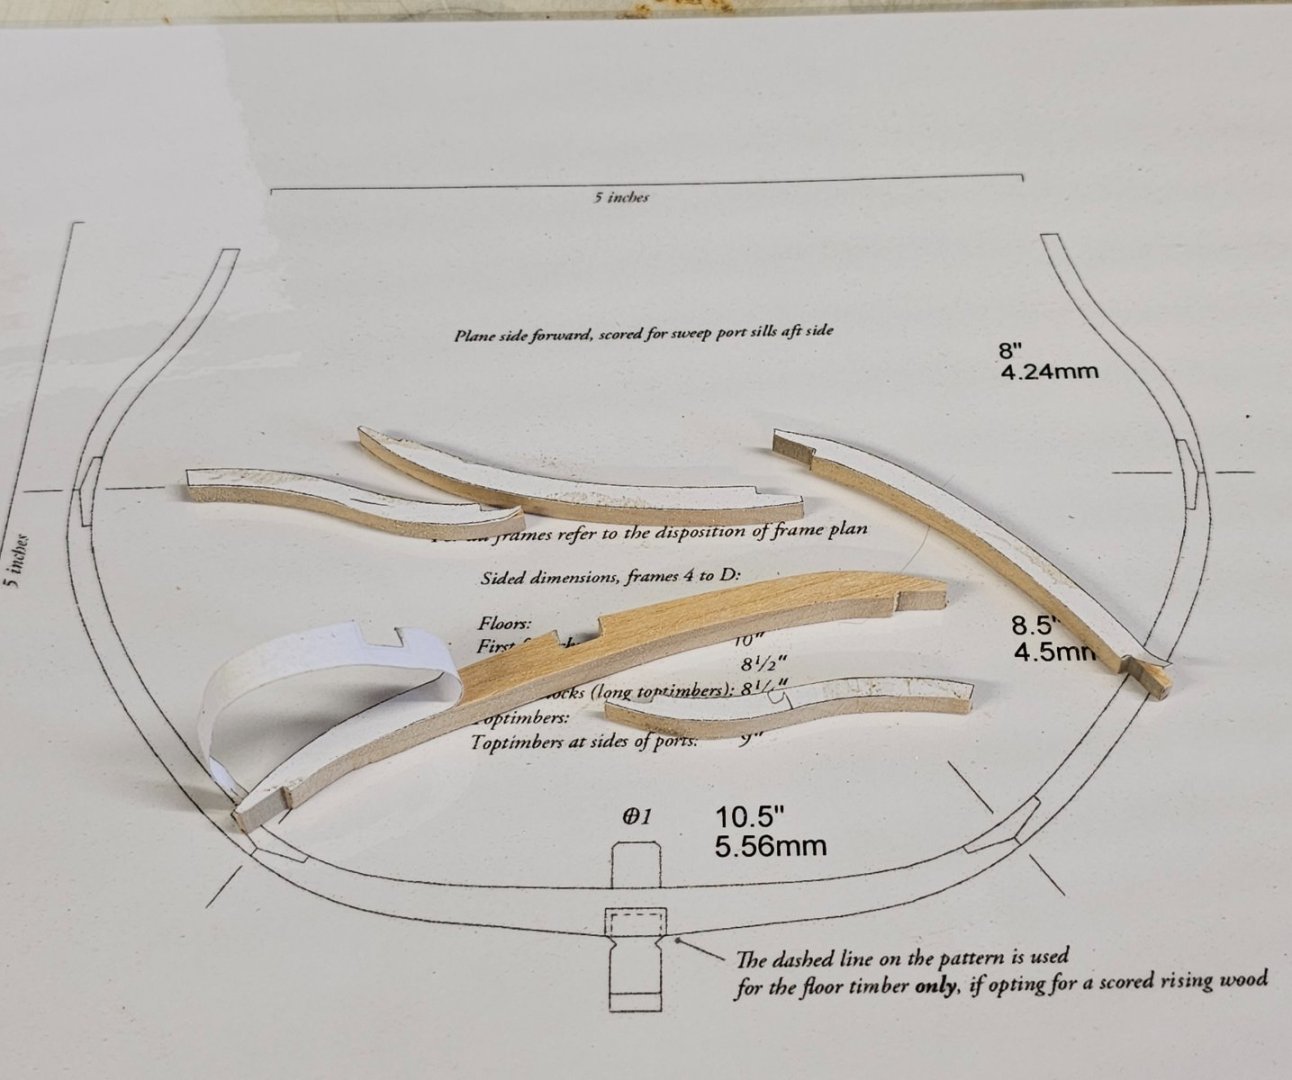
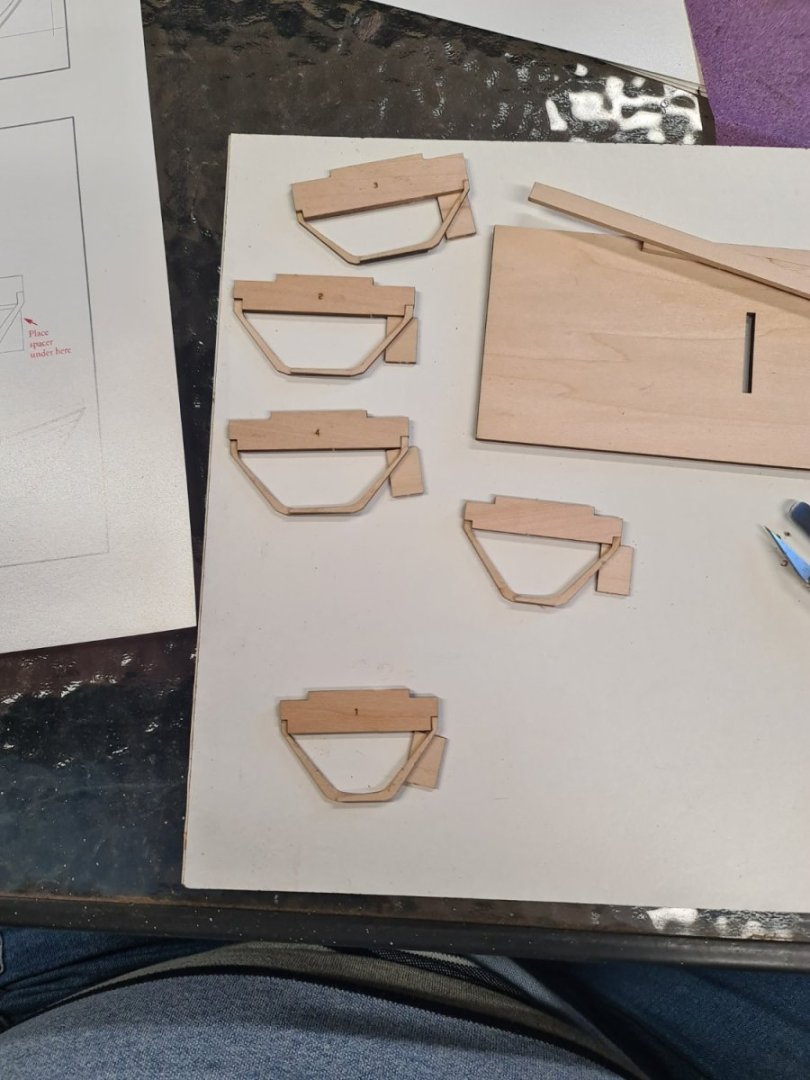
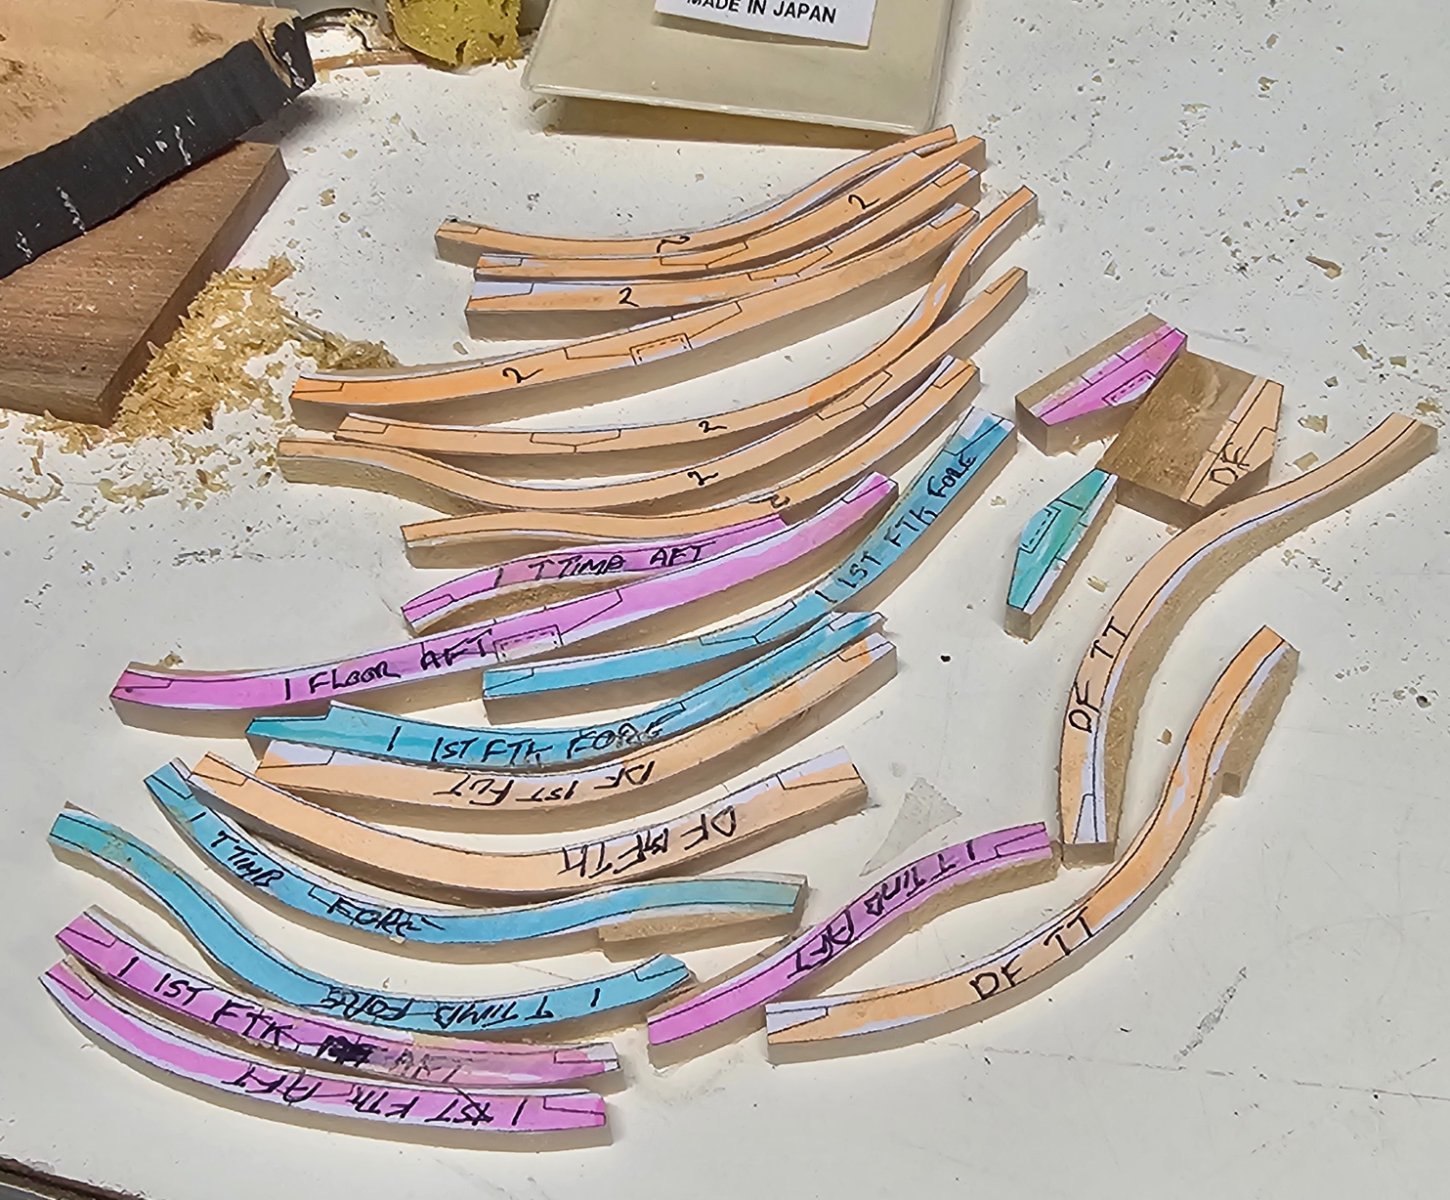
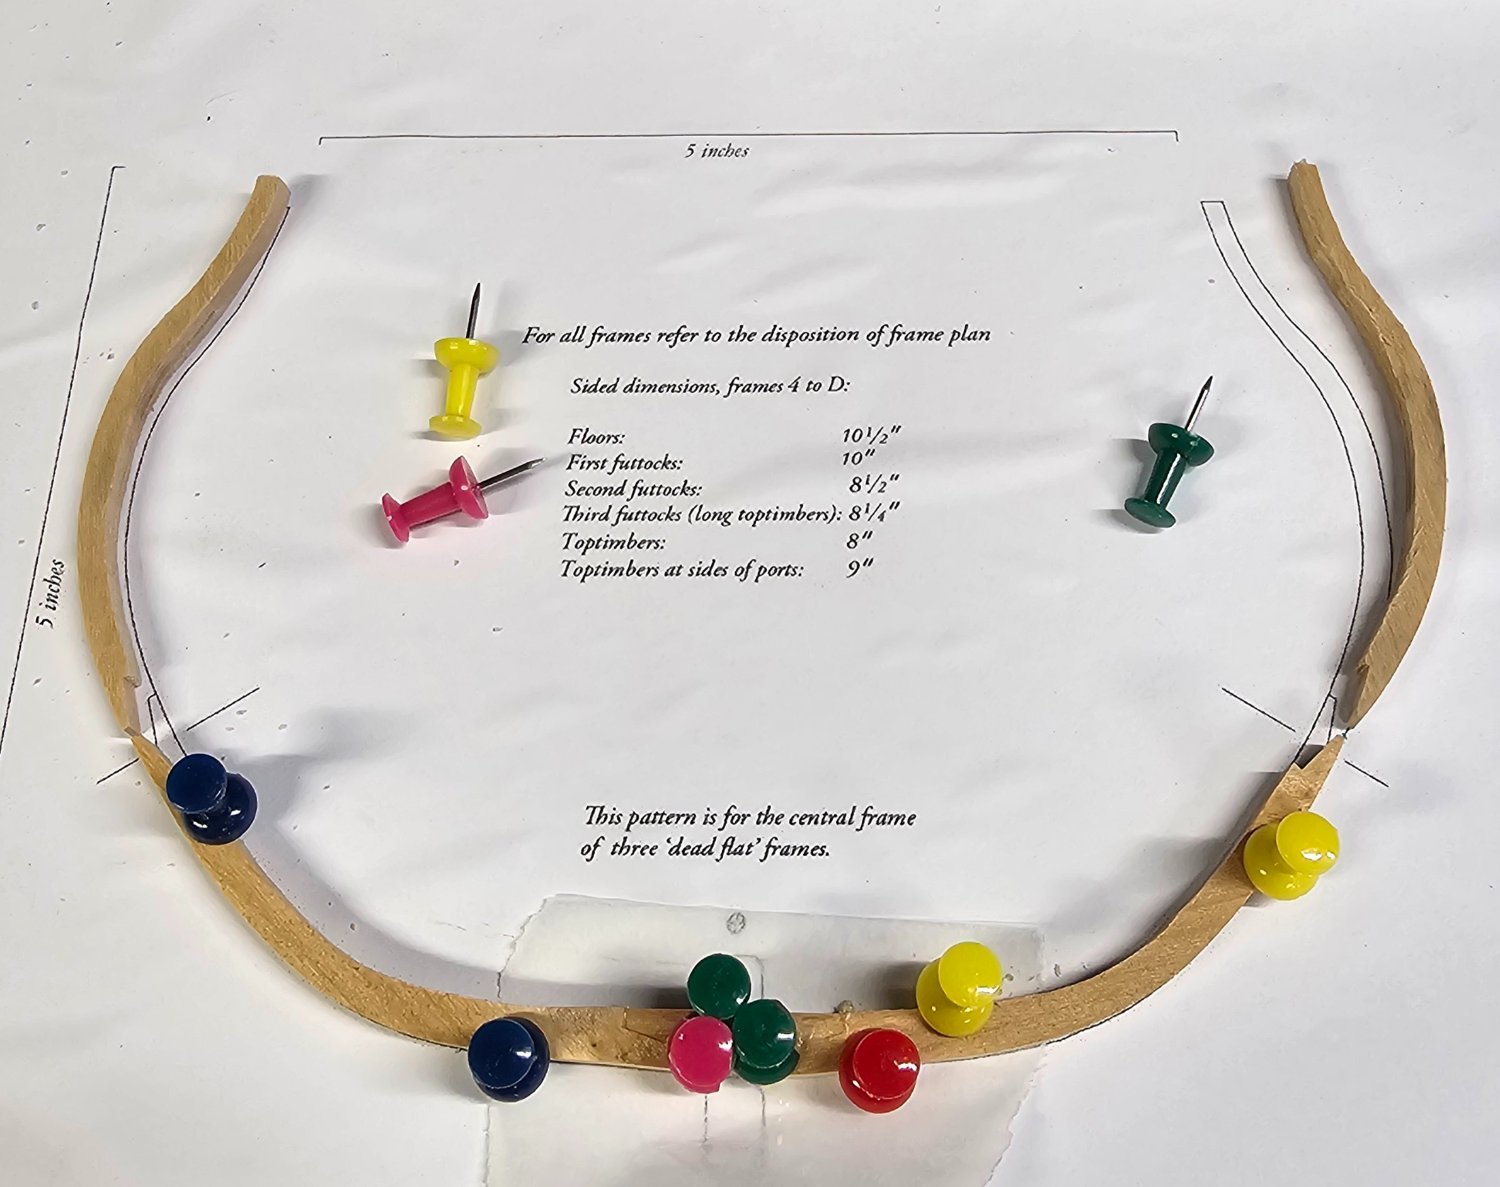
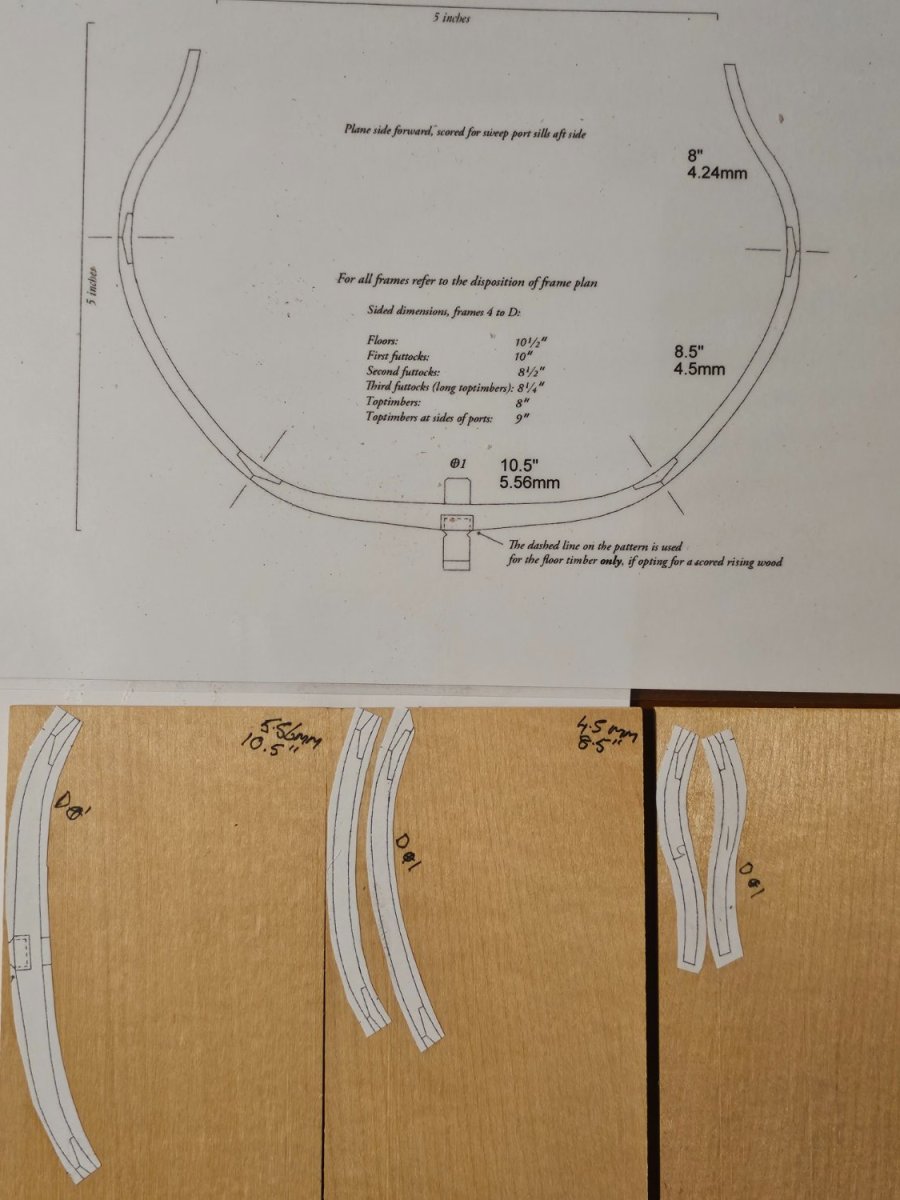
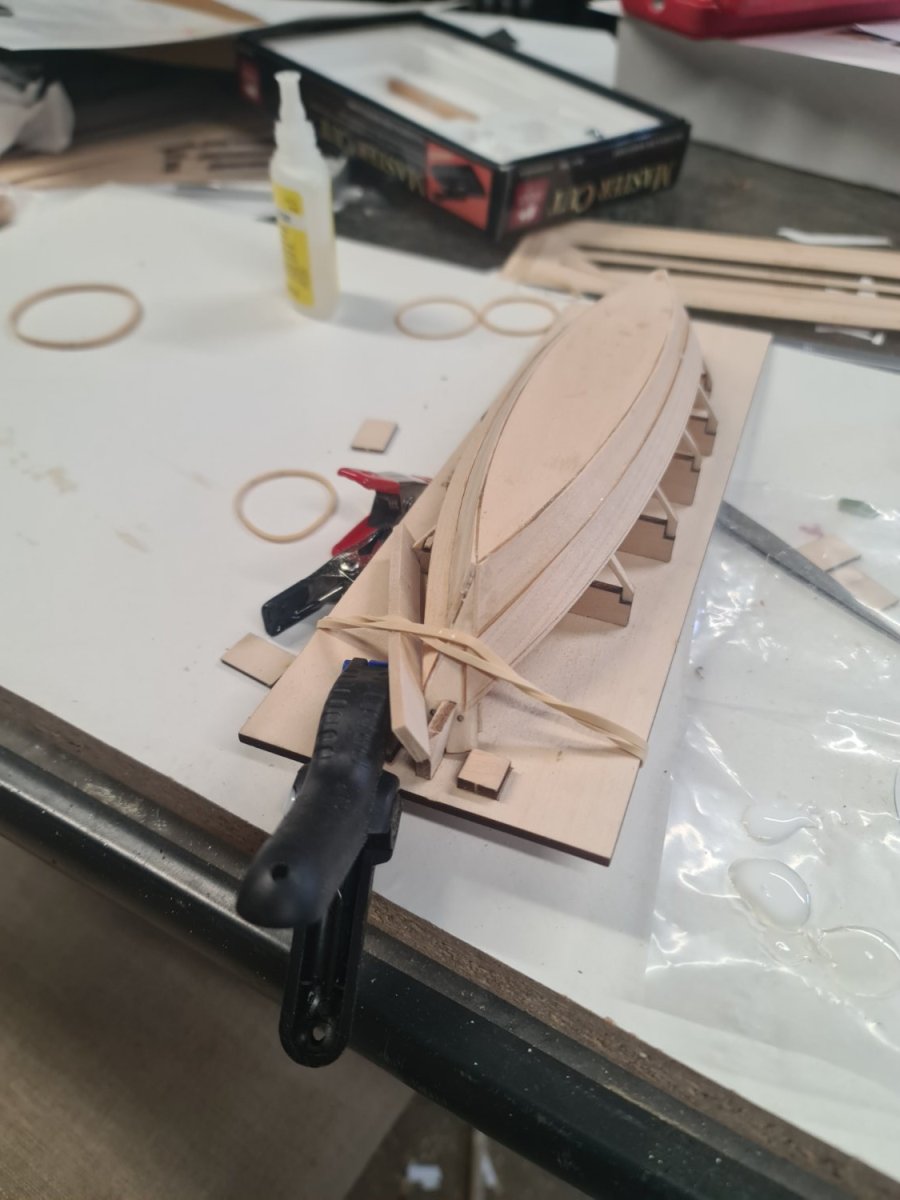
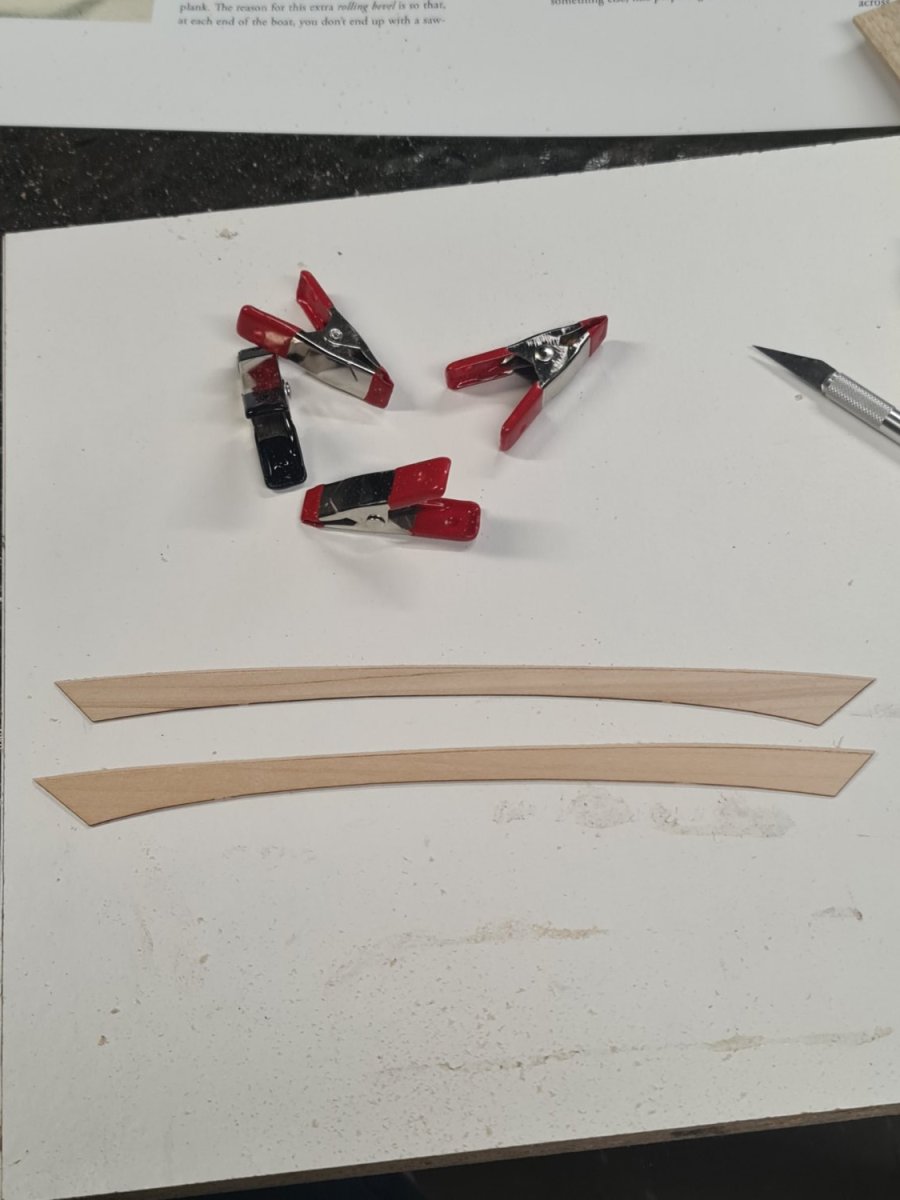
My workshop is in a garage which is not air conditioned. In South Australia it can get warm in the shed as well as cold in the winter. Any ideas how I can avoid this issue occurring over the 12 frames I need to construct? Elastic bands or hold downs of some sort to be applied to the top timbers as each frame is made? Bring each frame inside the main house once completed?In the 1st image, is having this many cut out likely to cause issues if I do not get to them all straight away?

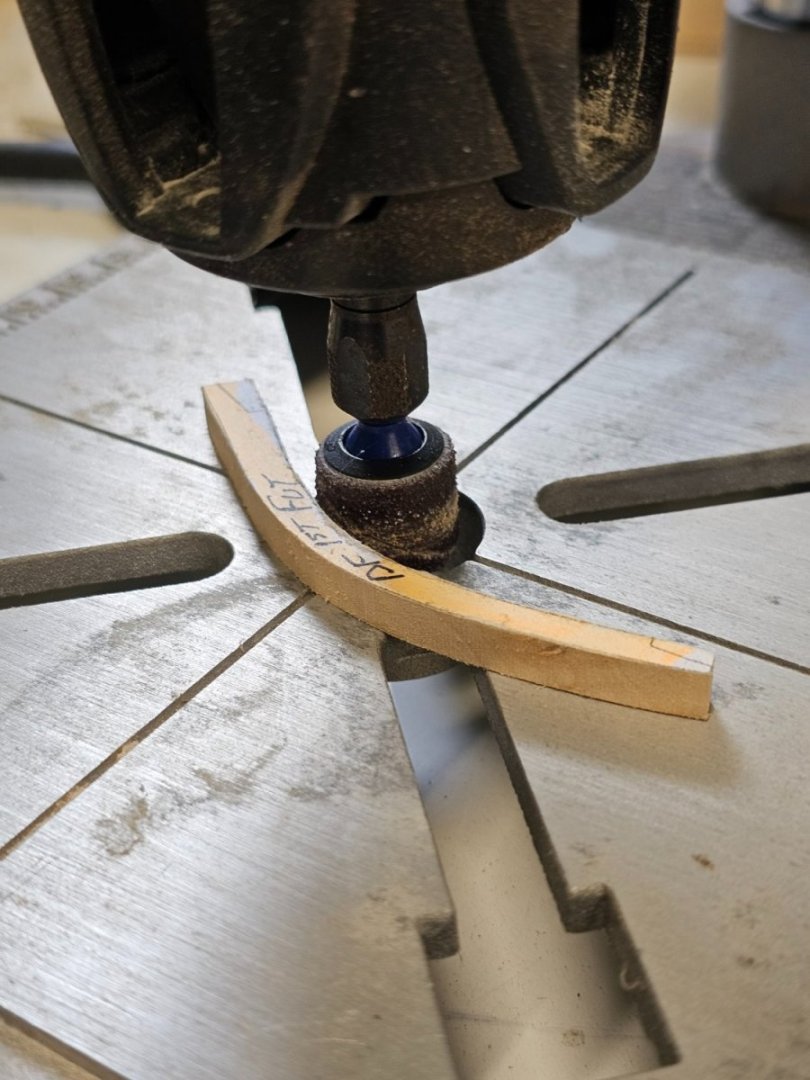
I realised I could you my dremel and stand to help me sand the inside faces of the futtocks.
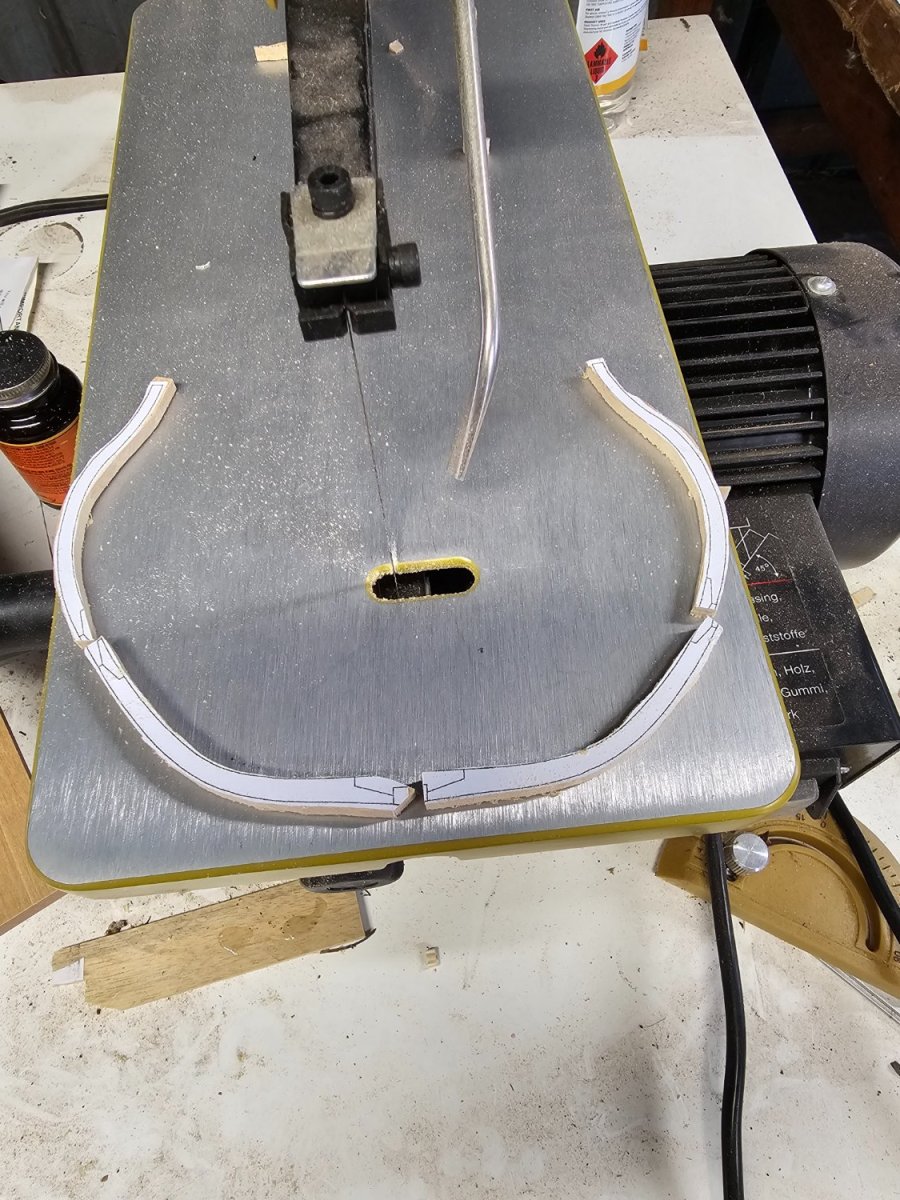
I now use my proxxon mill to cut the slots out. The cuts are far better than my manual cuts with a fret saw.


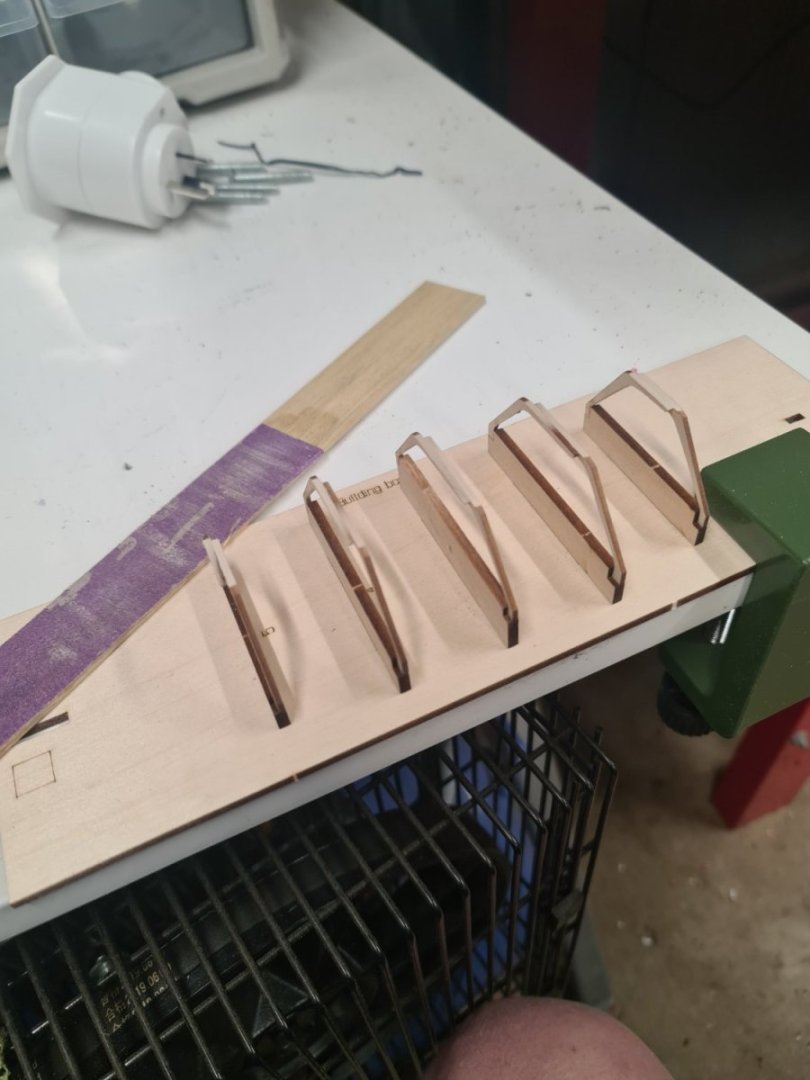
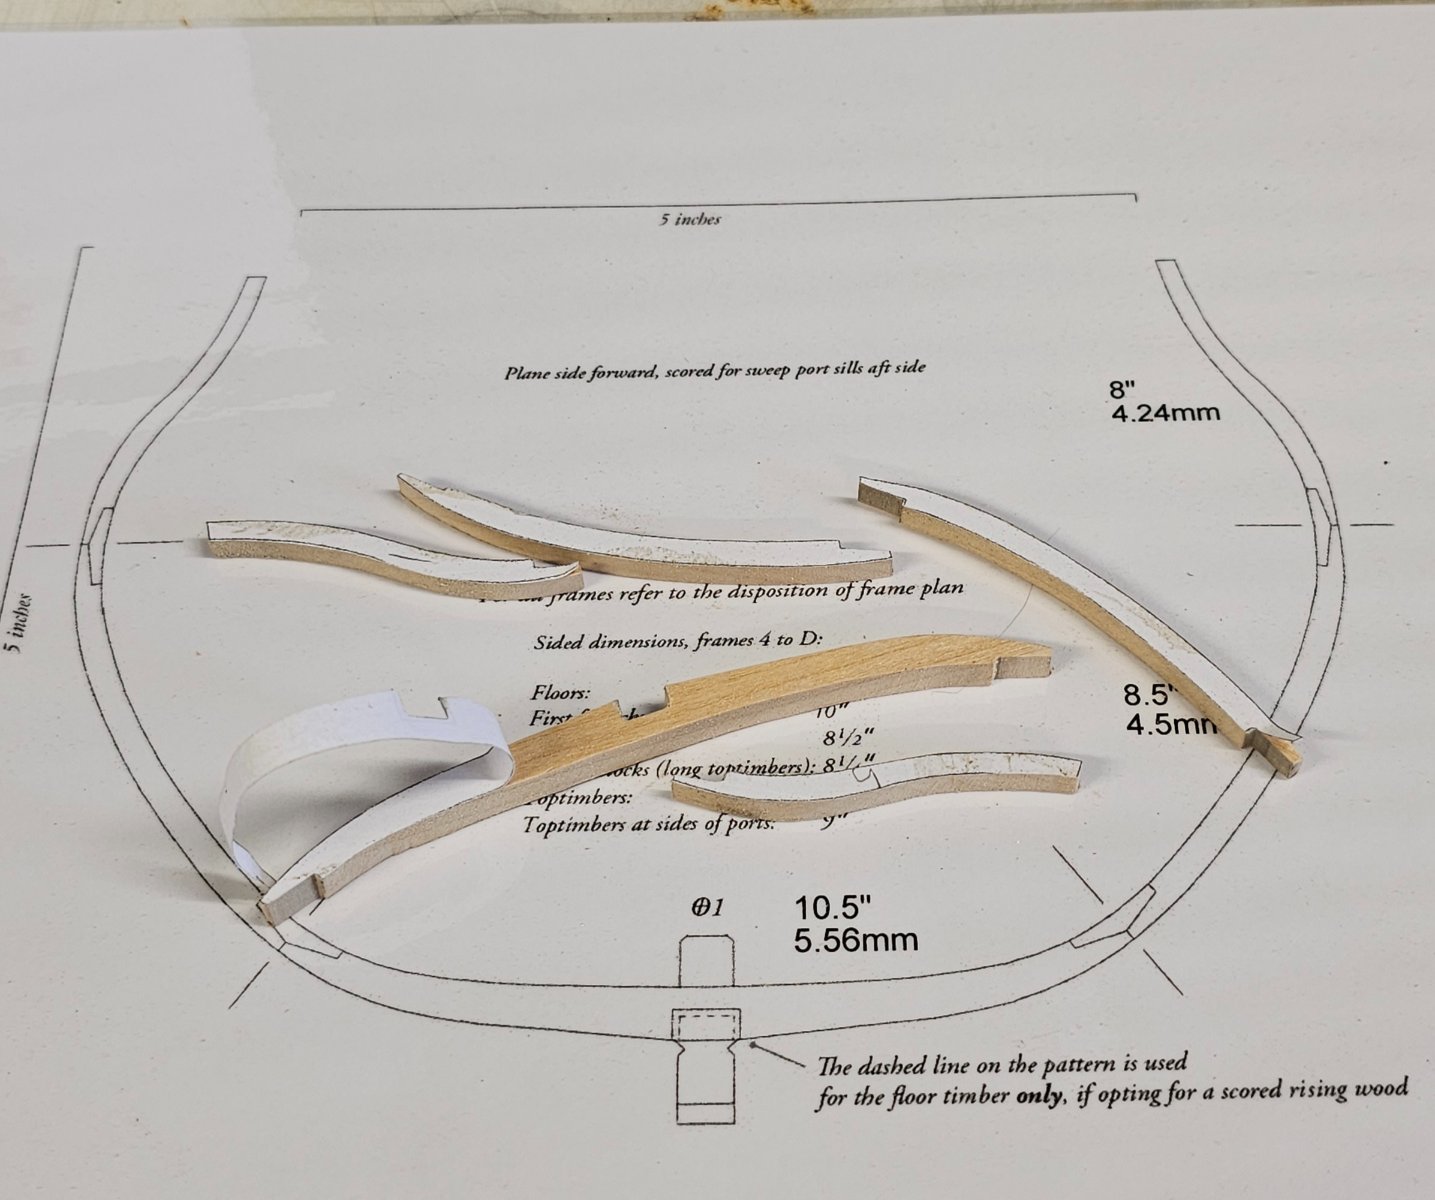
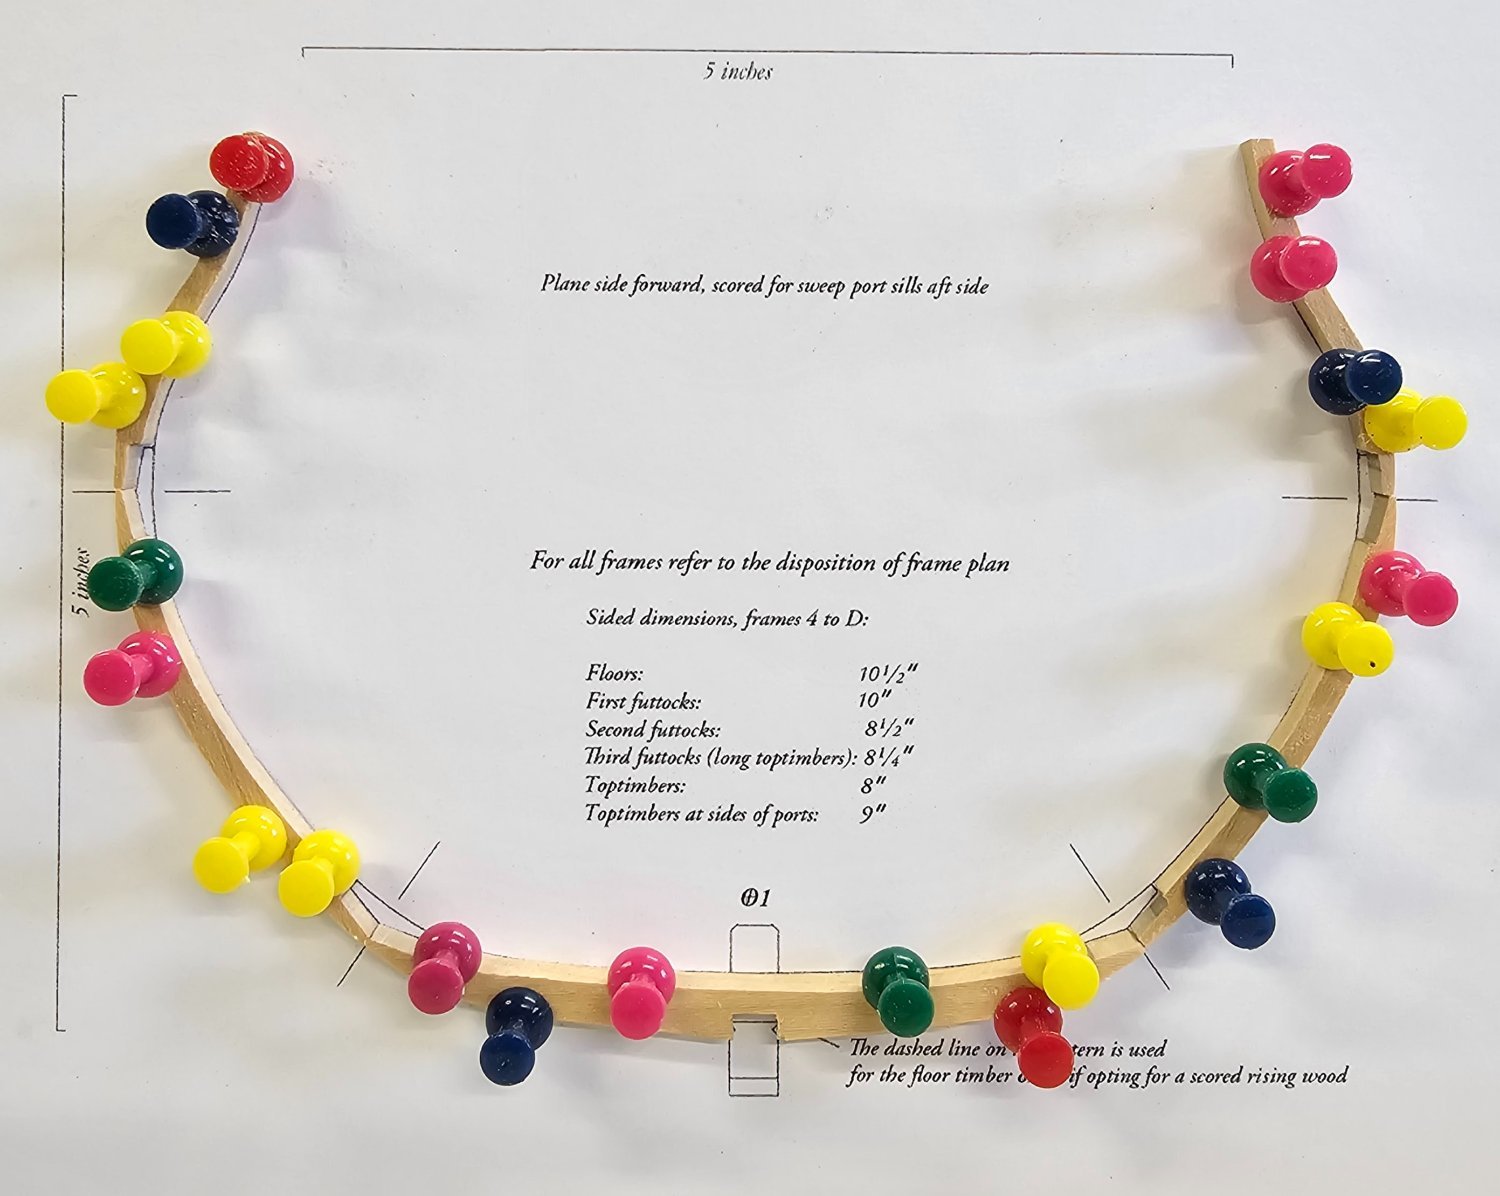
I glued the template of the frame onto 18mm masonite. I then assemble the pieces with wax paper underneath the glued joints. I drill 1.1 mm holes next to the frames and push in 1.15mm pins. These lock the frames whilst gluing up and holds the joints whilst they cure.

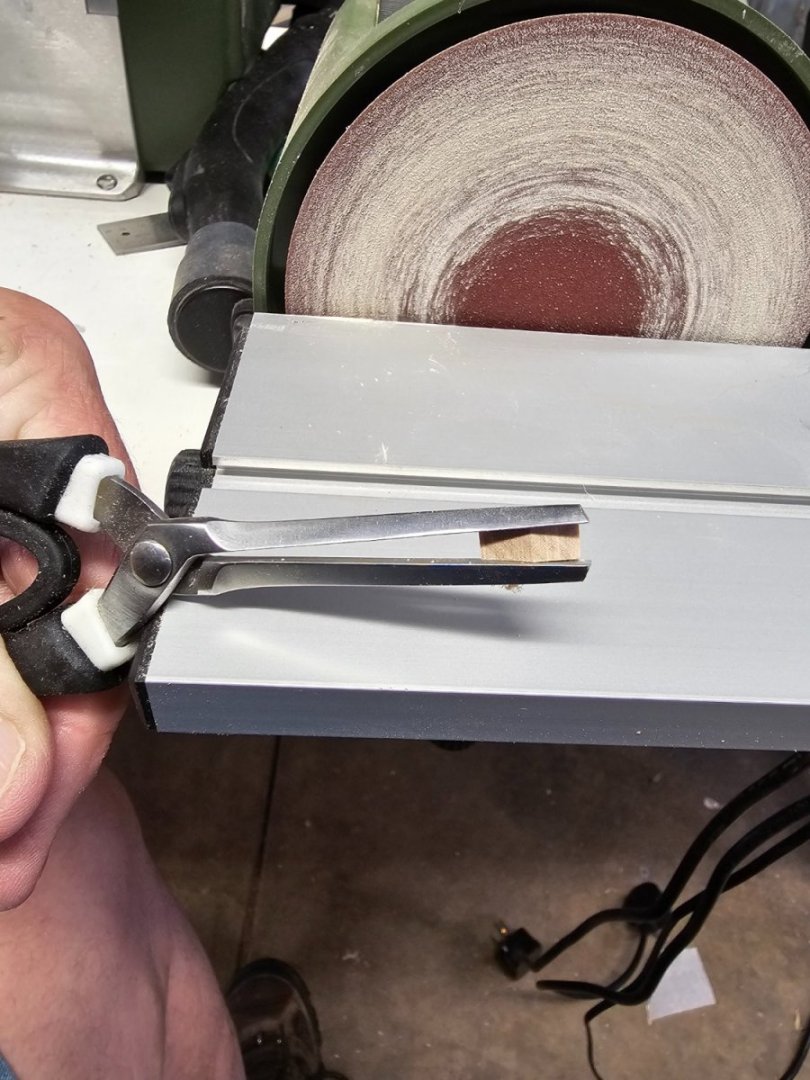
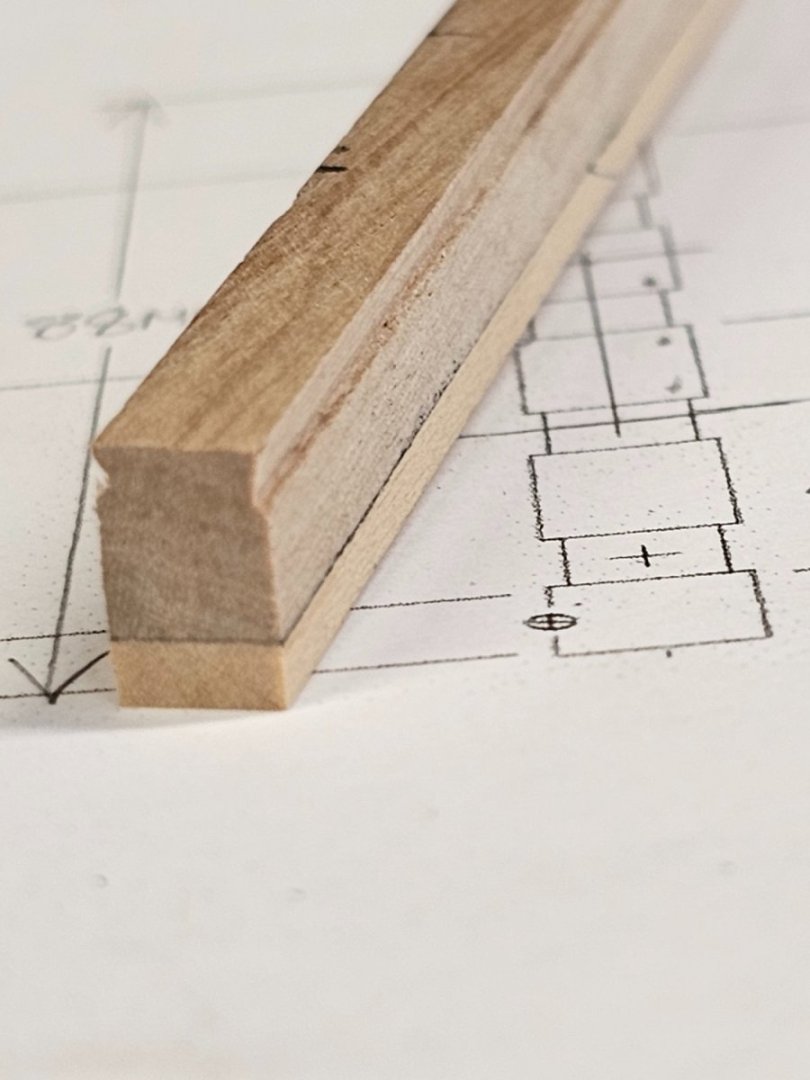
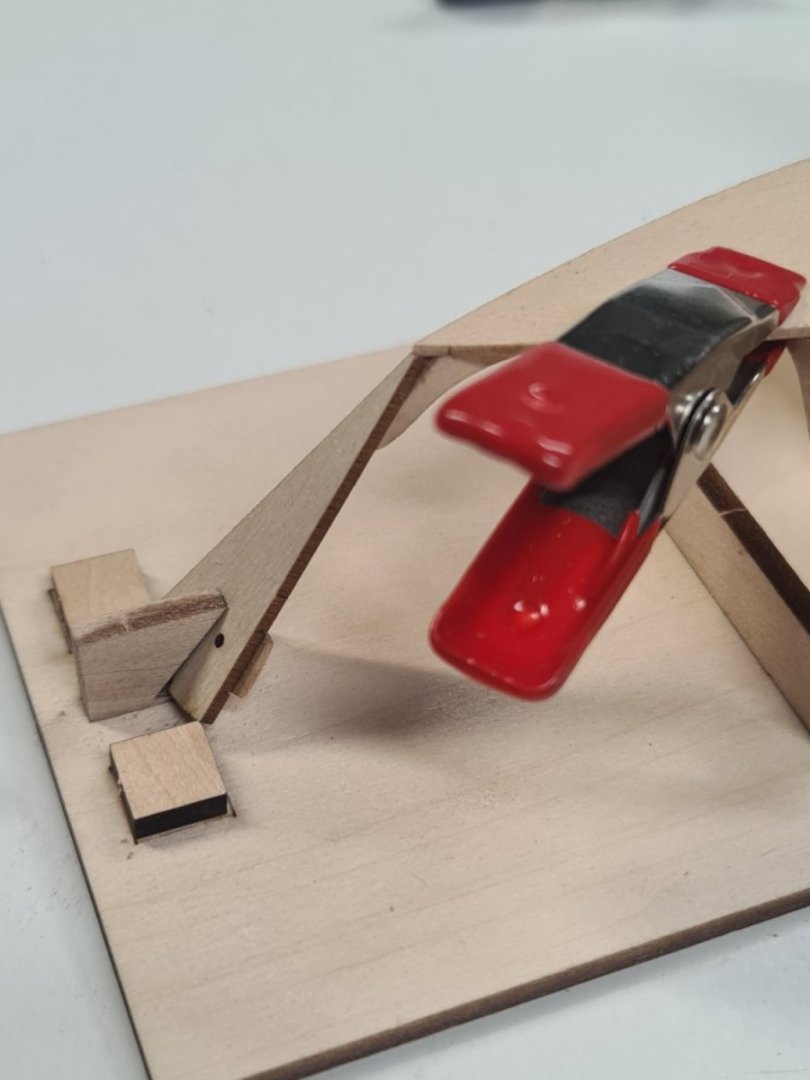
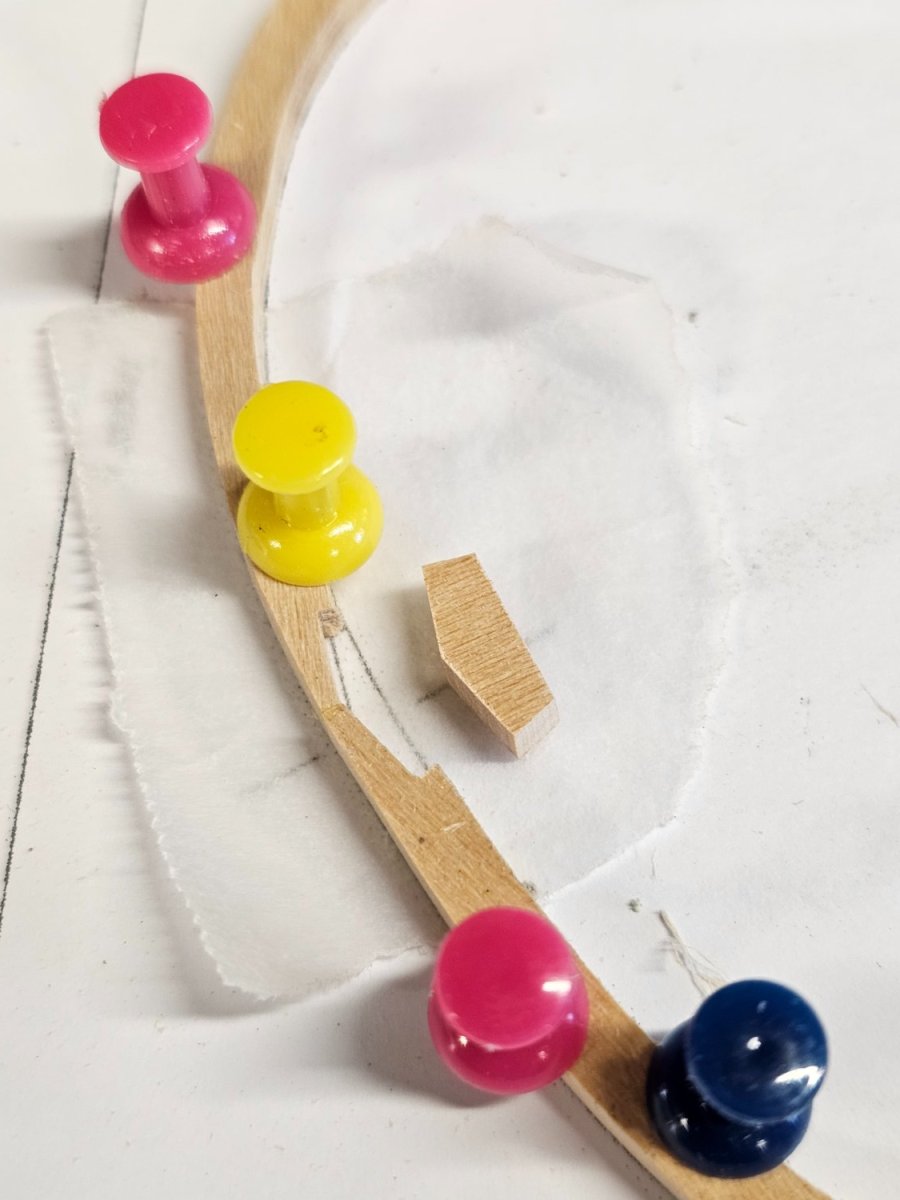
Once the frames are joined, I then make the chocks to strengthen the frames. I sized them to fit first and then used some PE pliers to hold then so I could reduce the depth of them.
A chock ready for gluing.

Glued in with titebond.
Chocks are now glued in. The wax paper stops the glue sticking to the template.

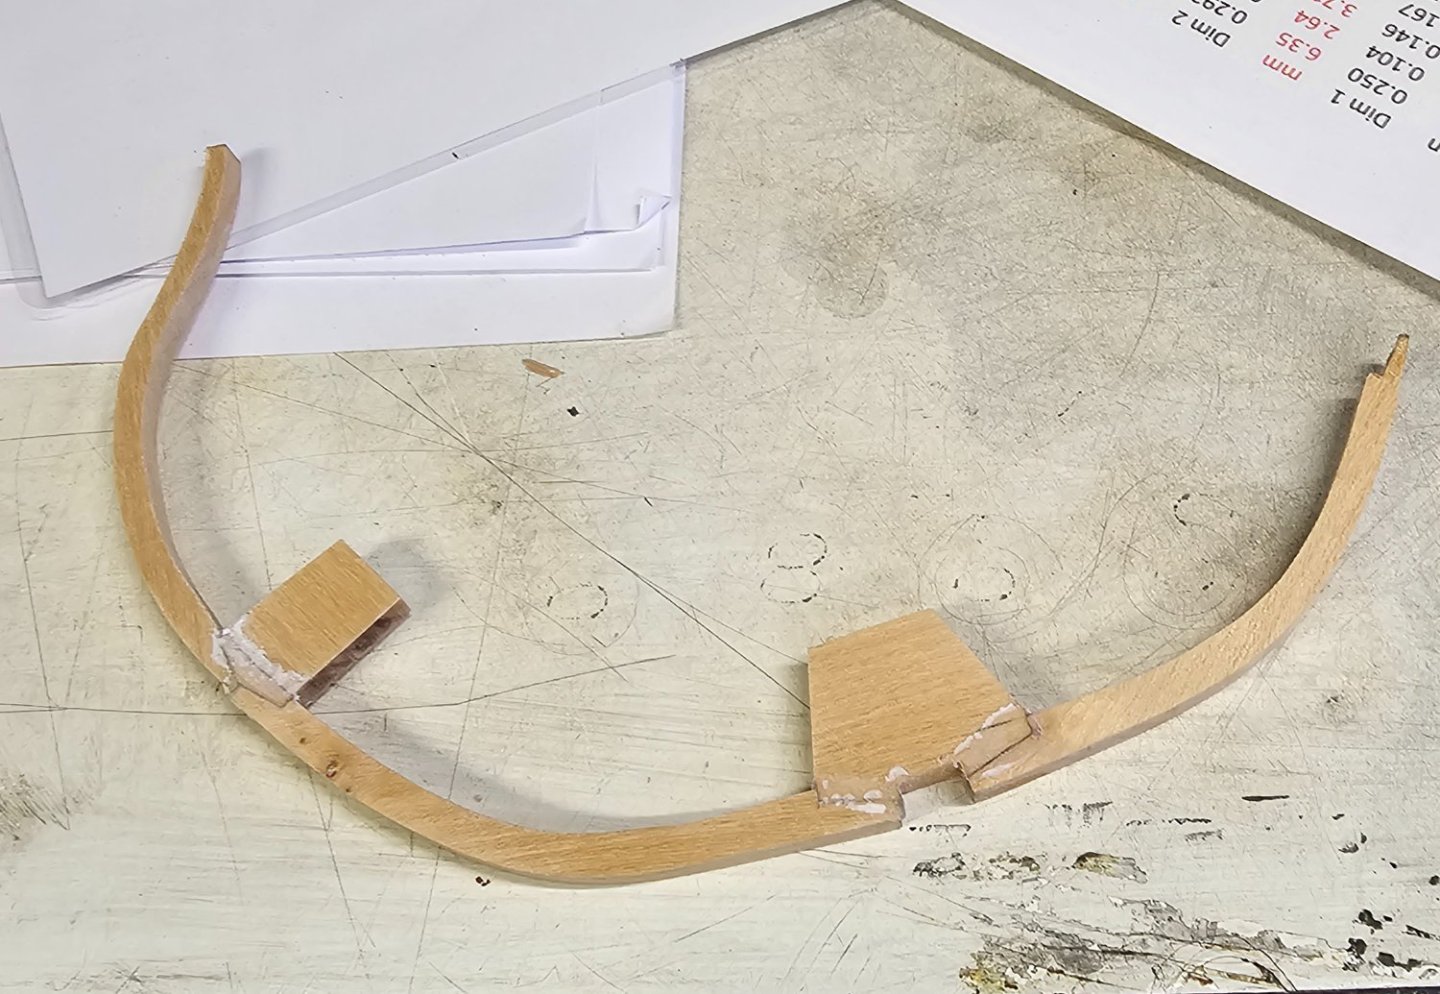
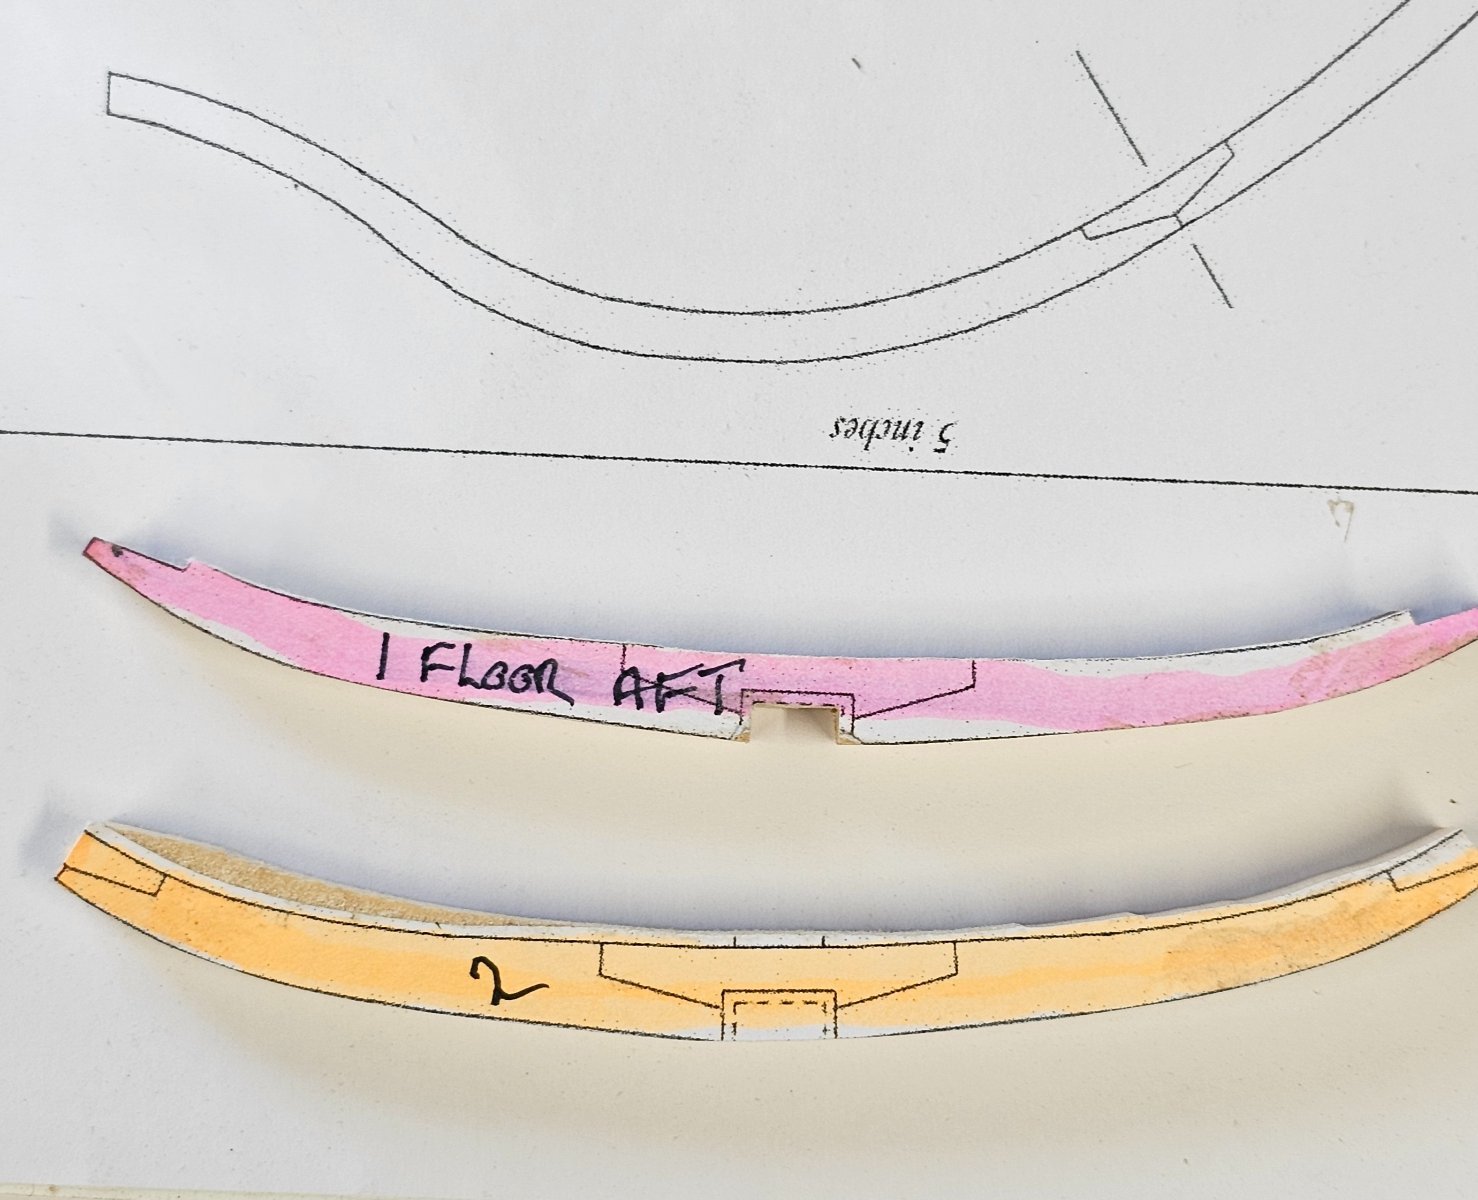
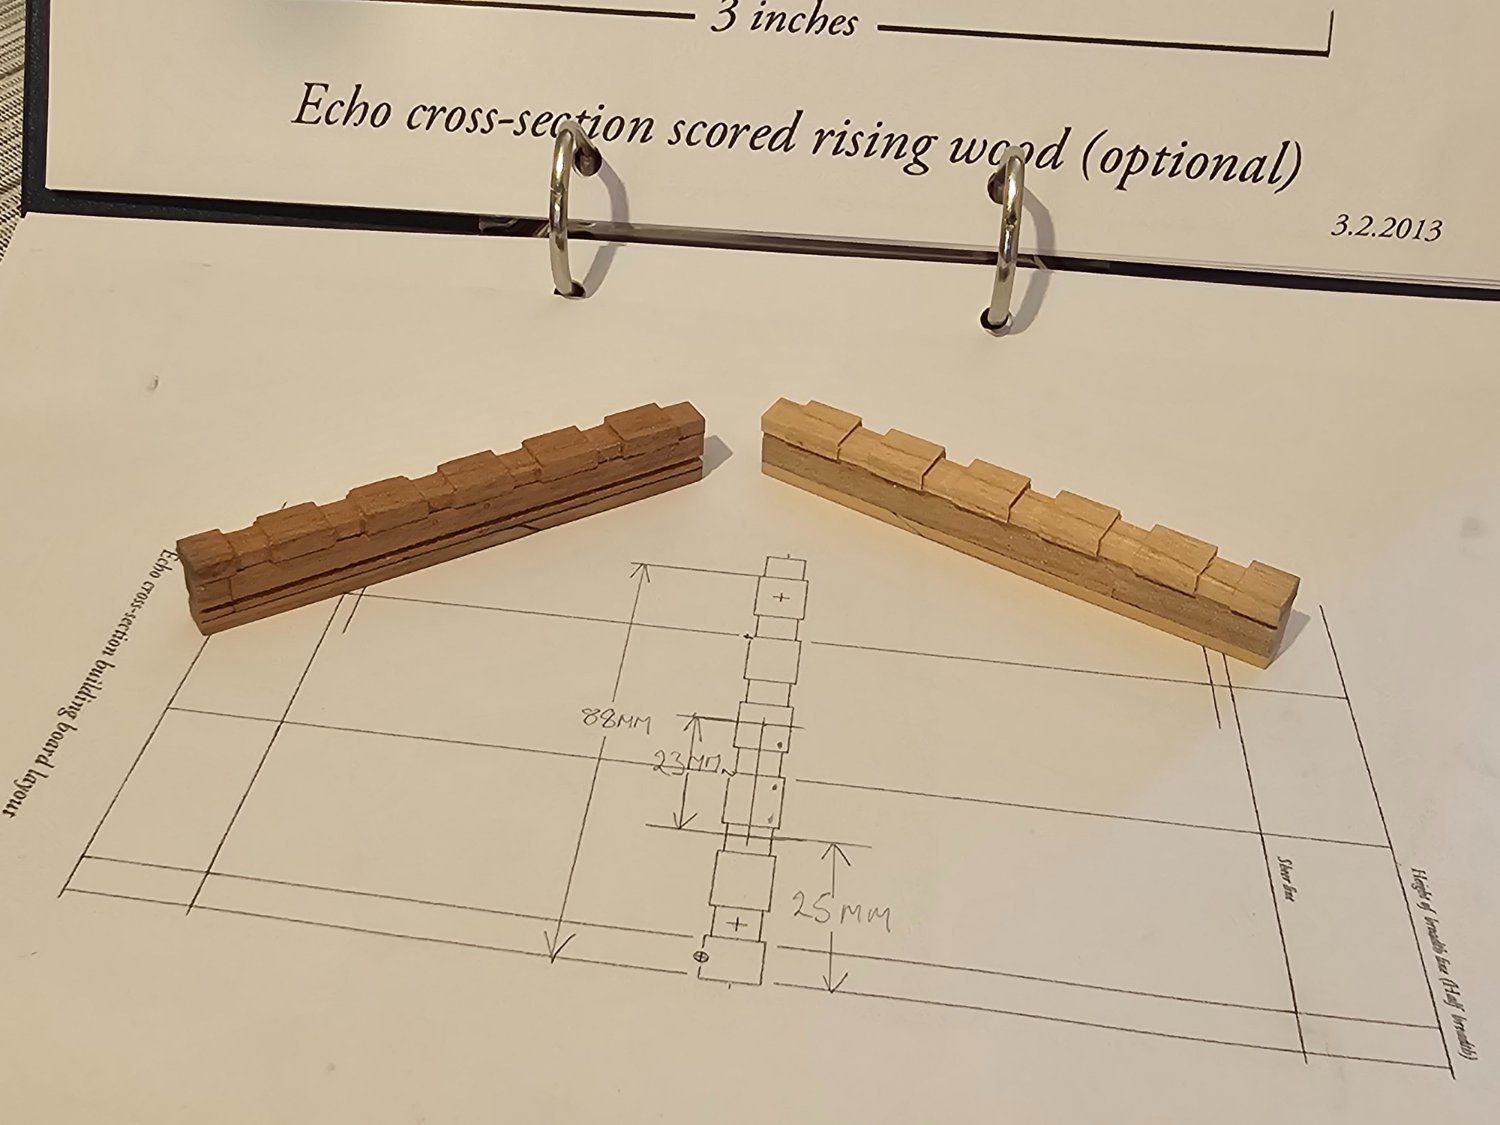
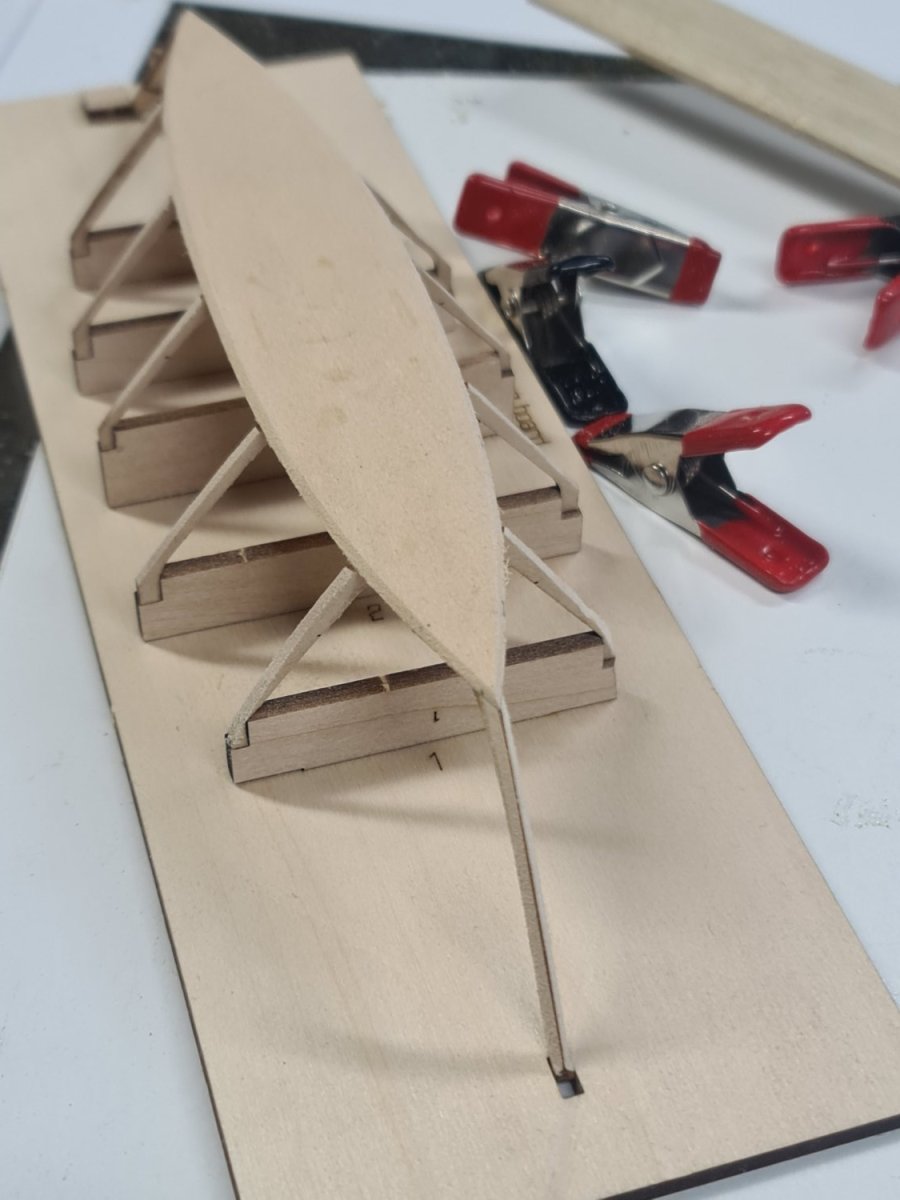
The bottom one fits the dead flat template perfectly. That was made today.
The one on top (the dead flat #1) was made around 6 weeks ago. It fits the pattern IF it is pushed in. I suspect I have to remake this but how do I avoid this recurring?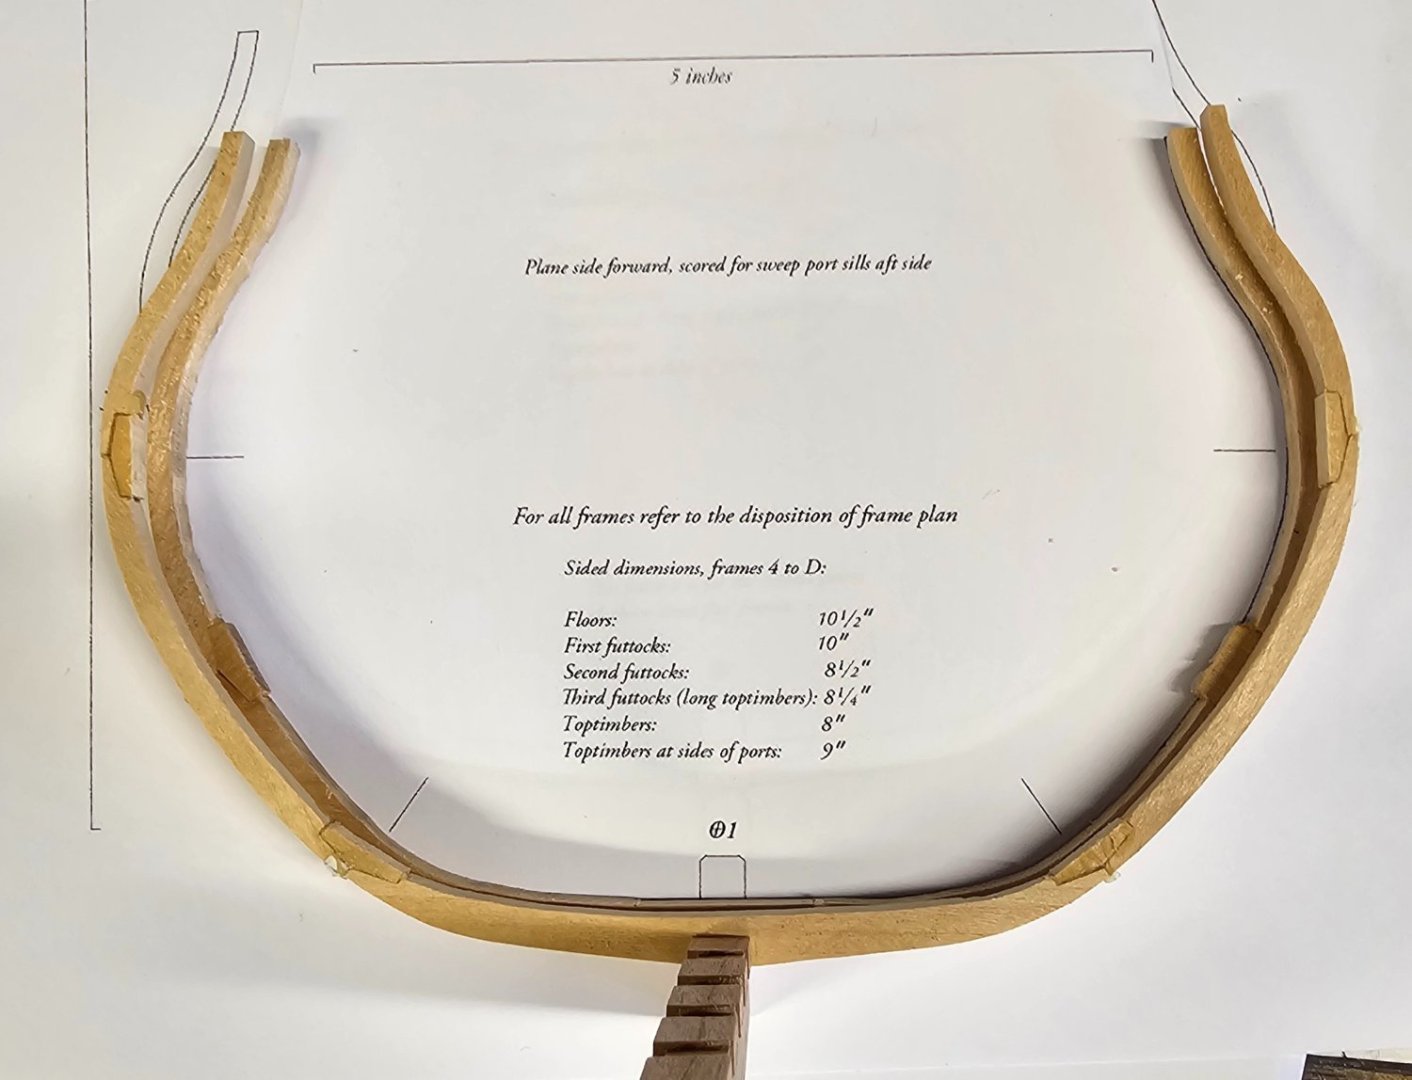
A top view of the issue. The far left one was assembled today.
-
5 minutes ago, Kevin Kenny said:
Hi John
you need to find someone with a large table saw or a large band saw. Either will do. You need to prepare two flat sides on the saw and then it is easy to cut into planks. You can also use a large hand plane to flatten one side and then if you need make a jig to flatten the vertical side of the log. Any good carpenter shop would be only to happy to cut this for you. My experience is that when they find out what you re using it for that they may even cut it for free. Woodworkers and shop owners or operators are a wonderful fraternity . I usually cut them to 1/2” -3/4” thickness so i can cut them thinner on my Proxxon table saw.
The Proxxon work bench tools are too small to do this work. Ill post some pictures
G'day Kevin,
Thank you for that. I need to try and sus some places out for this.
") I know it is asking a bit much but have you considered a video on this process?
I know it is asking a bit much but have you considered a video on this process?
I am sure I am not the only one thinking the same. Else, are you aware of any videos showing this process. I know of normal woodmills that I follow doing this for large slabs, but small logs such as we use seem to be thrown away.Ah well.
-
On 12/27/2023 at 5:35 AM, Kevin Kenny said:
I got mine from a friend. I am not sure that anyone sells this wood. But any dense hardwood will work.
Kevin,
I am interested in how you process your coffeewood. I have you you have branches perhaps 6 to 12 inch diameter by a few feet long. I have similar except they are pear. I only have proxxon gear, how do you rip them for processing by your proxxon tools?
Regards
John -
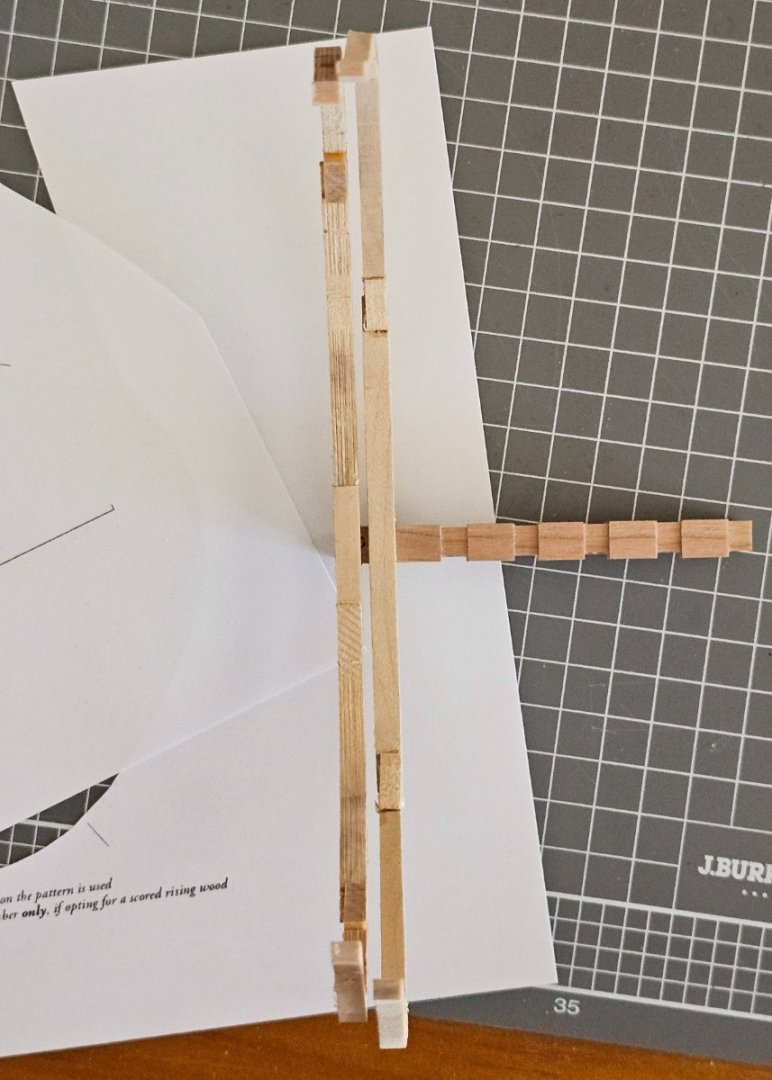
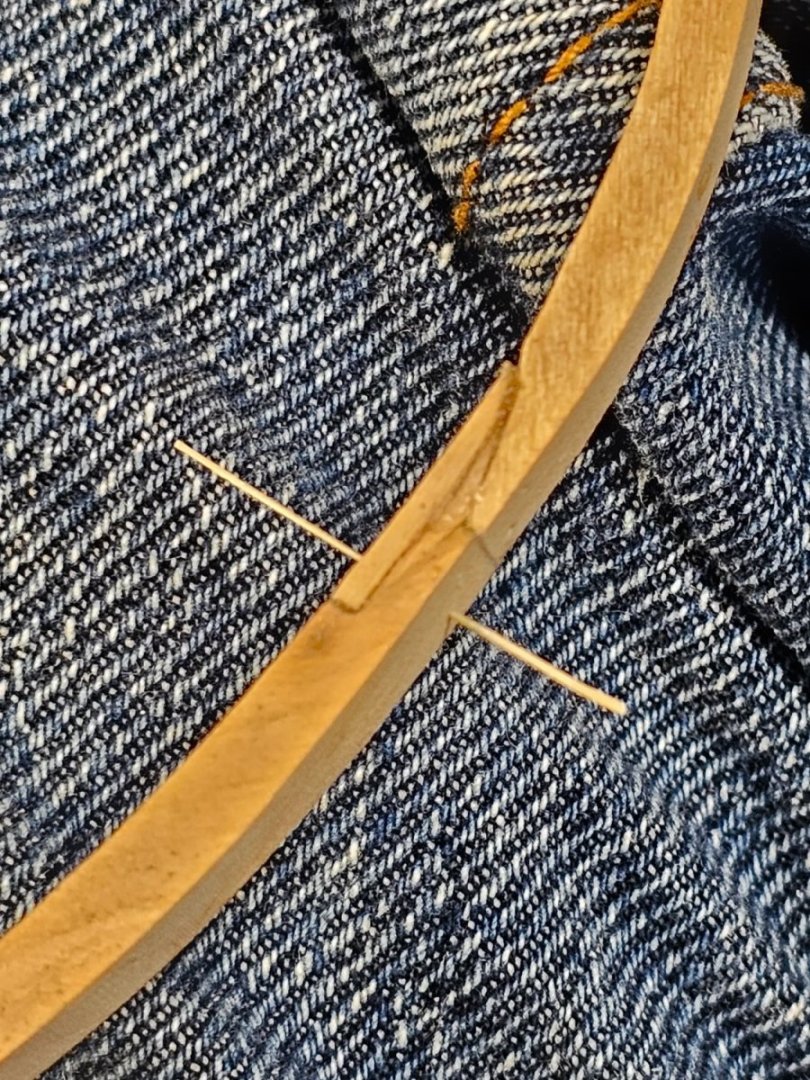
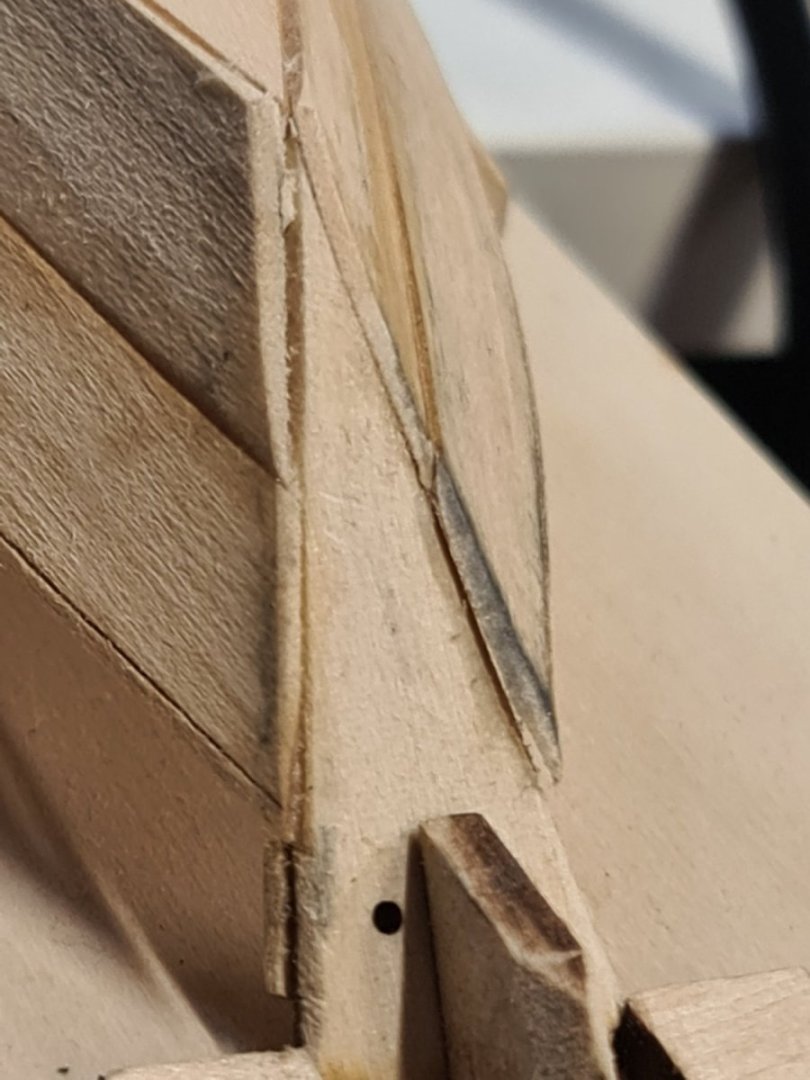
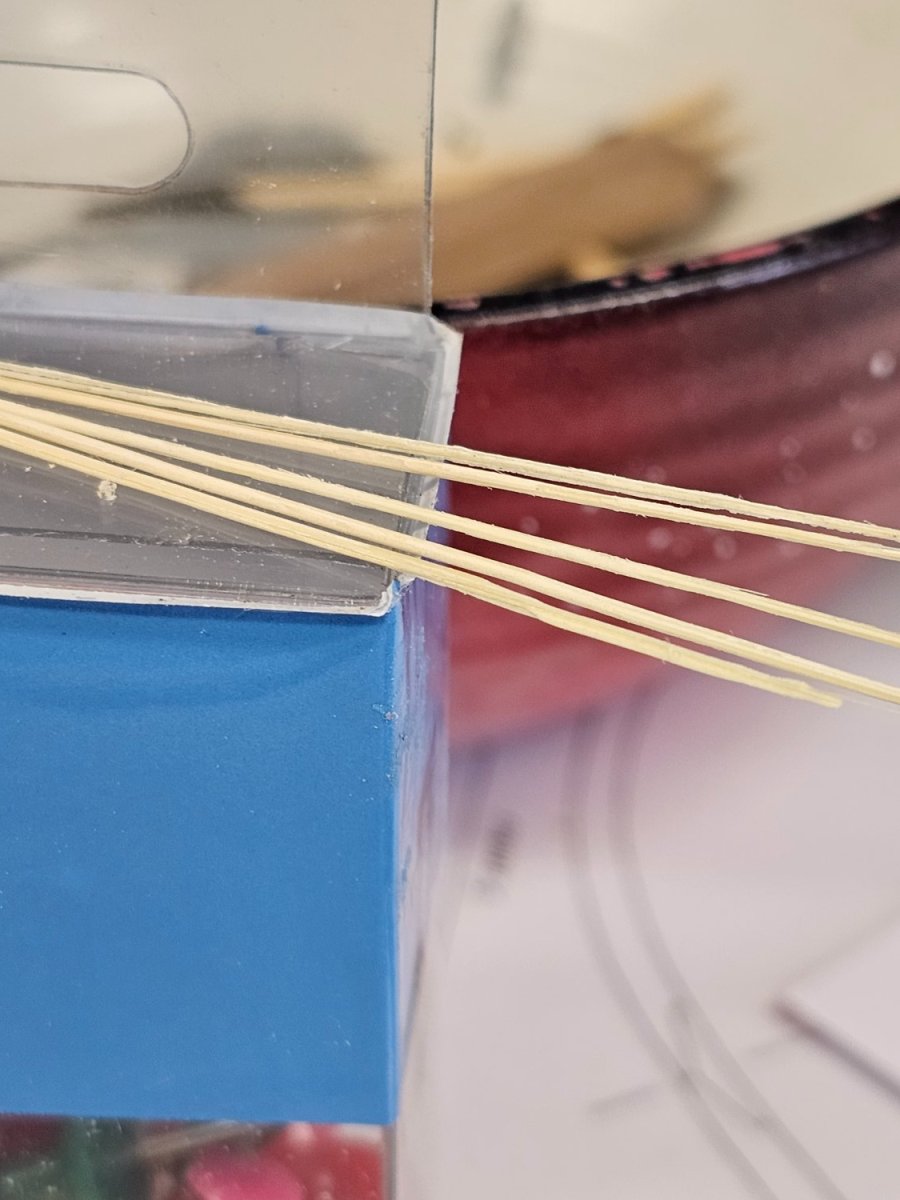
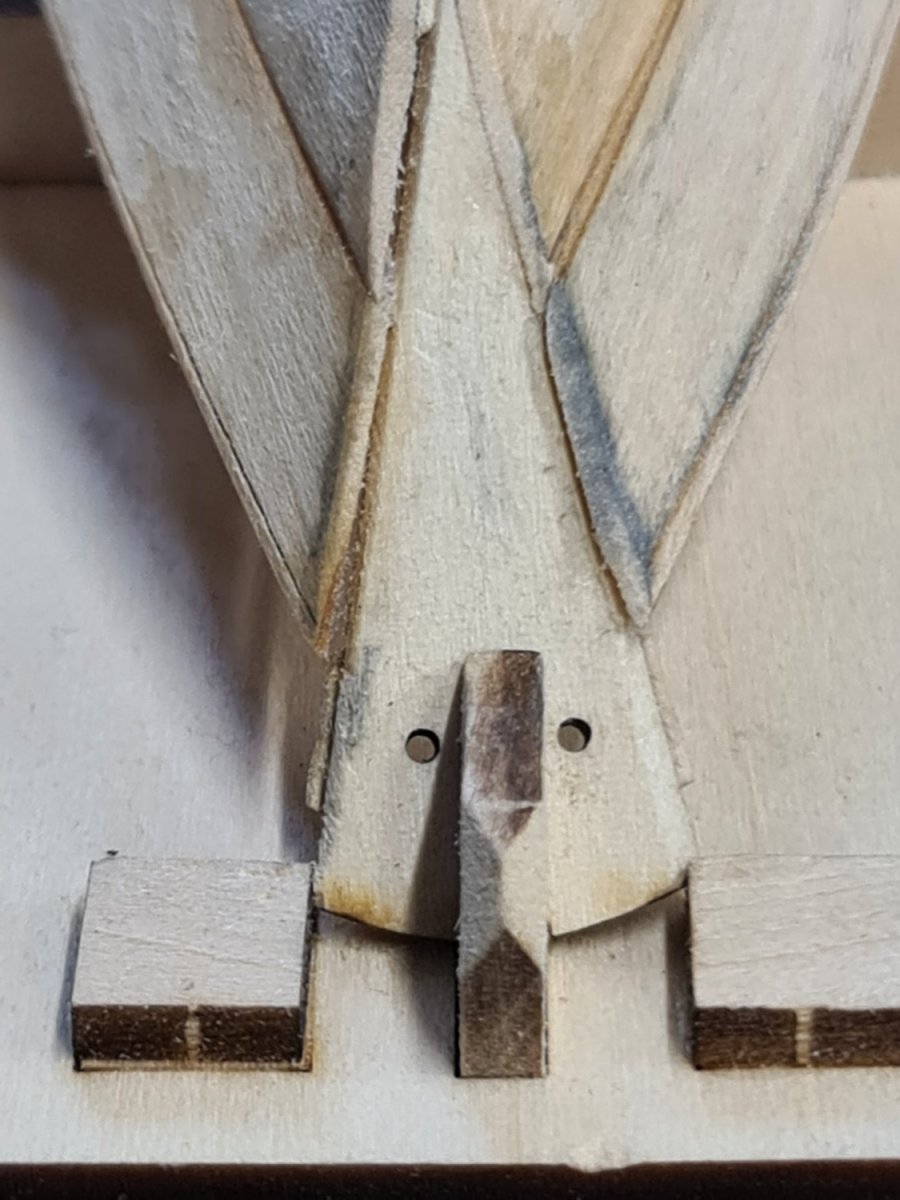
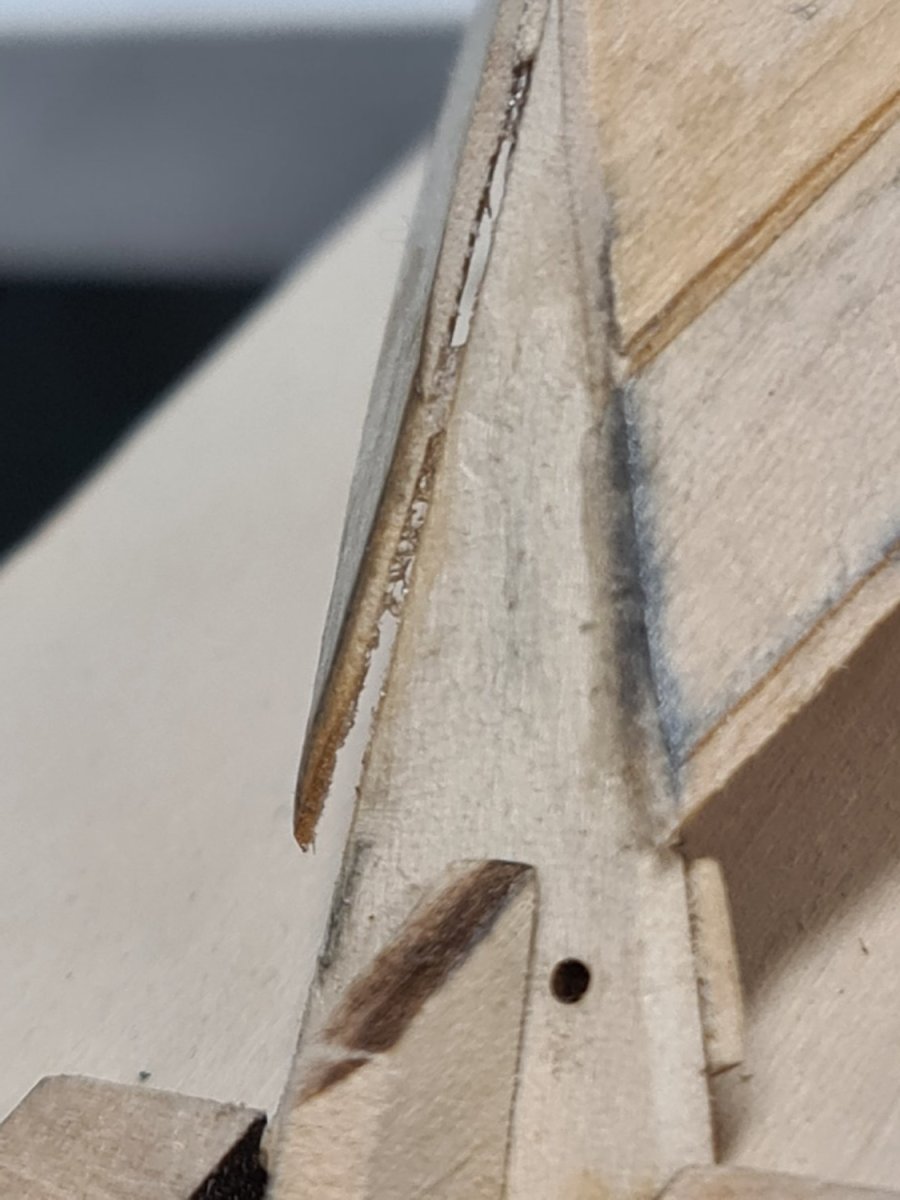
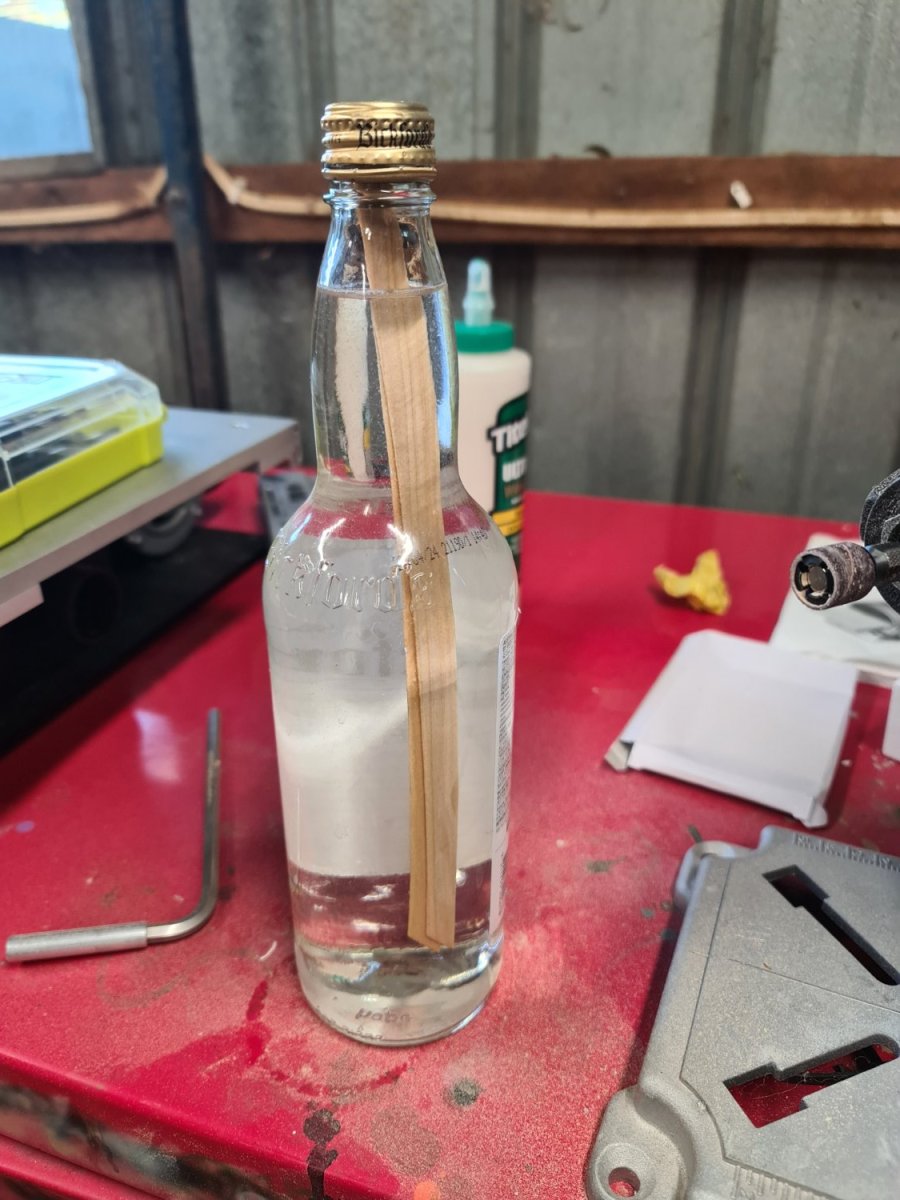
This afternoon, I started to make treenails for the joint of the cross section. I needed to get them to around 19 thou. I drilled the 4 holes in one joint and managed to insert the treenail.
Unfortunately, I then snagged the top timber on my trousers which had it snap off along the grain near the joint.
Ah well, I need to redo it now and will use this as a learning experience.


-
The last few days have been spent making the first frame. I have learnt some lessons here. I may use the frame and the keel as test pieces only.
I used 5 minute epoxy which was problematic on one joint. I changed the reglue of the joint to PVA glue and let it sit for 24 hrs. The joint is better. I will get some Titebond II. I couldn't find my bottle from last yr so used the epoxy. Lesson learnt.
I glued the frame printouts to 5mm foam board then pinned the pieces to it for gluing. The epoxy stuck to the foam board and was a mess to clean off. On the reglue of the one chock with PVA I used wax paper between the frame and board. That stopped the glued frame sticking to the board.

peeling the paper off. The rubber cement made this easy.
The dead flat #1 pinned over the outline.

The joint below failed. The 5 minute epoxy was still soft after 24 hrs.

2 joints worked ok with the 5 minute epoxy.
I need better clamping methods. None of my clamps were not suitable so this sufficed.

Raising the frame for a test fit on the keel.
-
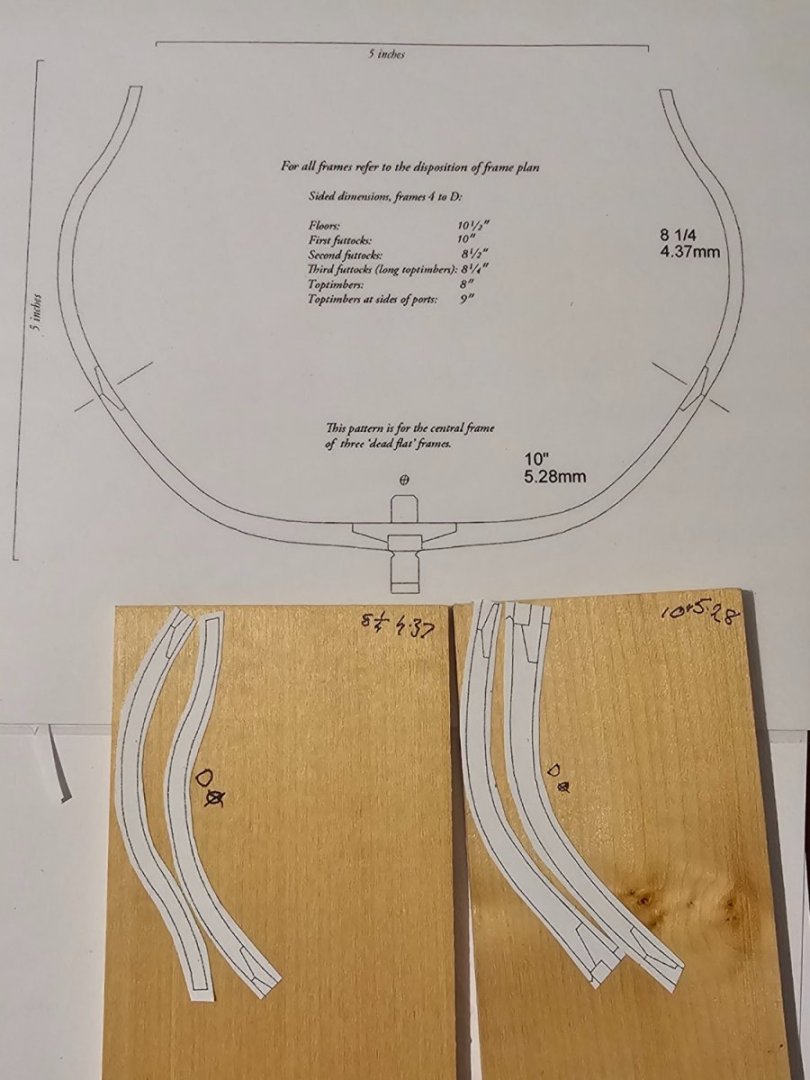
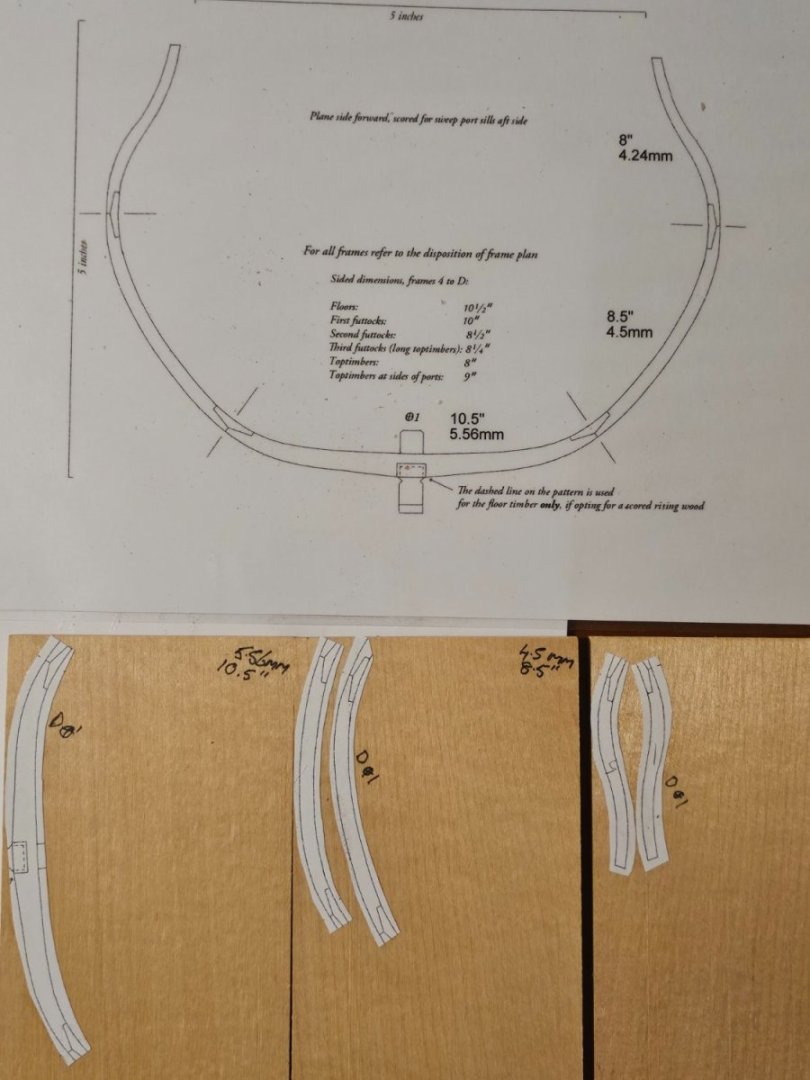
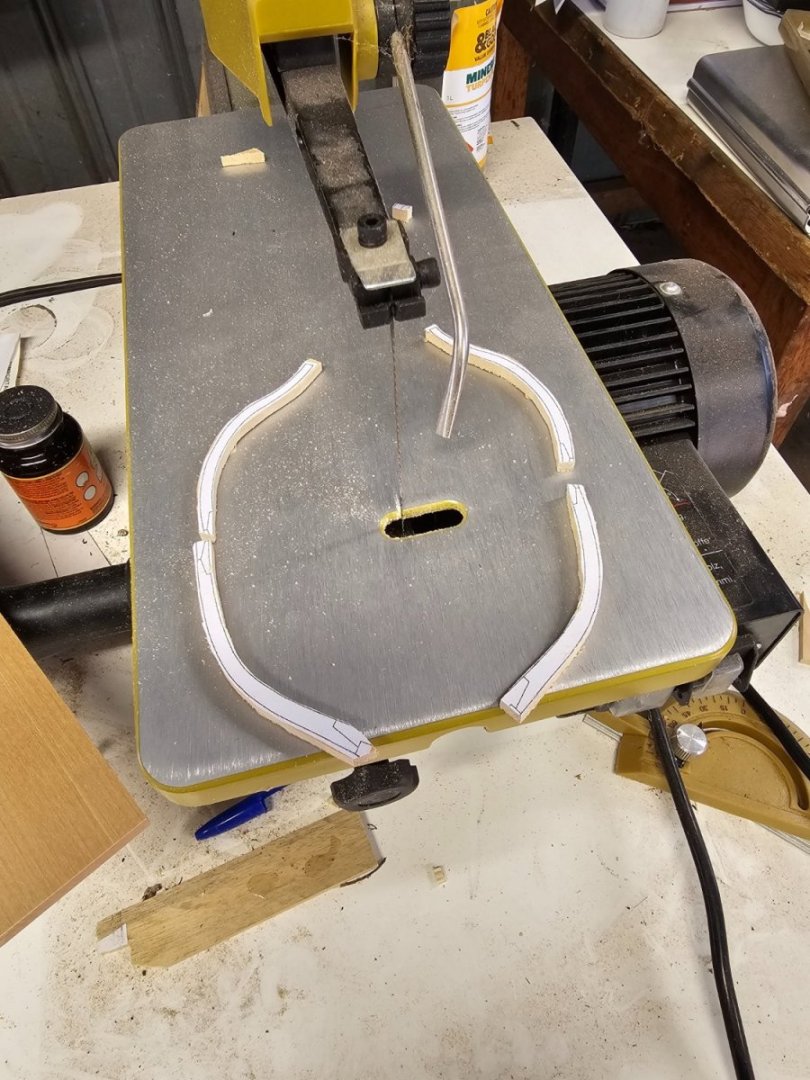
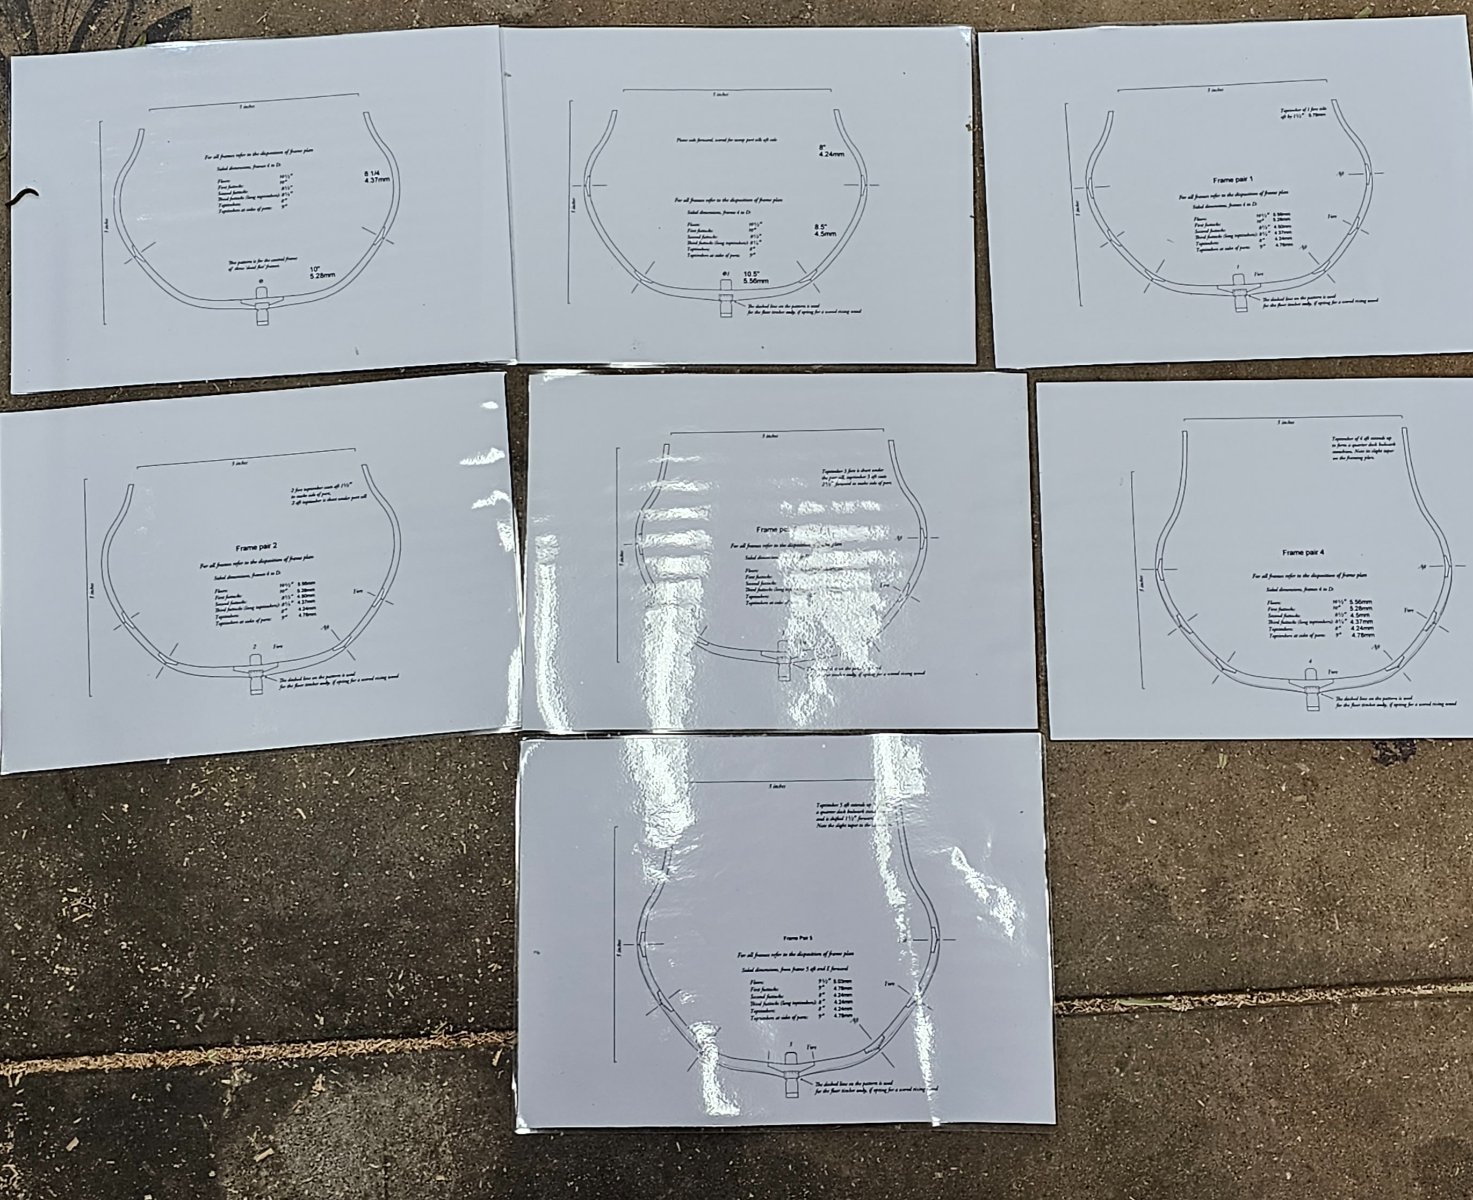
Today was spent getting things ready to cut the frames.
I laminated the 7 sheets so I can assemble the wood pieces over the laminated frame with pins and glue. It won't stick to the plastic.
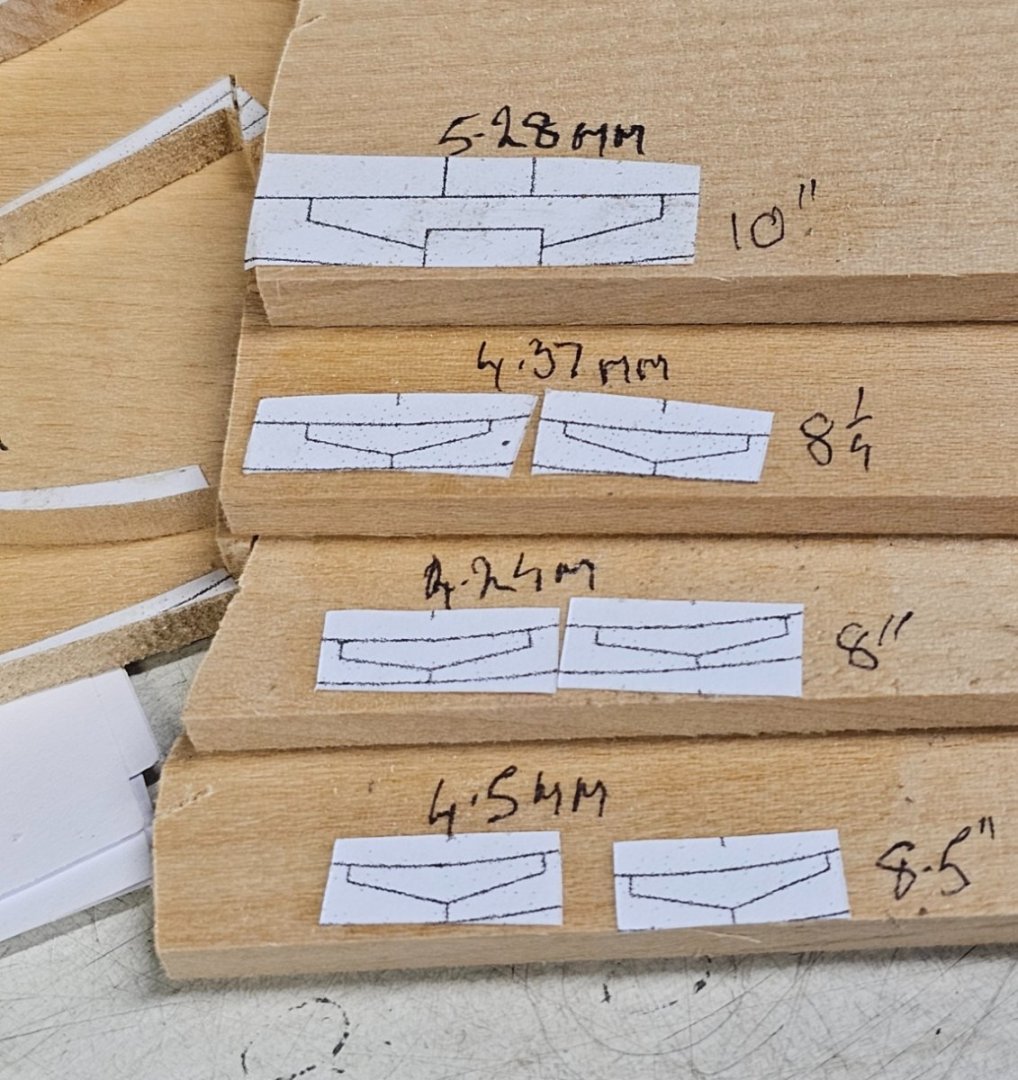
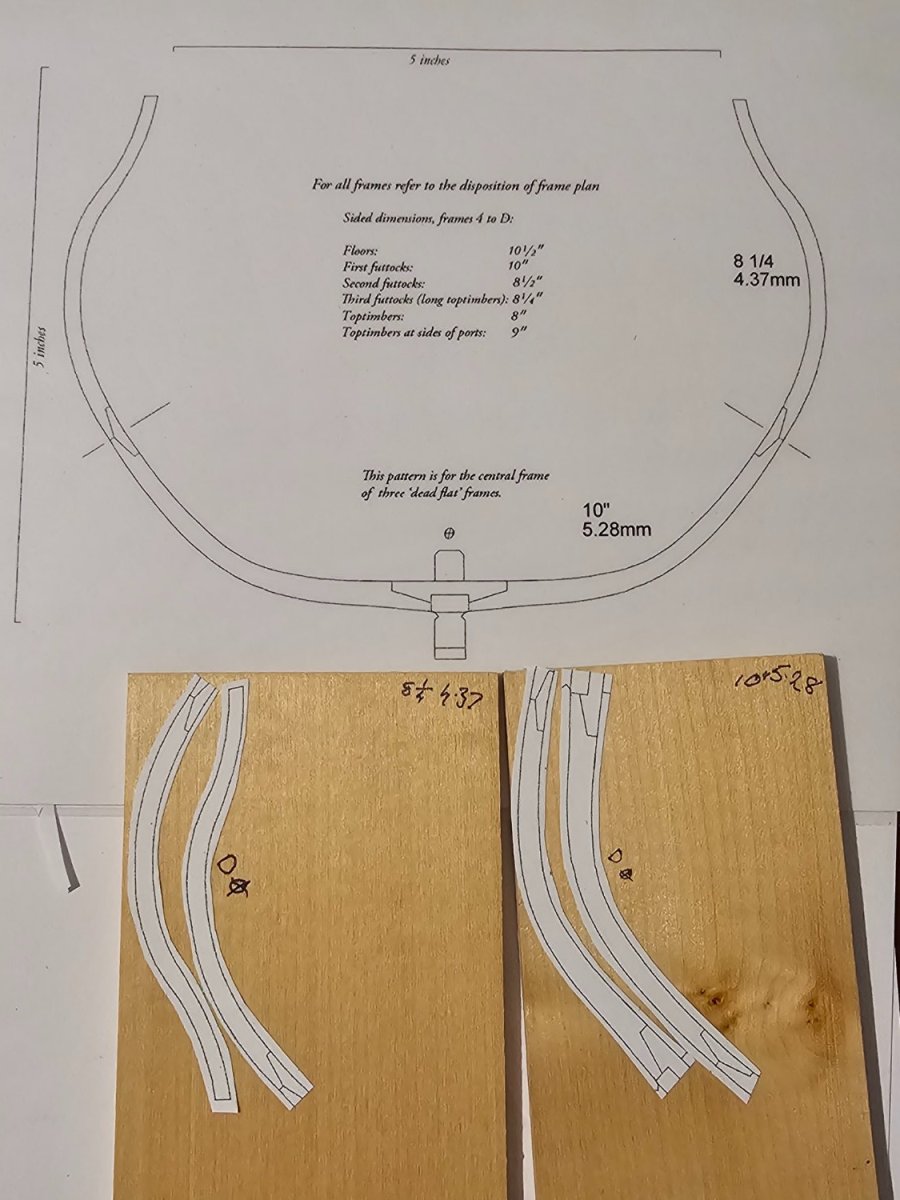
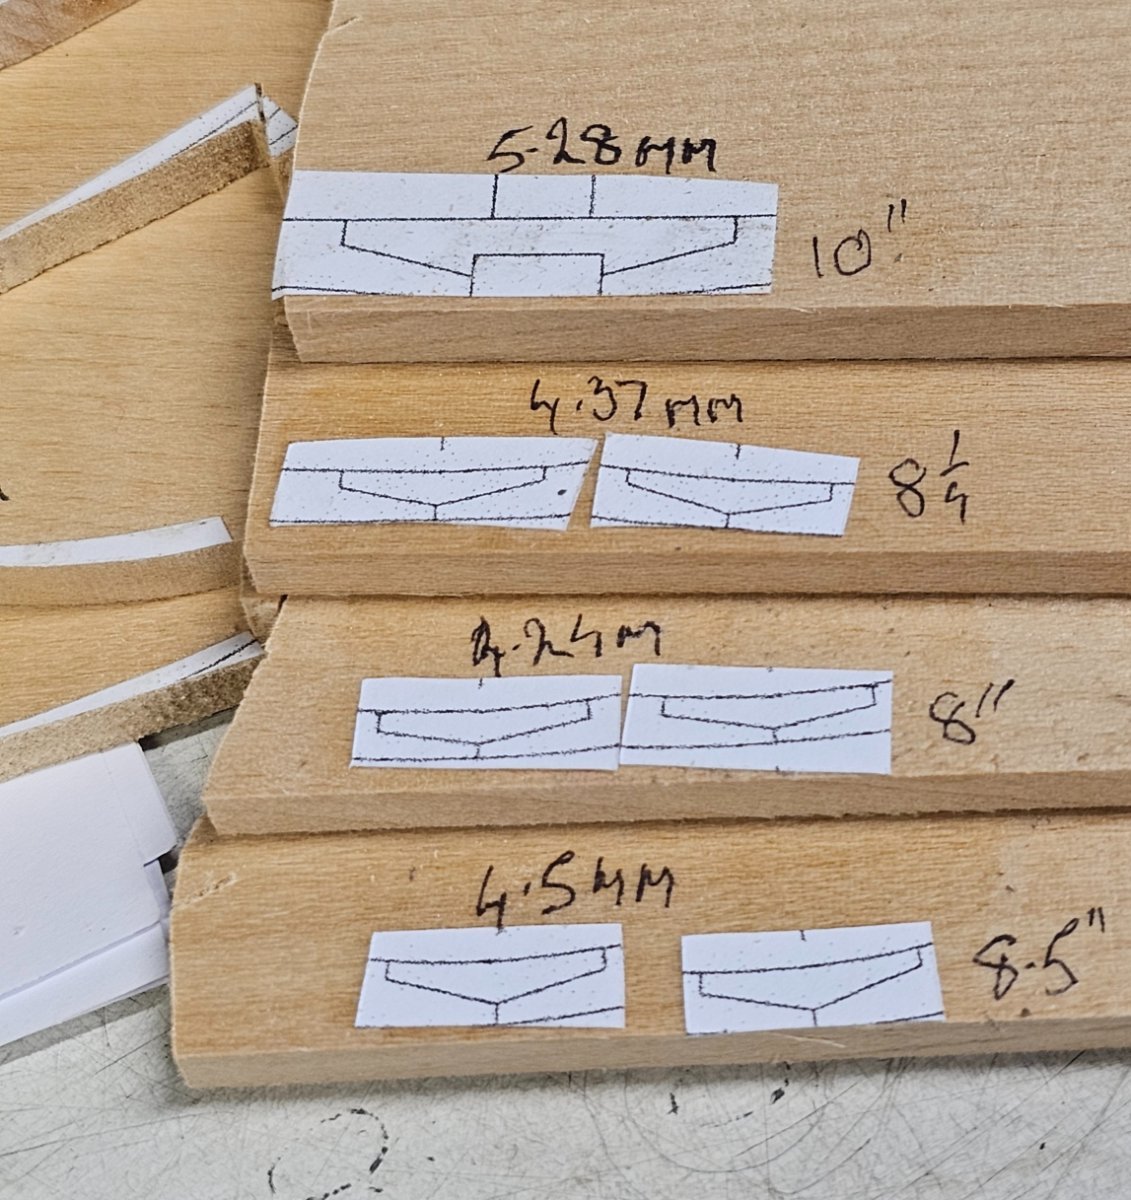
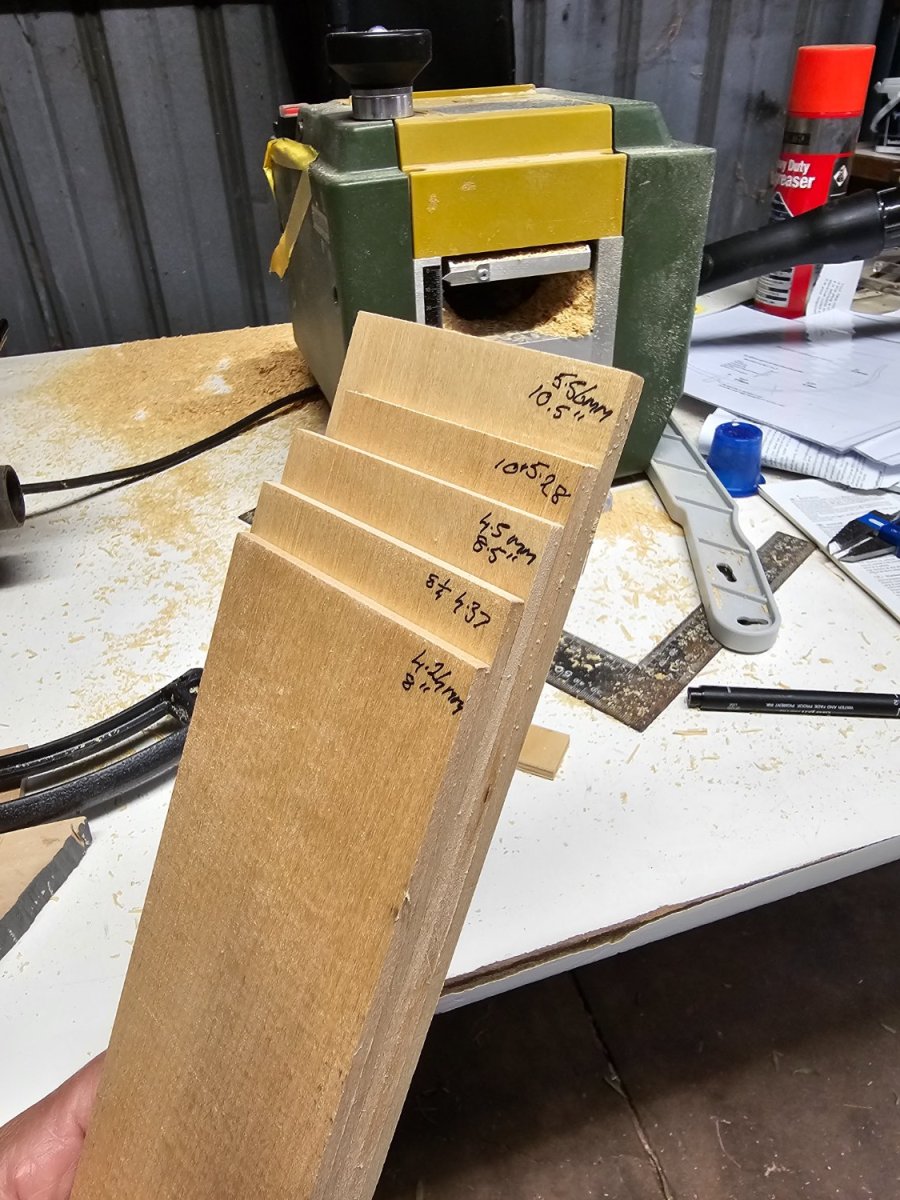
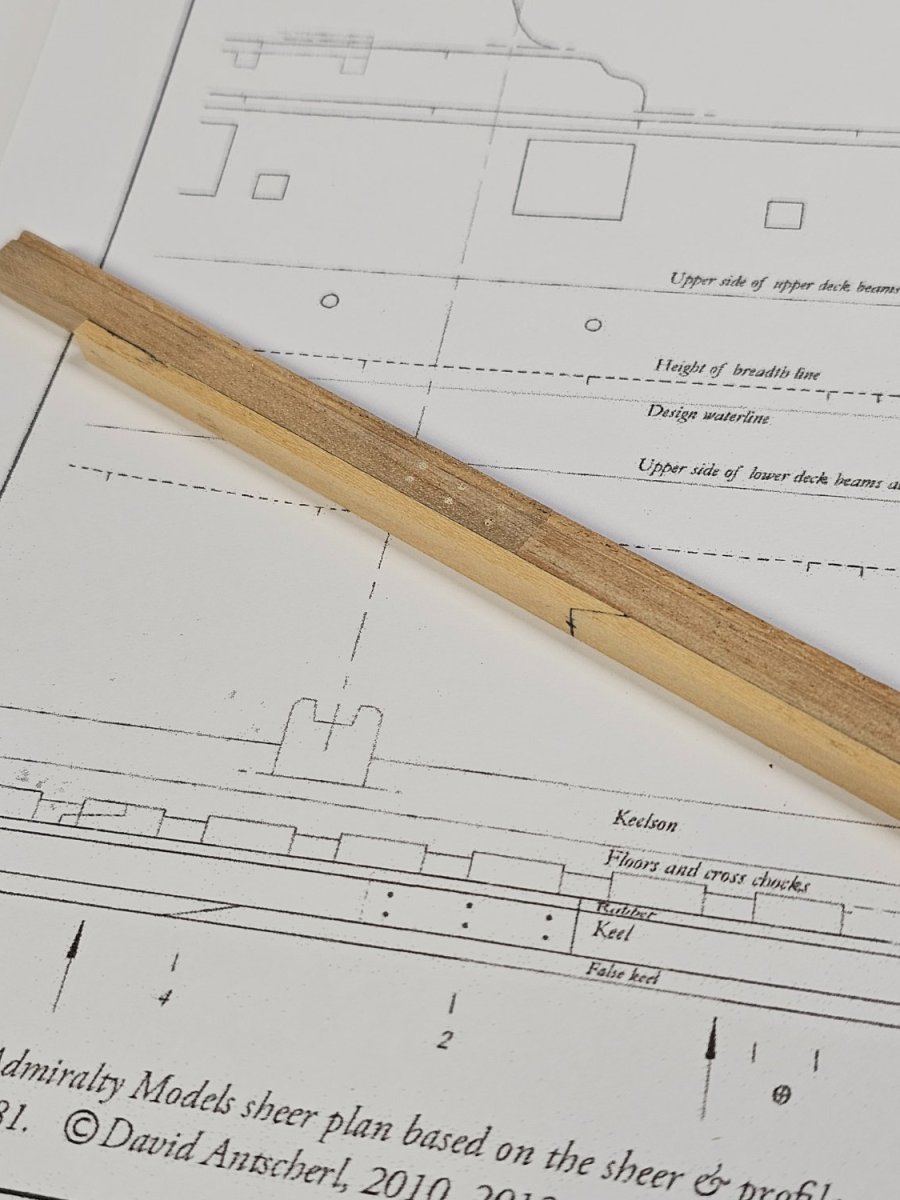
I also planed down 5 planks of 10mm thick English Lime to the five thicknesses I require for the two dead flat frames. The five vary in thickness from 5.5mm to 4.2mm
-
8 hours ago, druxey said:
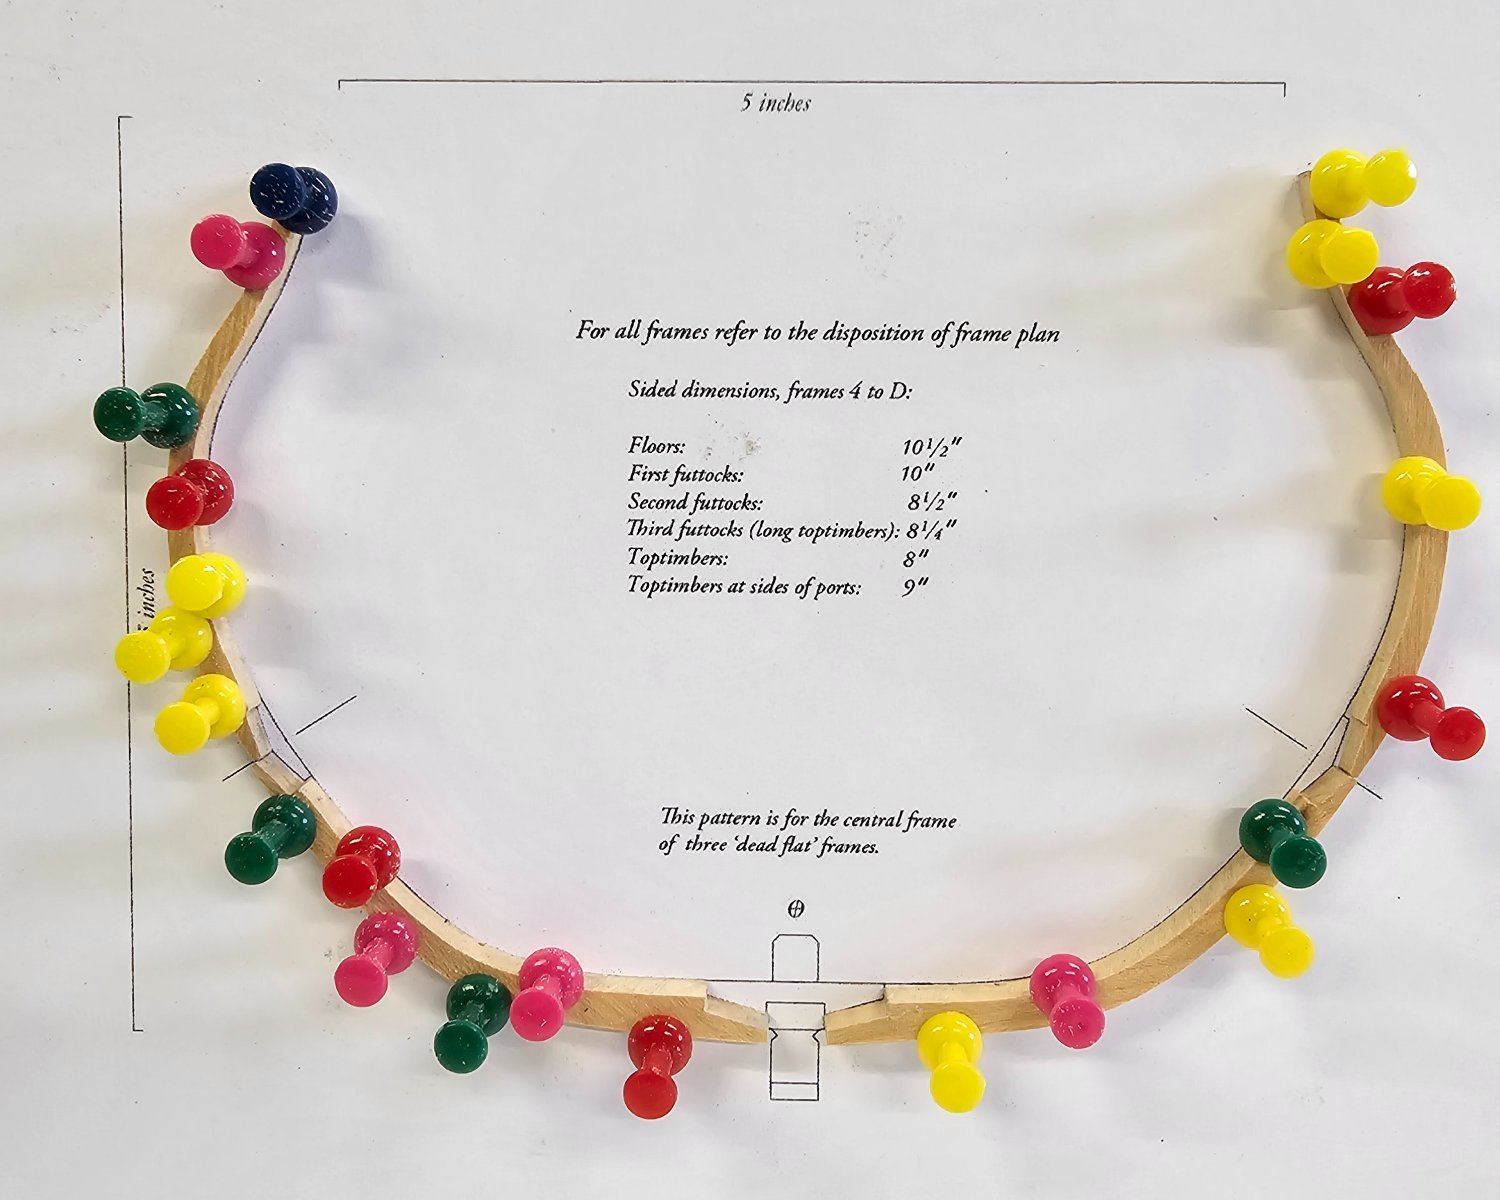
There are two single frames. the 'dead flat' and 'dead flat 1'. Both are, in fact, dead flat, but the labelling distinguishes them, as well as the fact that the joints are staggered one from another.
So, the 'dead flat' starts with a pair of first futtocks and the 'dead flat 1' with a floor, as shown in the framing elevation. There should be a pattern for 'dead flat' as well as 'dead flat 1' which you've posted above.
I now will go and kick myself! I knew there had to be a pattern for the dead flat but obviously on the website, I kept missing the dead flat 1 pdf. I have only just seen it after you said there was a pattern for it.
Thank you so much for that. -
Last yr I made a trial keel of the HMS Echo cross section available at http://www.admiraltymodels.com/Tips.html
I had life intervene but I want to start building the cross section.
The last few days I have spent building another copy of the keel. It came out ok. Thinking about the completed keel I realise a few ways I could speed up the process as well as make it a bit more accurate in cutting the slots of the rising keel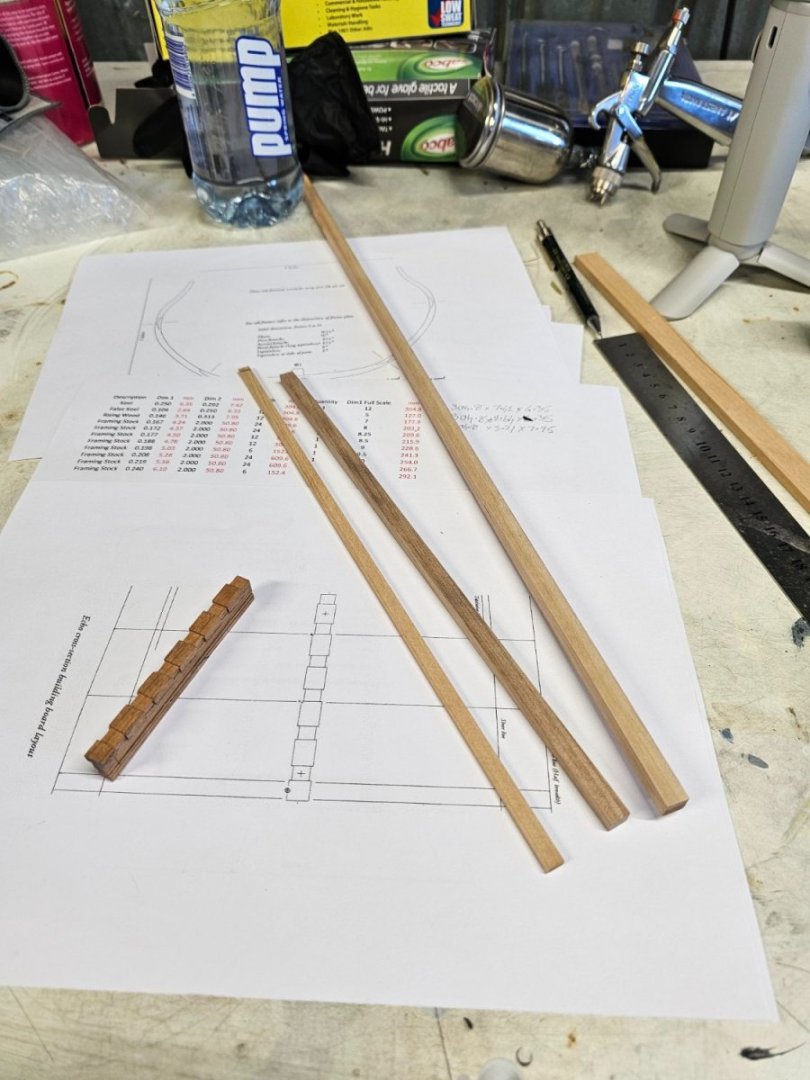 .
.


Last yrs keel on the left, the new keel on the right.

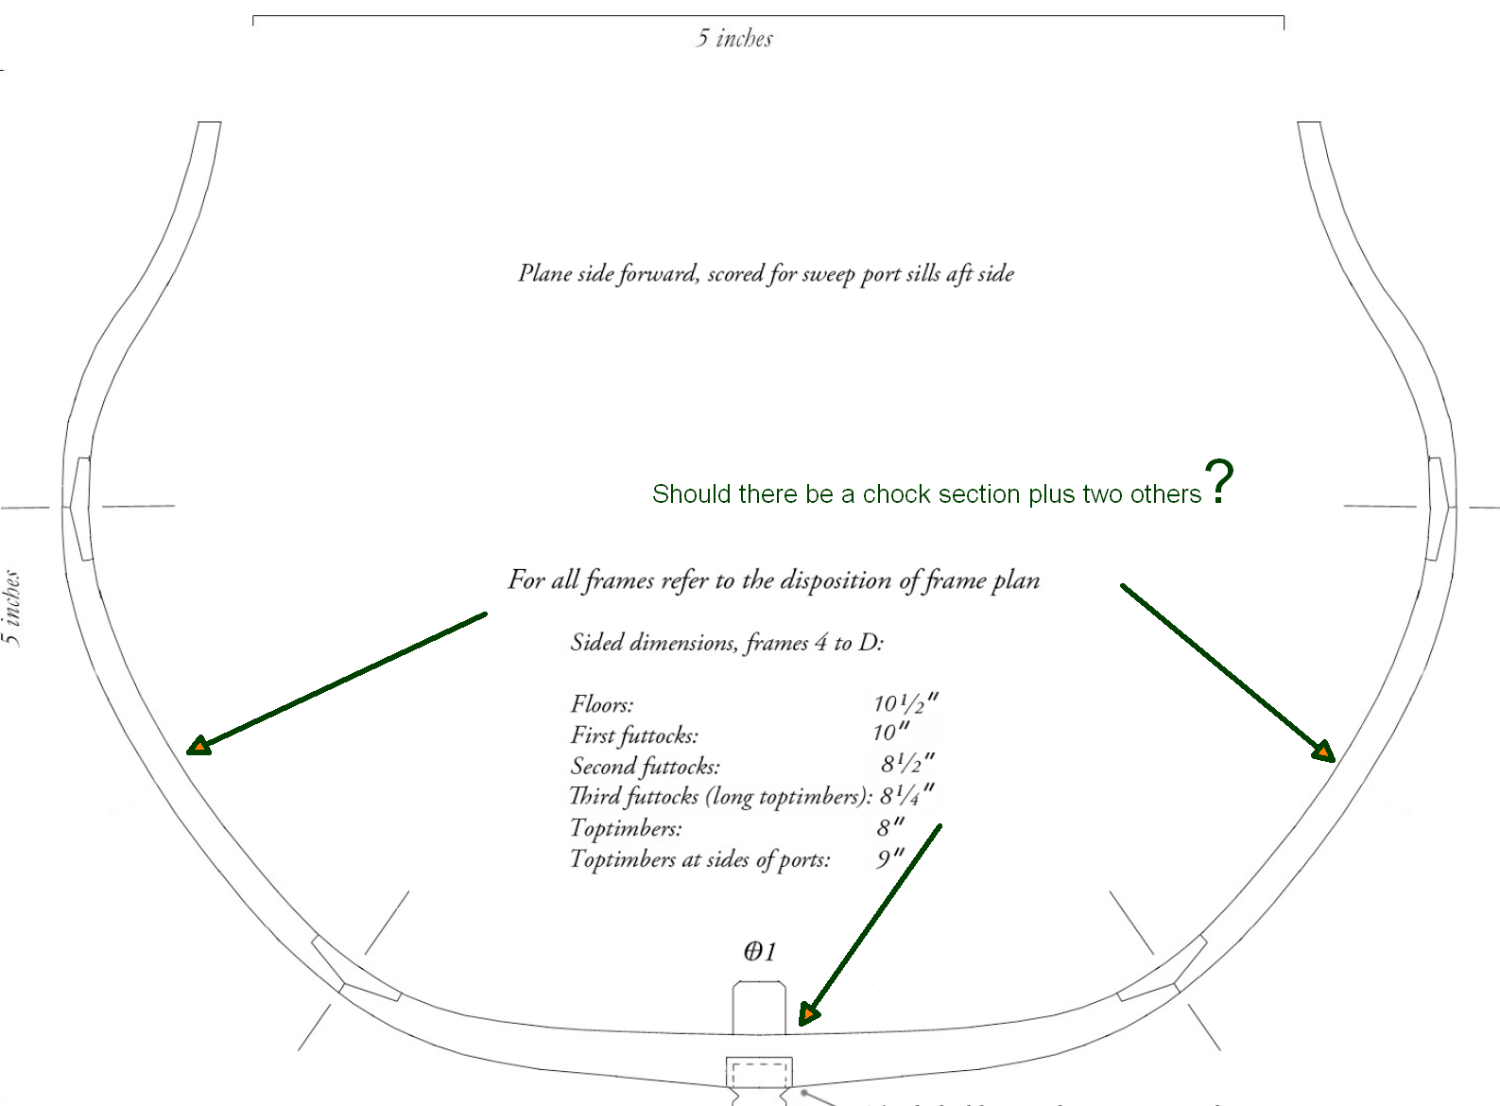
I have a question now that I am ready to start on the frames. The instructions call for starting on the dead flat available at http://www.admiraltymodels.com/Echo_frame__dead_flat__1.pdf My reading is that each frame comprises two sections, a fore and aft frame. All of the frame numbers have fore and aft indicated on the pdf except the Dead Flat.
Yet, It seems that there are two distinct sets of futtocks for the 2 dead flats as shown in http://www.admiraltymodels.com/Sided_frame_dimensions.pdf
I am not understanding this obviously so can someone point me in the right direction thanks?


- chris watton, mtaylor, VTHokiEE and 3 others
-
6
-
-
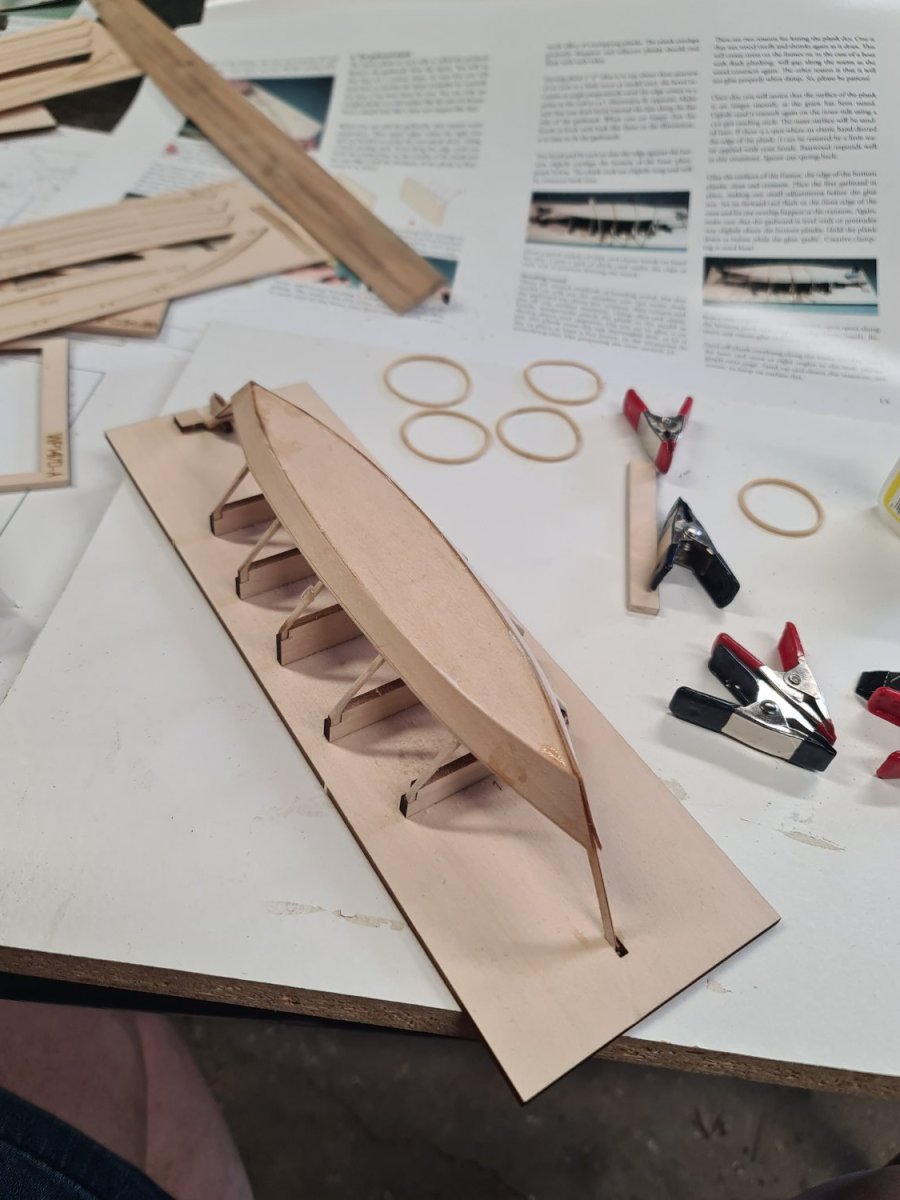
After putting it off, I tried debonding the stems broadstrake planks. I used my electric plank bender to heat it up and I was surprised how it came apart. I have now left it tonight and will clean it up tomorrow.
I will also ensure the stem is properly braced so it cannot move next time I glue the broad strakes in position.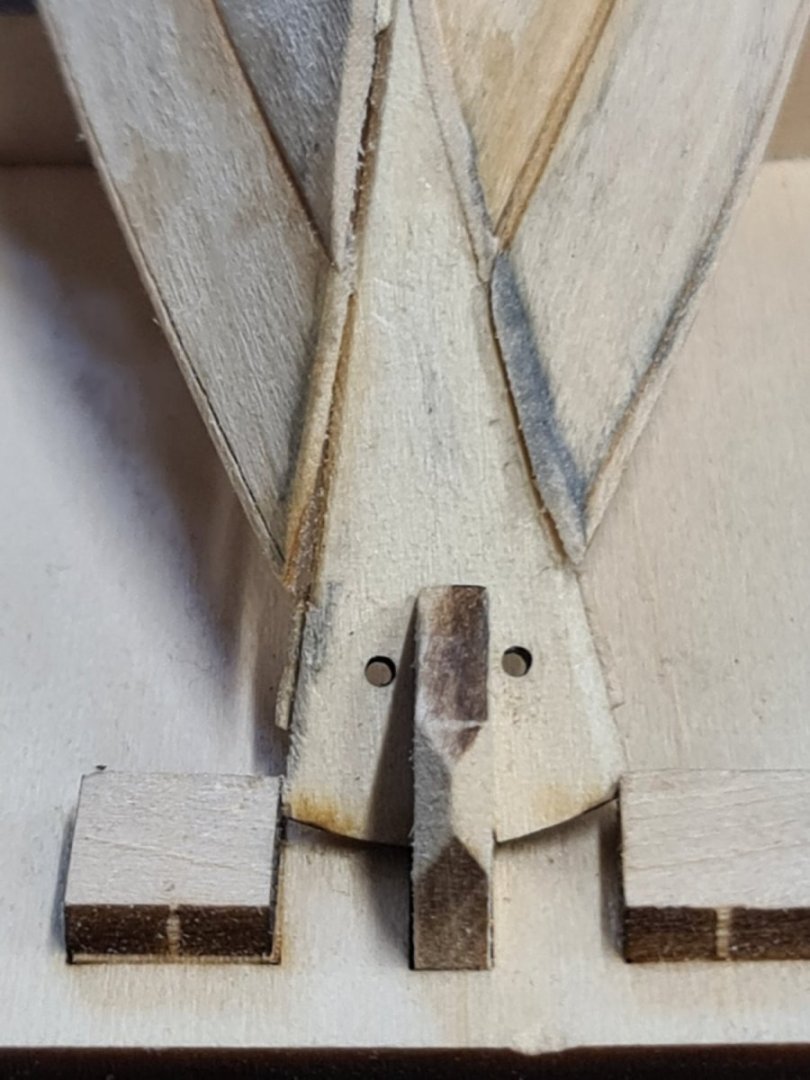


- AON, Ryland Craze and ccoyle
-
3
-
On 9/30/2022 at 4:40 PM, Richard44 said:
Hi John,
I too am in Aus and I happen to have a 12 inch three-sided Imperial rule that includes 1:48. I no longer need this so if you pm me your address I'll send it to you.
Cheers
Thank you very much for your kind offer. Unfortunately, I ordered one and then read your offer... Doh!
-
On 9/30/2022 at 12:43 PM, Charles Green said:
USA tool maker, Starrett, makes steel rules graduated in 1/48 inch. Six-inch-long, part # C601-6; 12-inch-long, part # C601-12. Front and back, top and bottom of the rule make for four graduated edges. One edge is graduated in 12ths, 24ths and 48ths. The others give measurements in 10ths, 20ths, 50ths and 100ths; 16ths, 32nds and 64ths and lastly, 14ths and 28ths. They will be very well made and surprisingly expensive.
I have just ordered one, not starret though. Couldn't find one anywhere then this forum turns up loads of responses.
-
On 9/30/2022 at 6:17 AM, realworkingsailor said:
Try here for something more closer to your location:
https://www.bnamodelworld.com/index.php?route=product/search&search=Scale ruler
Andy
Just ordered it.
- Canute, mtaylor and realworkingsailor
-
3
-
On 9/30/2022 at 6:10 AM, iMustBeCrazy said:
The Excel 55777 fits the bill but for most of it's length it's resolution is 3 inches.
That one seems to be Metric only, the only one I can be sure of is the Tankraft Imperial Pro Modeler Scale Ruler. @John Murray
That will be the 3rd ruler from BNA... 🤣 However, that does have the scale I am after on it. Strange thing is, when I searched BNAs website, I did not find that one.
-
4 minutes ago, iMustBeCrazy said:
G'day John, best I can offer is that I posted a PDF with some scale rules I worked up in CAD. It prints to scale on my laser printer but you may have to make some adjustments when printing.
After printing I just put Scotch Magic tape each side then trim to size.
Thank you for that. I shall try that. 🙂
- Canute, iMustBeCrazy and mtaylor
-
3
-
Morning All,
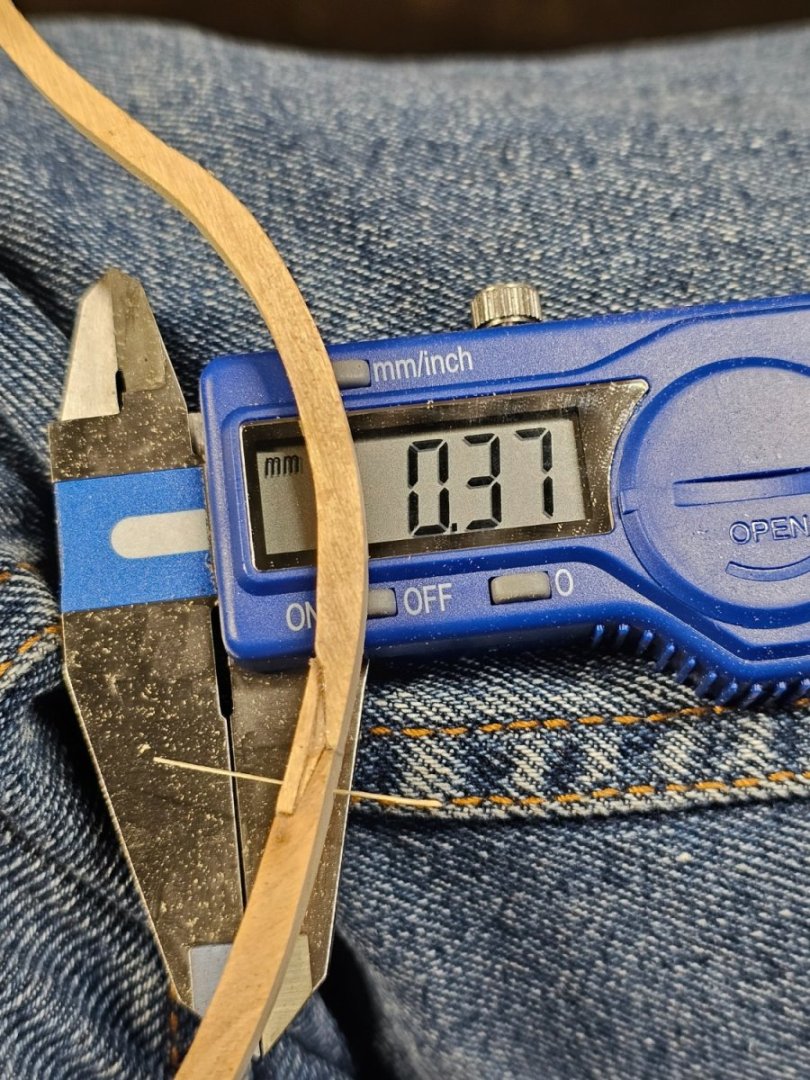
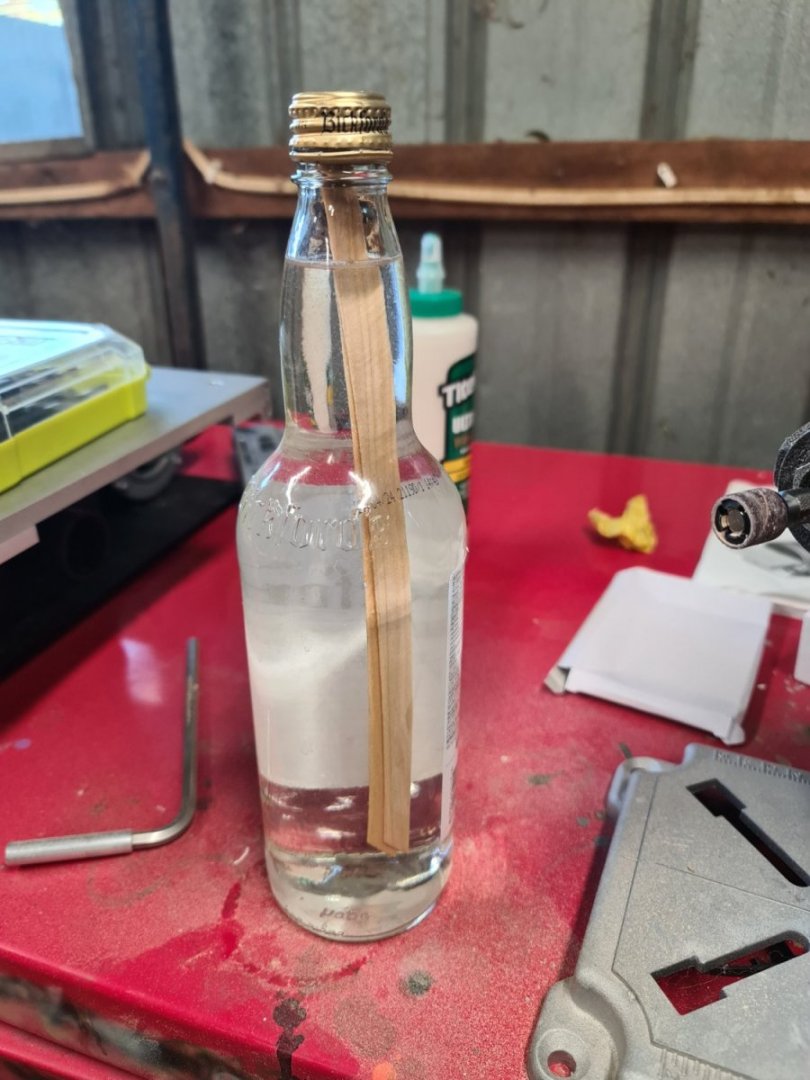
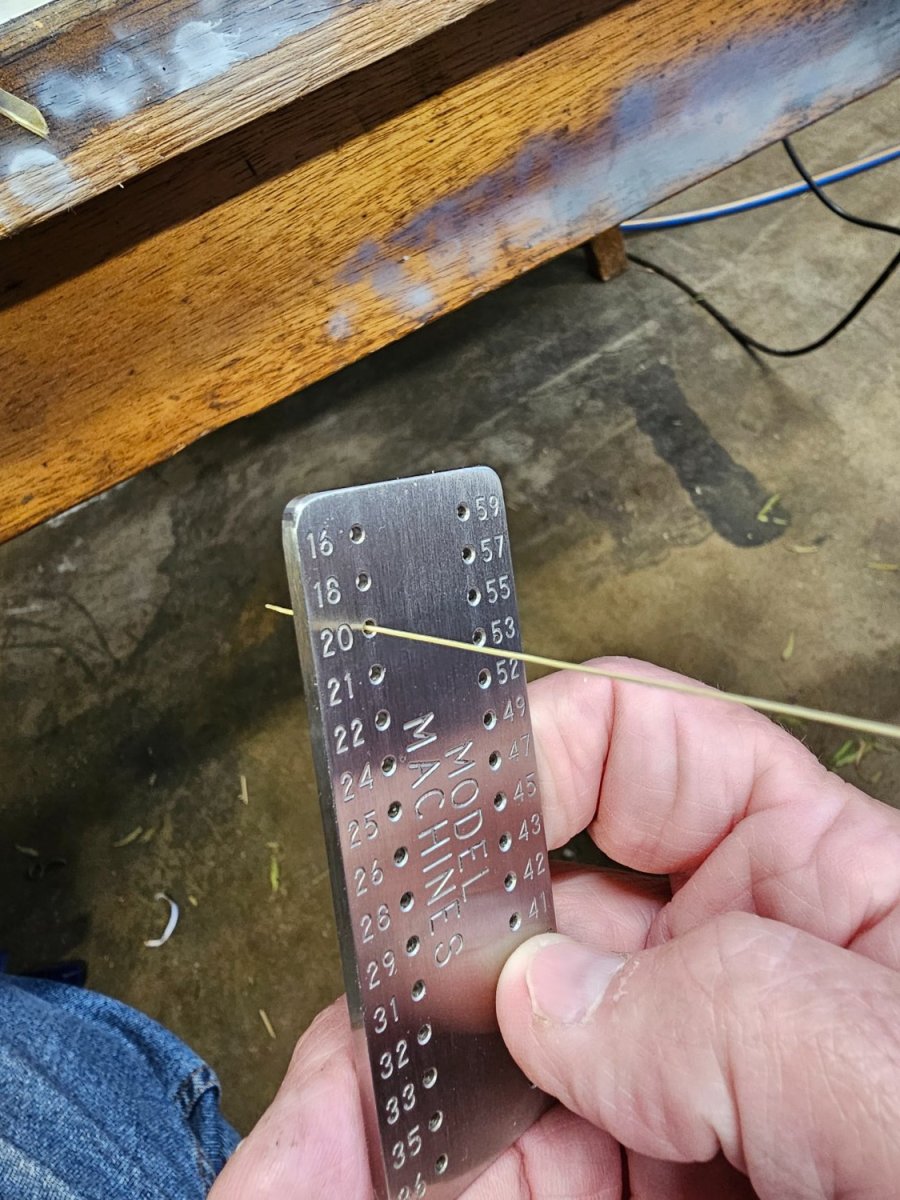
I am in Australia. I have searched for 48th scale imperial rulers with no luck. I have bought two so far but whilst they both have 1:1 imperial scales, they both have the 48th scale reading metric as in the attached pic.
I don't want to keep importing this sort of mistake.
is anyone familiar with somewhere that does have this scale ruler?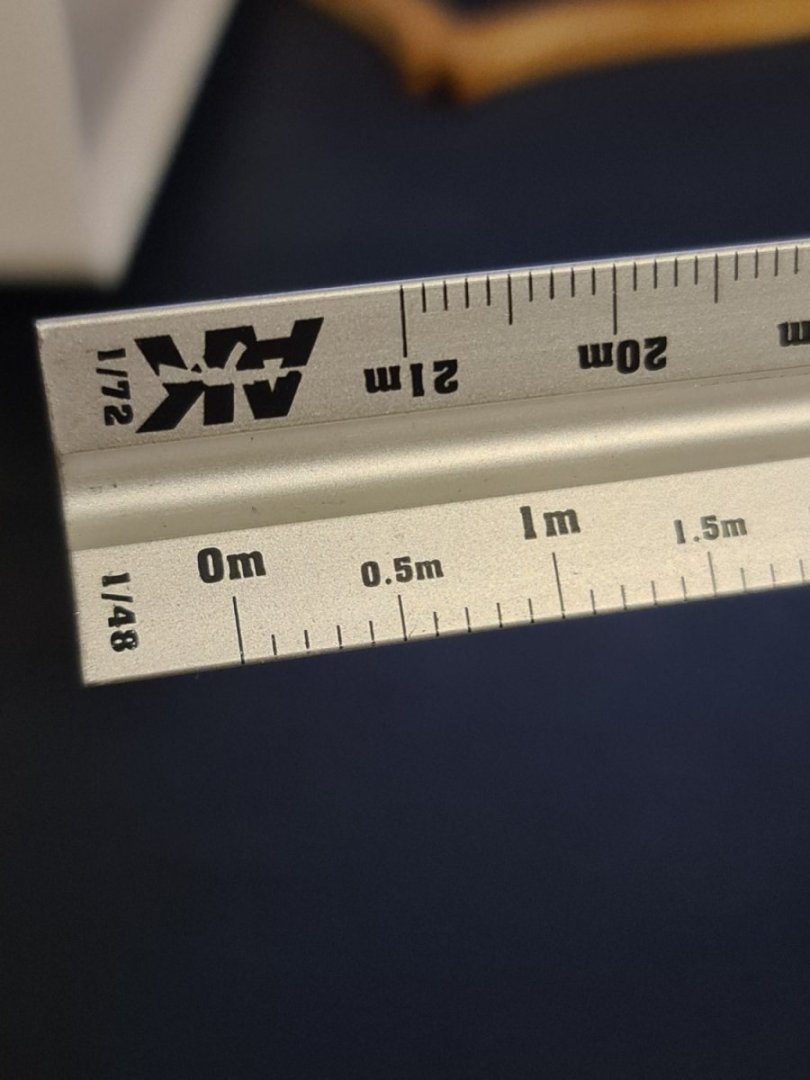
-
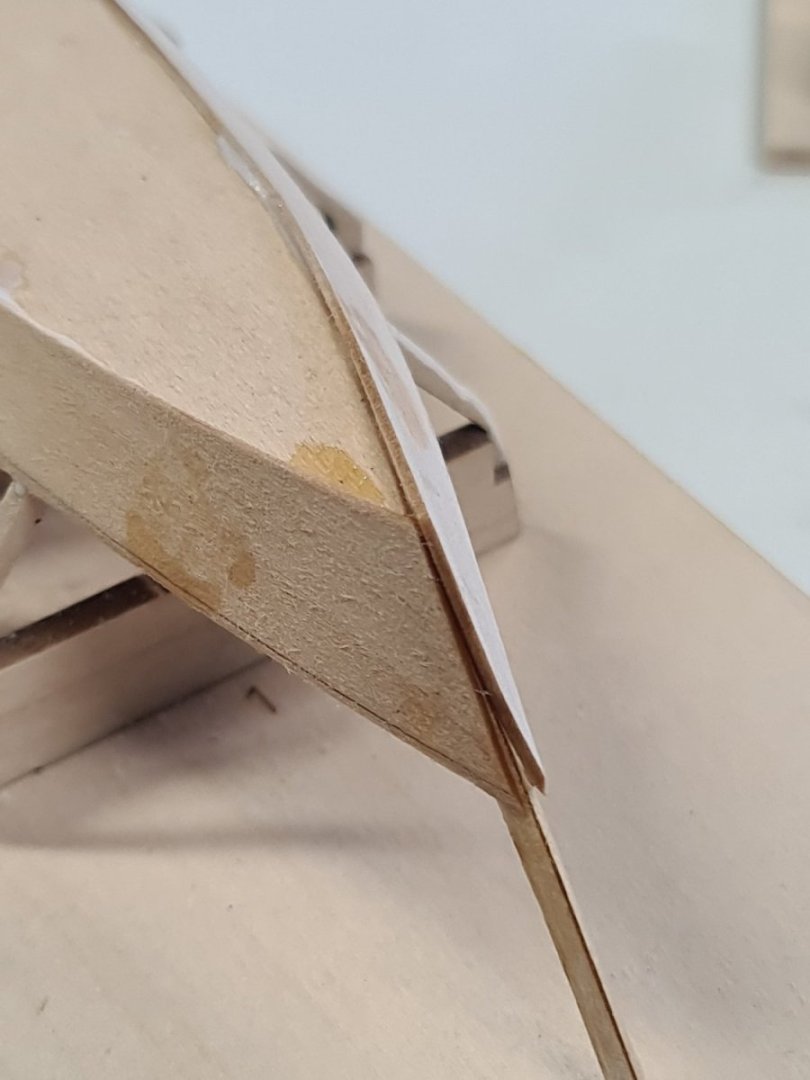
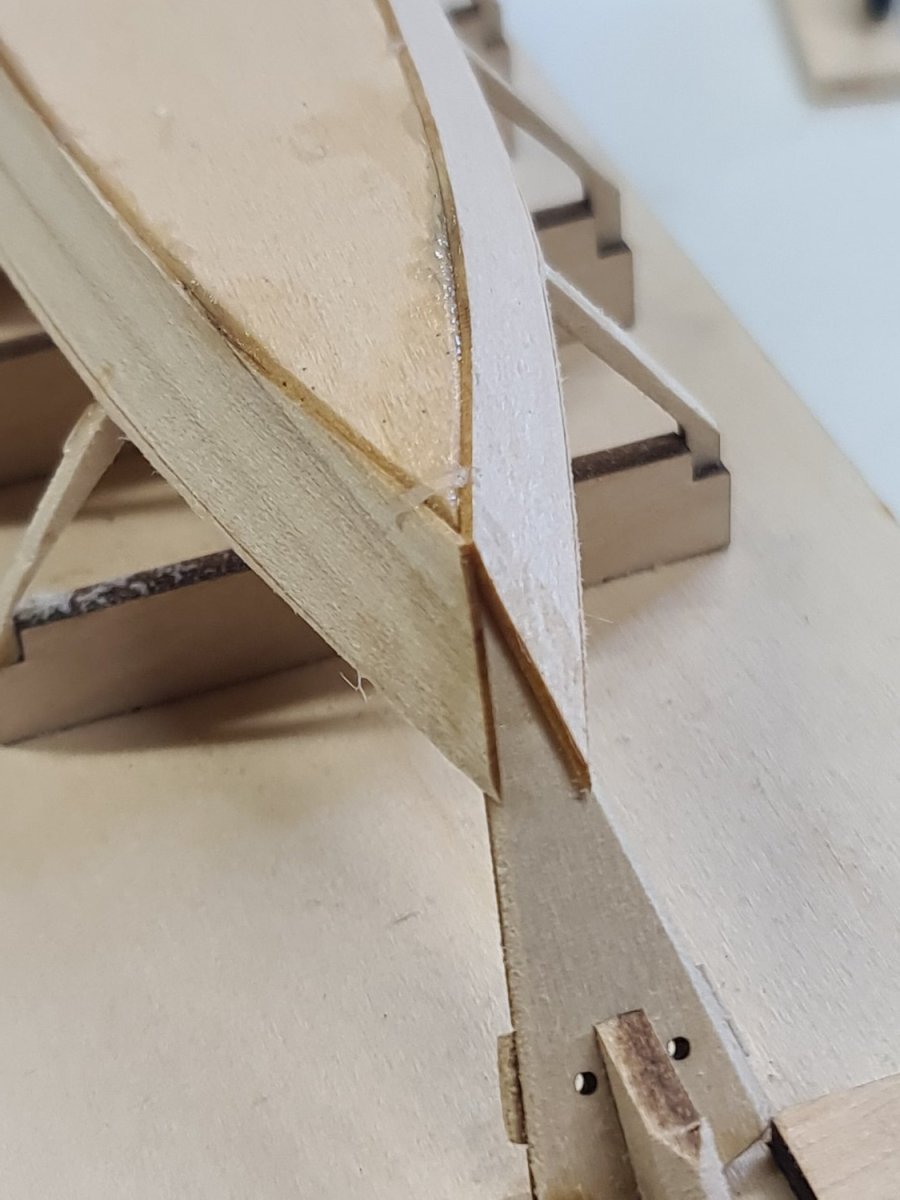
I have the broad strakes on now. I am disappointed in the stem. I did not pick up the fact that the stem had twisted slightly when I was bracing it while it cured. There is a slight twist in it.🤬
I left it for tonight while I consider whether to plow on or try and debond it which may affect the other three ends in there as well.

-
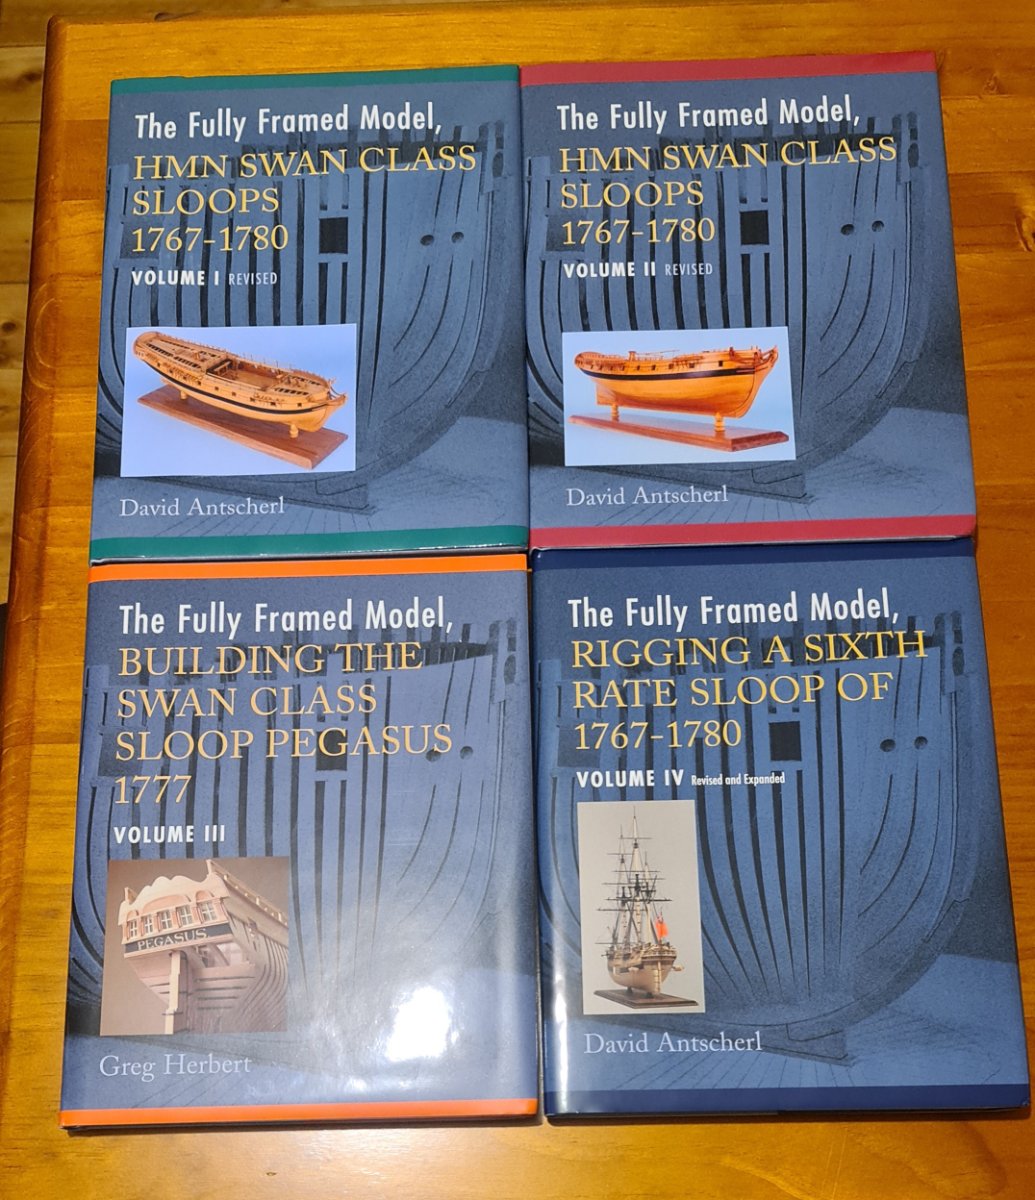
Kevin, I have just found this build. I have only seen the 1st 5 videos so far but am thoroughly enjoying them. I too bought the set of books a few weeks ago. I have the plans for the Atalanta from the NMM. Cost a bit, but hey...
I am only working on the Model Shipways Dory right now to get up to speed and have a couple of kits to do before I tackle this sort of project. A few yrs I suspect, but I will have everything hopefully that I need.
I look forward to catching up the videos...


-
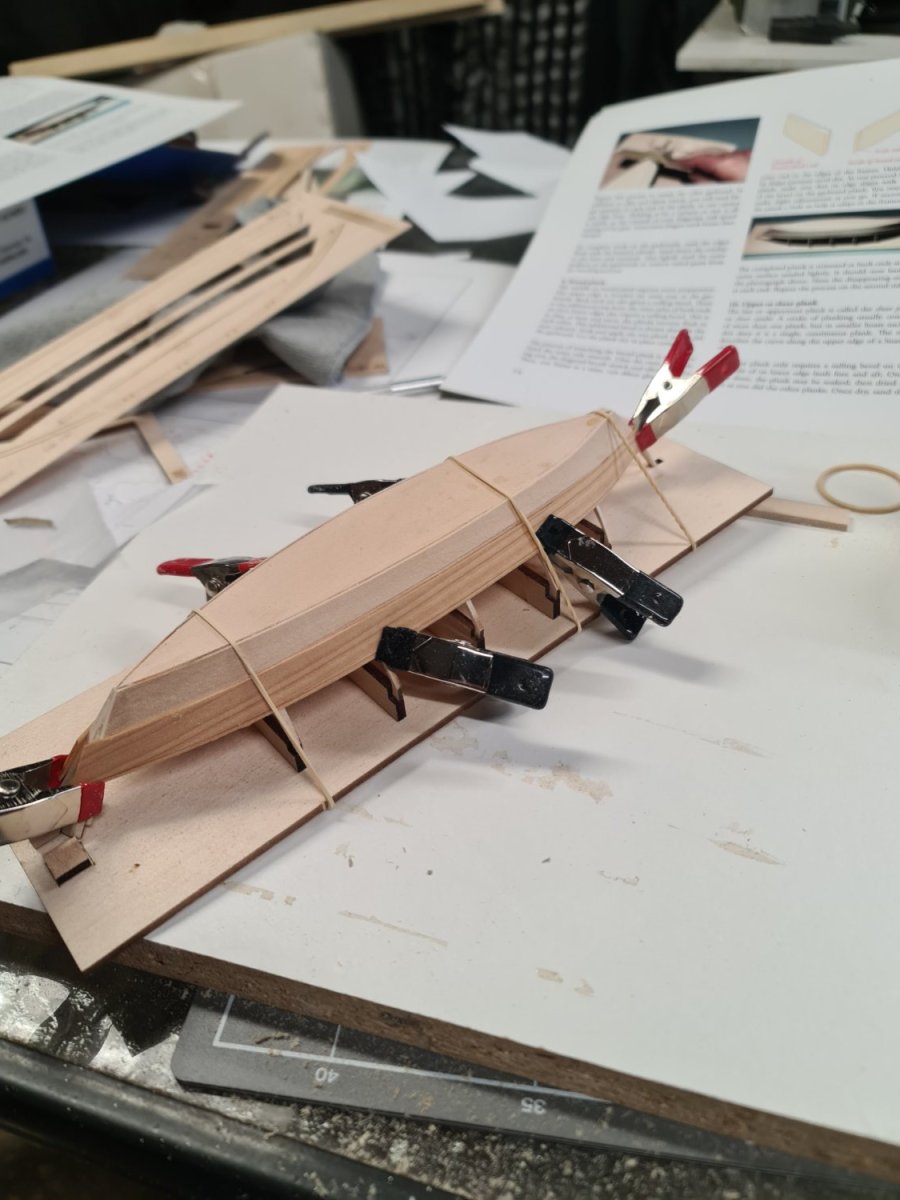
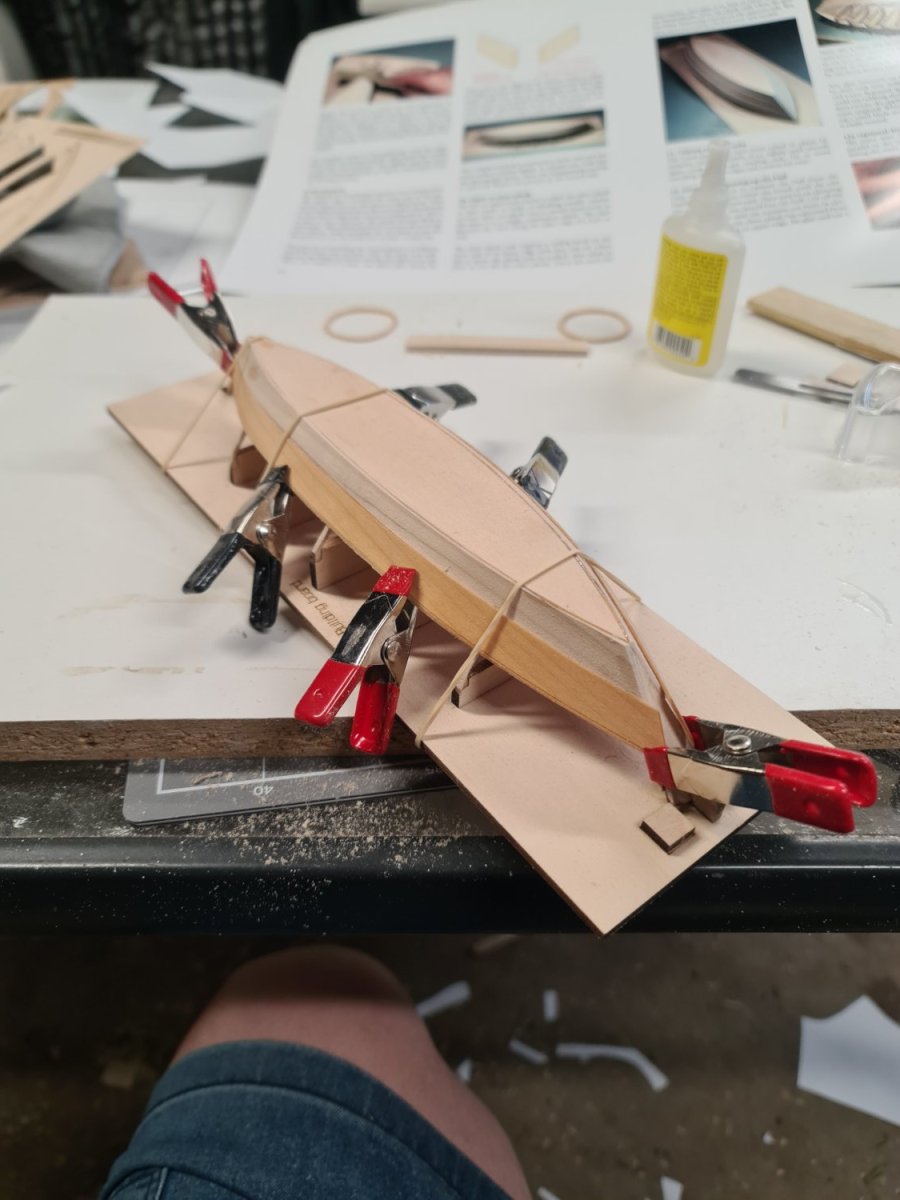
Some further work overnight on the Dory. I sanded the garboard planks flush. The joints weren't as good as I wanted but, still learning so will accept that.
I then placed the broad strakes in boiled water and soaked for 10 minutes or so before placing on the frame to bend before fixing properly.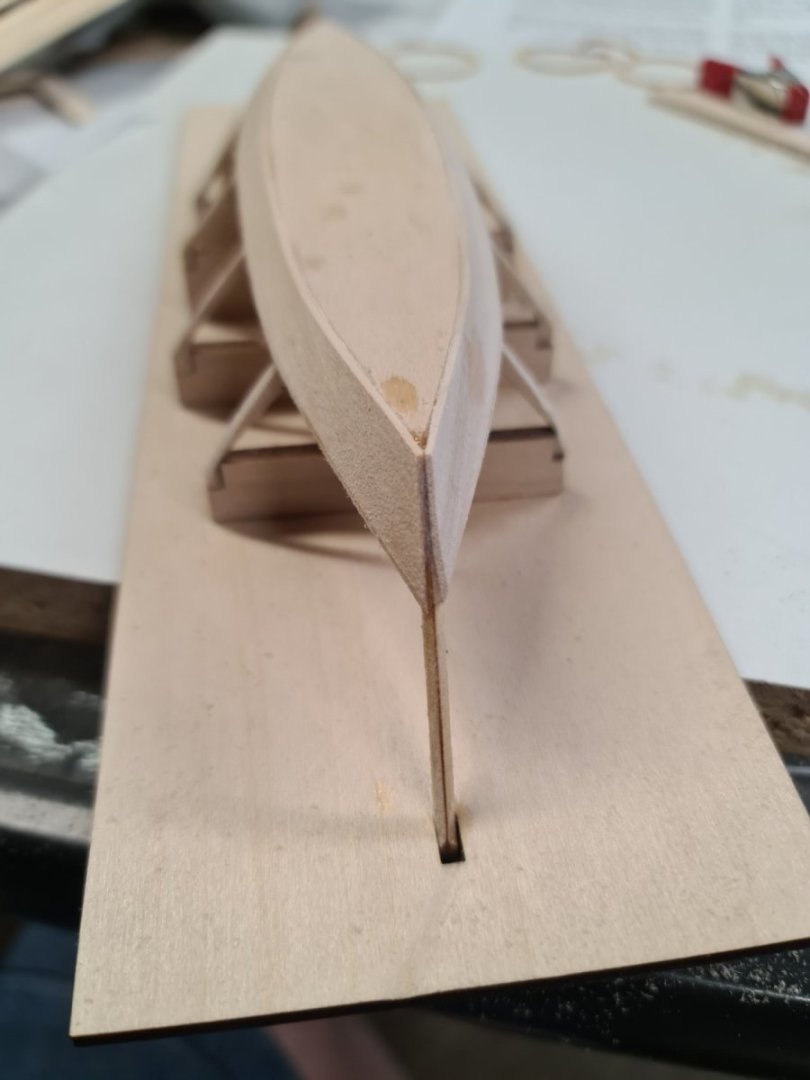


- bobandlucy, AON, druxey and 3 others
-
6
-
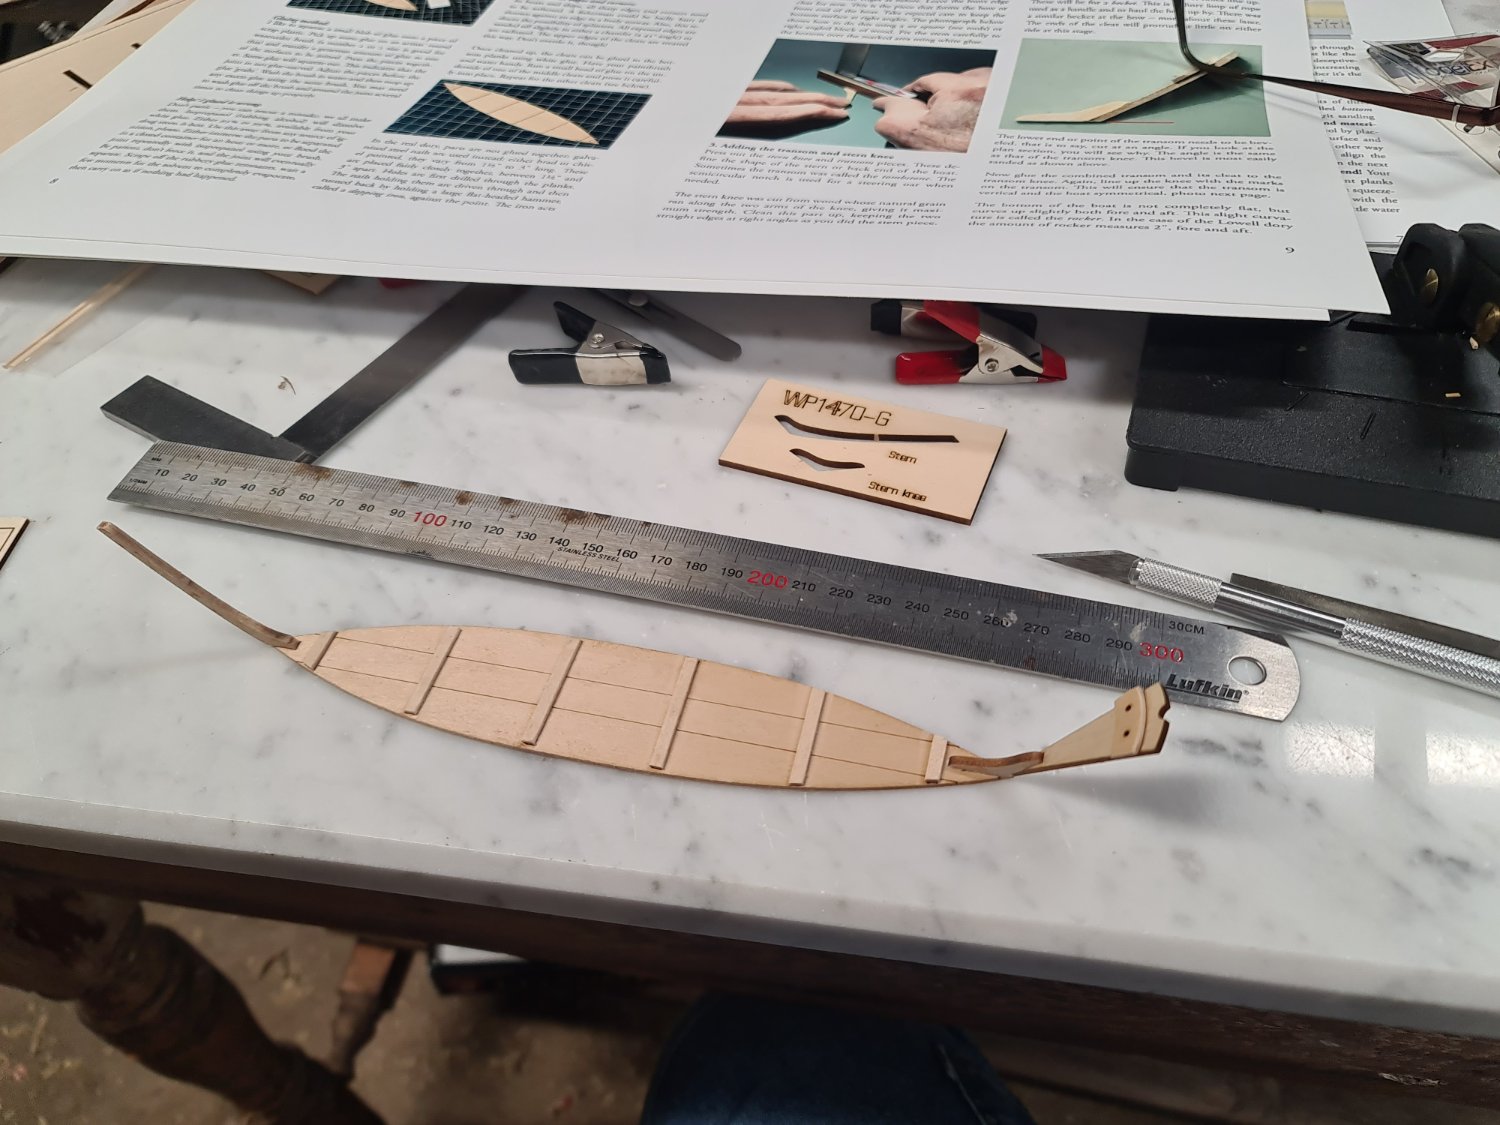
I spent time in the shed today messing around. I fixed the garboard plank on and am waiting for tomorrow for time to clean it up before placing the 2nd plank on. I need to come up with better fixtures for the ends of the planks to hold in place. The garboards weren't particularly well done.


-
I started my 1st model boat in decades. It is the Dory from the 3 kit kombo from Model Shipways. I got this kit not for the subject but to bring me up to speed hopefully as I progress through the 3 kits so I can tackle more advanced kits.
The instructions are good, although there are minor things that took me a while to catch on to. I initially did not realise the garboard planks were not symmetrical. The tapers at each end are different lengths and I did not pick this up until after I had bent the planks and held in place to set the bends. I suspect that is for trimming to final size. Apart from that, there was no issue.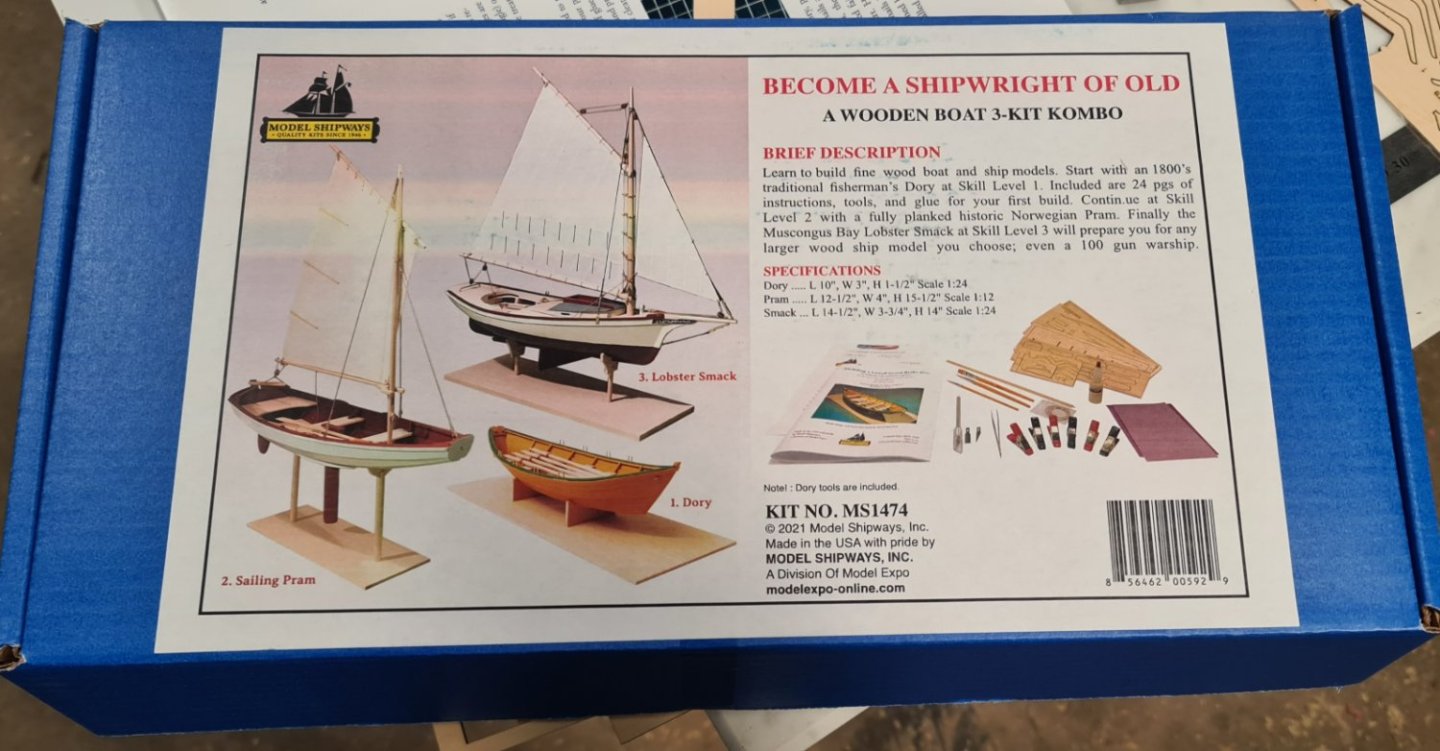


HM Sloop Echo 1781 by John Murray - 1:48 - Cross-Section
in - Build logs for subjects built 1751 - 1800
Posted
Cheers. What I meant though was I am not sure if that is the same as what you would know as English lime. I am not sure of the source of the timber.