


Jaager
-
Posts
3,084 -
Joined
-
Last visited
Content Type
Profiles
Forums
Gallery
Events
Everything posted by Jaager
-
 Bummer, You can try it, On the Wood Database - the JPEG reminds me a bit of Oak in that the grain is course and it is open pore. Be mindful of scale - if the grain and pores dominate, you may not wish to use it - but it is about your taste. If you do not paint with natural wood and actually seal and use paint and do not mind it tending to dull steel cutting edges try it. The wood is apparently expensive for most of us, You do not state a preferred scale, at mine (1:60) a 10 inch piece is 50 feet long in scale. This is longer than most any piece of a ship. I will use 6 inch pieces , it is just fiddly milling short stock. If you like it, and have any pack rat tendencies, stock as much as you can store. Situations change and it may not be there for free in the future.
- 28 replies
-
- 2
-

-
- construction
- models
- (and 3 more)
-
I have never done it myself, but Amazon has this: 3M 420 Fiberglass Resin & Repair Kit, .45 Pint < $ 20 Take a look and see if you can tackle it. I am not sure how fierce the epoxy resin solvent fumes are or what your ventilation safety is but factor that in. A thought = you are covering a wooden surface? Resin strength needing re-enforcement is not a factor. Could you not use actual cotton or linen cloth or even bond paper with the resin, instead of glass fiber or carbon fiber on the outside? Another thought + Use a solvent based varnish and paper or cloth instead of epoy. You have your strength already. All you want is a seamless water proof layer.
-
It is my impression that Asian Teak has relatively course grain and open pores. With the high silica inclusion, carbide edged saw blades are probably required. If it is Rhodesian Teak - it looks more promising. The pores look smaller and the grain = not so much contrast. It is difficult to beat free, I would try it and see, Twice as hard as Hard Maple, it would be difficult to take too much with a single cut. If you are POF, most any hull component - given that it is strong and likely to hold a crisp edge. You will have to determine if the color , grain contrast are something that you like.
- 28 replies
-
- 2
-
-
- construction
- models
- (and 3 more)
-
Dremel rotary tool - which one?
Jaager replied to RPaul's topic in Modeling tools and Workshop Equipment
An addition to Bob's Harbor Freight $10 drill = a variable power supply can get more work from the drill than the single voltage supply that comes with it. Just shop around: what American Science and Surplus sells for $30 - Marlin P Jones & Assoc sells something similar for $15. -
We are honored and fortunate to have access to someone with vast knowledge of and experience with 17th and 18th century Dutch shipbuilding. Your efforts to increase the exposure to this subject and make it much more accessible to ship modellers thru books and journal articles is greatly appreciated . I hope your tenure here is rewarding.
-
It is a new book. It is a showcase of the NMM model collection to demonstrate ship construction. Just selected examples of their vast inventory, but it is impressive to see what those Old Boys could do with just hand tools.
-
Dremel rotary tool - which one?
Jaager replied to RPaul's topic in Modeling tools and Workshop Equipment
Building and adapting tools, cutting off steel, a powerful and high speed unit can be useful. For working wood, drilling for trunnels, my main model is the 8050. The mega rotary tool sets are mostly things that you will not really need or use - probably. But the 8050 needs a full range of collets as an additional purchase. -
From the database: Workability: Northern White Cedar has good overall working characteristics, and works easily with both hand and machine tools. However, the wood is both soft and weak, giving it poor screw-holding capabilities. Northern White Cedar glues and finishes well. Perhaps the closest thing to Balsa that the United States has domestically, Northern White Cedar is one of the very lightest and softest of commercially available woods in the country In your place, I would give it a try, You might be surprised. As far as how AYC relates to other species that are named Cedar - the answer is probably: not so much. A relative gave me 3 logs of Aromatic Cedar, I think I will process them into billets and see what is there. I gravitate to hard, but I have used Tulip Poplar with success. I am impressed with how tall, wide and straight this tree grows.
-
Turning masts and other spars on small lathe
Jaager replied to Jaager's topic in Masting, rigging and sails
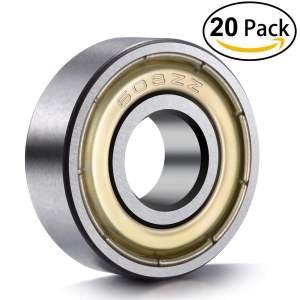
Thanks Wel, The Unimat rest is 3 adjustable points, I do not have it yet so I don't know how large the opening is and thus the max for the OD for a ball bearing race. It is fairly small though. I did a back of the envelope calculation and based on this, an ID of 3/4" or 17mm should clear the diameter of the largest mainmast I will encounter @ 1:60. $6/2 on Amazon. Cardboard shims should work. The main complaint about using a small watchmakers size lathe for shaping masts seems to be that the ways are not long enough, this covers that problem. I also see it as a way to hold the end of square stock for turning guns and capstans. Match the dimensions of the square stock to be a push fit into the nearest size ID ball bearing race. No locating the center of the square stock. -
On small lathes, such as my Unimat there is a limit to how long the piece being turned can be and still have distant end support. I have also seen pictures of the head stock being turned and a long mast being shaped with just the near end being secured. I remember seeing a suggestion for using a ball bearing live center with the support tip removed. I had the replace a frozen back support on my old band saw what it was stuck. These come in multiple OD and ID. I just bought a used steady rest for my Unimat yo hold one of these, but since I only heard from PayPal about it, I was thinking that it was not going to happen. It dawned on me that I could make a support for a ball bearing out of wood and saved the $90, and be able to use a ball bearing with a larger ID that might have an OD larger than the steady rest opening. A long mast could go thru a properly large ID unit and be supported by shims. Not many masts will be twice the distance of the lathe ways, so the mast can be reversed to shape. If it is that long the piece being shaped has support at two points with any outboard shaping. For small spars, the end can be shimmed in a ball bearing with a small ID and have a friction free support for the end. My apologies if this is common knowledge and I just missed being exposed to it.
-
Mark, Sustainable Northwest Wood 2701 SE 14th Ave, Portland, OR 97202 They have 4x4 and 8x4 Madrone lumber - they anywhere near you? By the way, I left a price quote inquiry for AYC with a lumber yard on your side of the continent, no joy today maybe the holiday?
-
Ship model terms in German. Where to find?
Jaager replied to greenstone's topic in Nautical/Naval History
For quick and dirty: Historic Ship Models Wolfeam zu Mondfeld has several pages - well 1 & 1/2 now that I look at it - at the back with Eng Ger Sp Fr It simultaneous translations for the more common terms.. A lot is packed into this book. Would not have believed that it is twice what I paid for a new copy. -
For lnen yarn Etsy has sources - mostly Baltic Coloredworld LINENGRAPHY TheRawLinen the natural grey looks like hemp as it is. It is a bit fuzzy and adherence to diameter spec could be better, but it is linen.
-
Mark, While you are at it, there is another strictly "local" species to investigate = Madrone. It - when seasoned correctly - sounds near perfect for our use. It is supposedly like, but superior to, Pear. Reading on the sites of the area mills that sell it - but only to walk in trade - it is a bear to season correctly. Apparently some have developed a way to effectively kiln dry it.
-
Newbie Questions - Glue and Pins
Jaager replied to Popeye67's topic in Modeling tools and Workshop Equipment
If you must use SS pins, take a look at Dritz quilters pins - 1 3/4" 28g which is #72 wire gauge. They run about 2 cents each. I use them as locators - outside the part's final border - For the pins that PVA bonds - it takes me 3 hemostats to get enough grip to twist break the bond - I now pull them as soon as I set my clamps. My thoughts on this: Pins strong enough not to bend when significant force is applied are like as not too large a gauge for a model 1:48 or smaller. For planking, I : drill first. use brass lills in case the pin will not let go, use a hitch chuck on the pin to hold the plank down, use the holes for bamboo trunnels after, A hitch chuck is a small piece of scrap wood to increase the surface area for the downward force. I have them be as thick as the size of my hemostat jaws. PVA can bond the pin to the wood. Splitting out the wood leaves room grip the lill with a curved Kelly clamp and prize it out. A nipped and filed brass or copper wire works with bamboo trunnels. There are French museum models with extensive brass trunneling of hull planking. #72 g is 1.5" at 1:60 scale. I am thinking about using copper wire as trunnels after I pull the lills. Using a draw plate, I can pull a piece of 12g Romex down to a really long #72- #75 wire, The question = will it be stiff enough to push? I think that pulling the wire will case harden it. I use a lot of 4" ratcheting bar clamps. The only brand that work for me is the Harbor Freight Pittsburgh with the large grey nut. The small grey nut variety do not hold, every body's orange or red varieties - the hold part is weak plastic and the triggers break. Irwin clamps can apply only a very weak force. If on sale, the HF clamps can be had for $1 - regularly $2. -
An Outline of Ship Building , Theodore D. Wilson , 1873 STEPS OF THE MAST ---- Steps of the mast are for stepping the heels o the masts in. At the present time, the fore and main masts, are stepped in cast iron mast steps,made to fit down over the main keelson, with a broad flange on the sister keelsons, to which they are secured. The Mizzen mast steps in a piece of live oak timber scored down over the berth or orlop-deck beams to which it is secured. .......The foremast in the above-named, and nearly all vessels built up to that time, stepped in wooden steps, built up on the main ans sister keelsons. A simple piece of timber just on the keelson does not seem adequate. For the coal cargo. The top of the knees could have been roofed over with relatively thin planking to keep the coal out. It would not have required a major overhaul to alter the mast steps over the life of a ship.
-
Cutting Planks
Jaager replied to sfotinos's topic in Building, Framing, Planking and plating a ships hull and deck
Dave and I are totally in sync on rubber cement - just be careful of the paper - the 5X, 7X, 10X type while they hold up well, they have a gummy backing that is incompatible with the cement. You want a raw paper back. That paper works well for my sleeveless drums and sanding blocks with mechanical hold. -
I am pretty sure that it is the topsail schooner Eagle. MS solid carved hull. I have the plans I think - PM me if you can use 8x14 sectional scans I prefer PNG if you can open them, but Painter will save as JPEG as well.
- 11 replies
-
- 1
-
-
- eagle
- model shipways
- (and 2 more)
-
I am surprised that Underhill was as precise in his mast step mortise - going so far as to cut it at the mast slope angle. Not much room for adjustment there. I like the old technique of fixing a cut off nail tip into the bottom of the mast so that minor adjustments can be made and the mast not move. I would think that the actual mortise f&a would be over size and wedges used to hold the tenon. That would allow the captain to alter the mast rake as conditions change.
-
Stringybark seems to be applied to a bunch of Eucalyptus species. If what you have is Messmate - it is not gonna look good on a model. Dye it blue or blue-green and It would make a baseboard for a model that looks like a series of waves in chain. I would go for that. I don't see any of the other possible species in the database. I would billet a sample and plane it just to see if makes the grade. It would be a shame to make a bonfire of something useful. If you have the time and resources, an examination and test could be made of your domestic hardwood species that are available commercially, and could be used for ship models. It might could be a help to make a virtue of your isolation and promote what you have available there. My target is tight grain, no visible surface pores, low contrast between the Spring and Summer wood. Fairly hard to very hard is good, crisp edges a must.
-
It is the size - which I guess is a function of age - I would want at least 3" diameter and 2' long - 6 inches long will do since at 1:48 that is 24 feet. 40 feet is as long as I have seen for planking in published lit. So, if that is your scale 10 inch stock will work. From the picture Spotted Gum looks very promising. Ironbark- grey looks worth trying too - can't tell if the surface has pores not not. From the description, my #1 lesion below goes triple. More HP is better, both sound hard. Check local farms or a tree service if you have one near by for logs. You want fresh cut. If you have room and intend to do carving - try growing Washington Hawthorn - or any Hawthorn. You can also grow Boxwood (real Buxus semiverins) and prune it for vertical growth. If there are tree-like varieties, use them . Your great grandchildren will thank you if any are ship modelers. If you grow Apple, do not bother with dwarf or semi dwarf stock. It will take longer to get fruit, but you will get lumber. The Pear you want does not produce fruit, but is what they graft the fruit varieties too. I think the Europeans consider this species a weed - Pyrus communis - but it is the lumber source. The ornamental Pear - like Bradford - grows fast - has really good wood - try a lot of this. Around here, after a hurricane, it can be found literally laying in the street. Also, grow some Sugar Maple if you can. I am cutting some now that is close enough to Boxwood not to matter for hull parts. I like being self sufficient as much as possible, so for being my own saw mill - right now - the lesions that I think that I have learned: 1- a bandsaw powerful enough to do serious resawing. - low end units will fight you. 2- logs need to be fixed to a carrier board to keep them from moving - particle board screws and metal braces work. 2 perpendicular faces and the table and fence can be used directly. 3- a carbide blade is ultimately the less expensive - even if the initial cost is a shock. 4 - Coat the cut ends of green wood as soon as possible with latex paint, varnish, or hot paraffin wax 5- 2 inch billets will take 2 years to season, but if you do larger scales you will want this thickness 6- Always sticker the drying billets - they need good air circulation to dry. 7- fungus will want to eat green fruit wood. A box of 1-2 inch Styrofoam insulating sheets - with enough incandescent light bulbs to get the inside temp above what a fungus will survive can save the wood and maybe speed the drying. A computer muffin fan is enough to pull the water vapor from the box. A kiln is better and faster, but I am not near a real sawmill. 8- a low quality thickness sander is not going to work well. One that uses sheet or roll sanding media instead of sleeves has lower material cost and has a better choice the sanding grit. 9- chainsaws are faster than bow saws - just more dangerous and expensive.
-
Looking at the Wood - Database, there are several domestic OZ species that sound useful. There is also wood from any local fruit trees like Apple, Pear Plum, Crab Apple, Orange, Peach,... But you need access to a good bandsaw and sanding thickness planer.
-
Small steps - sub assembles as the focus- keeps from becoming overwhelmed my the complexity. Stain is a semi transparent paint - it fills pores. Aniline wood dyes do not fill pores and enhance the grain.
-
Copper Plating
Jaager replied to Kurt Johnson's topic in Building, Framing, Planking and plating a ships hull and deck
I intend to try using 100% rag bond paper - the dissertation stuff - with the Modern Masters copper products. It has a primer - acid block and surface smoother (I hope) , a real copper coat , and a patina producer , antique copper , and copper penny. I was thinking of turning the paper into copper while still a sheet and using a Guillotine Trimmer to cut it into scale pieces. If I can ever get a hull that far along. -
Newbie with a few tool questions....
Jaager replied to CPDDET's topic in Modeling tools and Workshop Equipment
Toni and Chris - I agree with both. I have found that a hand plane is a tool looking for a job. I view it as an advanced wood workers tool that wants skill and finesse. Start with the kit. Lay out your first job. Figure out what tool you need - see how others did that job - buy that tool. Go step by step, job first, then get the tool. When it comes to drilling your first hole - a pin vise is not expensive - for a Dremel Moto tool - when or if you get to a gotta have one mind set - my go to for a while is the model 8050. Search for a deal, Big accessory kits are generally a waste of money, but you will need a collet set. But for the long delivery time and what the new tariffs will do AliExpress has been a low cost source for interesting stuff. If you turn into another tool junkie - the Fates help your CFO. But for now, husband your tool budget - that is my suggestion. Find out naturally if this endeavor becomes an obsession or is not for you and you have bought a lot of stuff that you will never use. I know that it is hard to keep tight reigns on enthusiasm, but these fields are probably littered with those who did not and wished they had.