
.jpeg.882f0a147f14858c9e673da7e13d8ebe.jpeg)
RossR
-
Posts
310 -
Joined
-
Last visited
Content Type
Profiles
Forums
Gallery
Events
Posts posted by RossR
-
-
41 minutes ago, Patrick B said:
Hi Capella,
When gluing the bulkheads, try to push them to one side only, say right or left. This will make them stronger. Also, I used lego bricks to make them squared.
Patrick
I agree with Patrick, Legos work great. When I built HMS Beagle, I glued all the frame pieces at once and dry fitted the deck on to keep it square. Not a route I would advise. There on some pics of using the Legos to keep things square in my Frigate Diana build log if you want to take a look.
Ross
-
Thanks for the feedback. I will check out your build log. I am not sure how I will handle the issue with the chainplates and gun ports, but I know I don't like the idea of skipping it like the instructions show.
-
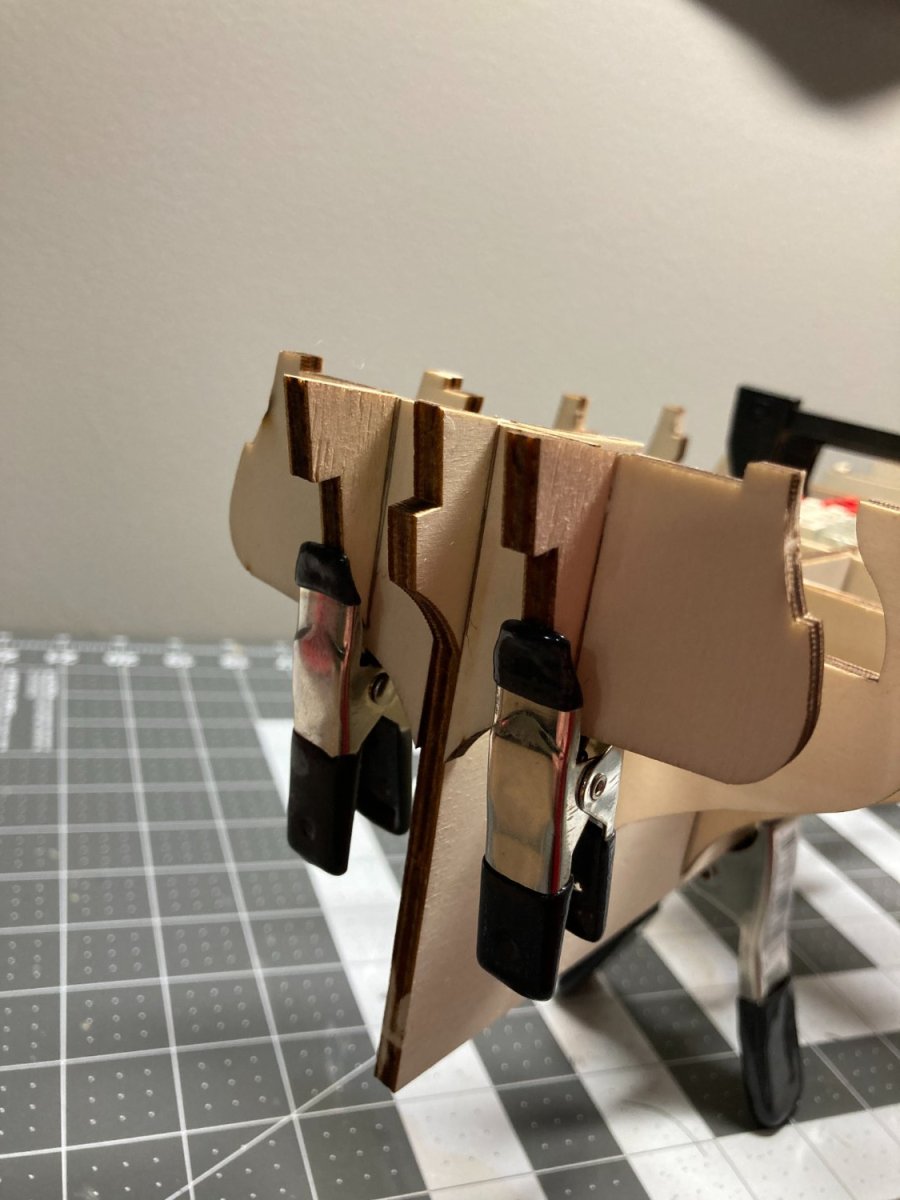
I have the bulwarks installed. When I built my first model I didn't have great luck using an iron to bend the plywood bulwarks. I decided to use a jig after soaking the pieces to bend the bulwark. I soaked in hot for about an hour then clamped to my jig for a day. I used a 4 inch PVC drain pipe coupler as the jig.
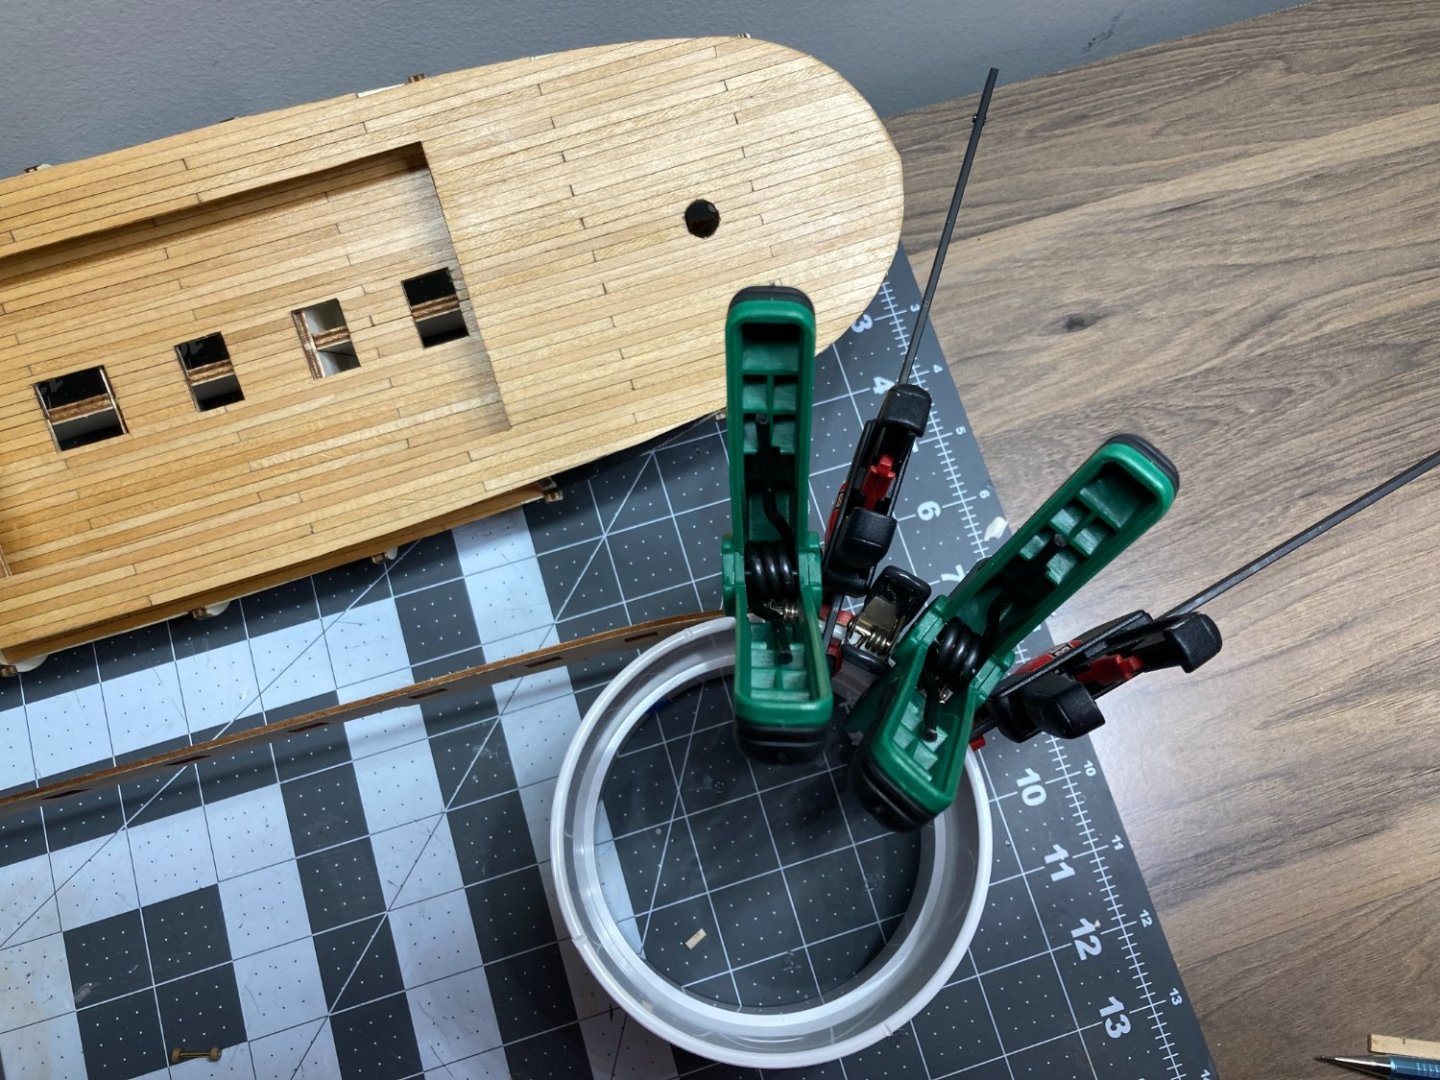
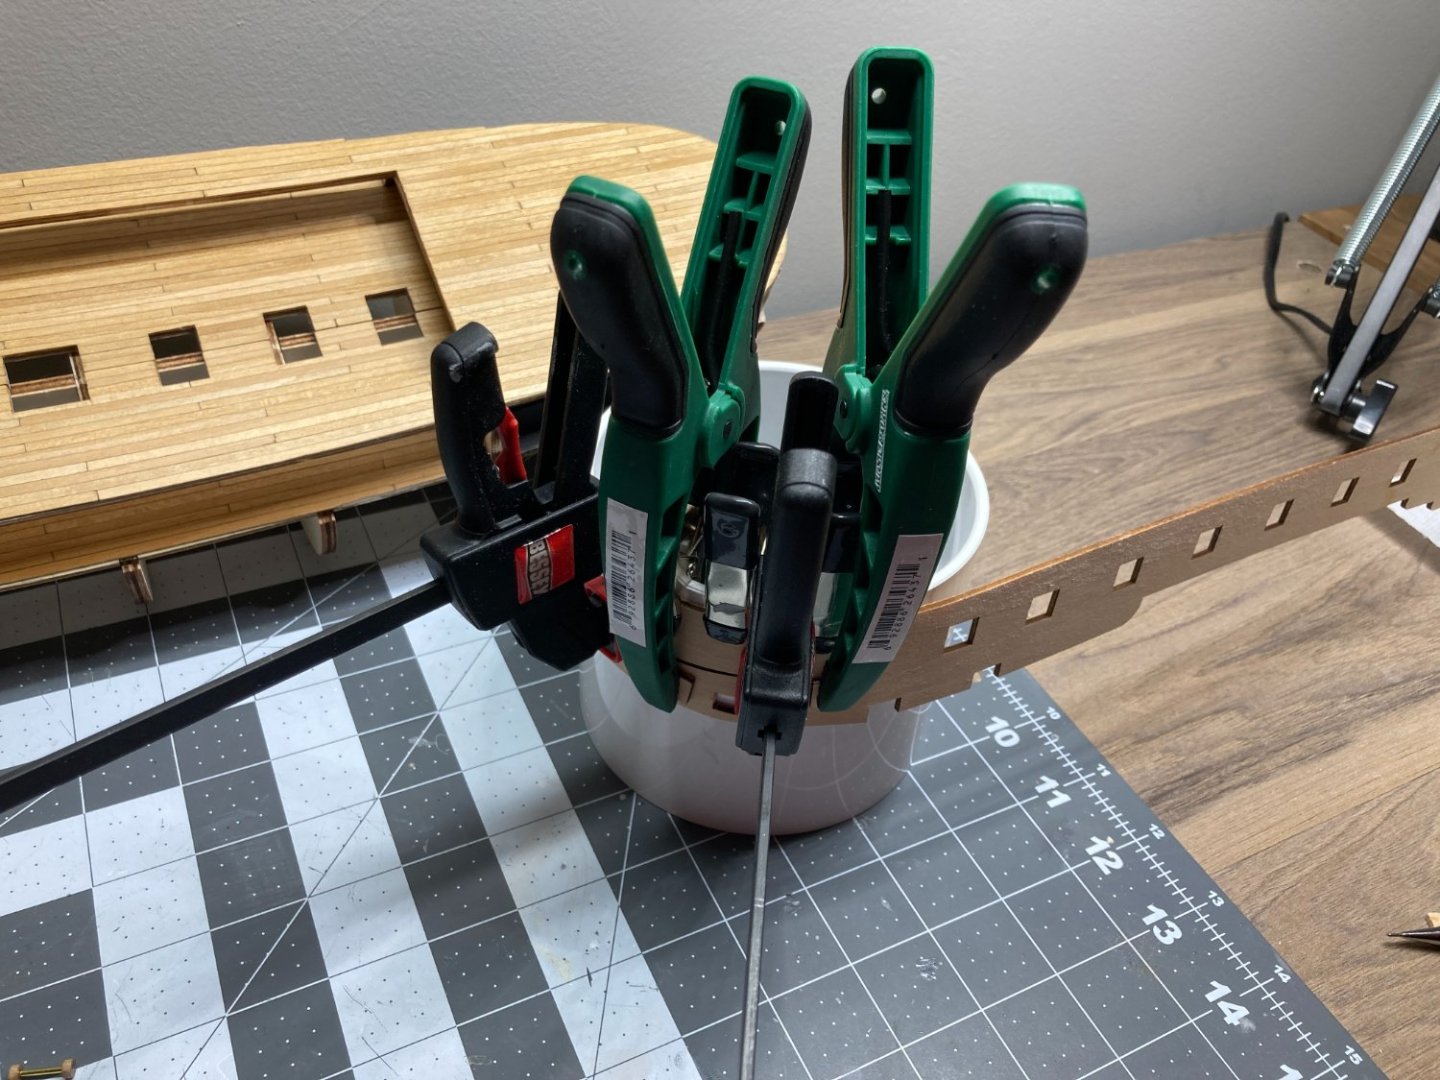
The instructions said to use quick drying glue and to start at bow. I had a really difficult time getting and of the nails inserted quick enough with the quick drying glue. I deviated from the instructions and used wood glue and started from the middle and worked my way back to the stern then forward to the bow.
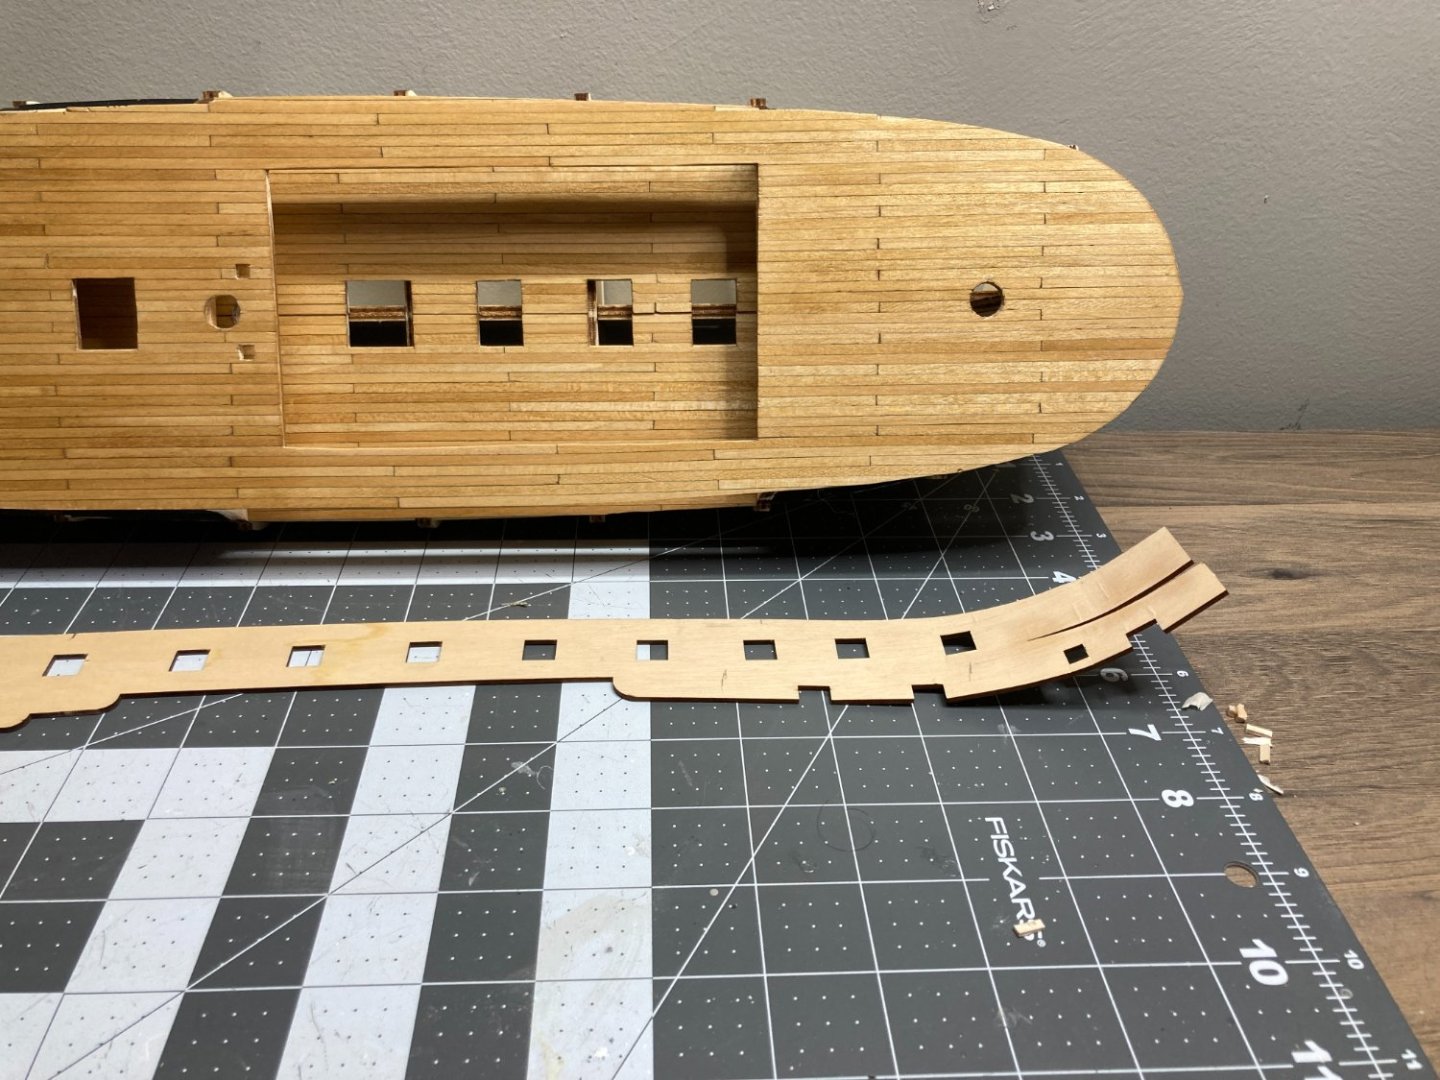

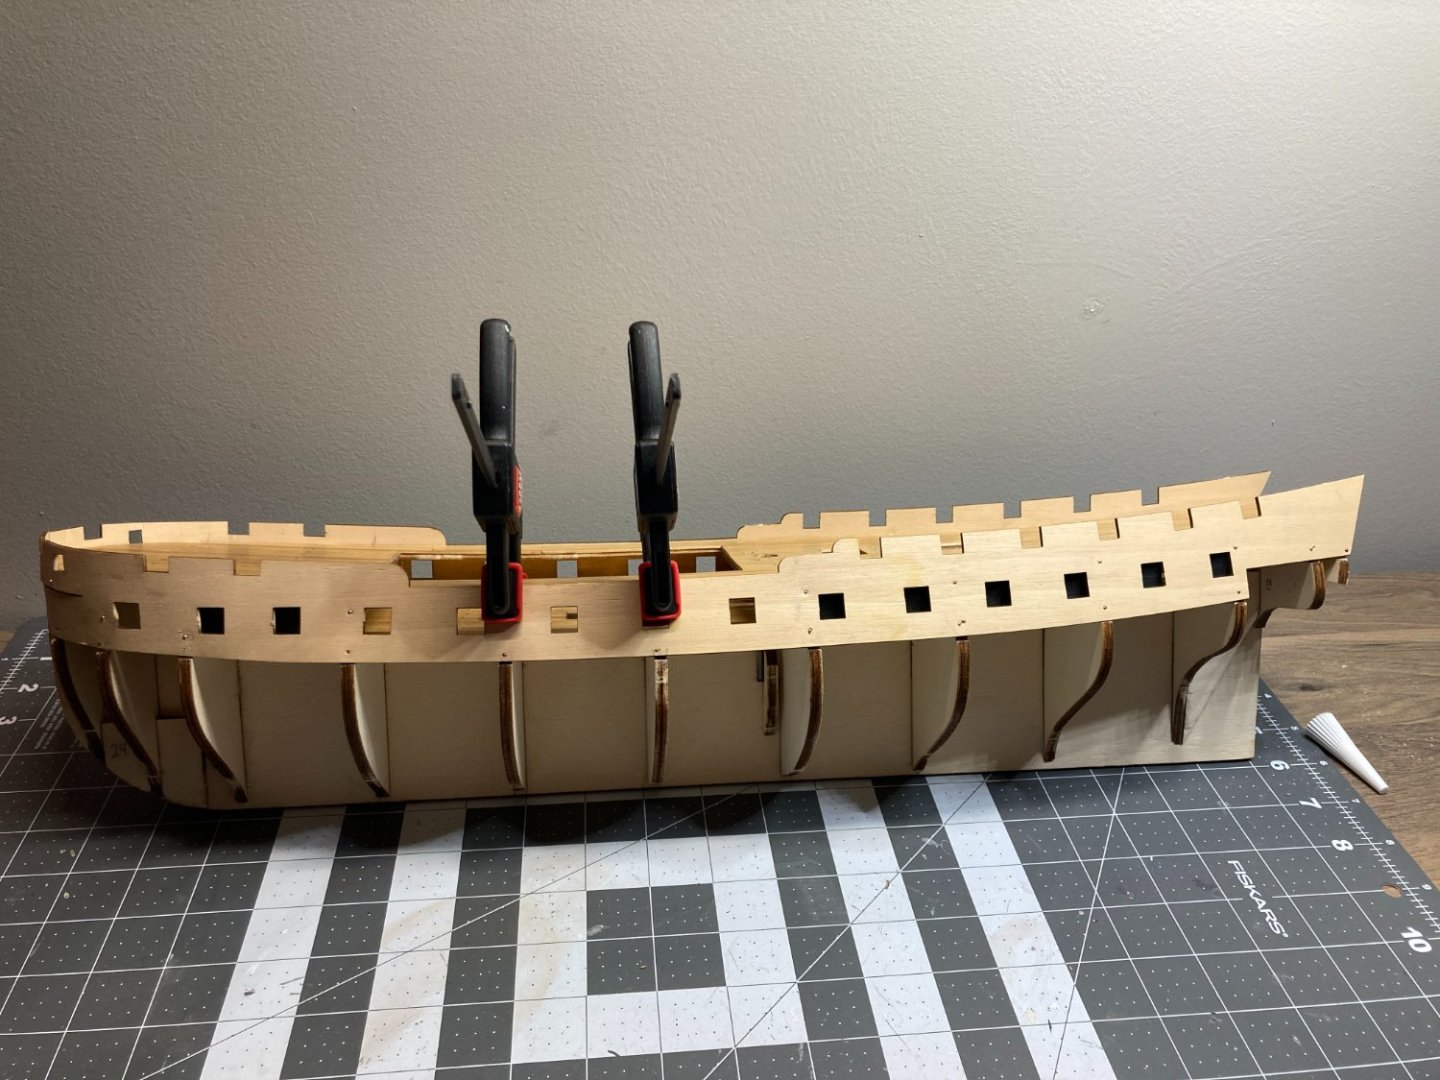
Next up I need to shape the frame pieces below the bulwarks and start adding the hull strakes.
- dunnock and Bill Morrison
-
 2
2
-
-
No need to apologize. In some parts of the US Ethanol can be purchase at 95% purity, for human consumption, usually under the brand name Everclear. This is often used for thinning shellac or dissolving shellac flakes. Denatured alcohol is ethanol that has additives to discourage people from drinking it. Where I live I can only get denatured alcohol and use that for thinning and mixing with shellac flakes.
-
4 hours ago, rcmdrvr said:
Just read your build for the first time. You are doing a great job building and I am very impressed with the quality of your photos. They are sharp and well composed. Makes it very easy to follow. Becoming proficient in soldering is good skill to acquire. There are some good you tube videos you can learn from.
Thanks. I am a long ways from working on the chainplate, but I really want to improve that area of the kit. Do you have any experience with products such as Solder-It? It is applied from a syringe and only needs the heat from a lighter to melt it. I saw some YouTube videos of it being used.
-
The holidays didn't allow much time to work on the ship. I have spent some time thinking about additions / improvements to the kit that I may want to make. I have a list of possible items, I probably won't incorporate all of these but right now and considering the following:
Scratch build the two small boats that are mounted on the deck - The kit came with cast metal boats, they look pretty good, but I thought scratch built might be fun. I received some great information from some other members of MSW on scratch building some boats. I think I will attempt this, as a separate build but use the kit supplied boats on this ship.
Adding blocks and lines to the gun carriages. I like this idea, but I am worried that at the scale of this model the blocks will be too big. Need to do some research on this, but I am leaning towards adding these.
Occre supplies what they call "composite" deadeyes. I am considering upgrading to wood so I can stain them black. I have seen that some people paint the composite ones, but I worry it will be difficult to keep the holes open and don't want to re-drill them.
The cleats that are provided need to be painted a wood tone. I may attempt to see if I can carve some actual wood cleats. Not sure if I will be successful, but don't need to invest much in the wood, so I may give this a try.
I am going to use a brass blackening solution on most of the brass components. I like the black appearance better than the bright brass.
I don't like the chainplate provided with the kit. It is just a brass wire that you paint black. I will do something different, but not sure what. Been looking at some other posts and I may try to fabricate something, but I have never soldered before, and would need to figure that out. I may just purchase some black chain and use that.
I would love any thoughts or advice anyone has on these items. Hopefully I get the bulwarks added soon and will post about that process when I do.
-
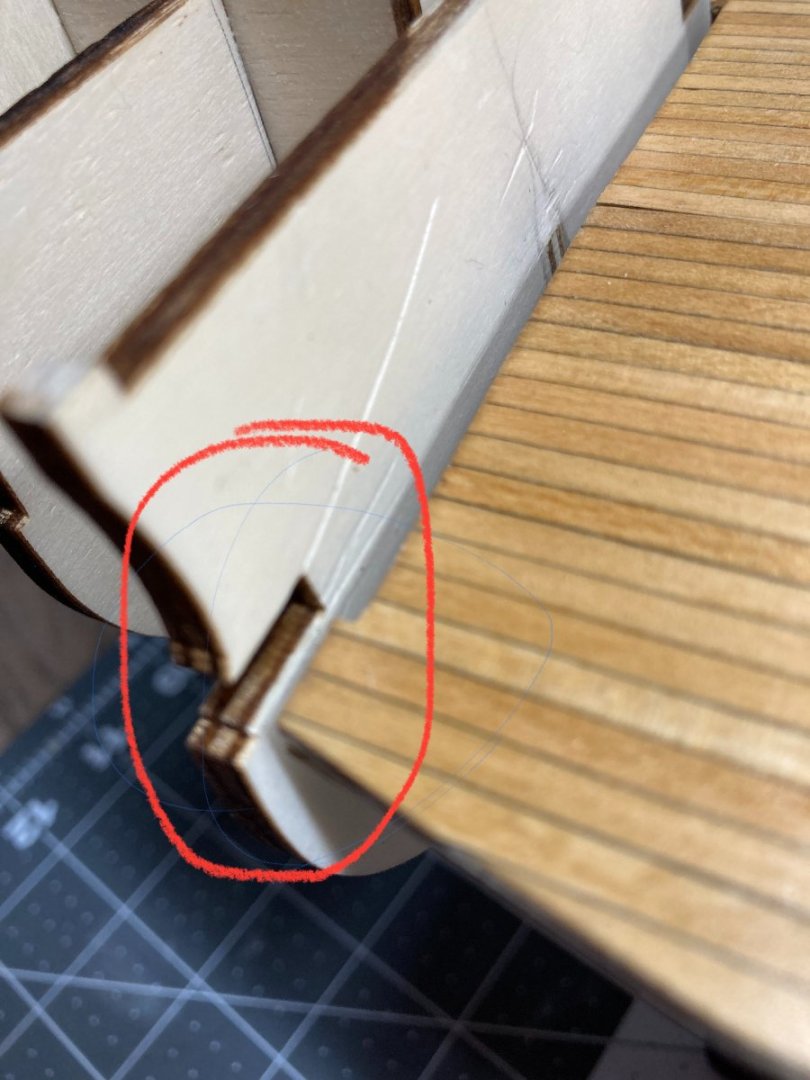
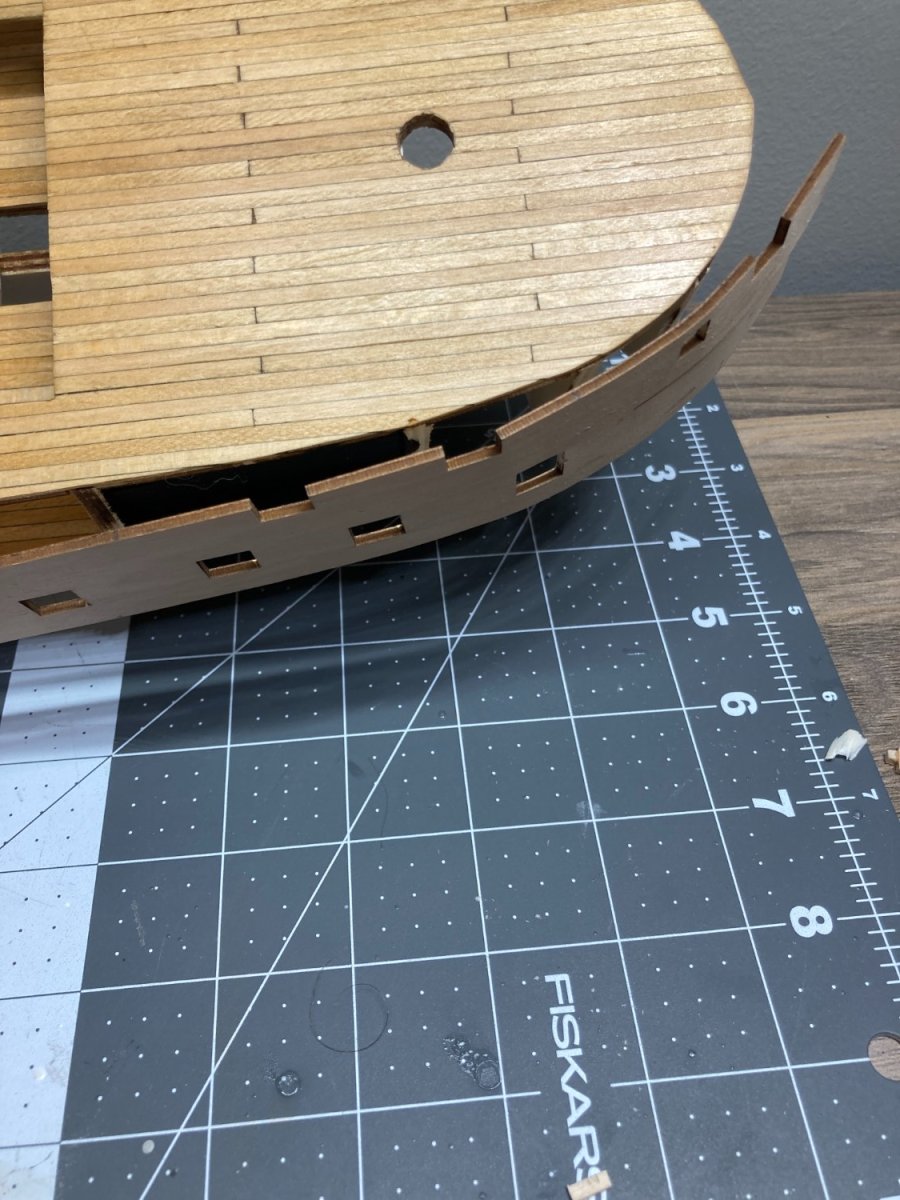
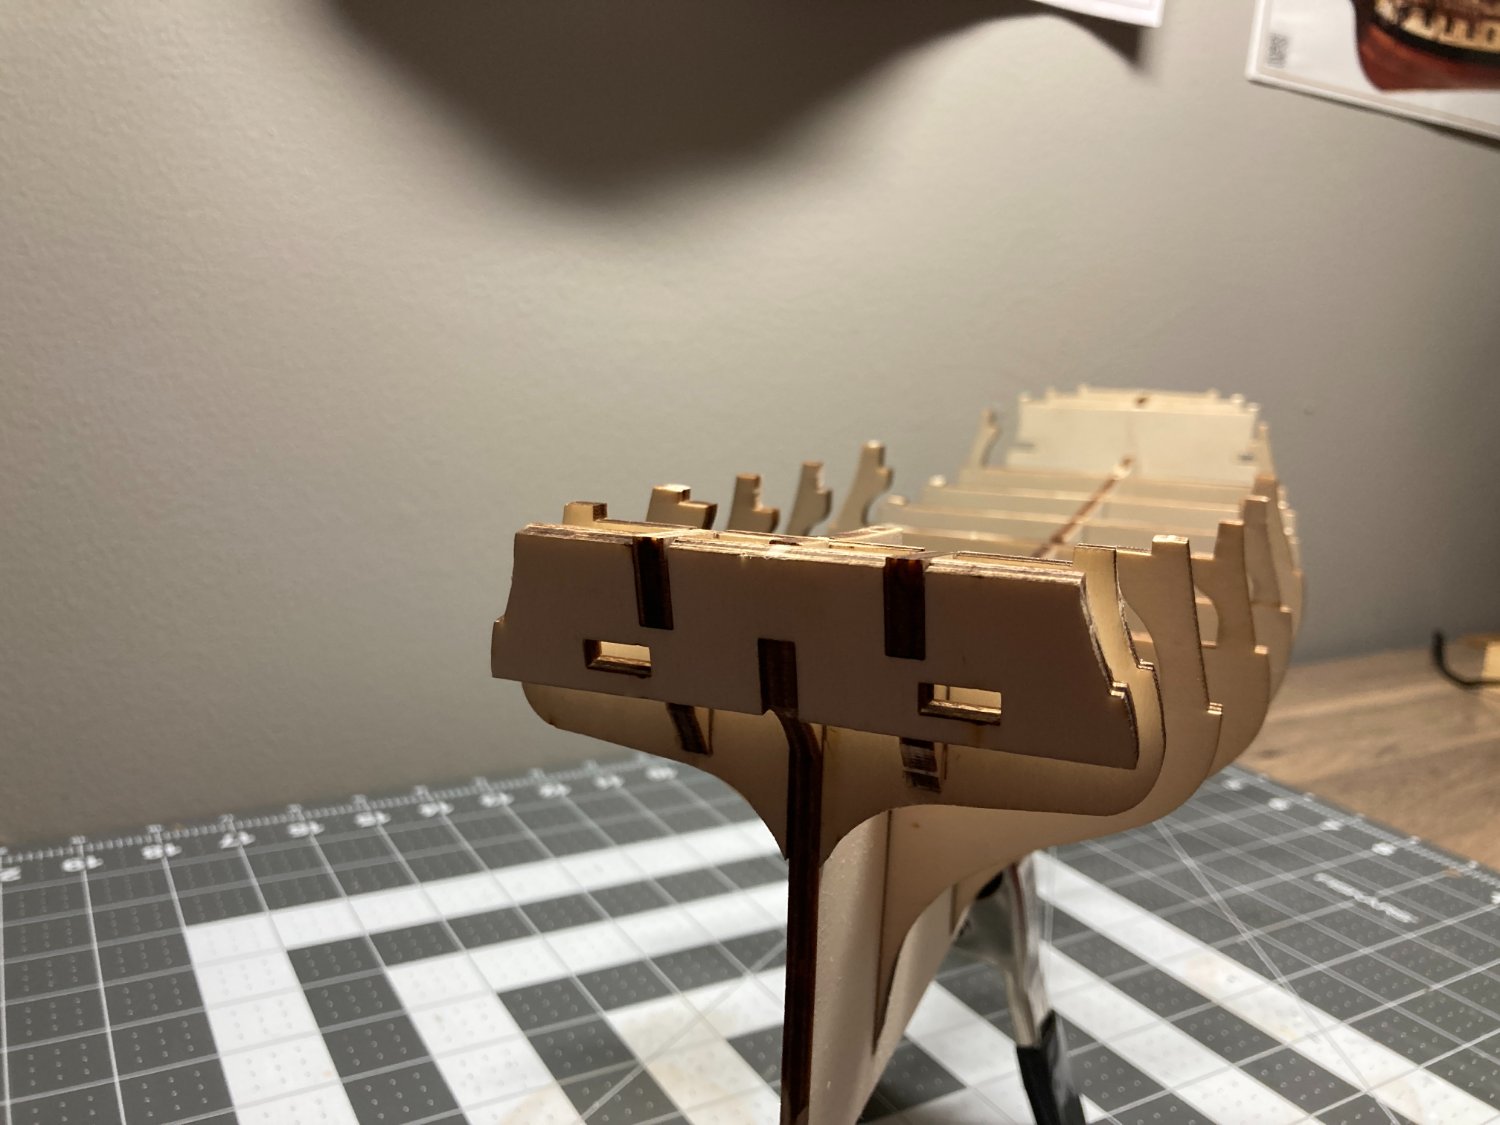
I ran into my first issue while installing the lower deck pieces. There is a tab on the deck pieces that fits into frame piece number 4. See picture below. With all of the frame pieces glued into place there is no easy way to get this piece installed. I ended up breaking the piece free and re-installing it after the lower deck is in place. If you are building this kit consider waiting to install frame piece number 4 until after the lower deck is in place.
.thumb.JPG.21b02801a5b4aba05a002b0252ab9347.JPG)
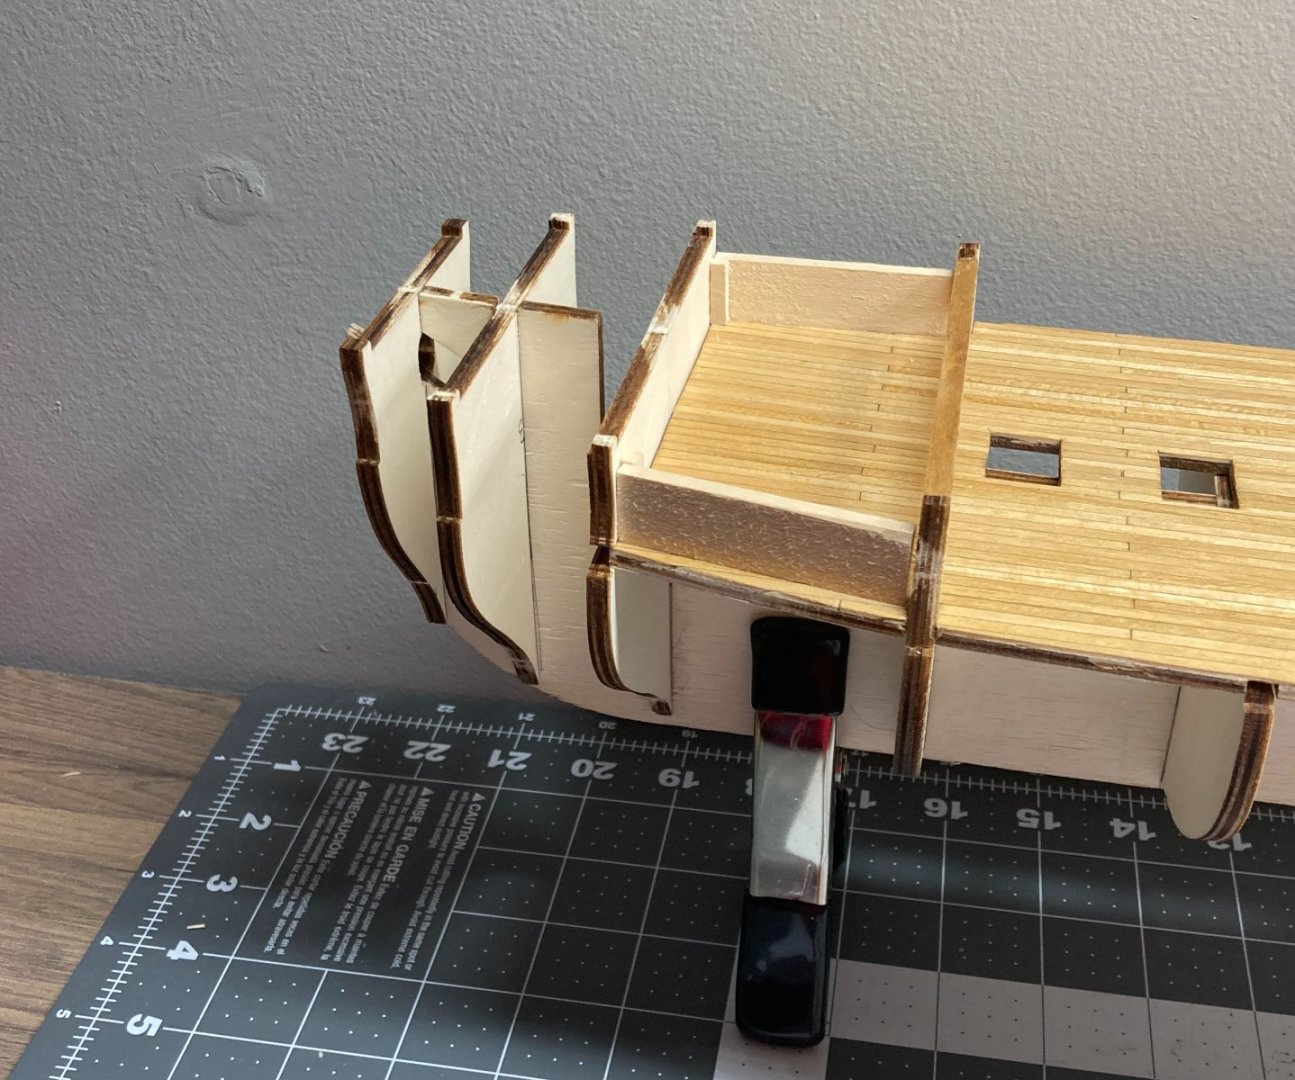
After the deck pieces were installed I re-attached frame piece number 4. I also installed the supports for the upper deck. The two closest to the bow should be finished as parts of those will be visible through the opening in the upper deck.
.thumb.JPG.e0e93fcadb02ad135e4f2989327ff01b.JPG)
.thumb.JPG.f3a741bf25a52a1b89ab21a2b81234e2.JPG)
Next I installed the bases for the partial cannon barrels to be installed. I added some bracing behind the bases to hopefully keep them from breaking free when the holes are drilled into them for the cannon barrels. The instructions do not call for this, but I decided it might be a good idea.
.thumb.JPG.79a6e99d86d89e9de5380c98ac6bd4e6.JPG)
.thumb.JPG.80b20738d01fd534a56d4e051fe8d43d.JPG)
Next I installed the upper deck and painted the bases black. The instructions do not say to paint the bases black at this stage, but it seems easier to do it now rather than wait and try and do it through the gun port.
.thumb.JPG.fbc68116e7bba978c199d78256a1b75a.JPG)
.thumb.JPG.4930aa6ce68a82b448bd1e4ca1e811ee.JPG)
Next up is shaping the frames for the bulwarks.
- Bill Morrison, dunnock and CiscoH
-
3
-
-
I used the contact cement only because that is what Occre has in the instructions. I had good results using it on my first model, so I stuck with it. I appreciate the info on the plank layout. I will use that in the future.
- Bill Morrison and allanyed
-
2
-
6 hours ago, allanyed said:
Thanks, that is what I thought might be the case. The middle piece has three gallery lights, but they probably had no way to translate from Spanish to English so called them windows by mistake.
Again, just a minor matter of nautical terminology which must be a very difficult thing for the folks making the instruction manual and drawings when it comes to translating.
Thanks again
Allan
As a newcomer to ship modeling the terminology can be a little intimidating. I appreciate you sharing this information. One of my goals on my build of the Frigate Diana is to take the time to learn more about the correct terminology as I go. Especially on the sails and rigging. Would love to have you follow my build log and add some help as I need it. Thanks.
https://modelshipworld.com/topic/33530-frigate-diana-by-rossr-occre-185/
-
I started with HMS Beagle from Occre. Good instructions and about 130 short youtube videos to demonstrate various techniques. I had no modeling experience and am pretty happy with the result.
Good luck
- Ryland Craze, Patrick B, mtaylor and 1 other
-
4
-
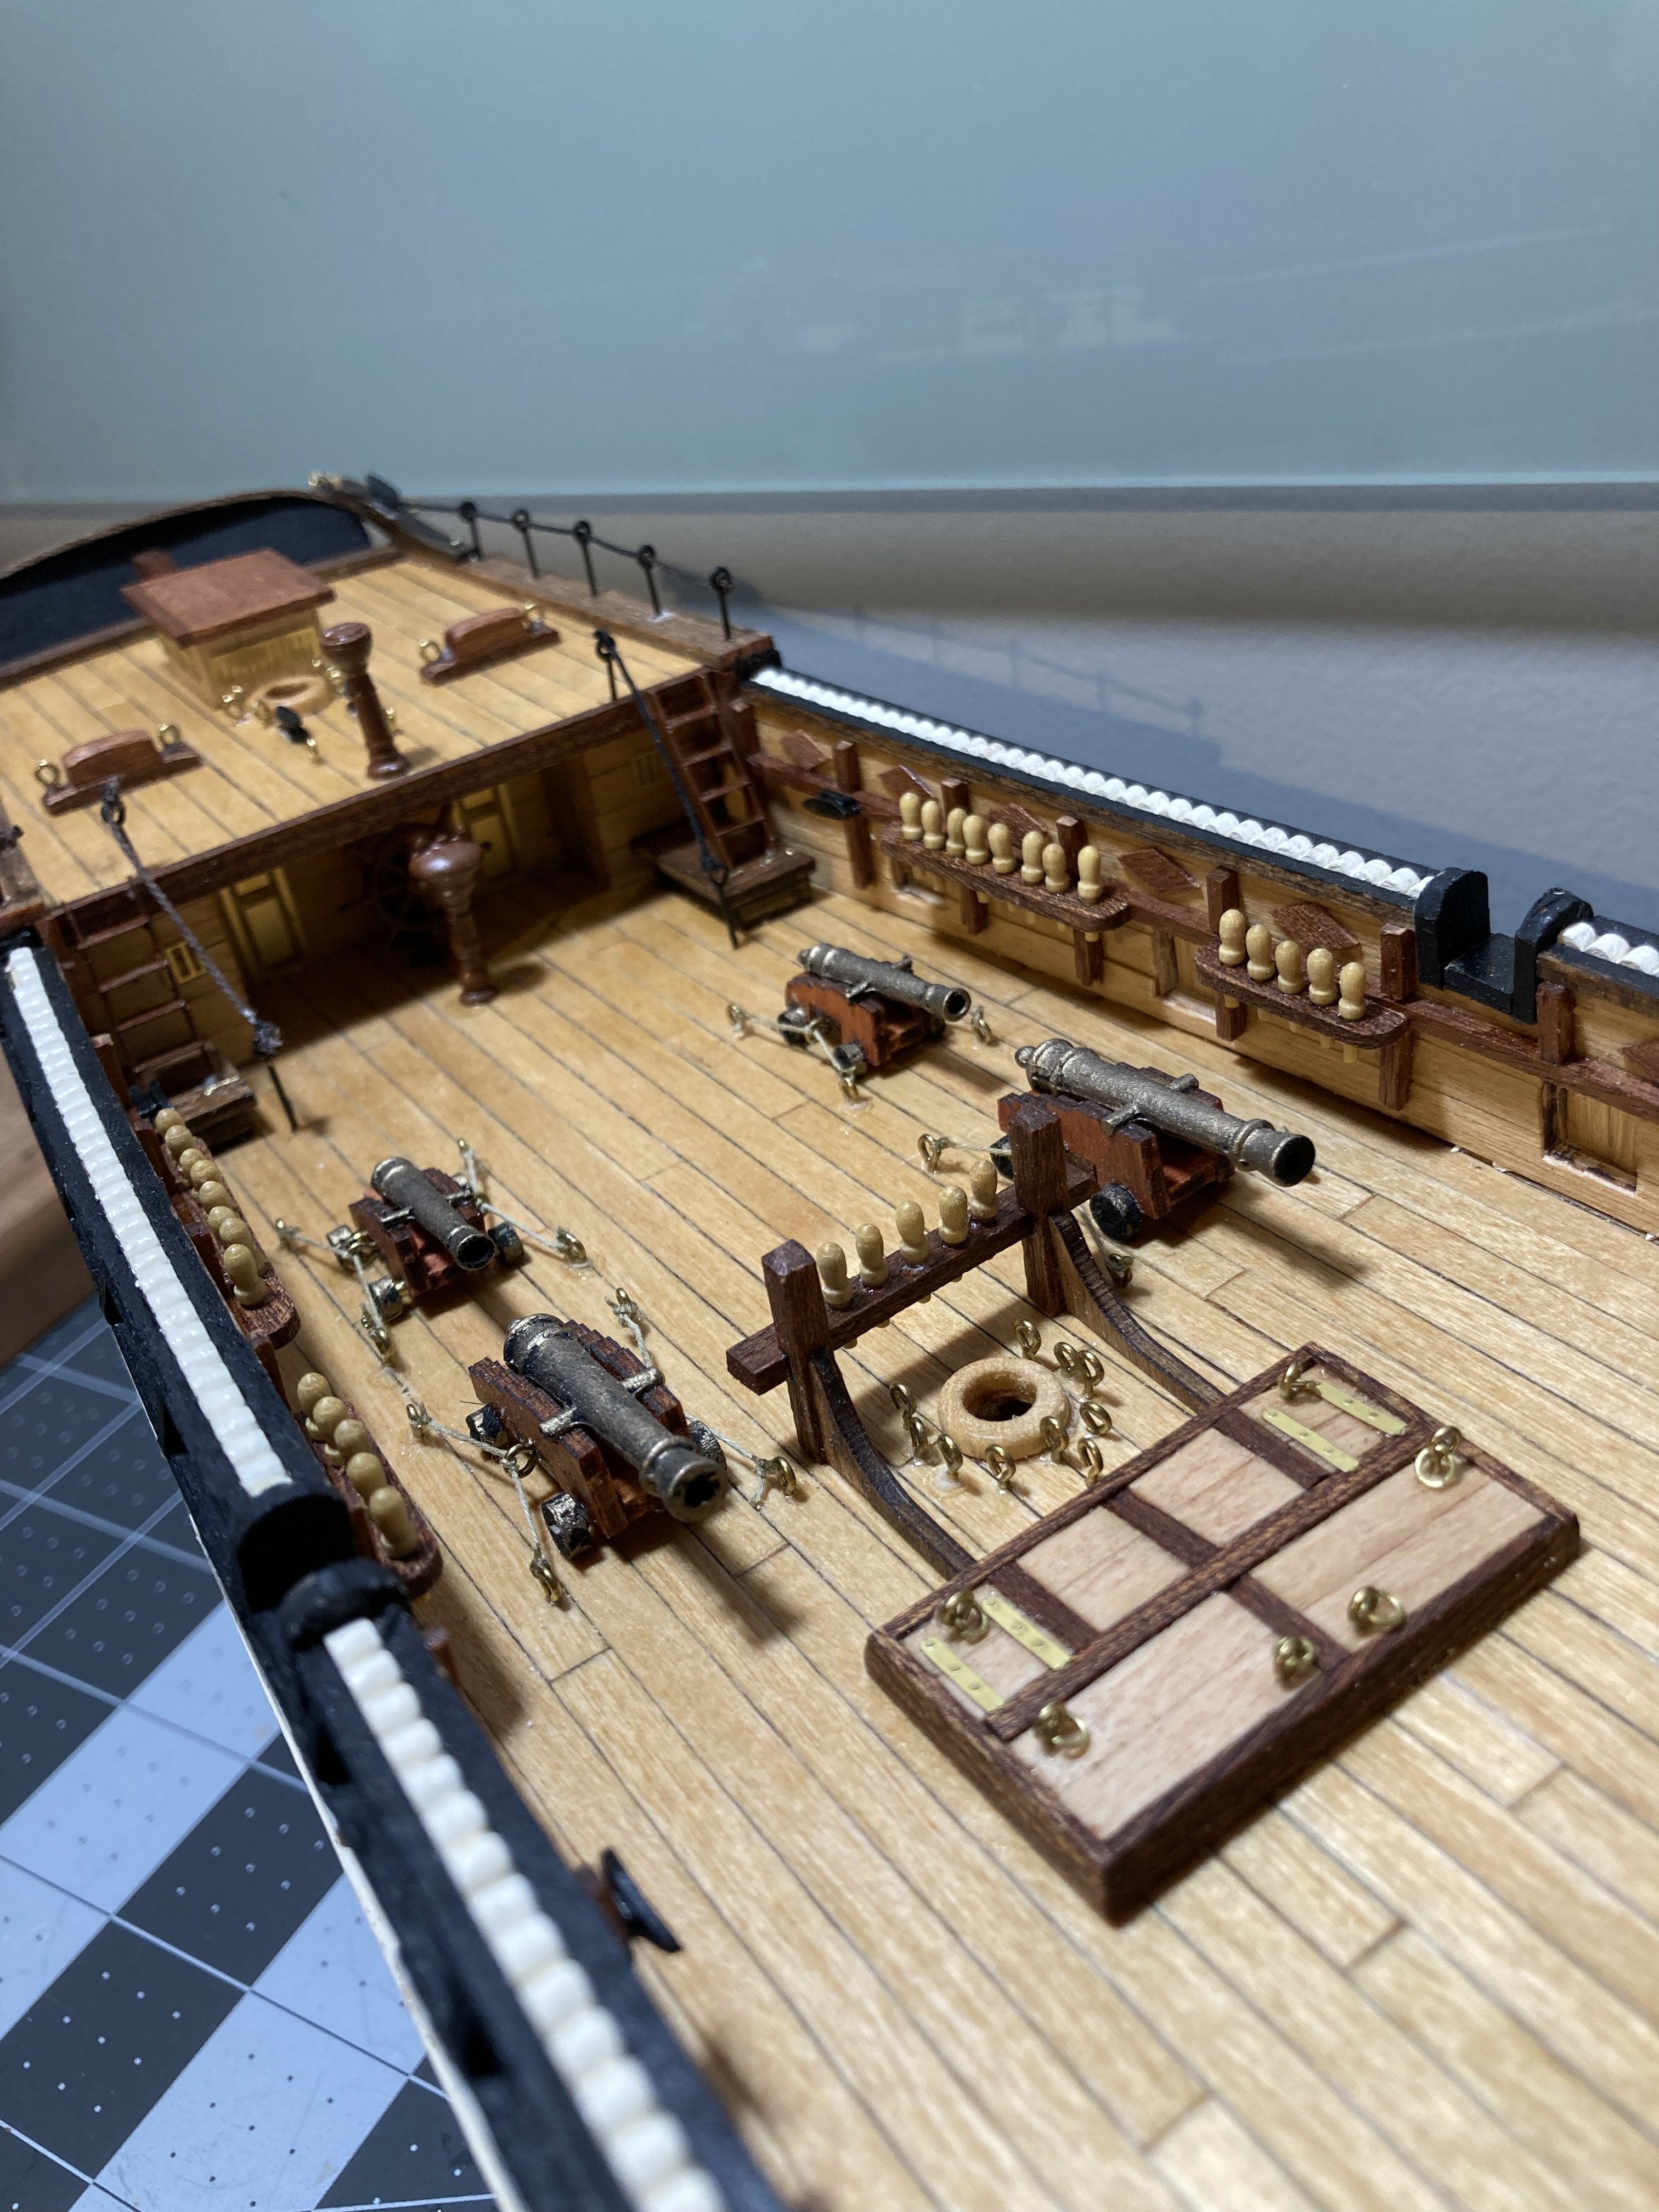
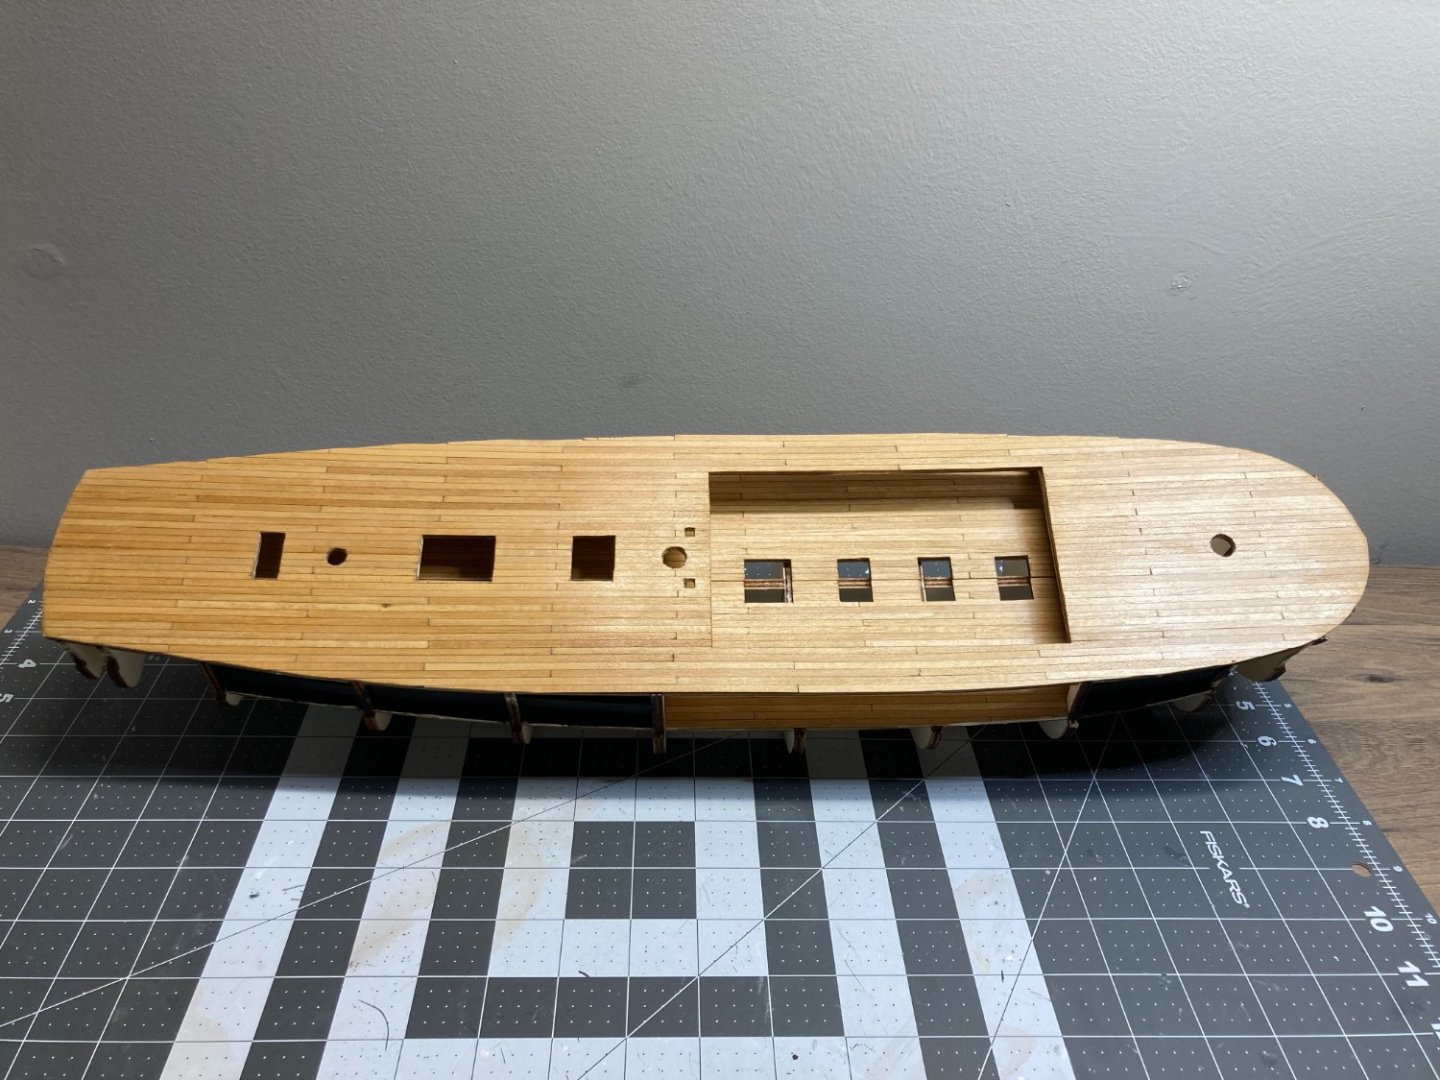
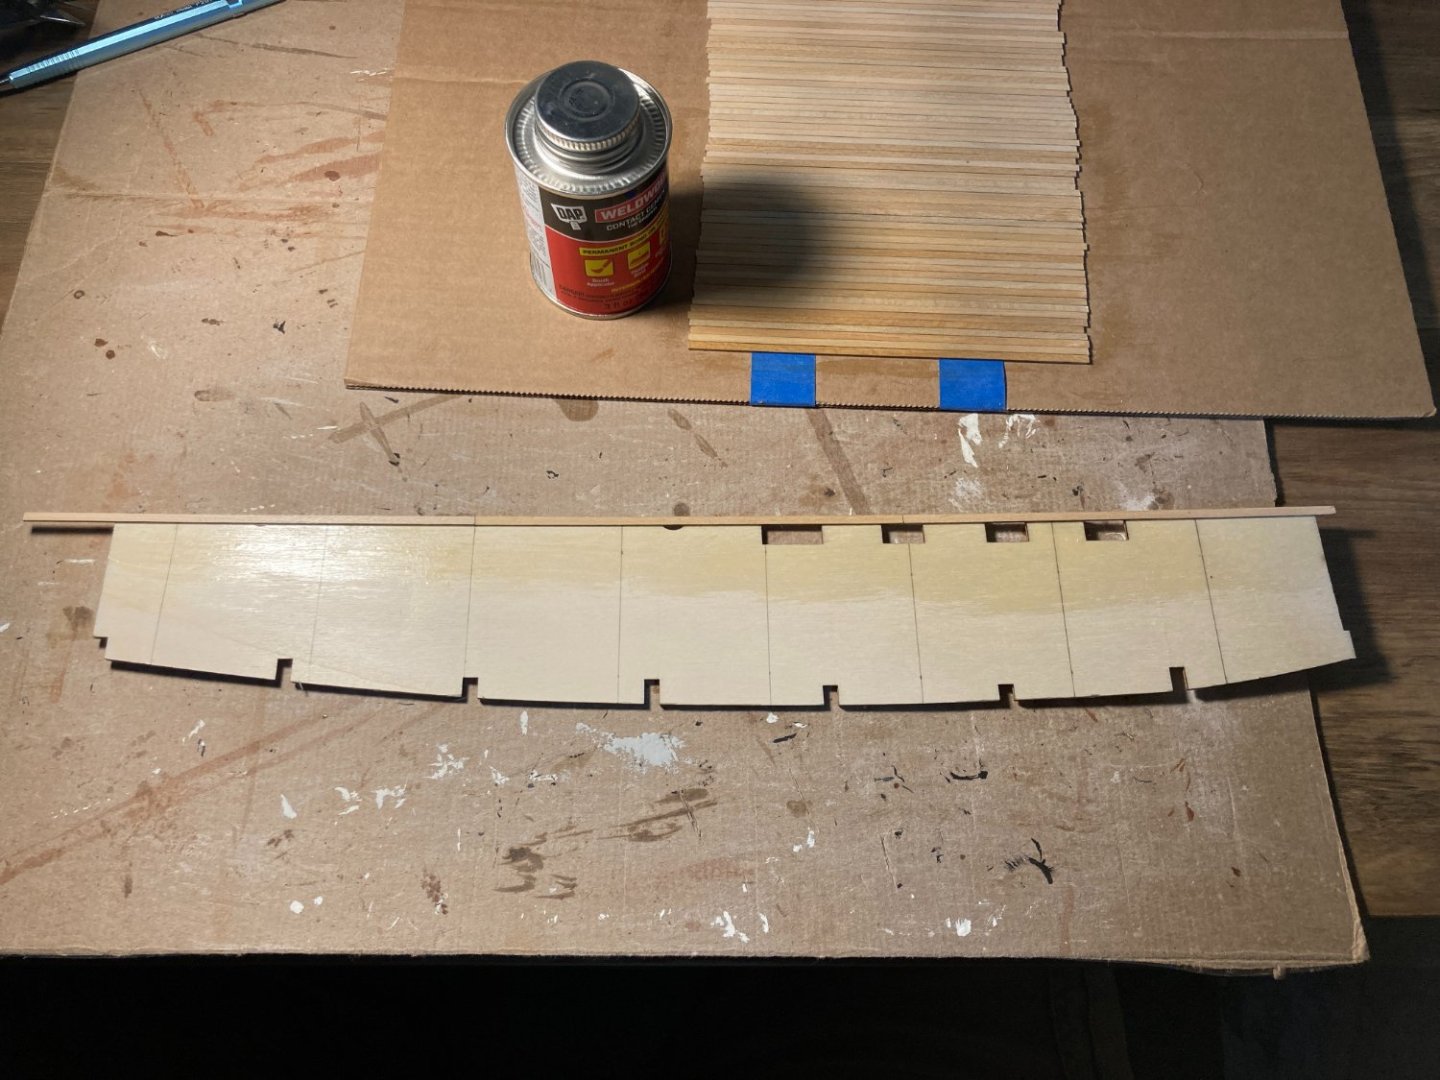
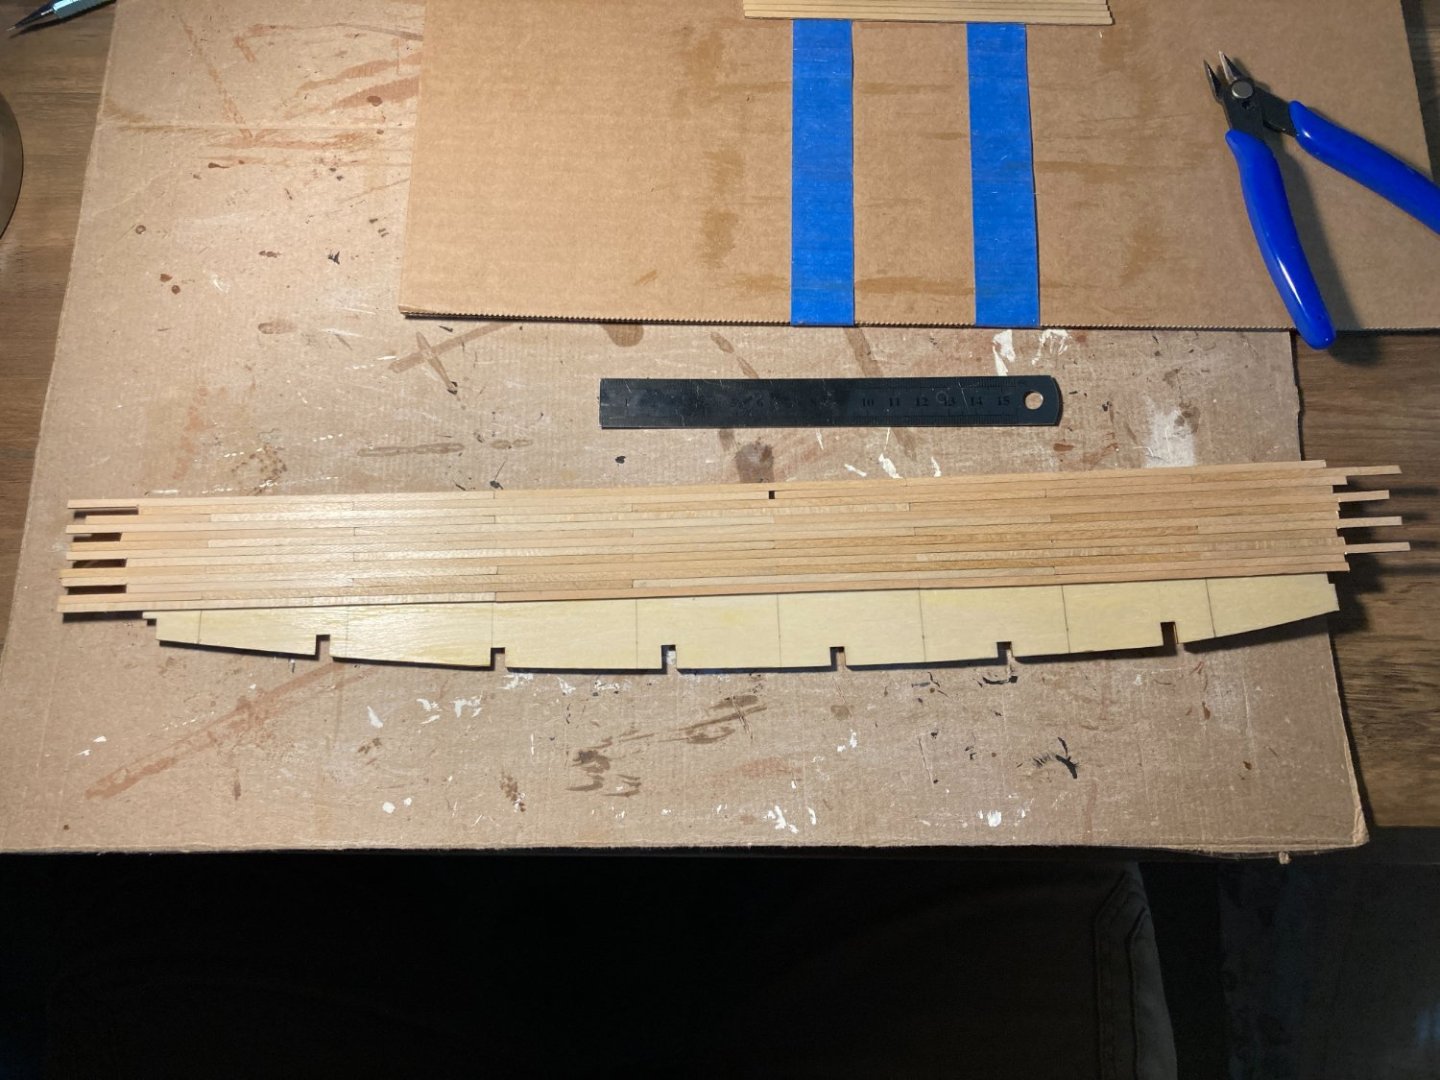
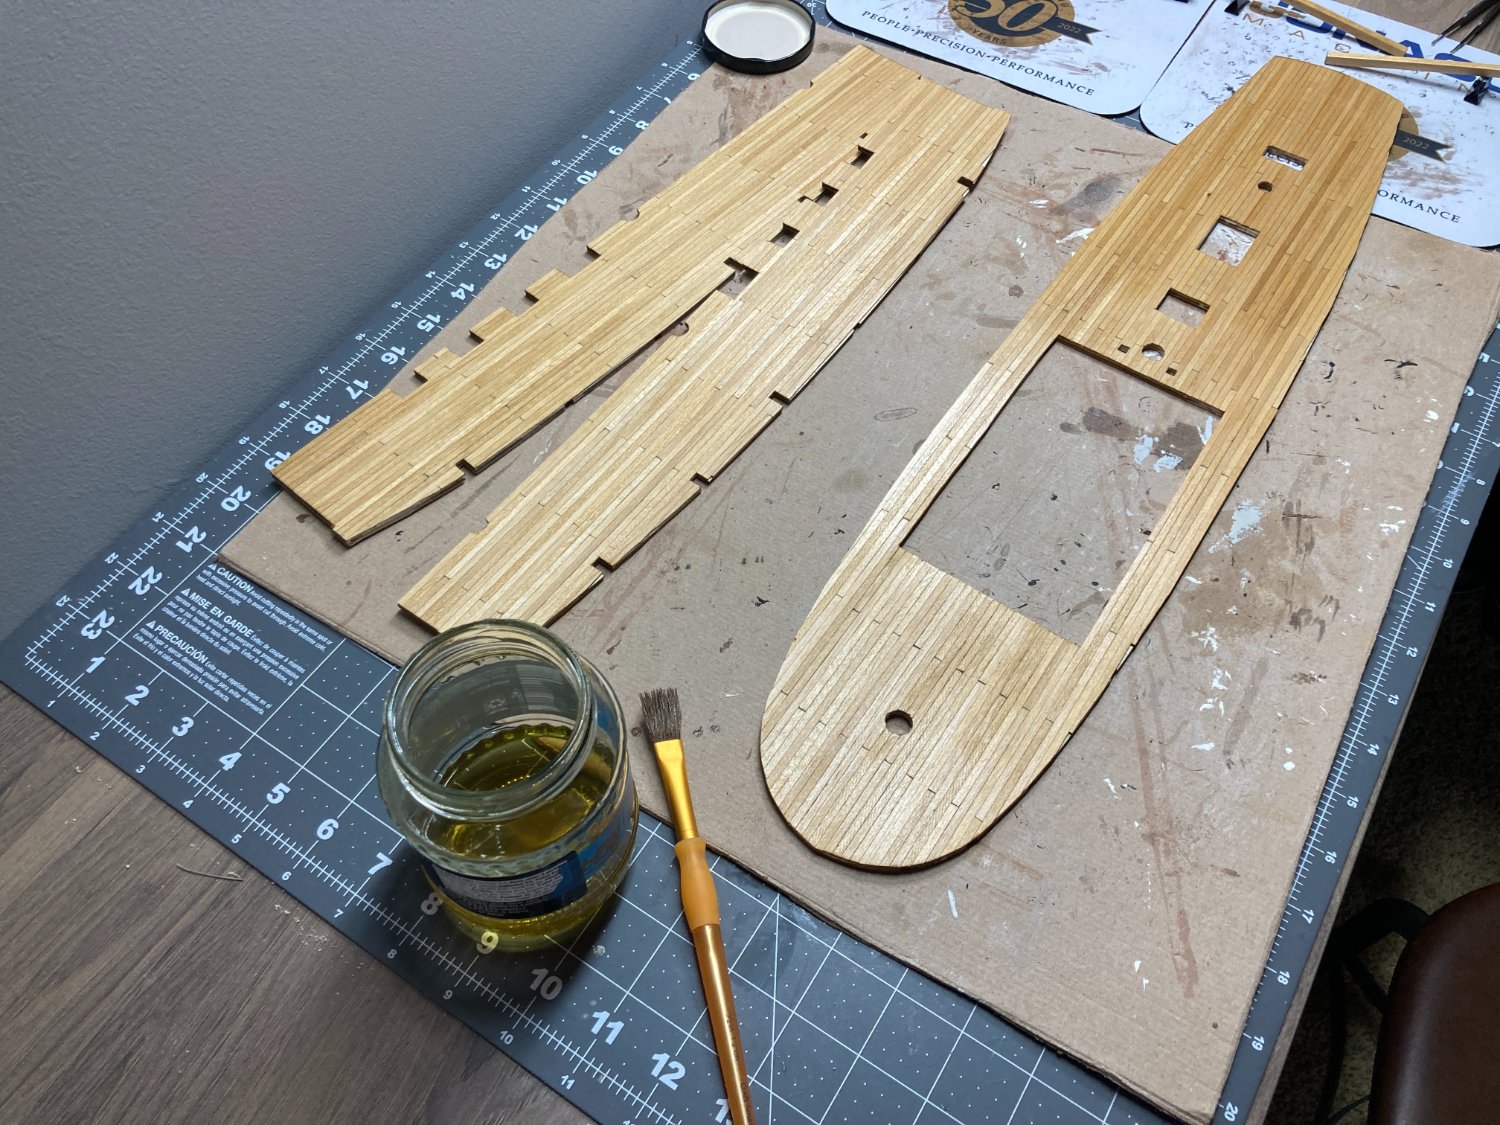
I have completed lining the deck pieces. The instructions called for gluing a single strip the entire length of the base and then using a pencil to create the appearance of caulking along the length of the boards and across the boards. I didn't care for the look of this technique and opted to cut the boards into shorter pieces and I used a pencil to darken the edges of the boards. I think this creates a more subtle look for the caulking.


I used contact cement to attach the lime wood pieces to the plywood bases. Prior to my first model I had never used contact cement. Occre has a series of instruction videos on YouTube for the HMS Beagle and I used the method they showed in the video. I wrapped two pieces of painter's tape around a piece cardboard with the sticky side out. Then place the deck boards on the tape taking care to butt them up against each other tightly. Contact glue is applied to both the deck boards and the plywood base. After about 10 minutes the glue feels only slightly tacky to the touch then the deck boards can be attached to the base. Care must be taken not to apply pressure to the deck board until it is in the exact right spot. Then some pressure is applied and the pieces stick together. After a few rows I use the round handle of a pin pusher to apply more pressure on the boards to ensure they are secured to the bases.
I stained the decks using Minnwax Golden Oak stain and then applied two coats of shellac. I used a fine steel wool after each coat of shellac.

.thumb.JPG.13fc210599c8fb342675a7caecb54076.JPG)
I use shellac made from flakes and denatured alcohol using a 2 lb cut. I received the advice to use shellac on this website after posting about problems I had with using polyurethane. I am thrilled with the results I am getting with the shellac. It's great to have a place to ask questions and get feedback. I have the decks installed and will post about that process soon.
- Bill Morrison, CiscoH, Prowler901 and 1 other
-
4
-
12 hours ago, allanyed said:
Do your instructions call these windows or something else? There are lights (not to be confused with lanterns) and ports but no windows on these ships. I realize this is a terminology thing so a very minor point to many folks, but I am curious. 😀. The translation from Spanish or Italian to English for many nautical terms has to be very difficult for kit makers as it is something of a language of its own.
Allan
I was referring to these three parts. They make up what the instructions call the gallery and the instructions call the top and bottom pieces in the photo the gallery bases and the middle piece is called the window. Sorry if I wasn't clearer in my earlier post.
.thumb.JPG.5ad92198fb2acf443a651947c1249794.JPG)
-
I have recently started building this kit. The gallery windows are made up of two separate castings with a photo etched brass piece for the window in the middle. I may try to fabricate a wooden filler piece between the lower casting and the photo etched brass to raise the window. It looks like there will be space between the upper casting and the railing for this to work.
- Esap, Chuck Seiler and mtaylor
-
3
-
Quote
Hi, some minor improvement on the deck. I have cut each strips 60mm in lenght and ran a lead pencil against it to simulate caulking.
I think I will try staining it in sapelli dye or meaby just put some flaxseed oil. My only concern is that I fear that the lead will smear...
Has anyone ever tried this before, oiling up a deck?
I have used this technique and didn't have any issue with the lead smearing when I stained the deck. I used minwax oil based stain and have used polyurethane and shellac over the stain with good results.
Good luck.
-
-
-
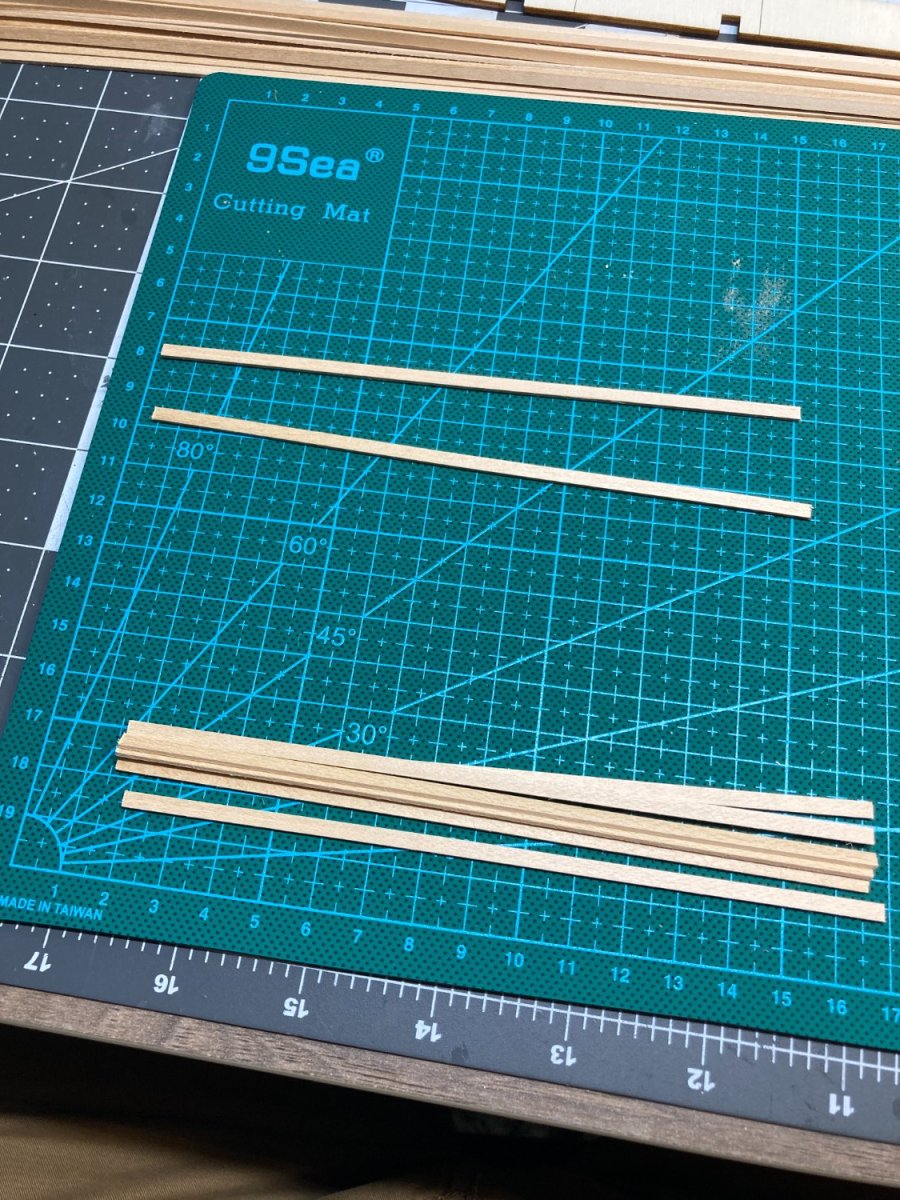
As I start to plan the planking of the decks, I am trying to decide if I want to include treenails on my deck. The plans from Occre instruct the builder to simply use pencil marks to represent the treenails. I do not care for the look of that am considering other options. The plans also call for a single strip of planking to run the length of the deck with a pencil line to indicate were one plank board ends and another begins. I am planning on not using the pencil marks for this either and will cut the plank pcs into smaller strips so there will be an actual line between the plank pieces. At a scale of 1:85 I am a little concerned that anything I add will be too big. I know there will be other things that are out of scale such as the belay pins and the thickness of the linen sails provided with the kit, but I worry that due to the large quantity of treenails on the deck they would be too much of a focal point if out of scale. Does anyone know what diameter the treenails would have been on a ship in this era. If they were an inch in diameter that would mean they should be about .3 millimeters on my model. I can get drill bits close to that size, but what material would I use to fill the holes. Would it look good to fill them with wood filler? Has anyone tried this?
I am not opposed to skipping the treenails on the deck if I don't think I can add any that look good.
I would love to hear other's thoughts on this and what you have done on models of a similar scale.
Thanks
-
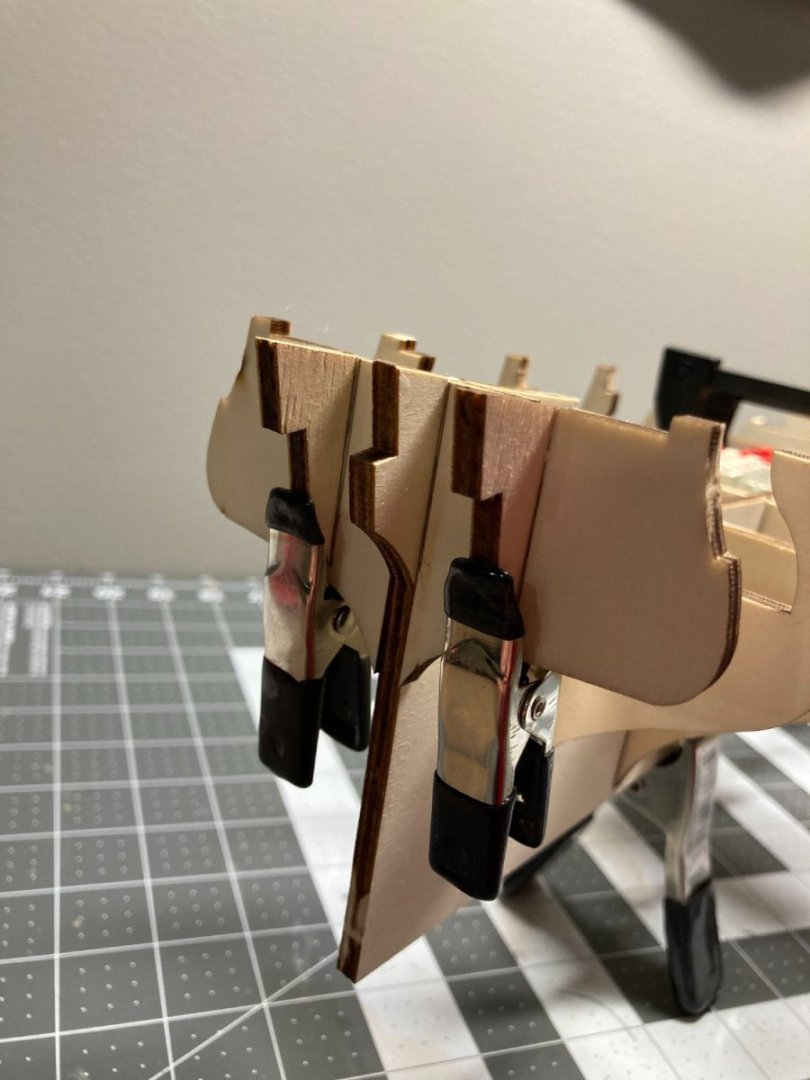
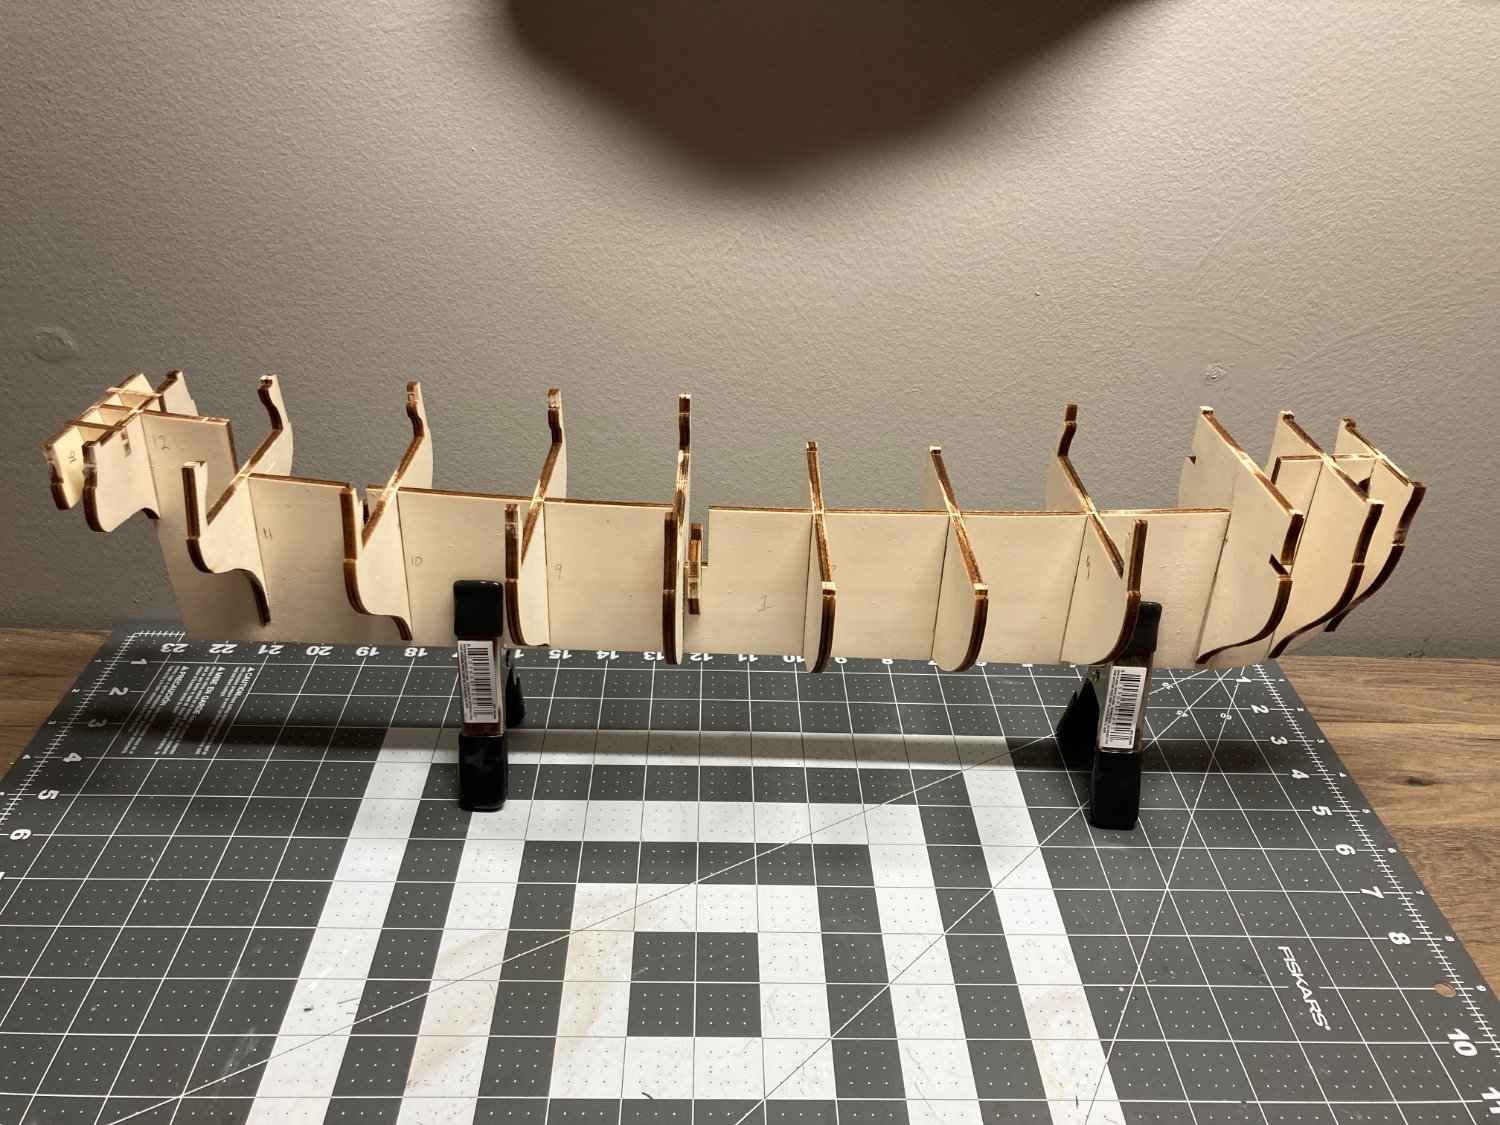
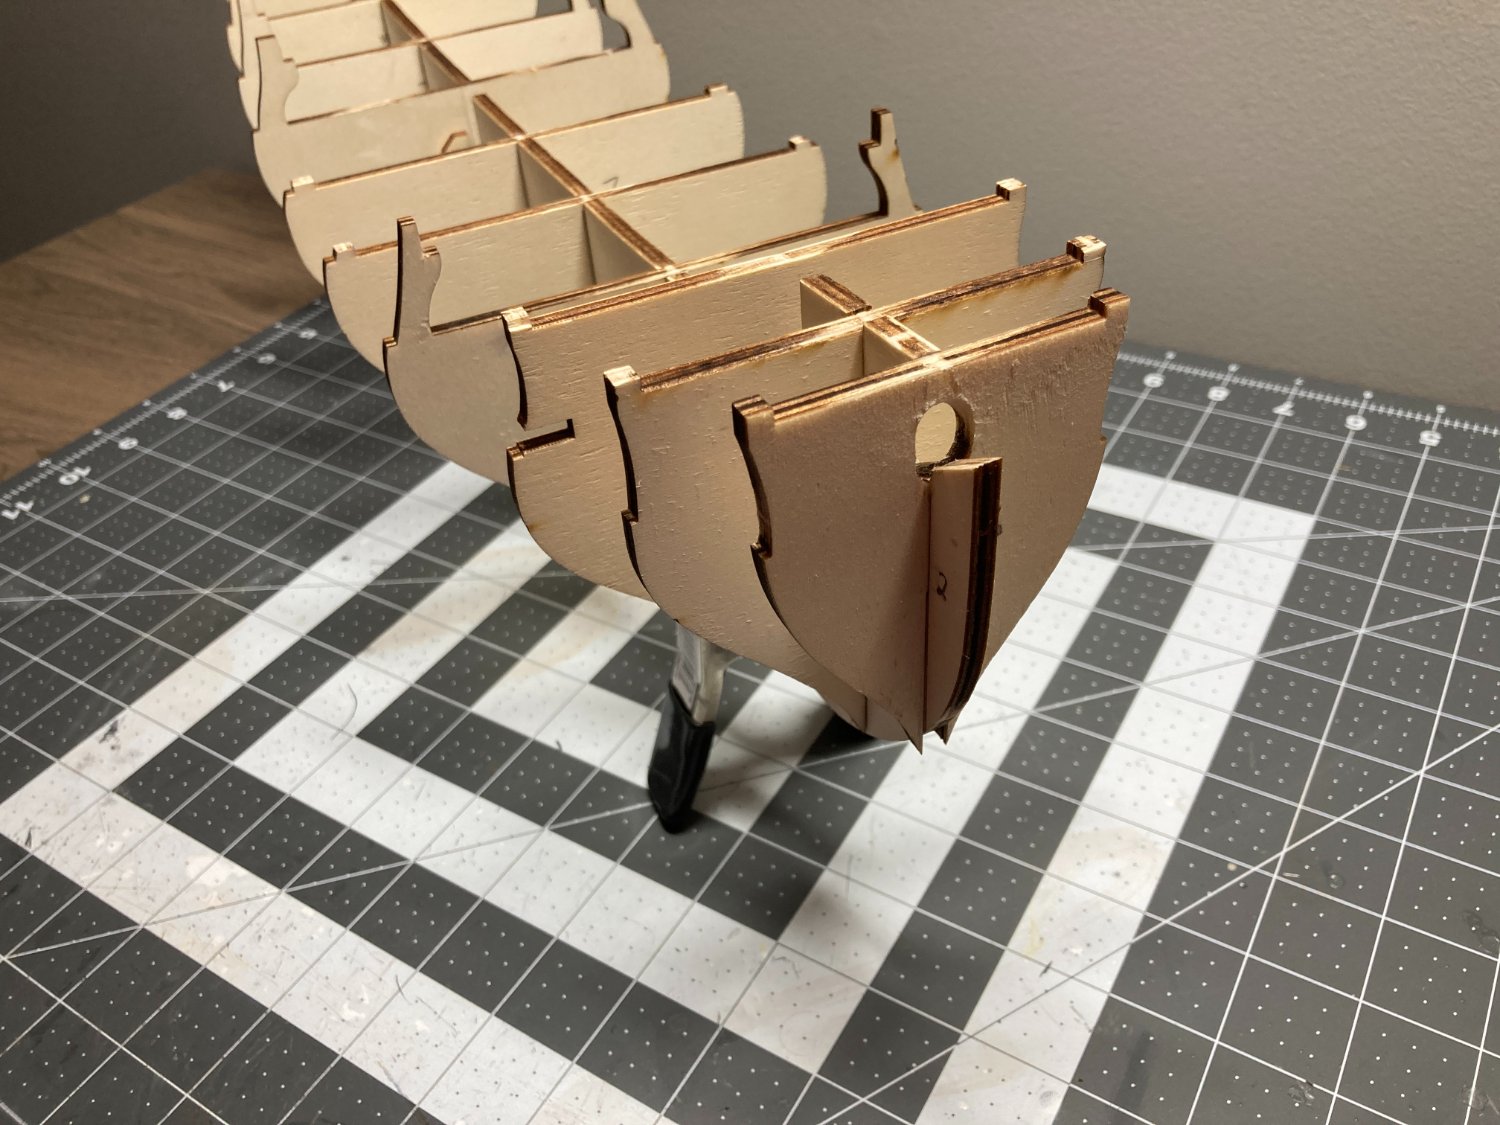
I have the frame assembled. I used some Lego blocks clamped on to the false keel to keep each frame piece square while the glue dried. I used regular wood glue to glue the frame pieces together.
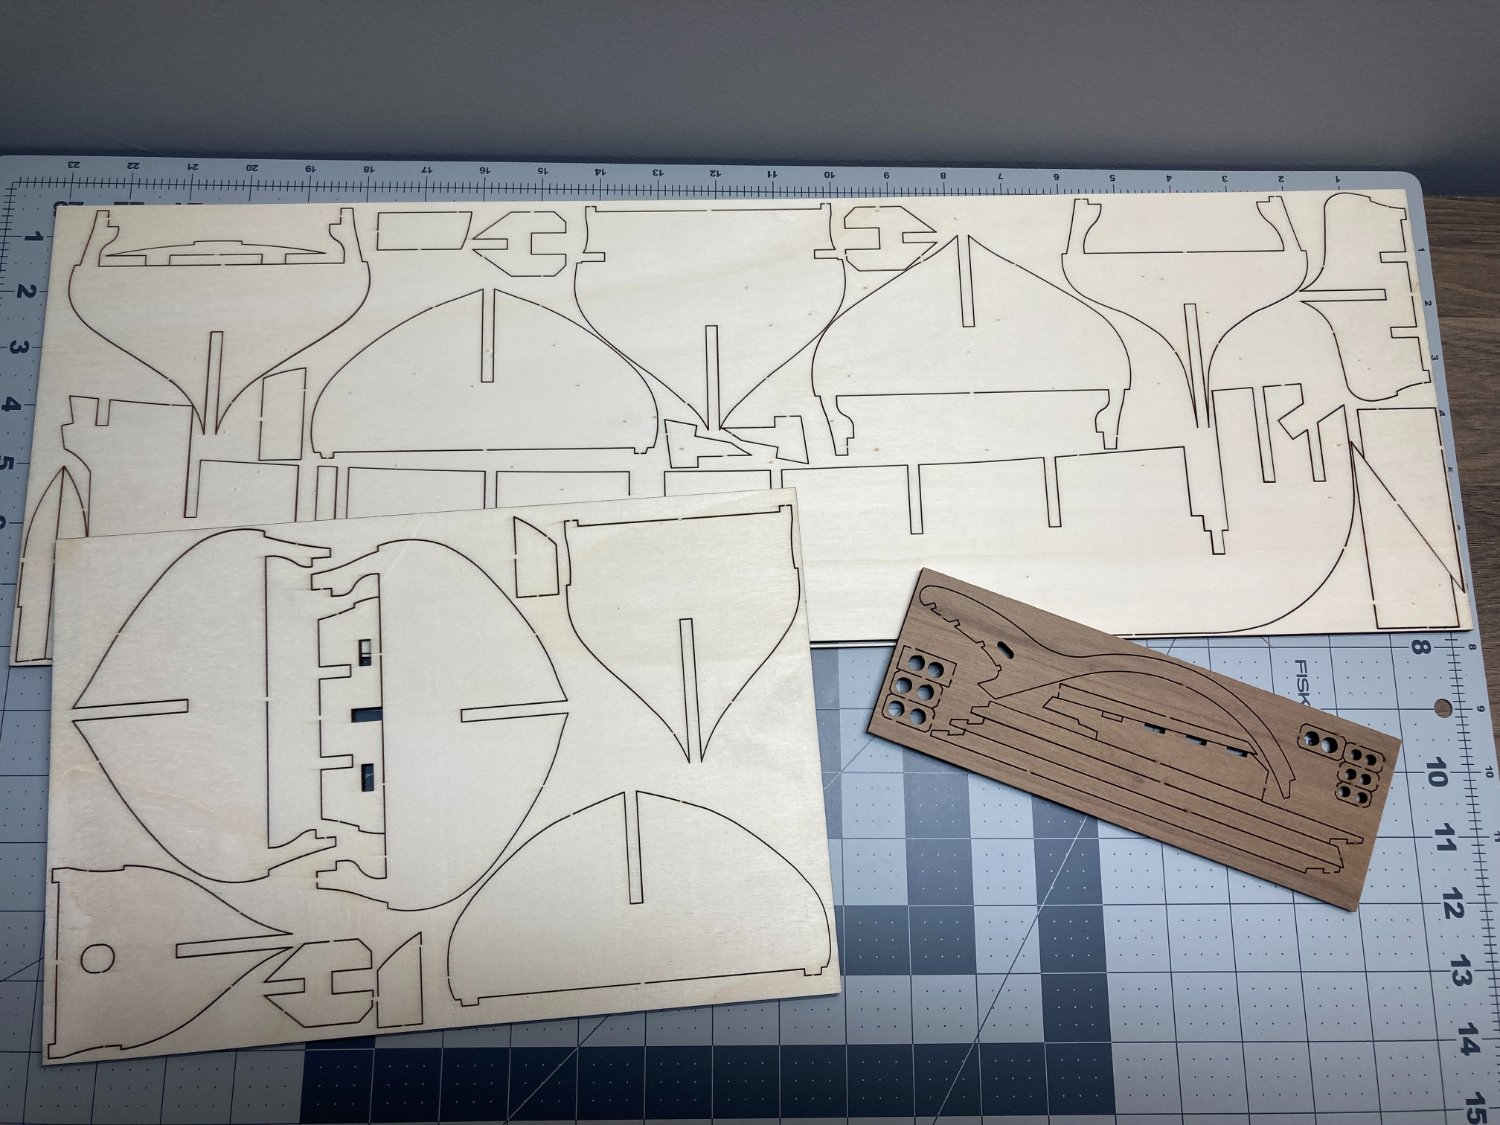
I find that Occre does a really good job with their laser cutting. I didn't have any issues with pieces fitting together properly.
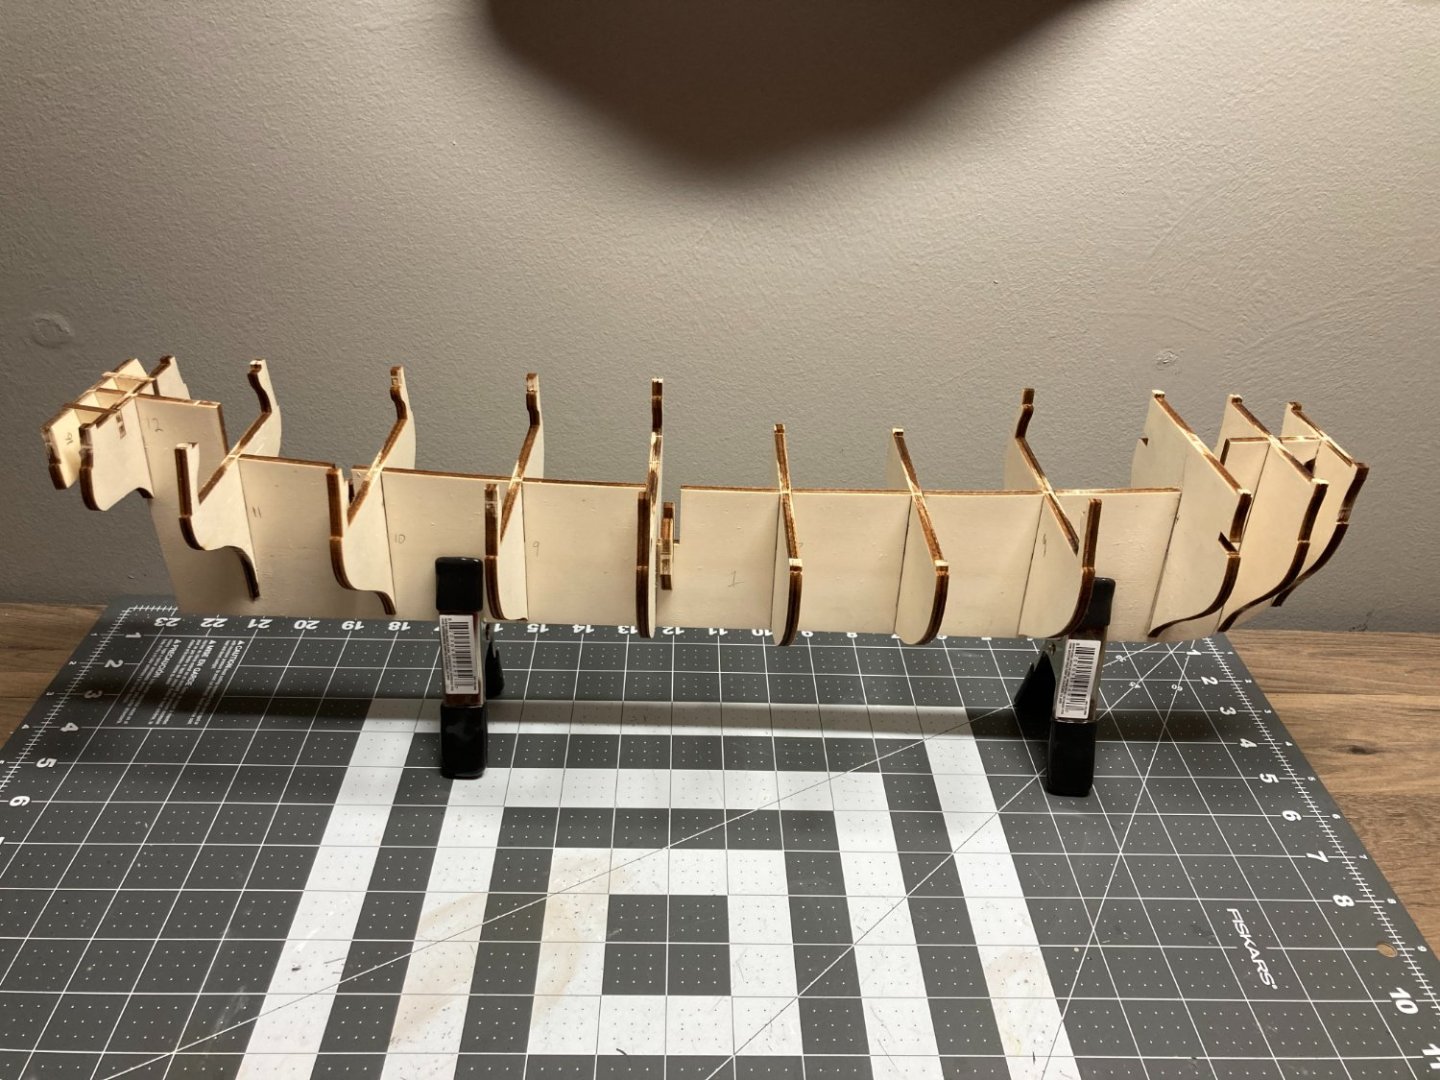
.thumb.JPG.2849bc571dc0f16652aec949e18546a2.JPG)
.thumb.JPG.2ad1ee055d5a7f792f348cffe0351c8b.JPG)

The hole for the bowsprit on the front frame piece is not contoured to properly accept the bowsprit. The instructions say to use a 10mm drill after the hull is planked to drill out the hole properly. I found this difficult on my HMS Beagle, because it was difficult to know if you were drilling into the slot on the false keel without making it bigger. I chose to simply use a file to create the proper contour on the frame piece so the bowsprit will fit properly. I will need to also file the hull planks after they are installed.

Next step is to plank and install the deck pieces. I enjoy this step. It is the first step that completes a part of the ship that will be seen on the completed model, so if it feels like progress as opposed to just prep work assembling the frame that won't be seen. Hopefully I have something to post soon on my progress with the deck.
.thumb.JPG.fc56fdddc252ad591187e38d94740297.JPG)
- dunnock, Prowler901 and Bill Morrison
-
3
-
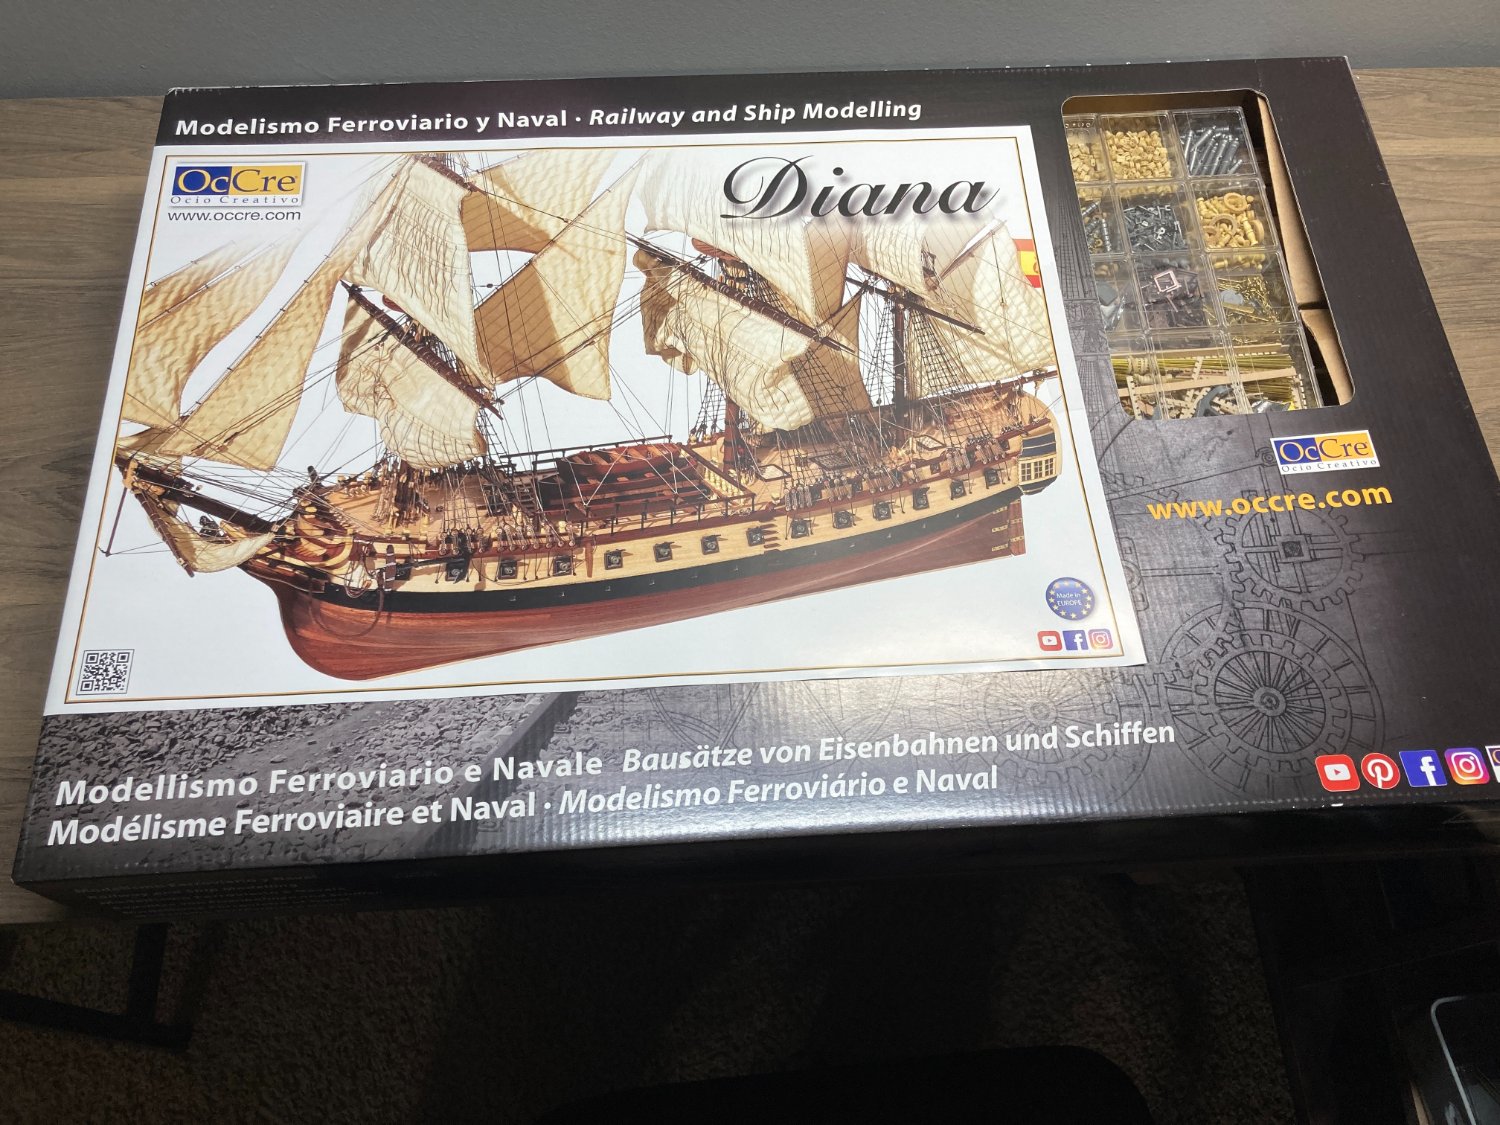
I have recently completed my first model ship, HMS Beagle by Occre. I am now starting my second, Frigate Diana, also from Occre. I have decided to document this build with a build log. I am hoping to get feedback and advice from more experienced modelers and to hopefully be a source of information to other beginners. Some of the members that post on this site are meticulous about being as historically accurate as possible. While I respect the time and effort that they put into researching and building their models, I am less concerned with this aspect of the hobby. For me it is about the relaxation and satisfaction I get out of building the model and the aesthetic of the final result.
While I am pleased with the overall result of my first model, I am looking forward to improving on my second build. One area that I am focused on is the first layer of the planking. I am planning on installing the first layer of the planking using some of the techniques that I have read about on this web site. This may be overkill since I am still planning on adding the second layer of planking, but I am viewing it as practice for someday building a model that only has a single layer of planking.
I am also hoping to be more precise on items like the trim on the deck railings and the masts and other deck features. My rigging got better as I progressed on my first model, and I hope to make all of the rigging better on this model. I am also hoping to learn more about the proper terminology for the various parts of the ship, especially the rigging.
Thank you for taking the time to read this build log and please add comments and questions about my work.

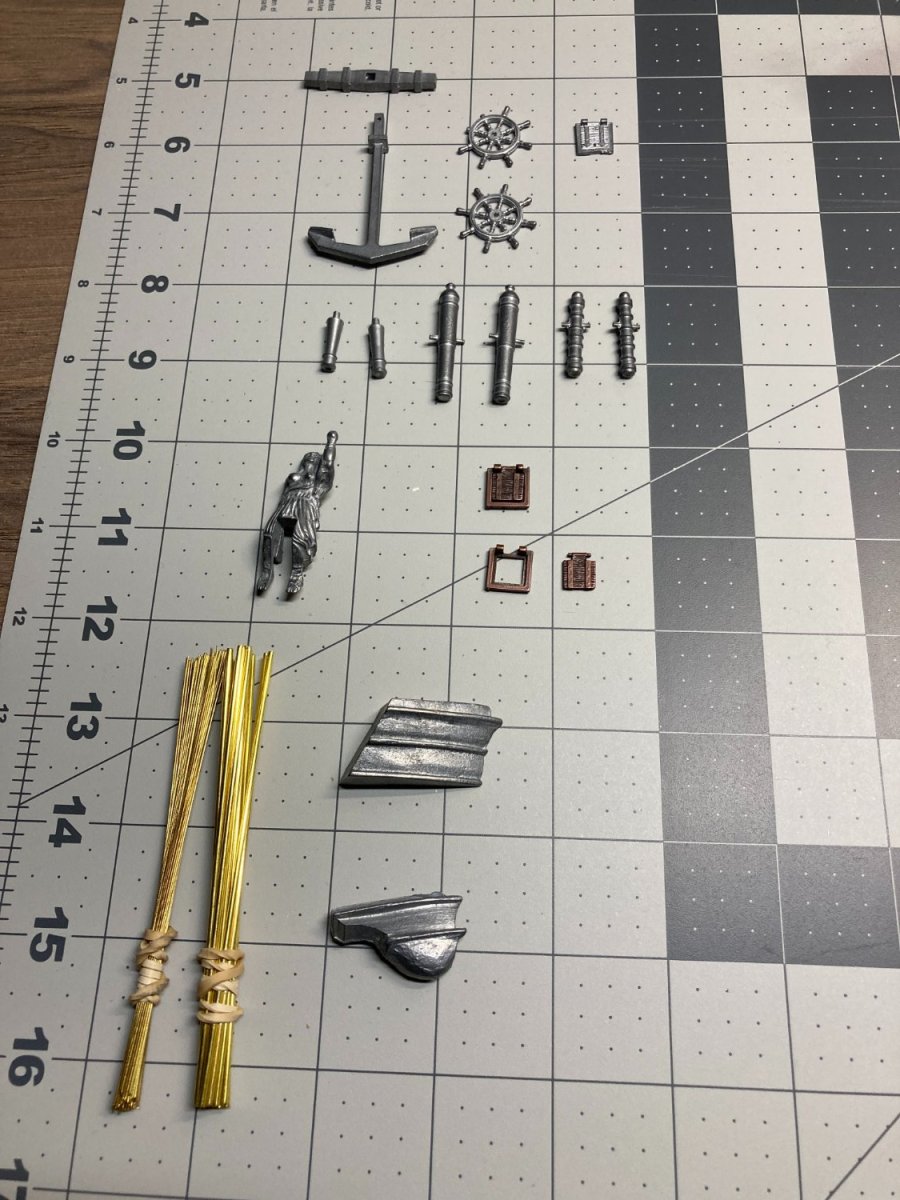
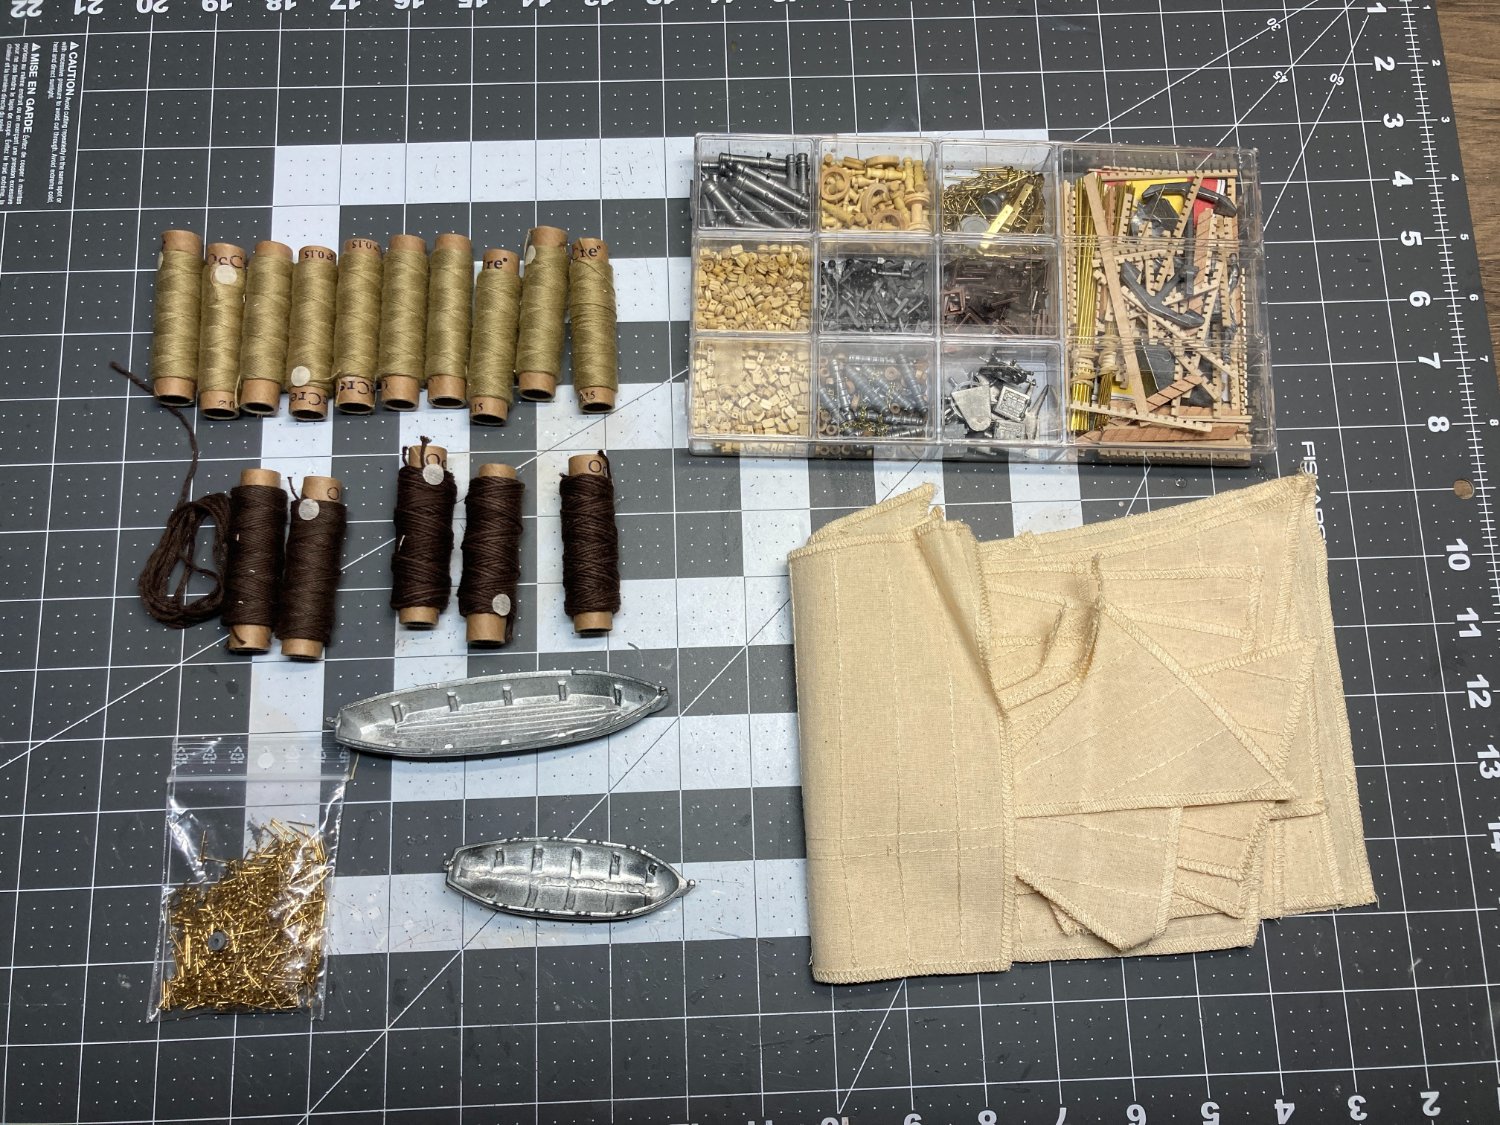
The parts were in great shape except for one of the ship's wheels had two broken spokes. Occre is really good about replacing broken parts and makes the process pretty easy.
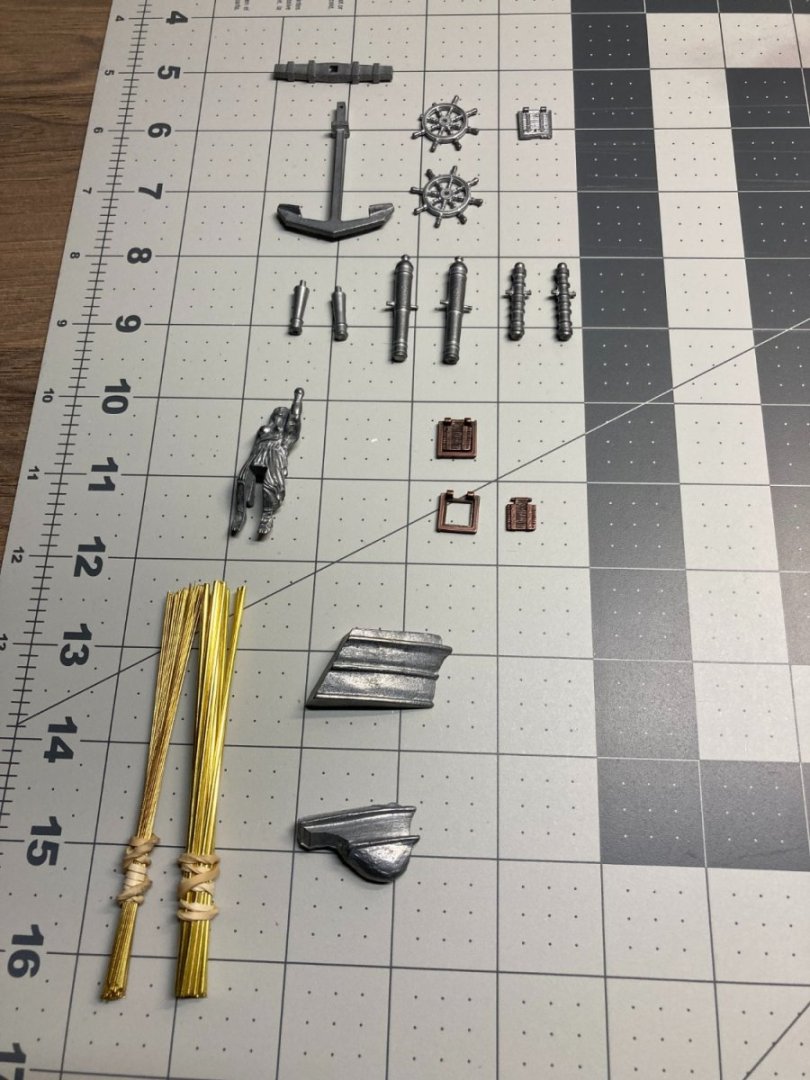

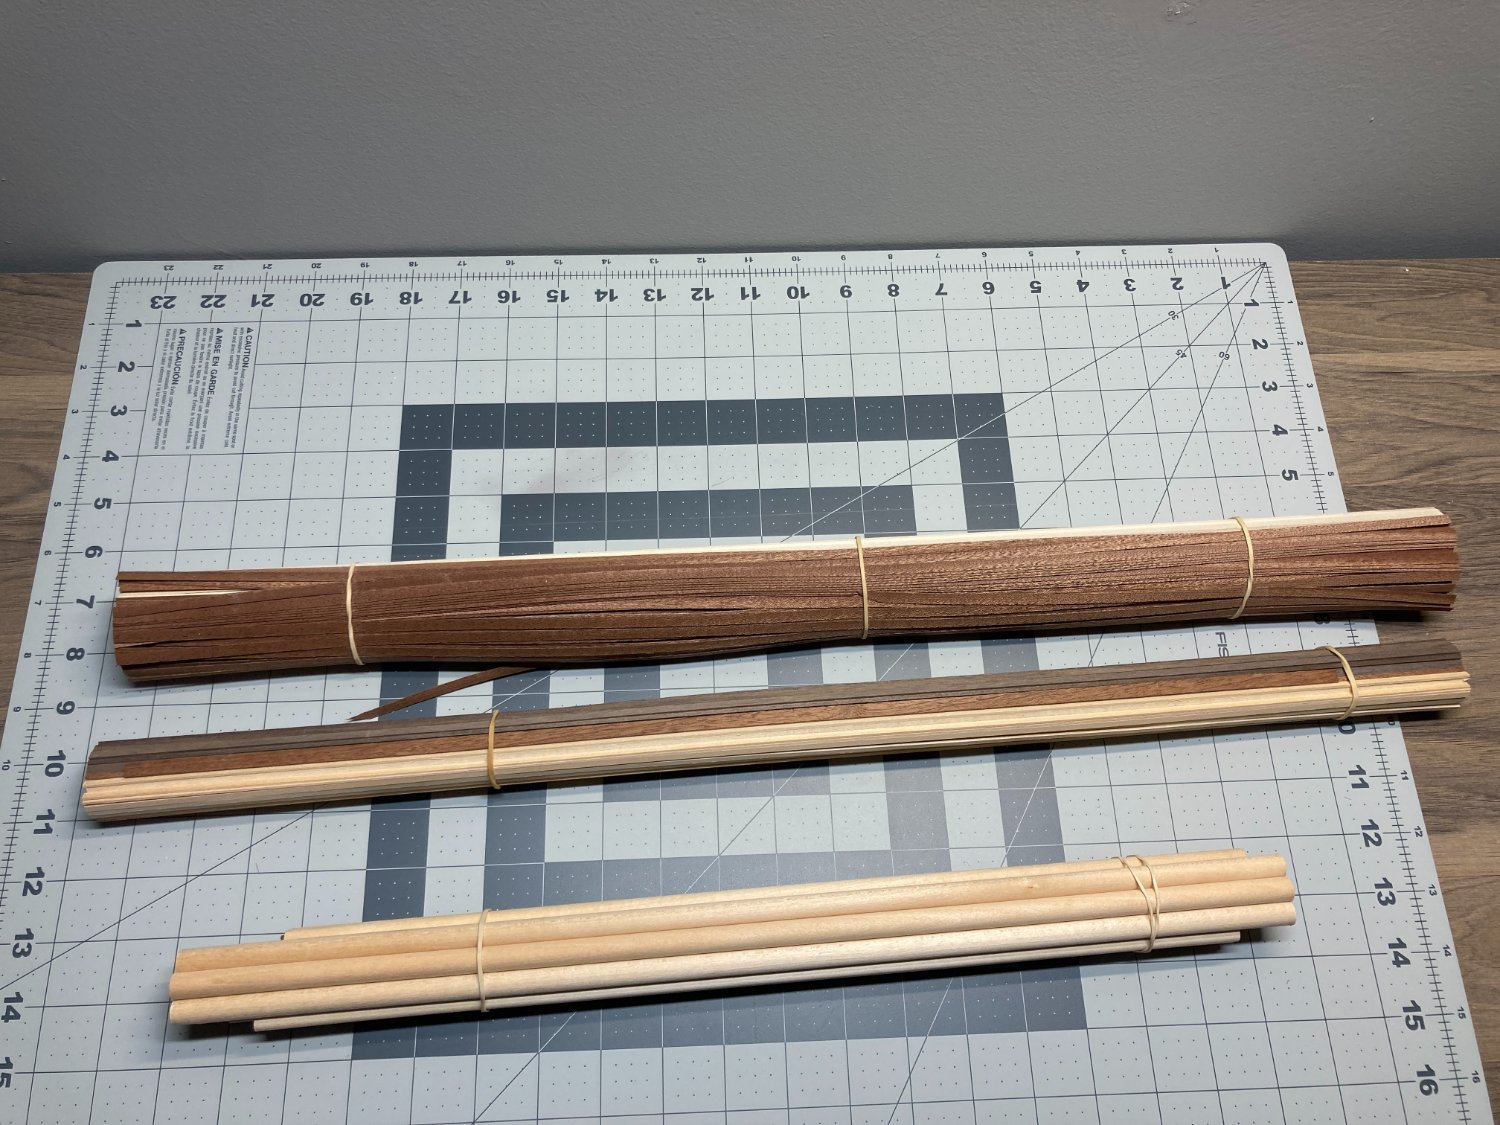
The laser cut parts are all in good condition and nothing is warped.
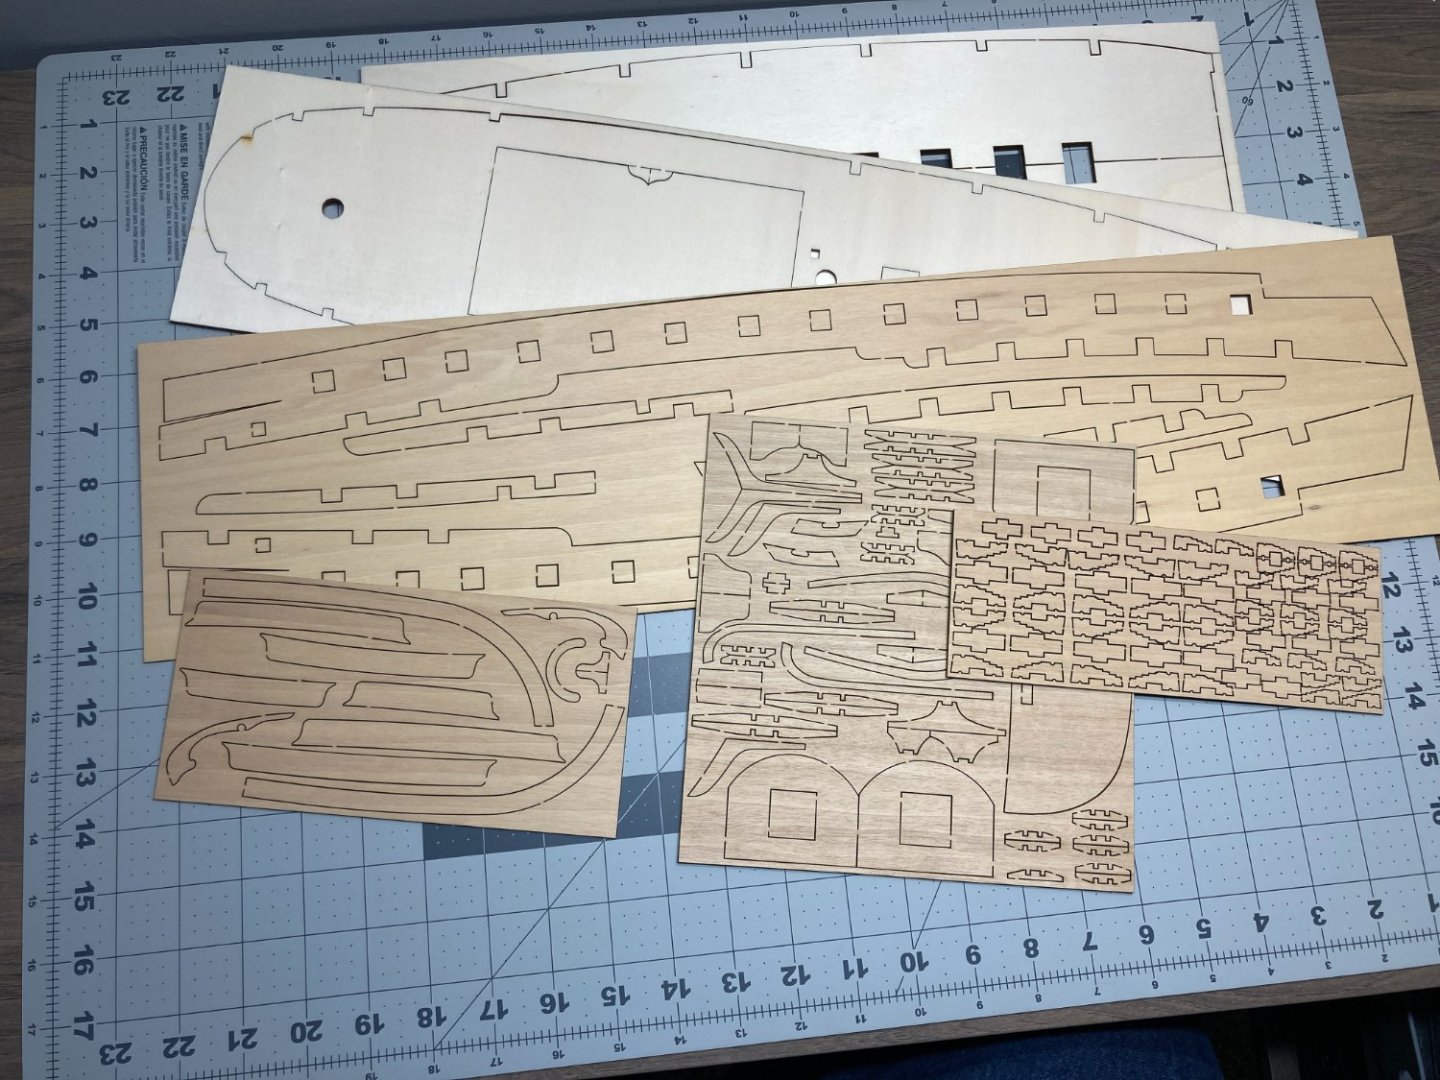


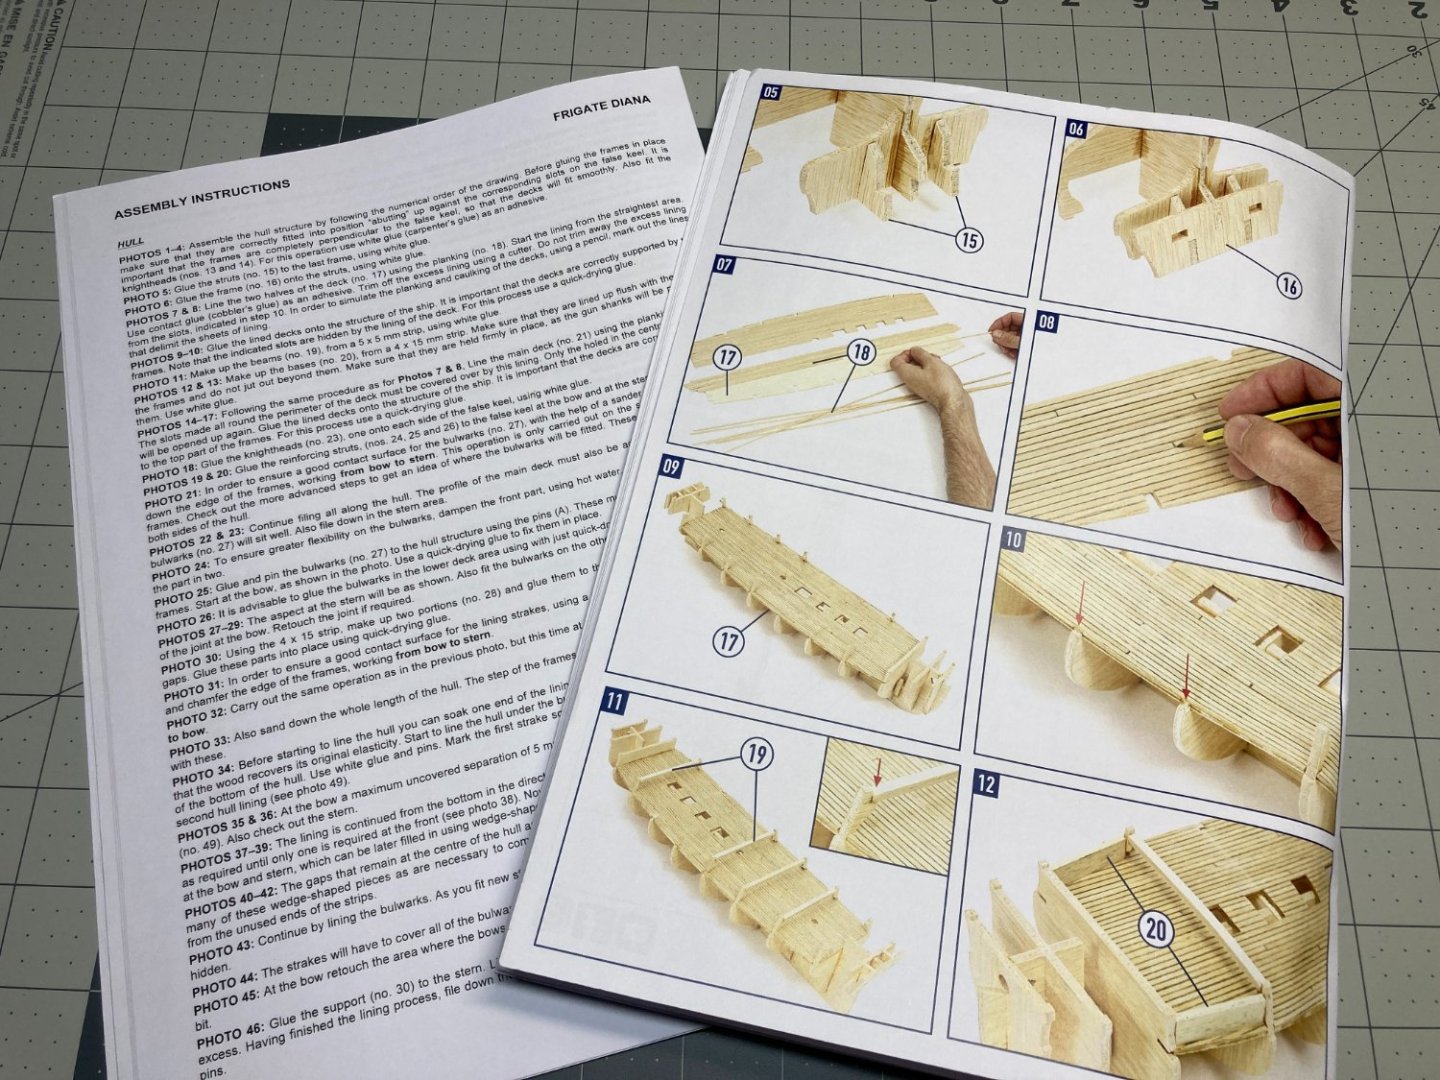
Occre provides over 100 pages of instructions and plans including detailed rigging plans.


I hope the have be basic frame assembled in a few days and will post on my progress.
- Paul Le Wol, CiscoH, Bill Morrison and 5 others
-
8
-
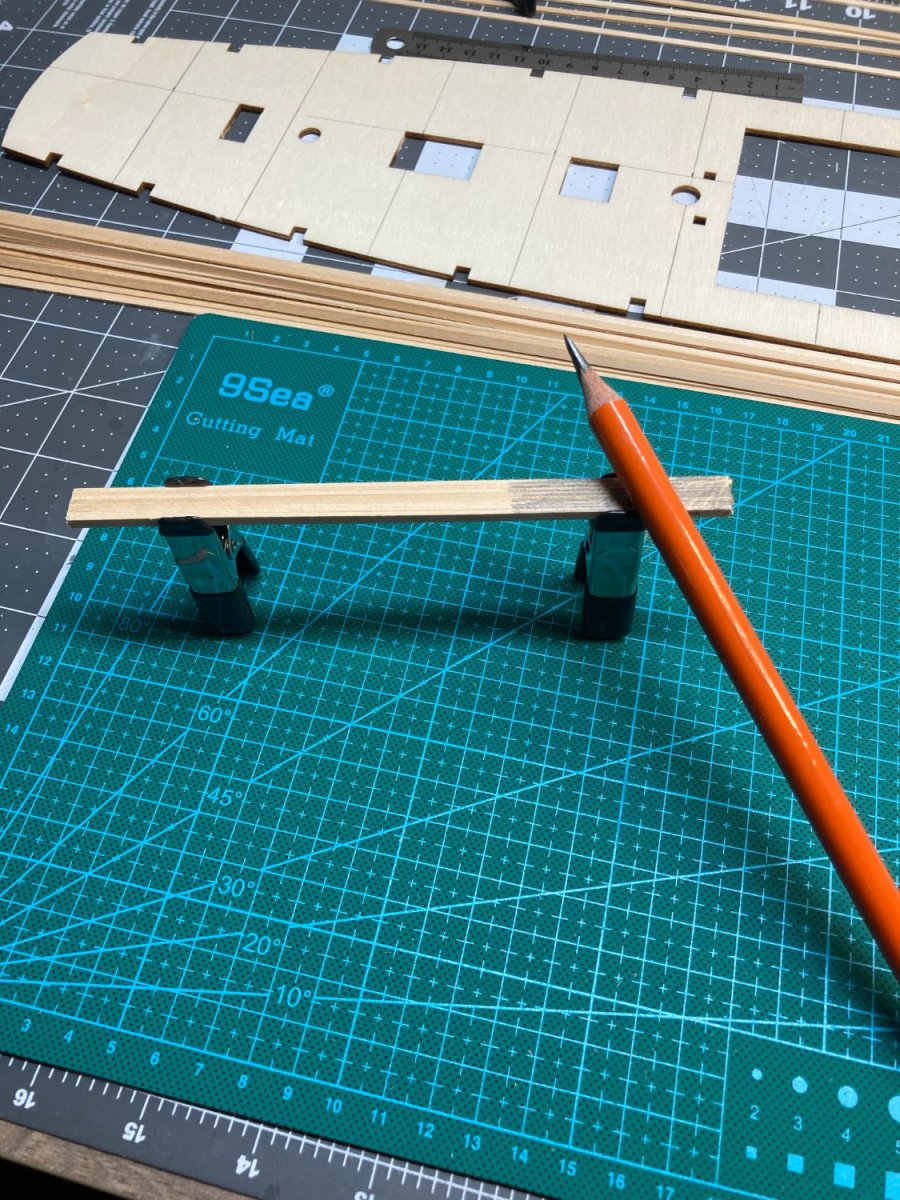
I am finishing my first model, and had really good luck using a small plane to remove the bulk of the material. Then I wrap a small strip of rubber around one end of the piece that I insert into a drill. The rubber keeps the drill chuck from damaging the piece. I use sandpaper to remove the rest of the material and make the piece round and then finer grit sandpaper to make it smoother.
-
-
I am about to start building the Frigate Diana from Occre. The boats that were supplied are metal die cast boats. My first model was the HMS Beagle from Occre that had 4 small boats that were built as a plank on frame construction. I am considering trying to scratch build the boats using a "layer cake" method like Model Shipways Constituion's boats. Curious if anyone has tried this or has any advice.


.JPG.9a6b578683d4673ed953ed2f9ce26c28.JPG)
.JPG.4e6c885882b9e8ab2fb5d9ab82f454e9.JPG)
.JPG.0646ec4e200e9fdde63e1aae2f2933eb.JPG)

.JPG.c2565d840f46388666a7067b18792b20.JPG)
.JPG.312ec0d905ef15b4f2658a0a7aa3ec5e.JPG)

.JPG.70f063001172d02357b11e81867b5c57.JPG)
.JPG.11258e5f10f9e3fcad78d1371e3e4e07.JPG)


.JPG.2f810de390562ae73f37e4552d84008c.JPG)
.JPG.ff480d490e98b93bb40d917a913611aa.JPG)
.JPG.3a06fdbc6b26009f7041744edbb6175e.JPG)
.JPG.4c44489ea44bcf1177b4faab09588ff3.JPG)
.JPG.3ed06087a75a564e1dc1e2f5fc0eb4ca.JPG)


HMS Beagle by Patrick - OcCre - 1/60
in - Kit build logs for subjects built from 1801 - 1850
Posted
Those look great. I wish I had done that on my Beagle.