
.jpeg.882f0a147f14858c9e673da7e13d8ebe.jpeg)
RossR
-
Posts
447 -
Joined
-
Last visited
Content Type
Profiles
Forums
Gallery
Events
Posts posted by RossR
-
-
Today I made some progress on the ship. The new shipyard is working great. my work light set up still.
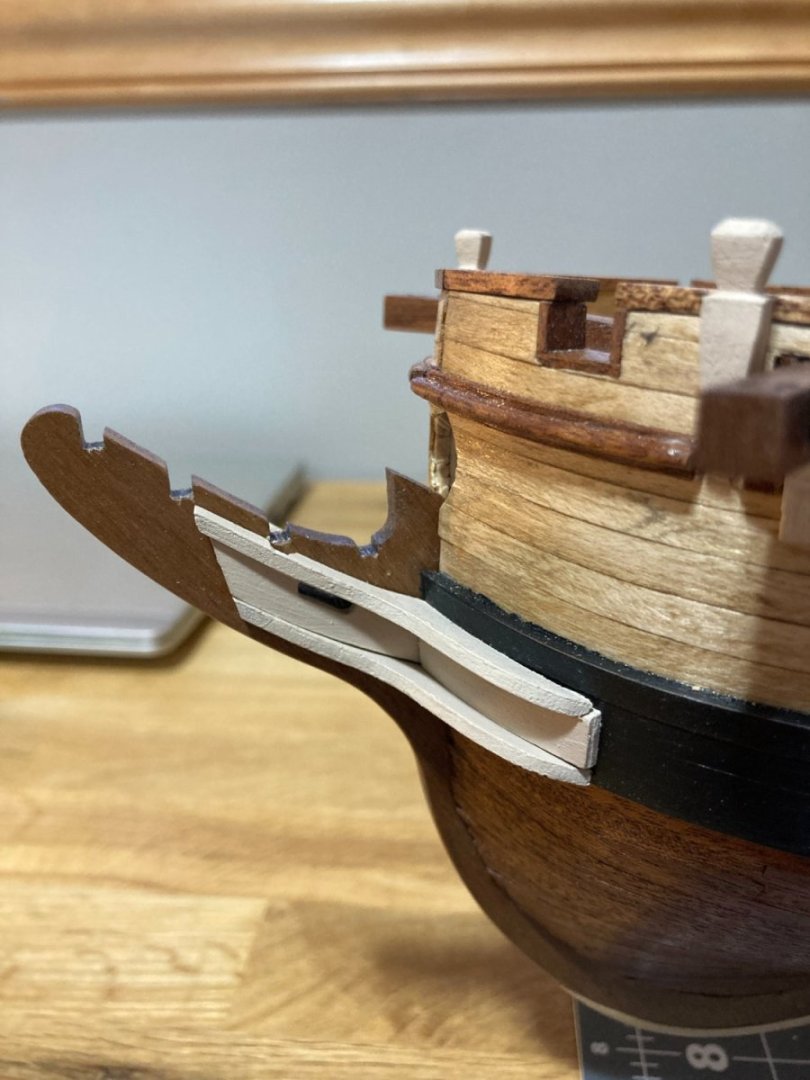
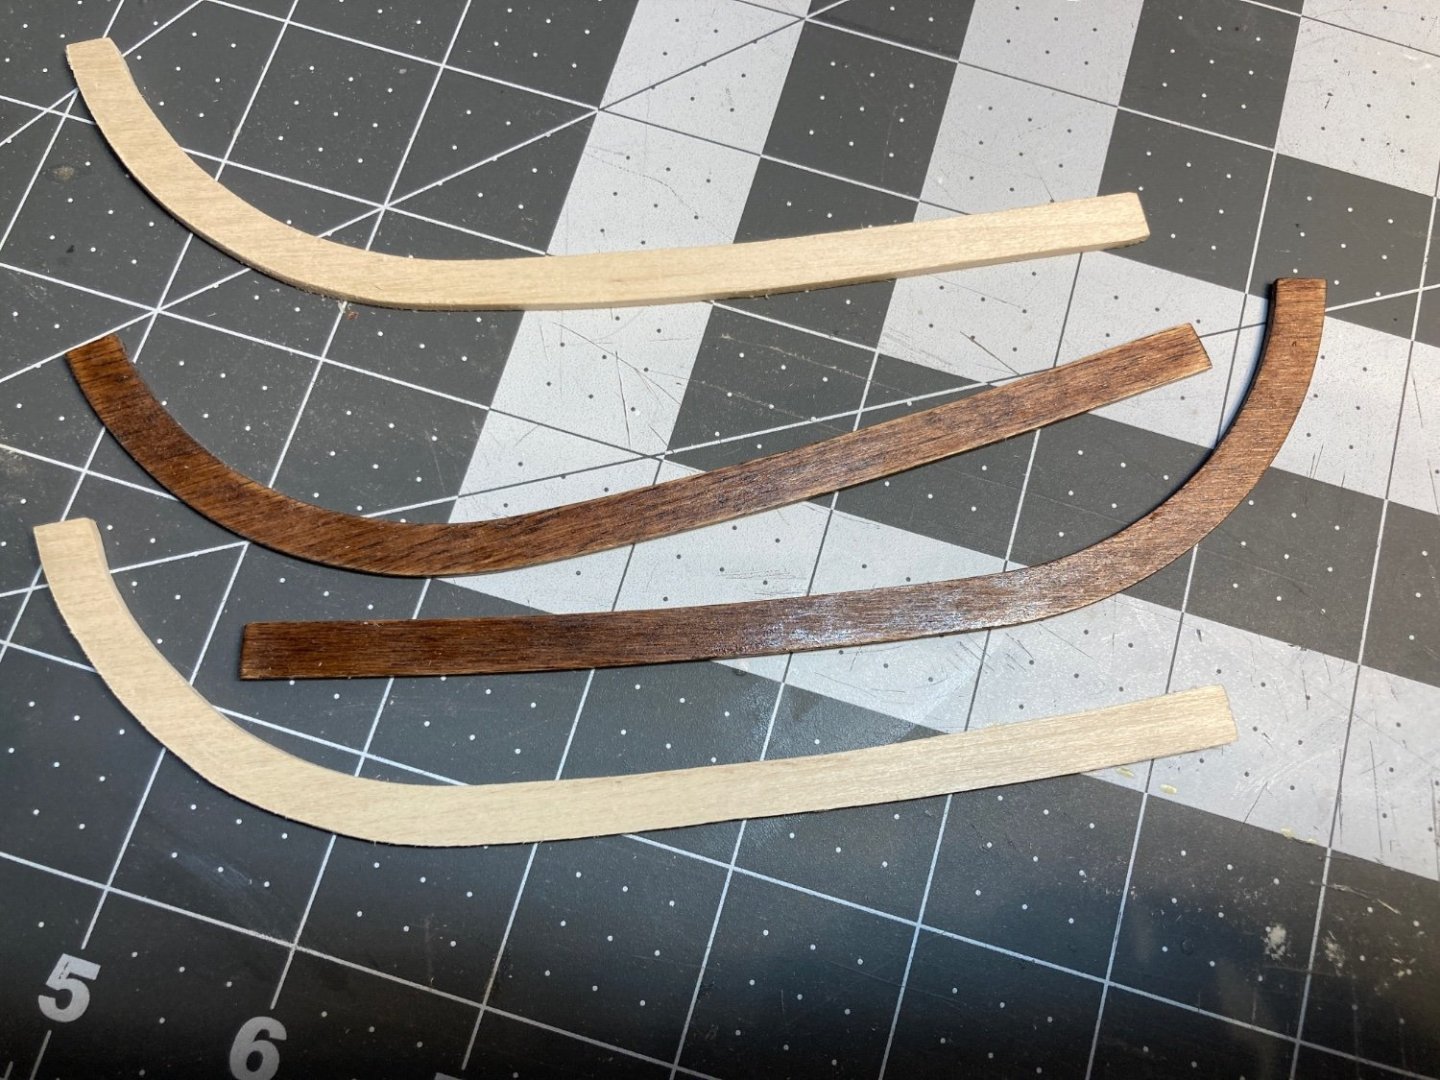
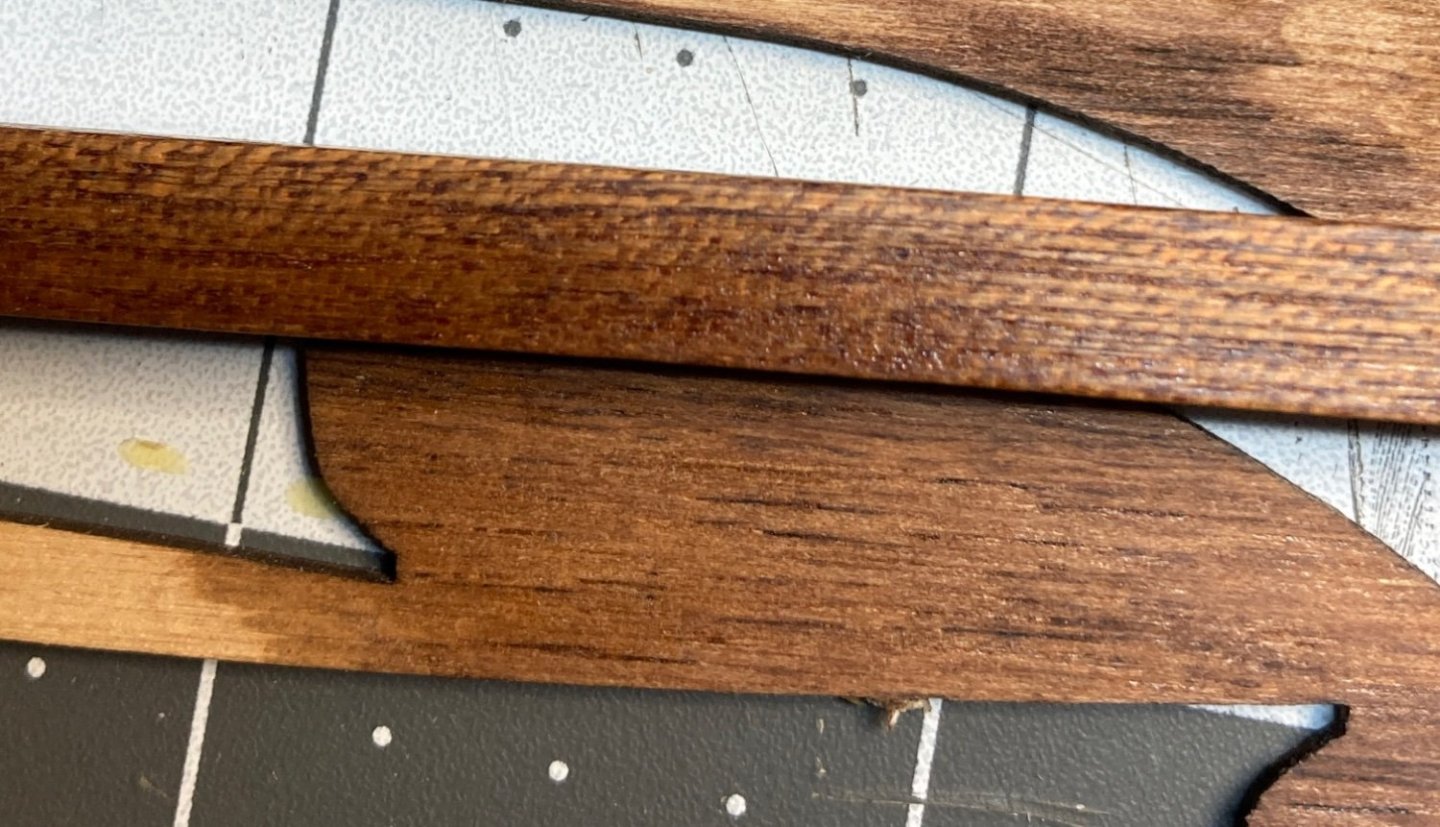
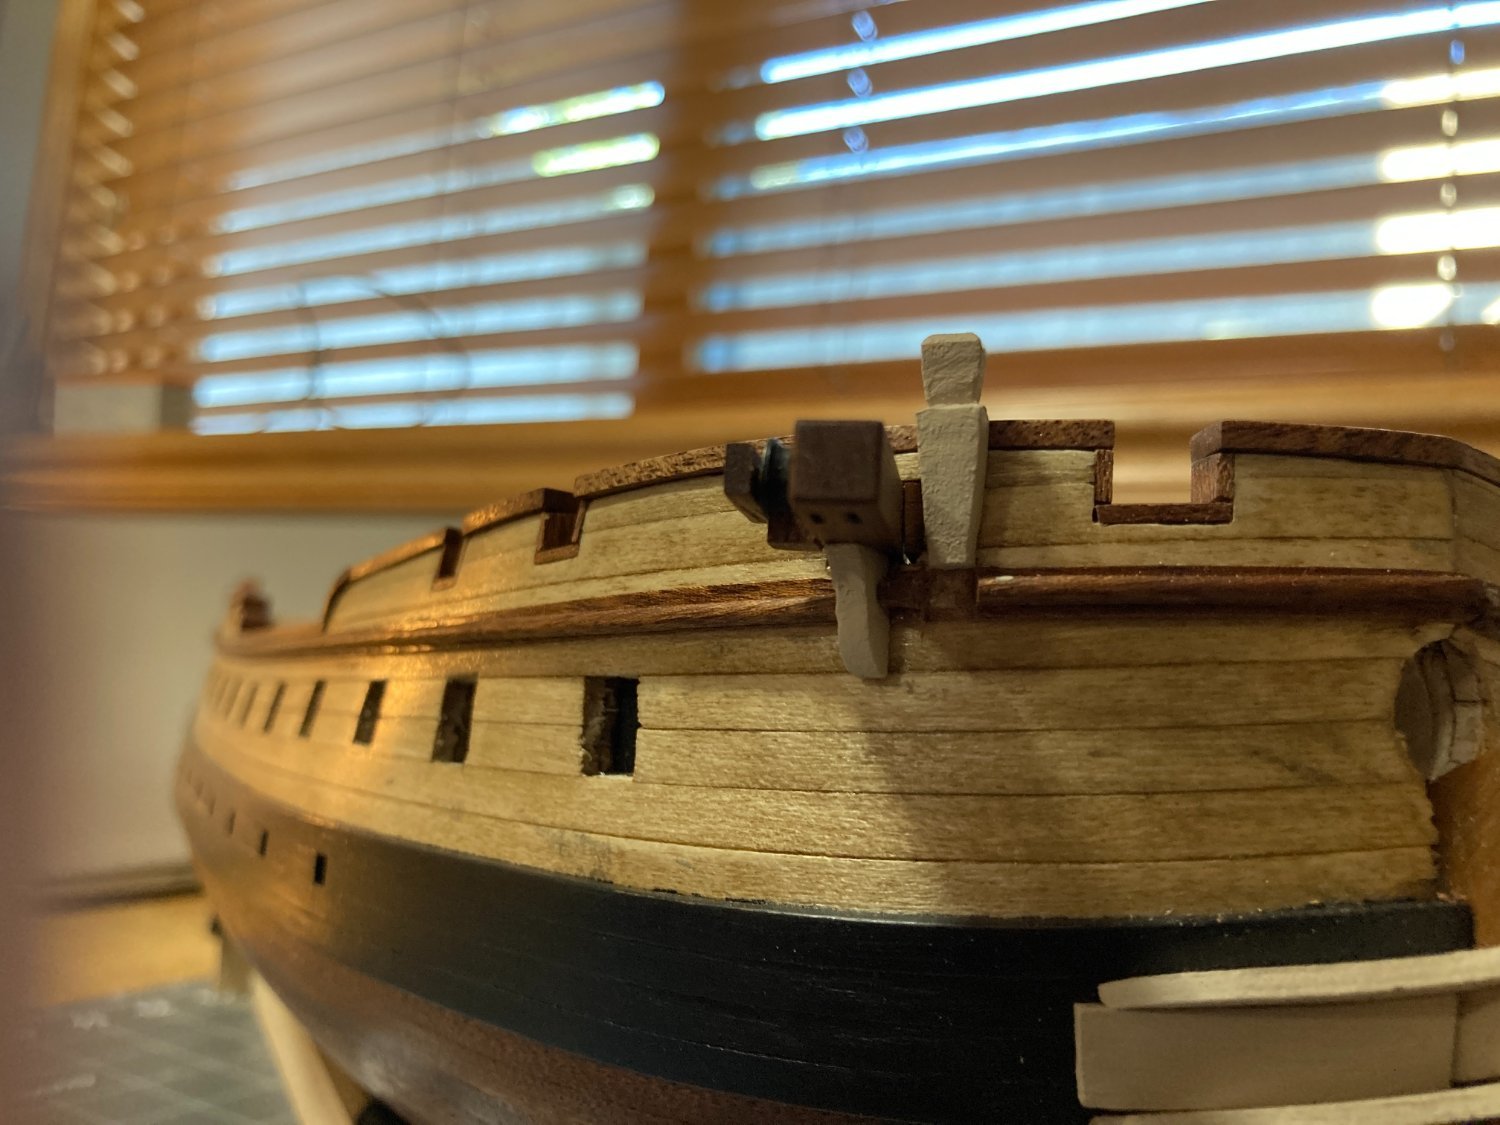
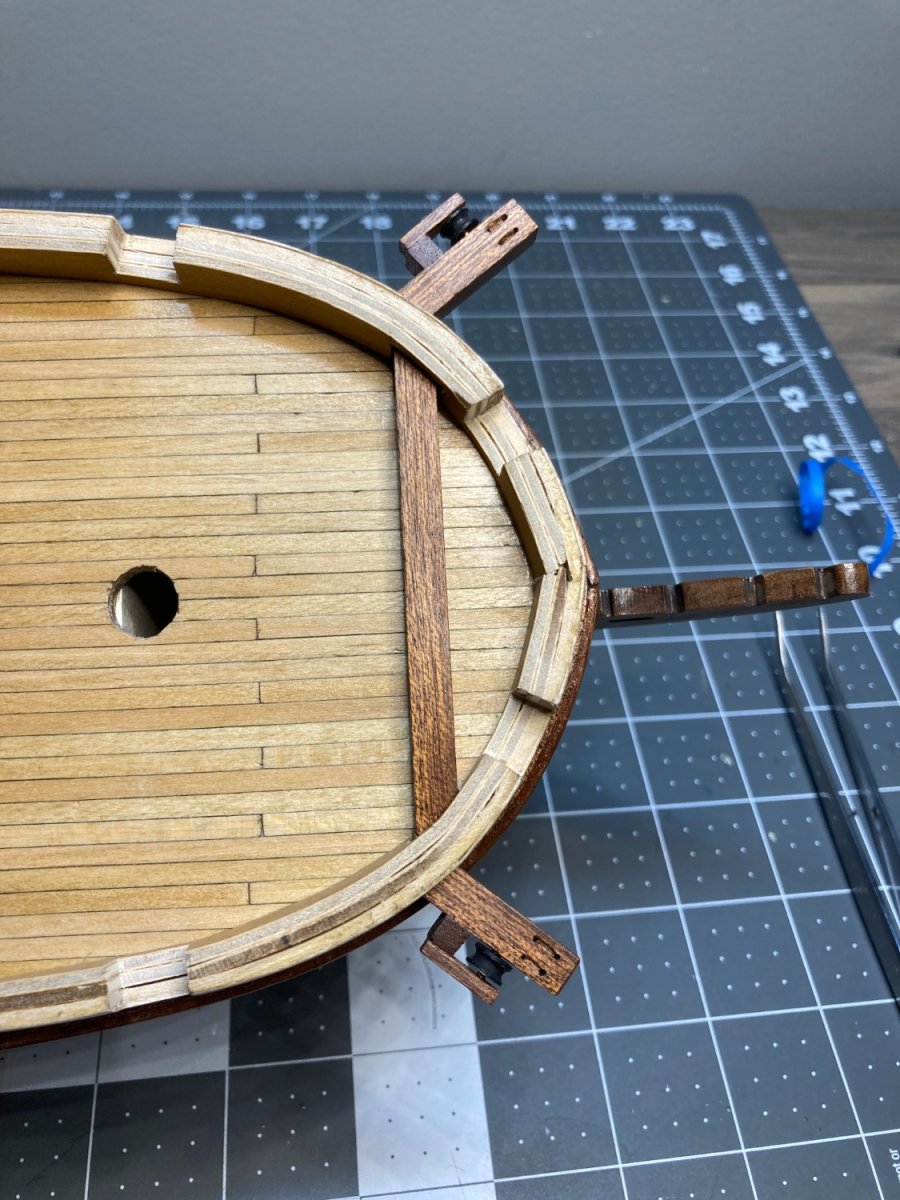
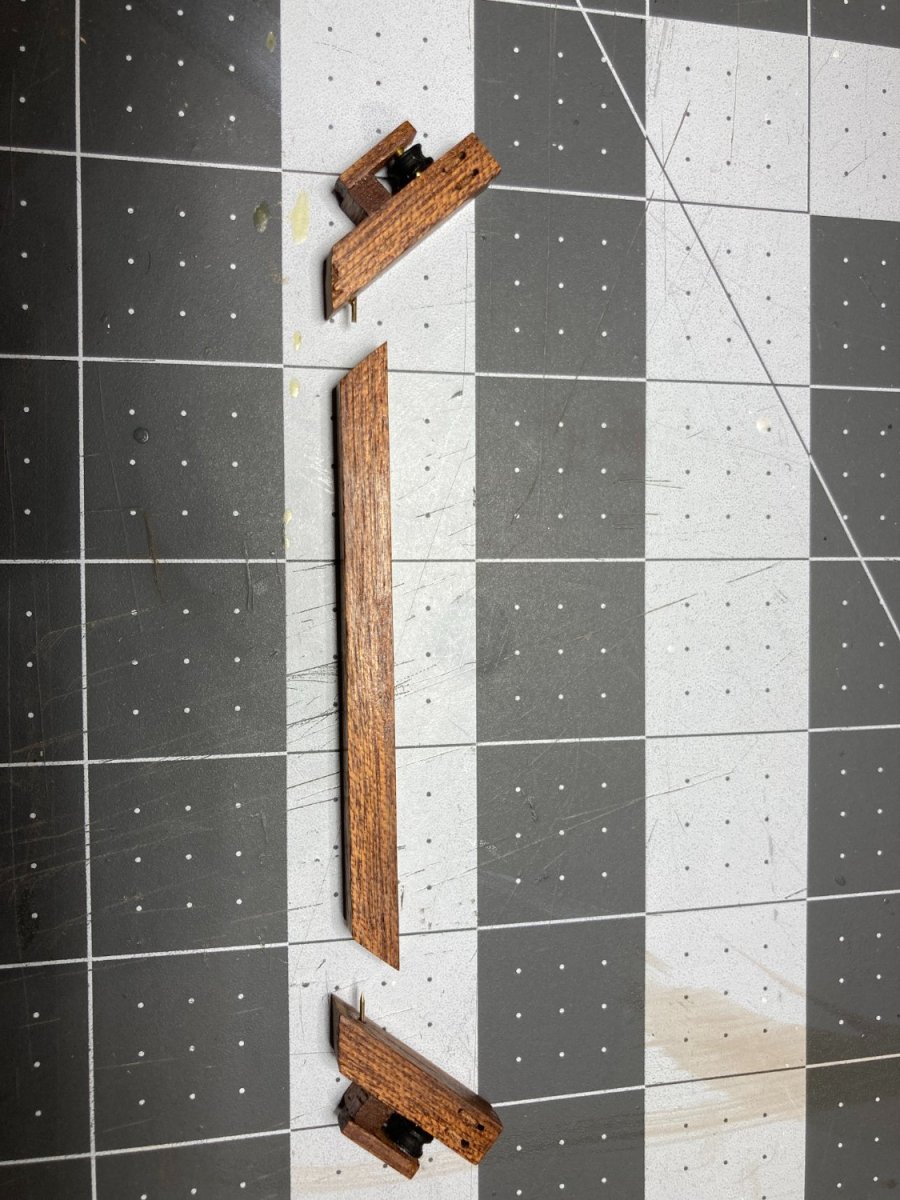
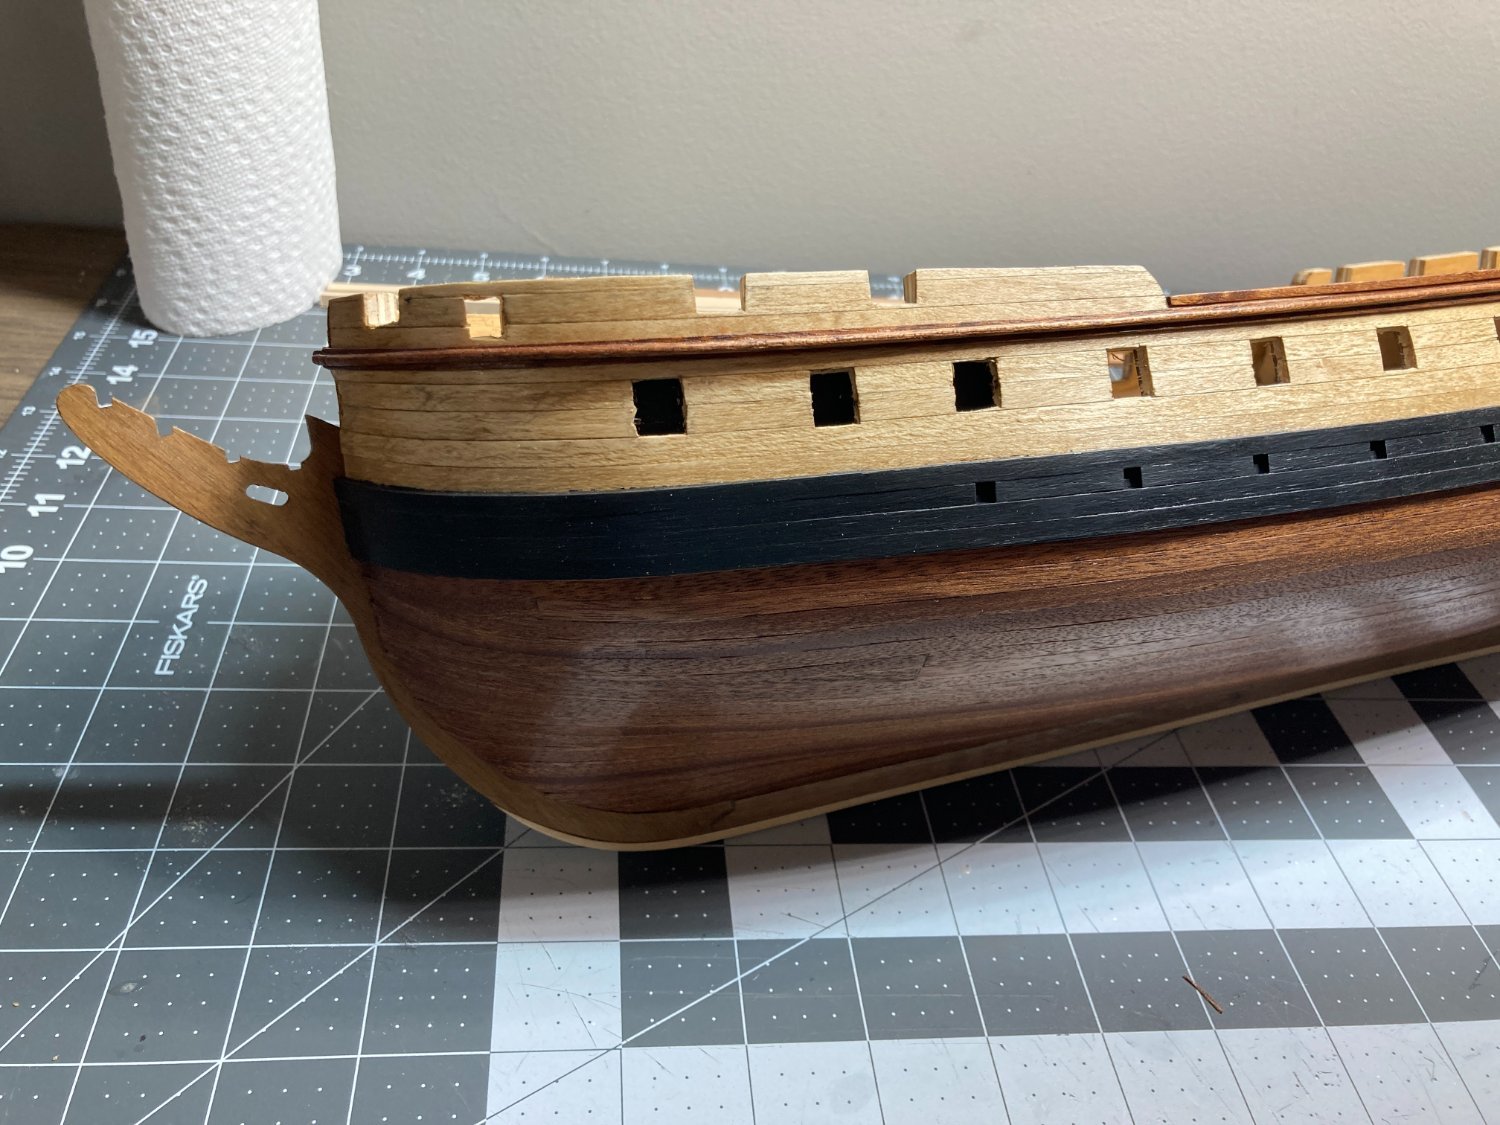
A couple of posts ago I had cut out new cap rails (I think that is the correct term) for the bow section out of basswood after not caring for the way the plywood pieces looked on the edges. I struggled to get the color of the basswood close the sapelli that was used for the rest of the cap rail. Then I was driving past a hobby shop and stopped in and found a piece of 3/32 mahogany. I re-cut the cap rail out of the mahogany and was much happier with the result.
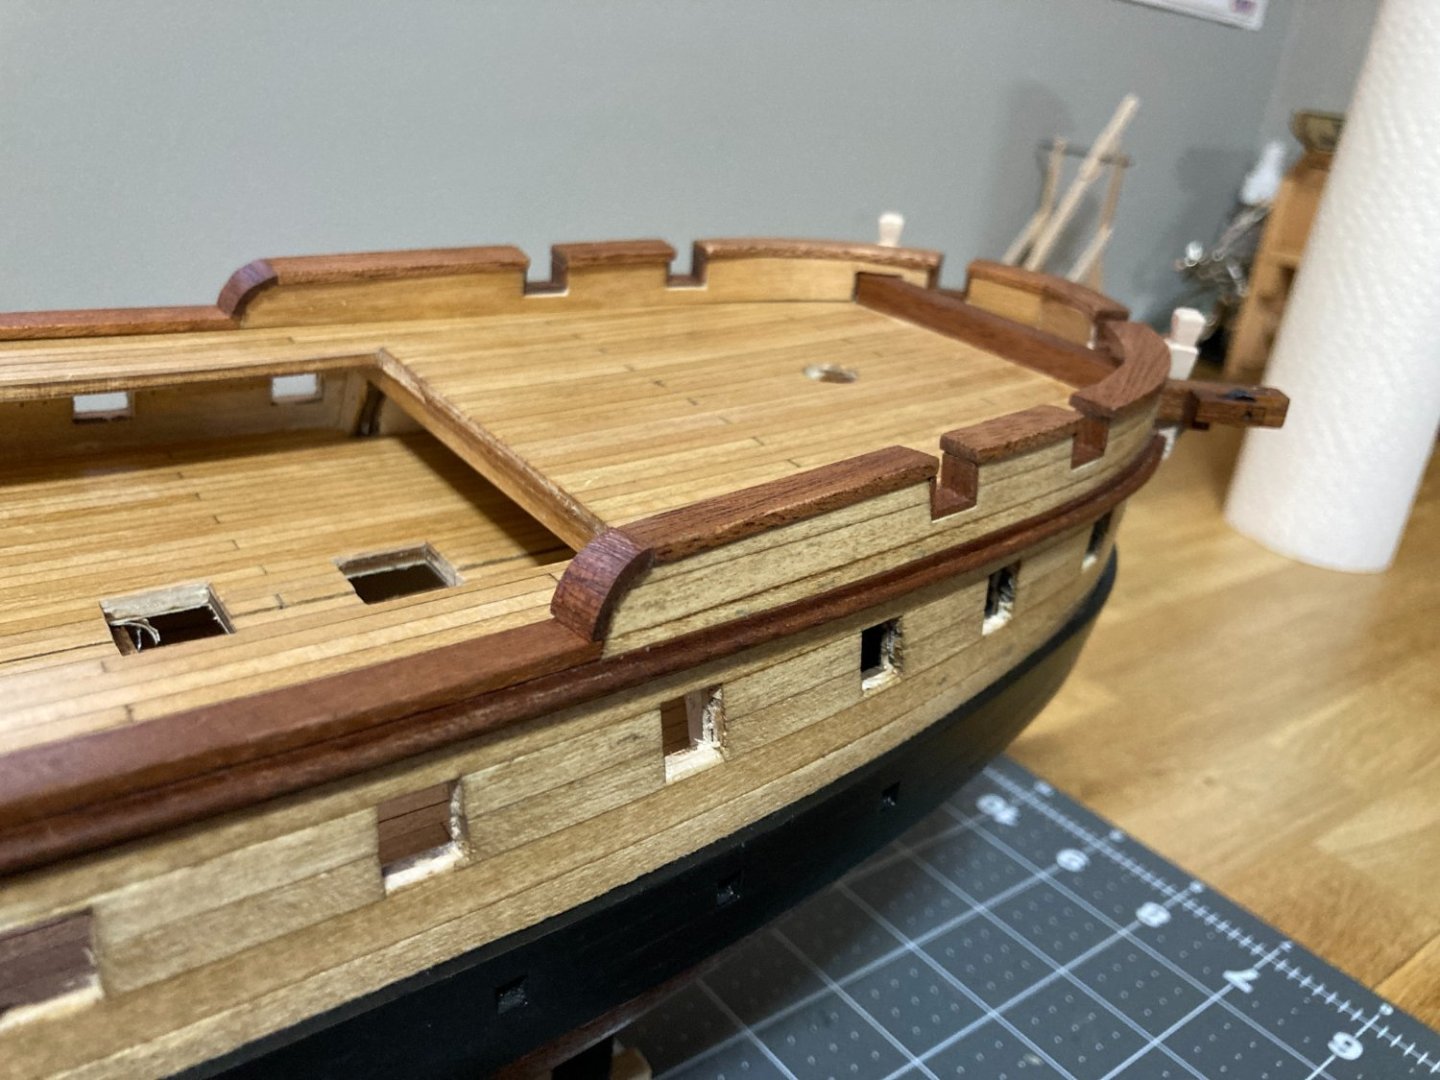
After getting the cap rails installed I added some of the other features that need to be installed before the head can be fabricated. I had to carve the posts next to the cathead and added some items to the stem.


-
Your progress is incredible. Looks great so far.
- mtaylor and Knocklouder
-
 2
2
-
I had today free to work on my ship. Plans changed when my wife was shopping and stopped at a business that was having a moving sale. She found two 6 ft x 2 ft butcher block tables and picked them up for an upgrade to the shipyard. I had been doing my work at a small desk in the back of our family room. She also generously gave up her home office for me to set up my new shipyard. It will take me a little time to get everything organized the way I want, but this is way more room than what I had before. Looking forward to the new space.
.thumb.JPG.0bed0771f0d2d791edbc88b32c069419.JPG)
-
-
-
-
Great job. your ship looks great.
-
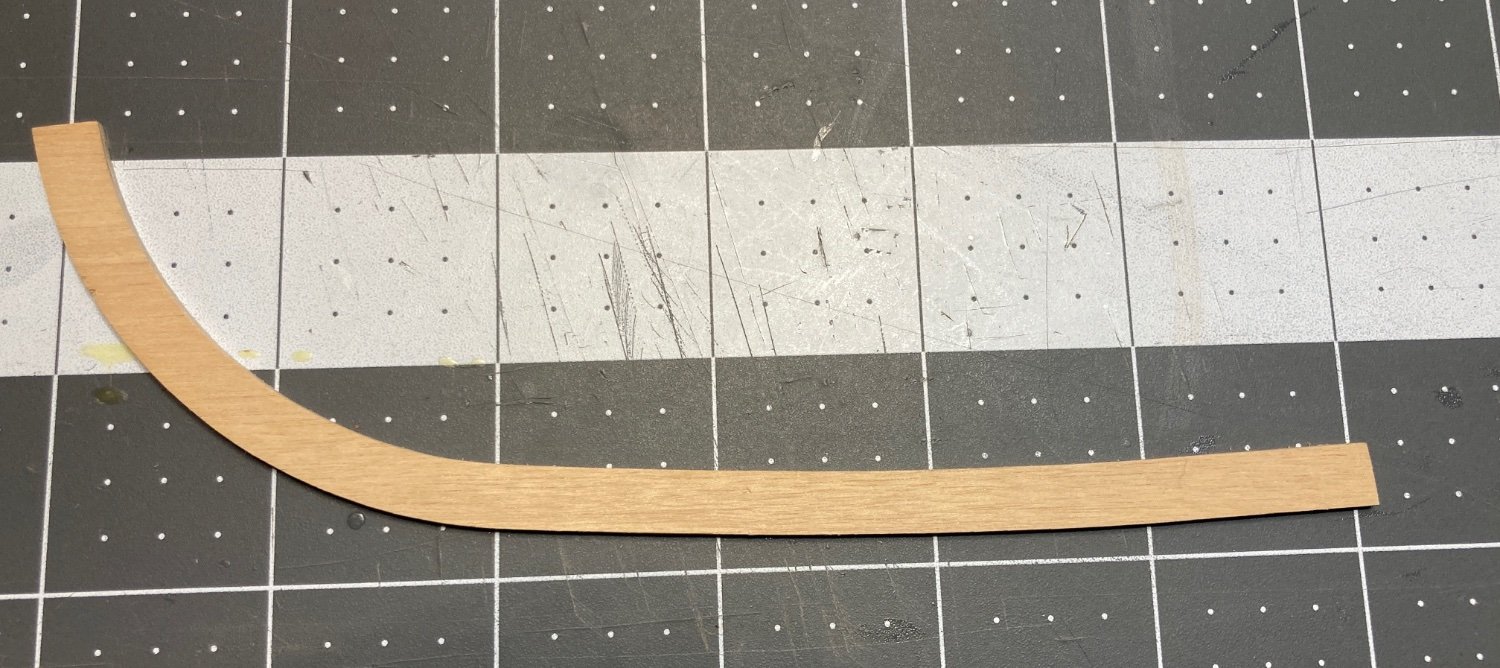
After staining and finishing the laser cut pieces for the bow, I was not happy with the look of the edges. The middle layer of the plywood ended up almost black.
I had recently acquired a scroll saw from my father, so I decided to attempt to cut replacements out of piece of 3/32 basswood.
I am pretty happy with the outcome. I need to go back to the drawing board on figuring out a stain that will match the Sapelli.
-
-
Is it possible your drill bit is dull or damaged at the tip?
- Keith Black, Bob Cleek and mtaylor
-
3
-
-
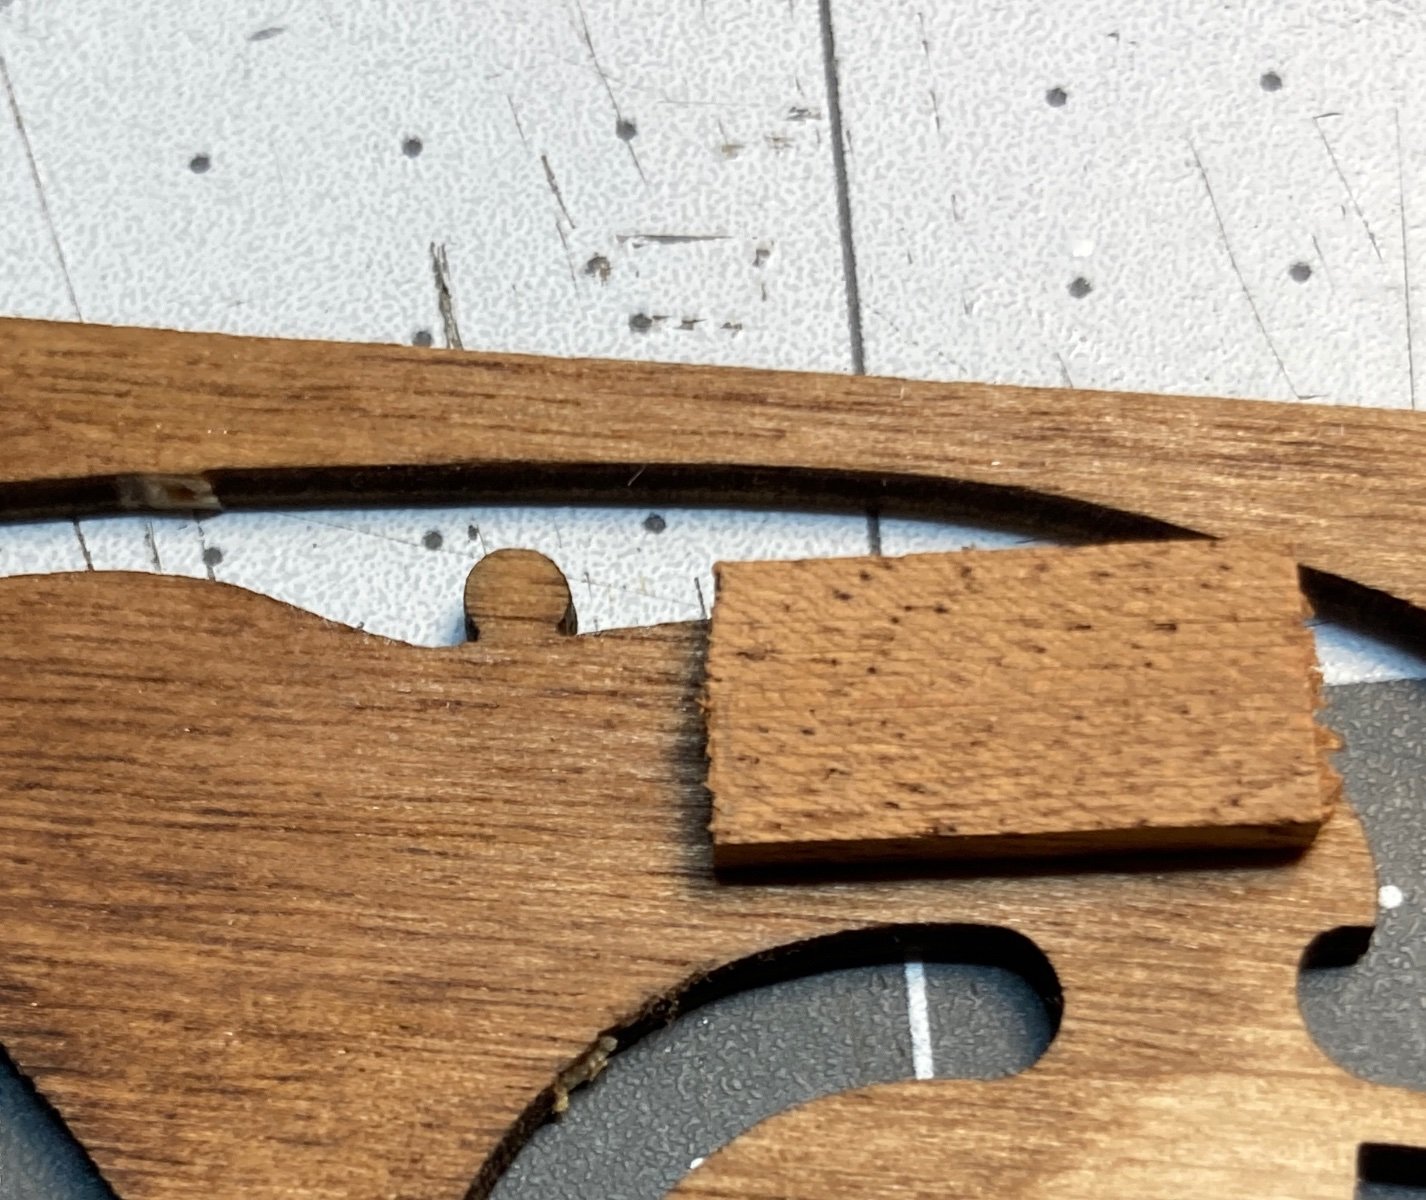
One more challenge with the bow section is related to finishing the material provided with the kit. Most of the trim is Sapelli. For the bow a laser cut piece of plywood (looks like birch) is provided to accommodate the curve on the bow.

finishing these pieces to look like Sapelli is a challenge. I originally tried to match the bare Sapelli. A mix of Provincial and Gunstock stain came pretty close.

however, when Sapelli is finished with Shellac it takes on a darker rich color. Covering the stained plywood with shellac didn’t produce the same dark rich color.
I bought some Red Mahogany stain but is wasn’t quite right. I then applied the Provincial stain first, then added a coat of the Red Mahogany, and after a couple coats of shellac it was pretty close.
I think it will take 4, maybe 5 coats of shellac to get the richness, but this should work.
-
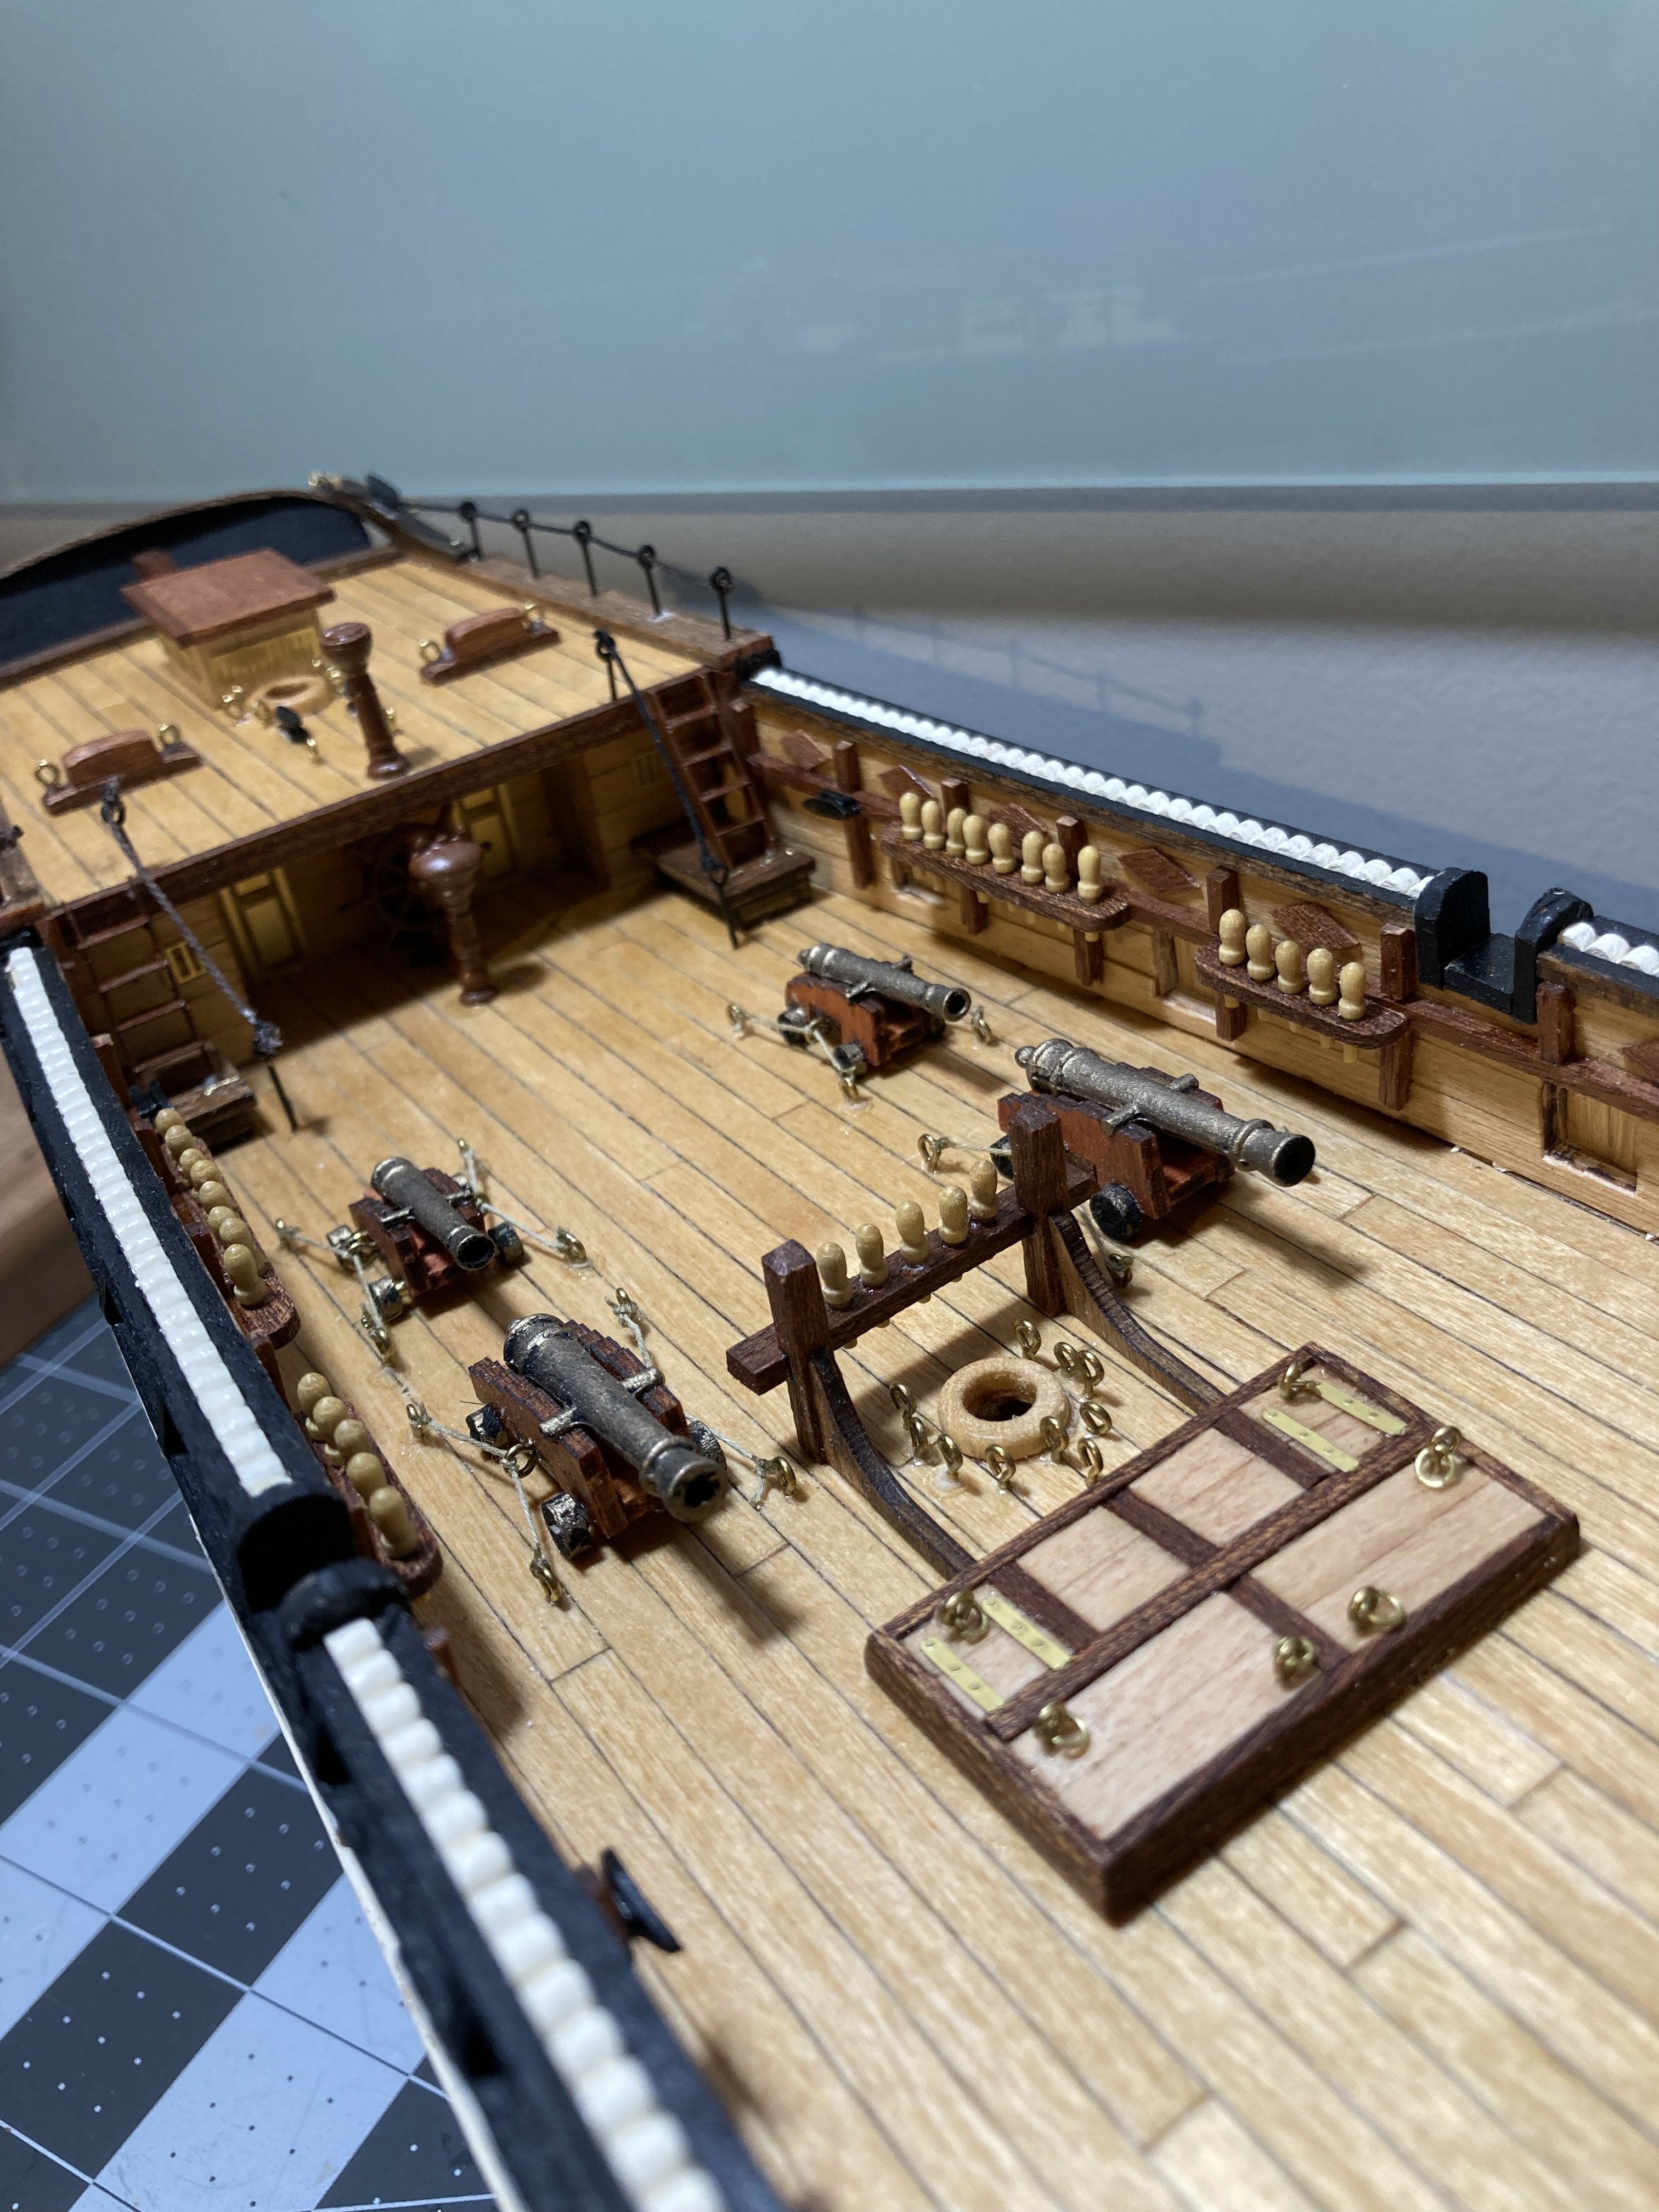
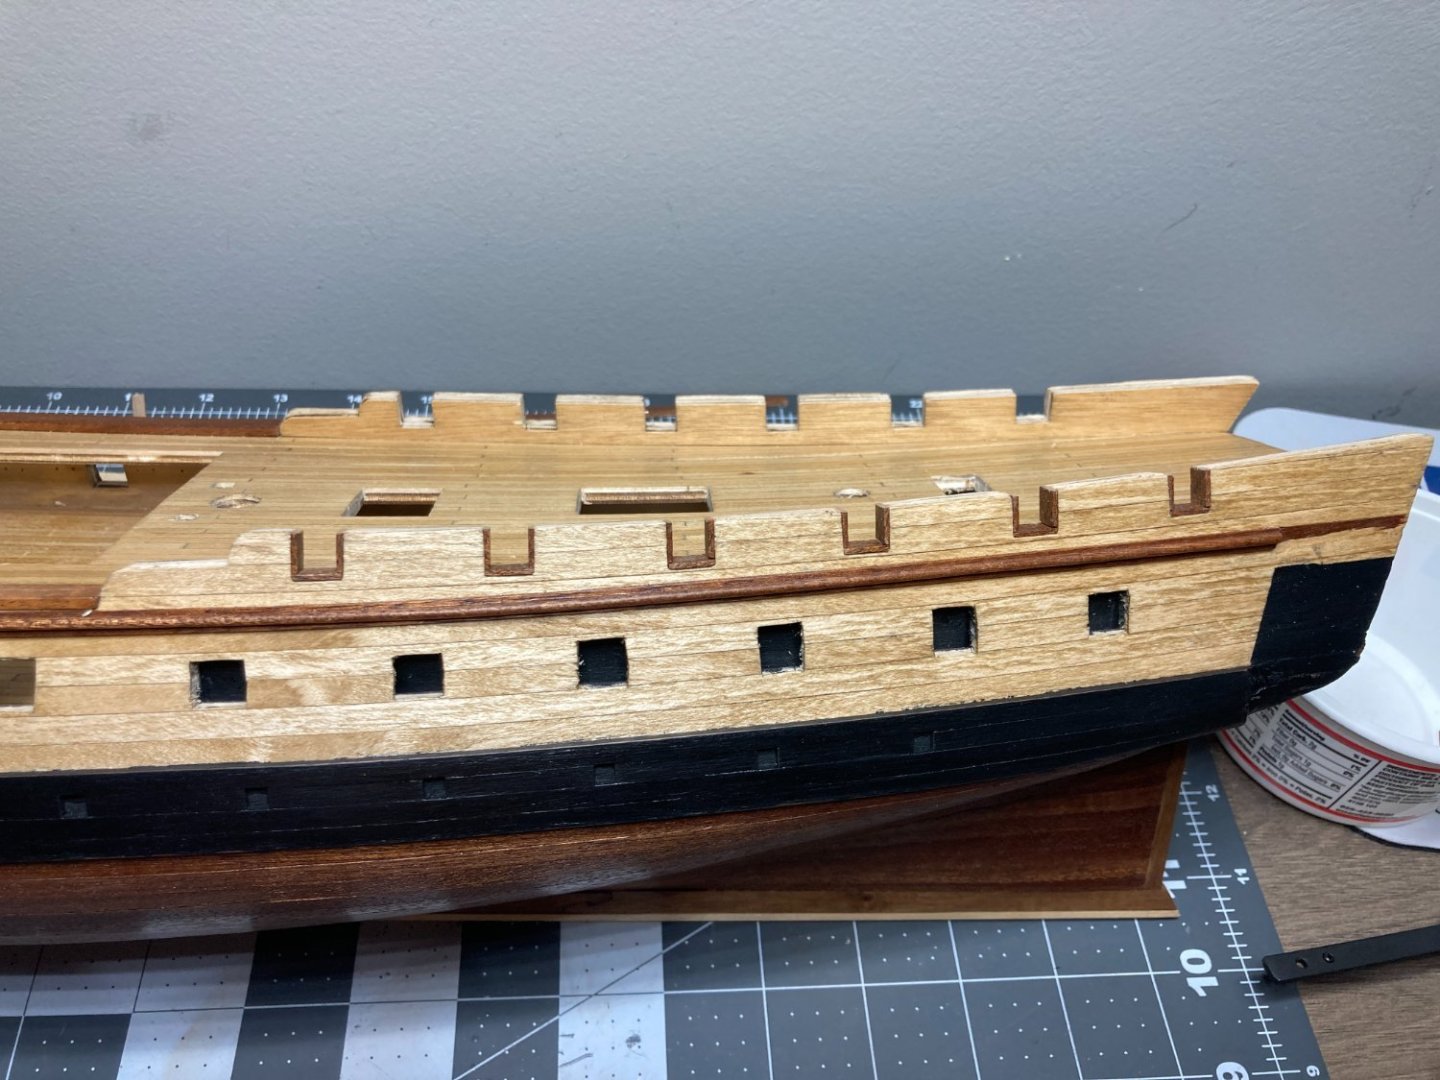
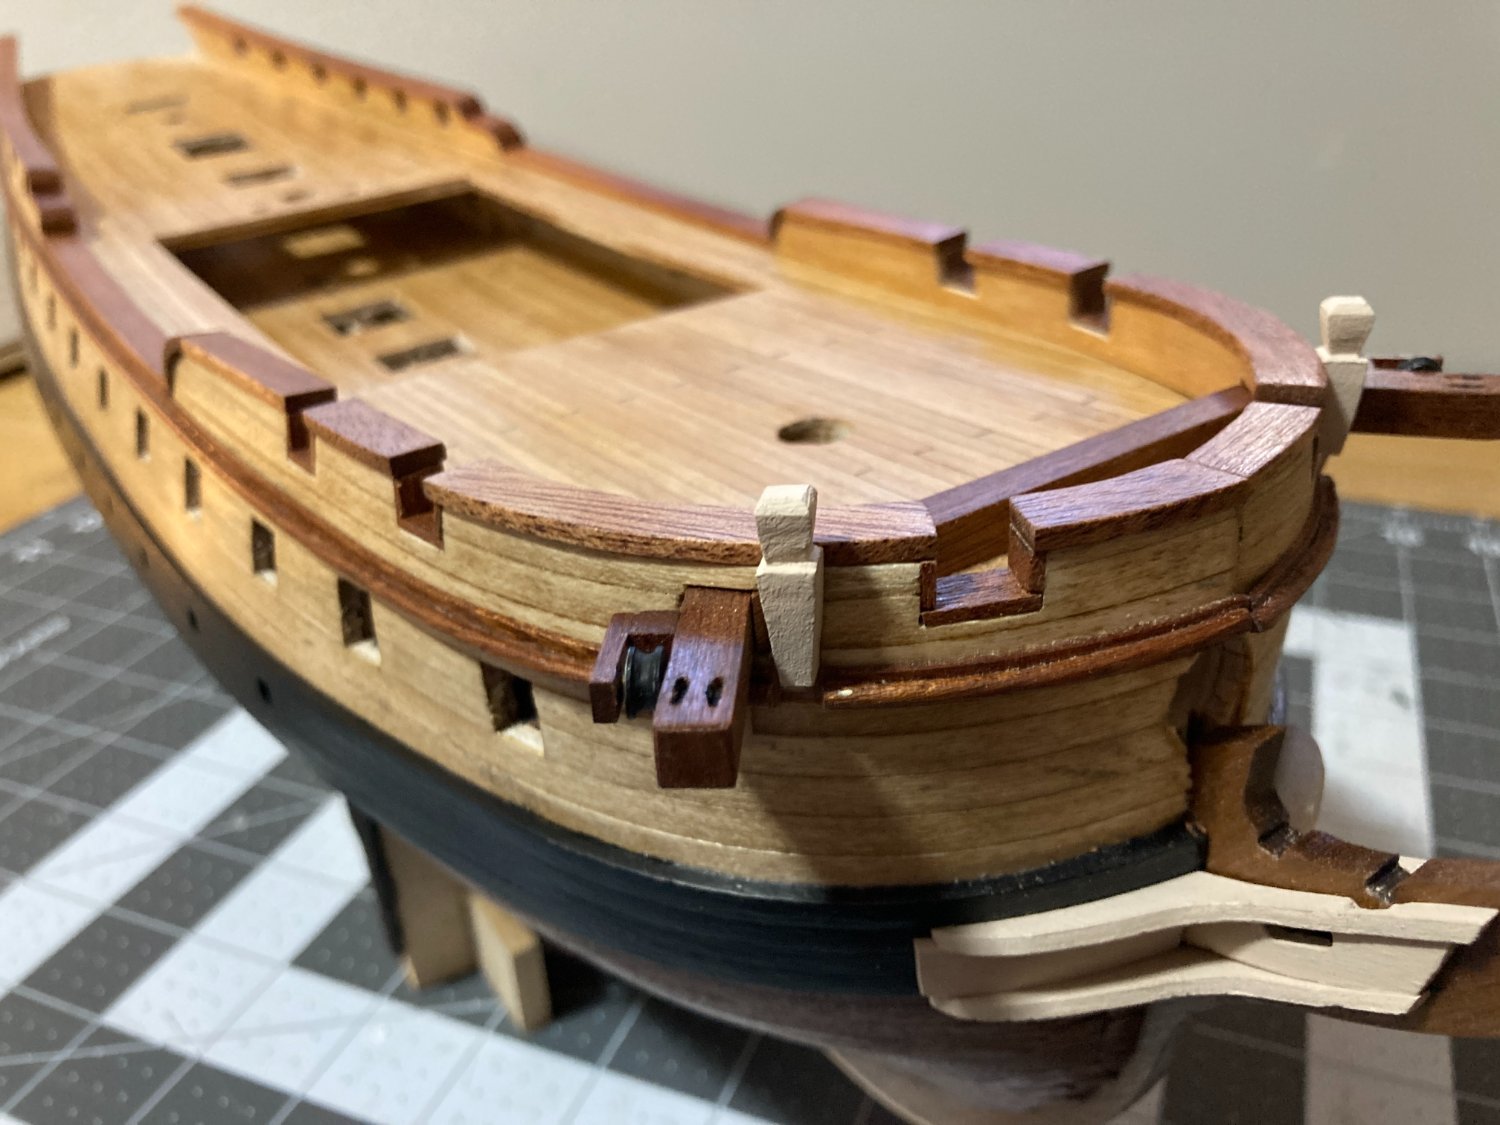
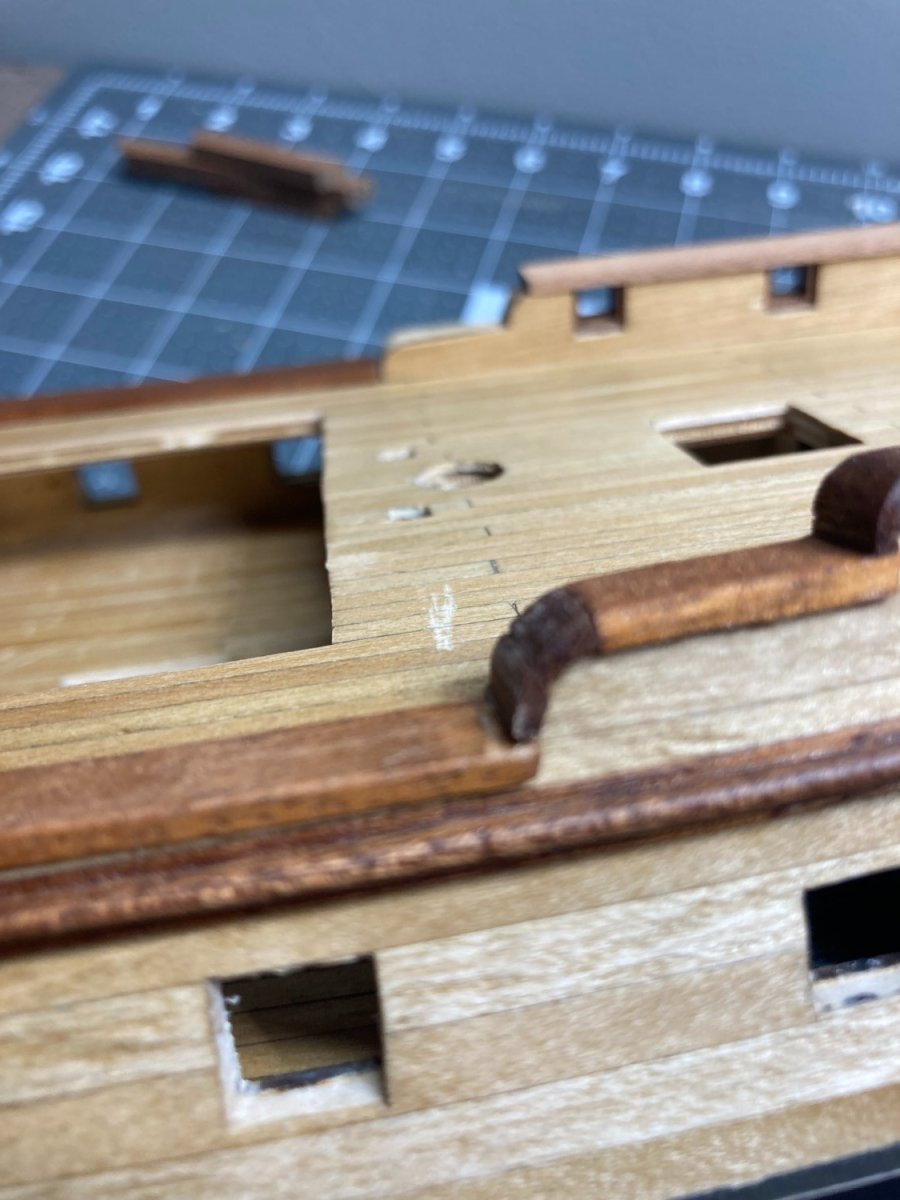
I finished the trim on the rear part of the ship, and I am pretty happy with how that turned out. next, I am giving a light sanding and one final coat of shellac to the deck. I put a few marks into the deck finish while sanding and filing the trim features, so hoping a light sanding and another coat will help.
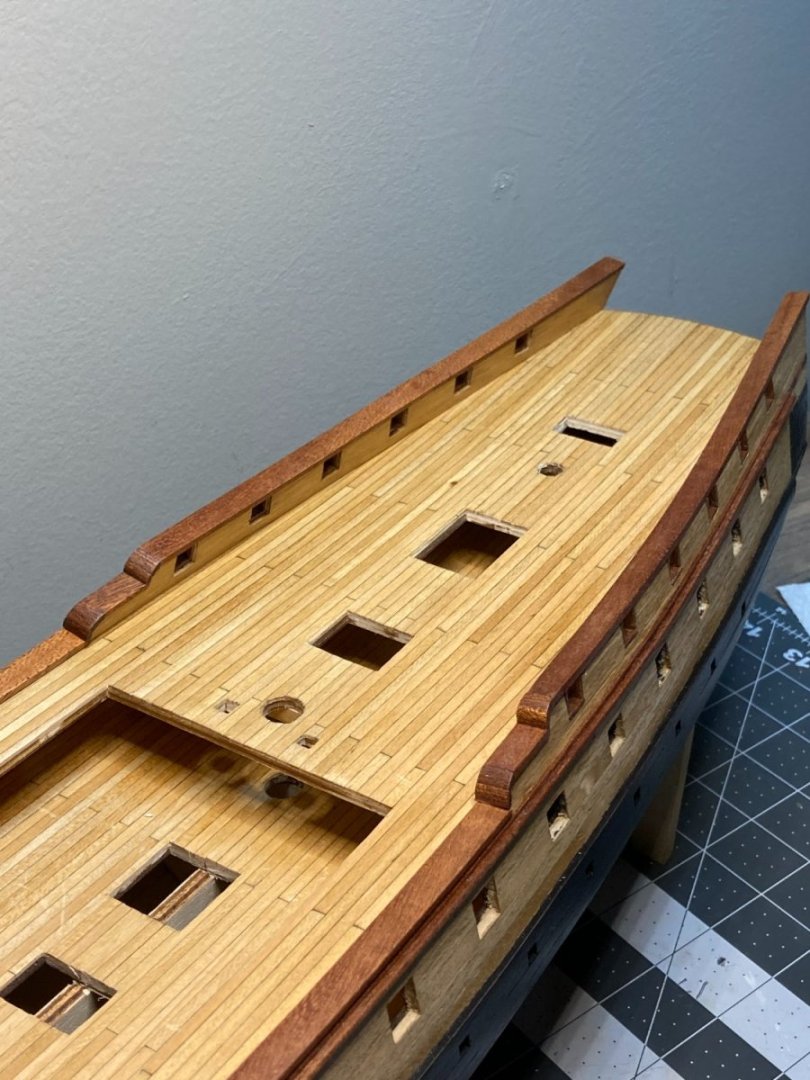
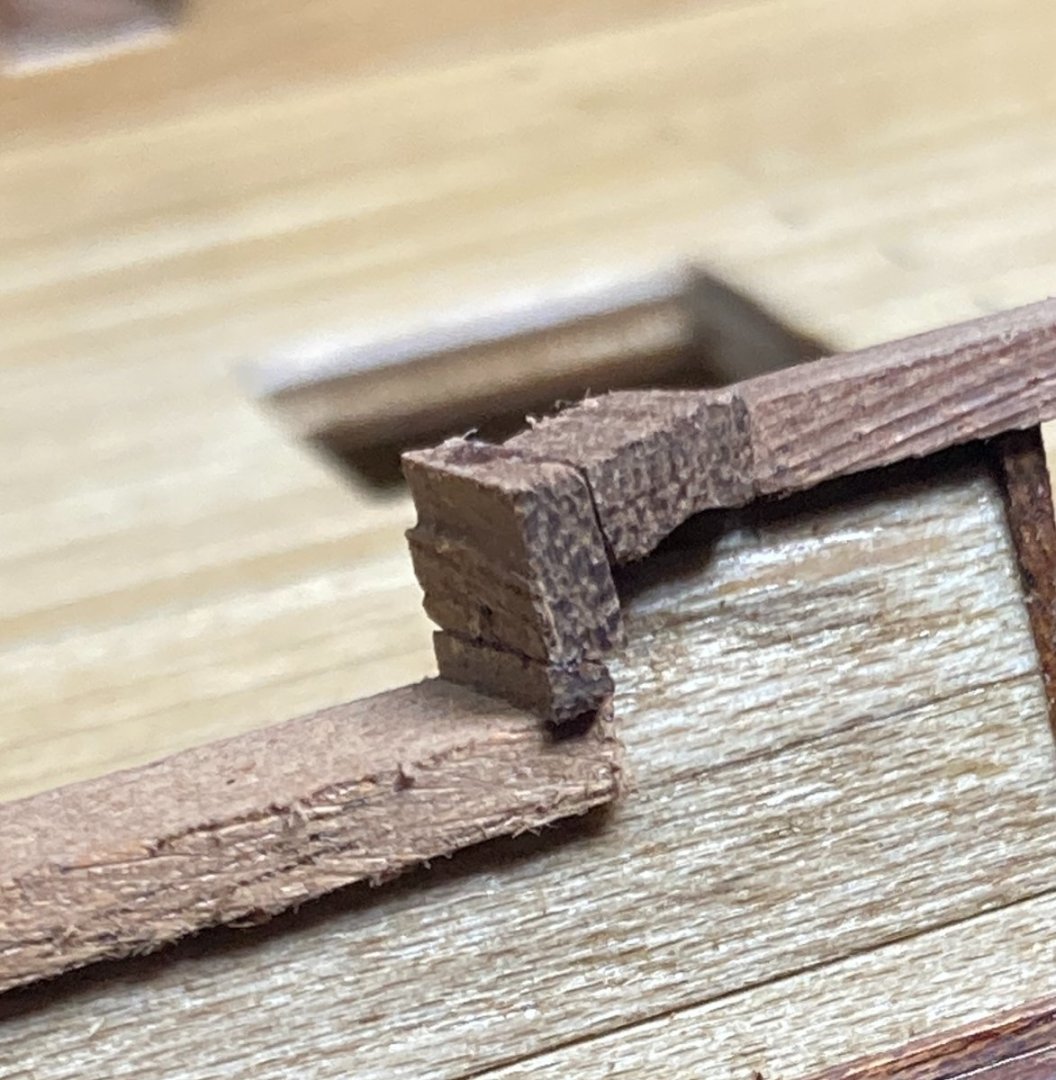
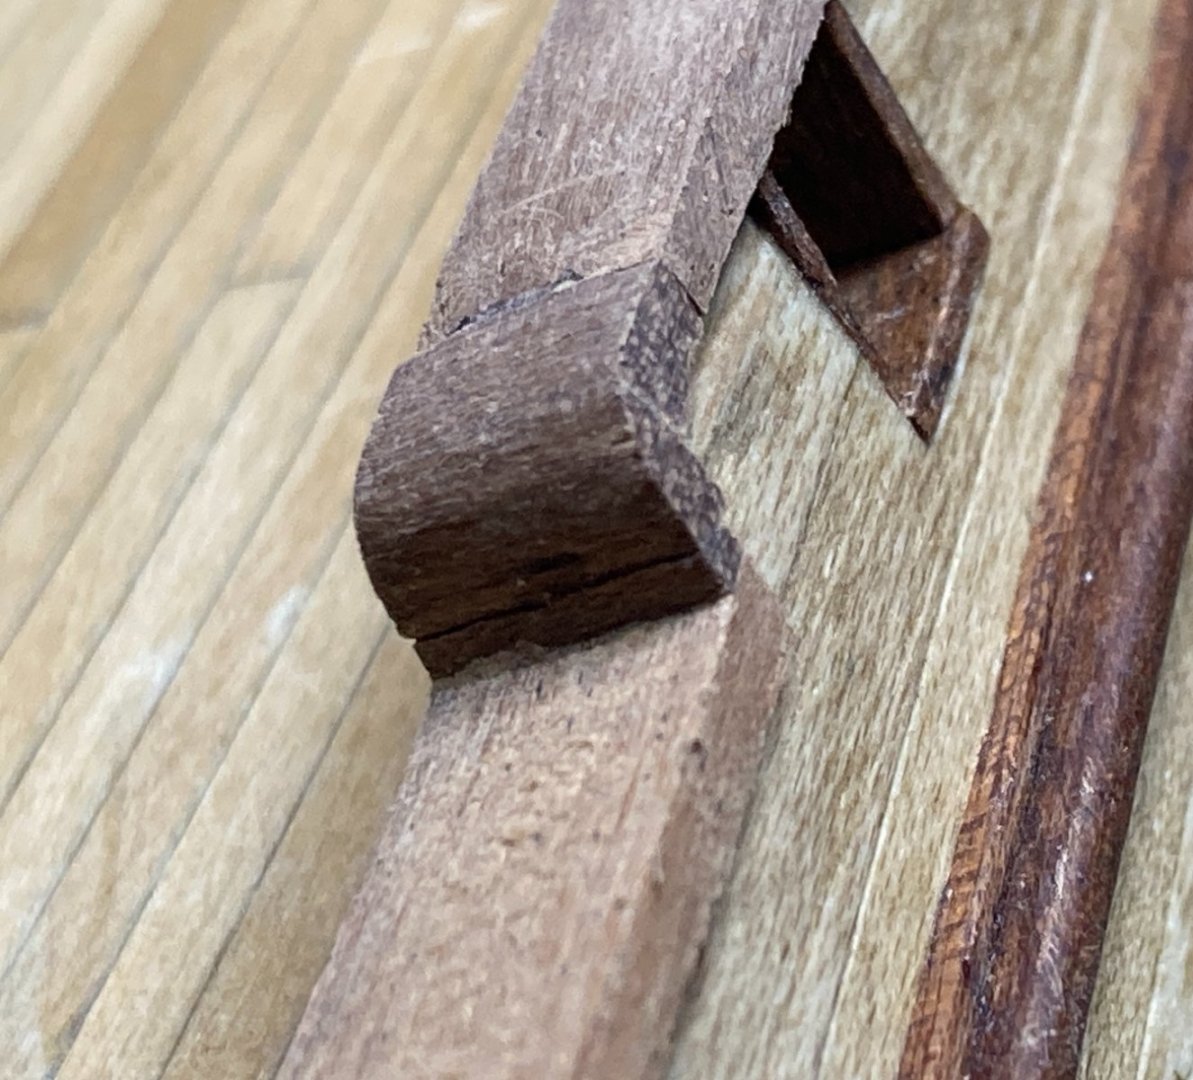
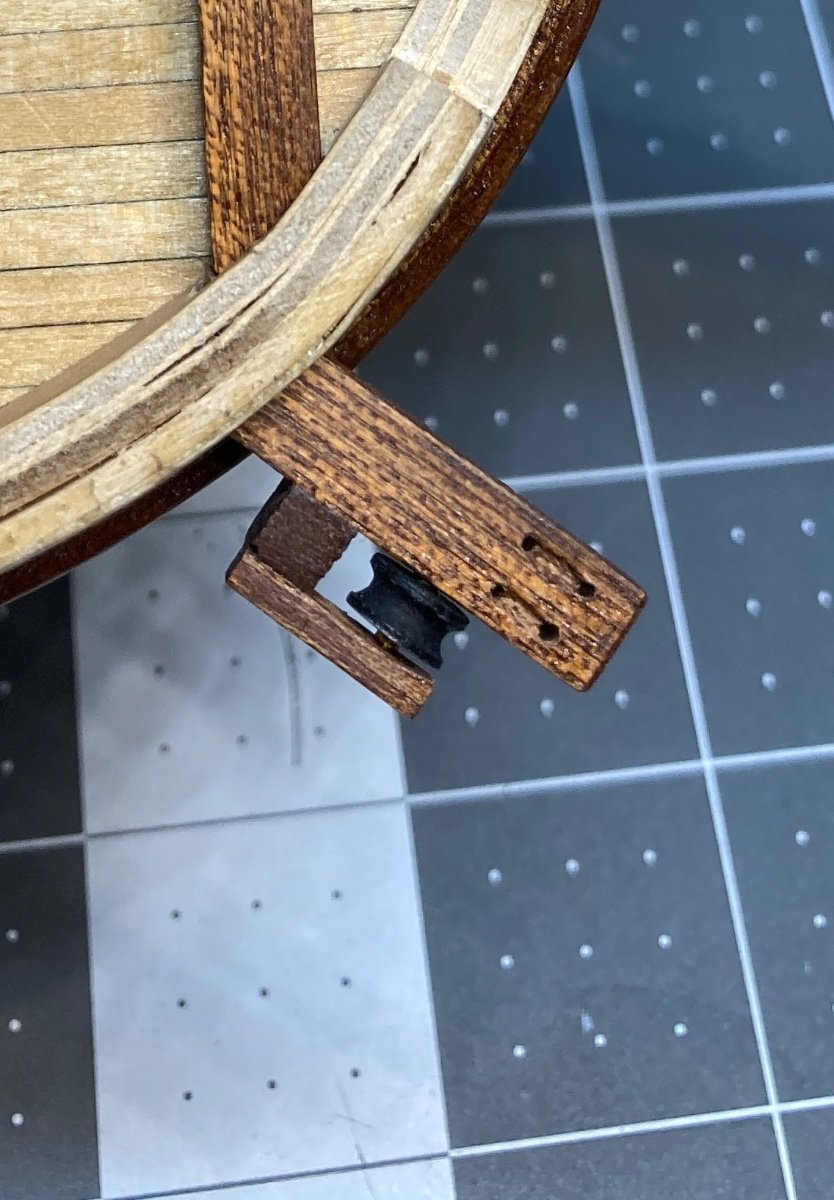
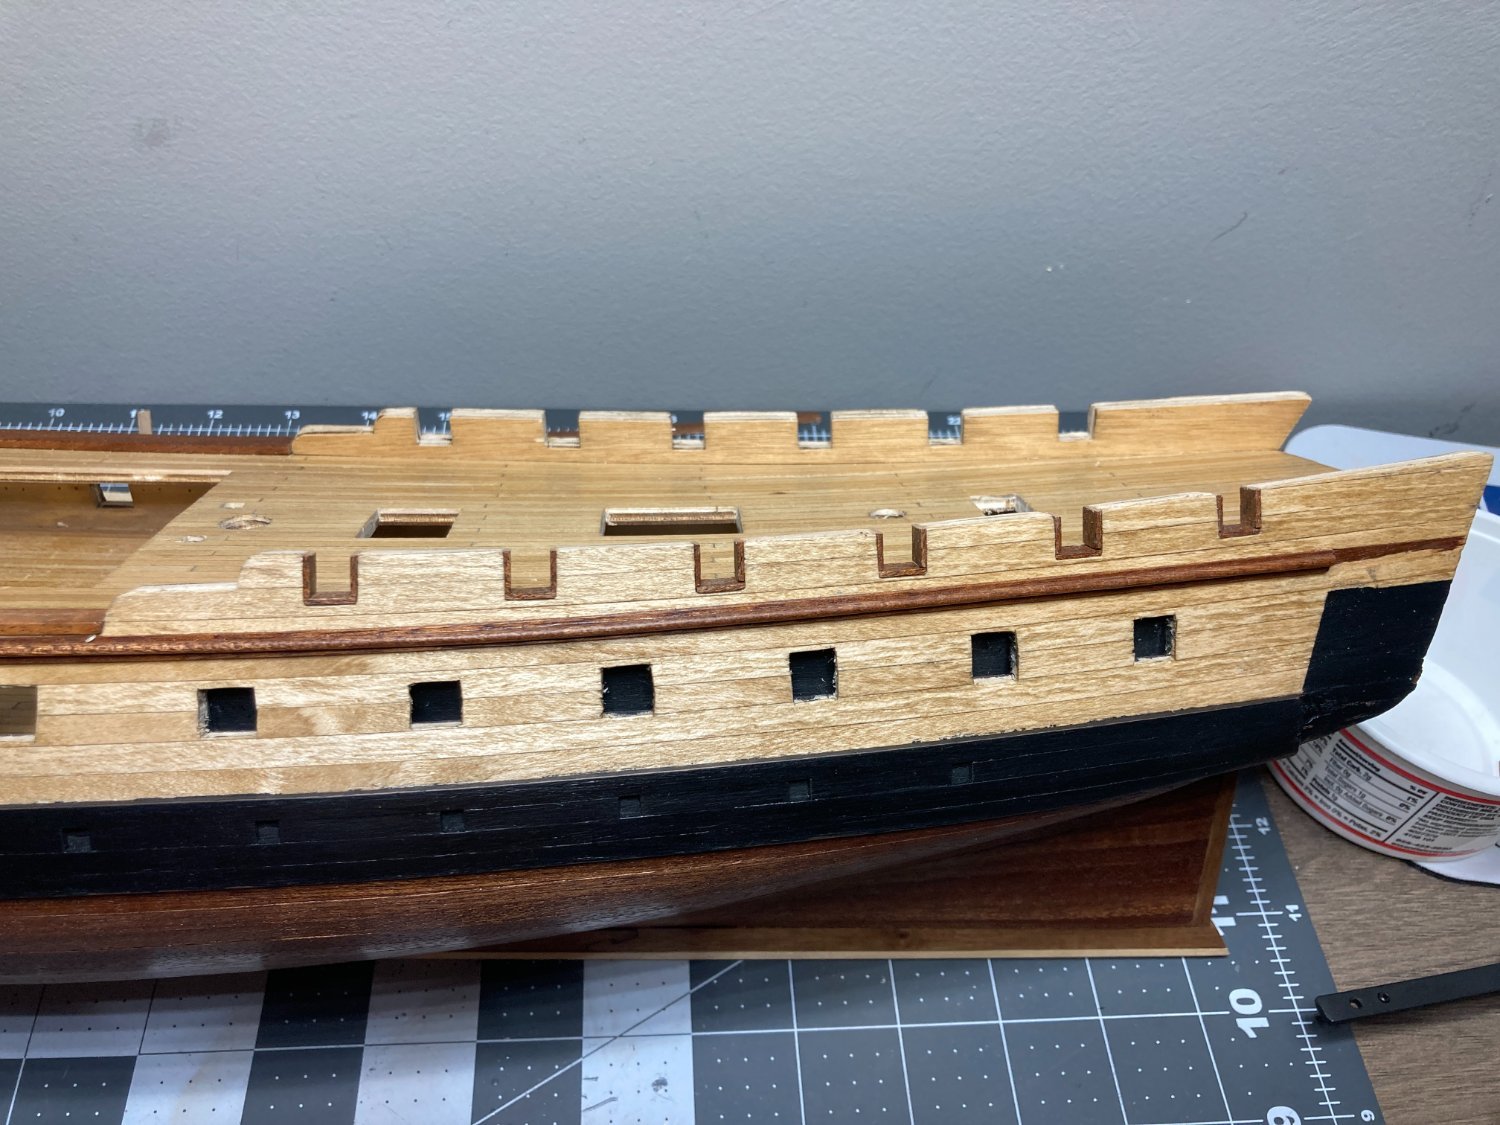
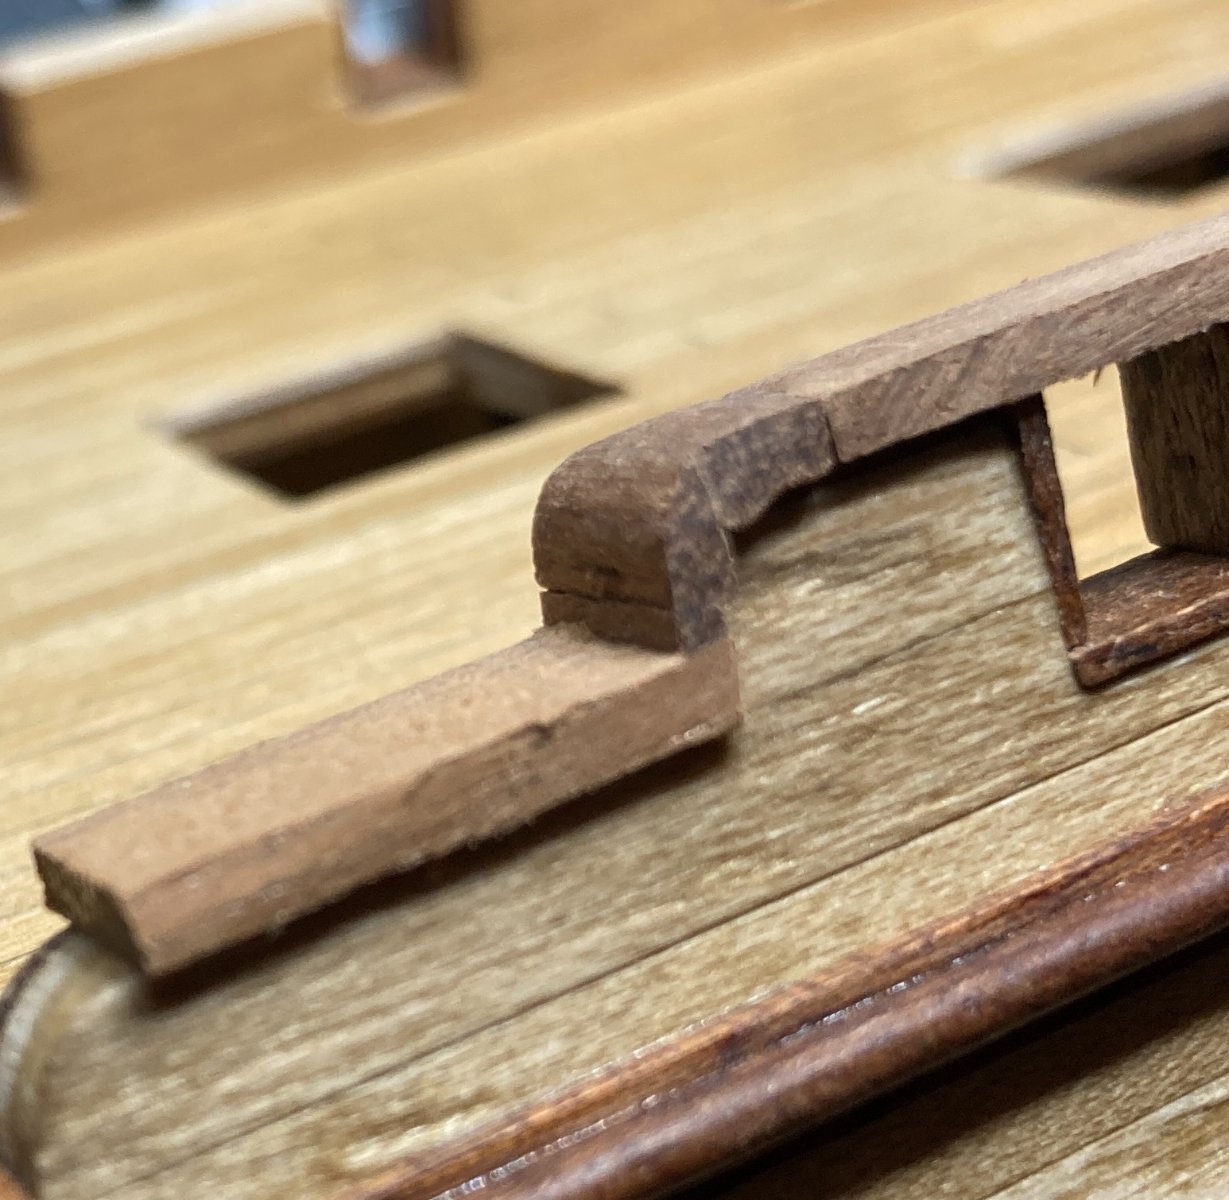
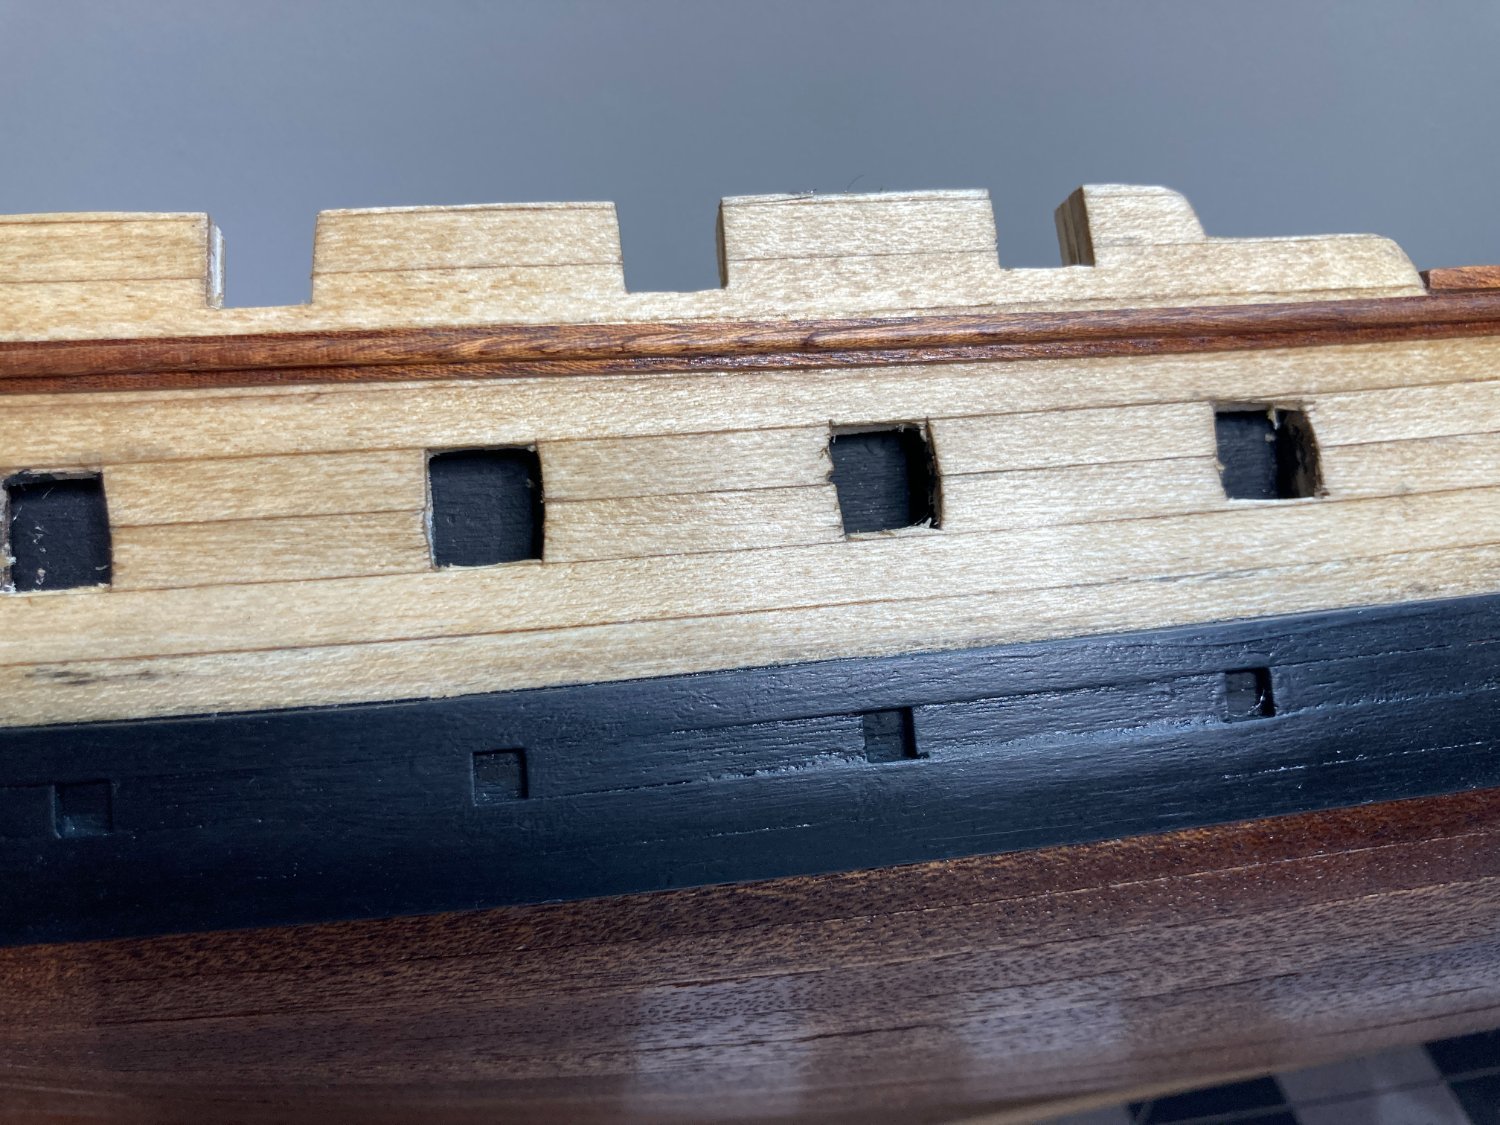
Next is the trim around the gun ports on the bow. I am calling these gun ports, but the kit does not have guns for this section of the ship. This part of the build will also include fabricating and installing the cathead. The instructions from Occre have you cut the top part of the bulwark above the cathead out and then attach the fully fabricated cat head on the ship (see picture below). Since all of the planking is on and finished, I don't want to cut that away. I have been making a few dry runs at assembling the cathead in place without cutting away the planking.
The other odd thing about the cathead is the pictures in the instructs appear tohave the cathead angling forward at about 30 degrees, but the plans clearly show a forty five degree angle. I will go with the 45 degree angle on mine.
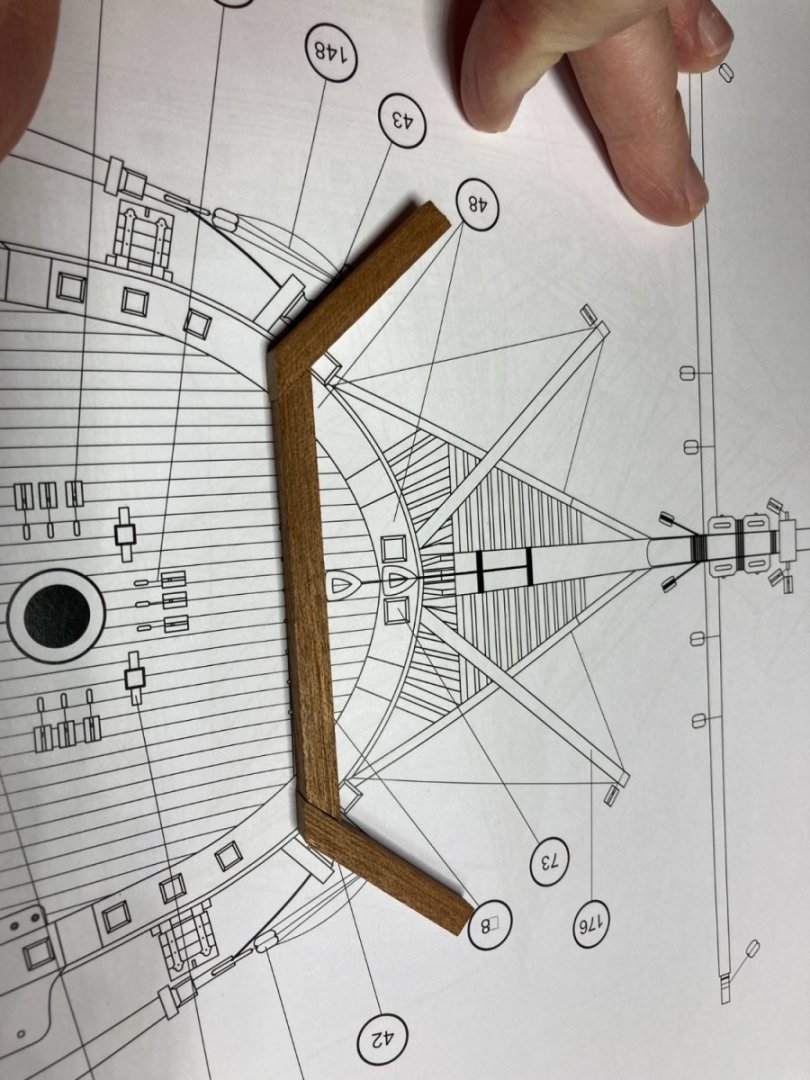
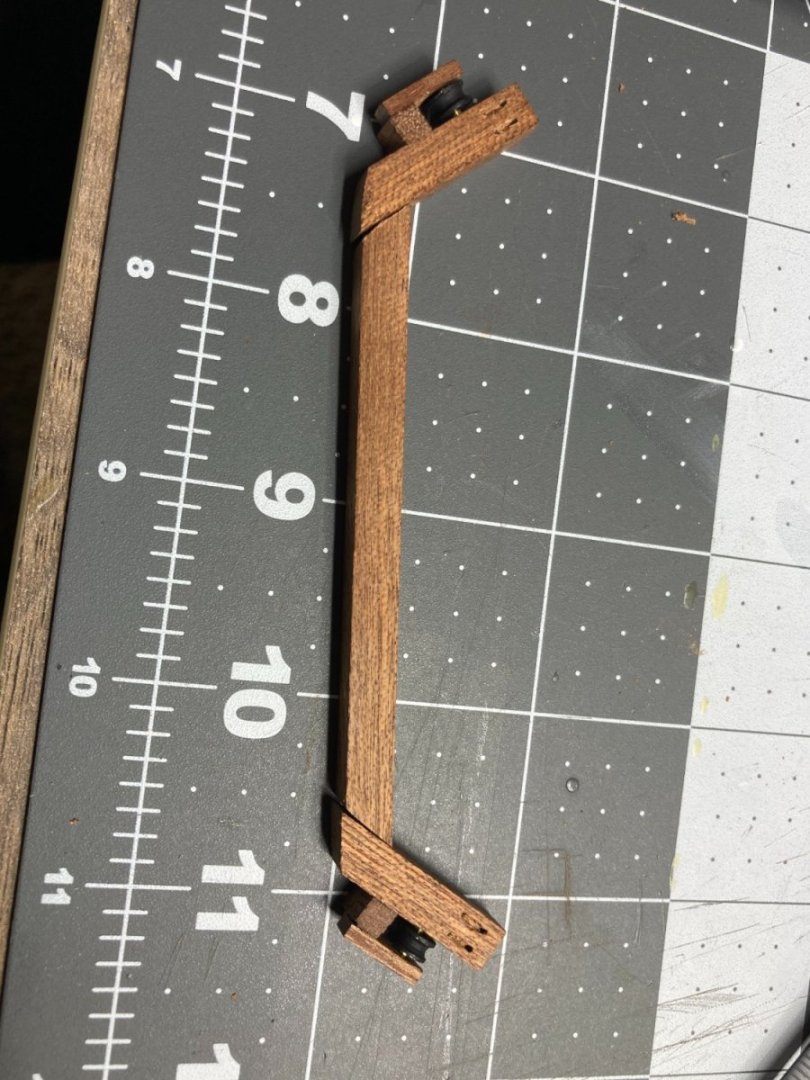
Since very little of the piece that extends out from the hull is supported by the hull, I am going to add a pin to help secure it to the larger piece.

-
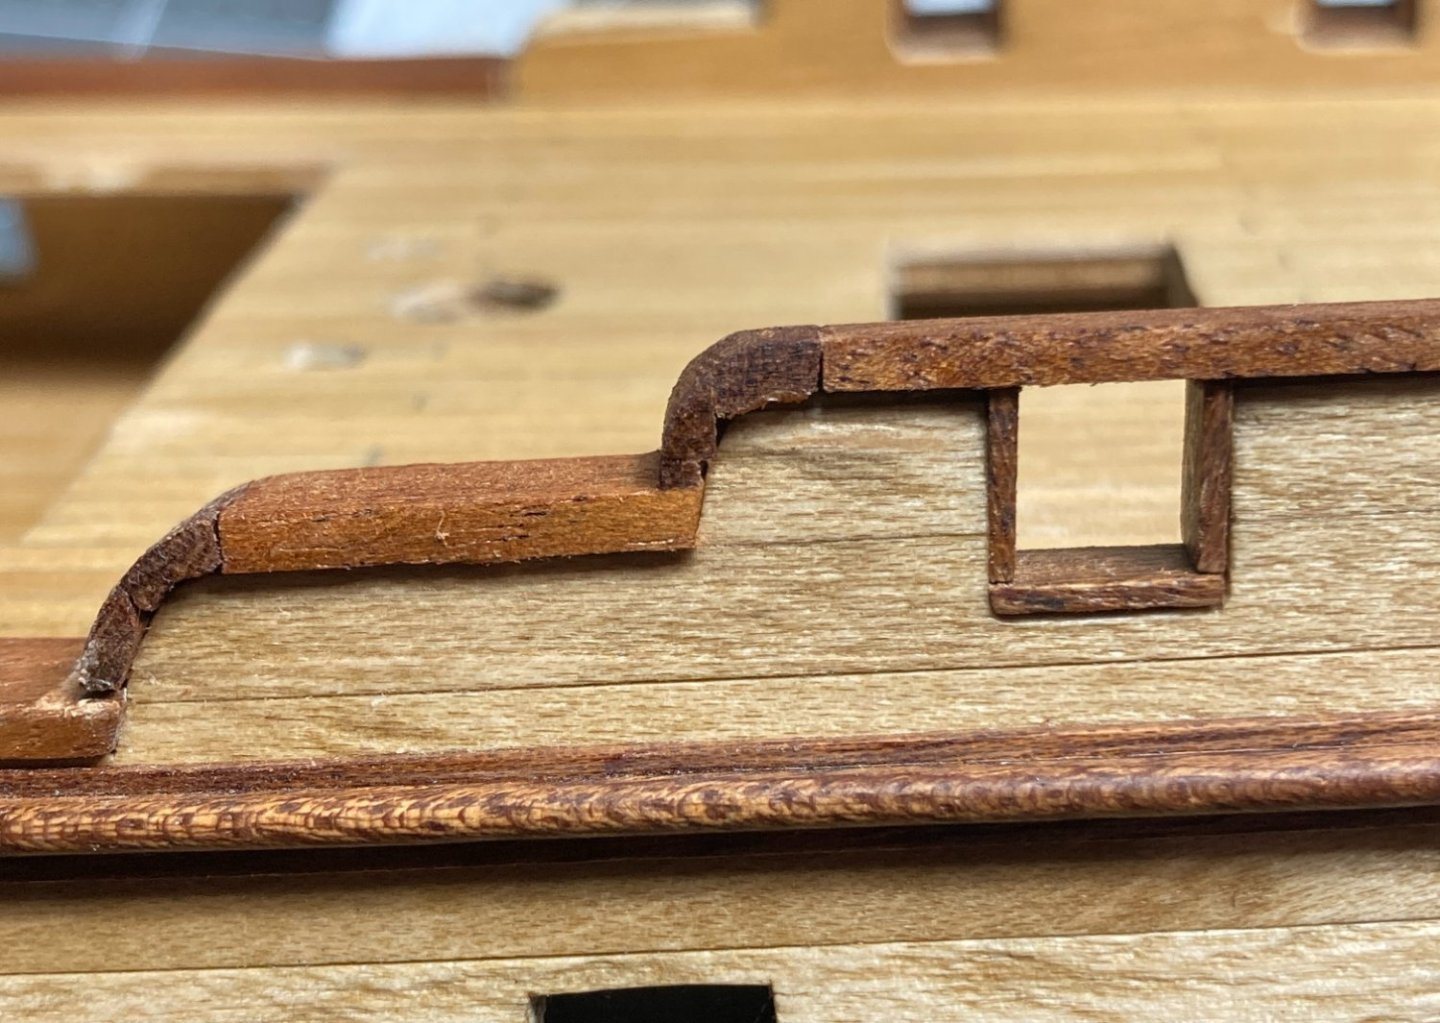
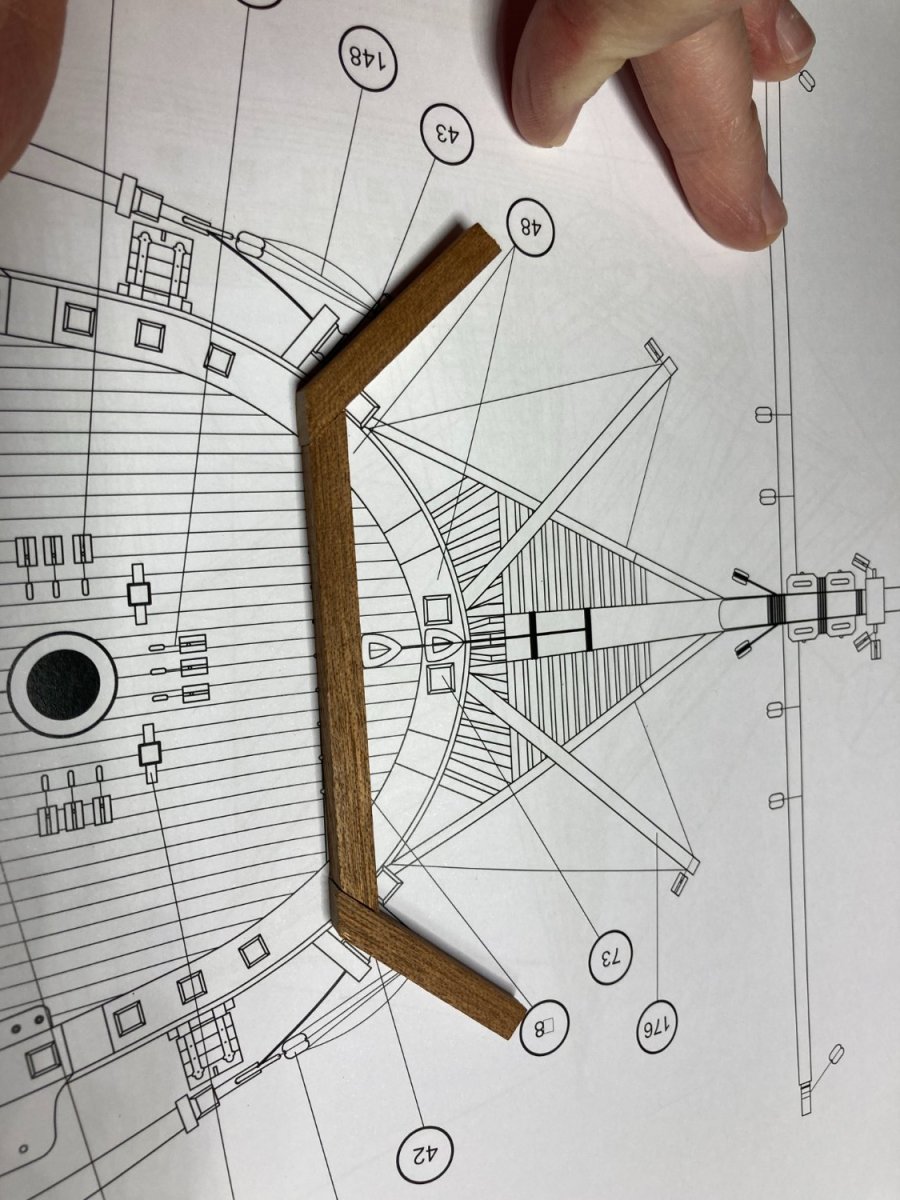
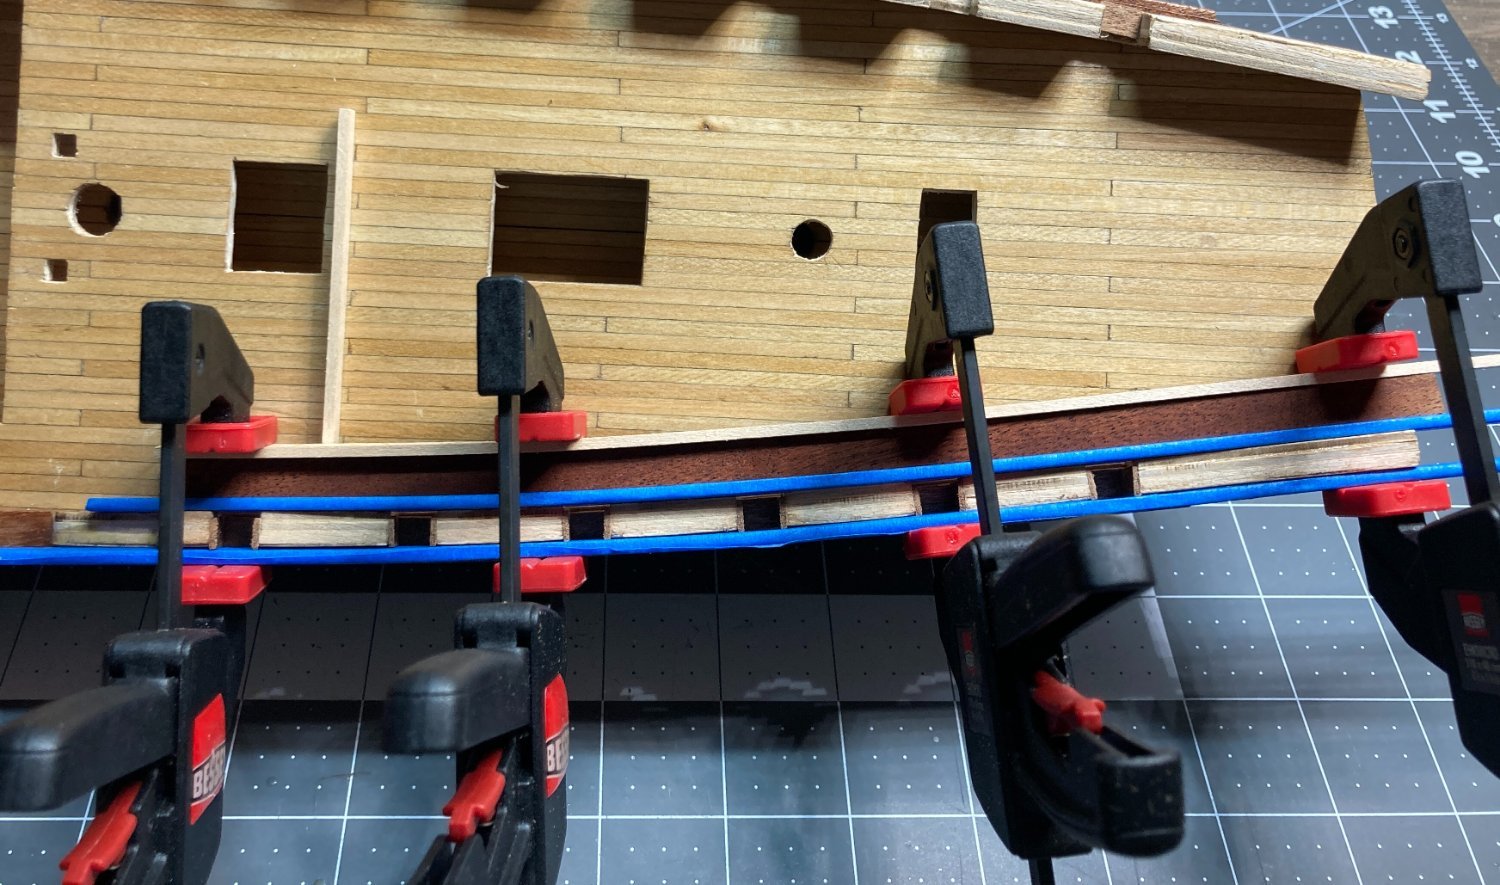
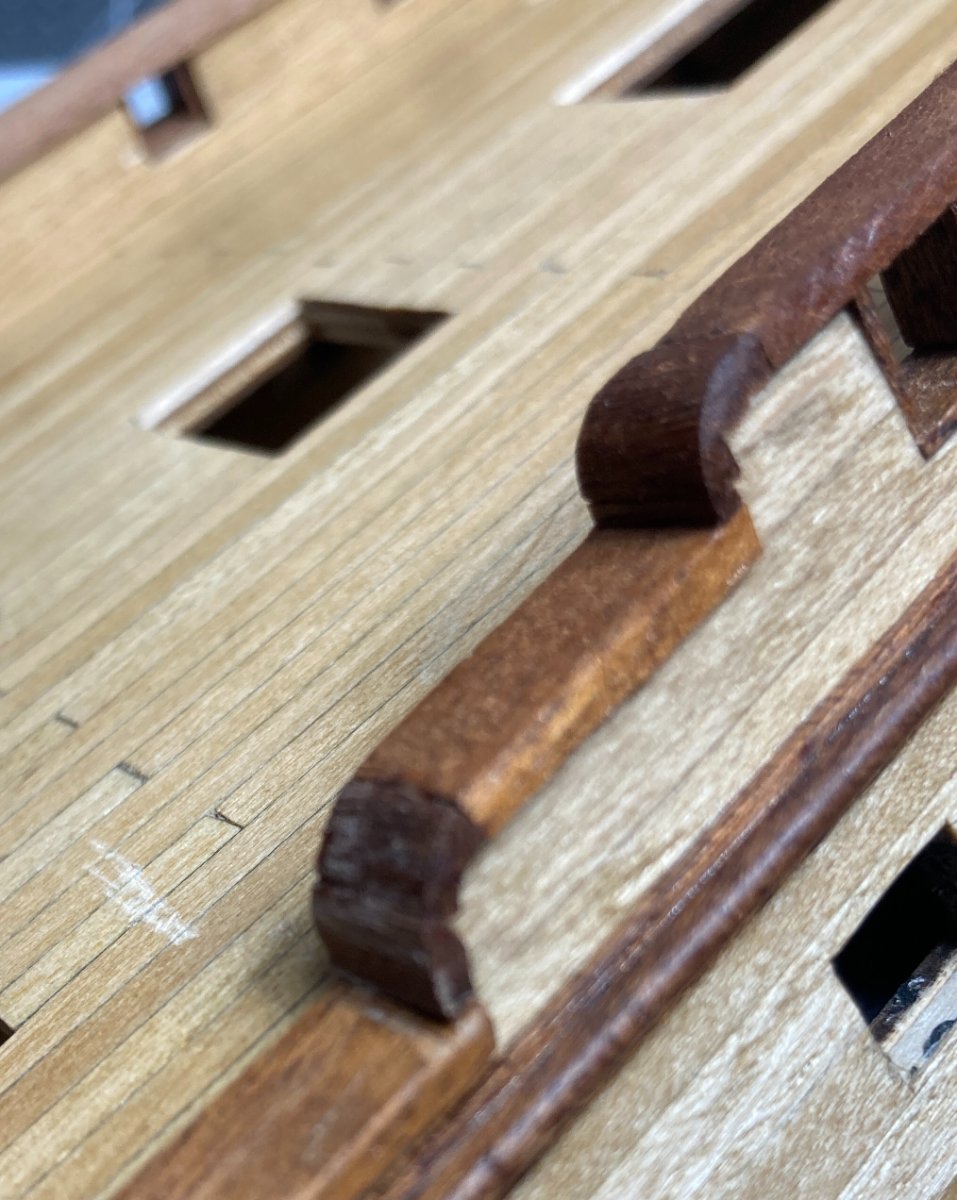
Making progress on the trim on the bulwarks and around the gun ports. The first step was lining the gun ports. 1mm x 6 mm sapelli strips were used for this.
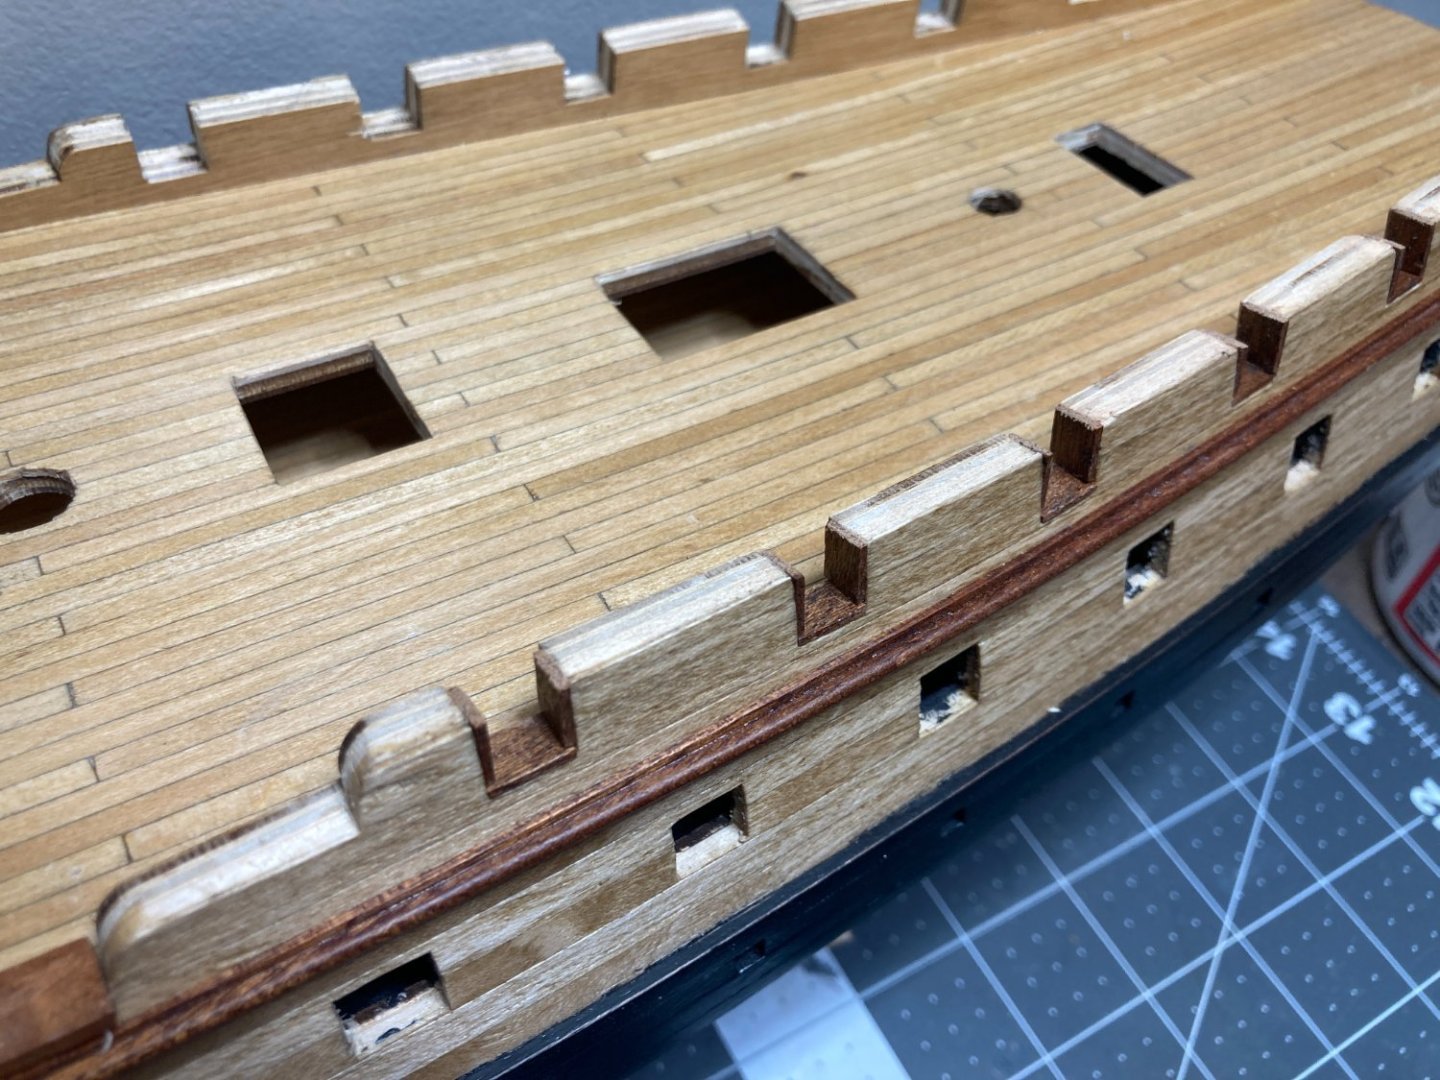
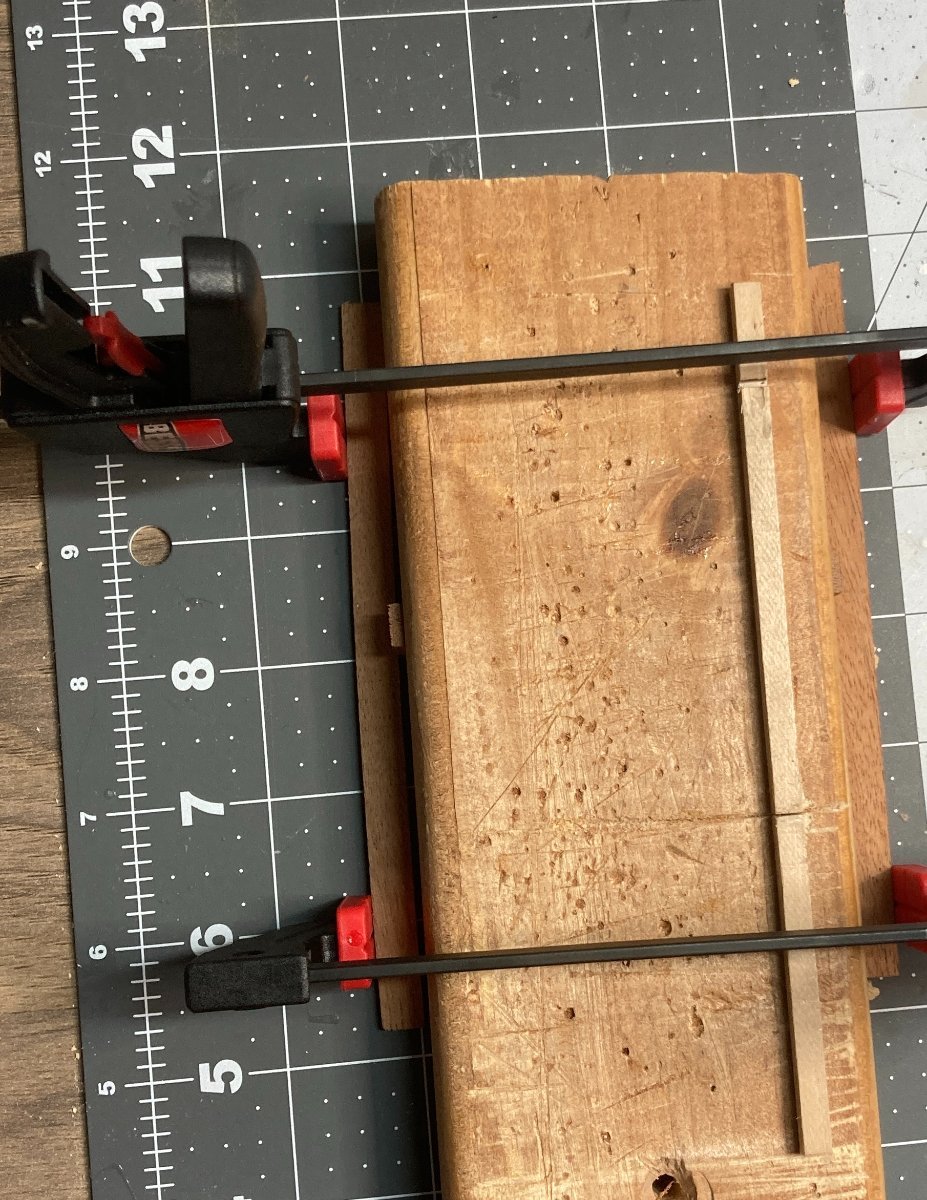
Next step was the cap above the section with no bulwark and the top of bulwark on the back half of the the ship. These were made out of 2mm x 8mm sapelli strips. Both have a slight bend. The bend was slight enough that I could manually bend the strip the required amount, but with the 2 x 8 strip the force of the strip to snap back to straight was pretty great. I considered manually bending the strip and using CA to glue them into place, but I have read that CA does not hold good against shear forces. I considered PVA which holds better against shear forces, but I couldn't think of a good way to clamp the pieces into place. My solution was to pre-bend the pieces and then glue with CA. for the slight bend in the mid-ship pieces where there is no bulwark, I clamped it against the straight piece of wood after soaking for 30 minutes with a small shim used to create the curve. For the piece above the bulwark on the rear portion of the ship, I clamped the piece to the bulwark after soaking to create the curve needed. I used scrap wood to protect the ship and the piece being bent from the clamps.


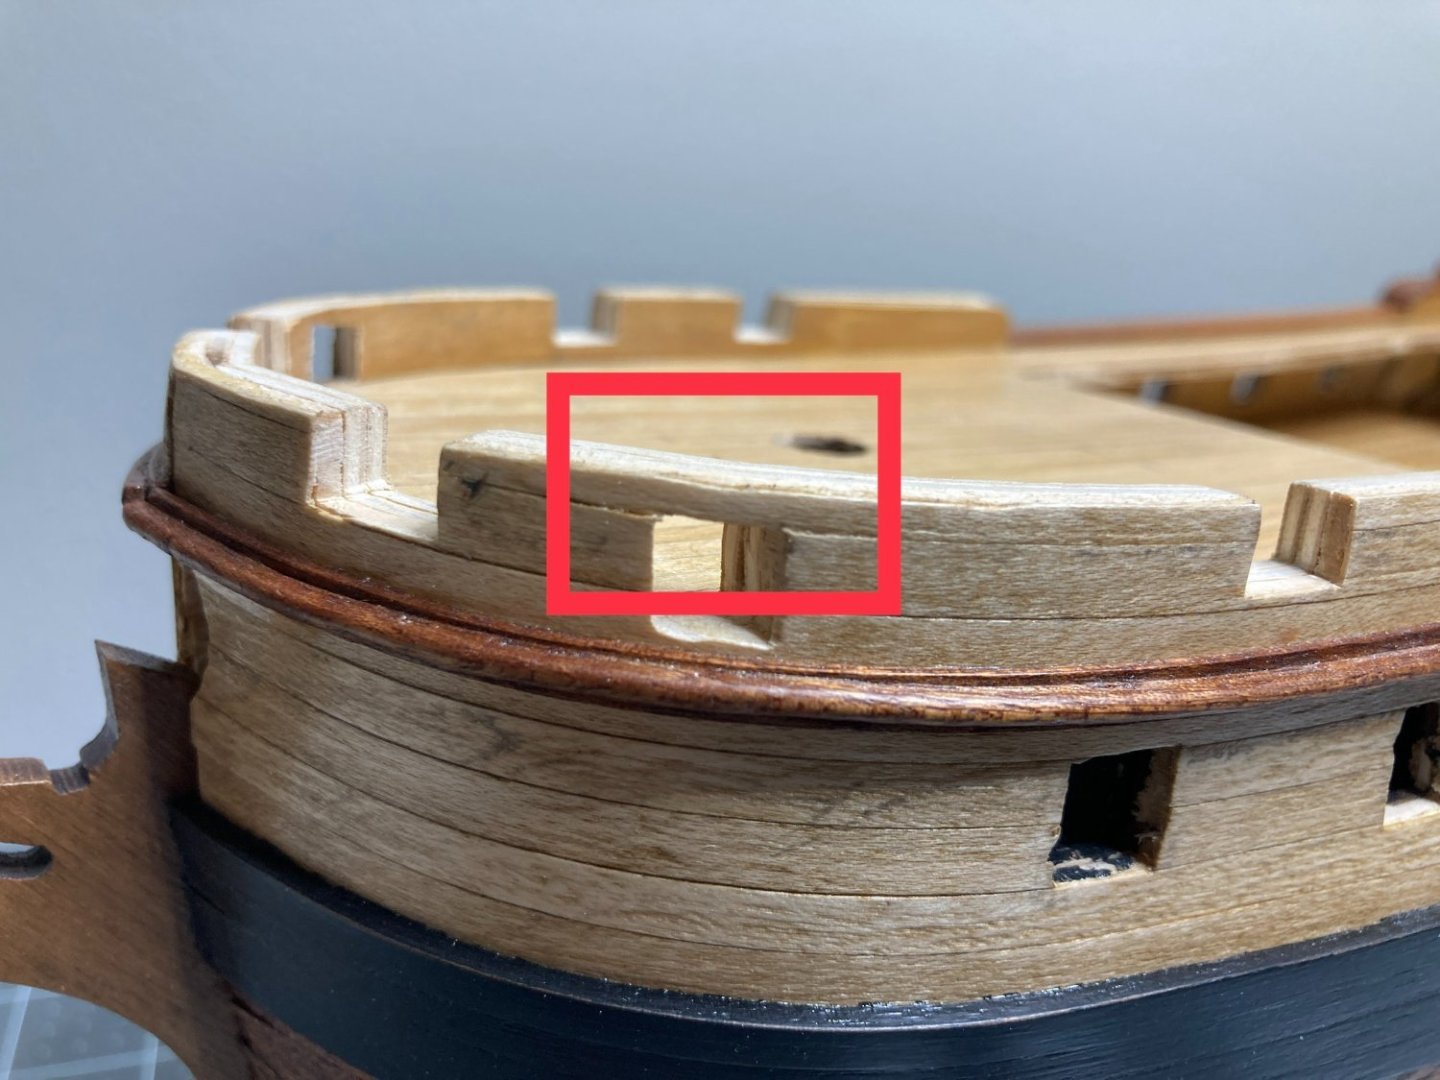
The next step was to fabricate curves that connect the different levels of the bulwarks. I used several small pieces that were beveled to fit together and then used a small file to create the curve.
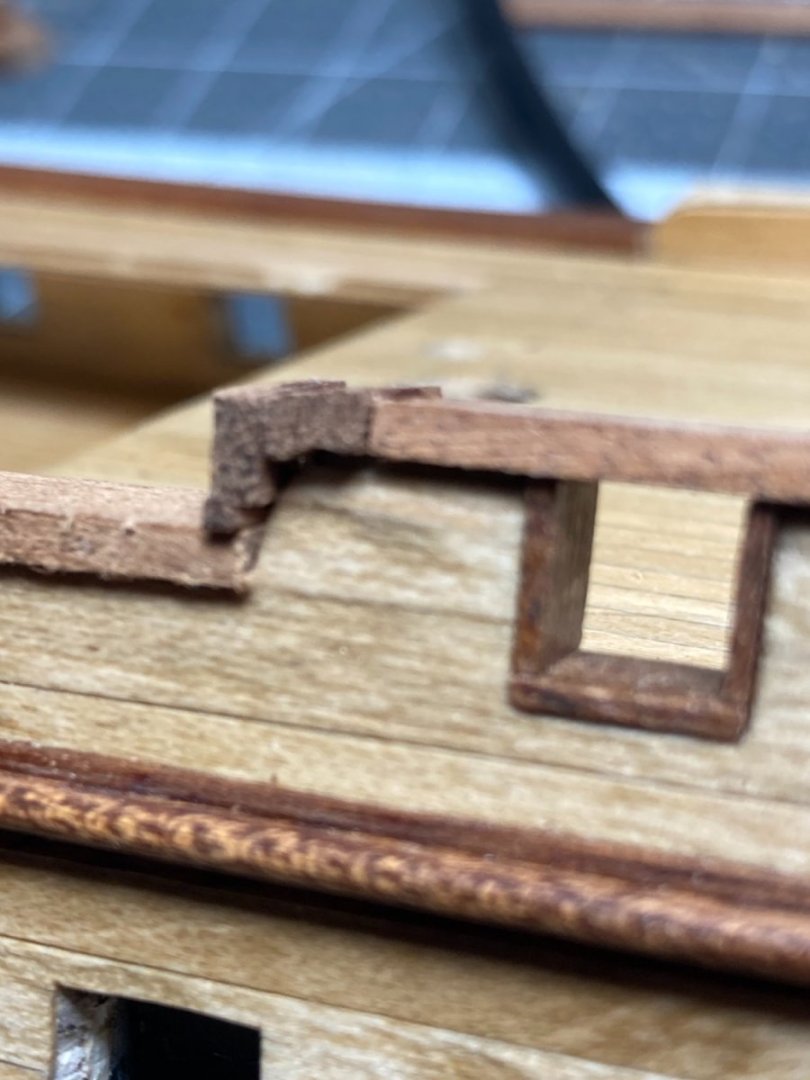

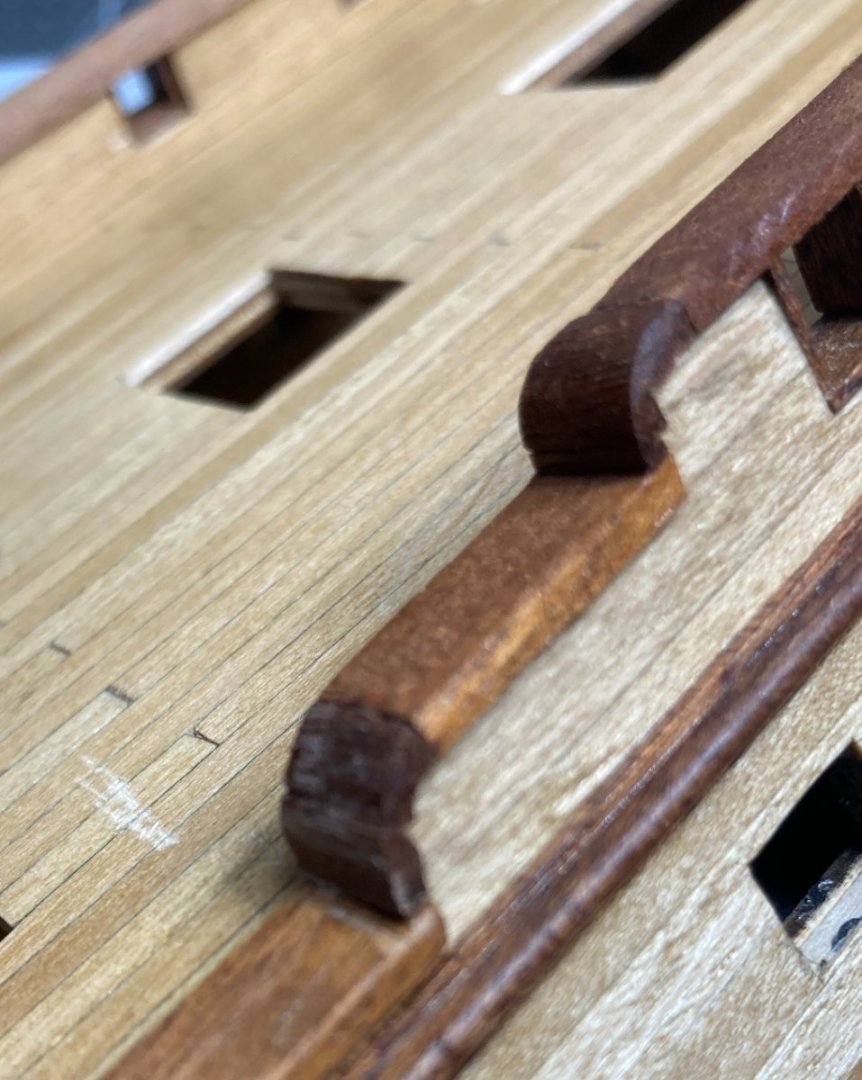

The lower curve needs a little more sanding and then two more coats of coats of shellac on all of it.
One of the reasons I chose this kit was because of features like this that require me to improve my skills working with the wood. Overall I am pretty happy with how these curves are turning out. I need to still create the two on the other side of the ship and then two more near the bow.
-
Very nice work on your planking. Impressive for an experienced modeler. Really impressive for a first time modeler. Looking forward to the rest of your build.
- SiriusVoyager and Isaiah
-
1
-
 1
1
-
I think the lines a tied off on the rail without pins. If you zoom in on some of the pics posted on April 14th on the build log linked below you can see how they were tied off.
-
-
4 hours ago, Avi said:
Also, what do you use to apply it?
I use this brand. A small cam is more than enough for one hull. There is a brush attached the the cap. They sell a bigger can also, but no built in brush. Not sure where you are located, but it can be purchased at Home Depot or Menards in the US. Probably most hardware stores also.
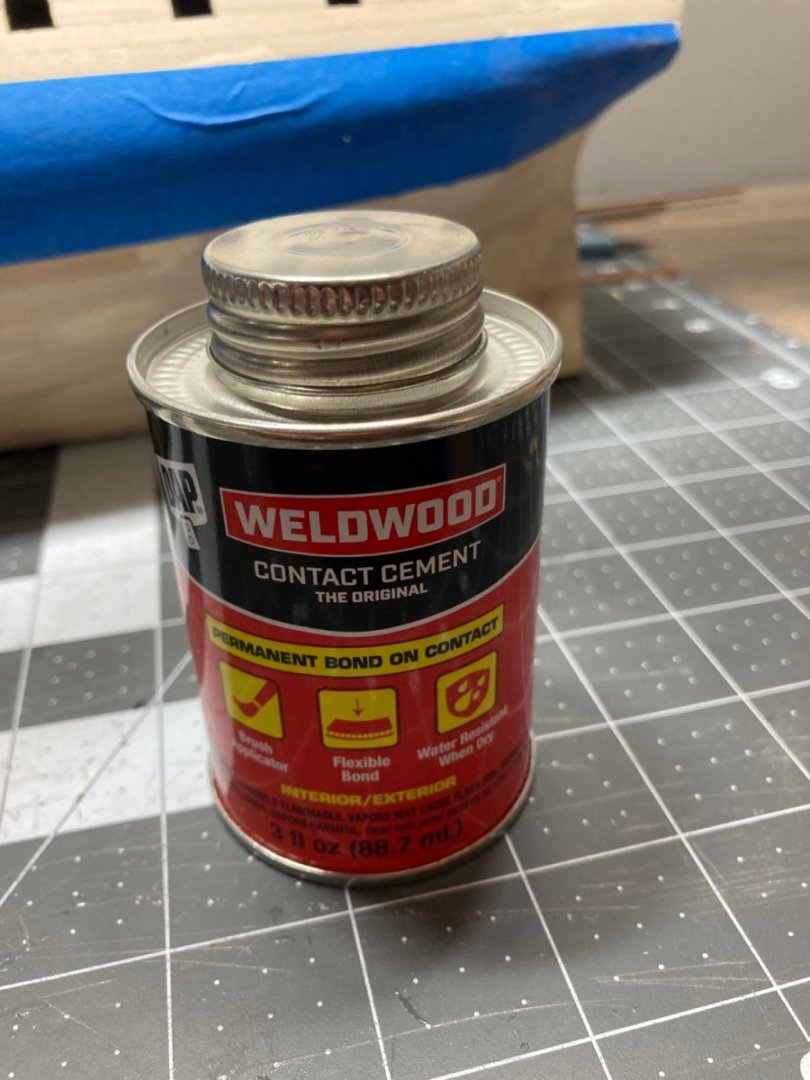
-
I assume the material is the 0.6mm planking. For that material I would use contact cement. I would worry that the edges of the material might curl up before PVA set.
I am not sure if Occre has instruction videos for your model, but if the don’t find the ones for the HMS Beagle for a demonstration on how to use it. I have used it a couple times and had no issues with it being messy.
my build log for the Frigate Dianna has photos of the process used on the deck planks.
-
Are you using contact cement on a second layer of planks or on the first layer. I use contact cement on the second layer, it works great when there is a large surface area that is being stuck together. If it is the first layer, I am not sure it will work as well as on a second layer.
-
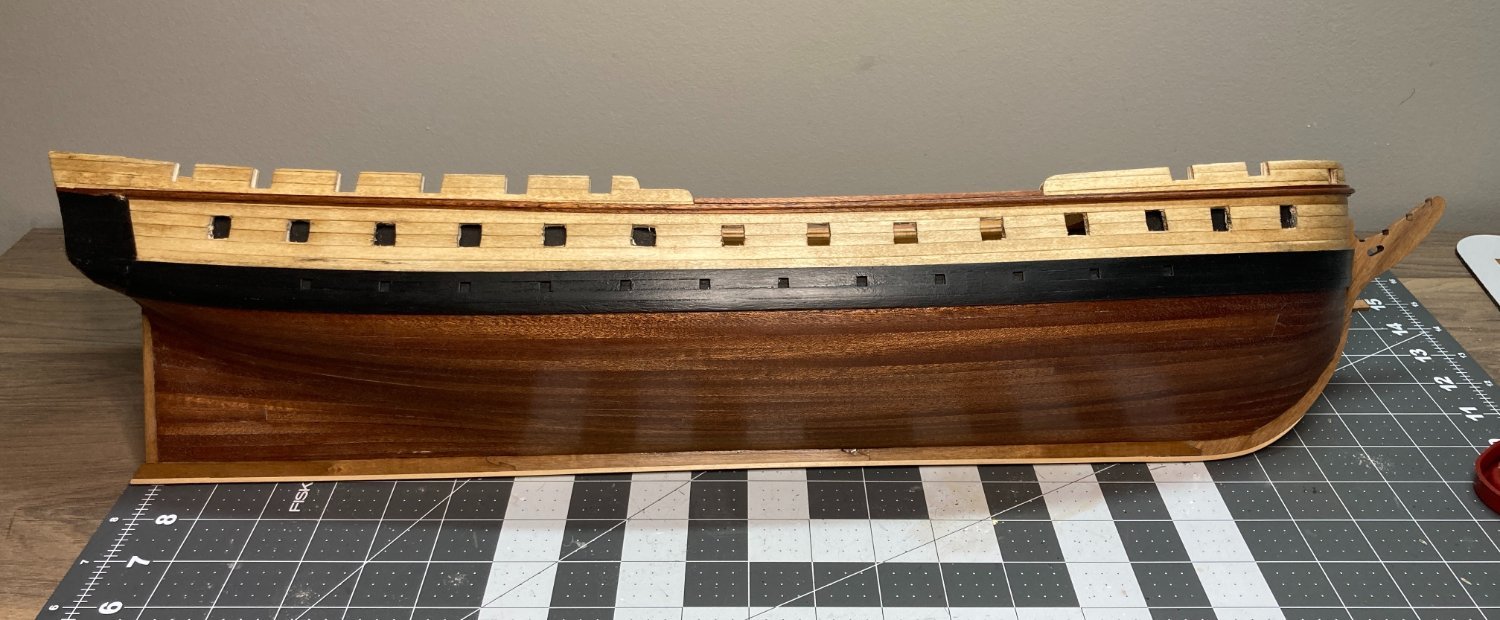
I have the the wales painted black and applied 3 coats of shellac to the unpainted surfaces on the hull. Next up is lining the gun ports on the upper decks. This will require an slight edge bend on a 2mm x8mm piece of Sapalli for the top of rail.


- dunnock, chris watton, Esap and 3 others
-
6
-
4 hours ago, DaveBaxt said:
Do you think they would work on walnut too? Perhaps it is possible to use these for making the scrolls out of a square or round flat piece of wood. Any one tried this?
I used it on Sapelli. I haven't tried it on Walnut, but is think it would work well. go slow and take just a little wood off at a time.
-
I used these shapers for a part on my Occre Frigate Diana and the worked great. They are designed for metric sized planks, so if you have non-metric planks you may want to order some wood also.
- mtaylor and Keith Black
-
2
-
The US Navy also maintains a forest of white oak in Indiana specifically for use in maintaining the USS Constitution.
- Gregory, Roger Pellett, Canute and 2 others
-
5


.JPG.25327ae35ec9aa66721b756ce9a72e96.JPG)


New from Minnesota-MS Constitution
in New member Introductions
Posted
Welcome. Nice to have another Minnesotan on the forum.