
.jpeg.882f0a147f14858c9e673da7e13d8ebe.jpeg)
RossR
-
Posts
310 -
Joined
-
Last visited
Content Type
Profiles
Forums
Gallery
Events
Posts posted by RossR
-
-
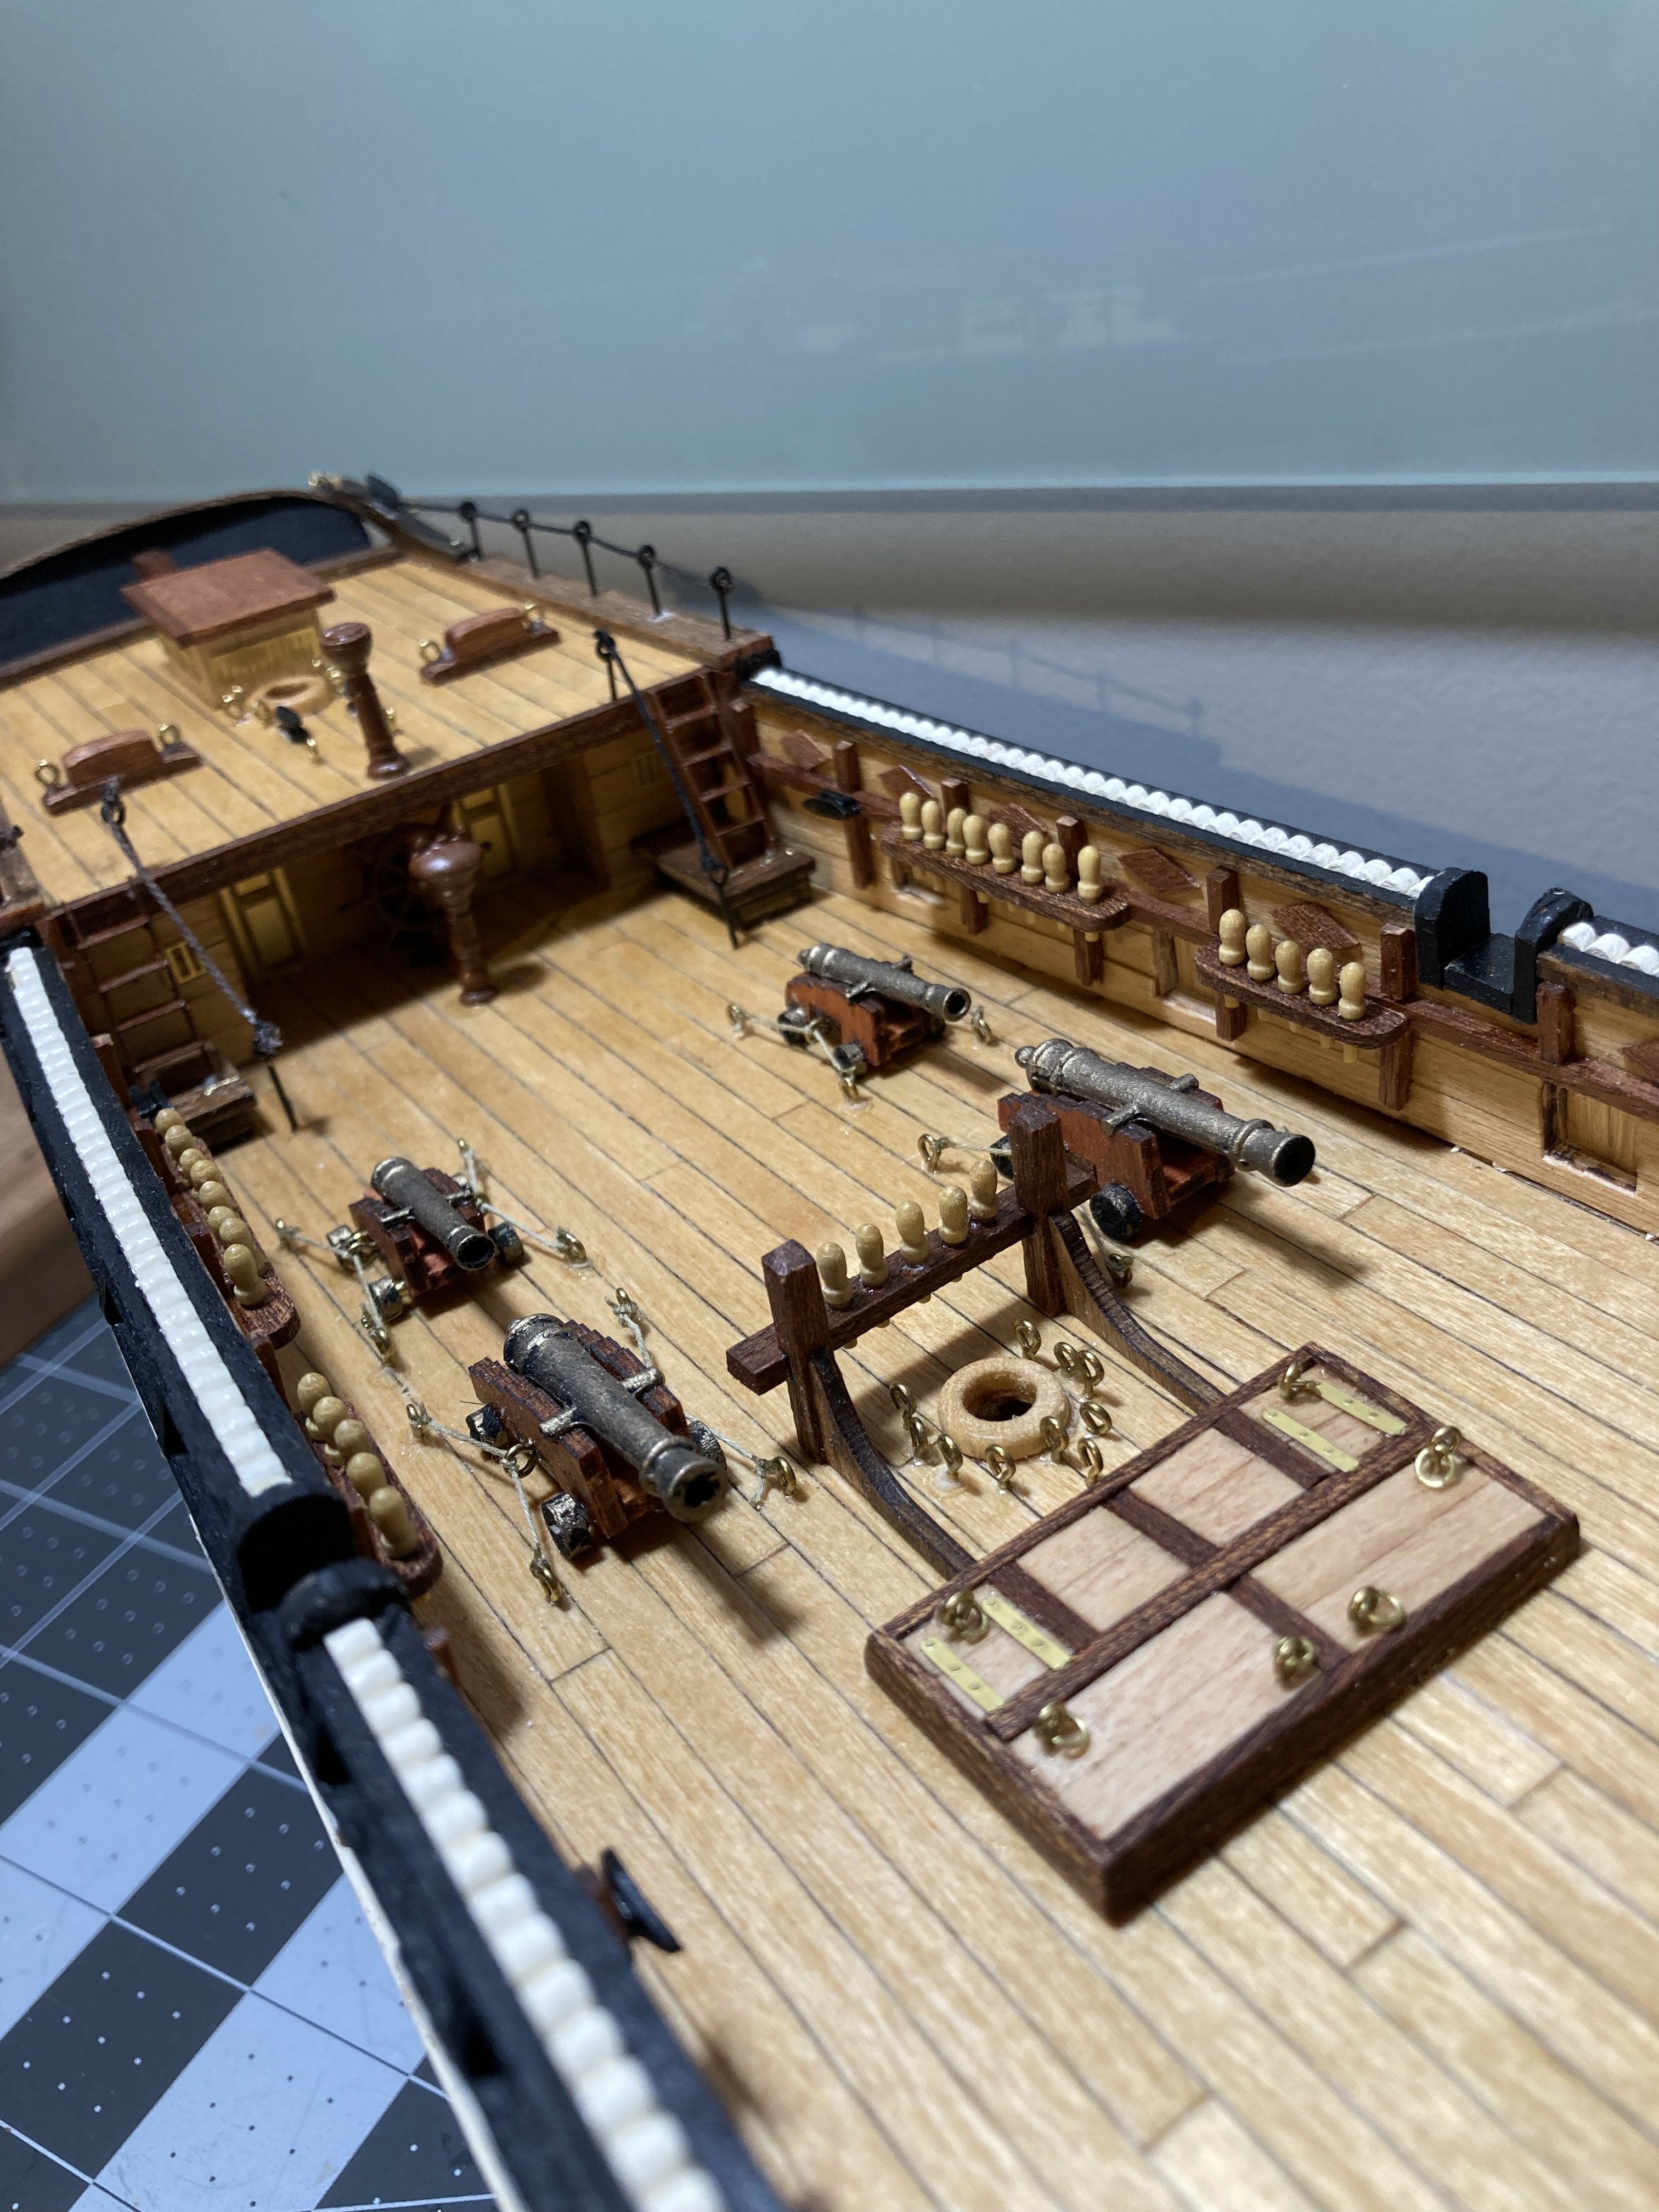
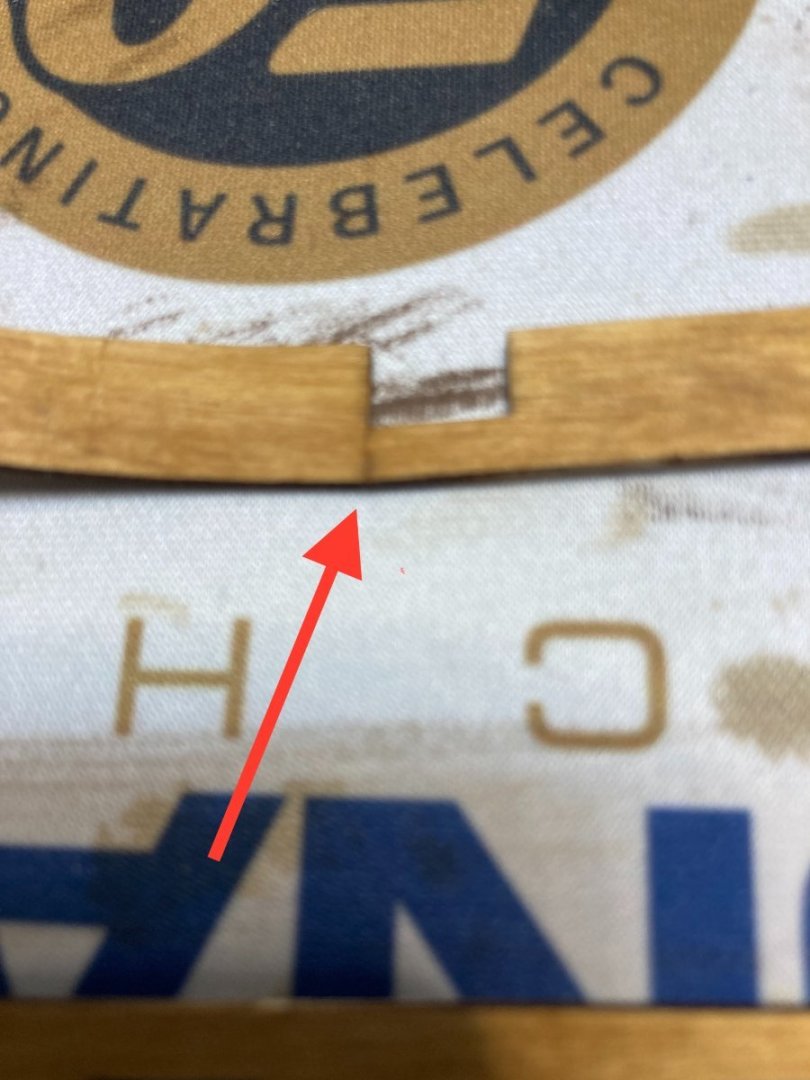
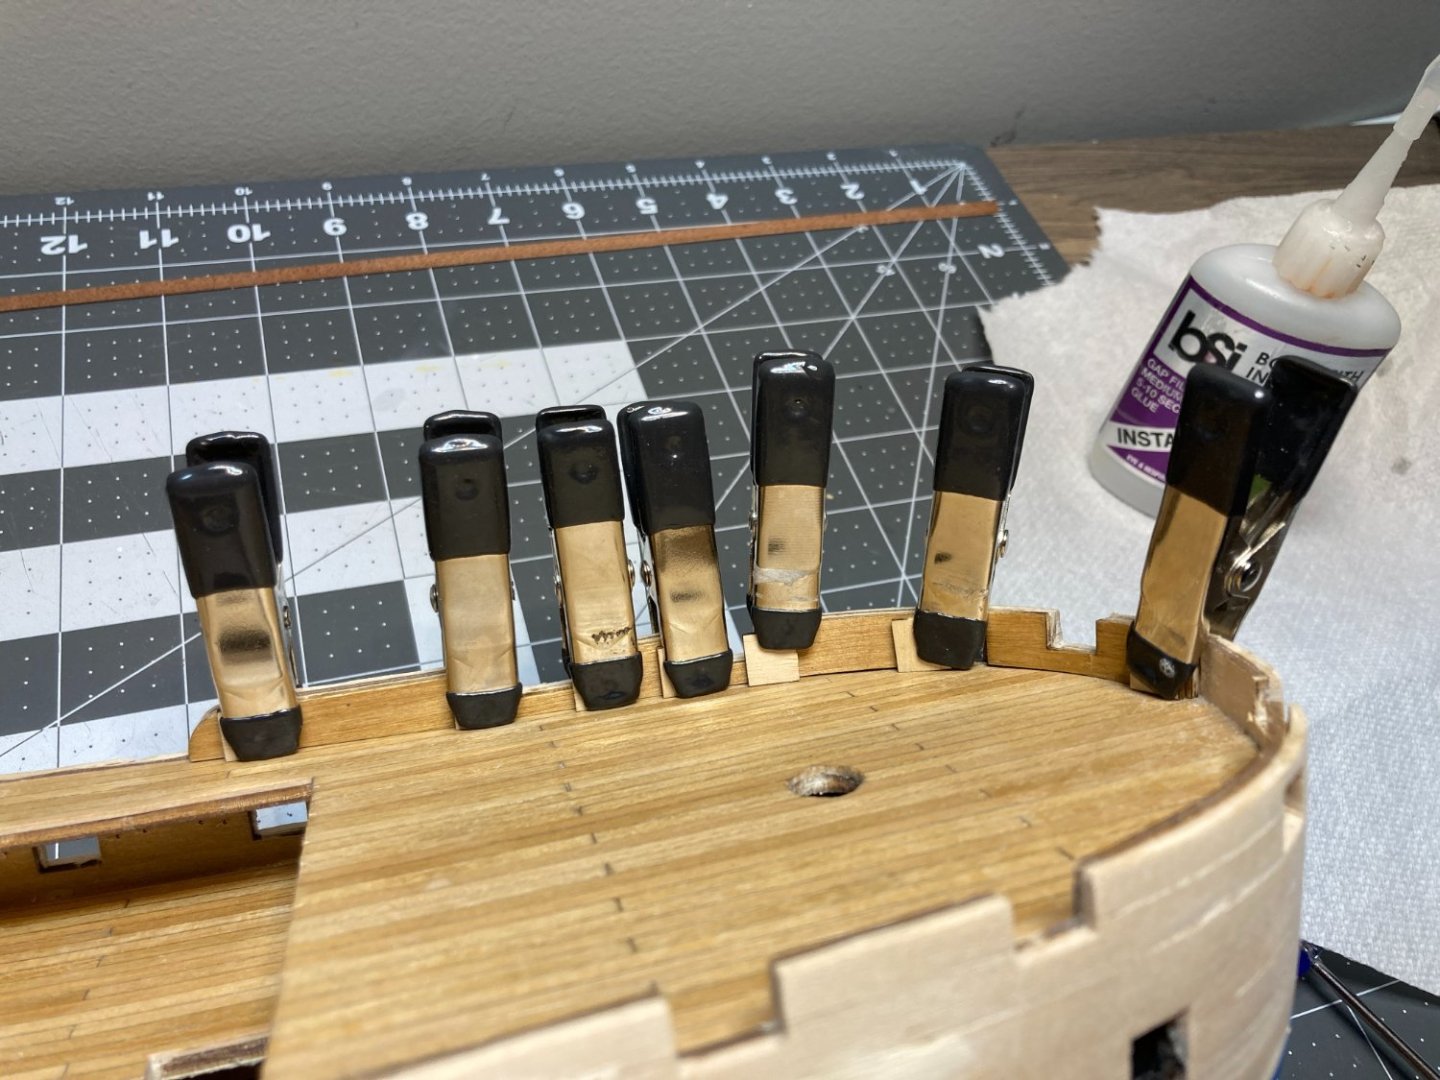
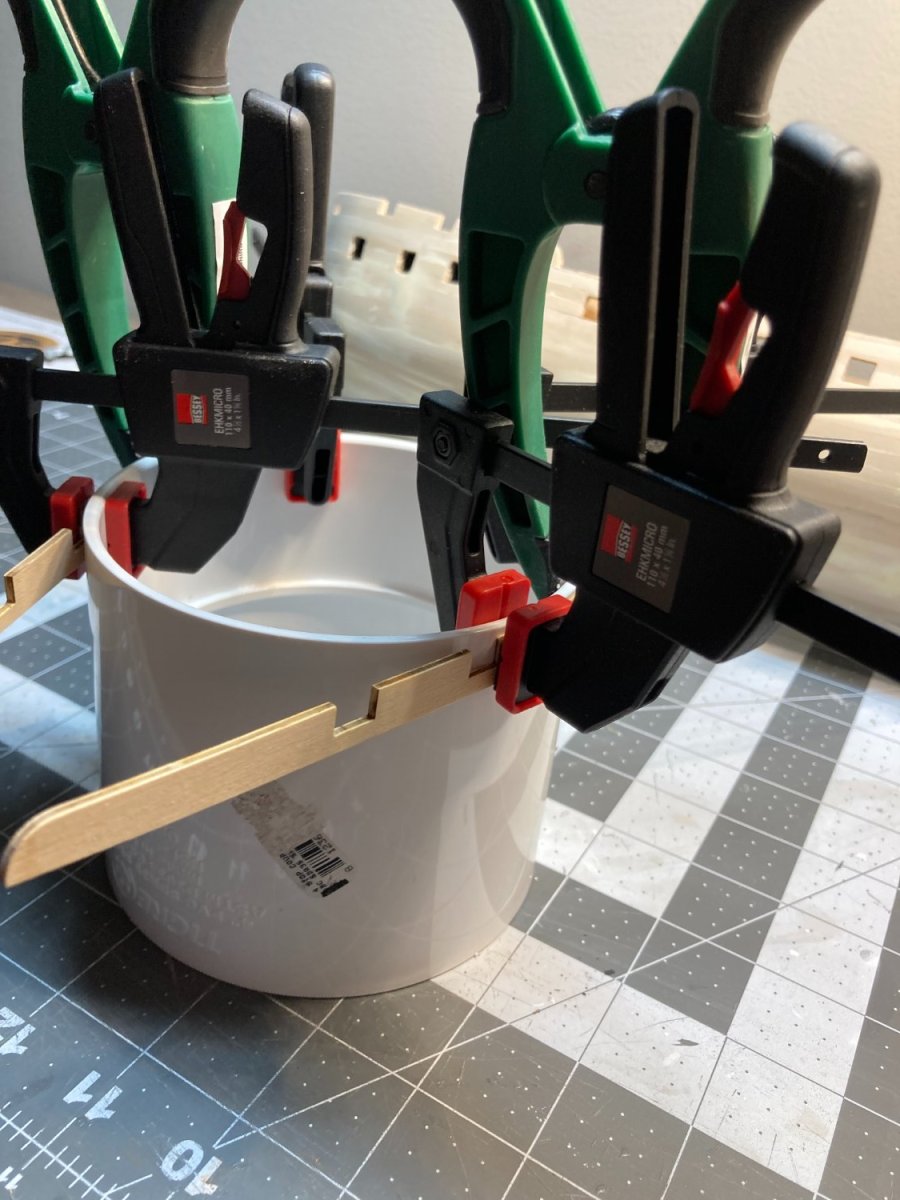
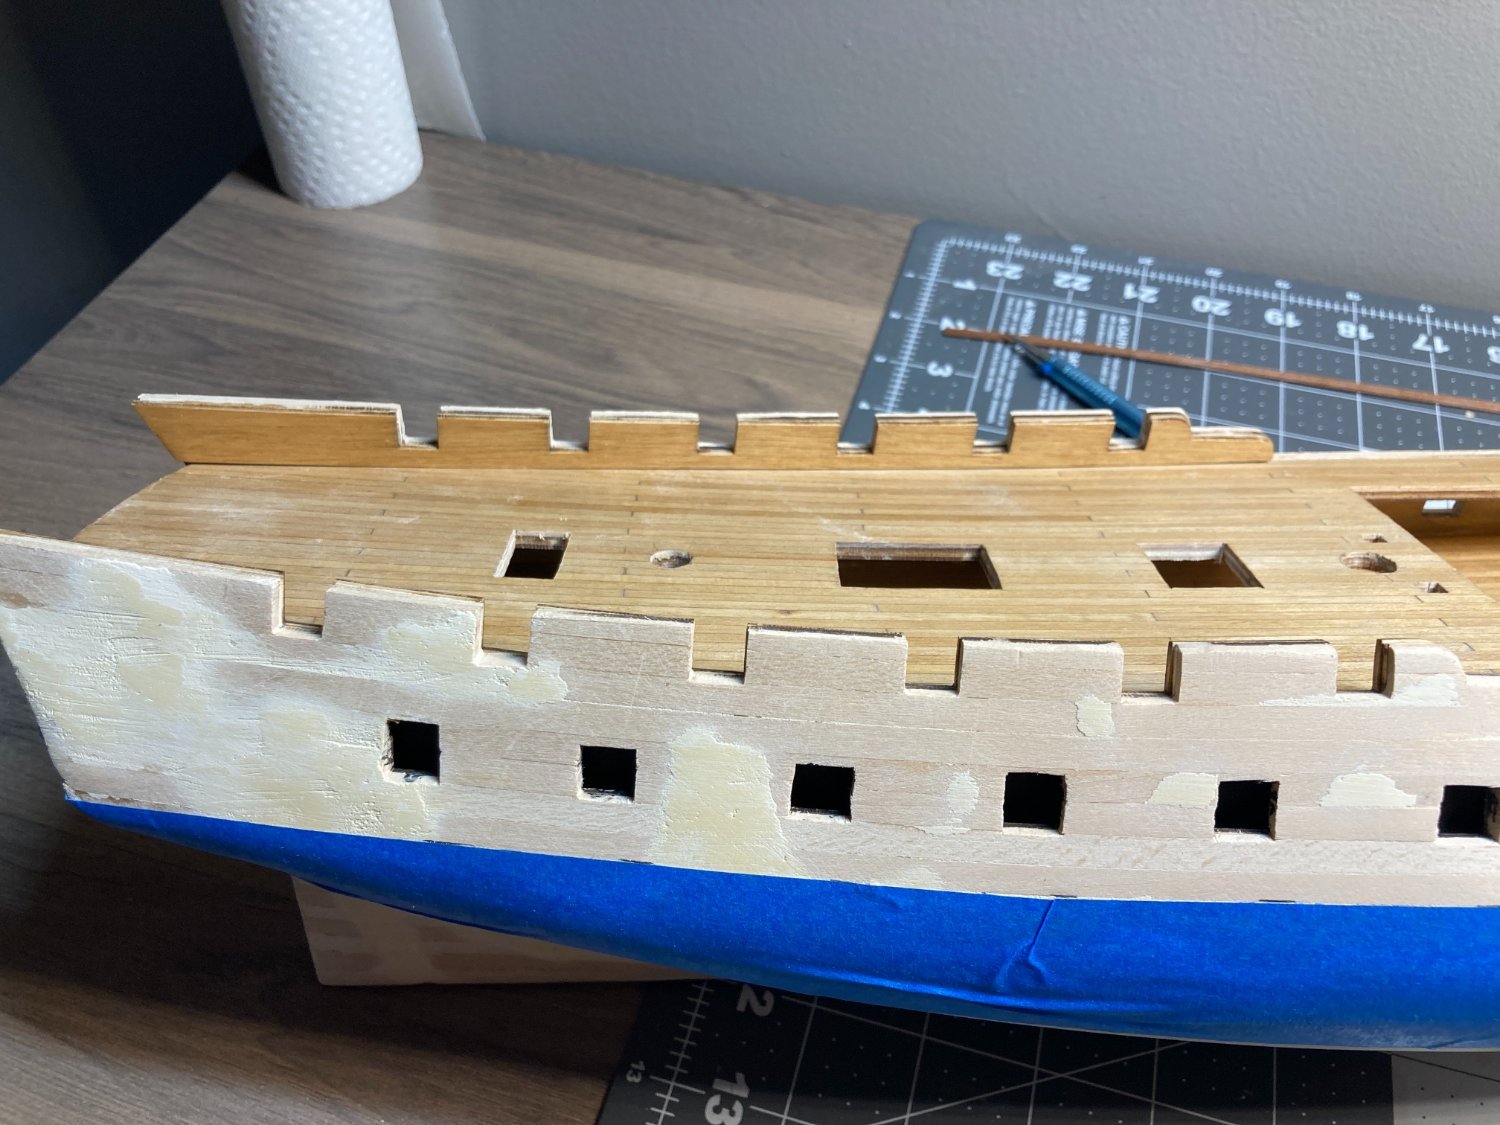
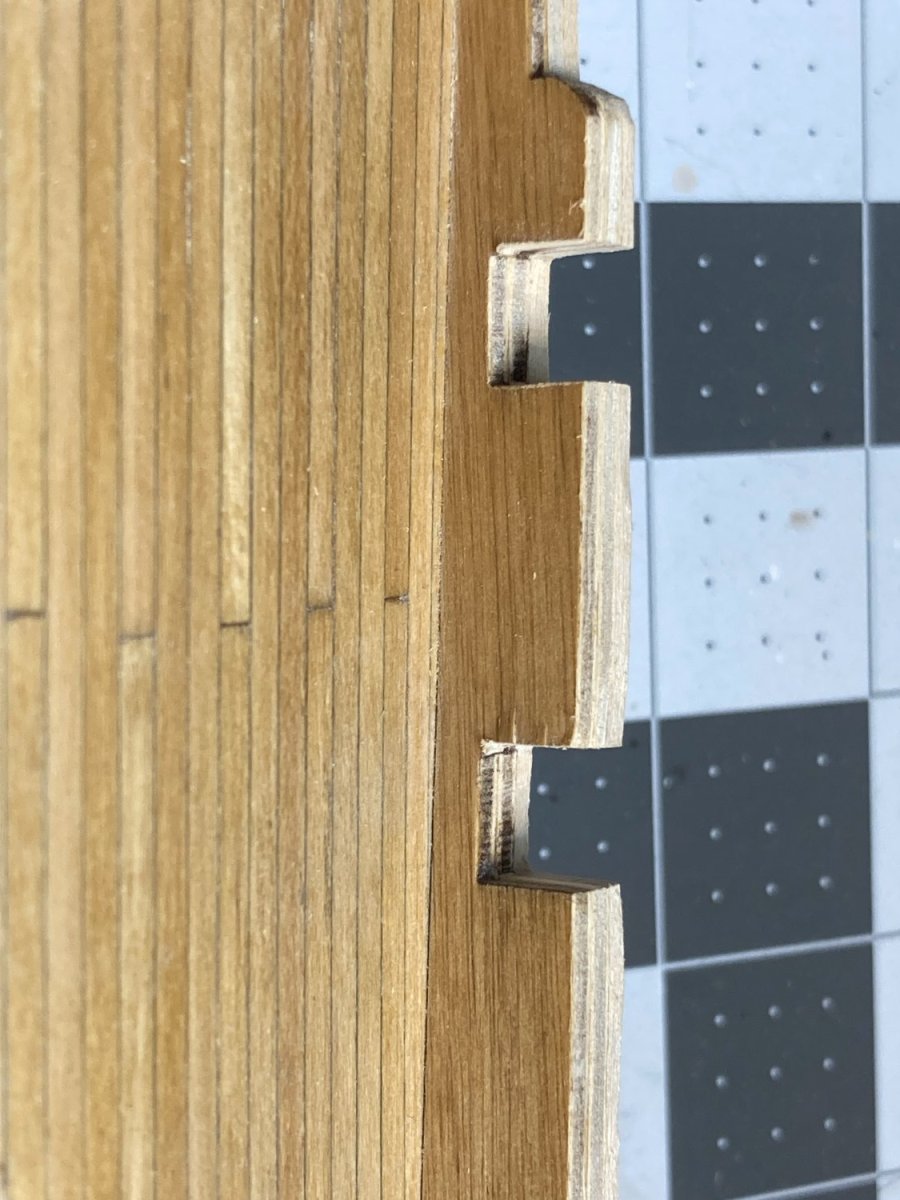
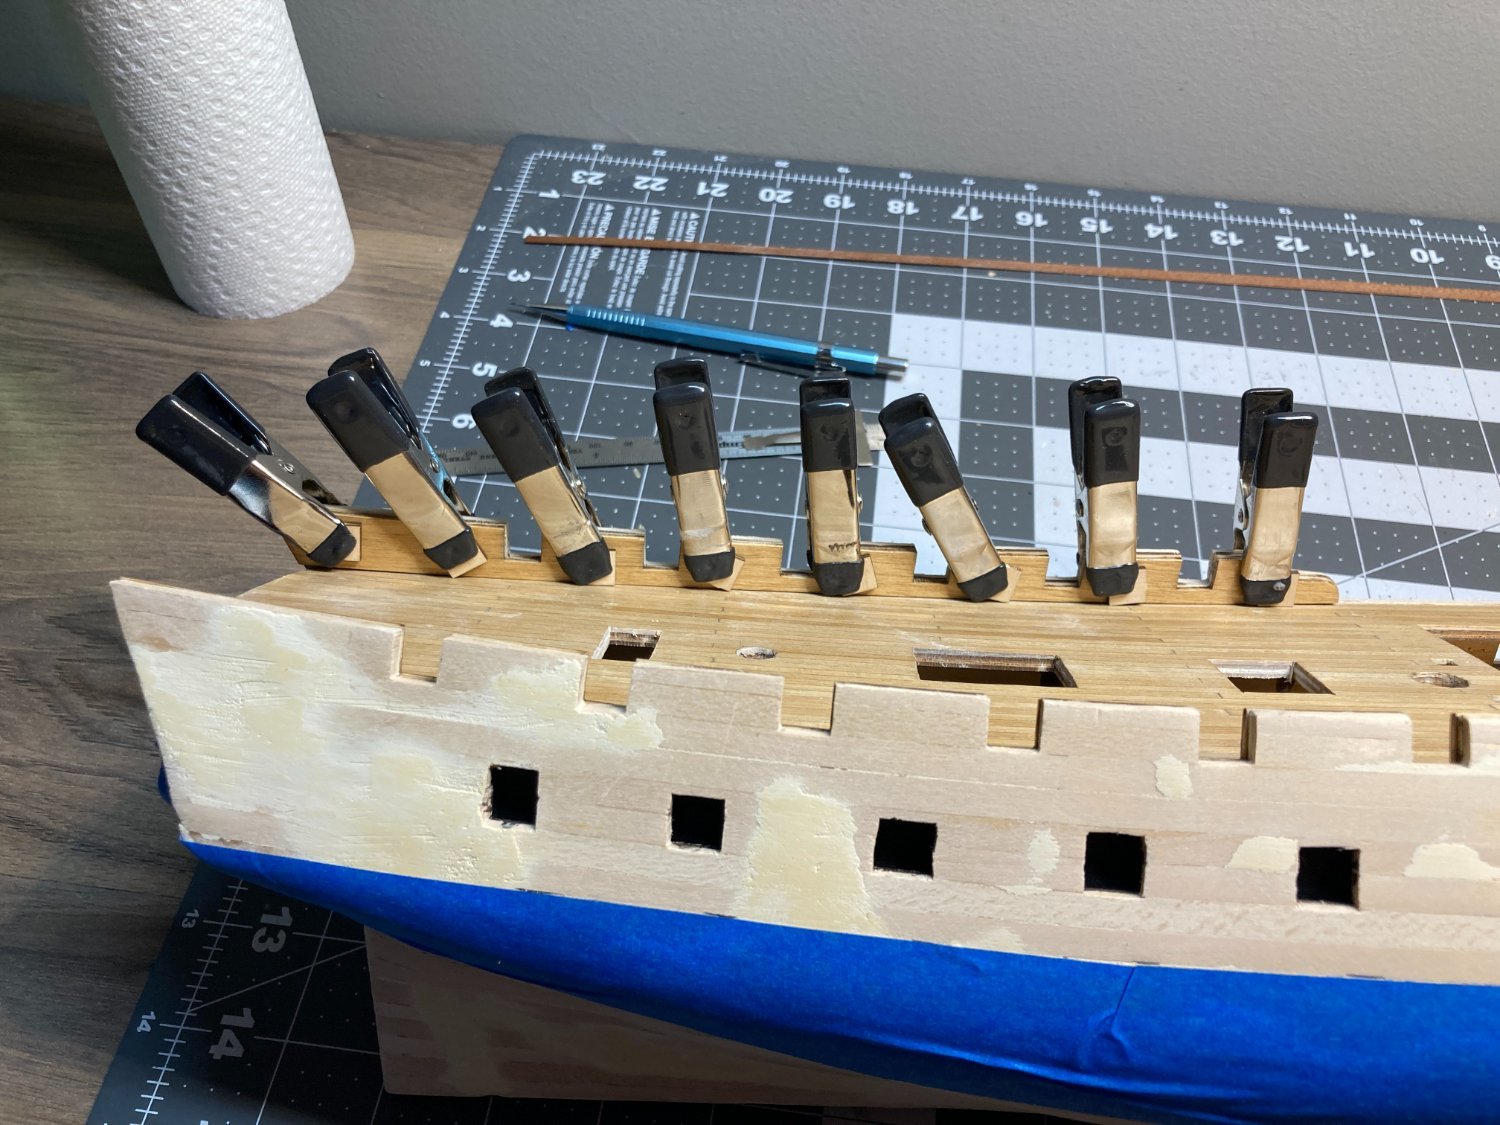
I installed the inner bulwarks today. Feels like the first real progress in a long time. the parts were laser cut plywood and bending the two for the bow were a little tricky. The narrow parts above the opening for the cathead were only 2-3 mm wide. Very fragile after soaking to make the bend. On one of the two pieces I almost broke the piece clamping it to my form to create the curve for the bow. I think there was only one layer of the plywood that was still intact.
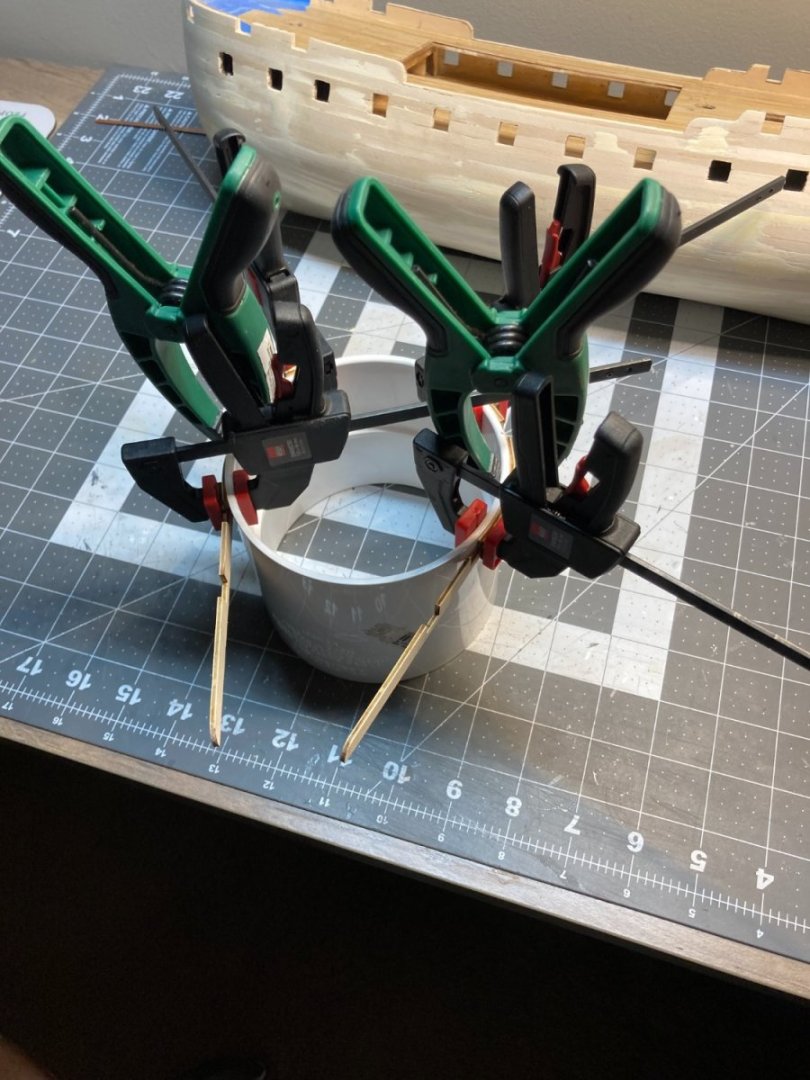

I applied a coat of Minwax Golden Oak stain and two coats of shellac. Below is where the one bow piece almost broke.
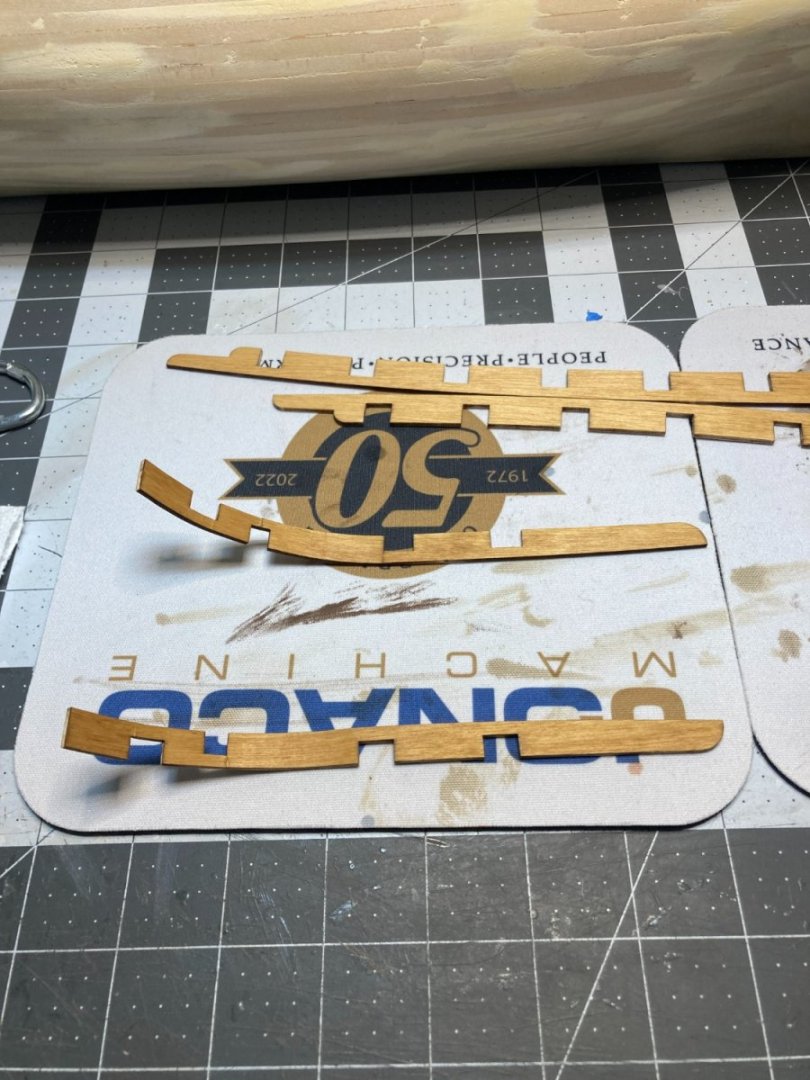

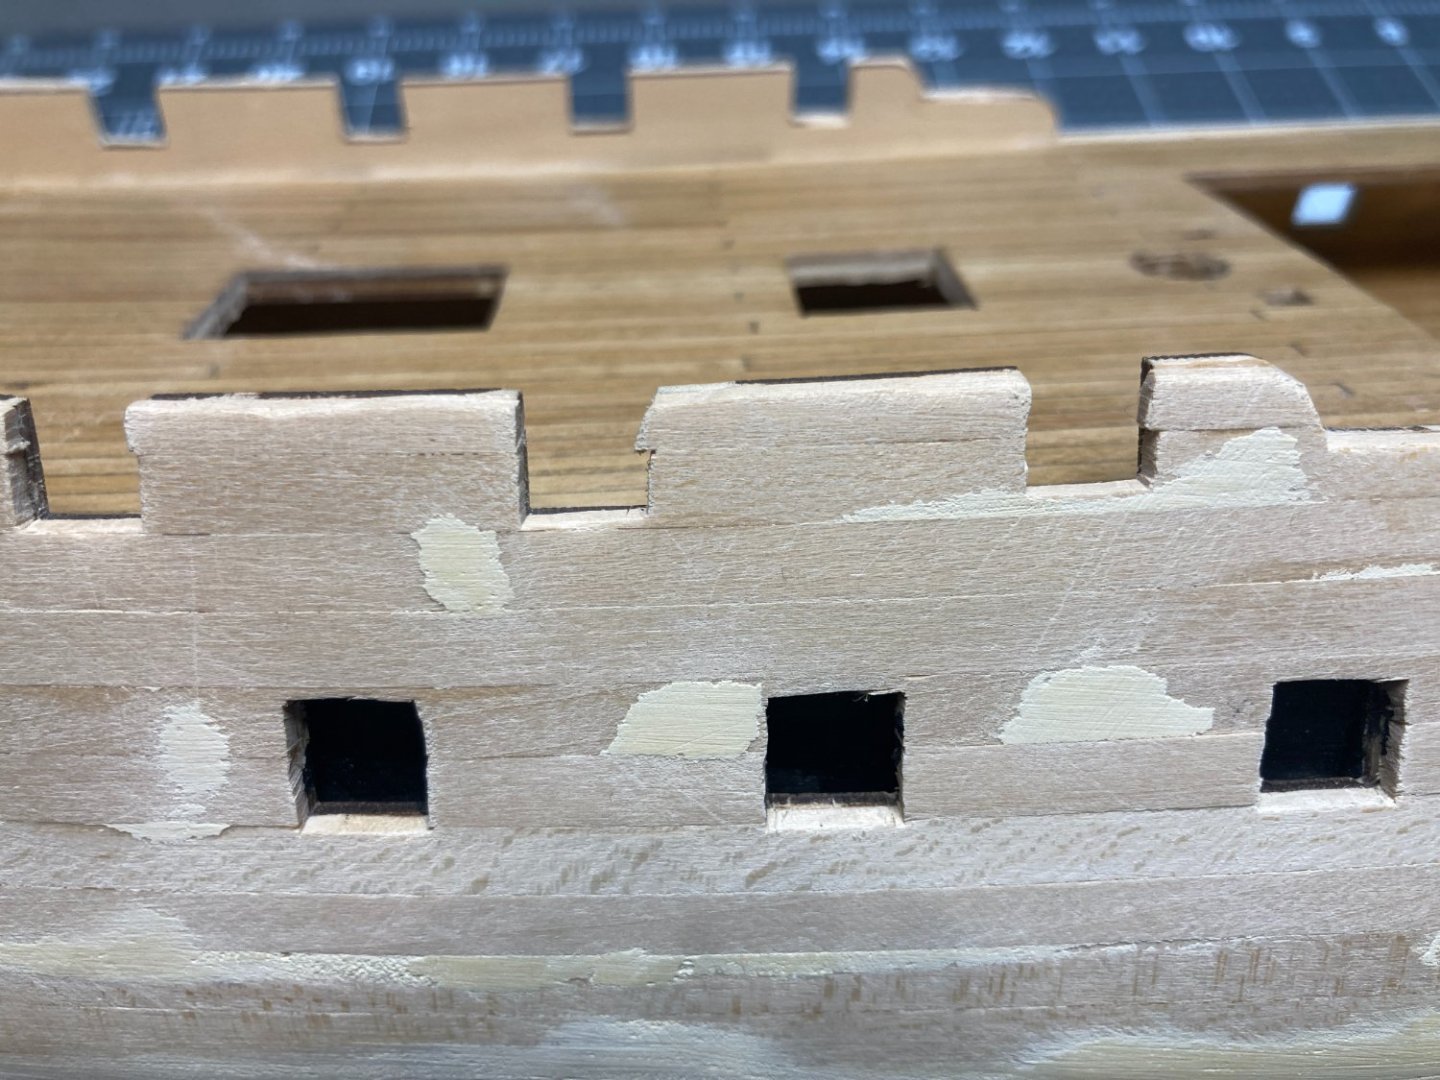
Here is another view of the piece that almost broke and a view of the gun ports after I cleaned up the gun ports with a file.
.thumb.jpg.b392b944f2f757c8e71da427811534b9.jpg)

Next up will be installing the sycamore outer planking above the wales.

-
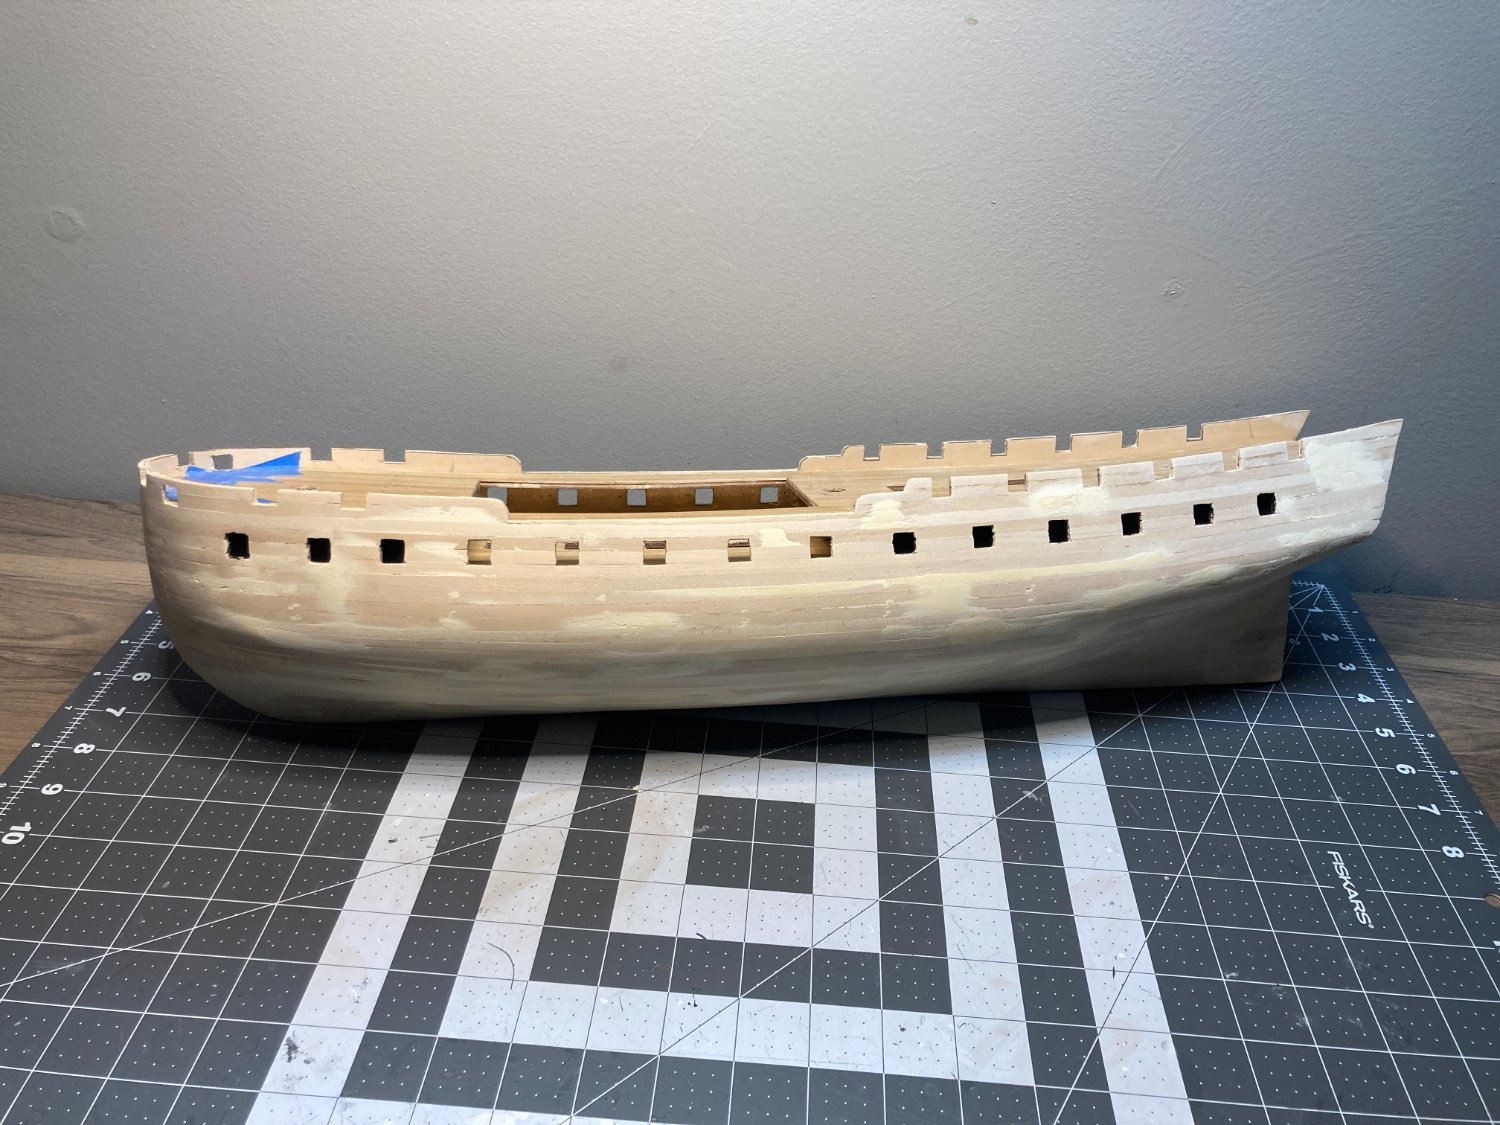
Well I finally have the first layer installed sanded and some filler applied to smooth things out.

Next steps are to clean up the gun port openings on the upper decks, and then install the pre-cut inner bulwarks. After those are installed I am going to add one final coat of shellac to the decks. Then the outer layer of planking. Occre supplies Sycamore for above the wales and Sapelli under the wales and below. The wales will be African Walnut.
Home projects have slowed me down a little bit, but hope to have the final planking done in the next month or so.
-
Depends on the volume of dust I expect to create. If I am sanding the hull after the first layer of wood is installed and I expect a lot of dust I definitely wear a mask. But smaller jobs I do not. I don't have an air brush. The little bit of painting I do with a spray can, I do in a well ventilated area with no mask. If I did more spray painting I would consider a mask.
- Knocklouder and mtaylor
-
 2
2
-
Good luck with your model. I am not sure about the Albatross, but for the HMS Beagle Occre has a series of over 100 short YouTube videos demonstrating building techniques. They were very helpful and I am sure many of them will be transferable to this model. If you need a link to them let me know.
- Ryland Craze, mtaylor and Keith Black
-
3
-
Good luck on your Polaris. Consider creating a build log. Great way to get advice and feedback on your model.
- mtaylor and Keith Black
-
2
-
Wow, really impressed that you are edge bending the thin final plank layer. I wasn’t going to try that. I wanted to do the first layer as practice only. Do you have a build log for your model? If not there is a forum for occasional in progress posts. I would love to see your model.
-
23 minutes ago, Esap said:
With respect to your comment that it isn't going quite as you originally hoped, as a beginner I am quite interested in hearing more regarding the challenges you ran into. I hope you will be able to share some of the lessons you have learned
The challenges I had related to trying to deviate from the Occre instructions and attempting to follow a more authentic planking method. I struggled to implement the edge bending technique from Chuck Passaro's videos. I am not sure the planks that come with the Occre kit are too thick, or if not having a rabbet created the issue. I ended up following the Occre instructions.
I still want to learn the "proper" technique and have decided to build the NRG Half Hull project before I build my next full ship, but that will be a year to two in the future.
-
Thanks for checking in. I have sanded down the first layer of planking and have some gaps and a few low spots to fill in with filler and then more sanding. I did a better job of shaping the bulkheads than I did on my beagle. I had to do quite a bit of filling to fix the bow shape on the Beagle. Except for being bigger, the process is very similar to the Beagle. I will get some pictures posted soon, before I start the second layer.
What are you currently building?
-
Thanks. Really appreciate the picture.
- Keith Black and mtaylor
-
2
-
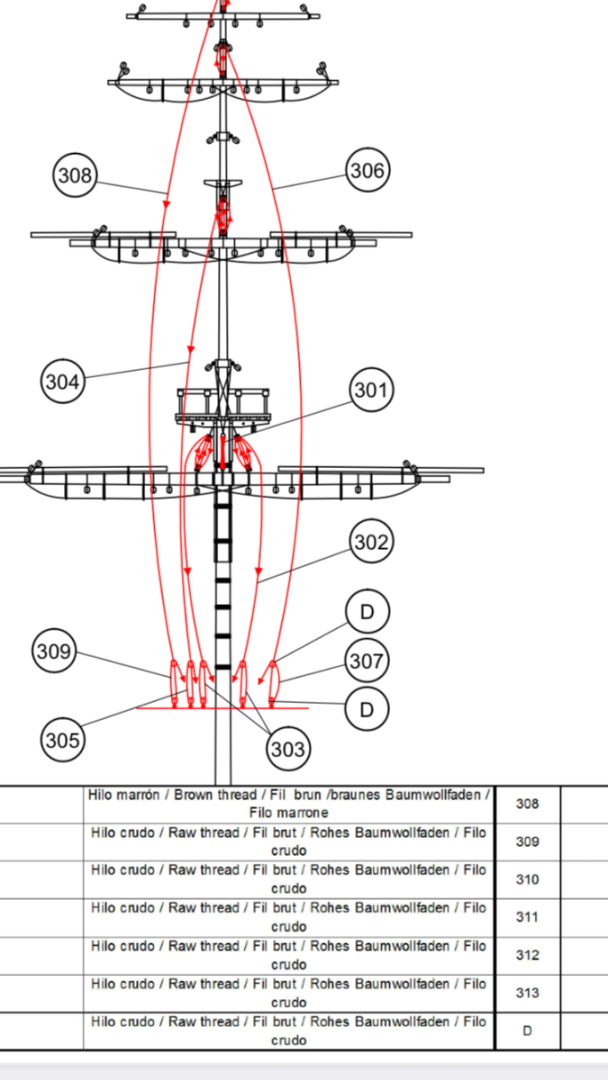
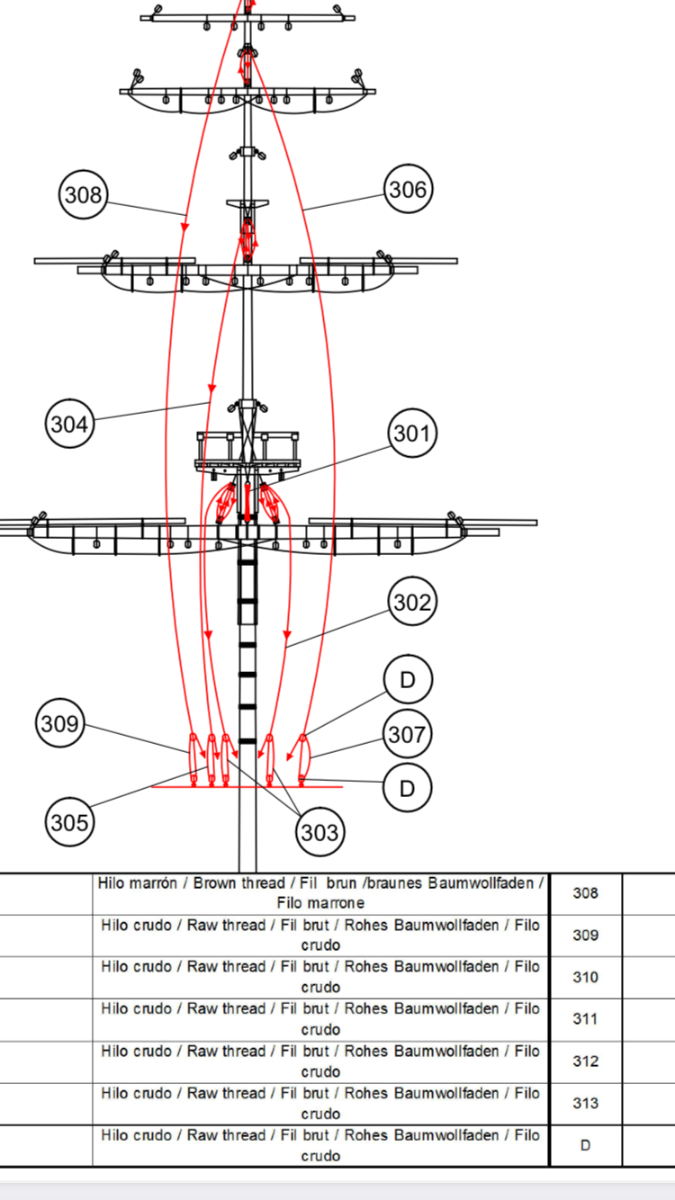
I am currently building the Frigate Diana from Occre, and I am trying to learn the terminology and purpose of the various rigging elements. There is one item that I am having trouble locating information about. There is set of blocks used at the deck on the halliards. I can't find anyplace online that gives a name for this arrangement or explains its purpose. The halliards have a double block at the yard and mast and the line that goes through those blocks has a single block at the end of it that is connected with a lanyard to a block attached to the deck. This seems like it would be a really ackward way to lift a yard into place, and I would think that you could get the same mechanical advantage with a triple block at the yard and mast. I have attached a page of the rigging plans and a photo from the instructions that show what I am asking about. Sorry the photo is not very good quality.
Any information on what this is called and why it is used would be appreciated. Thanks


- mtaylor and Keith Black
-
2
-
The quality of the gun port casting is actually really good. I just don't care for the finish they used. I will paint them and see how they look after that.
Thanks for the info on the lines.
-
It has been awhile since I posted on my progress. I am close to finishing the first layer of planking. Not the result I had hoped for when I started, but I am confident that I will get a good surface to install the second layer too. When I have the first layer finished I will post pictures.
I have been working on several other aspects of the build as I have been planking. Items such as assembling the gun carriages and ladders. I have been taking pictures as I go, and will post about them as they are installed on the ship.
I have also been studying the rigging plans. When I built my first ship, I followed the plans start to finish and didn't think about what items were for as they were installed. For example, I installed blocks on the yards and masts where the instructions told me to without really understanding thier function at the time. I made a lot of mistakes by not really understanding what each item was for. Such as installing blocks on the top of a yard instead on the bottom it that is what was needed for it's purpose. I also didn't spend any time leaning the terminology used in the rigging.
One of my goals on this build was to understand more about the terminology and the purpose of all the rigging components. I have looked at quite a few online items and have made some progress. I have a good handle on most of the items that deal with the square sails, but have found it harder to nail down the names of the lines on some of the other sails.
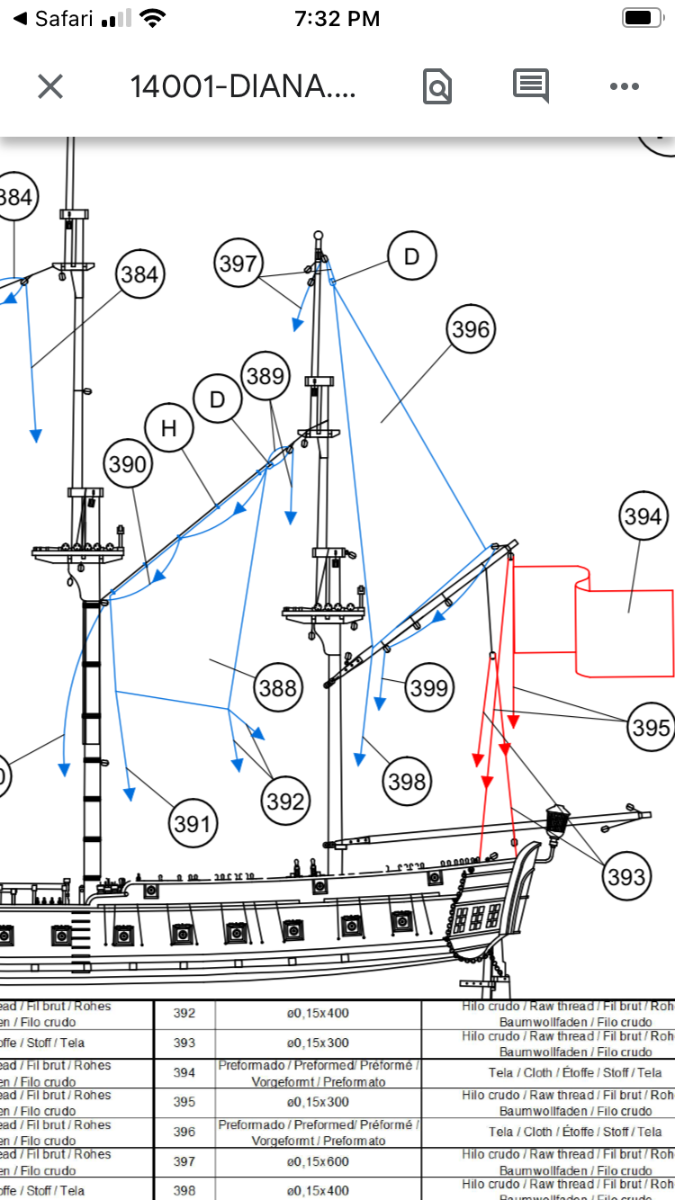
First item I can't seem to figure out is the name of the triangle shaped sail that is attached above the driver on the diagram below. I am also struggling to determine the names of the lines used on the stay sales. The diagram shows two lines that start at the upper corner. One goes up through a block on the stay and then down to the deck the other goes down along the stay through a block on the mast and to the deck. I am not sure what purpose the second line serves. It would seem to me to make more sense if it was attached to the sail near the top forward corner. The remaining lines are at the bottom of the sail, one forward and two aft. The purpose of these lines makes more sense, but I still would like to know what to call them.

The other question I have relates to a system of blocks used near the deck to secure some of the rigging lines. In the image below the halliard runs through a set of double blocks at the yard and mast and then at the deck there is another set of single blocks used to hoist and secure the yards. This seems like a very ackward way to raise and secure the yard. My limited knowledge of simple physics also tells me that the same mechanical advantage could be achieved with a set of triple blocks instead of doubles at the yard and mast. I would love to understand what the purpose of this arrangement was and what it is called. I have seen this on models of other Spanish ships, but not from other nationalities.
If anyone has the any info on these items and wants to share, I would appreciate it.
Thanks.
- Esap, Bill Morrison and CiscoH
-
3
-
Thank you so much for sharing your technique on the false splice.
- HardeeHarHar, dunnock and AJohnson
-
3
-
-
-
-
26 minutes ago, Keith Black said:
Dave, I always like looking over a man's workbench noting his tools and seeing if I can incorporate any ides into my workbench. I see a flyswatter hanging above your workbench top left. Do you have a fly problem or is that used on swatting builds in those naughty moments when they misbehave?

And the horseshoe is upside down. All the luck is leaking out.
-
That looks great. HMS Beagle was my first build and I built the small boats before planking the ship. I viewed it as practice for the ship and it showed. You should be really happy with how this looks. I really love the sycamore trim added to cover the plywood edge.
- Patrick B and Paul Le Wol
-
2
-
What power are the lenses? I haven’t had good luck with wearing magnifying glasses. I use a work light with a magnify glass in the middle. Purchased from Menards and it comes with a 3x and 5x magnifying glass. I have really good luck using it. I think the ability to easily look away without the magnification helps a lot. Only problem is the end of my paintbrushes will sometime hit the magnifying glass.
The light has three brightness settings and can be switched from warm light to cool light also. I find that if my eyes get tired switching the color of the light helps.
-
-
You can fix it with woodfiller and sanding. Sand it to remove wood where you don't want it then start with the wood filler. I used Durhams rock hard. I needed to put a couple layers of wood filler in some spots and quite a bit of sanding. I wouldn't start over.
- Capella and The Gimps Chimp
-
2
-
My Beagle took a lot of wood filler and sanding before the second layer. I am very happy with the end result, but if you saw a picture of the first layer of planking you would not be impressed. I wouldn't worry too much about the first layer. You will need to fill and sand to get the shape right for the second layer. A little more filler and sanding isn't a big deal. That is the great thing about the double layer hull.
-
I just checked out your build log. This will be helpful.
Thanks.
- mtaylor and Captain Slog
-
2
-
I am building the Spanish Frigate Diana. Built in 1792. I found an image of a painting of the Santisima Trinidad and will attempt to fashion the chainplate similar to what is depicted in the painting. The Santisima Trinidad was built about 20 years prior to the ship I am building but so far this image is the closest I can find for a Spanish ship.
Thanks


.jpg.46e1ad1a7a05341093d0a01f6d54f1c5.jpg)


HMS Beagle by Patrick - OcCre - 1/60
in - Kit build logs for subjects built from 1801 - 1850
Posted
Your planking looks great.