
.jpeg.882f0a147f14858c9e673da7e13d8ebe.jpeg)
RossR
-
Posts
315 -
Joined
-
Last visited
Content Type
Profiles
Forums
Gallery
Events
Posts posted by RossR
-
-
You can fix it with woodfiller and sanding. Sand it to remove wood where you don't want it then start with the wood filler. I used Durhams rock hard. I needed to put a couple layers of wood filler in some spots and quite a bit of sanding. I wouldn't start over.
- The Gimps Chimp and Capella
-
 2
2
-
My Beagle took a lot of wood filler and sanding before the second layer. I am very happy with the end result, but if you saw a picture of the first layer of planking you would not be impressed. I wouldn't worry too much about the first layer. You will need to fill and sand to get the shape right for the second layer. A little more filler and sanding isn't a big deal. That is the great thing about the double layer hull.
-
I just checked out your build log. This will be helpful.
Thanks.
- Captain Slog and mtaylor
-
2
-
I am building the Spanish Frigate Diana. Built in 1792. I found an image of a painting of the Santisima Trinidad and will attempt to fashion the chainplate similar to what is depicted in the painting. The Santisima Trinidad was built about 20 years prior to the ship I am building but so far this image is the closest I can find for a Spanish ship.
Thanks
-
-
You might want to check out the Polaris from Occre. Or if you want something a little more challenging the HMS Beagle from Occre. Occre has a great series of YouTube videos for building the Beagle. It was my fist build and turned out pretty good.
-
What did you use to fill?
-
If it is going to be painted, or for under a second layer of planking, I use Durham's Rock Hard from the hardware store. cheap and easy to work with. I don't find any odor problems. Dries hard and is easily sanded. It is a powder that is mixed with water and as such I am careful not to inhale it before it is mixed with water. I mix it to the consistency of peanut butter and sand it the next day.
Not a good option if not painted. Then I try to find a product like minwax colored wood filler.
- John Ruy, mtaylor, DonBMichigan and 1 other
-
4
-
I hate trying to sand/file off the nail heads. I agree with Chris on the push pins, I avoid drilling the hole by placing the pin next to the planks and let the shoulder of the pin hold the plank.
-
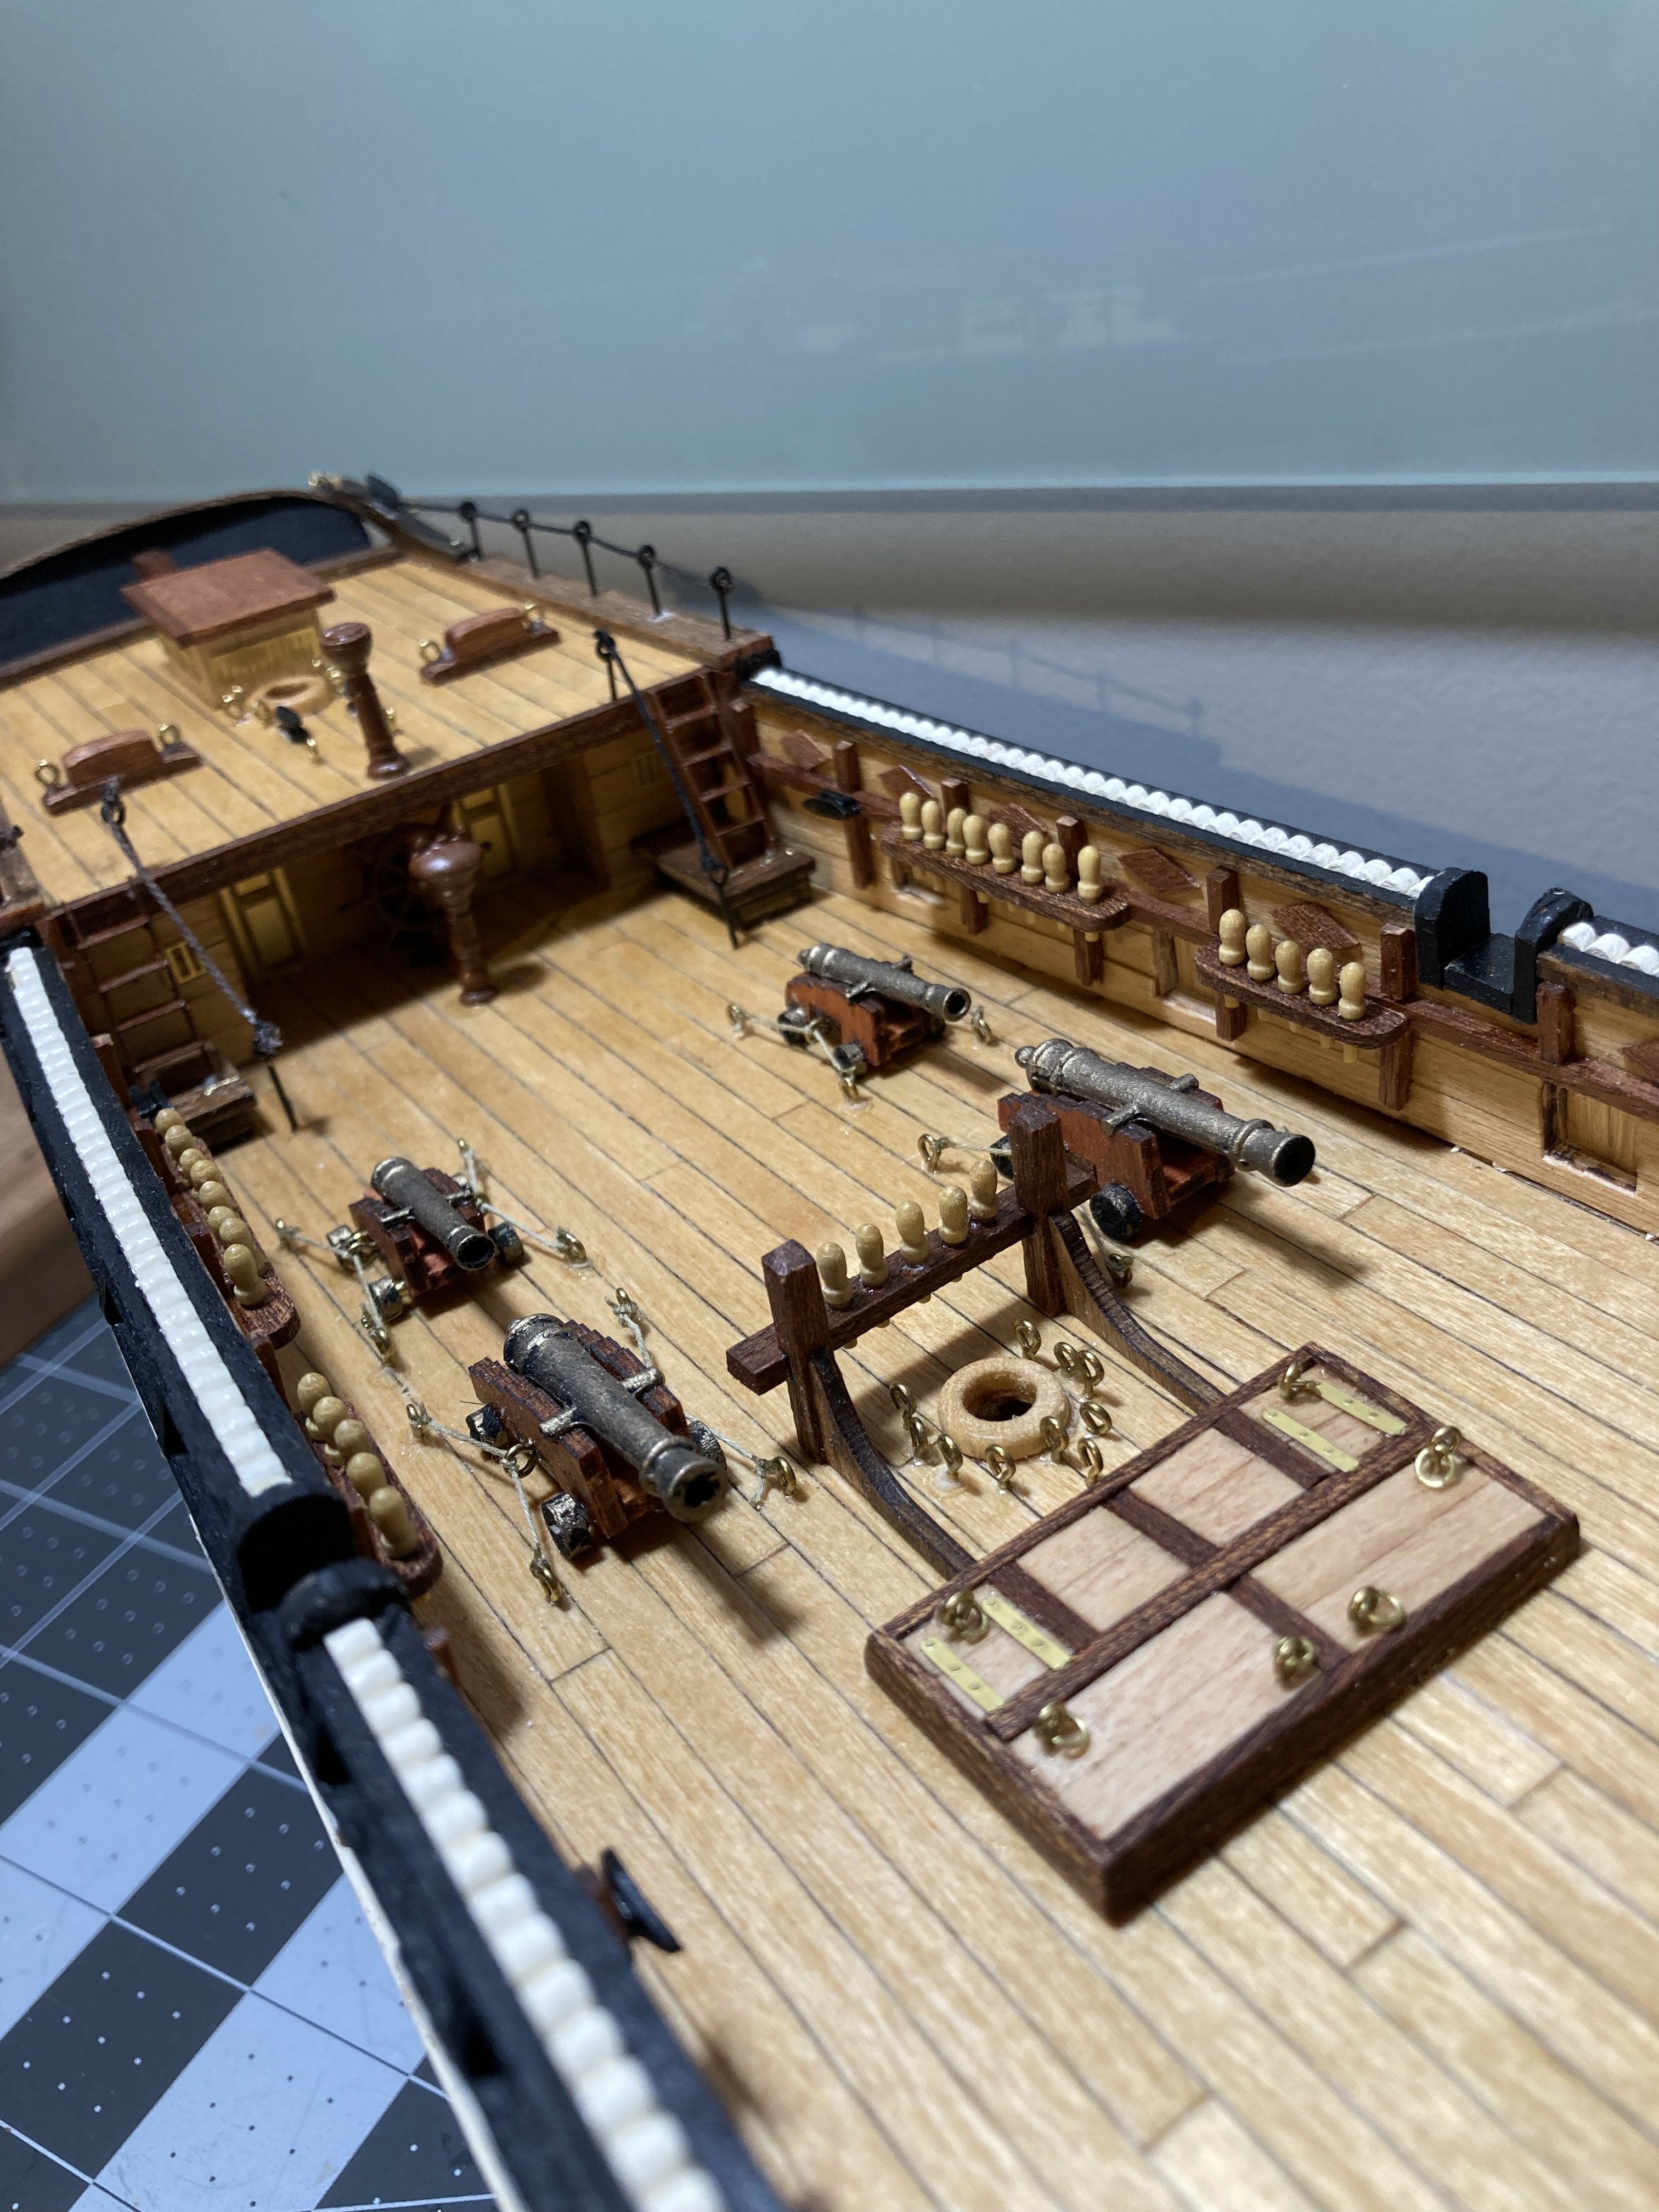
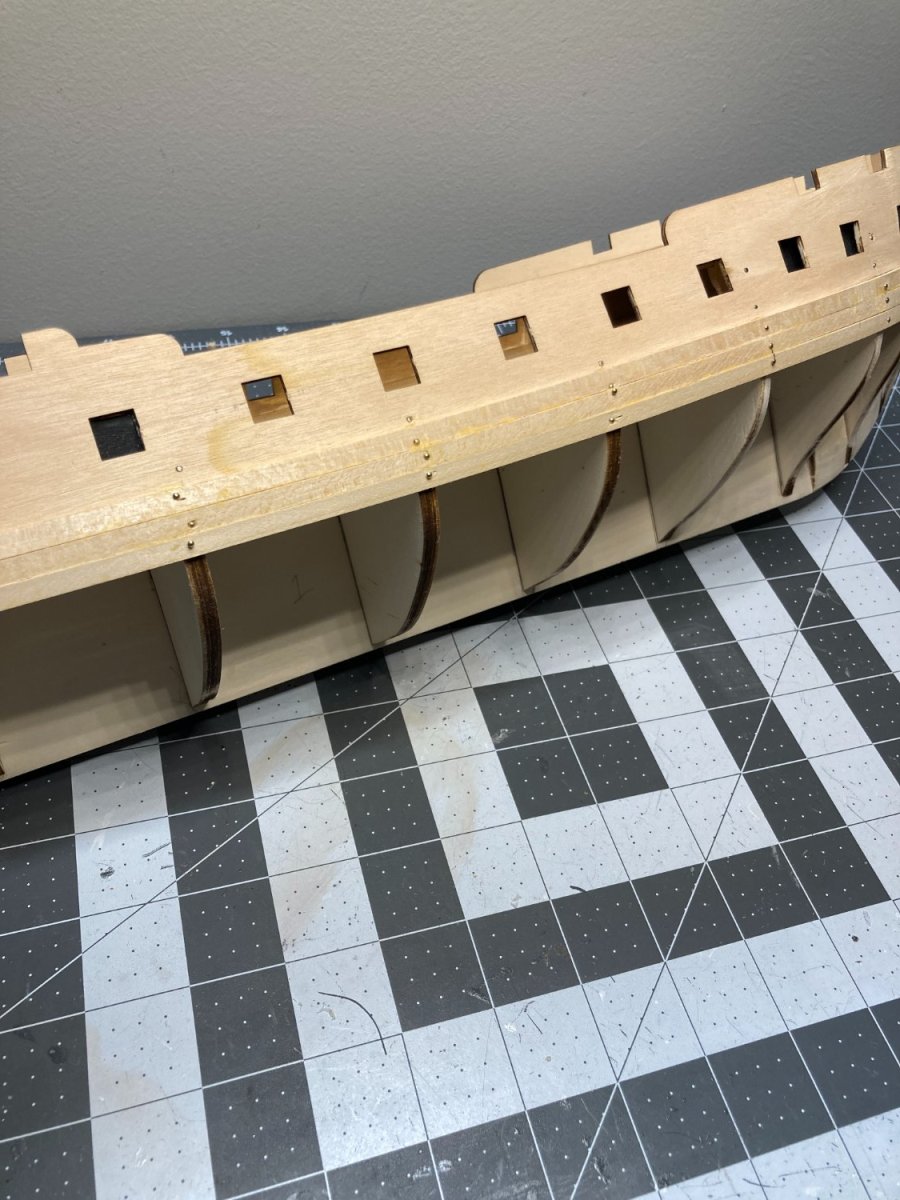
I have also, been adding the planks over the bulwarks and cutting out the gun port openings.
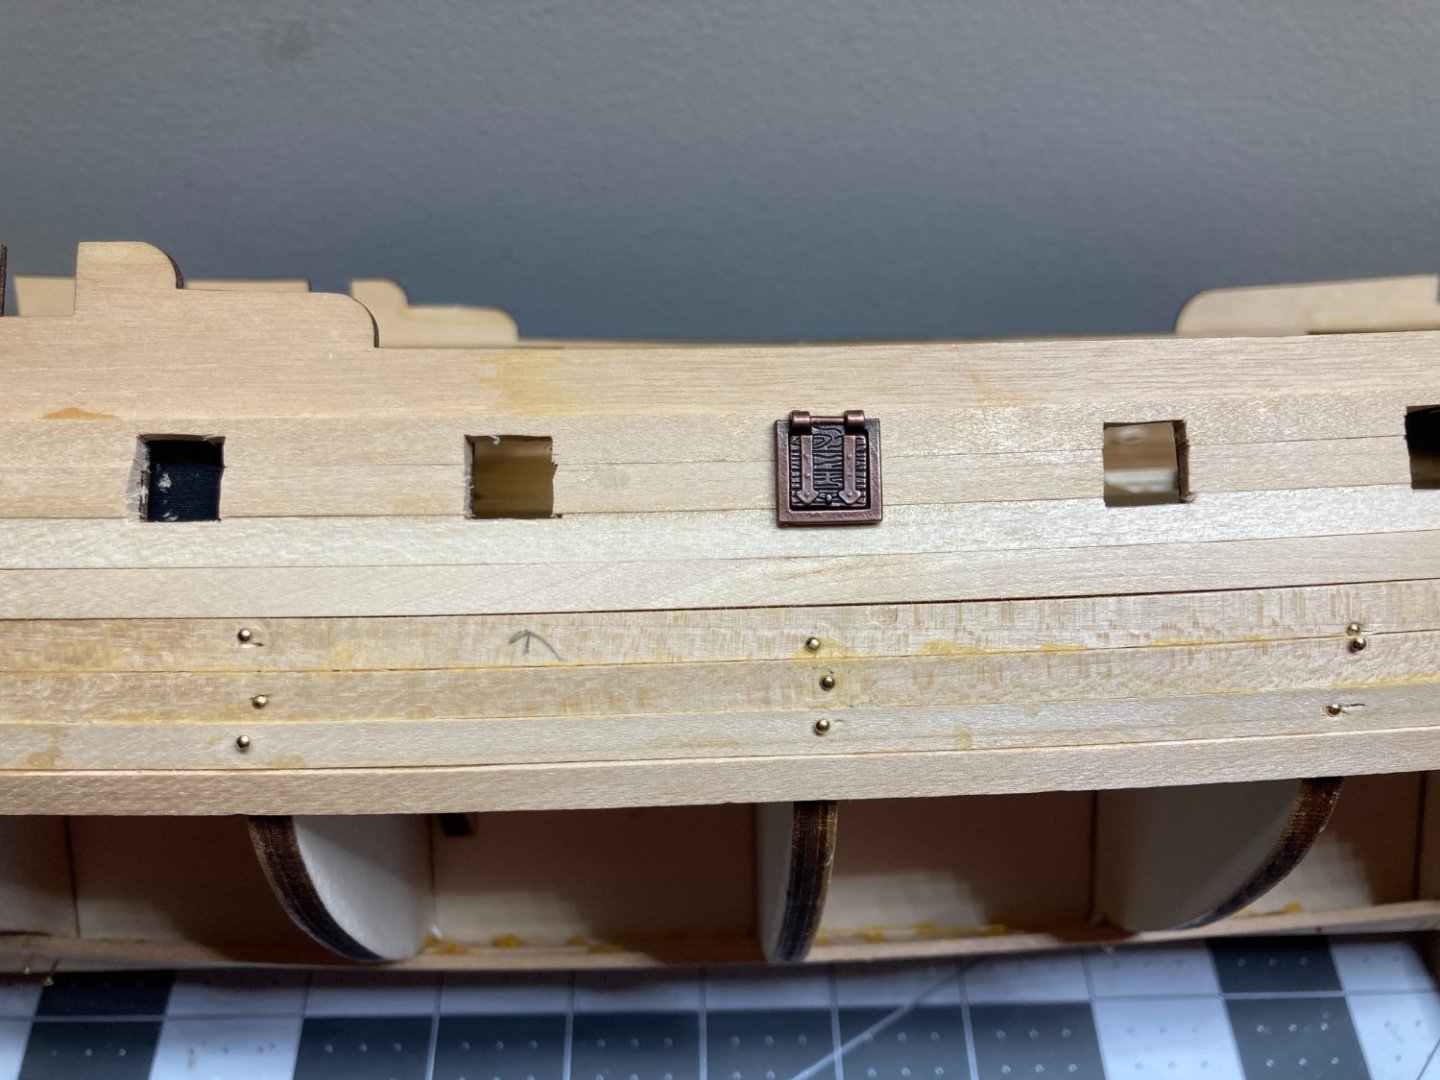
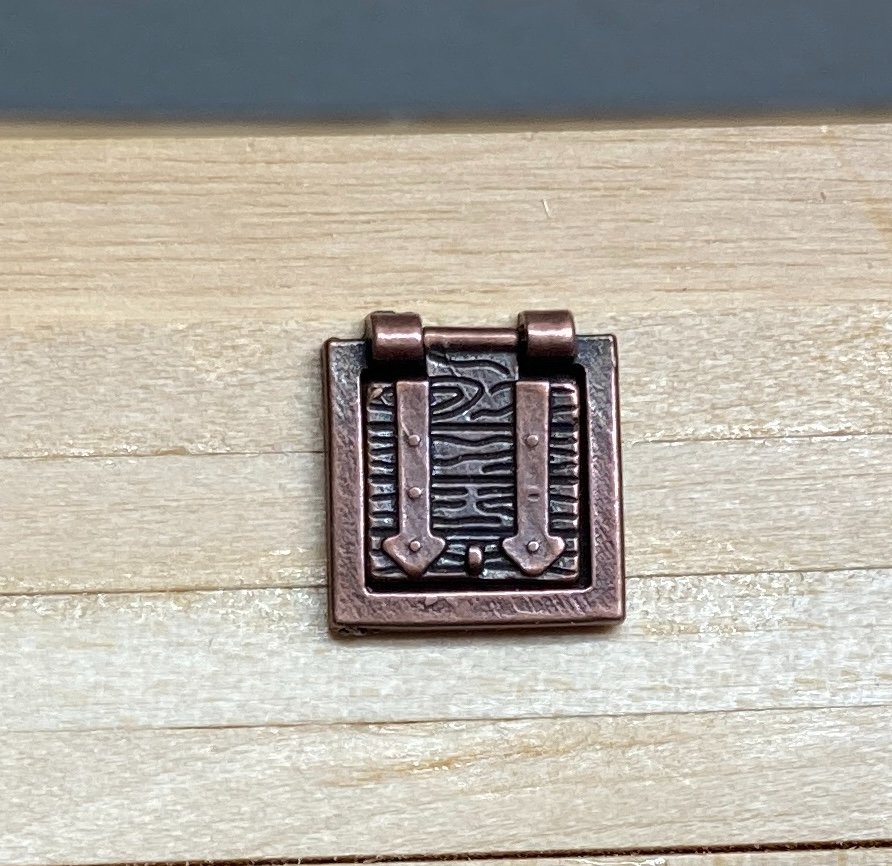
The gun port frames and hatches that are provided with the kit appear to be a brown anodized aluminum. The detail of the wood grain and the hinges are very crisp in the cast part. I don’t know if I am crazy about the anodized look of the metal and have considered painting the parts, but I am worried that the paint will cover the details cast into the parts. Not sure what I will do right now, but have at least a few months before I need to decide. I do plan on at least painting the hinges at a minimum.
- KurtH, ccoyle, Prowler901 and 2 others
-
5
-
One of my goals in this build was to do a better job on the first layer of planking. I have tried to spile the planks using the edge bending technique, and found it difficult to get the planks to lay correctly. This model is not designed with a rabbet joint and planks need to curve at to bow to a 90 degree angle to the centerline of the ship. I think this was maybe too much of a bend for the technique I was trying to employ, at least with my level of skill. I have decided to move forward following the Occre instructions. This will require a lot of sanding and some wood filler before the second layer is added.
Despite not succeeding at creating a better looking first layer, I think with the right model I would be less intimidated by building a single layer model than I would have before this attempt. Thanks to allanyed and others for their tips and encouragement. Really appreciate all the help from more experienced modelers.
-
No reason not to use it. There are some applications that CA glue is appropriate. Some people use one or the other exclusively, but most people use both I believe. The Occre instructions will say to use contact cement or cobblers glue for some items. I have had good luck with this, but I think most people on the forum avoid contact cement. I use CA when I can, because I get a little impatient waiting for glue to dry.
When you get to rigging, dilute some white glue or your wood glue with water 50/50 and use a drop to help secure your knots.
My first kit was the HMS Beagle and If you haven't started watching the youtube videos that Occre has available I would recommend it.
- mtaylor and Keith Black
-
2
-
-
Thanks for the tip. I was considering soaking first to see if I could get more bend. I don't have a hot air gun, but will look into buying one.
-
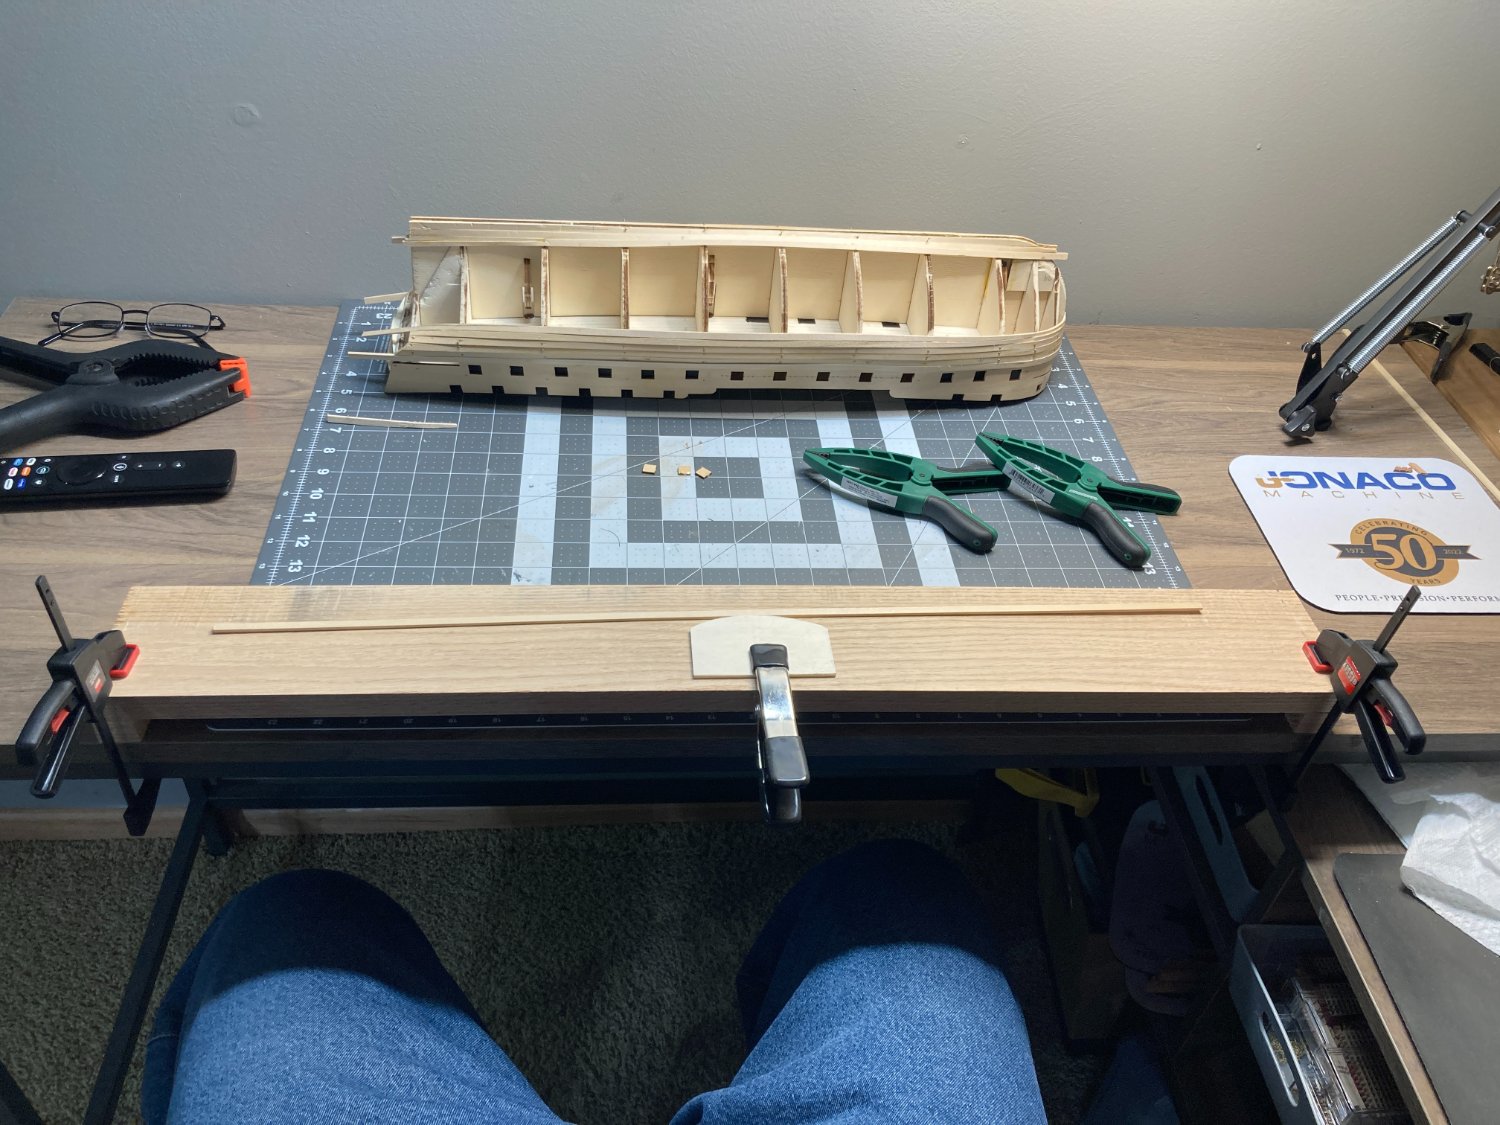
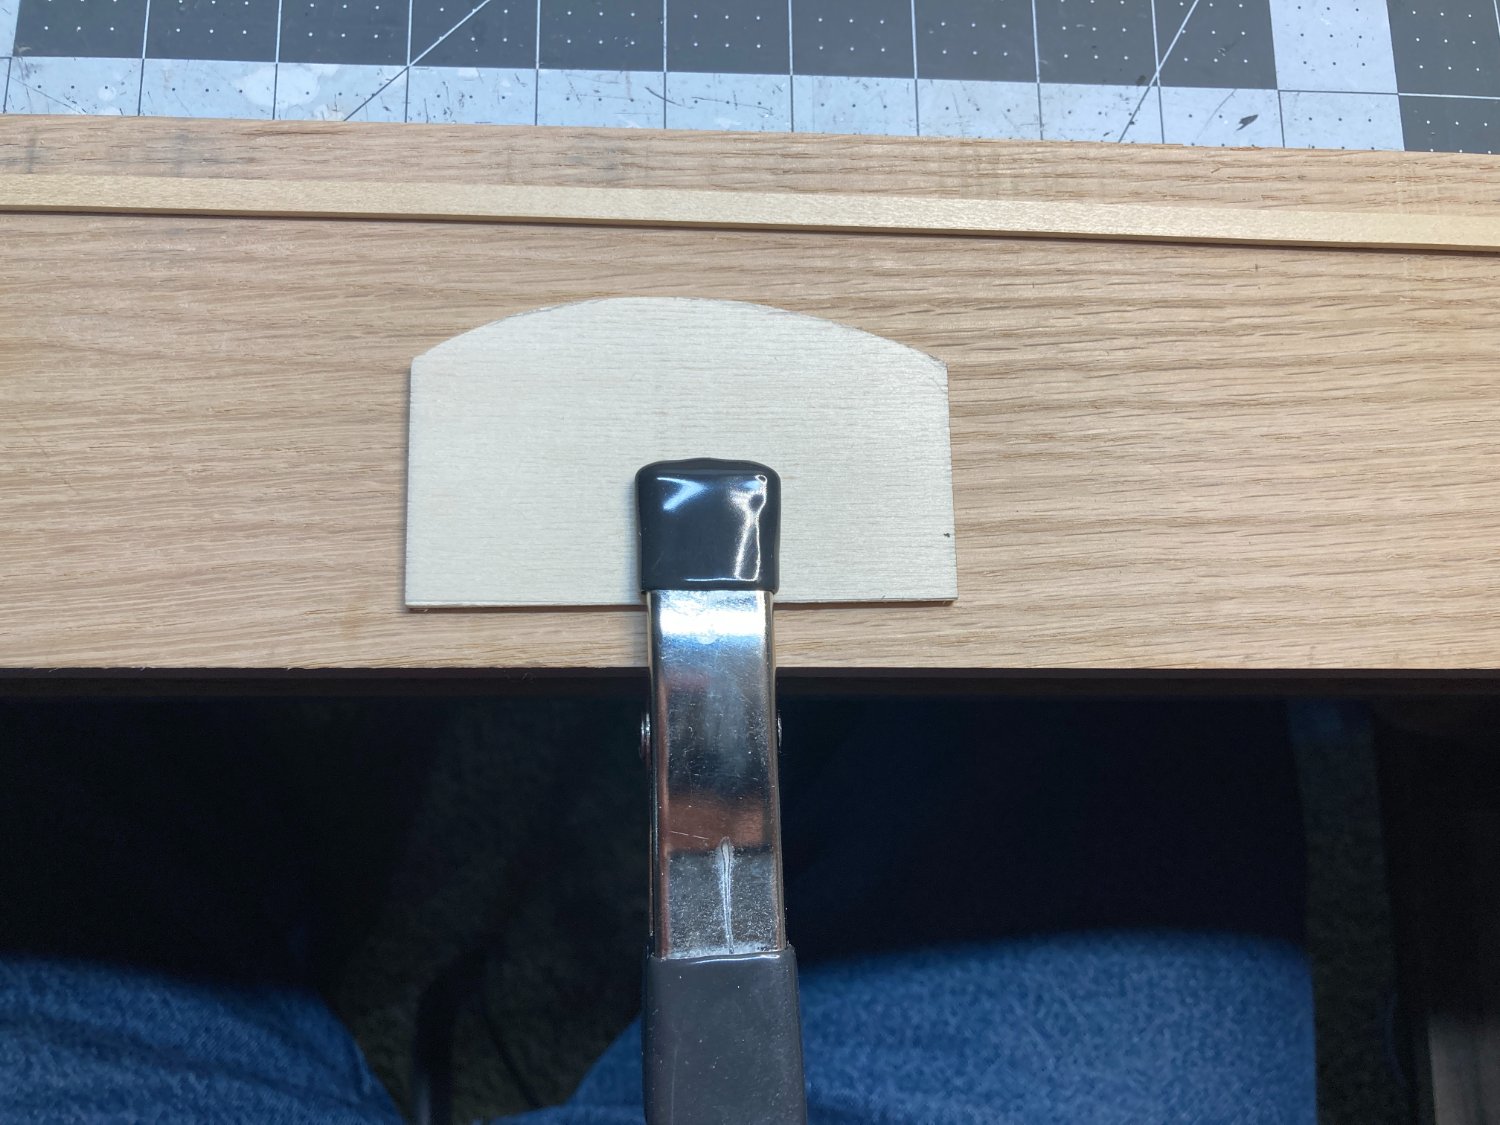
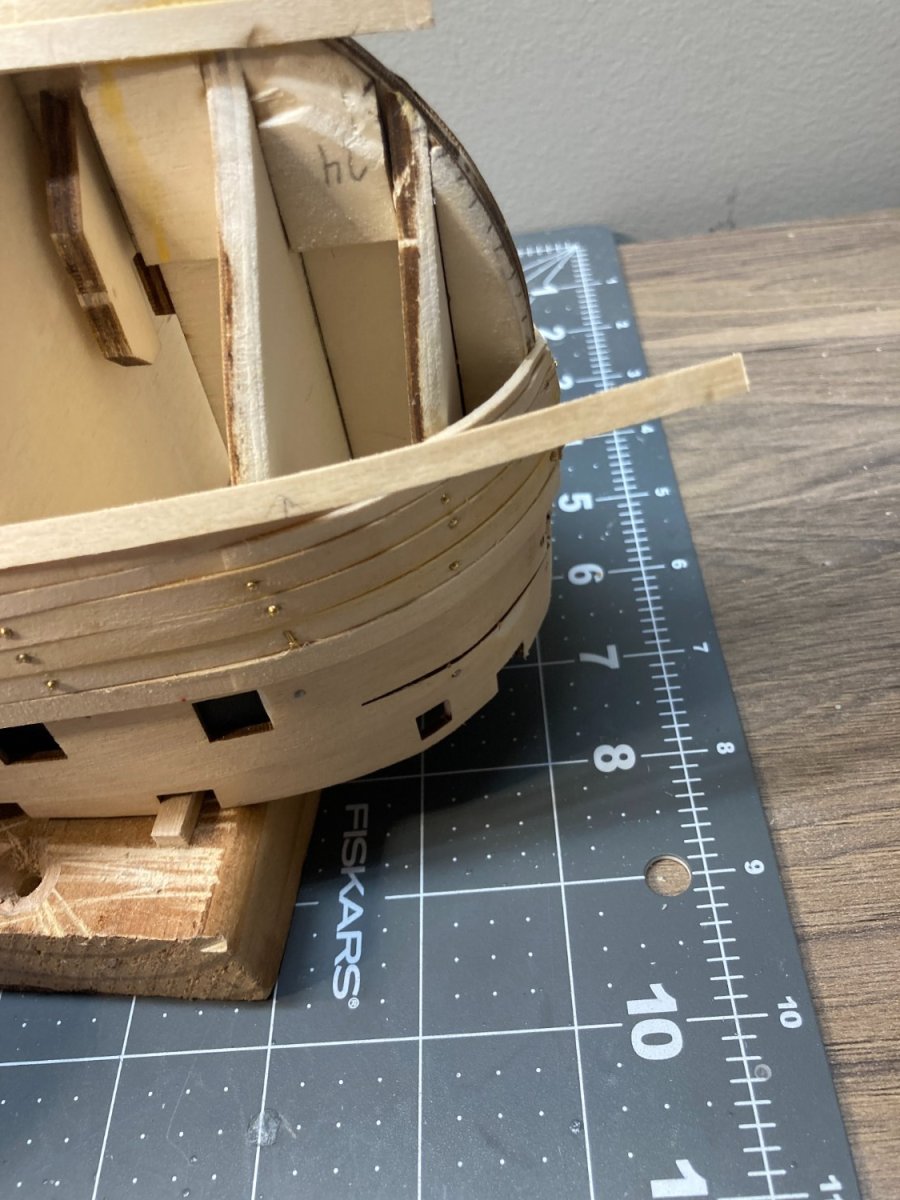
I have been making an attempt at edge bending the planks for my hull following Chuck Passaro's methods. I built the jig for shaping the planks and used an iron, but I can't seem to get the planks to bend enough to laydown properly.


The planks are 2mm x 5mm. I assume I need to get more bend on the planks, but the picture above is the most I can get them to bend without breaking. Is this an issue with the type or thickness of the planks. If anyone has any thoughts I would love to hear them.
- Bill Morrison and ccoyle
-
2
-
I would only use cobbler glue/contact cement for a second layer of hull material. Several Occre kits are designed this way and I been successful using contact cement for the second layer. I think the Santisma model only has a single layer of planks on the hull. I definitely would not use contact cement if that is the case. I think the choice of glue is influenced by factors such as how close of a final fit are you getting on your planks prior to installation. If you can get the planks close to the final shape, I would use CA and glue 2 - 3 bulkheads at a time working from bow towards the stern. If you are not getting the shape close and have to nail or clamp the planks I would use wood glue, so you have a little more time to get the nails or clamps in place.
Cobbler glue/contact cement is deferent than CA/super glue. Contact cement is usually applied to both pieces being connected, you wait about ten minutes, then press the pieces together. the pressure creates a bond that is difficult to pull apart as soon as you apply the pressure. It works great when you have large surface areas to apply the clue to. Not sure it would work well for applying planks to bulkheads with limited surface area.
-
This looks really good. I have this model on my shortlist for future builds and look forward to following your build. Good luck.
-
-
I asked the same questions awhile ago and there are a ton of great responses on the forum linked below.
Shellac and polyurethane both have their supporters, not very many use lacquer. I have used polyurethane with mixed results but most people who use it have no issues. I have been mixing my own shellac using flakes and am very happy with the results.
Good luck.
-
I am starting my second try at lining the off the hull. I wasn't satisfied with my first attempt. I have been watching Chuck Passaro's YouTube videos and and reading about his edge bending technique for spiling the planks at the bow, and this seems like the way to go since the kit I am building does not provide extra wide planks that can be used for spiling the planks by cutting them out. Chuck is able to get the planks to fit well enough that he can glue them with CA and not have to clamp or nail them into place. I really hope I can learn this technique well enough to not have to nail my planks. While he uses a travel iron for his edge bending, chapter two of his HMS Winchelsea tutorials says he uses a hair dryer for twisting and other bending. I haven't found a more detailed description of this process on MSW or on YouTube.
Is anyone aware of any instruction on using this technique for the twists and curves that are required on the stern of many models? I would love to read or see how this is done. Currently I am soaking and then clamping into place while the plank dries, then fine tune the fit and glue and nail the planks. Slow and the end product doesn't look great.
-
Very impressive. Looking forward to seeing the results.
-
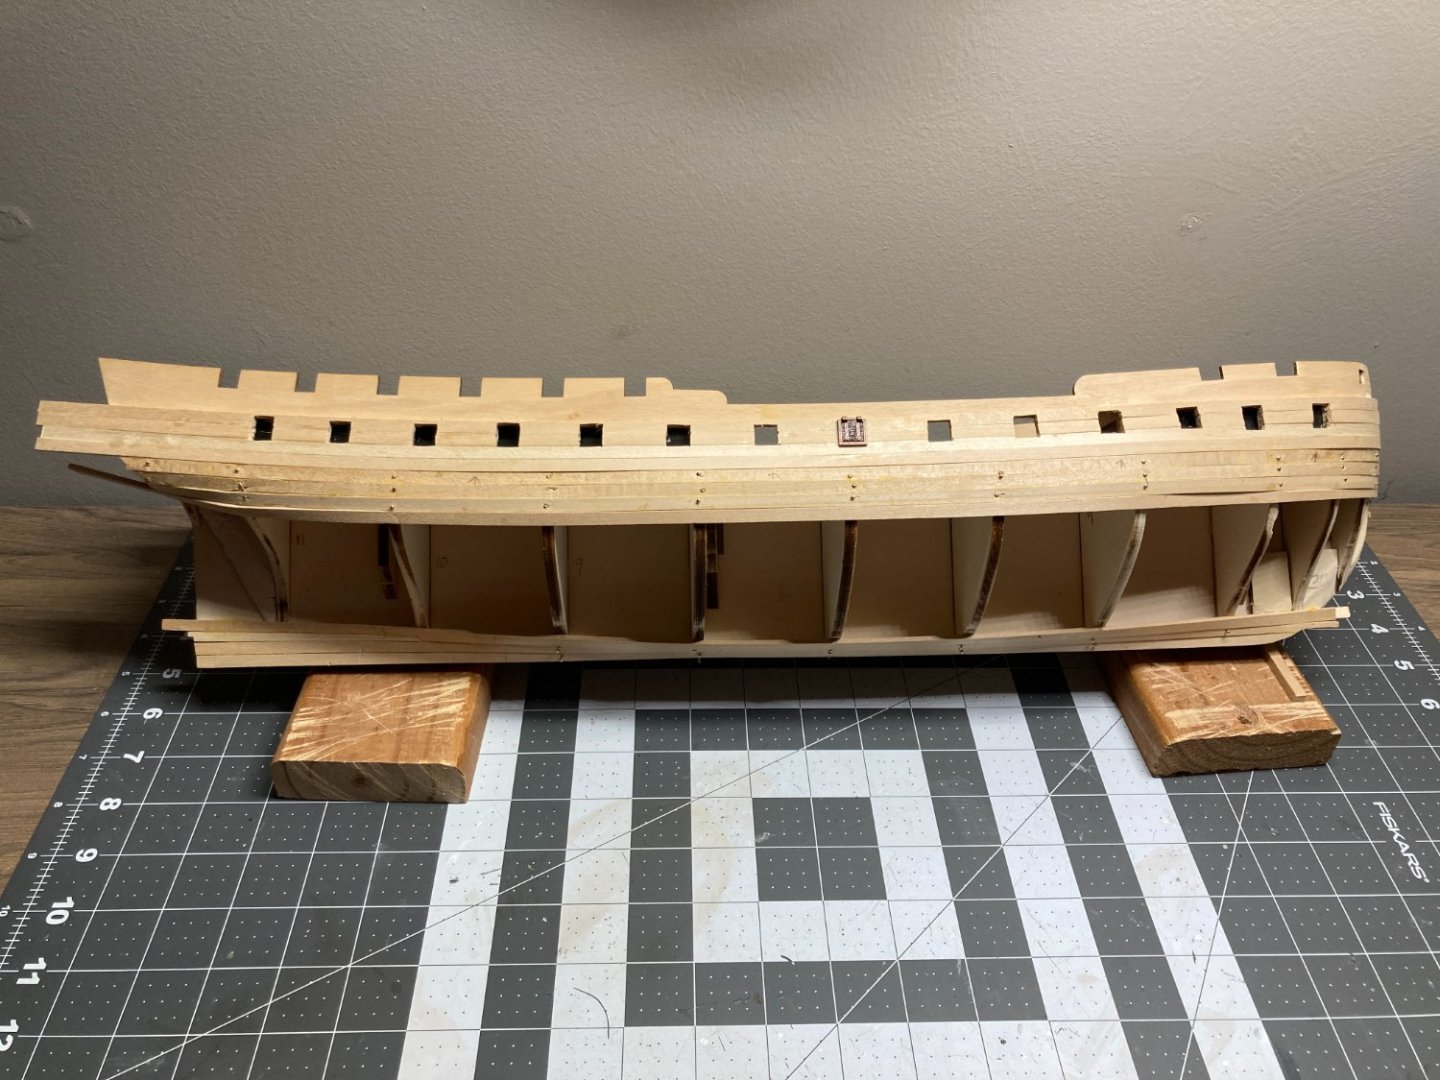
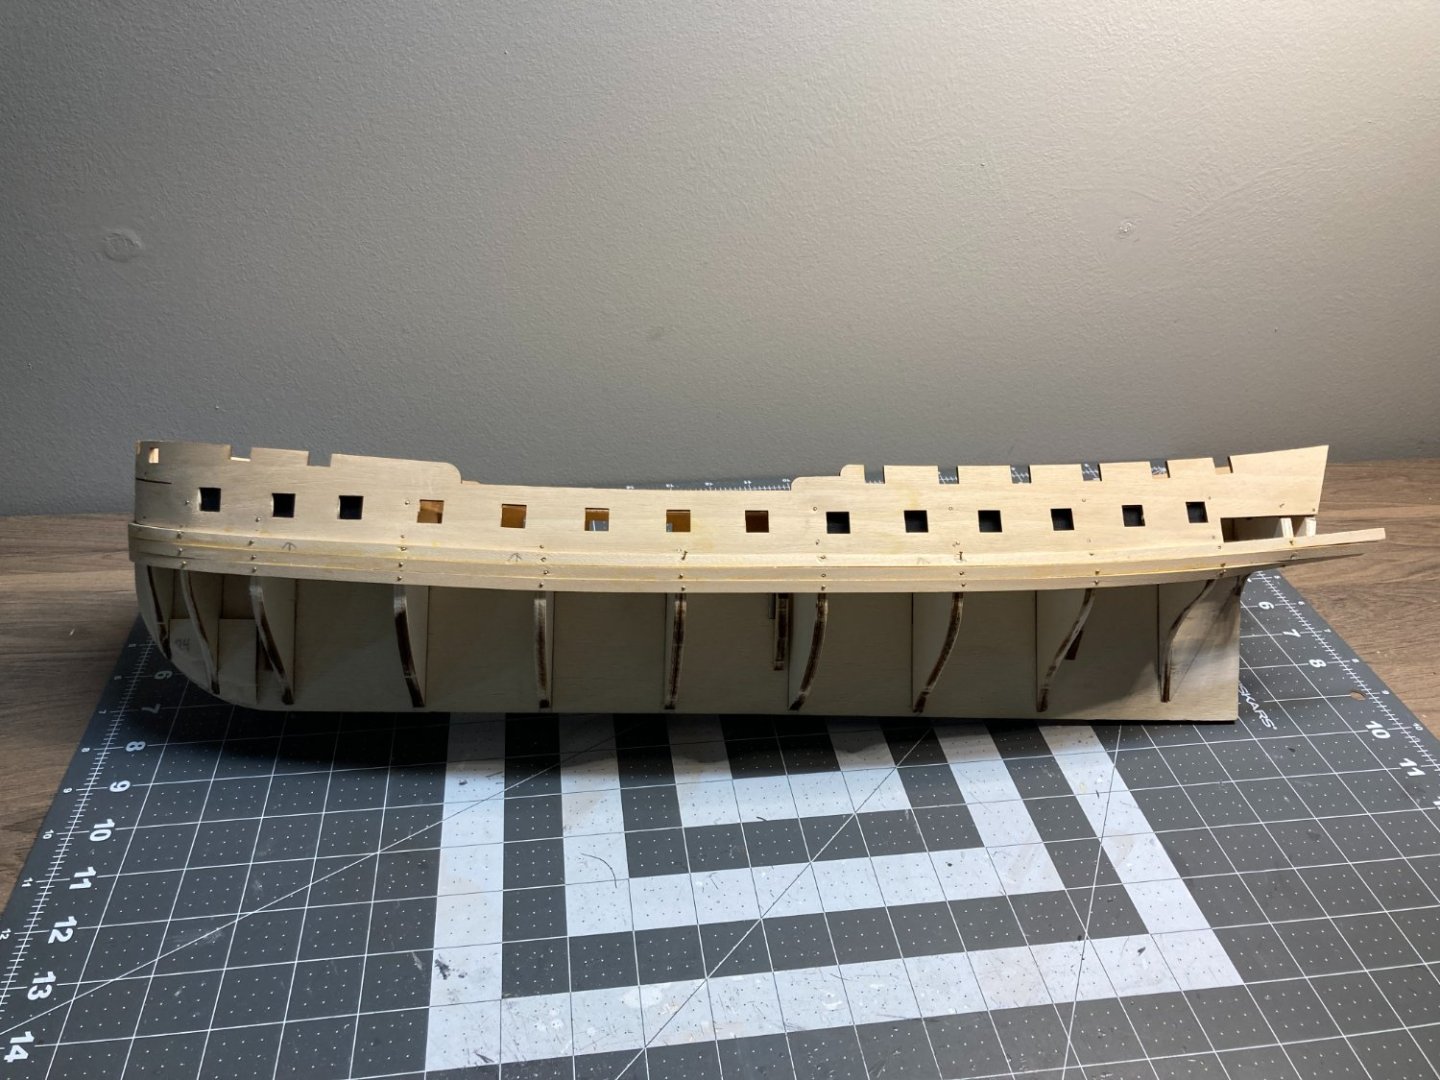
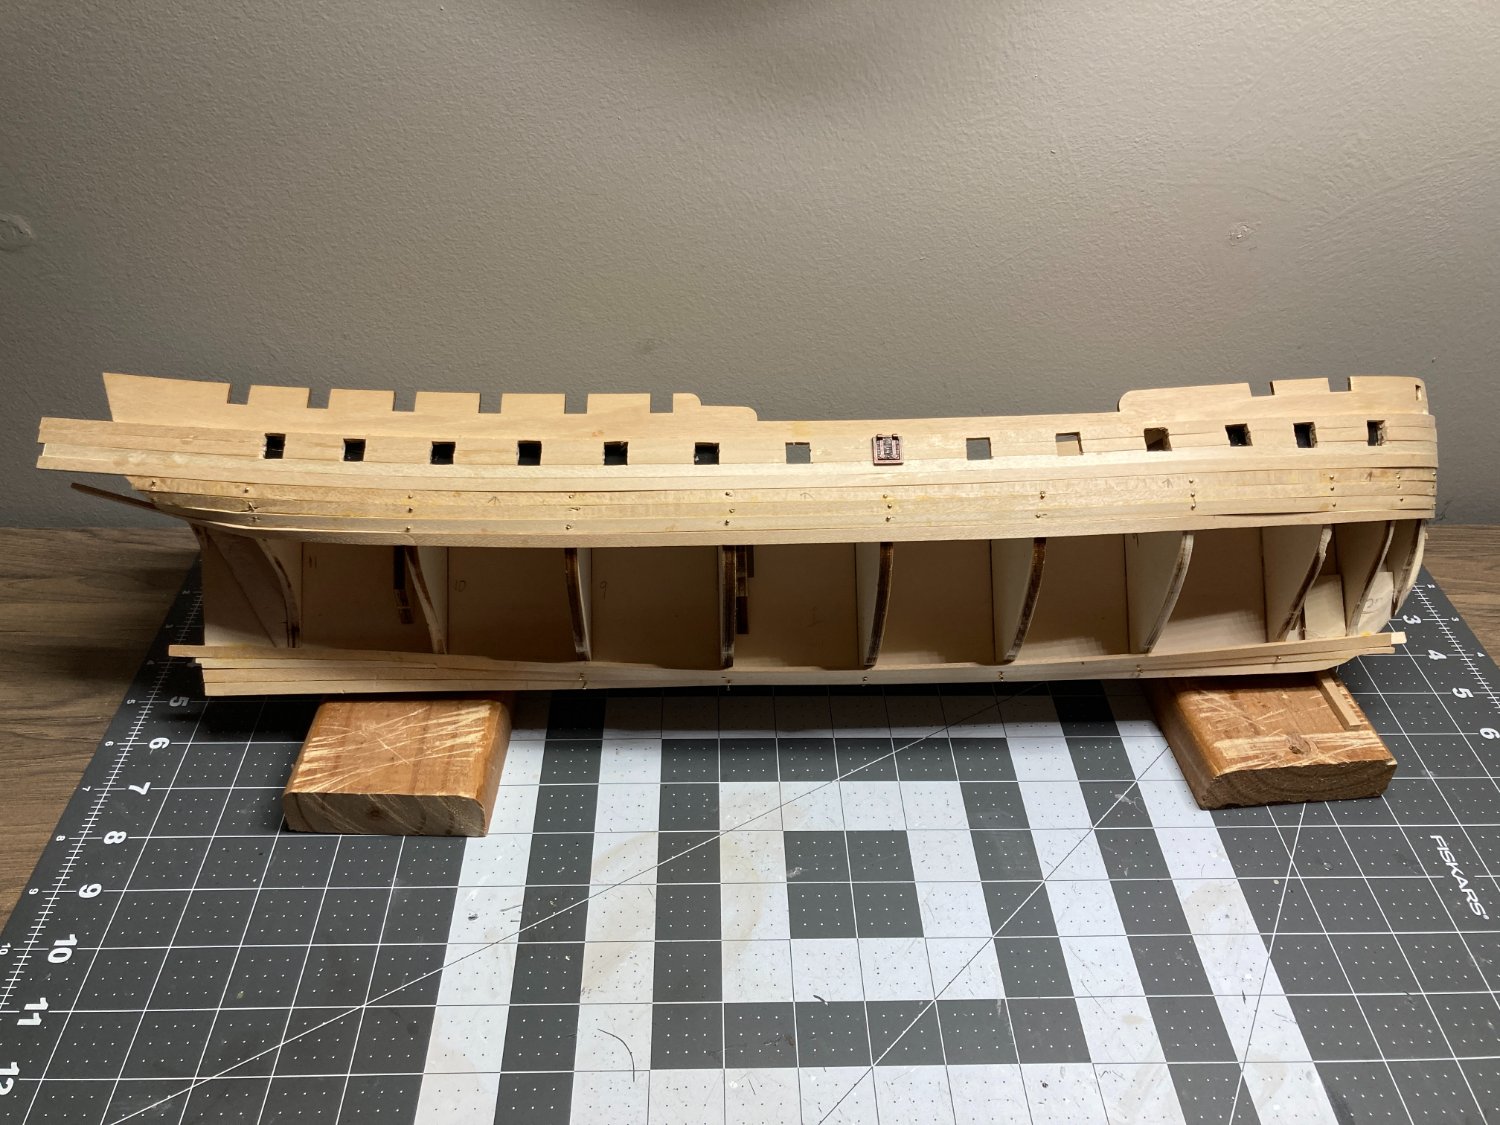
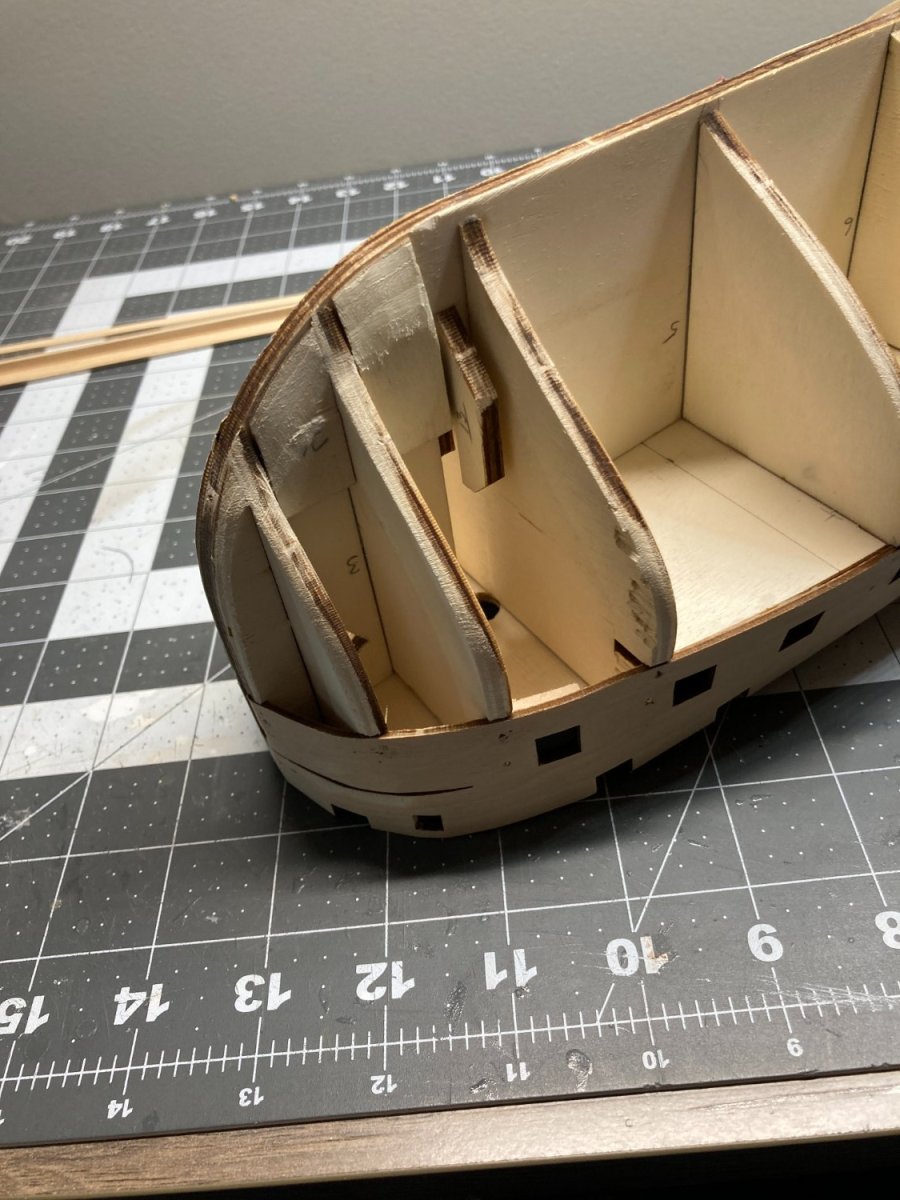
I have the bulkheads shaped for the installation of the planks. This is a step that I didn't do a great job of on my first model. I was too aggressive and removed too much of some of the bulkheads. As I result, after planking I needed to build up some areas with wood filler and did a lot of sanding work to get the shape of the bow right. This time I was careful to only remove enough material to get the angles set right for the planks to lay properly. I find this part of the building process to be a little stressful.

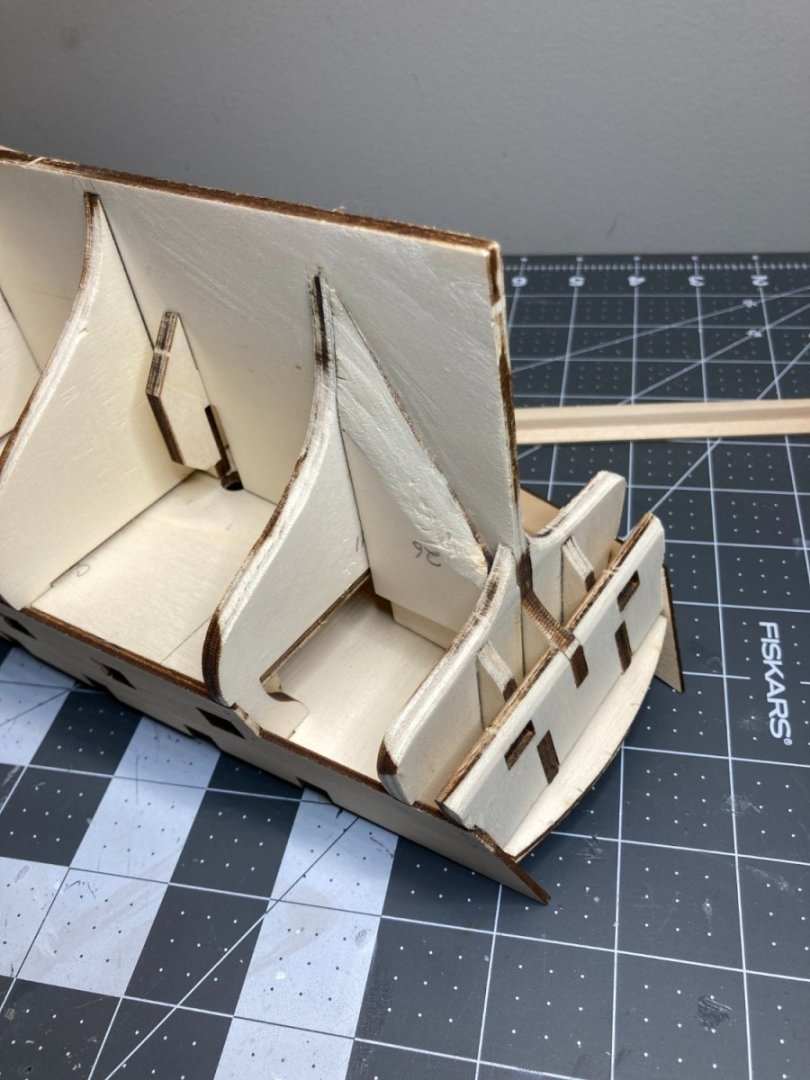
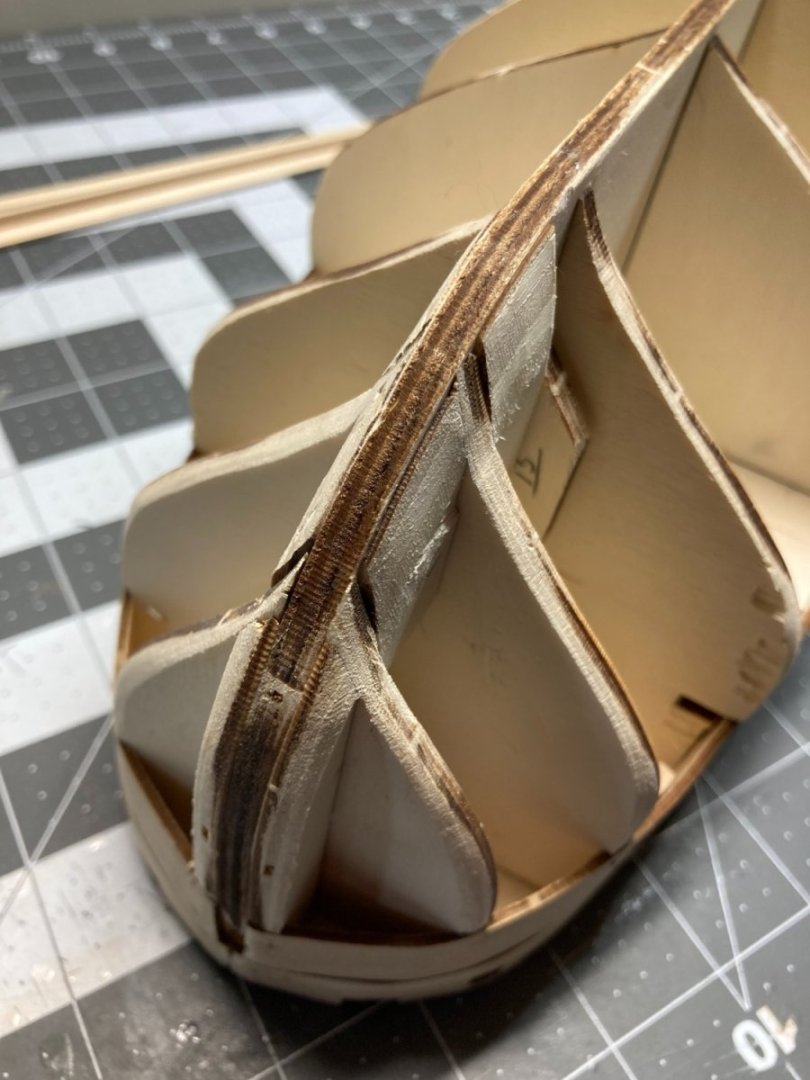
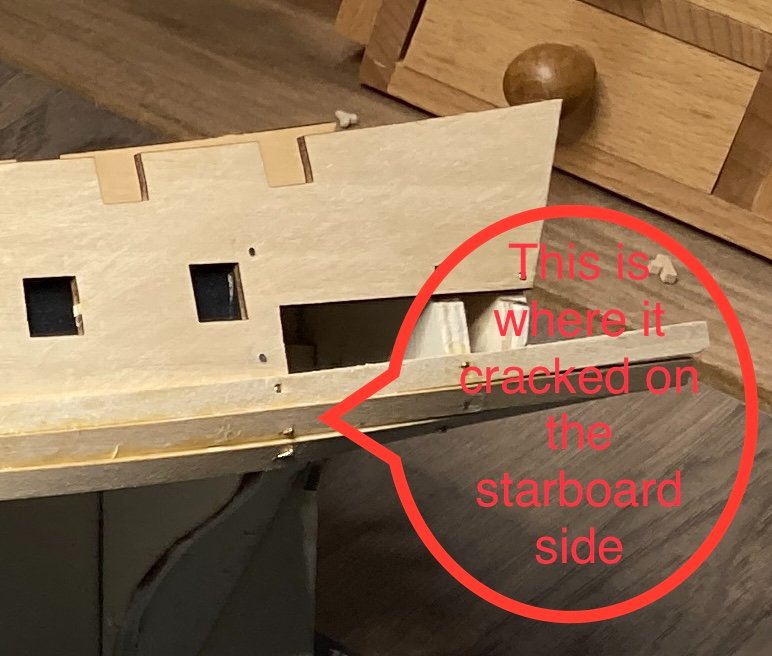
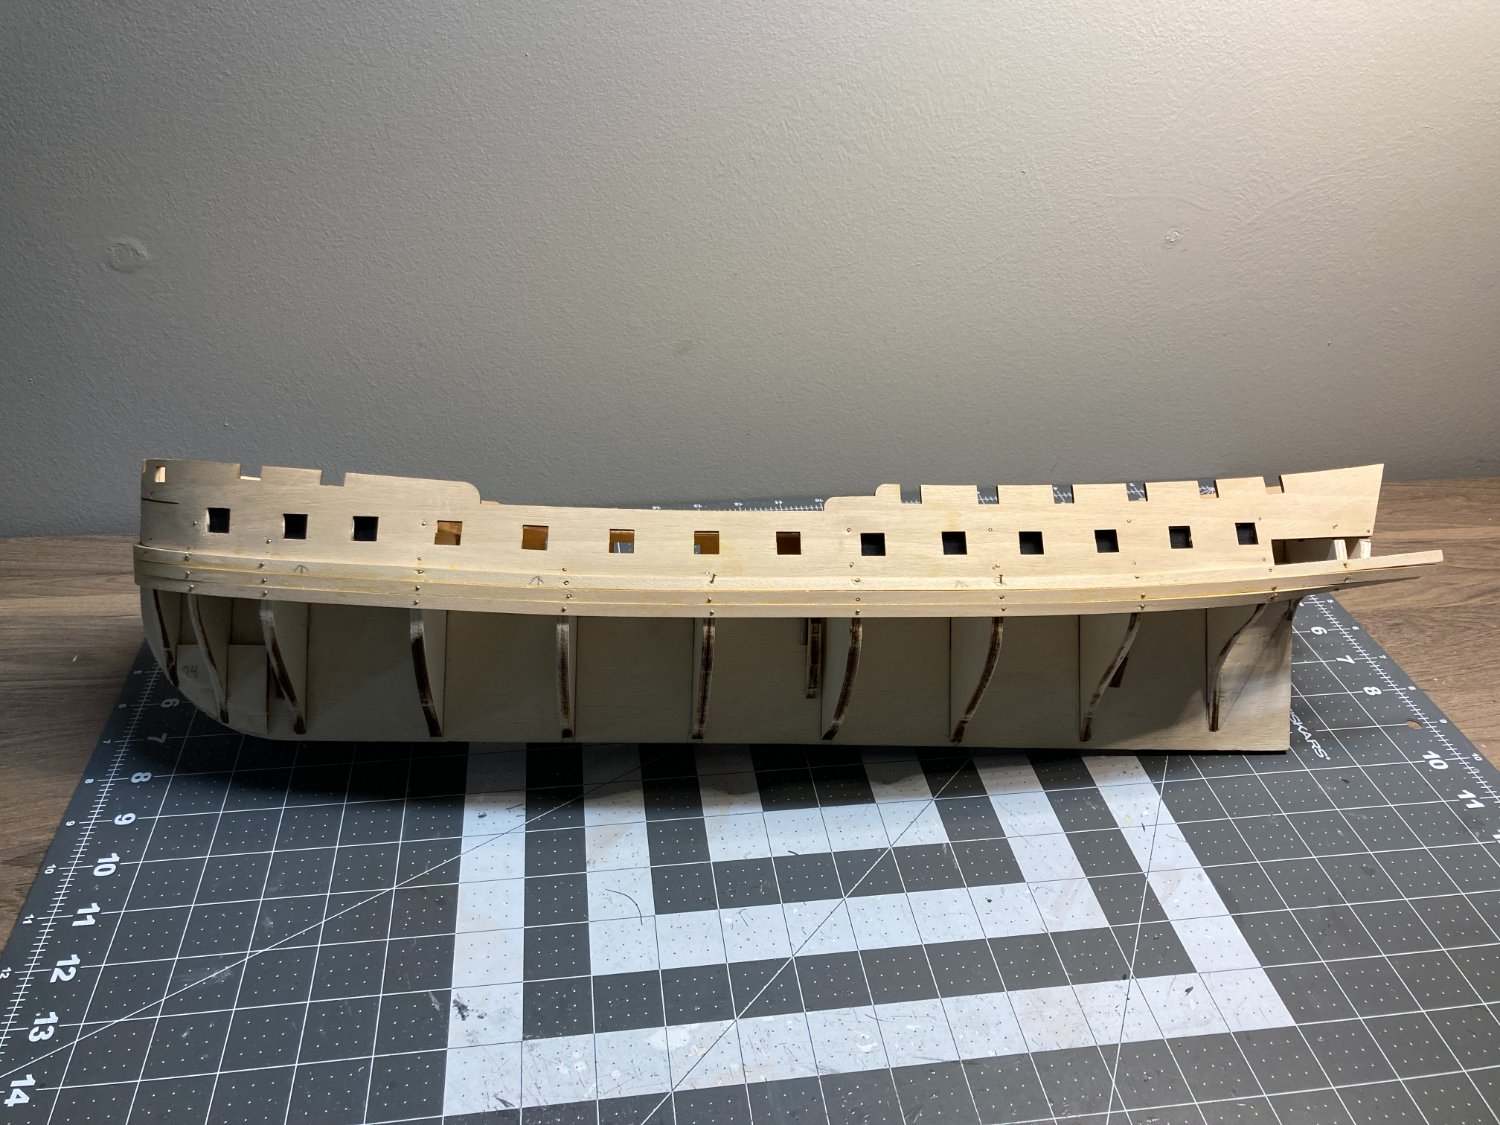
Next step was to add the first three planks below the bulwarks. I used the same technique to curve the bow portion as I used for the bulwarks with good results. I did have some issues with the second plank on one side. That plank needs to twist about 20 degrees near the stern. On the port side I was able to get this amount of twist without any soaking. However, on the starboard side the plank cracked from the twisting. Since this is a first layer of planking and there will be some sanding and filling before the final planking goes on, I decided to leave the cracked plank in place. After the glue dried it was very secure.

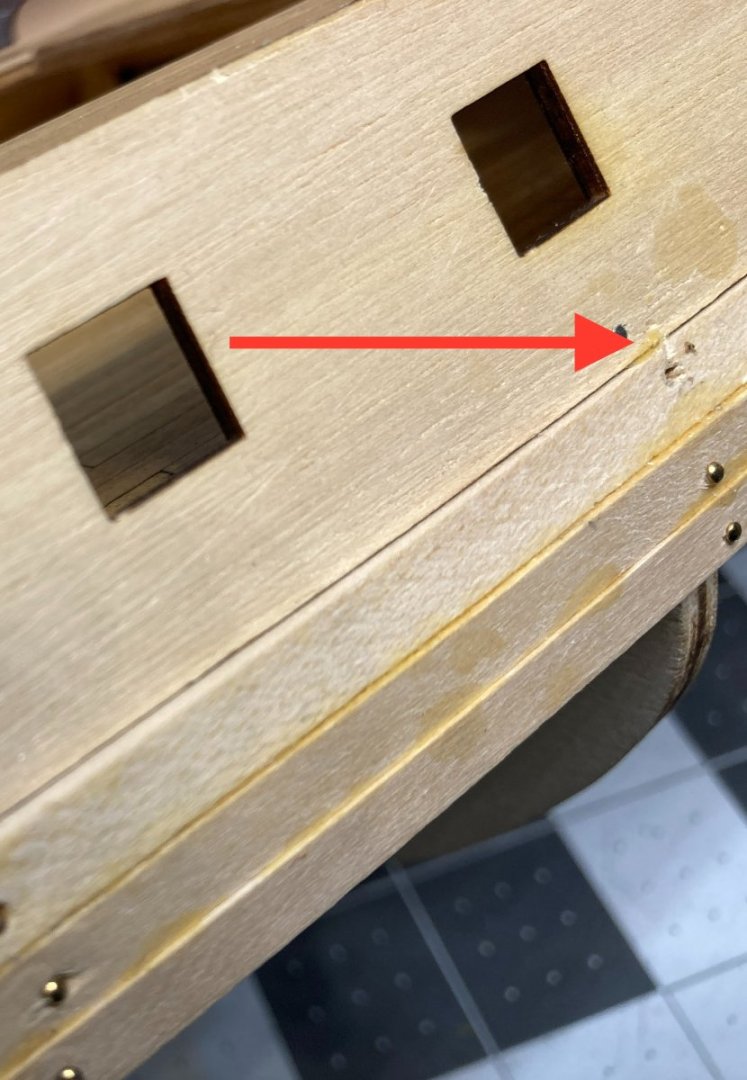
I had one other mishap with the first three planks. I didn't catch that one of the bulkheads should have been shimmed a little bit below the bulwark. When I add the planking over the bulwark there will be a large step that will be too big to sand out and I will need to use some wood filler.
One of my goals on this build was to do a better job on the first layer of planking to hopefully prepare myself for a kit that only has a single layer of planking. Not sure I am getting the result I hoped for, but at least I am learning some things. Occre kits aren't designed to cut a rabbet in the false keel so I can't completely follow some of the tutorials from MSW. I will be planning the planking using some of the techniques from the tutorials, and add the stealers and drop planks as needed and not follow the Occre instructions of using planks that come to a point.
I suspect this process will go pretty slow for me. I will post on my progress from time to time, but the posts could be a little sparse for the next couple of months.
- Esap, KurtH, Bill Morrison and 2 others
-
5
-
I personally think the natural lines created by your individual planks look great. I wouldn't add with pencil. I personally do not like penciled on treenails, but that is a personal preference. I think if you sand and finish your deck without any pencil marks it will look great. When your model is complete there will be very little empty deck space. I don't think not having the treenails will be an issue then.
-
7 minutes ago, Capella said:
No, actually, I haven't watched them yet. Although I'm pretty early in my build. But I'm sure as I progress, I'll have questions about how to do something, etc, and I'm sure the videos will come in handy then. I've heard good things about the videos.
Not sure what kind of glue you used on the deck, but Occre recommends using contact cement on deck, and the second layer of the hull. I don't think contact cement has a lot of fans on this forum, but I had really good luck with it. I had never used it before and the videos do a good job of demonstrating how to use it. I definately think you should consider it for the second layer of the hull. I have some photos of me using it on the deck of my Frigate Diana build log if you want to check it out.


HMS Beagle by Capella - OcCre - 2nd build
in - Kit build logs for subjects built from 1801 - 1850
Posted
I sent you a DM with some links related to the Beagle. Let me know if you have any questions.