Rustyj
-
Posts
2,535 -
Joined
-
Last visited
Content Type
Profiles
Forums
Gallery
Events
Everything posted by Rustyj
-
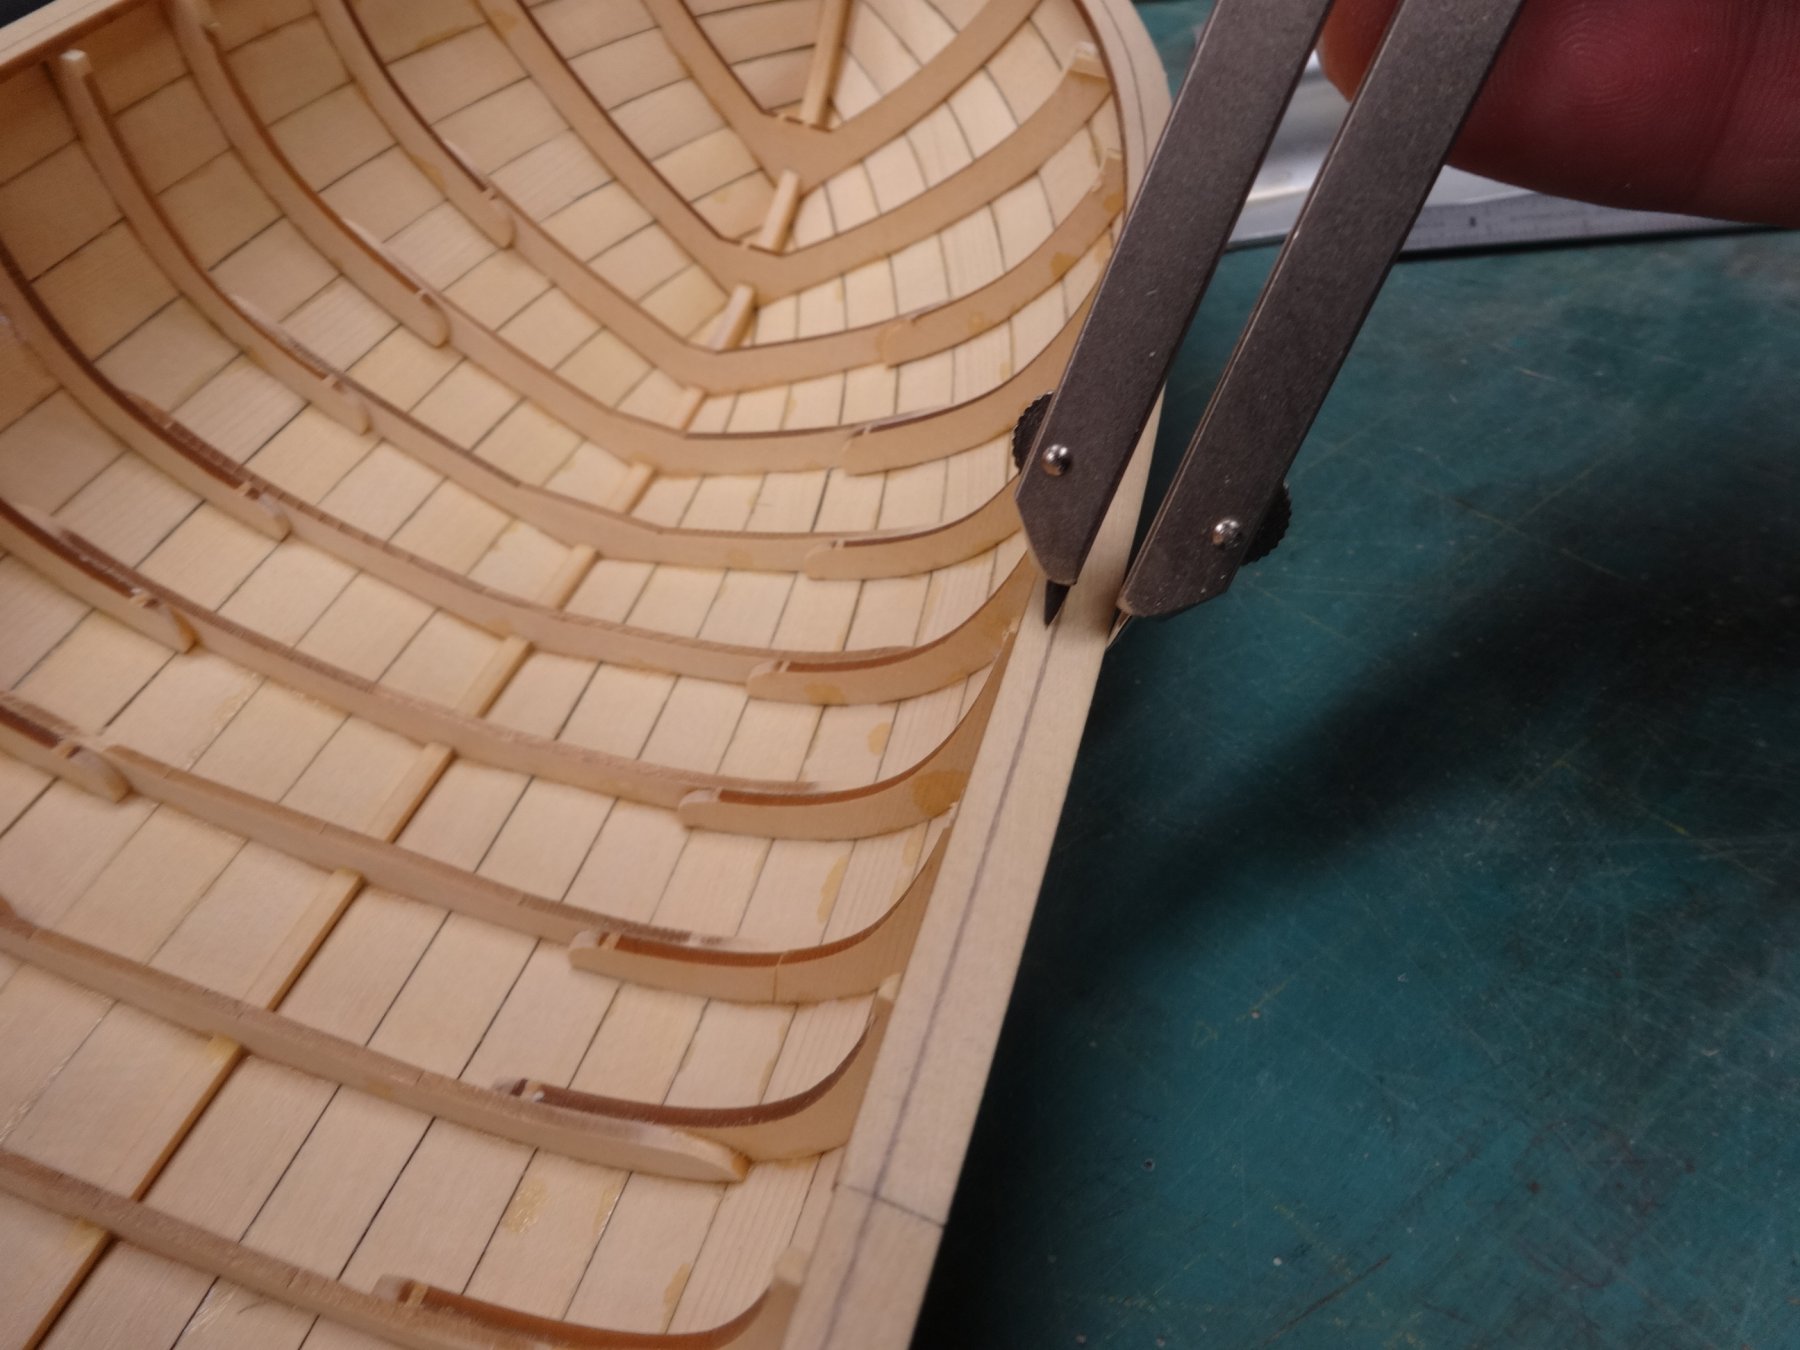
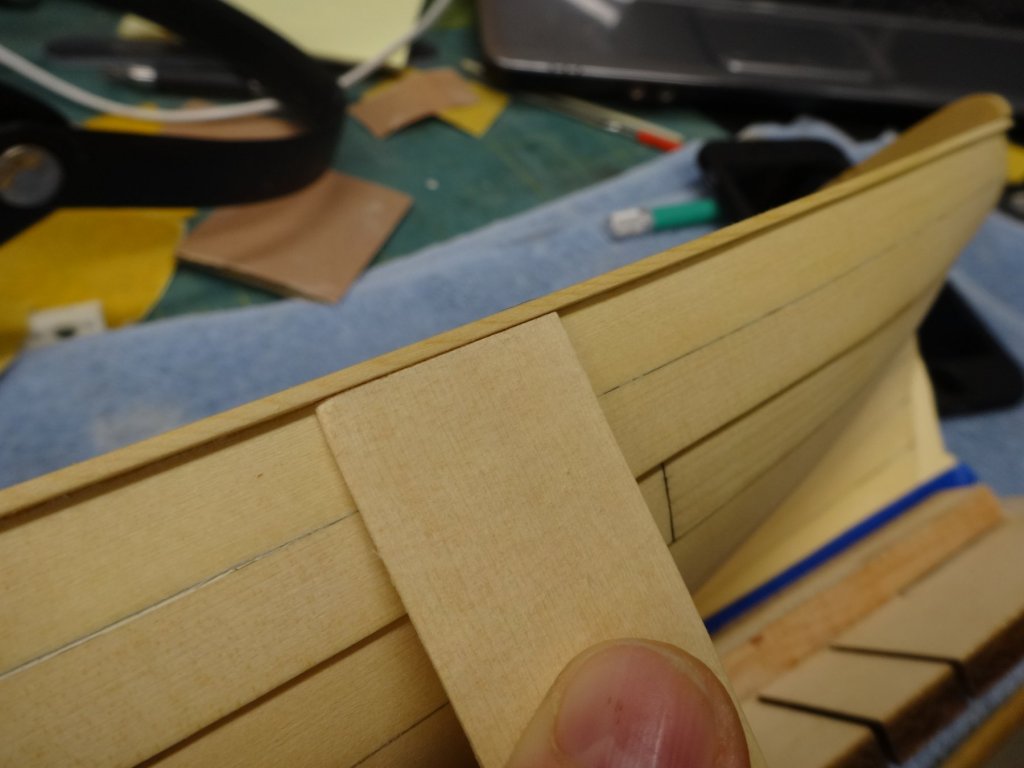
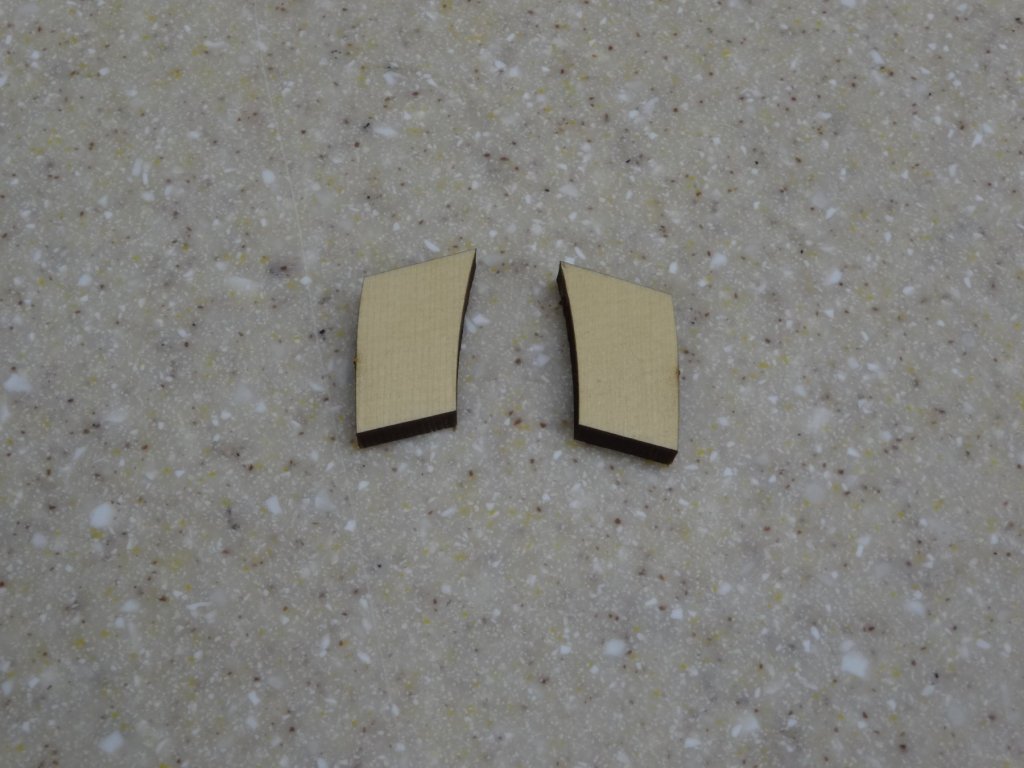
 The cap rail was trimmed to fit and added. While the glue dries the bolsters were formed and then fit at the bow. There are multiple angles to sand and cut into it. Once they were fit the outboard side of the cap rail was sanded down to 1/32". I used a scrap piece of 1/32" wood to keep checking my progress. The starboard side sanded to 1/32" and bolsters in place. Once the outboard was sanded I used a compass to mark the 5/32" thickness the cap rail needed to be sanded to. Next the inboard cap rail will be sanded to the correct thickness as well as the frames.
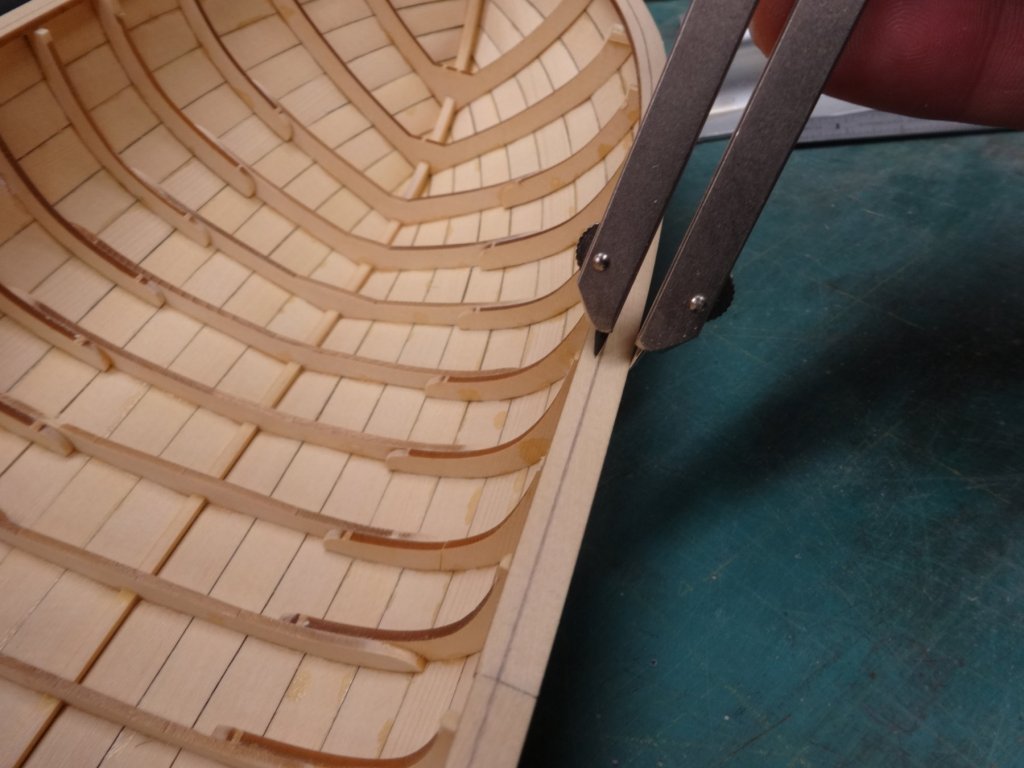

- 152 replies
-
- 13
-

-
- medway longboat
- Syren Ship Model Company
- (and 1 more)
-
Yeah Steve I'm not sure that's something you want to have in common with me.
-
Thanks Steve and Chuck. Having a lot of time to build is a real bonus plus all the fun of building her!
- 152 replies
-
- 1
-
-
- medway longboat
- Syren Ship Model Company
- (and 1 more)
-
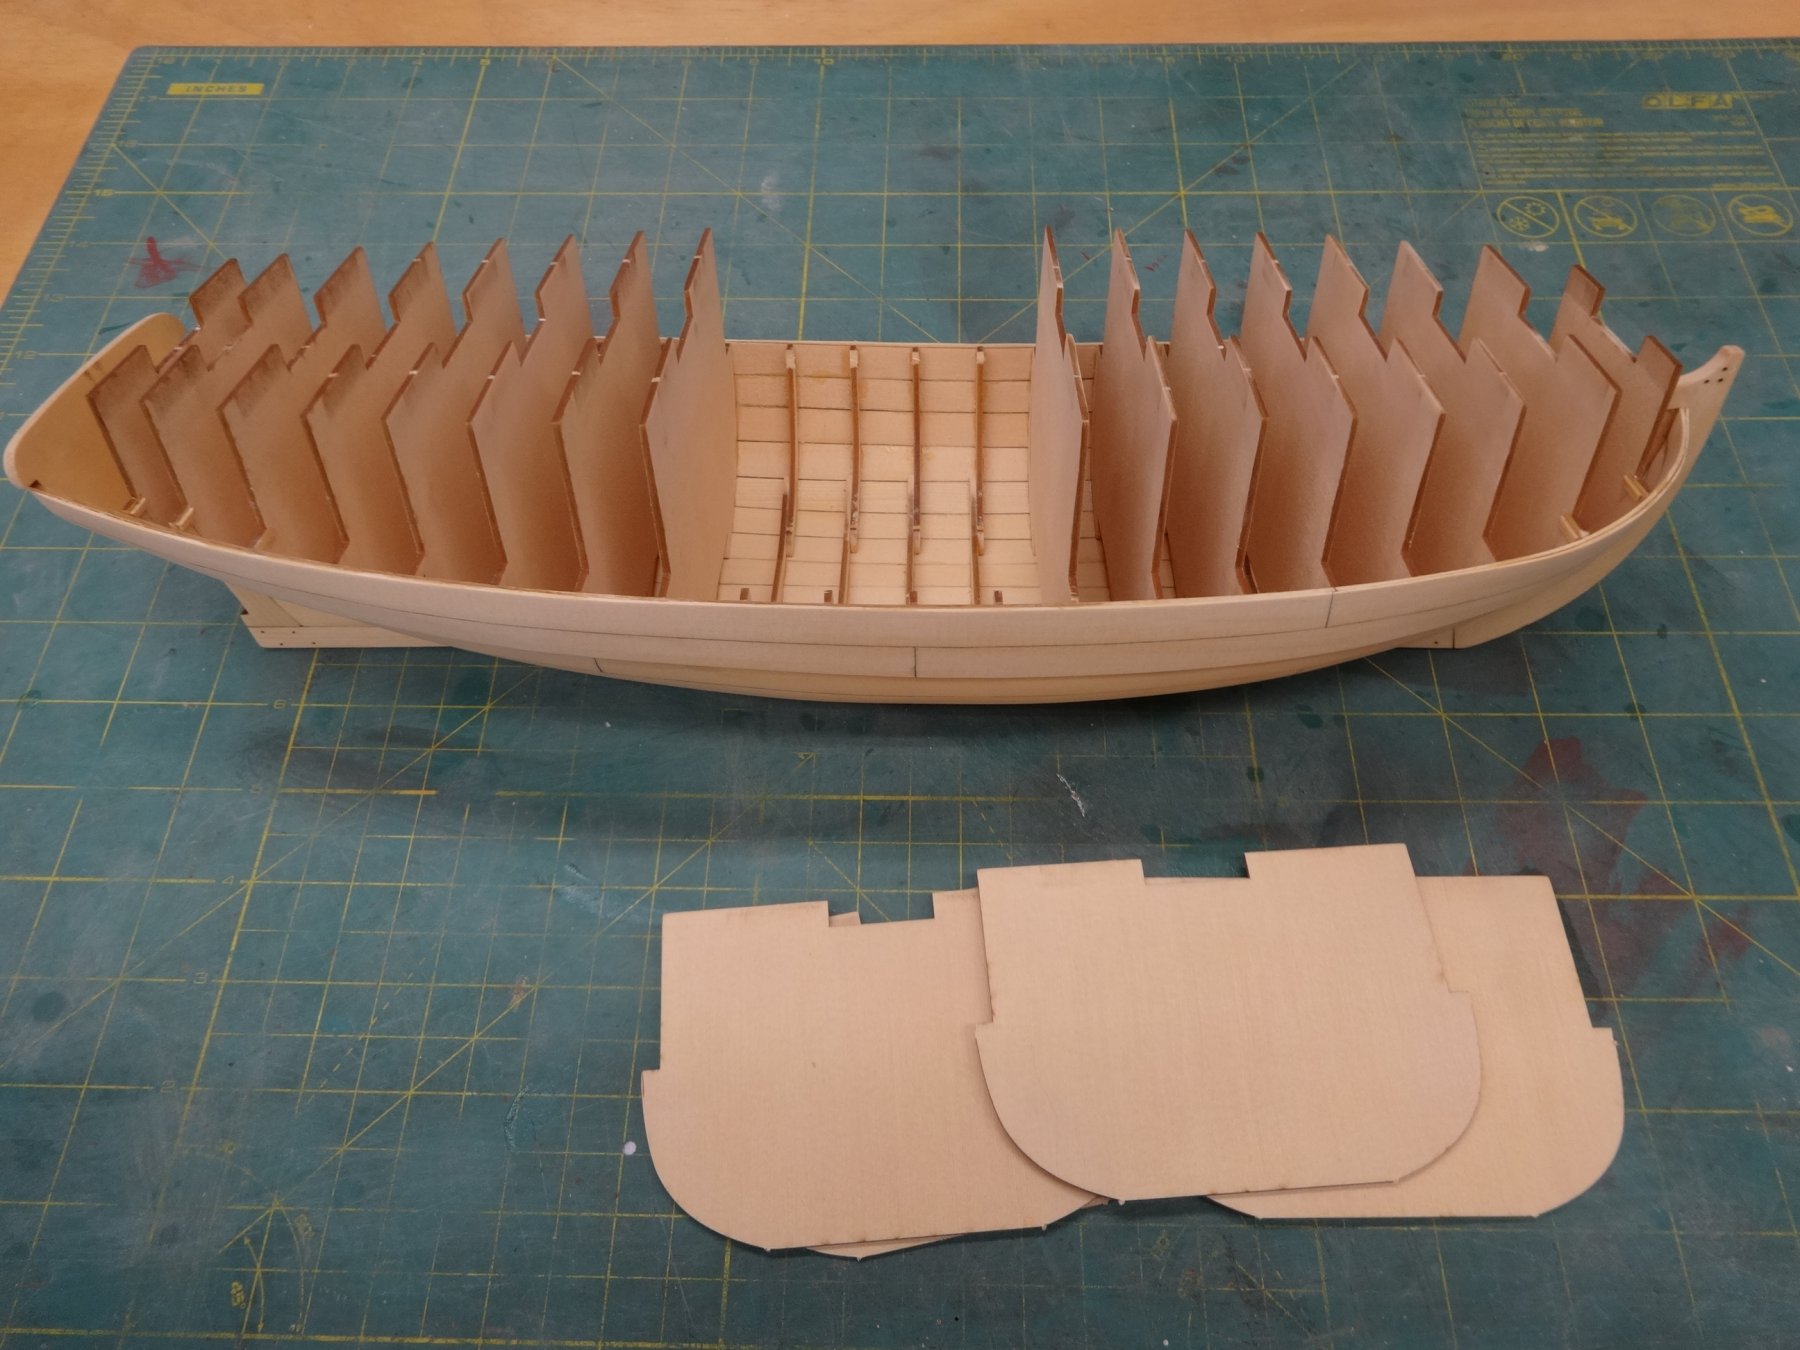
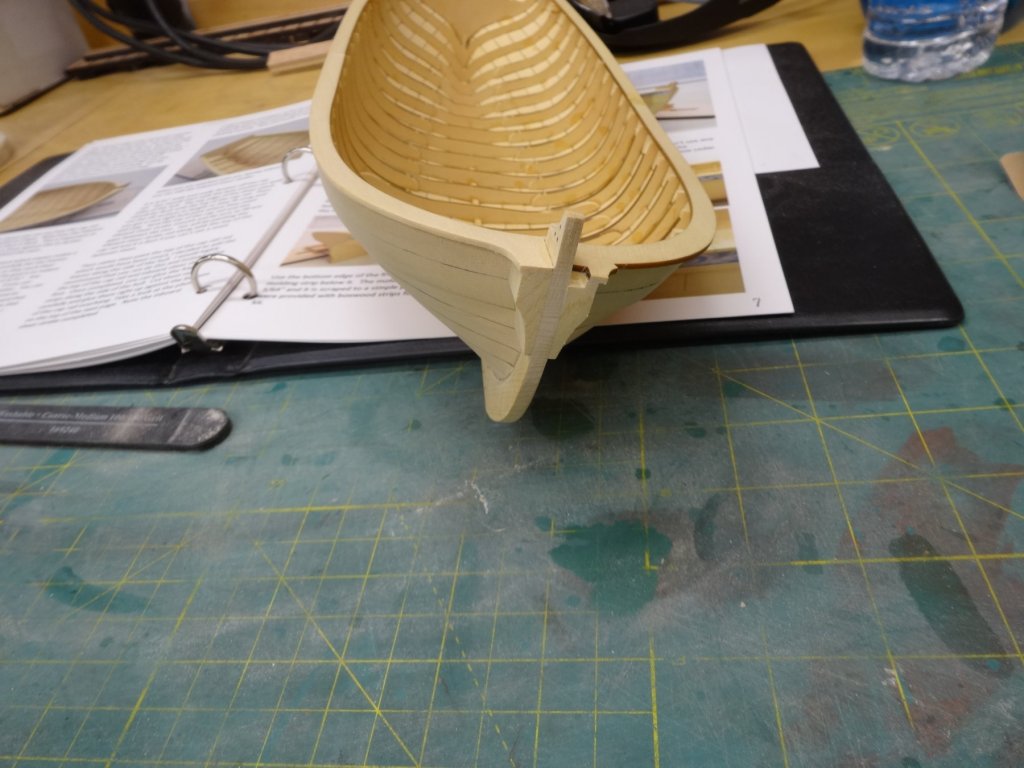
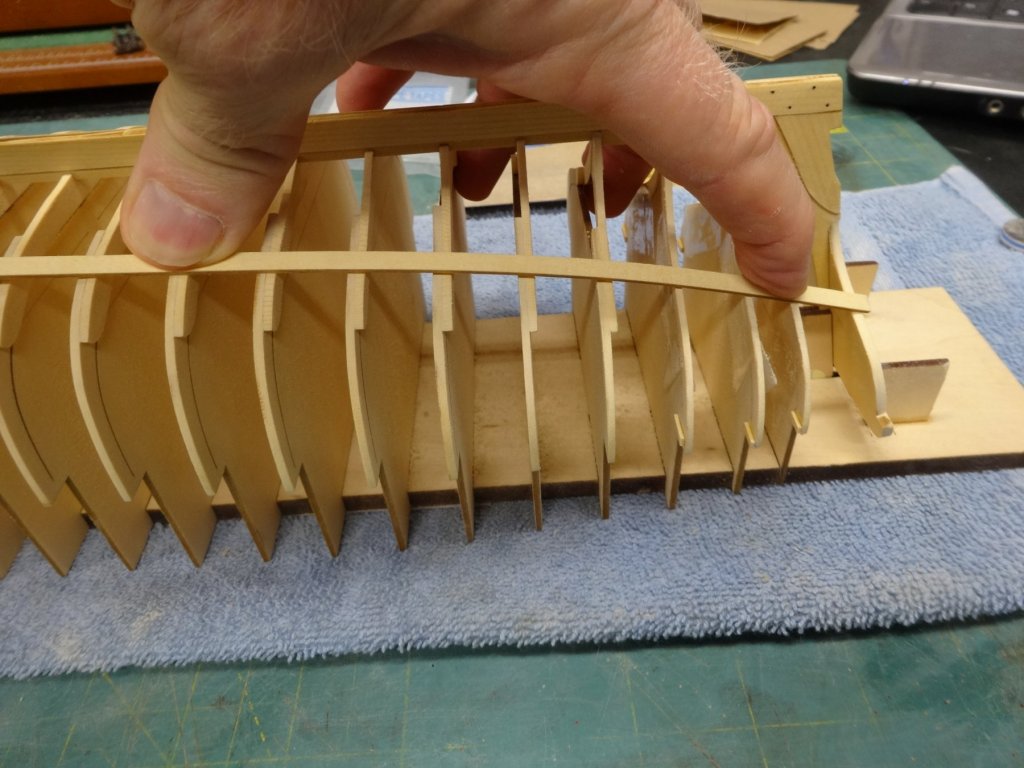
Thanks Ken and Ben! Well she's been freed from the building board. I removed the tape, the braces from the bow and stern, took the fore section and grabbed the starboard side, lifted and it rotated free with no issues. I repeated with the stern section with the same results. I used a razor saw to cut the top tabs of the frames and the flexed the center piece fore and aft and it came free nice and clean. I then glued the building board back together, added a couple of scrap strips the width of the keel and now it will hold the model again.


- 152 replies
-
- 21
-
-
- medway longboat
- Syren Ship Model Company
- (and 1 more)
-
Good catch and recovery! I don't envy you having to redo the frame marks though!
-
Thank you Rich and thanks for all the likes.
-
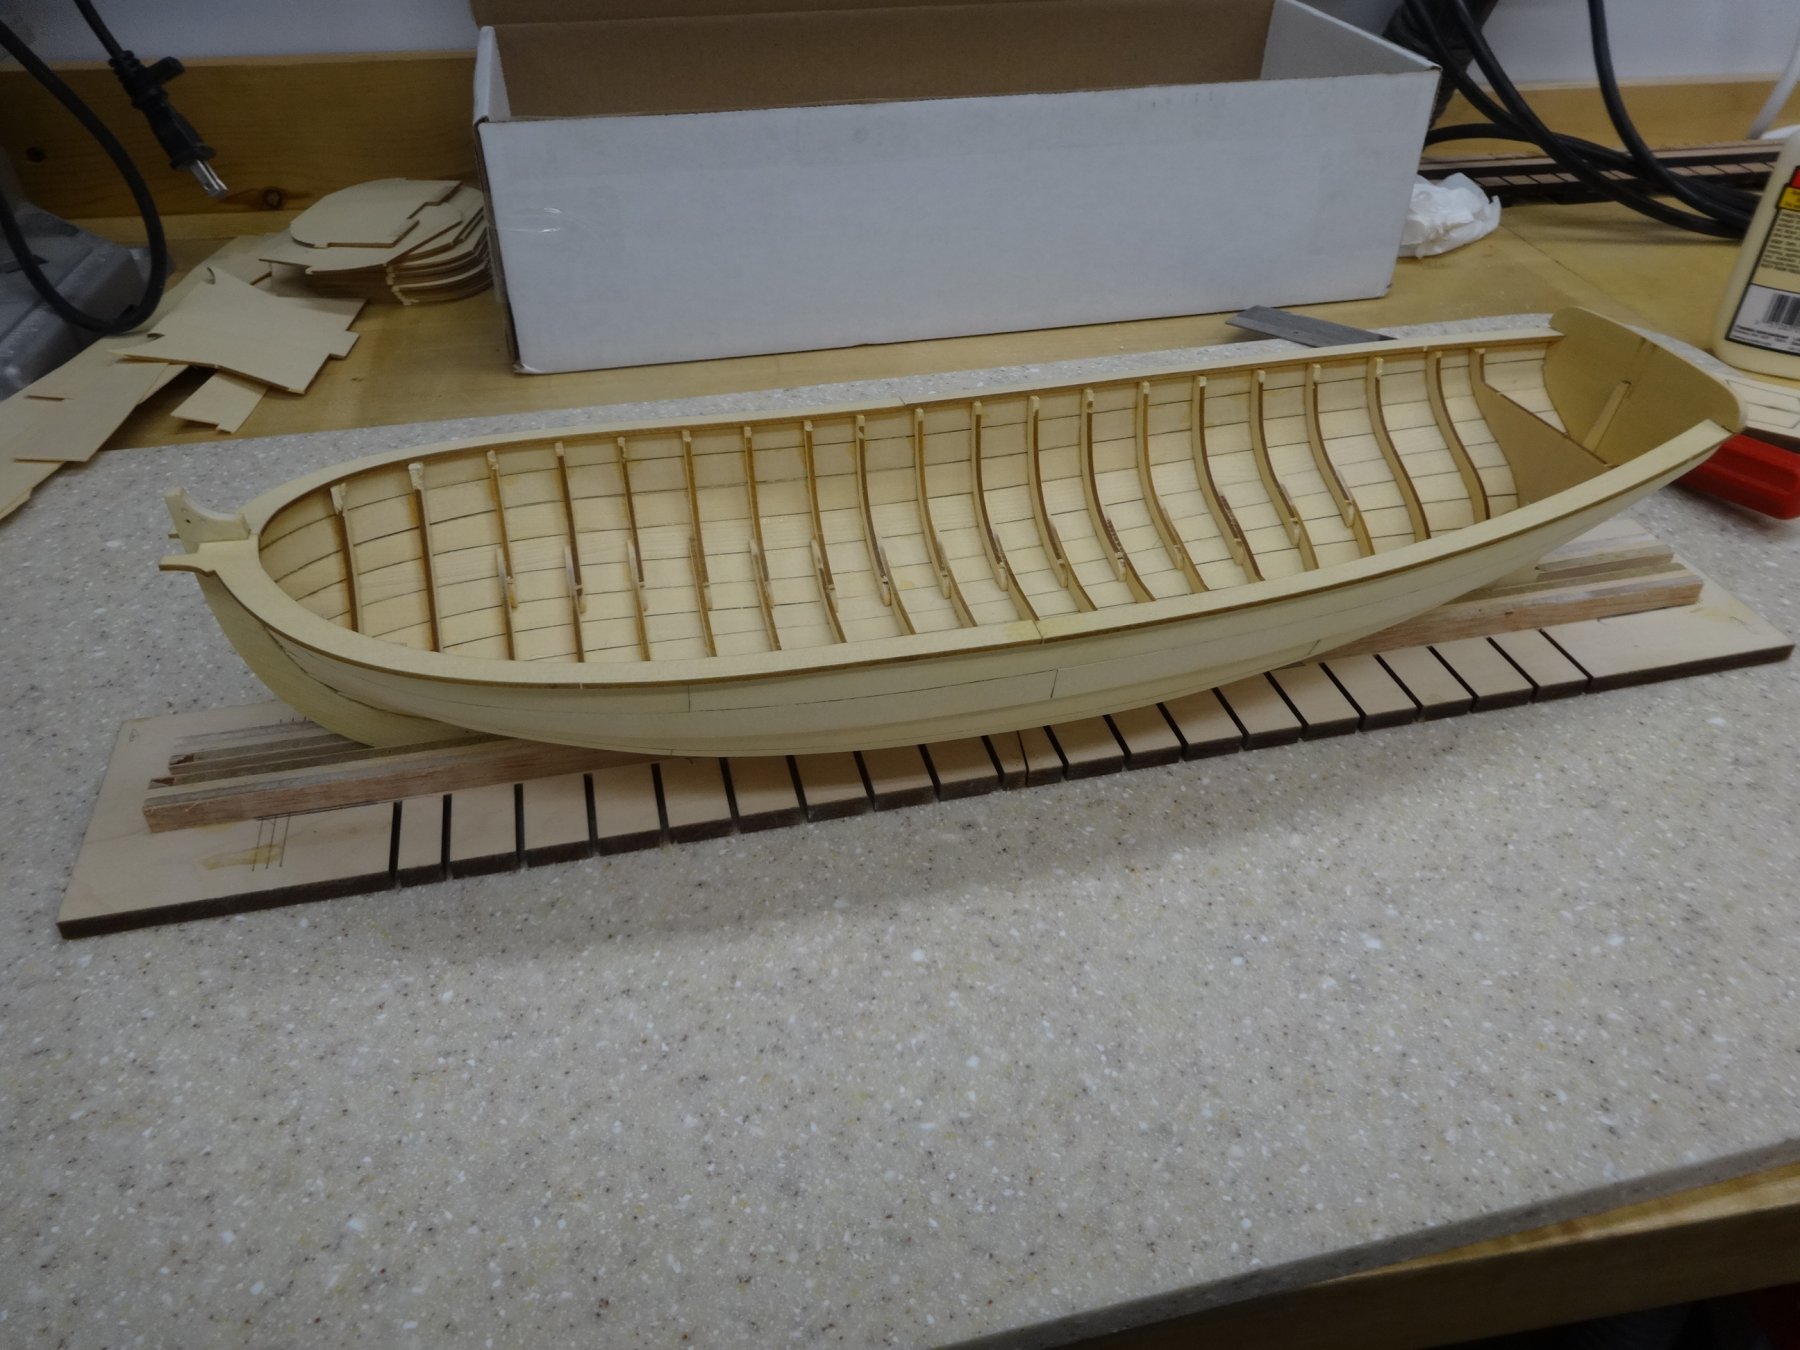
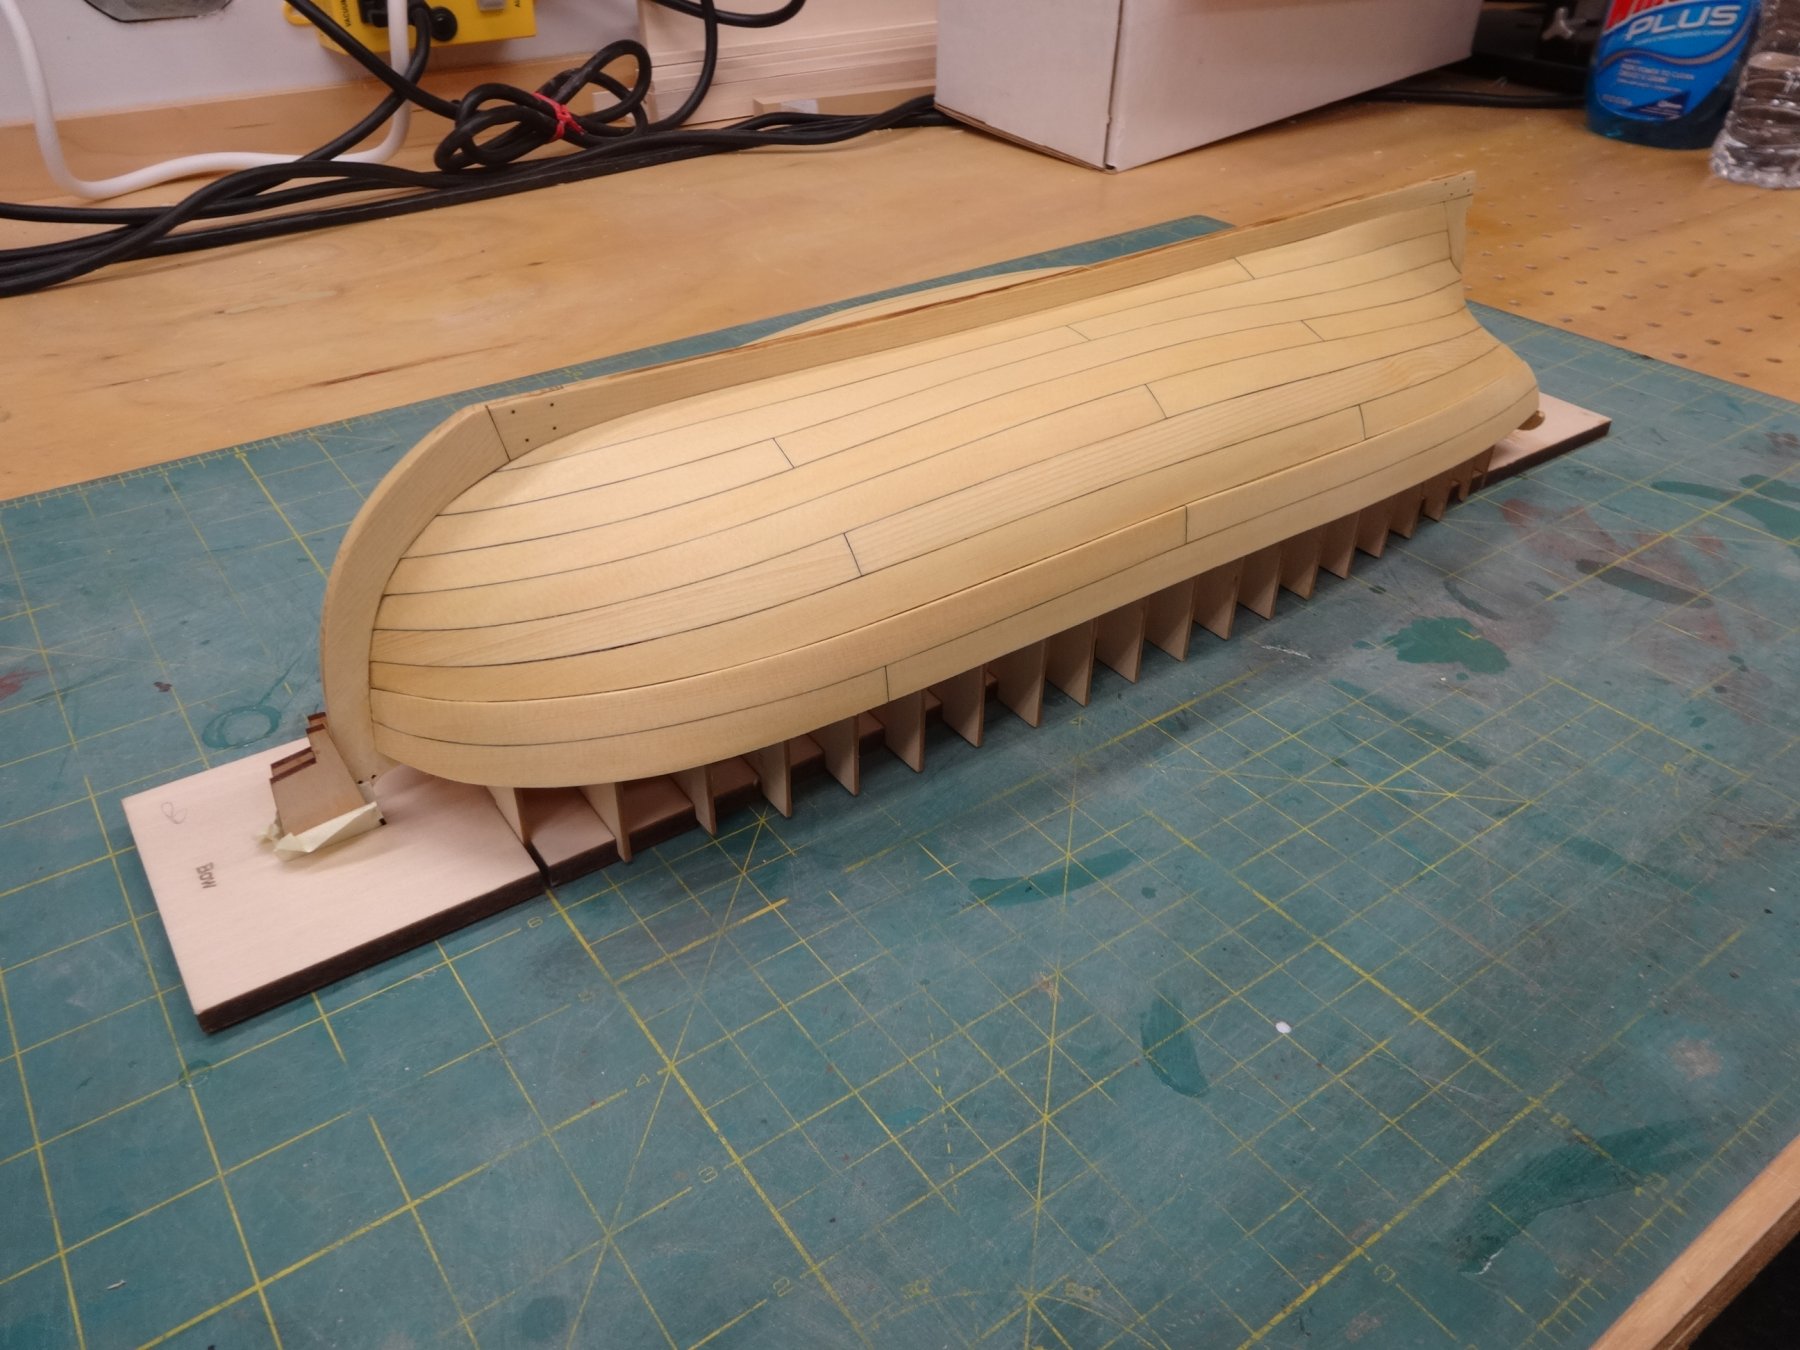
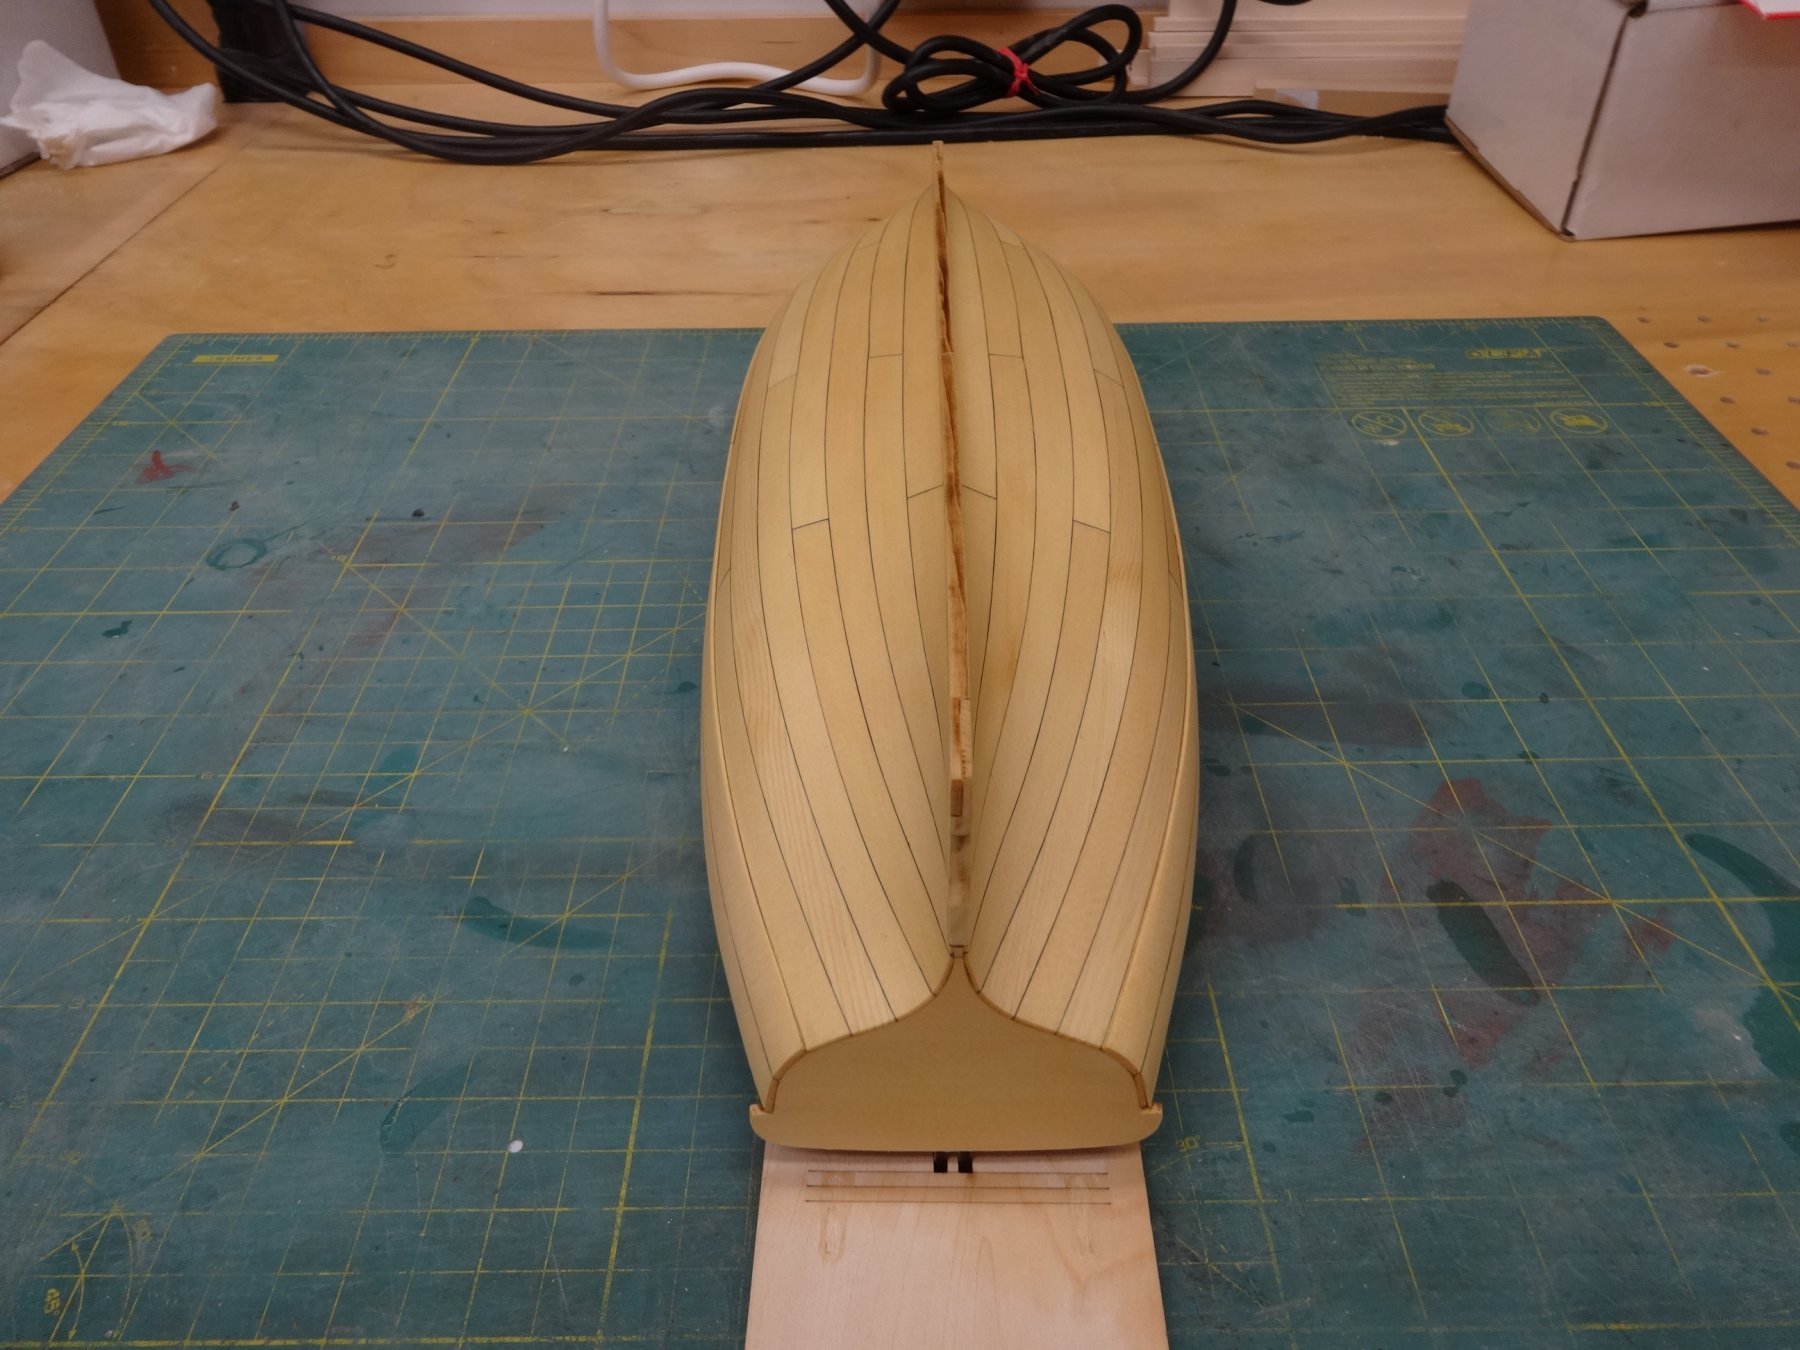
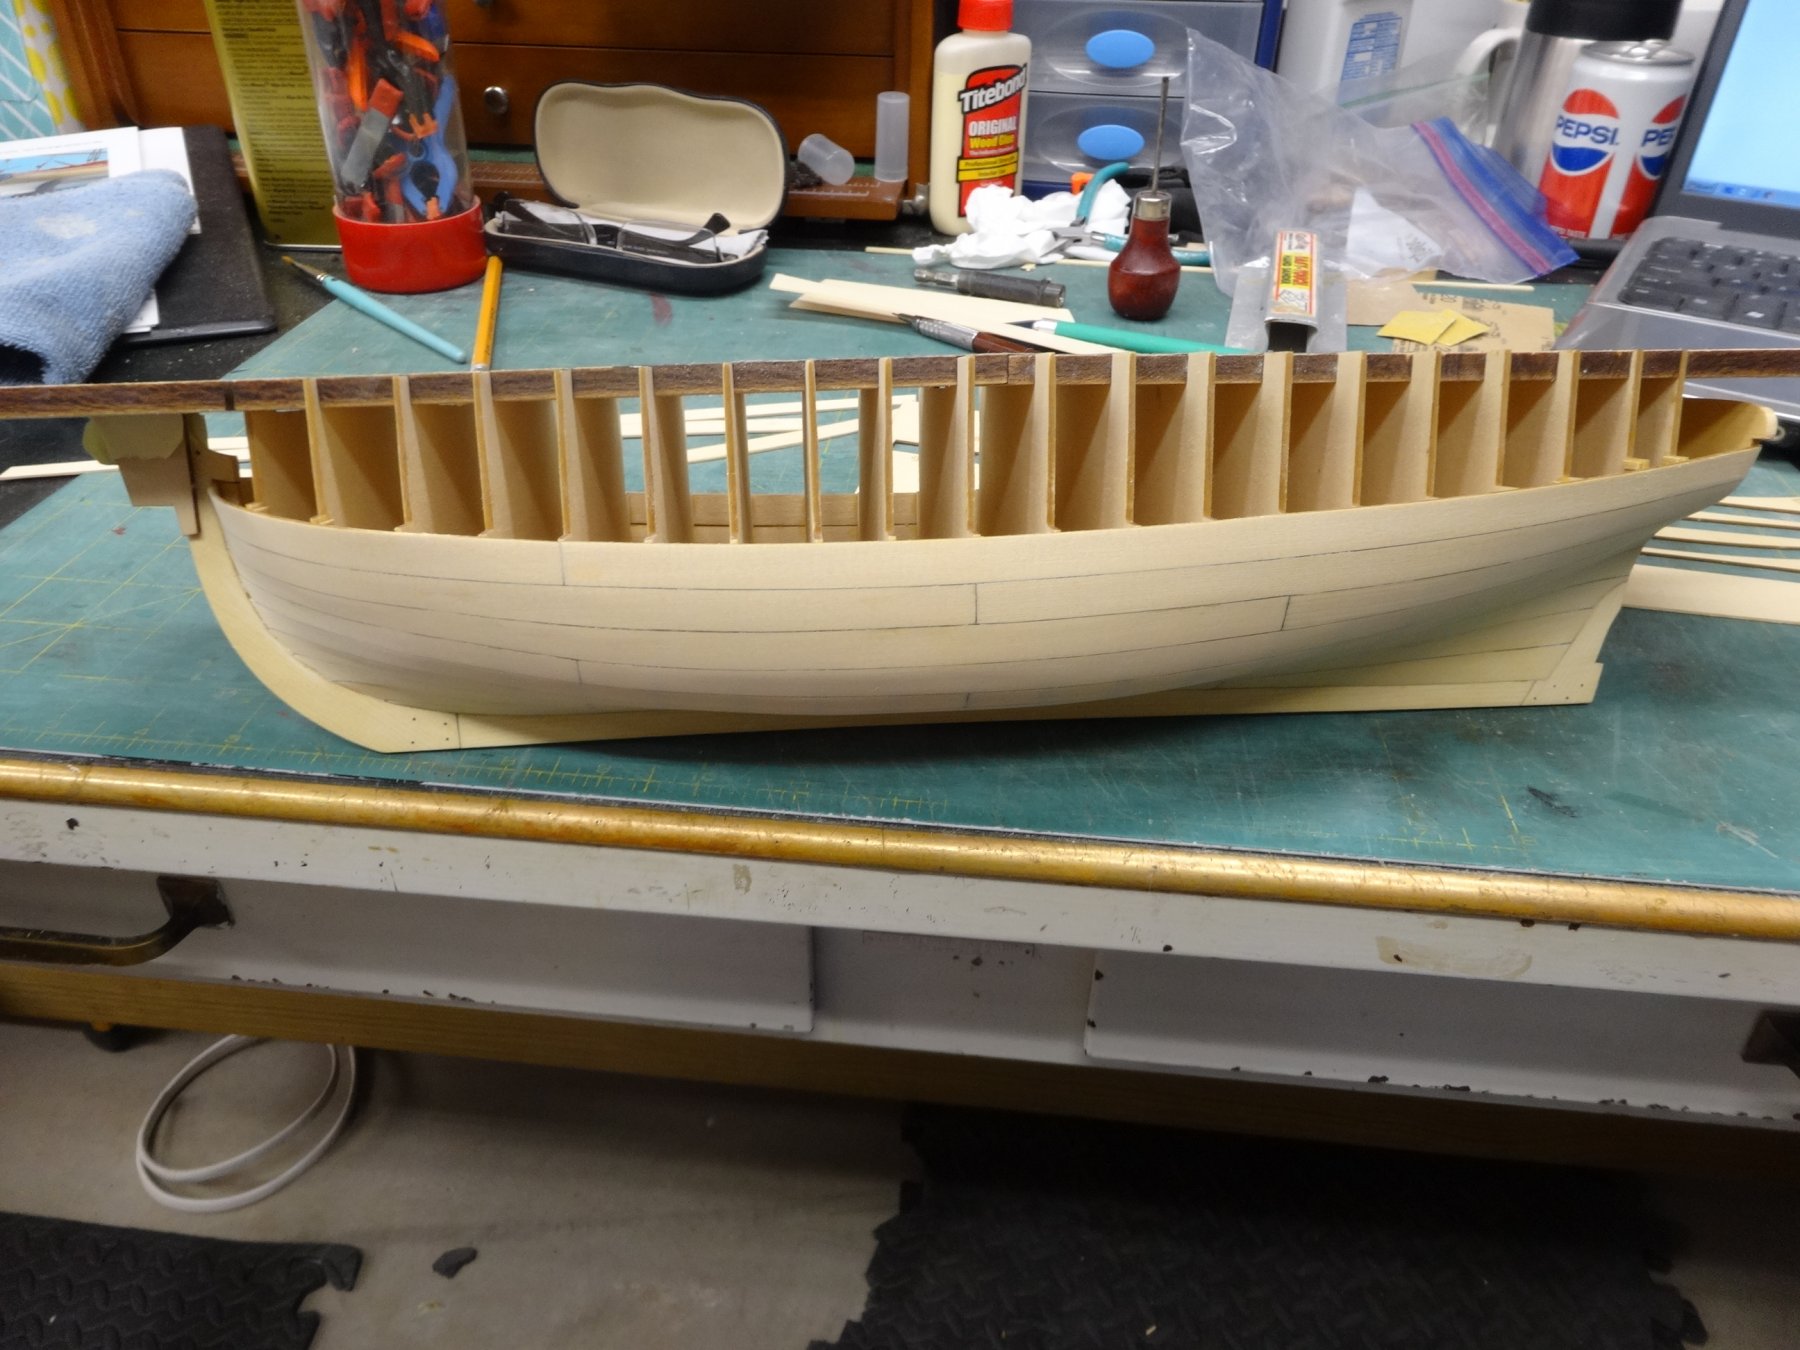
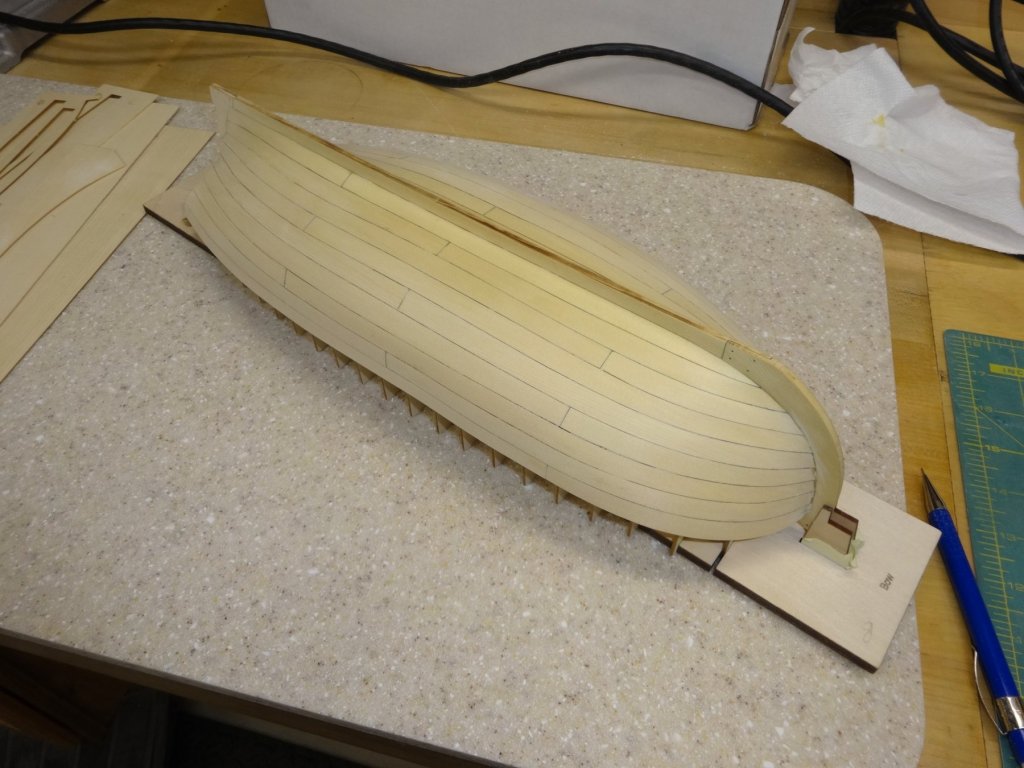
Thanks Joe and Capt Morgan. Sorry for the delay as I was out of town for a couple of days. Ok the planking has been completed. Here is the hull prior to adding the wales and a preliminary sanding with 220 grit. and then after the wales were added. The wales was just a second layer of 1/32" layed over the last two strakes. The last five strakes were the most challenging requiring slow minor changes and constant checking. I had about 20 hours invested in those five strakes. As I said before the pre-spiled planks were awesome. Now it's time to set her free from the building board.


- 152 replies
-
- 23
-
-
- medway longboat
- Syren Ship Model Company
- (and 1 more)
-
I don't know if it is right or wrong but I did them one at a time.
-
Thank Joe! Also all the likes. Much appreciated.
-
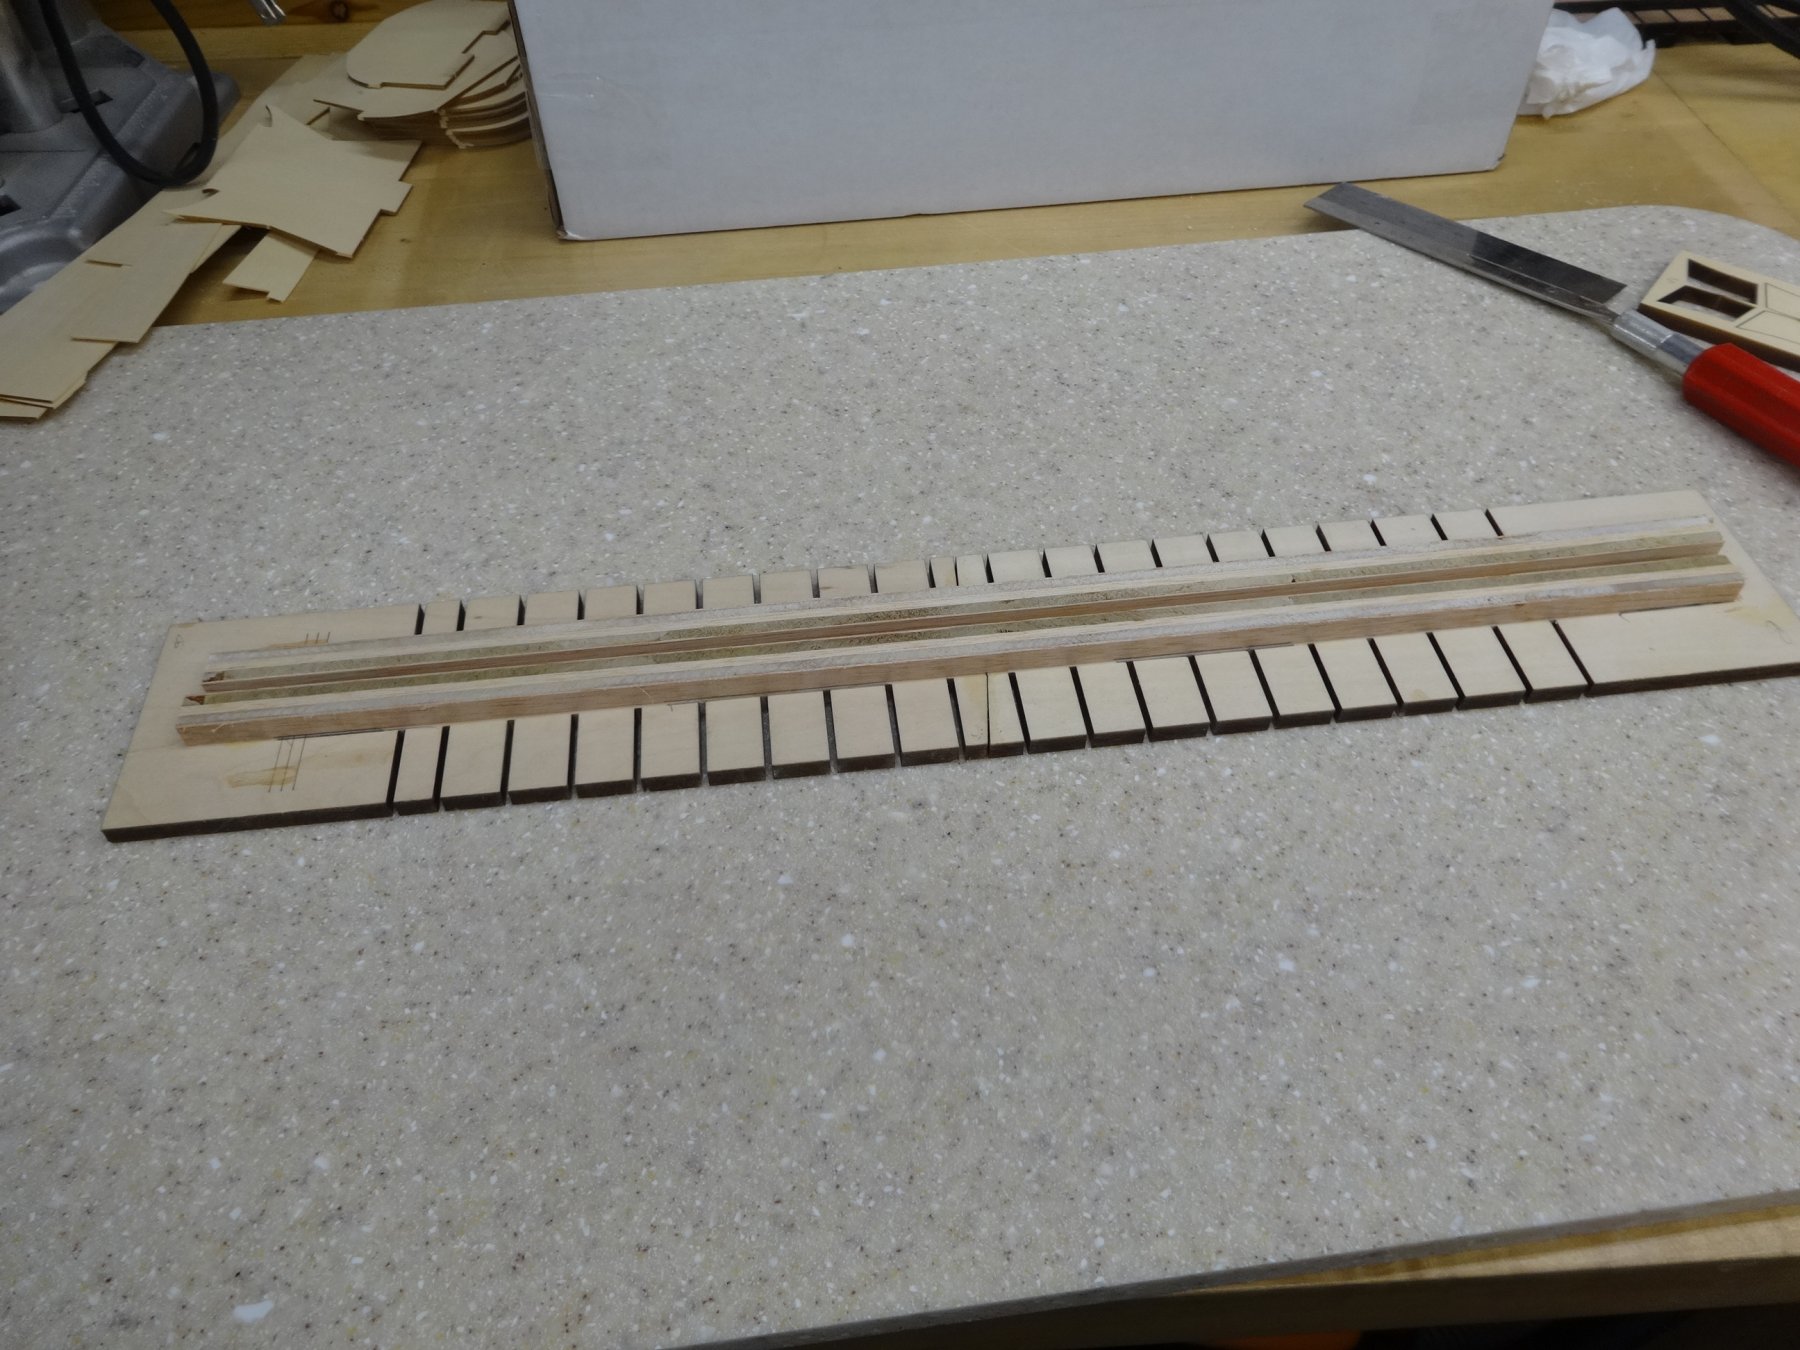
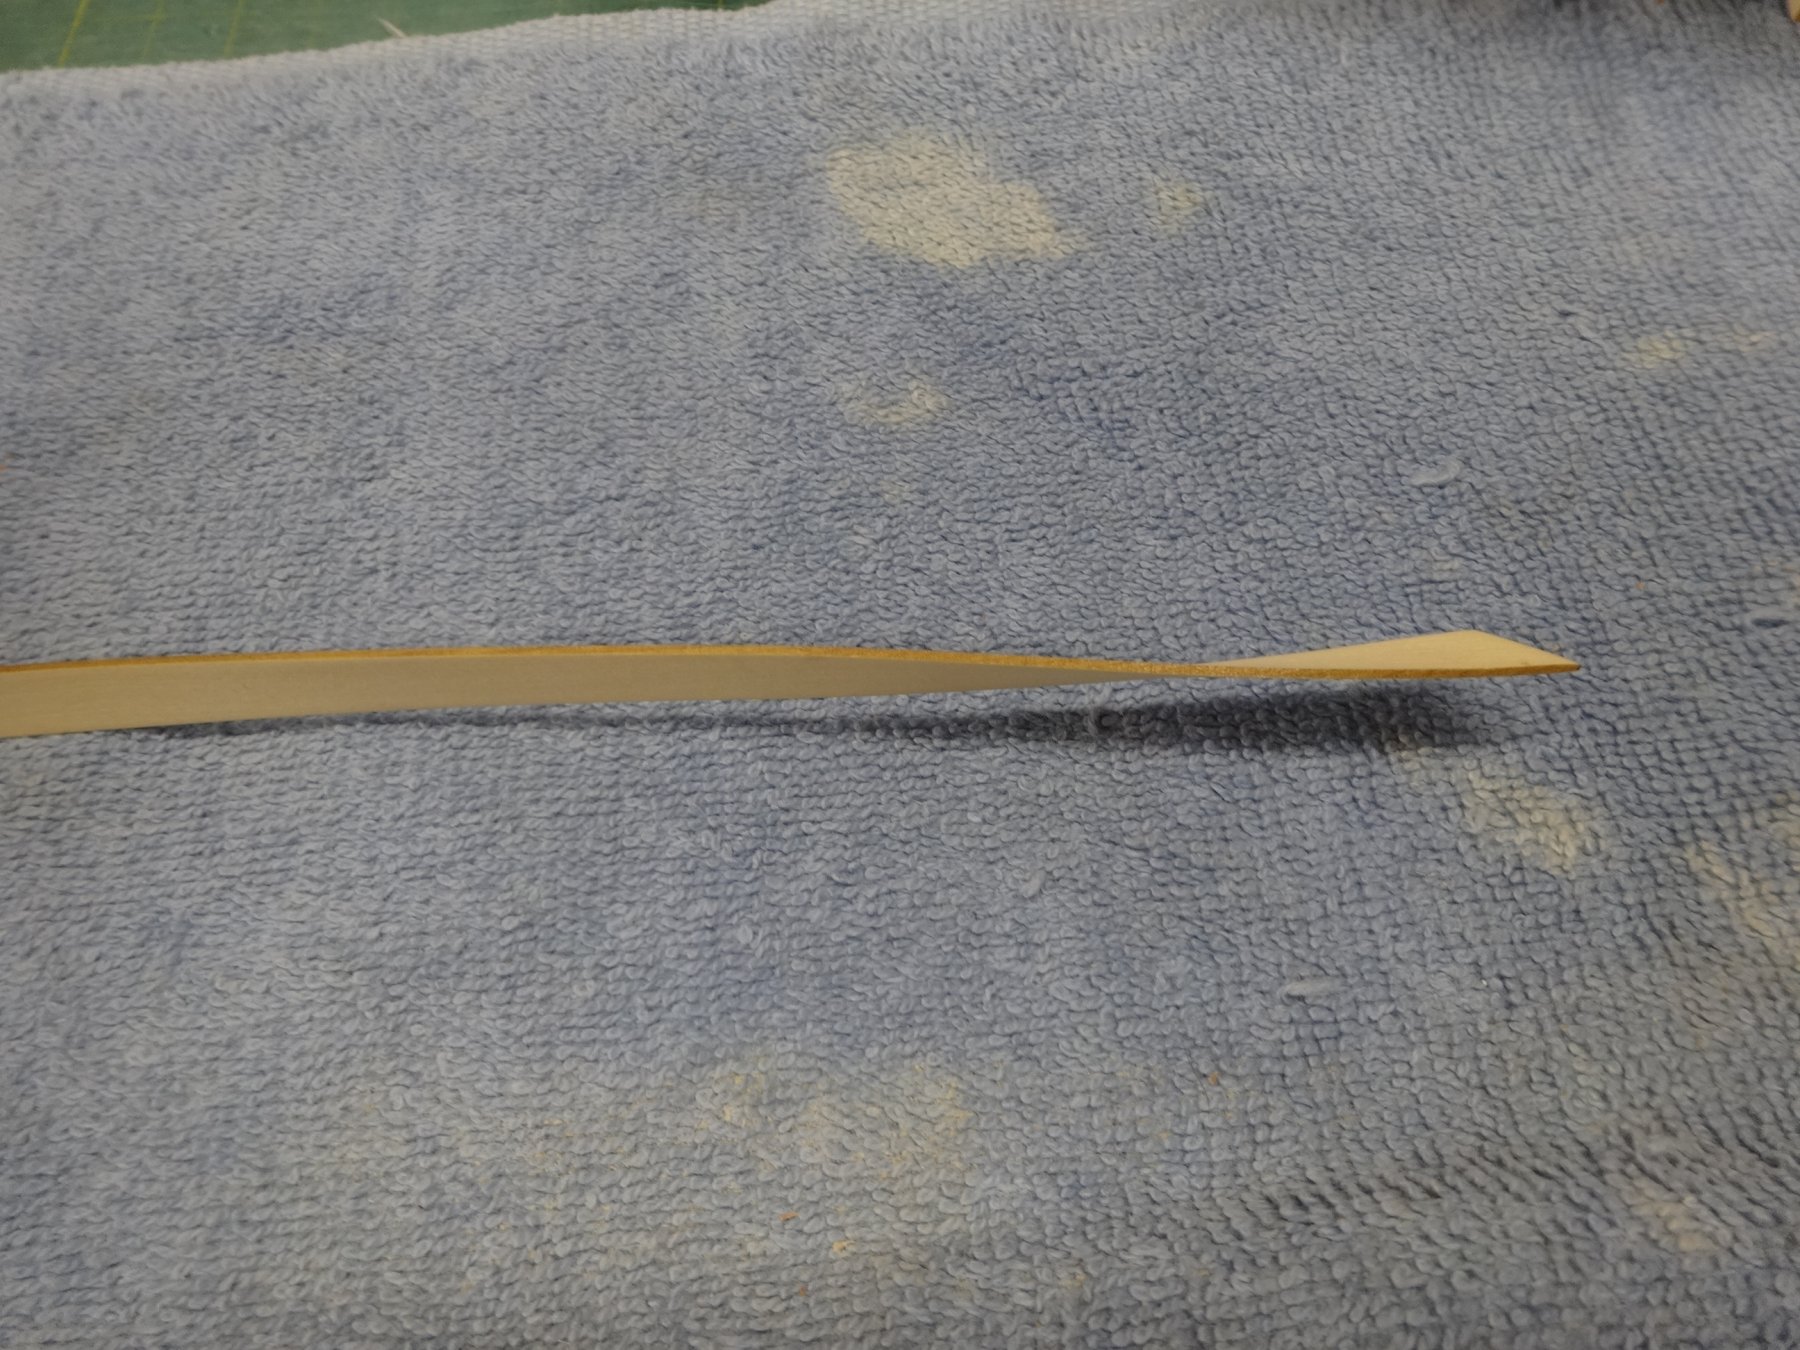
Ok a bit of warning here. If you are anything like me you WILL either break a plank or over sand/adjust one or more. I have 3 racked up so far. Here is what I did to get a nice new plank almost as good as the original. First off be careful removing the planks from the sheet and set it aside not breaking it just in case you need to make a copy. I took the sheet that the broken plank came from, clamped it on an area of another planking sheet that it would fit on. I then traced the plank, cut it out carefully sanded it and test fit it. Hopefully you won't need to do this but just to be safe save those sheets the planks came out of.
- 152 replies
-
- 15
-
-
- medway longboat
- Syren Ship Model Company
- (and 1 more)
-
Thanks Jeff and Grant and all the likes too! I'm also looking forward to watching both of you builds.
-
I agree. Chucks end points were more accurate to the actual run of the planks. Nice start
-
You're on your way now Brian. Very nice!
-
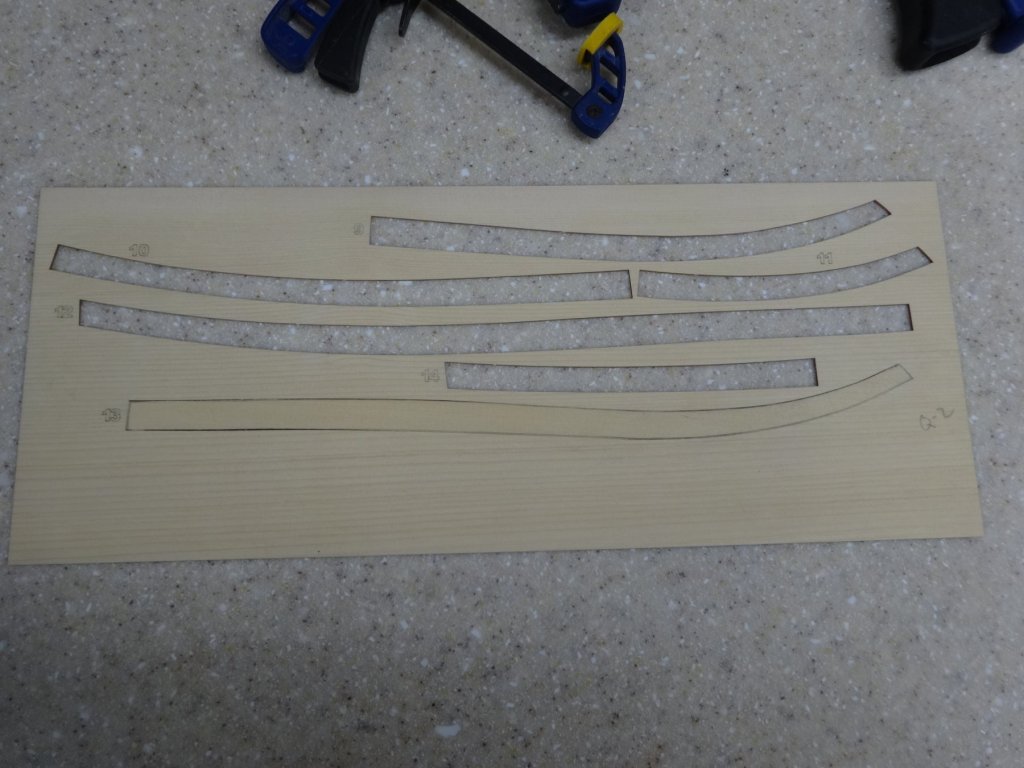
Here are the first four starkes in place. The pre-spiled planks are real nice and save a lot of work but still require work on our part. A lot of time was taken with each piece. Heat, bend, very lightly sand any portion that needs it and repeat over and over until a nice fit is obtained. As the AYC is a bit softer than boxwood I used fine sanding sticks and files as anything course would take too much wood off.Slow and steady really applies to the planking here. Though not as nice as Chucks I'm happy with it.
- 152 replies
-
- 19
-
-
- medway longboat
- Syren Ship Model Company
- (and 1 more)
-
And you're off! Nice start Ben!
-
It'll be great to see you build this. Looking forward to your return to the shipyard.
- 109 replies
-
- 1
-
-
- medway longboat
- Syren Ship Model Company
- (and 1 more)
-
Go for it Ben. You know you want to! Thanks for the kind words and all the likes too!
- 152 replies
-
- 1
-
-
- medway longboat
- Syren Ship Model Company
- (and 1 more)
-
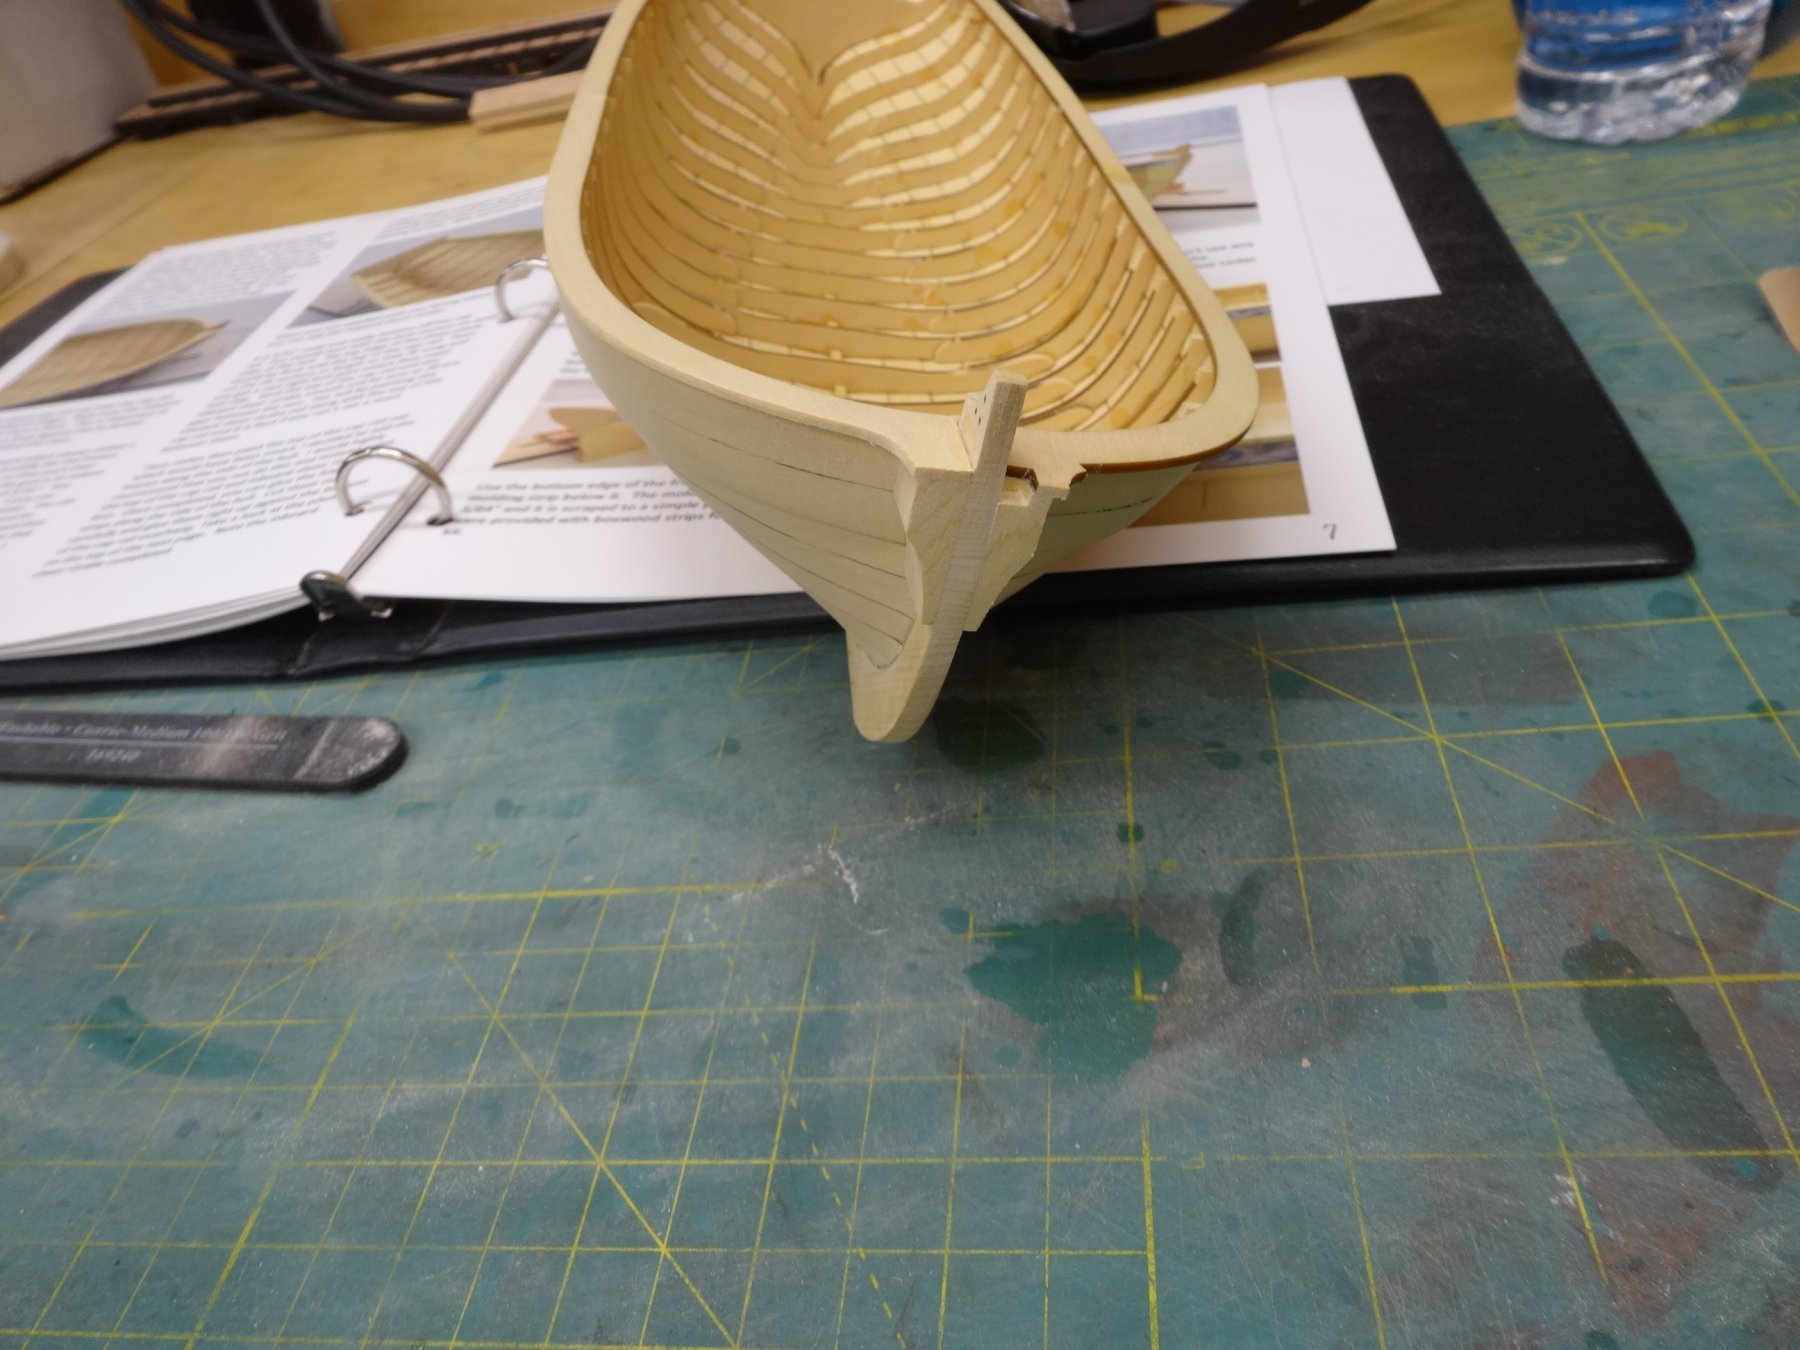
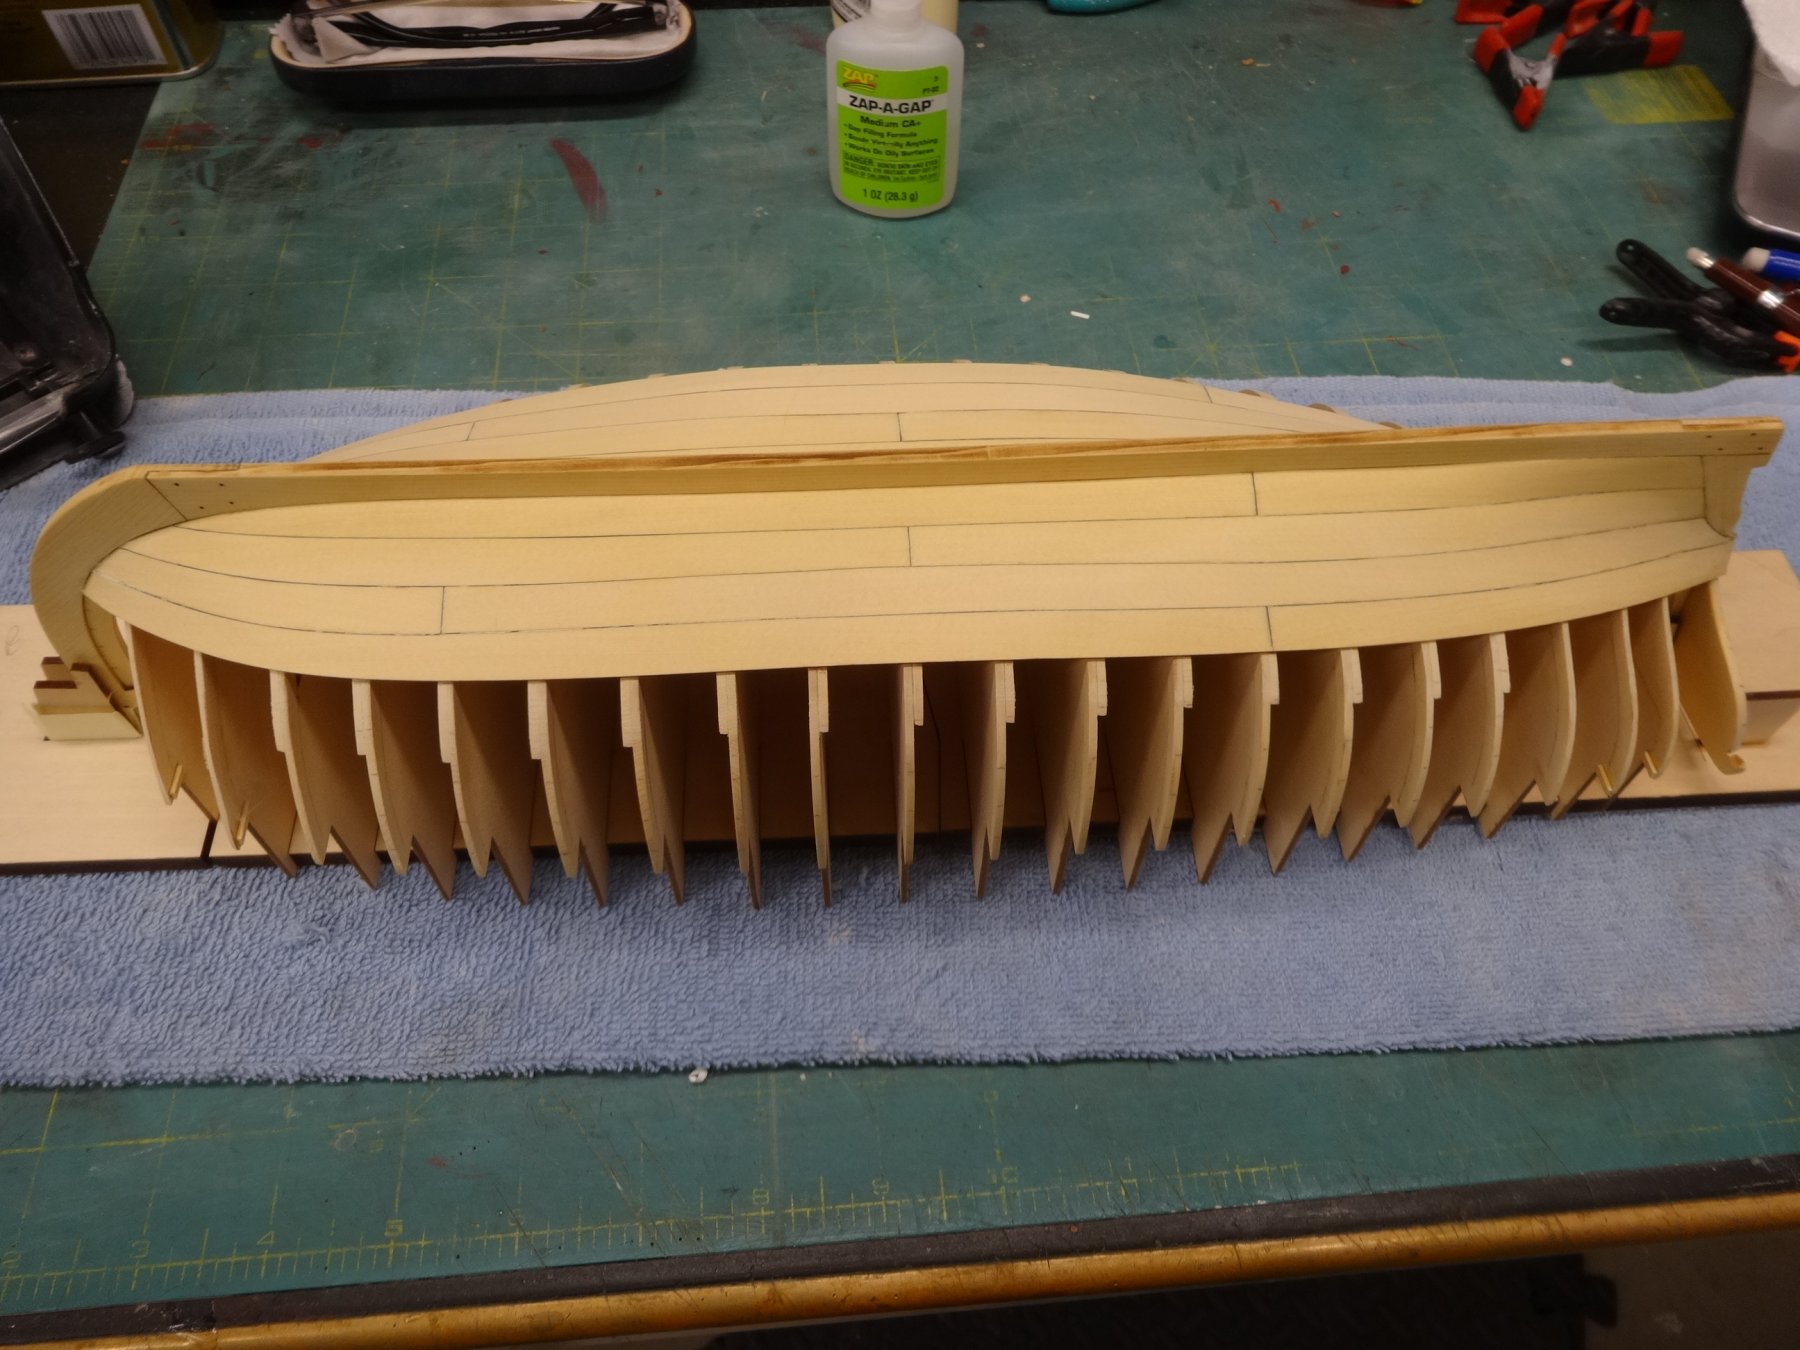
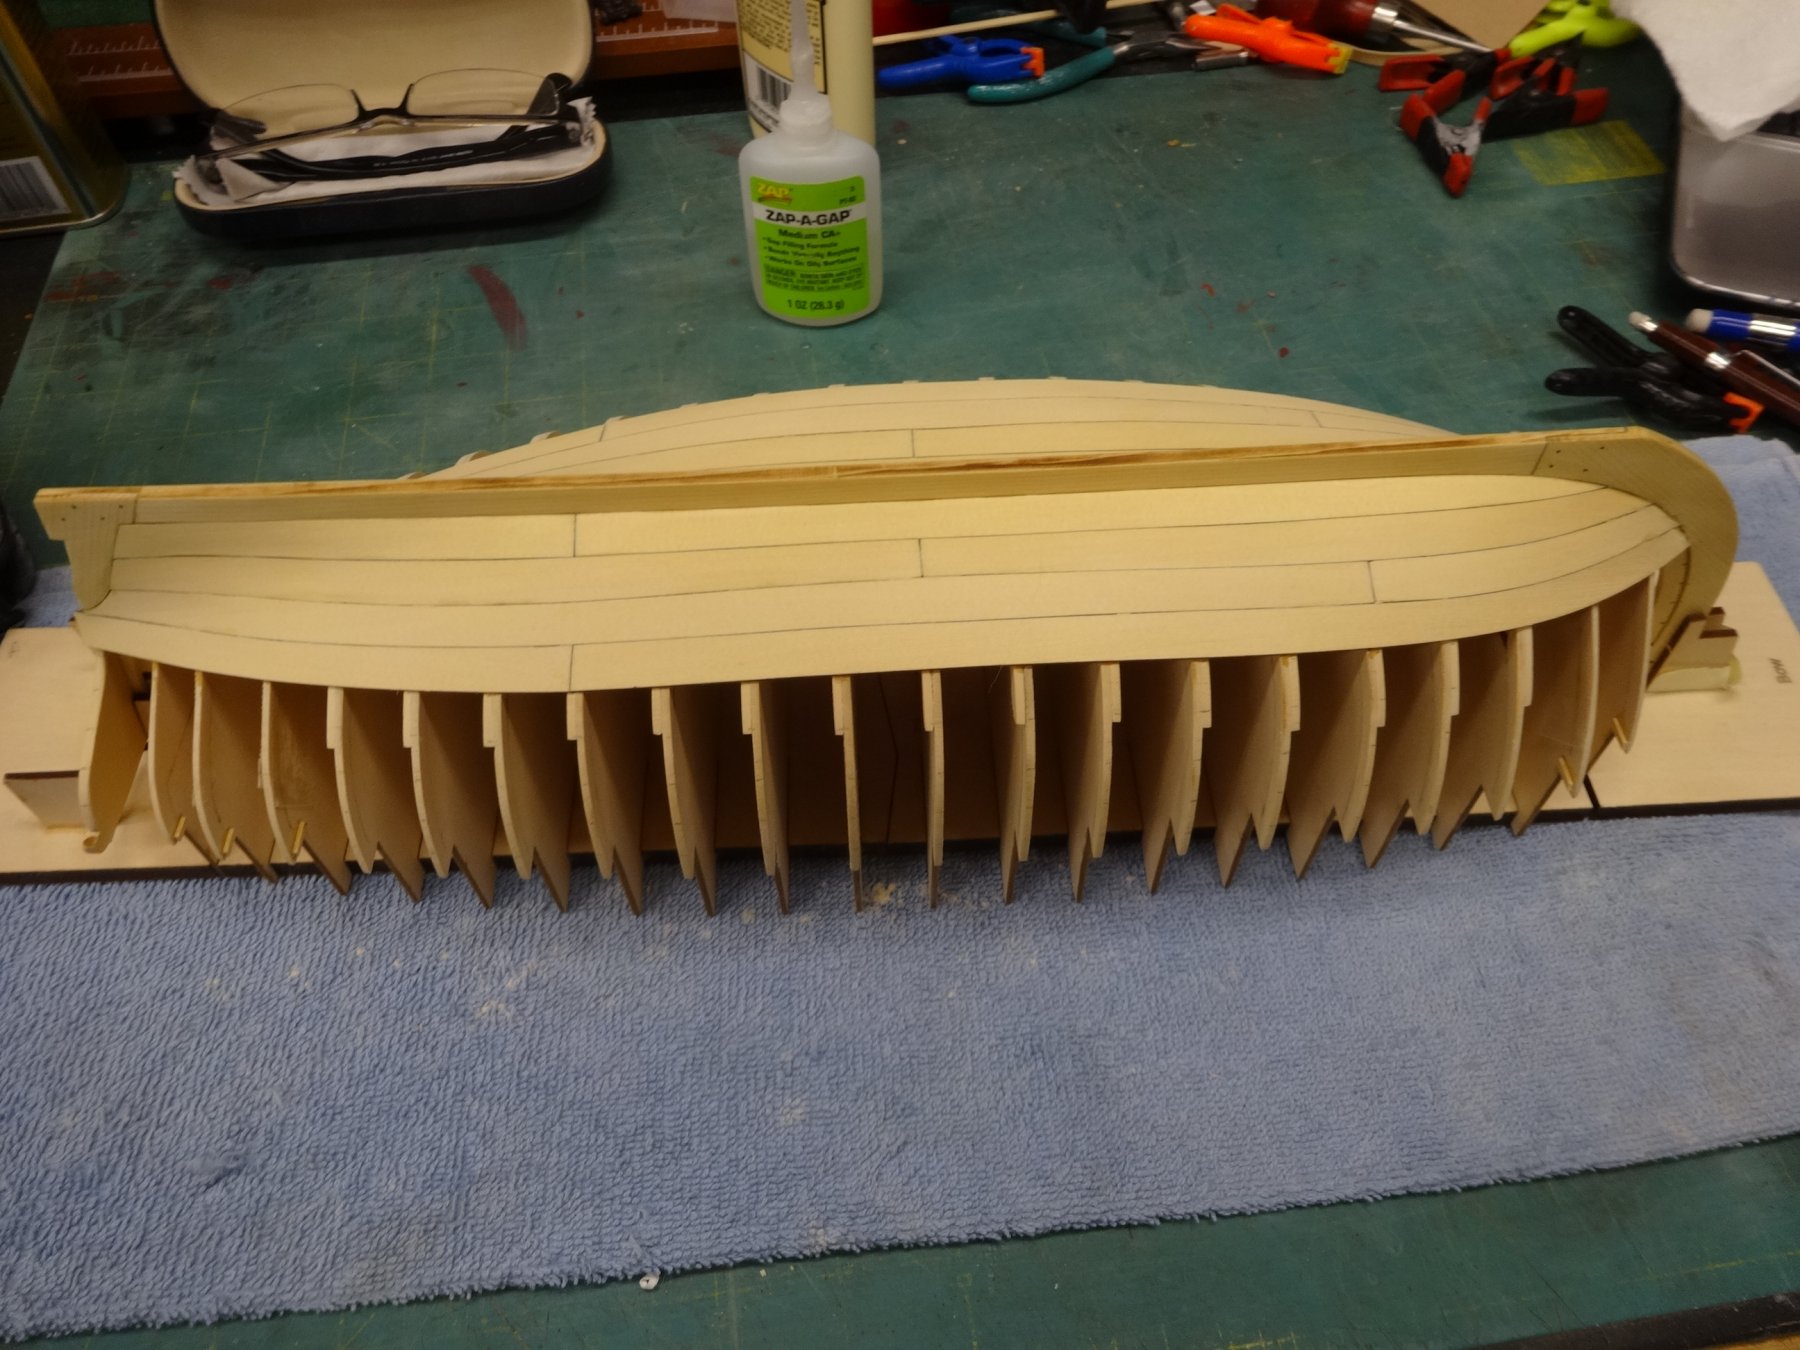
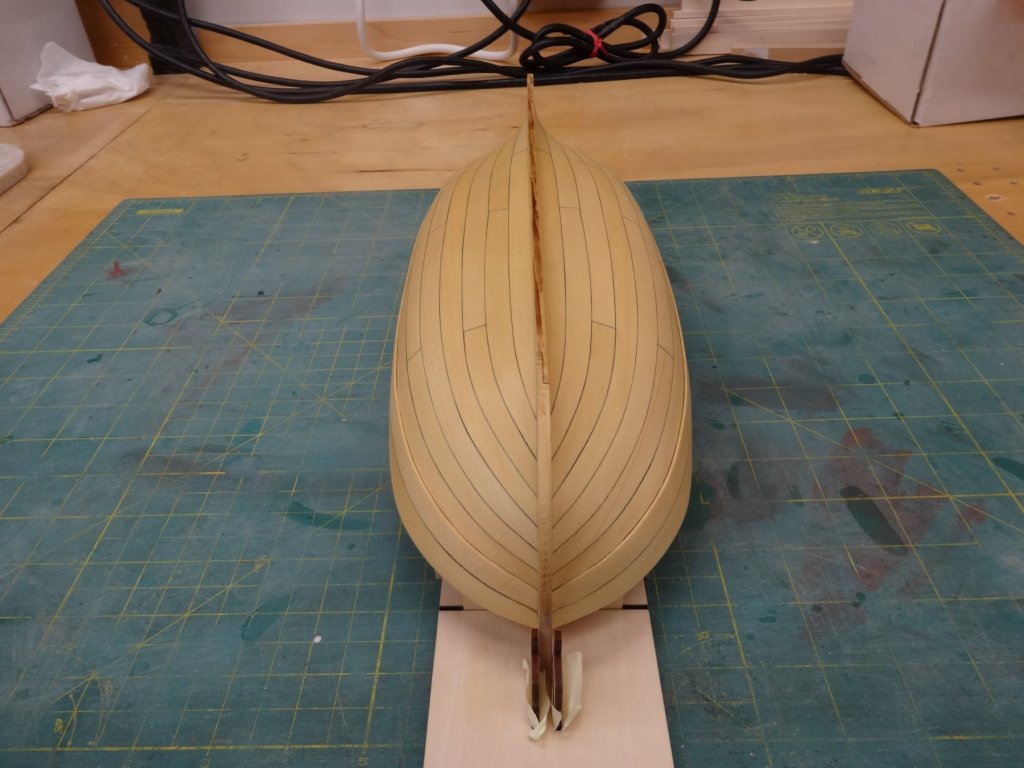
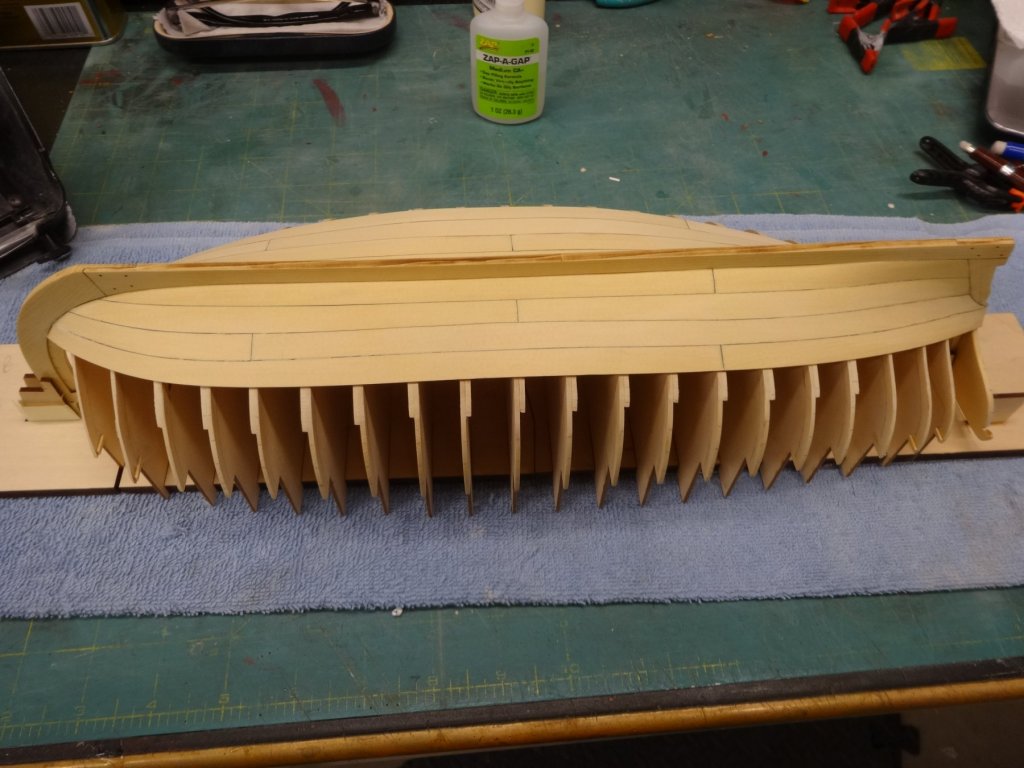
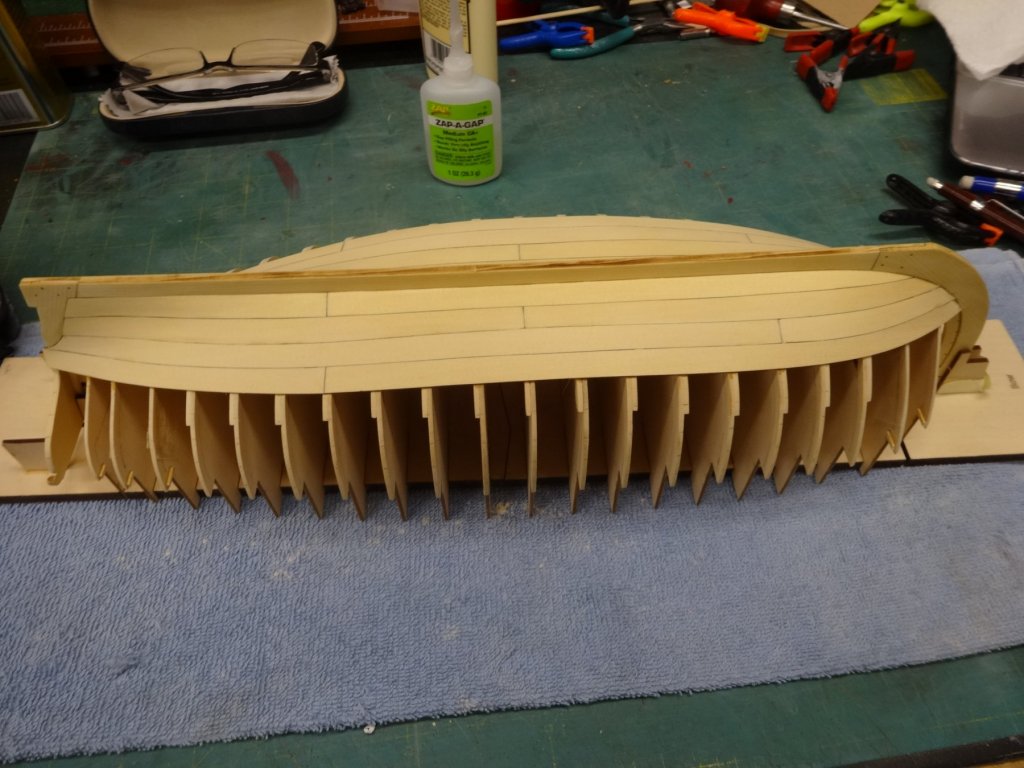
The fairing completed with no frame damage. That's a first! The garboard strake was interesting. Chucks pre-spiled planks are real nice but they do require some work on our part. Below you see the aft most pieces and how much they need to be twisted and bent to the correct form for a nice tight fit. They were heat bent with a hair dryer I commandeered from the Admiral sometime ago. Ok I asked nicely and she gave it to me. It took about and hour per side to get a nice fit. One down 8 to go!


- 152 replies
-
- 13
-
-
- medway longboat
- Syren Ship Model Company
- (and 1 more)
-
Very nice workmanship. I think we all should put SLOW DOWN signs in our shops. I feel you pain weather wise. We've had sub zero temps and a foot and a half of snow already and it's was only November. The upside is more shop time!!!!!
- 32 replies
-
- 1
-
-
- medway longboat
- Syren Ship Model Company
- (and 1 more)
-
Well done Jeff. Glad to see you jump in and get under way.
-
Absolutely will! Thanks
-
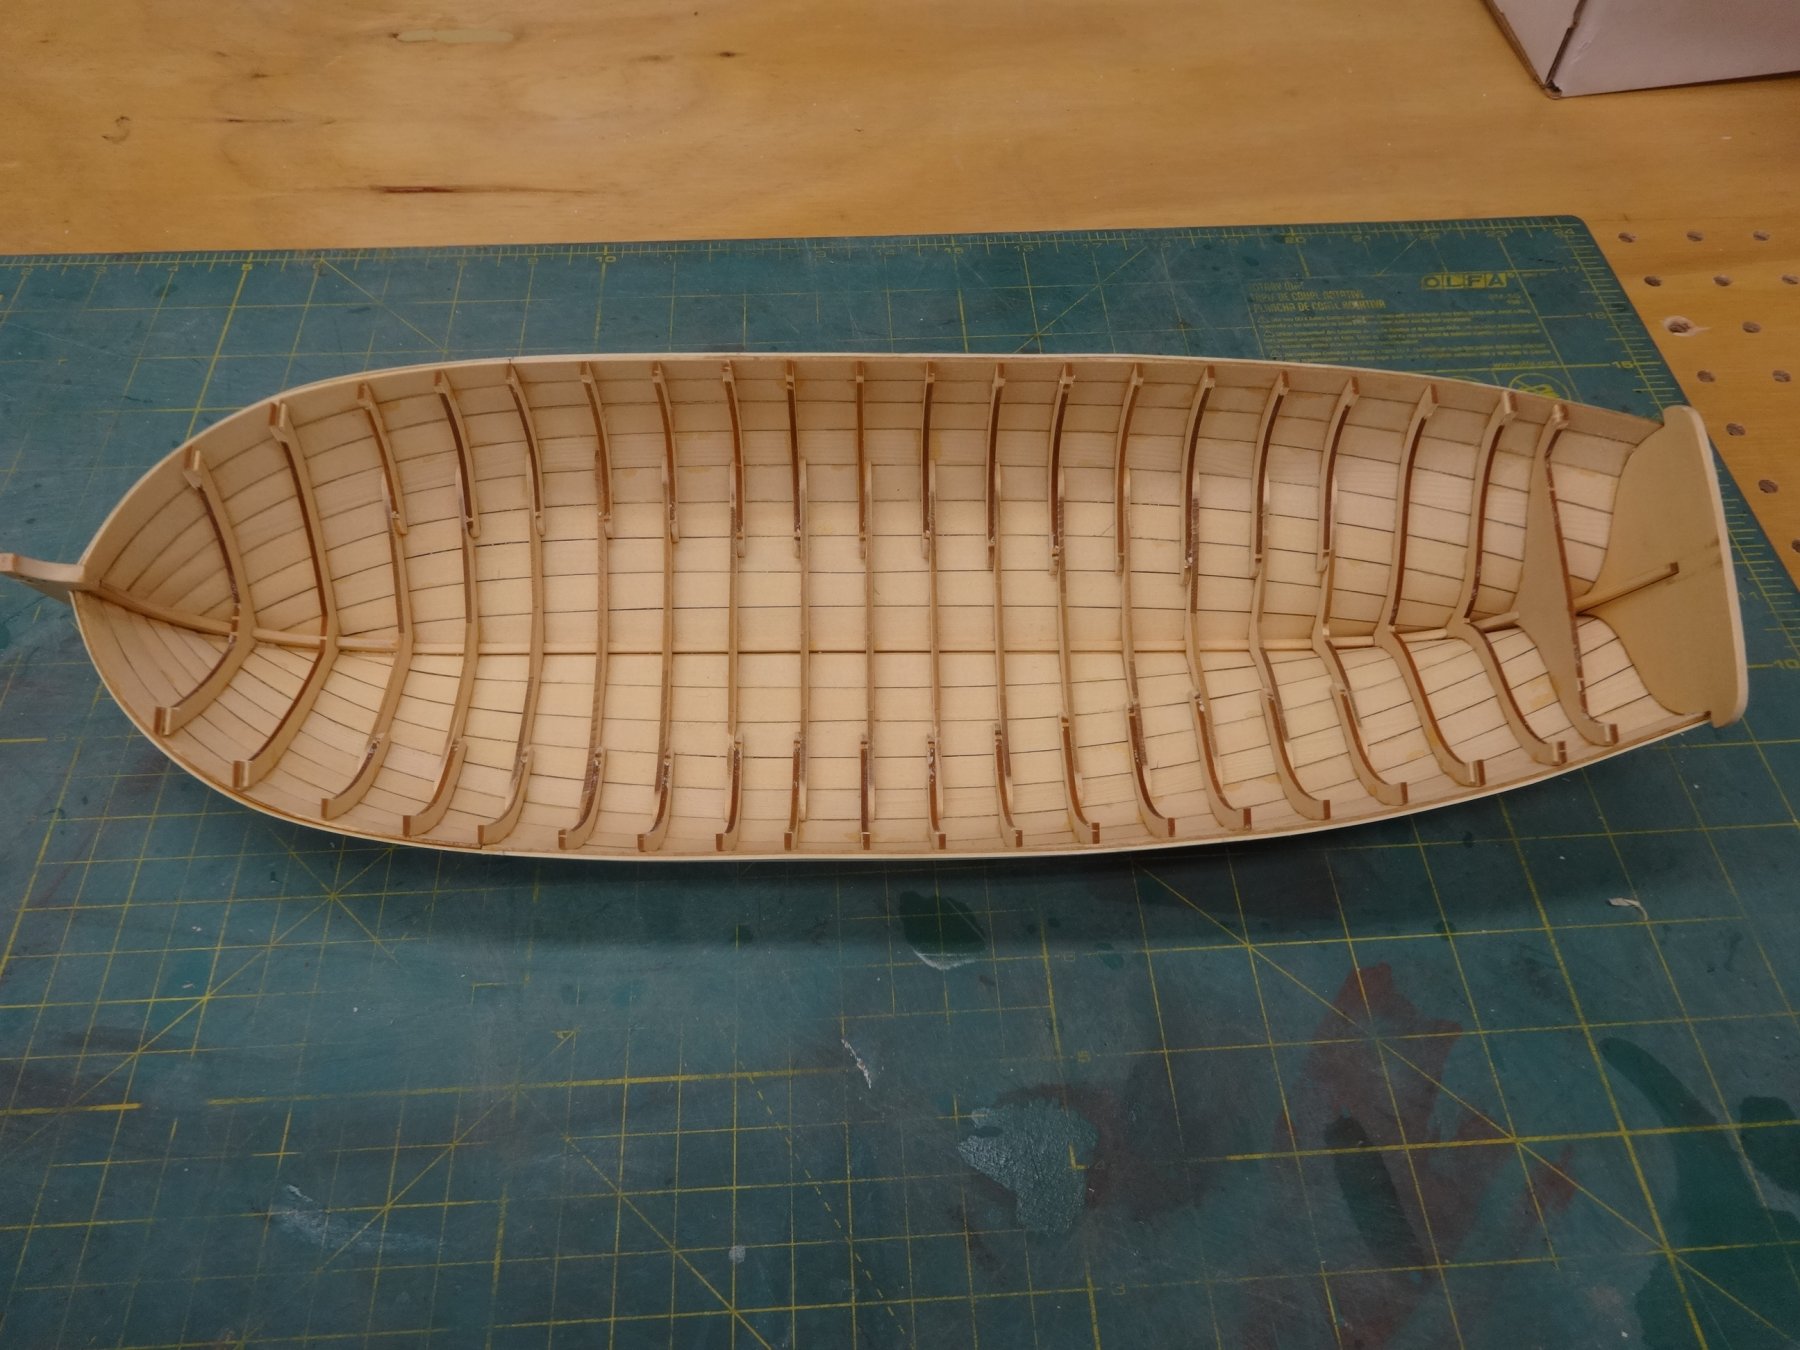
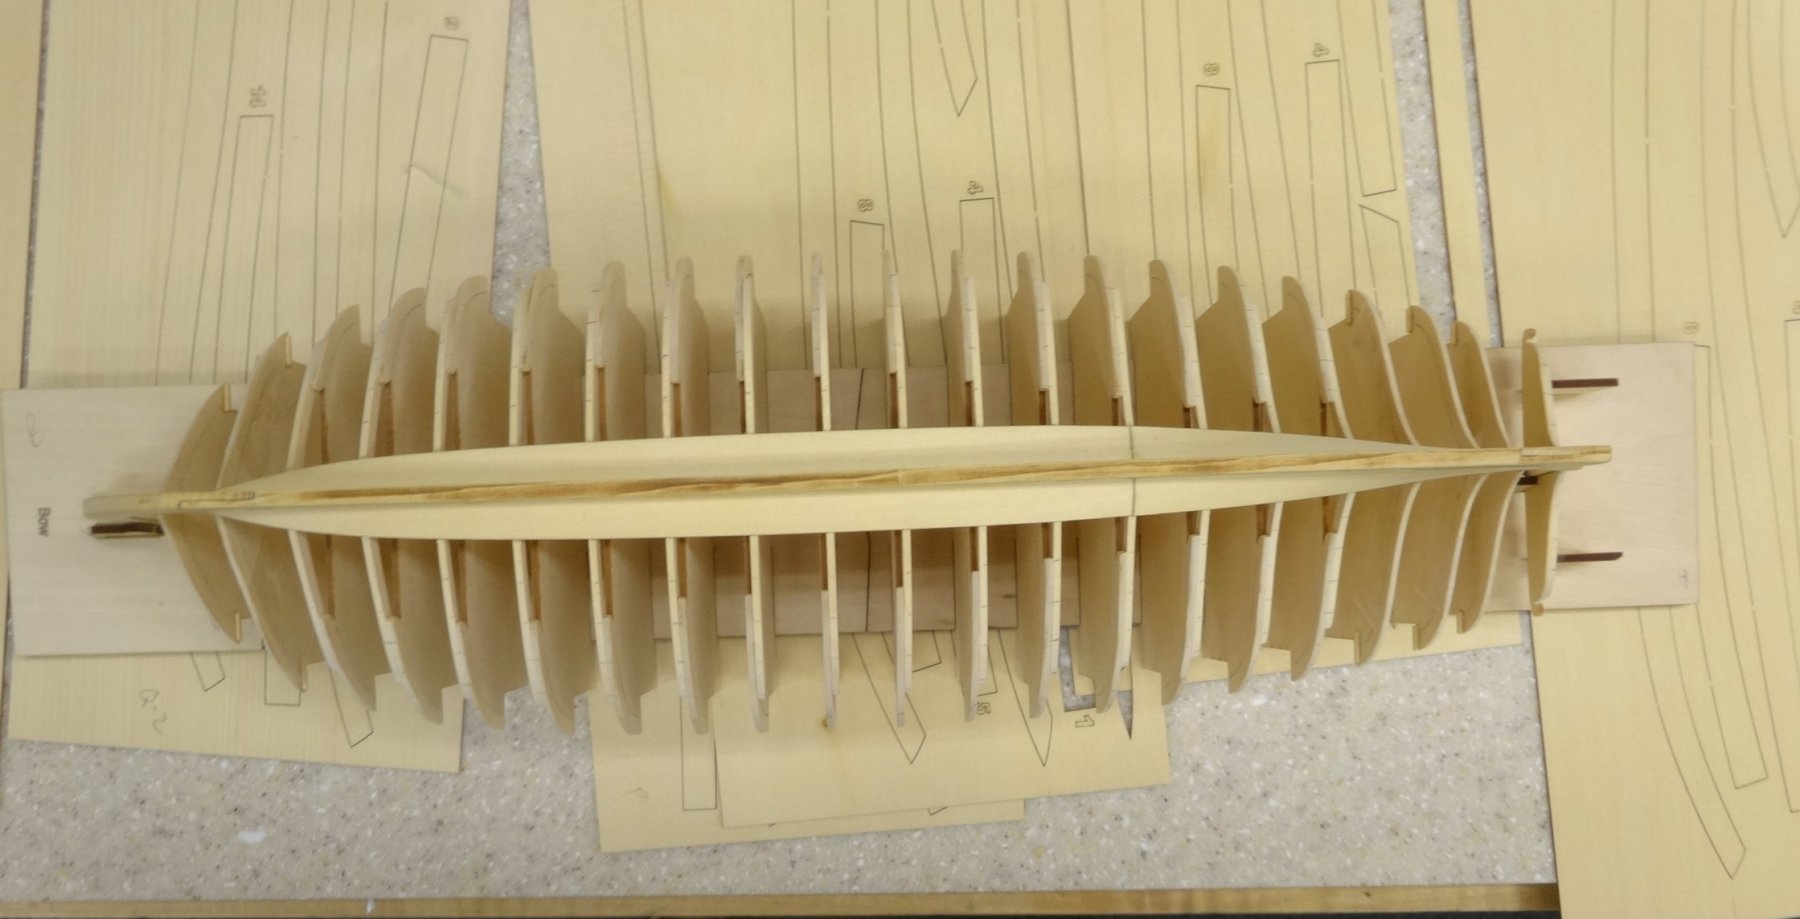
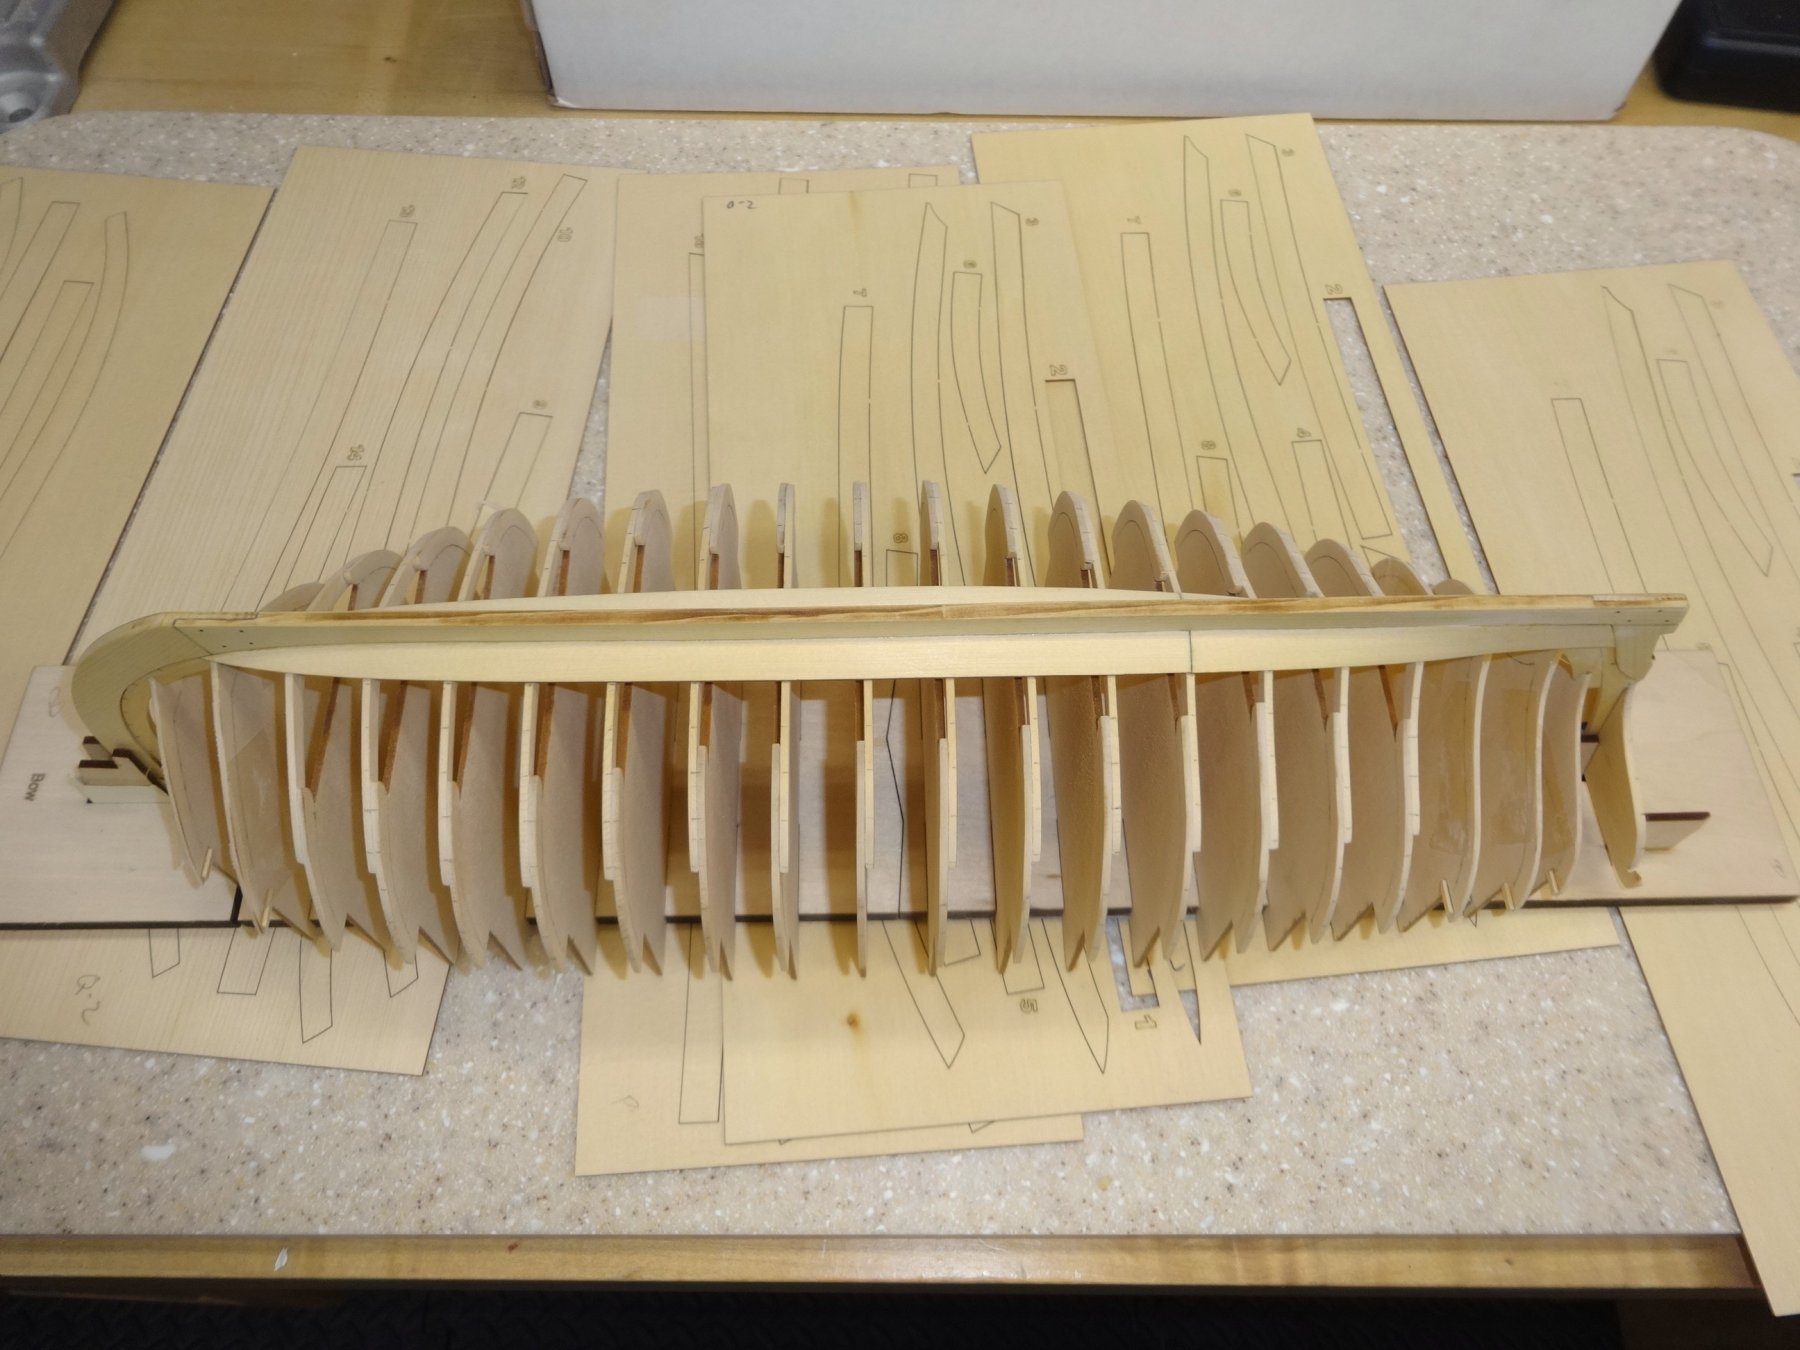
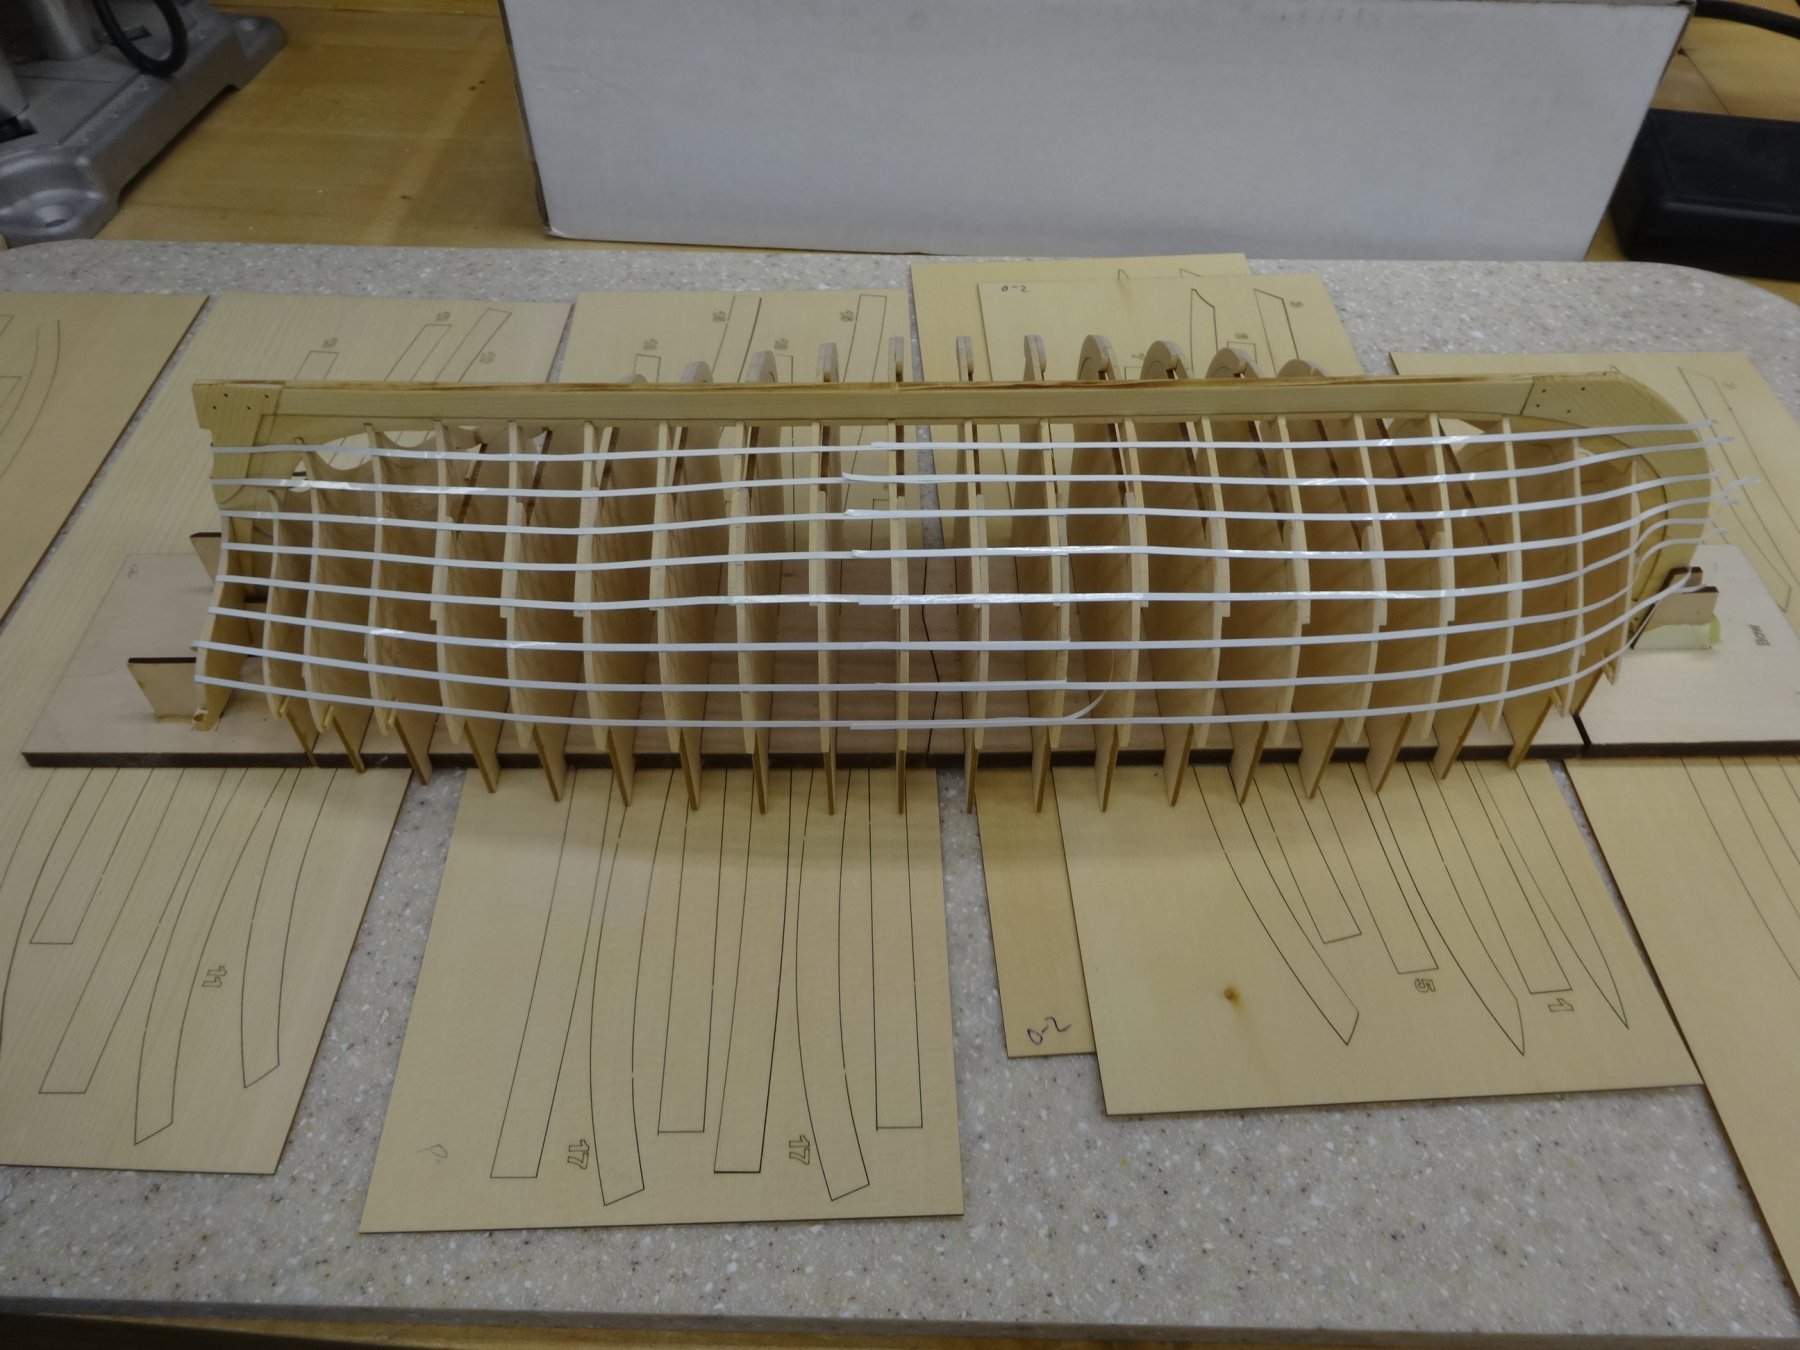
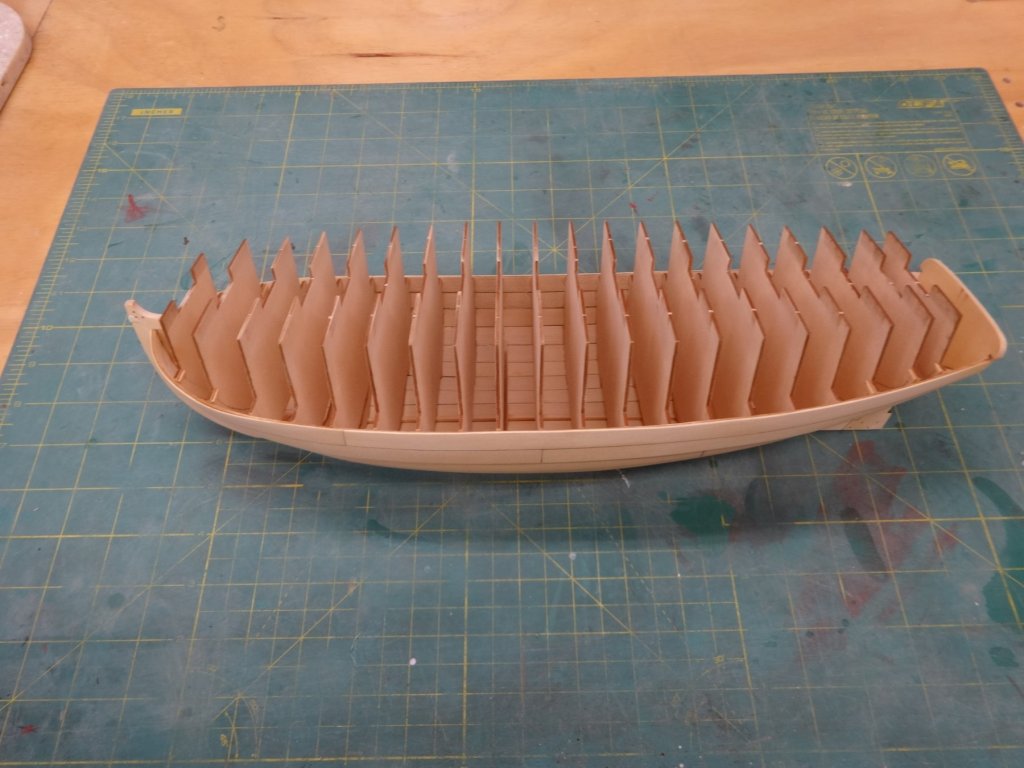
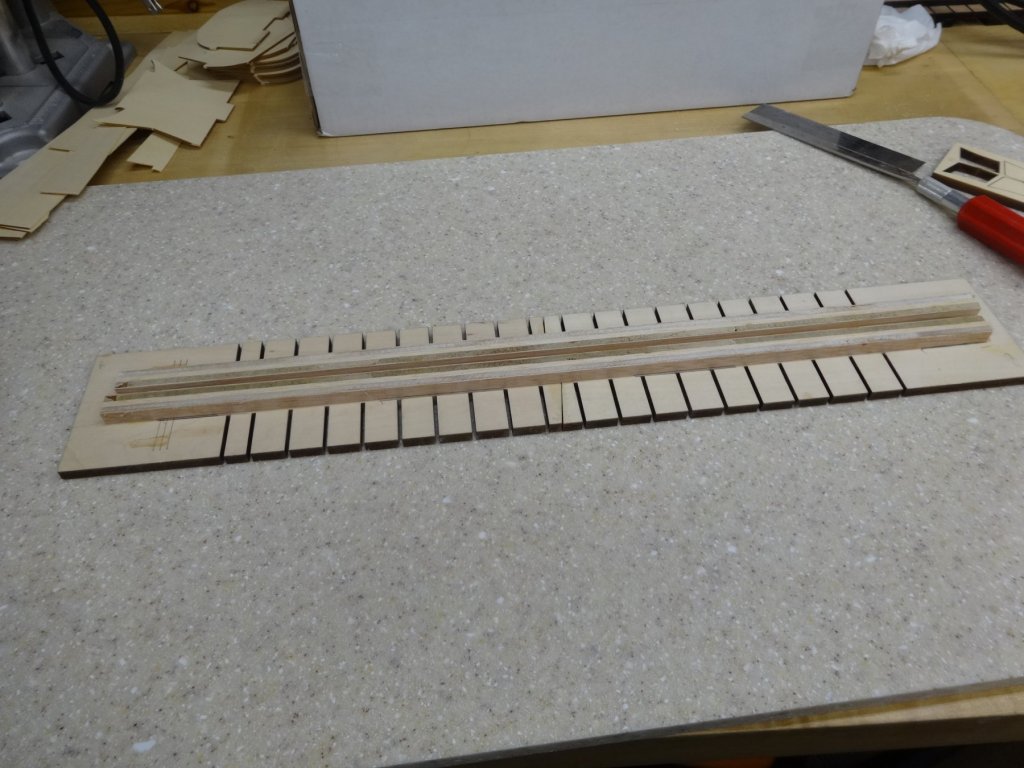
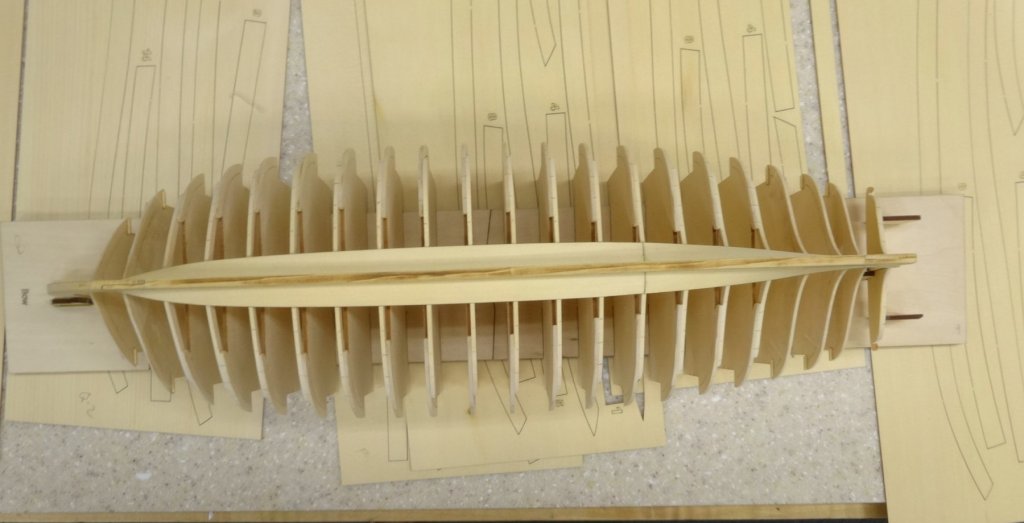
Boy that is beautiful! I've faired the frames and added the tick marks as instructed. I also used some pinstripe tape to "line off" the run of the planks. I used a batten to check the frames as I went. I used 220 and 320 sandpaper. Slow and gentile. This is the initial laying out of the lines. I'll tweek them to get a nice run and the mark the frames.

- 152 replies
-
- 9
-
-
- medway longboat
- Syren Ship Model Company
- (and 1 more)
-
Hi Jim, When I did mine all but one matched up which showed me I had that one frame slightly off center. I compensated for that when I lined it out.