


Loracs
-
Posts
222 -
Joined
-
Last visited
Content Type
Profiles
Forums
Gallery
Events
Posts posted by Loracs
-
-
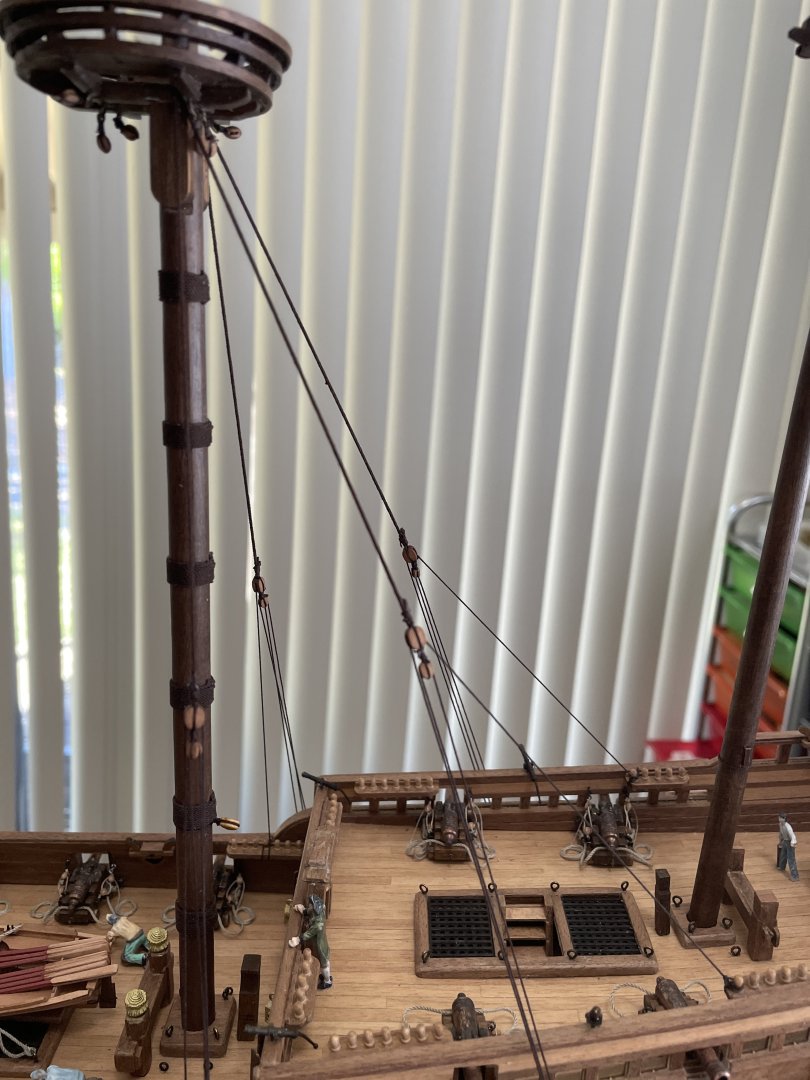
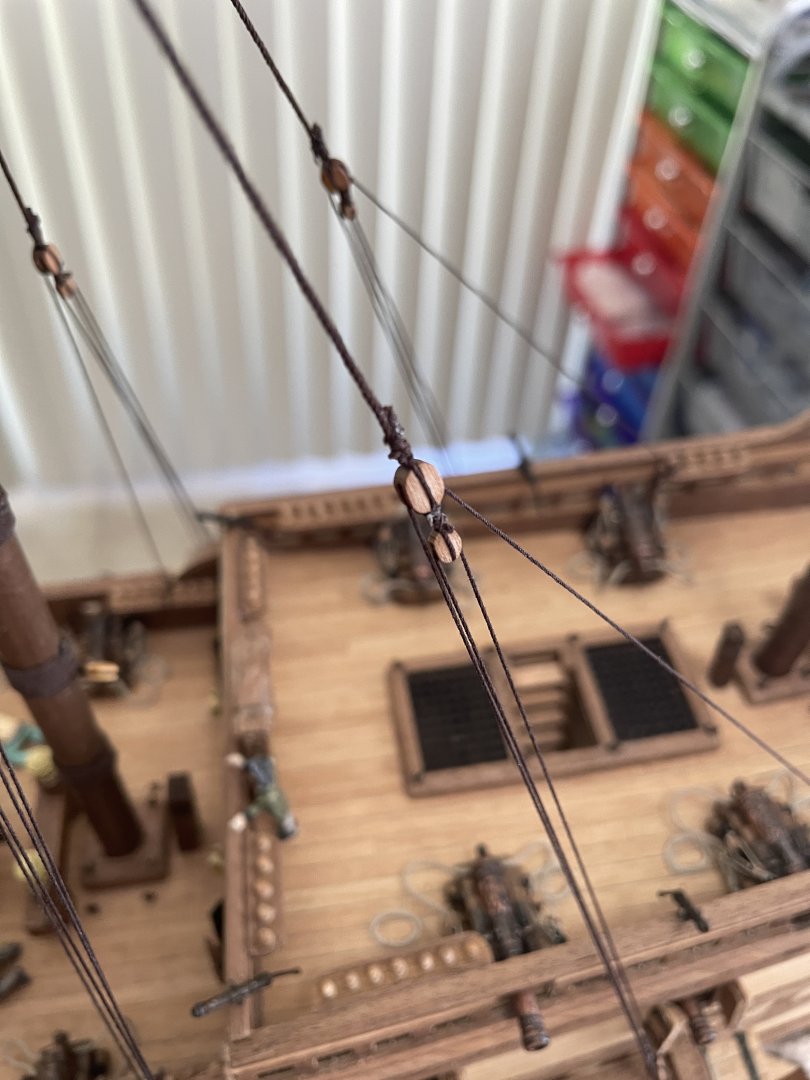
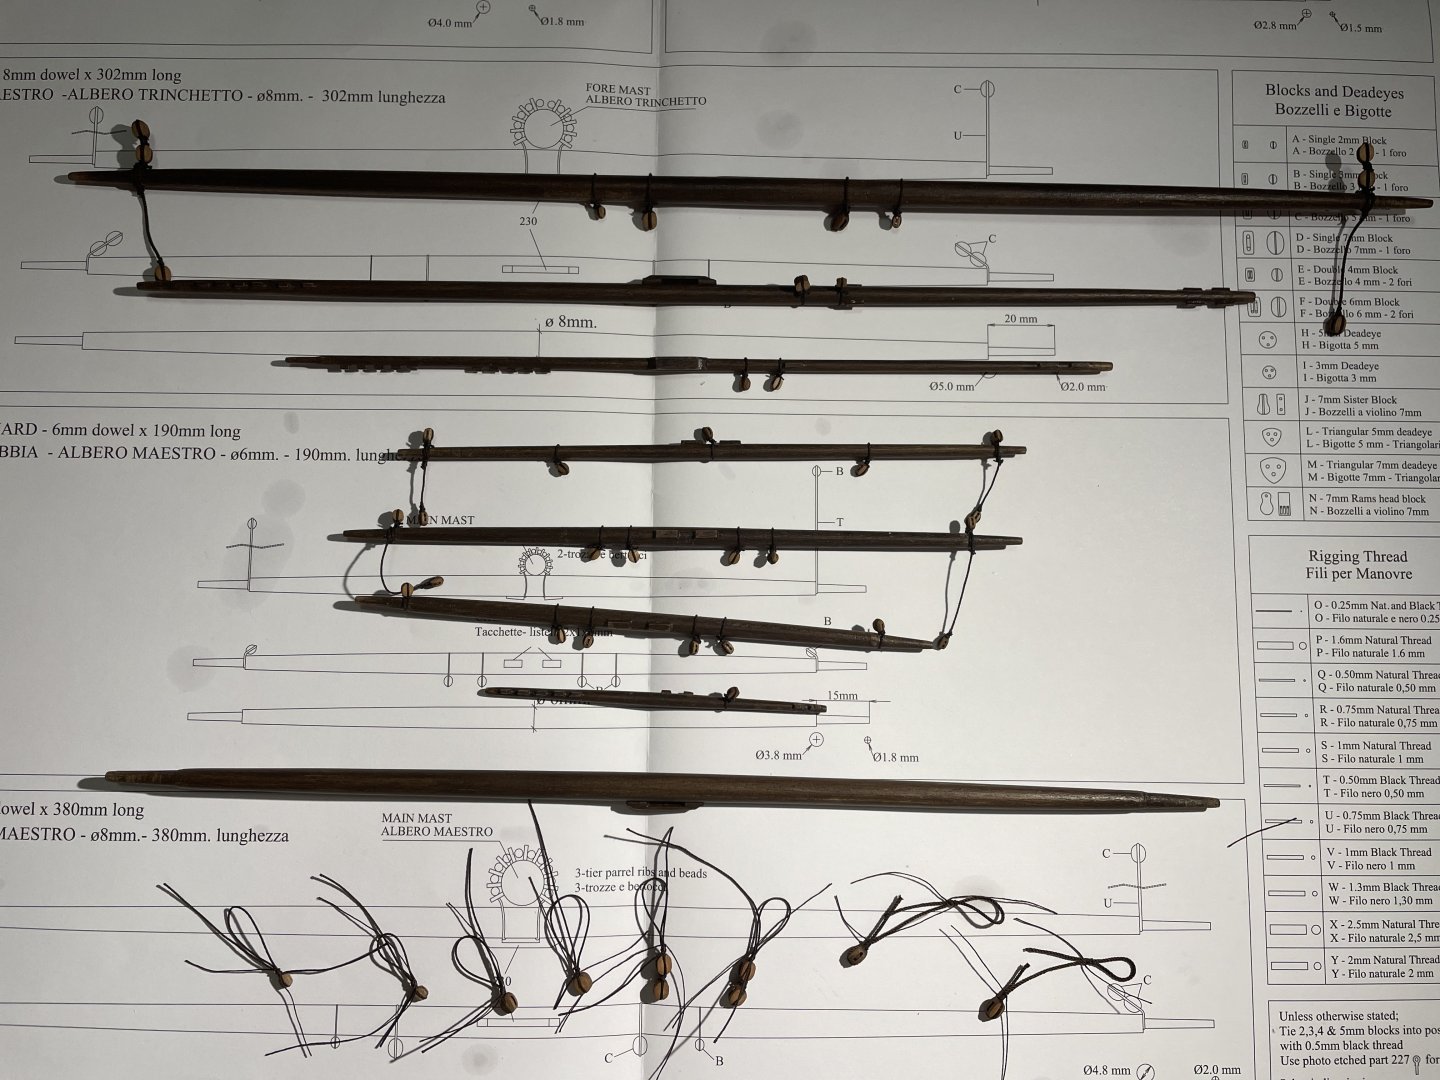
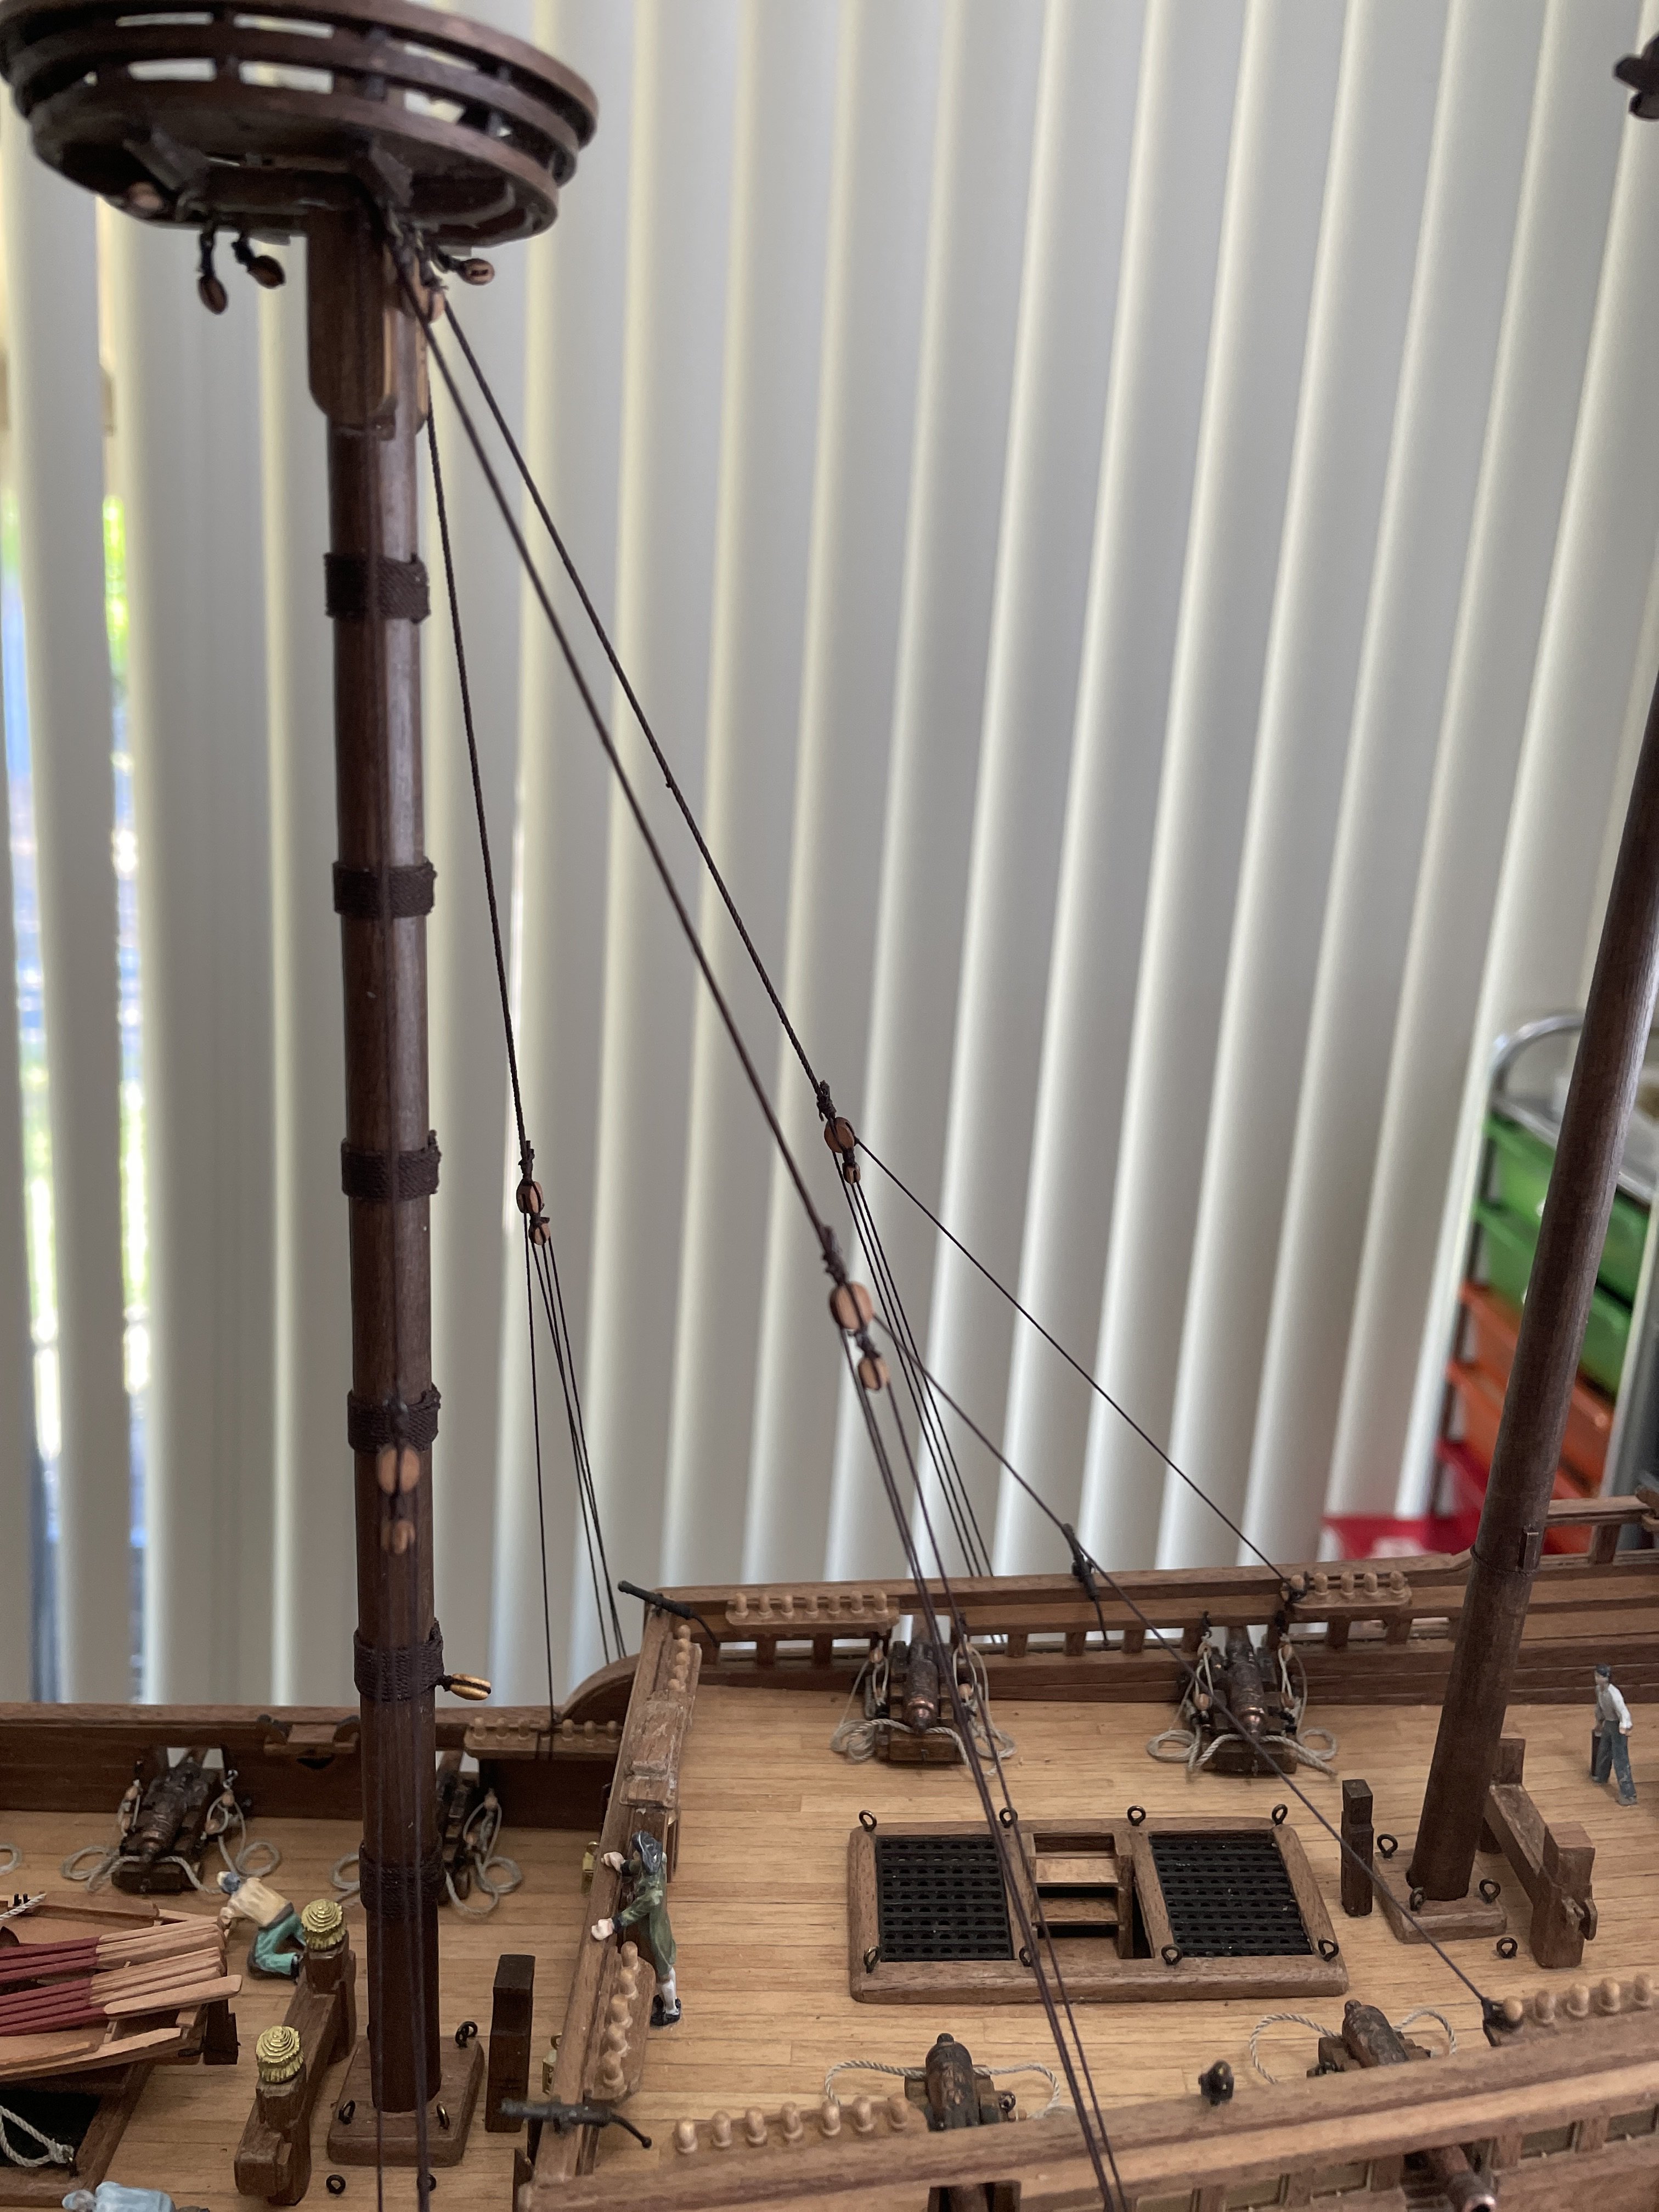
Main Mast Tackle: Attaching those under tension to side racks is a little challenging. One mast done, three more to go.
Note: Initially, I used MARA 30 thread directly for the lower part of the tackle... the one that runs through the block (since it was roughly 0.25mm as is). It was a BIG mistake. The tread by itself is slightly elastic and unwinds/twists crazily under tension. It had to be replaced. The same diameter rope was built from 4 MARA 120 treads for the same final diameter. IT WAS so much better.
As expected, couple crews got knock over in the process LOL.
- Baker, GrandpaPhil, chris watton and 3 others
-
 6
6
-
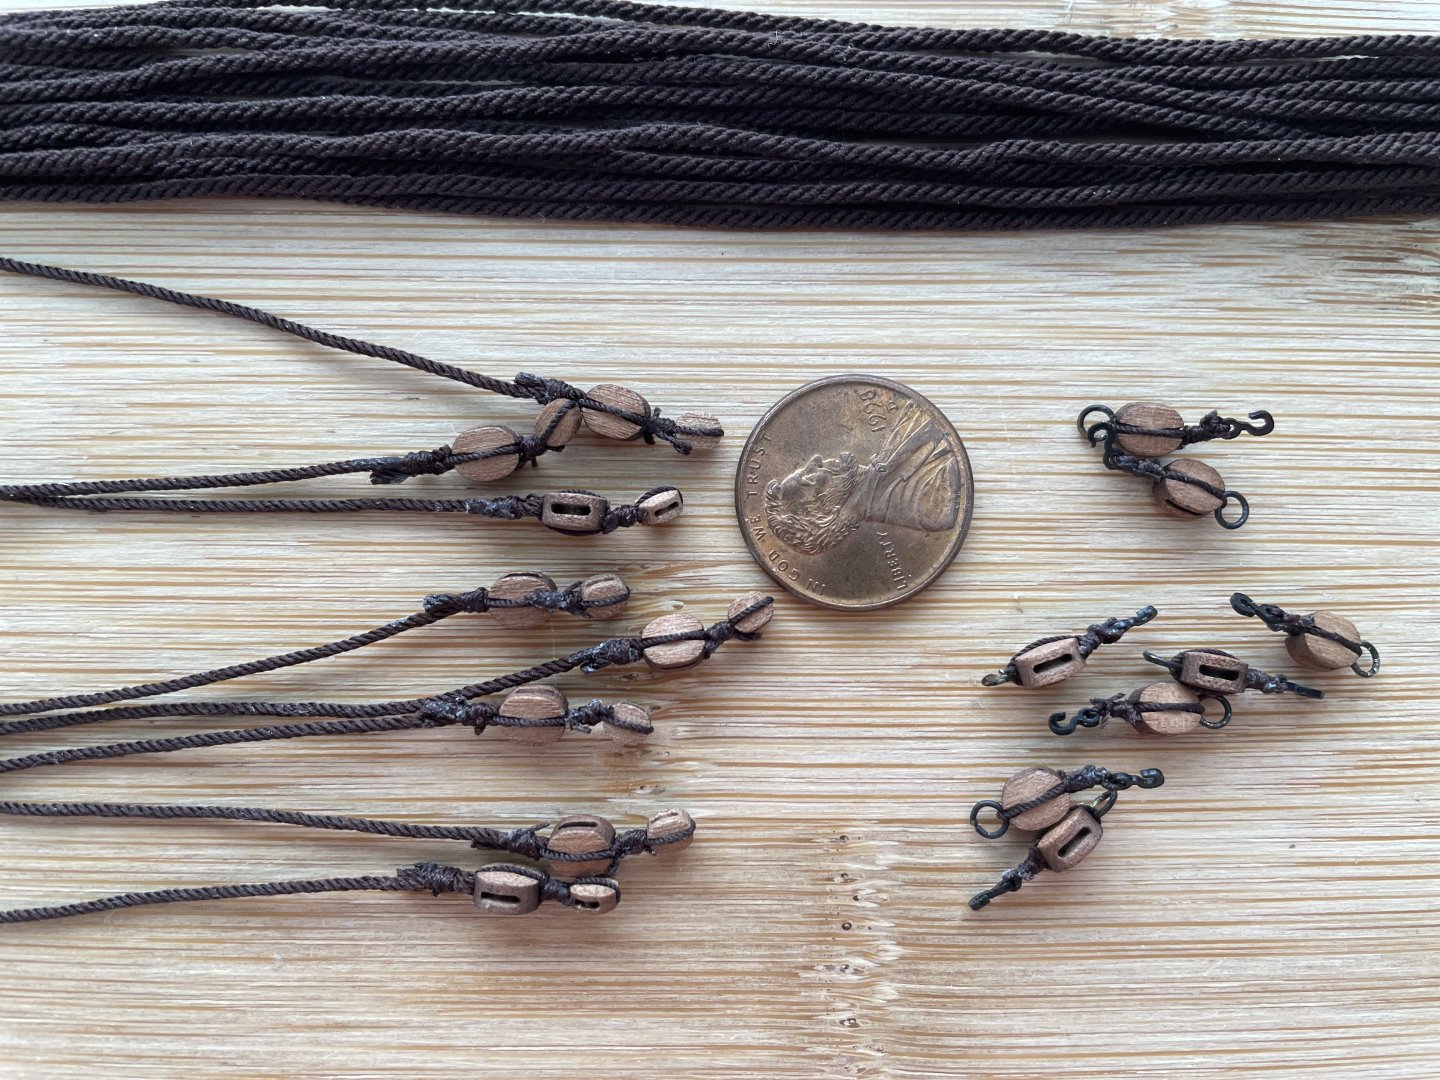
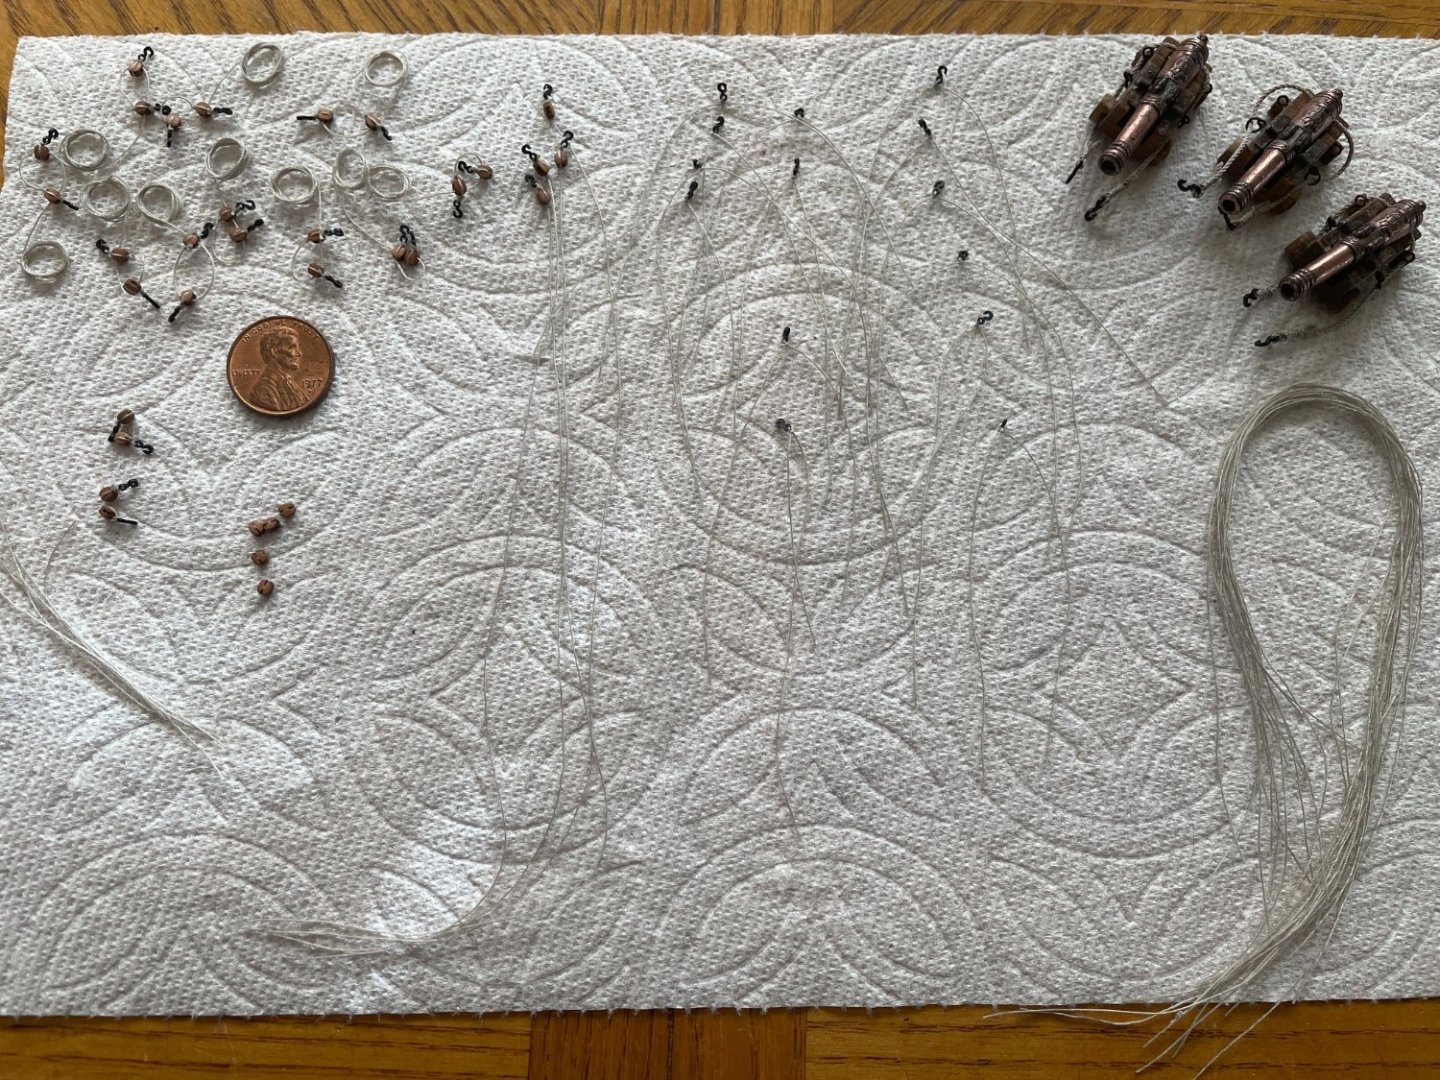
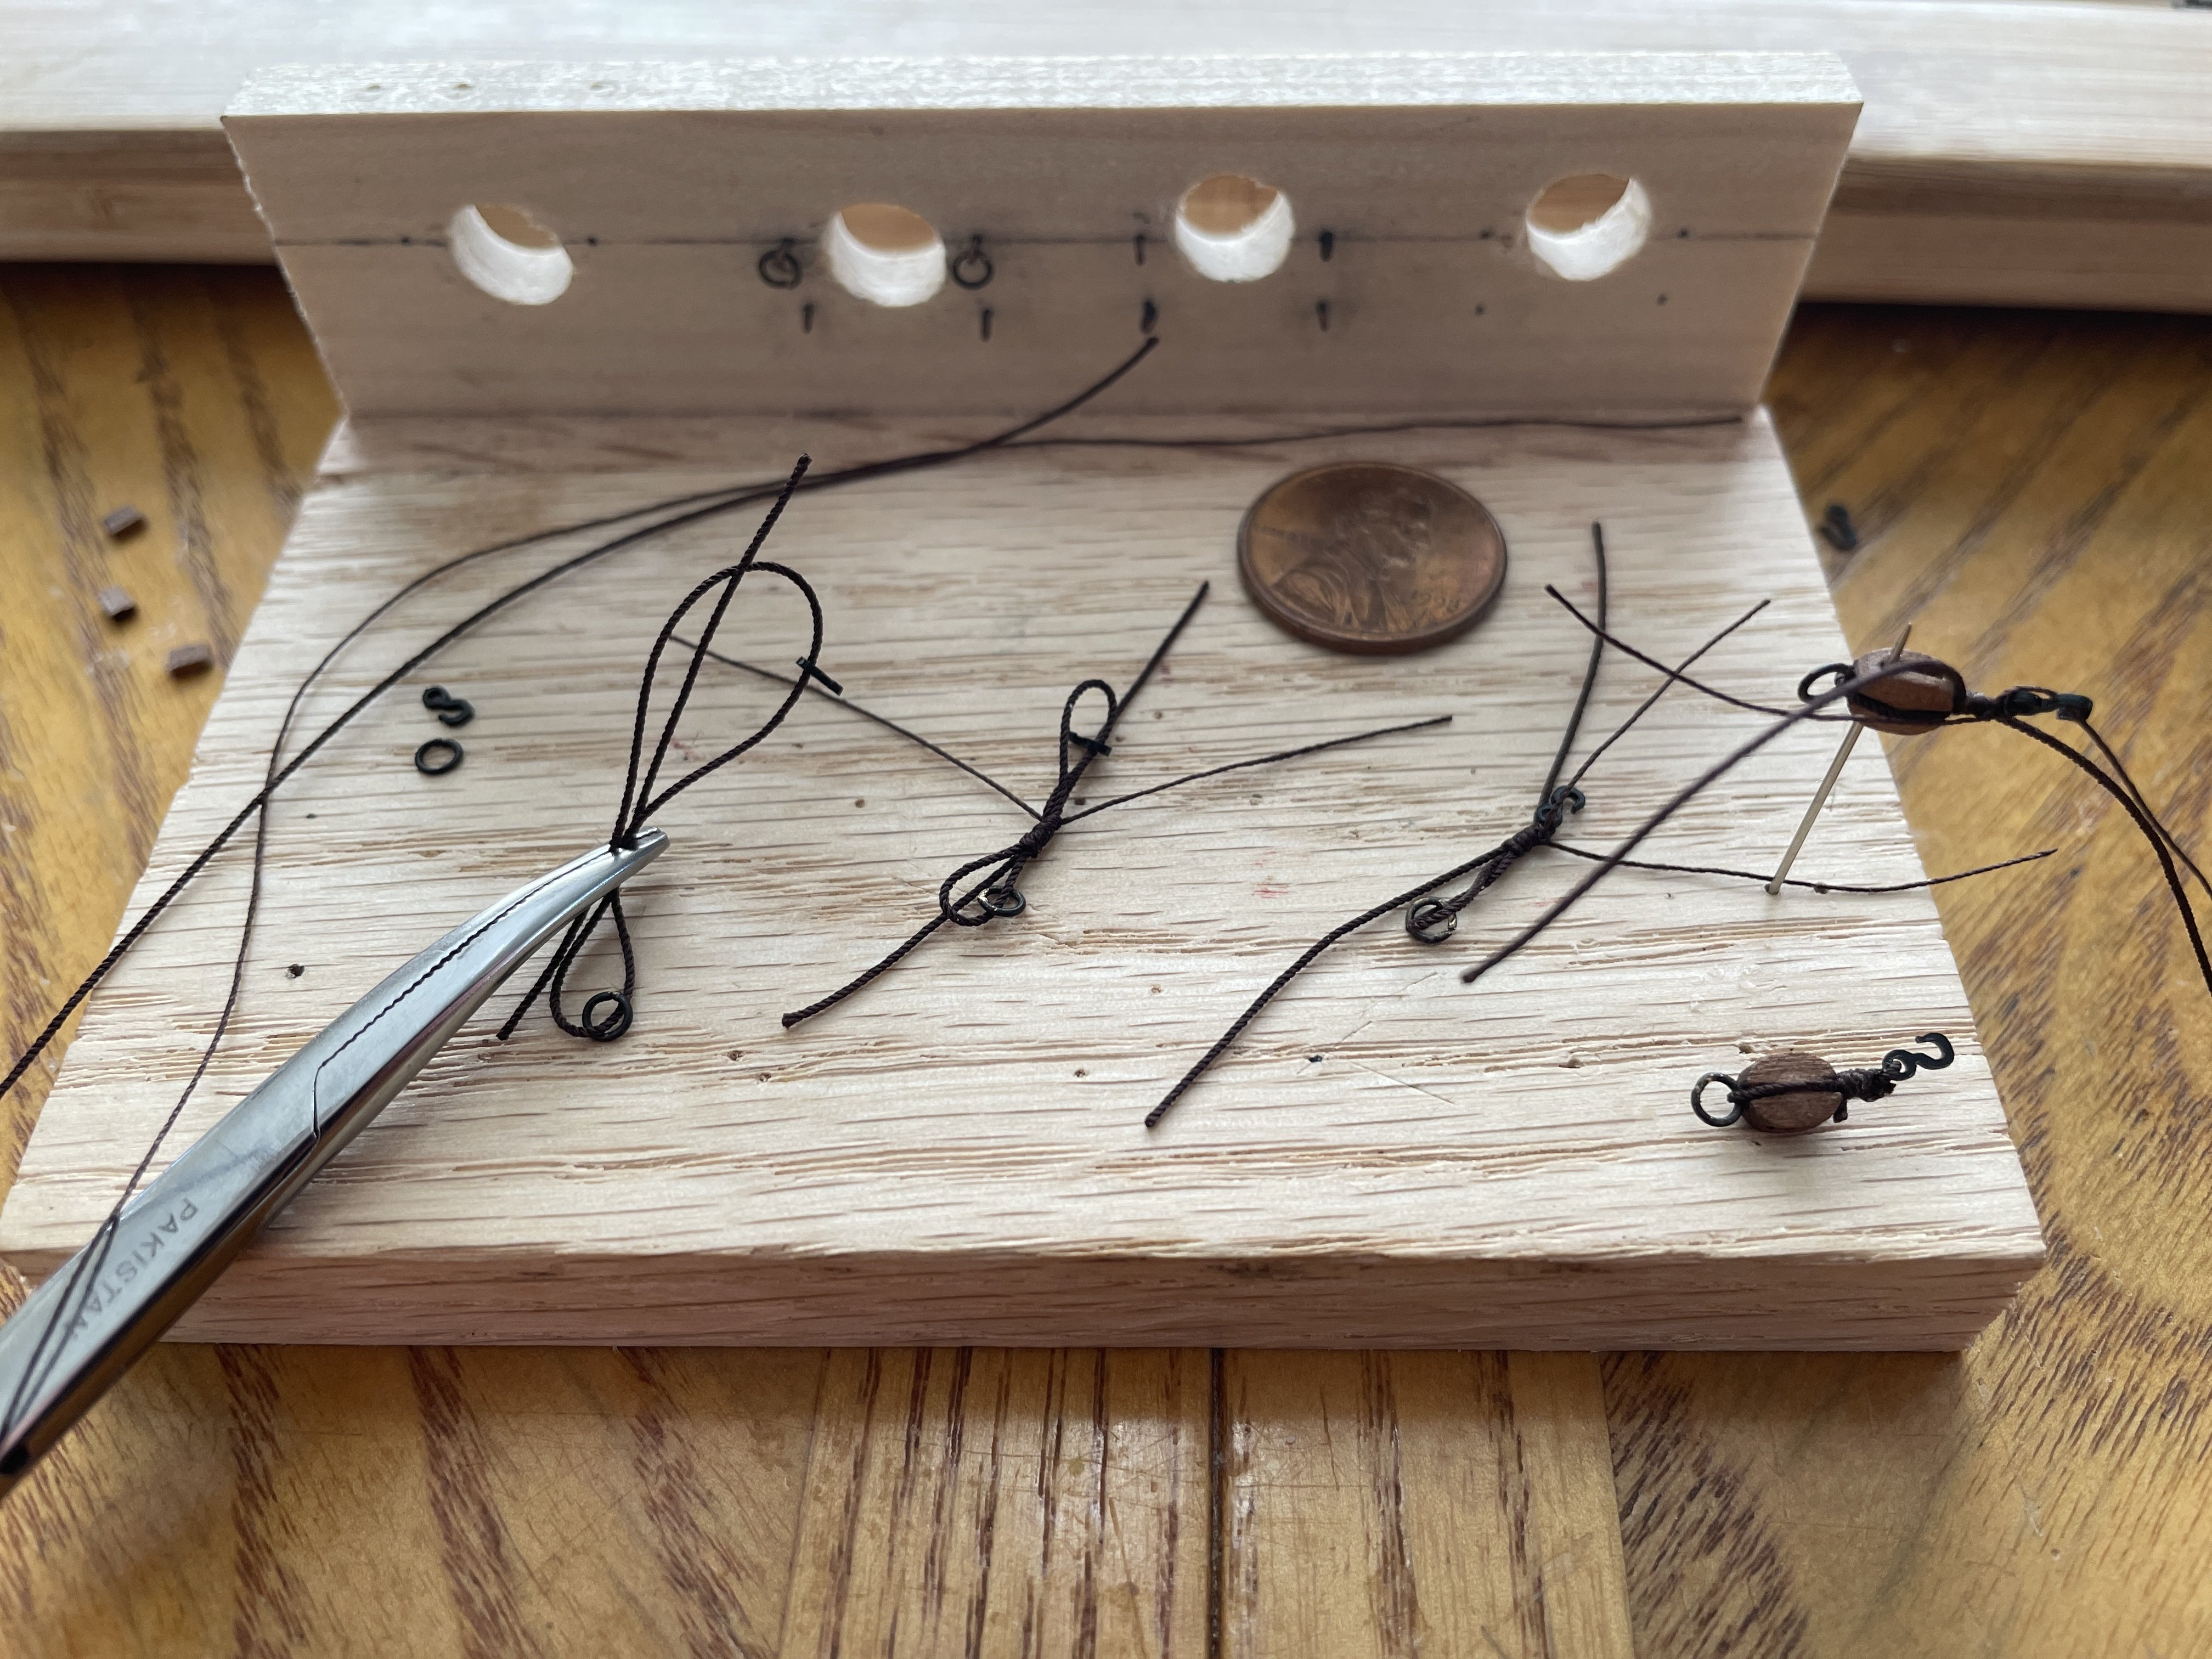
Preparing ropes for rigging: Quite a number of ropes will need to have blocks attached one way or another. Sometime 2 blocks in a row like in the first picture. At times, it is not the difficulty but simply having a method to tackle the tasks.
Tying rope in a figure eight, all tied using a slip knot is very useful for all kind of attachments, either to another rope, mats, spars, etc... For those new to this, let me share my simple how-to (pictures 2).
1: cut two ropes of appropriate diameter.
2: insert the elements you need (here a hook and a ring) and form a figure eight with the rope. Hold in place with a lock hemostat.
3: Tie a slip knock around the figure eight.
4. once done, you can just simply pull one or the other end to adjust the length of the loop.
5. insert the block in one end-loop... and cut all excess ropes.

- Baker, chris watton, TJM and 6 others
-
9
-
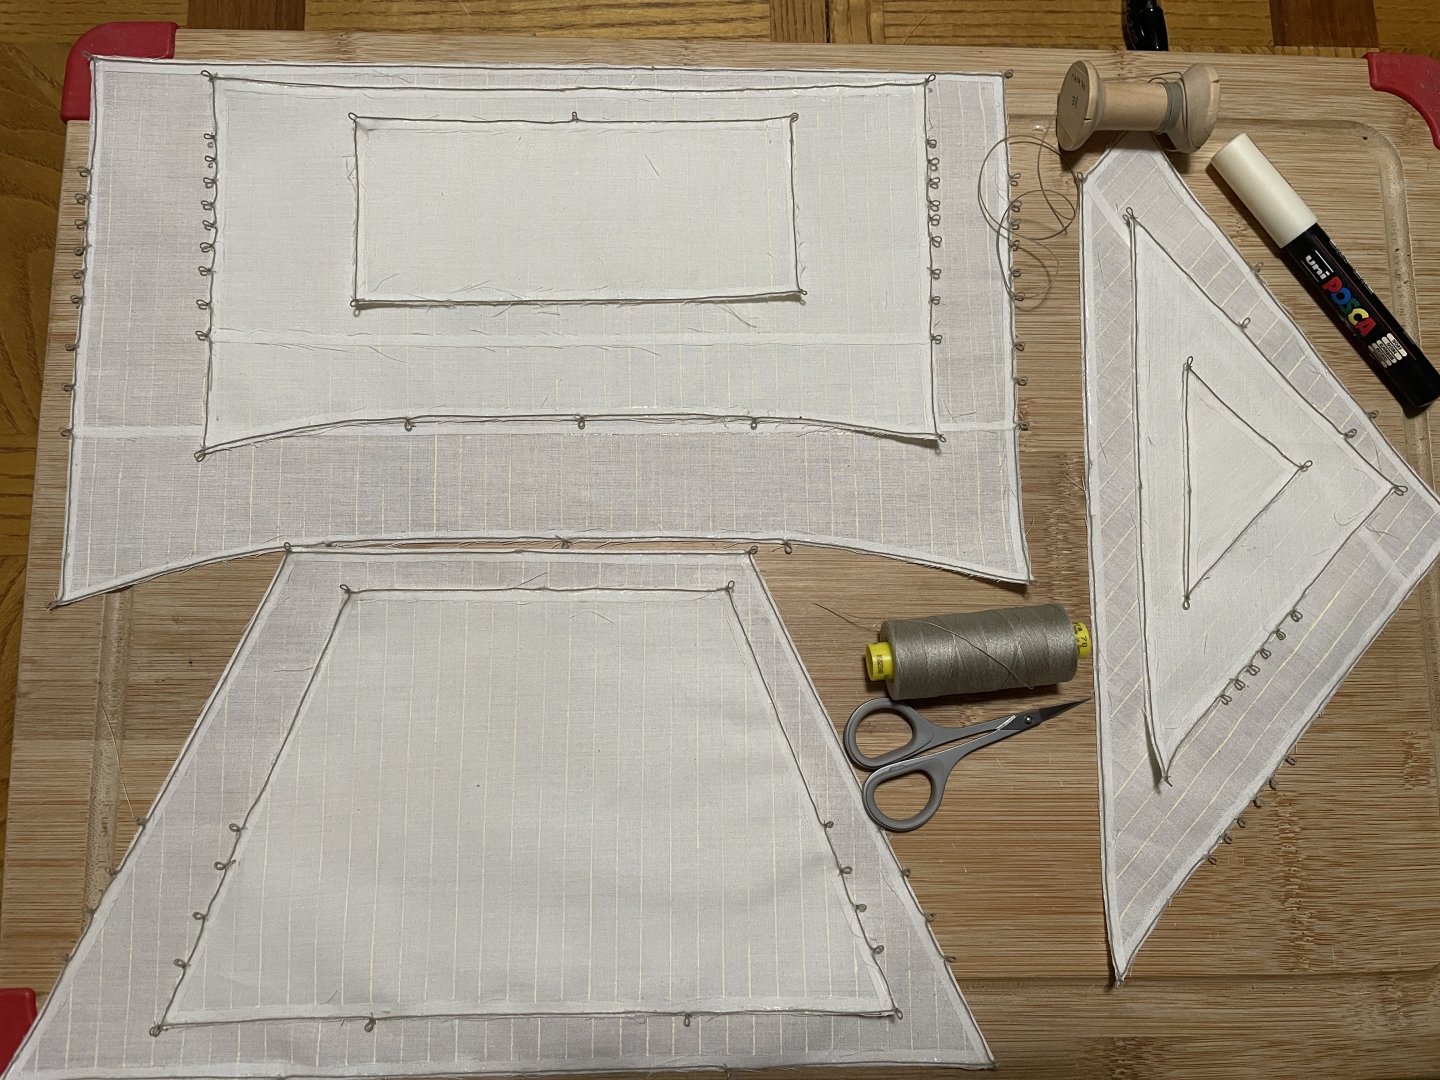
Sails: I wanted to keep the sails flexible... so no dipping in diluted glue. A 2-3 mm border was glued around to reenforce them at the edge. The "cringles" were a pain to do as well as sizing them.
- GrandpaPhil, chris watton, Baker and 2 others
-
5
-
The mats are shaped and blocks are nearly all attaches. That's already a lot of slip-knots and I'm afraid it's only the beginning. Repetition is part of the game.
- Baker, Ronald-V, chris watton and 3 others
-
6
-
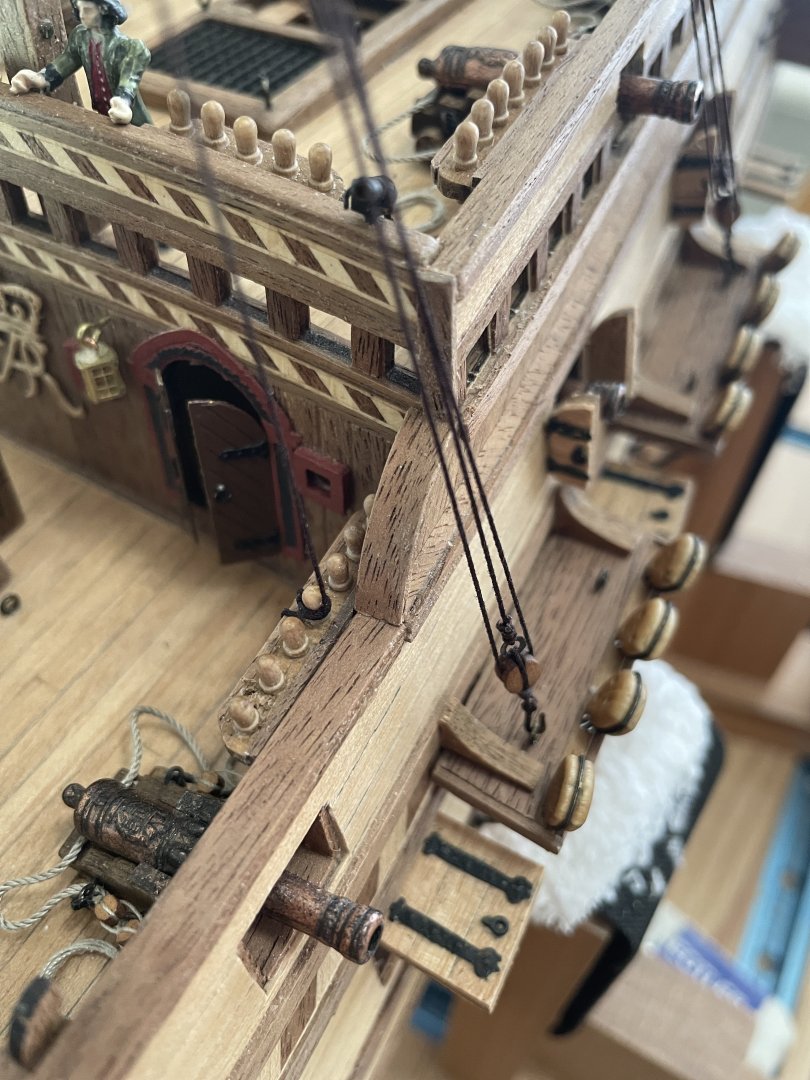
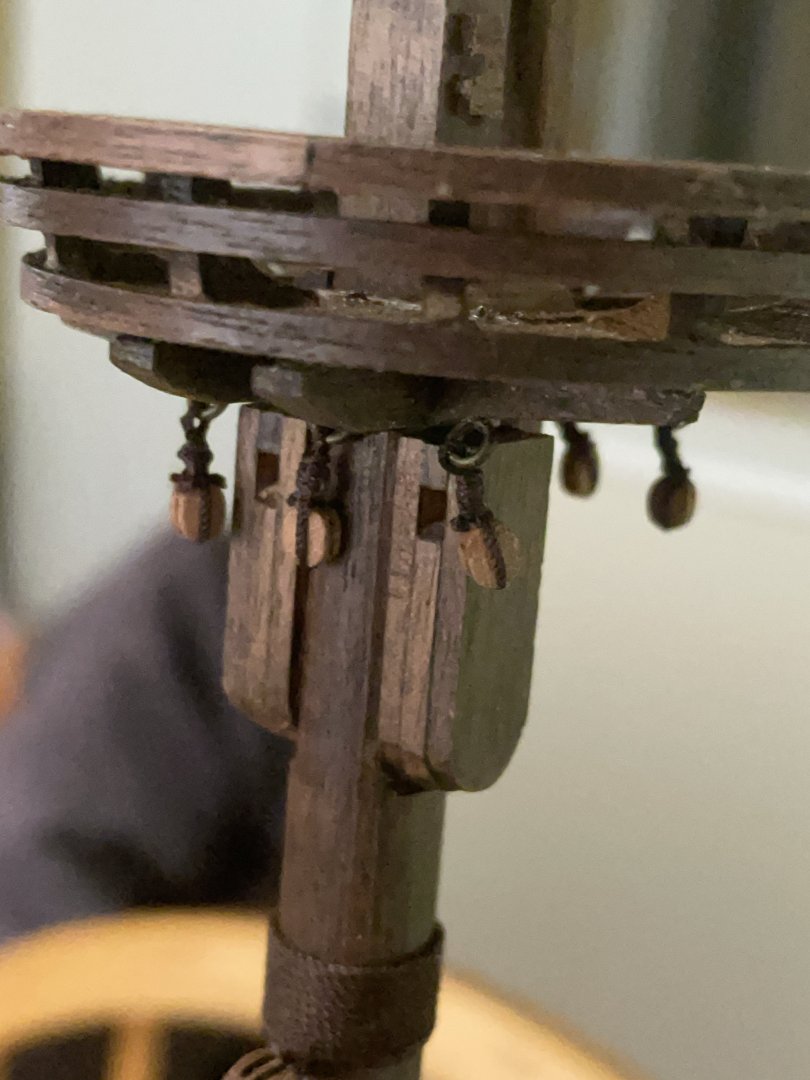
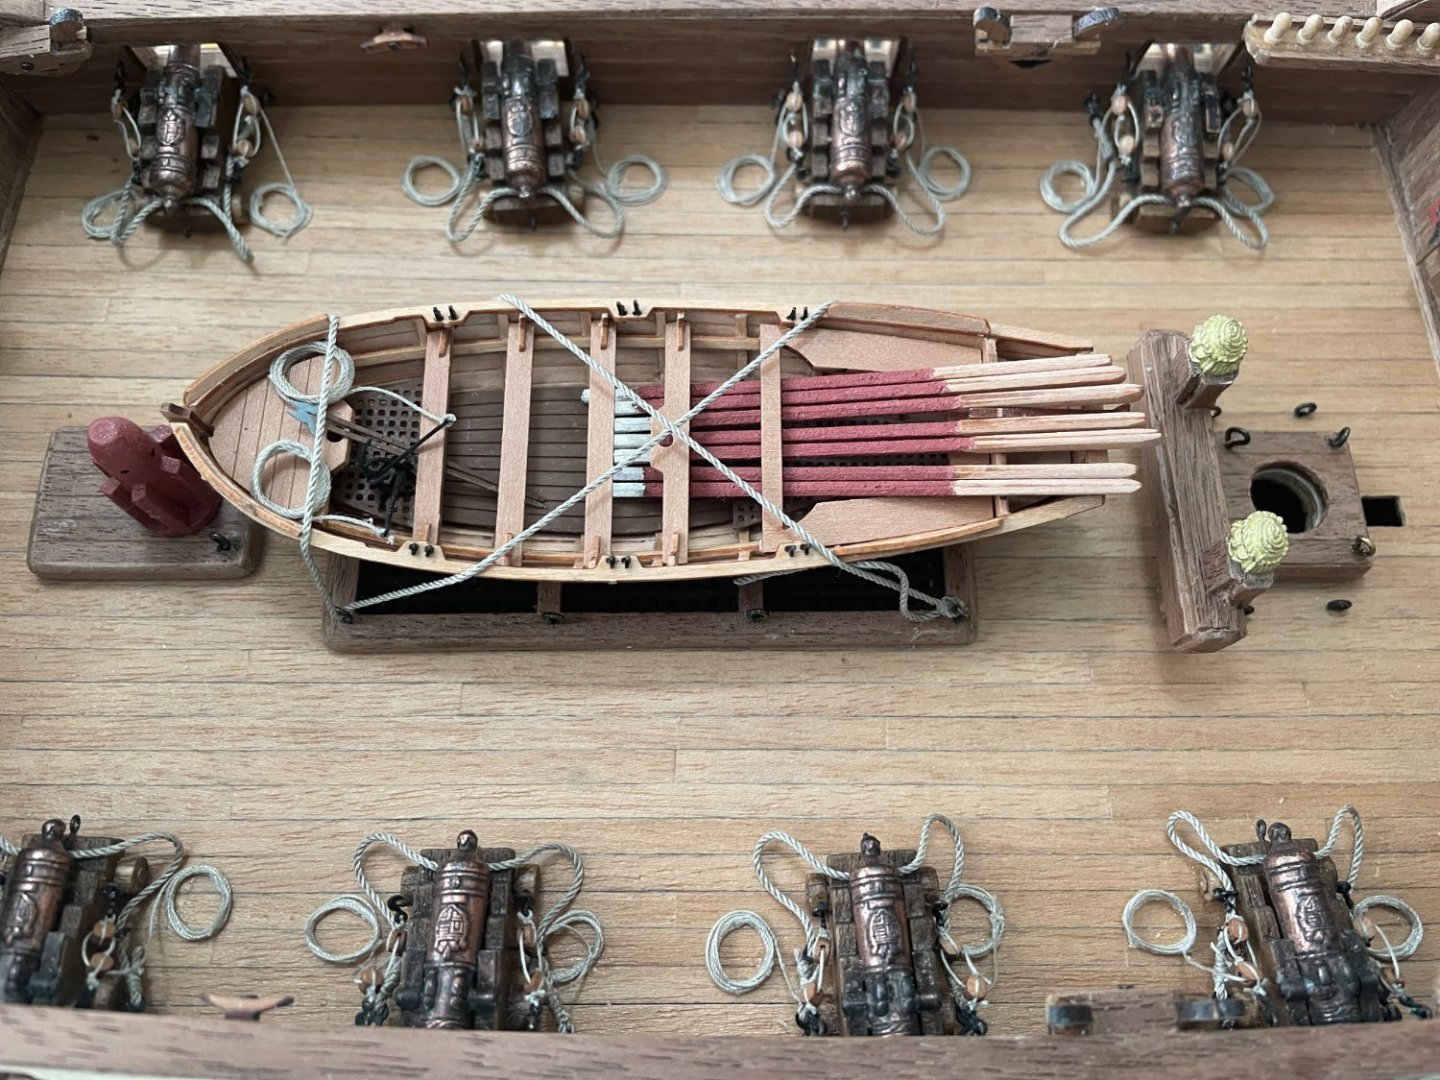
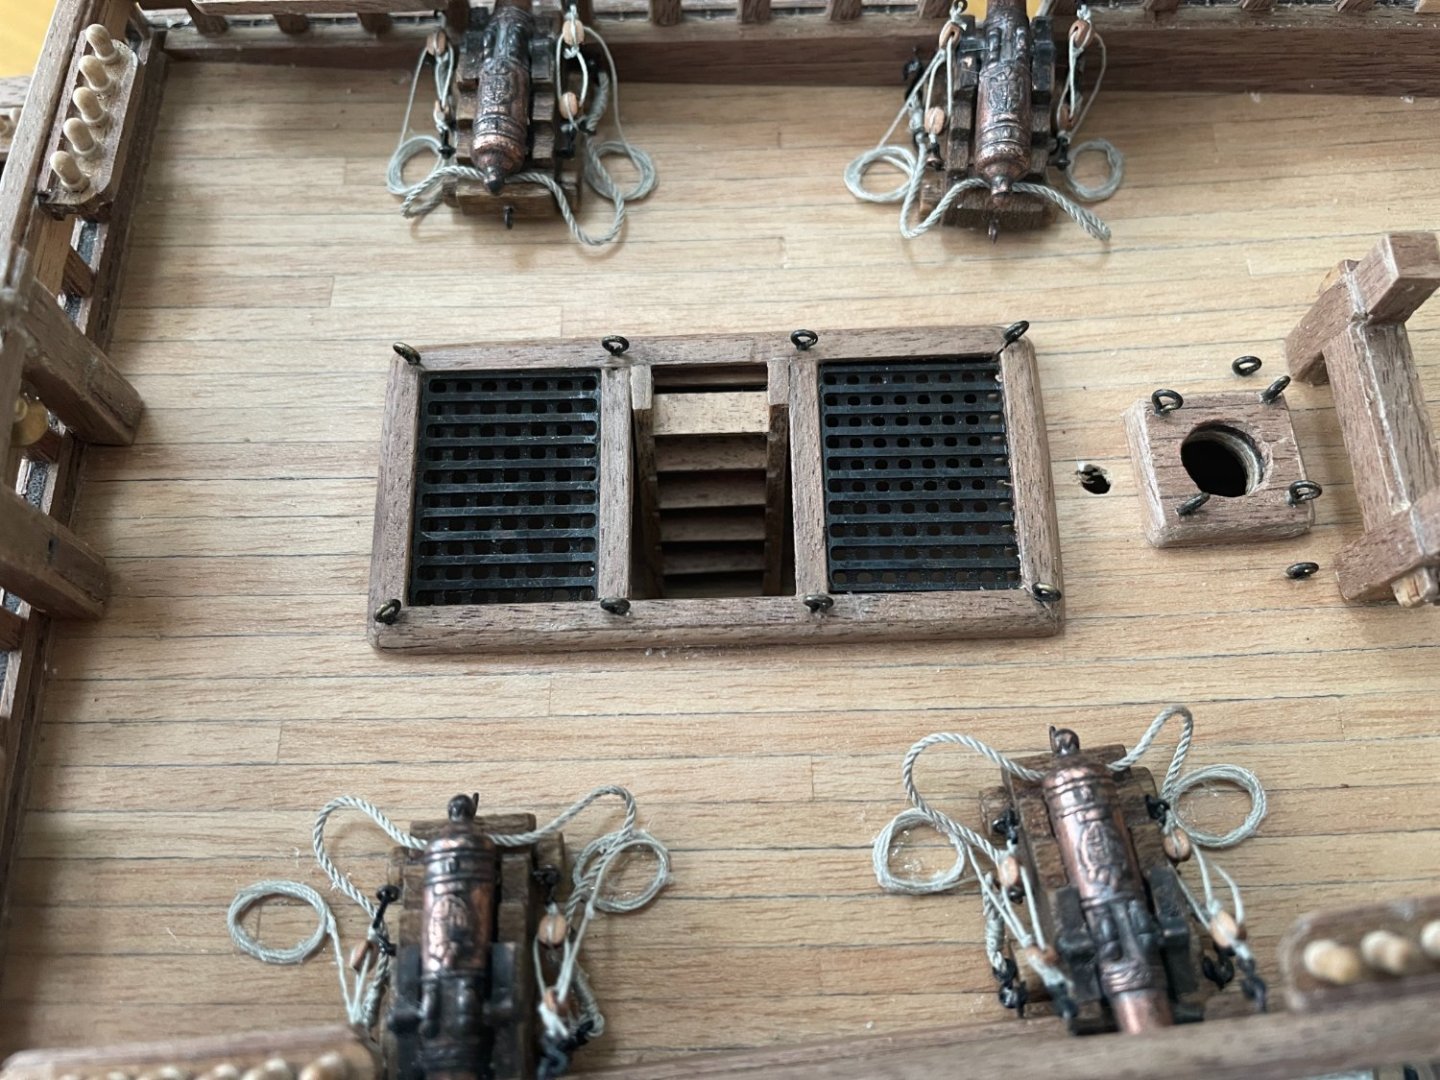
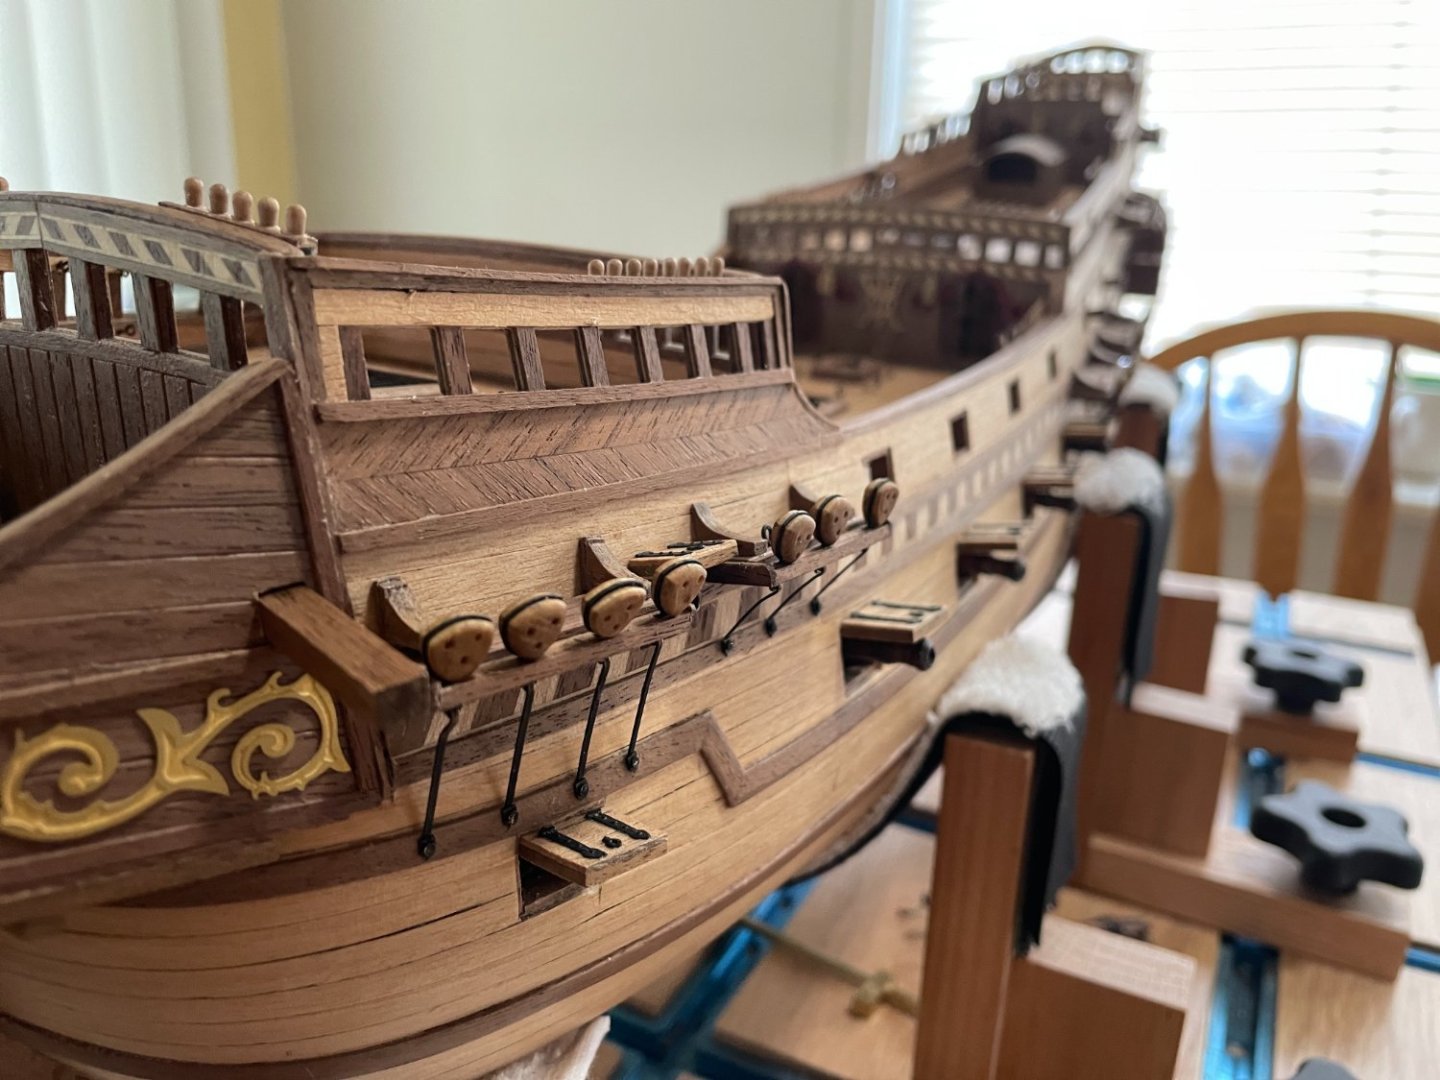
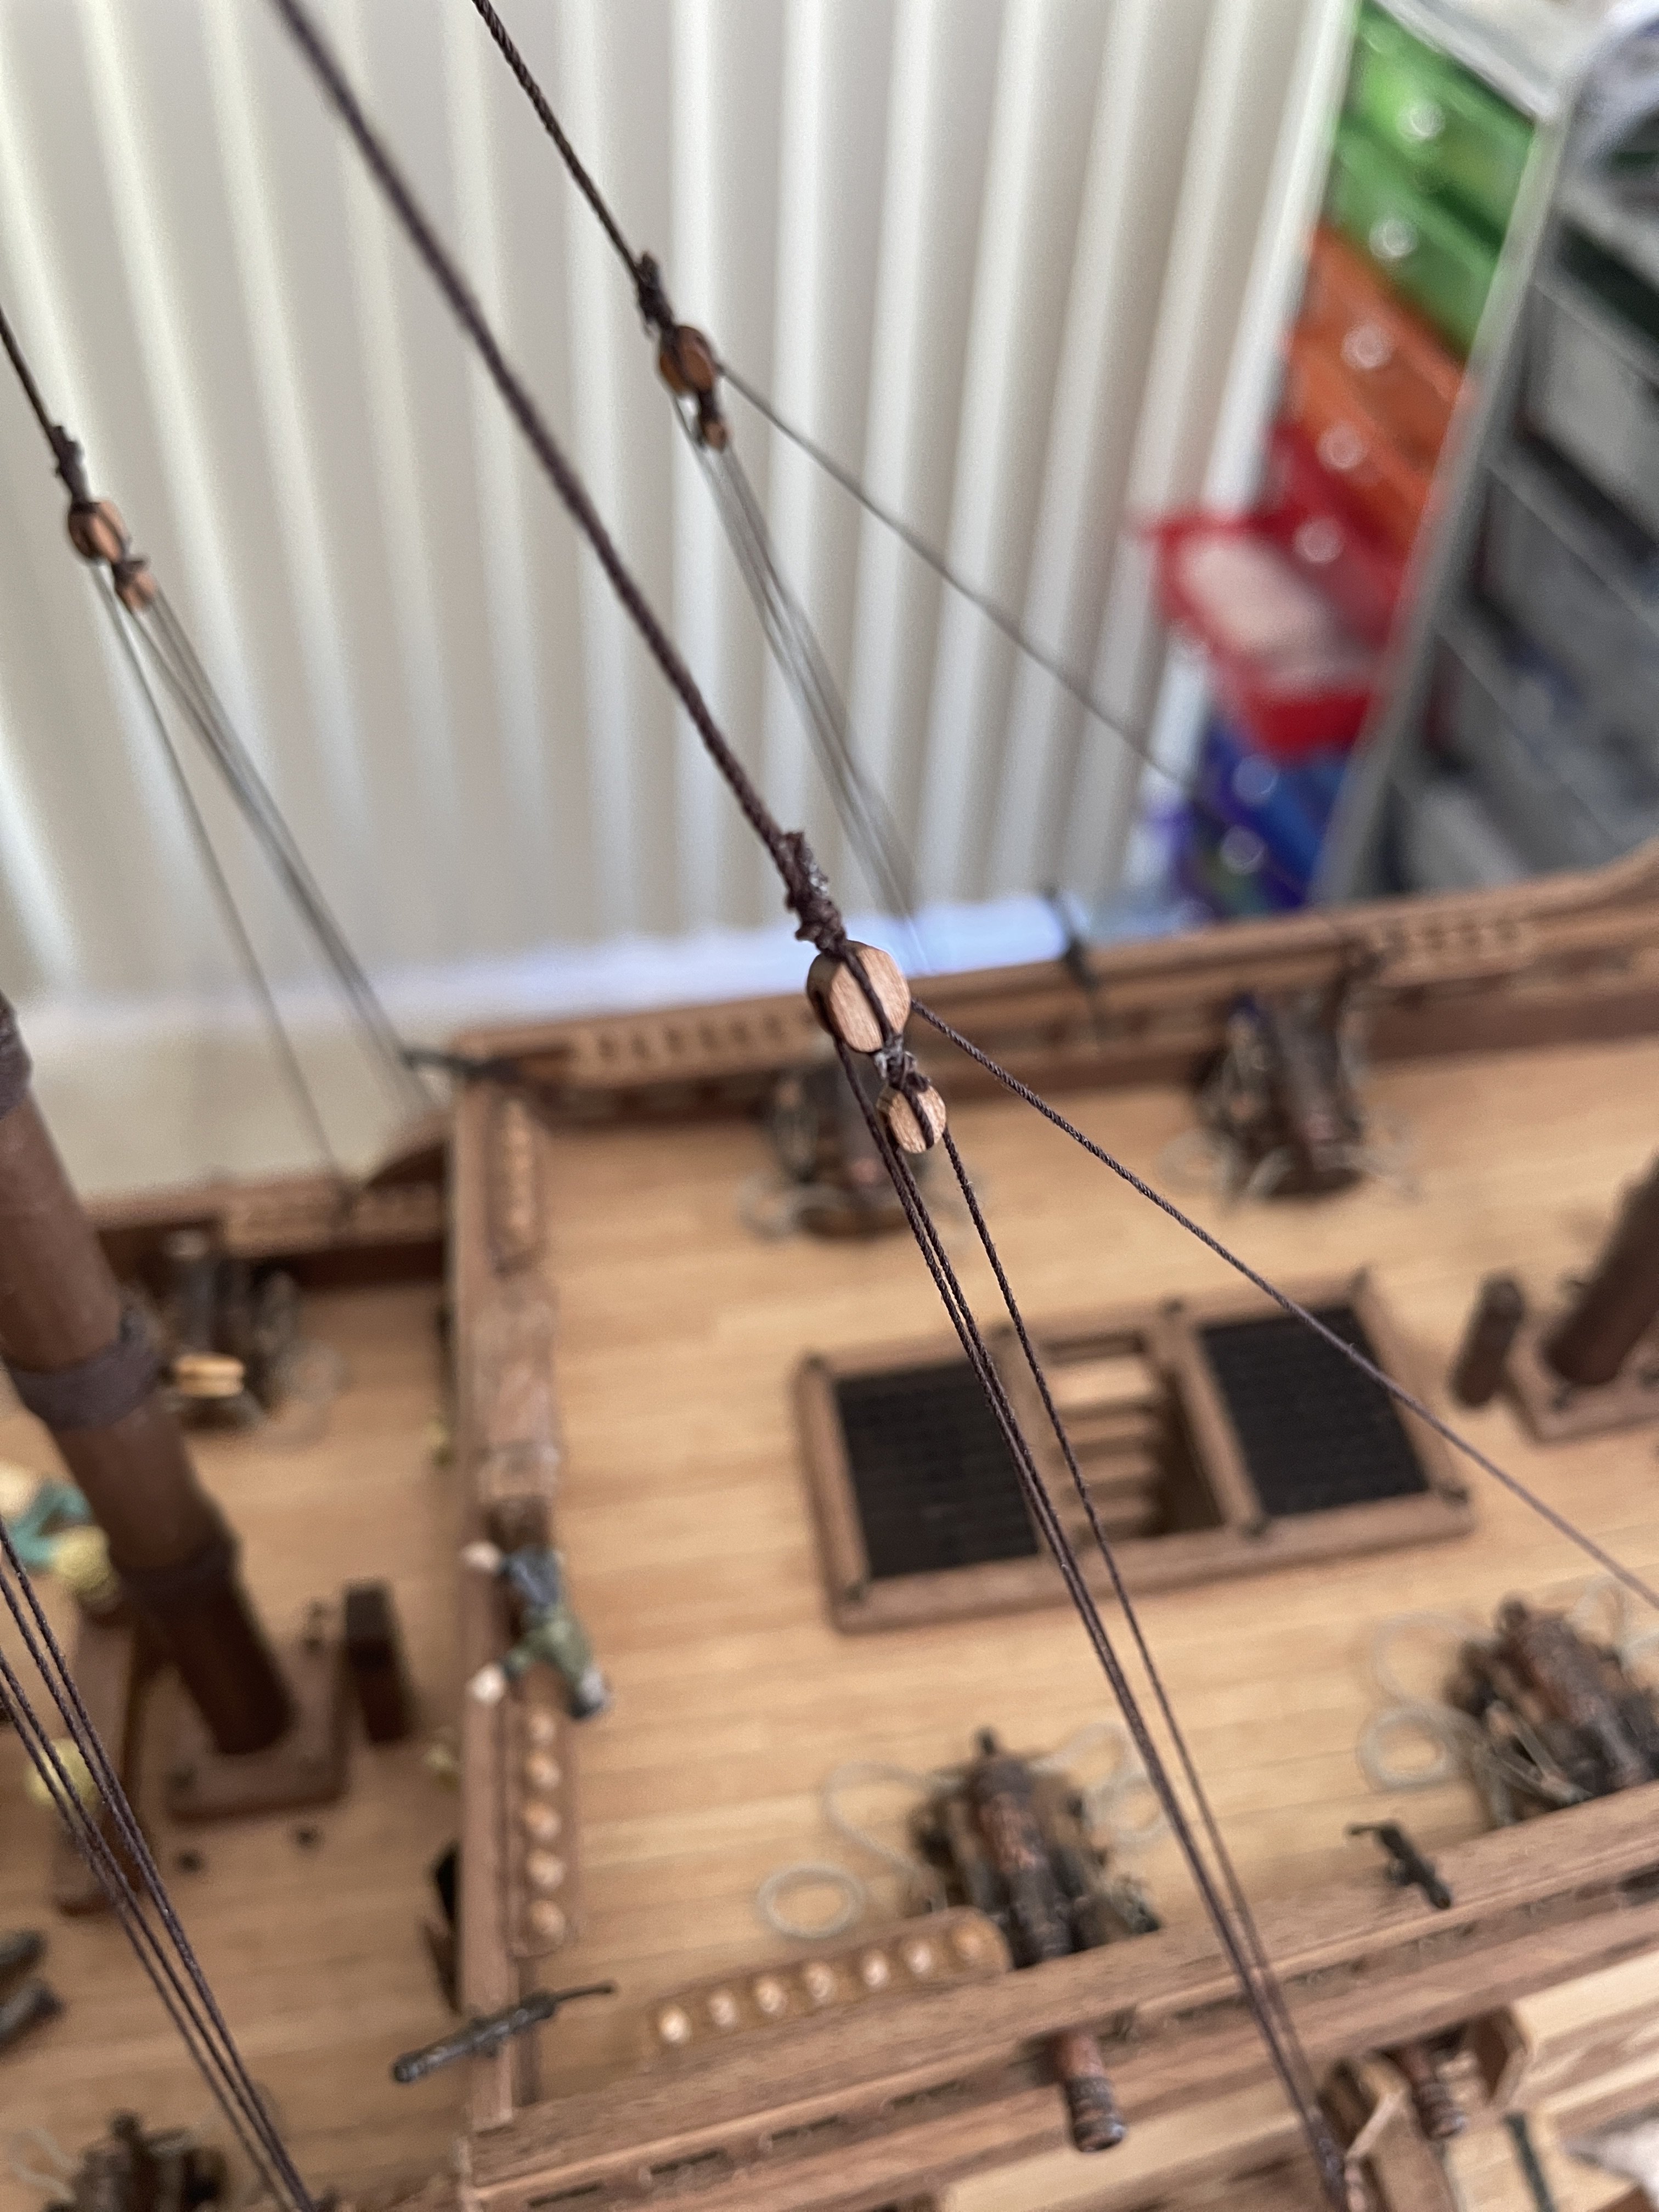
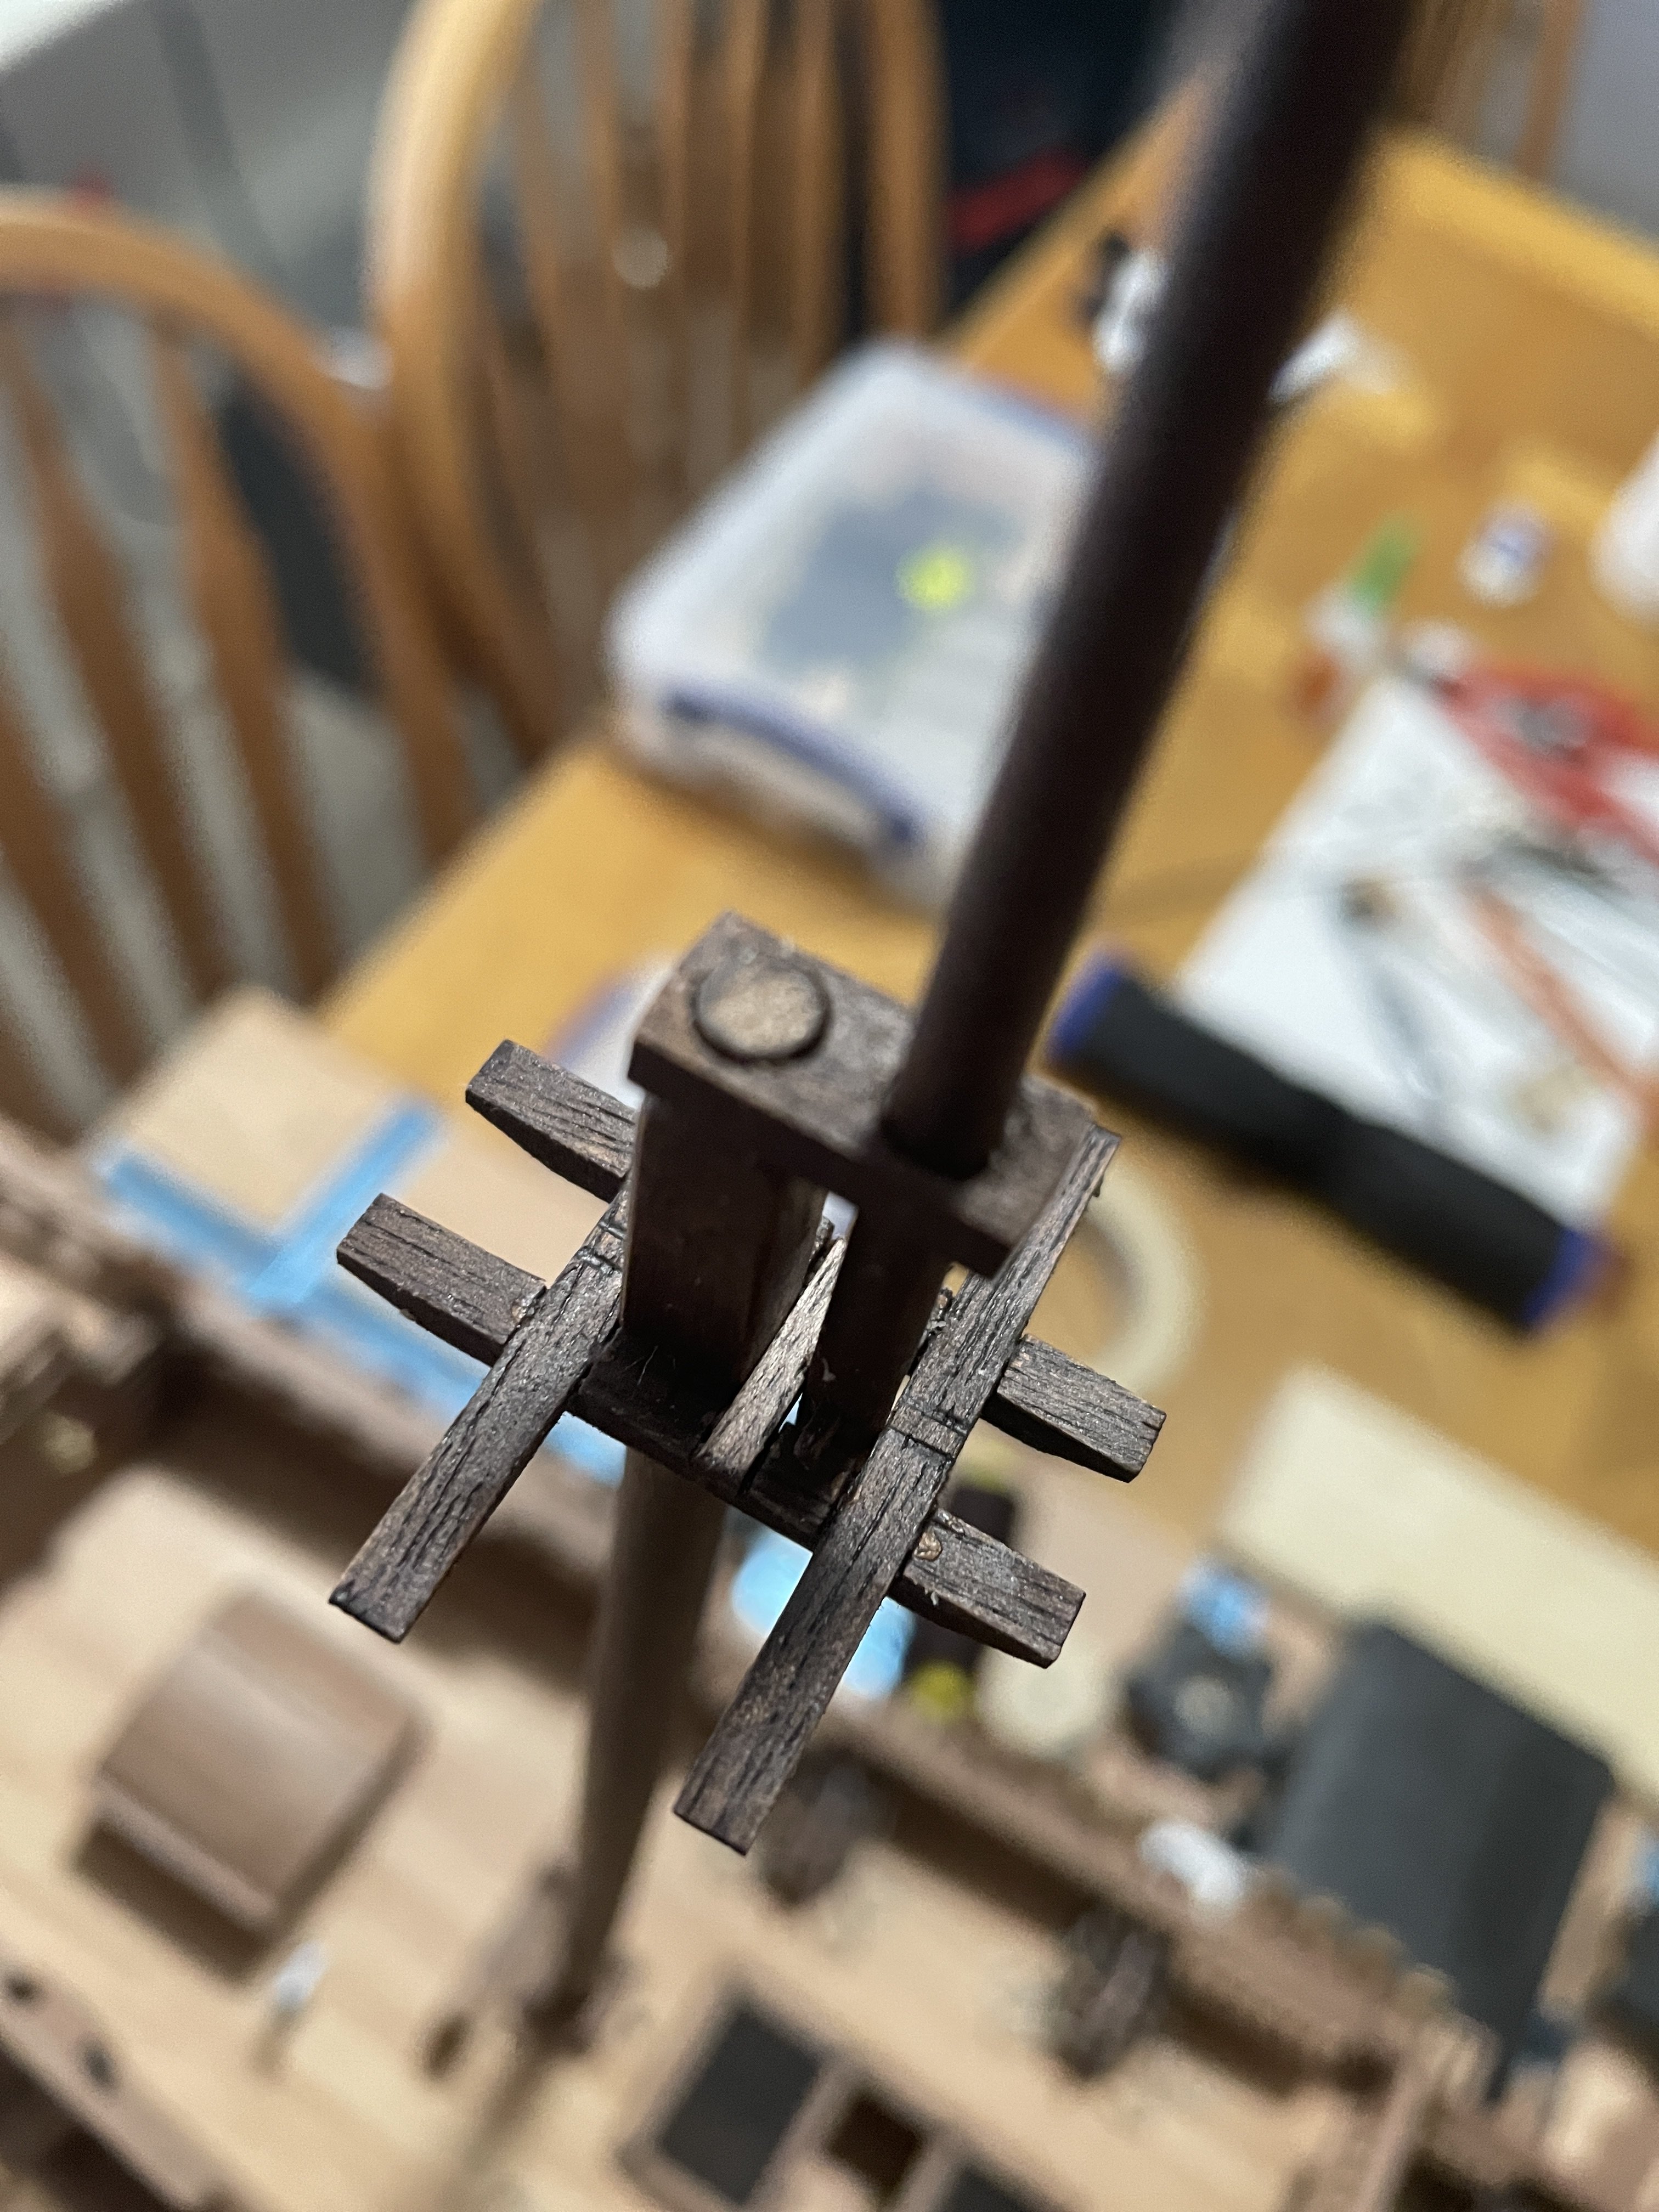
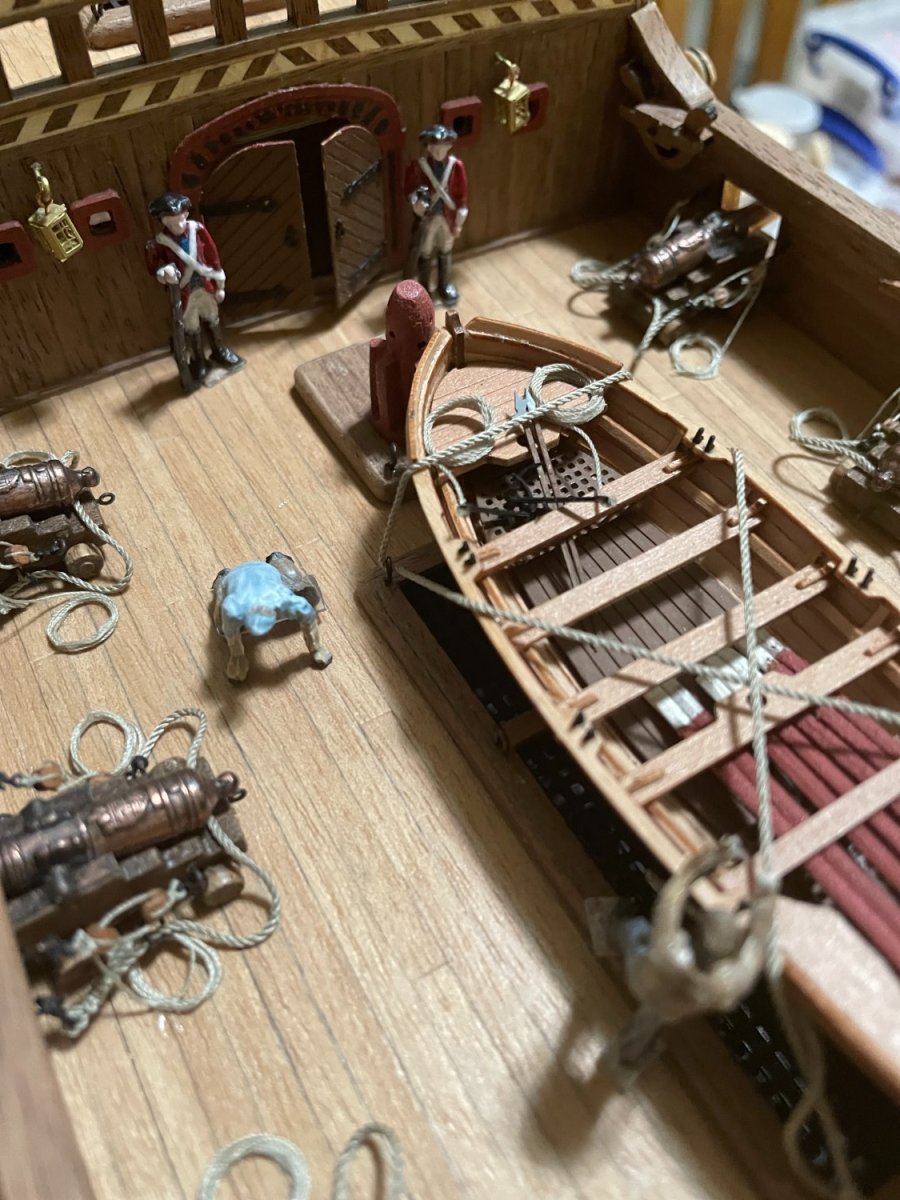
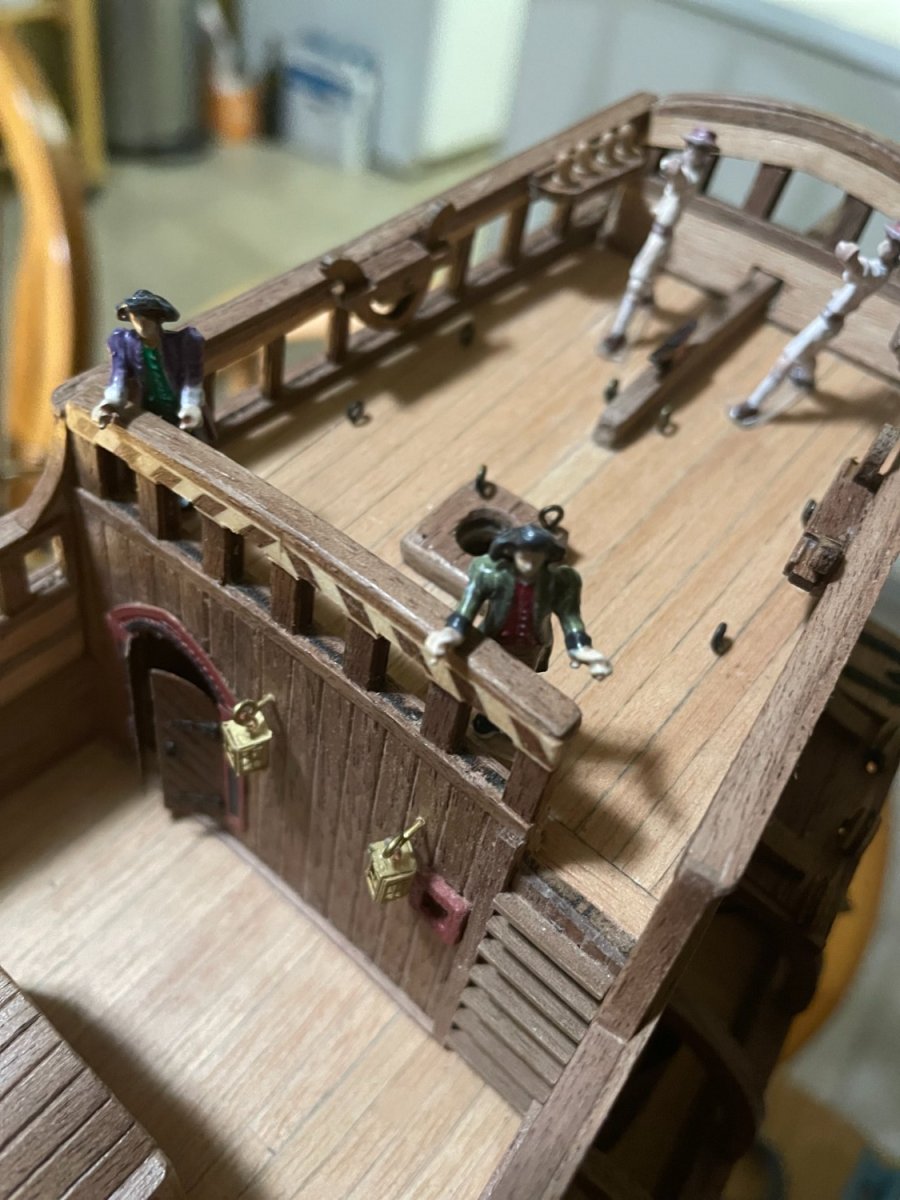
A few close-up pictures to show some of the details.


- Knocklouder, Baker, chris watton and 4 others
-
7
-
Hello, thanks all... indeed, the natural color was my go. I could not bring myself painting the hull or the mats. The reason for the inlays. It adds a little "design/oomph" while still be wood. Not quite historic though, but a display piece.
- Ronald-V, Baker and Knocklouder
-
3
-
-
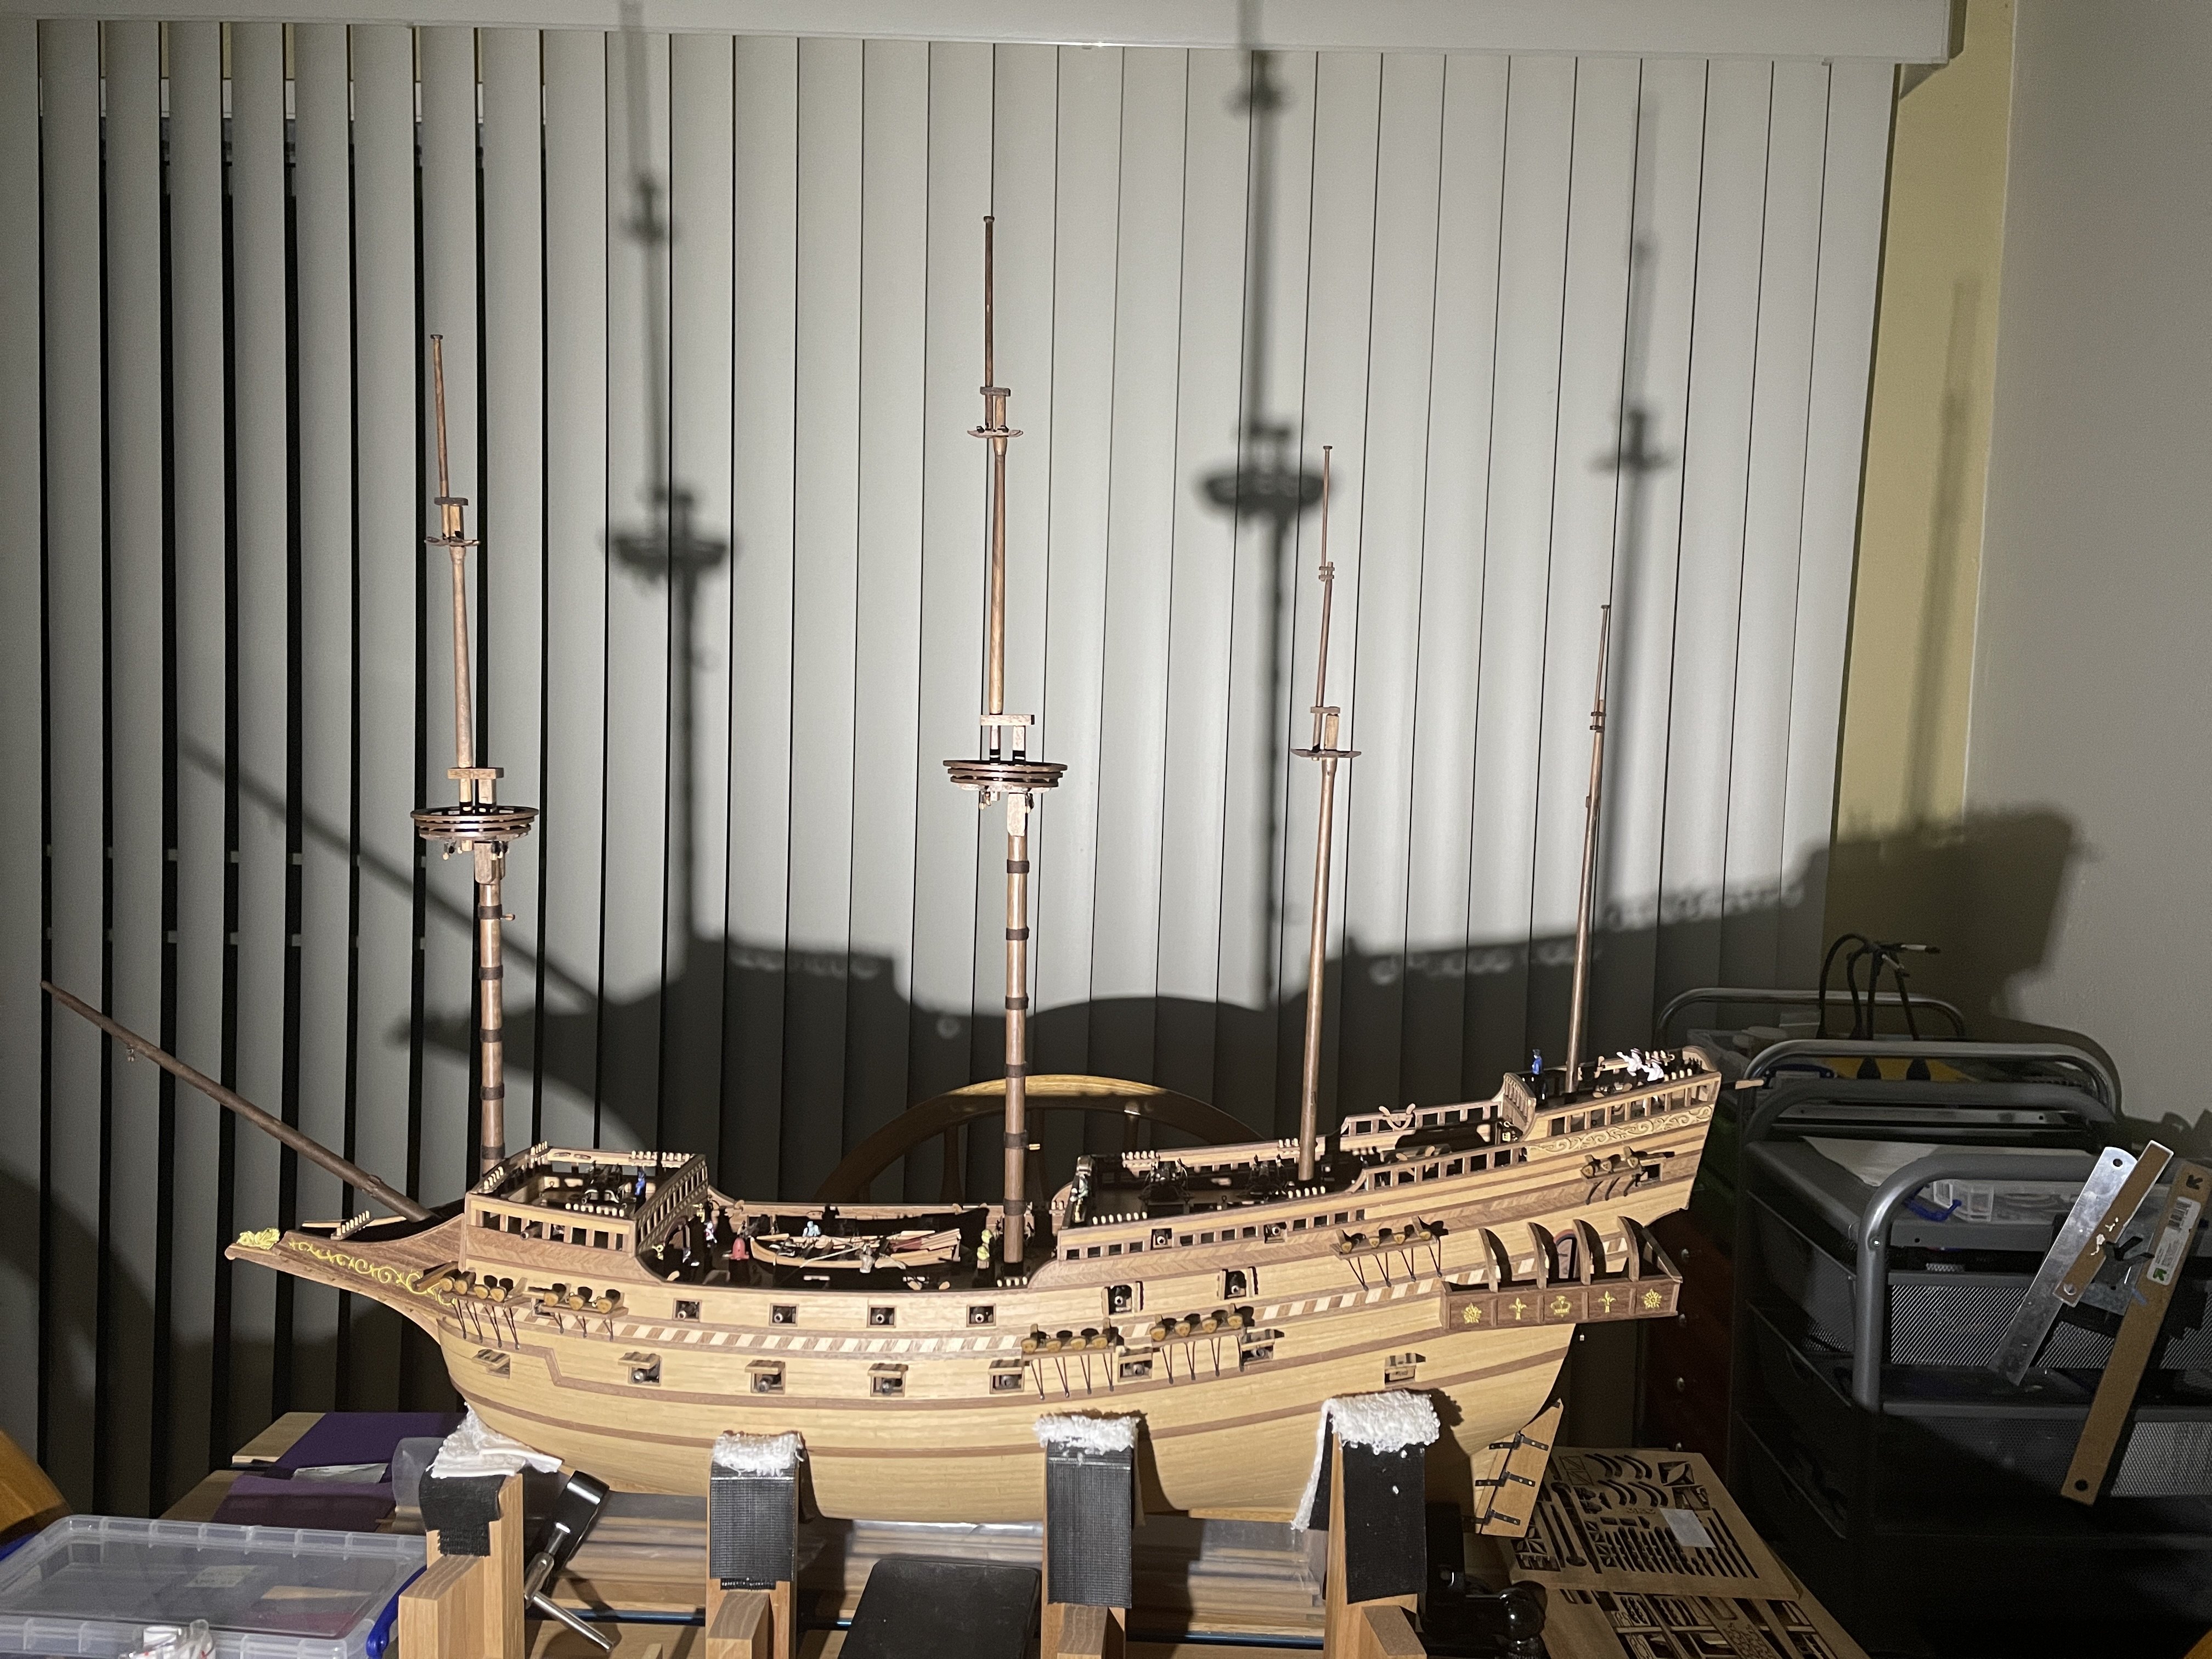
Mats: A lot of shaping but everything fits well. Nothing has been glued so far. Slow progress but still moving along. Rigging next.
- PvG Aussie, Javelin, Mr Whippy and 6 others
-
9
-
-
-
thank you @Knocklouder, appreciate. It took me 3 weeks to get the rigging blocks together. At 2.5mm, I had to wear a magnification glass... but only couple hours a day before getting a headache. Not getting any younger.
-
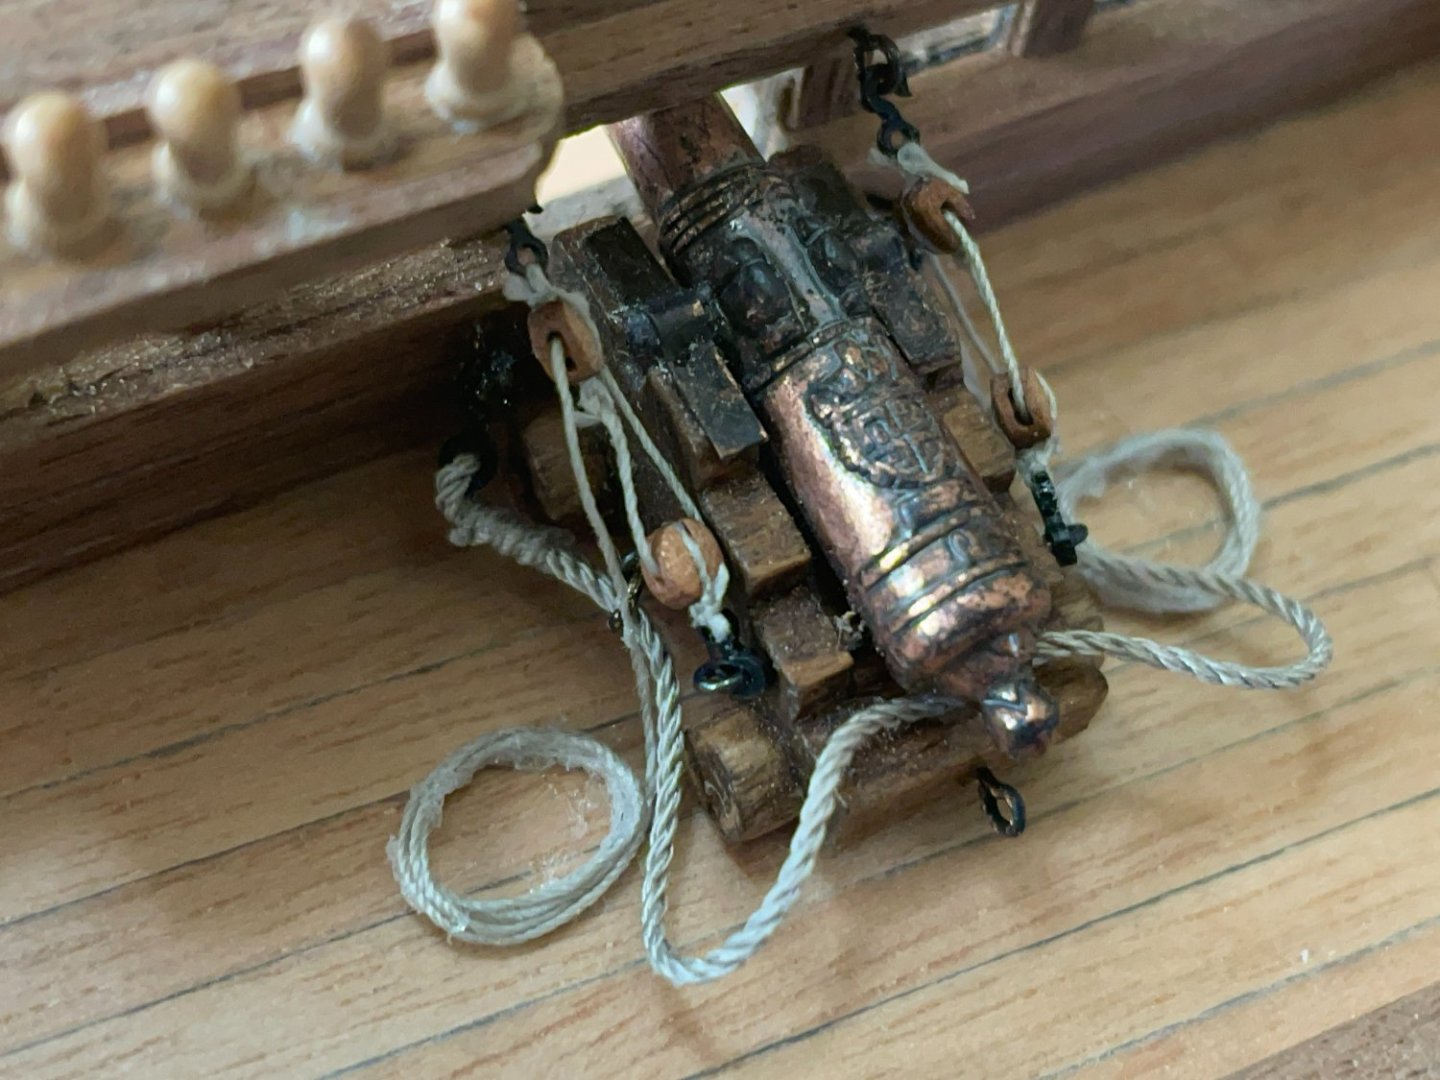
Rigged Cannon: I must say that this took me a while. They are so small.... not perfect but a step up for me since it is my first time. I like Master Korabel blocks a lot, but they are so hard to find in any amount.
Glue is still fresh... it will be mostly gone when fully dry. I used Fabric glue for the ropes.
- GrandpaPhil, Knocklouder, Ronald-V and 5 others
-
8
-
Cannon rigging at various stages. It takes patience. Two ropes, one to anchor the cannon to the ship (using 0.75mm rope) and the others to handle the cannon back and forth (0.25mm rope with blocks). Looking forward to having this step done. I'm running out of 2.5mm blocks so I may not do the one at the back.
-
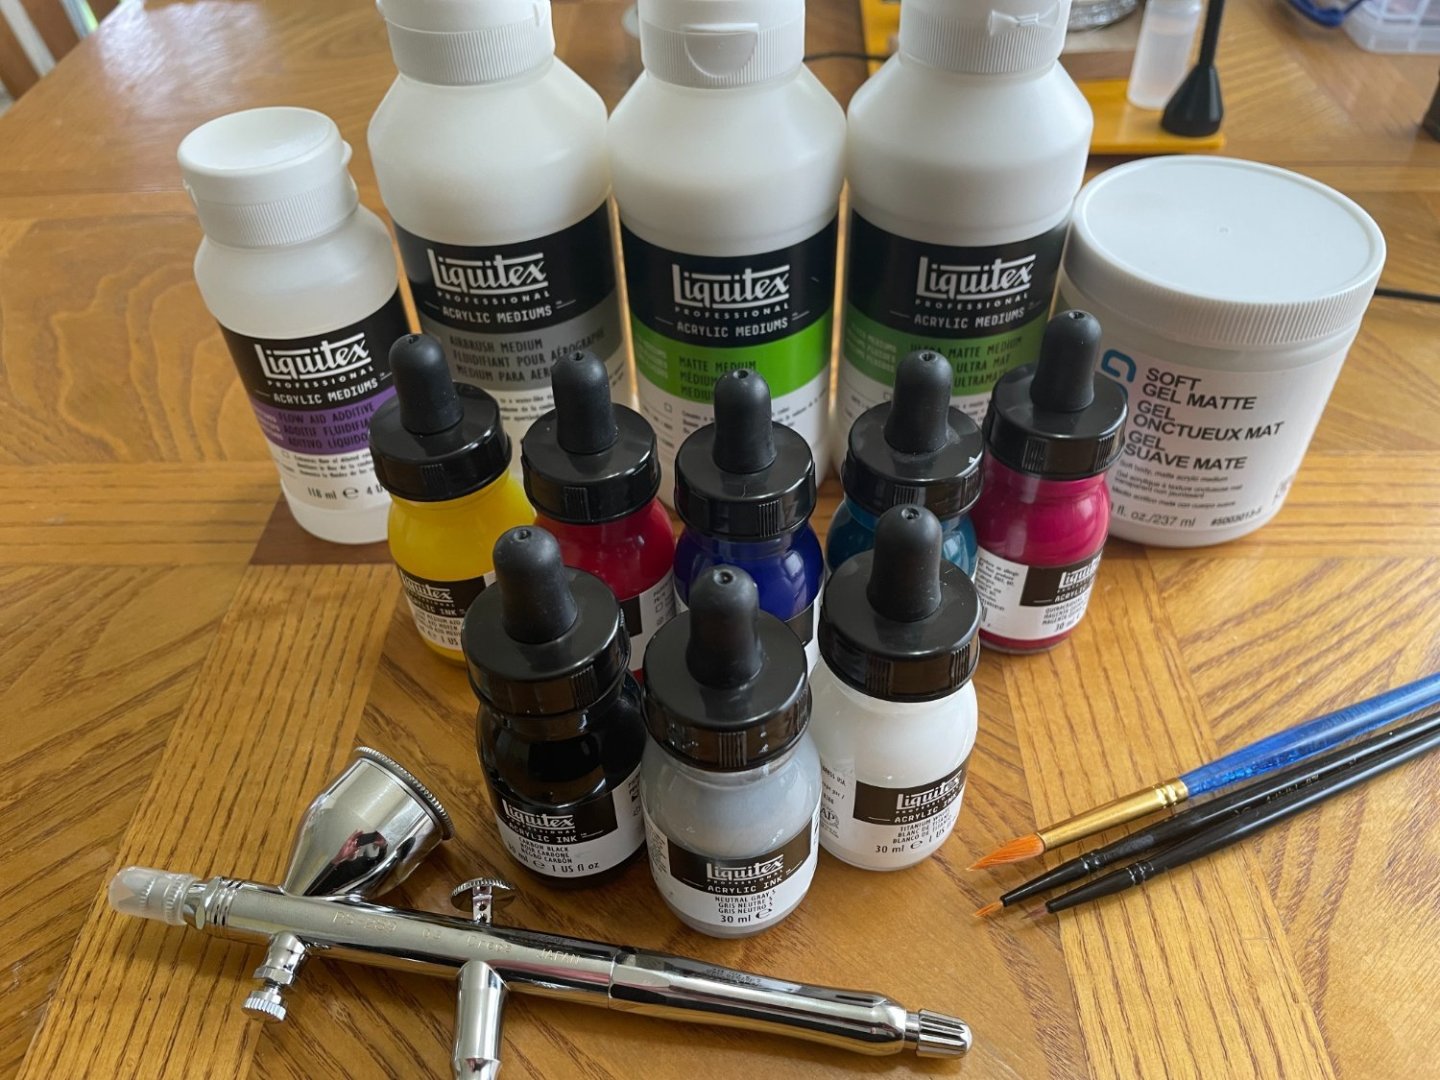
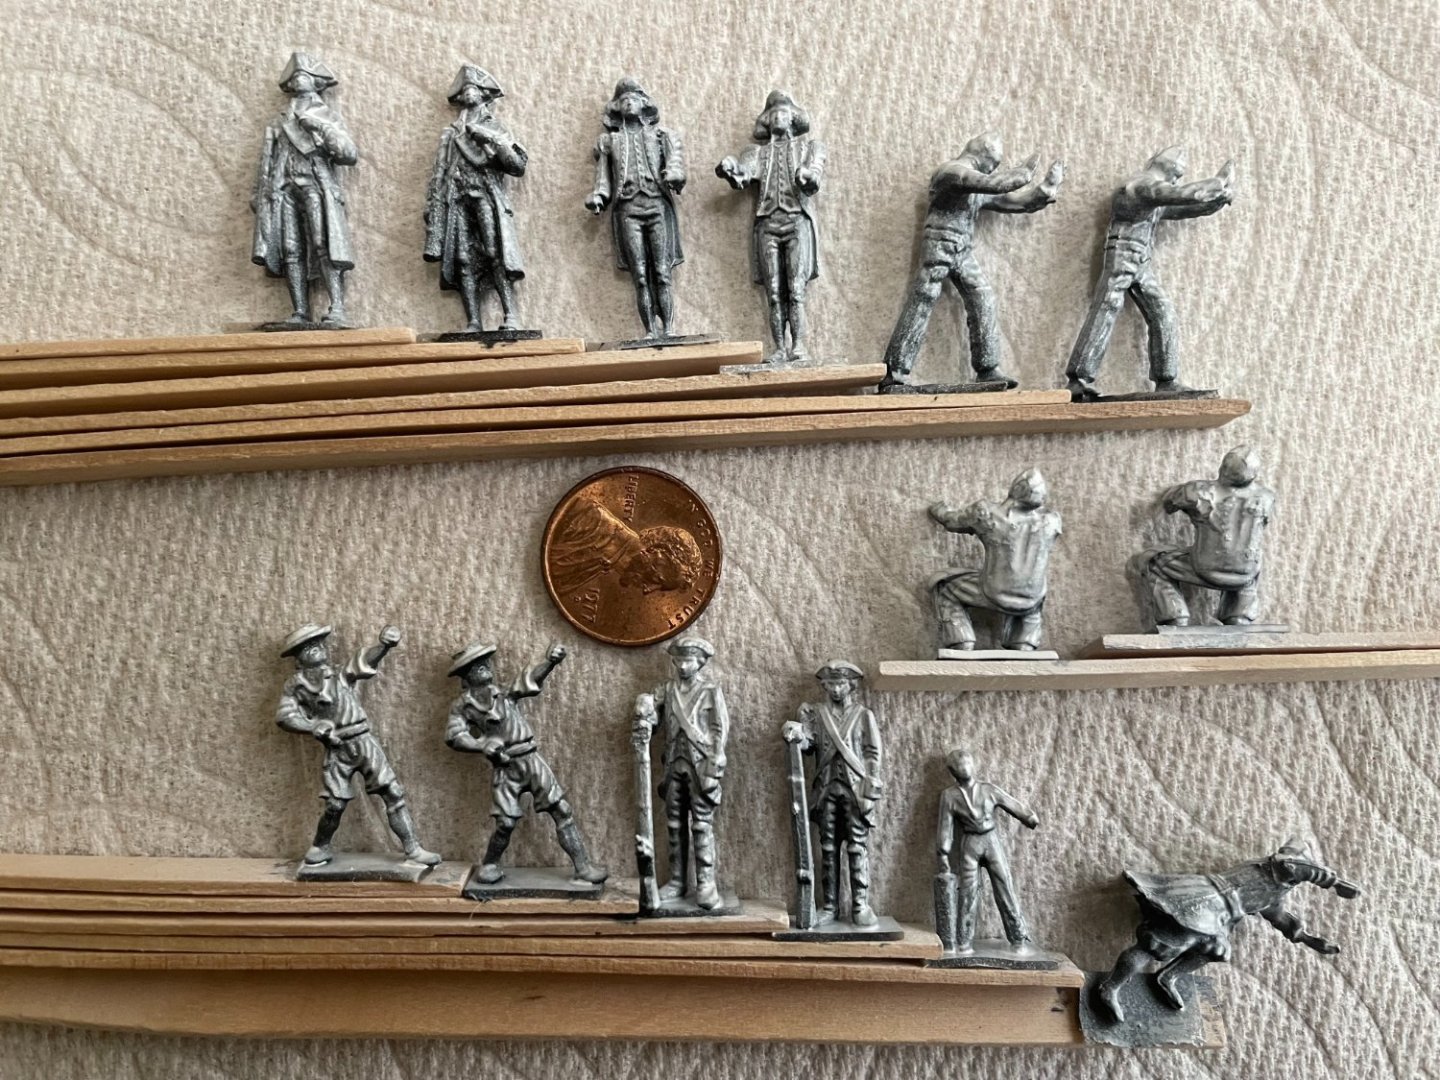
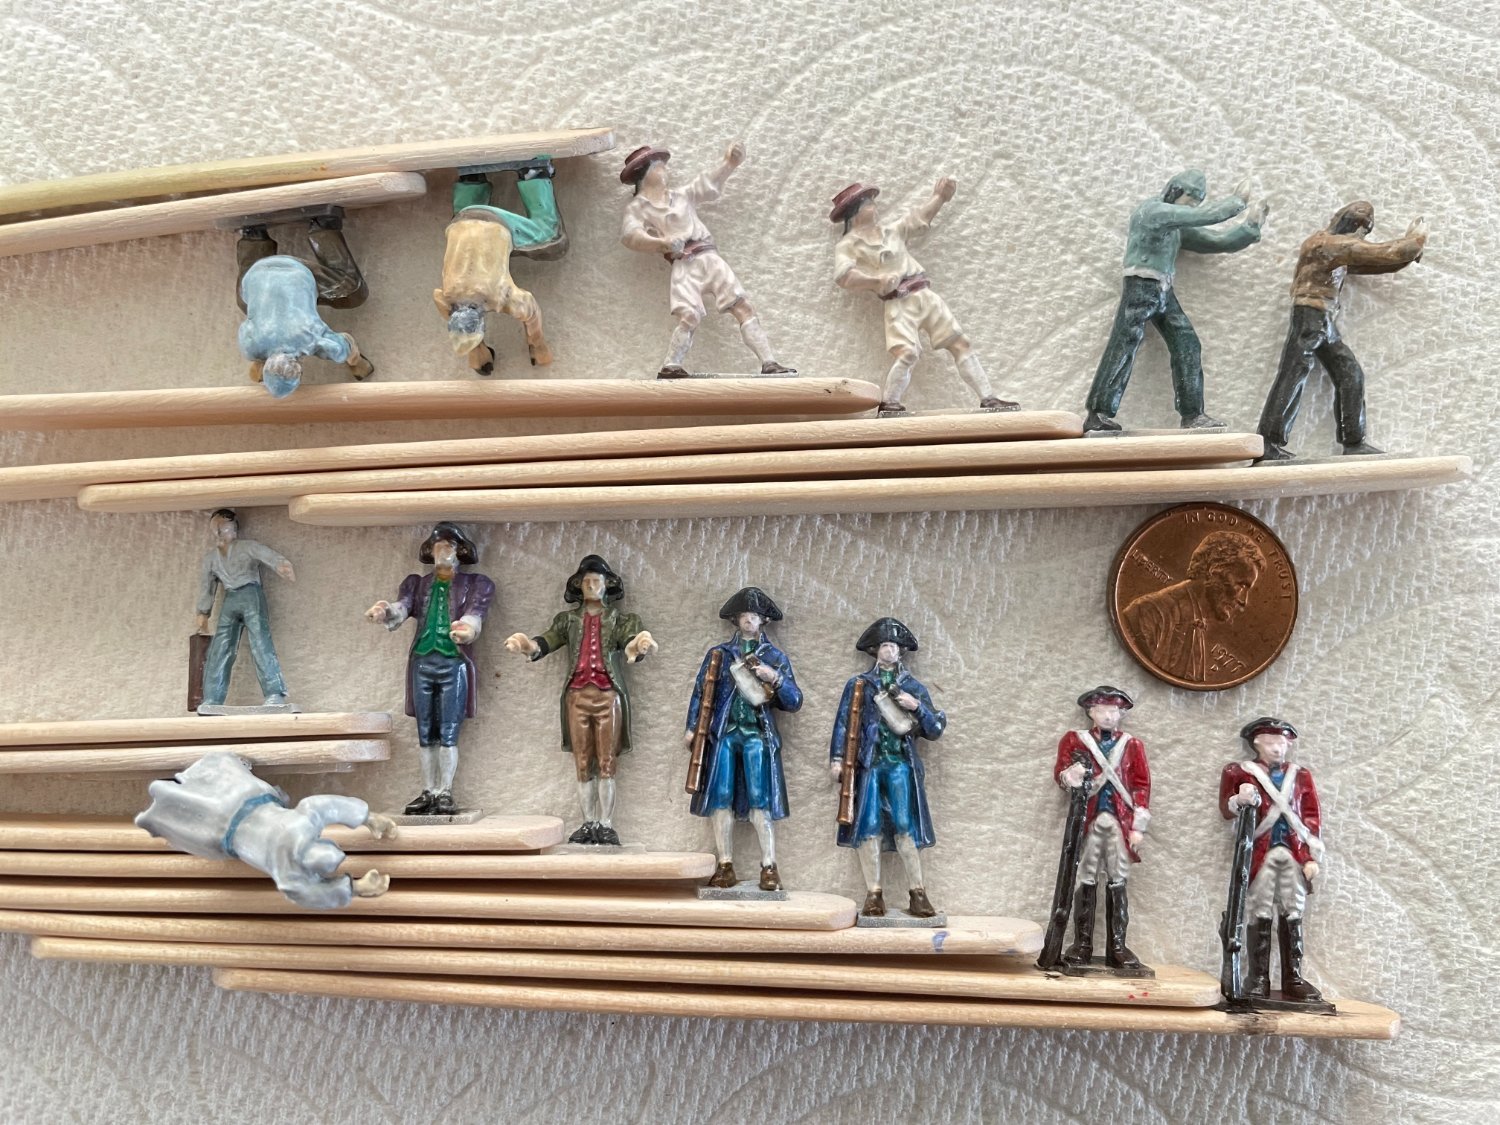
Taking care of the crew: I wanted to add before rigging. It may be difficult to place later. I have not painted miniatures in 40 years... so it was time for supplies. I'm doing my own paint, since you can basically tailor it to what you need, either airbrush (new to me), contrast, washes, opaque or translucent paint of pretty much any color with CMYK primary. I like ink because they are pigment dense so when you start mixing for colors, it does not get diluted much. First time trying Zenital base coat (highlights and shadows) on such a small model... let's see later how it turns out with colors.
Not great quality miniatures... but hey! I bought them to give a sense of scale (they are 1:64 too), and since I have it at hand, why not use them!
- TurkSailor, Baker, GrandpaPhil and 2 others
-
5
-
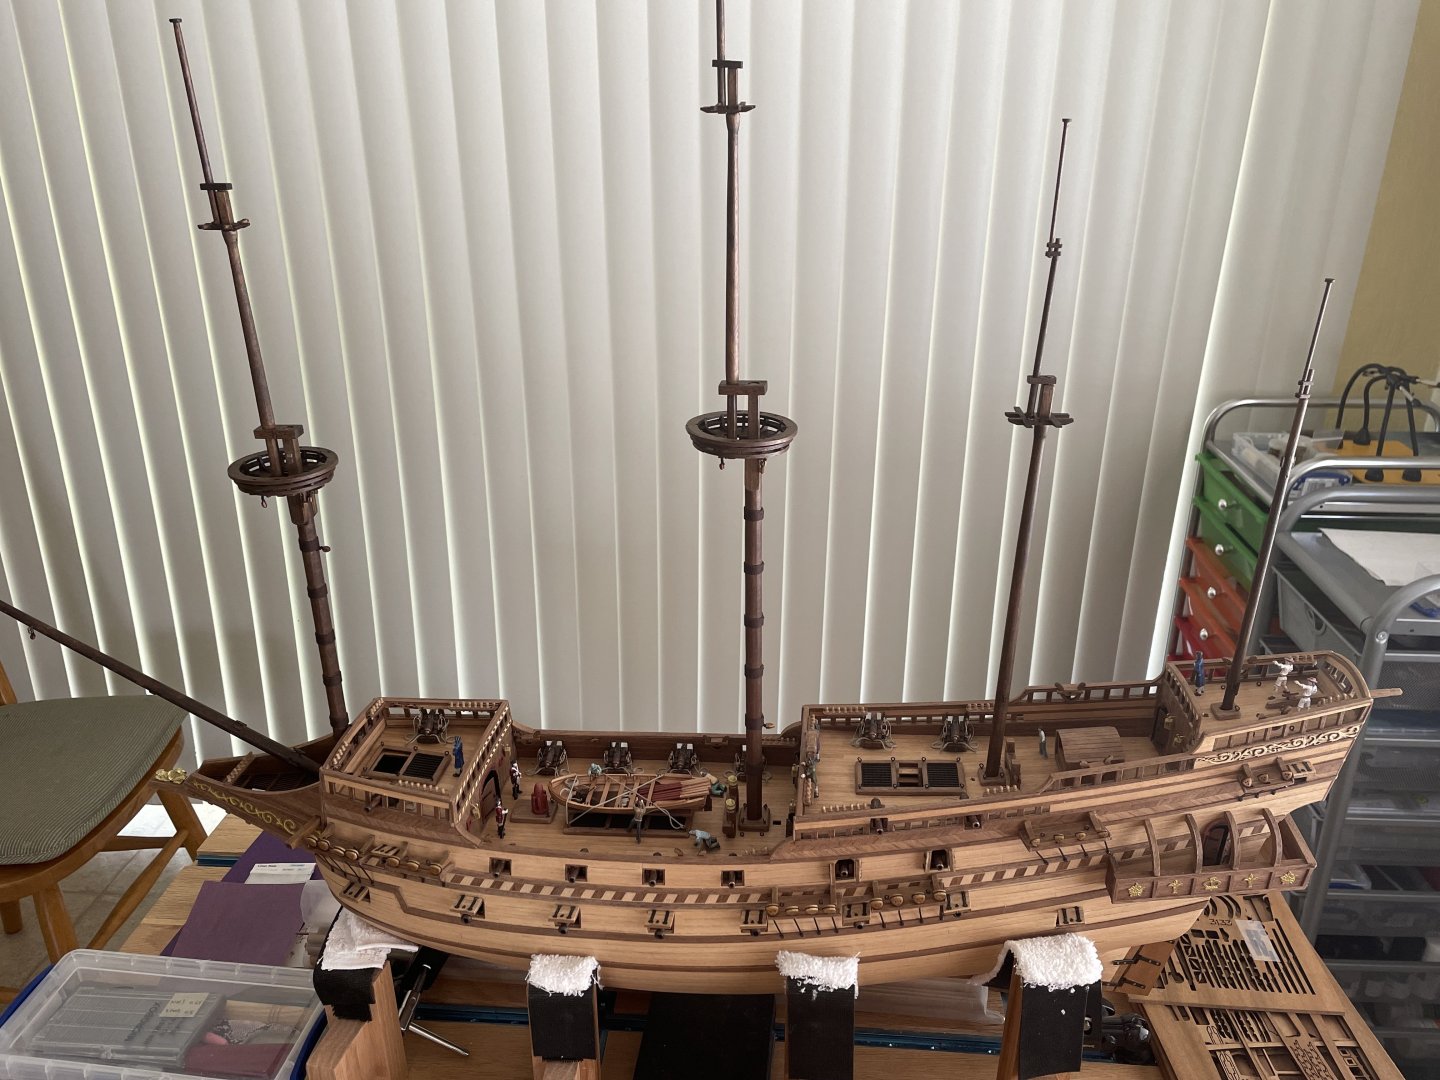
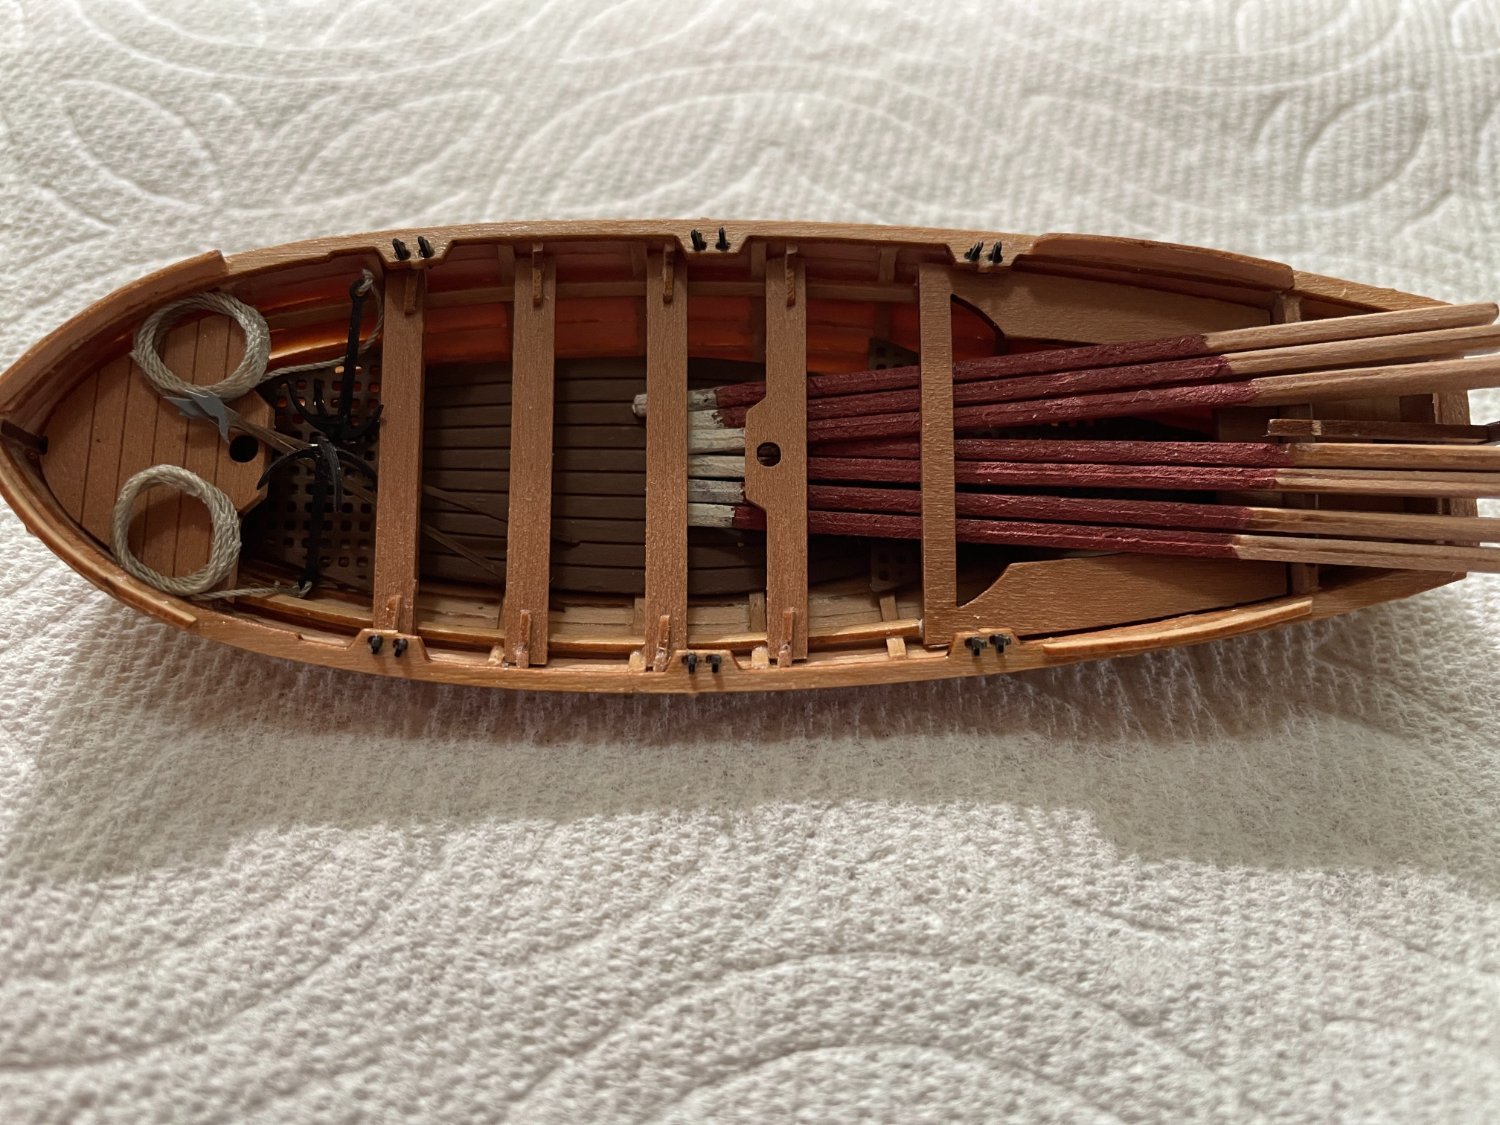
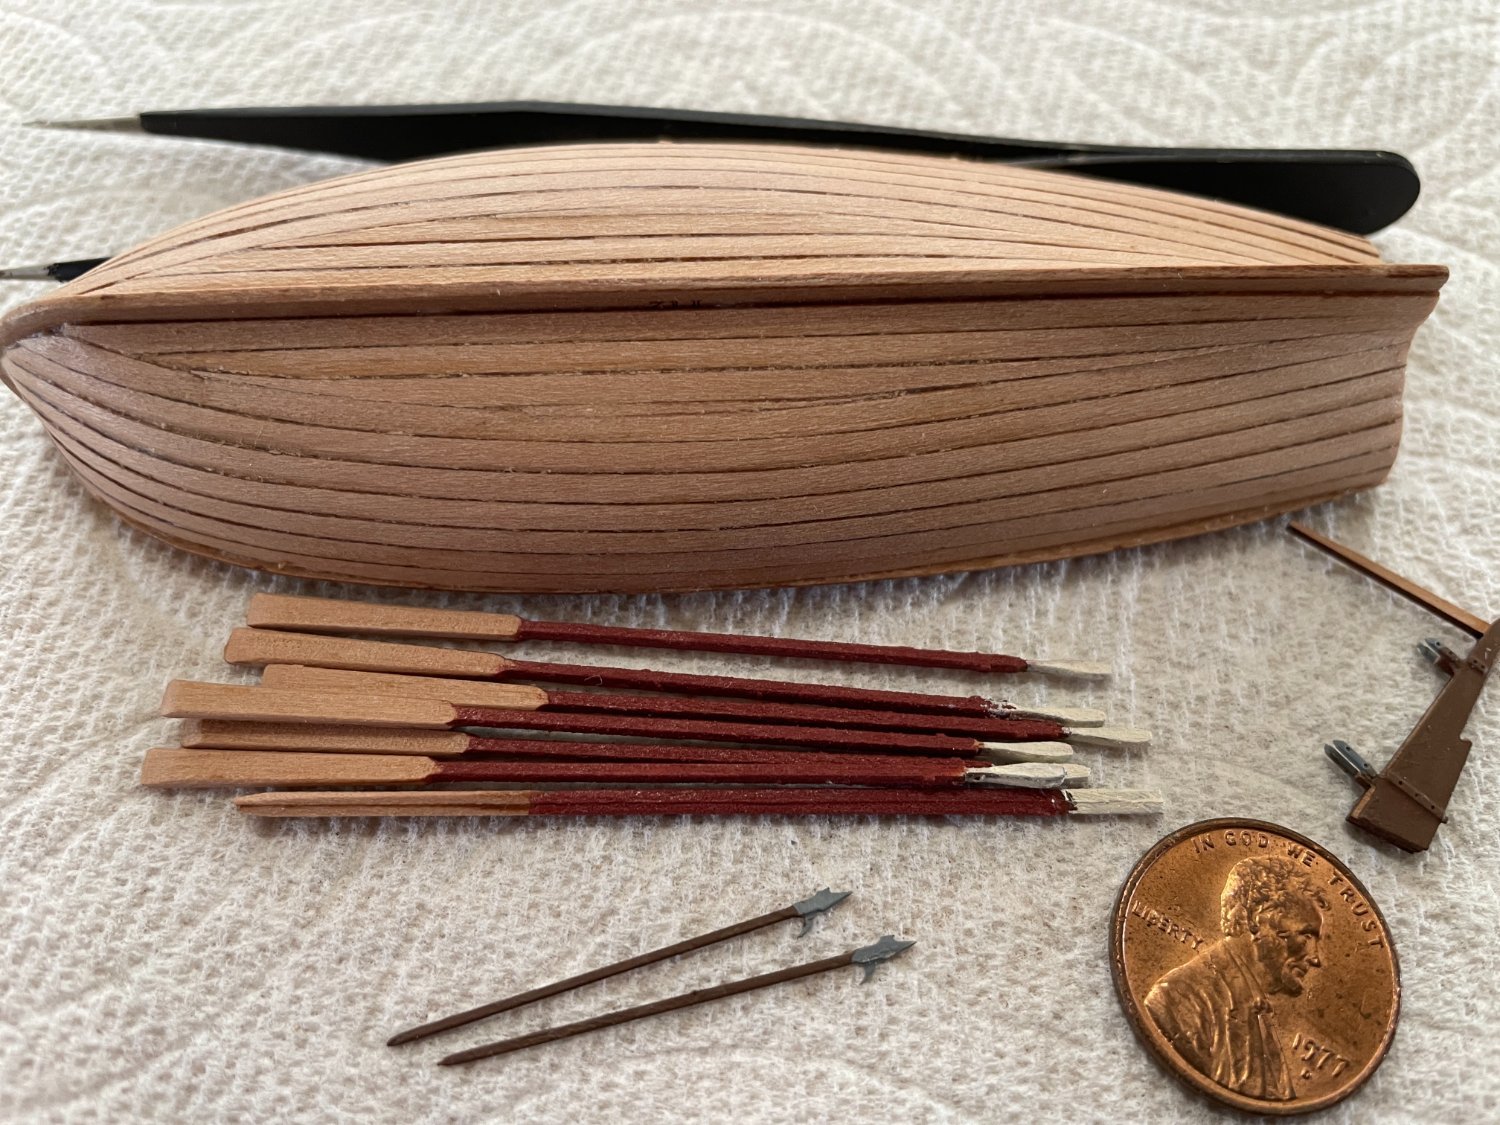
Yawl 22 ft completed...

- BobG, ccoyle, TurkSailor and 6 others
-
9
-
22 ft Yawl (Vanguard Models): I'm adding a 22ft Yawl and 18ft Cutter (later) to the Revenge Build. Both are made by Vanguard Models and of excellent quality and design. Since we don't see those often, I'm adding pictures below. The model has matte clear coat only (except at the bottom of the yawl because it has photo-etch parts - dark brown). Wood choice (pearwood and something else) is excellent and the laser burn is very minimal. Overall, a wonderful small kit, worth every single pennies. Note: A few photo-etch accessories still need to be added.
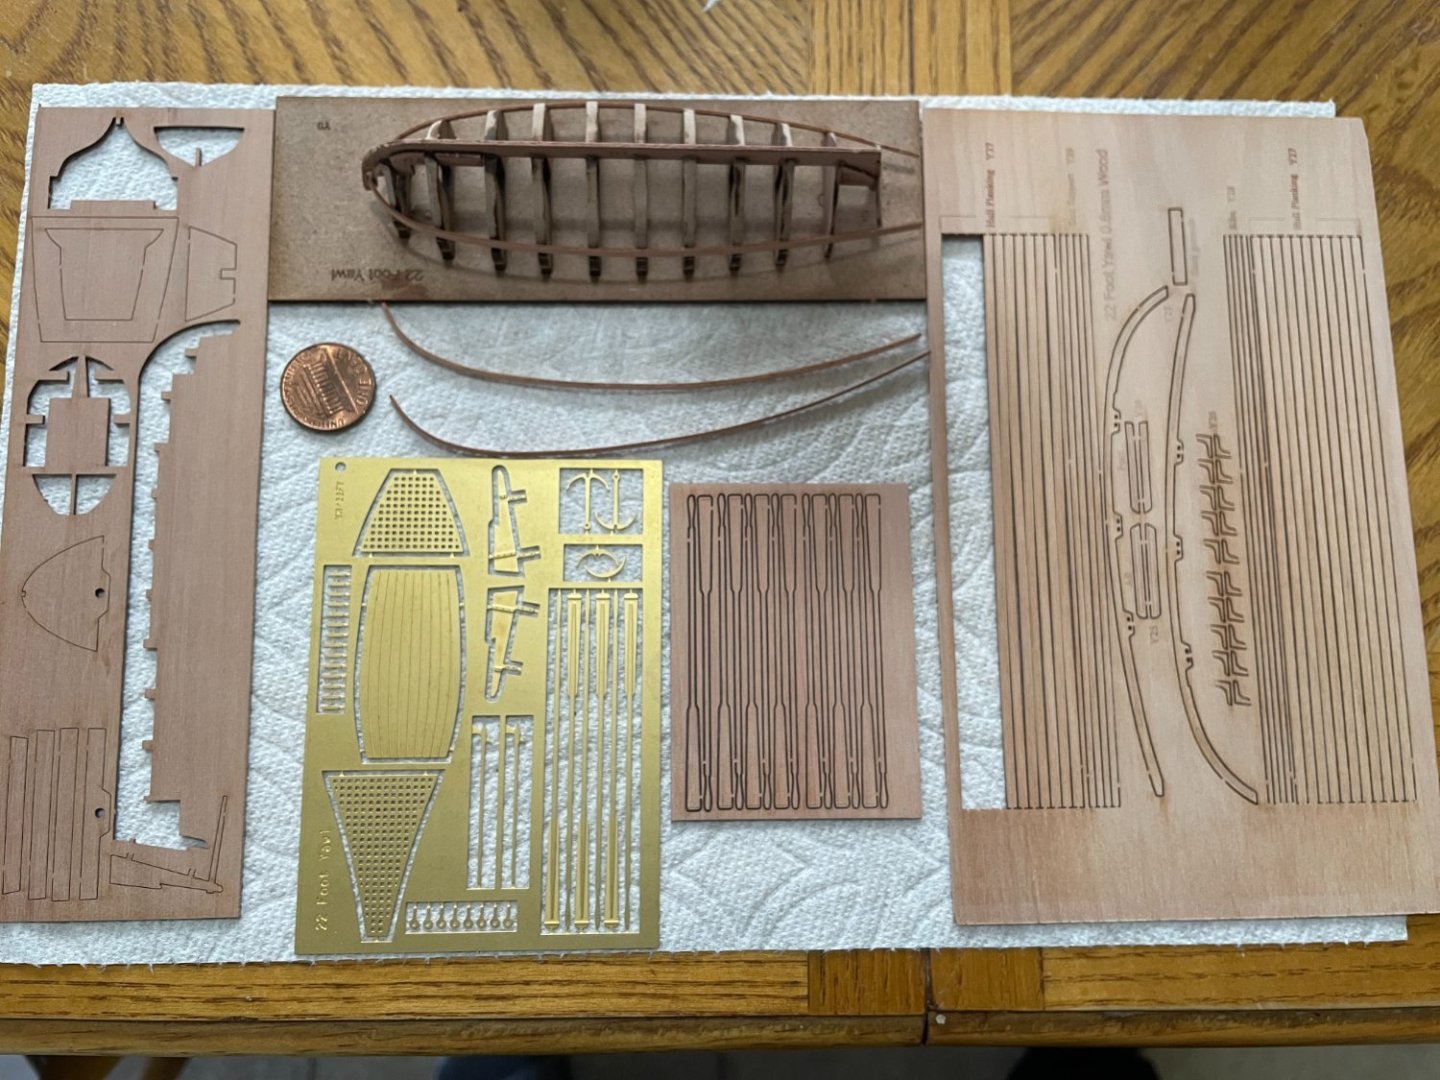
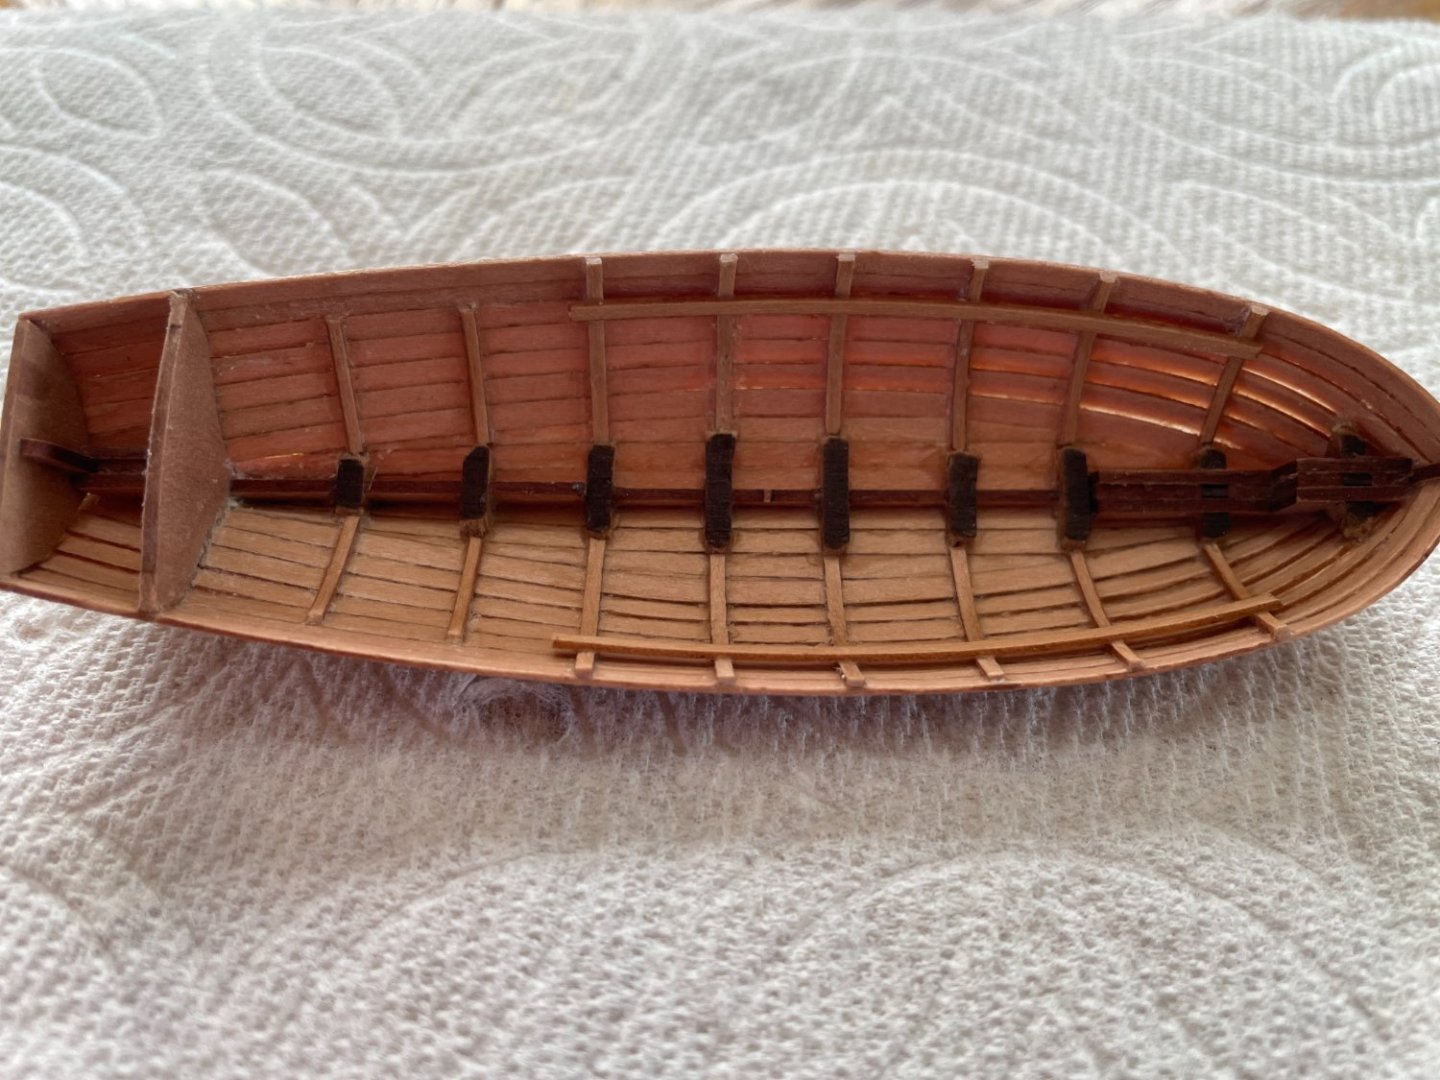

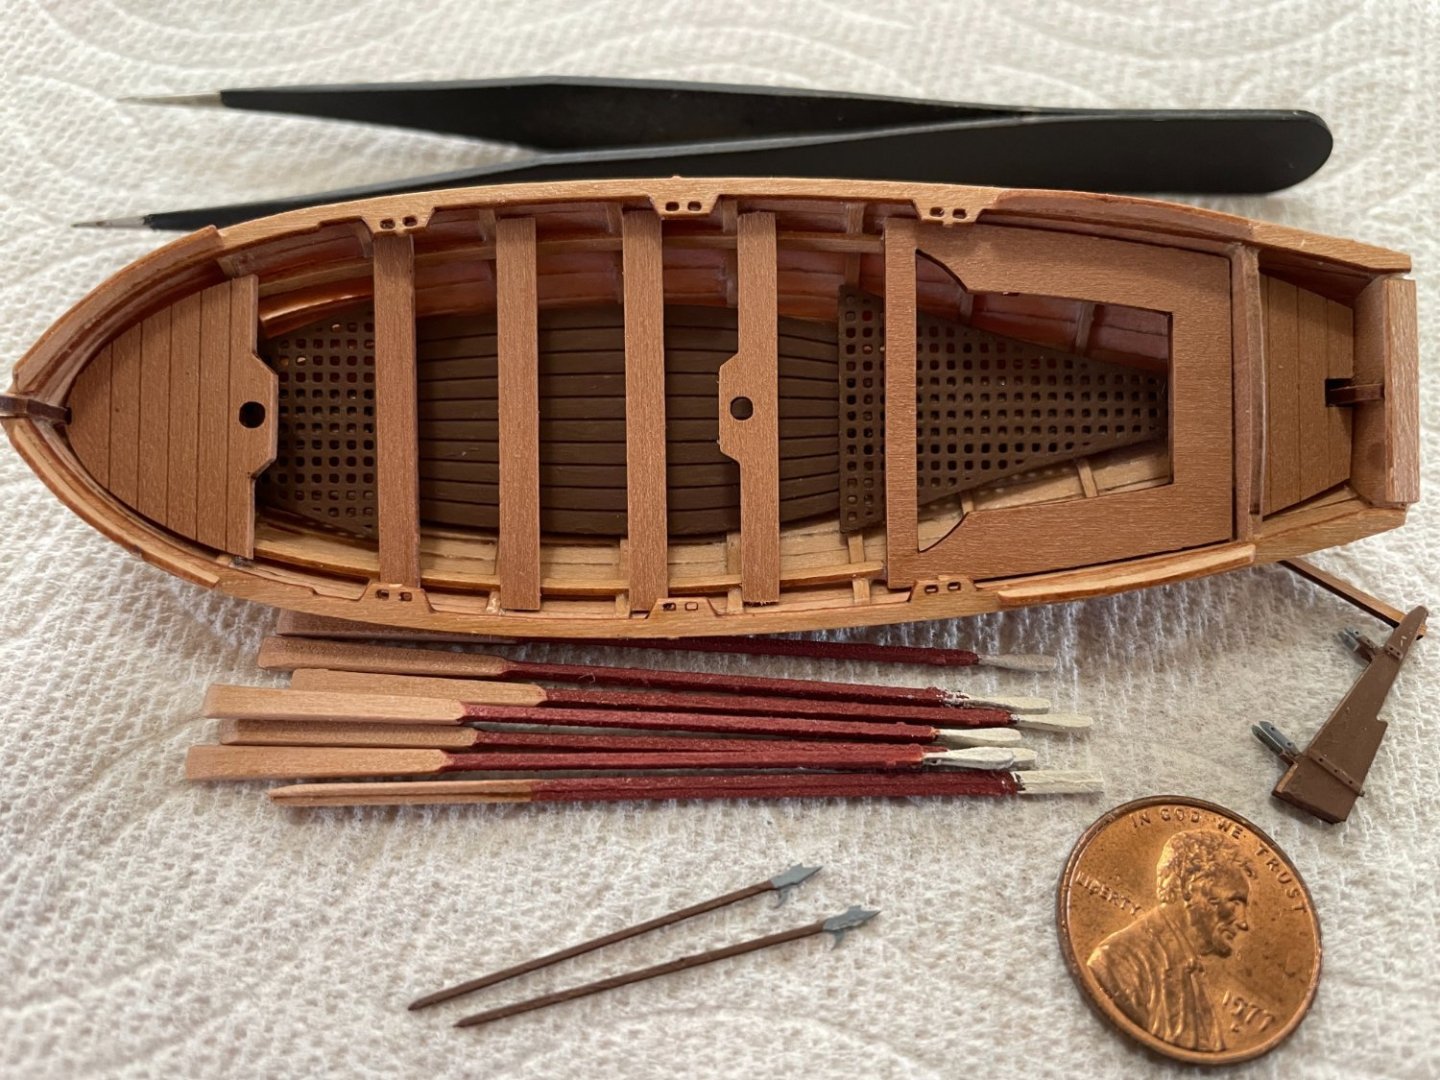
- GrandpaPhil, TurkSailor, BobG and 2 others
-
5
-
Thank you for the picture and recipe. This is a great way to display the ship. Something I will strongly consider doing too ;_)
- Canute, thibaultron and mtaylor
-
3
-
Just.... WOW. I wish I had a third of your skill and knowledge. This is very impressive build... something to be very proud.
- Keith Black and mtaylor
-
2
-
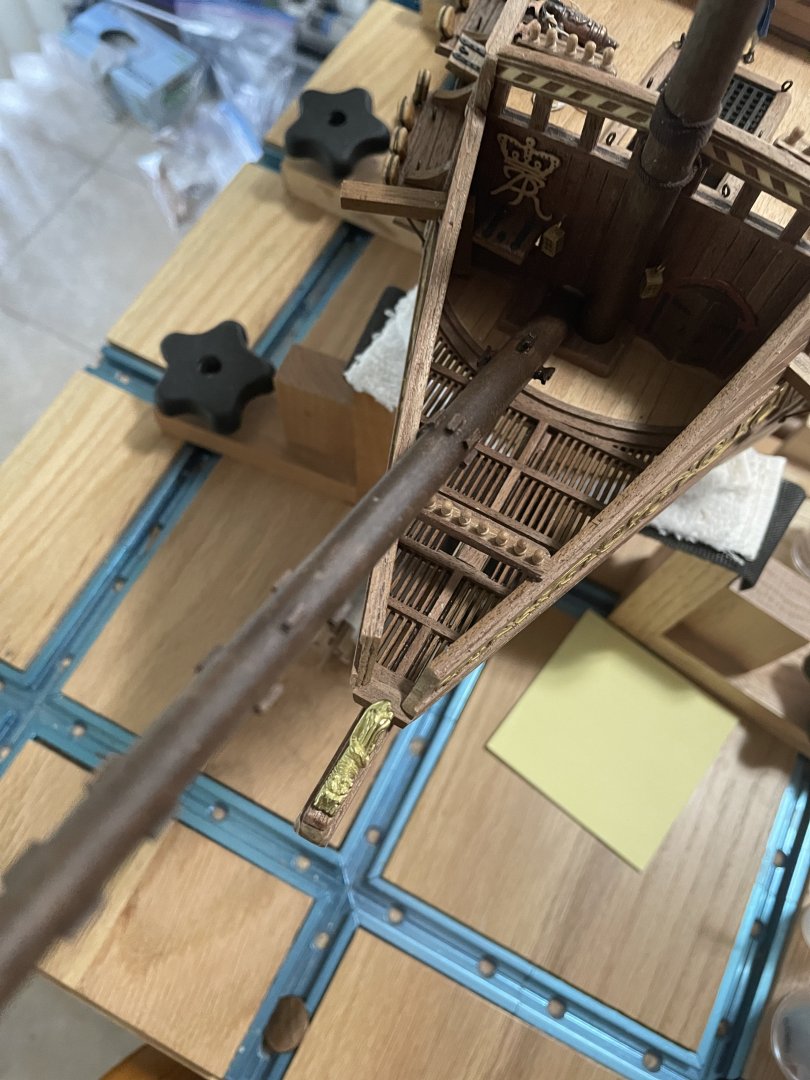
@TurkSailor I look a long time for a convenient building slip... The one I like was out of order and manufacturer did not even reply about possible availability in the future. Link here:
SO... I build a working table. Not quite a slip to guide you in the build but mostly to hold the ship in place. It was a lot of work to make and rather expensive. I choose to do it for fun (I wanted a woodworking project to spend time on). At the end NOT a slip... but a close second/third. Beside that... nothing else. You can get by with a lot cheaper alternative since it just holds the ship on place, nothing more. Lastly, it is heavy, very heavy. So, I place the table on a large Lazy Susan to rotate it.
Here the link for the table:
-
-
Another Question on RATLINES: I often see the cross section (horizontal segments) in light colored rope rather than dark like the vertical section. Is it a preference from the builder (for contrast) or those were never coated with Tar back then?
Same for the rope between the two deadeyes... always light colored or they were coated with tar usually?
-
Question: Likely one of many as I started thinking/working on rigging the ship. I'm reading that the fore-most shroud on the fore and main mast are typically served the whole length of the rope while the others only at the portion around the mats... why only the first? there must be a practical and/or functional reason it was done that way.
-
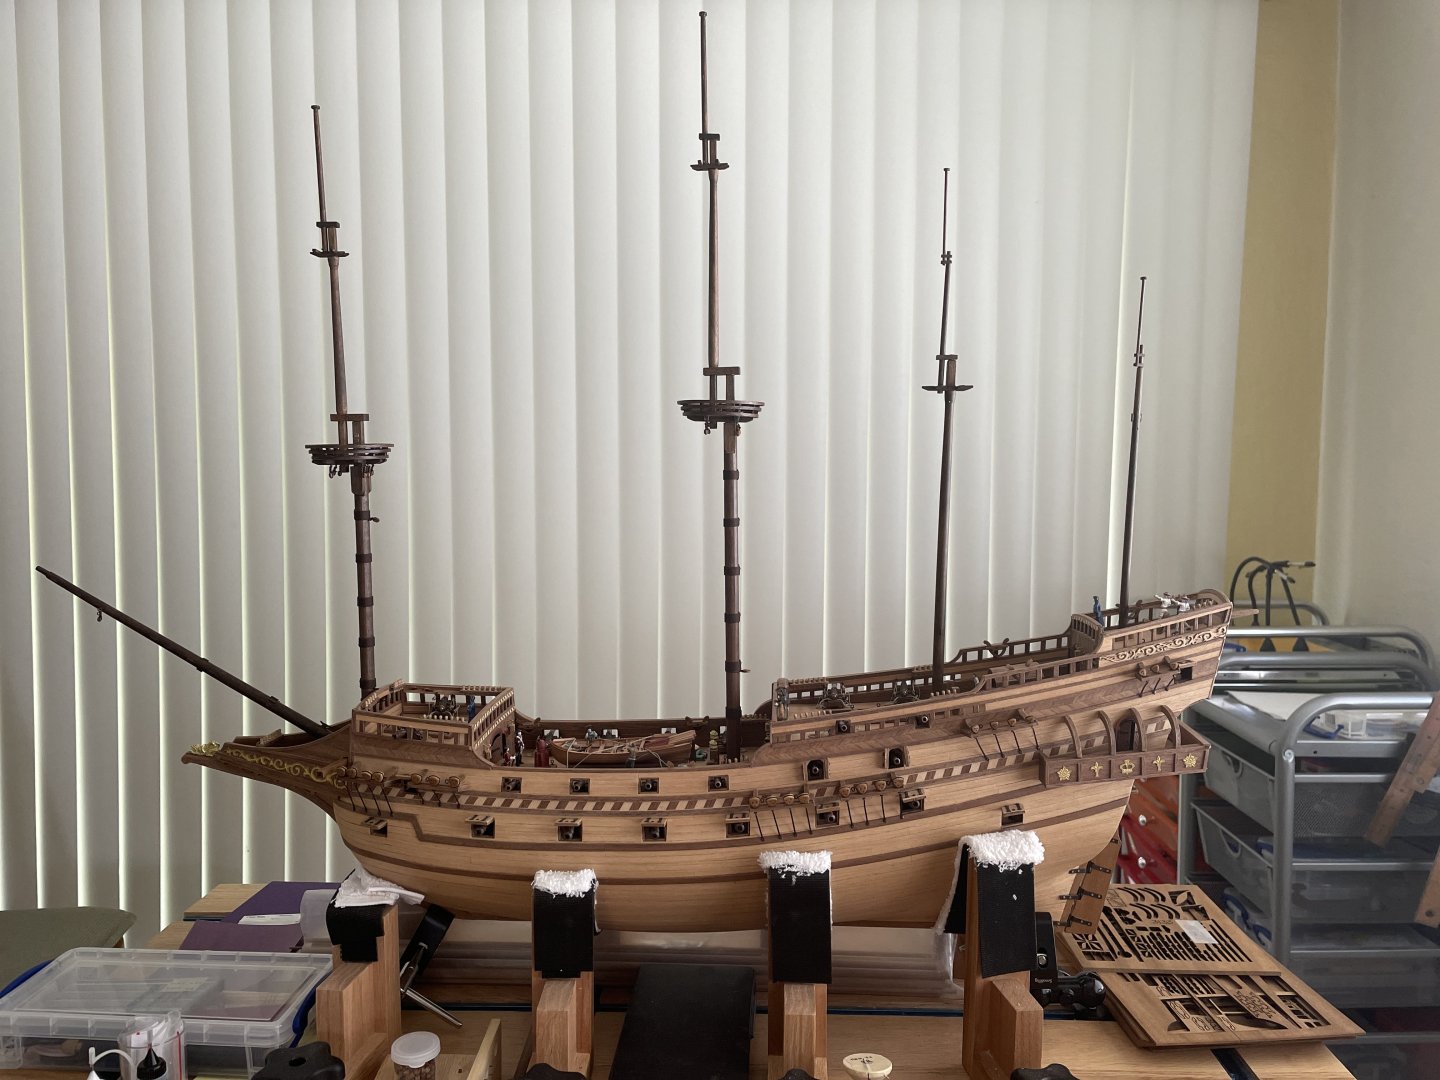
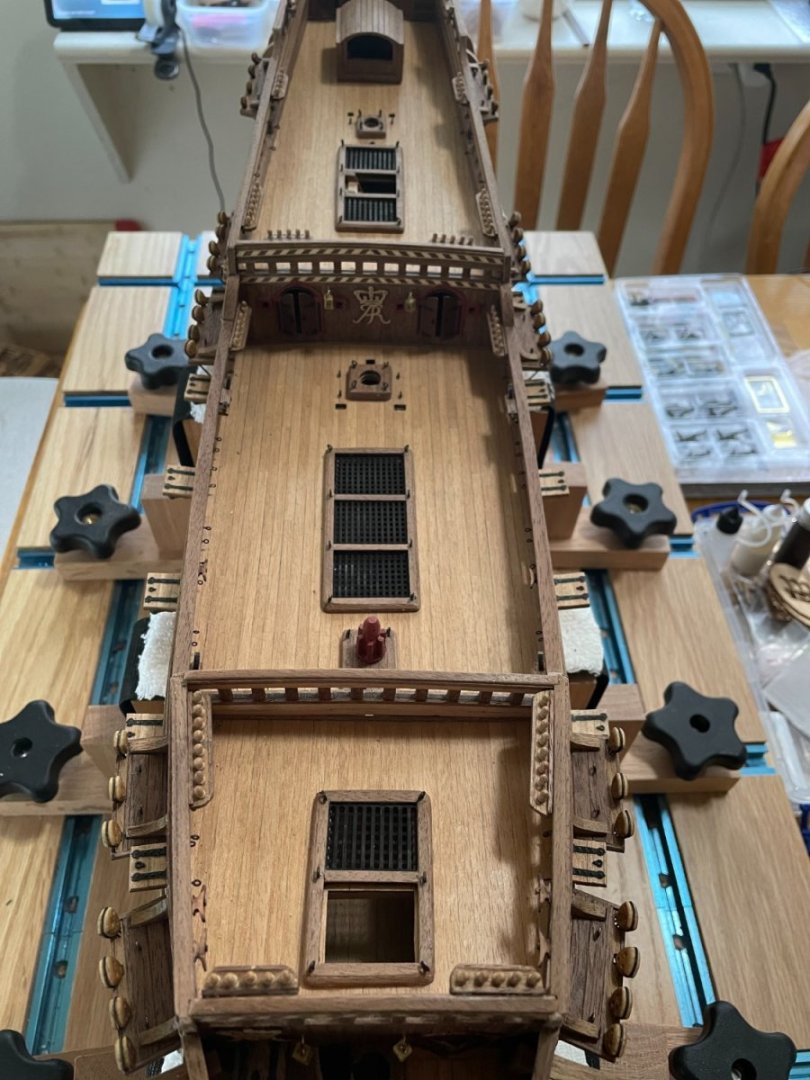
Deadeyes racks and gunport doors installed to the ship. This is no small task... amazing the number of little parts... all having to be fixed with nails. The good news, it is done and no major break (couple of minor ones though). Mark, drill and push in... all the while holding my breath that nothing fall apart. And those little corner parts on top of the racks!! each need to be adjusted to fit, what a pain.
With this done, this officially start the rigging segment of the build, starting with the deck cannons.
-


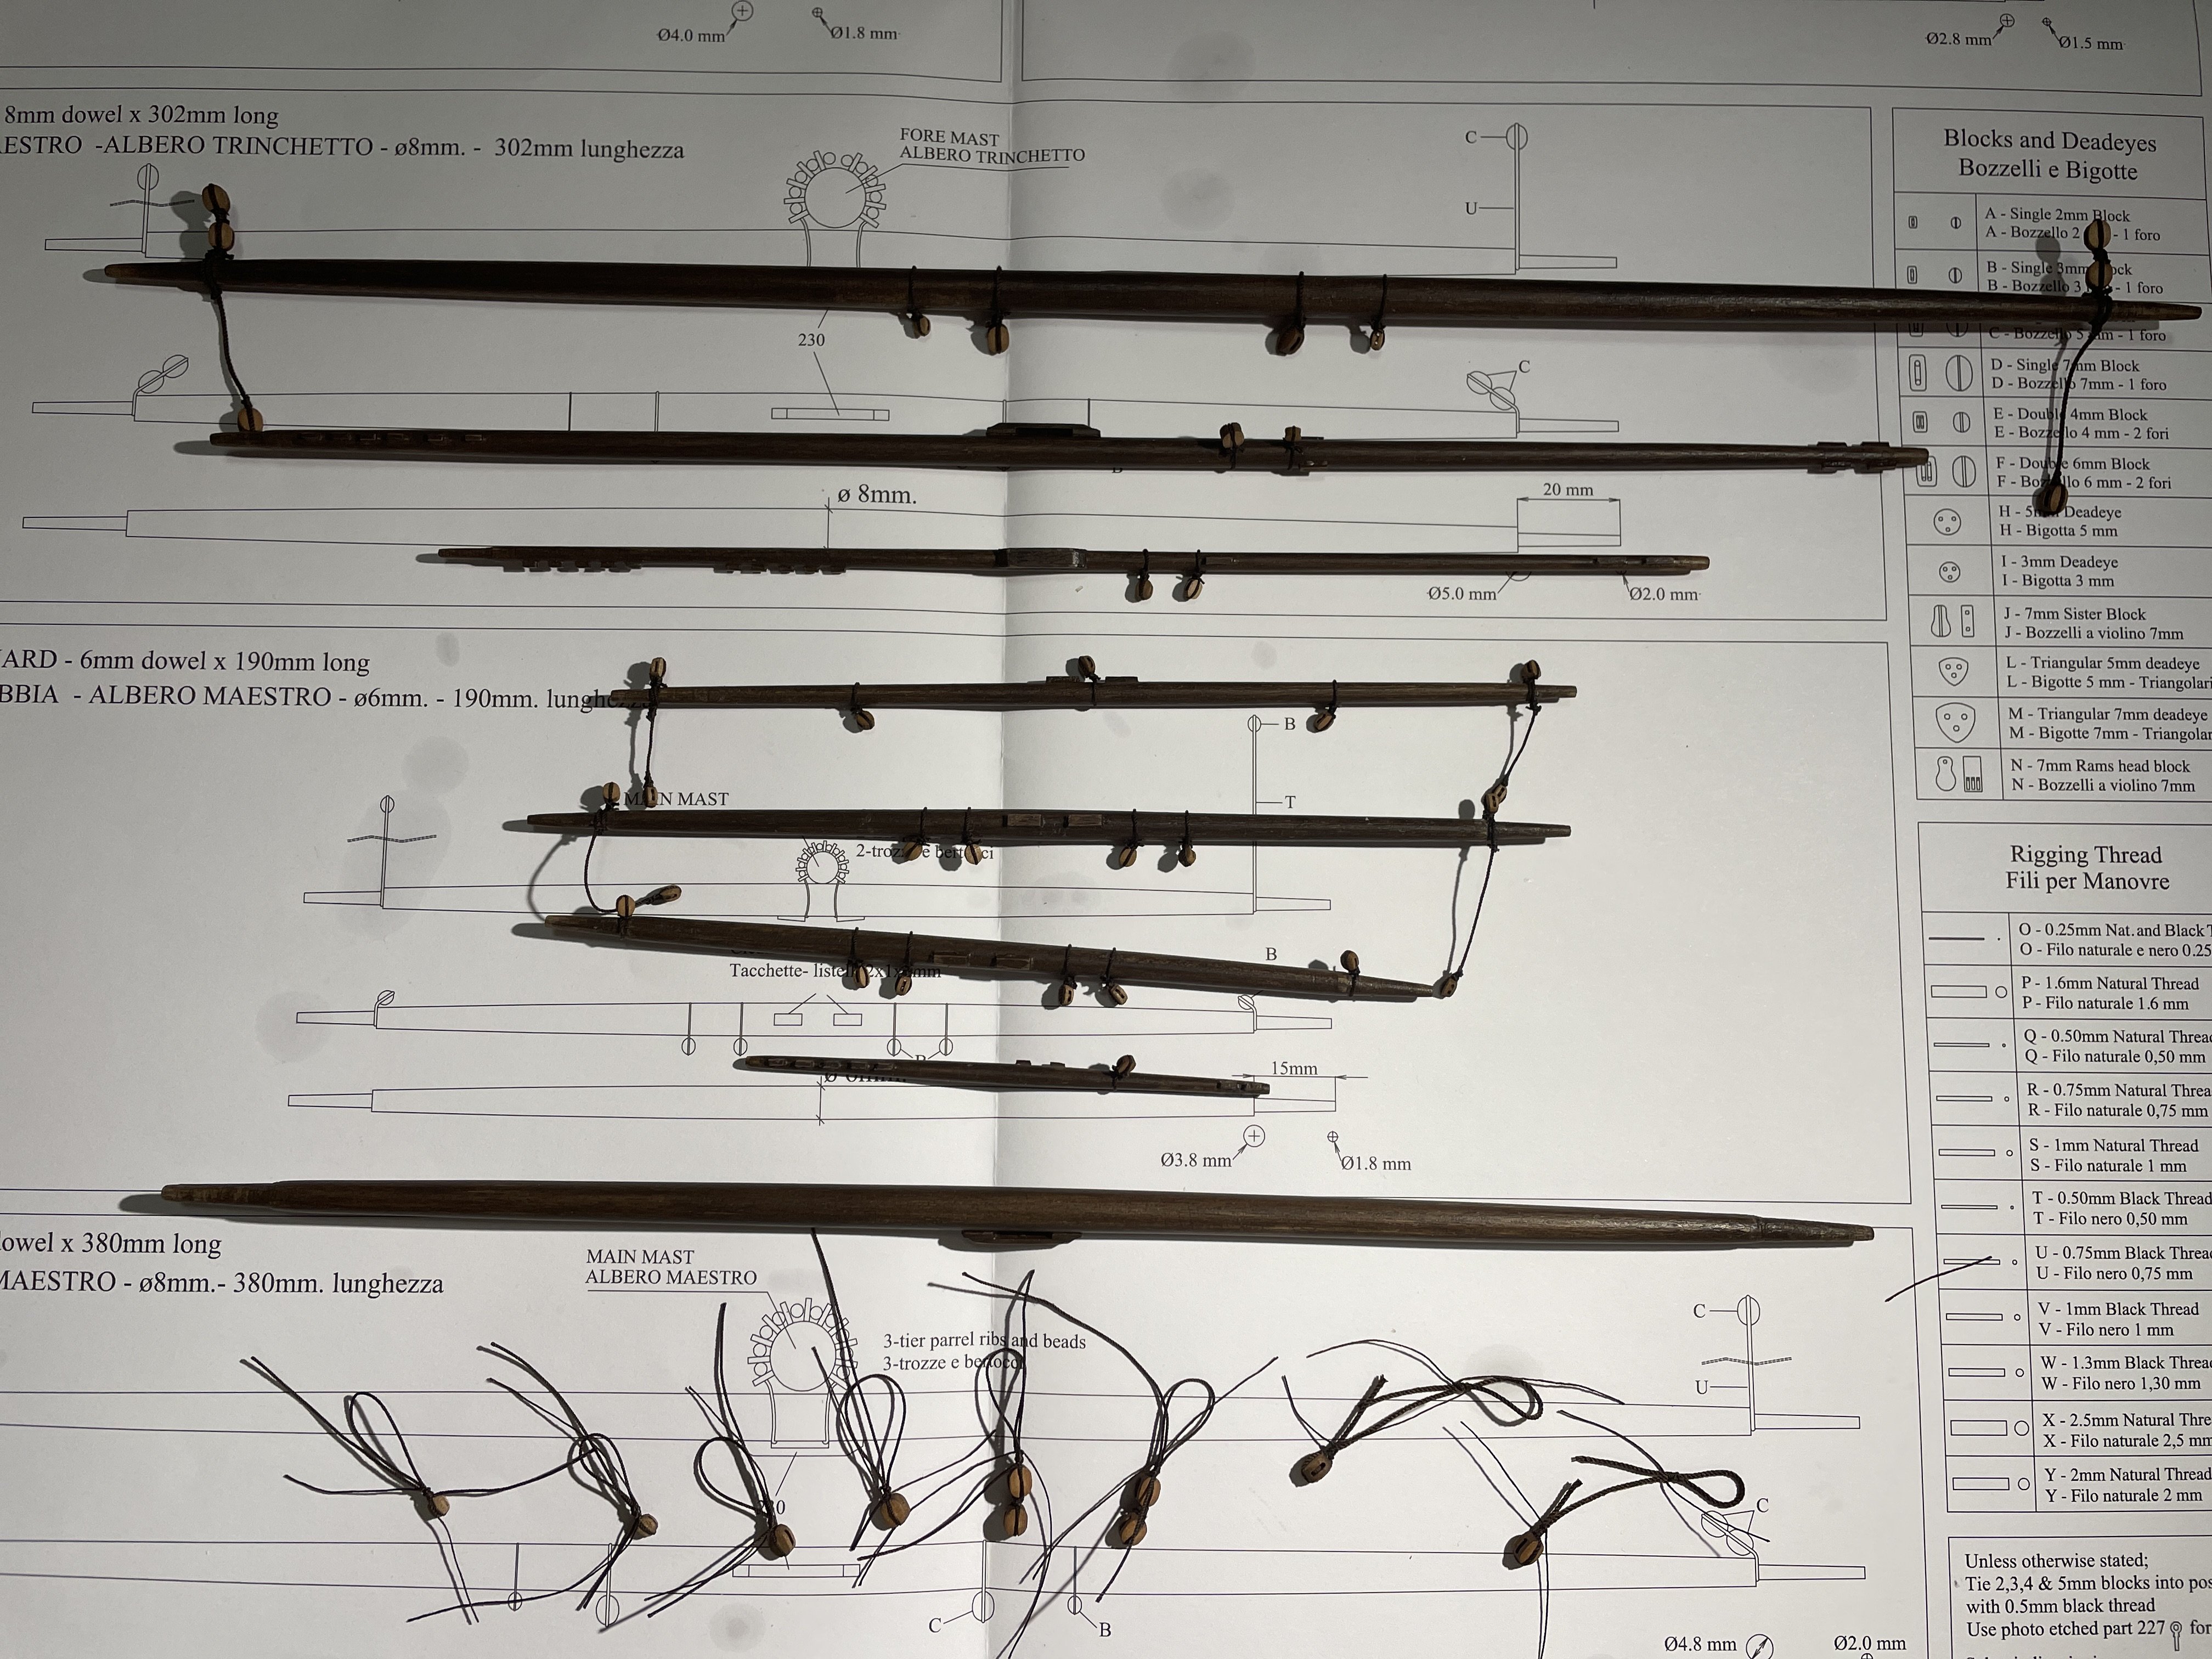


Revenge 1577 by Loracs - Amati - 1:64
in - Kit build logs for subjects built from 1501 - 1750
Posted · Edited by Loracs
Thank you... so much more to be done. ;_). I still need to find a way to clean up the slip-knock better for elegance.