


bcochran
-
Posts
598 -
Joined
-
Last visited
Content Type
Profiles
Forums
Gallery
Events
Posts posted by bcochran
-
-
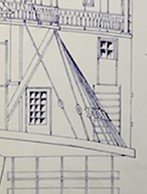
Pyro did not put doors where they show on my plans. They look to be doors to the engine room. I added them by sanding off some doors and windows from spare parts I had.
- Rudolf, ccoyle, GrandpaPhil and 2 others
-
 5
5
-
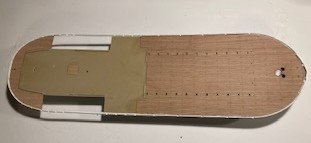
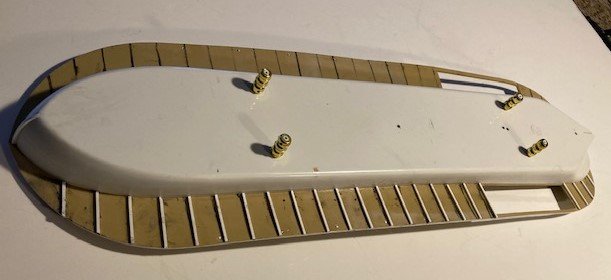
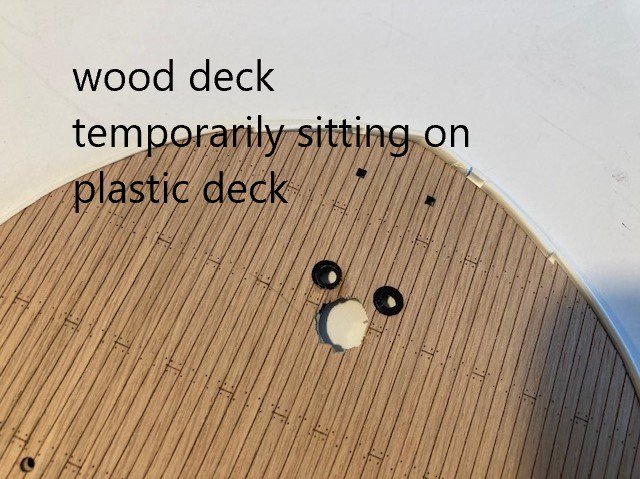
I glued the wood deck on. I did not get it lined up right before the glue grabbed. I am not too good with adding extra purchased detail like photo etch and decks.
It's not too noticeable when more of the parts are on. But it is a disappointment. It could have been better. It's one of those errors you make and live with, move on or quit. Moving on.
-
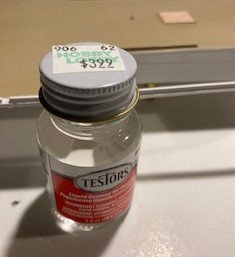
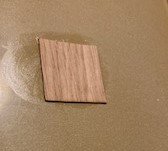
I tested out gluing the wood deck to the plastic deck using Testors liquid cement using a scrap of the wood. It works fine. as soon as the white paint cures, I'll glue the wood deck down.
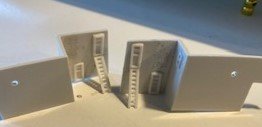
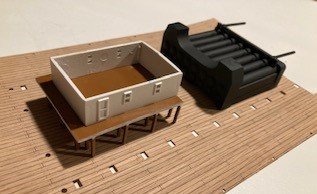
I started building the sub assemblies that go around the boilers. I don't know what the white cabin is yet. I read where someone called it a luggage room. The Lee had two guarded luggage rooms so that passengers would not have to keep luggage in their state rooms.
- GrandpaPhil, Cathead and ccoyle
-
3
-
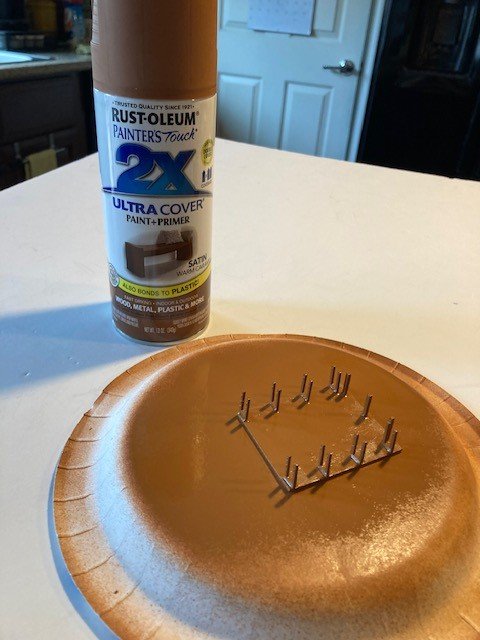
I am going with this rust-oleum satin warm caramel for the natural wood colors. Later the satin will be covered with dull lacquer.
I don't intend to "weather" or create a wood grain effect. I do that for dioramas and my model railroad equipment, but not on models like this.
Another thing I do is to use very few different colors. You can see this if you check out my Cutty Sark Log.
The colors for this boat will be white, tan, black, light blue, and red, and they compliment each other. I can't see any reason for anything else. Maybe the people and animals will be more colorful if I add them.
- GrandpaPhil and Cathead
-
2
-
The boat has its braces. The edges of the braces can be seen, and I think it adds a bit more detail. Then again, it may be distraction. At this point, I'm not sure. Much of this can't be known. I get a better idea once the model is more complete, and it blends in with everything else. You know something has to be holding that deck side up.
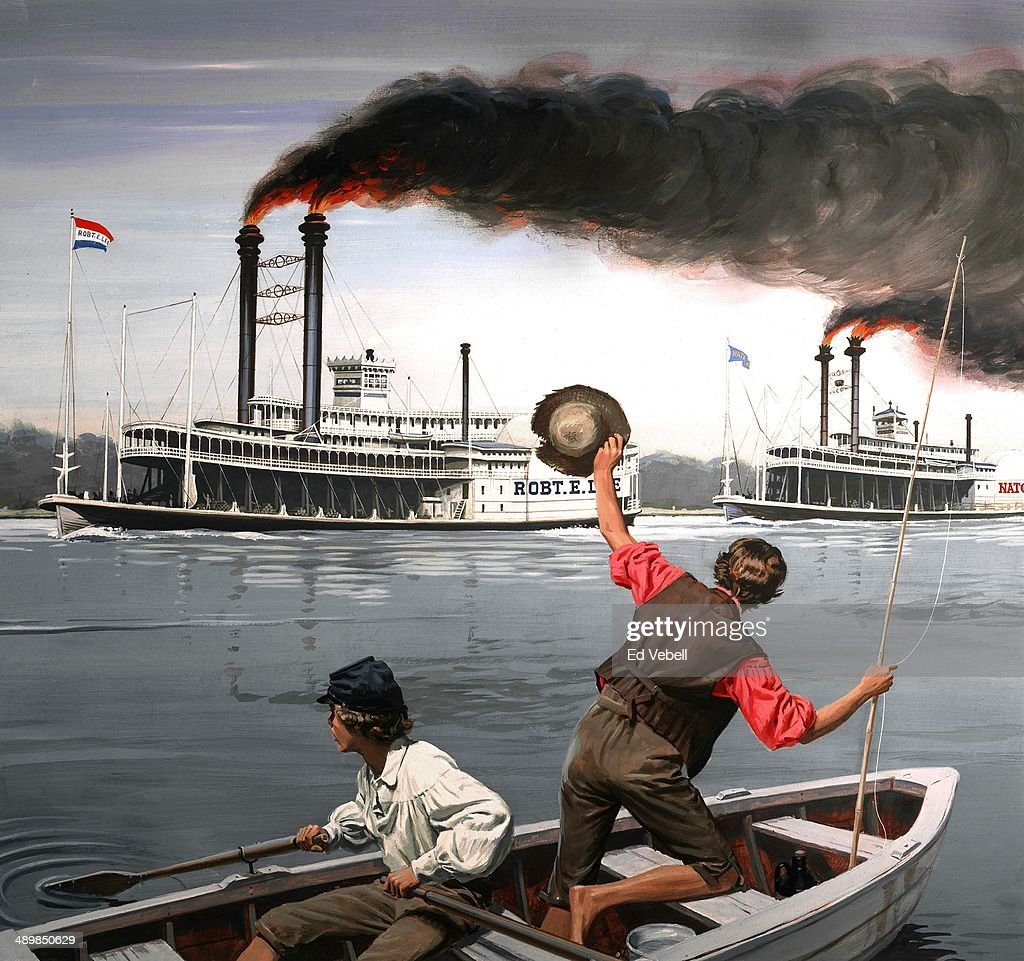
I read a discussion on another board, and it was said the Robt. E. Lee's hull was such and such color.
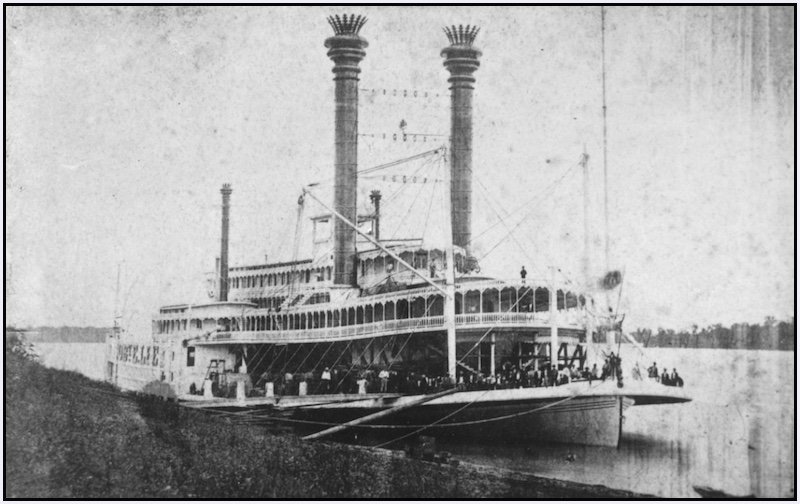
Only period writings of the time or handed down knowledge could tell what color these boat's hulls were in my option. The photos are black and white, the Robt. E. Lee's hull depth was around 9 1/2 feet, and she drew 6 to 7 feet of water. Two to three feet of the top of the hull was out of water. You can't tell the color of the hull in the pictures, except that the part out of water looks white to me.
In the picture here, she has a white hull.
The day after the race the Lee entered drydock for repairs. "To overhaul its engines and boilers and restore its stripped upper works, and have its hull repainted as well." "The Great American Steamboat Race" by Benton Rain Patterson. Maybe repainted white.
I am going with white because I like it and other modelers did so too.

- ccoyle, GrandpaPhil and Cathead
-
3
-
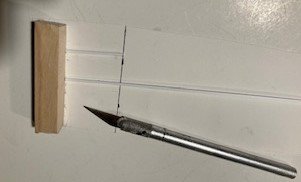
I always make some kind of jig to cut uniform parts. I need 32 of the plastic strip this size.
Also using a piece of card for a spacer. For shorter lengths I used a sprew cutter.
- GrandpaPhil and Cathead
-
2
-
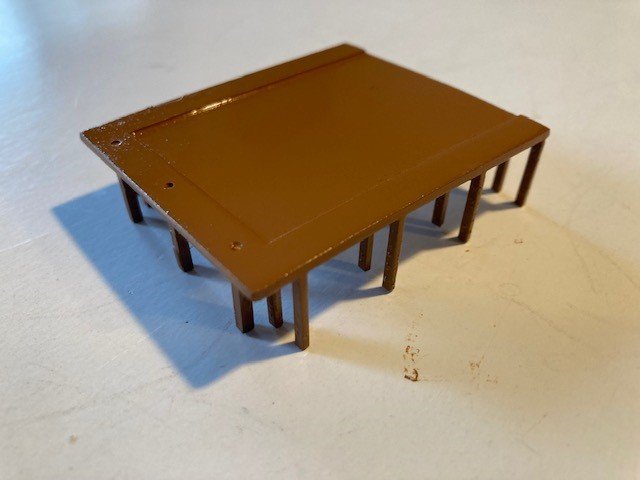
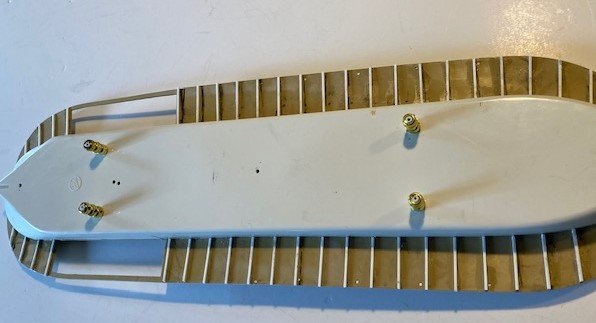
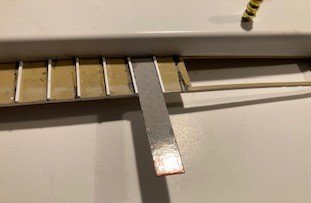
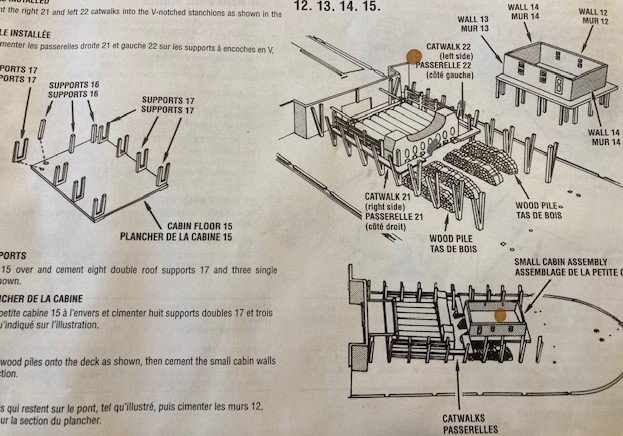
The superstructure of the boat had a main deck framing system. I want to add this though it won't be seen looking down on the model. I marked where the supports should go. I am lining them up with the stanchions that the side chains attach to. I'll have to drill holes for the side chains in the supports.
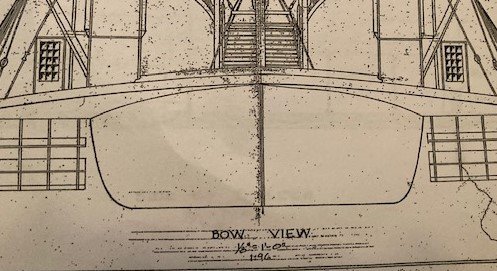
The drawing from head on shows a boat loaded with cotton. Shipping cotton down the Mississippi to New Orleans was the reason the Robt. E. Lee was built. The deck and its support system carried a lot of weight.


- GrandpaPhil and Cathead
-
2
-
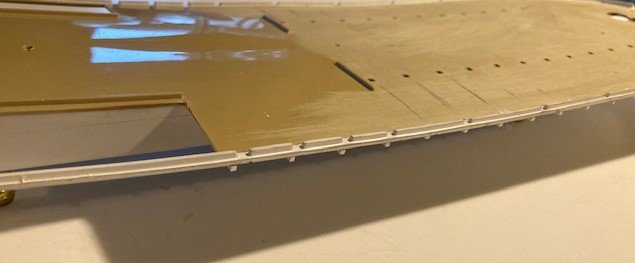
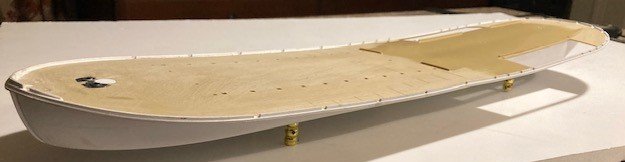
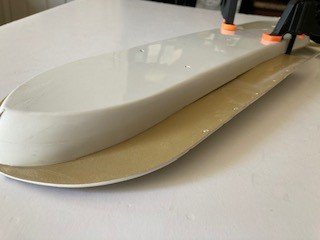
With the help of my new clamps, I have a pretty good bond between the hull and deck. Next I need to add any detail, paint, stripe and add the wood deck parts.
- Cathead, ccoyle and GrandpaPhil
-
3
-
This is the book I am currently reading about the race between the Robt. E. Lee and the Natchez.
"The Great American Steamboat Race" by Benton Rain Patterson.
It is a book loaded with steamboat information, it's not only about the race. It's also about all levels of people living, working and operating steamboats on the Mississippi and other rivers during the time of Lee and Natchez.
It is available for Kindle at a good price.
I just got "Fastest On the River" by Manly Wade Wellman today.

- Stevinne, Rik Thistle, GrandpaPhil and 1 other
-
4
-
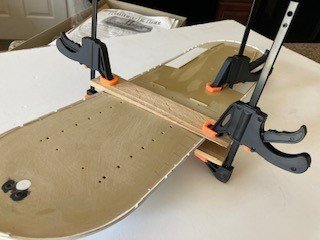
Still trying to attach the hull to the warped deck.
.jpg.34bbdc56444d55bce18f4d1bd567f32f.jpg)
- Cathead, GrandpaPhil, shipman and 1 other
-
4
-
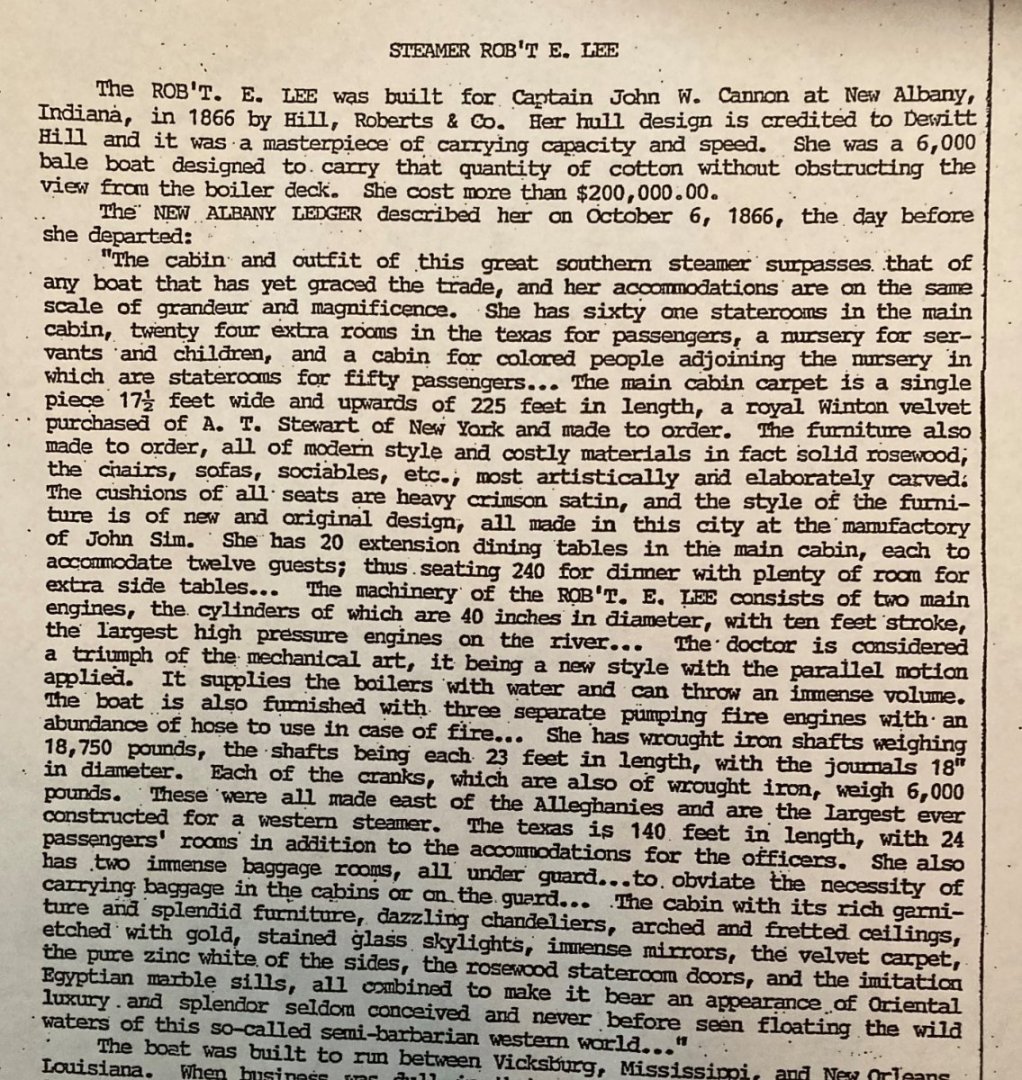
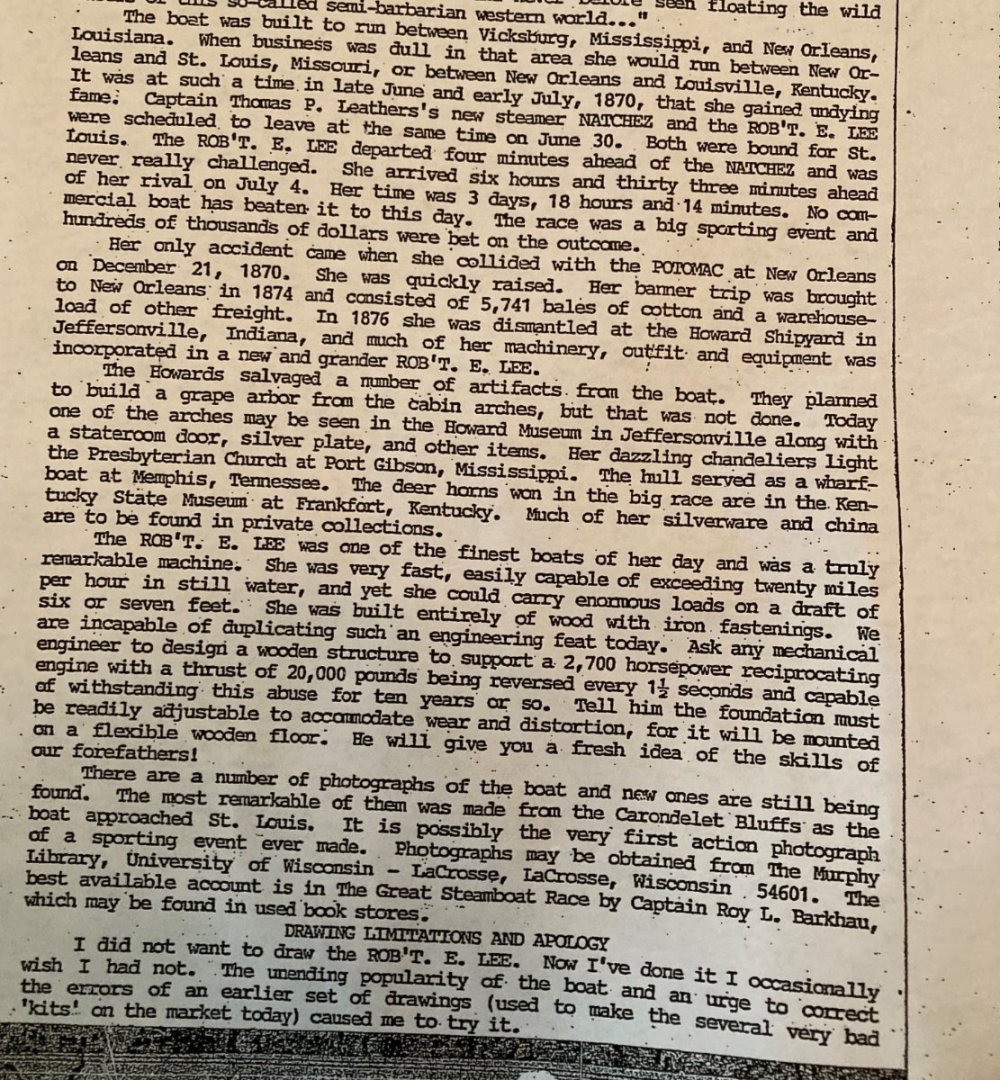
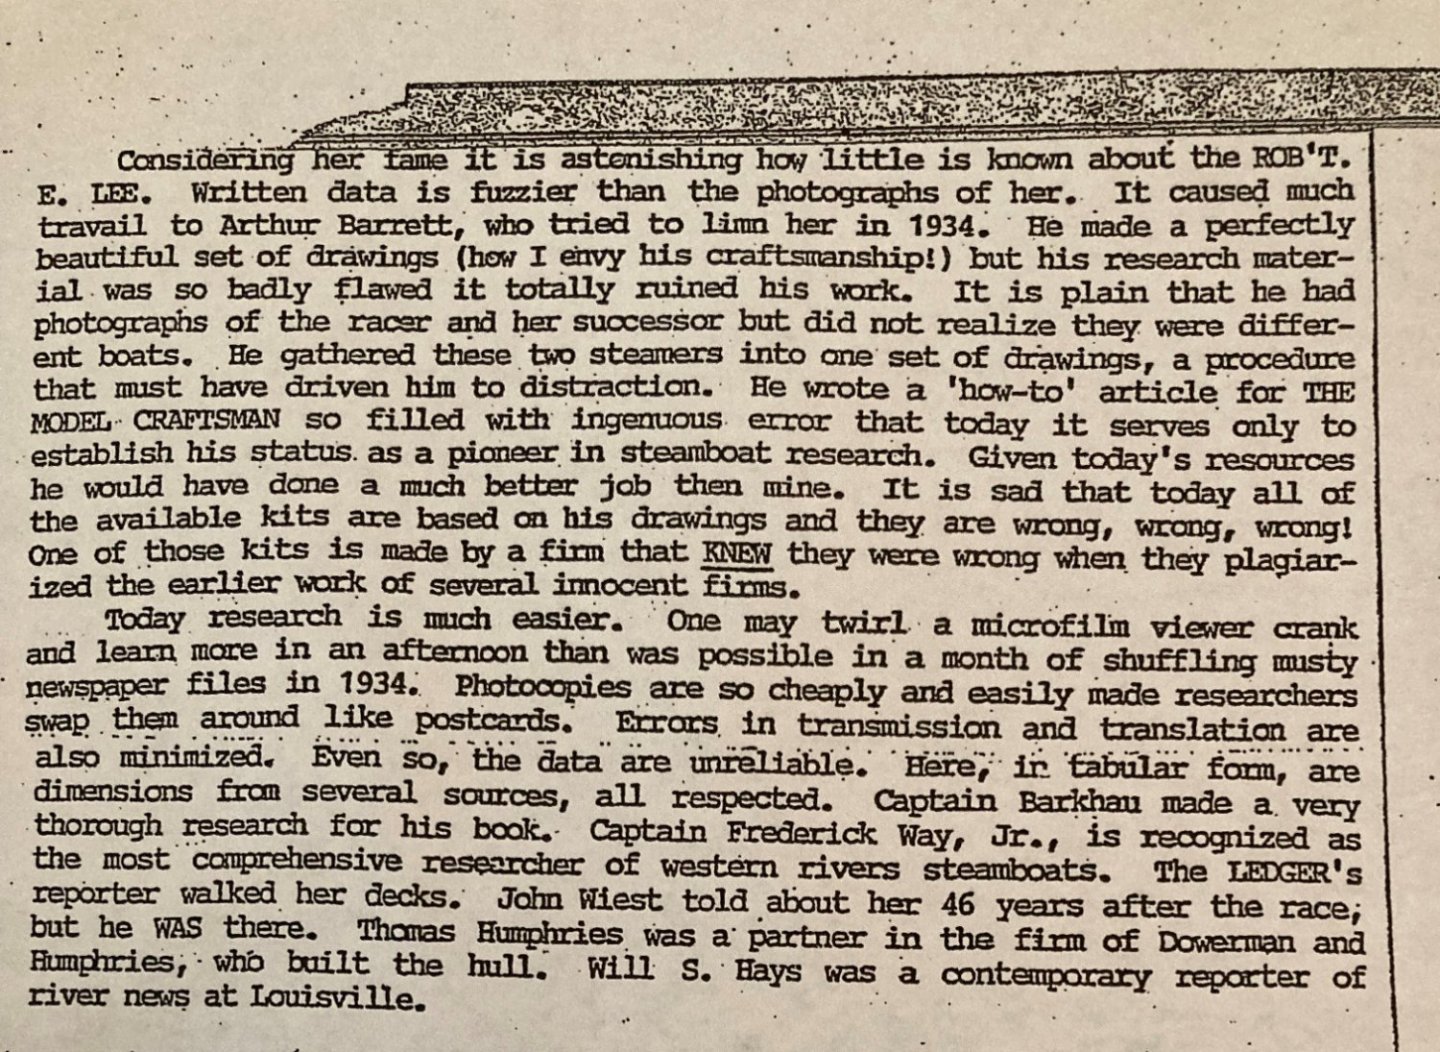
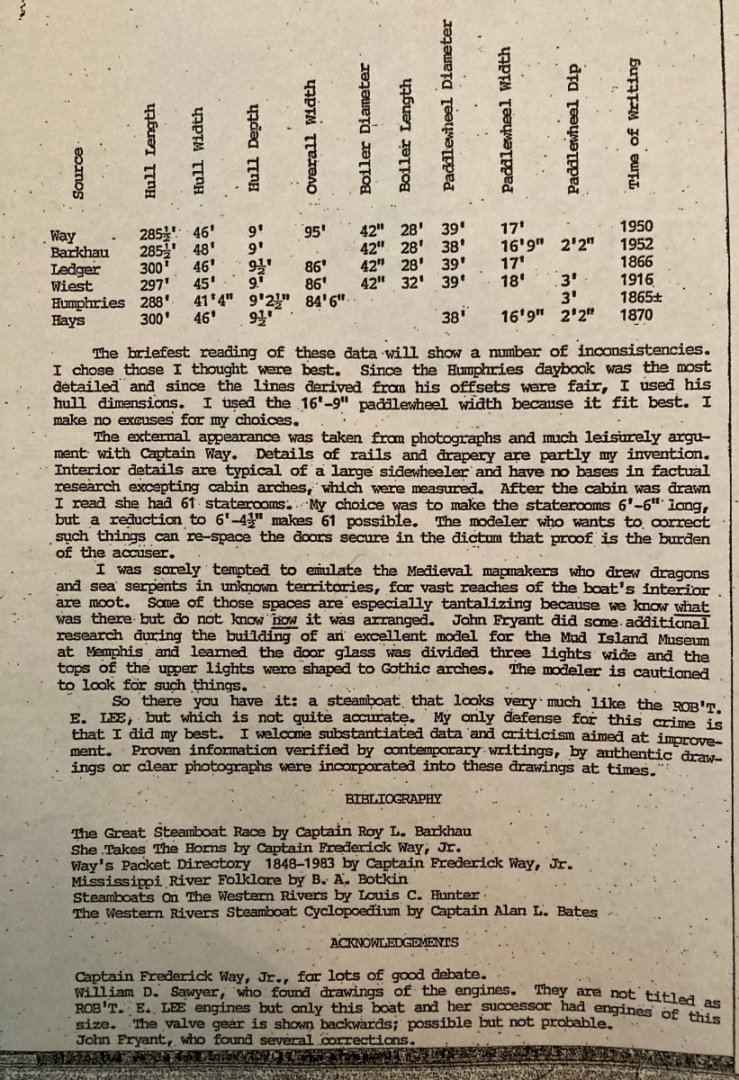
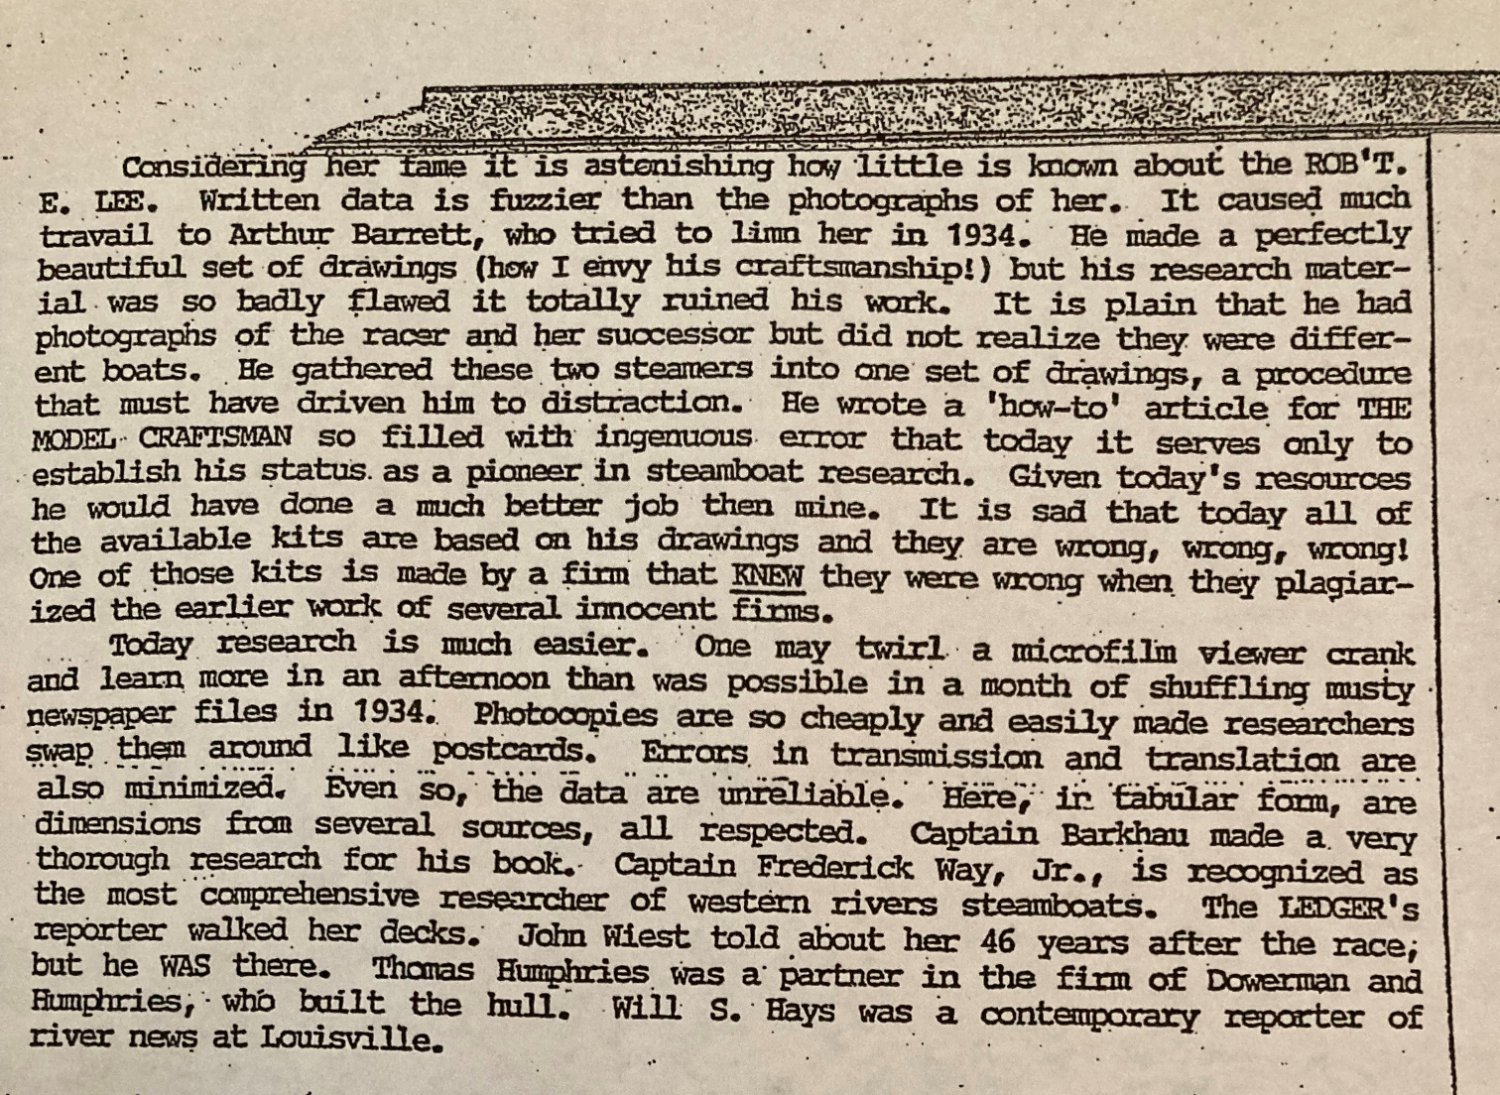
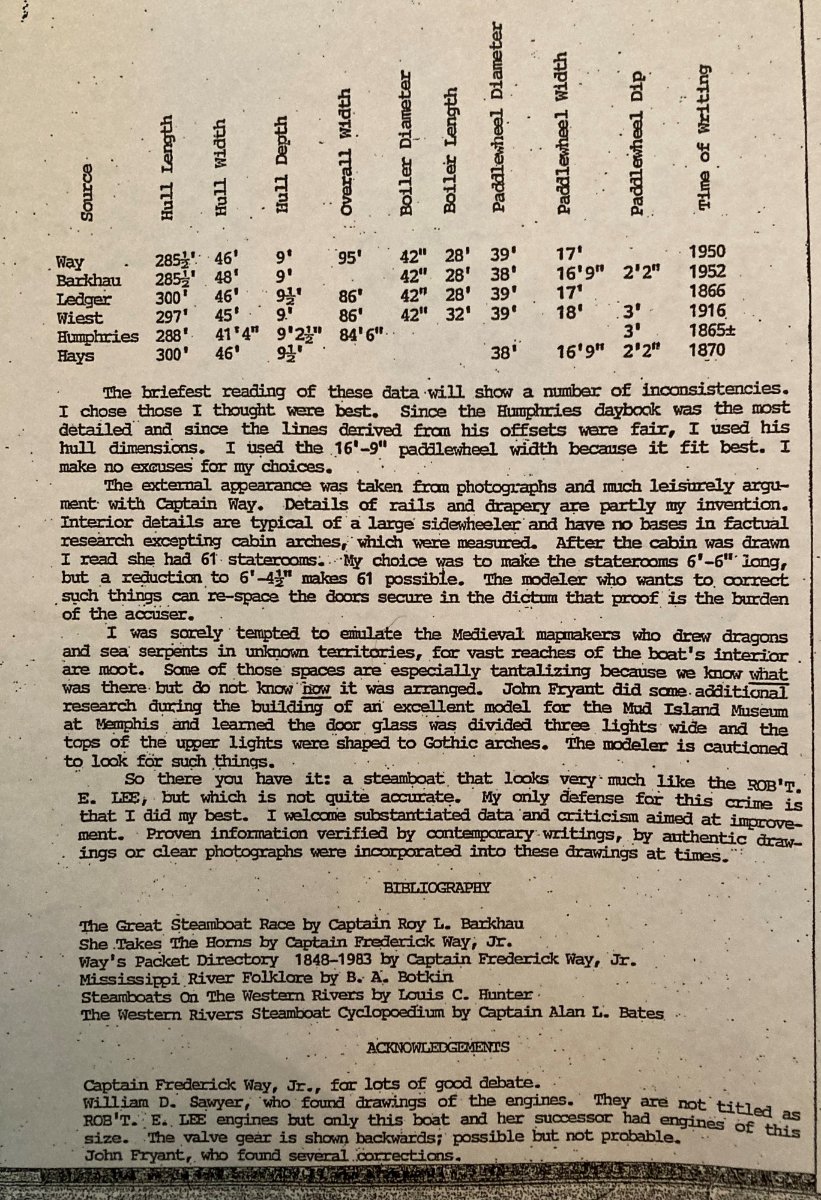
I wanted to share the history that is printed on the Robt. E. Lee plans that I have.
He mentions the reasons for the inaccuracies of models of the Robt. E. Lee.

- shipman and GrandpaPhil
-
2
-
-
I use superglue to fill sinkholes in the kit parts. Then I sand them smooth.
-
2 hours ago, Cathead said:
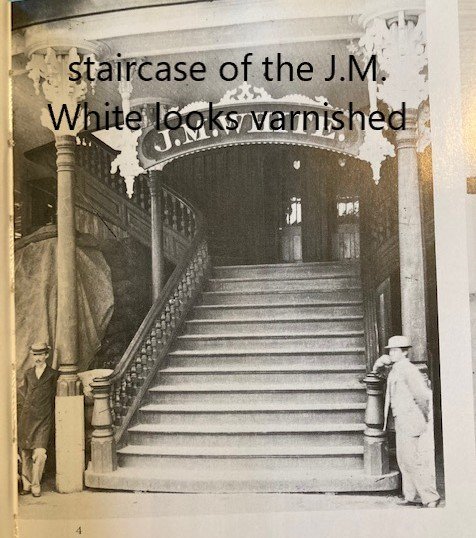
There hasn't been much advice needed so far. You're clearly done your basic steamboat research (more than many builders). As for the painting question, overall white was the standard color on these vessels but you're certainly right that some of those photos imply that raw/varnished wood would be acceptable for certain interior details. There was a lot of variation between individual boats.
I was also intrigued by that staircase photo from the JM White, where it appears the camber of the deck is curving down and away from the bottom of the flat staircase in both directions. This amused me because (a) it would've been pretty easy to fill those gaps one way or another for a better appearance on such a grand vessel, and (b) it looks like some simple beginner's modeler mistake, leaving gaps like that. There's a prototype for everything!
Hi Cathead,
I also thought the same things about the JM White's steps. I'm wondering how many rats and other varmints lived under there.
-
I am getting the next series of parts together to clean up the flash and make sub assemblies to paint. I have parts from a Lindberg kit and from the Pyro kit. The Pyro parts are not numbered like the Lindberg parts are, meaning you have to identify them. I am not working from Pyro instructions, so maybe I am missing something.
The older Pyro plastic seems more opaque and firmer than the Lindberg plastic.
-
I bought a bunch of N gauge people and animals to add to the boat. Usually I don't add people, but I wanted to see what they look like on this model. I see others have done it, and it gives a better idea of the scale of the model.
In reading about these steamboats, I learned that the food was excellent with all types of meat dishes. I read that the animals were kept alive until they were needed for dinner. On one side of the boat there was a kitchen and the place where the meat was prepared, and on the other side was a bakery. The kitchen smelled awful, and the bakery smelled wonderful. Passengers hung out at the bakery.
The majority of the passengers on these boats were "deck passengers." The rode and slept where ever they could find space on the lower deck. At times, they numbered in the hundreds. Also, the roustabouts rode on the main deck. They did the manual labor such as loading and unloading of freight and fuel. Freight was kept on the lower deck.
During the cotton harvest, the lower deck was stacked with cotton bails up to the hurricane deck.
The Robt. E. Lee was a packet boat used for shipping cotton. The boiler deck did not extend out over the main deck so that the cotton bails could be stacked there. On other steam boats, the main deck was protected by the boiler deck.
The wealthy rode on the boiler deck, with its cabins and main hall. The boiler was on the main deck not the boiler deck.
I want to try and depict this in some way.
-
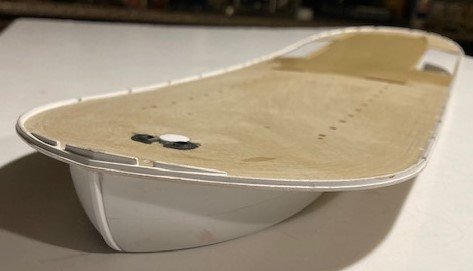
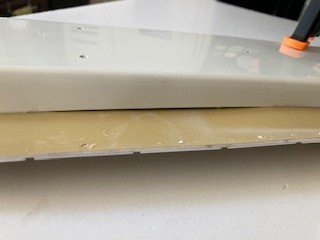
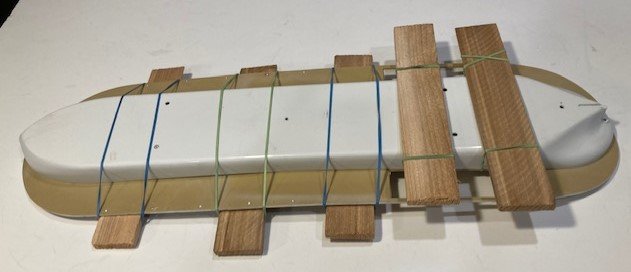
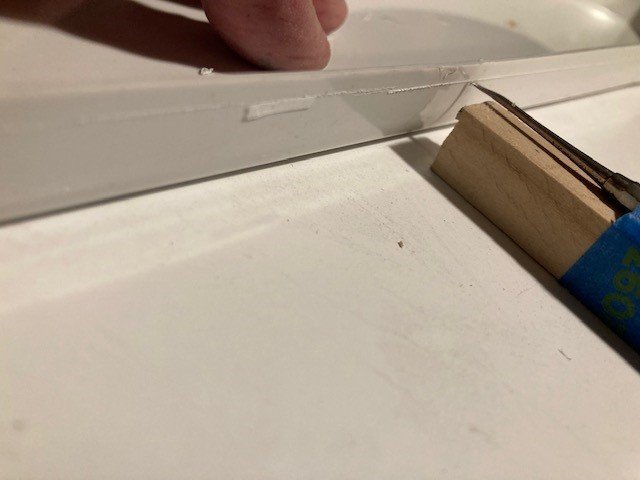
To glue the hull to the plastic deck, I am using rubber bands and some wood pieces as clamps. The deck is warped and even these clamps don't take all the warp out.
After the first application of glue dries, I'll have to find a way to clamp and attach the warped sections. I don't have a set of clamps to use here. I am going to look for some today. I think I saw something at Hobby Lobby that will work,
My plan of screwing the deck down did not take out the warp, so I scrapped that idea. I will plug the holes I made so that attempt is long forgotten.
I will also have to retouch the white edges I painted earlier.
- GrandpaPhil, shipman, Cathead and 1 other
-
4
-
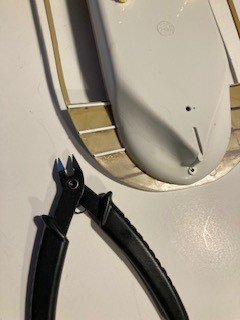
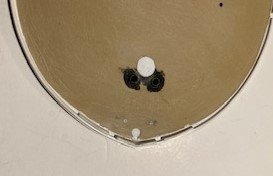
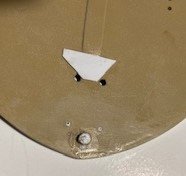
I decided to plug the holes for the jack staff and capstan. The jack staff position under the plastic deck forms a lug to position the bow of the hull. I wanted to replace the lug I removed by drilling out the hole. It will be easy to locate the jack staff when the time comes. I will use a piece of brass rod to attach it. I sanded the hole in the wood deck for the capstan. The capstan fits nicely into it. Now I will glue the wood deck down after the plastic deck and hull are glued together and any details added.
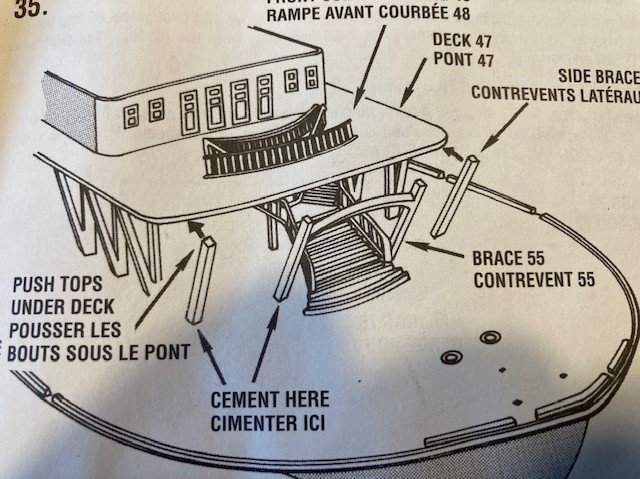
I want to put bracing under the deck overhang just for the heck of it. It won't be seen looking down on the boat and most likely won't be accurate, but I want it there.
.jpg.d91366b126bf491fe994e92b90528101.jpg)
- GrandpaPhil, shipman and Cathead
-
3
-
I wanted to say that if anyone wants to help me out here by offering advice, or just for fun, feel free to do so. I learned while doing my Cutty Sark log that there are a lot of members here who have very helpful knowledge and skills that are useful to someone building a ship or boat.
I welcome your input. It is the two-way street, the joking and of making new friends, that makes these logs a pleasure.
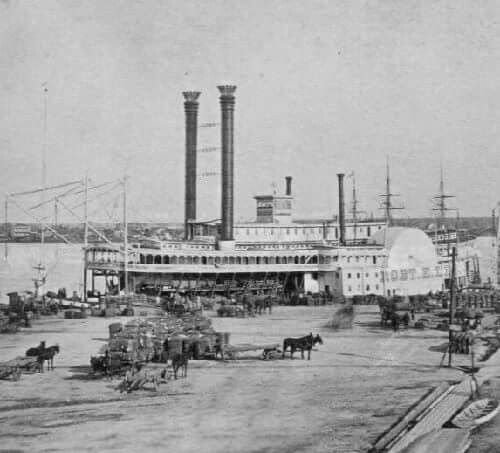
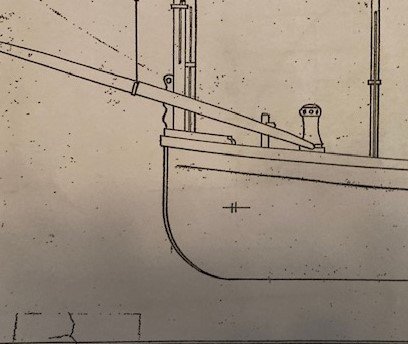
I've had this picture of the Robt. E. Lee and of the Natchez in my stuff for a long time. I don't know where I got it and I don't see these images online anywhere. They are from a book by Manly Wade Wellman which I don't have in my library yet.
One of the most enjoyable parts of modeling for me, be it a boat or ship or piece of railroad equipment, is studying the history of the subject being modeled. In doing so, I buy books because I like holding them and looking up ideas that need researching.
And when my model is done I like just looking at it if the result is pleasing to me. I like to be accurate, but I am not a rivet counter. My models are representations, such as paintings are representations, not replicas. As such, I don't "weather" much. Maybe I am a contrary. I am willing to accept flaws in a kit and go with them. I try to put myself in the place of the designer of the kit and wonder why it was done as it was. These plastic ship models are old, not state of the art in any way.
.thumb.jpg.35cb3368027f4e79541f190cf6ca4bf4.jpg)
- shipman, CDW, GrandpaPhil and 1 other
-
4
-
Now a decision needs to be made. What color should I paint the stanchions around the boilers and the legs of the cabin, and it's walkway. Also, the staircase, it's railings and the support stanchions around it.
I can't look at the Robt, E. Lee because it no longer exists. I do have pictures though and of boats like it. In some pictures, the stanchions and staircase look painted white. In others, they look varnished, like the teak on the Cutty Sark.
I think, like the Cutty Sark the boat had changes made during its life. It could have started out varnished, then later painted white. I don't know this for a fact, and I haven't read anything in my reference that informs me.
I am going with the varnished look. Mainly because I like it and I have pictures showing it that way. It adds a bit of contrast to the model.
I am using the Lindberg set of instructions because my Pyro kit had them missing. There are subtle differences between the two kits parts.


-
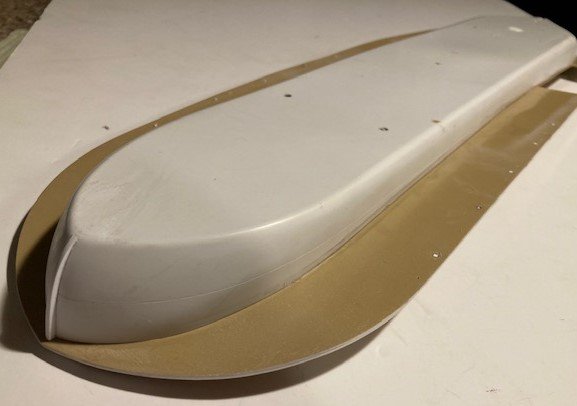
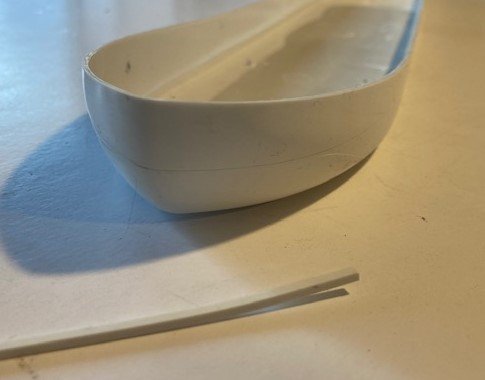
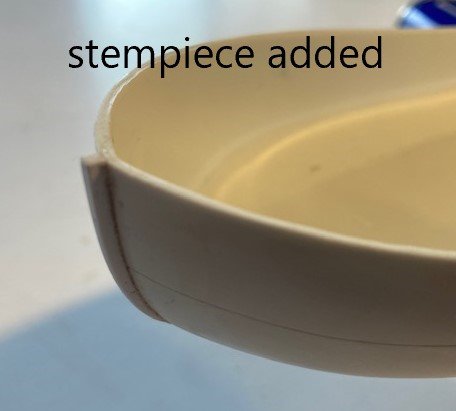
The bow of the hull needs a stem piece, not provided on the model. I am using a piece of evergreen plastic square rod for the stem piece. I need to file the hull flat, glue on the stem piece, then shape it as per the plans.


- Ryland Craze, yvesvidal, coxswain and 3 others
-
6
-
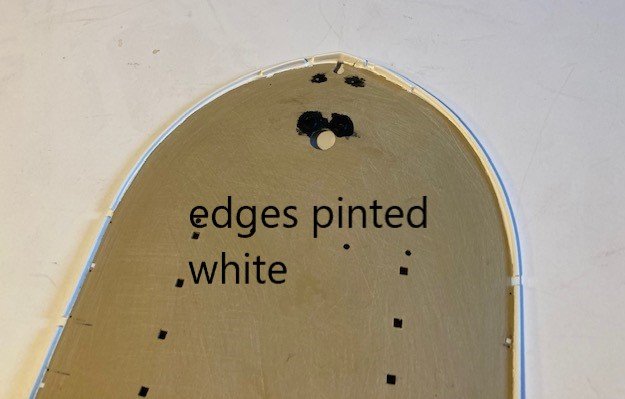
The deck is ready to have the edges painted white. I want to glue the wood deck to the plastic deck, not to paint, so I am only painting the edges of the plastic deck.
I will paint the bottom after I have attached the hull so that I paint them together and so that the glue will bond to the plastic of the deck and hull edges.

- GrandpaPhil, Cathead, Ryland Craze and 1 other
-
4
-
I am using Testors spray paint in a rattle can for the finish. I could use my air brush, but it is more fuss than needed. You need to paint the parts, then let them dry for a day or two.
I paint the parts I am about to work on, assembling parts that should be attached together and are the same color first.

- Cathead, GrandpaPhil, CDW and 1 other
-
4
-
I wanted a waterline scribe along the hull, so after it is panted I have a line reference to add the red decal I am going to use for the red stripe.
I took my scribing tool and attached it to a piece of wood the right size and drug it along the hull as I held it down. The hull is curved from bow to stern horizontally. I kind of ignored that as I held the hull down for the scribed line. My water line may not be exactly correct, but I don't think it will be too noticeable.
- Cathead and GrandpaPhil
-
2


.jpg.1446bfba6840bdfa6827672b9b2da565.jpg)
Robert E Lee by bcochran - FINISHED - Pyro - 1/163 - PLASTIC - steamboat
in - Kit build logs for subjects built from 1851 - 1900
Posted
Preparing parts for assembly.