HOLIDAY DONATION DRIVE - SUPPORT MSW - DO YOUR PART TO KEEP THIS GREAT FORUM GOING! (83 donations so far out of 49,000 members - C'mon guys!)
×


yvesvidal
-
Posts
3,607 -
Joined
-
Last visited
Content Type
Profiles
Forums
Gallery
Events
Everything posted by yvesvidal
-
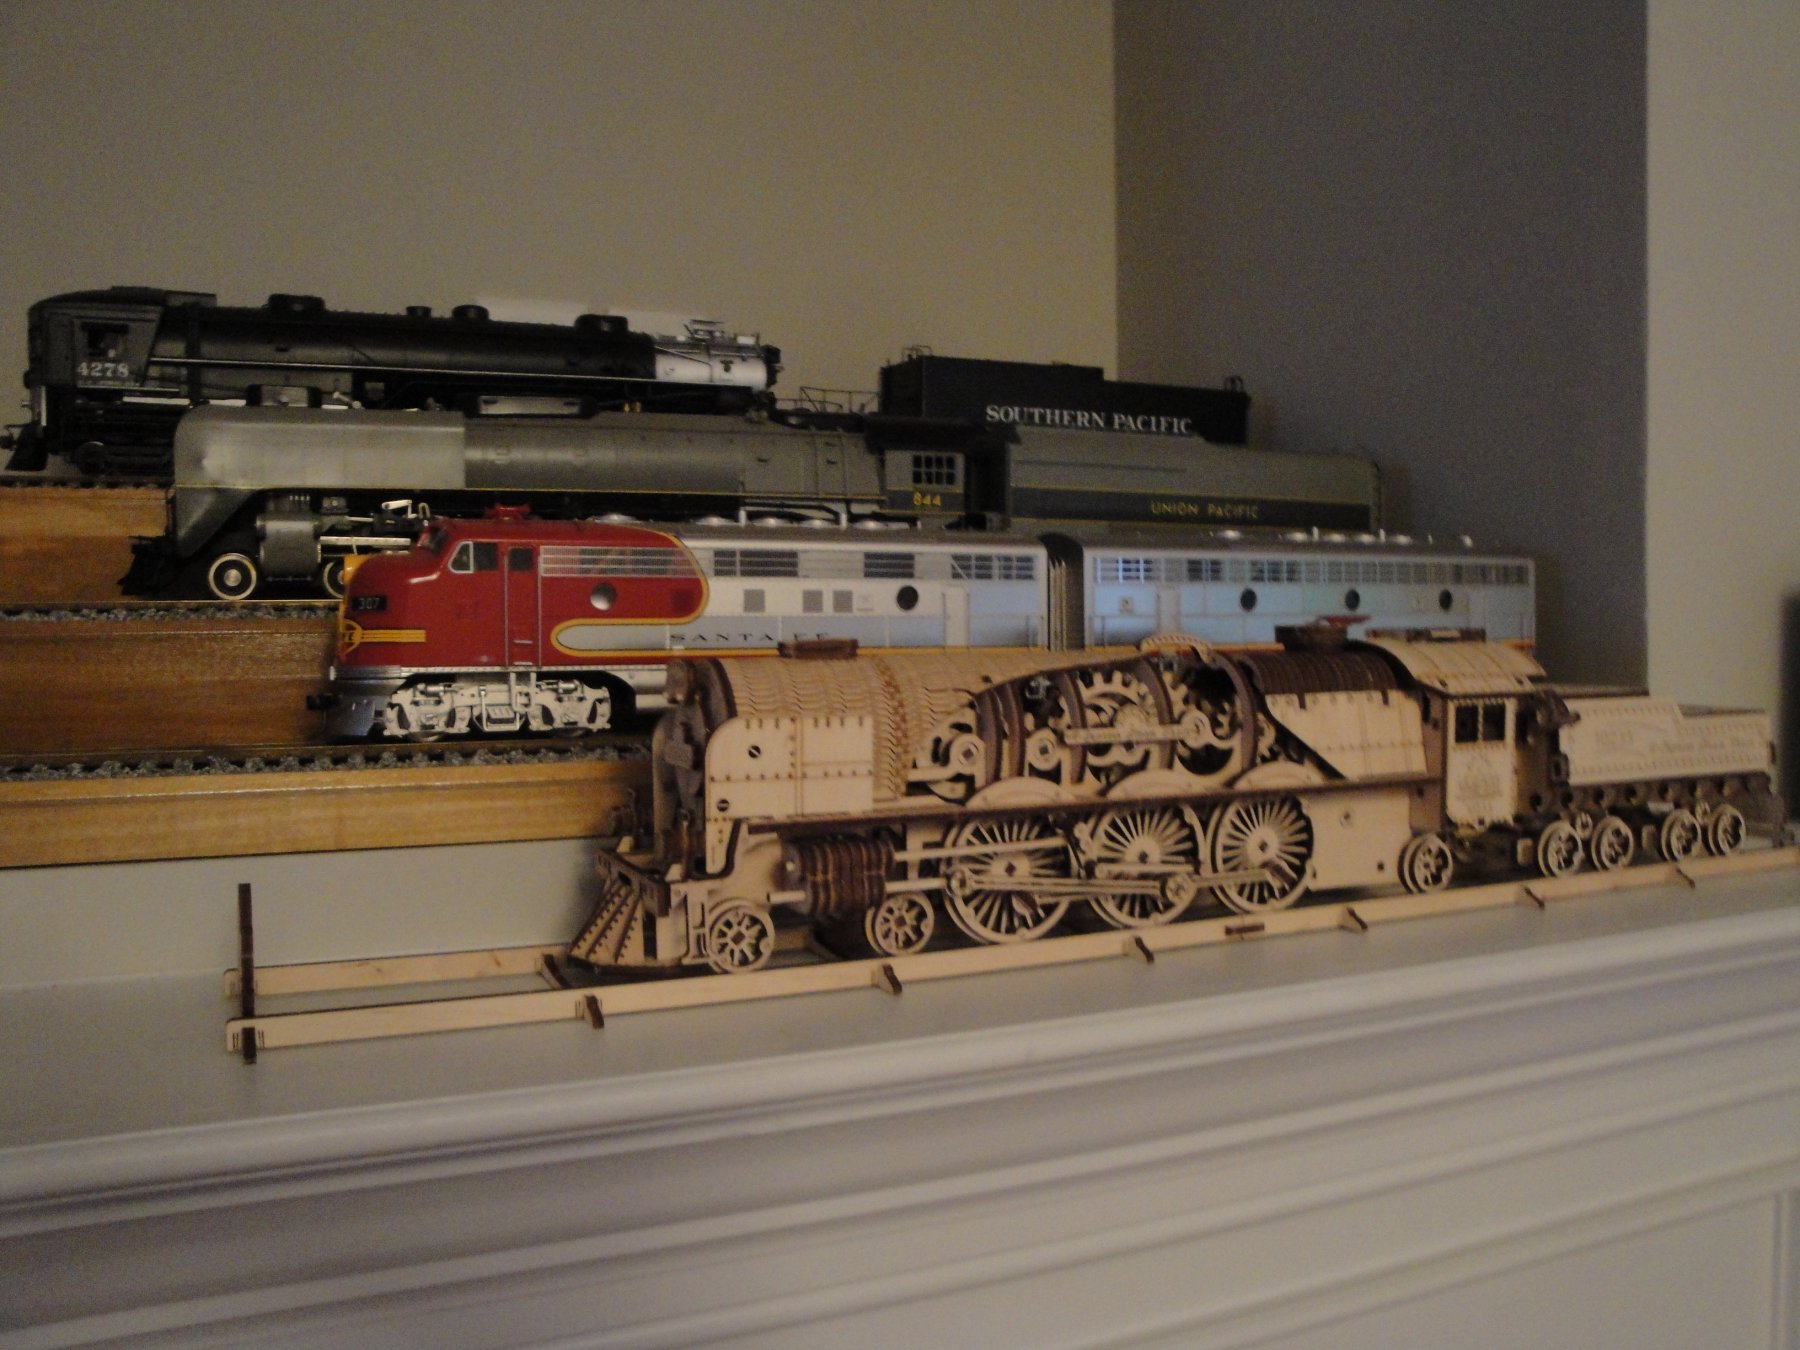
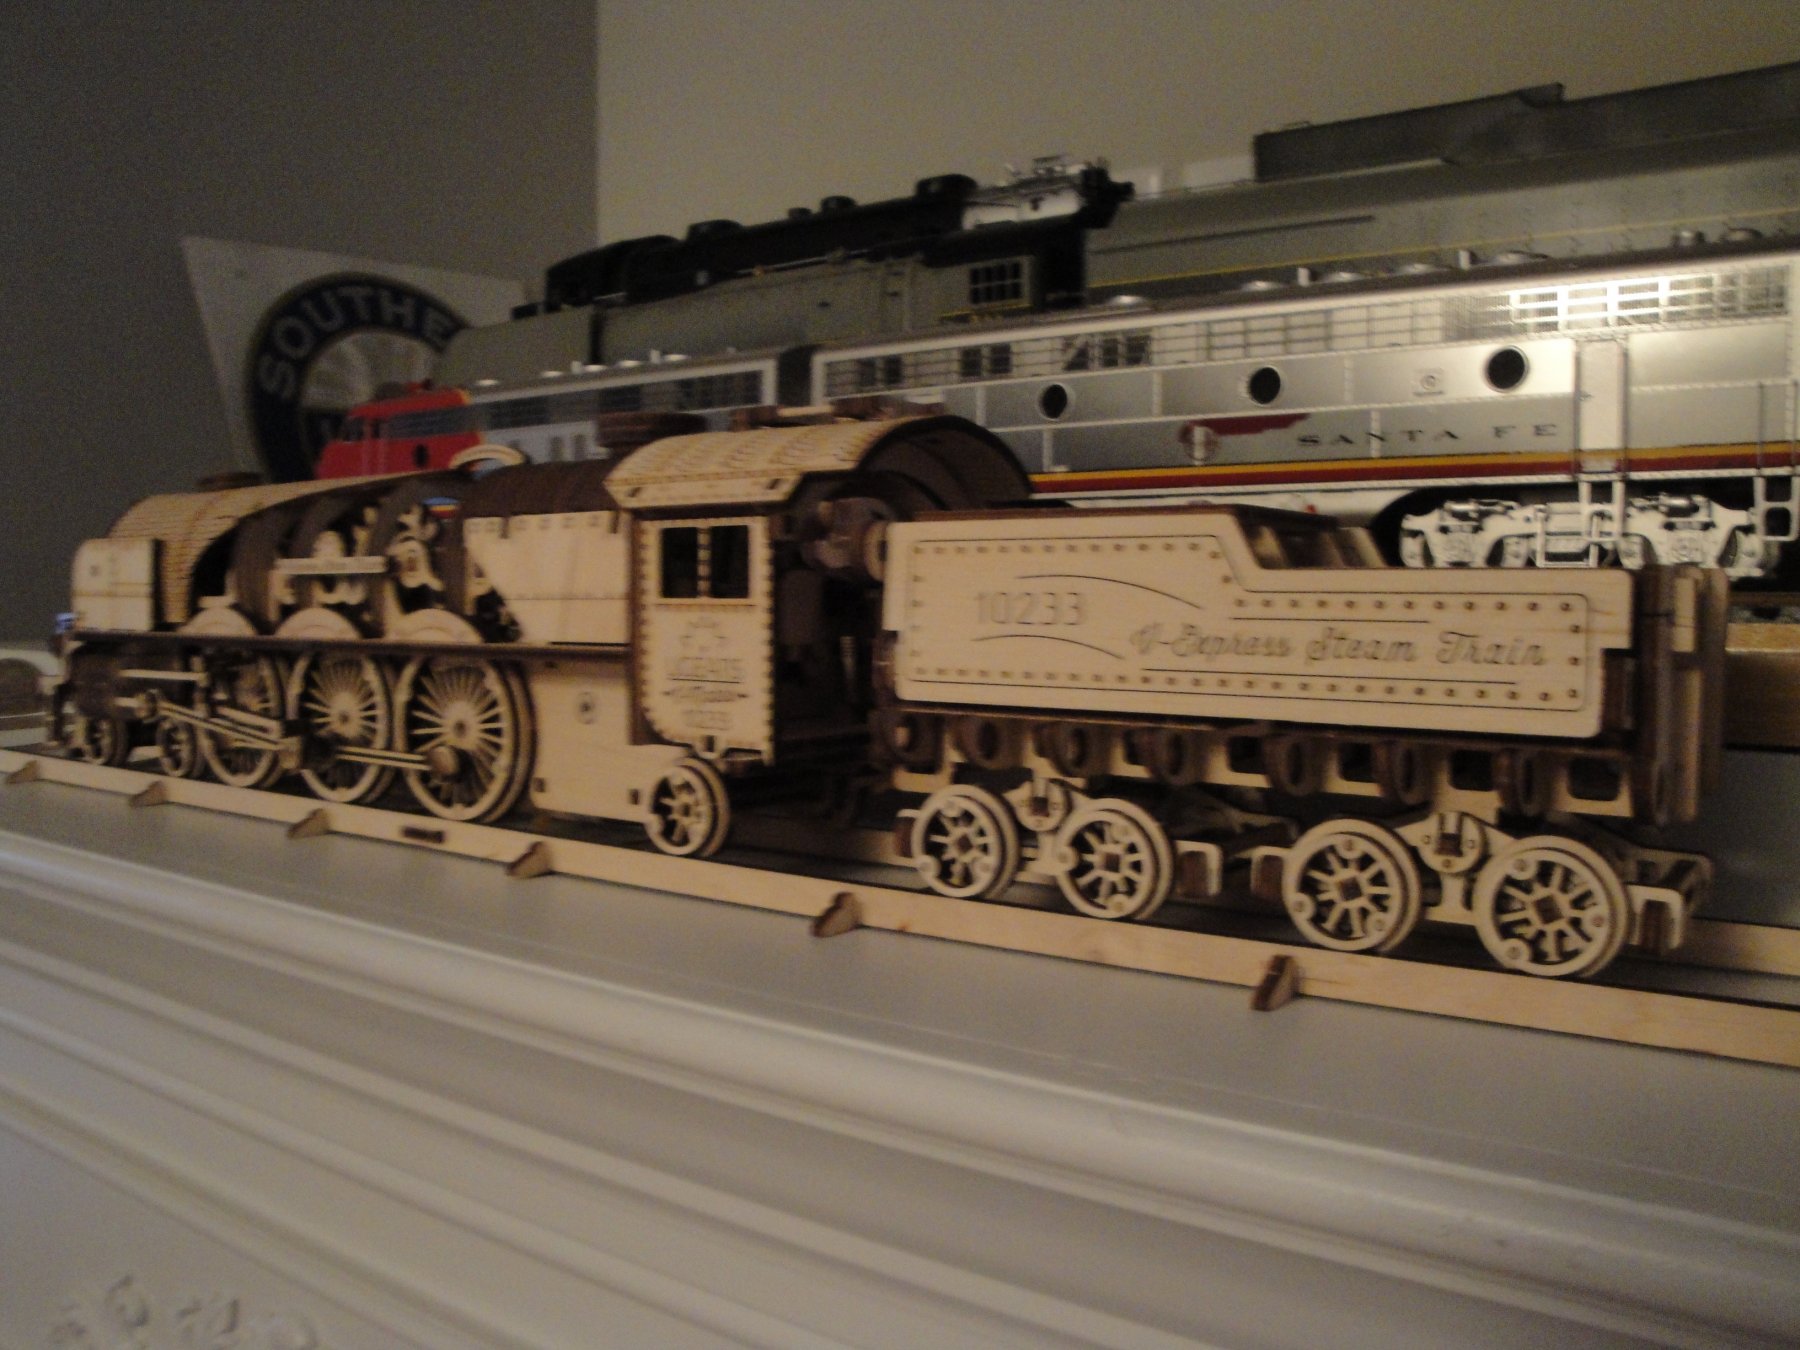
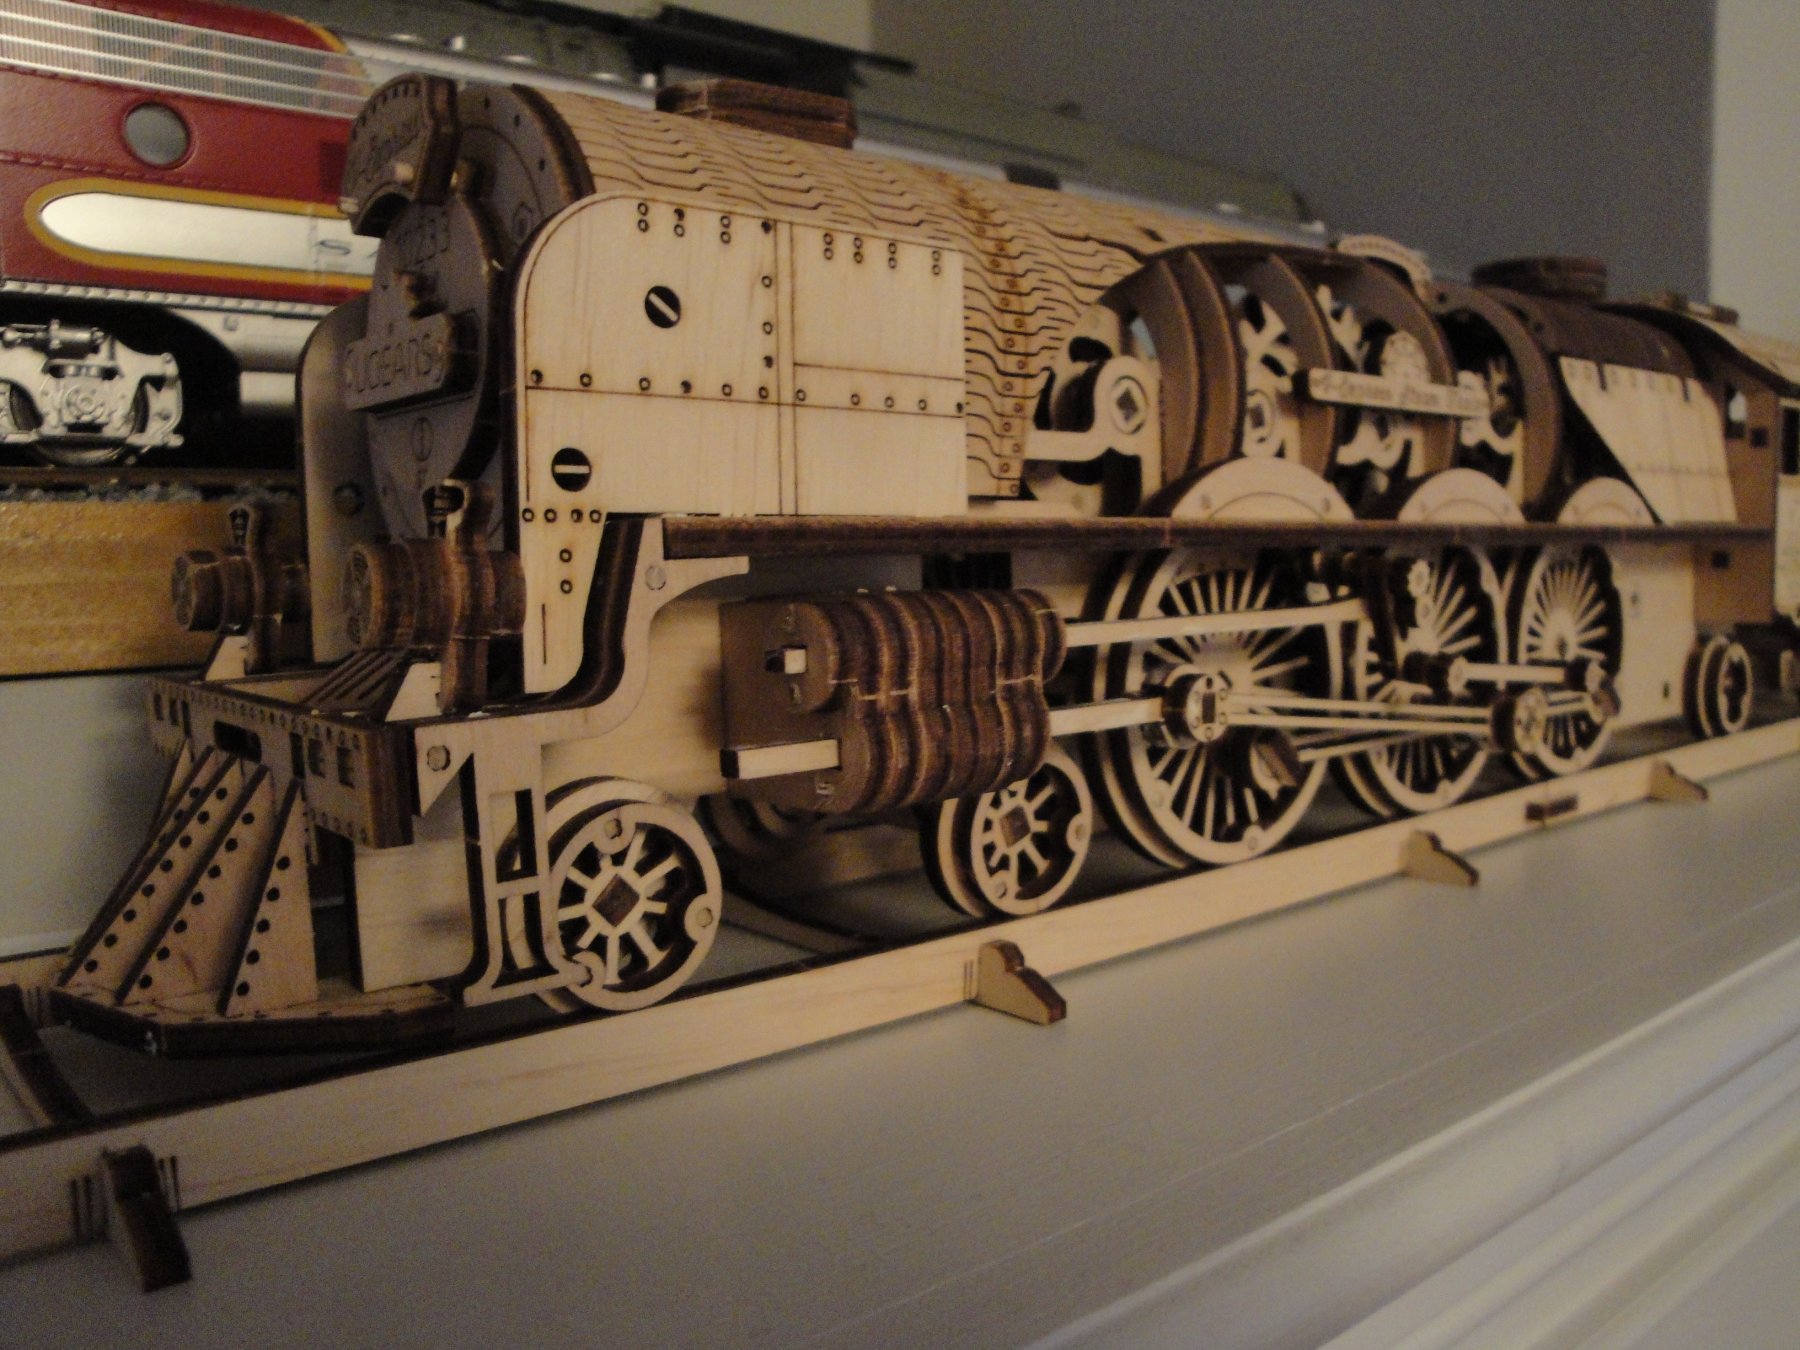
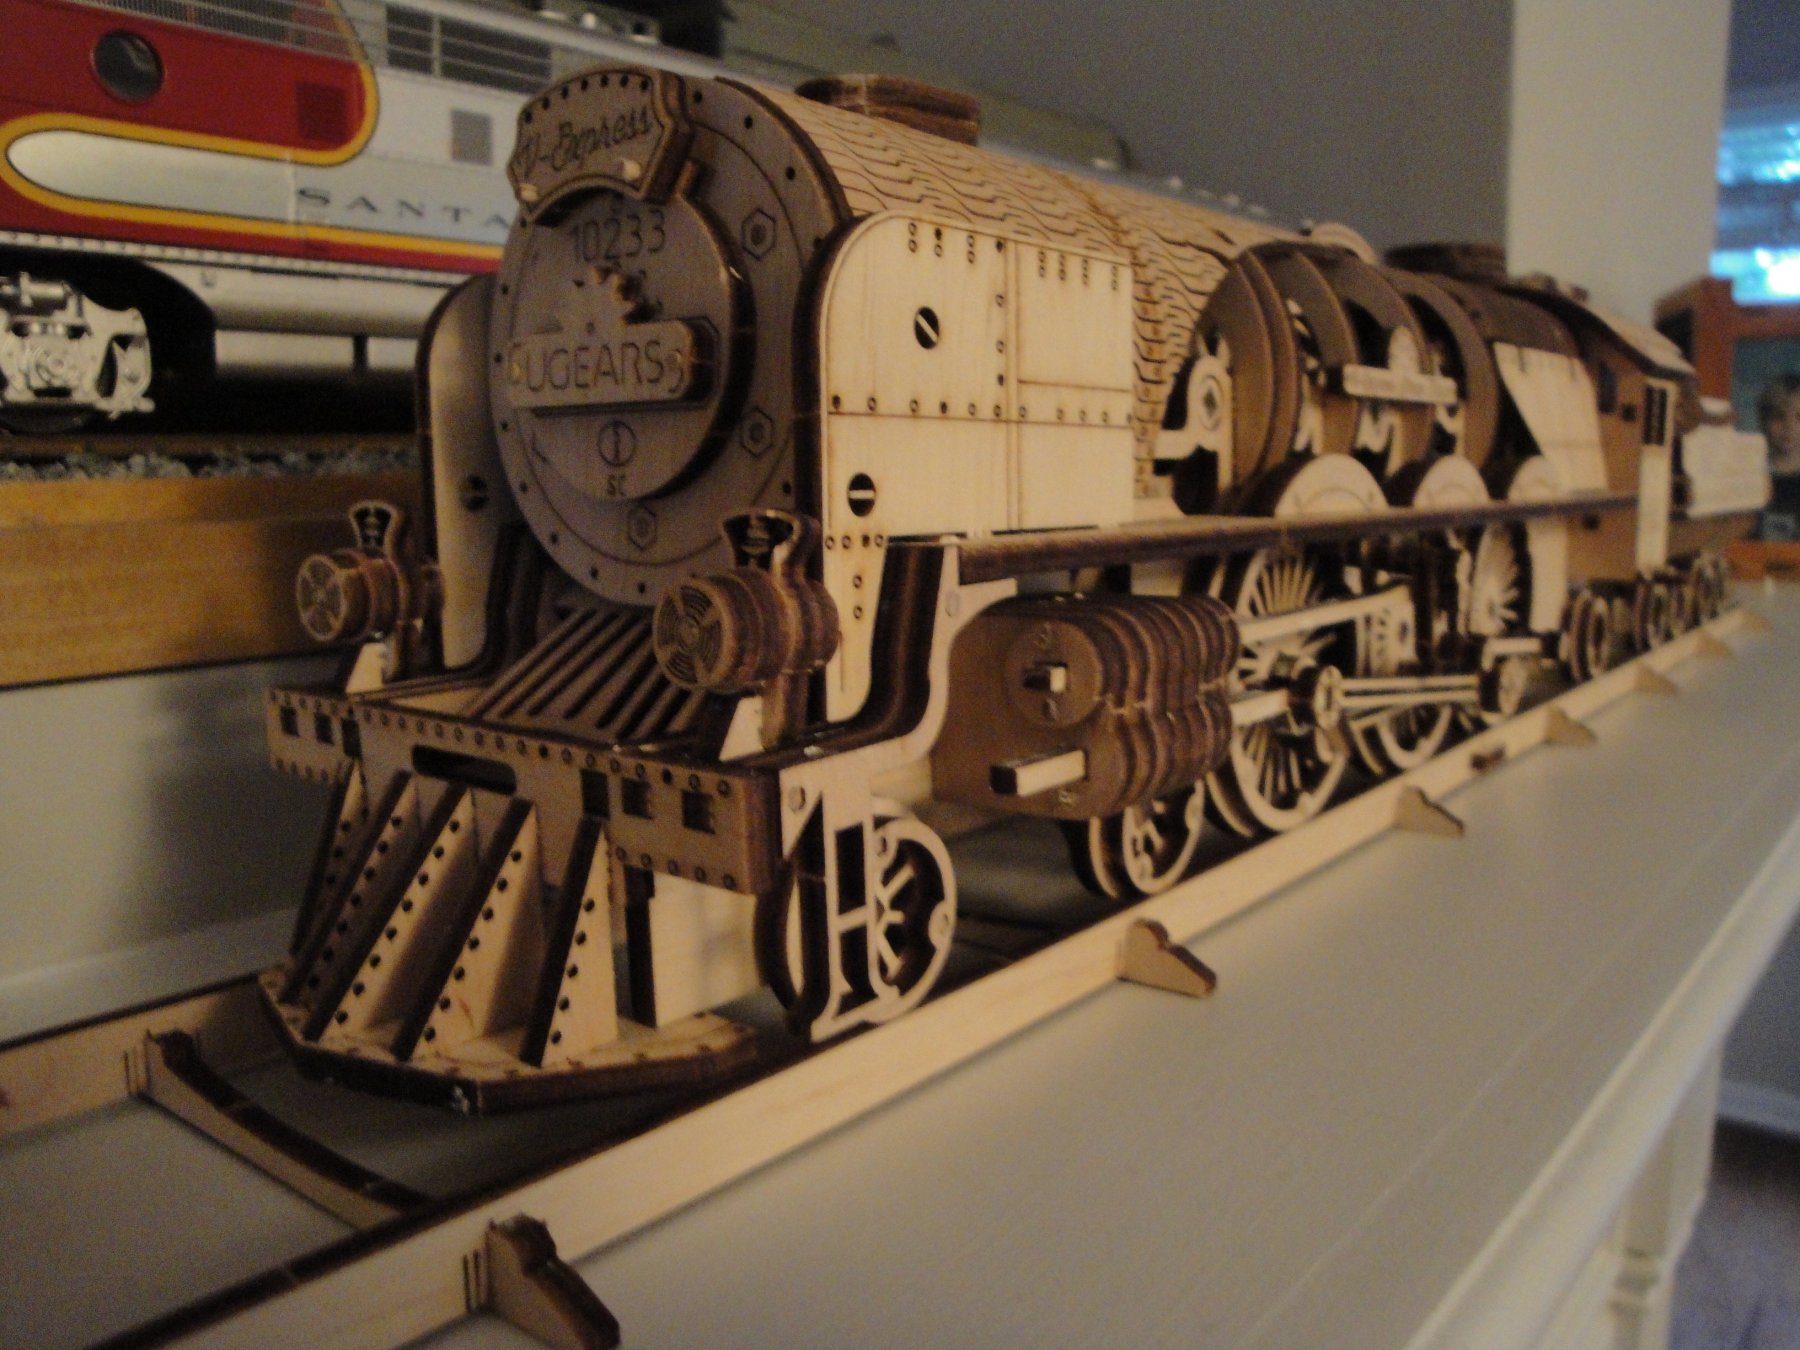
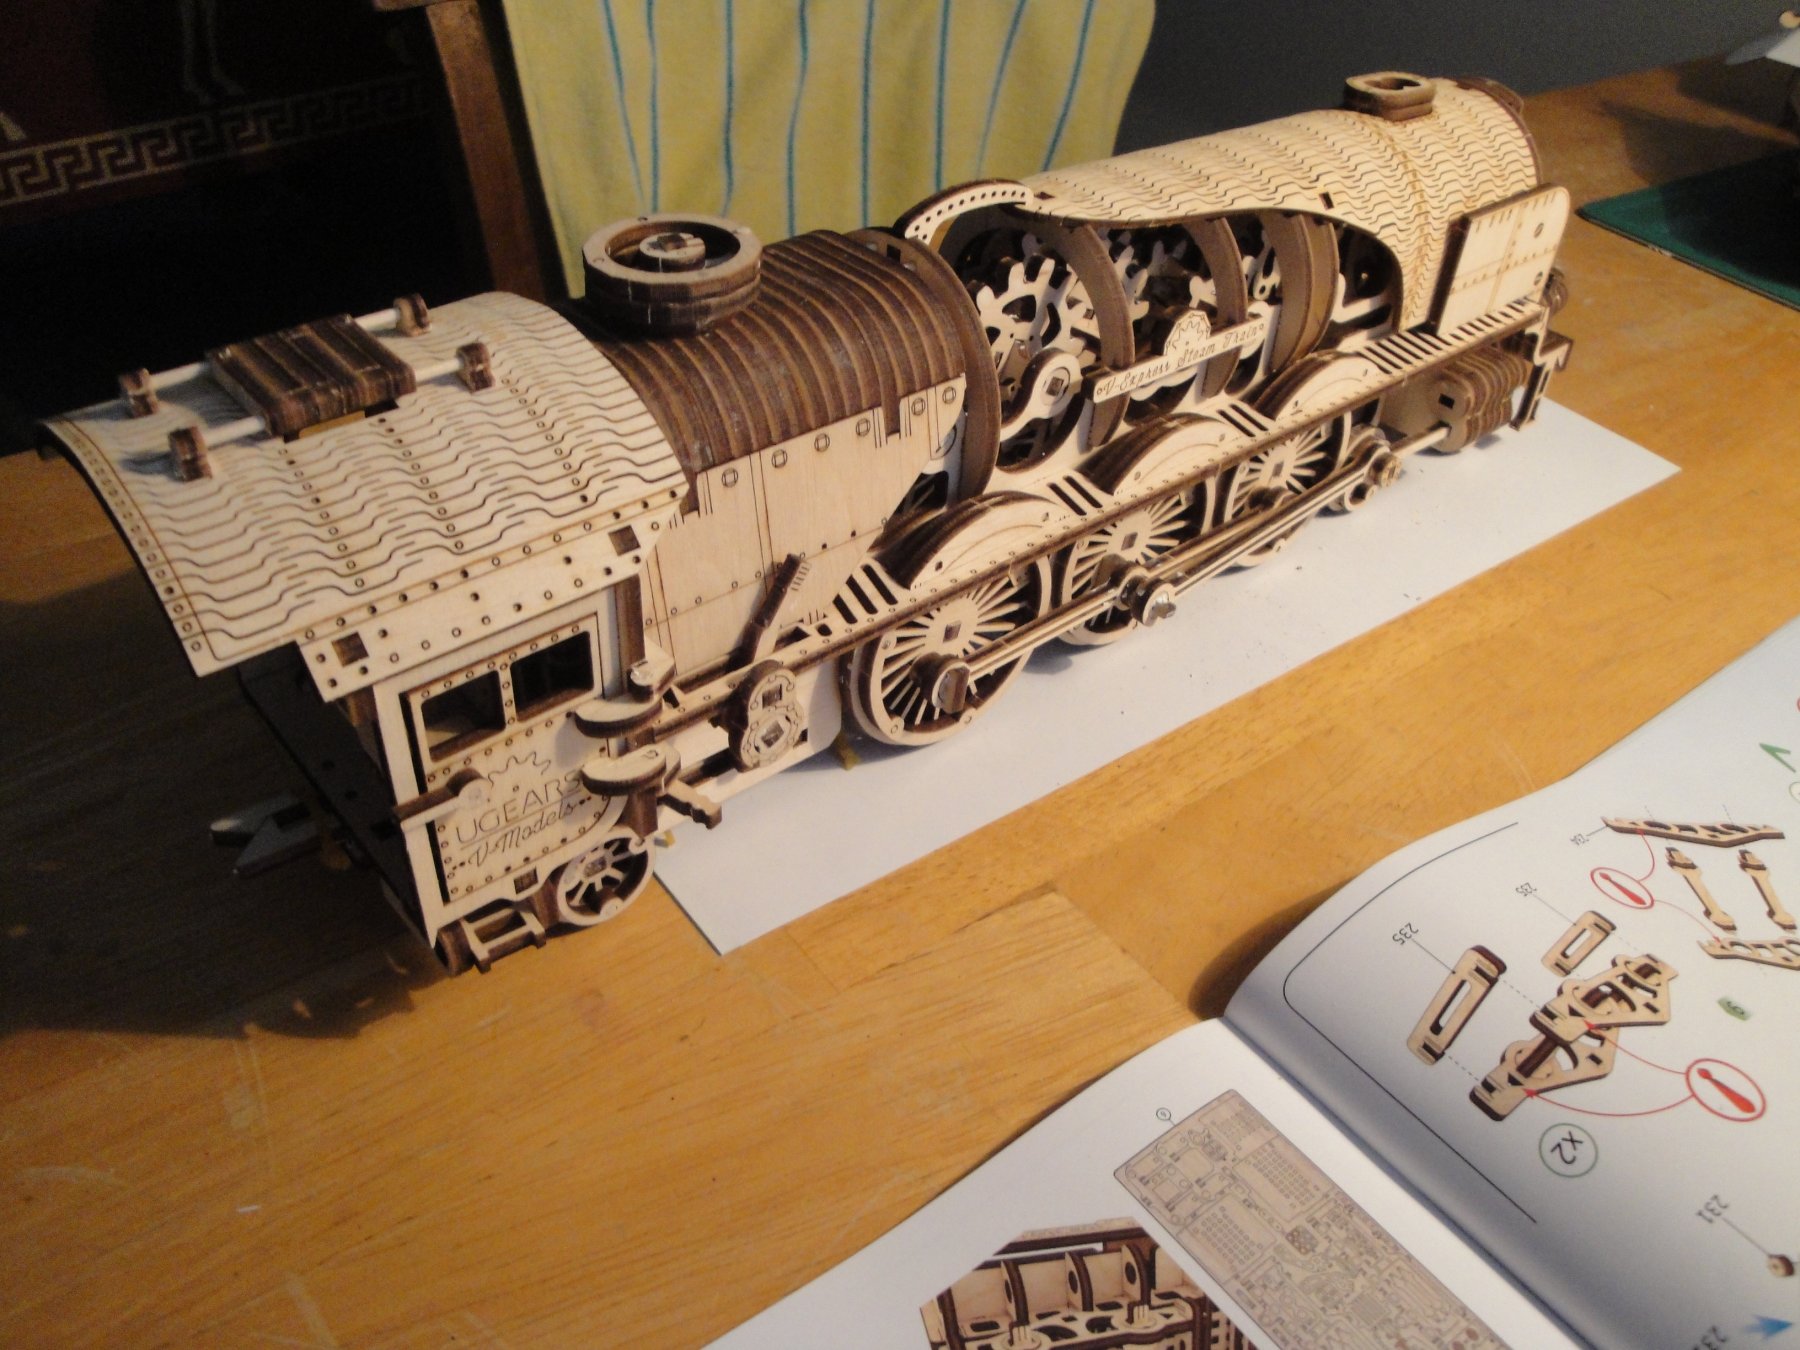
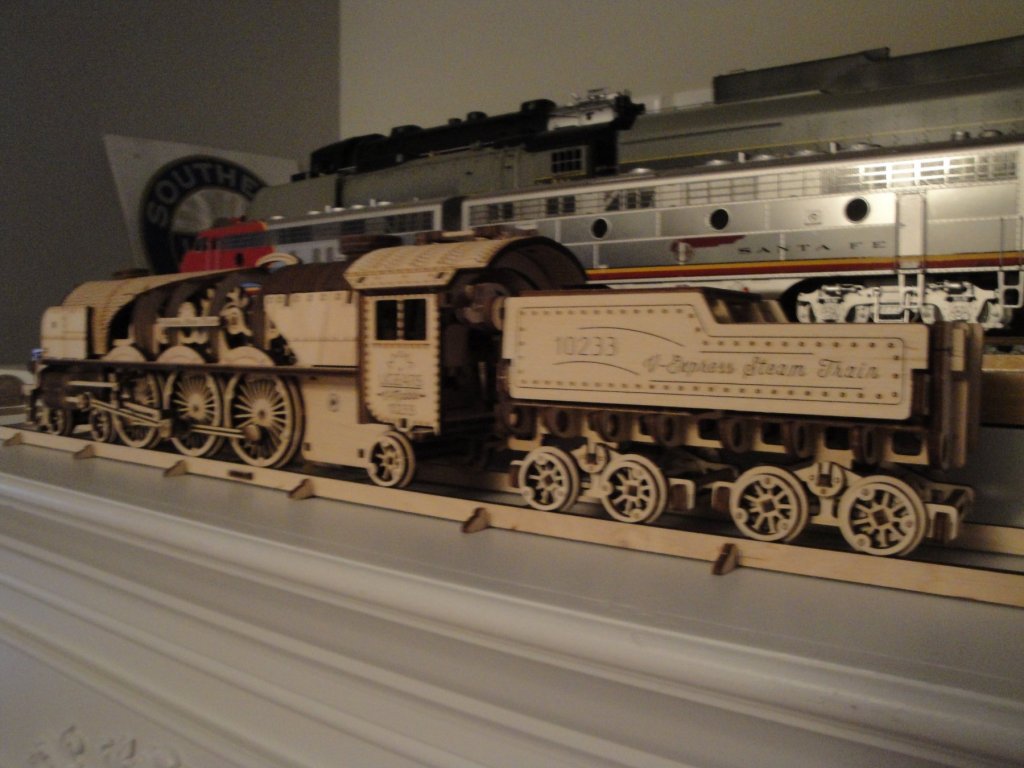
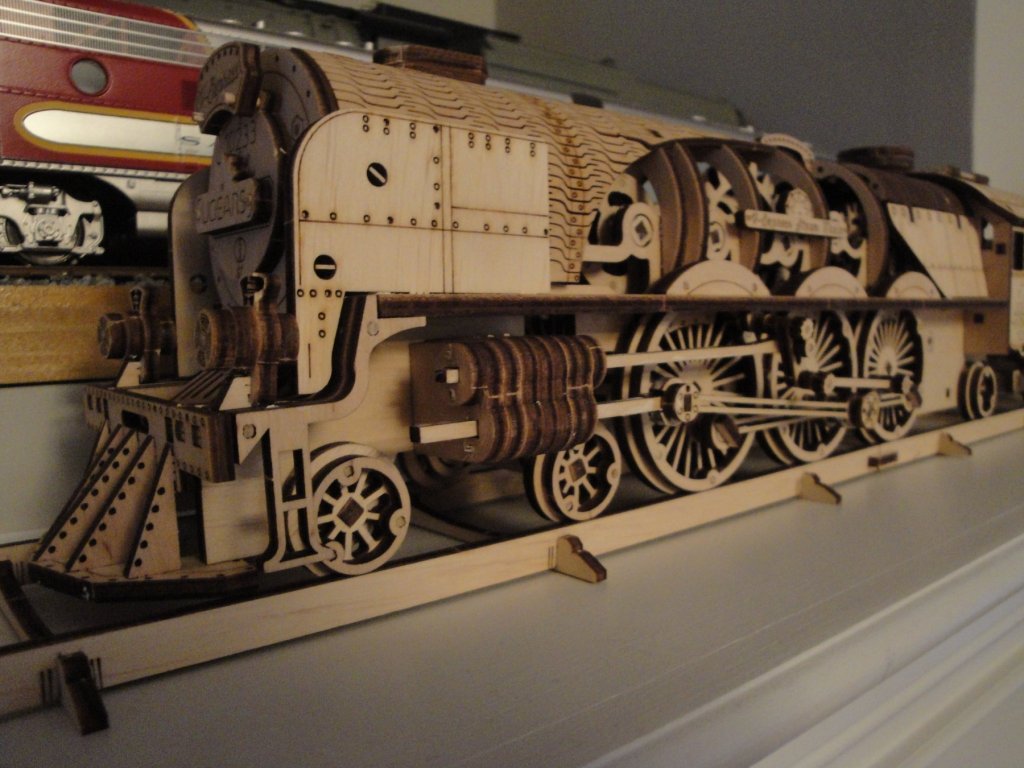
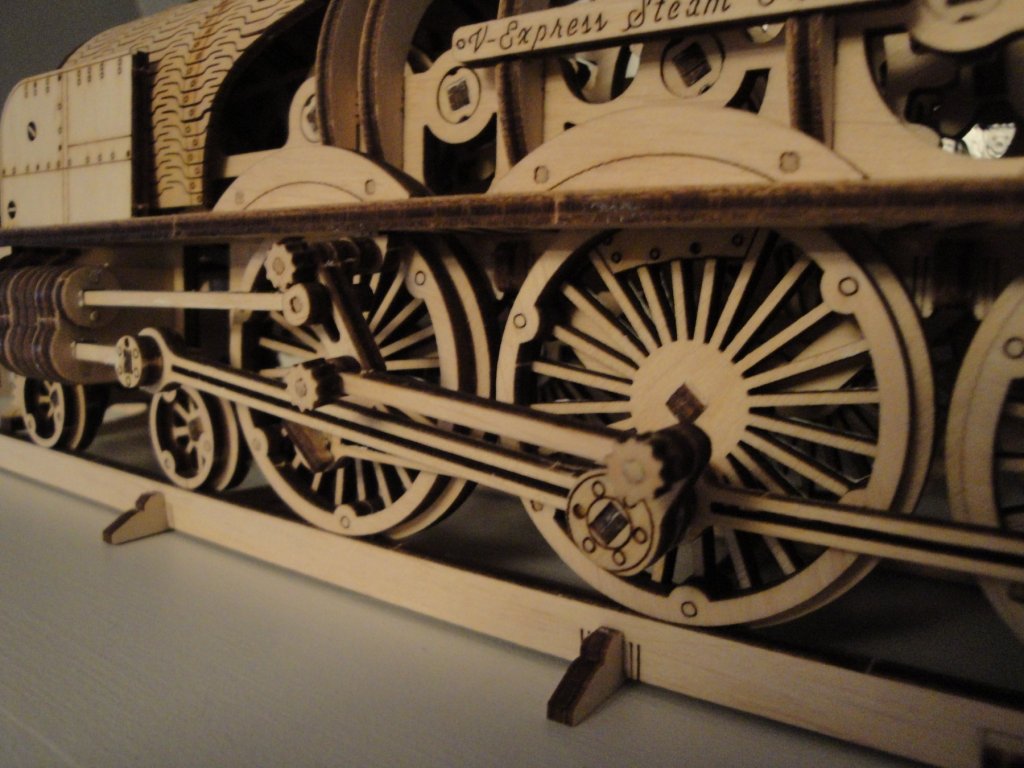
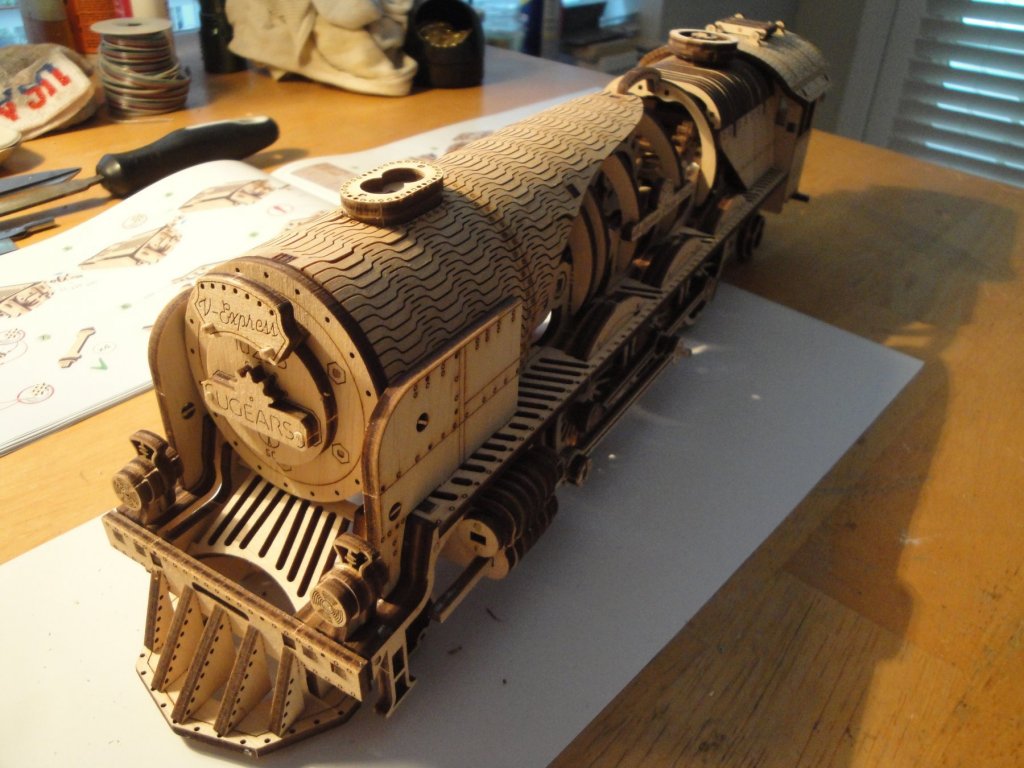
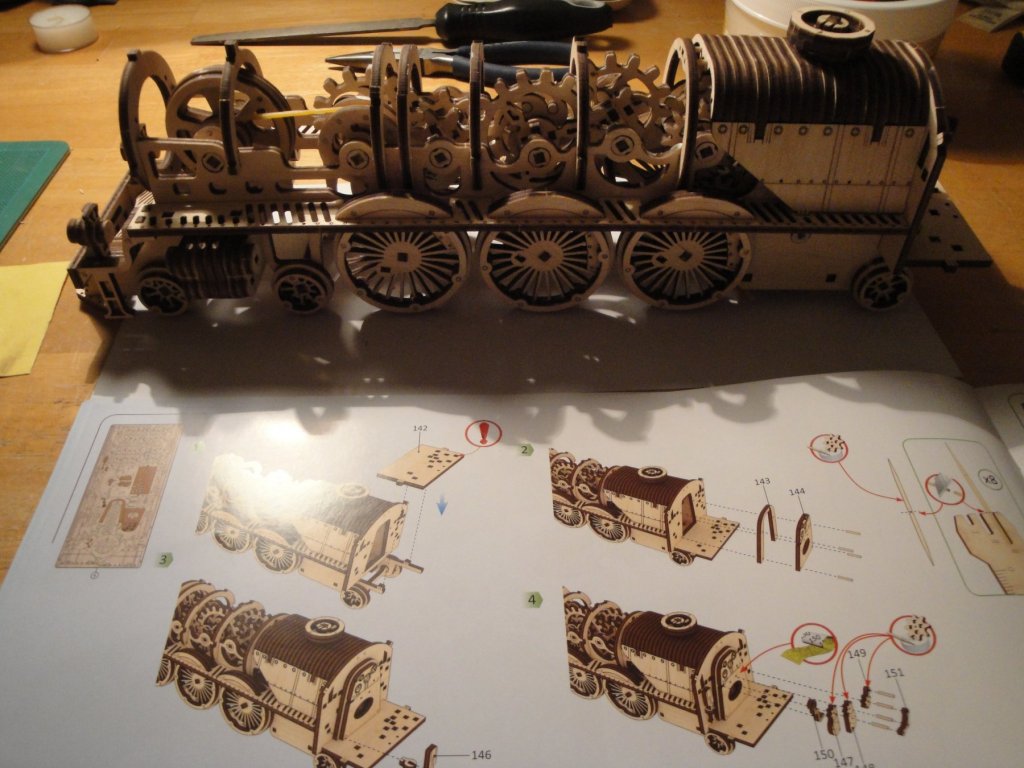
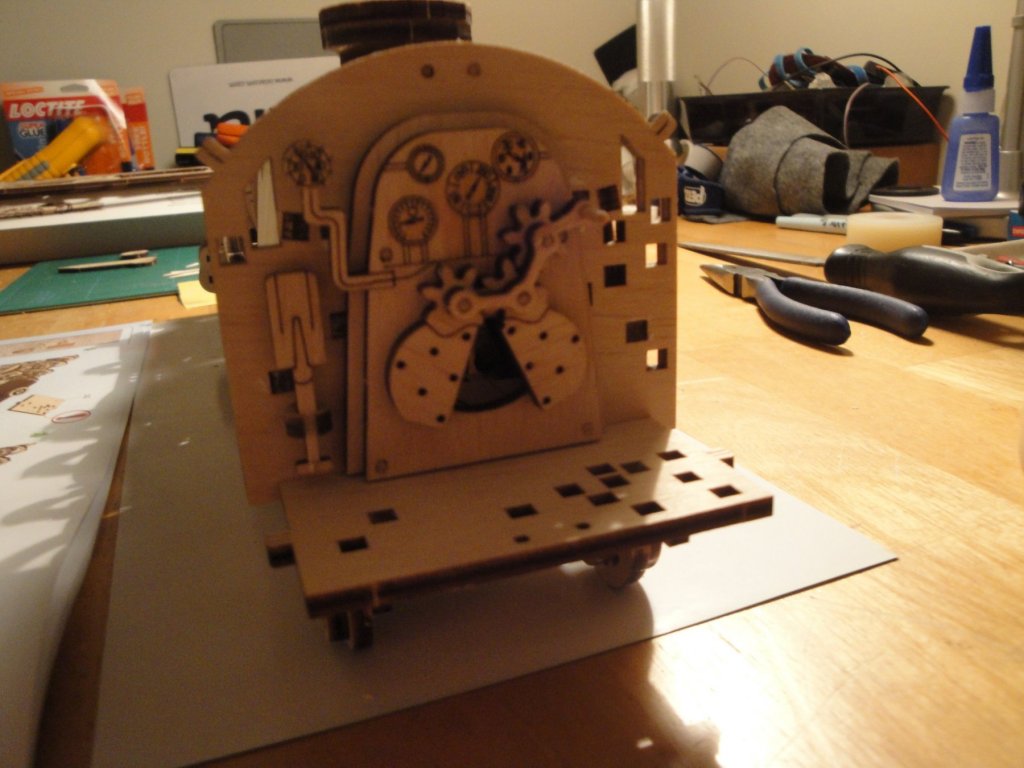
 The engine is now completely finished and sitting on its wooden rails: Note that the kit offers much longer rails than what I am using for display purposes. The engine is sitting in front of some of my O scale brass locomotives. As far as running, I was able to get a few inches of movement but I am reluctant to increase the number of rotation to rewind the rubber bands (even though they recommend up to 25) and I believe it would take some serious rework of the gears and flywheel located in the boiler to get a longer duration of thrust. Here are a few more pictures of that very nice and well engineered model: I hope you enjoyed this BLOG and will perhaps try your skills at one of these Ukrainian kits. I certainly enjoyed putting it together and it has been a nice challenge. Yves

- 18 replies
-
- 10
-

-
U-boat by tozbekler
yvesvidal replied to tozbekler's topic in - Build logs for subjects built 1901 - Present Day
Approximately which scale is this U-boot built? It looks like 1/48 or 1/50 scale. Also, could you elaborate on the other big projects on your workshop? That looks like a dreadnought or some Mikasa model.... Thanks Yves -
U-boat by tozbekler
yvesvidal replied to tozbekler's topic in - Build logs for subjects built 1901 - Present Day
Great work and very interesting method of building. Yves -
Greg, Another one of your marvels that I cannot let pass. And what an elegant and thorough way of presenting your Build Log, with all these photographic archives and details of the upcoming PEs. Fantastic job on the forum, to announce an even more incredible Build Log in the future. Kudos. Yves
-
Absolutely superb. I like this version so much more than the plain light grey of the current ship. Your BLOG will be my reference when I start the building of my kit. Yves
- 467 replies
-
- 7
-
-
- mikasa
- wave models
- (and 1 more)
-
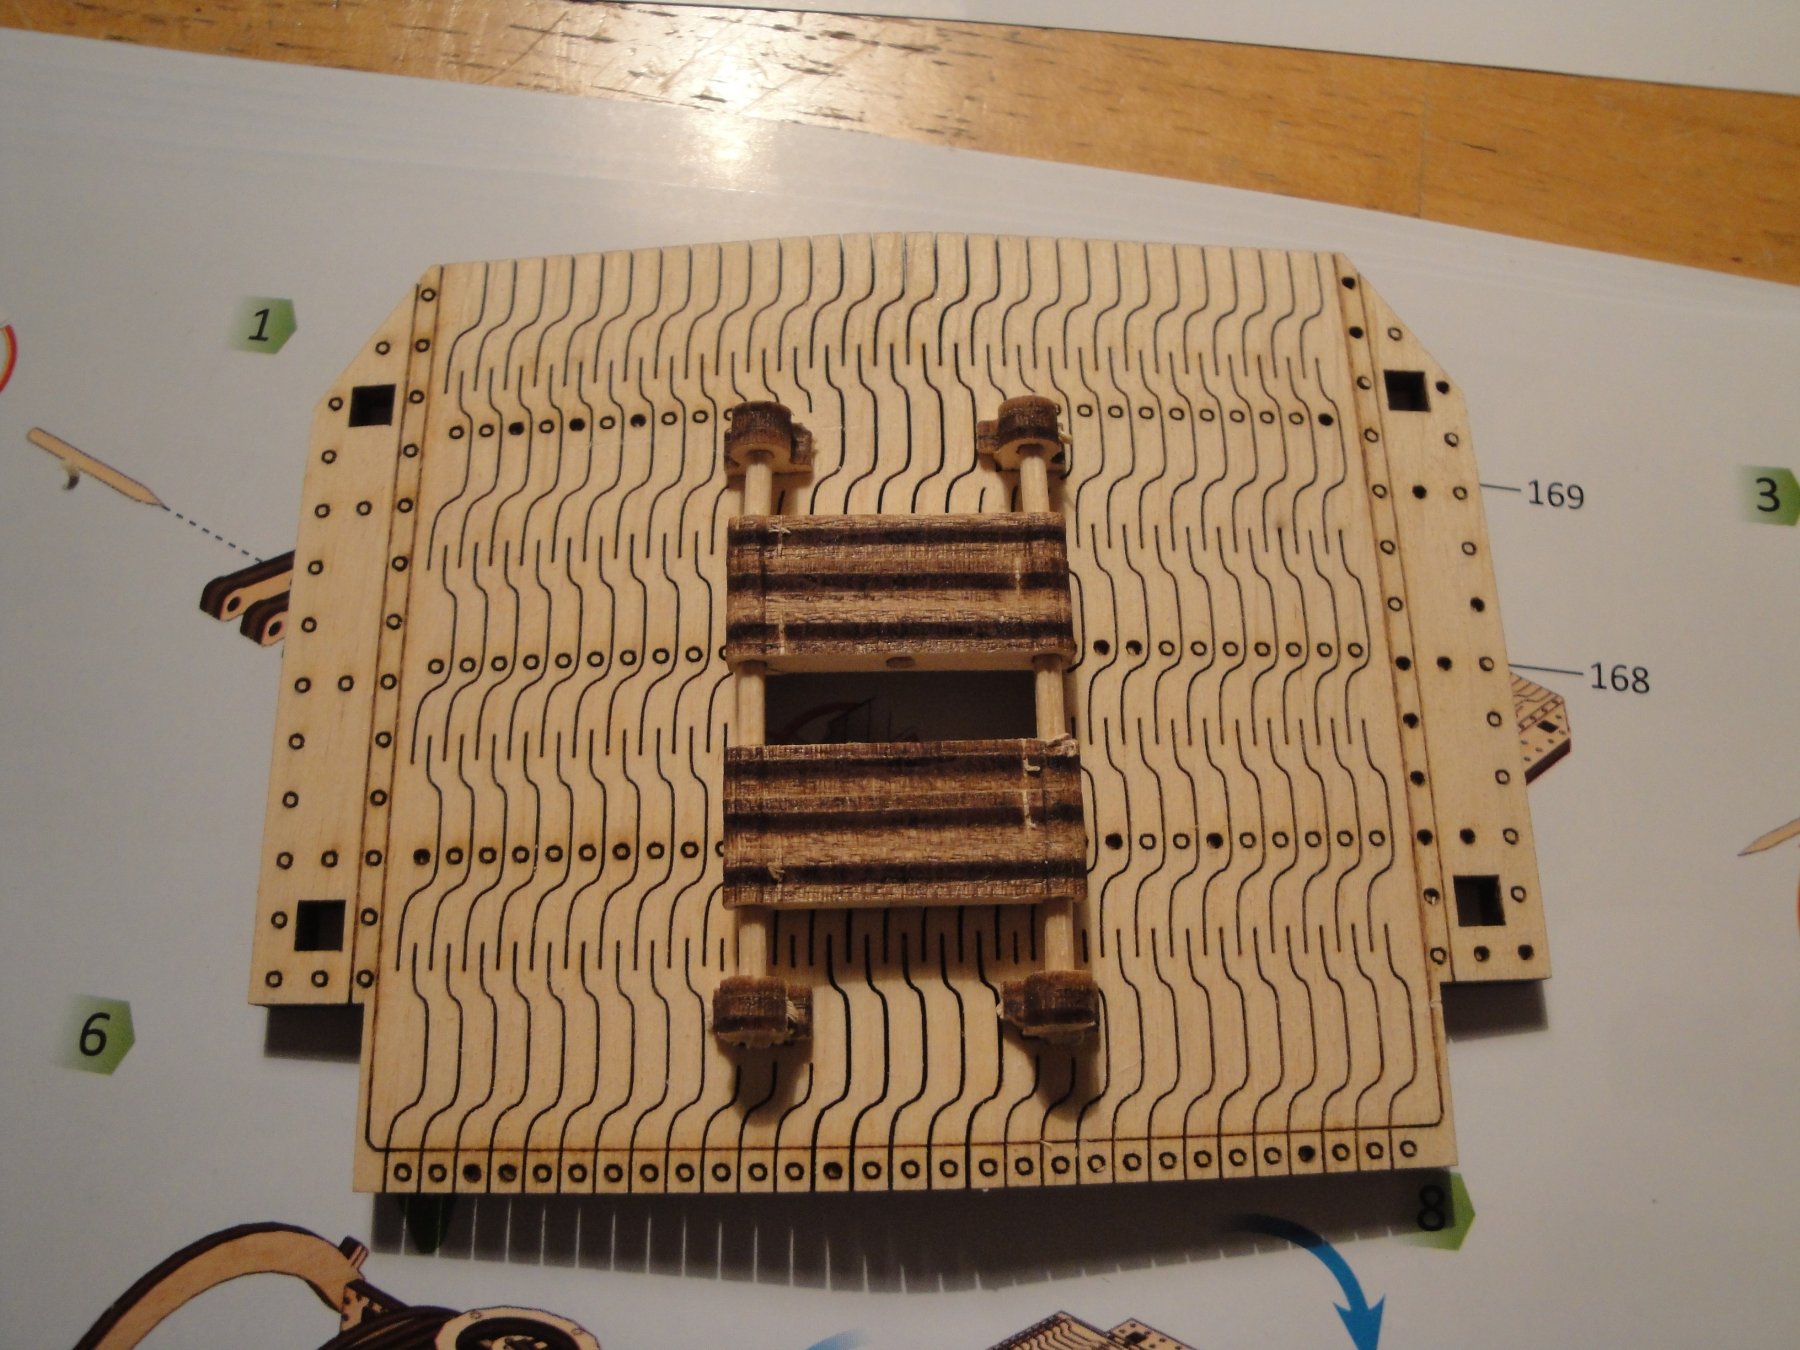
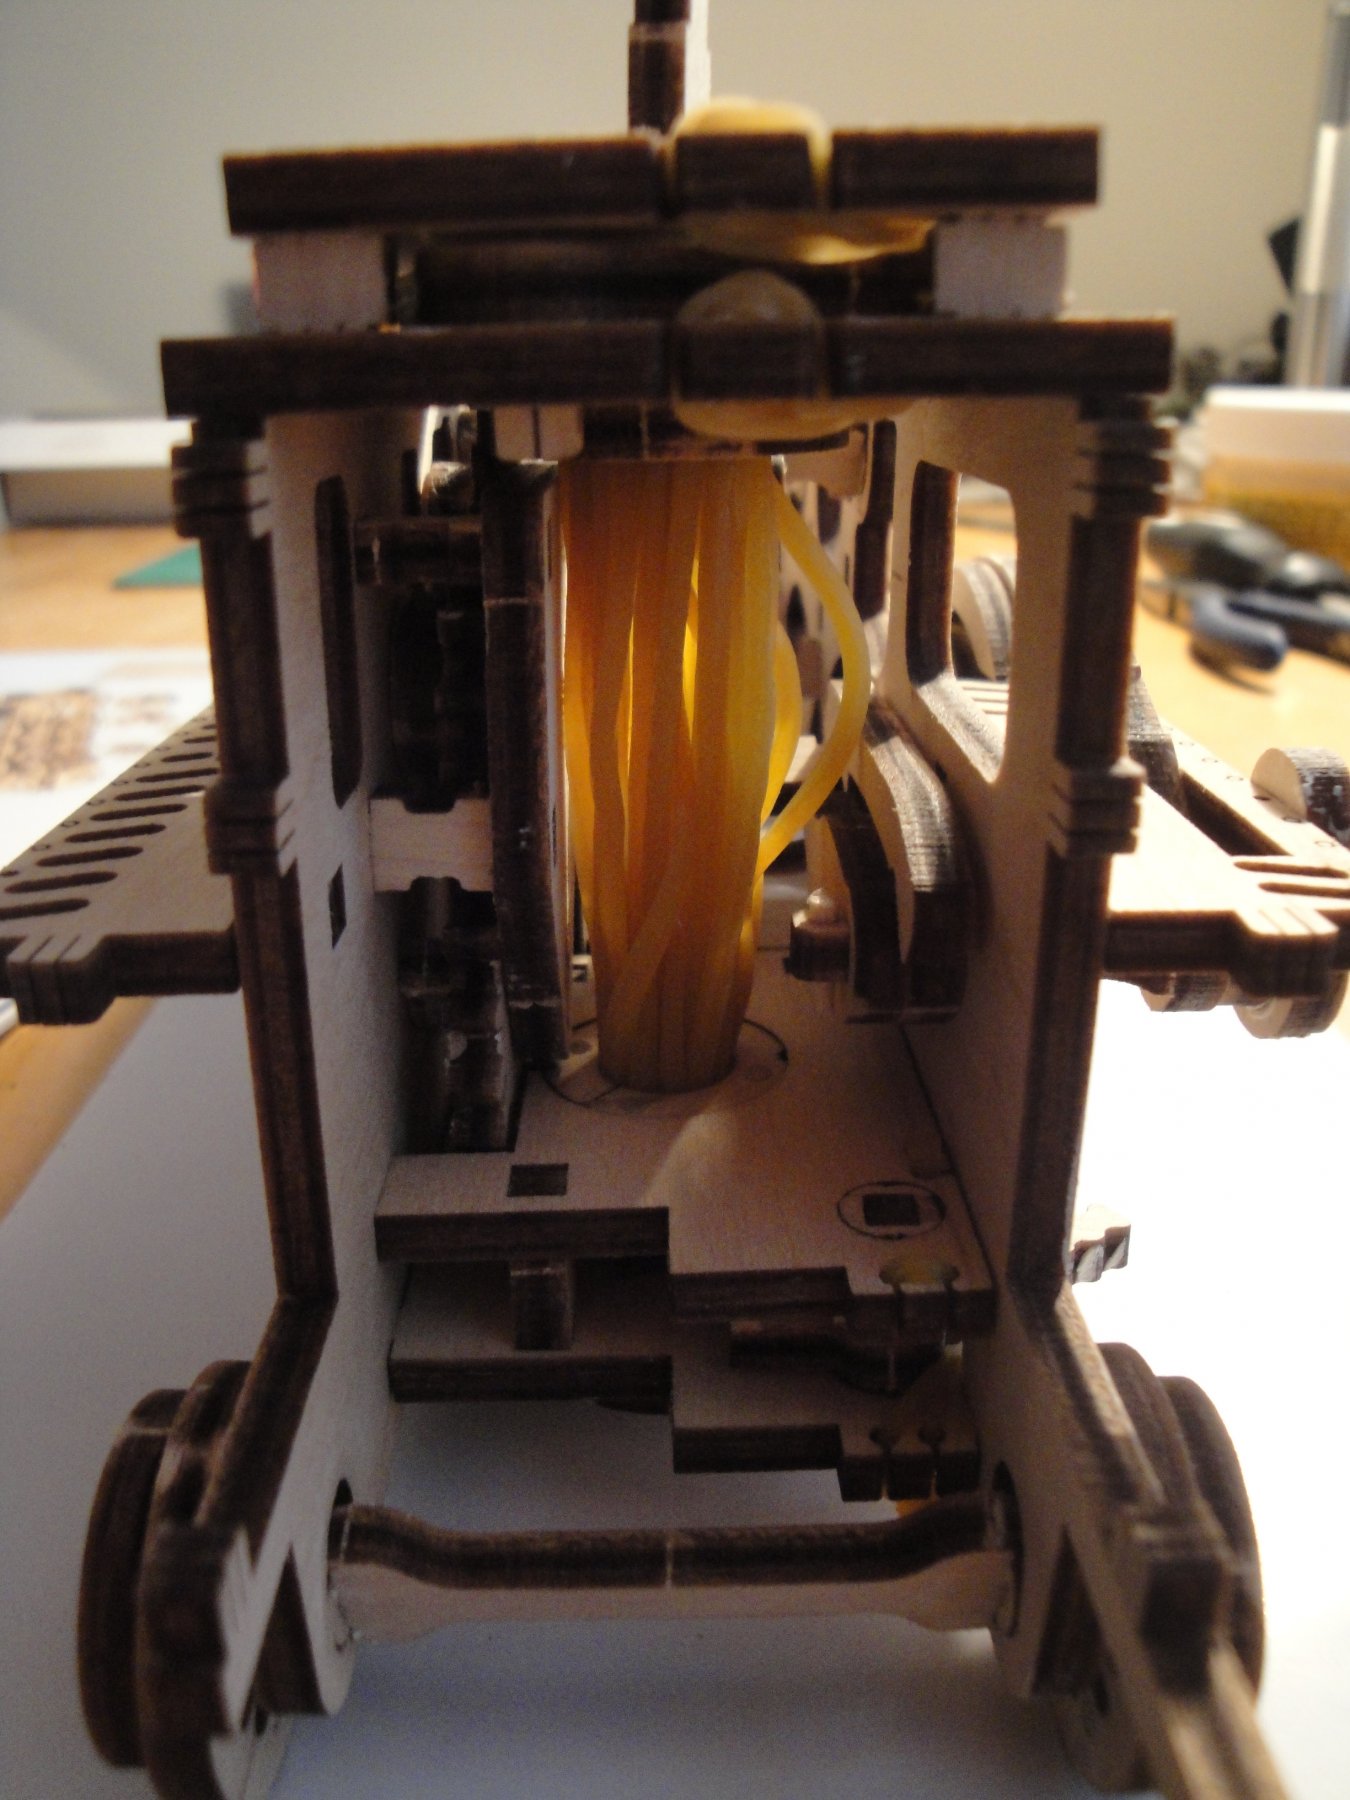
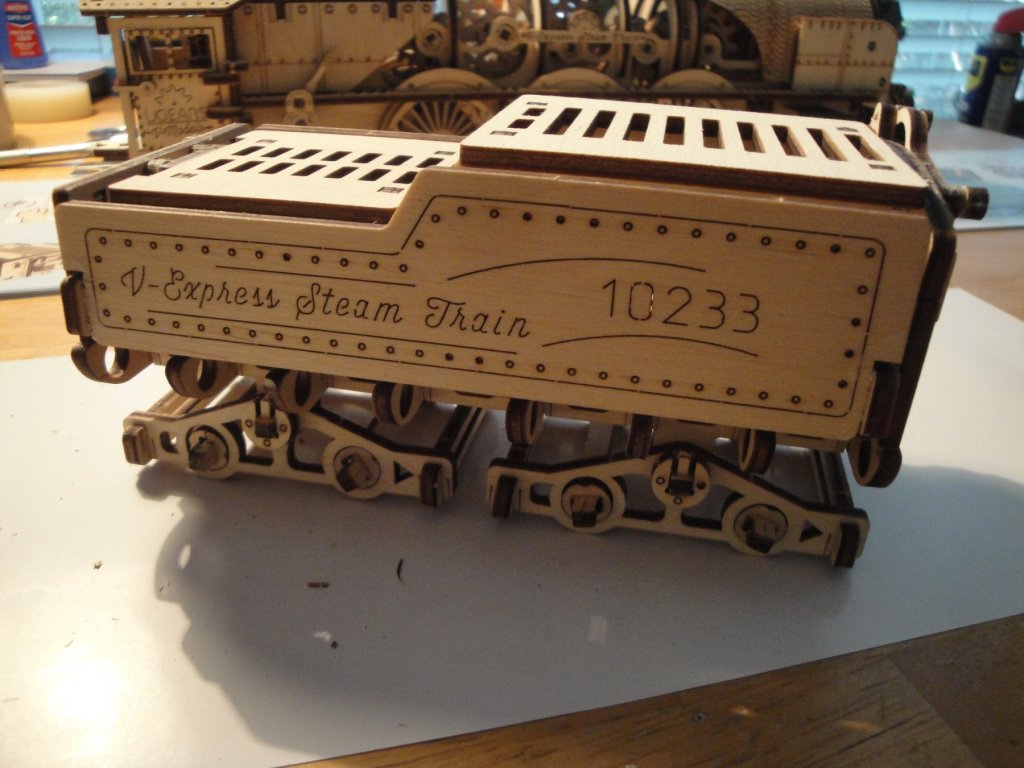
Assembly of the tender is continuing.... A very unusual way to access the inside of the tender, but why not? Yves

-
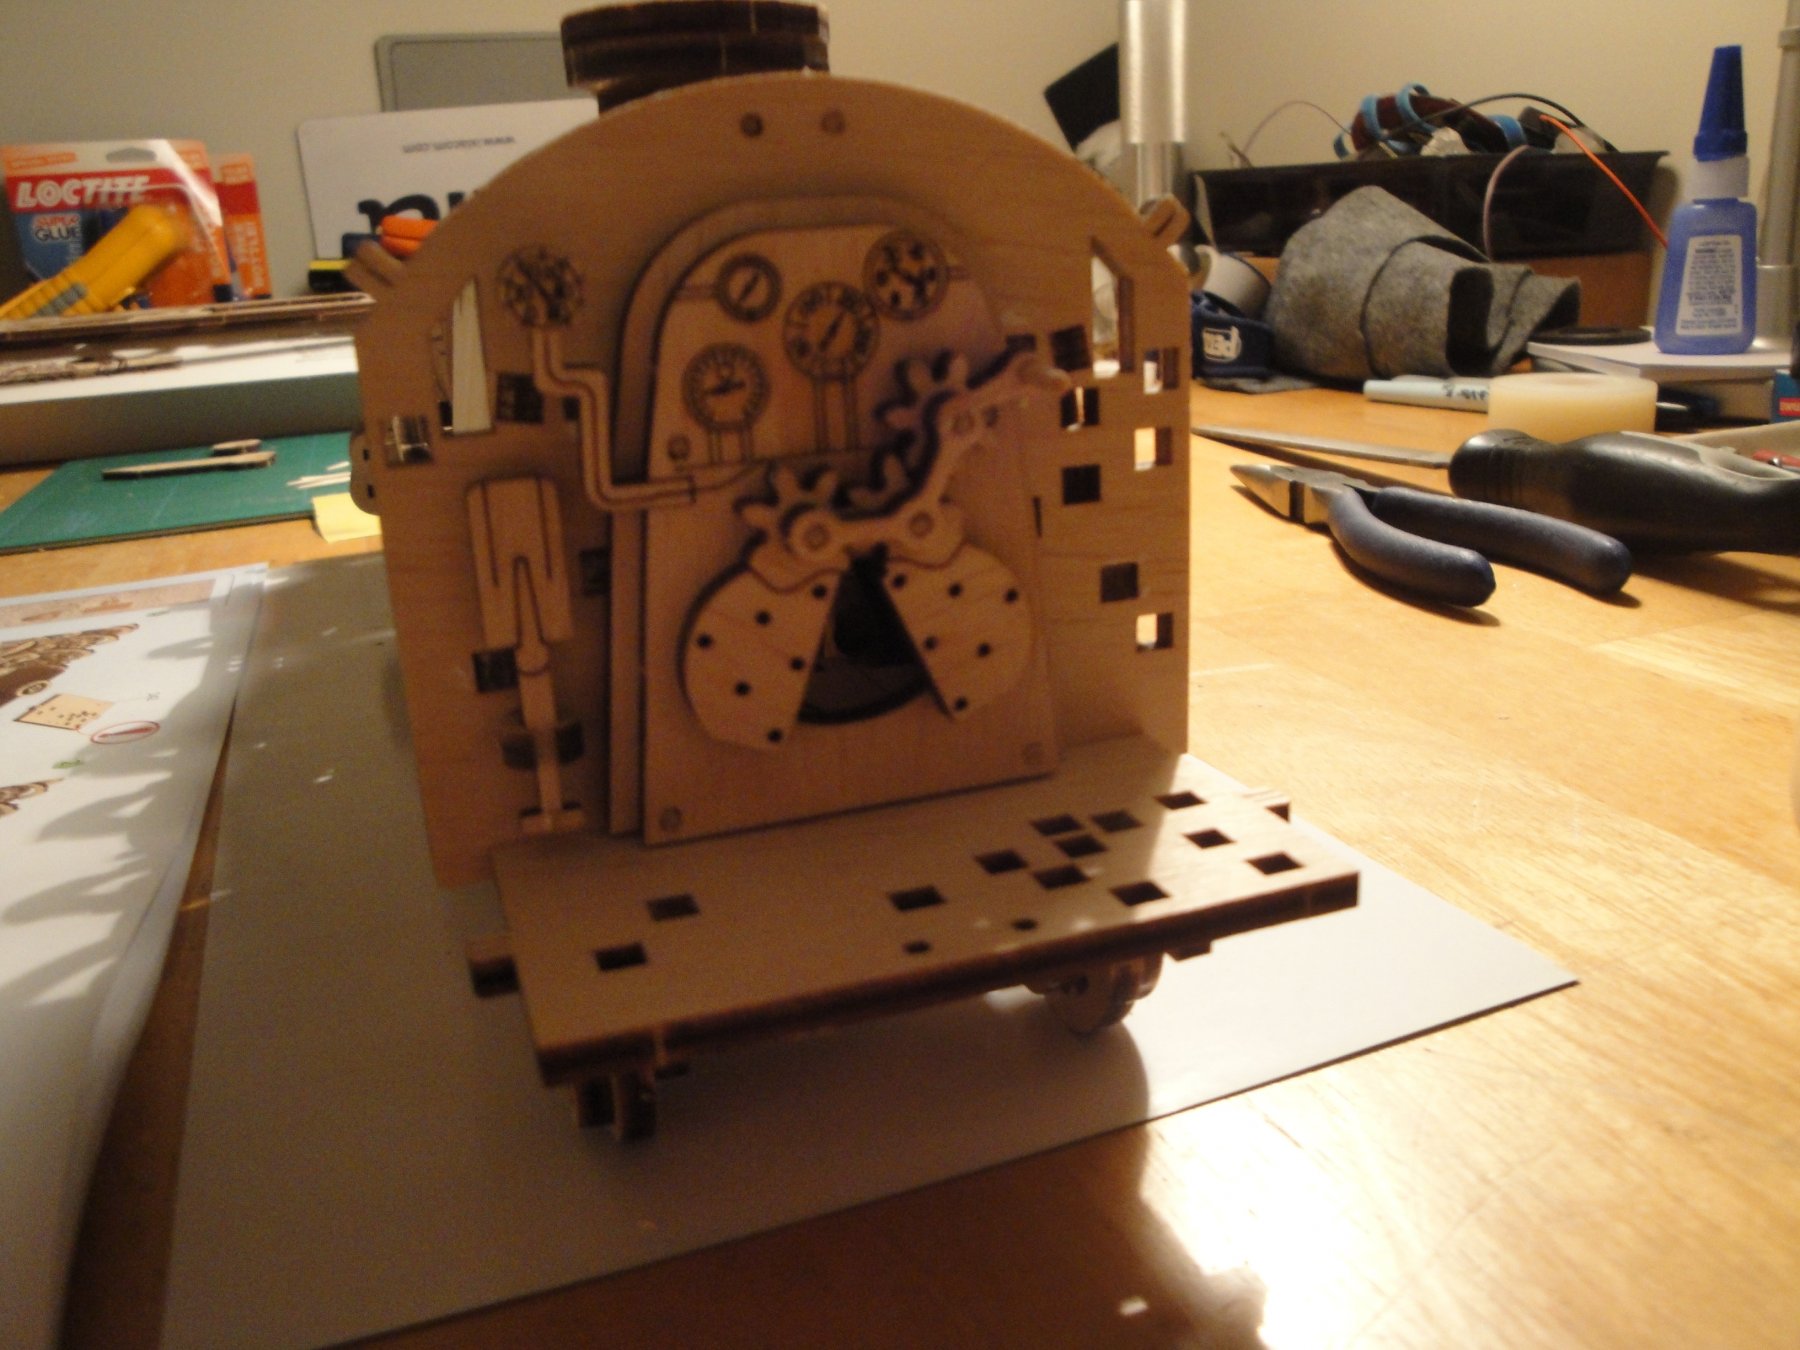
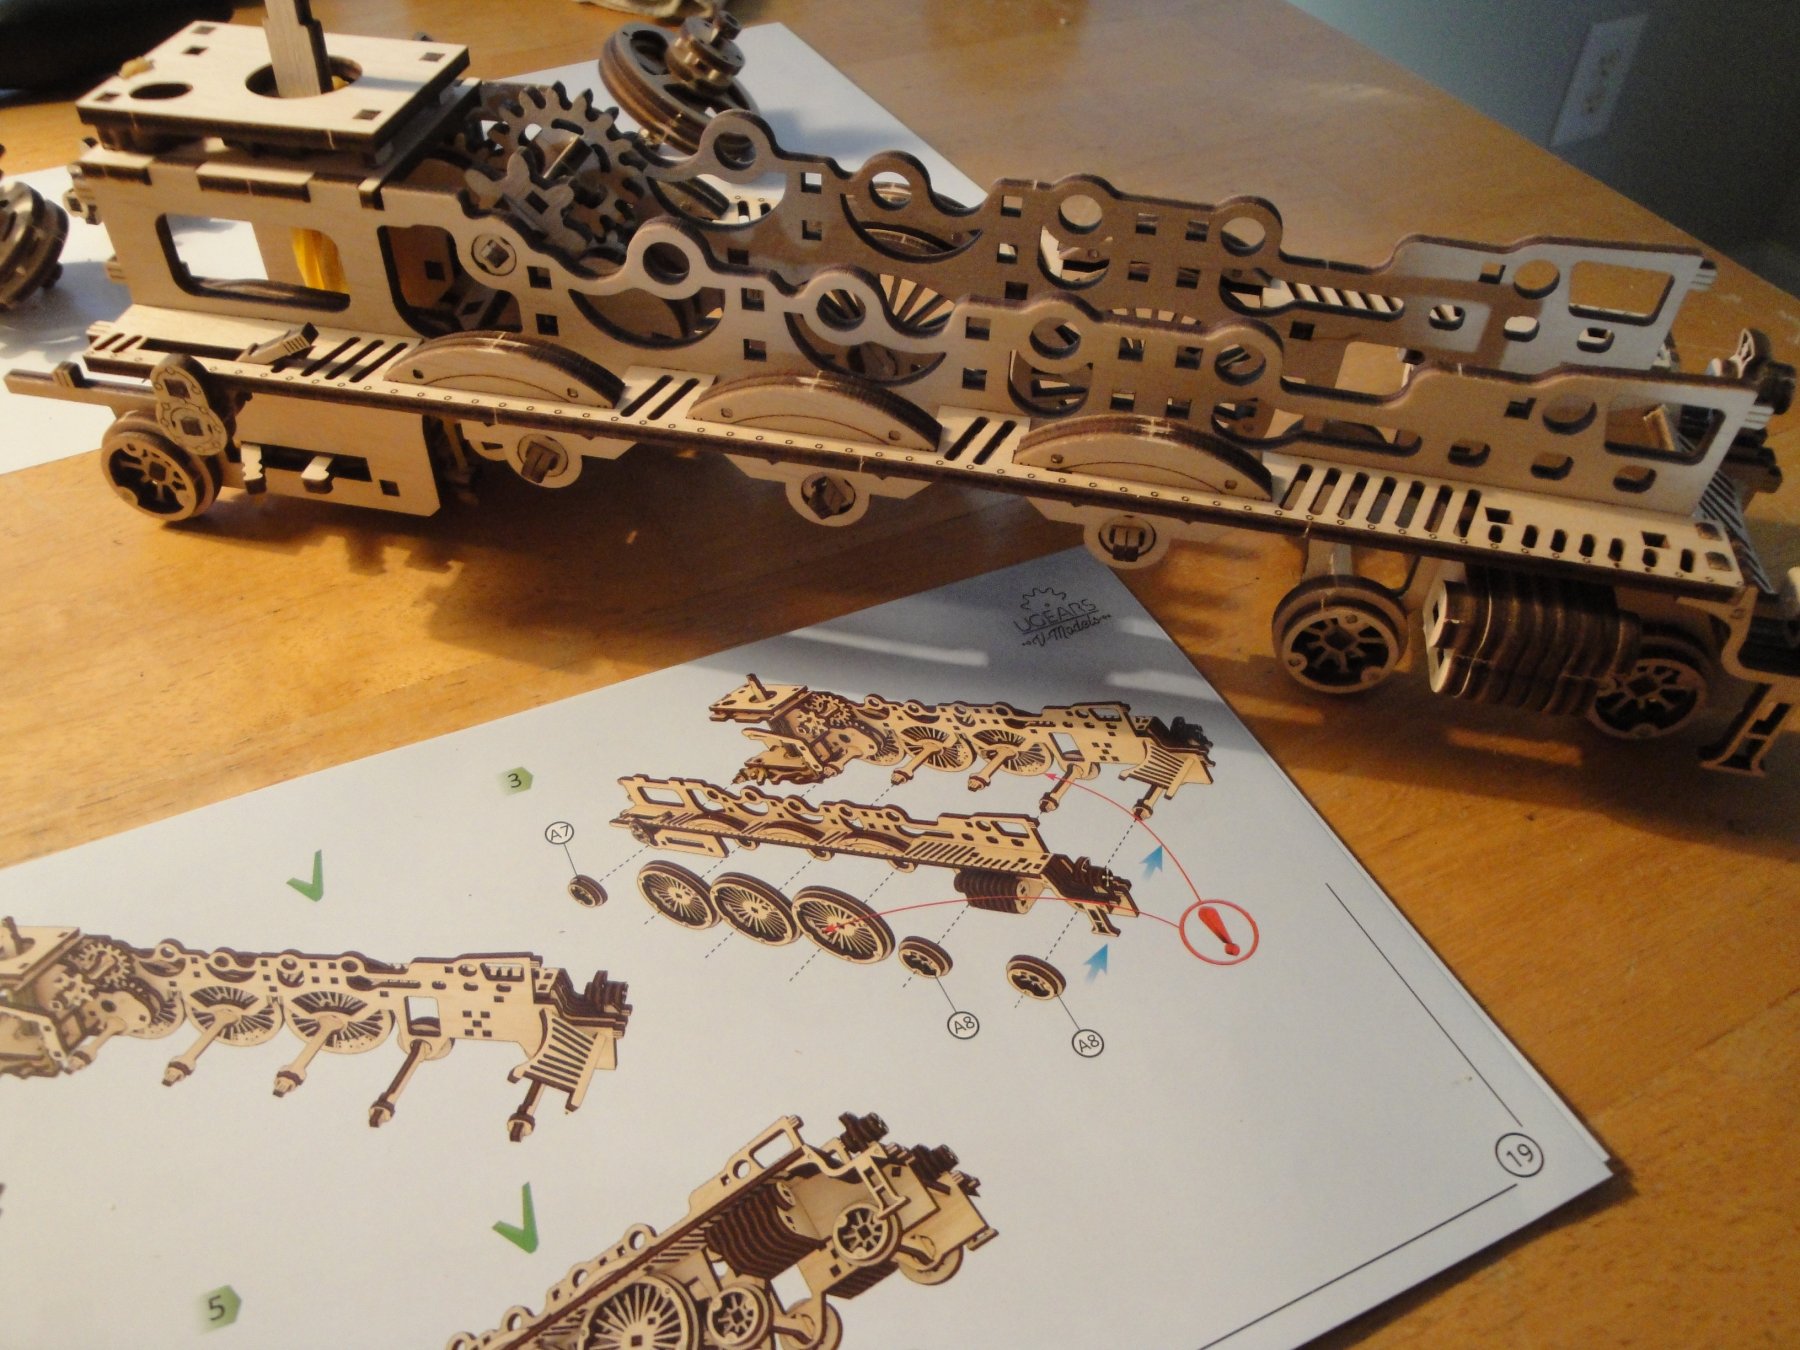
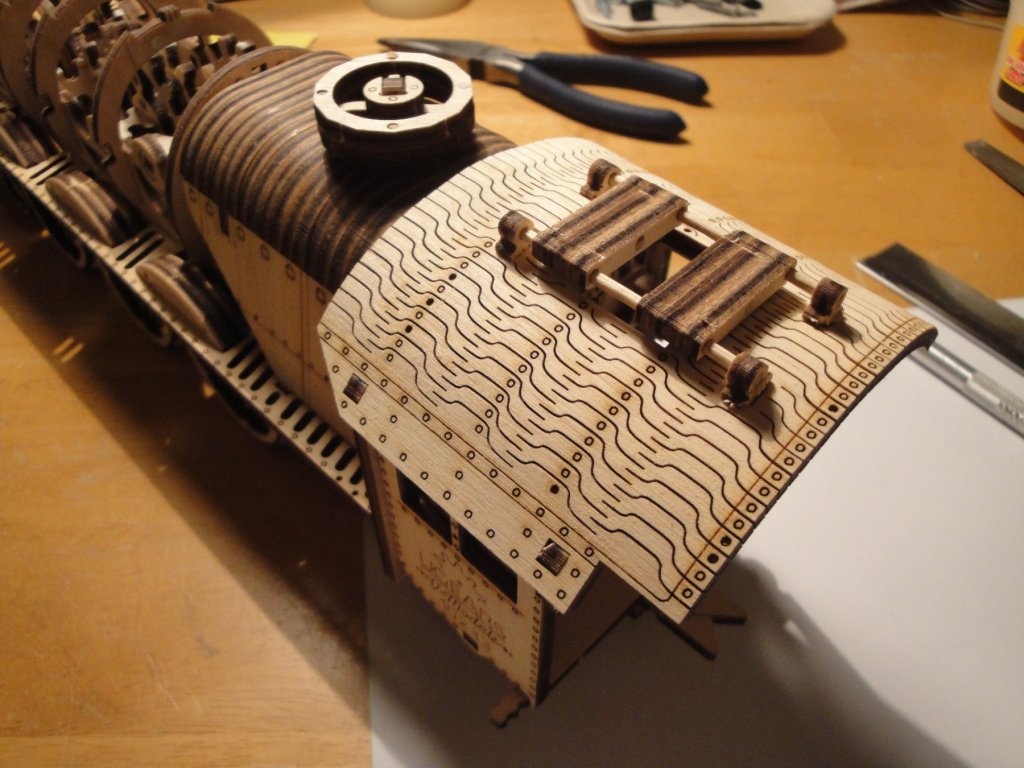
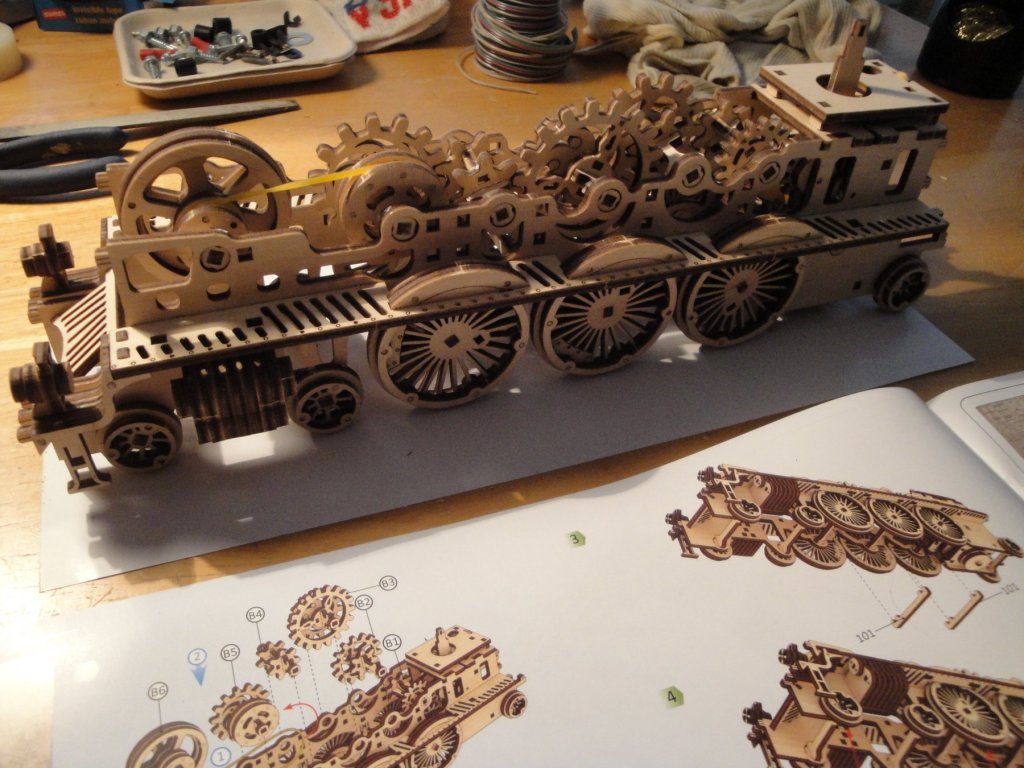
After a long hiatus, the engine is now almost completed. It is just missing the distribution rods, which I have elected to install at the very end, due to their delicate and fragile structure. This engine overall is quite impressive and all drivers are rotating very freely. Will the rubber engine be powerful enough to make it run remains to be seen. The engineers that designed the kit installed a lot of gears in the boiler and some sort of flywheel to regulate the speed of the engine. These numerous gears are taking a significant amount of the available power and I will see if they deserve to be kept, at the end. Yves


-
Congratulations on the progress. You may actually end up finishing it in time....😊 Yves
- 73 replies
-
- 2
-
-
- mayflower
- model shipways
- (and 1 more)
-
Superb work. Now, don't take this as a criticism as it is more of a pet peeve for me, but is there any way you could fix the gap between the bridge walls and the wood planking on the deck? I know that sometimes, the fitting is not perfect and perhaps you have not glued the bridge to the deck yet. Your model is so beautiful, I would hate to see those big gaps. Yves
- 467 replies
-
- 7
-
-
- mikasa
- wave models
- (and 1 more)
-
Jack, We are all so pleased to see you coming back. Ciao, Yves
- 190 replies
-
- 1
-
-
- ragusian
- marisstella
- (and 1 more)
-
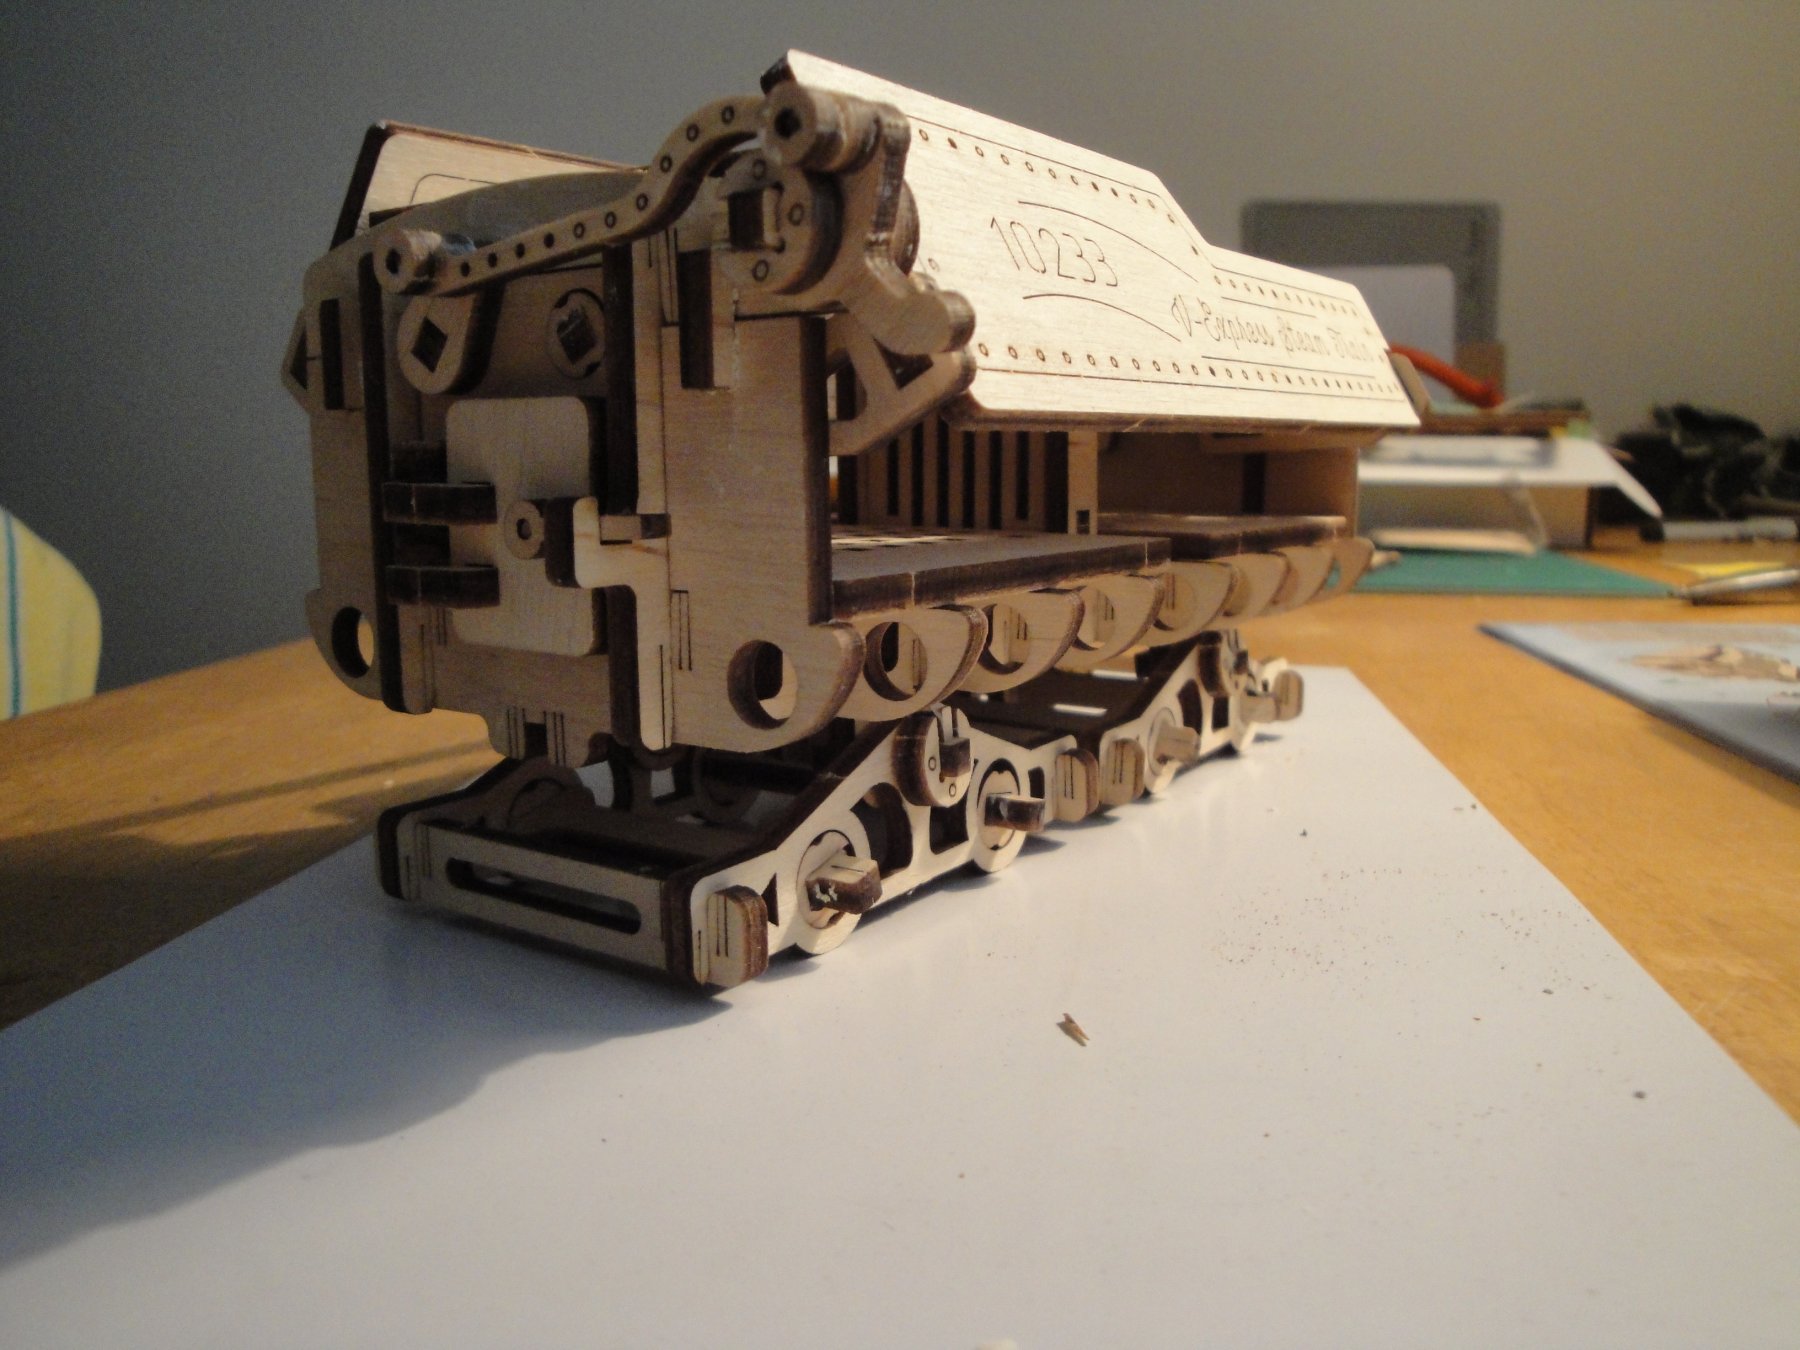
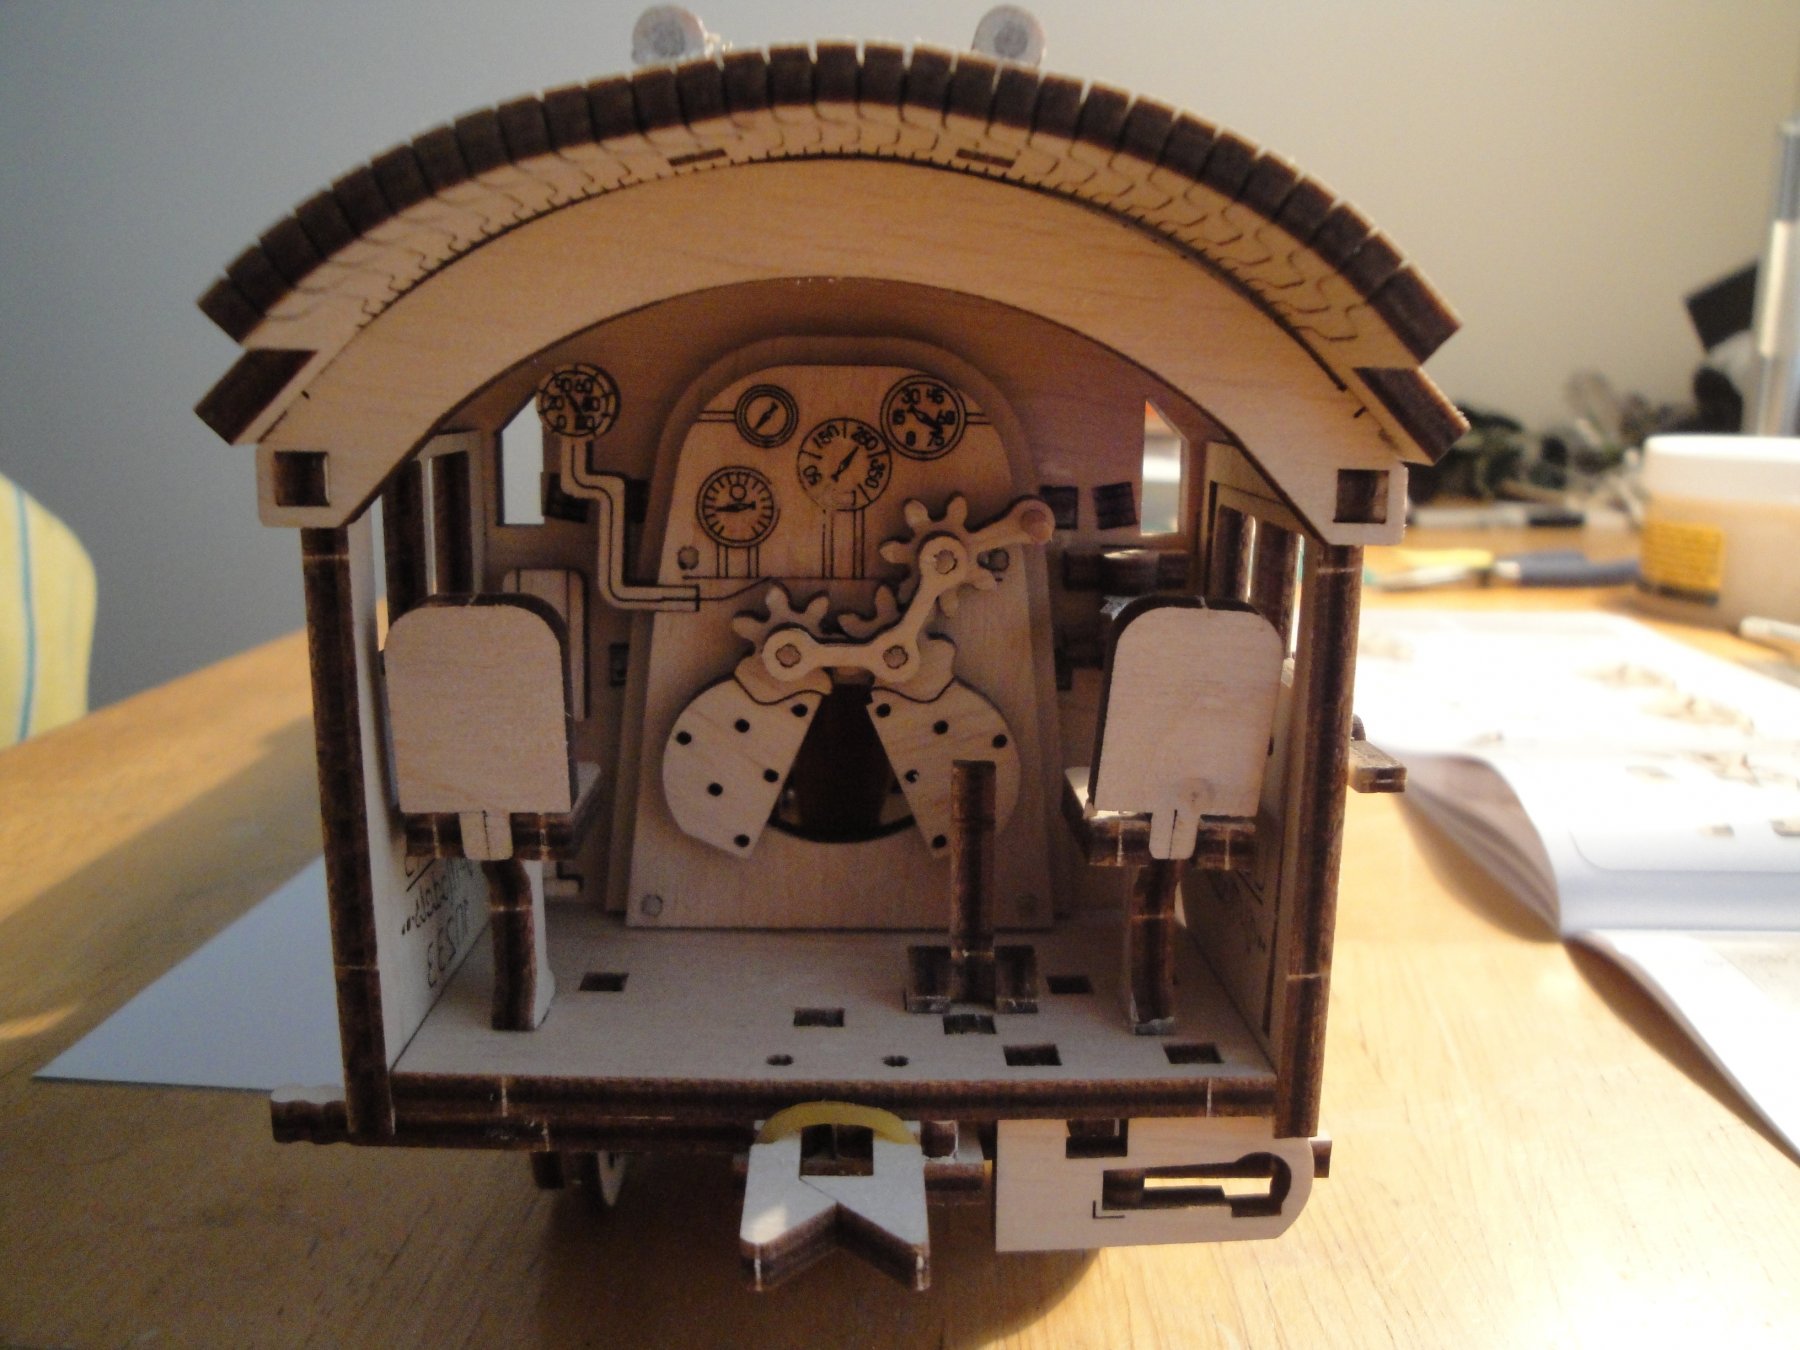
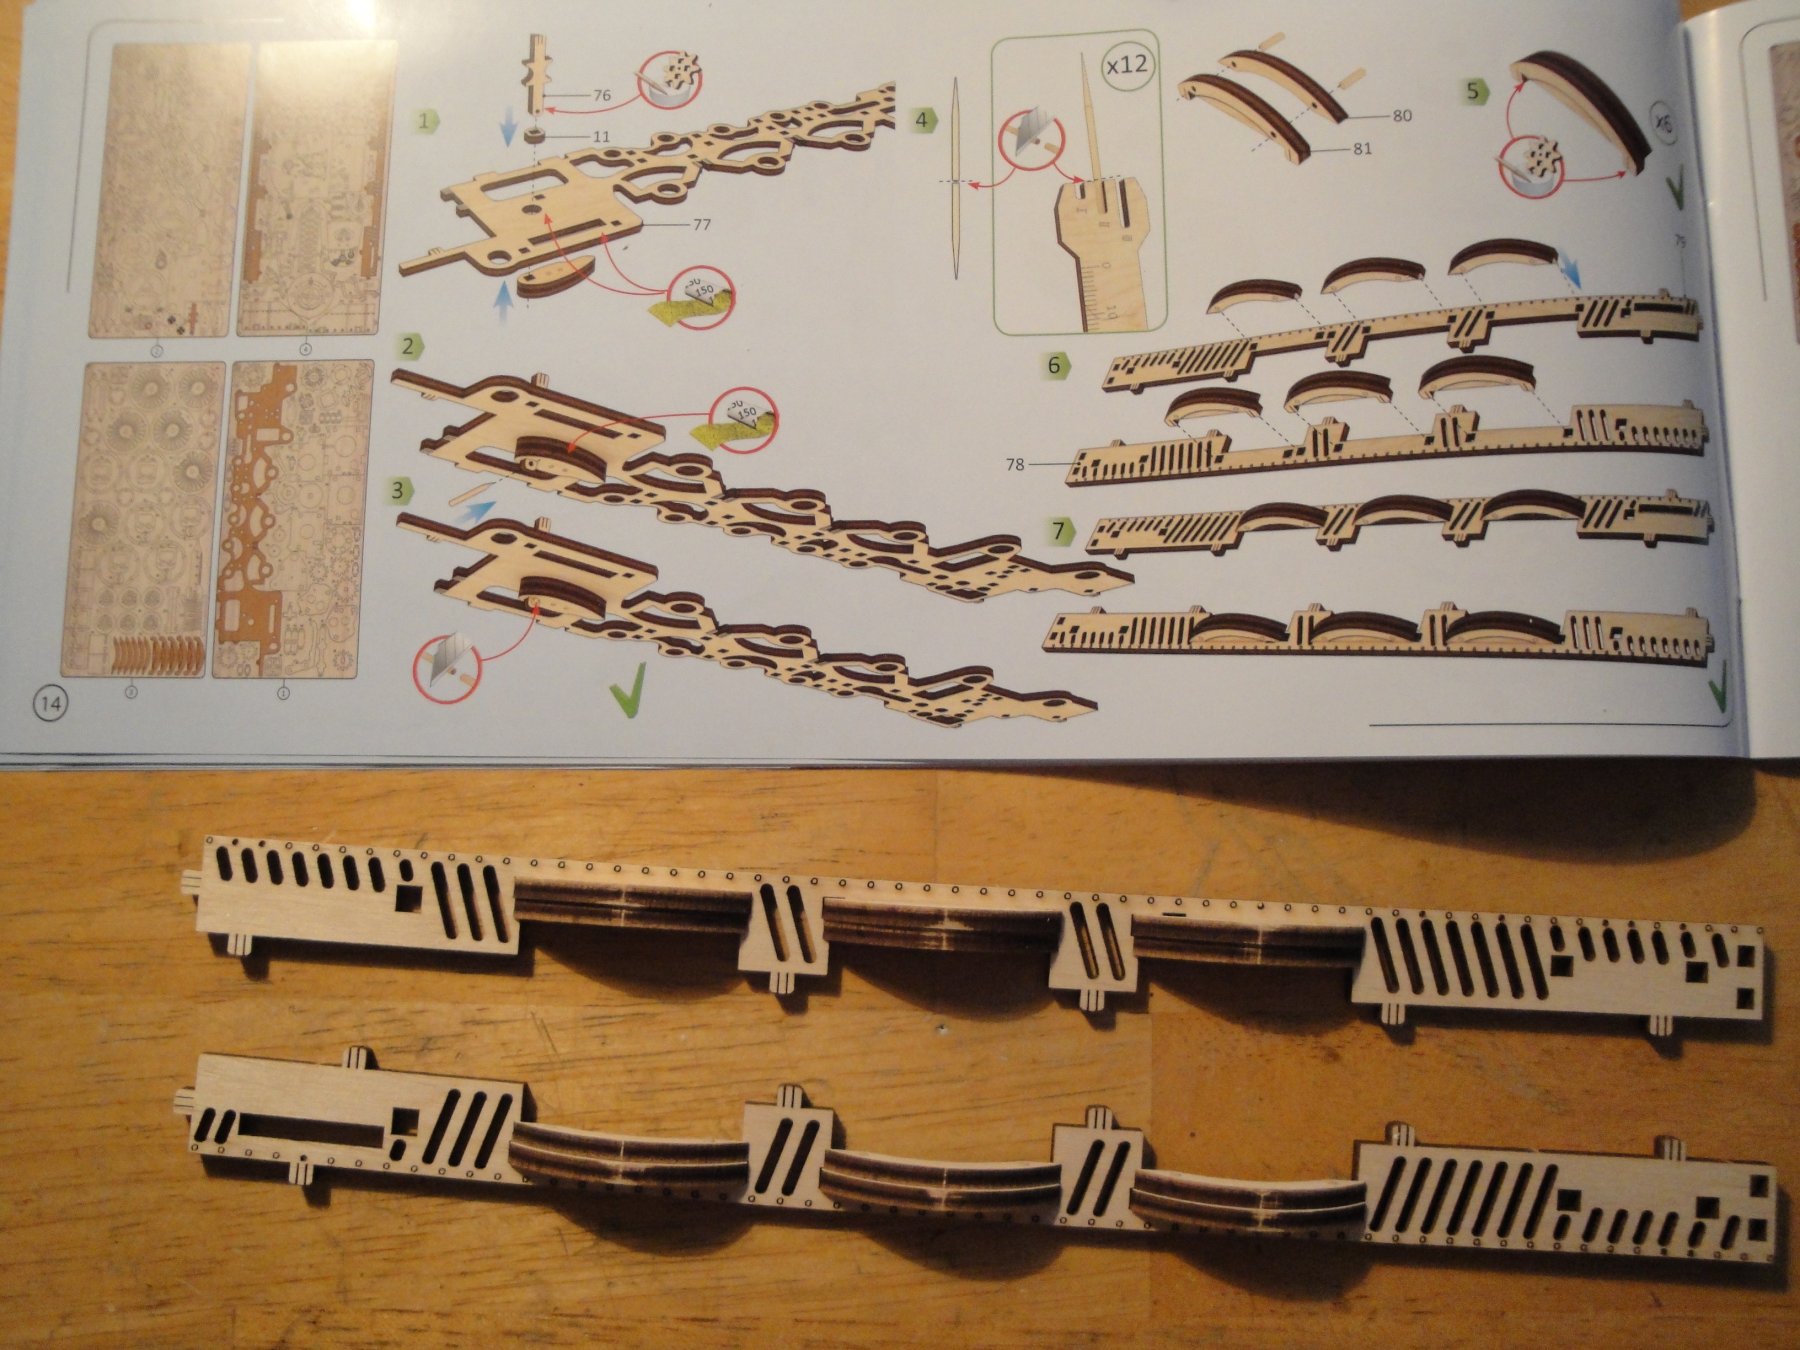
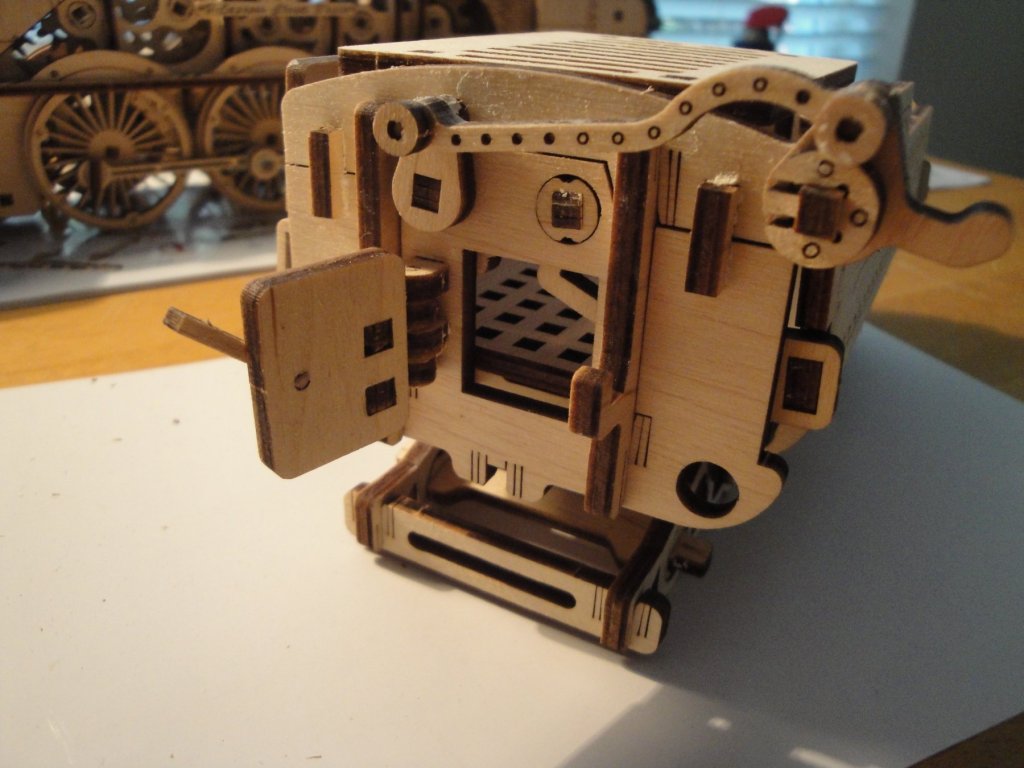
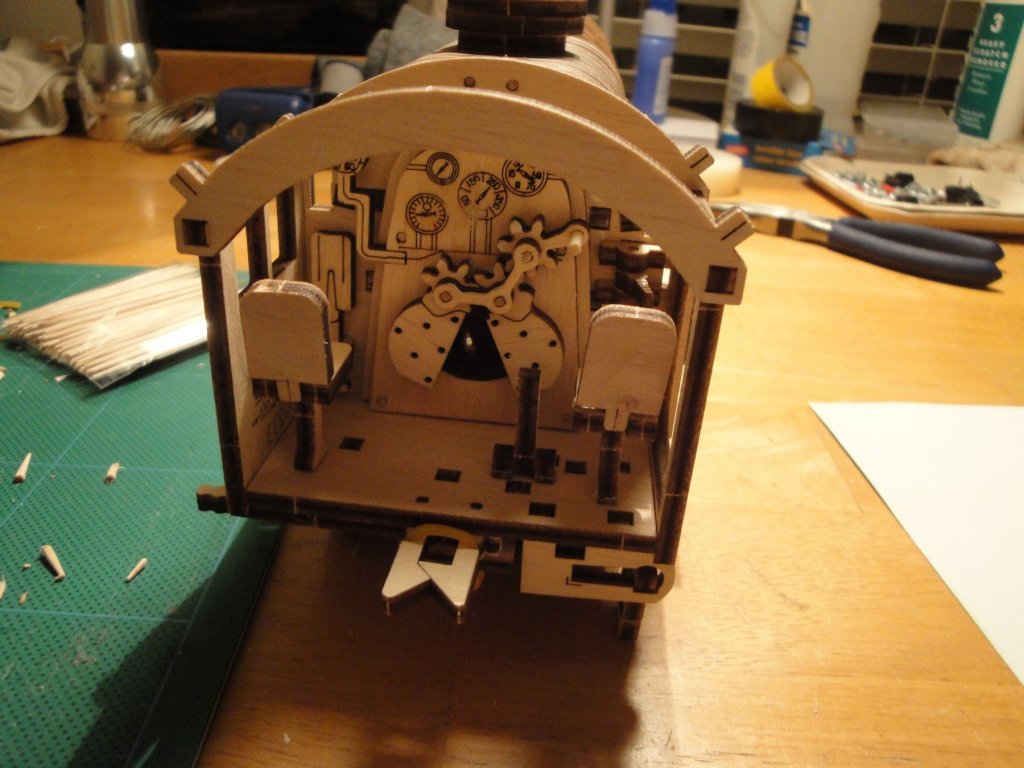
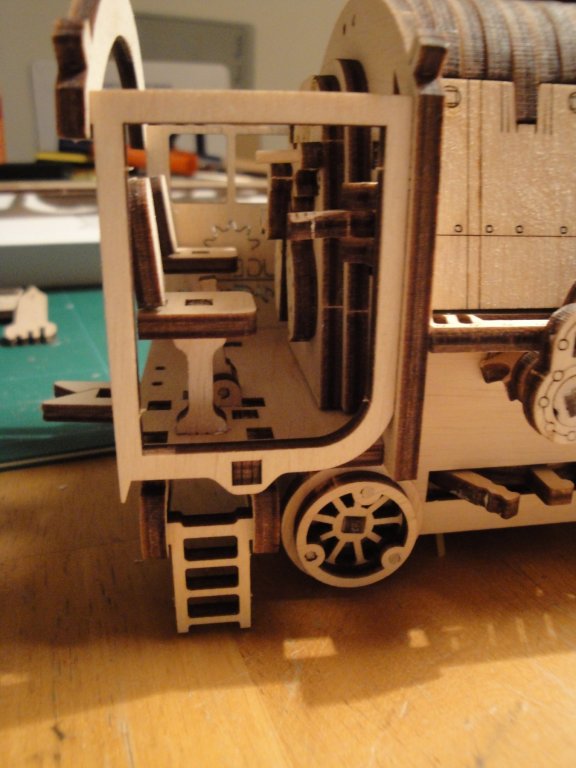
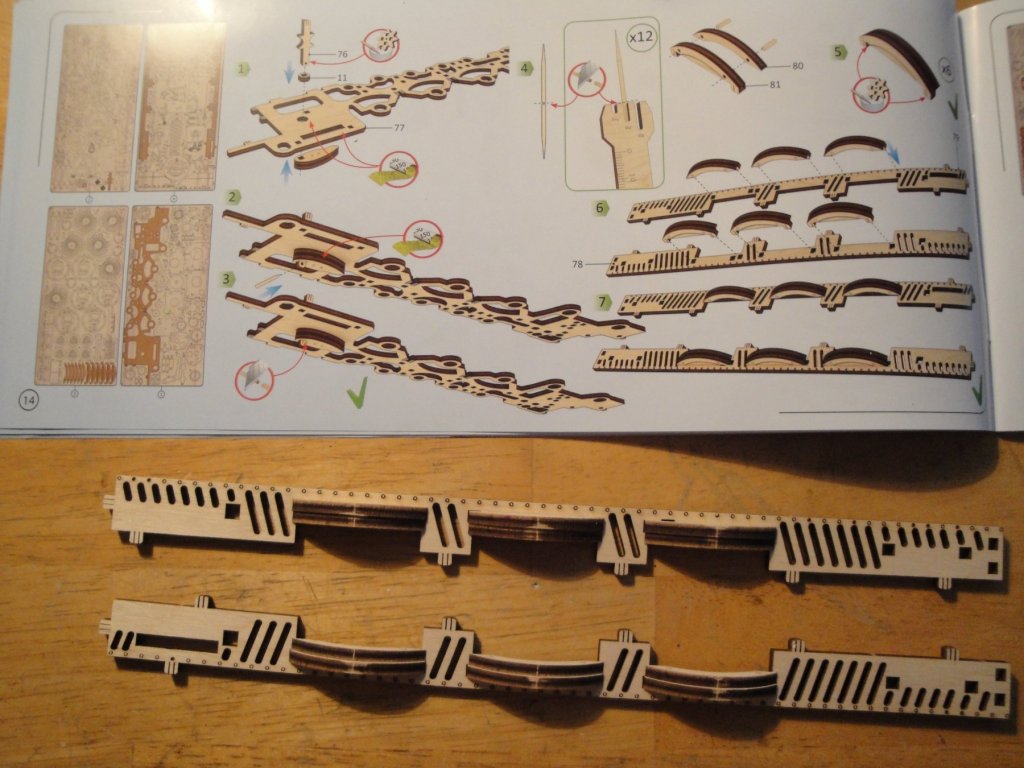
The construction continues, unabated. Details of the cabin: The coupler works with a rubber band to keep it closed. A small ladder extends from under the chassis to allow access to the engine cabin. Now, look at the precision and ingenuity of this roof: A piece of flat plywood laser cut in such a way that it can be bent and rolled like the rook of a steam engine: Quite incredible. The fitting is perfect: Yves


- 18 replies
-
- 11
-
-
What a beautiful model. Truly, a source of inspiration. Yves
- 467 replies
-
- 7
-
-
- mikasa
- wave models
- (and 1 more)
-
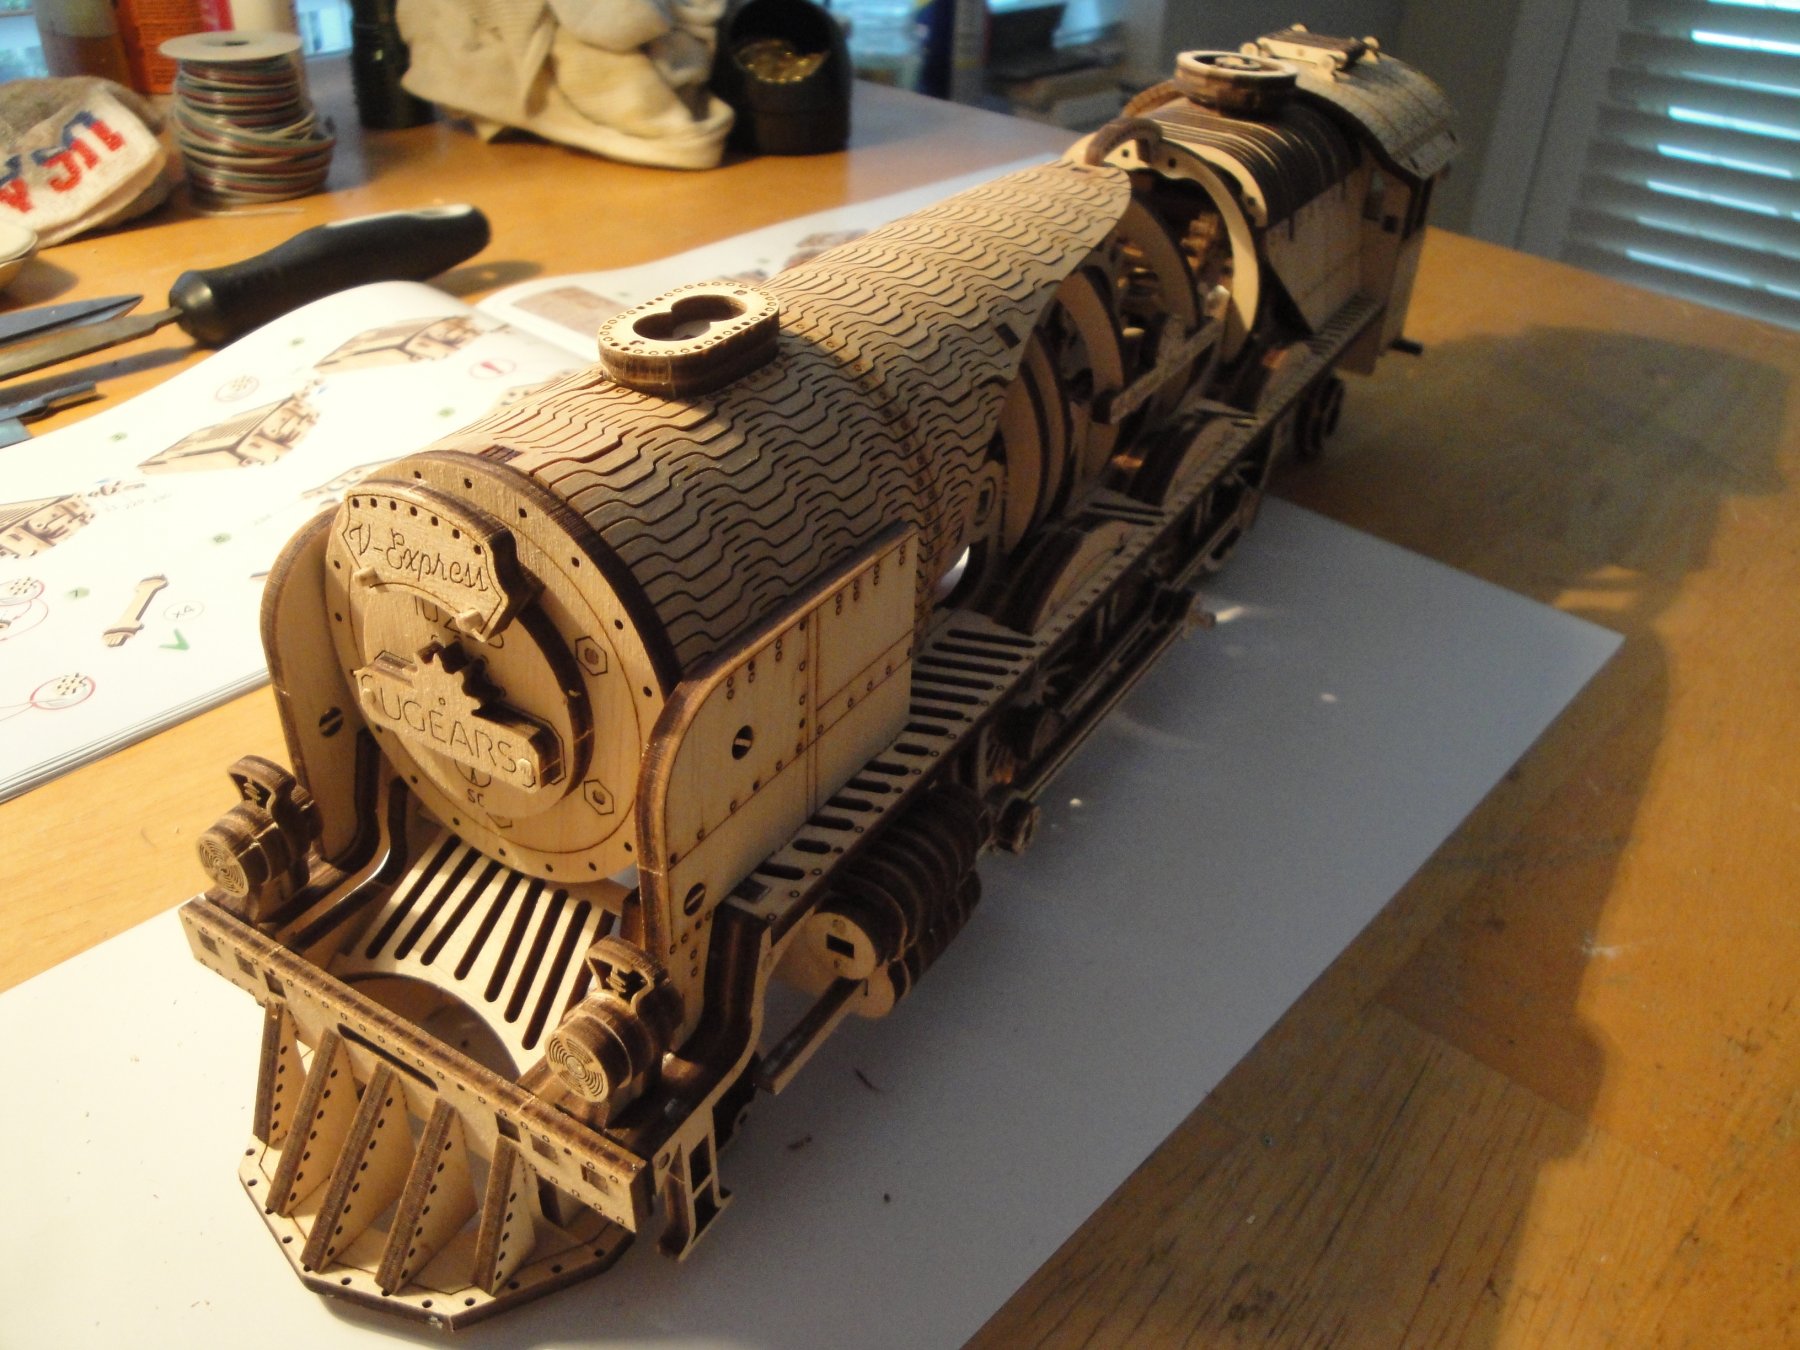
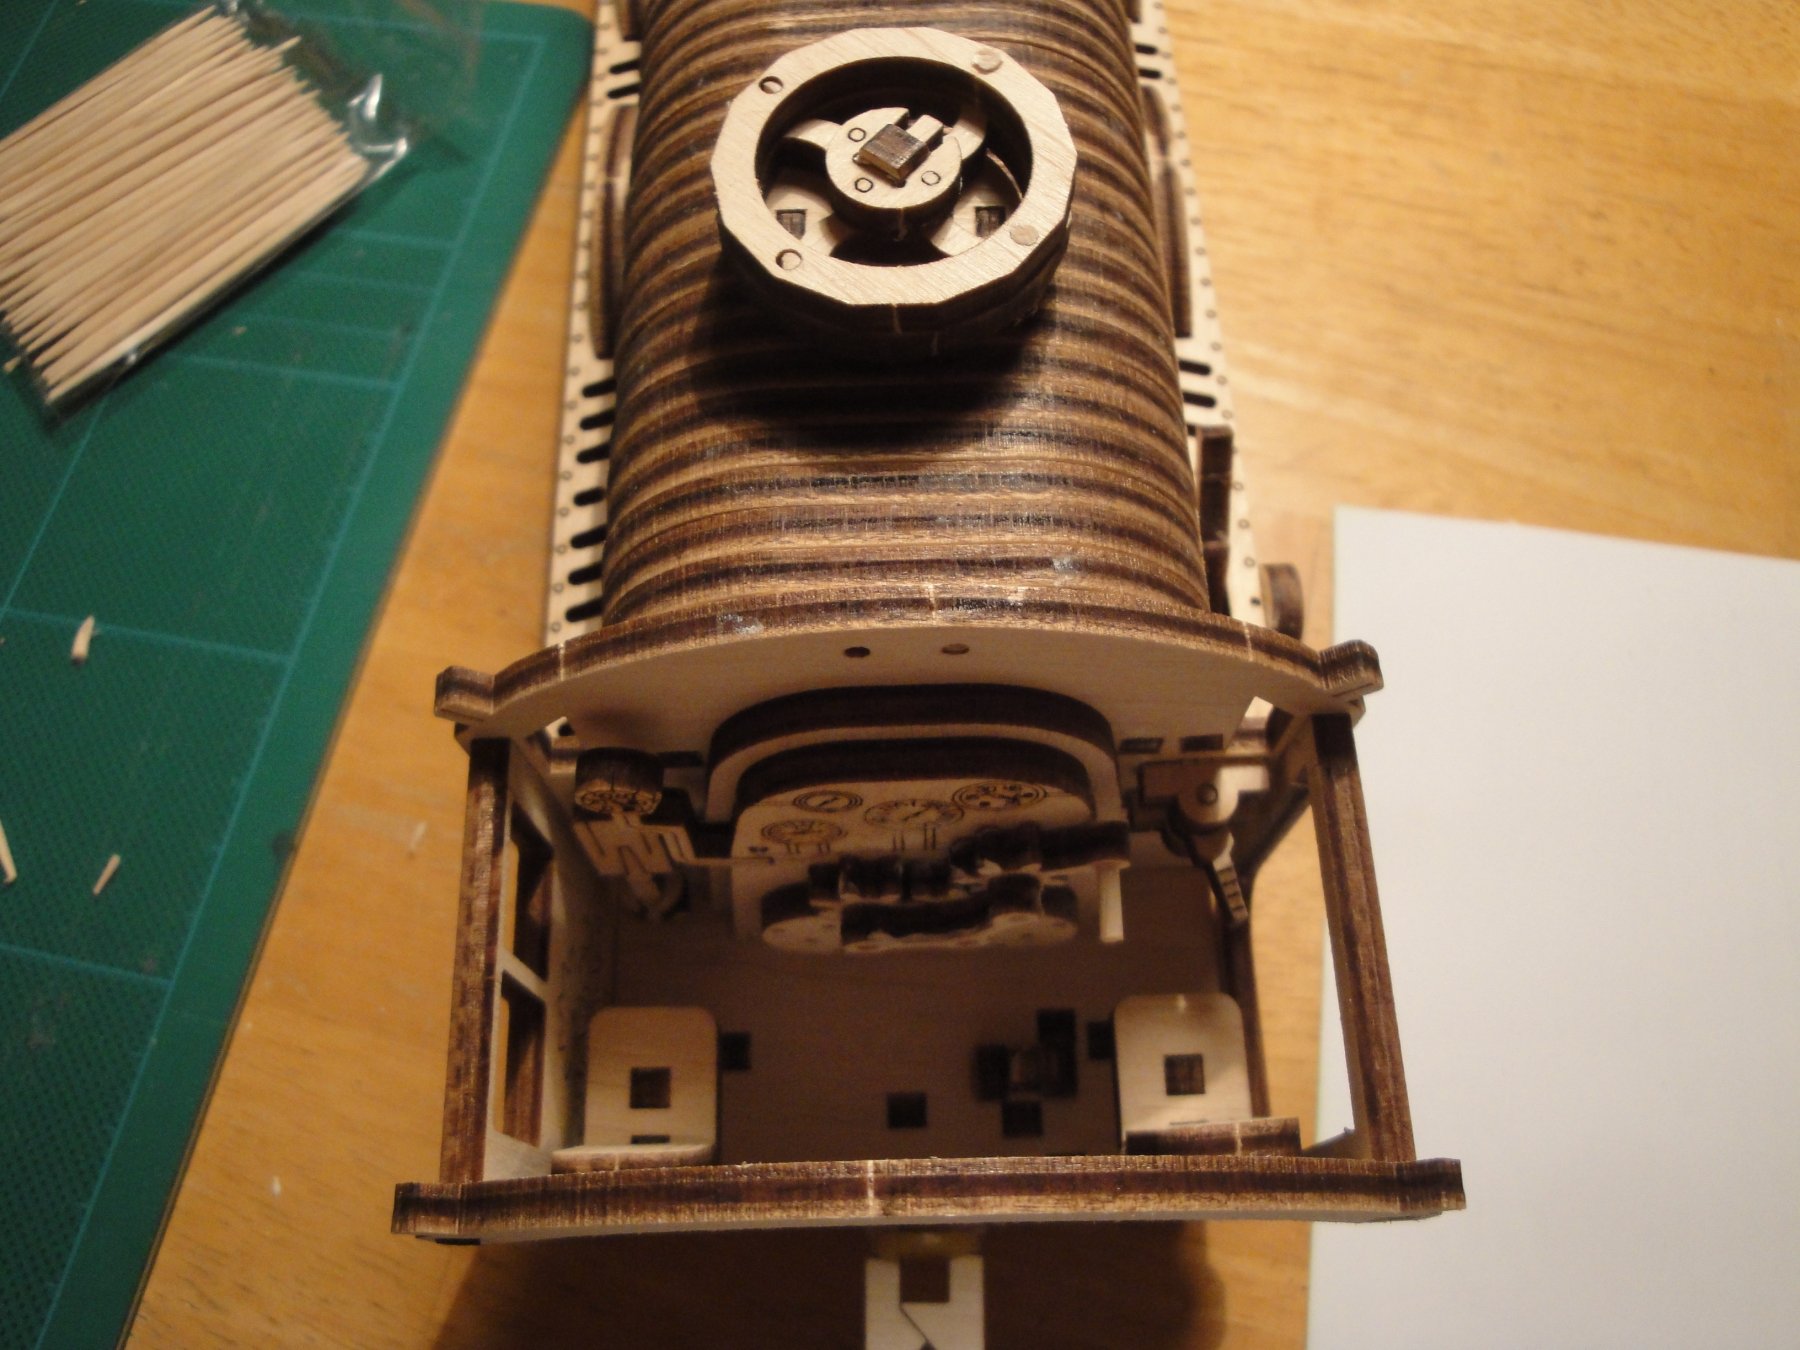
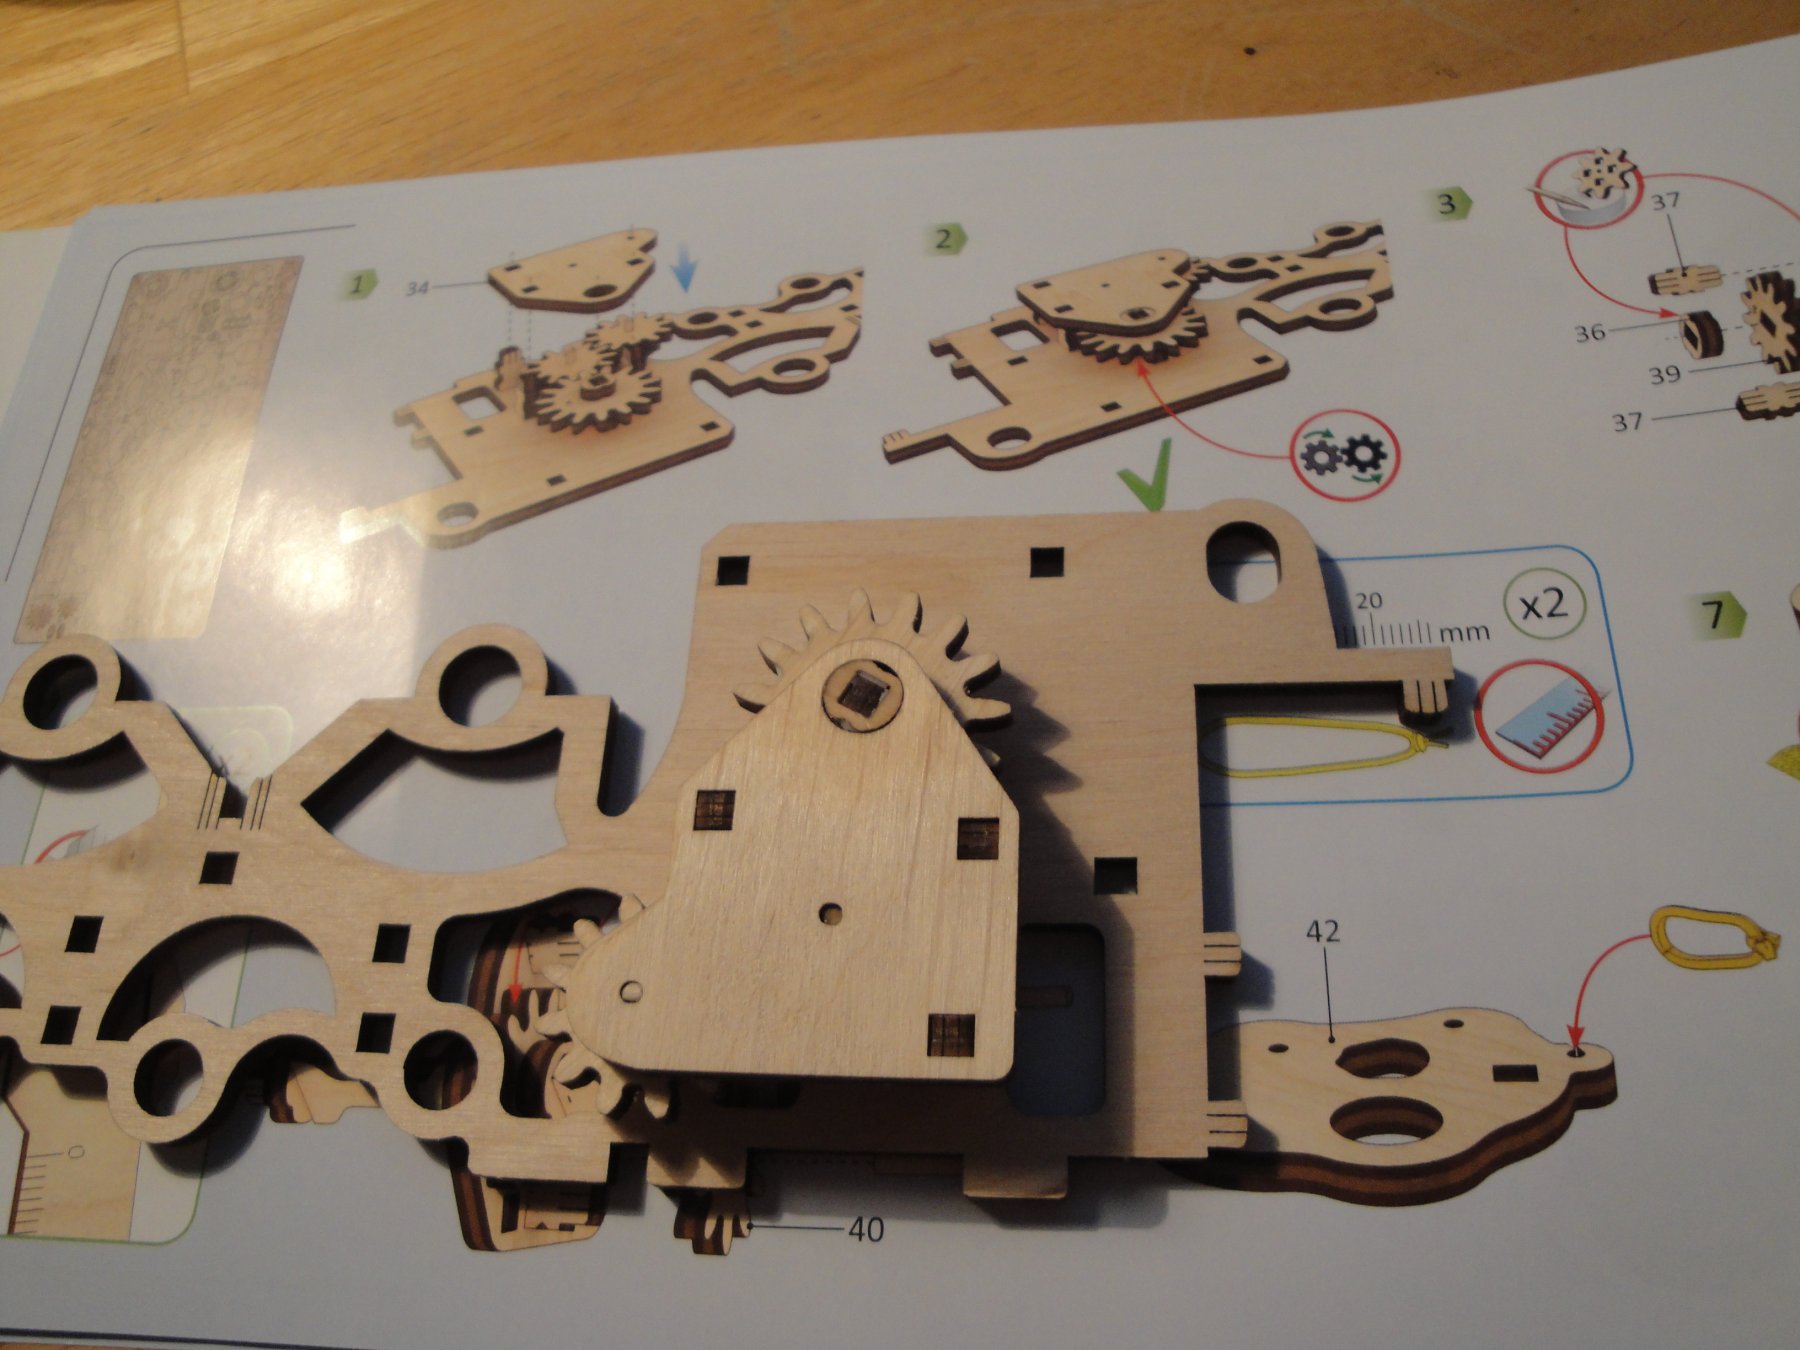
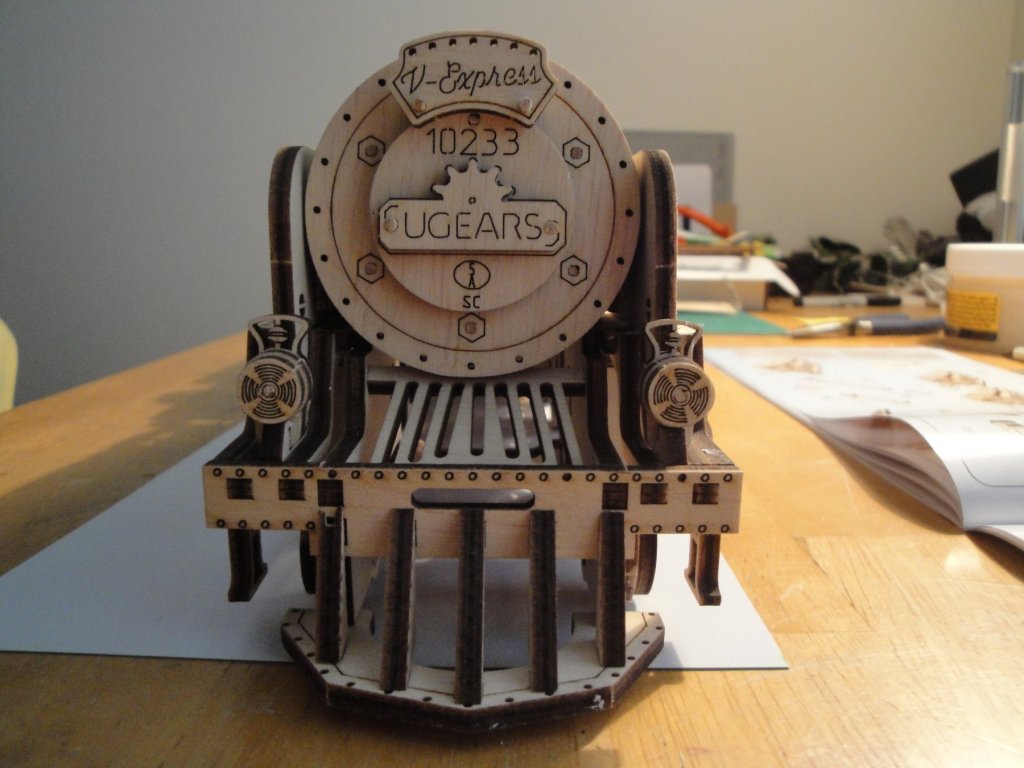
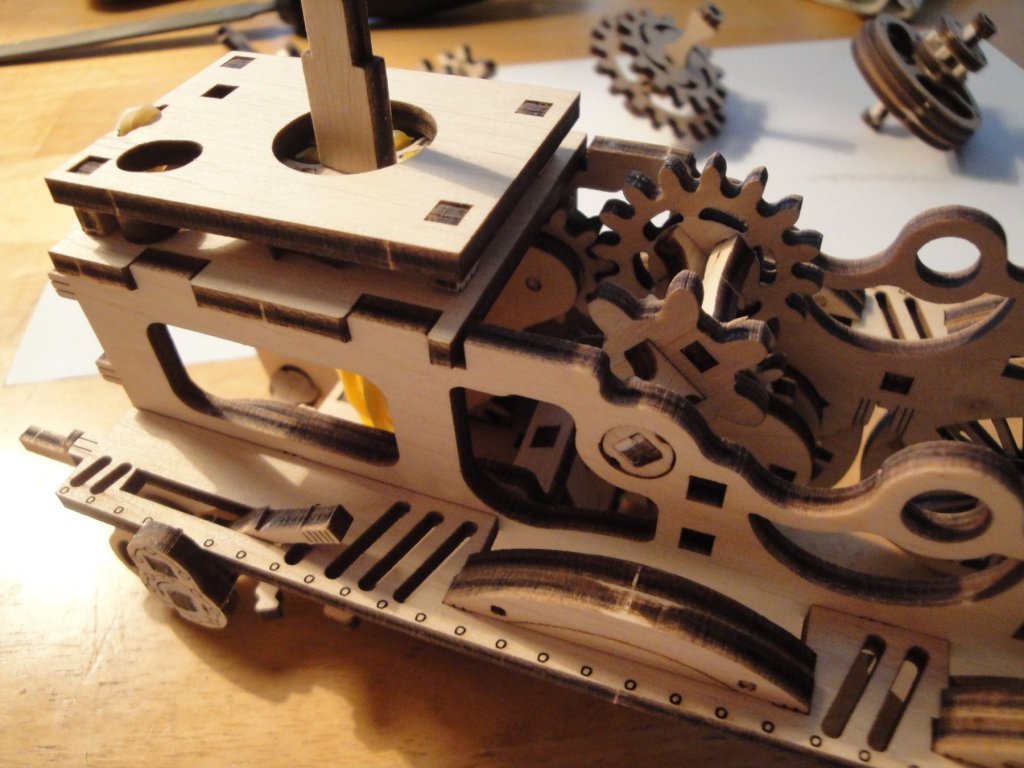
We area at a point, where this assembly starts looking like a steam engine: The crown of the boiler is very well rendered with no less than 21 wood parts. It is now time to try if all the gears are working. Wax helps a lot in that case and you have to be generous with it on these mechanical parts. I got to a point where, all the gears located inside the boiler are spinning with the rubber engine. This was done with the lever in Neutral position. In forward position, the rear main drivers are also turning well and freely. It is a good sign for what is to come. I love this kind of little details: The fire box can be closed or opened with that lever to the right. Very cute and astute. We even have a shovel for the coal. It is going to be an impressive engine when finished. I wonder what the scale is? Probably Scale 1 or 1/32nd. Yves

-
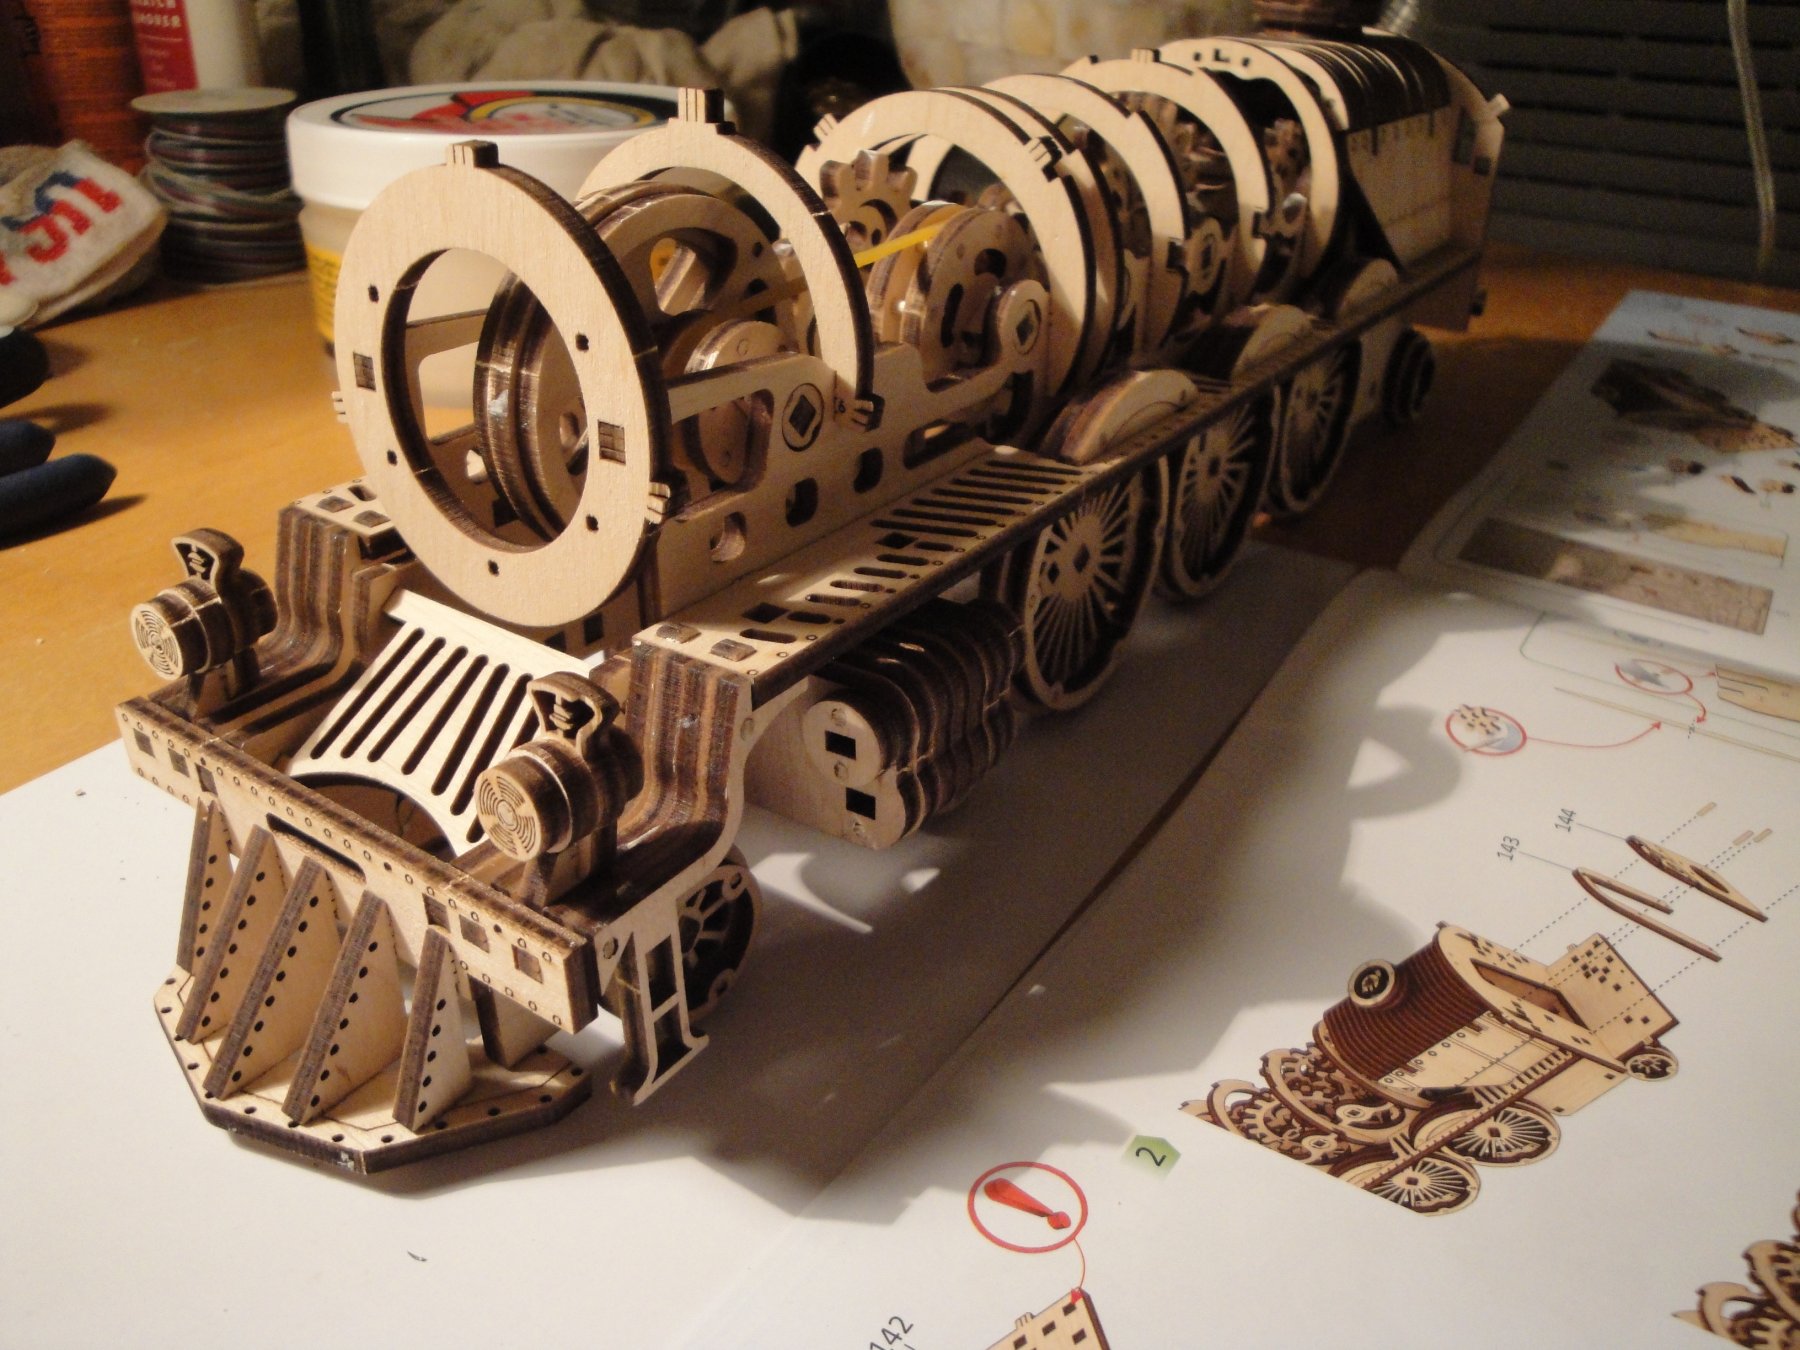
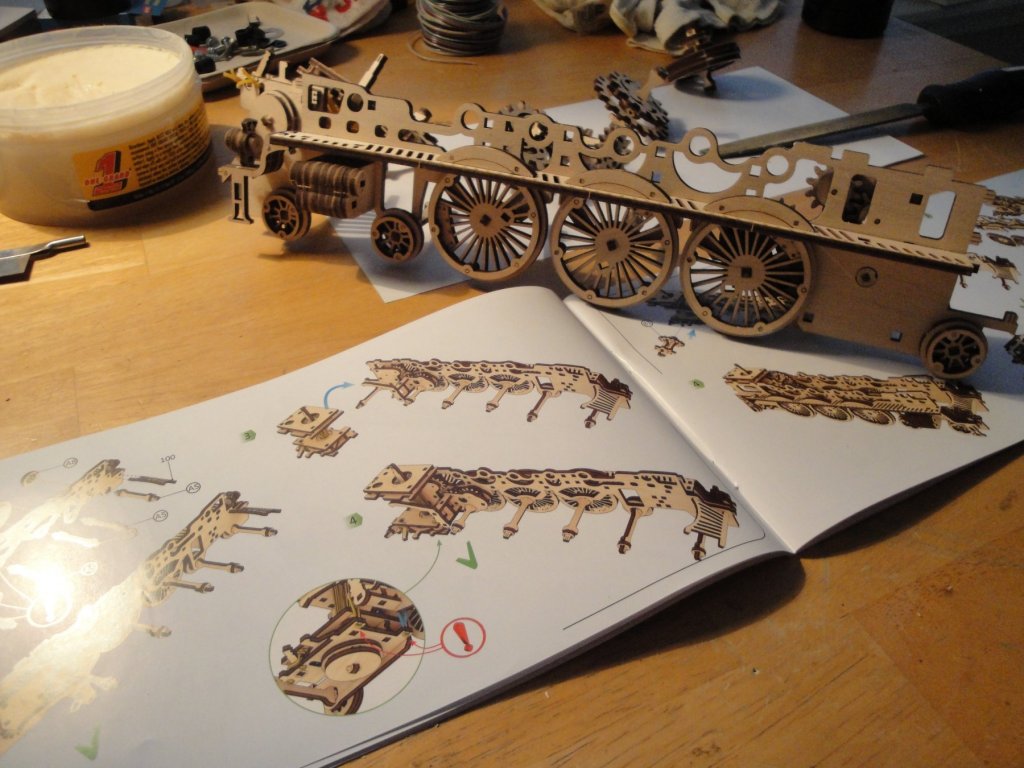
The engine is almost mechanically completed. I installed the drivers after quartering them (not too difficult on this kind of assembly). That will hopefully allow the rods to work smoothly. Lots of additional gears and belts.... I am not too sure what they will be for yet: And a close up on the steam engine...sorry the rubber engine: Yves


-
Very nice set of Citroen Traction Avant 15CV. My brother (who lives in France) owns a fully restored 15CV (like your left side model) and a more modern 11CV with the larger trunk. Great cars to drive and use for back roads trips. Yves
-
The main engine is starting to come together: Thanks to the lever, you can reverse the direction of the locomotive: Very ingenious.... Yves
-
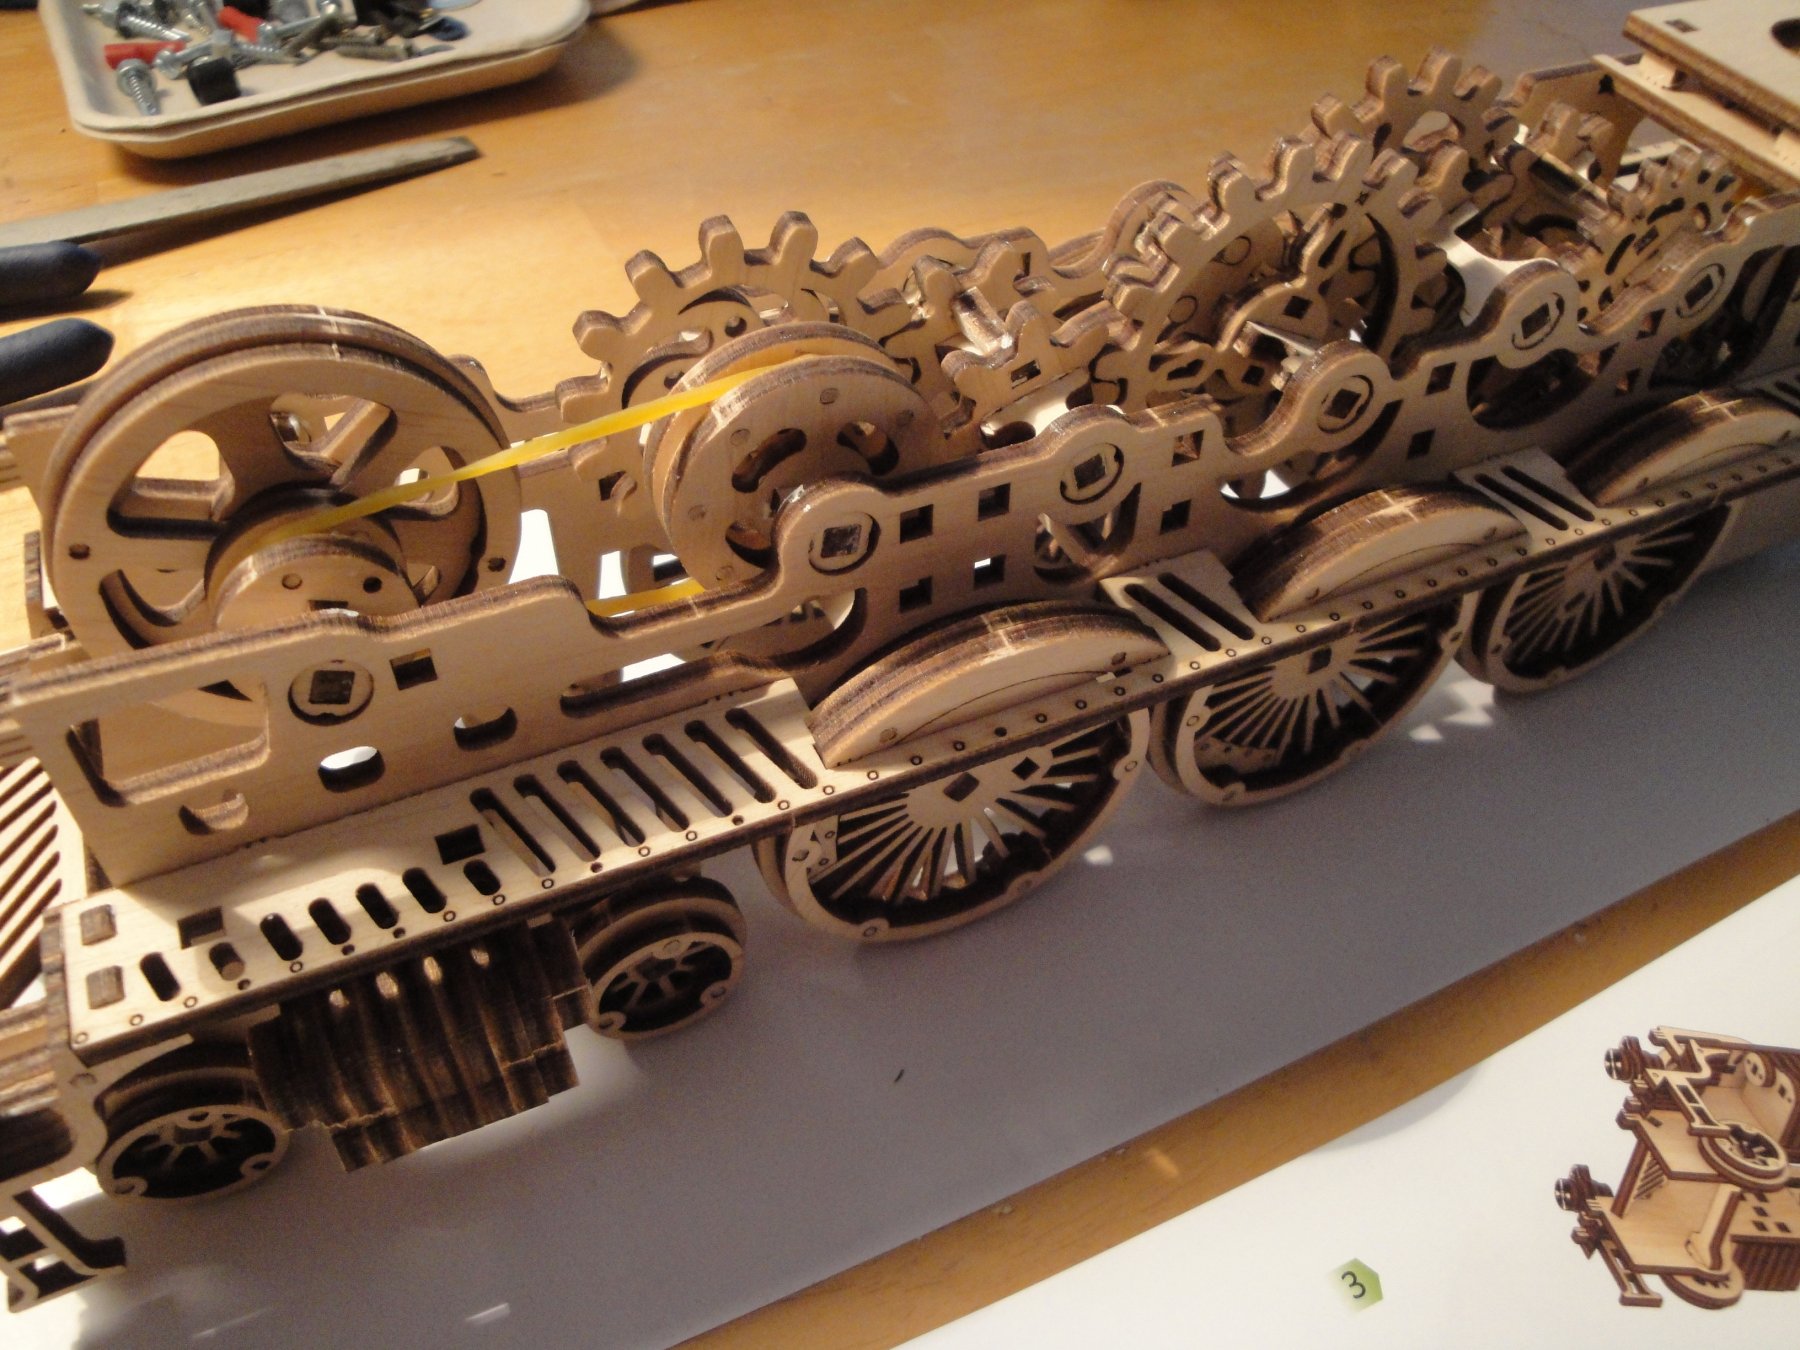
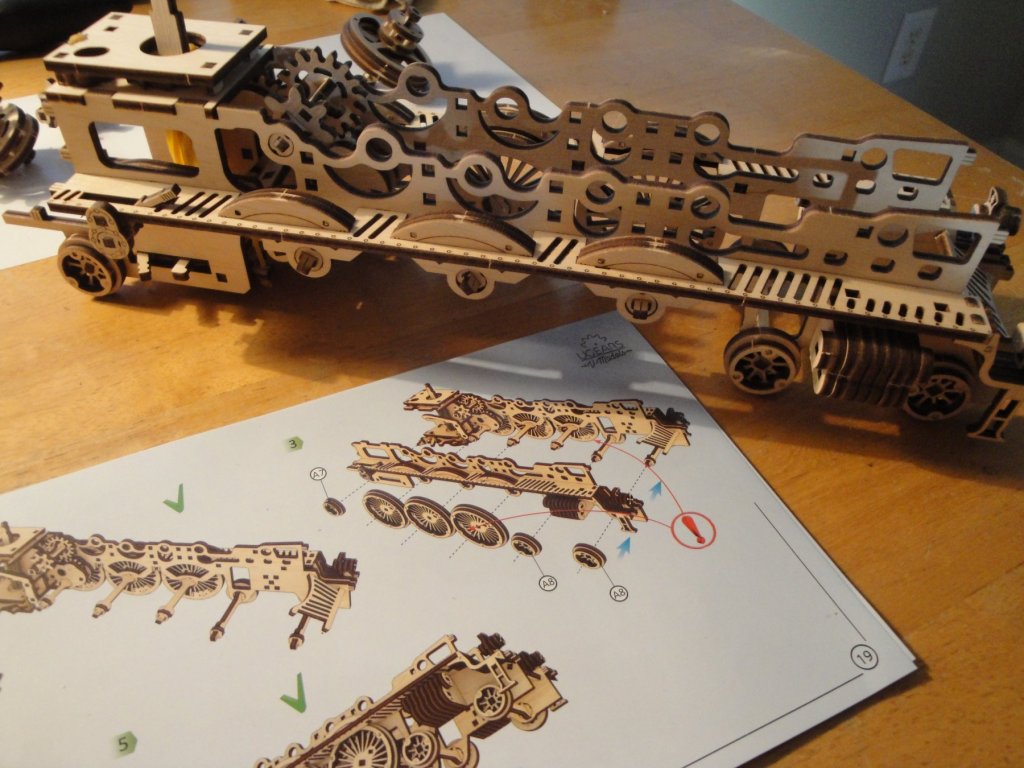
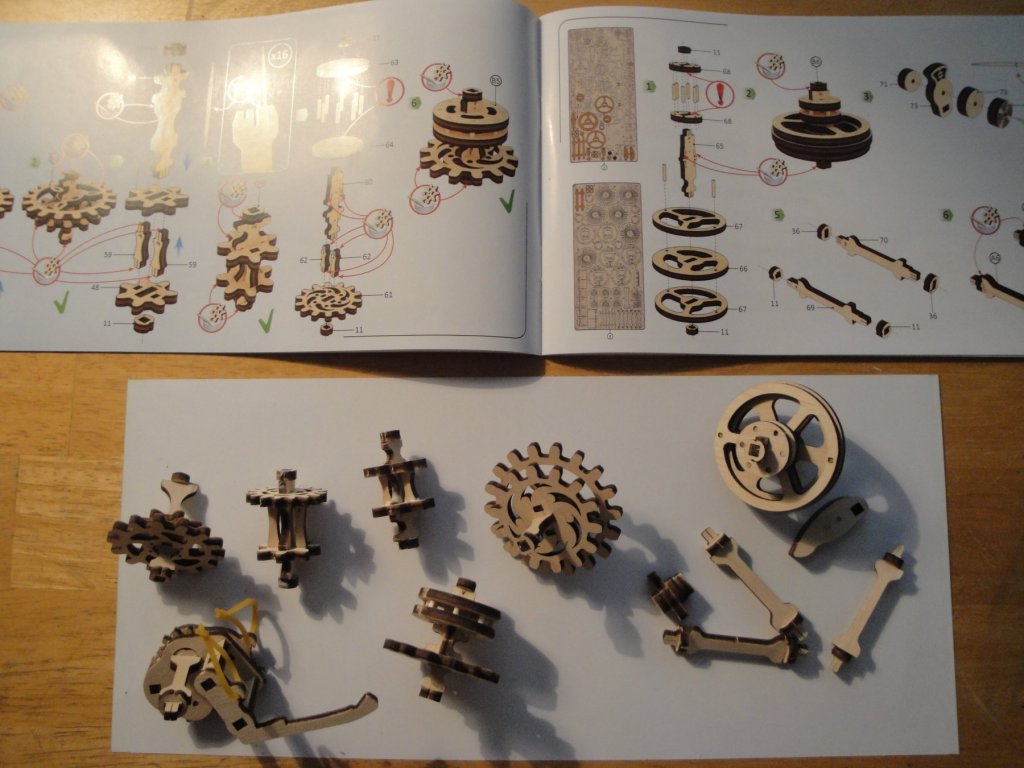
Some major progress: We are now assembling the axles for the wheels and all the gears that will be used to move the main drivers of the locomotive: I kept being amazed by the quality of the fittings. For instance, parts that are supposed to insert into another one, have this delicate middle (or triple) laser cut that basically creates a spring effect, making sure that the axle will fit into the wheels, tightly. These Ukrainian engineers are quite wizards in that domain, and I am in awe in front of the engineering that goes into these kits. Yves
-
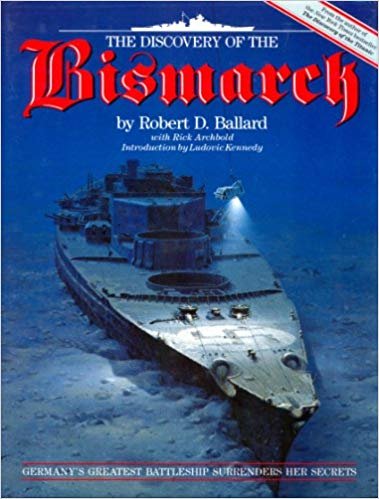
There is an excellent book by Bob Ballard that depicts the wreck of the Bismarck. There are a lot of underwater pictures too. Yves
-
I am sure, she would prefer that you start the Trumpeter kit in 1/200 scale, instead of these old Revel kits..... 😉 Yves
-
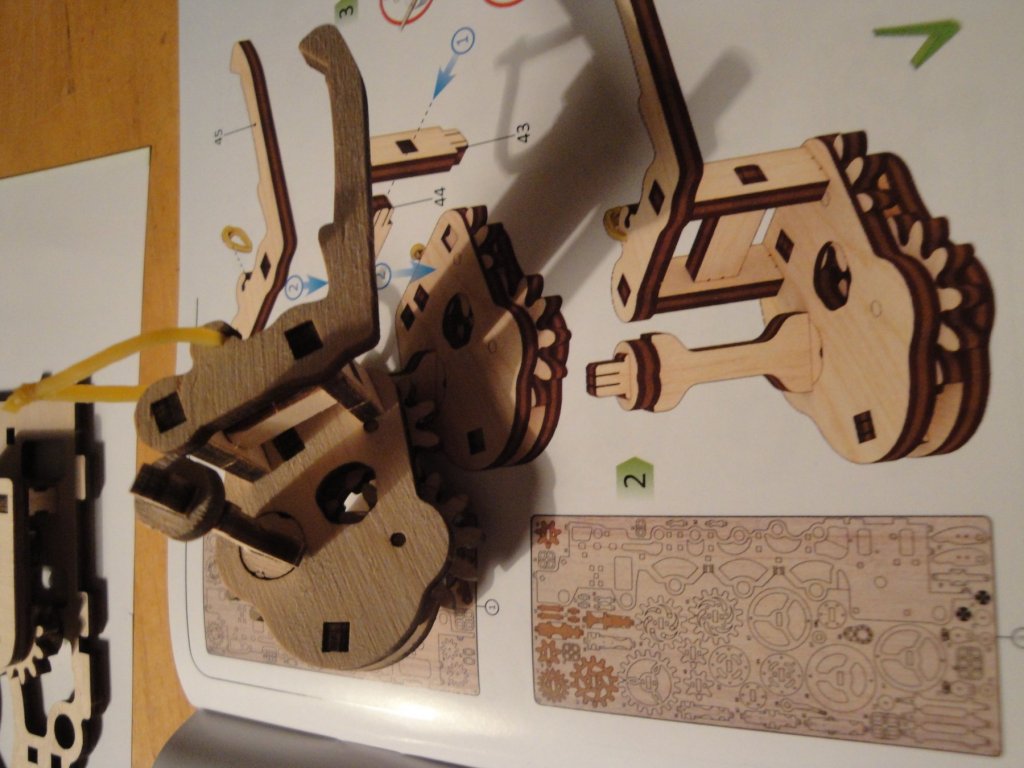
A little progress..... lots of gears and levers..... for now: At this stage, it is essential to grease/wax all the gears and make sure that everything runs freely. Yves

-
I built the old Matchbox kit in 1/72, when I was 19 years old.....40 years ago. It was great kit, although full of inaccuracies. I think I may get it again, with the Revel Platinum version. I will be following your 1/144 version with a lot of interest. Yves