captainbob
-
Posts
3,498 -
Joined
-
Last visited
Content Type
Profiles
Forums
Gallery
Events
Everything posted by captainbob
-
Carl, Glad you stopped by. I'm also glad I din not go with a plug. Bob
-
plank steaming
captainbob replied to bigpav's topic in Building, Framing, Planking and plating a ships hull and deck
I just happened to look up, "boat building steam box" on the web last night and there were so many different types it looks like any container to allow steam to saturate the wood would do. As far as how long, I've never heard of modelers using a steam box. I would start at scale. If 1" takes 1 hour 1/8" would take 7.5 min. and then adjust from there. Let us know how it works out, others would like to use this method also. Bob -
Great wood working. Did I miss something, why remove the stern planking? Bob
-
Nice details. The more you add the better it looks. The book and glasses. Is there a drink to go with them? Bob
-
Nice planking job. Bob
-
Hang on, Michael. It won't be long before you're sailing. Bob
-
Beautiful job, Mario. Don't know how you do it after those work hours. Bob
-
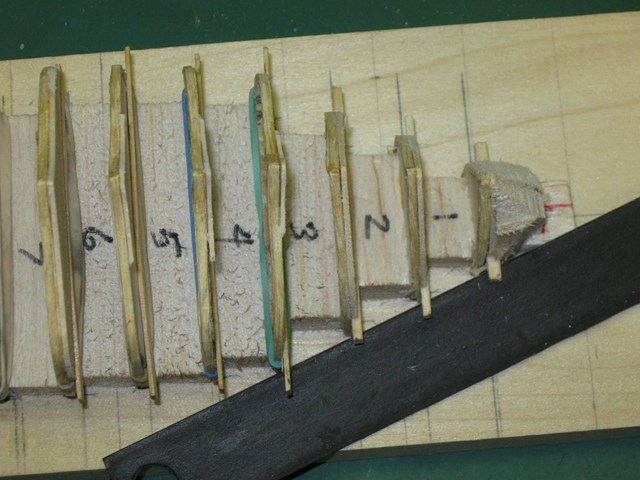
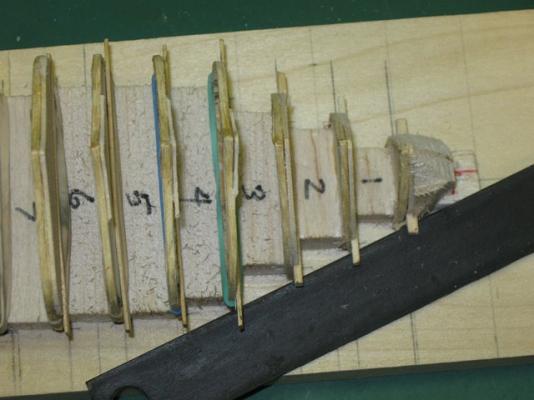
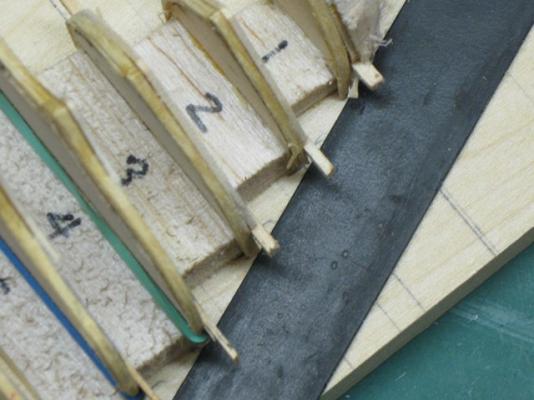
Anja, John, Thanks for the encouragement. Michael, That's sure what it looks like and I was hoping, but when I went are back to the original line drawings it turned out 1, 2 and 3 are correct and all the others are oversize. What was that about "measure twice, cut once". I must have missed that part. Ah well, as John said "The Dark Side demands its sacrifices" ,I've started over before and I can do it again. Sigh. Bob
-
“NO! NO! NO!” I yell as I beat myself around the head and shoulders. “You %@#&%#”. Oops pardon my language I shouldn’t say things like that on this forum, but I’m angry with myself. I just found a major error that is forcing me to go back to the drawing board and start over. Right now I feel the dark side is very dark. As I was faring the frames I discovered that either # 4 is too large or #'s 2 & 3 are too small. You can see it in the pictures. Why I didn’t see it sooner ? ? ? So now it’s go back to the original line drawings and find where I went wrong, throw away bad parts, make new parts. . . Ah, well at least now I have experience in this new, for me, method I’m using. Thanks for letting me vent. I feel better now. Bob
-
Enjoy the holiday, we can wait. Bob
-
Fine work on the steam engine. Bob
-
Gripos-kaiki by Giorgos - FINISHED
captainbob replied to Giorgos's topic in - Build logs for subjects built 1851 - 1900
Giorgos, A beautiful boat well built. Thanks for sharing it with us. Bob -
Well done Mario, You say they were short lived a built all the time. So I suspect there were several builders and every builder had his own frame pattern. Bob
-
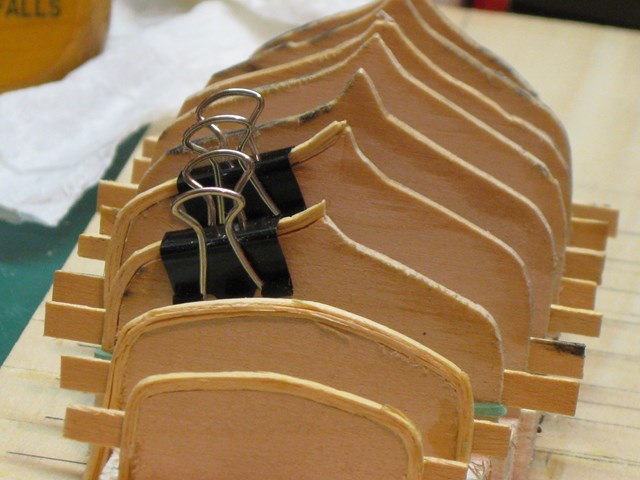
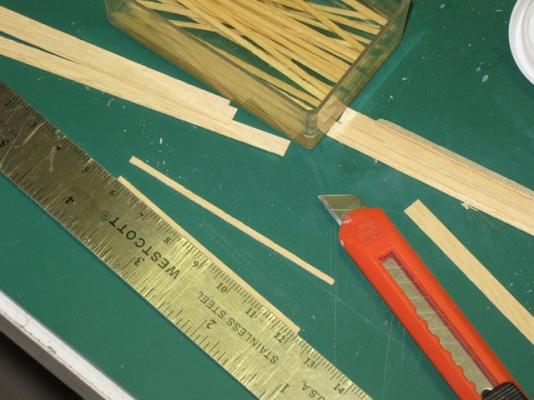
Last month a friend gave me some wood that had been left over from a boat kit. He had picked up the wood at a yard sale for ten cents for the whole batch. Among this wood was a bundle of 0.5 X 5.0 X 500 mm strips. The grain went all over the place but I decided to see if I could use it. I had allowed 0.063” for the frames and 0.032” for the planking so if I laminated three layers of wood for the frame and double planked with this same wood over that, after sanding it should be close. So here is my start. I cut enough pieces for the frames 2.5” long and then split them in thirds. I threw away about 1/4 of these pieces, because the wood split when I was cutting. (This is the kind of wood that drove me to the dark side.) After soaking in water I bent them onto the strongback and glued between the layers. After drying the frames I have made so far seem to be good. More later as the build goes on. Bob

-
Sawdust, hadn't thought of that, Andy, good move. Bob
-
Richard, If you shorten the cross beam at the top of the rudder post., that is bring the push rods closer to the rudder post, you will turn the rudder at a greater angle. you can play with the length of the cross beam to get the rudder movement you want. Bob
-
Yes, Andy, we should all be concerned, but he's fun to watch anyway. Bob
-
Mario, Well done on a tough planking job. It will be interesting to see how the second hull differs. Bob
-
Ah, the fun of it all. Bob
-
Well here I am again, late to the party, but glad I made it. Good job on a difficult planking job. Bob
-
Popeye if you keep up this pace you'll finish before Anja. Just remember, it's not supposed to be a race. Bob
-
Good job on the planking. Looks like you're having fun. Bob
-
Tony, I just found this build. Fantastic. Thanks for writing you thoughts and actions as you build. It lets us know that we can too. Bob
-
Very nice work. Bob
-
Wayne, John, Popeye, Michael, Tarbrush, I'm with you guys. Can't wait to see what happens next. Sometimes my Ideas work, sometimes I start over. Ah, The excitement is just too much. Bob