HOLIDAY DONATION DRIVE - SUPPORT MSW - DO YOUR PART TO KEEP THIS GREAT FORUM GOING! (89 donations so far out of 49,000 members - C'mon guys!)
×


freewheelinguy
-
Posts
130 -
Joined
-
Last visited
Content Type
Profiles
Forums
Gallery
Events
Everything posted by freewheelinguy
-
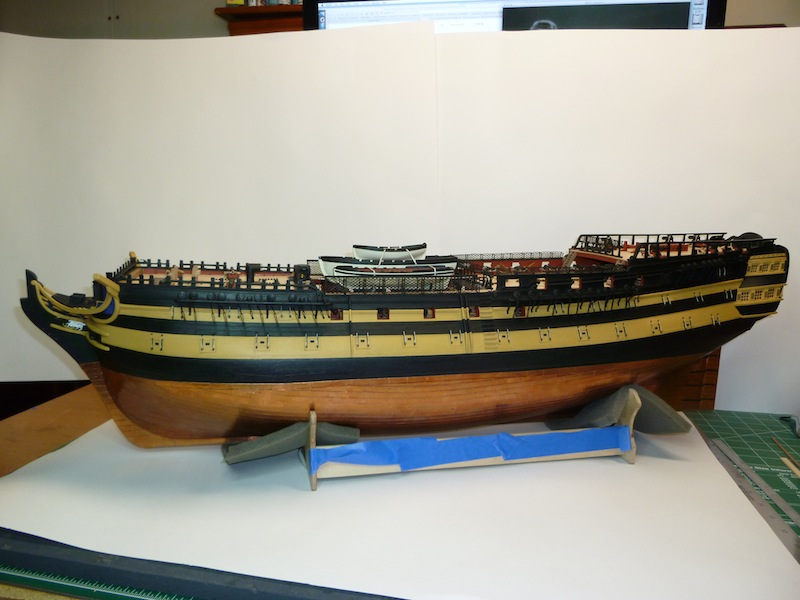
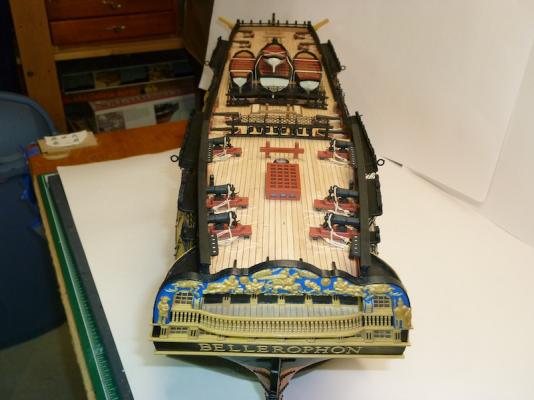
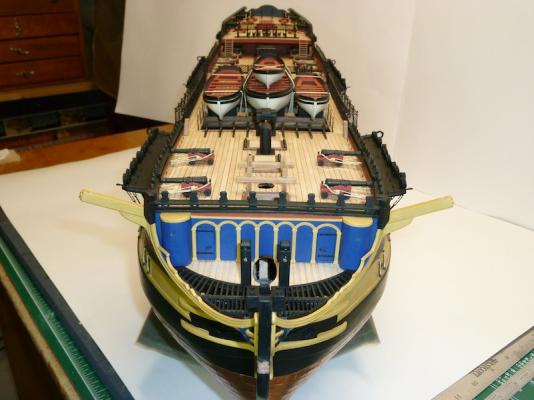
Guys, thanks for the comments. Build update: Finished adding pieces to complete this phase of the build, except for items that will be added after rigging phase is complete. I sure if I added the stern lanterns they would be knocked off many times. Figurehead isn't added yet either. The one that came with the casting package has a bowed left leg (won't seat flush with stem). These items don't bend, so I made a mold of the leg out of clay. Would like to get a replacement from Amati. Things that were done since last update are: Did all the hammock netting and stanchions. Added fire buckets, but didn't order enough of them. Made and added the additional ladders required. Made and added the channels, supports, eyelets, chainplates and deadeyes. Rigged the four guns on the FC. Completed the catheads, headrails and associated pieces. Added ship boats and tied down. Next step making the masts.

- 122 replies
-
- 17
-

-
- bellerophon
- victory models
- (and 1 more)
-
Chris, I have enjoyed reading this thread immensely. Thanks for taking the time for all the valued information and the pleasure it was to see this wonderful kit evolve. I vote for the Leda class frigate. Yours sincerely, Len
-
Frank, Since today is a non-modeling day (having new central air installed next to my work area), it's giving me the opportunity to look in on builds I haven't seem before. There's only so much forum read time and to read all that's contained here would require 24/7 time. I thoroughly enjoyed seeing your work. I'm absolutely blown away with your weathering and detail skills. Thanks for taking the time posting and allowing us to look in as this build develops.
- 389 replies
-
- 2
-
-
- supply
- caldercraft
- (and 1 more)
-
Dave, I typically don't comment and just click the like button, but your hook is the best formed hook I have ever seen.
- 601 replies
-
- 2
-
-
- constitution
- revell
- (and 1 more)
-
I would think most will prefer the dark gray and not the black. I know, if I were purchasing the gray would be my choice. Ropes look awesome.
-
Hope you guys are right. Thanks for the thoughts, even belated. Chuck, thanks for the supportive comment.
-
Thanks for all the encouraging comments. Greatly appreciated. Jason, It's Amati 1.3mm. Scale wise diameter is larger than what is correct for these carronades, but visually I liked this better.
- 122 replies
-
- 1
-
-
- bellerophon
- victory models
- (and 1 more)
-
Bob, Somebody didn't read their Manual instructions (10 lashes) (Masts - section 8 on page 8). I am guilty of not reading these instructions, as well, therefore would have probably made the same mistake. Very grateful for the heads up. PS after writing this I noticed that you sent this warning out on our build logs also (me, Arthur, and Mitsuaki). That was an especially thoughtful thing to do for us, therefore I'm rescinding the 10 lashes.
-
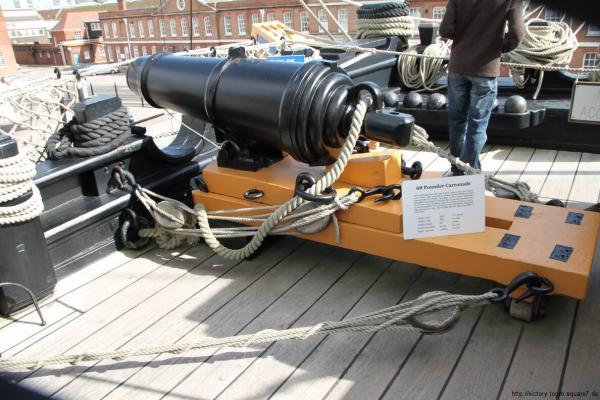
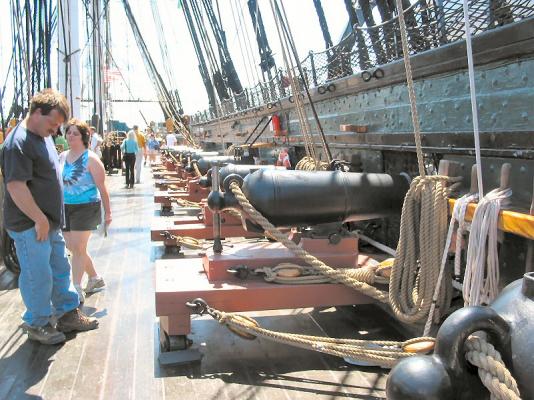
Hi guys, While working on the carronades for my present build I noticed from a pic of a carronade on the Vic that the hooks are perpendicular to the eye. I always made mine the same as described here. I have attached to pics one from Vic and Conny showing what I mentioned (English and American example). For accuracy talking should these that are on real ships be copied or are the way most of us making these ok? Just some food for thought.
-
Chuck, 20 gauge for small blocks and 28 gauge for larger? Possibly typo?
-
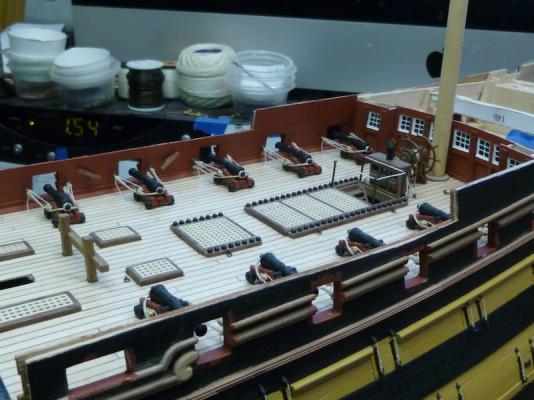
Build update: Finished mounting and rigging the carronades on the poop deck. Wasn't sure how to rig them properly, so I took my best shot. The drawing I have shows the train tackles bulkhead eyelets spaced about the length away from the perpendicular. I had two problems: one being the lack on bulkhead on this deck and second if I put the eyelets this distance the two aft most carronades rigging would overlap. I guess the train tackles were spaced as specified to allow it to be pulled parallel with the deck. I just mounted a eyelet for running out, breeching and train next to one another on each side. I also think there was a tackle running on each side from the front eyelet on the slide of the carronade to an aft eyelet on deck for the purpose of bringing the slide aft for loading. I had seen a drawing of this, but can't find it. There are so many versions of carronade assemblies. I've attached the picture of the one I used for example. Would be great to have a reference for the use of each eyelet. For rigging I used single and double blocks (3/32) purchased from Syren Model Company. The rigging line for breeching is from Amati and the tackles are DMC 100 and using UNI-thread 6/0 for seizings. Hooks are made from black annealed #28 gauge wire. Made up purchased buckets from Amati (these are made attaching two halves which did have some offset therefore required sanding, not good). I did make the mistake of only purchasing 8, but 12 are needed to complete bucket rail, oh well. Made the handles from 32 black annealed wire. Presently working on the hammock cranes netting. I'm using a material that I purchased when building my HMS Fly from JoAnn Fabrics (craft store). It only comes in black, but has the diamond shape and pretty close to scale. I think I paid about $1.25 for a yard of the stuff which is enough for many builds. Prior to mounting this material, I ran DMC 40 thread through each hammock crane and secured a knot on each end. Then made strips of eight rows of diamonds from the netting, folded in half and pushed into position, then using UNI-thread 6/0 tied a knot connecting each top diamond to the top thread rail. Once complete used diluted Vallejo black paint, therefore the reason for covering deck. Thin paint will spatter. Continuing on.


- 122 replies
-
- 10
-
-
- bellerophon
- victory models
- (and 1 more)
-
Mitsuaki, Wonderful to see you back, my friend and taking the time to repost. Always enjoy reading and learning from your updates. You always come up with great solutions on areas I find most difficult. Thanks.
-
Thanks for all the comments. Always appreciated and welcome either yah or nay. Hard to believe a month has gone by, since my last post. Still working on headrails area and rigging the carronades. Modeling time has decreased because of cycling vacation to Wisconsin plus other interests. Should post updated pictures once carronades are rigged.
-
Yon, Yes, I did the same. The end of the thread going through the hole in the hull doesn't need to be glued. The stiffness of the thread keeps it in. After I used diluted white glue, just used tweezers to push the open end through the opening in the hull. I didn't notice any discoloration with the white glue, but know you would with the CA. Hope this helps. This also allows to shape thread to look natural, as in foot ropes.
-
Yon, Just a suggestion and a heads up. I've read several posts here and other forums that say never use CA on thread in time will become brittle. I have no experience, but is enough warning for me not use CA. I think using diluted white glue will give you the proper stiffness for this application.
-
Chris, Absolutely beautiful work. You got me thinking of repainting the boats on my Billy. Would you mind giving the Vallejo paint numbers used? Since your mention of these way back on your Bellona prototype on MSW 1.0, I only purchase these now and am extremely satisfied. Some of my current build is using the existing paints I have only to use them up. This is one special kit. I just hope I'm still around once this kit hits the market and will be available to purchase as my current build. Thanks again taking the time to post these updates and sharing your prototype pic and explanations.
-
Norman, Just noticed you generated another build log. Thanks for reposting was hoping you would do so. Not sure how I have missed it back in March.
-
A fully Rigged Model Shipways Confederacy.......
freewheelinguy replied to yvesvidal's topic in Wood ship model kits
http://www.history.navy.mil/faqs/faq63-1.htm nto the early years of the 20th century there was no fixed form for Navy ship prefixes. Ships were rather haphazardly identified, in correspondence or documents, by their naval type (U.S. Frigate ____), their rig (United States Barque ____), or their function (United States Flag-Ship ______). They might also identify themselves as "the Frigate _____," or, simply, "Ship ______." The term "United States Ship," abbreviated "USS," is seen as early as the late 1790s; it was in frequent, but far from exclusive, use by the last half of the 19th century. -
Request for Help- Soldering with Paste
freewheelinguy replied to PopJack's topic in Metal Work, Soldering and Metal Fittings
Russ, When I click on your link in tools and materials it takes me to a conversion thread. -
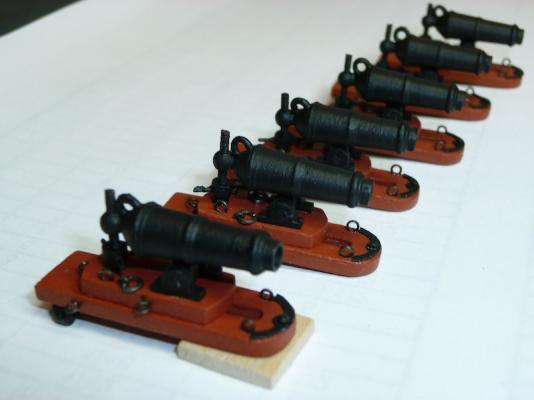
Thanks for the compliments, greatly appreciated always. Build update: Presently have been working on the headrail and associated pieces, but while I was waiting for some bending pieces to cure I decided to build up the six carronades required for the poop deck. When purchasing the material for this build I decided to purchase the carronades from Caldercraft. These seem to be the closest size for this scale, plus the came with the elevation screw. Carronade assembly as follows: 1. Added breeching ring 20 gauge wire. 2. Shaped out of boxwood piece, drilled hole for mounting pin and glued to bottom of carronade. 3. Cut 1/8"dowel 1/16", drill center hole, slipped down screw, drilled two hole and glued 24 gauge wire handles. 4. Screwed onto carronade and cut screw (looking at magnified picture will cut off more, plus pic shows I need some cleanup). 5. Painted after treating brass pieces in Blacken-it. Paint used Admiralty matt (metal) black. Carronade carriage assembly as follows: 1. Cut and shaped two platform pieces out of basswood and painted red. 2. Made nine eyelids for each carriage out of 28 gauge wire and attached. 3. Added two more eyelids and rings out of 24 gauge wire for breeching rope. 4. Made and shaped wheel assembly plates out of thin styrene, cut round toothpicks 1/8" for wheels, glued pieces and added to bottom of carriage. Initially, had an additional wood pieces on bottom as my carronade drawing showed, but when I put this on the ship was too high off the deck therefore removed and cut wheel plates in half. 5. Made the pin for the carronade out of filed down toothpick through draw plate. 6. Made the two side pin holders out of 1/8" dowel, filed bottom flat, and a strip of wood for bottom piece, glued together then drilled the hole for pin. 7. Glued carronade to carriage. 8. Made front pin plate out of thin styrene, added pin, painted black and glued to carriage. Next up: mounting and rigging to poop deck. Take care and if your reading this thanks for looking in.
- 122 replies
-
- 11
-
-
- bellerophon
- victory models
- (and 1 more)
-
From book: "the foremost and aftermost shrouds are omitted for the first six ratlines below the futtock staff and for the first six above the deadeyes. The futtock shrouds are rattled down also at 13in. intervals, with no omissions."
-
Chris, What a great design. It is truly an honor to see your development. Thanks for taking the time from your busy schedule to share this with us here. Hope my body can hold out before this kit comes available. I've said before, but I'll say it again, Amati is truly lucky to have you.
-
Thanks all for the kind words and looking in, greatly appreciated. I as much as you guys enjoy seeing others builds in progress. Timmo, far from a master, but thanks. Make many mistakes, just an average modeler, but I do enjoy this hobby.
- 122 replies
-
- 1
-
-
- bellerophon
- victory models
- (and 1 more)
-
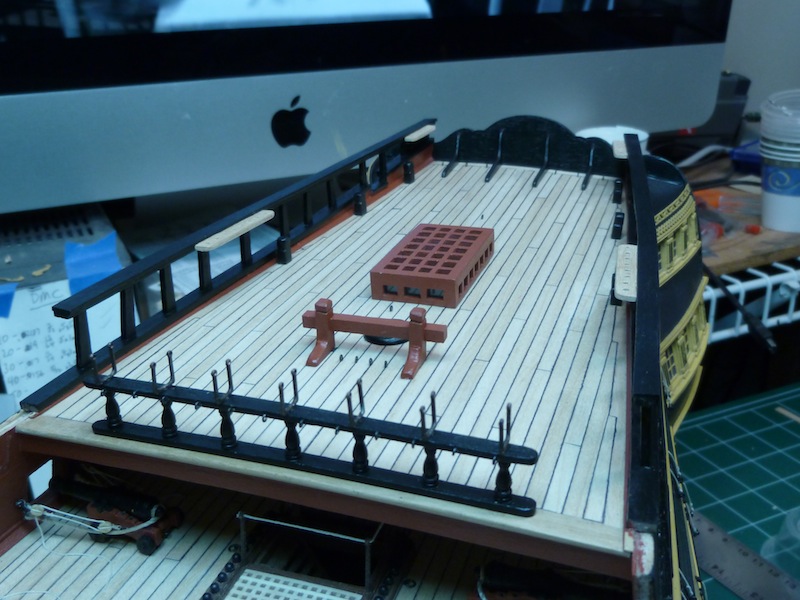
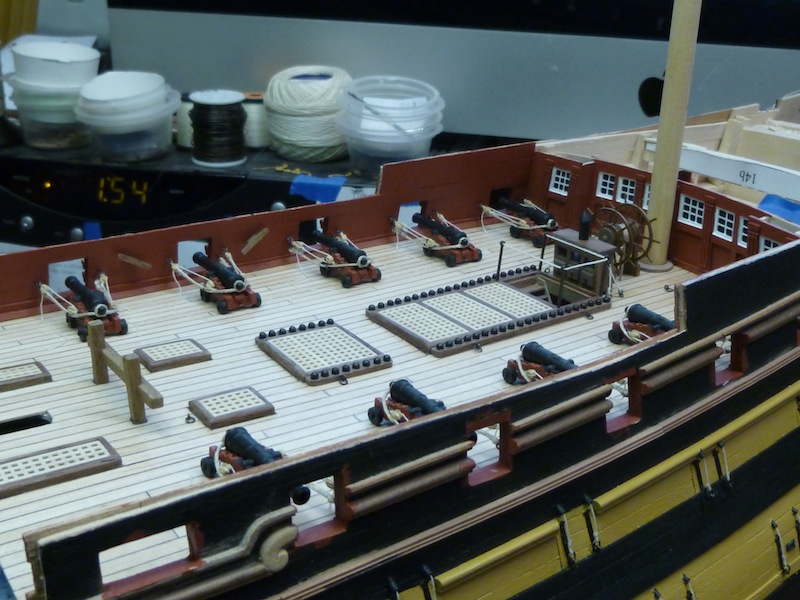
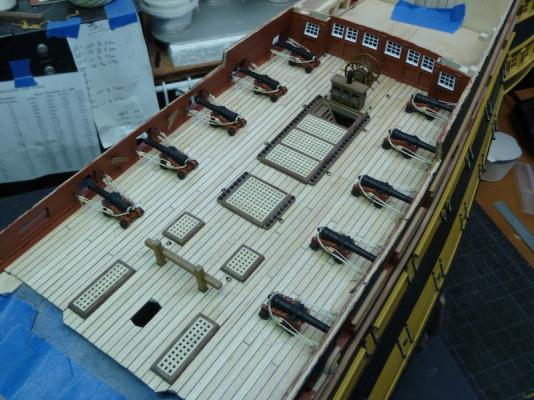
Build Update: Followed same procedure as the QD for the Poop Deck. Added deck pieces, rails and all associated pieces shown in the poop deck picture. Next up gangway and boat beams.

- 122 replies
-
- 2
-
-
- bellerophon
- victory models
- (and 1 more)
-
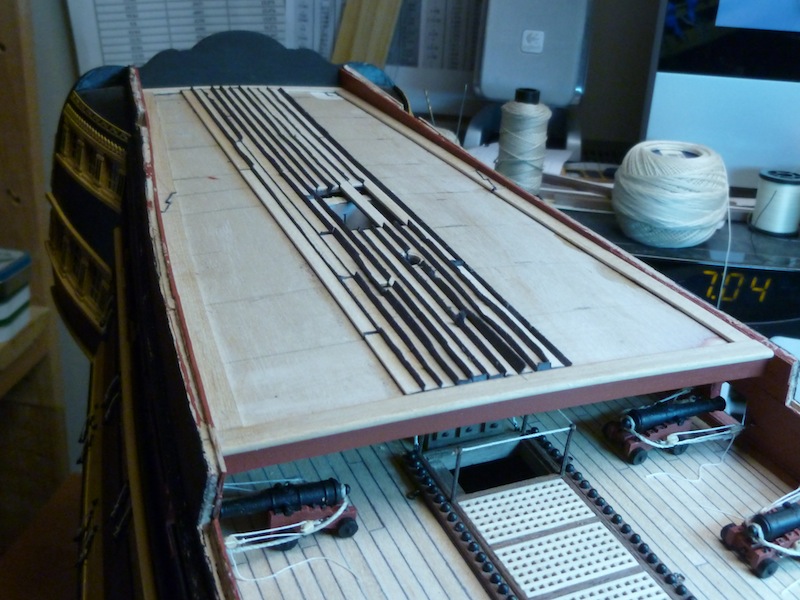
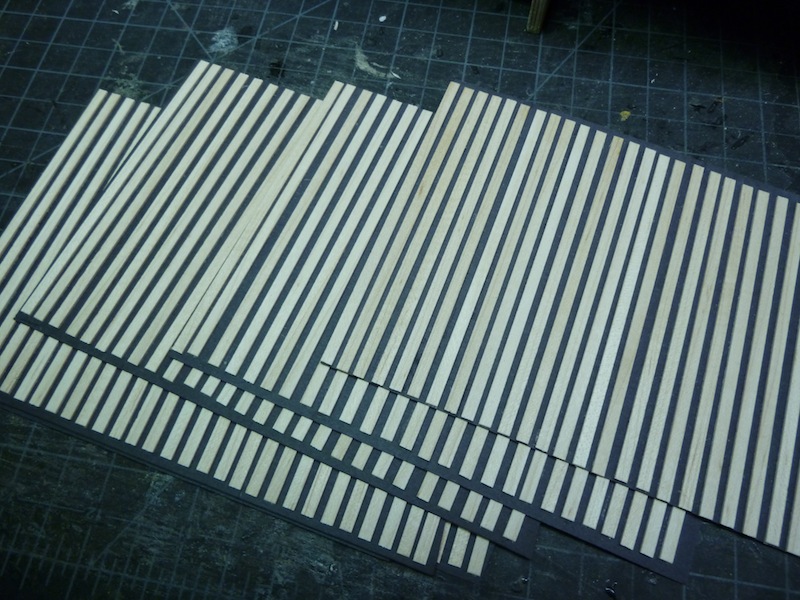
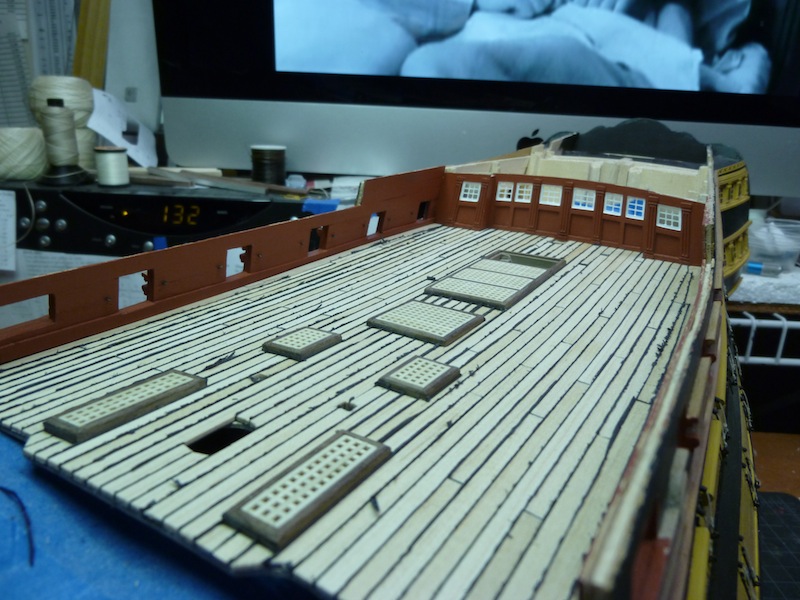
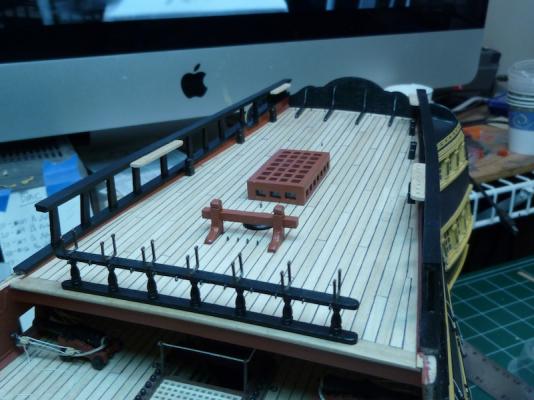
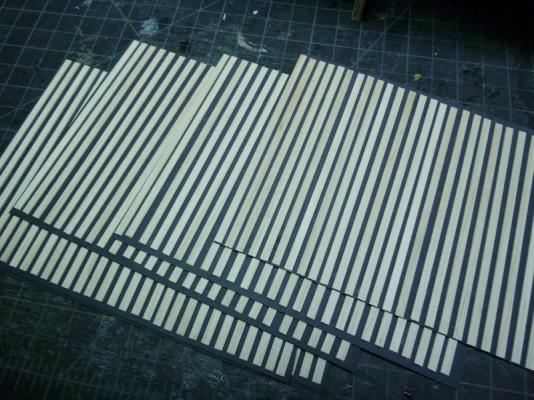
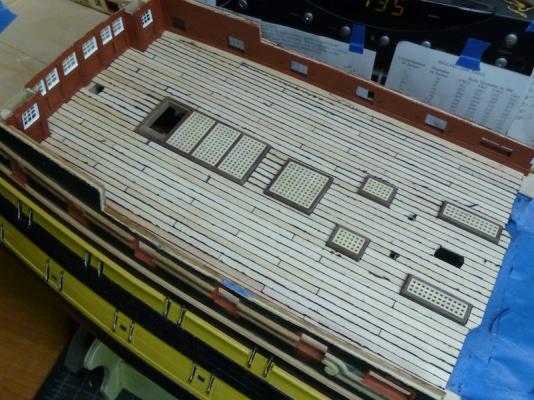
Build Update: Added false QD/FC deck piece. Had to trim away the inner QD sides to a more appropriate thickness before adding the planking. The bulwarks were much too thick because of what material I used to frame the bulwarks. Then added planking and made up the screen bulkhead assembly. Assembled and then added the required grating pieces to the deck. Added the margin plank. Tried a different approach for caulking planks from what I did on the gun deck. This time instead of putting black paper strips down the side of the planks I glued the planks to black paper sheets. Once dry ran a knife down the edge. This gave me a plank with a border on one side that I could fold up. Having the bottom and one side with black paper stopped the problem of the paper coming up when trimming and sanding the finished deck. Added QD planking and sanded and sealed. Assembled ships wheel, cannonball racks, cheats, stanchions, binnacle and bitts. Made up ten 18lb cannons and everything else associated with them. That's it for the QD for now. Next up Poop deck.

- 122 replies
-
- 3
-
-
- bellerophon
- victory models
- (and 1 more)