HOLIDAY DONATION DRIVE - SUPPORT MSW - DO YOUR PART TO KEEP THIS GREAT FORUM GOING! (Only 13 donations so far - C'mon guys!)
×


Craigie65
-
Posts
480 -
Joined
-
Last visited
Content Type
Profiles
Forums
Gallery
Events
Everything posted by Craigie65
-
 Yip, I will be watching out for this one being put on sale. Plus should be small enough to hide from the admiral 🤞
 -
Excellent build and a credit to your fleet. You powered through the rigging in short time. The name plate is a nice touch.
- 233 replies
-
- 4
-

-

-
- Indefatigable
- Vanguard Models
- (and 1 more)
-
Wow, if Flirt is up to the level of the Pinnace then just wow!
-
Hello Andrew
-
She is a lovely ship; excellent, clean build. The flag is very realistic, how did you do that? You have given me the inspiration to get back on with my current build - thank you. Looking forward to your next log.
- 103 replies
-
- 2
-
-
- Grecian
- baltimore clipper
- (and 4 more)
-
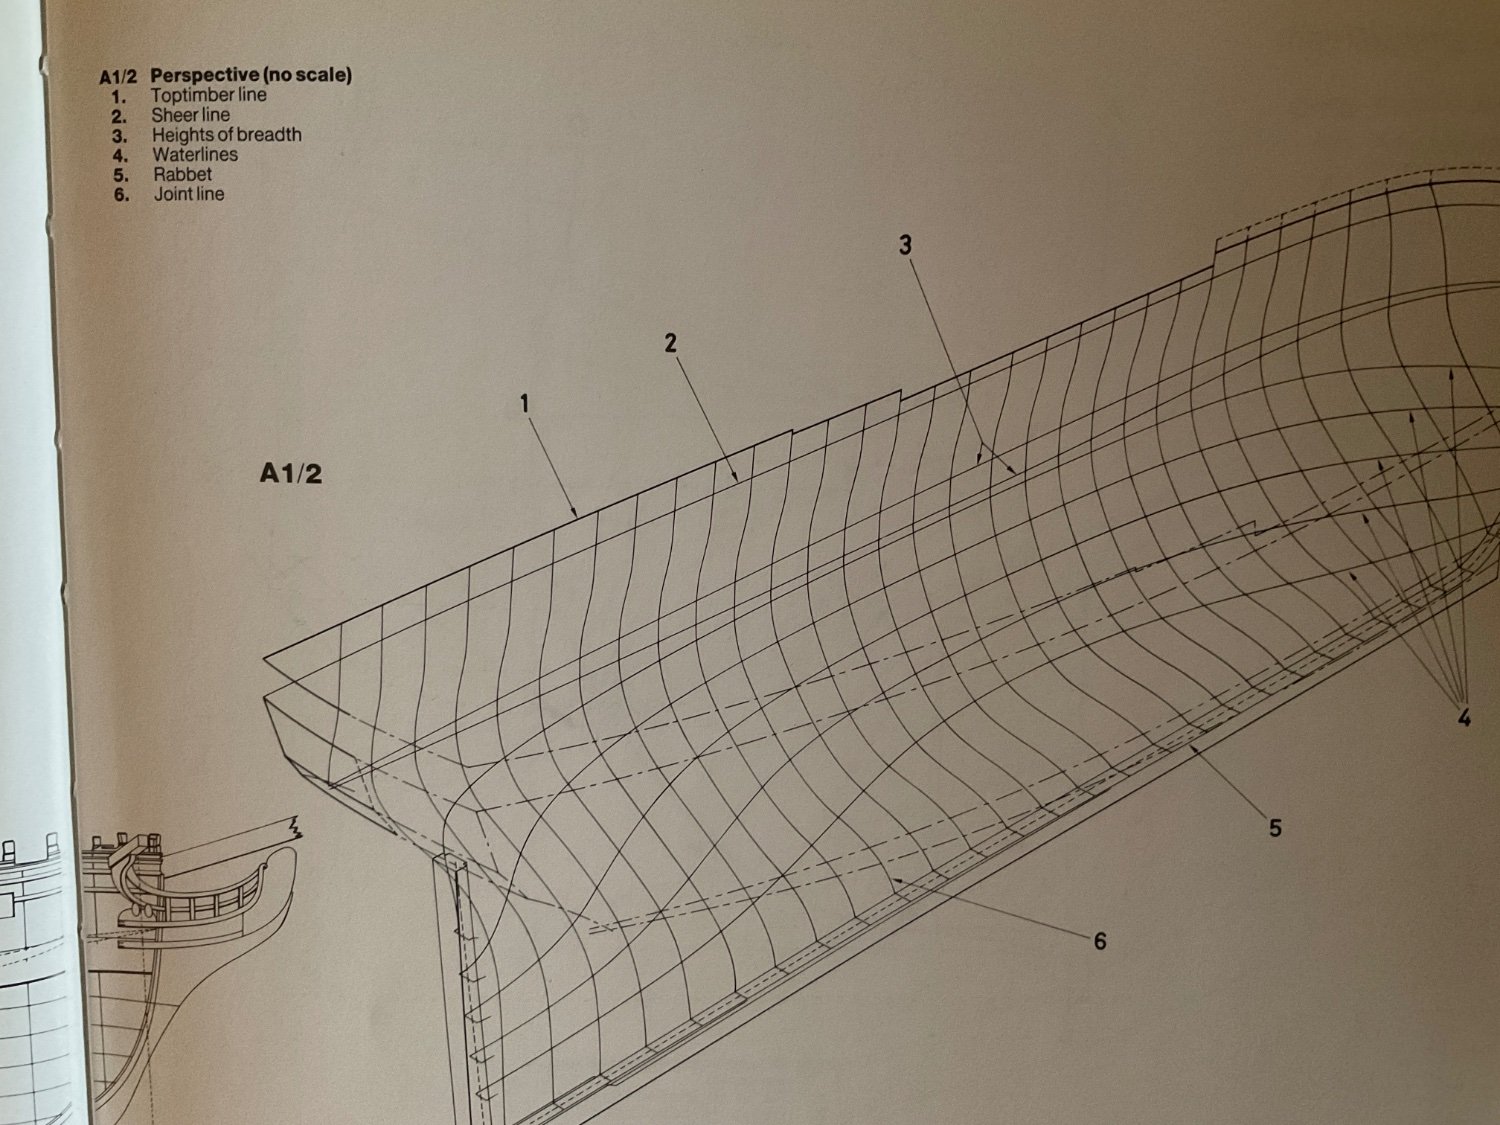
Don’t know if this helps, but in the AOTS for Diana this is labelled as the sheer line

-
Sturdy little thing isn’t she. Enjoy your holiday and try not to think of your shipyard too much!
-
I love these kits. It is amazing how far you can get in an afternoon. Looking forward to see this one planked.
-
Always been fascinated by a cross section model. If you don’t mind I will pull up a chair.
- 8 replies
-
- 1
-
-
- Sirius
- cross-section
- (and 1 more)
-
Strange I have “Signature” below Content view Behavior maybe one of the moderators can chime in here?
-
Hello Pierre, Click on your avatar to go to your account. At the top of the background banner you should see account settings. Click on that. On the left hand side you should see a list - at the bottom is signature. You can add the info there
-
2023 Donations drive
Craigie65 replied to James H's topic in Using the MSW forum - **NO MODELING CONTENT IN THIS SUB-FORUM**
Wiki was in your face - big section saying they needed donations. TBH I didn’t see the green strap line, too easy to overlook. -
Wow! Looks first class to me, you are doing a grand job. You cannot see any bleed in the pictures, even when blown up. We are often our own harshest critics. The colour scheme is really striking. I do like that shade of green. Looking forward to her being fitted out.
- 103 replies
-
- 2
-
-
- Grecian
- baltimore clipper
- (and 4 more)
-
Hey Dan, Found your log and will pull up the proverbial chair. Looking good so far, she has really sharp lines. On the coppering, my vote would be for the pre cut plates. Don’t fancy having to cut all those individually from a roll of tape……
- 103 replies
-
- 1
-
-
- Grecian
- baltimore clipper
- (and 4 more)
-
Probably not far off with 100mm, I am sure someone will chime in with a definitive answer. Given the deck planking will have a shift pattern I find it easier to work with a length that easily divides by the number of shifts.
-
Gregory, You are absolutely right for a cutter, but I think Speedy and Flirt are square rigged?
- 70 replies
-
- 3
-
-
- Alert
- Vanguard Models
- (and 1 more)
-
The rigging does look daunting when it is complete. But building it up line by line, mast by mast it becomes relatively straight forward. Vanguard instructions will keep you right. If you don’t have it Lennarth Petersson’s Rigging Period Ship Models is a good investment. Whilst there is no text the drawings are very clear and are a good supplement to kit drawings.
- 70 replies
-
- 2
-
-
- Alert
- Vanguard Models
- (and 1 more)
-
That lathe is a godsend! not sure I would have taken the fixtures off, may prove tricky to get back in. looking forward to seeing the Grecian taking shape. This and the new cutter are soooooo tempting, but I will never get them past the Admiral!
- 70 replies
-
- 2
-
-
- Alert
- Vanguard Models
- (and 1 more)
-
I presume you mean on warships? Depends on the ship and nationality, but I believe it was to hide the blood. Not sure how effective that was as they did not paint the decks red!
-
Lovely clean work. Hope you are enjoying the change up from fishing smacks! Nearly time for the mast and those lovely ratlines 😜
- 70 replies
-
- 1
-
-
- Alert
- Vanguard Models
- (and 1 more)
-
Bismarck greys?
Craigie65 replied to Ian B's topic in Painting, finishing and weathering products and techniques
Try Sovereign Hobbies colour coats. Link Here they are enamel but I have found they spray well if properly thinned. They also have colour guides for most of the well known ships White Ensign also has a description of the colours Here