HOLIDAY DONATION DRIVE - SUPPORT MSW - DO YOUR PART TO KEEP THIS GREAT FORUM GOING!
×


clloyd
-
Posts
153 -
Joined
-
Last visited
Content Type
Profiles
Forums
Gallery
Events
Everything posted by clloyd
-
 As a note to what has been said there. Single action generally goes hand in hand with bottom (suction) feed. This is good for large volumes, but sacrifices precision control. You press down the button and you get air+paint. Great for covering large areas, not so great if you want to do anything small or precise, as you always get the same amount of paint coming out. Double action lets you control both when you get air, and how much paint you are introducing into the airstream. A lot of double action brushes are gravity fed, and usually that means paint cups of 5ml or less. However you can get bottom fed DA brushes. If you imagine doing more with your brush then investing in a better brush earlier is worth while. You can learn on a good brush, but a cheapo brush will need to be replaced if you end up wanting to do more. Colin (who owns a Harder & Steinbeck Infinity)
 -
Absolutely my Byrnes table saw. It's the one power tool that I can't replicate what it does with hand tools. Rotary tool would be second. Colin
-
Got it. The word description had me confused but that clears it up nicely. Colin
-
Isn't that always the way... You look at something and wonder why it was done that way, then when you try and do it yourself you find out exactly why. Nice result. Colin
-
The reason that they don't touch the first bulkhead is that you haven't faired the 1st, 2nd and 3rd bulkheads nearly enough (or the stern ones either, now that I look). Read the planking tutorial. Particularly the parts about fairing the hull. I would strongly suggest you take them off, then get out the sanding block and get those bulkheads sanded down. This is a step that you need to get done properly or planking the hull just won't work. If you don't have adequate support behind the planks they'll be springy and you won't get the hull smooth or the right shape. Secondly: the run of the planks in this area is defined by the wales not the decks. When you've got the bulkheads fair, measure off your plans the location of the wales and use that to set your first plank. Colin
-
I'm with mobbsie - just a quick tweak with the pliers on the ends should do the trick. The choice of metal was a good one too - just looking at the wood cleats I agree that they would be far to delicate, and would result in breaking and much cursing during the rigging process. Colin
-
They would be drawing pins I think. Blademaster - I can't tell from your photo - but it almost looks as if you are taking it horizontally along the hull. If you haven't planked a hull before check out the planking tutorials linked at the top of the Planking and hull forum. reading through those will save you a lot of stress and heartache. Colin
-
Hi bsco, Welcome. We're pretty friendly around here so you'll get all the patience and advice you want. We'll be looking forward to seeing your build develop. Colin
-
Ahh - someone bitten by the scratch build bug! Good luck with the build! Colin
-
Lovely hull. Well done. Colin
-
Grant, When I made shroud cleats for bounty I had a similar mass production idea, but came at it from a different direction. I crosscut a piece of timber from a blank. Thickness = depth of cleat, width = length of cleat. I then shaped that - a concave depression on the top, a cut on each side to make the profile so I could then just slice off individial cleats, tidy up with a file and install. I don't have pics anymore, so I hope that made some sort of sense - give you another option for how to make them. Colin
-
Magnus, I'm glad you found MSW. I found your 3D build a couple of years back and was really impressed. I'm even more impressed now! (I did also pinch and early pic to use as an avatar, since I'm building her in wood at the moment). Colin
-
Faux nailing
clloyd replied to Captain Al's topic in Discussion for a Ship's Deck Furniture, Guns, boats and other Fittings
Captain Al,, Size chart here... http://www.sigmaaldrich.com/chemistry/stockroom-reagents/learning-center/technical-library/needle-gauge-chart.html a #21 needle has in inner diameter of 0.5. Outer diam is about .8 Further points from experience. Do it before your final sanding. If you have a wood that is at all soft then go gently, as it is possible to take plugs out. They don't look too different so it wasn't an issue for me. Definitely trial first on scrap. Make sure you like the effect. I'm a bit lucky that I work closely with a couple of GPs, and am allowed to just wander into the storage area and source materials. Colin -
Faux nailing
clloyd replied to Captain Al's topic in Discussion for a Ship's Deck Furniture, Guns, boats and other Fittings
If you want to see the effect look at the wales of my pandora (link in sig) The photo's don't quite catch the effect. Trial on scrap first to see if you like it. I tried this out as I knew that in a properly sanded hull, real trenails (like dannys') aren't visible under paint. My hull is pretty much going to be mostly painted. Colin -
Faux nailing
clloyd replied to Captain Al's topic in Discussion for a Ship's Deck Furniture, Guns, boats and other Fittings
Depending on how subtle you want to be, you can also take a hypodermic needle of appropriate gauge, grind the angle off it, and "stamp" a circle on the end of the planks. The indent on the wood will be visible, but the effect is a lot more subtle than the drill and fill method. Colin -
Full size plates were 48" long. Width about 14" if I recall correctly. At smaller scales the plates don't look too odd without the nails. You'd drive youself nuts trying to replicate a nail pattern. Amati does a 1/72 plate that is less than 1mm too wide and about 2mm longer, and would probably look fine as well. Colin
-
If one of the planks wants to run nicely, what about doing the second much like you'd do stealers in the stern? Lovely model btw
-
Historically she was coppered. The only reason you'd have to not copper is if you wanted the opportunity to show off the wood of the hull in a more artistic presentation. You are right that it is getting a little small for showing the nails - however if you look at victory models 1/72 plates they have etched the pattern on. Colin
-
Navy? Time period? Ship size? Those things really affect the answer to that question. But - just cause they were lying round my harddrive (research for my current build) here's a couple of contemporary models from NMM - British mid - late 18th C. 6th rates Dark blue (prussian), ochre. It's my understanding that some of it did come down to what the captain could afford. Blue was quite expensive as a pigment, ochre not so much. If memory serves prussian blue was the main blue pigment that had been available at that time. Later (19th C) the back yellow became a bit more common. Colin
-
I had nearly the exact same injury on bounty - and she spent the final 6 months of rigging with a "cast" around the fore topgallant mast. My solution was the same as yours. Colin
-
Hi Pawel, Just popped in to have a look and see what you are doing. I think doing proper windows will be a good thing and make her look a lot better. Don't use trenails. They were closer to 1" than two, and are just about achievable at 1/64 (i've tested 0.4mm in my 4mm wide planks and it looks ok), but at 1/85 they will look too out of scale. I would recommend getting Lees "masting and rigging", and the AotS:pandora for the rigging. My recollection is that constructo builds great looking kits, but historical accuracy is sometimes suspect. Colin
-
Well Jason, You're responsible for me getting to be a half hour later as I've read all the way through your log. She looks great and you can see the benefit from all the extra work you are putting in. Colin
- 800 replies
-
- 1
-

-
- snake
- caldercraft
- (and 1 more)
-
Jason, Thanks - they were hugely fun to do as well, as everything I was doing was a new experience. Owe the result to David Antscherls book completely. Colin
-
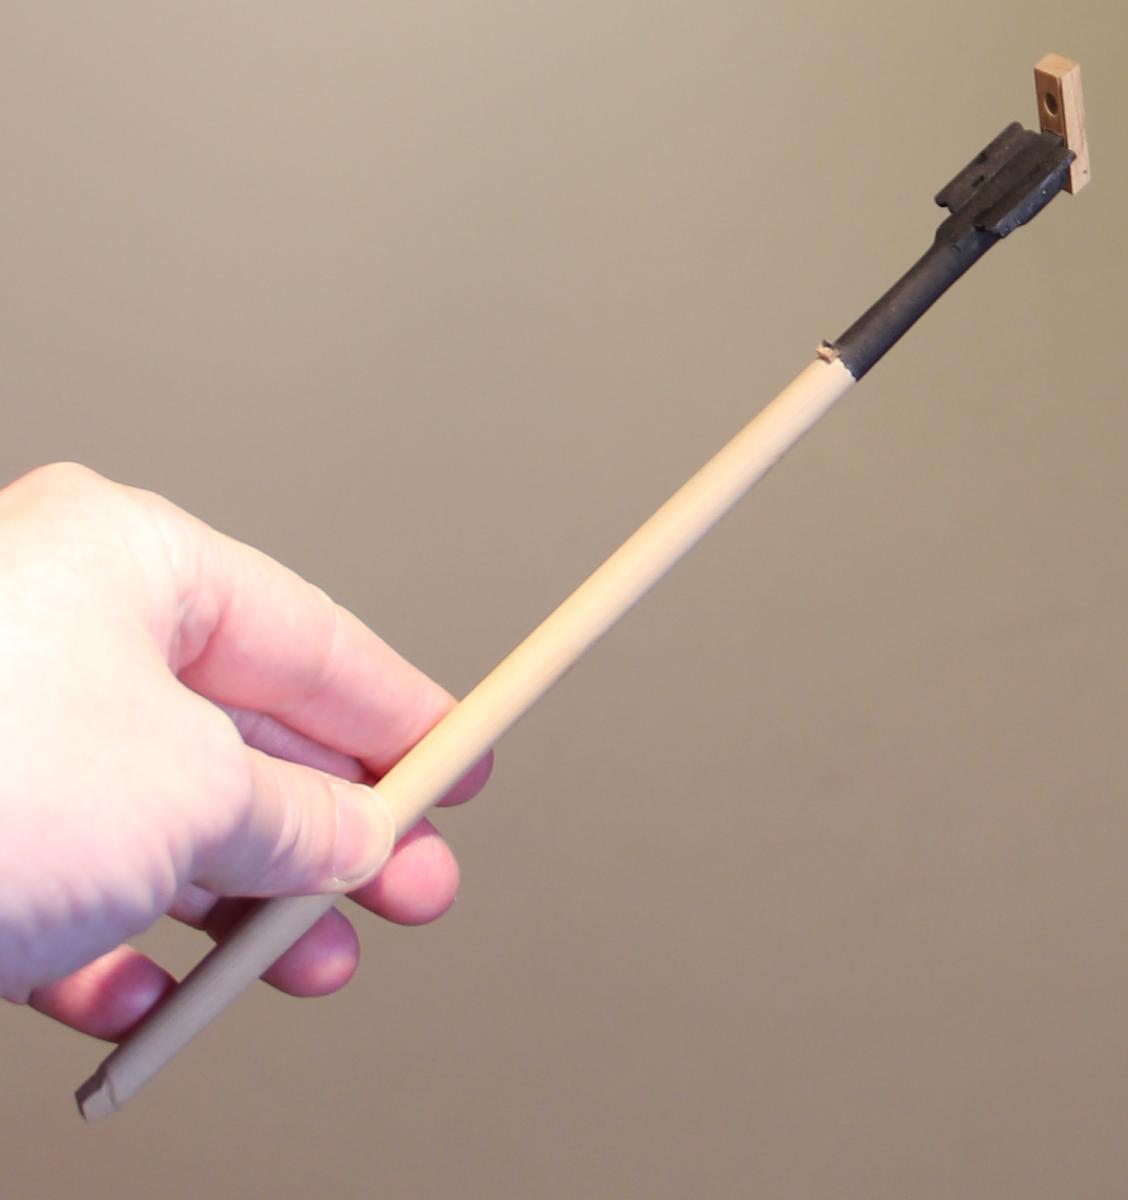
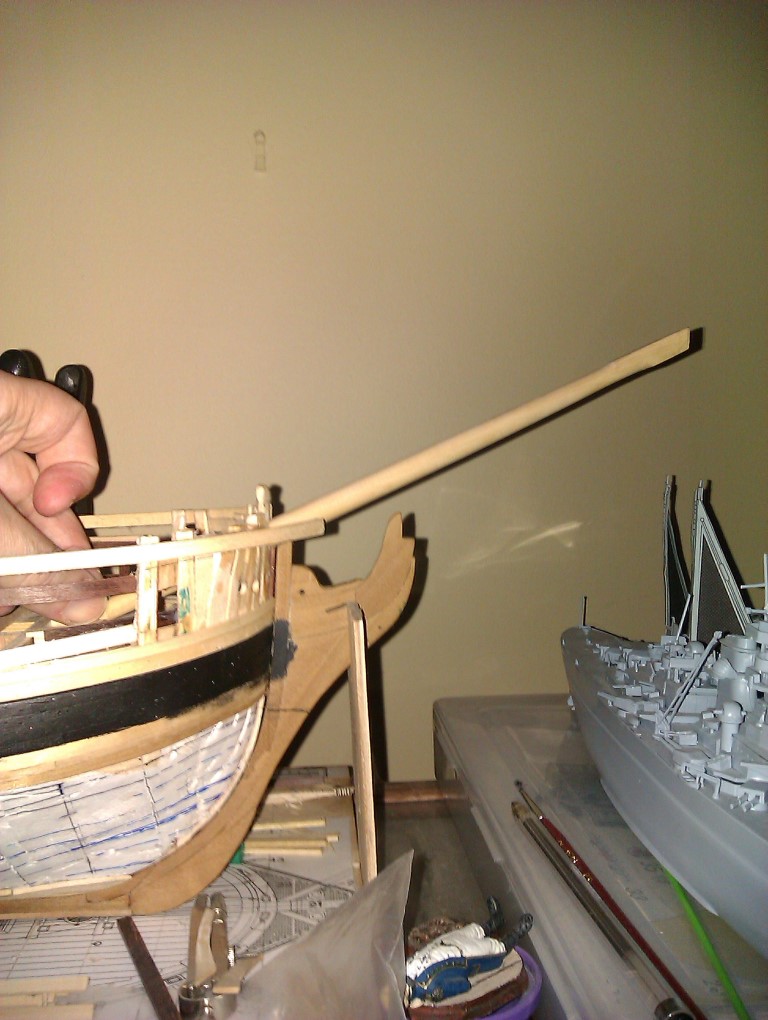
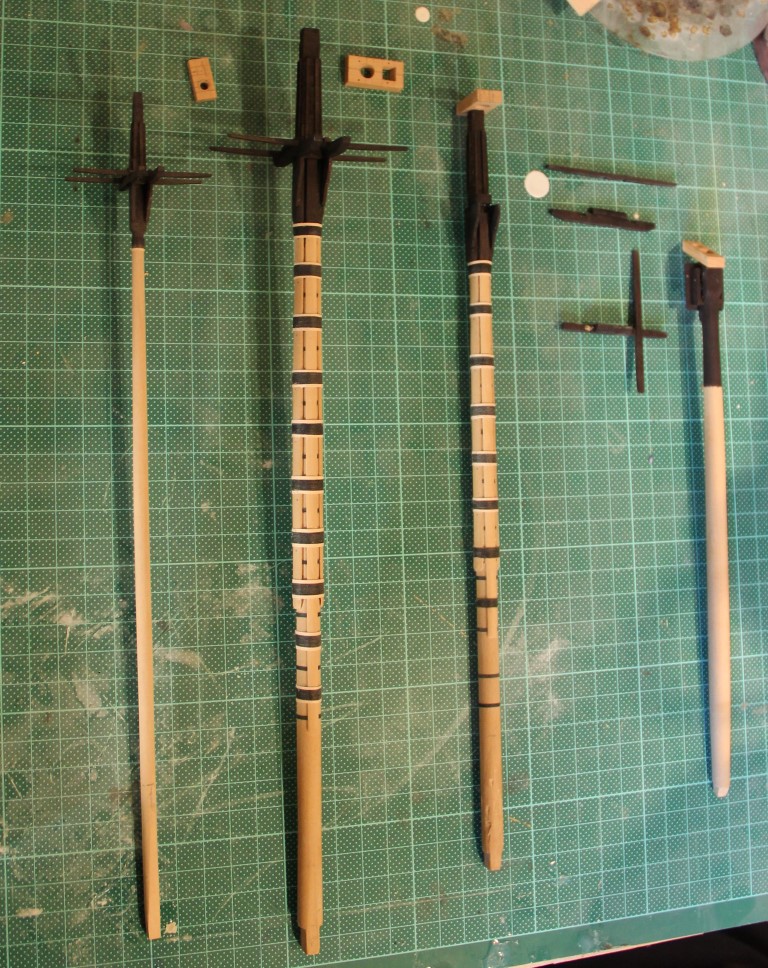
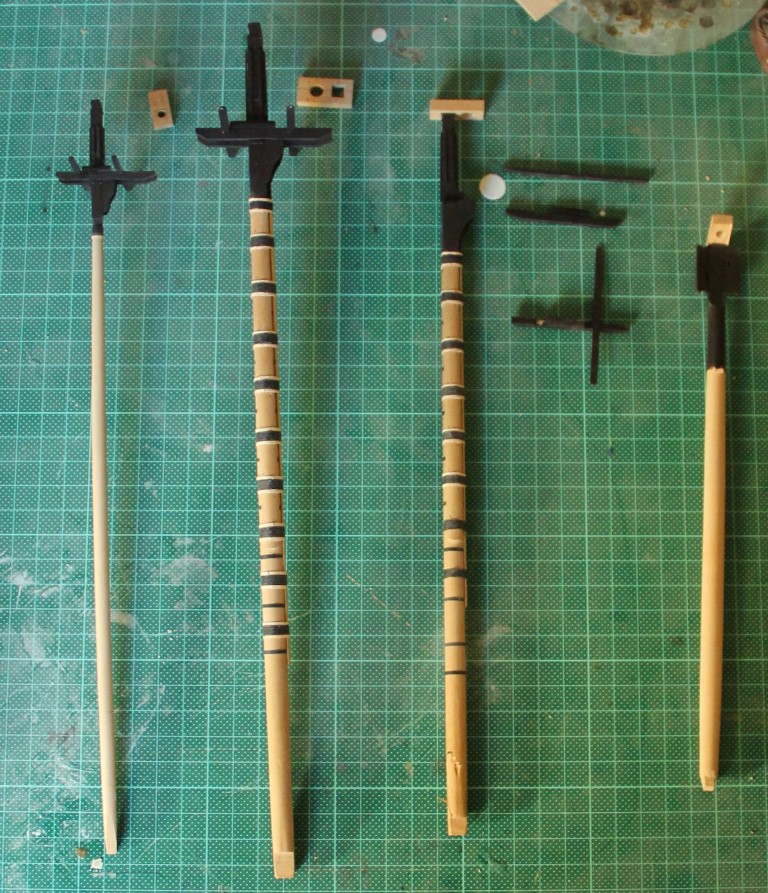
To finish, I was able to figure a way to light the mast to give some detail. Pics are large. Things to note. The heads are stained, but the stain and glue don't fully agree, so they will be painted later. Prestaining should mean I need only one or two thin coats. The bowsprit shot gives a good indication of how nicely lemonwood finishes up (it's still raw wood there) The mizzen mast seems to have been occupied by rigging spiders - their work needs to improve. Enjoy. Current tasks: Making sawdust: Portlids and sheaves in the hull. Hurting brain: quarter gallery construction. Colin
-
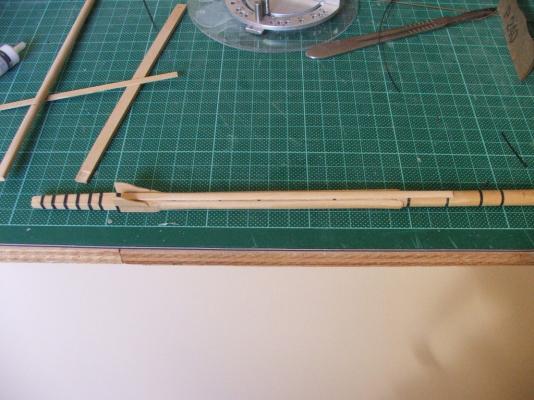
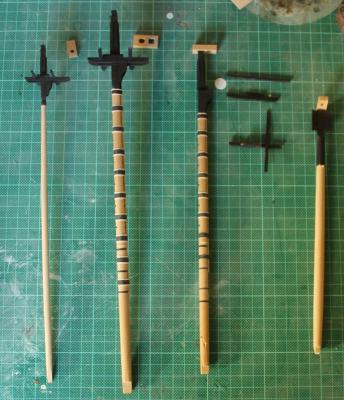
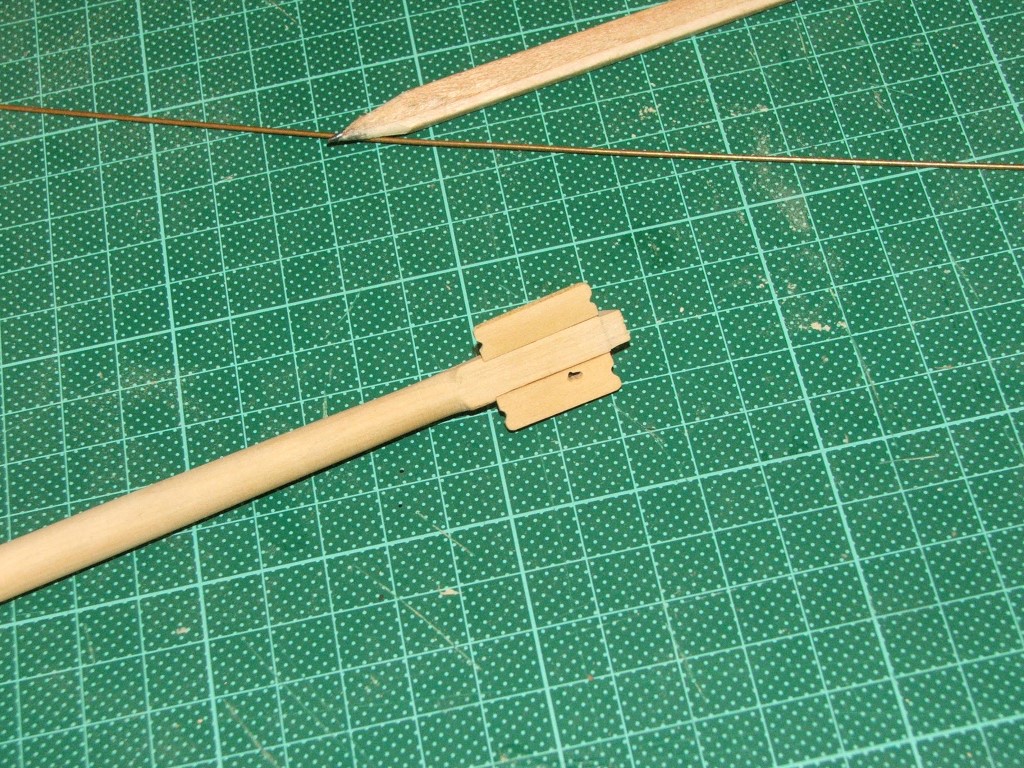
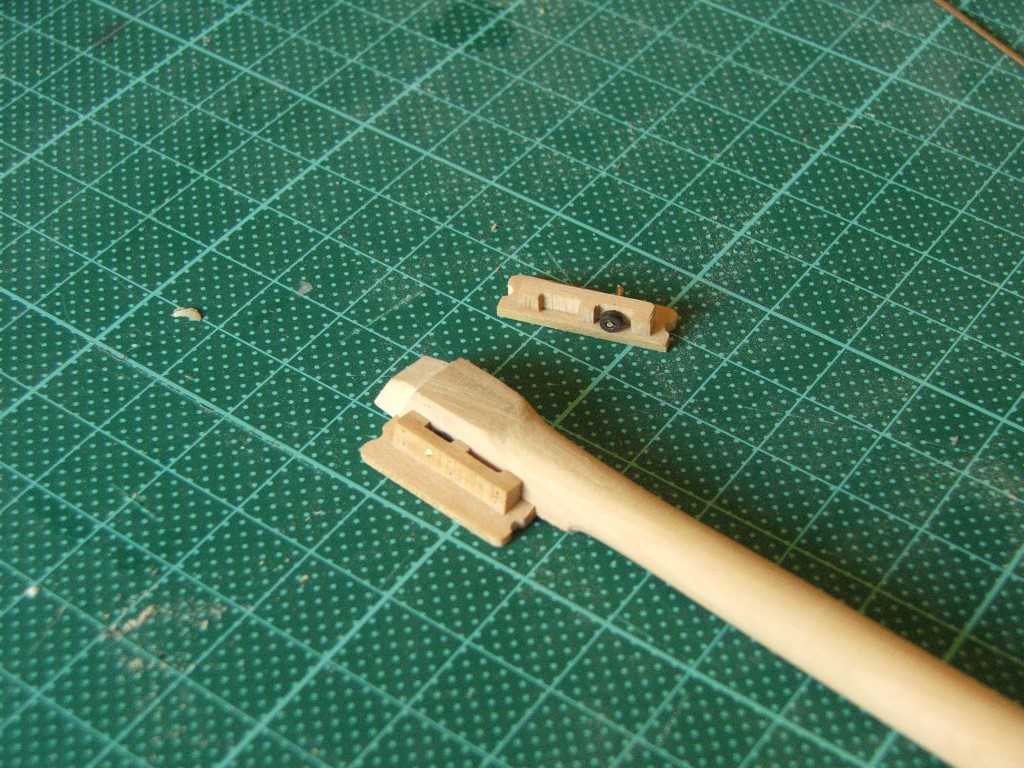
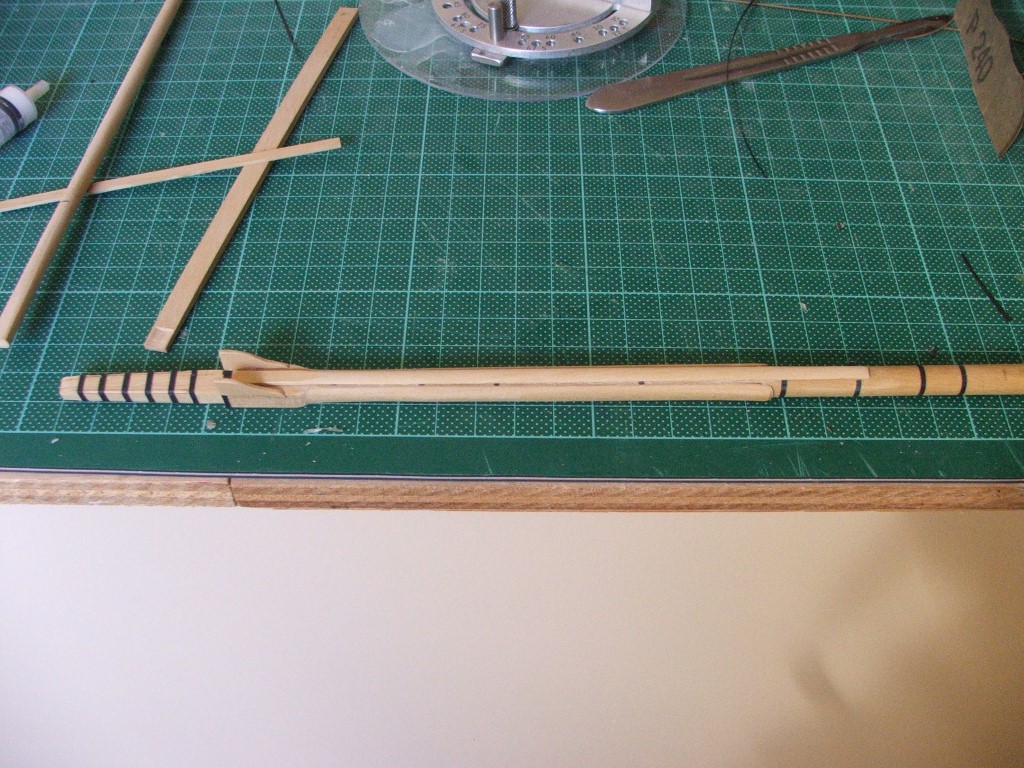
Lower Mast Continued... Fish Running down the front of the mast we had the fish. This again was rectangular stock, but this time I did shape the inner surface, then glued it to the front of the mast, then the external surface sanded round. Examining Steel - I noted that before the cheeks were added there were iron bands to support the central spindle of a made mast. These were done in paper, and do not actually go under my cheeks or fish - they are just tiny squares, with matching bands on the rear of the mast. Wolding, Trestletrees and crosstrees. Once all that was sorted the wolding was added, with paper again serving for the wooden bands above and below. I don't have any photos of building the trestletrees and crosstrees, so they are presented mostly built. The foremast not complete since I need an item of served rigging in place before permanantly fixing them. Bowsprit Shaped in the same manner as the lower masts. Constructing the bees was an interesting and rewarding task - I was able to actually install sheves here. Test fitting....