


SkerryAmp
-
Posts
809 -
Joined
-
Last visited
Content Type
Profiles
Forums
Gallery
Events
Posts posted by SkerryAmp
-
-
Randy, for a shot at ratlines you did pretty darn good! Always room for improvement but those are not that bad at all!
nice Job!
-Adam
-
Well then Sjors, your Gnomes are doing an outstanding job and should be rewarded - the ratlines look really good!
I will be sending mine over to you when it is time for ratlines.

-Adam
-
Danny those guns look incredibly good! The detail is amazing! (SUCH patience)
Love watching your work unfold!
-Adam
-
Planking and fix worked out great!!
Really nice stuff!
-Adam
-
Shouldn't that be 100
Bottles?


I think that may just get me kicked off the site
-Adam
-
 :champagne-popping-smiley-emotic :champagne-popping-smiley-emotic :champagne-popping-smiley-emotic
 Adam
Adam -
Great work Bob. Looks like a nice looking boat - well done so far!!!
-Adam
-
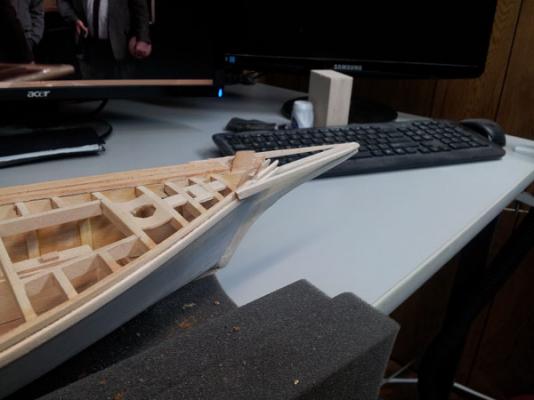
Greetings, Salutations and Hello Happy Modelers!
Work has continued on all fronts, the Mayflower included. So far this is my favorite build of the three - I think it is because things are clicking for the most part and it is moving along.
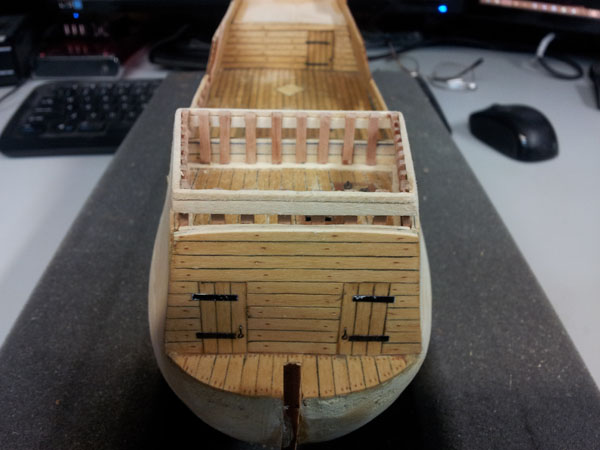
I have started putting the posts and rails in and it is beginning to look more like the Mayflower (always nice with some of those goal moments where things begin to change the look and feel of the ship - I like it!).
I used Swiss Pear for the posts to give it some color and a slightly dark compliment to the rest of the ship. The same wood and tint used on the hatches and the grates which help tie it all together.
The foredeck is together and ready to go and posts have begun getting installed along the main deck. Tedius, but each one looks a bit better
Had a little bit of stress damage on the foredeck bulkhead, but that will be filled and sanded out with little issue so not to worried about it.
Once all of the posts and rails are in I will be sanding it with the same 10:2ish ratio of natural to golden oak to blend all the woods together.
Oh - here are the pics!
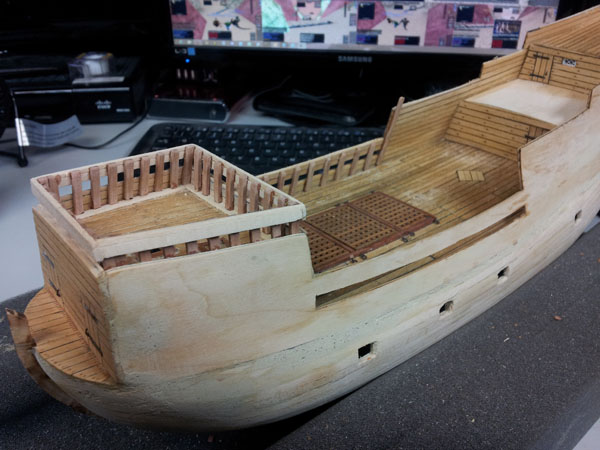
Posts started getting installed, I used a scrap piece of lumber to get the spacing. The foredeck is a little of but i got it right later. Luckily it isn't SO far off that it jumps out at you, it still looks good and "works" but to me it was a DERNIT!!! moment.
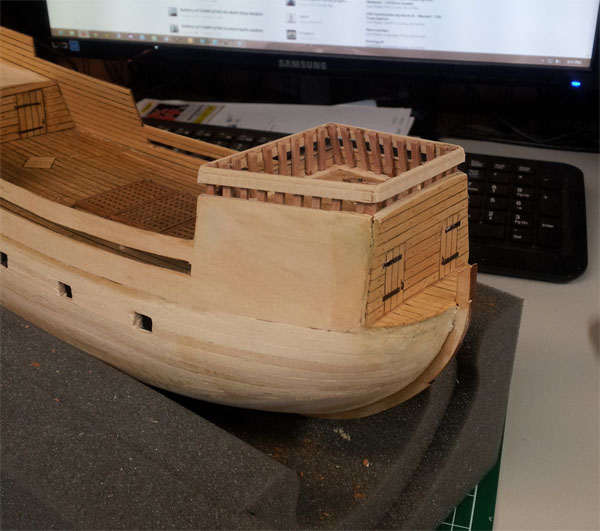
 A thin piece of basswood is used arond the edges of the inside deck which not only acts as waterways but also hides those oopsie not so nice cuts... so, wait, what not so nice cuts - can't see em; they don't exist!!
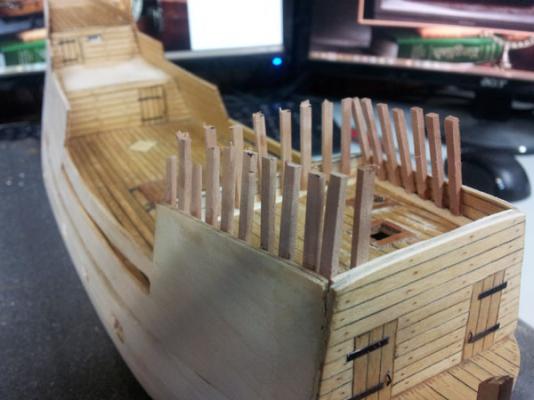
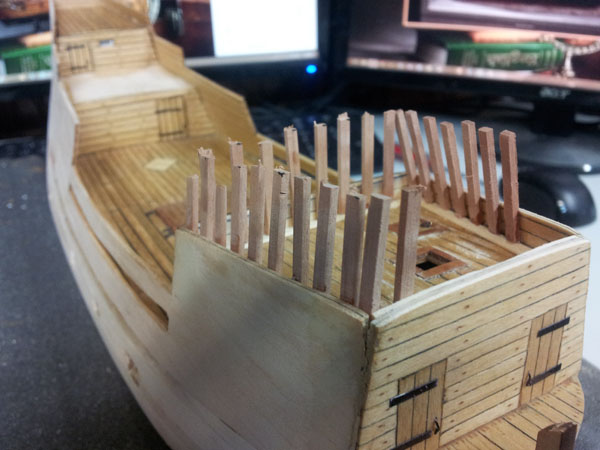
Railings are up, spaced 1/8 inch off the side - again using scrap lumber to maintain the spacing all around.

Started working the main deck posts and will continue around and rail them. Then sand, finish and stain everything to blend it all together =)

Thank you all for stopping by and following along, the company and kind words and interest are appreciated! Great crowd here at MSW!!!
Enjoy and Happy Modeling!!!

-Adam
- DCIronfist, lamarvalley, Chuck and 4 others
-
 7
7
-
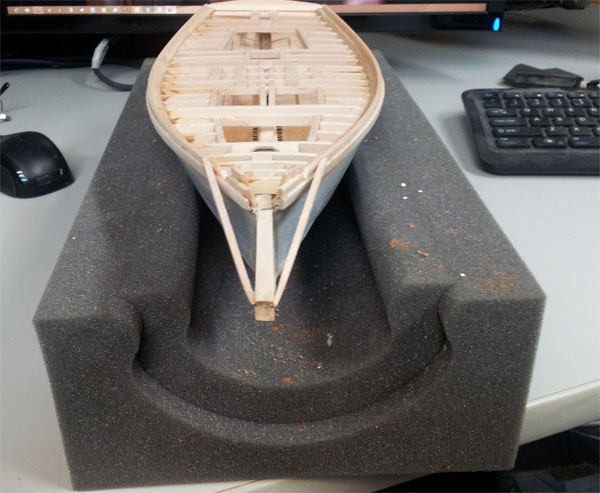
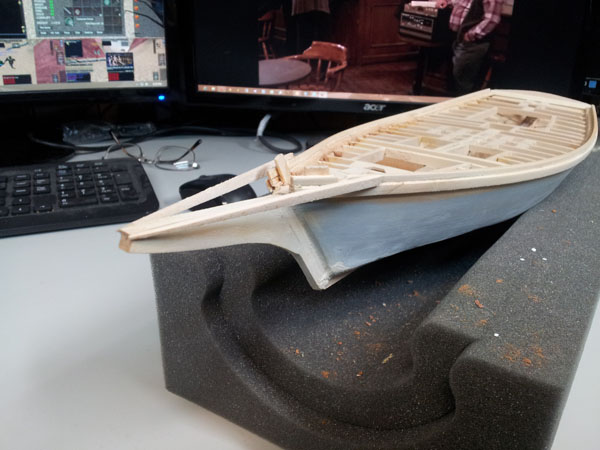
Greetings happy ship modelers!!
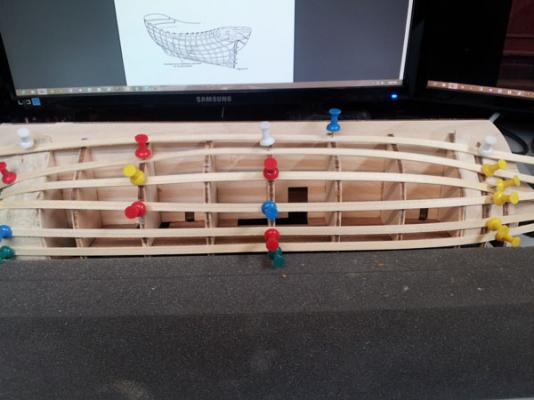
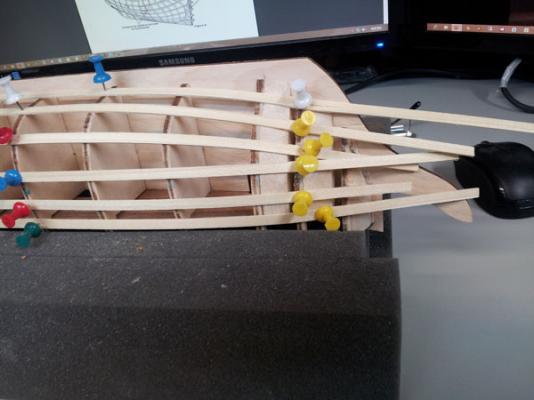
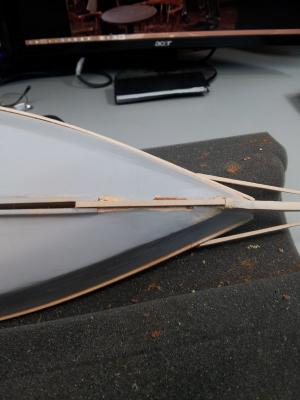
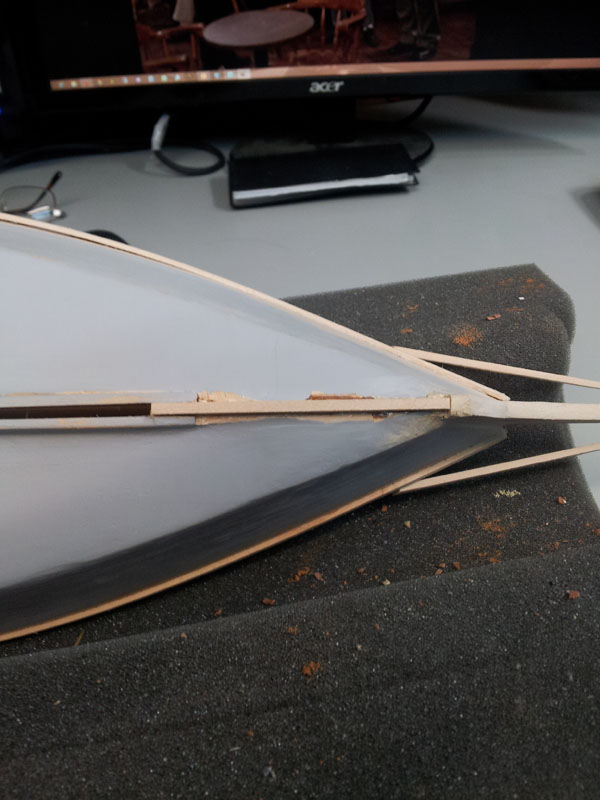
Tonight's installment of the Blue Shadow / "Kara June" is more of a question for you seasoned hullp plankers than it is an update.
The update portion is simply that I have sanded the fill and shaped everything so the basic shape of the hull works and is ready for planking.
Then, I decided to get ready for planking. I did a first planking on the Mayflower and got it to work but with a WHOLE lot of cheating
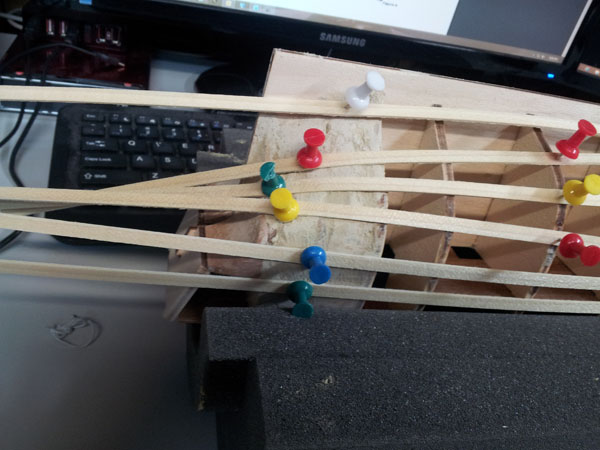
I figured I would try different approach which I have seen many use and see if that helps this "click" a little more.So I referred to the Basic Hull Planking PDF here on MSW (Basic Hull Planking for Beginners). Makes a lot of sense on paper and filled me with hope and promise.
I got up to the laying of the temp battens and looked at it and thought - that looks NOTHING like anything I have seen (at least to me). There is certain shapes and patterns you see with all of these builds and mine just doesn't look right. So, here are pics of the ship as she stands with the temp battens attached. Which gives an idea of how the planks will lay.
Does this look right to you experienced or "in the know" plankers? If so, great!
 If not - help?!?!?

Thanks for stopping in and for any advice !!
Enjoy! And Happy Modeling!
-Adam
- HIPEXEC, FrankWouts and cdogg
-
3
-
Gerty, John - thanks for stopping by and for the good words! Appreciated greatly!!
I can't say I have done a great deal on this one, but am trying to move it forward, even if but a little bit.
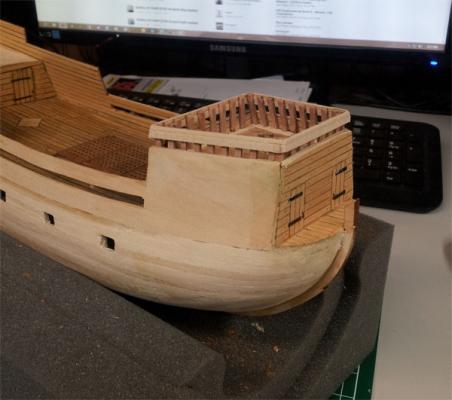
Sadly - we had a small incident. While moving something on the desk I bumped the Willie and down it went. It caught the foot of my desk just right so it spun and landed keel side - which was good, didn't snap the cutwater. Did however damage the keel. So had to do a bit of repair work before moving along. Replaced the section of damaged keel and will fill - sand - shape once the glue dries.
Once that was attached I finished adding the headrails and getting them into place.
Again - not a huge jump in progress as they are just glued into place, but once completely dry will sand and shape them a bit more and get them blended into the hull.


That is about it on the Willie for now!
Thanks for stopping in and as always -- HAPPY MODELING!!
Enjoy!
Adam
- ModelBoatMaker, 4whelr, riverboat and 1 other
-
4
-
nice work on the grating - that was one of the things I was not thrilled with on my phantom, the grates looked more like a stage compared to the rest of the boat rather than a grating!
You'll be glad you did that!
-Adam
-
Hey Kevin --- you've set a new record. A blank post!!!!!!!
It wasn't blank, it was a zen post.
If you stare at it long enough you can feel his admiration for the model and the attempts at reaching 100. The eternal struggle between man and post is vivid. His attempts to reach our inner modeler through his minimalist approach is commendable.
-Adam
- Sjors, Salty Sea Dog, gjdale and 2 others
-
5
-
That was some pretty good detail even on the smaller one1
This one is looking really nice! - the weathering is superb!
-Adam
-
I suggest we not let this thread die until Augie hits at least 100 pages...
Guard the doors - I think we are going for it....
-Adam
-
Ahhhhhh.... Budweiser and Muskrat!!!
hehehe, this crew is just too much fun!
-Adam
- Salty Sea Dog and mtaylor
-
2
-
Egads another one - can tell from the full shot there will be so much rigging, so much line! (Intimidating to newbies like myself, can picture myself in a ball on the floor wrapped in rigging line sobbing into the night! ). Great start on it though, and the colors of the ship - really fantastic!!
-Adam
-
Coors and Marmots? Sorry, from New England - these words do not mean anything to me - translation please?
 Adam
Adam -
-
Excellent Job Robbyn and Pre-Congrats on the wedding and have a blast at Sturgis and beyond!!!!
-Adam
-
some call them thongs {not to be confused with
 } I'm wearing a pair right now
Where is the do not like button, DO NOT LIKE!!!!!
-Adam
- augie and popeye the sailor
-
2
-
Excellent, must feed the Sjors!
-Adam
-
:dancetl6: :dancetl6: :dancetl6: :dancetl6:
Excellent!!
Glad to see the log up - look forward to your approach!!!
-Adam
-
-
Very very nice sir, very nice!!!
-Adam


Willie Bennett Kit has finally arrived (Title changed by Moderator)
in Wood ship model kits
Posted
Excellent Scott!
Welcome to the Willie Bennett club!!
Look forward to watching you go
Will tag along with ya!
-Adam