HOLIDAY DONATION DRIVE - SUPPORT MSW - DO YOUR PART TO KEEP THIS GREAT FORUM GOING! (Only 20 donations so far - C'mon guys!)
×


kruginmi
-
Posts
629 -
Joined
-
Last visited
Content Type
Profiles
Forums
Gallery
Events
Everything posted by kruginmi
-
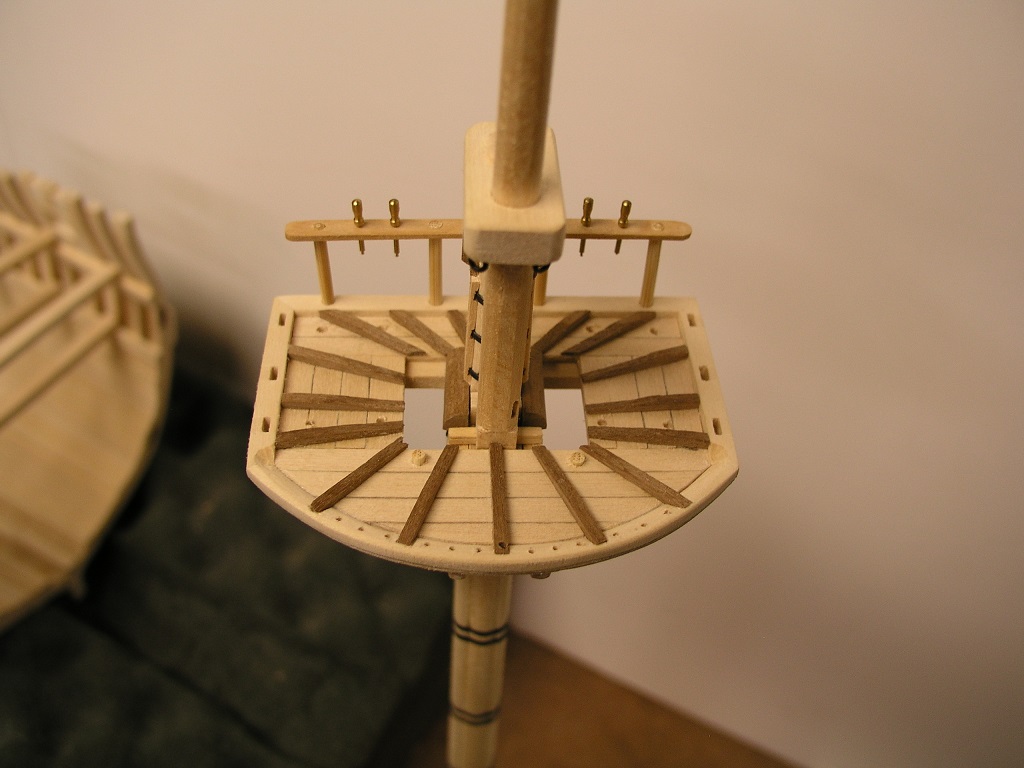
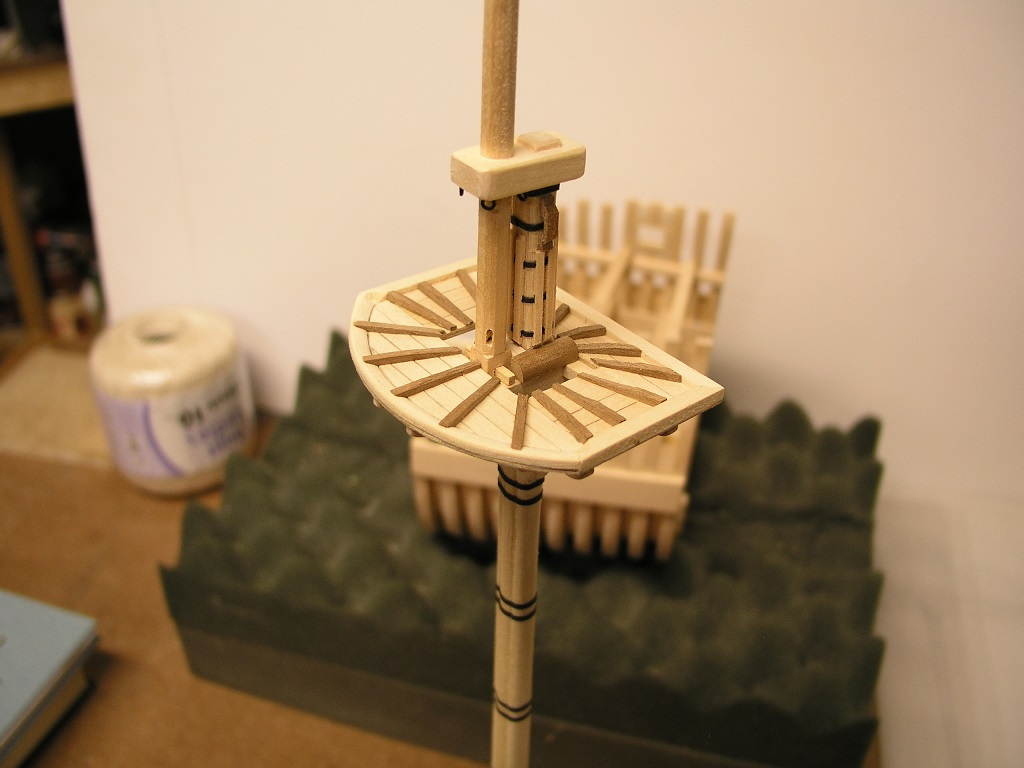
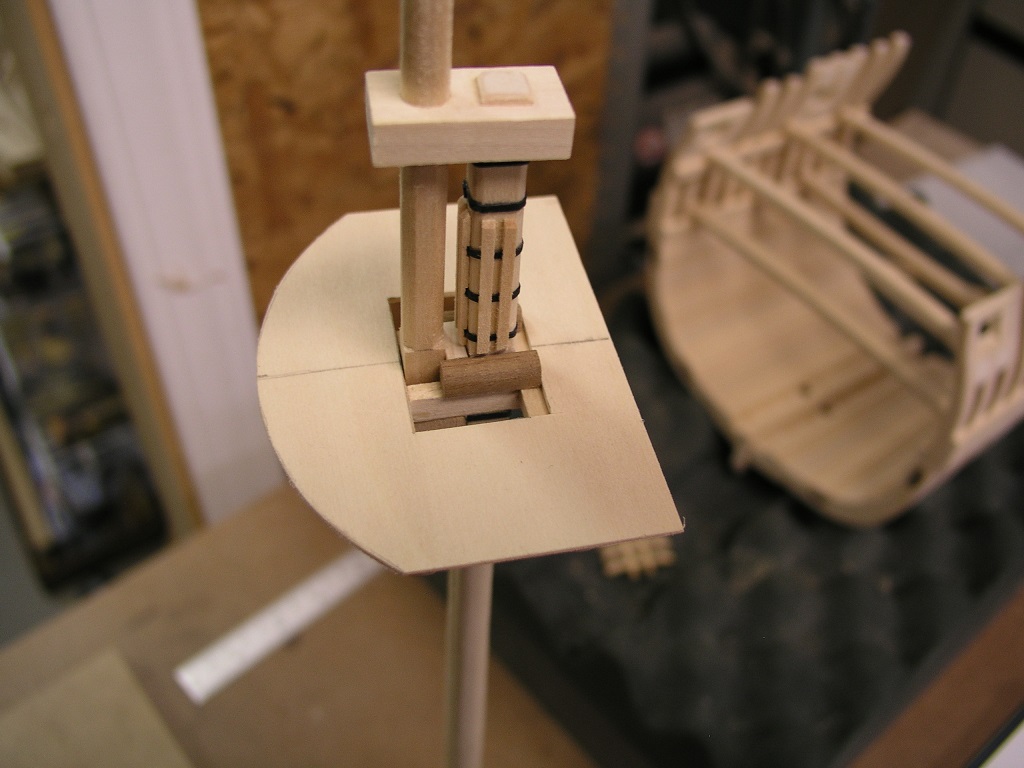
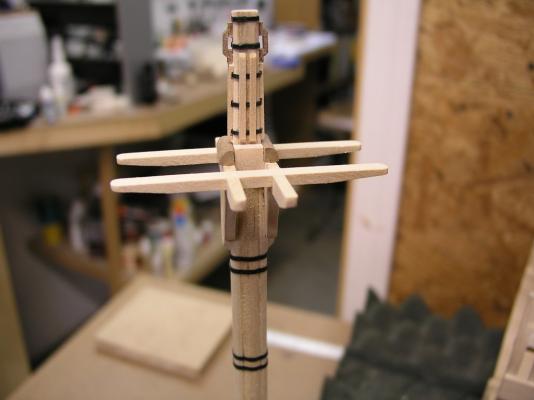
 And the saga continues.... Next up is to cut the 'square' holes for the top mast shrouds to come through the top. Cutting a square hole in basswood is not straight forward. The wood is softer so keeping crisp edges is harder. It is possible though with a little 'trickery.' Instead of drilling out and then hacking away praying for a good result, I outline where the squares need to be and use my sled on the table saw to cut out three sides of the square. I then cut out a replacement piece for the missing side and slide into place. I have the wire that will be used for the shrouds so used this as a spacer. Then with a little sanding everything ends up ship shape and perfect. Square internal holes in basswood. You might also noticed I added some trunnels through the top into the trestle trees to accurately locate the top each time I put it on. It is also important before drilling the holes for the blocks under the top that you make sure you know where the supports are! A little progress when possible. Mark

- 172 replies
-
- 10
-

-
- druid
- sloop of war
- (and 2 more)
-
Great job Mike. You are finding your Zen and working each port as its own project and it shows. A full hull certainly gives you lots of practice on most jobs. At least the Cromwell (like Druid) is 1/48th and this detail as achievable (at least for me - hah, hah). Keep it up, Mark
- 968 replies
-
- 4
-
-
- hahn
- oliver cromwell
- (and 1 more)
-
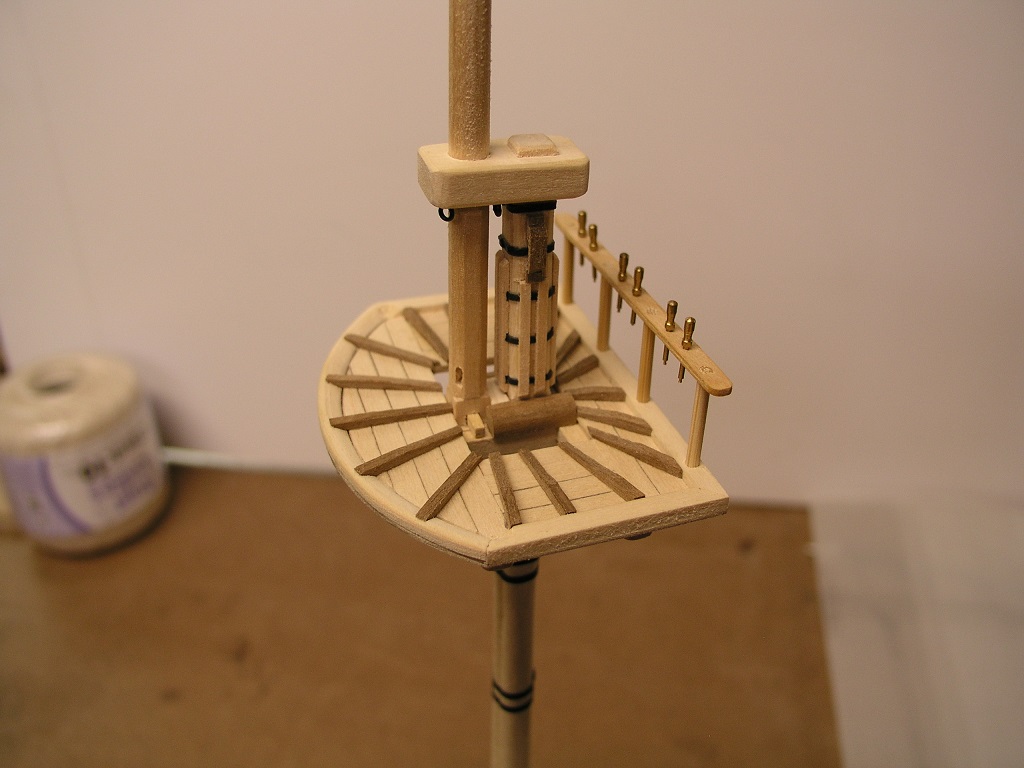
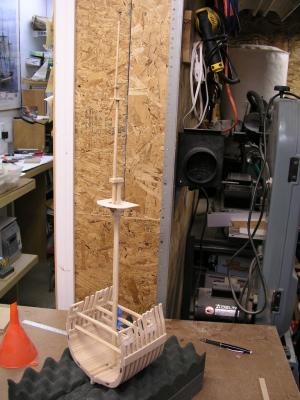
Thanks everyone, with the snow falling outside I had a bit of time in the workshop to add the railing: I used bamboo skewers for the upright posts and a piece of boxwood available for the railing itself. The belaying pins were from my spares box. Just need to drill some holes for the shrouds and necessary blocks (also for the stay - crows feet - that will remain empty). As a side note, the cheek blocks didn't quite look right to me so I removed them, put them higher and thinned them out. Mark

- 172 replies
-
- 13
-
-
- druid
- sloop of war
- (and 2 more)
-
Great Job! I love the look. And it only took four build pages to do! (hah hah) mark
- 79 replies
-
- 1
-
-
- santa maria
- amati
- (and 2 more)
-
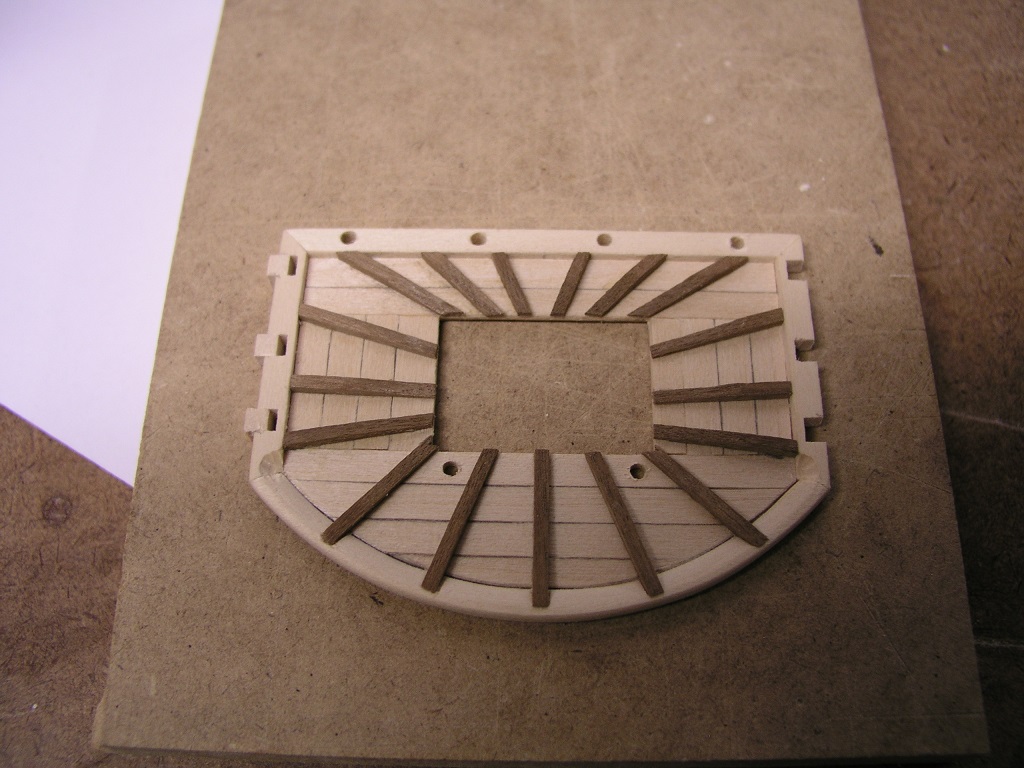
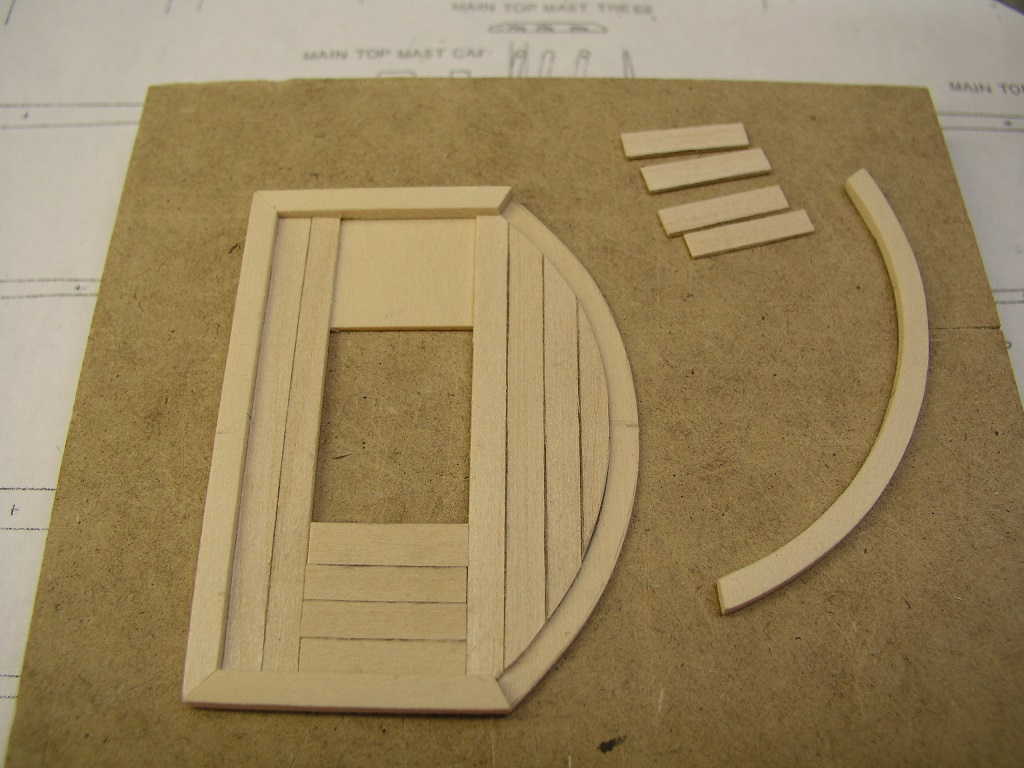
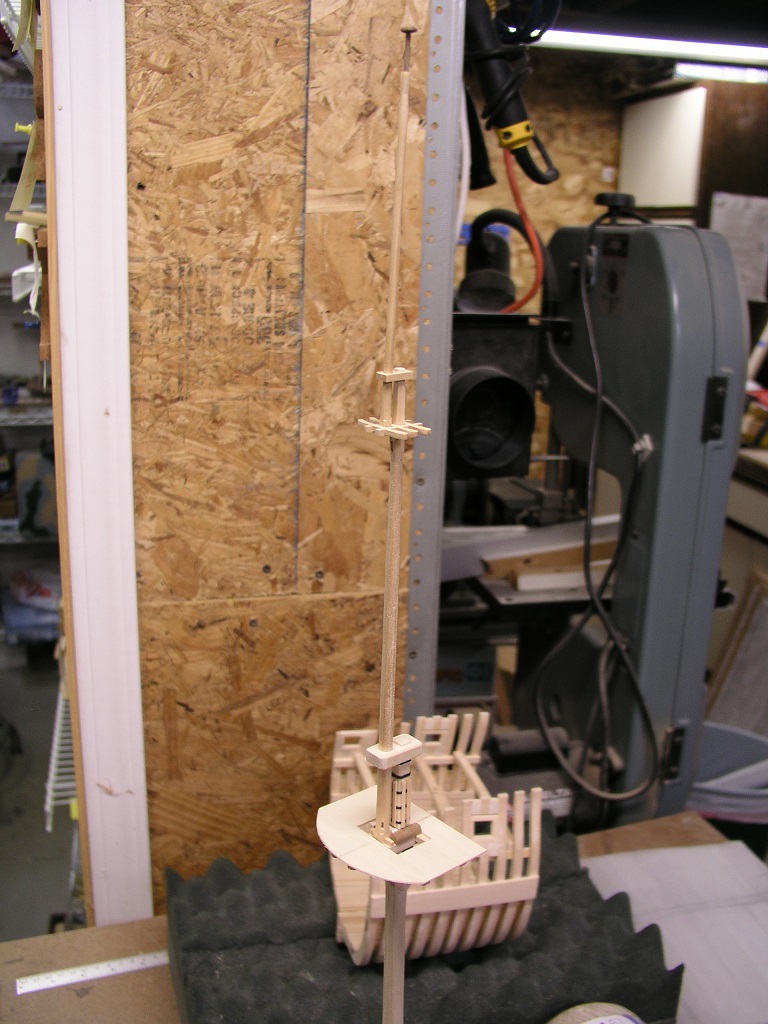
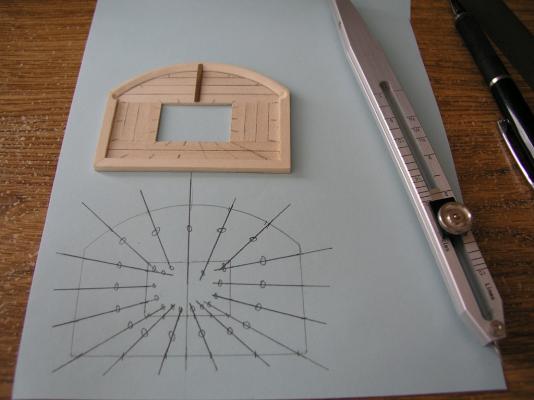
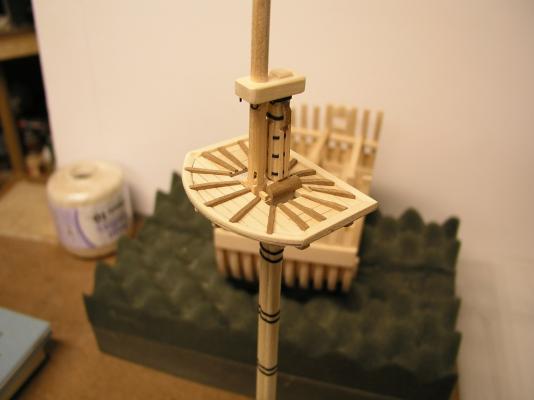
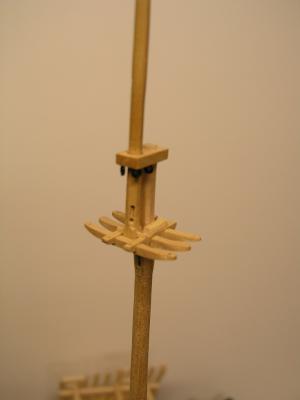
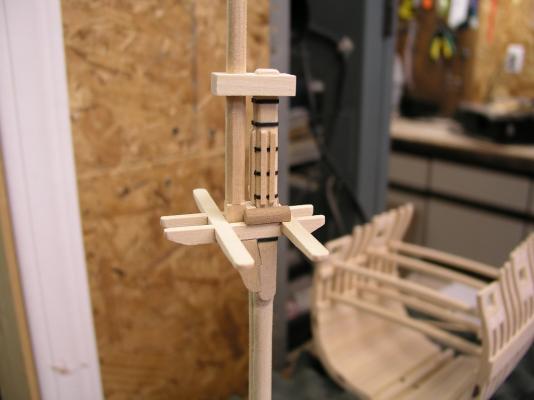
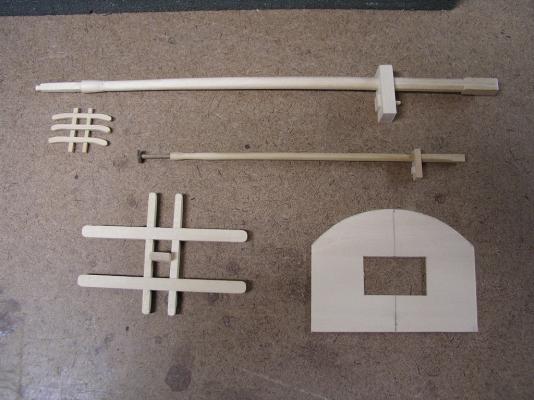
On to another mini-project all in itself, the fighting top. Lots of techniques here but I was leery of warping so I opted for using a 1/32" piece of basswood for my basic form, then glued the surrounding thicker rim before applying the second layer of planking. - again 1/32". I did keep the curved front piece free to make shaping the inner planks much easier. This whole assembly will be painted black but I still added some pencil caulking to give it the look prior to that painting. next up was figuring out where all the radiating outward supports should go. I copied the top to a piece of paper and figured out where I think they should be. My proportional divider was used a LOT. Once figured out I transferred to the top itself. Then a lot of cutting. I used a piece of walnut because I found a strip already cut that was perfect. I ended up mortising the pieces that intersect the front curved piece into the curved piece to make the fit snug with no visible gaps. I thought at first the strip I used was way more than enough, a third of the way through I wasn't so sure, sweating it until the last three pieces showed I was good. Still have the rear railing and quite a few holes to cut but visually I am happy with it: Stay building my friends, Mark

- 172 replies
-
- 13
-
-
- druid
- sloop of war
- (and 2 more)
-
Thanks Grant and Mark, here is to a better sleep tonight.....(as I get older, that broadside is usually something entirely different!) So what are cheek blocks? Only item left (beside the fighting top) are cleats around 4 feet above the deck around the mast. I will wait until the mast fits into the deck to insure I do this right. mark
- 172 replies
-
- 8
-
-
- druid
- sloop of war
- (and 2 more)
-
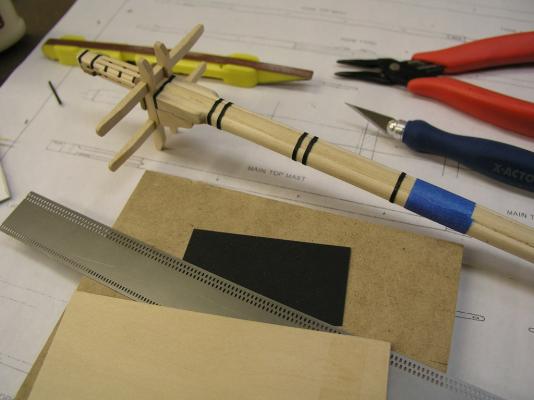
Well of course I woke up at 3 in the morning with the realization I had skipped over the cheek blocks on the top mast. Hanging on too tight? (completed at 7:30 this morning).
- 172 replies
-
- 4
-
-
- druid
- sloop of war
- (and 2 more)
-
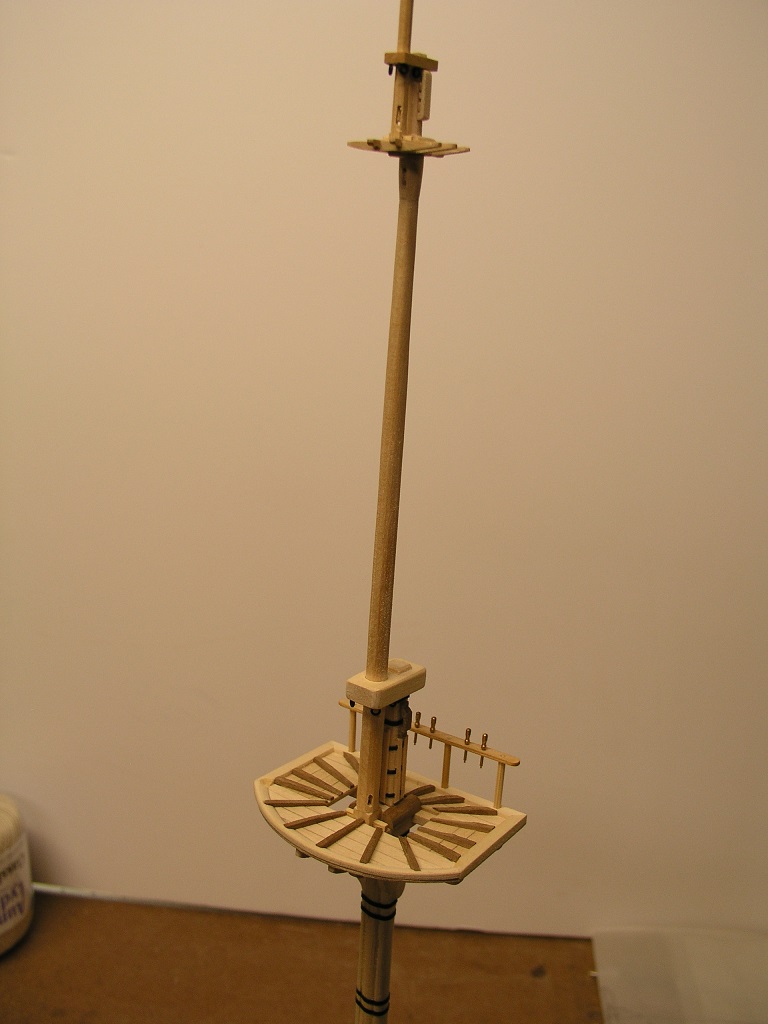
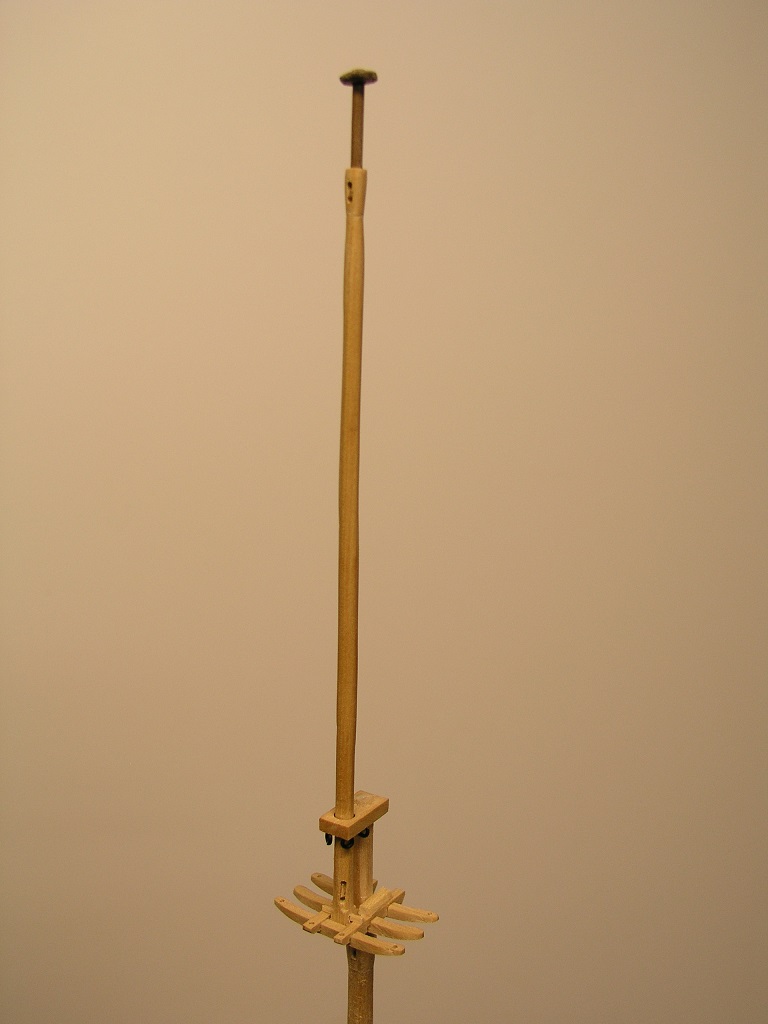
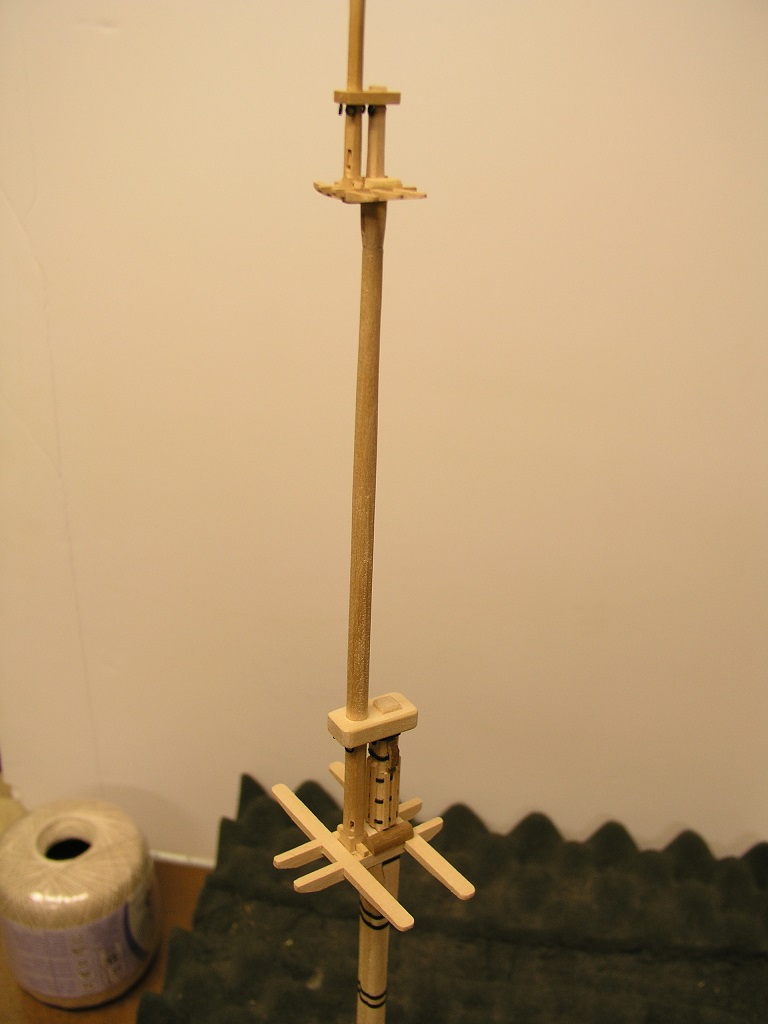
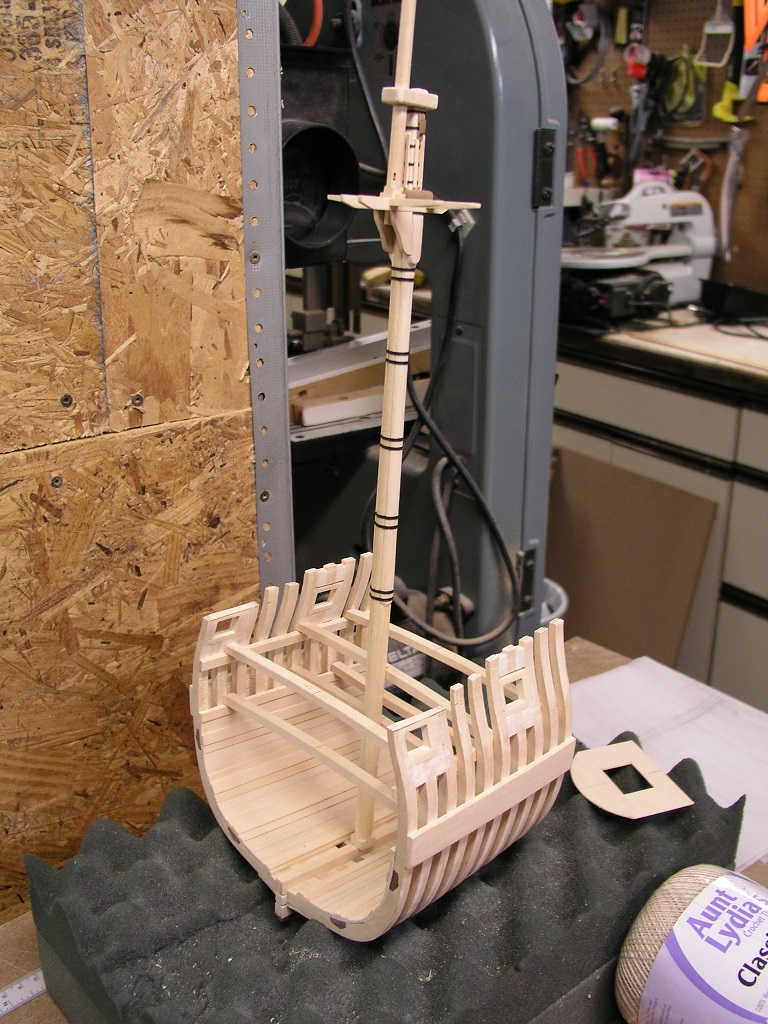
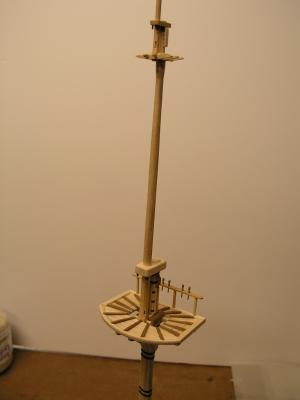
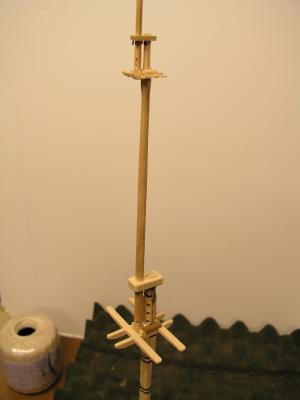
Alright, looks like the end of the Druid-X mast photo series (I think). With the completion of the topgallant mast I believe this section is done. I do not count the eventual sealing and painting. I do not think Now for a close-up of the topmast - topgallant junction. Thought this was done awhile ago, but then I remembered the bolster. Then I remembered the eye bolts, etc etc. This is actually pretty small, this close up really brings out the details (ugly warts and all....). Also a retrospective of the topmast. This has been a great learning adventure. Oh, the fighting top is still in the raw - back to the workbench and at least one more set of pics...... Mark
- 172 replies
-
- 8
-
-
- druid
- sloop of war
- (and 2 more)
-
Thanks Walter. If you can't find the magnus hitch, let me know and I can draw a rudimentary picture for you. Mark
-
Thanks everyone. I never knew I would be spending this much time on the masts. Lots of learning. Going through my notes and looking forward I realized I had not accounted for the jeer slings yet. I had already put on the drying strakes so I had to do some modifications to the as completed mast head. I came up with a solution that I believe is workable: The last (I think) requirement for the main mast itself was the iron hoops for the woolings. I used pretty much the same method as I did for the mast head. I did notice that as you wrap them around the mast sometimes they would not follow an even course, opting for climbing or descending the mast. To avoid this I first wrapped painters tape around the mast at the point the hoops are required. Once triple checked, the paper mast band was added pushed up against the tape. It didn't take too long to get the rest of the hoops into place: Stay Building my Friends, Mark

- 172 replies
-
- 11
-
-
- druid
- sloop of war
- (and 2 more)
-
Hey Walter, looking great! I was wondering if you could elaborate a little on the process you use on those ratlines (and maybe what techniques didn't work). How are you working to keep the shrouds from being pulled together, how are you making each clove hitch tighten up where you want it, how are you keeping each line parallel? Each person has their own way and that is the beauty of this sight - to share and see what techniques I can selfishly use myself (hah hah). I would put forth using a Magnus Hitch at the end of each ratline. This knot causes both lines (input and output) to face the same direction (if you have the Ashley book of Knots, #1736). Keep it up! Mark
-
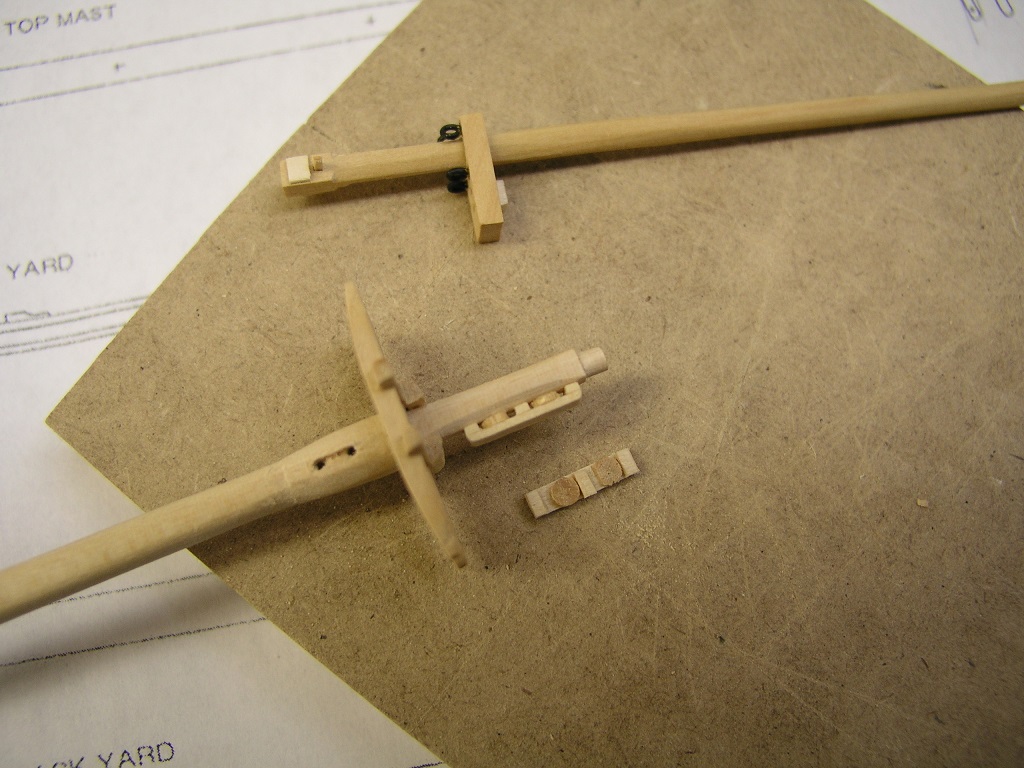
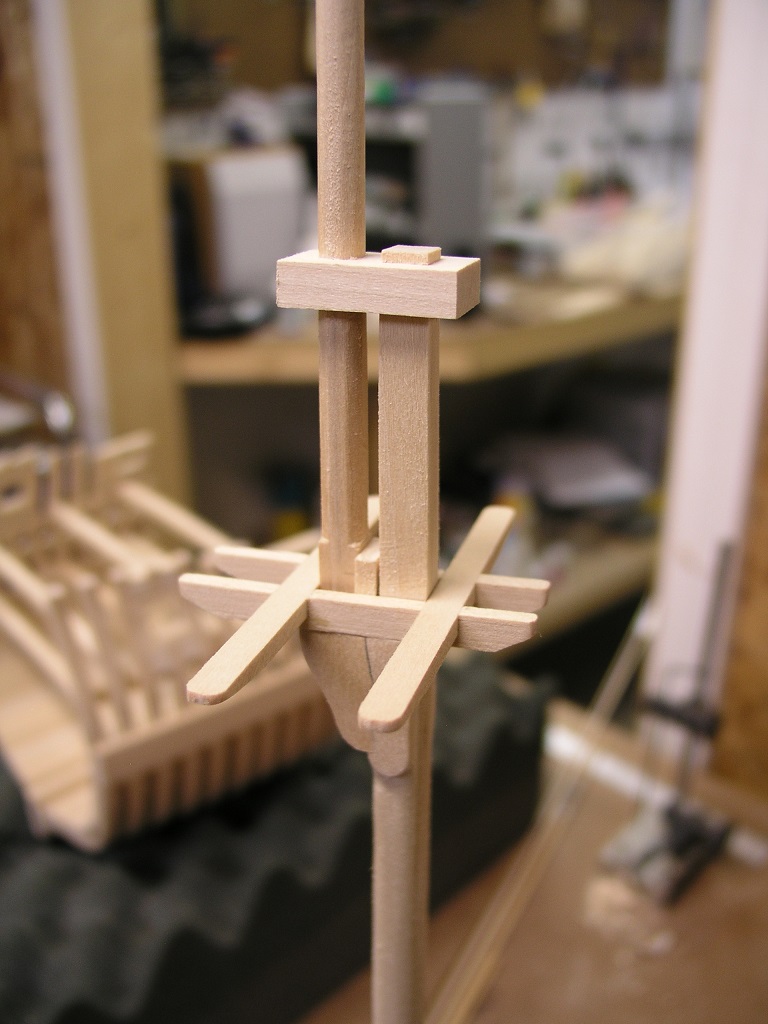
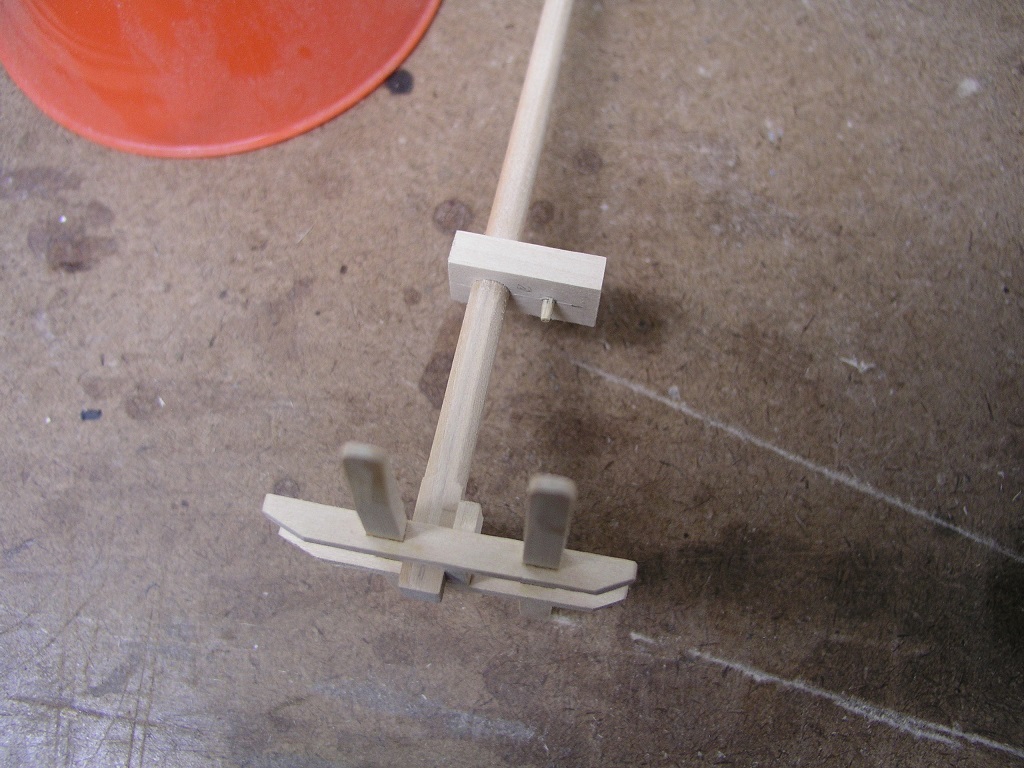
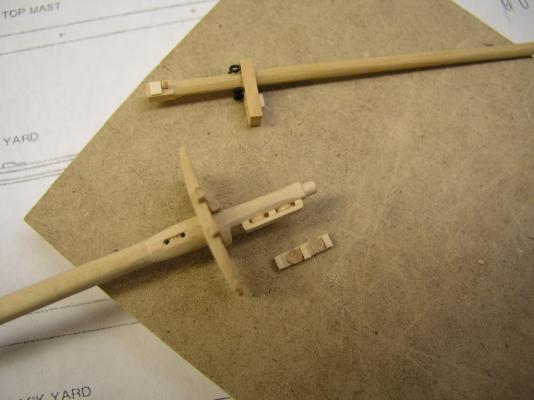
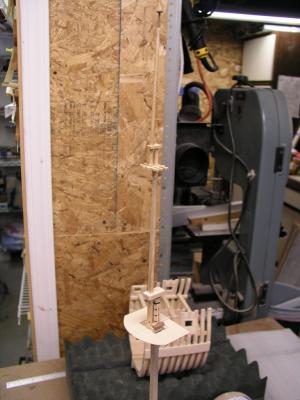
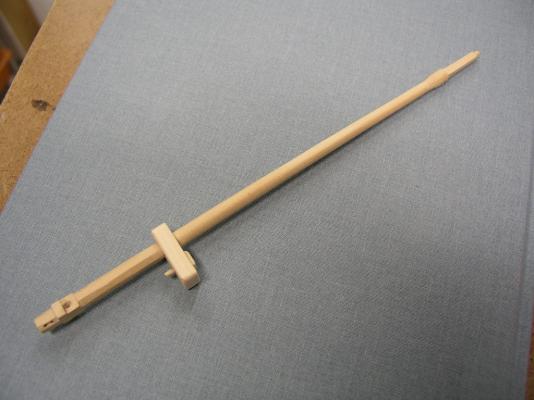
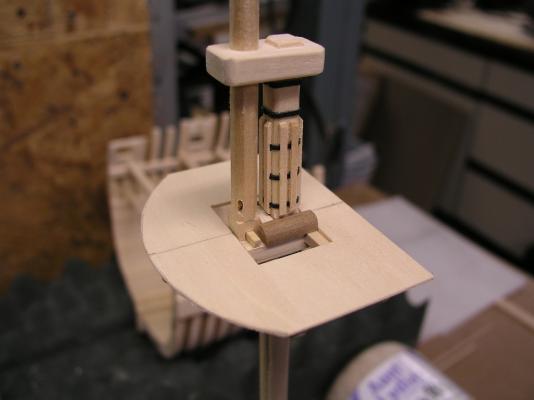
Spent some more time working away at the topmast. Not a huge leap forward in the build but visually it is really making a difference. The sheaves (3) were added to the topmast itself. Two on the bottom section for the top ropes and one in the top section. Probably still some more shaping to come. The fid was attached, the bottom section of the topmast shaped and then two 'fillers' added to insure the topmast is centered in the trestletree hole. For the sheaves I needed to figure out what size hole needed to be drilled for the rigging. I have currently selected a crochet thread for the rigging. Next up is similar treatment of the topgallant mast then focus on the platform. Plugging away, learning a ton and most importantly having a lot of fun. Stay Building My Friends, Mark
- 172 replies
-
- 11
-
-
- druid
- sloop of war
- (and 2 more)
-
I know the decision is already made but have to interject that basswood can be used pretty effectively and has a bad rap that is a bit unjustified. My fully framed Druid is 95% basswood. Now it is 1/48th scale but.....I don't think I have done a disservice by her. The smaller details which require details and / or strength (figurehead, railings) were done with boxwood - the other 5%. The original question for me was cost and availability - if not basswood it would never have occurred. However after completing it, I am very comfortable with the selection of basswood again - albeit this time with paint for some color. If you can afford it or have access go ahead and choose what you want. However, if you want to build and have budget concerns feel free to use basswood. Mark
-
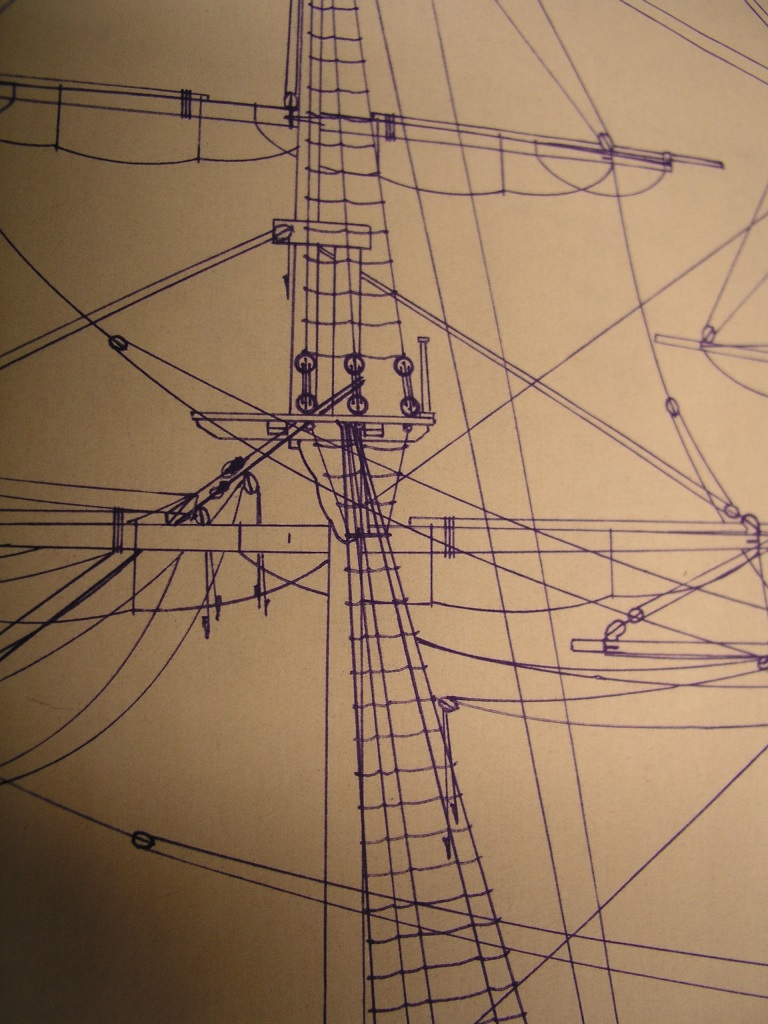
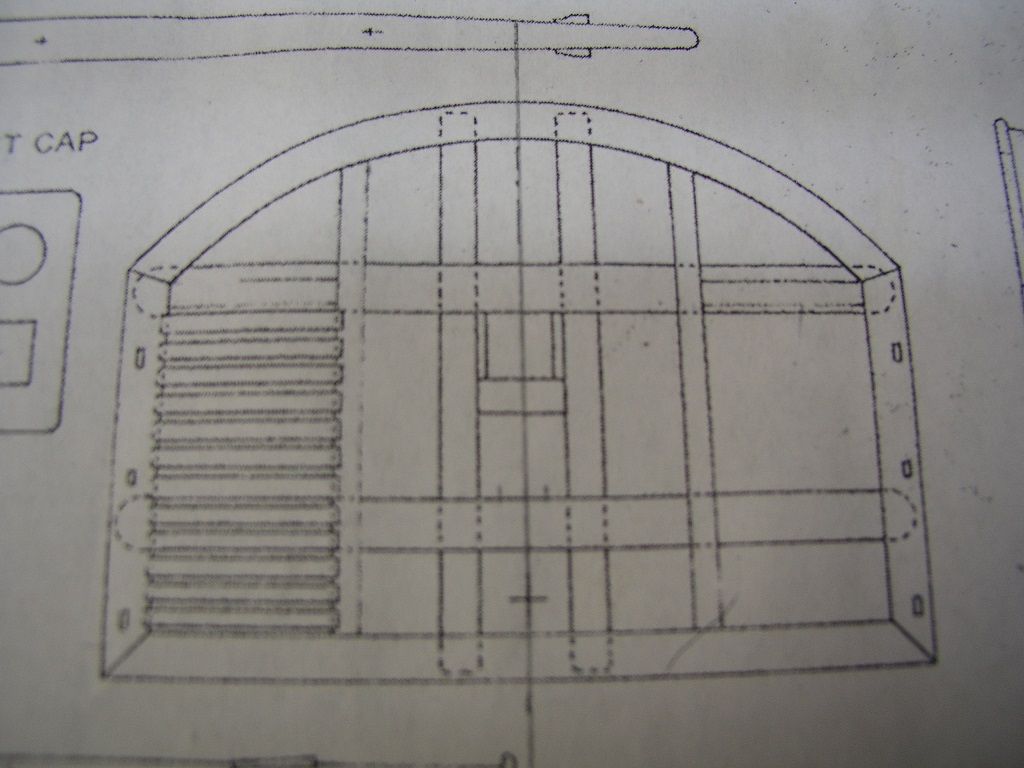
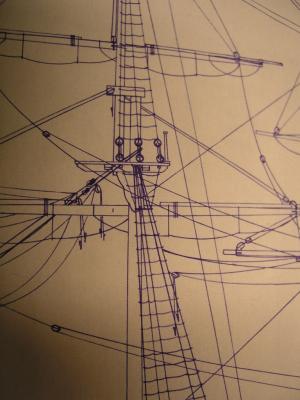
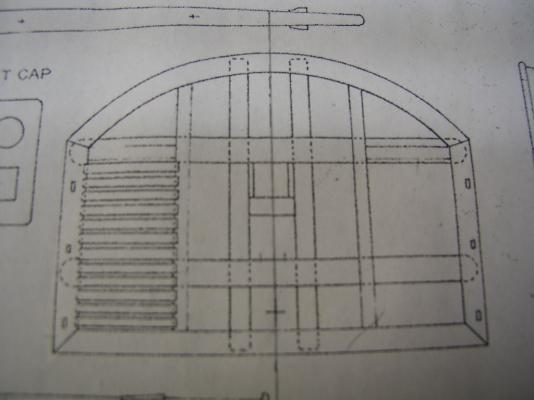
After dropping my son off this morning at 5:30 (AM!) at High School for sports stuff I decided to take the time I had and do some research on the trestle trees - I surely hoped I didn't need to rebuild these! The norm for British design during this time was to have the mast centered between the trestle trees supports (but not touching). French design was much closer to what I was seeing but....this was originally a continental ship so all bets are off, who knows how the person was trained who originally built this ship. The issue was having sufficient clearance for the shrouds through the lubbers hole. I decided to go back and re-verify I had not messed up in my construction, starting with the masting plans for the top: Now these were drawn up for the cargo ship, not the as converted British sloop of war. The hole for the mast was just that, it could only fit the mast. No more offset possible for the shrouds to clear the rear support. Next up was looking closer at the one rigging picture supplied by Mr. Hahn (for the British conversion): Again, the trestle support is seen to push up against the rear of the mast. Also the 5 shroud lines are drawn to go in front of this support. So...I didn't mess up. The question is whether or not the shrouds will clear the lubbers hole cleanly in a neat and orderly way, without applying undue stress on this support. My conclusion: Keep going as I have built. I would also keep the lubbers hold sized in the top itself as previously shown, exposing the trestle support. This was reinforced with looking at 'Historic Ship Models' by Mr. Mondfeld which shows a pic of such an example.
- 172 replies
-
- 5
-
-
- druid
- sloop of war
- (and 2 more)
-
A little work today to transform the main mast rough in into a more finished look: Added bolsters, metal hoops and then the wood strips to give ventilation to the shroud lines. I still need the fid for the the topmast and to smooth over some right angles off of the cap (not to mention some eyebolts), but it didn't take a whole lot to polish it up. I used walnut for the bolsters because I found a piece in the scrap bin that was the right dimensions. Everything will be painted black. The metal hoops was a piece of black scrap booking paper cut to size and glued on - single layer. I had originally cut the top to fit tightly to the back of the mast (and cover the underneath support). Putting the bolster in (length defined on the plans) however did not allow the top to be added. The forward part of the bolster had to allow the fid to be affixed. So.....I cut away a portion of the top inner hole for it to clear the bolsters. THE QUESTION: Is this correct? I need to pull some books and scratch my head some more. Mark

- 172 replies
-
- 6
-
-
- druid
- sloop of war
- (and 2 more)
-
Dave, Rigging was a brain buster. Armed with my spreadsheet I am totally at ease with what is needed where and that everything is totally accounted for. Wonder why this method wasn't used before for clarity.... Mark
- 172 replies
-
- 3
-
-
- druid
- sloop of war
- (and 2 more)
-
Thanks everyone. Greg - I think crazy cases come to me naturally..... The wife also had some thoughts but not necessarily case related (hah hah). Not too much concrete ideas on the case, but it will not be a solid plexiglass case. I am thinking wood corners with the sides having a reinforcing wood horizontal piece half way up. The back would be a thin sheet of wood with some sort of motif on it. Solid wood top and bottom (bottom obviously weighted). I am hoping to keep the weight at a minimum. Hopefully come spring I will be working earnestly on it. I really enjoy having the core assembly roughed in. Now as the details are built in the piece will really start to come to life. Mark
- 172 replies
-
- 3
-
-
- druid
- sloop of war
- (and 2 more)
-
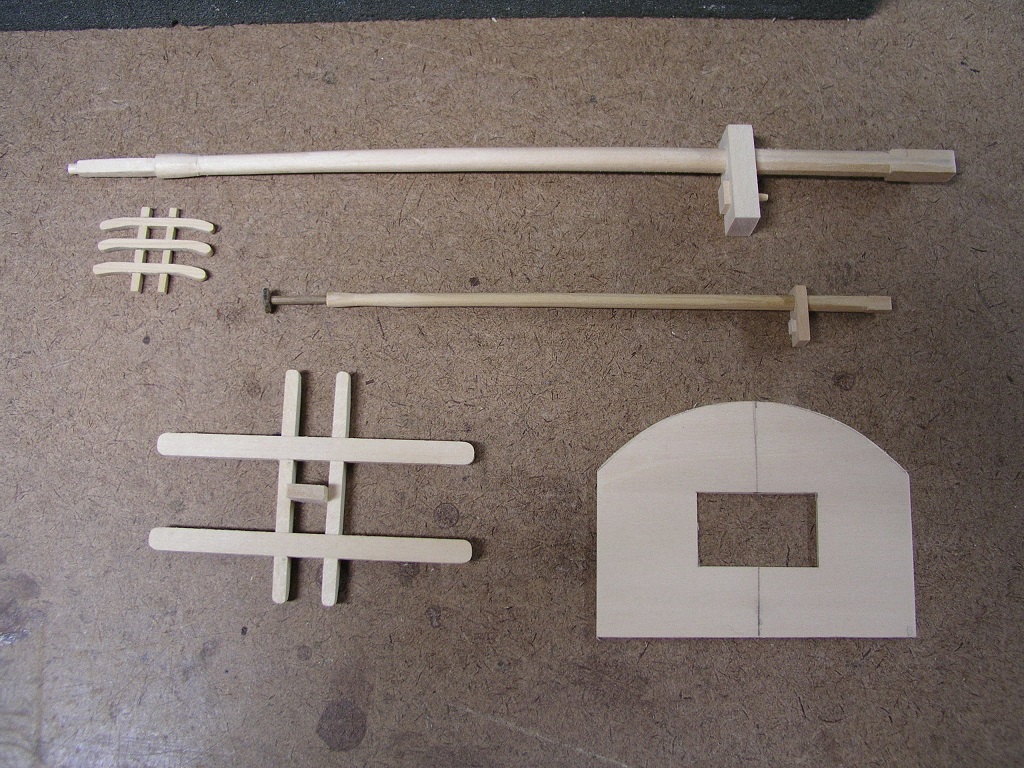
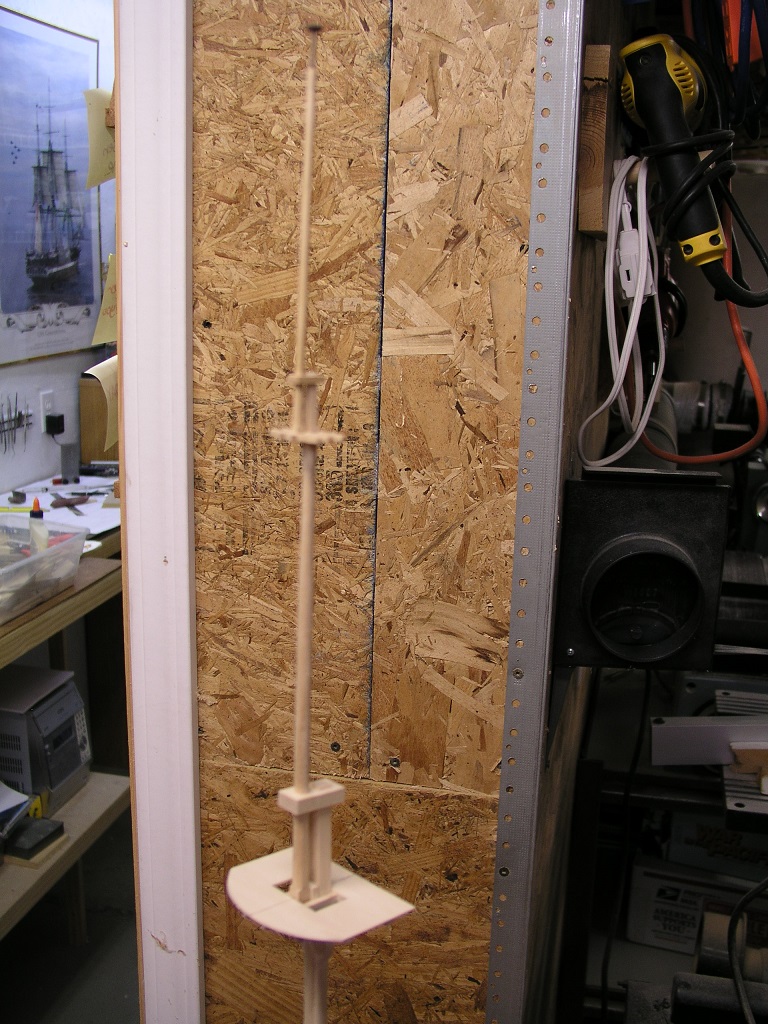
Moving up the mast I now tackled the junction between the topmast and topgallant mast: For a different method (stronger) I decided to turn the topmast portion in the cap circular for an integrated tenon. As before I glued a faux cap over this for the mirage to work. This is probably my preferred way for strength over using a dowel, but the flip side is there is no adjustment - you have to get it right the first time. With a dowel you get an alignment step possible. The trestle trees and cap were of boxwood since the size is getting pretty small. I also have cut out the initial template for the main top. Putting it all together: Put some more details on those tops (along with some sheaves) and this will actually look like a mast! Mark

- 172 replies
-
- 10
-
-
- druid
- sloop of war
- (and 2 more)
-
As always, the final decision is yours. The batten provides the look you always see in paintings and such of this great ship at a step back. I sure you are aware this should be composed of individual hammocks rolled and folded over. You are to be commended getting to this stage. My dream list has a Victory somewhere out there. Beautiful. Mark
-
BTW: My son is focused on school and on swimming right now. As you can see the build is somewhat on hold. Still hopeful for sometime this year to re-ignite it...... Mark
-
Thomas, Those would be mighty small cannon! I am not sure how much exchanging the supplied cannons with brass would help but each person is their own captain. I would also try some of the newer brass paints to see the effect you can get with the provided plastic. I am 'assuming' you would also replace the gun carriages, the table saw is definitely out for that. Can you provide some more description / thoughts of what you are thinking for the whole build? Mark
-
Thanks all. This hits the definition of what is the 'right' way. In my sense, that could be different from person to person. Brilliant? I don't know about that, some would probably say a lost opportunity. However, the old saying "I am the captain" rules all. I don't think the over all effect would have been any better. Again, lots of details to accomplish like softening the hard edges as well as battens and such. I think I have become more comfortable in this hobby, particularly after finishing the full Druid. With the Druid-X I am having a lot of fun and not 'hanging on' too tight. Should I say I am even considering ordering the blocks for the rigging? The understanding of the rigging was the big mountain for me. Mark
- 172 replies
-
- 5
-
-
- druid
- sloop of war
- (and 2 more)
-
Time for some progress. I turned towards the main mast cap. I used a circle stencil to figure out the correct diameter of the top mast at the tenon and chose the drill bit accordingly. A good snug fit that was fine tuned with some sand paper. Now I needed to work on the tenon onto the mast itself. Thought about how I was going to do it. First the result: I did add a little mast exposed above the mast cap, just like the look. How did I accomplish this? How about the following pic: That's right, there really isn't a tenon. I cut off the mast at the appropriate height, drilled a hole through the mast cap for a 1/16" dowel into the mast itself, and then finally added a faux mast piece on top of the dowel. Still a lot of shaping and tuning up, to include the metal hoops, bolsters, etc etc. However I am happy with the result at this rough in stage. Next up is the topmast to topgallant mast connections. Mark


- 172 replies
-
- 7
-
-
- druid
- sloop of war
- (and 2 more)
-
Thanks David, One of the most common questions I have gotten on my full size hull model (same scale) is why I didn't rig / complete it. Having this as a companion piece drives the answer to that question home. Also, not to make light of anyone, it will show that the hull was truly planked all the way to the keel - another common question, and having the ribs exposed was not the norm. Bringing wooden ship concepts to the masses - never a bad thing. The width of the Druid-X will make it sit very nicely on the mantel, close to the full hull. Mark
- 172 replies
-
- 3
-
-
- druid
- sloop of war
- (and 2 more)
-
Whew - after many reviews and open books spread across the table and a lot of "A-HA' moments I think I am finally over the rigging plan. These charts will be invaluable for this build. Final Tally: - 71 lines have connections to the main mast and are accounted for - 142 total blocks will be necessary to rig this thing up. - 3 to at most 5 line widths will be used. Once I get my ropewalk up and running this number will fall out of the thread choice and resultant windings. I am not putting on stud sails / booms - and so no lines above reflect this option. My latest 'senior' moment was figuring out why the ratline shrouds were 10" line, that is huge. Well, finally had the light bulb and realized the line dimensions were in circumference and not diameter. So this meant a 3.5" line which makes sense. Now to think about cutting some wood. Mark
- 172 replies
-
- 4
-
-
- druid
- sloop of war
- (and 2 more)