HOLIDAY DONATION DRIVE - SUPPORT MSW - DO YOUR PART TO KEEP THIS GREAT FORUM GOING! (Only 20 donations so far - C'mon guys!)
×


kruginmi
-
Posts
629 -
Joined
-
Last visited
Content Type
Profiles
Forums
Gallery
Events
Everything posted by kruginmi
-
 Definitely a fan of another Basswood modeler! Looks like you are off to a solid start and have a great subject to model. I will be watching as she comes to shape. Mark
 -
Siggi, excellent job! Very enjoyable build to read through and I really like the colors that you have brought to bear. I have never thought I would actually paint any of my models but with your results I am seriously thinking about going in this direction. Keep up the updates. Great idea also to build just a partial ship for size constraints. I think 1:48 is the best for my skillset and had wondered how to tackle anything bigger than a 16 gun sloop. A good solution with great execution. Mark
-
Nils, looking great as usual. Sails have always been that off in the distance learning thing. I really enjoy your result and will use it to inspire me to add sails to my current cross section. Sails really bring the ship to life. Mark
-
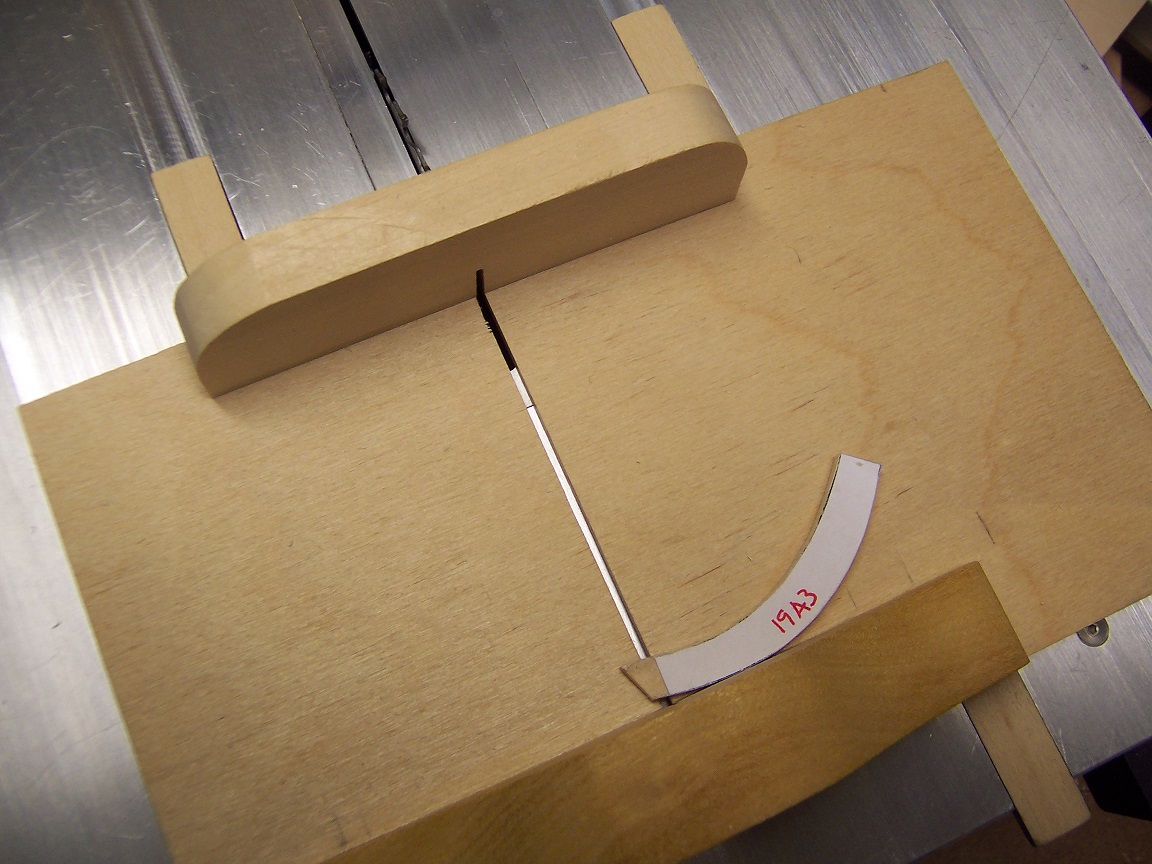
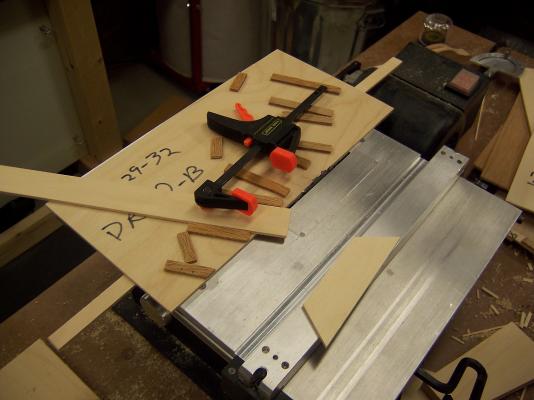
For a more in depth description of my sled see: http://modelshipworld.com/index.php/topic/3191-hms-druid-by-krug-148-hahn/?view=findpost&p=191005 Mark
-
I of course need to add the exclaimer - SAFETY, SAFETY, SAFETY. My saw blade is set to just clear the height of the wood and I always keep my fingers clear of the blade path. I use push down blocks, clamps (when possible) and always try to set the wood to be trimmed against the back stop to act as a support and solid point of contact. That being said, the sled cannot be beat. As said previously, 90% of my straight trim cuts are done with the sled. Further note, if the cut I am making produces scrap wood in excess of the blade width I will either insure that scrap is held down itself or I will trim off board prior to the final cut. I will not put my face too close with a possible piece flying off (safety glasses always please). Lou - of course centerline: just hadn't worked my brain that far ahead. One of my big lessons learned over time is that clamp power does not equal accuracy. Before I would use anything to insure rock solid clamping but with time I realized solid support and accuracy came with proper preparation. With the cross brace defining proper width, measuring the proper height of the frame and centerline defined that should define where to glue to the base, not the base itself (though of course it should be close).
- 172 replies
-
- 1
-

-
- druid
- sloop of war
- (and 2 more)
-
Grant - I do believe the sled is more accurate than the disc sander. I am not pushing the material into the sander, but positioning it exactly as I want on the sled before cutting. Greater control (the piece in question never moves by itself). Guaranteed 90 degree angle. Also no possible rocking or wobble on the join end resulting from inserting or extracting the piece from the sander. Lou - Can't figure out what you mean by c/l and am 'assuming' you are referring to my cross brace at the top of the frame. In my previous Druid I had noticed even with all the effort of cutting an accurate jig for the base being off a millimeter here or there (or more) was easy to do. This resulted in frames being slightly compressed or pushed out. This was accounted for in more sanding of the whole hull. This just seemed a natural solution to keep everything trued up. My goal is not to clamp to the jig but it should just slip in and glue (once assured it is centered). Mark
- 172 replies
-
- 3
-
-
- druid
- sloop of war
- (and 2 more)
-
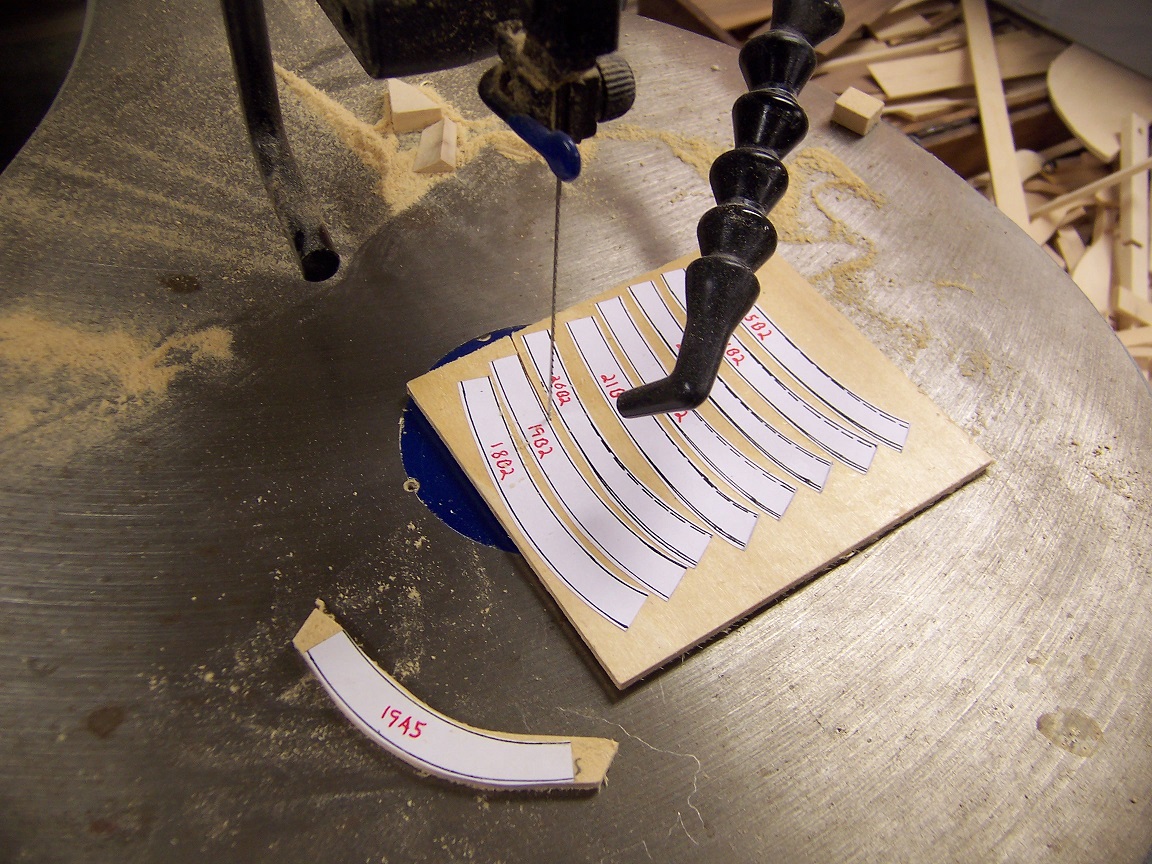
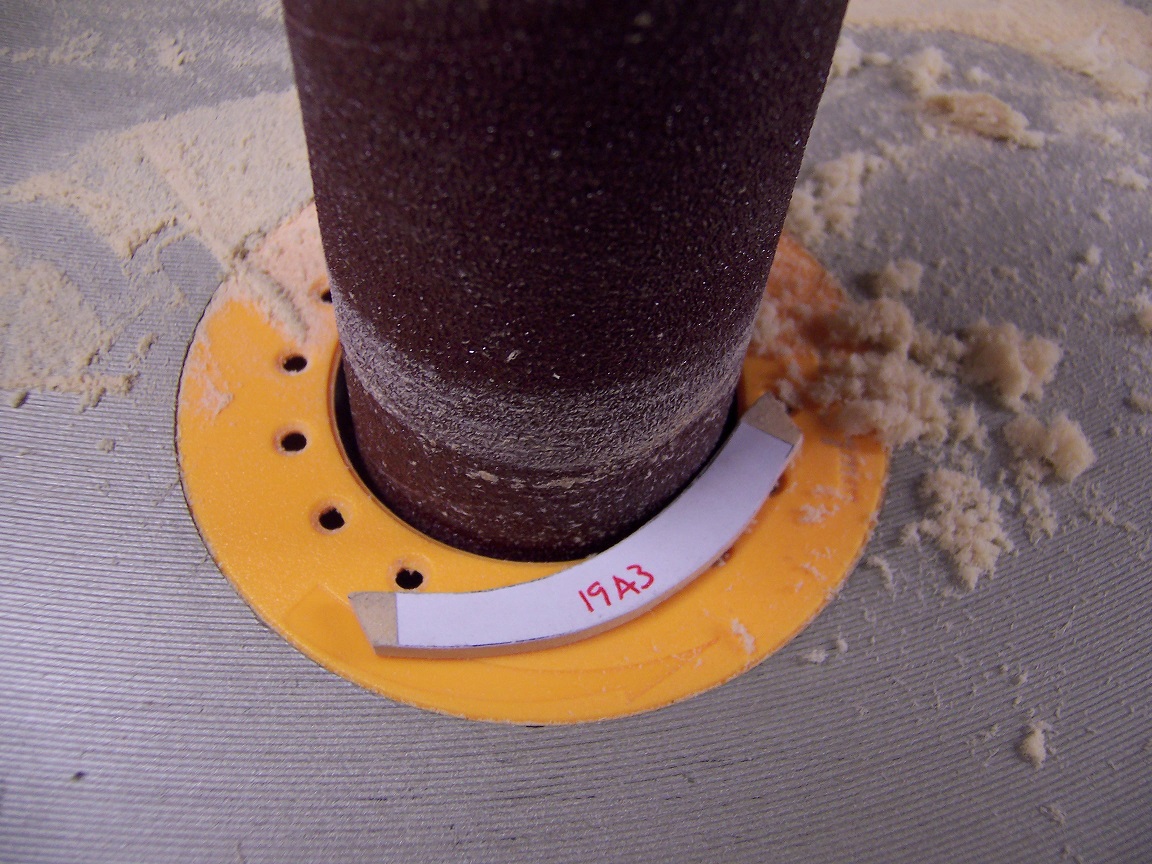
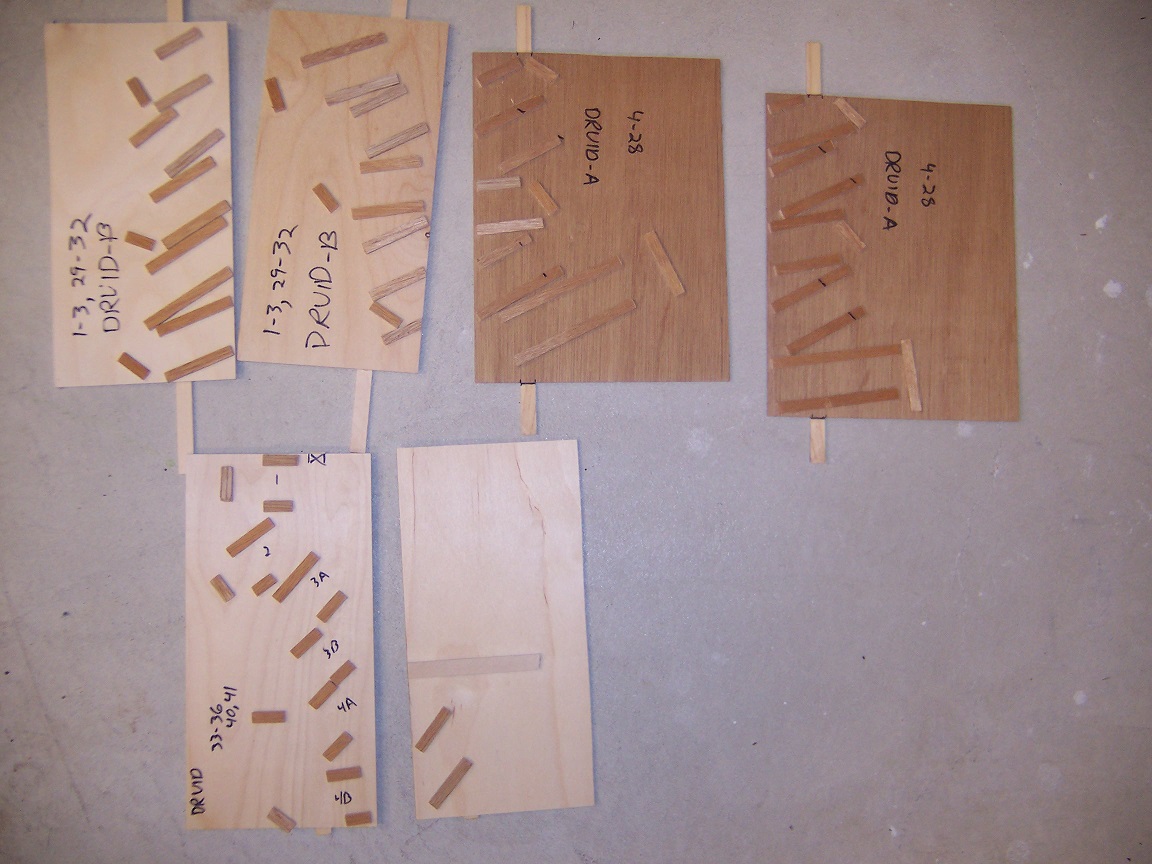
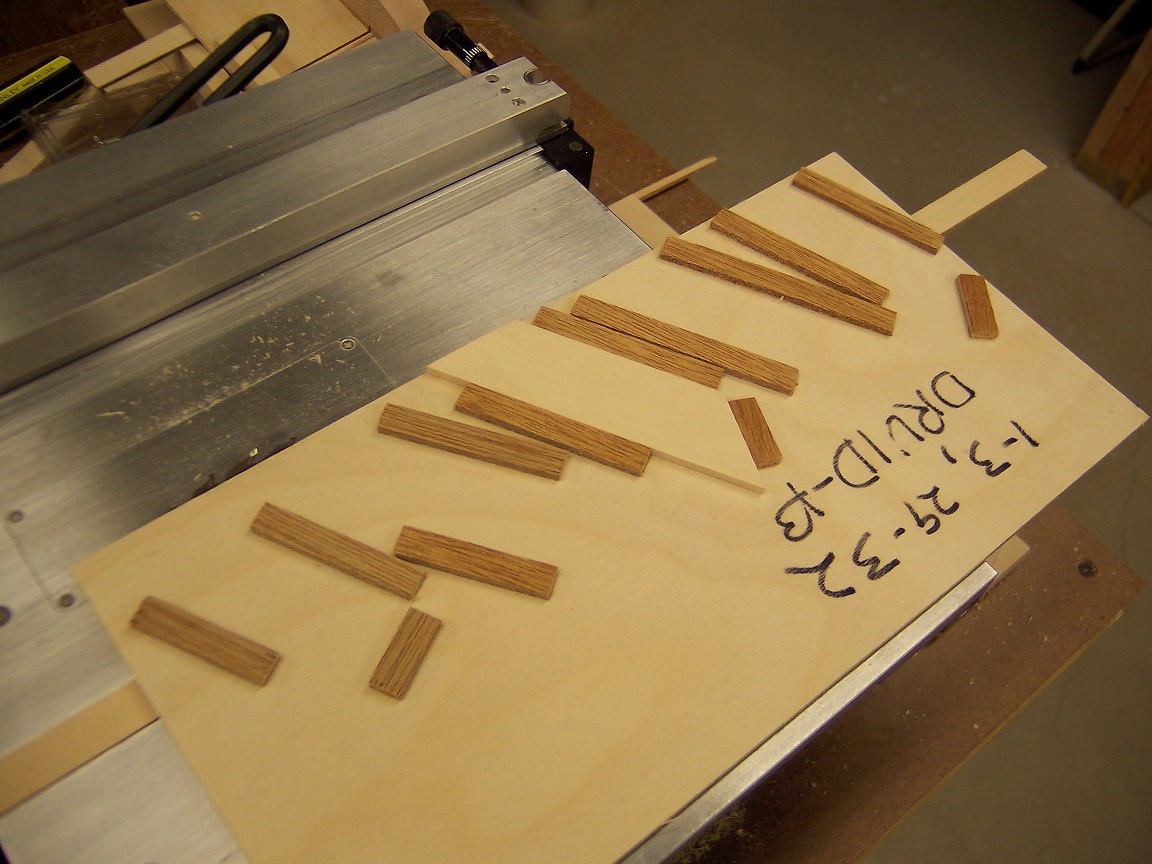
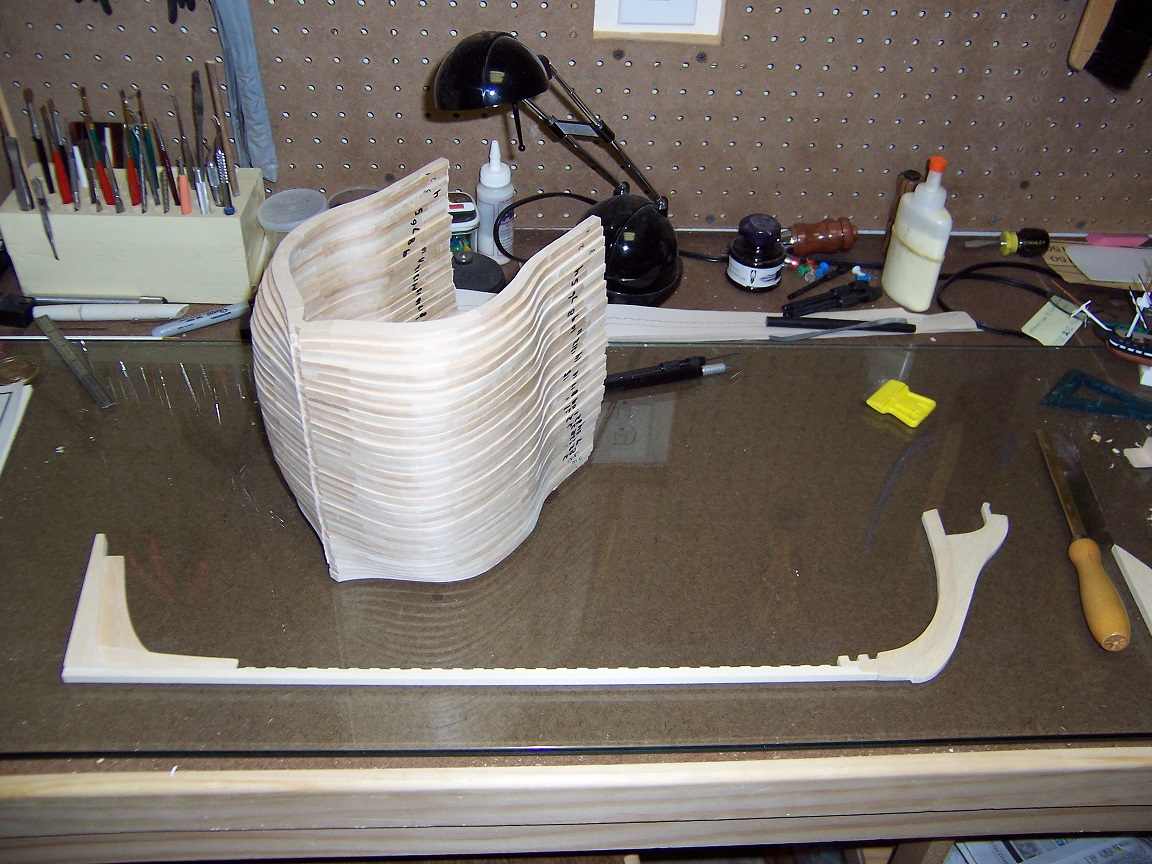
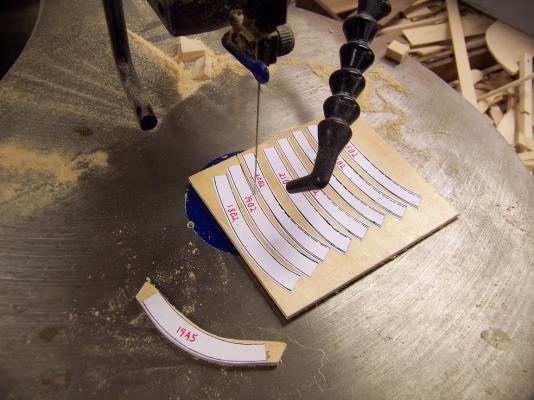
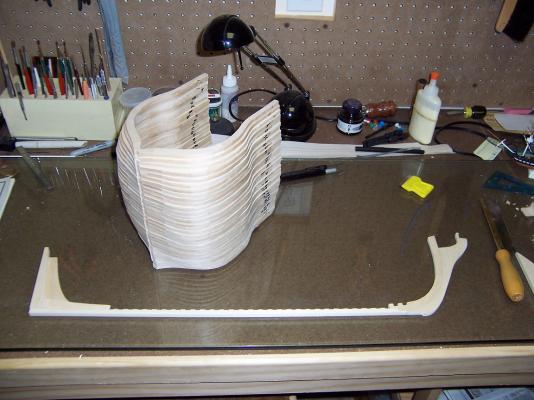
As we say in the Army, no plan survives first contact and it was proven true once again. After rubber cementing the futtock templates to the Basswood sheet (grain oriented correctly) I cut each one out with about a 1/16" buffer, which was sanded to shape on the drum sander. For the joining edges I used my sled on the table saw for precise angles (match the cuts). Guaranteed straight and perfect 90 degrees. I could shave off a 1/64th safely using this method. The first layer was finalized (paper template removed) and glued together piece by piece over a copy of the frame (with wax paper). Then I finished each piece of the second layer and added each one separately to the existing finished layer. I had thought of making the second layer independently and then joining both whole layers together but the piece by piece looked to be the better and more accurate solution. In the following pic I was using the second layer pieces as clamp aids for the first layer. After everything dried I did a gentle sanding by hand of all the surfaces. I finished frame 19 first (second one in) since it will be totally covered up. After I am confident in my technique I can then do the exposed frames of 18 and 27 (one side exposed each). Next up is frame 26 so I can also start working on the base jig and get that trued up. With everything going on, hope to have the skeleton complete and setup during Christmas break. Very happy with this approach. More time than with the original Druid but a lot less wood. Mark


- 172 replies
-
- 14
-
-
- druid
- sloop of war
- (and 2 more)
-
Chuck, I really haven't had that much trouble keeping the edges sharp. I use sharp tools always and do a last swipe on the edge with sandpaper to eliminate most stray strands (if any). You definitely don't want to sand or anything else when Basswood is wet / damp - definitely fuzzes. So no prep other than to insure the wood is dry. I buy most of my pre-milled stock at the local hobby store in 3" by 24" by thickness planks as I need it. As I said before, I enjoy working with basswood. If it wasn't around, the Druid would not have been built. Not for everything (finer details are boxwood) but 95% of the Druid is Basswood. I will be experimenting this time around with different stains to get some more accurate colors (such as the external hull planking). That should be interesting. The current thought is once again, 95% of the cross section will be Basswood. Mark
- 172 replies
-
- 5
-
-
- druid
- sloop of war
- (and 2 more)
-
Chuck - the Krug favorite: basswood. BTW: Currently watching Dirty Jobs as he works on the Star of India. I used to go to San Diego a lot in a previous job and was lucky enough to actually attended a San Diego Ship Modelers Guild meeting. You guys are pretty lucky and motivated!
- 172 replies
-
- 1
-
-
- druid
- sloop of war
- (and 2 more)
-
Totally agree Antony on the added detail. As a companion piece it will add a lot based on the experience I have had on the comments offered to the full Druid. At the very least being fully planked externally (and coppered) I will hopefully get less questions about if ships were normally open on the bottom.... This afternoon I get to make cookies with my four year old so further work will have to wait (single parenting this weekend). Mark
- 172 replies
-
- 1
-
-
- druid
- sloop of war
- (and 2 more)
-
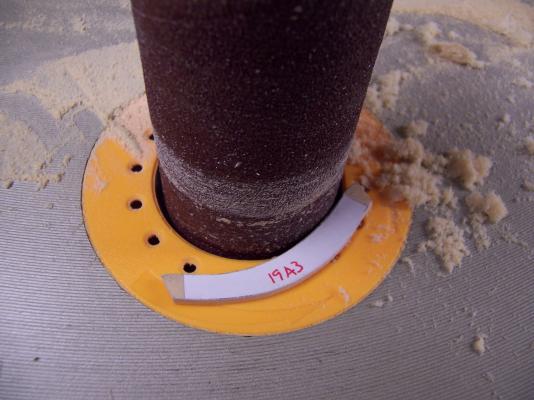
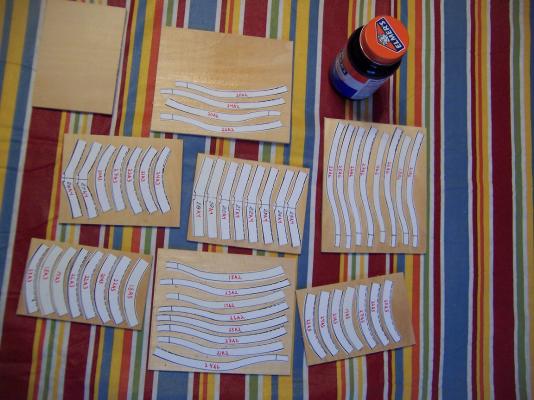
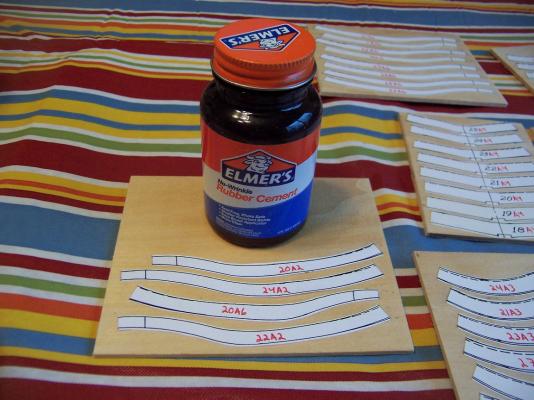
You make progress when you can. I have affixed the futtock templates for ten half frames using around one and a third boards (3 inch by 24 inch, 1/8 inch thick). For comparison sake, using the expedited method created two half frames per board length if memory serves correct. Many different techniques that probably vary with wood type, but for basswood I evenly apply a coat of rubber cement to the wood and allow to dry, usually around 5 minutes. Then I apply a second coat and apply the paper templates to the wet surface. You have around 5 seconds of maneuver time to slide them around before I apply pressure from the center and rub outwards to insure flat and totally affixed. After getting the other ten halves affixed I will rough cut out using the scroll saw and cut the mating joints using the Byrnes saw with my sled. Mark
- 172 replies
-
- 8
-
-
- druid
- sloop of war
- (and 2 more)
-
Sorry to hear about your troubles Kevin (but congrats on the new saw). I would suggest a scratch is not an all or nothing opportunity. Originally due to cost I did the Druid using basswood which is relatively cheep. Since starting I have no problems with the wood and have enjoyed the experience. Get a set of plans (maybe do a cross section from scratch when this experience is complete - even if the plans are of the whole ship). Just think of an opportunity that you like and go for it, even with basswood. It will help the confidence and skills before going onto a full masted hull. Mark
-
Lou, great to hear from you! You certainly have power packed comments so I inject my answers in red: How is the Lady Anne coming? The Lady Anne awaits sitting on the shelf in my workshop. I still intend on getting back to her someday. Part of my issue is where to put her once she is complete. I need a couple more kids out of the house….. I finished my Harvey - guess I should update that log.... Yes you should. Beautiful workmanship and you are holding out on us! I am hoping to do a couple of Hahn's models after I retire as well, I have the Cromwell and Confederacy plans – I have really enjoyed my experience. I have all of his plans and am sure a couple more builds are in my future from them. I have had my eyes on the Confederacy but with the kit being available I am thinking of choosing another one. They certainly build big! At 28” high, the masted Druid would be quite the handful to move around. did you do the full model using separate futtocks also or did you use the traditional method? if you did the stacked frame blanks can you give some comparison for both methods? I was wondering how it would be to build the frames up using the futtock method but still leave the extensions on and use the upside down method for framing. For the full model I used his jig for speed (plus it was easier). It does use a good deal of wood but he is very open that he used it because he had a lot of wood on hand. My current method will definitely be slower but will deliver very close to the same finished result. I really like the upside down base because it defines a very rigid reference line to measure specific points to both sides with certainty (deck clamps, gun ports, etc.). Once you have the keel centered and leveled, you can be sure both sides are good. More on that later in the build. Are you going to build up the frames in two halfs and then glue the halfs together or are you going to layer them up as you build up each futtock? I am currently thinking about gluing the separate halves together once complete. However I will try it out on the first frame and see how that goes. Also how did you determine where to section the futtock lines? Did you use the frame blank drawings from the plans or use the TLAR method? I took the lines off of the jig locations as reference points. As an American built ship, I certainly have the ability to do whatever I want. Those crazy colonials did not subscribe to rigid systems – especially with cargo ships. Learn, Learn, Learn, try, try, try. Always a new discovery but you have to build! Mark
- 172 replies
-
- 1
-
-
- druid
- sloop of war
- (and 2 more)
-
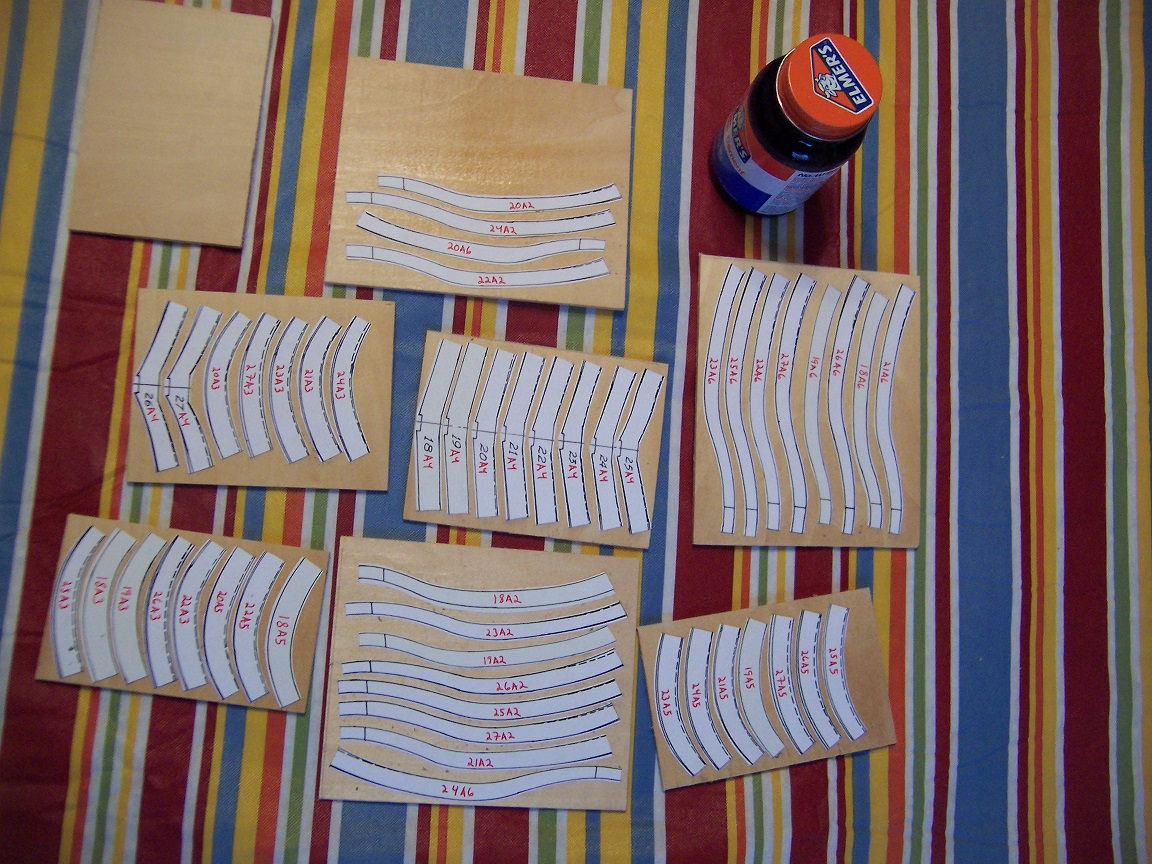
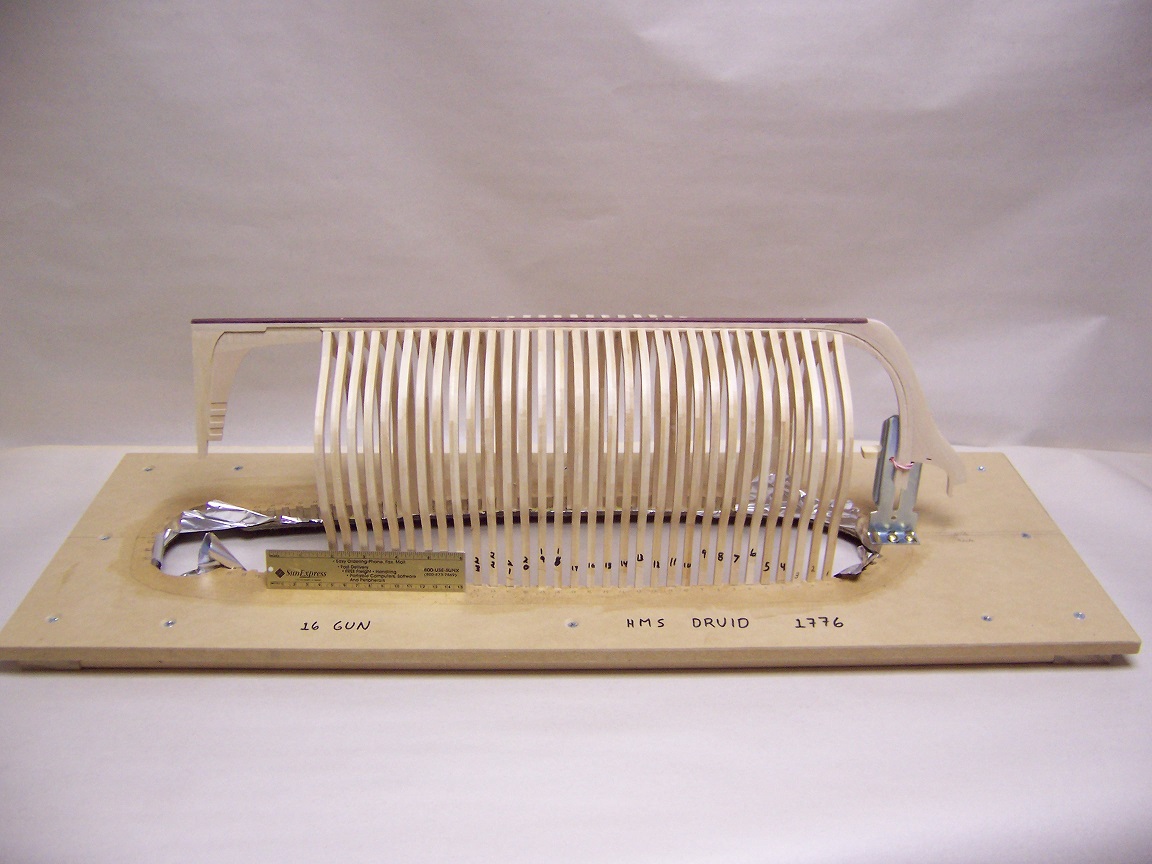
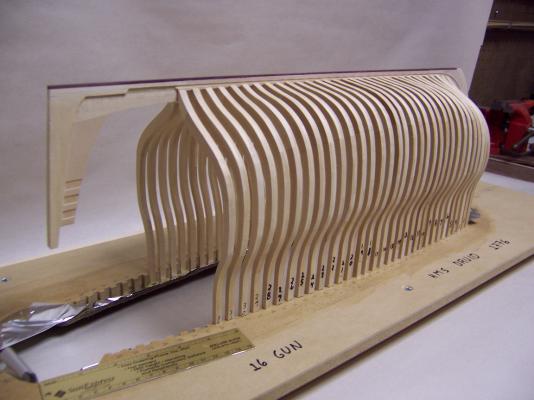
Now to get down to business - the frames. I created four copies of each of the frame patterns. Two of the copies were allocated to creating the patterns for the two layers of each frame. I intend to keep a millimeter or so of extra wood on either side of each piece. Once the pieces are rough cut to their dimensions I will cut the join edges using my sled on the Byrnes saw. Then the frames will be glued together individually over the third plan (with wax paper). Once each half is complete, the fourth plan will be glued onto the resultant frame before final shaping. I will super detail the exposed frame face of each side of the cross section, but will leave the rest as shown. With full planking the others will not be seen. More pics to follow showing that. You can see I am still using the baseboard (built upside down). Hope to have the first frame together this weekend. Stay Building my Friends, Mark


- 172 replies
-
- 7
-
-
- druid
- sloop of war
- (and 2 more)
-
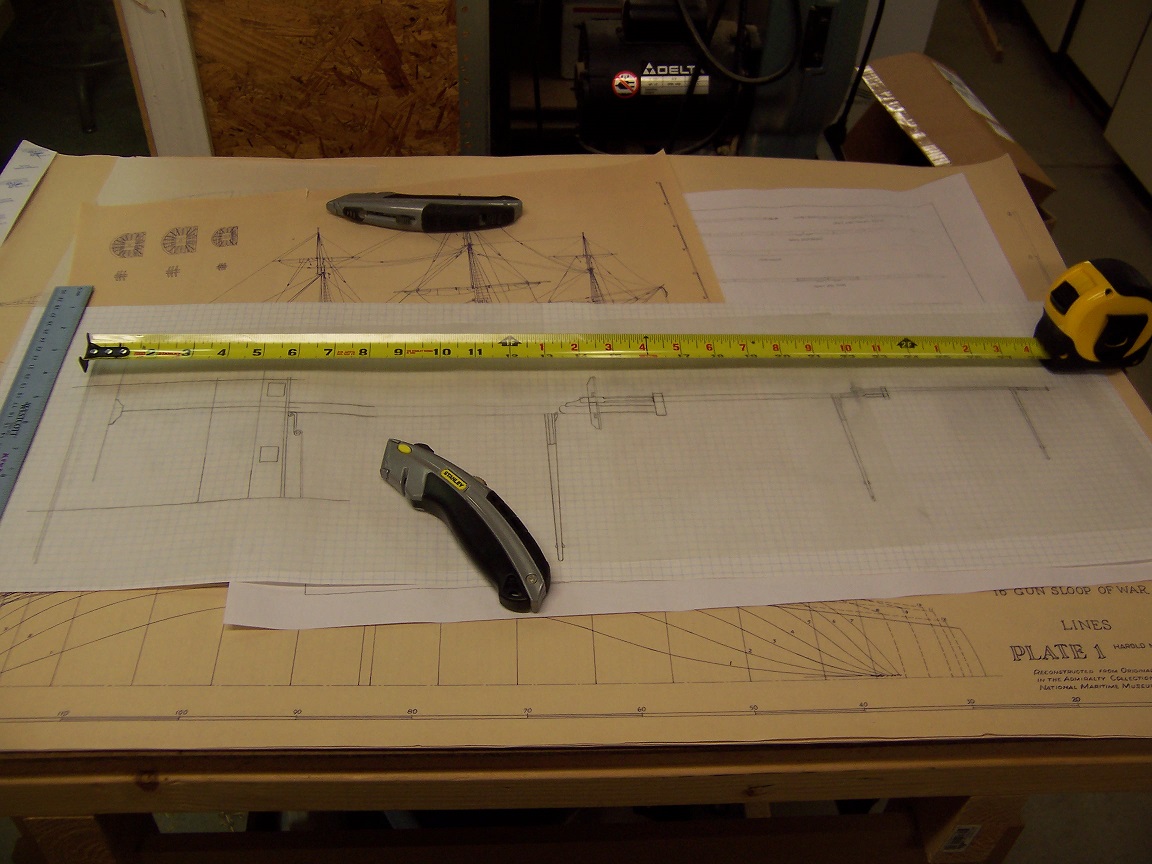
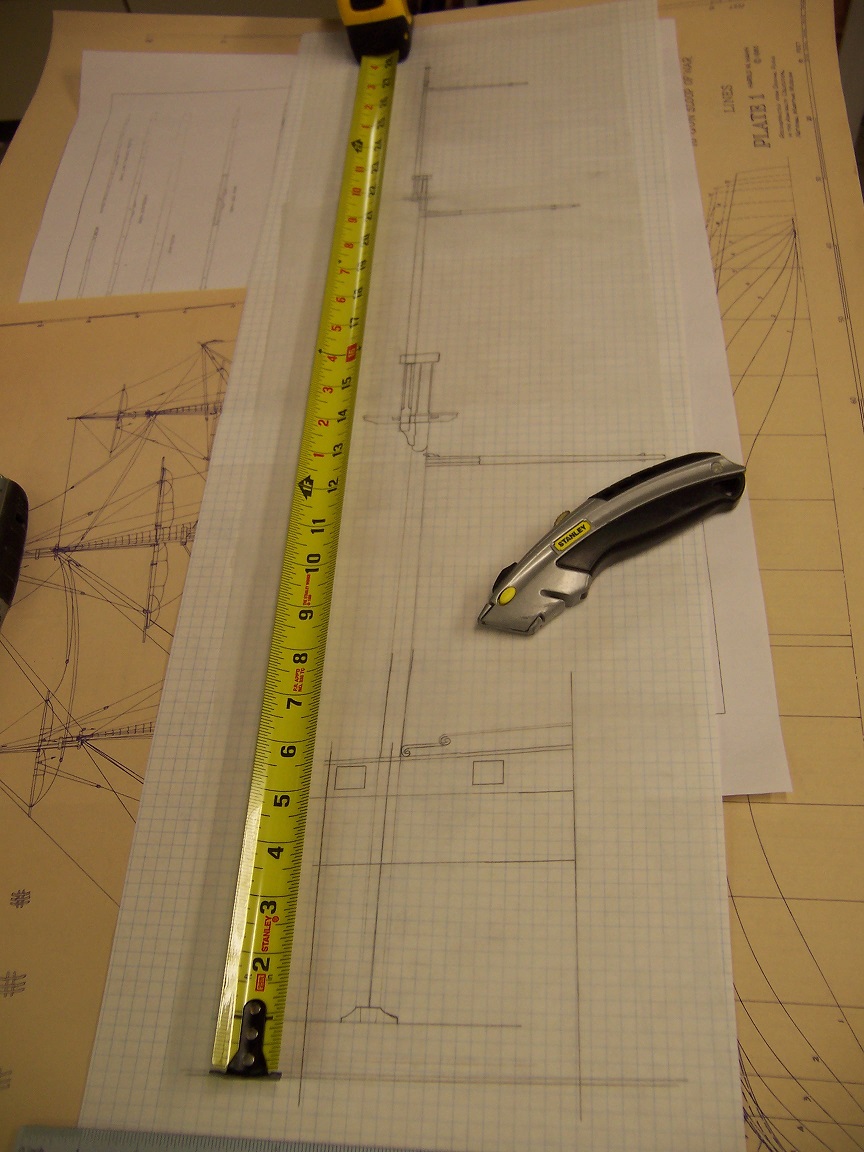
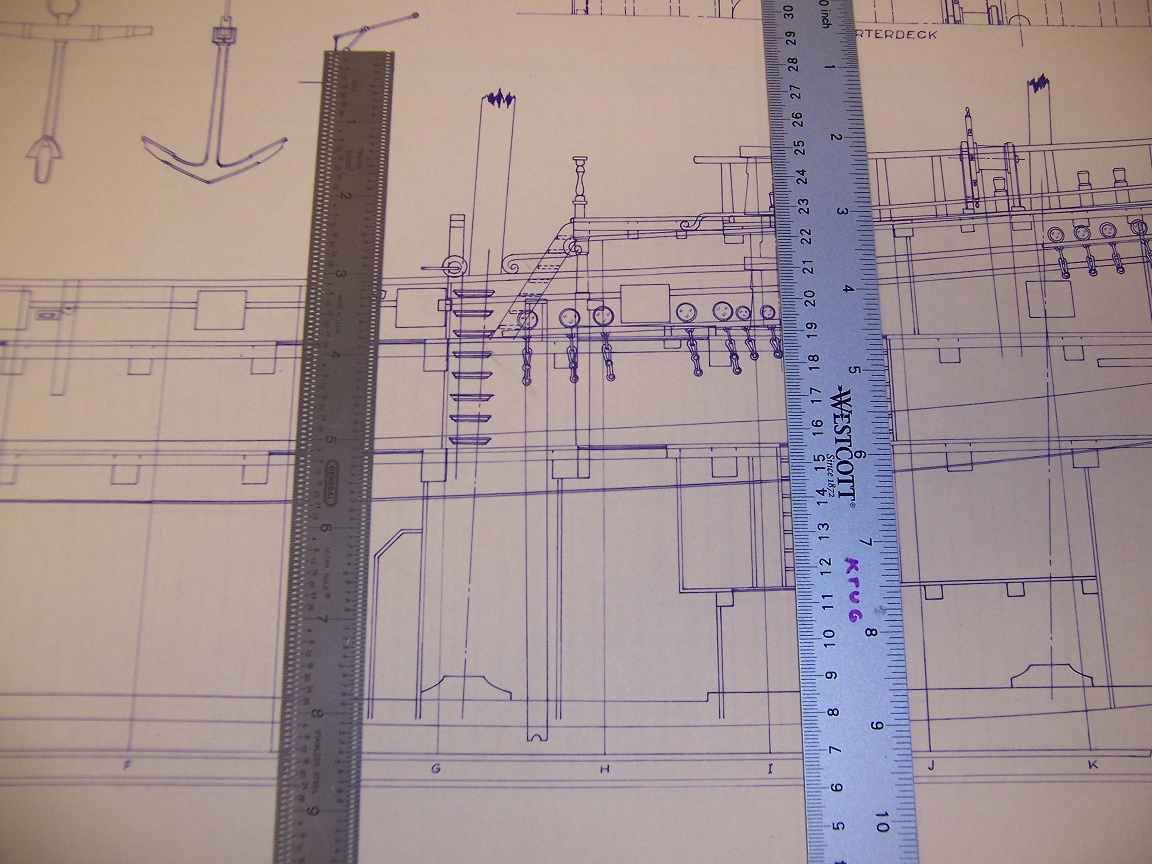
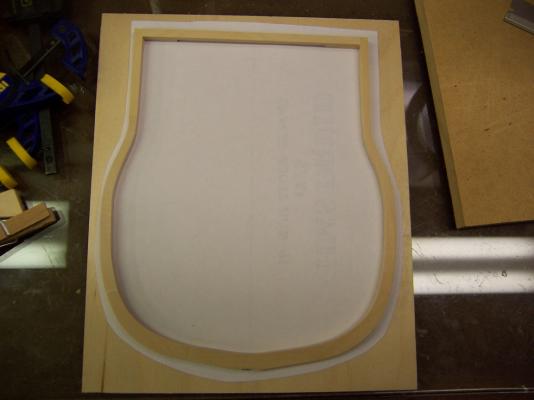
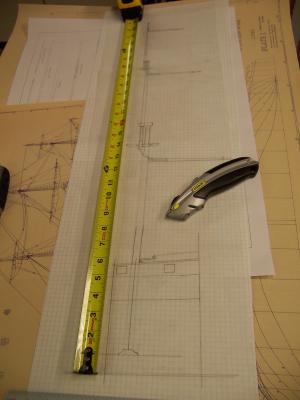
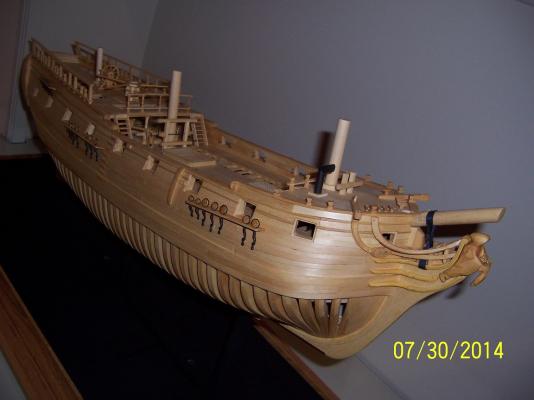
First thing I wanted to do was understand the scale of what I was attempting. I grabbed some tracing paper and drew all the pieces in the correct place. Not too surprised, but this comes in at 28" tall (sans base). The admiral's eyes bugged out a little at the plan but it is full speed away (or full speed as my time allows). This is just a planning tool, it wasn't drawn absolutely accurately for all of the details. I am feeling pretty pumped for building this. Lots of new skills to learn and do. I am also leaning towards adding actual people into the scene. The 1/48 scale Hasegawa aircraft ground crew shows promise with some modifications. It will be neat to have a couple of people swinging in their hammocks on the berth deck, haven't seen that too often. Stay building my friends, Mark

- 172 replies
-
- 10
-
-
- druid
- sloop of war
- (and 2 more)
-
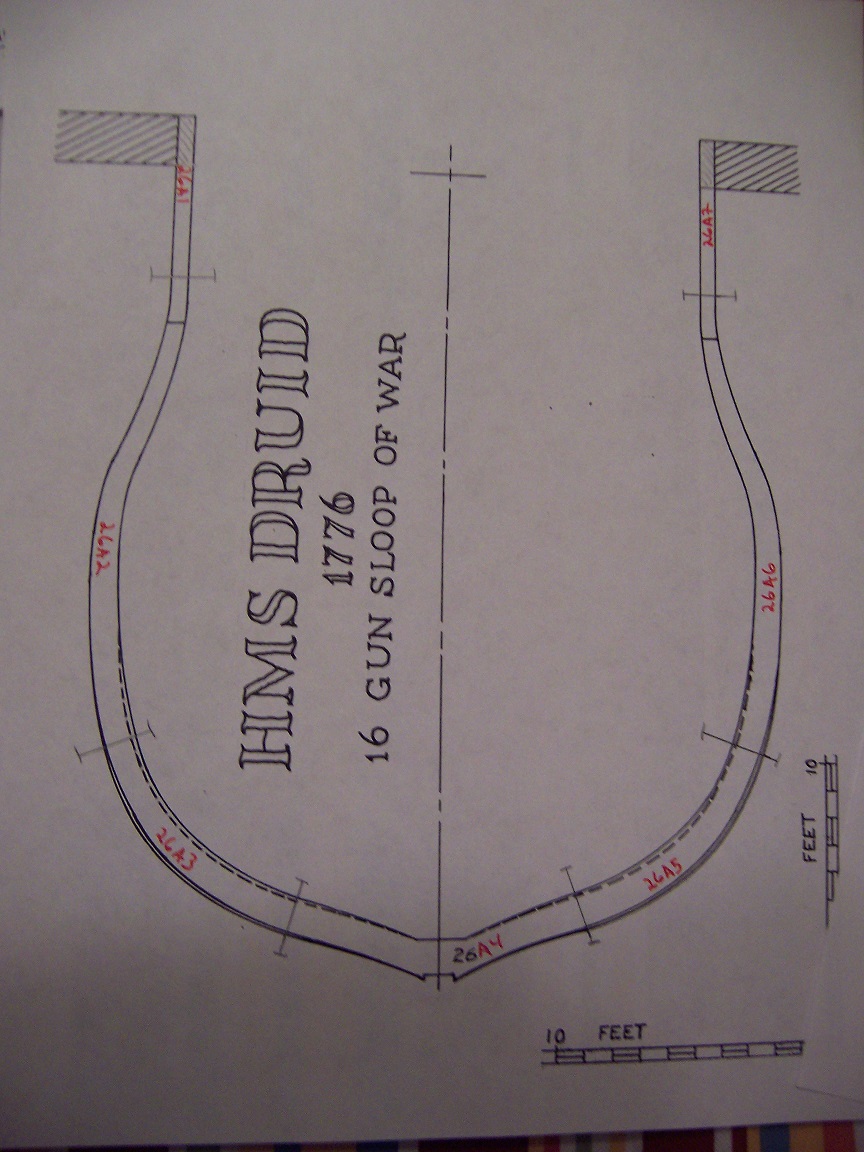
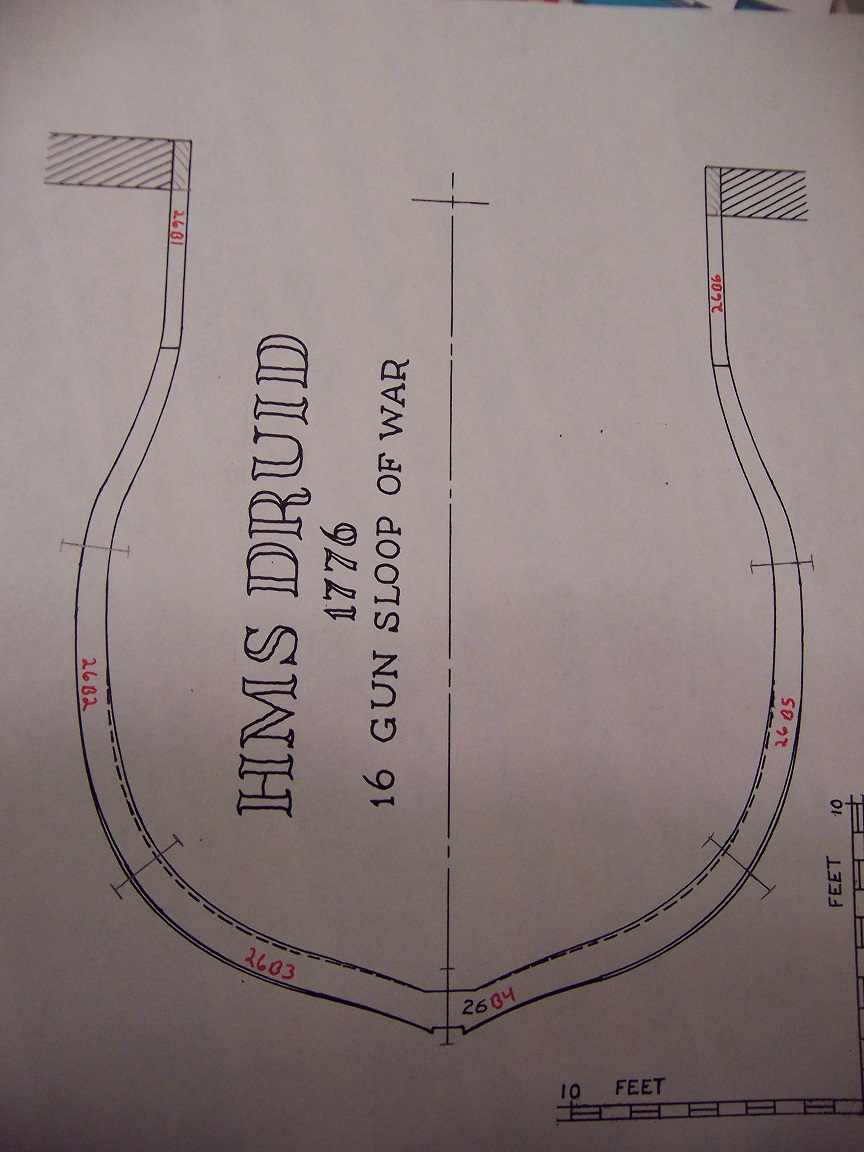
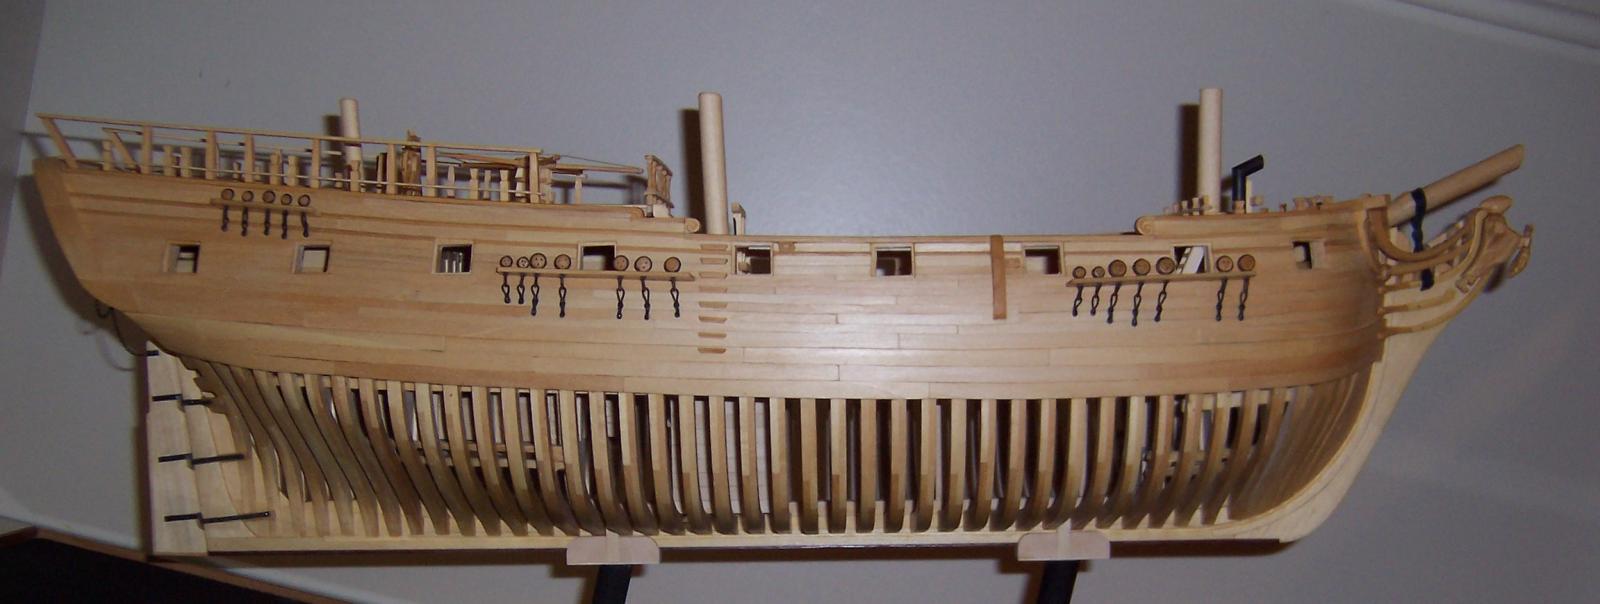
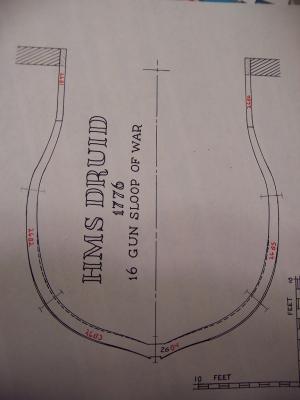
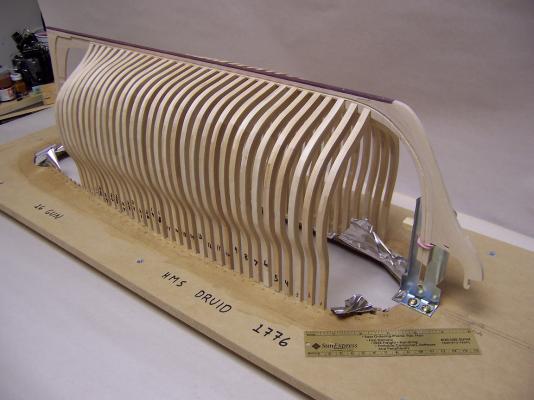
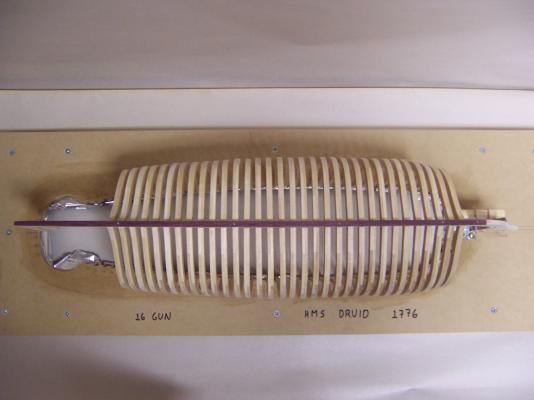
As the planning starts, so does the log. With my admiralty hull finally back home after a month road trip around town I am more convinced than ever that a cross section is needed. With a variety of questions being consistently asked about the layout of the internals and how did this or that happen, the cross section would be perfect. Being a cross section it will fit on the mantle but also bring home the resultant size of the full ship with the full main mast being present. The first question is where to define the cut lines. After looking at the plans I am looking at the following layout (frames 18-27): Being a Hahn plan, there are no knees defined (not seen at all in the full model). In this case they will be seen so I will add those in. I am a little lucky in that this is an American built cargo ship purchased and converted by the British. So......I do not necessarily have to follow exact British standards of the time. I am pretty sure I will put in at least one futtock rider. I am thinking of fully planking the outer hull inside and out both sides, but then one half of the inner hull decks will be left with all floor beams exposed. The fully deck planked side will be fit out with ballast, water and food casks, cannon (kids happy about that) with associated tools and probably a hammock or two. The rigging will be that which is possible. I am thinking about having sails (lower one furled). I have picked up the masting plans for the Brilliant / Druid in the possession of the Smithsonian. That is a big help. Lots of scratching of the head on tie down positions with the added quarterdeck extension. Now to start on the frames. I will not use the short cut frames jig provided but will go with more of wood saving futtock by futtock method (modified) - still using the inverted building stand / jig. Stay Building my Friends, Mark

- 172 replies
-
- 14
-
-
- druid
- sloop of war
- (and 2 more)
-
No issue with silly questions here, Kevin. However, I did not buy a timbering set. I primarily used Basswood that I could procure in various thicknesses locally at hobby shops around here in standard sizes (3" by 24" planks). I bought it as I needed it throughout the build so I didn't keep track as to how much I actually used. For the boxwood I purchased $50 in various sizes from the Lumberyard of which I have a lot left . For sizes I referred to the plans by Mr. Hahn (constantly) and if nothing shown, looked into my book supply (or this site) to figure out what made sense. I could give you widths of any part of my ship you want but you need to confirm yourself that this is what you want to use. It is primarily standard sizes (1/16", 3/32", 1/8", etc). Mark
-
Kevin, No issues with messing up my build log, it is essentially done. This is just filling in the gaps. I now see the interest, you are jumping in and looking to build the Druid yourself - GREAT CHOICE! I have really enjoyed my time building it. 1/48 is an optimal size (in my opinion) and the Druid is a great subject. Not too much ornamentation but plenty of things to learn from. Good Luck! Mark
-
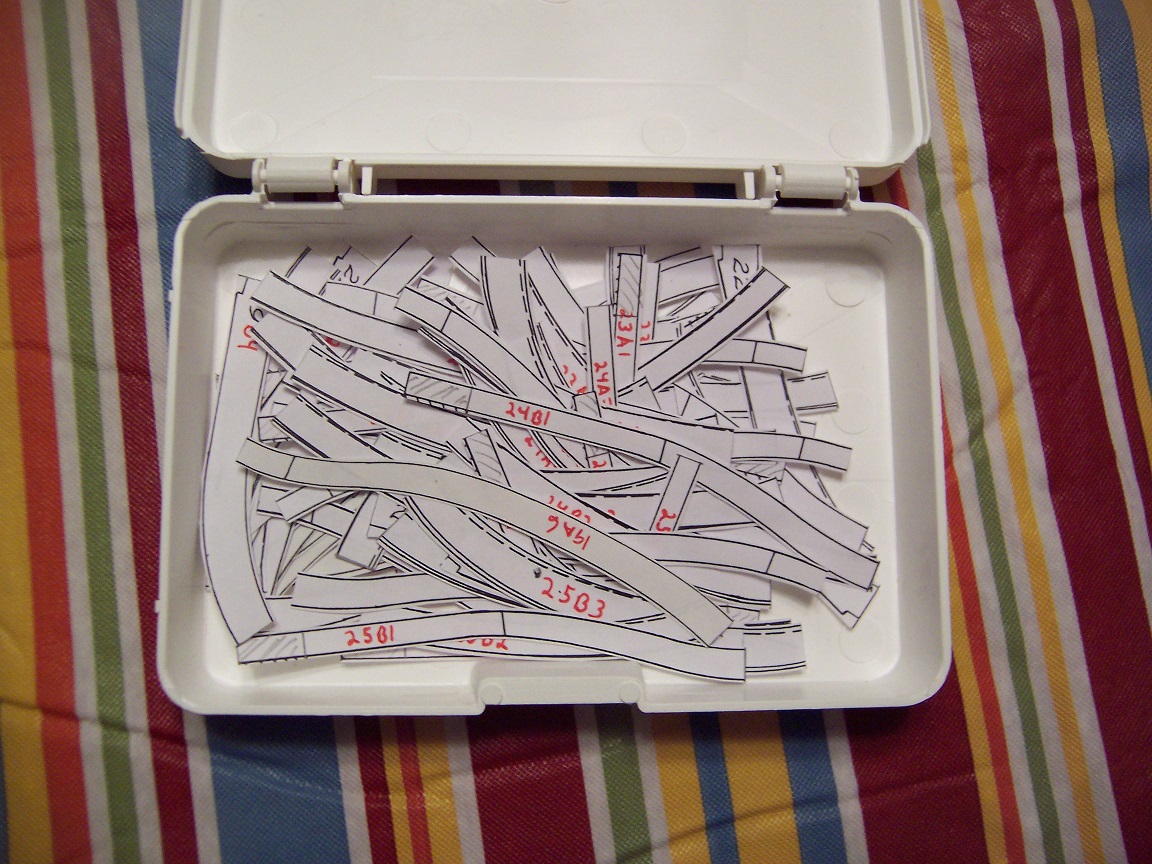
Okay, I am currently confined to the family room watching the four year old so I started some poking around my computer. This is a sample of my earliest stuff: First thing to be tackled was the quick frame cutting guides that Mr. Hahn provides. I was using Basswood so like he states for his builds, he had lots of wood and this significantly cut down the frame generation time. I was unsure of replicating the guides as provided so I altered the method a little: I cut out one jig piece at a time very accurately. Using these as guides, I generated sleds for replicating. First strips were cut from the boards equal to the piece width (constant over all jig pieces). The sled has two slots for each piece required. One of the slots is open ended allowing these strips to be inserted and the end cut to the right angle. Then you flip the strip over and position the newly cut end against its stop and with one more cut the jig piece is made. Then was production of the frames. This is where the pics are lacking but I did work very closely with the frame outlines to insure the frame wood covered the required area that had to be cut out. Production of the middle frames was pretty easy, it was went you went to the curvature of the bow / stern that you had to be careful. I did not pre-bevel the frames and looking at the frames as they were trial fitted in the jig slots shows there was definitely work ahead for me internally (and externally). Most of this beveling was done with cabinet scrapers and actually didn't take too long. I also somewhat modified the actual gluing up of the frames into the slots. I created a faux-keel which had the width of the keel (no slots) but was extra thick to insure no distortion. I worked very hard to precisely position two full frames both aft and forward - insuring the frames were 90 degrees to the board, their height was correct and the keel absolutely level as it sat in place between them. The rest of the frames had their extension pieces (into the board) clipped just a little. I then worked towards the middle from the ends. Each frame would have glue applied to their extension pieces and pushed into their jig board slots. The faux-keel would be clamped on the verified good frames fore and aft then the new frame pulled up into place and clamped to the faux-keel (verified it was 90 degrees to the board). I also would insert temporary spacers (usually not necessary). Periodically I would use the produced keel with slots to verify it would fit and never had a problem. I think I saved a lot of abuse on my good keel this way. I guess my main take away is to never think what you are told as the process as being the only way. You can always personalize and change. If it doesn't work out, try again. For my next ship (based on Mr Hahn's plans) I will custom make each frame piece (but still include the extensions). I believe I can do it pretty quickly now - I don't think I would have had the confidence back then AND it will be probably a slower process. My signature piece of purple heart for the false keel is apparent in these photos. Stay Building My Friends, mark If people have any interest, I can add some photos every couple of days. Actually makes me feel like I am doing something.....


-
Hi Kevin, I do have quite the archive (I call it the "Book of Druid"). One part where I am lacking is up to where the frames are attached to the jig. I had no idea if this 'madness' would go very far and pictures just didn't enter my thought process. If you have anything specific I can see what I have. Remember this was my first total scratch so I always put the disclaimer 'Viewer Beware' (hah, hah). I really need to get back to the workshop...... Mark
-
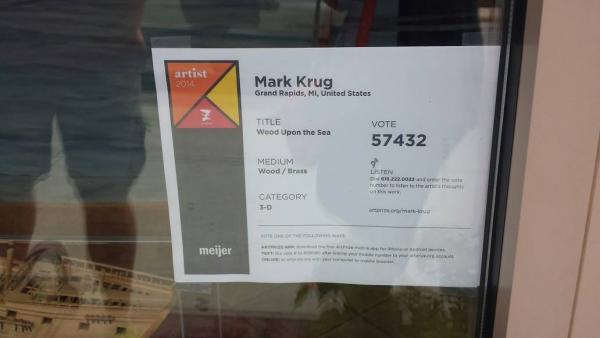
Thanks Eamonn and Mark (plus all the likes). They have picked the final 20 (out of 1536) and I didn't make the cut. This is that whole what is art topic. For instance the official judges put the following at the top of their list: At least it involves the water. Those are two representations of the 'artist' dressed in a bunny suit floating in the Grand River. What can I say, I just didn't stand a chance against the pro's......(hah, hah). I wasn't in it for the money (would have been nice though.....) it was the discussions from the people stopping by and the interest it caused. Mark

-
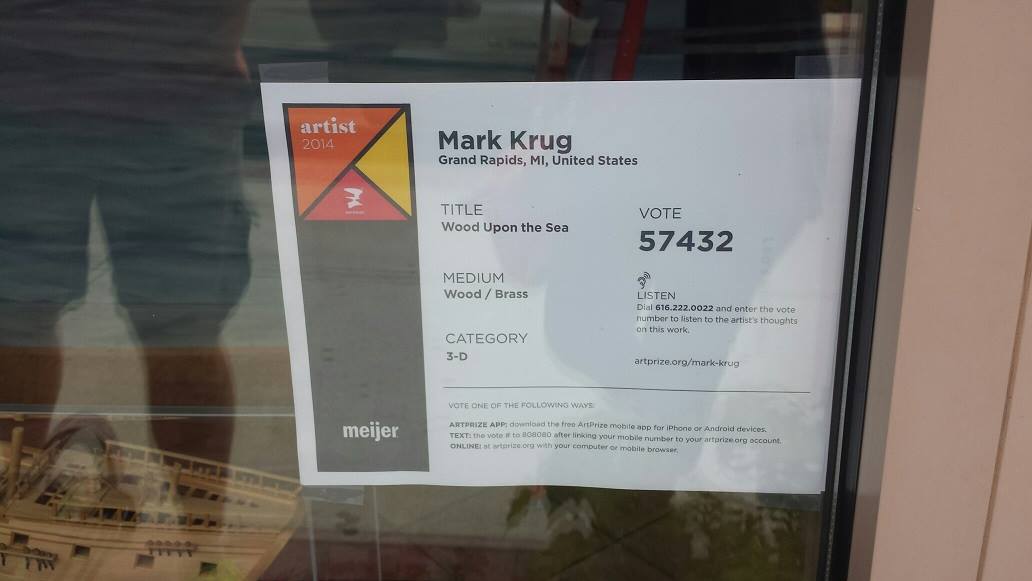
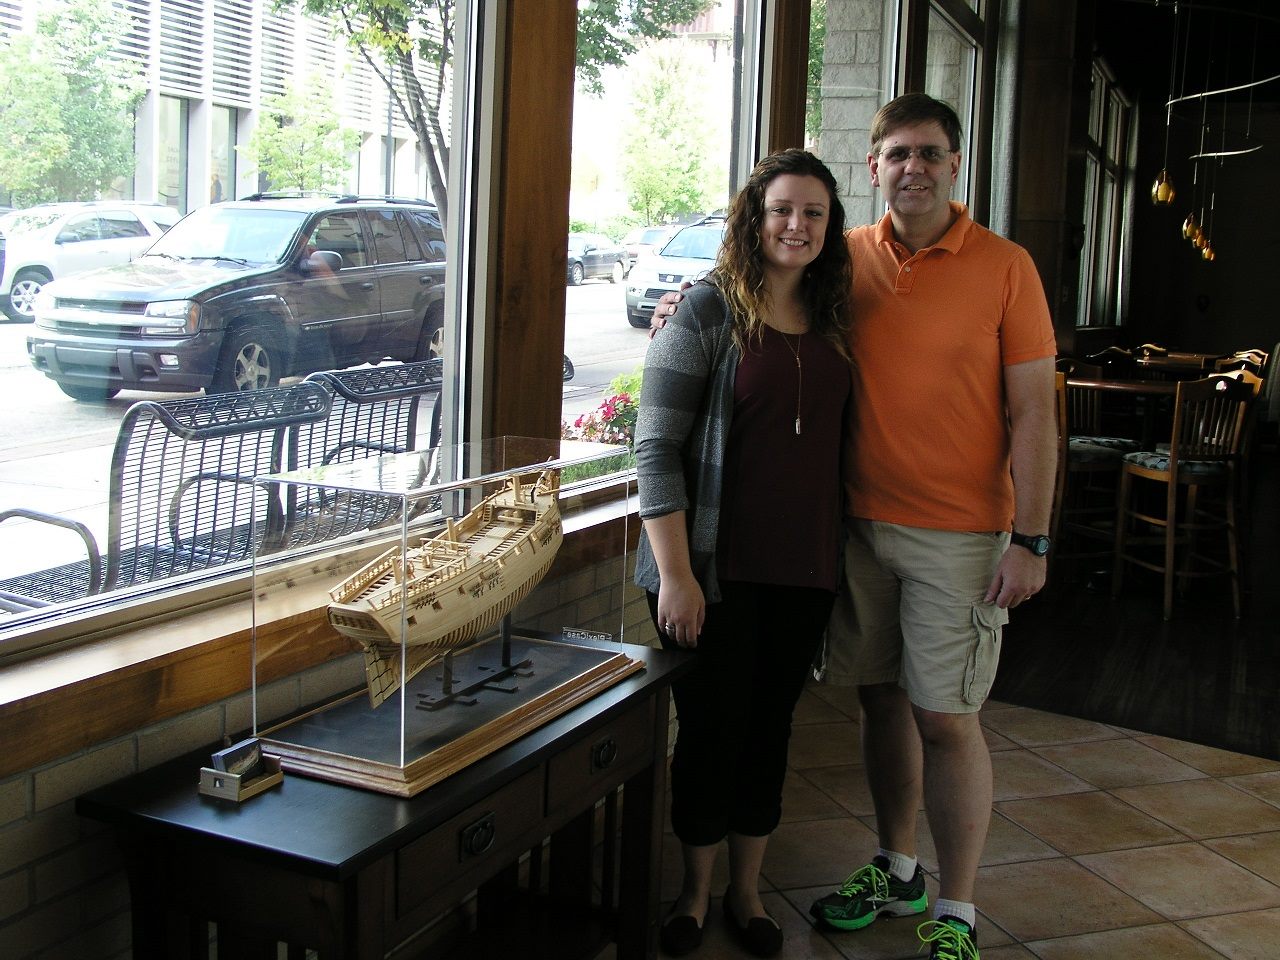
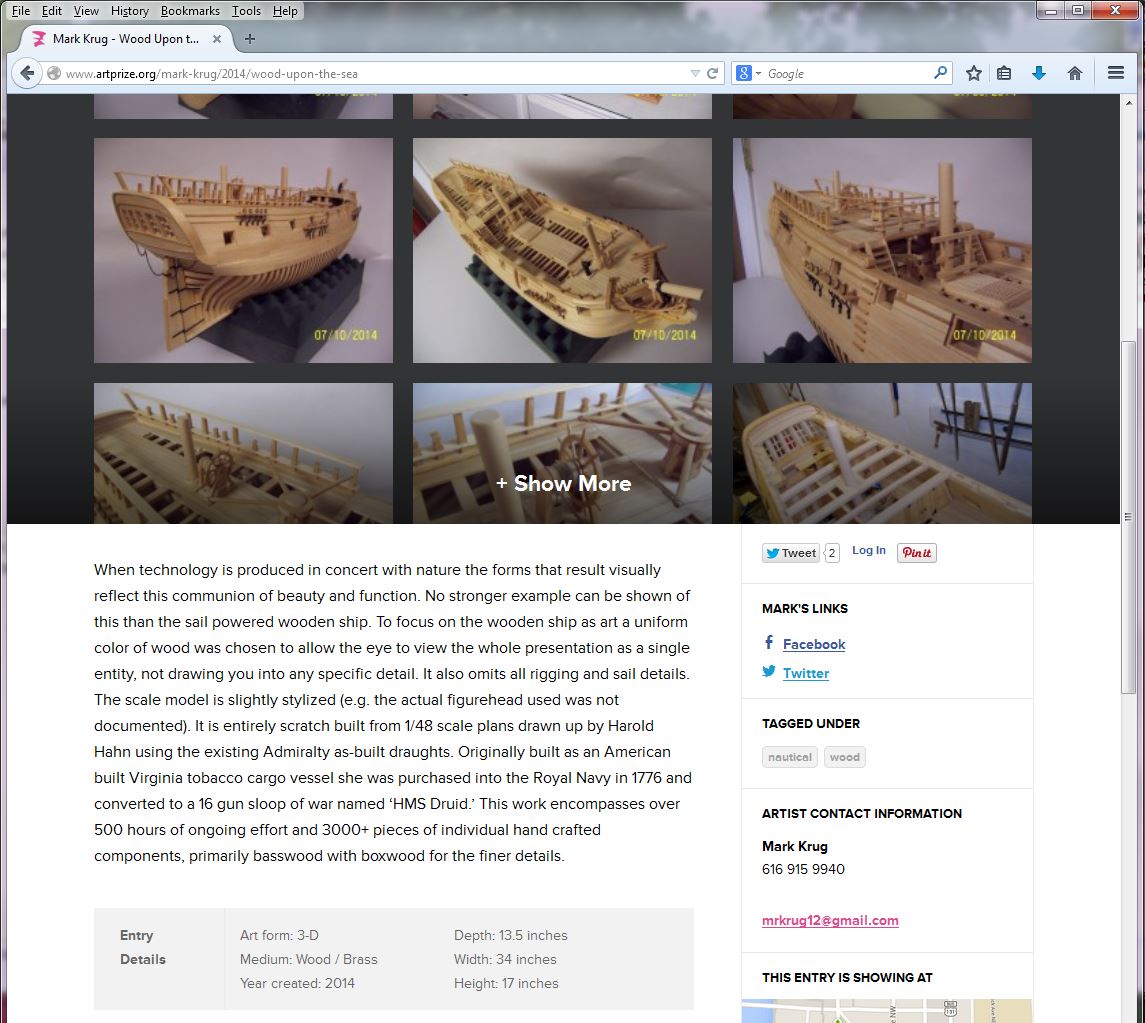
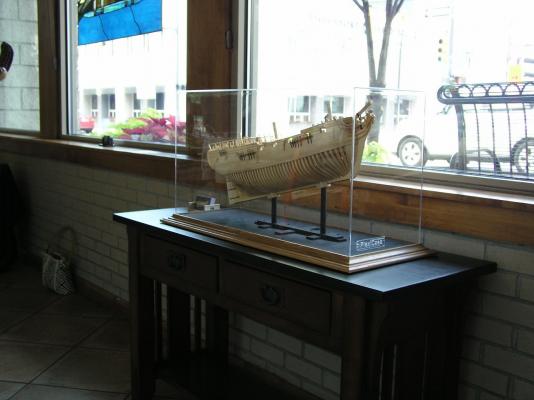
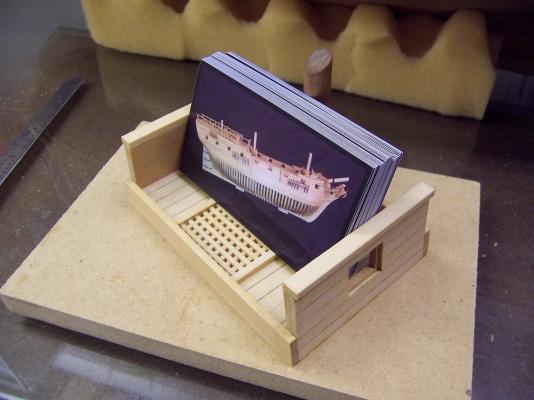
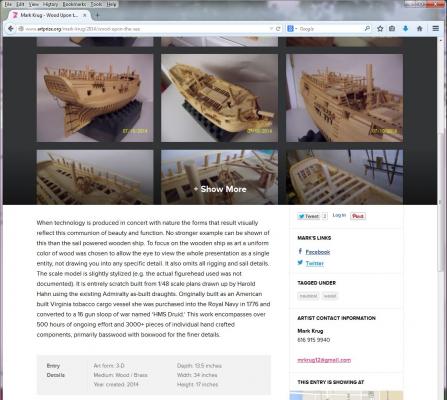
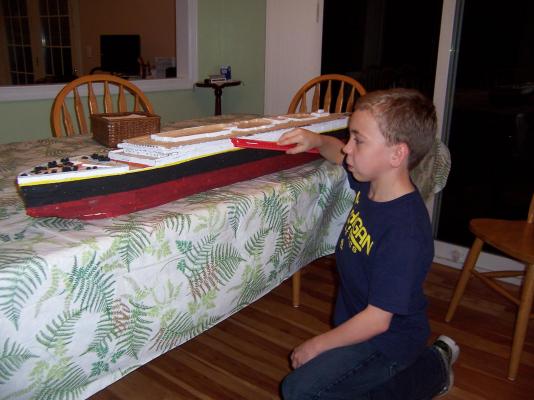
A little addendum to the story of my Druid. Grand Rapids (here in Michigan) has hosted for the past six years an event called ArtPrize. This is a city wide hosted event focusing on art, both professional and amateur. There is a prize purse in excess of half a million dollars so this isn't small. This year saw 1536 entries spread over 174 venues. My wife wasn't impressed with a lot of last years entries and said she was going to enter the Druid, which she did. So I earlier this year became an official entry of the 3-D category (with 346 of my closest friends). I ended up being hosted by a seafood restaurant actually directly across from the art museum: Over the course of the last week and a half I have been on site talking about my work to over a 1000 people. I made up small business cards to advertise (standard fare for this event) but took it up a notch with a customized card holder: I do not want to turn this into a 'what is art and what is not' topic but I was the only ~accurate model based entry (all years). It was a little hard to keep my ego in check with the consistent outstanding comments people directed at me. There was lots of "My Grandfather / Father / Son would love this / used to do this." "I grew up with one of these in the house and have always loved them...." The feedback was worth it if nothing else. I did meet a special youth that I invited over for some ship modeling discussions. Peter has faced a lot of challenges but has been working on a model of the Titanic with popsicle sticks and pictures (no plans): There is a lot of interest out there in models, particularly ship models. Do not be afraid to engage and put yourself out there, I can tell you the rewards are huge. Stay Building my Friends, Mark


- 268 replies
-
- 16
-
-
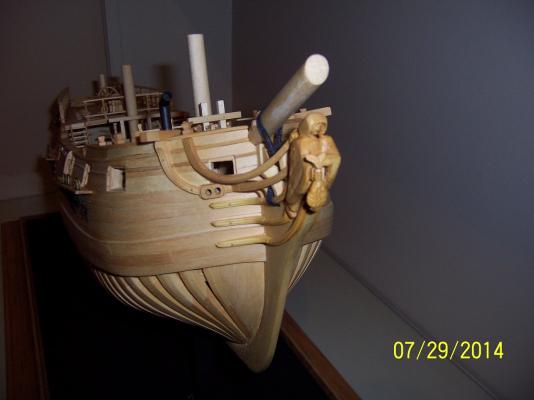
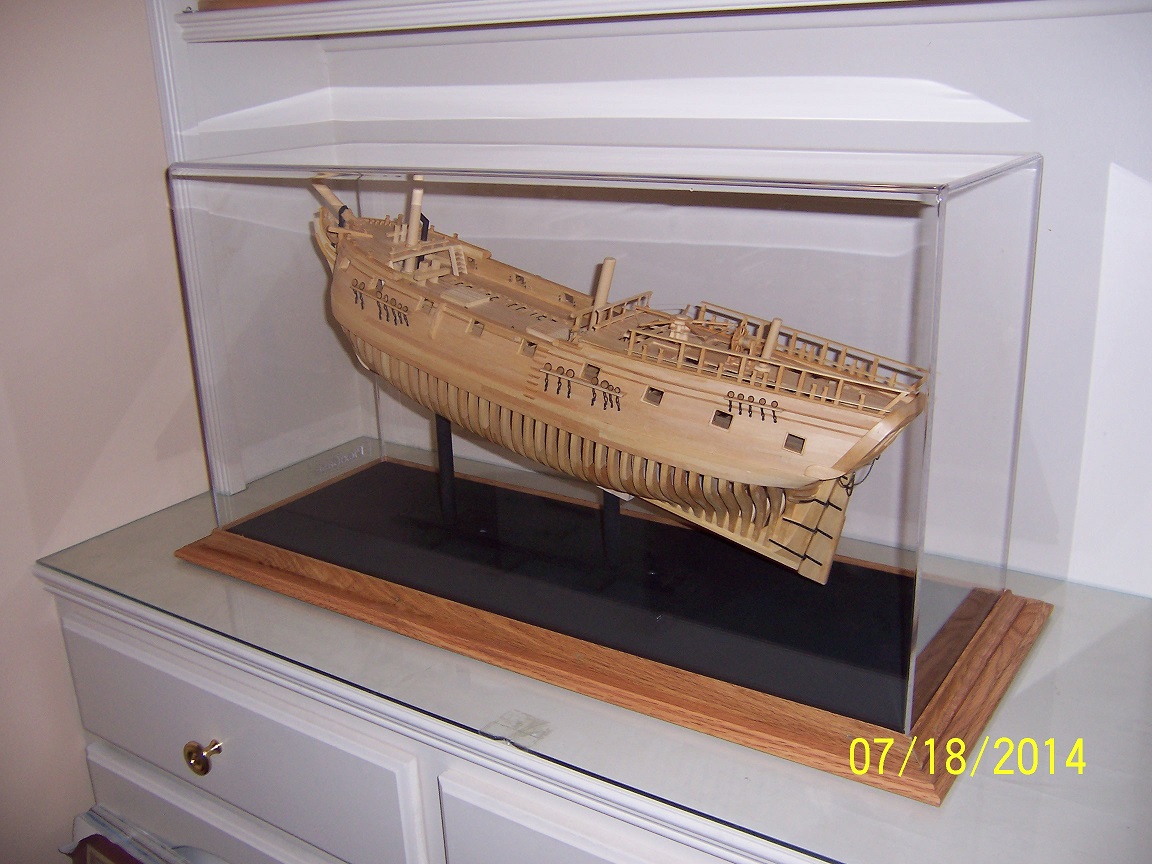
Thanks Everyone, still hard to believe this journey is over but....since I have moved the Druid up to the family room I have had quite a few comments (all good) but also questions covering construction, 1700’s nautical life, tactics and a LOT of architecture based ones. This has got me thinking about my next steps. The Lady Anne will definitely be completed next (mostly rigging exercise now) but I am looking for something scratch to start this fall. The limits on display locations also play into the selection (I have absolutely NO IDEA where the Lady Anne will end up). So…..I have decided to augment my Druid build with a same scale Druid cross section focused on the main mast – half open construction and half fully planked and framed. The main mast will be complete to include yardarms and shrouds, the decks will be stocked with representative items (cannon, ballast, barrels), still made mostly with basswood but I will appropriately stain the wales and other colored areas, copper the bottom, and add knees since they would now be seen. Not too many large wooden ship nautical types around these parts. As I get an education this provides me with a ready-made way to pass on my enthusiasm and ‘maybe’ get someone to think about taking part in the hobby. There are many items down deep in the hold that I know I can do better (now). Now that they will be seen I believe I have the skills to properly execute them. My hope is that this is done in a year or so! Stay Building my Friends, Mark
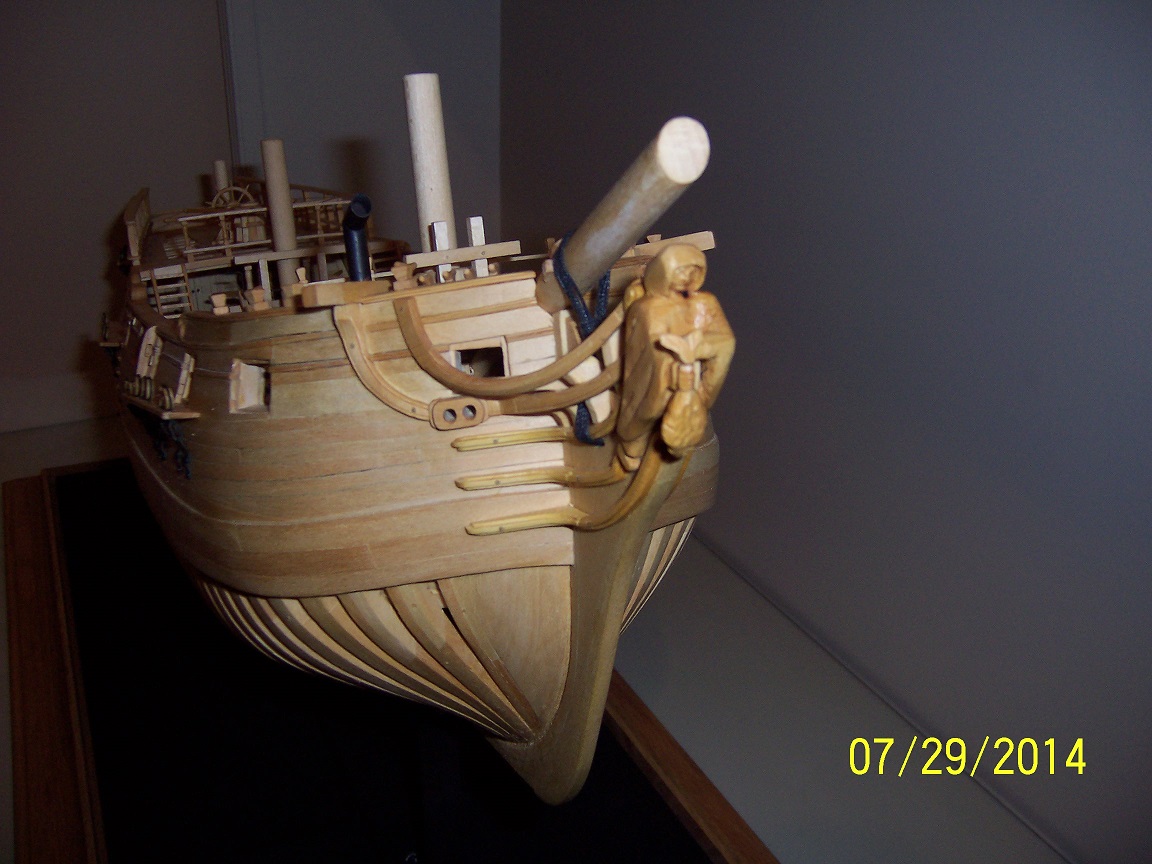
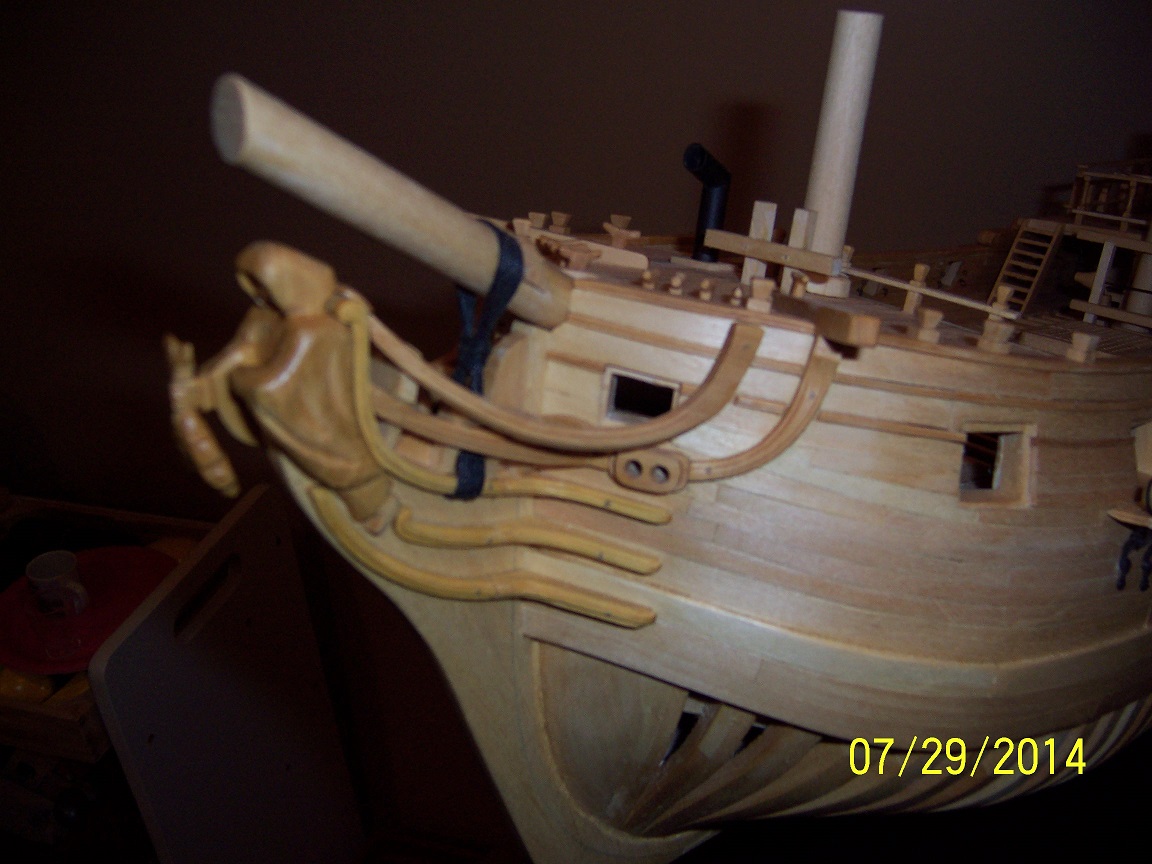
-
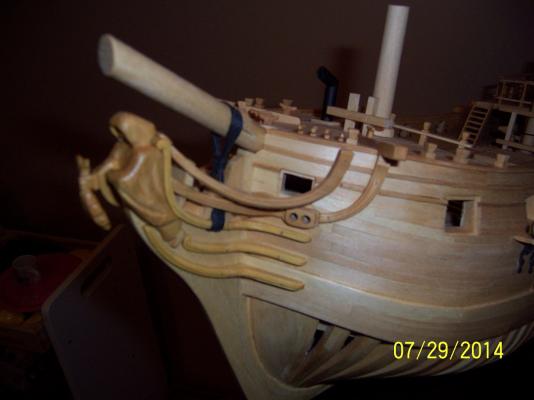
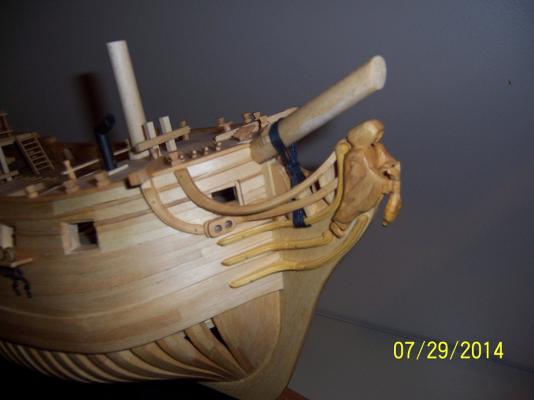
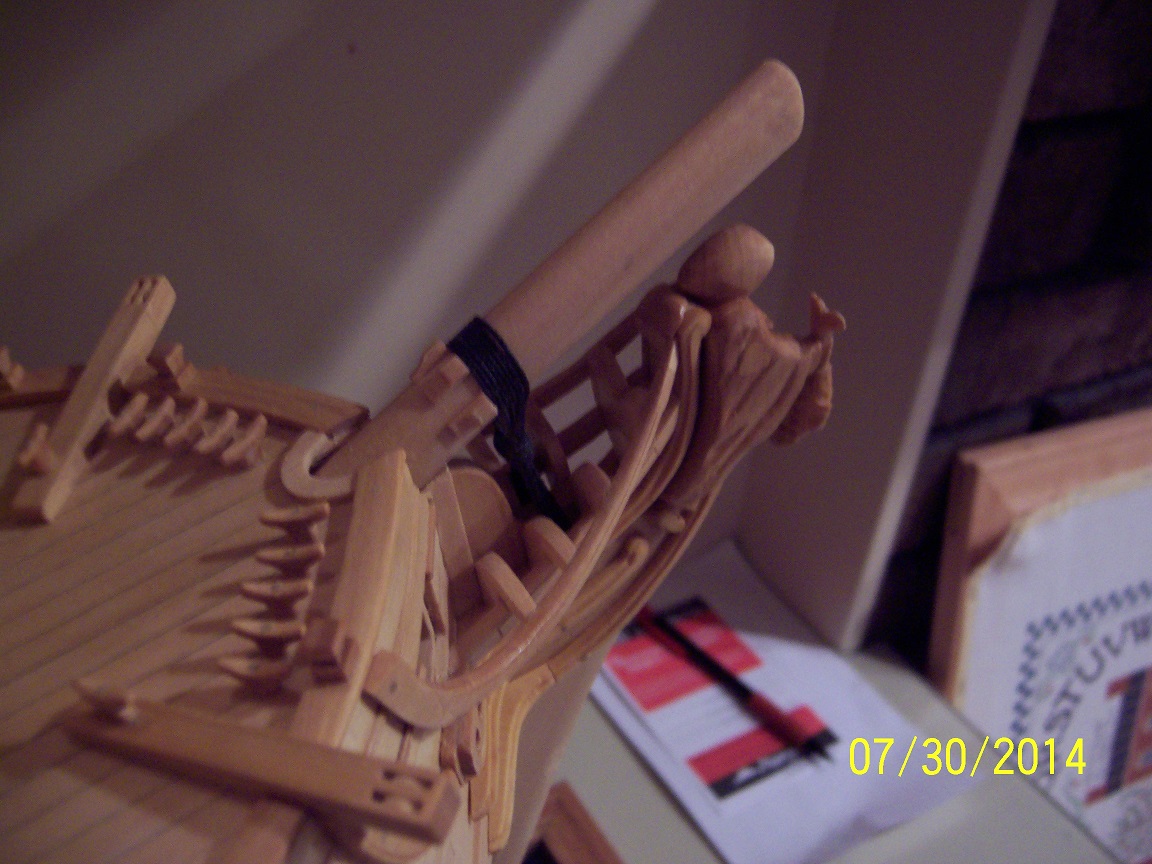
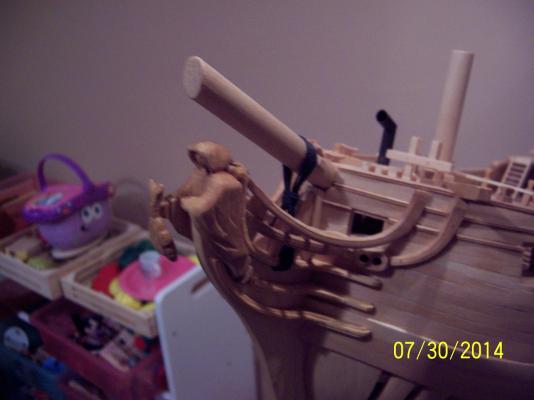
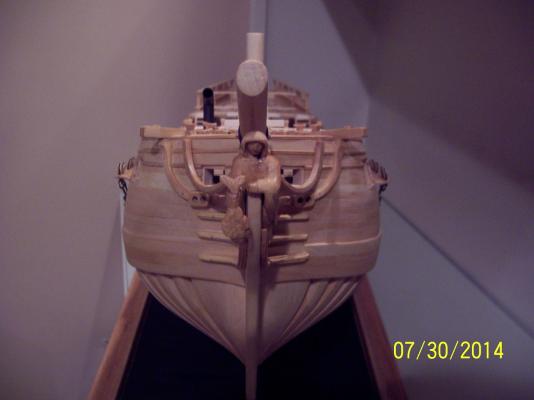
Thanks, Peter. I have used two more sessions with the figurehead generating a LARGE pile of dust and chips, hard to believe from a piece so small, but in this case less is more. I am trying to balance between a stylized version and a realistic version. But after last nights session I was happy with the look and after staring at it for 10 minutes this morning there was no little voice in the back of my head. The final version is: So I can officially say that the SHIP IS DONE, and this will be my last post with pictures (and the peasants rejoiced). Stats of my first scratch ever: Duration: 12 years (during 3 house moves, 3 finished basements, kitchen remodels, etc) External Additions: 2 kids (6 in total) Hours: Over 500 estimated (356 specifically accounted for in my log, begun 3 years in) Pieces: Over 3000 estimated (2600 accounted for in my log) Fun: Priceless My thoughts now turn back to the Lady Anne and my next scratch..... Stay Building my Friends, Mark


- 268 replies
-
- 17
-
-
In for a buck, in for a hundred. I dove in and started cutting: A little hoodendectimy and some gouges into the smooth robes and 20 minutes later a more refined figurehead. For now good, who knows tomorrow?? Mark