HOLIDAY DONATION DRIVE - SUPPORT MSW - DO YOUR PART TO KEEP THIS GREAT FORUM GOING! (Only 20 donations so far - C'mon guys!)
×


kruginmi
-
Posts
629 -
Joined
-
Last visited
Content Type
Profiles
Forums
Gallery
Events
Everything posted by kruginmi
-
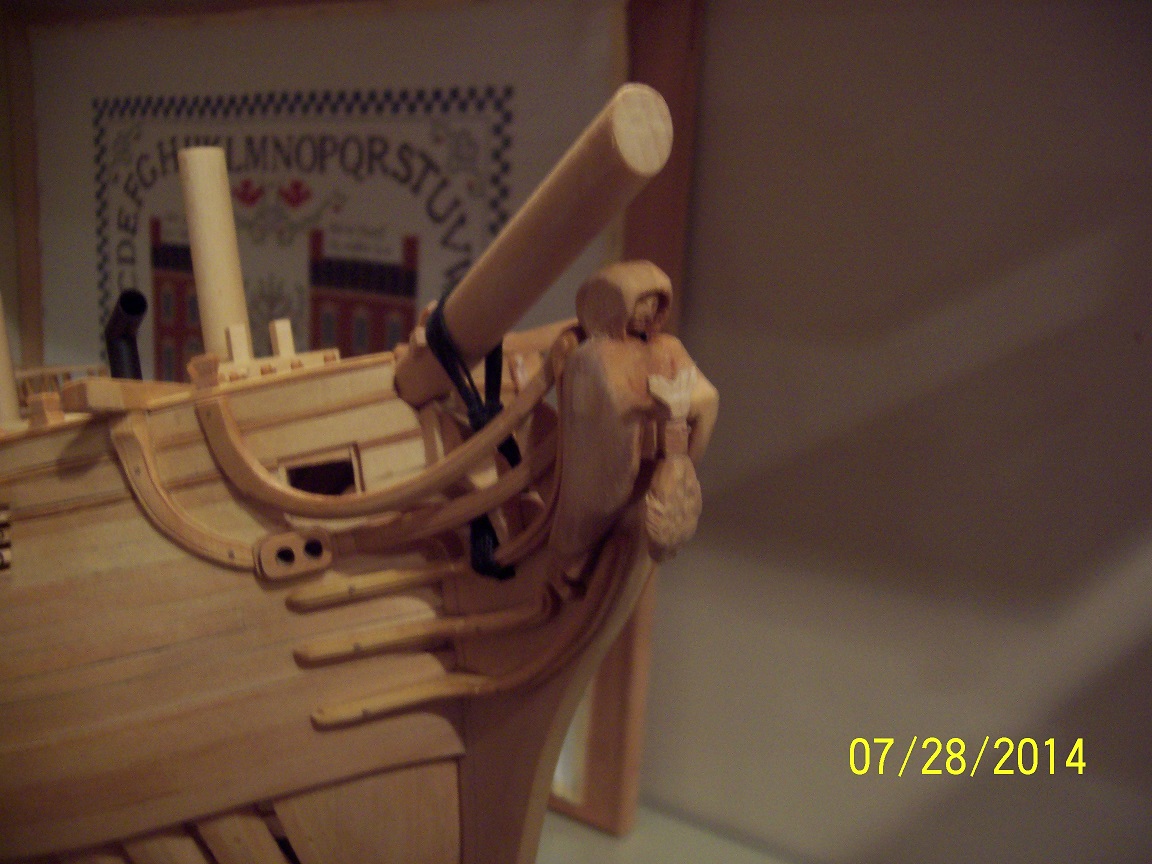
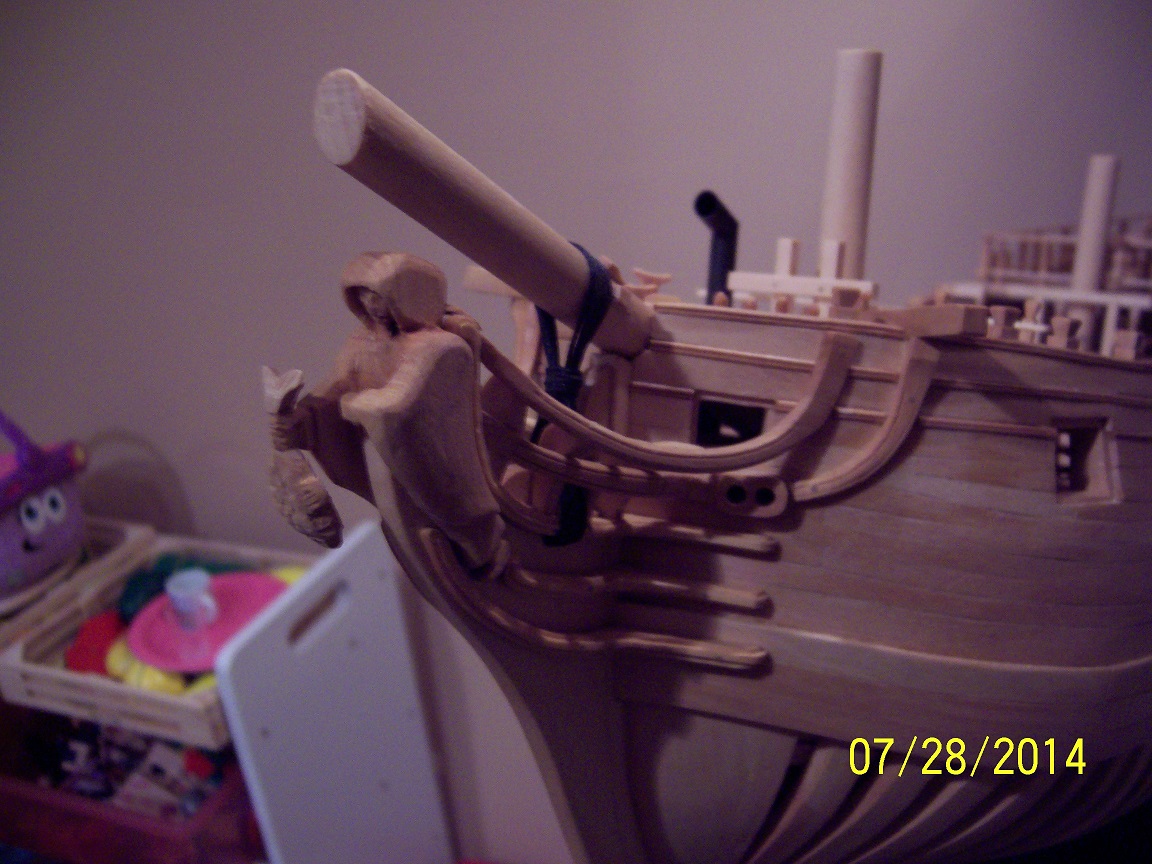
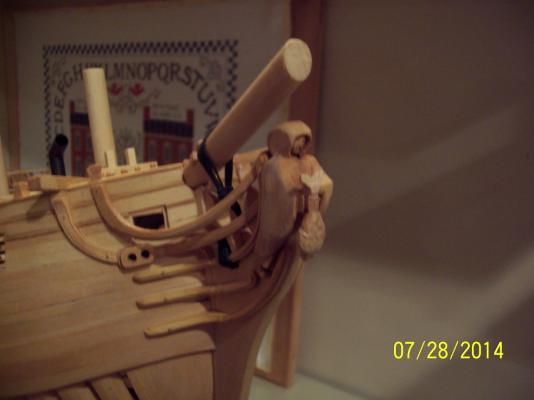
 Thanks everyone for your well wishes! Peter - Don't worry, the build always waits (remember - mine is around twelve (12!) years old). Have you ever thought about just a hull model if the thought of everything above seems impossible? The question now is the figurehead. As I sit back and look over the pictures (pictures that tend to make that figurehead REALLY big - looks much better with the hull included in the pic) I am wondering about some tweeks: 1. Reduce the size of the hood 2. Add some sort of sense of folds to both sides of the robe off the arms #2 was going to be done on some wood offship to see the effect prior to touching the figurehead. #1 was going to be a go slow and constantly re-examine where I was at. I do NOT want to make another figurehead if at all possible, I really like this one, especially knowing it was my first attempt. I need to call it done sometime but something keeps gnawing at me with respect to the figurehead. Mark
 -
Okay, I am not saying I am done.......for example I still need to gel coat some small areas....but....I am very happy with the figurehead as produced and the carving tools are now put away. If you look real close on the starboard side of the Druid you will see some repaired battle damage I added, inflicted from the Raleigh. (okay, knot in the wood that came loose but as I tell the kids, it is all in the story you tell). I will take a day or two then go over the ship to see if there is anything out of place or missing. At that time I will declare this complete. It is a little hard to believe that I am finally at this stage. Stay Building my Friends, Mark

- 268 replies
-
- 10
-

-
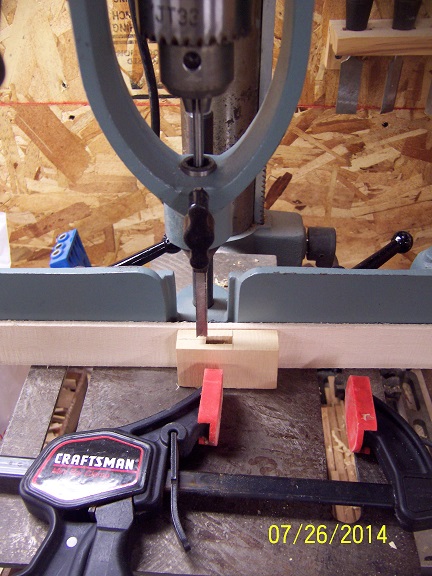
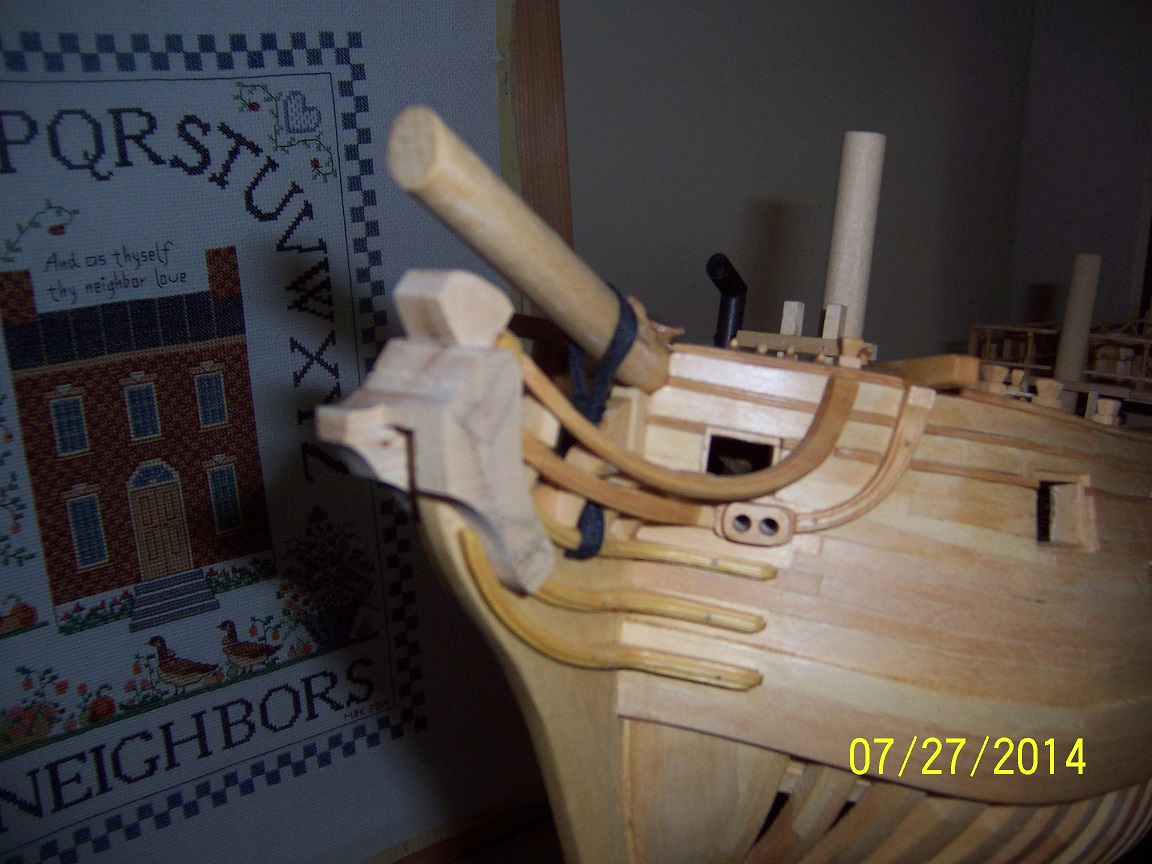
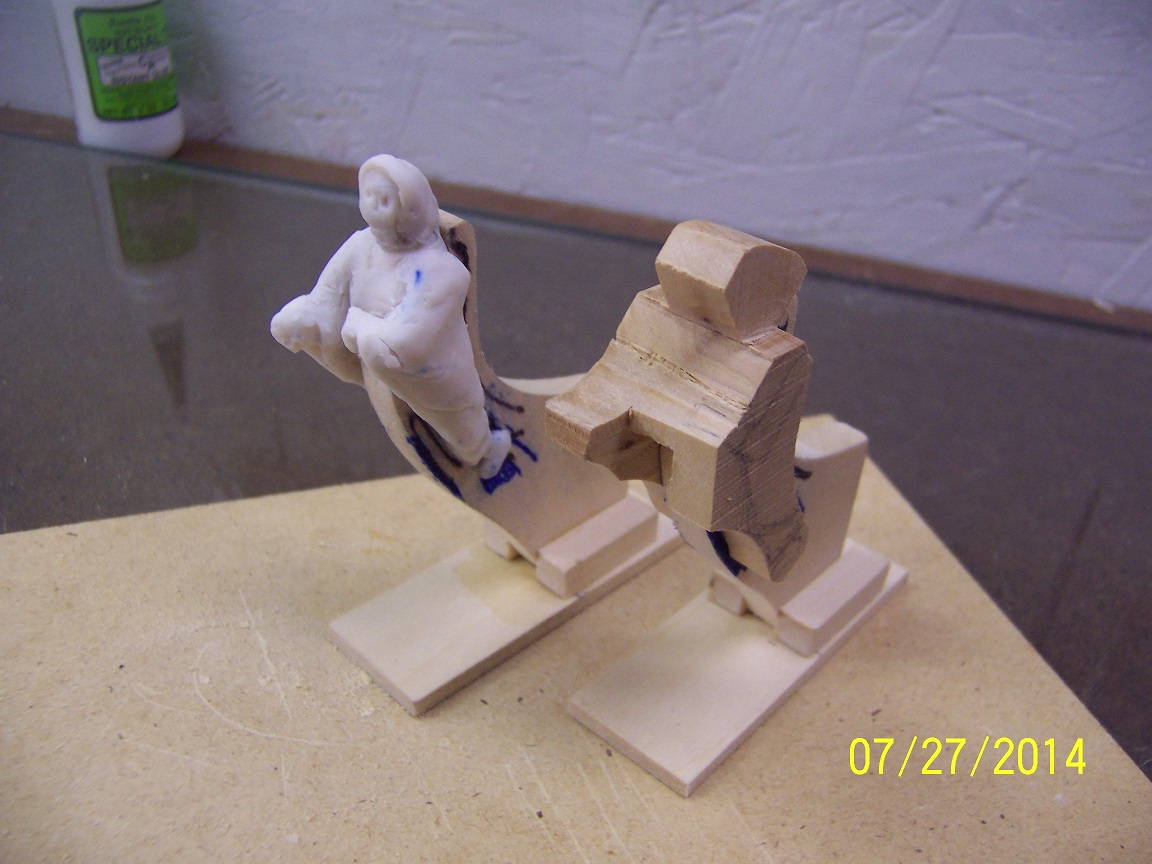
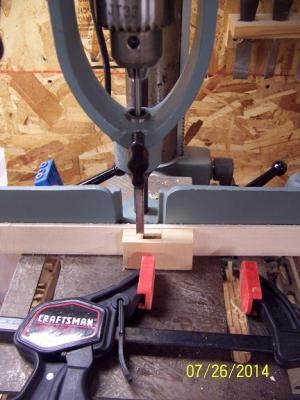
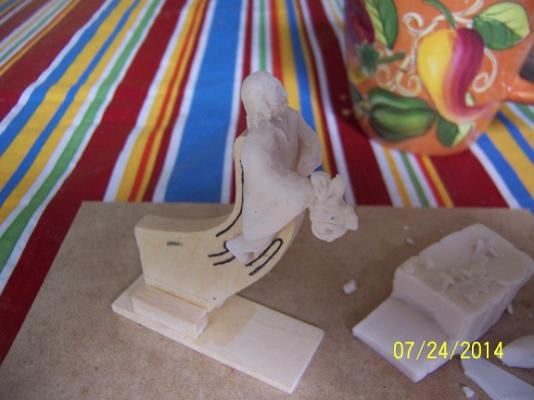
Chuck - definitely some Reubens influence.... Another reason why I LOVE 1:48 scale (and didn't even realize this until two days ago). The stem is 1/4 " wide and my smallest mortiser for the drill press is..... 1/4". cutting the slot into the carving block was a piece of cake: From there it was a matter of hacking off the bigger chunks prior to any actual carving. The Sculpey model is INVALUABLE at this stage. So far everything has clicked and no big mistakes: The check of the blank on the actual ship showed perfect sizing. I am now on the second level of hacking - those cuts that only affect a portion of the blank. I am definitely thinking four times before actual cutting. Maybe start carving tonight! Stay Building my Friends, Mark

-
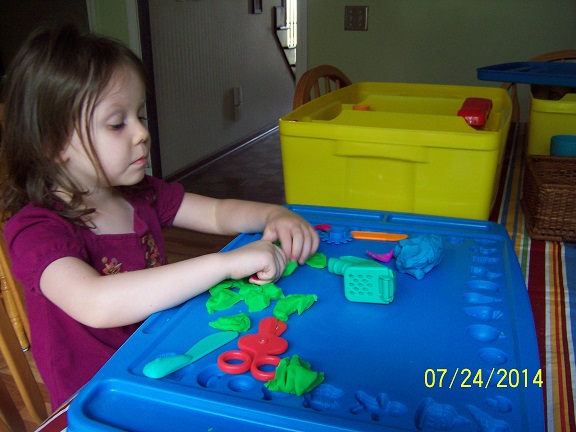
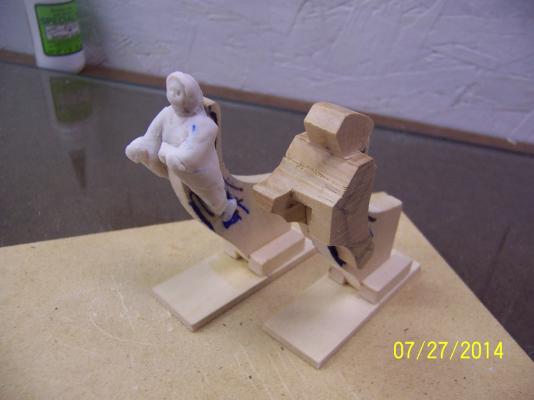
My daughter opted to make more of a 17th century Dutch influenced figurehead, so it went back into the Playdoh jar. I also do not believe it was a correct 1:48 scale representation. She handled it well. I have actually started another figurehead in clay since the other one was pretty fast as well as fun. Mark
-
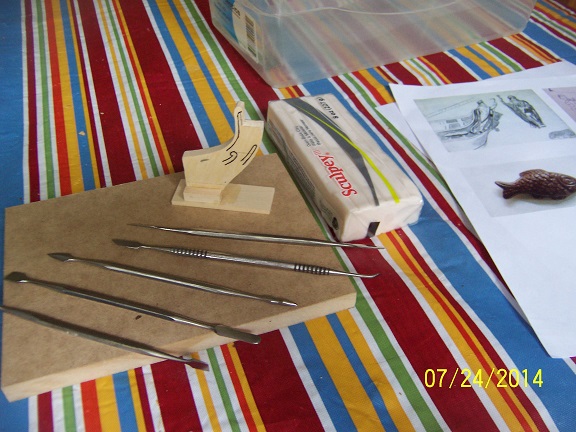
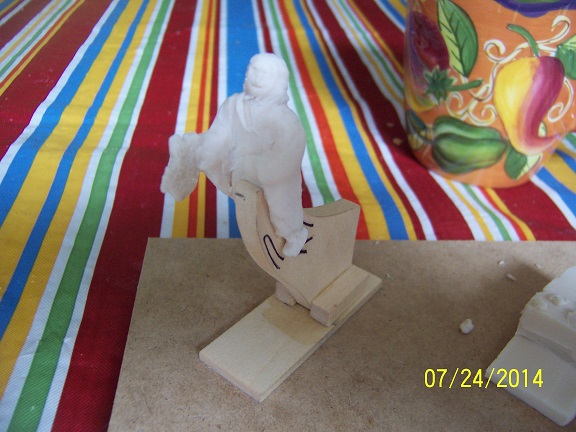
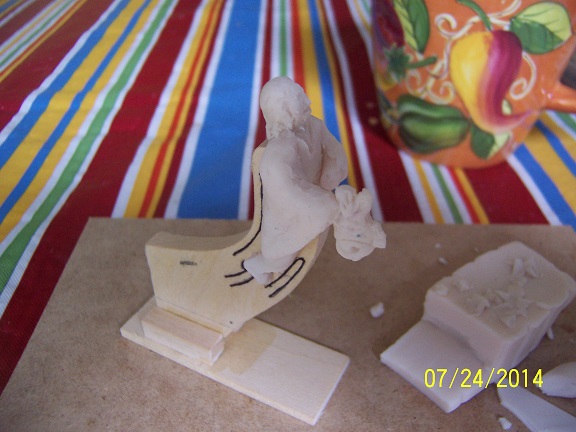
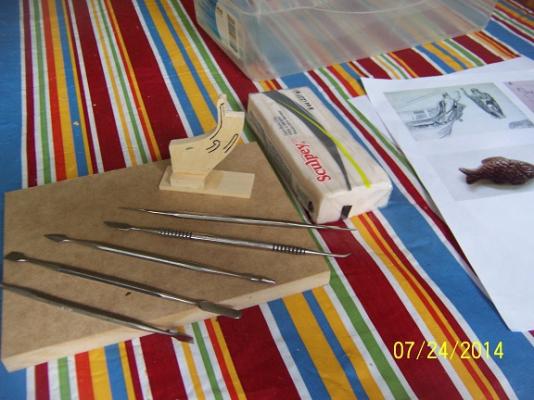
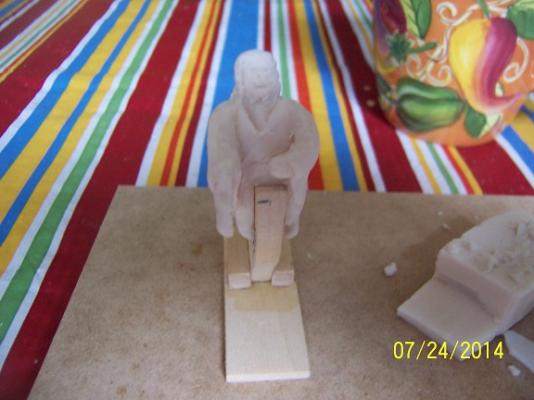
On to the figurehead! Never having carved before, but having some skills in drawing and 3-D perspective I was actually looking forward to trying this. The big thing was to understand the proportions of what I was doing, especially since I was doing a Krug original. Instead of just hacking into a piece of wood and going prototype after prototype I decided to do a first attempt using Sculpey. After a quick mockup of the stem, I prepared my supplies. My daughter wanted in on the action so I also set her up for her example. The Sculpey did not stick to the wood at all and was actually fun to work with. The target was a robed figure, so I started with a bare figure and then wrapped the additional layers where appropriate to replicate the look I was aiming for. I wasn't too concerned about the hands or face at this point, just that there was enough material present in the eventual wood blank. I added a bit of whim with the fish. This will be displayed for a time at a local seafood restaurant and they offer a fish chocolate after the meal so - why not? My storyline is that the British, when converting this American built ship to a 16 gun sloop of war, had this figurehead gathering dust in the warehouse. Someone wanted it out, so they put it on this ship, causing the eventual name of Druid (prove me wrong - hah hah). After another hour or two I will bake this solid and then proceed to measure off the wood blank for final carving. I might have found a new hobby!!! (like I need one) Stay Building my Friends, Mark


- 268 replies
-
- 11
-
-
Building a Display case for LARGE models
kruginmi replied to mtdoramike's topic in Wood ship model kits
I would suggest using wood corner posts and then just sheets of plexiglass into slots. The cost would be a LOT less and given the size, the wood posts would not block too much. For the Druid I used 3/16" and that is pretty strong.. This would also allow you to put the ship into the display and just put one case side into place, as opposed to trying to lower a dome over the whole thing (requiring twice the height). Mark -
Building a Display case for LARGE models
kruginmi replied to mtdoramike's topic in Wood ship model kits
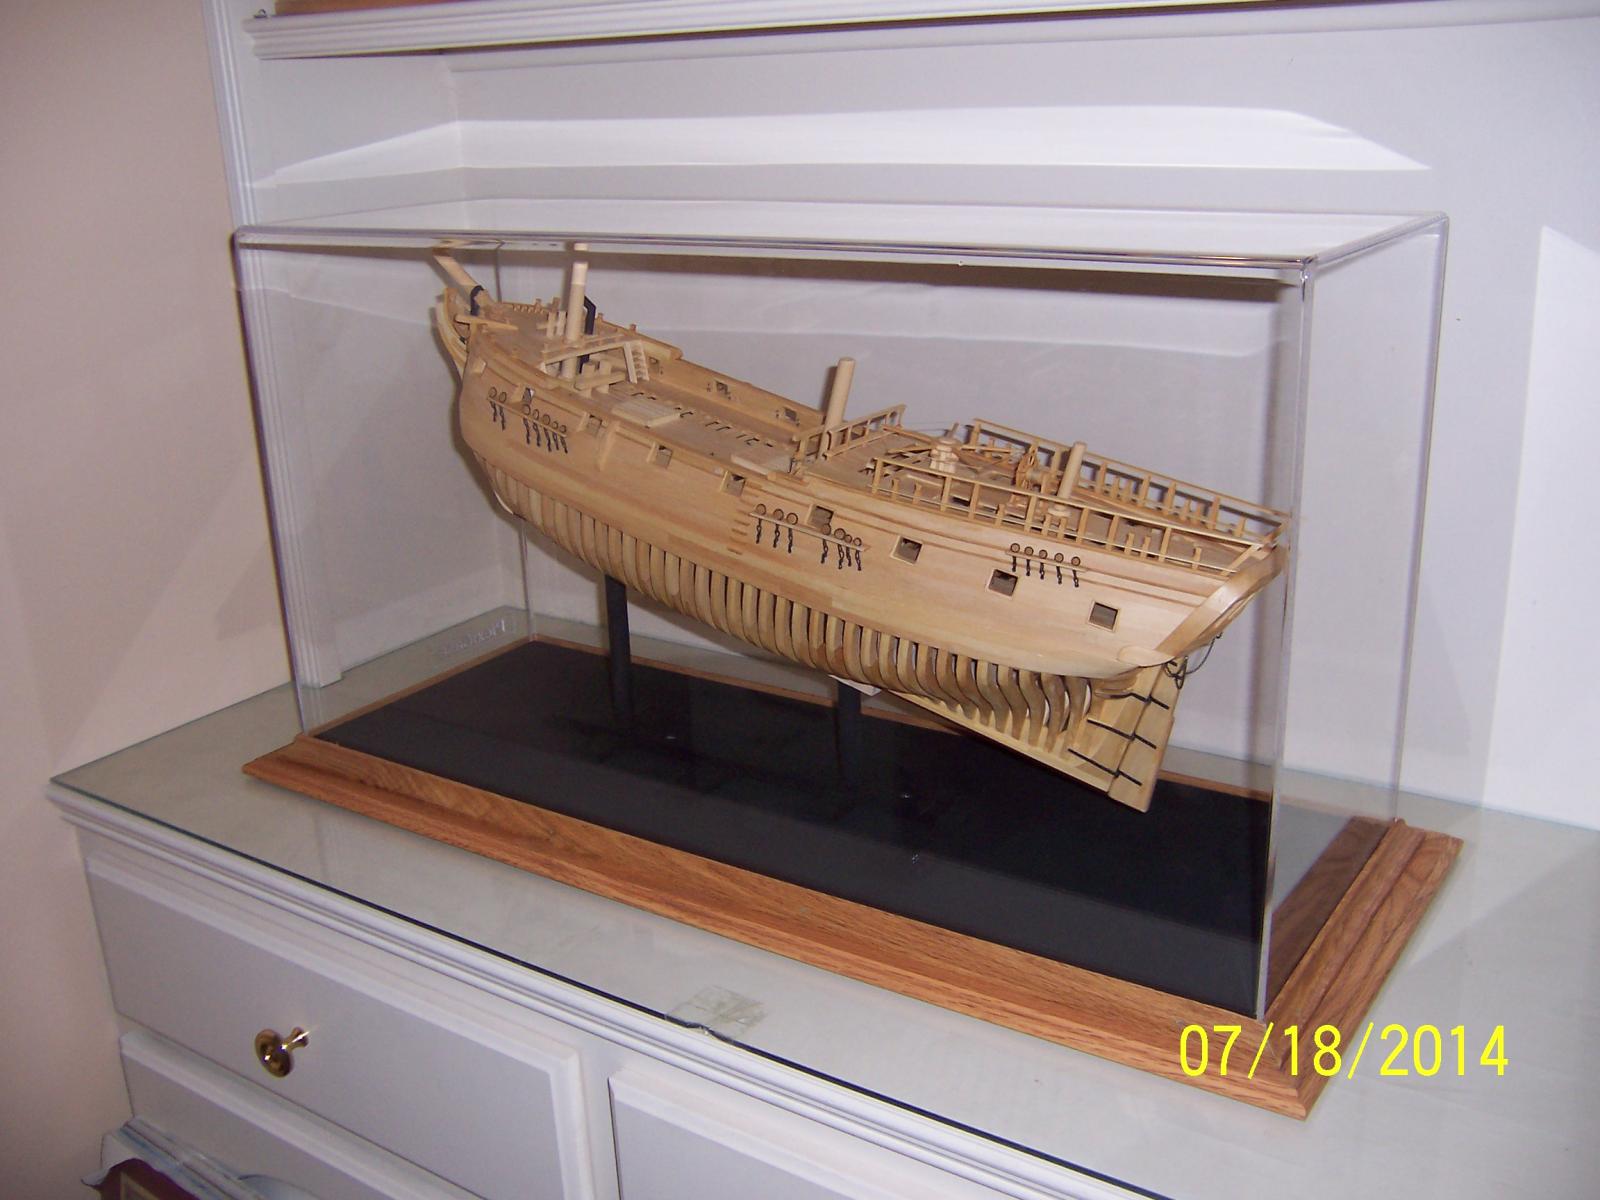
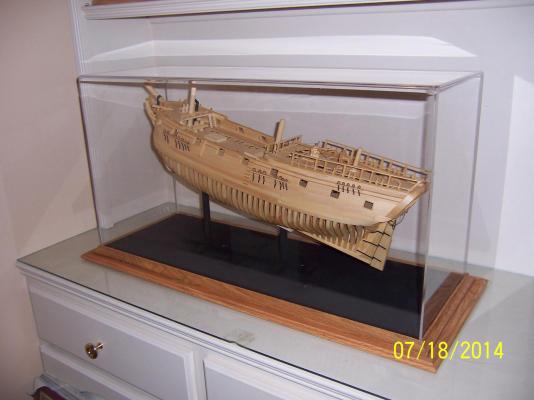
If you look at my Druid, the last entry, you can see the case I ended up with. It has a plexiglass dome that is pretty light for its size. It is definitely smaller than what you are looking to do but I see no reason why it wouldn't scale up easily. It will take some $$ for the plexiglass to be formed and glued. I contracted mine out. Mark -
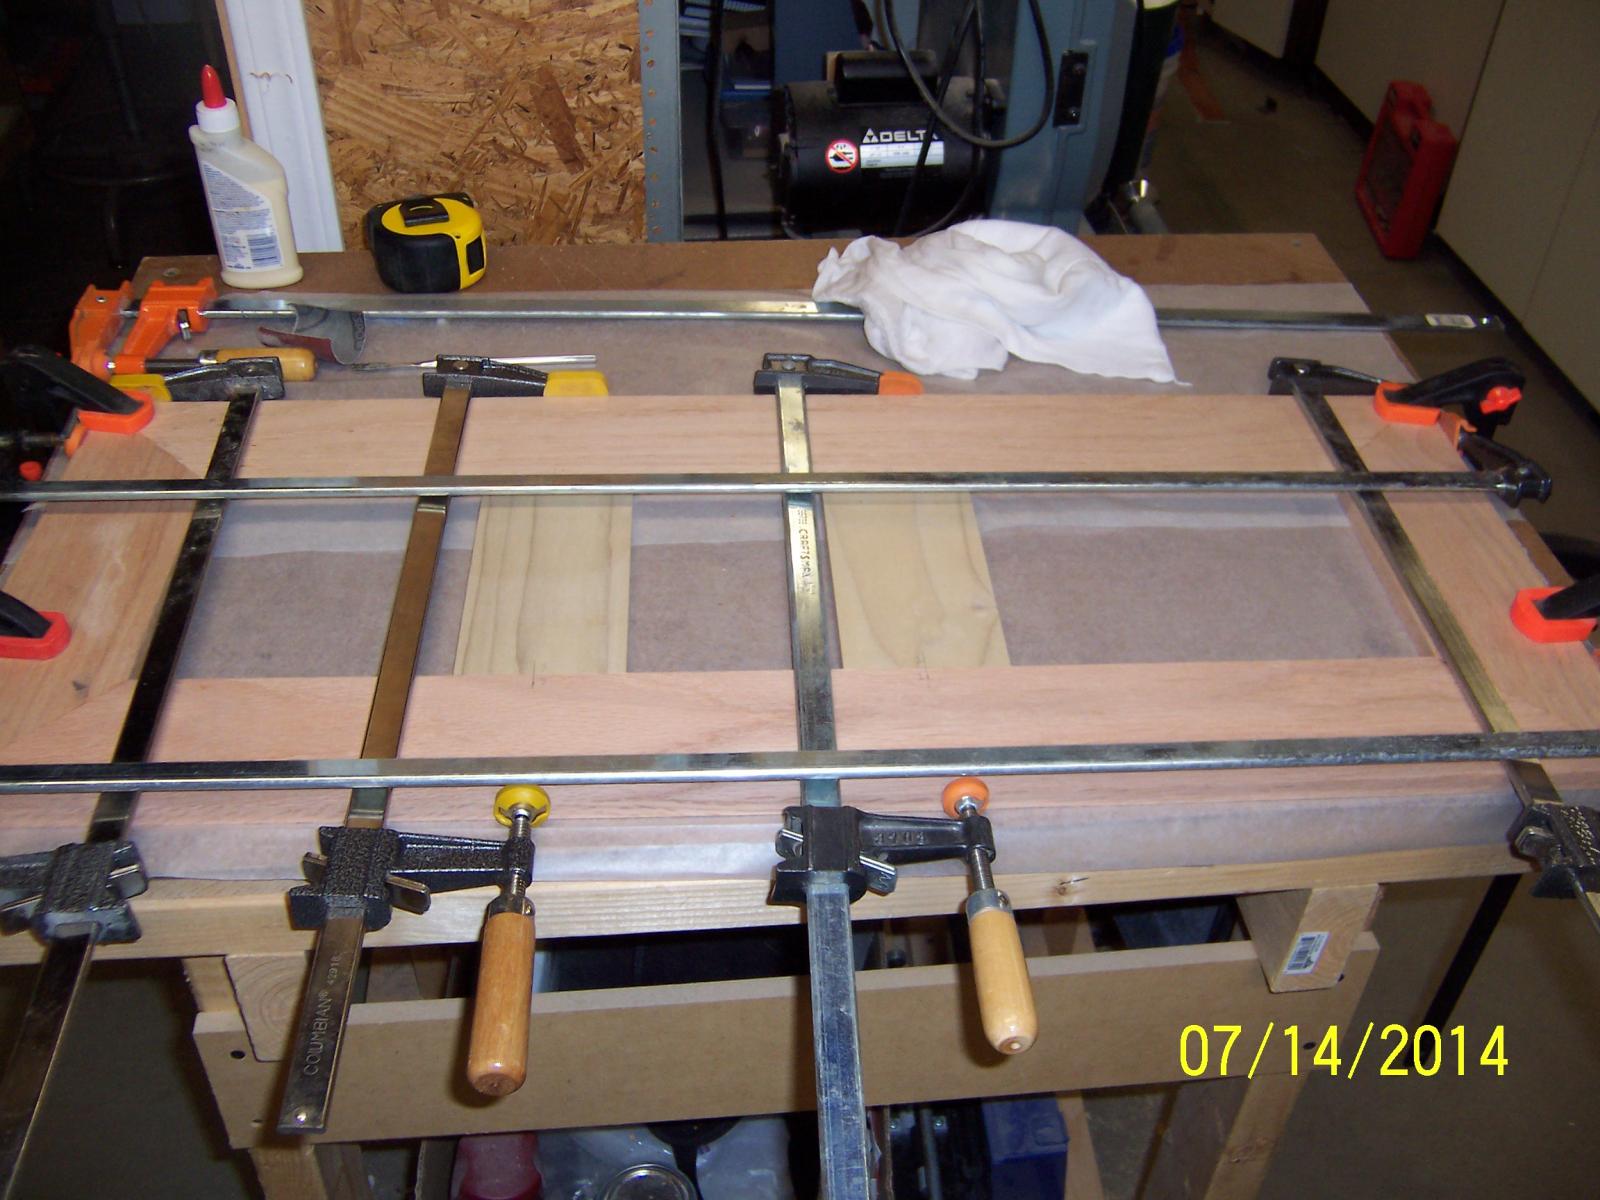
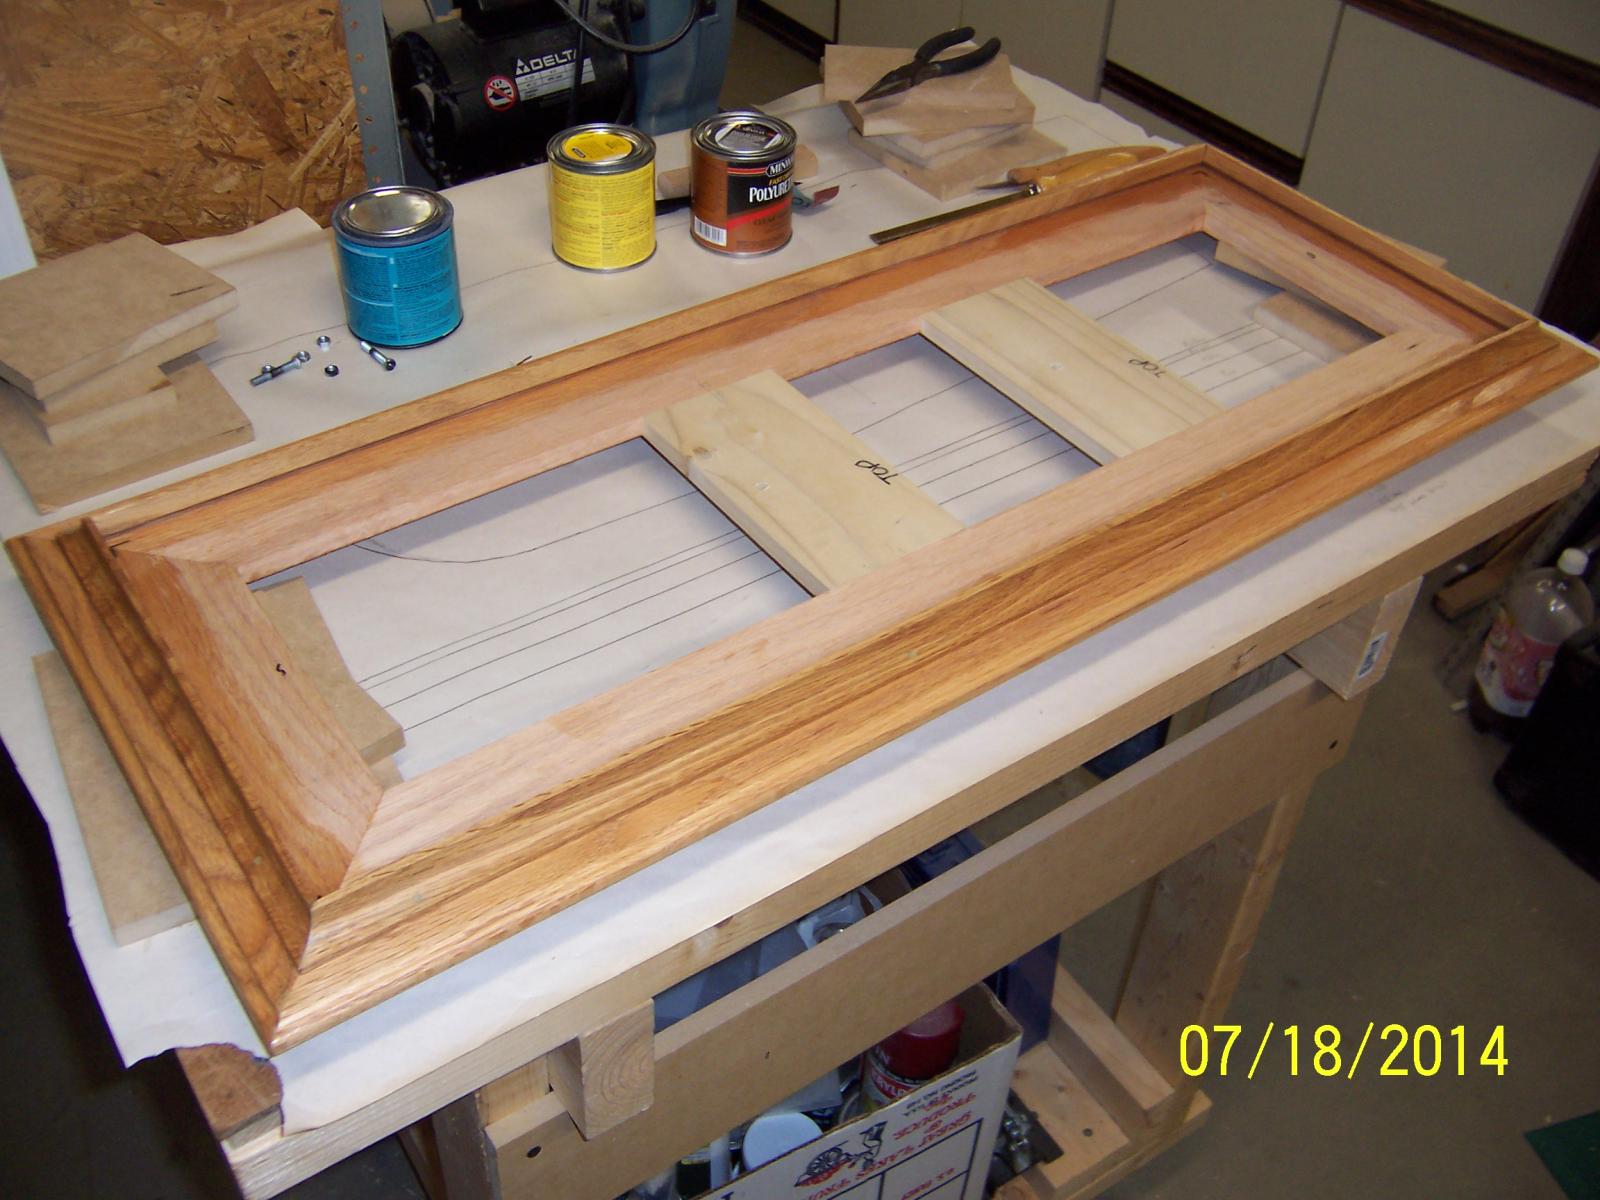
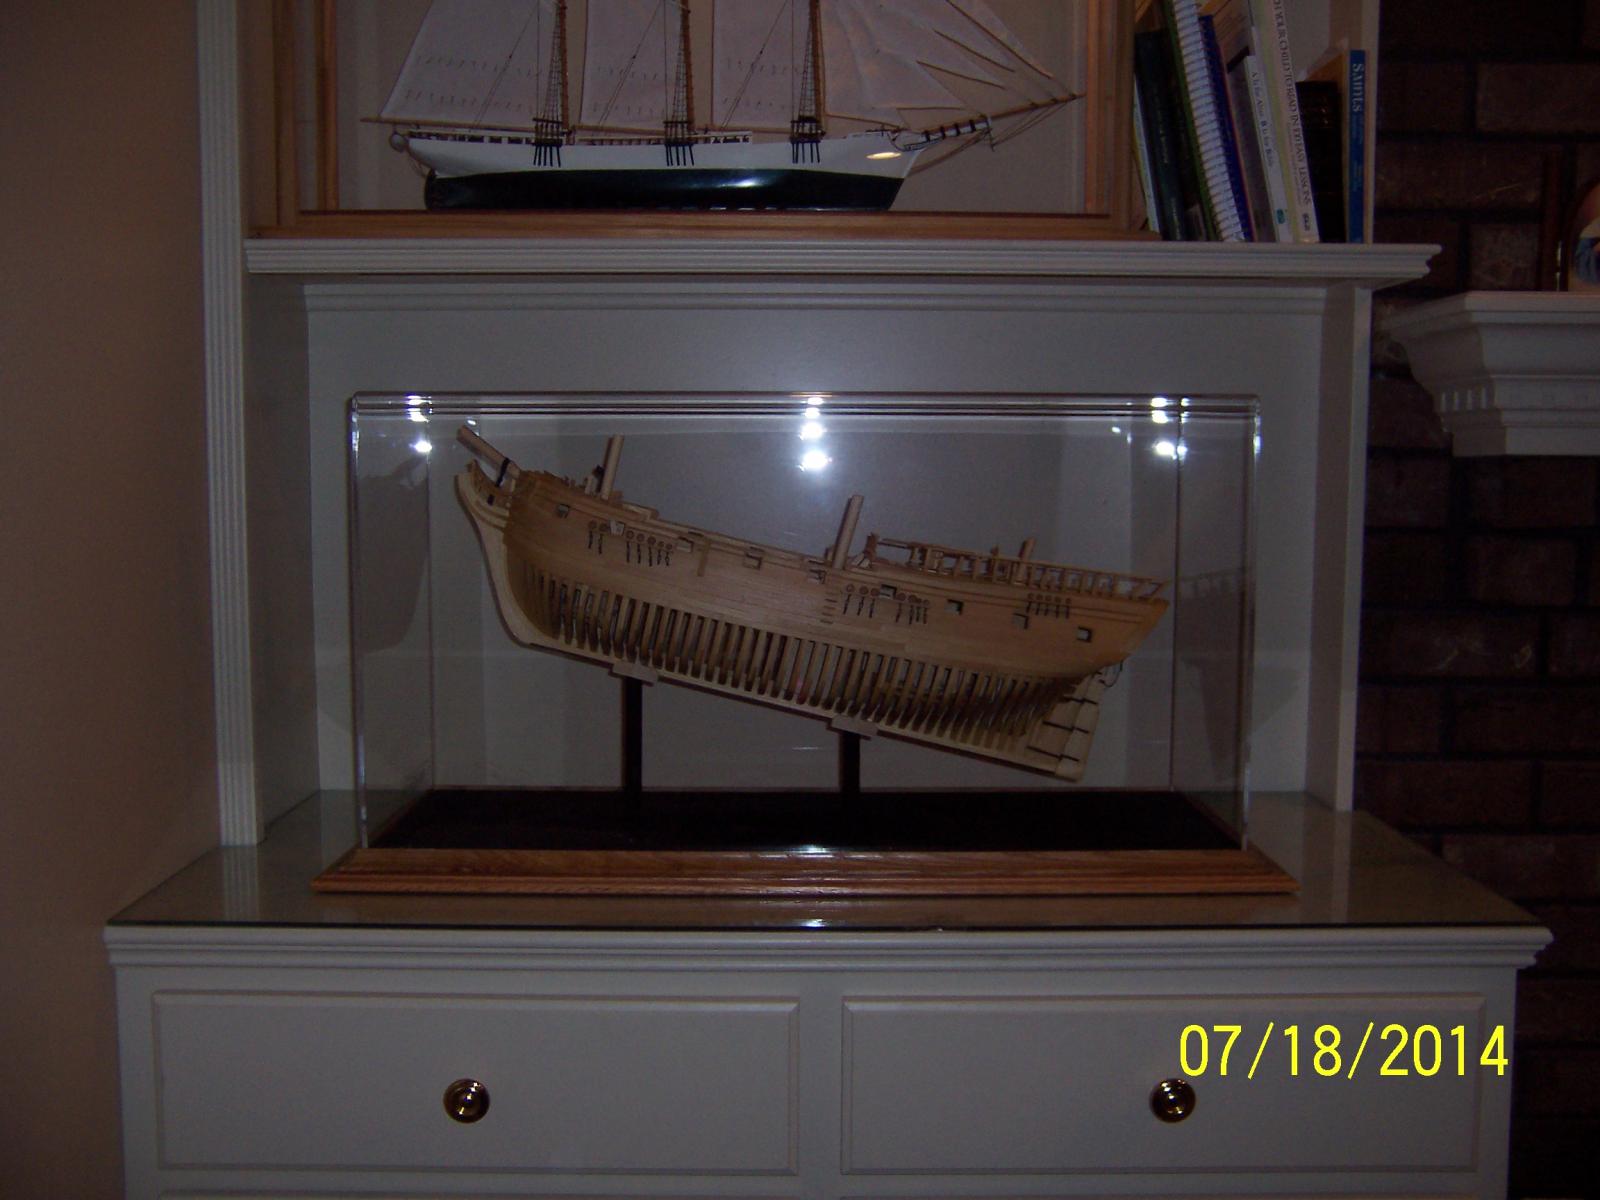
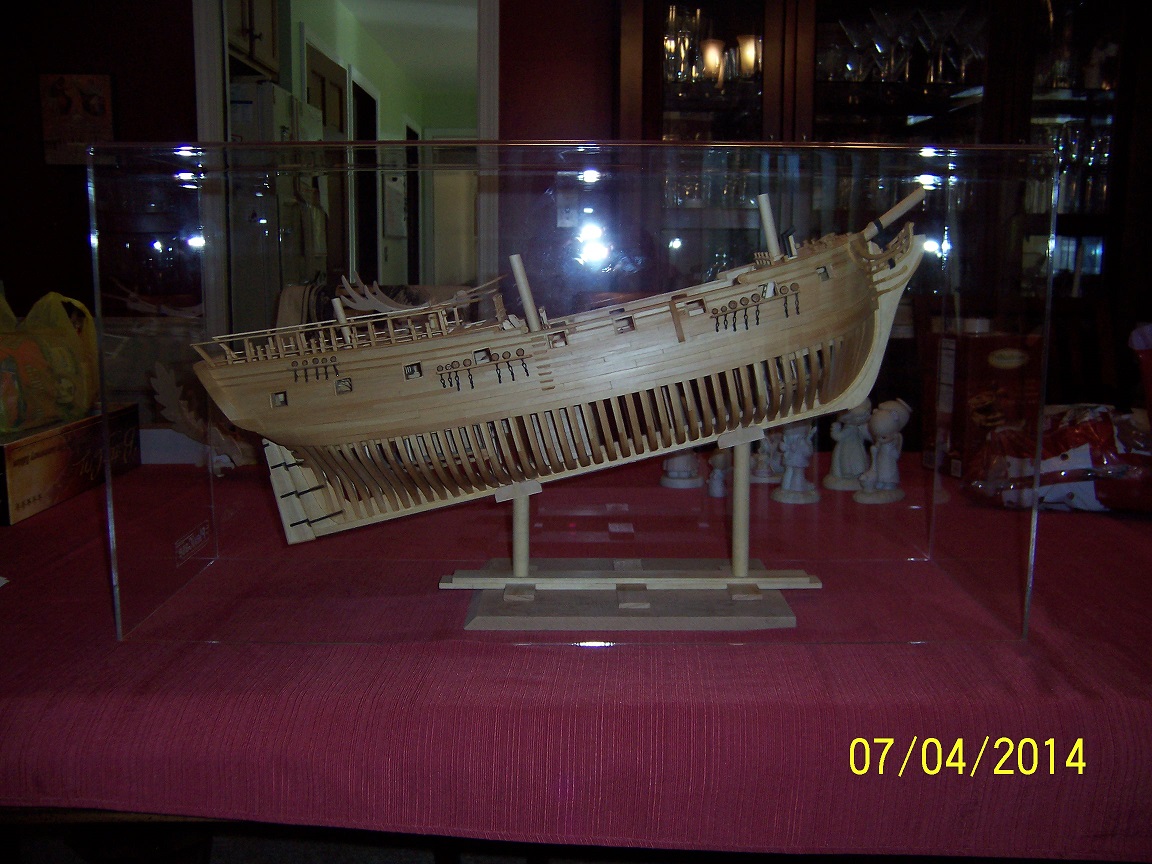
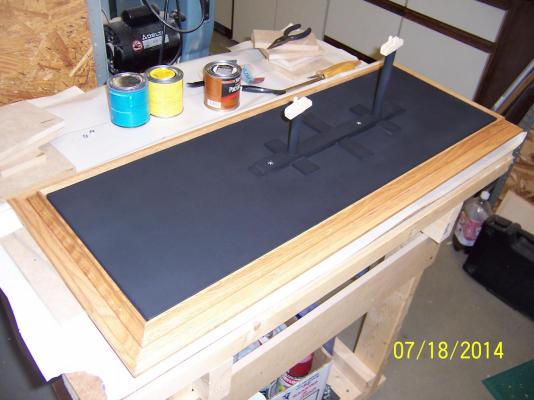
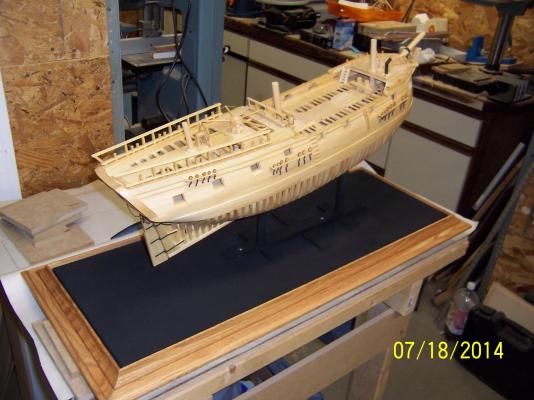
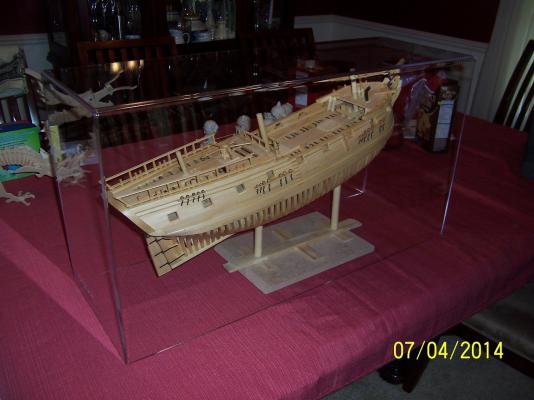
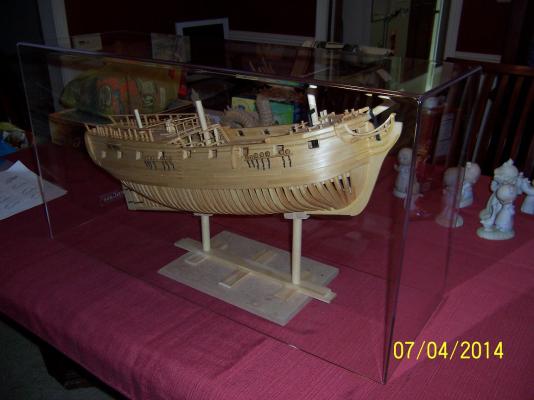
The case. Yes I know the figurehead still looms out there, but I wanted a measure of safety with not only because of the kids but also spectators that love to put their hands near, if not on, the hull. So....I needed a bottom to go with that plexiglass top. Step one was to get some 1/2" oak and some 1/2" poplar (filler) to construct the main base. Everything was glued together using biscuits: Then I added some 5/8" inch cove molding to provide half the slot for the plexiglass dome. The outside edge was also routed to add some character and the whole thing stained and urethaned: Then I cut a 1/2" MDF board down to size to create the slot (between it and the molding) for the plexiglass to slide. The MDF was painted a flat/flat black along with the stand previously made. I did not paint the connection point that slides over the keel and between the ribs so it wouldn't stand out. I still need to paint the bolt heads that go through all three pieces and are affixed with a nut recessed in the very bottom. I affixed the Druid and I had not done anything really dumb (which I hadn't discounted): So I carried everything (bottom, top and Druid separately) to the family room and put it in its designated place. I put the top on and stood back (thinking about that FIGUREHEAD). Yea, that will begin come Monday. I really appreciate all the likes / looks / comments. This last stretch is truly a stretch. I keep thinking just another week and I will be done but that started 5 months ago and I am still plugging away. I am still having fun and truly only have one item on the list left (the figurehead - did you catch that?). Stay Building My Friends, Mark


- 268 replies
-
- 12
-
-
Just to be a little more clear: My break is painting the bathroom on Saturday and picking up some stuff across state on Sunday. Monday is a the target. Off to the store to pick up a carving glove. Never done a 'true' carving before but I can draw and believe I have a bit of an eye for 3-D so I am hoping for decent results after a couple of tries..... Mark
-
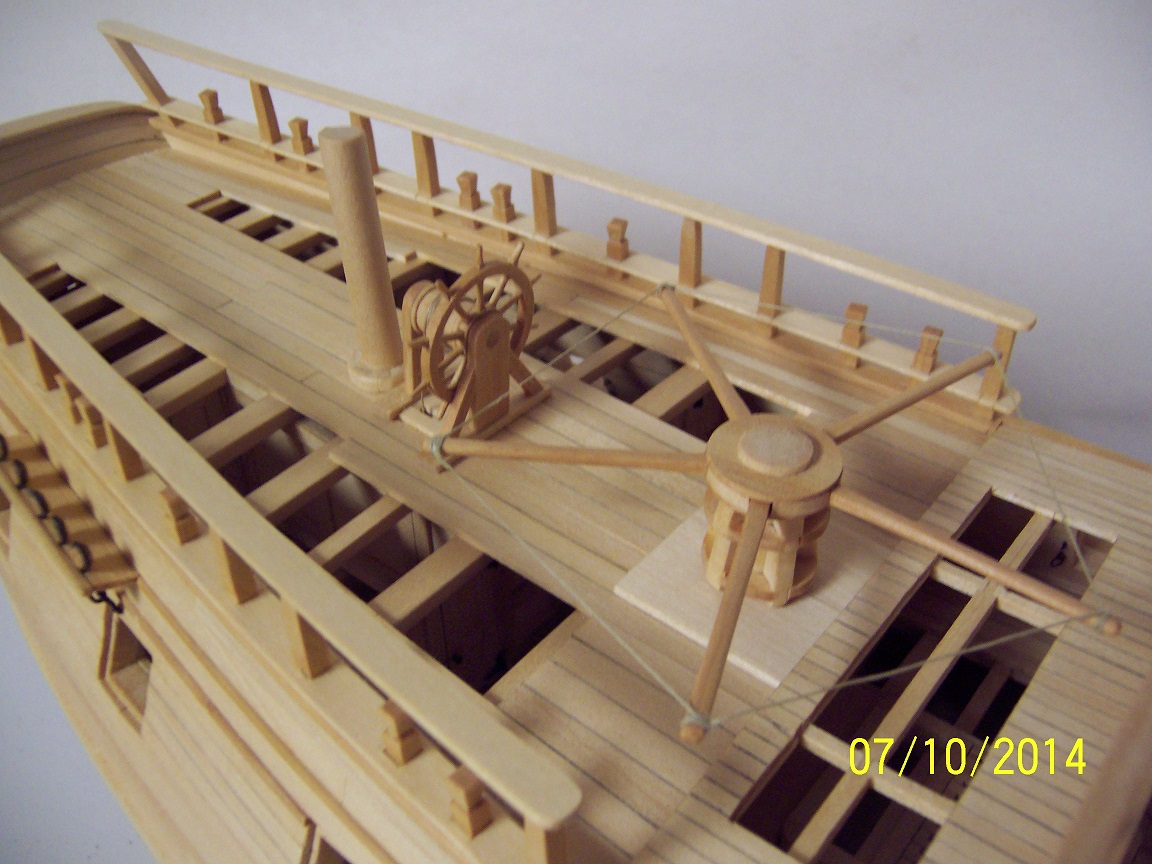
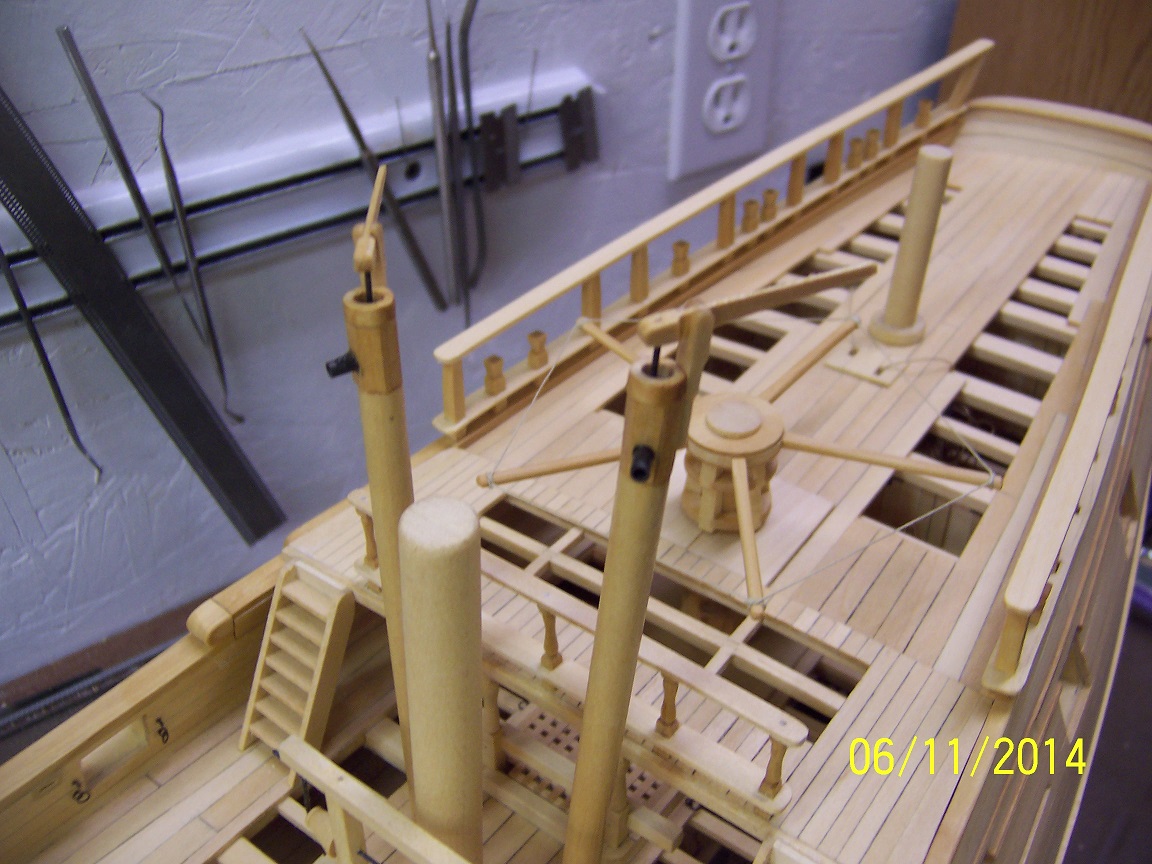
I am just rolling along. In a couple more hours I banged together the wheel stand and got the tiller rigging all set. This is a big milestone for me given that the figurehead is the only item remaining. I am currently sitting back and giving myself a break. Maybe clean up the workshop a bit (hah, hah), Stay Building my Friends, Mark

- 268 replies
-
- 14
-
-
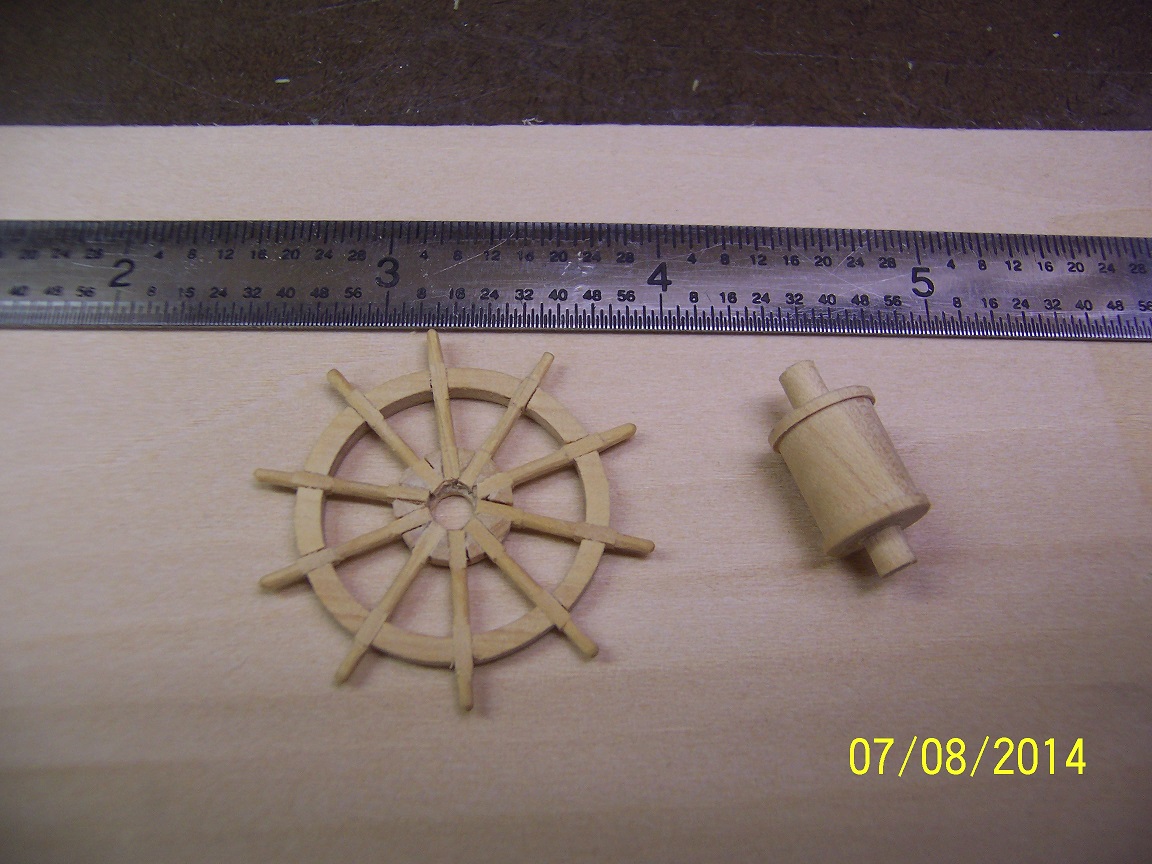
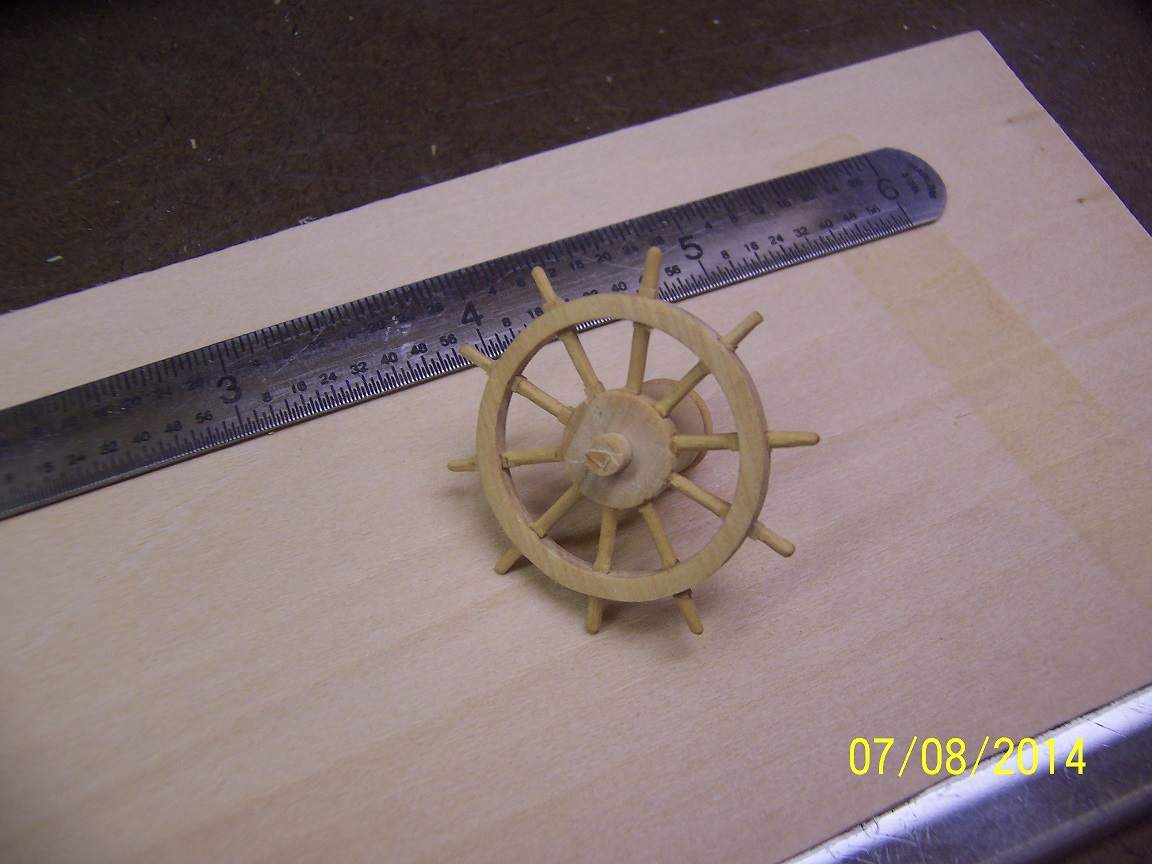
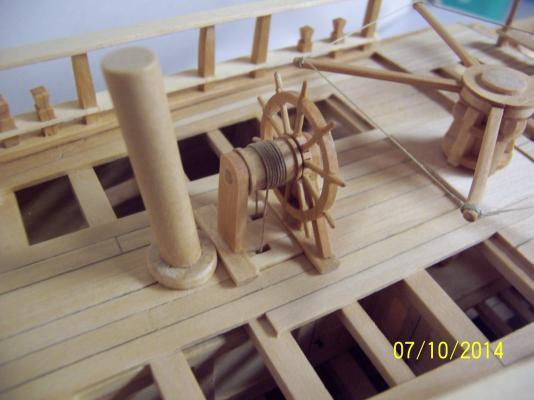
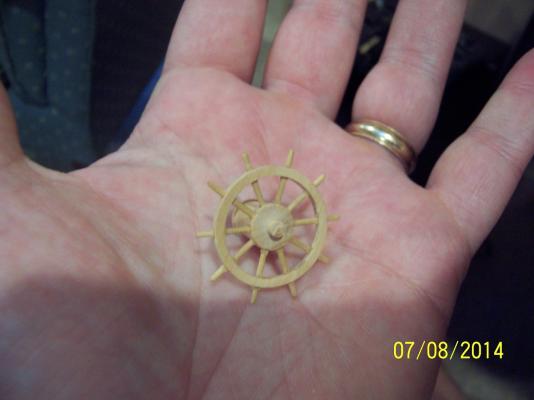
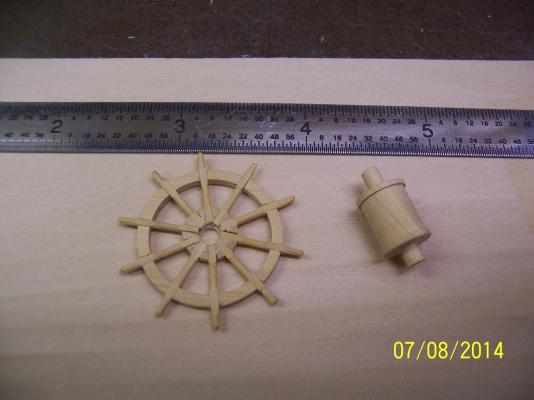
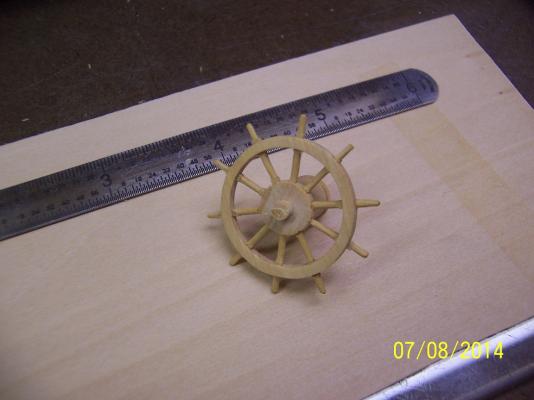
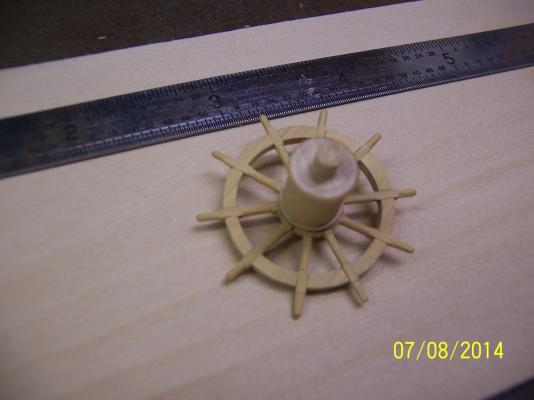
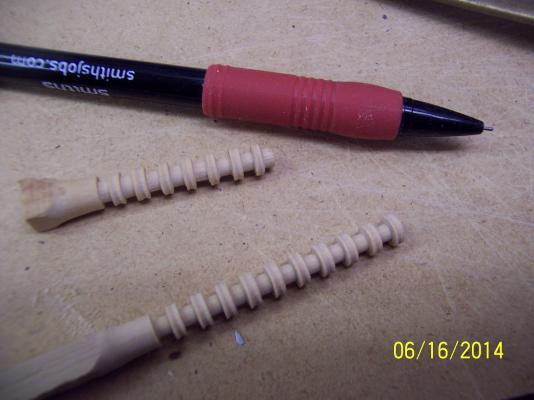
Time for that last piece of deck apparatus - the Ship's Wheel. I didn't take a lot of pictures (getting caught up in the moment) but this worked out a lot more straight forward than I had feared. For the outer ring I used a 7/8" forstner bit to drill out the inner hole on an oversized piece of boxwood previously sanded to thickness. I nibbled away the outside excess on my Byrnes saw using a sled then switched to the circular sander for the finer rough in. Finalized with hand sanding. The inner ring was turned on the lathe along with the associated drum. The next pic is of a prototype drum that was replaced with another: For the spindles I opted for a size equal to the carbide blade width of the Byrnes saw. So after marking on the outer ring the spacing of the ten spindles, I set the height of the blade to this depth and made five passes through the ring leaving a small ring of wood to keep everything together. The same thing was done for the inner ring. After complete it was quite easy to glue in the spindles: I kept the spindle blanks as one piece over the entire ring (two spindles) to make shaping easier. After completing shaping I cut off the connecting piece to make two separate spindles. The inner hole for the axle was made after all the spindles were complete. I was very happy to take the following pic of the wheel essentially complete: Now I need to make the stand for it then attach to the deck and rig. Hopefully by the weekend. Stay Building My Friends, Mark
- 268 replies
-
- 11
-
-
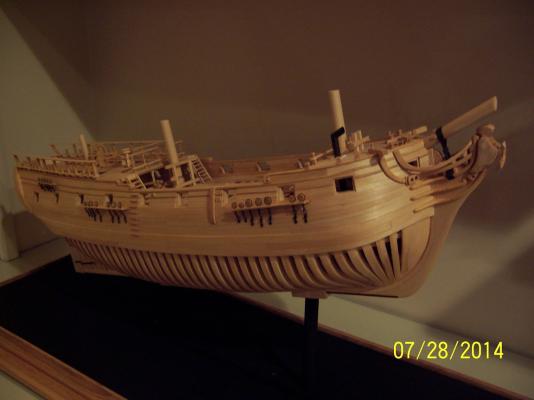
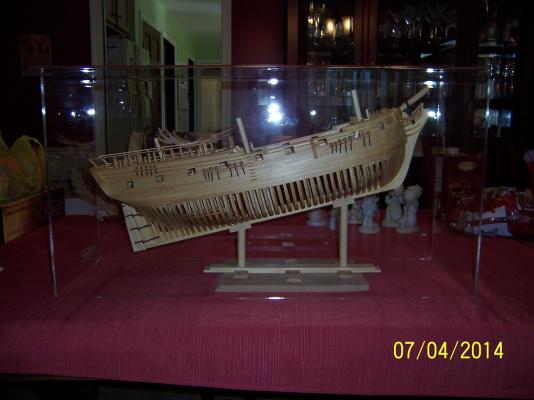
Seems like forever, but finally I can state the deadeyes are complete. I am ready to get back to woodchips and away from all this metal work. Lots of continued lessons learned!! In another milestone the plexiglass case I ordered arrived and it fits!! The base is not yet built so I lifted the stand up to the targeted height with a wood block. Still need to focus on the ships wheel and figurehead, but things are falling into place. Some family time left this weekend prior to hitting it hard again come Monday. I actually think it is a tunnel exit ahead and not a train.... Stay Building My Friends, Mark
-
I have picked up several tools and such at craft / fabric stores that specialize in beading supplies. These are also aimed at us older folk. Not just plastic stuff for little kids, they stock tons of glass beads and such of all sizes so grabbing them as well as manipulating the wire to string them for jewelry. A different hobby medium but very suitable. I have picked up tweezers (small tension included to keep them shut) that I have used for similar things at such a place. Mark
-
Blackie - I just realized I have been remiss in getting that gun lid sketch to you. Tonight I will draw something up to show the direction I was going. Sorry! Mark
-
Nice work David. I have a made a few card models and really enjoyed them - you are bringing back memories. Mark
-
Nils - I had just thought (first step to getting in trouble) about the normal viewers I have had. Most have leaned over the ship to peer into the openings and get a closer look at the fittings on the deck. By having a slant this viewing is easier to achieve. It additionally invites closer looking and turns it more into a study ship than one in historical perspective. Hopefully this will keep the "I thought the bottom was planked..." questions to a minimum. I haven't really seen this done before but thought I would try it. Bob - I had thought about the mirror on the bottom but will wait until I get the full case constructed and see how that looks. My initial thought was to have black fabric on the bottom mounting board to which the base is affixed. Still time to think those things through as I bang my head on the channels, ships wheel and figurehead. Local surveys have shown a tendency for just painting the pedestals black and forego the acrylic. I might have to make two stands (not very expensive) to do a final look comparison. Mark
-
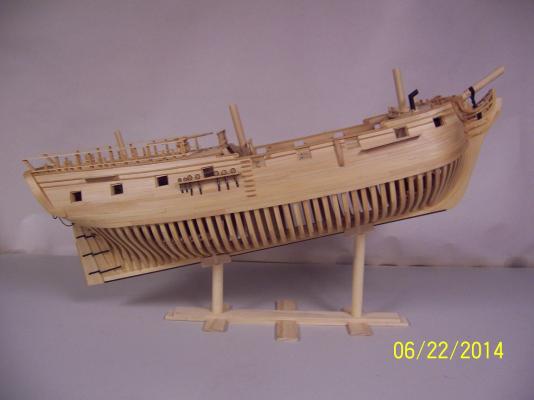
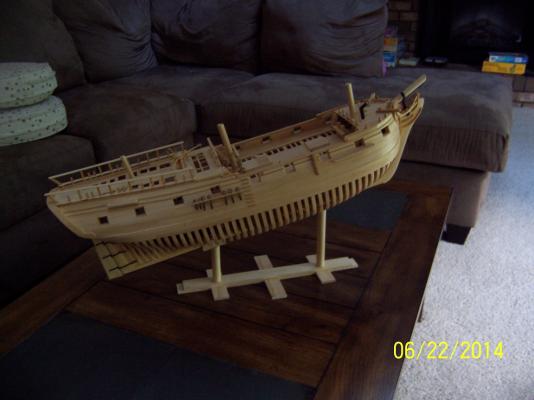
Thanks David and Dave. I actually think the clove hitches would be therapy compared to the issues I just had - but have to believe it is in the past and it is all rainbows and sunshine up ahead, hah hah. Speaking of in the past I jumped into the prototype ship stand today to see some progress (and success). This was a think of it as you go (other than the base measurement calculations). It turned out more solid than I had thought. I thought some outside rods for lateral movement support would be required but now don't think so. It is configured for people looking at and through the upper decks to see the internal details. And yes, the seamless acrylic case is on order. The bottom stand will be painted black and I will probably substitute clear acrylic rods for the upright posts. A little different but I like it. Stay Building My Friends, Mark P.S. Now to get back to those other channels.....
- 268 replies
-
- 13
-
-
Russ - it pays off to take multiple camera shots and pick which ones you use!! I have silver soldered the joints but wrapping wire around such small circumferences really tried these stumps I have for fingers. Mark
-
I think these links are among the most time consuming and frustrating things I have done on this build. I have spent a lot of time trying to get them right and have probably thrown out enough wire to do 2-3 ships. Never anticipated this at all. After a lot of false starts and changes in techniques I finally have something that I am okay with: Thirty eight (38) total pieces involved for this. I have only kept track since about a third of the way in the build but I have to be over 2500 total pieces so far..... Now to just do the same thing for the other five! I am hopeful I can cut the time required for each to just a couple of hours per. Stay Building My Friends, Mark

- 268 replies
-
- 11
-
-
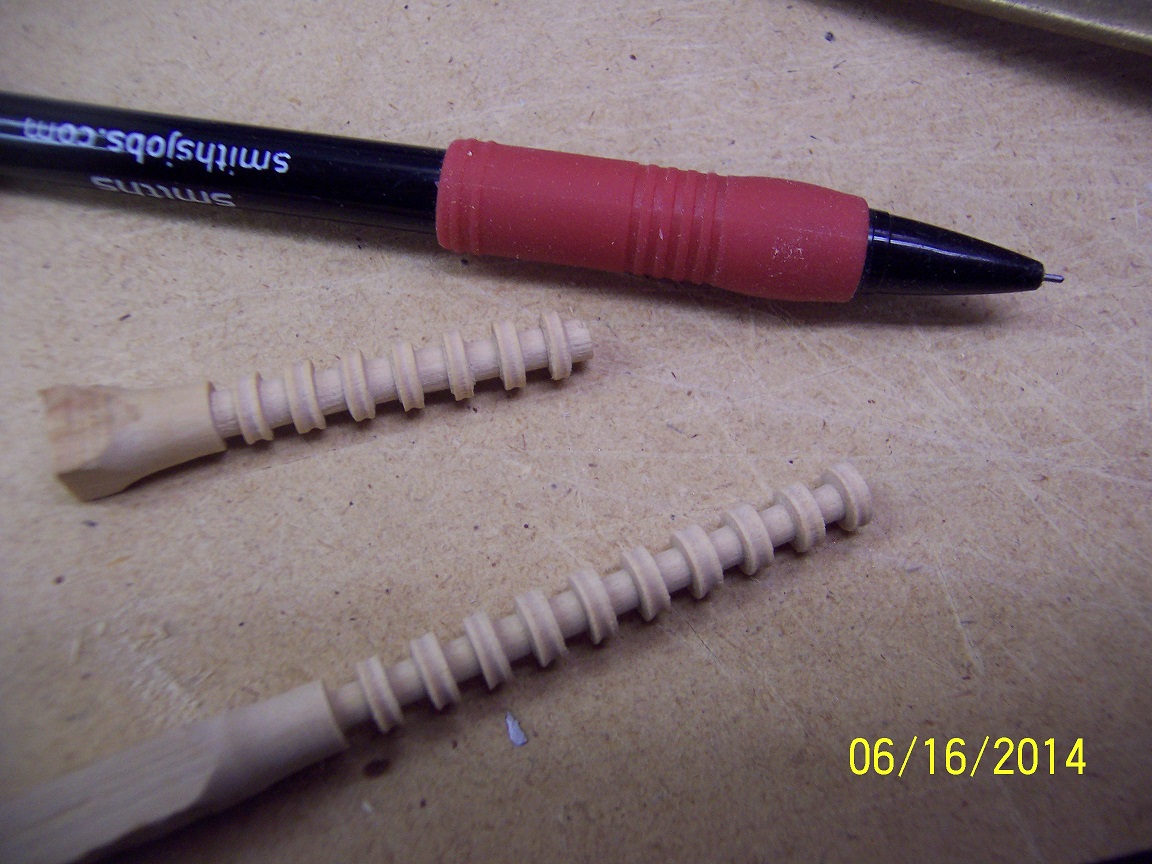
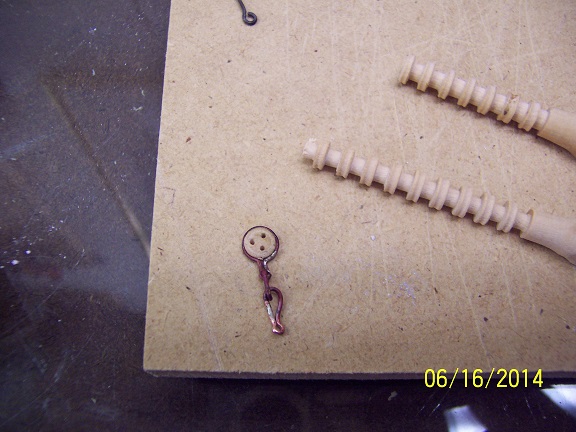
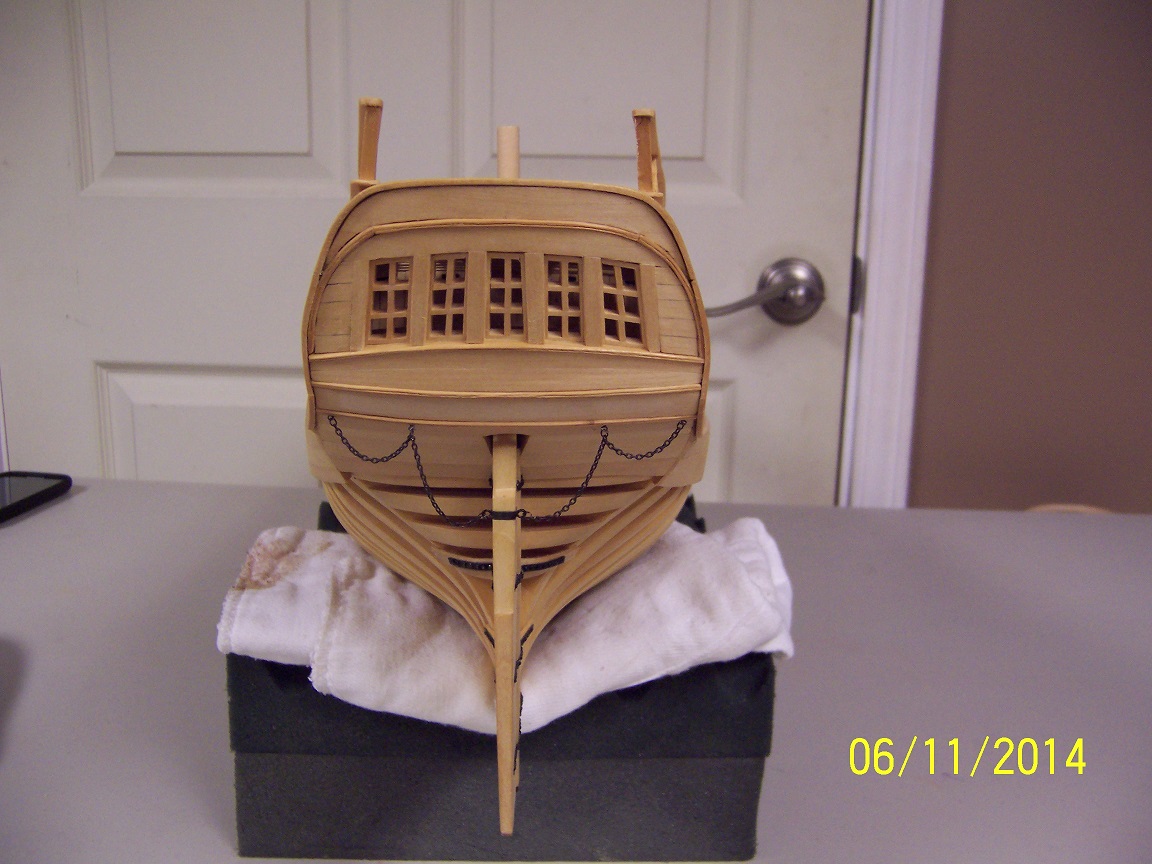
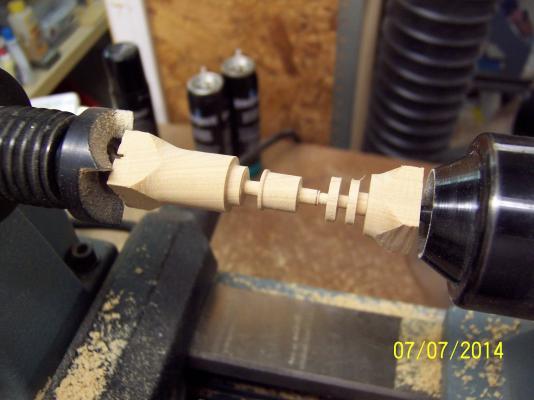
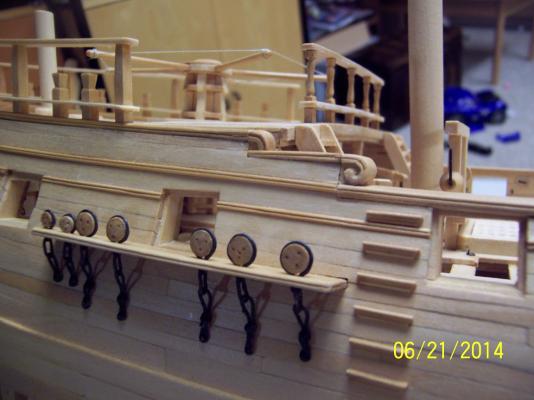
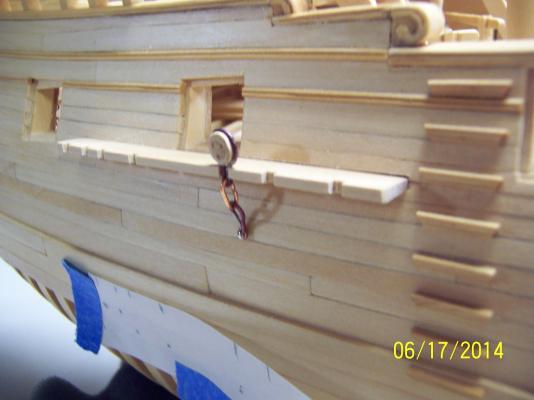
Time to forge ahead and work on those channels! First task was to generate the deadeyes. I cut some square stock to the appropriate size and chocked it into the lathe. After rounding it wasn't too much difficulty to get the deadeyes roughed in. A lesson learned was to keep the length of the wood stock to around 3.5 inches. This provided enough rigidity to make the lathing pretty straight forward. Anymore and the flex just started to get too much, especially after a couple of inches of deadeyes were cut. With the string of deadeyes it was straight forward to add the three eyes and THEN cut off the deadeye. Much more handling power so greater accuracy. With the deadeye figured out, it was a trial and error to define the wire lengths (20 gauge brass) necessary for the three loop lengths. The intent is to silver solder the loops closed. Then to check everything I put the channel in place (still missing the cap strip), made a template of the right angles to put the links on and affixed the prototype. The bottom flat brass link is still missing. Everything seems to check out and now I just need to make 29 of these for each side (2 different sizes for the deadeyes). With the cap strip on the deadeye is angled more correctly. If necessary I can add a bend to insure this happens. Stay Building My Friends, Mark


- 268 replies
-
- 10
-
-
No, just trying to achieve the effect you already have. Some silver solder to make the links, some brass sheet for the cap plates then on to the lathe for the deadeyes. -mark
-
Great information Nils - I am starting on my chain plates so this is very timely. I will not have my upper rigging so I have a little less difficulty (angles just have to look good and will not be tested by the actual shrouds!). I am looking to use 20 gauge wire and am hoping that will do the trick. Looking great as usual! Mark
-
David, I will certainly consider it. Given the body of water that separates us this is not an easy decision given it's distance but I will talk with the wife as the time gets nearer. Mark
-
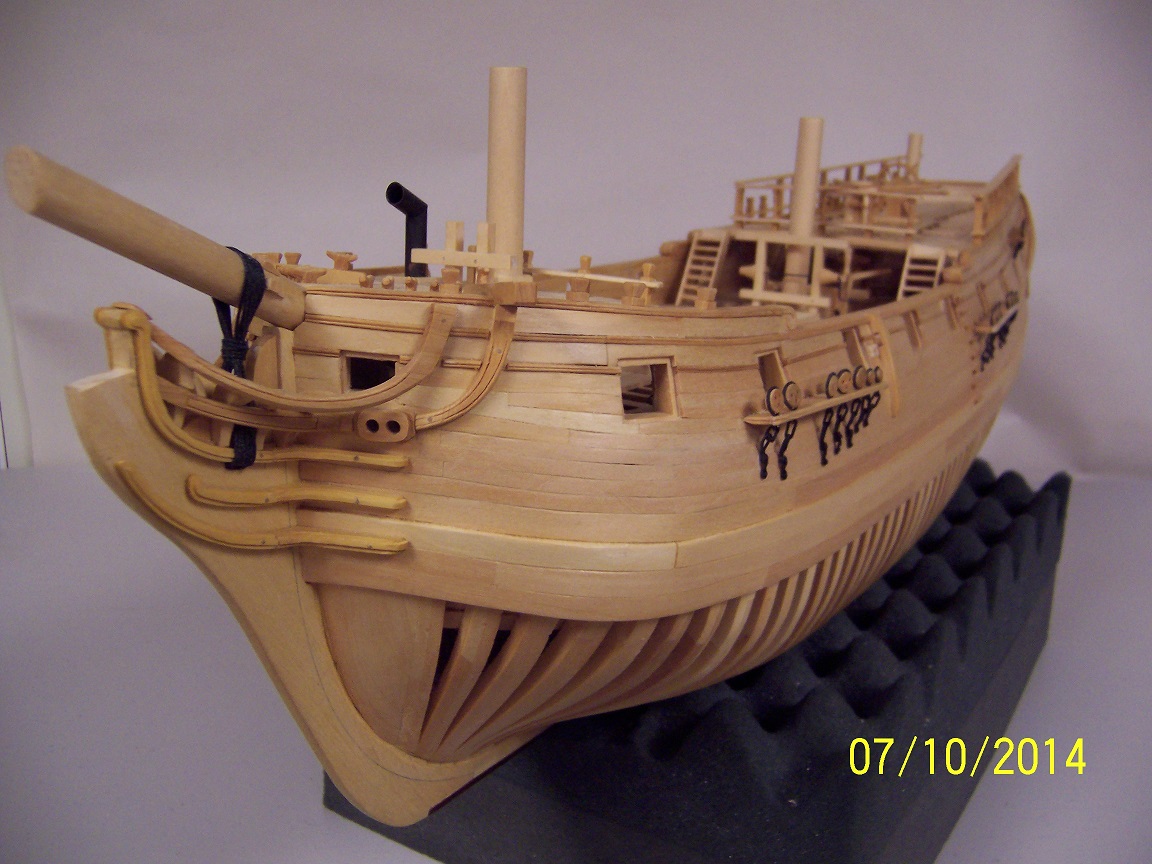
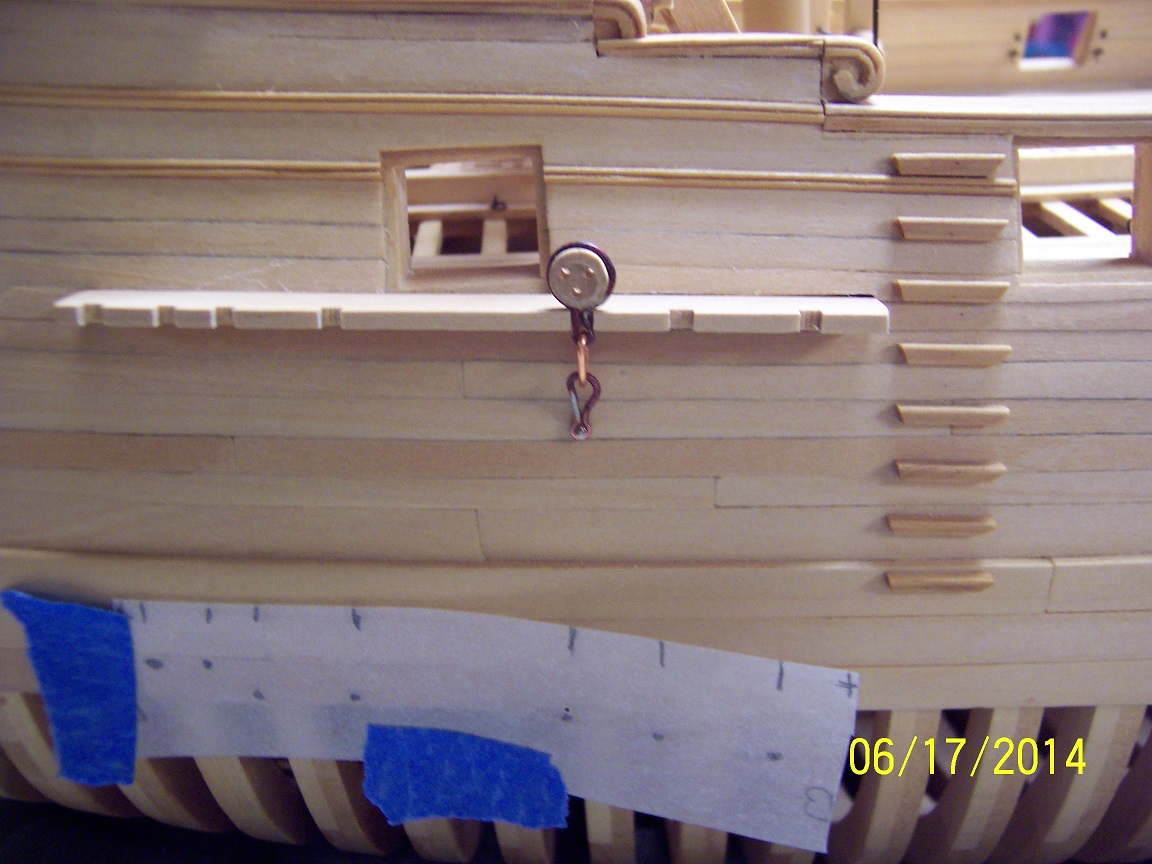
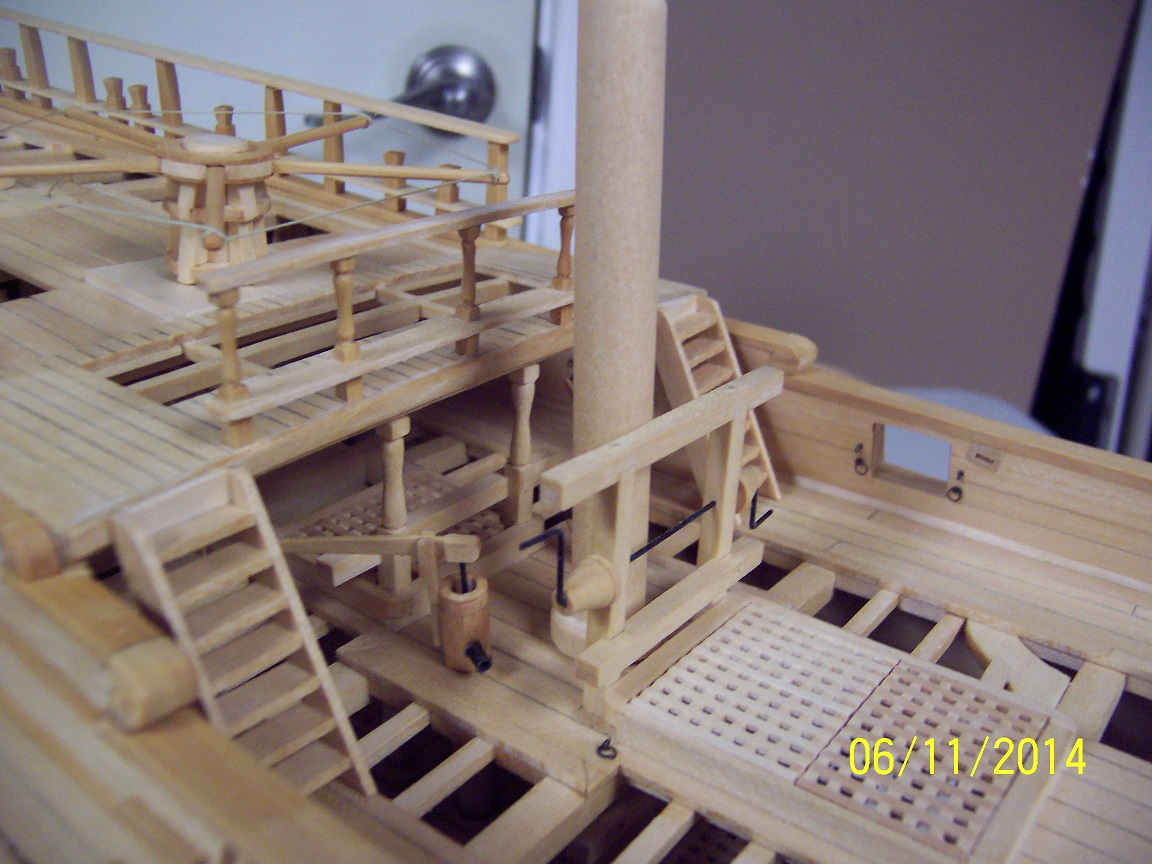
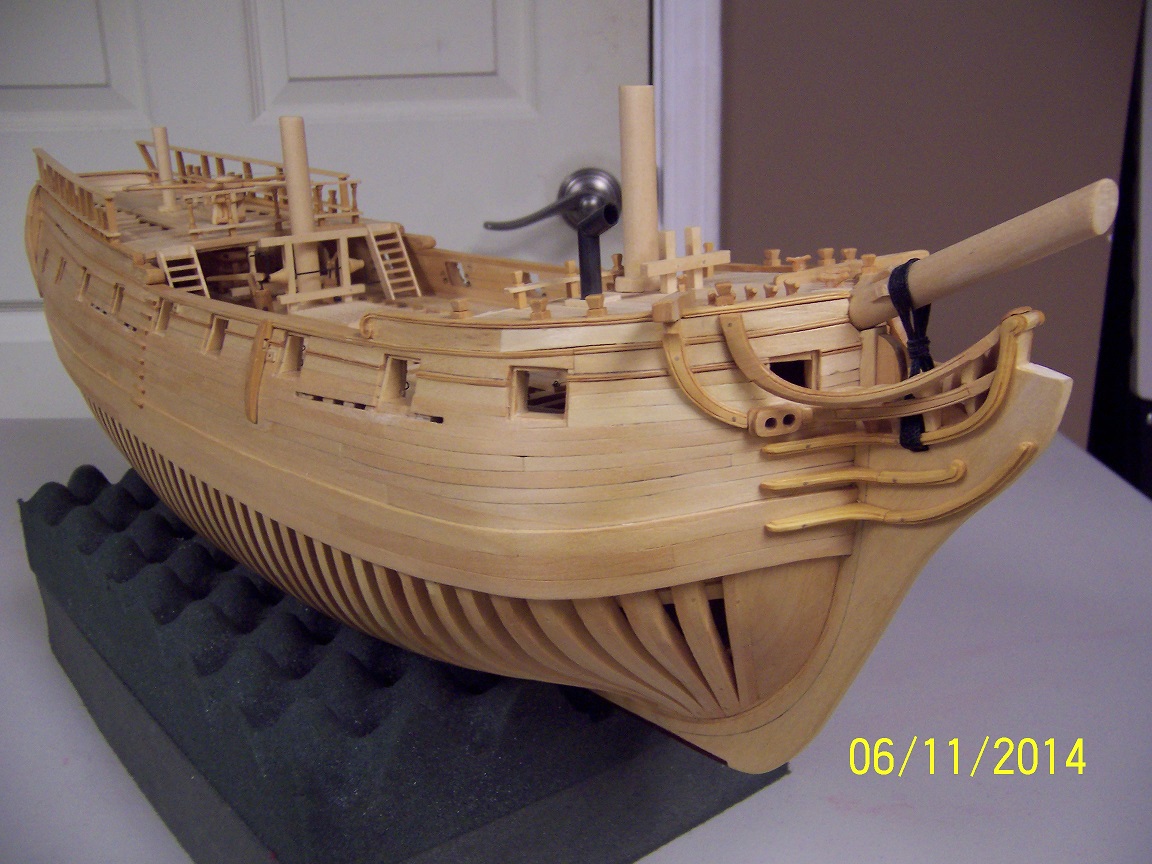
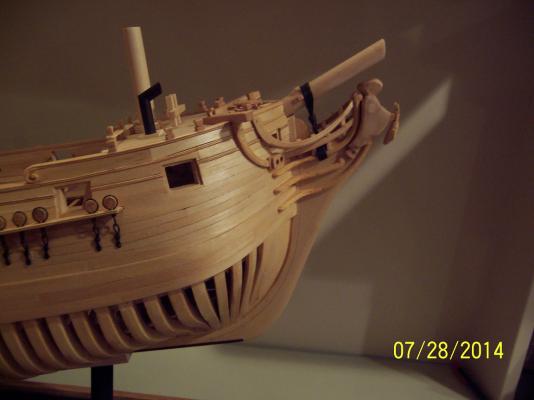
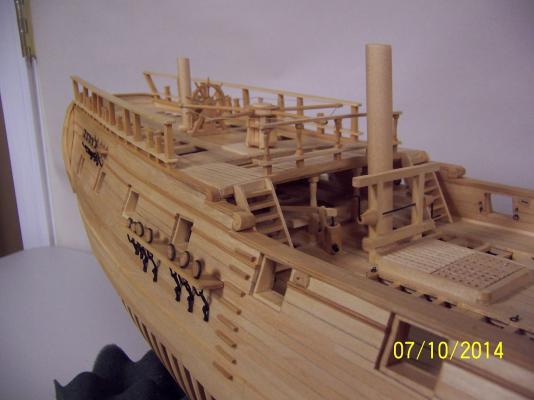
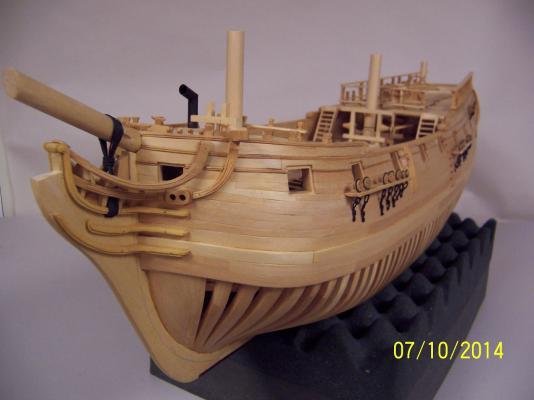
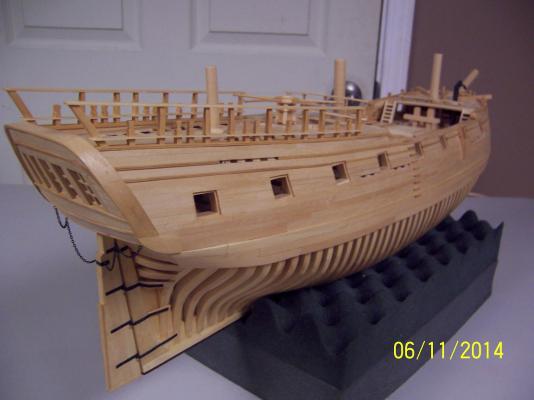
Moving right along..... Rail transitions pieces complete, tree pumps complete, rudder chains complete, capstan rigging complete. Misc Cleanup operations in-process. Once the pumps were gel coated I used the ship as a drying rack. Not your typical look. Once the pumps were in place the gun deck is complete for this build. Lots of stuff going on at the quarterdeck line: I decided to attach the rudder chains (since I was blackening the pump metal, might as well blacken the chain). The attachment points were equivalent to the cannon tackle on the gun deck. The ships lettering goes right above the chains. I can finally sit back and see how close I am: The channels, ships wheel, ship name lettering and figurehead are all that remain (end of the month?) Stay Building My Friends, Mark


- 268 replies
-
- 16
-
-
Growing up I used to really like building plastic WW II airplanes. Almost every one had broken props from people asking "Does this spin?" while they give them a whack with their finger. My reply was always: "Even if they did (which they didn't), how would this enhance the build? Do you expect it to fly?" Long story, short. Do what you need to protect your build. But by building things so they move 'generally' the visual effect is better. On my models I generally make them moveable, but never demonstrate nor state that fact (the finger whack always comes after if you do). As stated before, do what interests you to achieve the look you want. Just try to keep that look as long as possible.... Mark