


popeye the sailor
-
Posts
15,998 -
Joined
-
Last visited
Content Type
Profiles
Forums
Gallery
Events
Posts posted by popeye the sailor
-
-
holy cow! it's a good thing I poked into the forum to catch up.........you'd be done and I would have missed all the fun!
") she's looking great my friend ........your rigging looks awesome! looking forward to seeing her completed.........the closer you are here........the closer you are to the Mosquito
she's looking great my friend ........your rigging looks awesome! looking forward to seeing her completed.........the closer you are here........the closer you are to the Mosquito ")
-
thanks Ken.......I owe it to this book. the original author Geoffrey J. Thomas, passed away towards the tail end of the research. Barry Ketley picked up where he left off and had it published. there is also quite a bit of info about Adolf Hitler, so this book would also be a good source of info for any history buffs out there. it does make it harder to discern color with the bulk of the pictures I've seen in black n white, but I've seen enough faded finishes { cars and such}, that it isn't hard to imagine. I think that's what drew me to the plane......all of the exterior detail. thankfully, it will make up for the lack of interior detail....because this kit doesn't have it. so I will try to add as much of the exterior detail I can into the model. when I get more into the Memphis bell kit.......you will see the difference
- Old Collingwood, mtaylor, lmagna and 3 others
-
 6
6
-
pretty ingenious set up.........it actually moves
I've seen these kits around, but never thought about buying one. congratz on the move.........bigger house or bigger work shop?
- mtaylor, Don Quixote, lmagna and 1 other
-
4
-
-
-
-
-
-
thanks OC........thanks to all for the likes
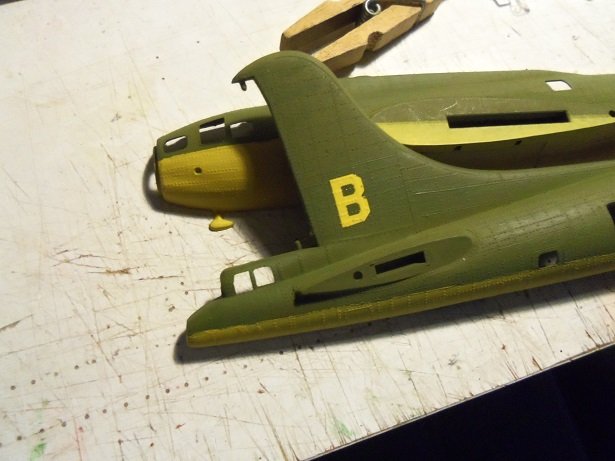
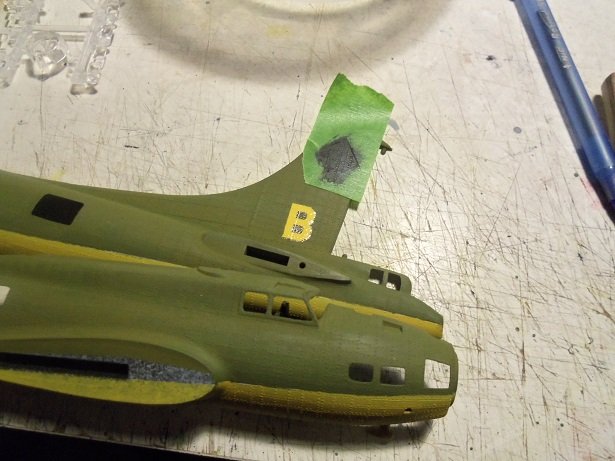
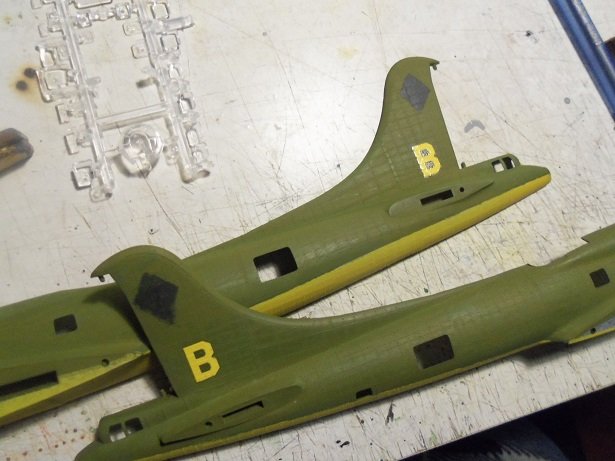
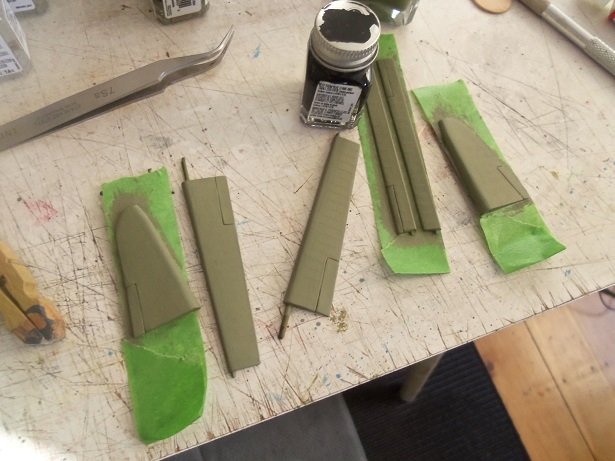
I've gone a tiny bit further.......the markings on the rudder fin that were defaced. for the 'B' I'll be using a decal.......and for the pennant marking {which for most was a triangle, but for some reason appears as a diamond on the Wulfe Hound}, I'll just do some paint. I put the decals in place first.
taking some parchment paper, a strip of tape was laid on it and a diamond was cut out. it was laid in place on the rudder fin, and with some dark German gray, I tried to dry brush it on....came out a tad too dark though.
the call letters were still left on the fin...a couple of the numbers were a bit faded. luckily, they are supplied on the decal sheet and two of the numbers are faded. I'll be adding them on after I attempt to blot out the code letter
here are a couple of pictures from the book...

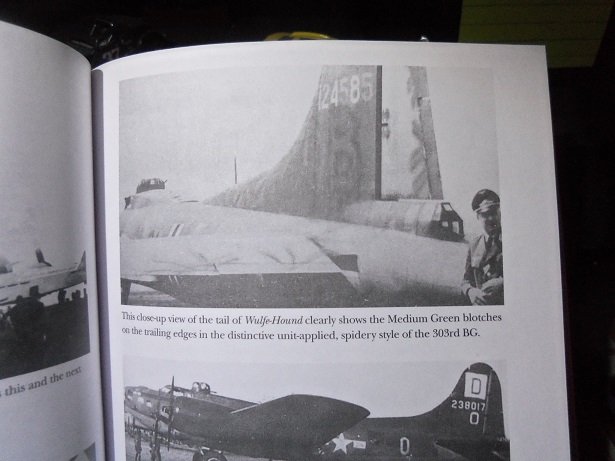
earlier I mentioned that these planes were also equipped with an inflatable dingy, in the event that they landed in a watery situation........here's where the compartment was located on the fuselage
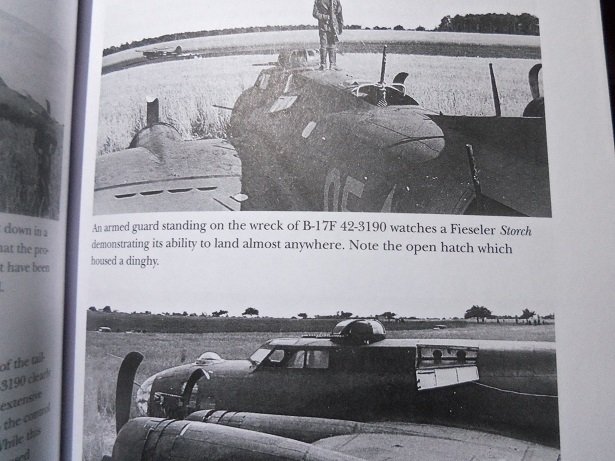
I made this one so you may be able to read the caption......
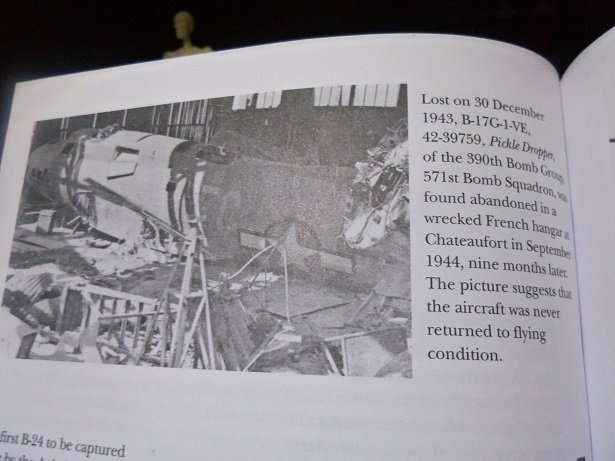
at one point, the Germans were known to have as many as 20 B 17's in the KG 200. a few were not air worthy and used as parts.....such as the fate of Pickle Dropper
- Tom E, GrandpaPhil, FriedClams and 8 others
-
11
-
wow Ken........that site is worth book marking! for anyone who is looking for paint tutorials, they have some here as well
sadly though.......the bottles aren't what I'm looking for. I don't use pipettes and stuff........I'm old school. I don't use future either....tried it, but for whatever reason, wasn't happy with the results.
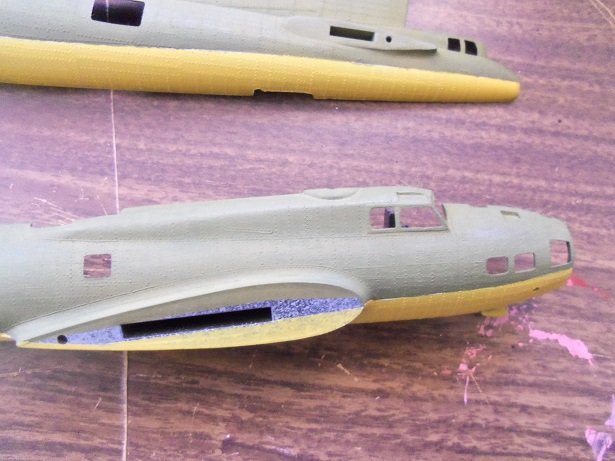
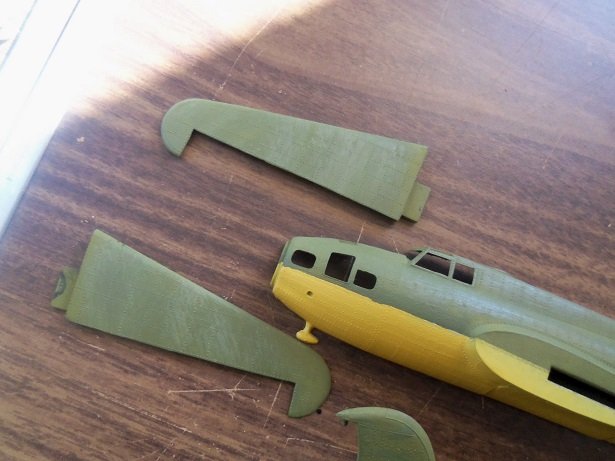
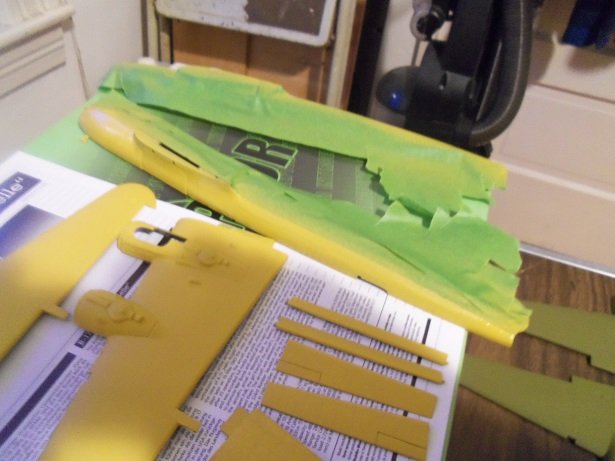
thinking further on the paint.......as I mentioned, the olive drab is no good. letting it set after mixing in all that thinner, was the swan song........the suspension in the paint was totally broken down, and allowed to harden. I am not without a solution though............................I have a couple of white ensign paints light olive drab, olive drab, and light bronze green. I also have a couple of Humbrol paint too...interior green, khaki drab, and US light green. I started this morning, by trying to fix the olive and yellow line. it worked out nice......but I saw something more. the mottling of the paint on the Wulf Hound has been a question to me........how can I achieve that?.
well......I just did
the olive I began using looks a little bit darker than the olive I used........using a brush to repair the line....I then went over the rest of the fuselage.
this turned into a paint fest.......started to paint other aspects of the plane.
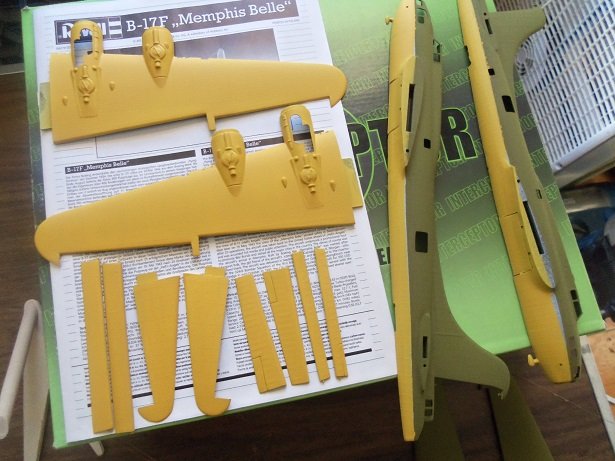
the nacelle cowls had flash around the rims...took some time to clean them up. I also did the props too, cleaning around all the tips.
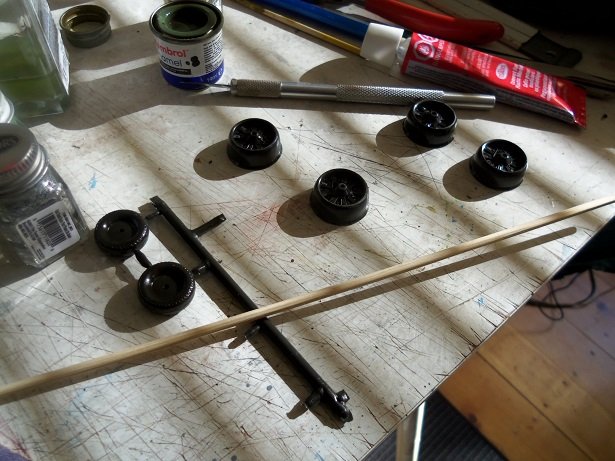
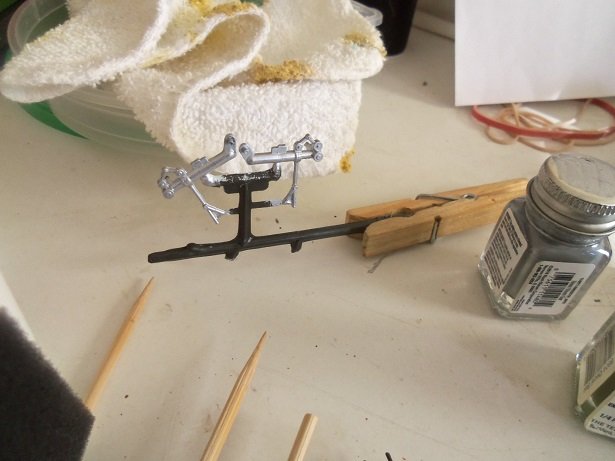
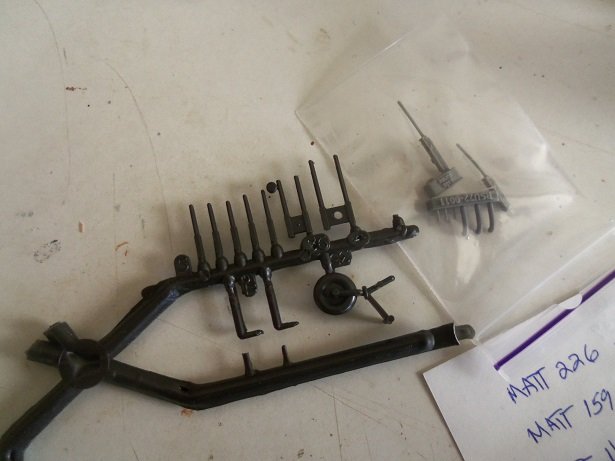
I assembled the tires, cleaning up the seams after they had set a bit. Mark had sent me a couple of machine guns that he couldn't use.......I though they looked a bit small for 1:72 . here they are along side the machine guns for the Wulfe Hound.
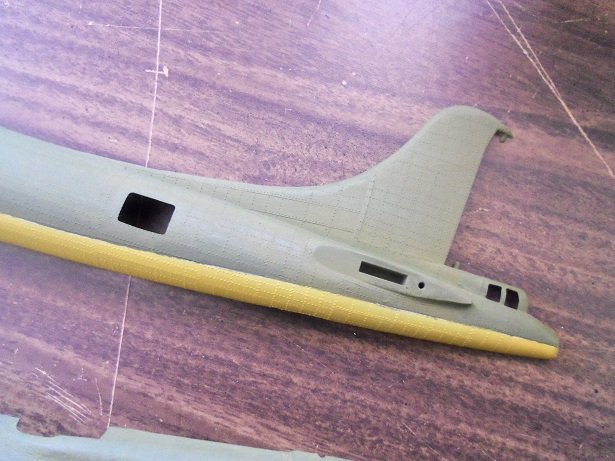
seeing what the white ensign did to the fuselage, I decided to use it on the wings too. to use a brush though wouldn't do the trick........the streaking would be narrow and it needs to affect the entire wing. rubbing somehow entered the picture, and it became the ideal solution. I first went over them with the olive drab............and without changing the cloth, went over them with flat bomber tan. this mottled the wings fairly well.
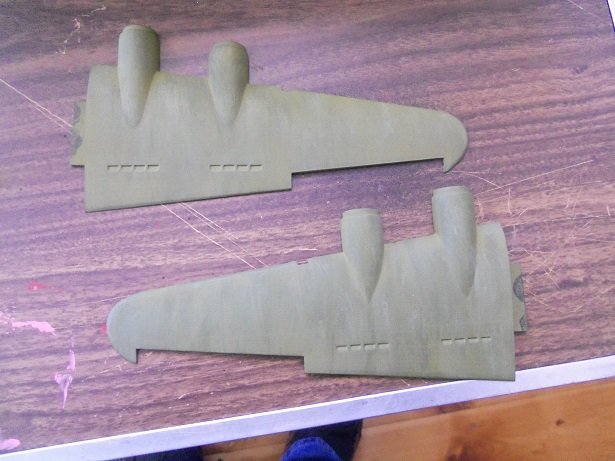
I rubbed over the fuselage a little....I think I might do more.
I did the ailerons rudder halves and flaps in the light bomber tan
I did notice while all this was going on, that the waist gunner positions, are just glassed over and no guns are present. I may use the machine guns that Mark sent me.........I will need to make a bracket to mount them on. more on this bird in a bit
-
great looking model Phil.......is this for some type of war game? I can envision a 4' X 8' battle table
- lmagna, GrandpaPhil, mtaylor and 1 other
-
4
-
I did injection molding....automotive parts and seals. the molds to make the parts are interesting.........heating......injection time......cooling, are all critical. when the mold opened, I had less than a miniute to wax it up and close it, or strange things would happen to the material, as well as the next run of parts. I could get into some of the scenarios, but it's a long story........fog might be caused by heat and cooling ratios.
- Canute, Old Collingwood, lmagna and 2 others
-
5
-
first class job Kevin! I went out for thinner the other day, and I picked up a couple bottles of that green chromate. those tins look like the ones I have
I've heard of that name......although when I did a search, it took me to bass fishing and pleasure crafts {not exactly what I had in mind}. I've compiled a couple dry transfer videos in my youtube....but haven't had the courage to try them out. I still believe that there is a way to make the perfect water slide decal.......constantly looking for other programs. cockpit detail looks super!
- thibaultron, mtaylor, Javlin and 3 others
-
6
-
it's been so long.........hard to recall if they did name as well as number the parts. I know that the Revell ships did. gotta be the worst thing about planes........all that good stuff being closed up and hard to see, if seen at all.
being late to some of the scuttle butt.....did you look into seeing if you could get another set of clear parts from the manufacturer? Revell USA used to do it before they were bought up........I do believe Revell Germany does it. I'd check with Zvezda to see if it's possible
-
could be another chigger in the armor........I do believe the olive drab is ka-put..........wouldn't mix when shaken, and when stirred looked very chunky and crumbly. let ya know more soon.
- lmagna, thibaultron and mtaylor
-
3
-
really nice job on her Craig.......did you need to put any weight in ? I recall mine being sort of a tail dragger. I made up a base and painted it flat black...cemented it to it
- Old Collingwood, CDW, mtaylor and 1 other
-
4
-
I've seen so many pictures of B 17 damage....the movie was no exception. Imagining being in the three most vulnerable { I changed the two to a three due to the belly turret....wouldn't want to be in that position either} areas of the plane...............I'm sure it was a sick feeling. the ability of these planes to stay in the air, in spite of heavy damage was astounding. when I built the Nine o Nine, I watched a documentary on the 452nd Bomber Group.......even though the Nine was with the 303rd, I watched anyway.........horrific footage in that one too.
- Old Collingwood, lmagna, Canute and 2 others
-
5
-
yea........I must have a book mark list that's over three feet long
I've not tried toothpaste though........simple light rubbing with a soft cloth usually does the trick for me {my hulls love me for it}. in my younger days, I enjoyed listening to stories the residents had about their normal lives.......I worked at a nursing home while in school. there were fewer brands to choose from and most of the things they bought, were drawn from bulk barrels and made fresh {pre invention of the refrigerator}. your list Lou is a sterling example of having too many brands to choose from. my teen years were the 70's mostly.......even back then, life was simpler. but we won't go into all that.............I'm not a confirmed 'tree hugger' or anything......but one can't help but think of the implications. this knowledge makes one think
by now, the yellow paint has had ample time to cure. it will need to undergo another round of masking. I've run into a slight problem concerning 'mixing bottles'.......I'm running out of them. usually, I'll buy the 1/4 oz bottles of thinner, along with the 3/4 oz bottles and airbrush tins {larger size}........empty out the 1/4 oz and I have the bottles I need. I can buy them empty and ready to use, but I think it's more economical this way. I'm going to look into Amazon and the like, to see if I can acquire the 1/4 & 1/2 size bottles. been meaning to do it....but now I'm finding myself backed into a corner
- lmagna, thibaultron, mtaylor and 1 other
-
4
-
there is the confusion between the movie and the army versions.........the movie was about the 25th mission. John Lithgow is the PR guy in the movie. the army version, which was released during the war, was about the every day life of the B 17 and her crew. that was a compilation of missions and places. the Memphis Belle was front and center in that piece as well. there were a couple of other B 17's that were flown in and altered to look like F's to Co star in the movie version........the Swoose was one of them........the Sally B was another. we had more than one flyable B 17...........sadly we lost one of them

Memphis Belle (aircraft) - Wikipedia
Memphis Belle (film) - Wikipedia
the movie did point out one thing......that the fighters weren't carrying a belly tank during this period.
- lmagna, mtaylor, Old Collingwood and 2 others
-
5
-
not crazy at all..........it makes for an awesome display! very museum quality
- mtaylor, Old Collingwood, yvesvidal and 2 others
-
5
-
wow John.........you've made some really good progress since I last checked in.
superb job on the hull frame and stern!
- FriedClams and mtaylor
-
2
-
-
-
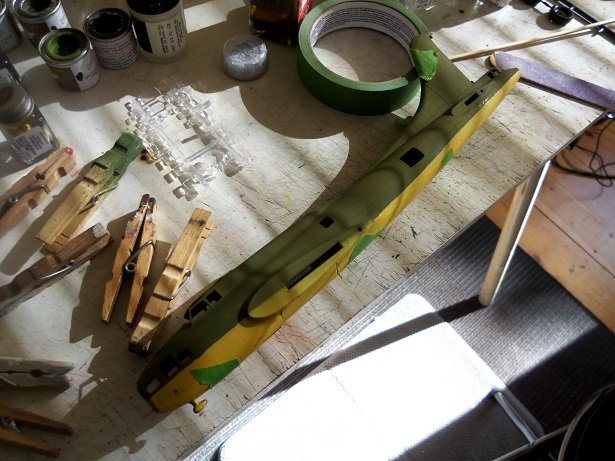
the weather played in my favor yesterday.........I think it will be good for today too {hurray}. for the underbelly, I picked out a Humbrol color. when I got all those paints from Lou, I looked up a color chart for the Humbrol paints.......came up with a gloss and matte chart. I picked out Humbrol matte #24, which is Trainer Yellow according to the chart. as I though further, I began to think it was too much of a mustard color, so I almost chose another color........but I stuck with it. as mentioned, the Olive is really good, although it looks a bit grainy on the parts. I think adding colors relating to the fading might smooth things out......I though about rubbing down the parts lightly, but I am concerned about scratching. I may not do it. when I did the olive color, the parts that I had painted flat white {primer} was too close to where I was working, and they got some over spray.....I though I might need to repaint them. at this time, I sprayed the trainer yellow, crossing my fingers that this wouldn't be an issue. to my relief, it wasn't
I am not at all disappointed with the color either. opening the tin, I found that this was new.........it had never been opened! took a bit to mix it........made a bit of a mess transferring it to a Testor's bottle. I wish I could get hold of some 1/2 oz bottles.......shame that the airbrush I'm using depends on the 1/4 oz bottle. the caps fit on them alone.......I might look into that other siphon feed that I have.
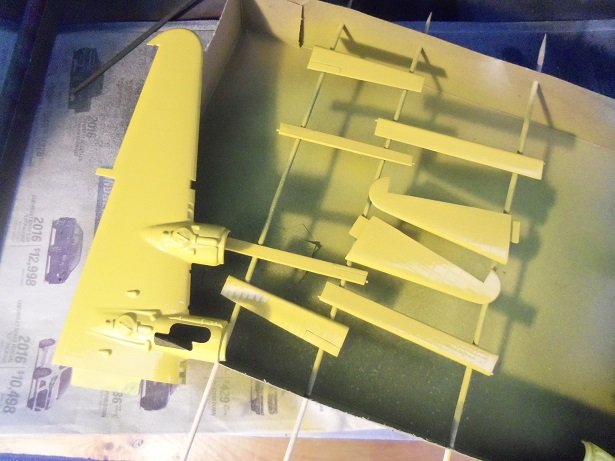
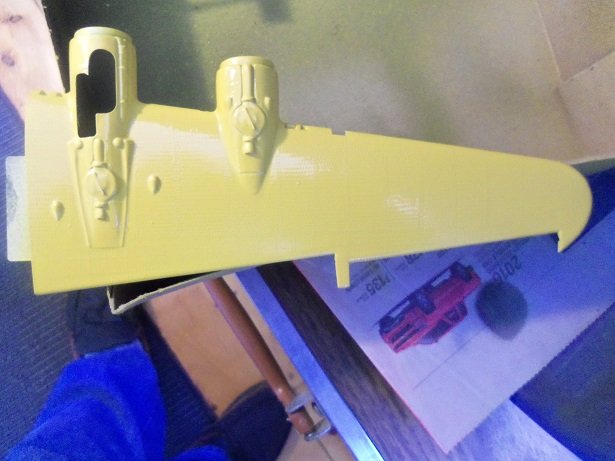
they are still a bit wet. I misjudged the lines on the fuselage halves and did some adjustments with the 'yellow line'
light seemed to hinder the true color shown.......I used very little thinner in the yellow. this morning I took this picture to show the true color....I hope....
- thibaultron, Canute, BLACK VIKING and 7 others
-
10
USS Essex by RGL - FINISHED - Trumpeter - 1/350 - PLASTIC - as she appeared in February 1944
in - Kit build logs for subjects built from 1901 - Present Day
Posted
amazing detail Greg........the contrast between the supplied and PE guns is astounding! the Island is a model in itself! really nice progress........very well detailed")