
HOLIDAY DONATION DRIVE - SUPPORT MSW - DO YOUR PART TO KEEP THIS GREAT FORUM GOING! (89 donations so far out of 49,000 members - C'mon guys!)
×


popeye the sailor
-
Posts
16,007 -
Joined
-
Last visited
Content Type
Profiles
Forums
Gallery
Events
Everything posted by popeye the sailor
-
 some of them did terrible the way you boys were treated coming home.
 -
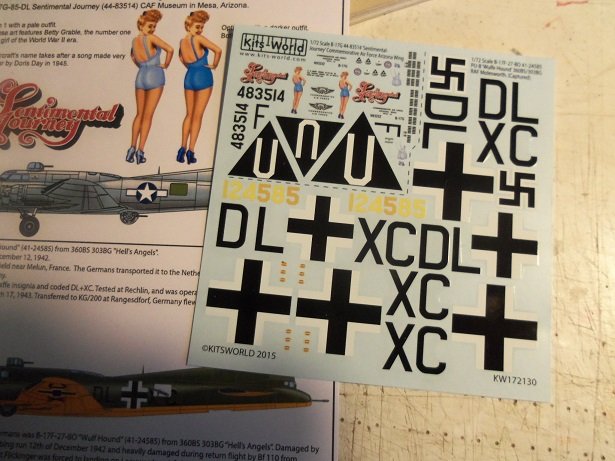
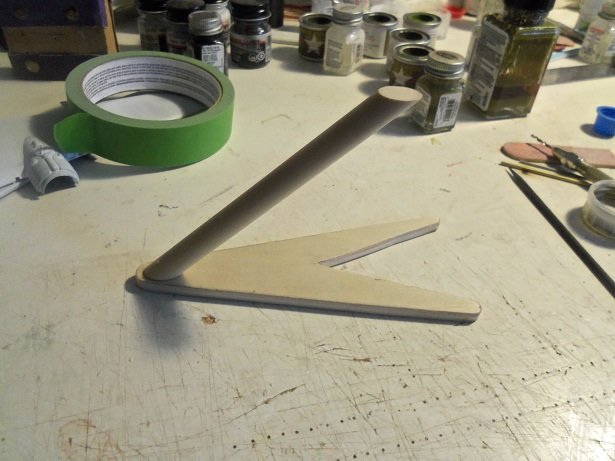
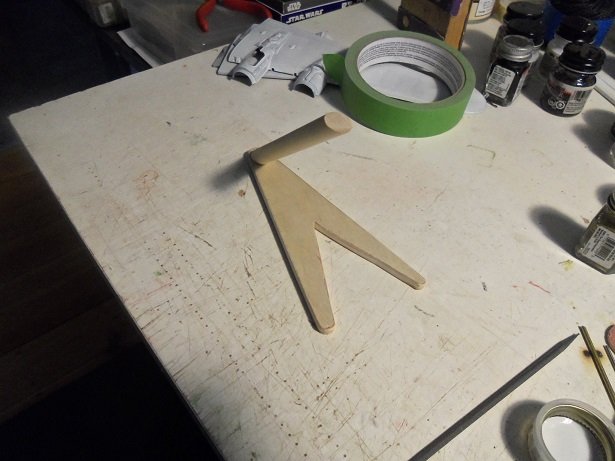
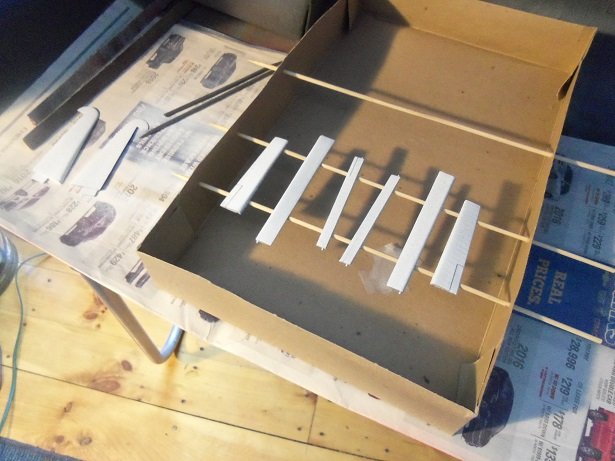
thanks everyone I still remember the hobby shop that used to be Manchester, when I was a lad.........the 606. it was a huge shop......dealt with everything hobby...trains, boats, planes....cars. you name it. now we're down to a couple small shops....craft stores make up the balance of the supply train. I wish I could say that I was that crafty.......but the blotches are gone. as mentioned, I have a lighter shade for the ailerons, so I need to do them over again. this paint came out totally dead from any sort of sheen {even flats can have a dull sheen to them}. I think wiping them down and over spraying them with a second coat might do the trick. the pains is also rough, which is why I will wipe them down......it's a bit grainy. this comes from being in that evaporated state for so long. so much thinner was added to make it viable, that it expanded and lifted the masking tape after it dried. this concerns me, since I want to do that thing with the call letter 'B'.......I shudder to think what it will do to the decal. kinda sad really......this color looks really good. I was going to give it a shot of dull coat afterwards......now I wonder about that too. the decals are nice........would have been better if a few other markings were included. I have the other sheet, so I can add some. as for the white masking tape......I really don't need to add it, since the plane was marked like that for a short time....only for training purposes. you might notice that they included some extra insignia letters........they weren't sure if there were any on the upper surfaces of the wings. all of the pictures I've seen, I haven't noticed any, so I won't need them. they added the prop decals, but I won't need them either, since the only thing I saw about the props were the white striping a few added markings other than the black strip walkways: here is a preliminary peek at my first stab....making a stand for her... I may stick with this one, but I have another design I want to try. I inserted a brass rod to strengthen the base/shaft connection. if I use the hole where the belly turret was located, that will put the balance off because the model will be too far forward. looking at the location on the Nine o Nine, the slot for that stand is just aft of the bomb bay doors. so, if I want to go with that positioning, I will need to install what I'll call the rod root....subsequently drilling the access hole for it before the fuselage is put together. either hole I choose, I will be adding the rod root. the root will act as a guide for the rod that will be added to the base. if I don't, the plane is liable to tilt and do strange thing when placed on the stand. the Nine O Nine stand utilizes a button root, cemented into the bottom of the fuselage. I may also concave the mating surface of the shaft, so the fuselage will rest in it firmly. more to be done today

- 134 replies
-
- 11
-

-
interesting! I ask because at work, we have been fitting new GPS units on our trailers, and they use magnets to keep them in an inactive state until they are installed. the magnets are 1/2 in in diameter and 1/8 of an inch thick they look like what your using, although yours do look smaller. they are strong little buggers...I will say that superb job on the model so far.......I really like the way your going to anchor the model to the stand.
-
glad to see you started your project as well Mark looking at that base, it would be interesting to see a diorama, but at that scale, it would be huge! I know your not planning anything like it, but it does make for an interesting observation I look forward to your progress.
-
stinks when that happens.......... beautiful bird though.......the paint is awesome and decals are going to amplify to no end!
-
awesome so far Yves! I do wonder about the magnets though, since it will be suspended on a stand base. are you going to cement it all together, or are you going to have parts of it undocked from the station?
-
very happy to see the start of your project Lou! as I mentioned, I dealt with the place your getting the decals and parts from. I pretty much had to prod the heck out of them........and them having the brass to ask me for a review afterwards......nawwwww, they would have deleted it, not only that, I didn't have the order yet! I'm sure I didn't mention it, but they also asked me to send them pictures of the Nine o Nine. after almost two months of waiting for the decals, I wasn't about to fulfill that request. give Mega Hobby a try.......I got the Wulfe Hound decals in two working days......ordered them Thursday, the 9th........got 'em on Monday, the 13th! I'm sure they will have what you need. I didn't know what B.S. I'd run into canceling the other order, so I let it go full circle........but I'll never order from them again. your knowledge of this subject will be valuable.......this will be a fantastic read....and project I built a few of the gunships they used in Nam Ken........they are some of the meanest pieces ever created!
-
sorry to hear of your cousin...condolences to you and your family plane's look'in really sweet.........panel lines are awesome!
-
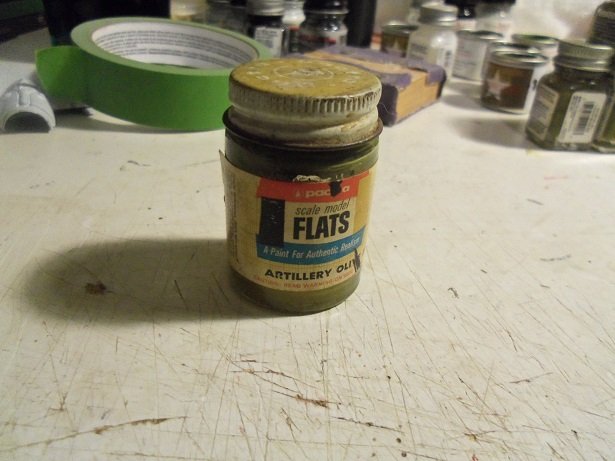
thanks Ken....I hope there's still a little fading...I haven't had a chance to look closer. I have never see Pactra sold in that size of bottle......always saw it in the "Testor's" size bottles {.25 fl oz}. in my younger days, I used it often.........good selection of colors. now a days, you hardly see it.........same with Humbrol. I have one more day of work............but we have a line of nasty weather coming. we just had two days of temps over 50 degrees........it's gone downhill since
-
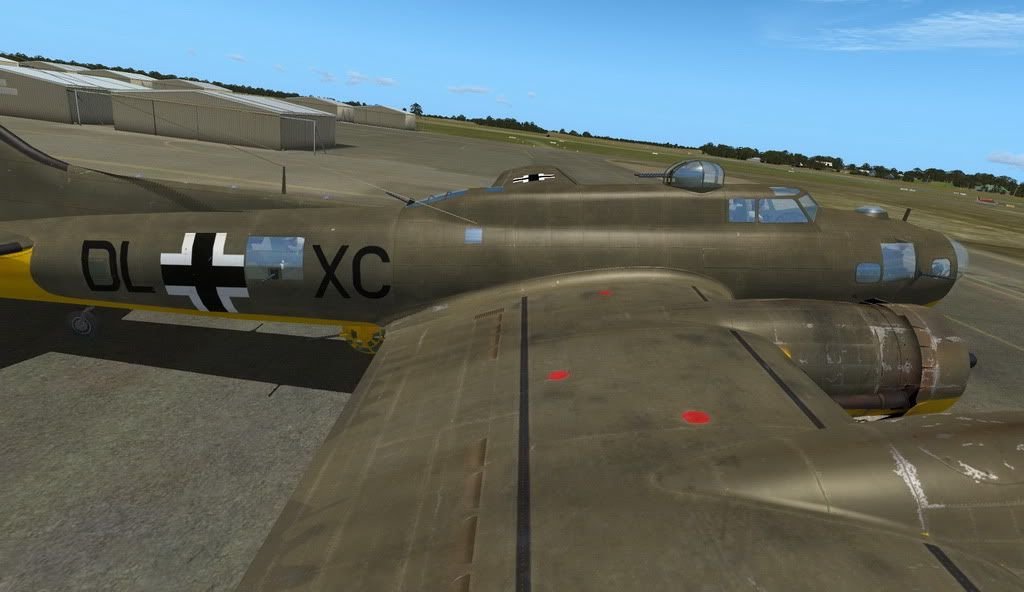
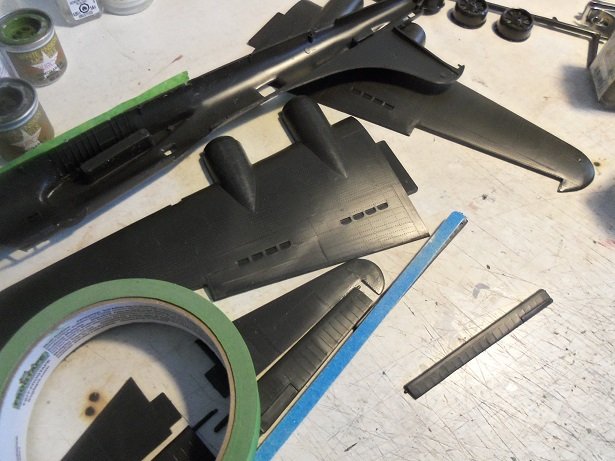
I had to thin that white down a bit Ken......it's part of the older paints I got from Lou. he mentioned earlier that the plastic looked like it was black. it's actually a very dark green. the last B 17 I'm going to do next is in white plastic, so it will be easier to deal with. sometimes colored plastics can be a problem. welcome to the build Kevin looking at pictures...and there are quite a few of them, I get the impression that there is a reproduction of the plane, like the Nine o Nine { either that, or someone build a large R/C model of her}. in any event......they made a goof. the ball turret was destroyed when it belly landed in the field. the Germans never repaired it, and so it was removed and patched over. I've seen pictures of this plane with the ball turret. note under the fuselage......and the glass in the waist gunner's position. the markings are positioned around the window........some show parts of the letters missing. there is also clarification as to where the antenna wires are run. the ball turret again.......now you see it........ ...now you don't. .......just silly thing......not trying to be picky it give you an idea of what's out there. wonder what the dealio is with the port nacelles? after I made the revelation that I indeed DID have olive green paint, I decided to check out to see what was viable. I have three shades of the White Ensign paints, which I will use the lighter one to highlight the rudder and ailerons. then I stumbled on this bottle of Pactra paint... the paint was very thick........and it took an unusual amount of thinner to make it viable again. I had to add a bit more thinner on top of what I already added to be able to spray it. the end result was good...it's still a little blotchy. I didn't mind the blotchy-ness........it would have added to the fading. now that the paint has fully cured, it all gone! so much for that thought......... I think it was Thursday when I ordered the decals for her.........I got them today. I'm beginning to really like Mega Hobby

- 134 replies
-
- 10
-
-
B-25 Mitchell "Meet Miss Runyon" by Javlin-HK-1/32
popeye the sailor replied to Javlin's topic in Non-ship/categorised builds
super job on your progress! the detail looks awesome -
nice paint job Craig
-
hull is coming along really nice Peter the dry fit looks awesome!
-
i'm sure they are......I use windows media player....never had a problem before. I'll check it out.
-
hello Jens.......so glad to see your progress....looks great! yards and masts have come together nicely
- 188 replies
-
- 1
-
-
- cutty sark
- billing boats
- (and 1 more)
-
wow Greg...the deck looks awesome.......as well as the model as a whole your videos wouldn't work for me...but that's OK..the pictures do her justice!
-
Rafale by CDW - FINISHED - Hobby Boss - 1:48 Scale
popeye the sailor replied to CDW's topic in Non-ship/categorised builds
superb job -
of the C and D models, they only built around 80 of them........the plane was going through constant modifications. they settled on the B 17 F and G........of these two models, they built over 12,000. the only reasoning I read about the development, was they wanted the tail reconfigured to ward off rear attacks. not to go fully into wind tunnel statistics, a large rudder and stabilizer surface would displace a lot of air.......coupled with the turbulence caused by lift from the forward wings, it may have been too much for them to overcome. the plane wasn't meant for speed, unlike most fighter planes, which have narrowed wing surfaces. this bird had some pretty big wings yea....no excuse Lou.....I totally spaced it. I probably was thinking not to use any til I got into the New Jersey, so I'd know what paints I could use. but the way white ensign designates their paint....if I stuck with U.S. army colors, I'd have never touched the naval stuff I've already made use of a few colors in other projects.
-
that is so cool! something to show my grand sons perhaps??? my son Brandon has mentioned to me that he'd like to get the boys involved in model rocketing....they have a huge field as a back yard...... might be worth a shot
-
good you were able to repair the first problem.......and this one too modeling is part assembly and solution solving........things can go batty in the blink of an eye. instruction are partly to blame.......depending on how poorly they are illustrated. good solving skills will handle the rest....it's good to see that yours are top notch
-
is this the Testor's pro modeler?
-
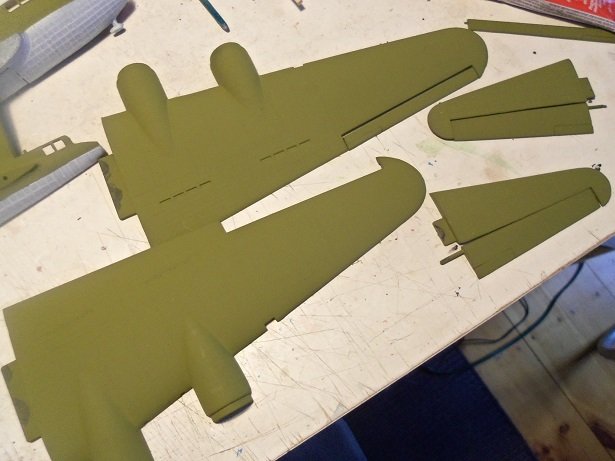
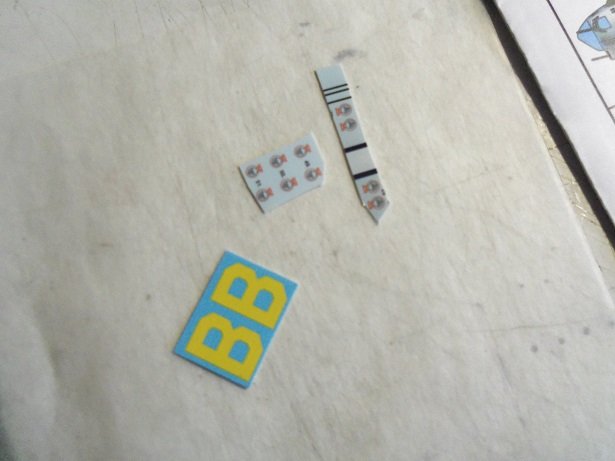
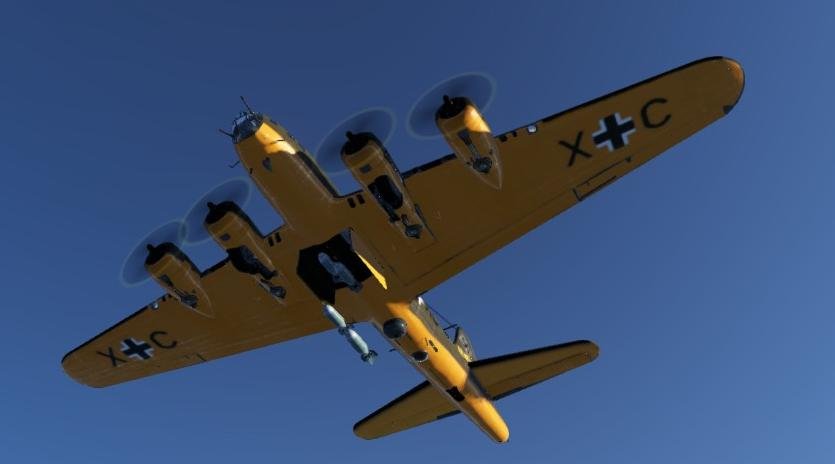
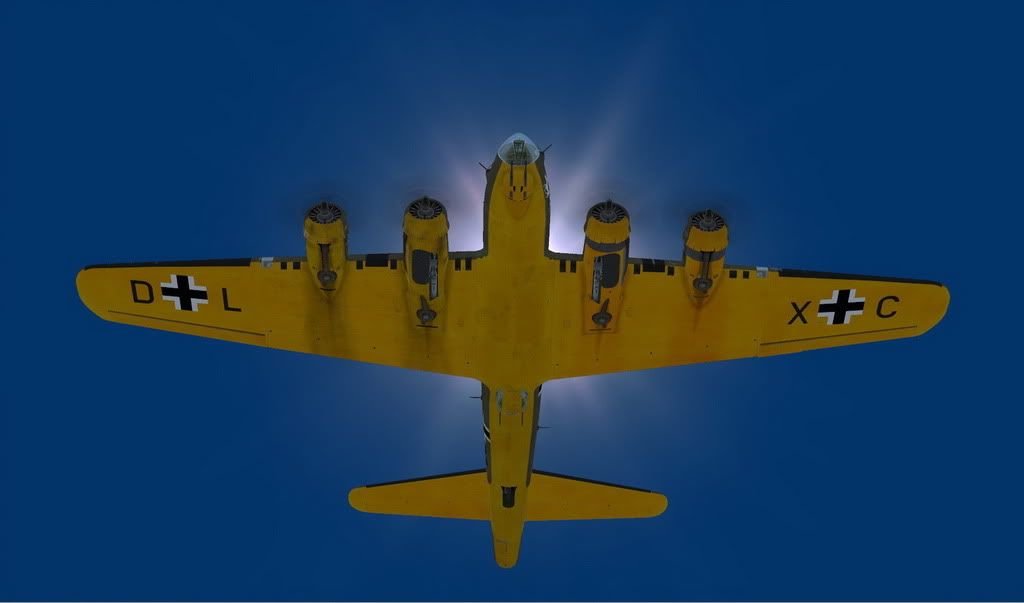
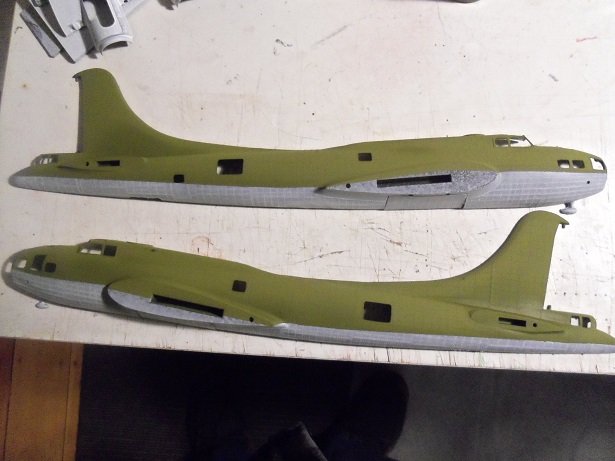
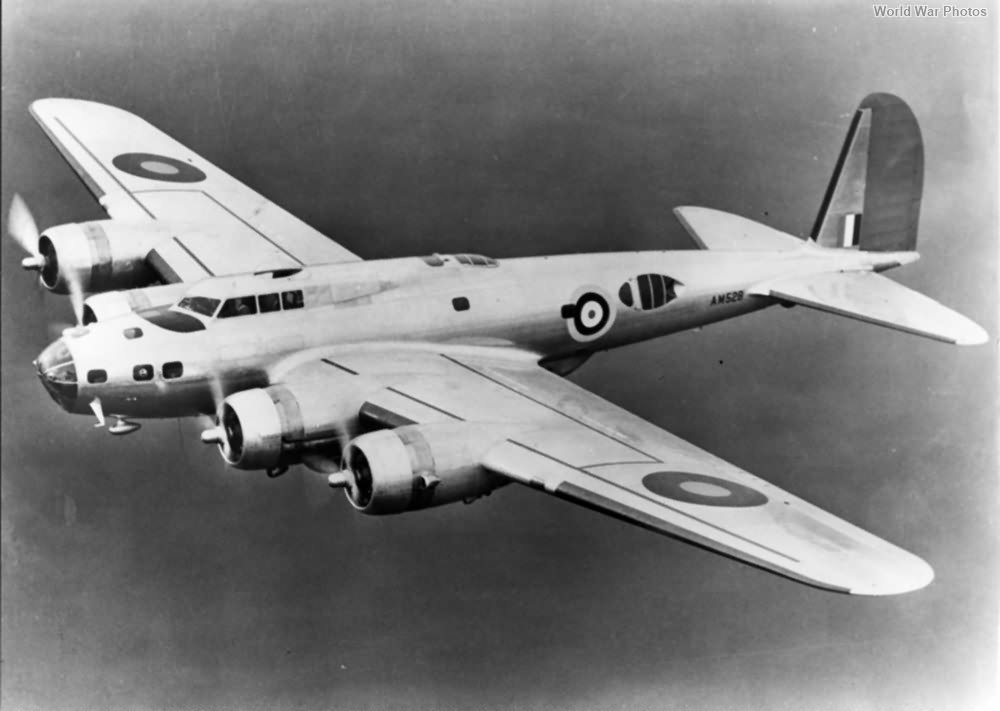
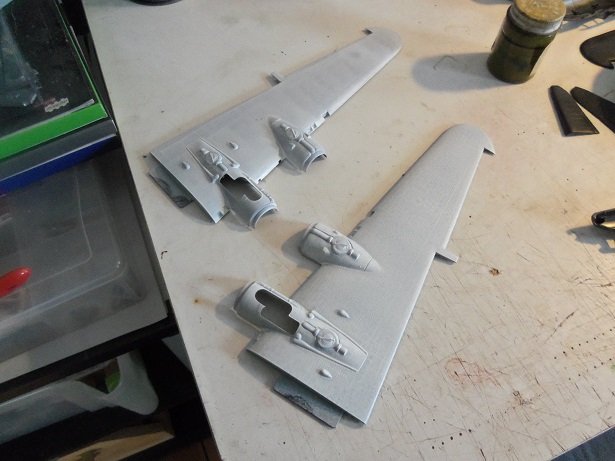
has to be an He 111 variant........looked through the pictures in the book. I saw some close....but the shape of the rudder had me stumped. most of the Dornier's had the dual rudder set up. also, you need to take into consideration, that other countries bought aircraft too, as is the case with this example....the US sold B 17's to the British and French. this is either a B 17C or D. note the narceled waist gunner windows. they were outfitted for guns in the Y1B and E variants and were built........but they were intended for civil and rescue planes. they were first developed back in 1935 on the model 299 B 17, but were never used. it also had what is know as the "Cheyenne" tail...not out fitted for the tail gunner position. the decals have been ordered......and I have enough of the other decal sheet to do a few other bits. I need to do the white 'tape' on my own, which I can do easily with white decal paper, cut into thin strips. I was going to use gray primer for the underside of the wings, but I recalled I had that bottle of flat white primer, included in the paints I got from Lou. I also got a large bottle of olive green, but it looks rather thick.......I will need to thin it and see if it's still good. funny.......I forgot all about these paints when I did the Nine o Nine........silly me I decided to prime because of the color plastic...it's very dark and I figured it might give the yellow a terrible hue. the upper wing parts will get the olive drab.......along with a light spray of med green to lighten her up. the olive showing through should give it enough to appear faded the decal sheet coming will supply her number.......I have a decal 'B' call letter, that I will put on prior to the light med spray.......it need to be slightly visible through the fade, as if the Germans tried to remove it, without total success. I was going to use the underbelly turret for the stand.......I still may........but I did remove the molded build up {it doesn't look too bad}. I have a couple of ideas for the stand......should be interesting to see. looking over the parts....you can see that there really aren't a whole lot.......there are no bulkheads to speak of......just the pilot platform. with this, I did cement the bomb bay doors closed. I did it now instead of later, so I can paint the underbelly with them in place. the port half can be seen above. more to come....

- 134 replies
-
- 12
-
-
super model the F 15.....enjoyed building mine curious as to what you have in mind for decals...the Rafale came out wonderfully!
-
there was another plane too..........read it this afternoon........but it too had problems with engines. they really weren't looking for long range....they did more R+D on their armor. they were capturing quite a few B 17's and B 24's anyway, so they really didn't have to worry about it. the book has quite a list of aircraft that the KG acquired. some pictures in the middle of the book are in color, and most of the black 'n whites do have some descriptions of how they were painted. today, I cleaned up the underbelly wing parts........they will get a primer spray, before they get the yellow coat. I was looking through the White ensign paints that Lou sent me, and I do believe I have the paint figured out. I I might have the missing turret thing solved as well.
-
did you sort out that problem Danny?........plumbing looks good