
HOLIDAY DONATION DRIVE - SUPPORT MSW - DO YOUR PART TO KEEP THIS GREAT FORUM GOING! (Only 13 donations so far - C'mon guys!)
×


popeye the sailor
-
Posts
16,007 -
Joined
-
Last visited
Content Type
Profiles
Forums
Gallery
Events
Everything posted by popeye the sailor
-
 look'in really great Michael........spar deck looks very well done some really sweet detail and the lanterns make it even better.......should look awesome in a case!
 -
some really great progress here OC, although I think you might want to do the braces later.......these might get in the way she's look'in very good! sorry to hear of your mouth problems.......I can sympathize with you. I was the same.......I used to steer clear from dentists. if I told you what the last dentist I saw did to me, you'd fell the same way too. I even pulled a few myself, just so I wouldn't have to go. the last couple of years though, it became apparent that having them all pulled was my only option left......I began to develop abscesses and get sick. this last bout, caused me to go finally, and I couldn't have found a better guy....Dr. Beshay was fantastic......I not only didn't feel a thing....but he didn't screw around like the others! I found out, that all the others fed me a bunch of bull......it was just an all around great experience. I'm still waiting to get the final fitting, but I now have dentures......best thing I ever done! I don't like the adhesives, so eating with them is a bit harder to get used to, but I've been assigned to another dental tech, that is using a different type of fitting material, that helps to keep them in place. it's been so awesome to eat the foods that I couldn't eat before. sweet tooth...........bud, Captain Crunch was my staple for breakfast I started this journey back in October.........today, there are time I forget I have them in place! I won't lie........they cost me a fair bit of cash.........but I feel so much better, and I'm back to gnawing on pork chop bones again I hope something comes for you with your situation...I hate to see friends suffer
-
WOW! what an amazing difference! absolutely beautiful all your paint had paid off in spades!
- 146 replies
-
- 5
-

-
- deagostini
- vasa
- (and 1 more)
-
netting?.......I've combed over her and I don't see. there is so much detail there one would never see it all in one blink
-
awesome looking vessel Greg...love her overall color your rigging on these vessels is way over the top......stunning! I guess Carl doesn't like carbon 14
-
yepper Steve........it's too bad I'm not knowledgeable enough to make money doing it
-
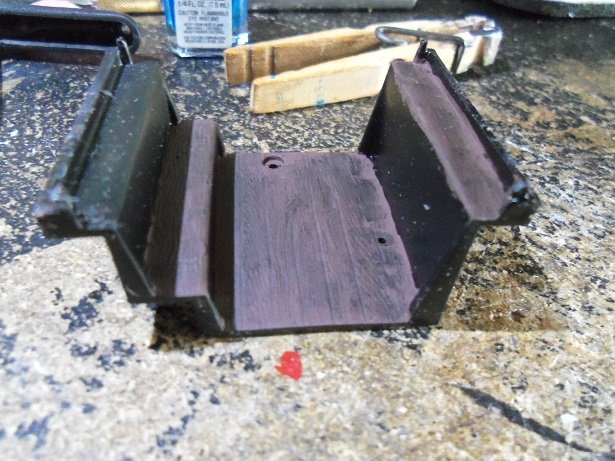
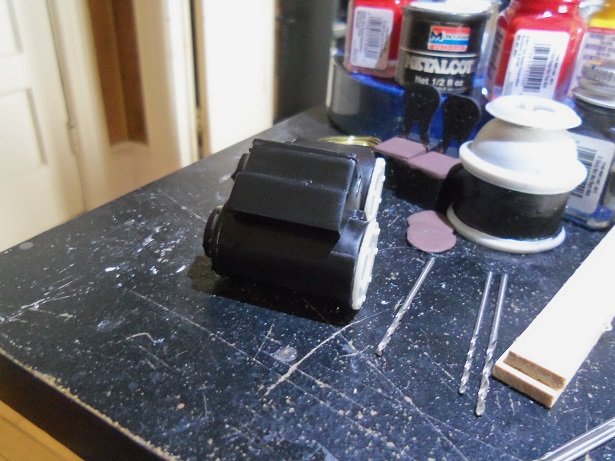
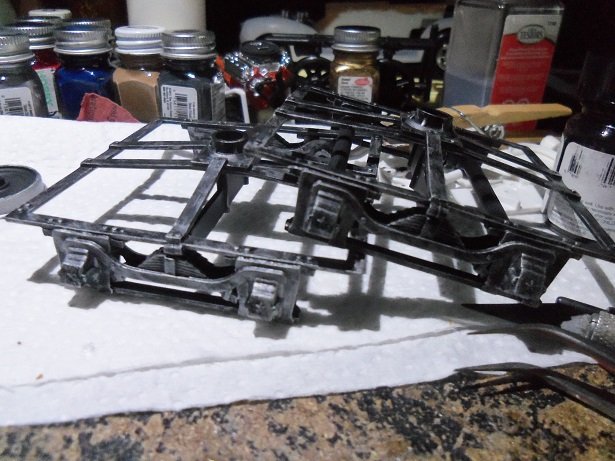
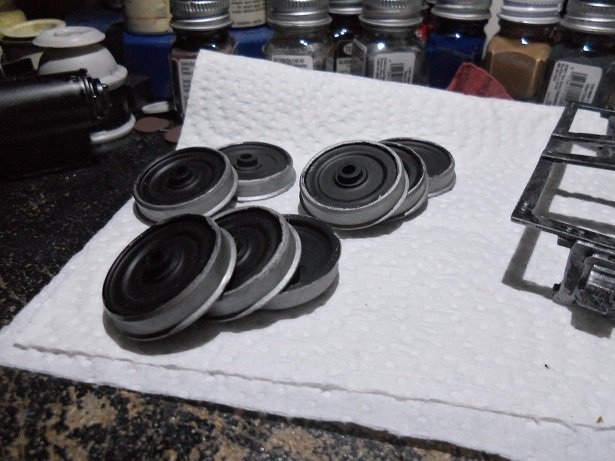
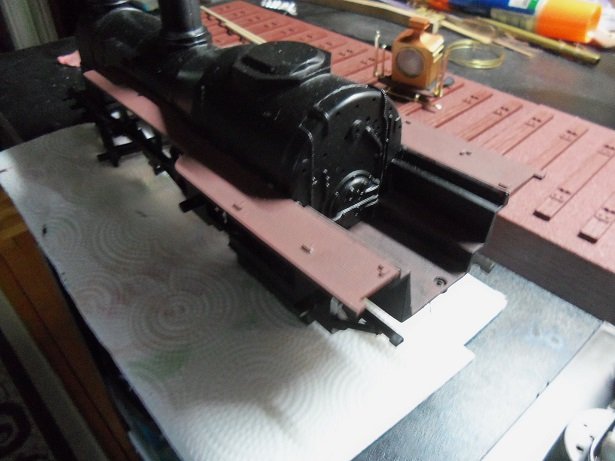
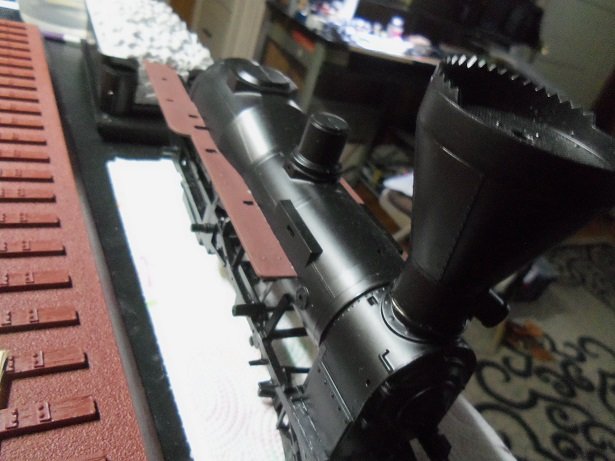
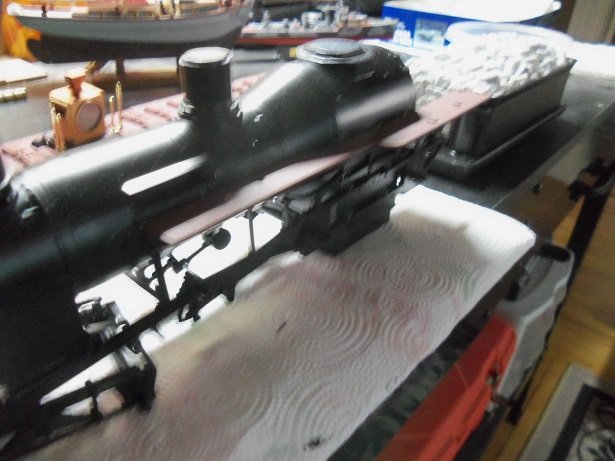
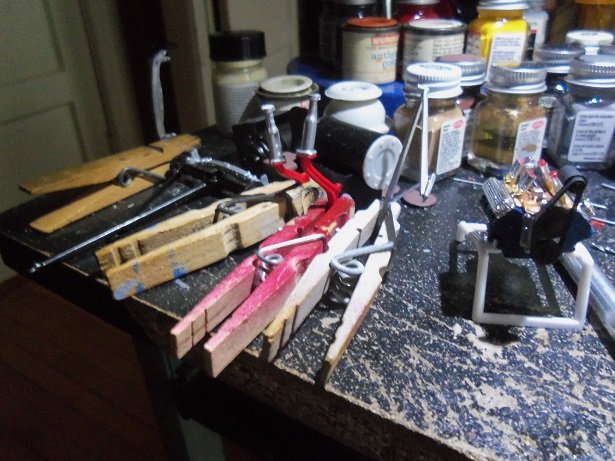
hidie ho there neighbor! I think I have enough here to give you a fairly decent update on the affairs of this fine loco {and I'm not talk'in 'bout the modeler either.......>even if it's true } at the beginning of the month, I painted the floor of the cab with a flat brown. I used a brush, so that allowed some ghosting to occur. looking at the brown and black contrast....I kinda liked it. so I mottled the rest of it too. touch up needed.....I know...but it does give the appearance of a beaten floor. I finally took the valve chest assemblies out of the spray booth {I had forgotten them there}. not much of a picture of them, but it also shows that I've been working on the seats and the steam dome. I need to get back to finishing the paint on it, as well as the sand dome..........I have an idea of a paint scheme for these two parts this was also when I cemented the walkways on the boiler. by the time I tried to cement the floor in place, they had plenty of time to dry. it looked like the locators on the floor cemented into holes in the underside of the walkways.........bad assumption! the stress of getting them in the holes pulled the walkways off the boiler..........can anyone say "square one" this also left a right jolly 'ole mess to clean up.........good thing it's on the underside. the floor is in place now, but I'll wait a bit longer to get back to it. as I had mentioned earlier......I should get back to working on the tender. just painting the trucks for the tender flat black is kinda bland....I wanted to spruce them up some. I'm rather hesitant about weathering......it just never seems to look right to me. I look at it the next day and clean it all back up I got my courage up last evening and took some flat steel, dry brushing both trucks. this might not be the best picture of them....I'll have a better one when I get the wheels in place. the outer bands on the wheels were also done in flat steel......I think I should give the sides the same weathering. here are a couple pictures of the boiler, with the walkways and floor installed.......I haven't touched it up yet. the admiral has been after me to clean up my desk. my table doesn't look much better I bought a stool so I can sit, but it too tall and I feel like I'm over my work........I plan on cutting a couple of inches off the legs to make it more comfortable to use. usually, I like to stand. I hope to have an update for you folks soon

-
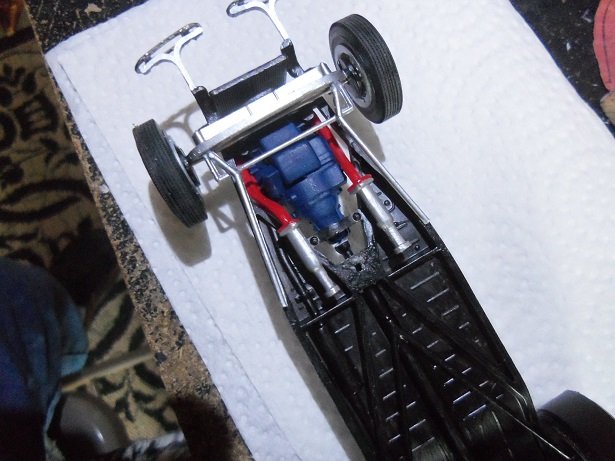
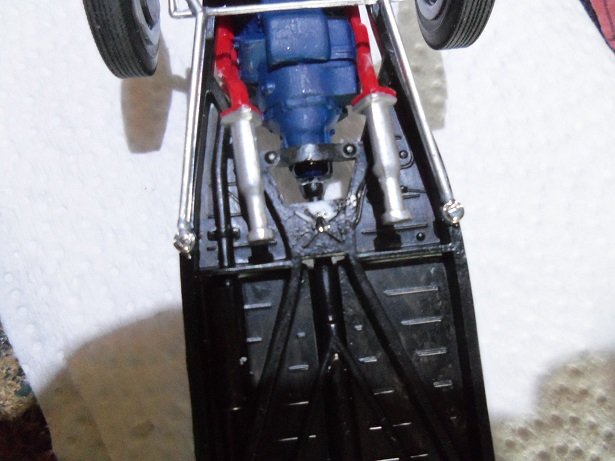
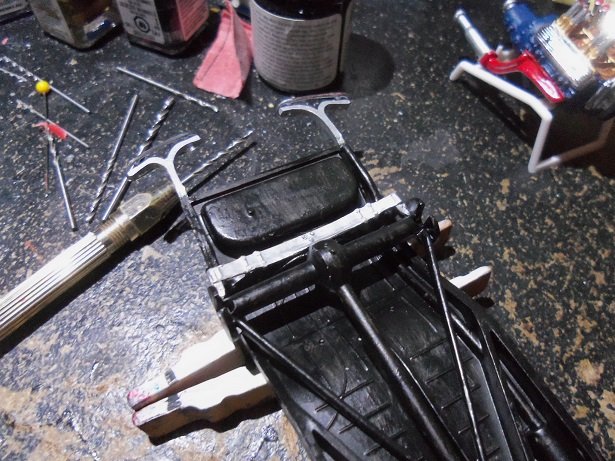
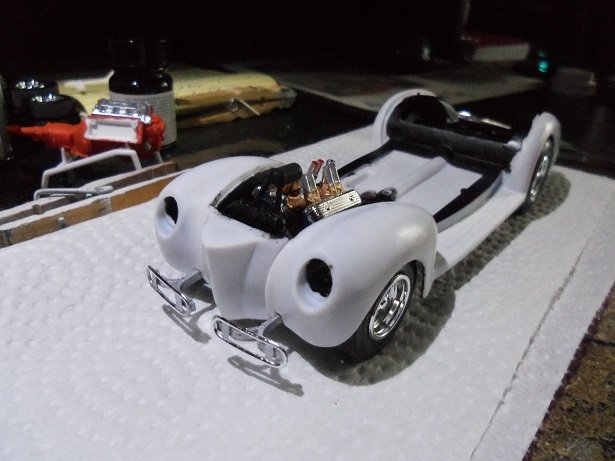
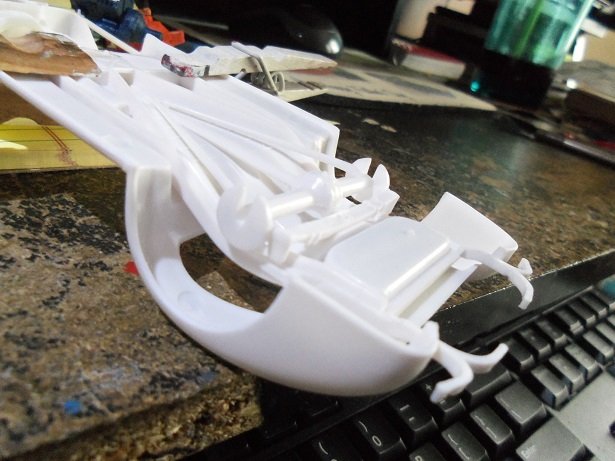
hi all.......a small update on the dilemma I ran into. no matter how I tried......the engine would not fit with the stabilizer bar in place. I removed it and installed the engine. as before.......putting the stabilizer back in place wasn't going to happen either. so, I guess it's modification time I wish I had snapped a few pictures of the dilemma as it unfolded..... anyway........what the bar part consists of, is the bars {left and right}, and the tie rod assembly ....this is all molded together. right where the bars pass over the tie rod bar, I scored the plastic on the inside, and bent them outward, equally to meet the frame. cement was applied at the cuts so arrest this new design. in my small meager spare parts box, I still have two of the caps from the revellution funny car, which will make very nice "attachment" pints for each of the bars. I did a little more cleaning up to the part.....missed some tell tale mold lines..... ...and cemented it back to the axle. the caps were added afterwards. all was touched up later, to get rid of the glue marks I'm still thinking of what color to paint her in........but I assembled the front seat and gave it a coat of tan, as well as the rest of the interior. now to assemble the rest of the interior and paint the overhead interior inside the body shell.........part will be tan, and the rest will be flat black. more to come..........I took tomorrow off! forecast is rain


- 67 replies
-
- 12
-
-
very nice progress.......the paint work looks great
-
thanks J.........but I'm trying to cover over all this white my........this transfer of color is trickier than I thought?!?! the grill screen looks great.....but this one isn't finned at all, so a screen like that won't work out well. I have something of a mural in mind
-
nicely done Slog! that's the main reason I smile, when I see that the clear plastic is in it's own bag.........I've had that happen to me on a few occasions as well. don't be too critical on the exhaust.....the effect can be seen...there's always the gray area on just how much, and I think you captured it quite well welcome to the plastic forum.......always good to see new faces. I started with the funny car, but with the nice weather, and the indication from my last project in this forum, I fear the wood bug is starting to make me itch. I've still got a couple non ship plastic projects in the Que, so I think I'll be keep'in ya company for a while. very fine job on the Crusader........following along to see how she turns out
-
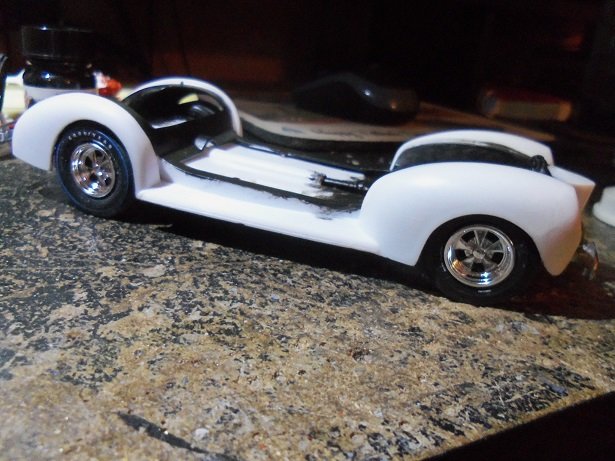
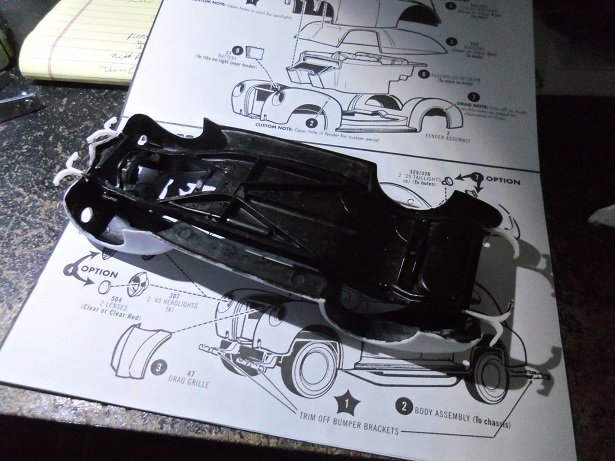
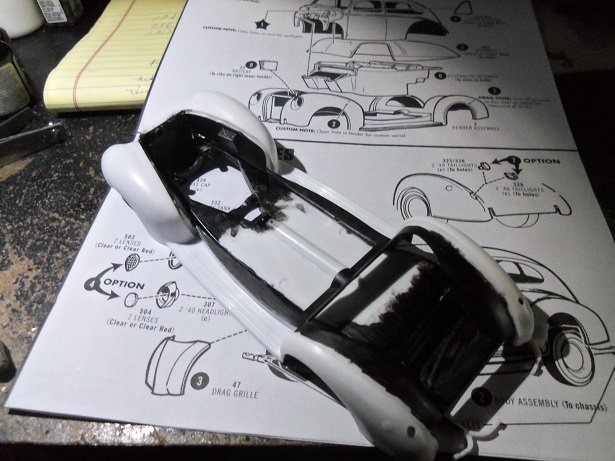
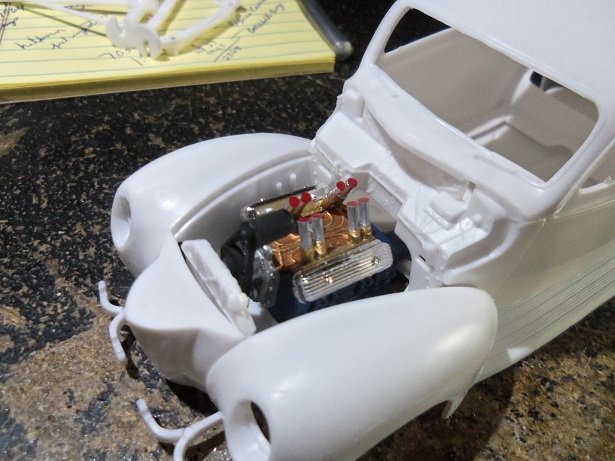
.......and get back to it I did. first thing was to cement the headers on the engine. I should have filled in the depressions on the headers.......if the model is flipped over to see the undercarriage, they can be seen. the rear differential is the same way, although that open area can't be seen. again, thanks to J for clearing up the bumper question. the kit includes some neat looking custom bumpers, and I really wanted to use them. they were added to the chassis and then touched up, along with the bumper frames. the suspension was added next......the front, along with the stabilizer bar... ......and the rear suspension / differential. the tires were assembled onto the chassis after everything set for a bit. the holes for the metal axles were drilled out to accept them better. the lower part of the body was then placed on the chassis for a dry fit....still thinking of the body color. .....then the first major snag. with the stabilizer bar in place, the engine will not fit oh bother! the only option was to remove the stabilizer bar, with the hopes that it can still be put back in place. if not, I will need to modify it somehow. the engine was cemented in place, and again, I'm happy with the looks. I was looking at the center grille I'm using.........I think it needs a really cool image...........back on the net I went, looking for that perfect image

-
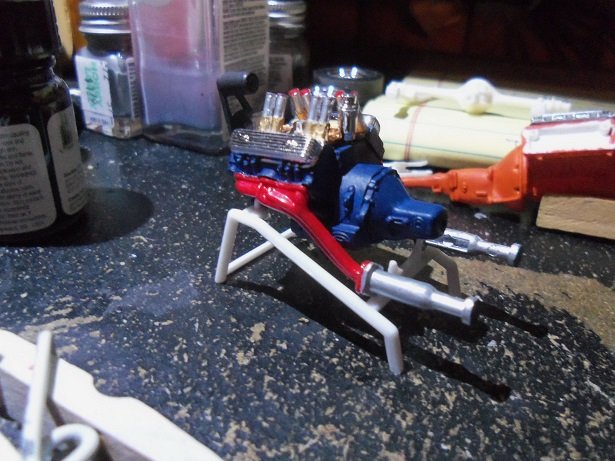
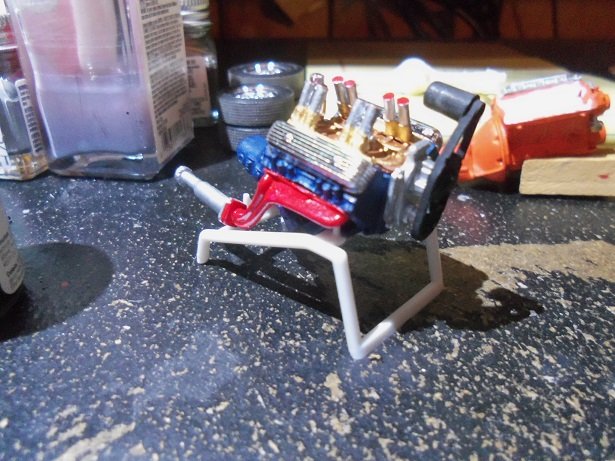
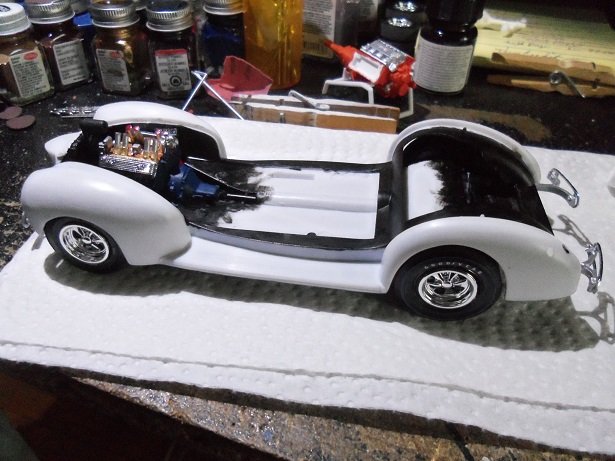
thanks J.........I did a copy and paste to word pad. there is a lot of good info there thanks for taking the time! I got in a bit of table time today....a little here and a little there. the Olds engine is still in the works........I added the magneto and finished painting the headers, the chassis has been painted flat black. the radiator was cemented in place to better gauge the room left for the drive belt, and the battery was cemented in place as well. I'll have to do a dry fit in order to see if there is any more white showing. suspension parts and other parts are drying at the moment.......I might get to assemble what I have later on. this is where the model stands at the moment......the next update will be soon
-
here's a quick question........is having bumpers on it against the rules, or would they normally be removed?
-
so sorry to hear that your having back problems.......I used to go to a chiropractor myself. I hurt my back back in the '70s......seemed that every October, I had to go get cracked. I also took Flexirill {the spelling might not be right} whenever I had pain or spasms. this went on for quite a while, but one year {now quite a while ago} I stopped going and stopped taking the meds. I still have pain every now and again, but Advil handles it good enough. .....now, about my knees........ anyway.......I hope you get better......you've done some wonderful work with this project. hate to see it get sidelined! take care my friend and do take it easy.......it is true to keep working the muscles, but don't over do {I'm constantly chasing my admiral about that}
- 1,208 replies
-
- 2
-
-
- great republic
- clipper
- (and 1 more)
-
my word Frank....you have been busy! I've caught up with your log........amazed with the sail and rigging work. I had toyed with metal 'cordage' some time ago and gave up. I have since found some small and flexible cabling that may fair better at Hobby Lobby you have some neat methods here! very nice work.........she's look'in fit as a fiddle!.......the lazy jacks look cool!
-
you can buy the basic kit.......come with some decal paper, the program, and a can of decal bonder. the only thing about it though, is you can't import images into it. DECAL-SYSTEM I did some digging and found the decal it standard edition. it wasn't very expensive as I recall........the upgrade for it only cost $15.00 DecalGear.com - The hobbyist's source for inkjet decal paper and Decal Maker custom decal making software for modelers and hobbyists I didn't get to do much today......the outside beckoned and I have to get our car ready for inspection. I did do a little painting...hope to get more done tomorrow
-
thanks Richmond for the link I've got some pictures to go on from the net........this is a different take on the colors. then again.......other folks had their own ideas as well. it looks darn good.......I'll say that !!!! I finally got the floor of the cab in the correct place now.....haven't had a chance to do much more.......darn nice weather keeps getting in the way!
-
OcCre San Francisco Cable Car by bogeygolpher
popeye the sailor replied to bogeygolpher's topic in Completed non-ship models
very nice looking model.......well done -
hee....hee........especially on Game of Thrones I was tickled pink! this decal program has quite a few images..some even comparable to the markings on your Mustang { but not as "connected"}. if I get a chance, I'll thumb through the images in it and show you. the program is cool, but it does have that nagging transparency issue, that limits how they can be used. some have been overcome with the use of white film paper, instead of clear film paper, but I have been able to expand the fix by changing the background colors. I haven't done that to the name image yet......I'm still looking for a font that I like. the only problem here, is that if I do it....it affects the entire field........and if there are any decals that I don't want this to affect, I can't have them on the sheet. the big draw for me, is the ability to import images and manipulate them to my liking.
-
the nails look really good.........I say that, because I have an abundance of 10 mm brads, collected from all my past kits, but I find I have to comb through them to find the perfect ones. some of them are really malformed. I wasn't at all worried about the hiatus.......I do the very same thing, as I have many other projects that I'm working on. good to see the continuance
-
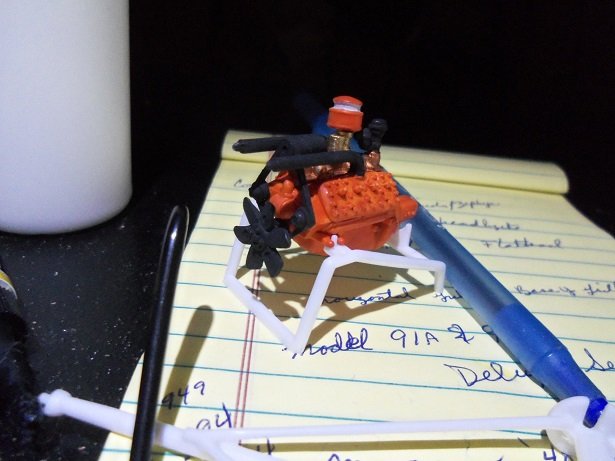
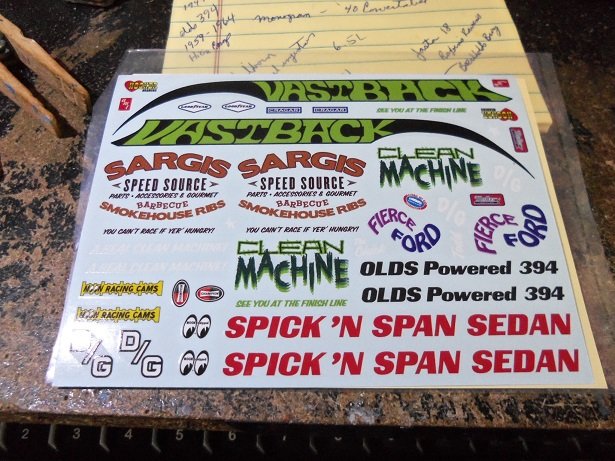
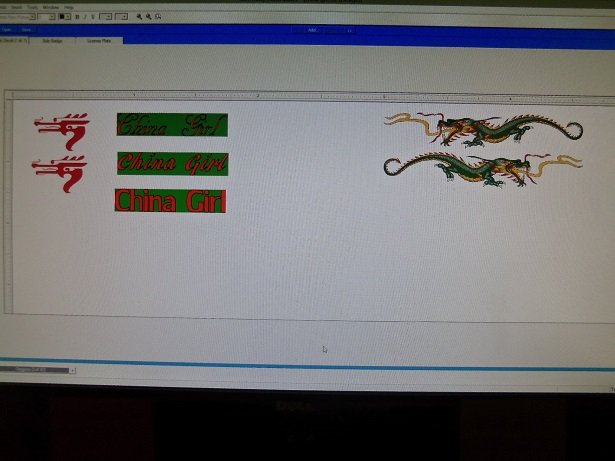
as mentioned, I did a little tinkering during the work week.......rare for me, first, I wanted to see how the clearance would look for the slicks. the tires being untouchable at the moment, left it to my imagination.........I think I'll be OK. then the clearance for the engine........I don't think the drive belt with the fan will fit in there...... so off came the fan.......and I put it on the flat head engine. the drive belt was added to the Olds engine, after a tiny bit of trimming........it was then fitted again to see how it looked. .....just makes it here is the decal sheet that came with the kit. you might agree why I decided to change it up a bit ...not too many in the way of sponsor decals. but to start off with........here are some of the images I've come up with using the decal maker. the dragon is one of the images it has in it.

-
I'd be happy with a job like that.........I think with the decals, it will look great! that's like some of the camo works on focke wulfs and Messerschmidts especially the winter camo. I've never tried it. one of these days, I might attempt it, but I'd likely not get it right either don't get too crazy and ruin it