
HOLIDAY DONATION DRIVE - SUPPORT MSW - DO YOUR PART TO KEEP THIS GREAT FORUM GOING!
×


popeye the sailor
-
Posts
16,007 -
Joined
-
Last visited
Content Type
Profiles
Forums
Gallery
Events
Everything posted by popeye the sailor
-
 that happens quite a lot in kits, especially if your adding extra lines that the instructions and diagrams don't show. cripe.....one kit I have doesn't show double blocks, but I know some were used......so I'm adding them in. of course, that will also add to the amount of single blocks as well it's madness I tell you!!!!!.....shear madness! so glad to hear your still making progress.......I hope you are well
- 1,306 replies
-
- 6
-

-
- syren
- model shipways
- (and 1 more)
-
the plastic looks thin.......that might save the depth perception problem that most kits have
- 345 replies
-
- 3
-
-
- graf zeppelin
- trumpeter
- (and 2 more)
-
good to see your still working on her....... looking very good nice job on the railings.
- 54 replies
-
- 1
-
-
- robert e lee
- amati
- (and 1 more)
-
the start of a great project Greg........the port holes look so well drilled. do you use any type of reamer to take the edge off the drillings? when I drill holes like that, sometimes they seem to show a raised edge...even when using a new bit. look forward in seeing more
- 345 replies
-
- 3
-
-
- graf zeppelin
- trumpeter
- (and 2 more)
-
Vought F4U-1D by Papa - Tamiya - PLASTIC
popeye the sailor replied to Papa's topic in Completed non-ship models
these were the perfect carrier birds..........the wings fold up and are easily stored. nice looking plane -
Phosphate railroad car by Canute
popeye the sailor replied to Canute's topic in Non-ship/categorised builds
a covered hopper........so this is a converted box car to serve the need. most hoppers that I know of consist of twin basins with a trap door in the centers underneath, to empty it's load. I was a bit confused with what you were doing with the side, until I realized that you were adding the ribs outside....not inside. it all makes sense now chalks up to never seeing one of these kits go together -
Phosphate railroad car by Canute
popeye the sailor replied to Canute's topic in Non-ship/categorised builds
interesting box car Ken.......the only one I've ever built was the snow plow. I really like the molded wood........I did look into getting some for my ship builds. looking forward in following along -
you should have no problem finding a place to display it........glad to hear the admiral likes it what's not to like. next up ..........bat wings?
-
thanks J.........I made up the decals. I tried one.......I'll show you very soon.
-
thanks for posting the link. sadly, I already have this one The 4-4-0 General it has pretty much the same picture, without the flag banner. thanks for look'in in........hope ya follow along
-
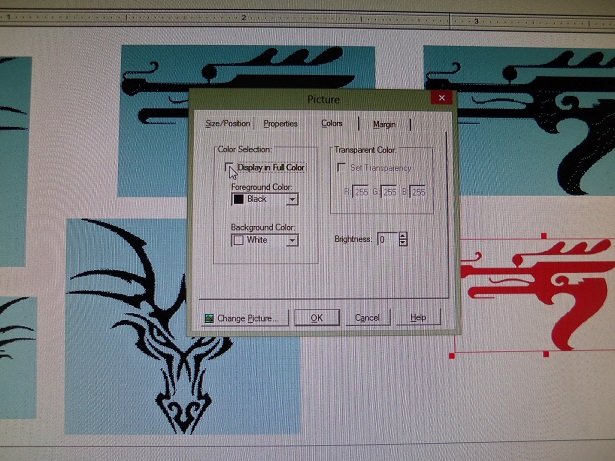
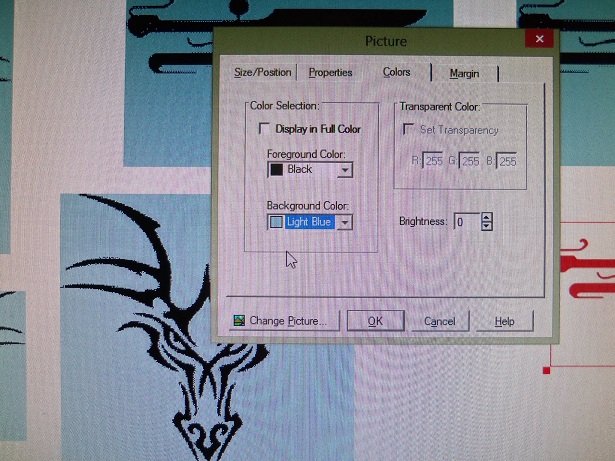
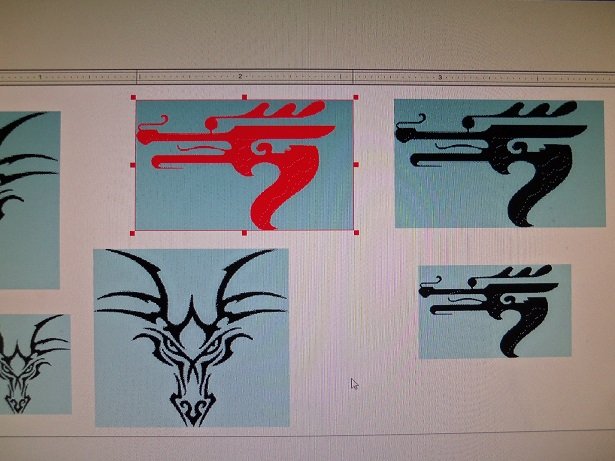
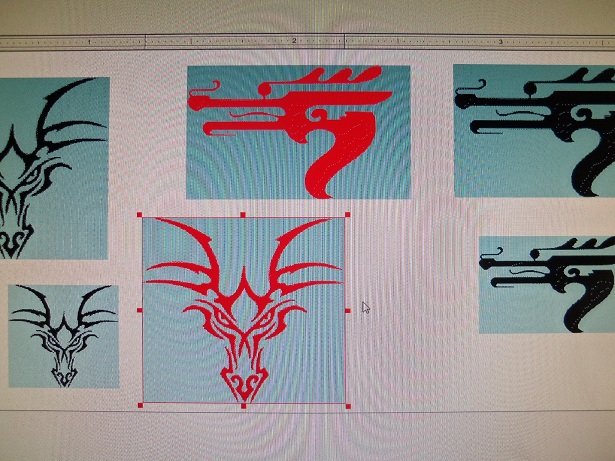
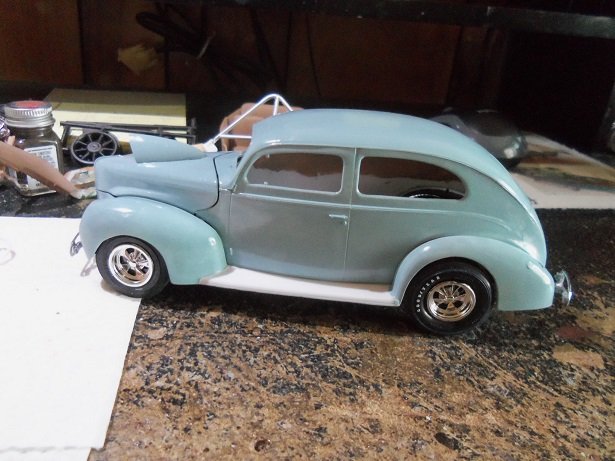
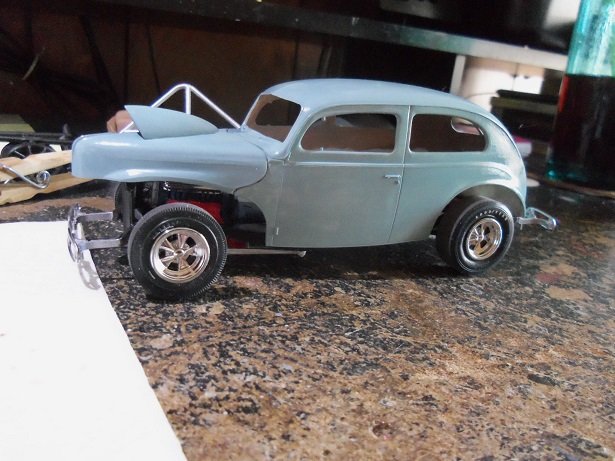
yea.....like I make 'em every day I messed around with it a bit more.......I even went into the color spectrum. I tried blue tint........green tint.......etc. I did settle on a color....it will be close, but not a perfect match. what has to be kept in mind.......you can import an image, but to change the background is impossible. this is because your scanning an image..........it will be a single layer from this point on. if I had the original image, it would be different, because I could then change it's individual layers........printed in any way, and it's fused into a single layer. the same goes here with the Testor's {decal it} images........in it's original form, it has many layers.....but once imported into the program, it becomes a single layer. I can change the background color, but it will change the entire image too. as a test, I took the China Girl decal and laid it over the dragon. changing the background color, it also changed the dragon image, but not the text overlay. photo shop would have probably been better to use....but one would have to hunt up all the images and create the text needed. font can be changed to the desired effect and then sized. the decal program simplifies all this. I can't use what I wanted to use......they too would be affected by this problem. this gives me an idea though.......I can use some OK......I had wiped the sheet clean of all the images..........I have a copy in the folder, so I may not have gotten rid of them totally. I put a couple of the dragon images back up and resized them. I changed the background of most of them.........here is how this is done. first, the full color mode must be deactivated, to allow you to change either field. pardon the rippled screen........flat screens tend to do that more than analog. the image in the parameter box is the one I'll be changing. now I'll change the background to light blue. clicking OK will do the dirty work. having images drained of color is kinda bland........don't know why I didn't think of this before. lets change the foreground color........let's say red, since the China Girl text is in red. ....and there ya go........the dragon is now red. note that the areas around the images is still white. I can't change that, it's not part of the image. I can change the others at will.......... is is just a small part of what can be done with images. text can be manipulated in many ways......angled upwards and downwards........half circles.......full circles........changed fonts.....and even color. great for decaling life buoys and signage....but care must be taken to not lose the image due to the transparency issue. of course, I had to pick a color that would prove to be hard to match up with the decal maker.....duck egg blue. as mentioned, it won't be perfect, but I will try and trim them enough, so it won't be too much of an issue. I have been painting.....at the moment, fine tuning things. I'm not pleased with the roll cage part of it........it seems incomplete. then I thought I'd show you how easy it is to chop it down to a modified....just me being silly amazing....the stuff one can think up while tinkering
- 67 replies
-
- 11
-
-
thanks Sam..........I have many interests. it has it's mistakes......I'm no expert, but I try to do a good job. in fact, a recent purchase just arrived.....a 1:16 scale Lindberg Concord Stagecoach. it's a bit different than what I've read about it, but it still looks good I've even got a couple of mods I want to do to it more on it soon. the thing that really staggering about this kit, is the box it came in. I had it repacked to reduce the shipping cost {the owner suggested it}.......and I'm glad I agreed. the box was huge.......probably the largest I've ever seen! saved me over $20.00! thanks for look'in in and the kind comment........and thank every one for the likes. I know I'm approaching this one a bit slow........I do want to thank you folks for the suggestions....they are a big help
-
look'in great Slog.......super nice finish
-
it sets up nicely on the base!.........love it! definitely a delicate piece.......looks like you won't be hang'in it it would be a perfect fit in your study, on on your desk at the office. the only problem with the office though, is you'll have a hard time keeping a person's attention I think their eyes will be on the model. it has a very nice balance of color and vividly shows how detailed it is. a very nice piece of art it looks awesome Grant........you did a stellar job on it I do hope you'll post you Pocher project here......I've heard a lot about these models, but have never built one myself. interested to see what I've been missing out on
-
I know that if I were to paint any of the handles another color, I would have to grime them up to show use. like.....when I get to the cap detail, I will need to apply a dry brush of that dead pan black that I made to show soot around the boiler door. if I were to paint the knobs, they would need the same treatment......whatever color I painted them. I'll be runn'in out for some flat red.........the more I think of trying the gloss, the more I feel I'll be ruining the model oh Lou........a what if by any other name, is still a what if I haven't visited the site in quite a while, but there is a 'what if' community that dabbles in these futuristic models. some are quite good.......aircraft and ships that are armed to the teeth!
-
has anyone ever tried decal set from Testor's?
-
did some mess'in 'round with the decal program today.........has me in fits so far. this is something that I don't get to do enough of.......I seem to have forgotten how I changed the background color from white. here I am click'in my life away, an' nothing's happening......little did I realize that I need to click in the image field......not in the open space of the field. I got it to happen.......the other images have a white block around them {because they have their own image field}, but the image of the dragon is now black....drained of color! I had overlaid the China Girl logo over the dragon image......that stayed in color, because it is not part of the original image. changing the field color before adding the images won't happen......it has to be the image. for this, I'm using white decal paper...which I have an over abundance of. the white paper is going to give me a backing for the image that will remedy the transparency issue that the program has. by changing the background color, it will narrow down the color for the car.......the decal will blend in to the car finish, leaving a decent image. more trial and error........when I figure this out again.......I think I'm going to write it down
-
flat red.........that's what I meant ....and I didn't say you were old {even though your older than me}. I don't want to get into any of that White ensign paint, until I get going with the New Jersey....I have no idea what it's gonna take to get it off the ground {an' no smart azz jokes about it not being a plane either!} so in the meantime, I'm trying to use up the monogram and Humbrol paints. I've added a couple more parts to the tender folks..........and assembled some of the chromed parts. there are some parts that are made up of two halves. more on him soon
-
that's a darn nice looking plane you have there. I've wanted to try the larger scale aircraft, but......like with the wooden ship kits........too hesitant and doubtful to pull the trigger on one. I had to have a wooden ship kit thrown in my lap, to get me started. {yea......I know....the admiral keeps telling me}. I did get back into flying aircraft a little.......I've built a Guillow's Spitfire Mk1, and I have a Fokker Dr1 in the closet......got to sand everything. to sit there and computer out a plane or ship is way above me {I'd be there forever}. I have had reasonable luck with taking and bashing a kit to fit the bill. love the paint job on 'er..........she looks so sweet!
-
this looks very cool Grant.....I'm interested to see this base. have you given thought to a posable 1:6 scale figure? what scale is a GI Joe doll.......or other dolls of the like? I have a couple of Walking Dead figures that are rather large......not sure of the scale. just a thought.......might look neat to see them on a person. these are too cool not to try something like it call 'em Angel........or Constantine.......or even Icarus
-
wow! some really nice progress since I last looked in she looks awesome! this one is on my list.........once I can afford her
-
look'in good Richmond it depends on the brand of model you buy {I've found}, as to the level of detail you'll get. moving over to wooden ship for me, was a golden opportunity, as I enjoy bashing kits I have the Lindberg North sea trawler in my stash. it's funny, because my first wooden ship was the Billing's Nordkap........32 inches of sheer enjoyment. it was an old kit {not laser cut}, and a couple of Christmas's ago, I got another shot at one of these old Billing's kits. I'm bashing it into the Progress, another one of Billing's older offerings. it is too bad you can't cut out the windows....some clear cello would have done nicely in them, and you could have scratch built the interior. shoot.......at $32 bucks, get another one and experiment a little. nice progress so far.......looking forward in seeing more
- 7 replies
-
- 2
-
-
- northsea fishing trawler
- revell
- (and 1 more)