
HOLIDAY DONATION DRIVE - SUPPORT MSW - DO YOUR PART TO KEEP THIS GREAT FORUM GOING! (Only 13 donations so far - C'mon guys!)
×


popeye the sailor
-
Posts
16,007 -
Joined
-
Last visited
Content Type
Profiles
Forums
Gallery
Events
Everything posted by popeye the sailor
-
 I'm a game nut too.......mostly sword and bow..... Divine divinity, diablo, and Gothic are three of my favorites. I tried the on line games, but I can't see buying the game and then having to pay to play on line with it. there are a few simulator games out there....I'm sure that there are naval sims out there.
- 1,319 replies
-
- 5
-

-
- caldercraft
- Victory
- (and 1 more)
-
hefty prices for those kits.........I do like the decal assortment though
-
thanks Ken.......there are two chains. I am acquiring quite an array of plastic chains........I don't use them.....simply terrible 👎 the coupler that connects the tender to the loco, isn't till the final assembly, so I have time to fab out some eye bolts and hooks. add a few more parts to the tender now that the decals are in place, and I can get heavy with the loco.......I've been assembling the valves and stuff. some of these parts are a two piece deal, and trimming the flash lines around them is scarring them badly. they are gold chrome parts I may have to drop them in the dip and paint them. would the cab be done in flat paint? the reason I ask, is that I am out of flat red. I do have gloss........I was going to run out and get some {Lou didn't send me any } thinking back in these times, I wouldn't think gloss paint was invented yet.
-
ya had to love all those 'no step' decals to put on...........I had a ton of them on my F 15 Eagle. I'm not too much with jets, although there are quite a few kits out there. very nice progress....she's look'in super
-
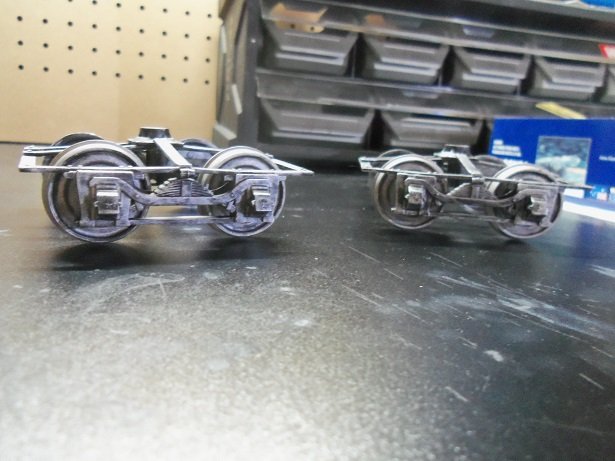
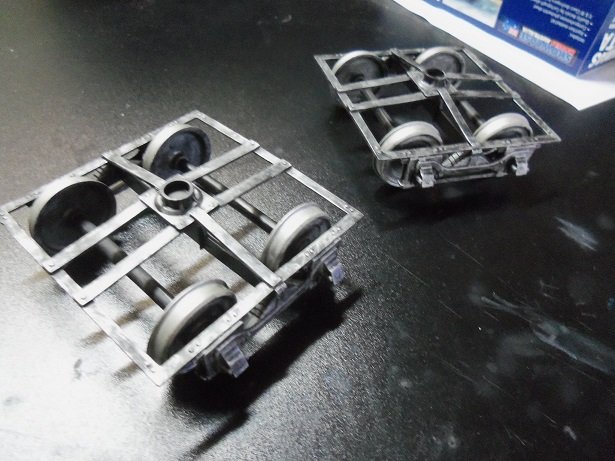
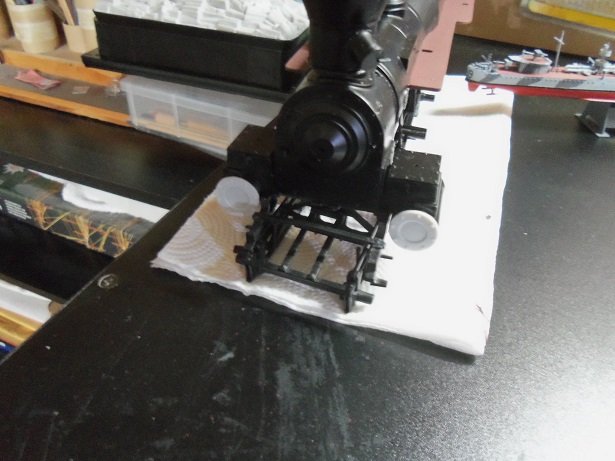
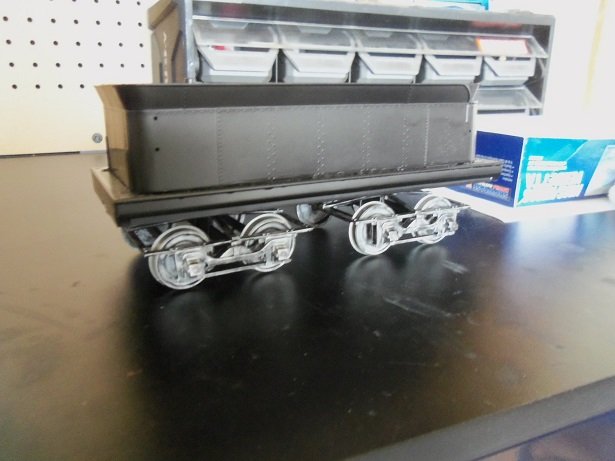
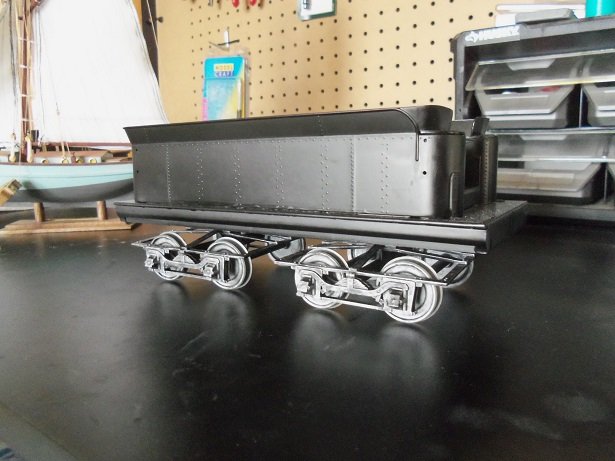
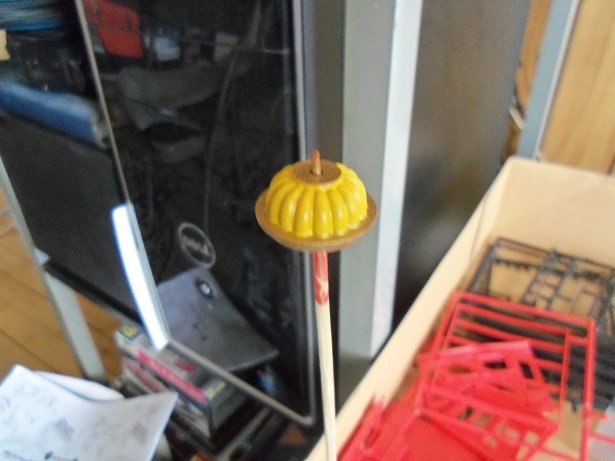
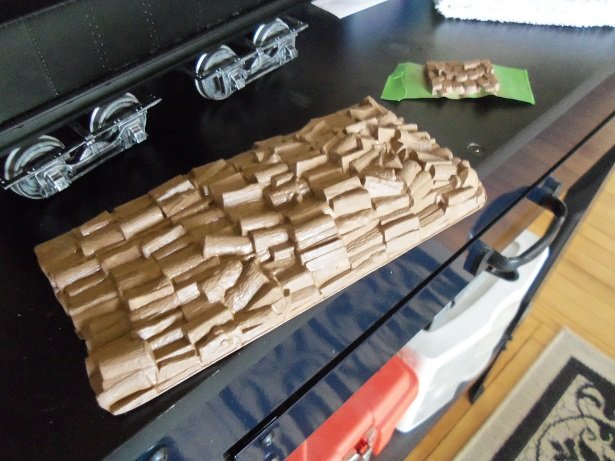
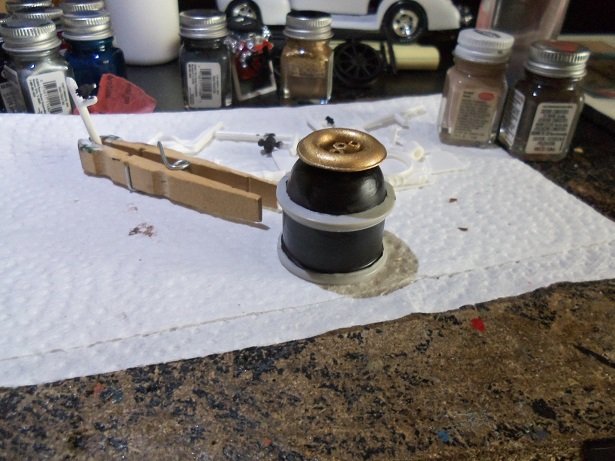
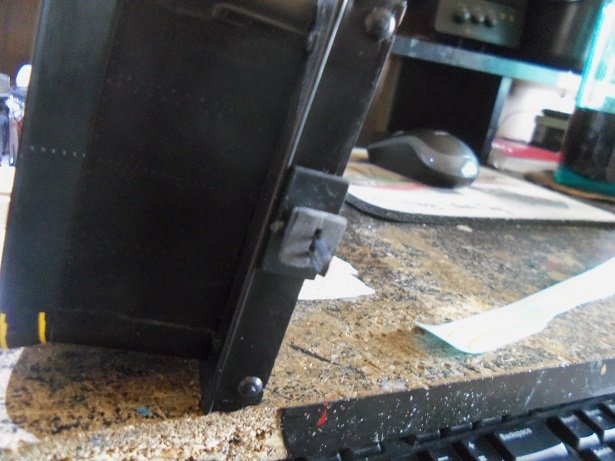
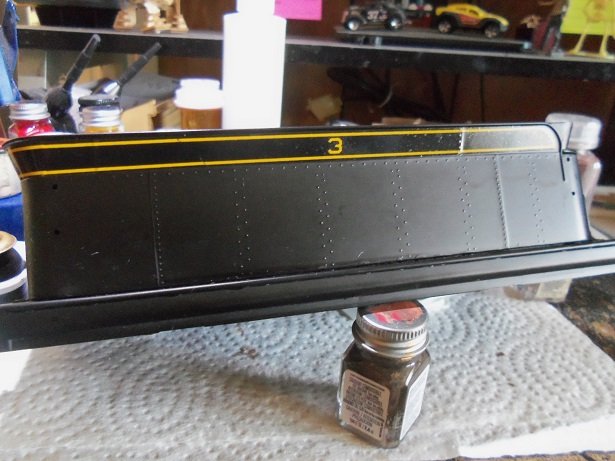
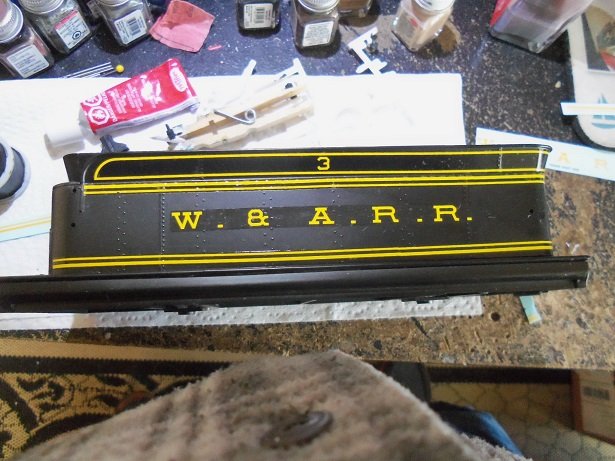
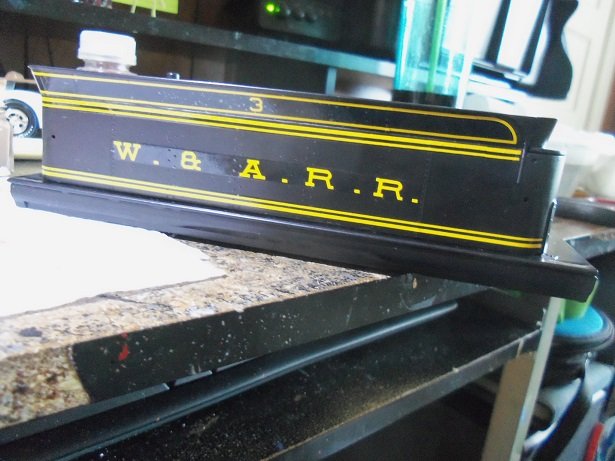
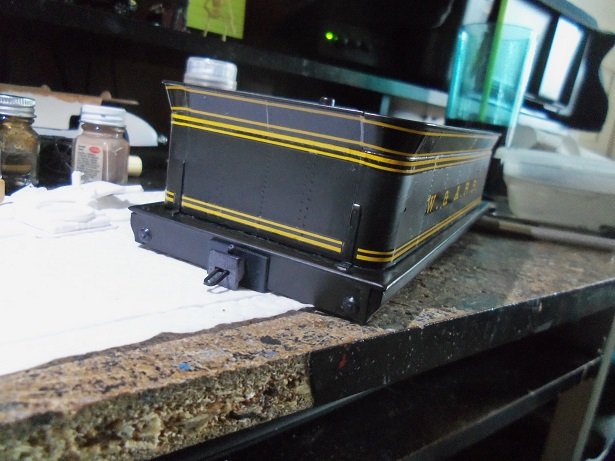
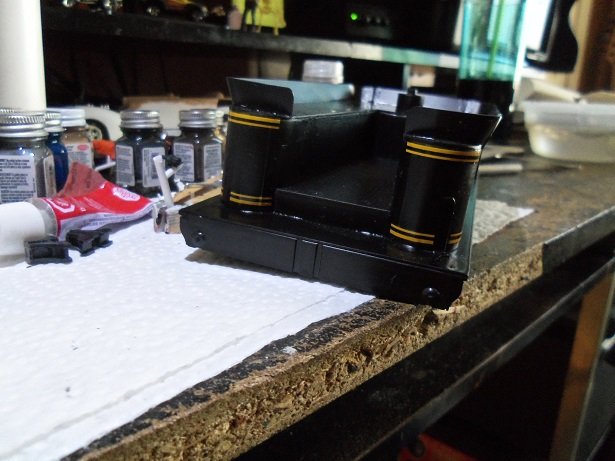
I had a 'both spectrum' day today.......still beats work'in the session was slow, since I was browsing the site here, but I think I got a lot done. as mentioned......I had a bout of happiness, with a dash of utter frustration. here.......I'll walk ya through it. after I cemented the axles in the trucks, I devised a way to put pressure on the frame to remedy the warpage they had. for the most part, it was successful. I haven't added any other wash colors to them yet, but I did promise a better view of them. I got those valve chests off the table too.........I added them to the loco. I was going to paint the gray parts flat red.......I still can....that is, if I had some handy. I ran out.........opened the bottle and found that it had dried up........oh bother I did a dry fit to see how the trucks would look under the tender. I like it I also need to do the pony truck on the loco too........maybe even the under carriage. next was to finish painting the sand dome......it had been painted yellow. I gave it some gold banding. I decided to give the wood load the base coat.......there are other colors that will be added, once the two parts are fully dry. the steam dome {I found that there is a typo in the instructions } got a continuation with it's paint job, deciding to accent top and bottom in flat black. actually, it seems like a semi gloss black.......I'm using the Billing's paint. I gotta try and use it up.......I still have too much to just toss out come to find out, the rattle can I've been using, has pretty much the same sheen. I added the rear coupler to the tender........it's not painted yet. also added the two caps... that is the pre civil war coupler. now comes the frustration part of the show....the decals. I truly pity the person that has the original kit........those decals are likely going to be worthless. they are very thin, with absolutely no give at all. the fact that they are long makes them even more prone to breakage. my only recommendation to you would be to spray them with a decal bonder {whichever you use}, or try lacquer. these are a reissue by Round 2 models and I had a devil of a time. the first one wasn't bad..... the other side broke in four places.........others broke in a number of places. I did the best I could to salvage them.......I managed to use them all. {damn stomach...........} I'll have to see what they have for the front coupler.......I know there's chain.........which will be substituted with metal chain. I may have to make a pair of eye bolts for it......hooks too most likely. the steam dome is done....here it is next to the sand dome. there are other part to be added to them both. thanks for look'in in
- 245 replies
-
- 12
-
-
good that your keeping the mottle.......it really looks good are you going to mottle the wing root?......that would blend it in. over all......a really cool camo scheme !
-
looks very nice Vivian........must be some elaborate rigging for the braces {steering}.
-
I was gonna add a little red primer here and there too.......already got the black, but I do have the soot I had mixed up earlier, for another build. I have some other pictures......I'll post 'em later. I've been working on the General most of the day.........little here, a little there.......while trying to get caught up here on the site. there are so many logs I haven't read.........I feel like such a chode. another example of the vagueness of the instructions..........there are these two parts that locate just above the rear trucks on the tender. there is supposed to be a tab there, but on the model, the tab isn't there! I will have to wait till I get the trucks in place, before I can fit them.......somehow?!?! thanks for the info Ken
-
thanks Sam......Sam I am
-
nice!
-
catching up on your project here........I see your finished ! you did such a great job, even the water look great! congratz on a model well done!
-
the Revell Alabama is a spin off from the Kearsarge........same with the Cutty Sark and the Thermopylae.........and yet again with the Constitution and the United States. as a matter of fact, I was always under the impression that there were seven kits in the 1:96 series.......there are others. I saw a couple of them on the old model kits site.......I wanted to cry { I bought my quota for the year already...admiral said } there is an Alabama for sale there too, that has some upgrade kits included with it.......they want over #300 bucks for it. these kit are rare. I recall back when I built mine back in the '90s.....now that I have reflected on it.....I did a poor job on her......didn't paint half the stuff I shoulda. at the moment, I have the Connie and United States.........second time build for them both there are very few kits that are a good representation of the vessel they are the subject of........a lot more are fictitious. they were cutting edge back in the day they were produced.......but today there's more information on them and model companies fail to upgrade their kits accordingly. the research is now left up to the folks willing to build their models as accurate as possible.
-
nice looking sails and blocks
-
just catching up with your project.........she looks super! very nice work all the way around........hull and sails. the rigging is exceptional have you begun the Santa Maria yet?......I'll have to check
-
putting the cap rails in place, this will never be seen anyway this is a neat approach....no need to taper or bend.
- 131 replies
-
- 2
-
-
- santa lucia
- panart
- (and 1 more)
-
I had my tiff over belaying pins.......the ones I got in a kit looked like knewl post tops! considering the scale of the kit, they never would have worked! I fancy the brass ones myself........I changed the way I run the lines too. I thread the rope through the hole and then stick the pin in. it saves on me having to hang clothes pins to keep the lines taught, I'll never forget where they are supposed to go, and if the hole is small enough, I don't have to cement them in place. your ship's look'in good.....keep up the good work!
-
really nice progress Semore.....the hull is coming along wonderfully deck looks swell too.......you'll fill the gap in with no problems
-
hello Ferit....I am so amazed with the progress you've made.........the rigging looks absolutely fantastic! I've been play'in with plastic for a bit, but a recent project makes me want to start mak'in sawdust again. she's look'in a top notch vessel......getting better and better with more that you add! great job!
-
you've made some really great progress Kevin she's a stunning vessel to be sure! I think that by the time you can truly hang the completed sign on her, someone will be following you with hankies........the feeling of her being finished might be a bit overwhelming. I remember how I felt when I finished my first project........now, after several.........eh, not so much your labor of love really shows....she's a sweet look'in vessel!
- 1,319 replies
-
- 7
-
-
- caldercraft
- Victory
- (and 1 more)
-
catching up on your project EJ...........glad to hear your feeling better the hull looks fantastic.........and the first steps of the masts are looking fine as well. awesome work