HOLIDAY DONATION DRIVE - SUPPORT MSW - DO YOUR PART TO KEEP THIS GREAT FORUM GOING! (Only 13 donations so far - C'mon guys!)
×


popeye the sailor
-
Posts
16,007 -
Joined
-
Last visited
Content Type
Profiles
Forums
Gallery
Events
Everything posted by popeye the sailor
-
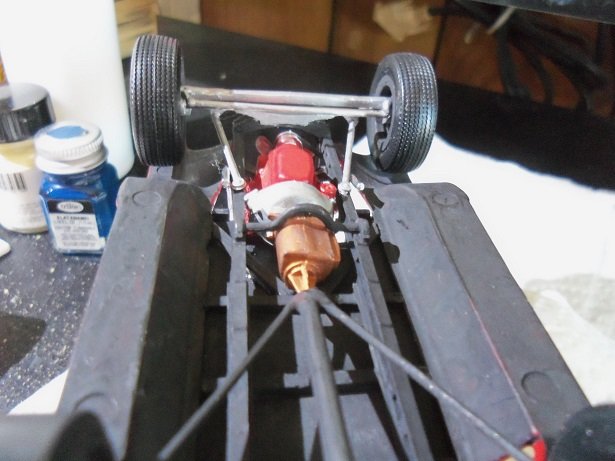
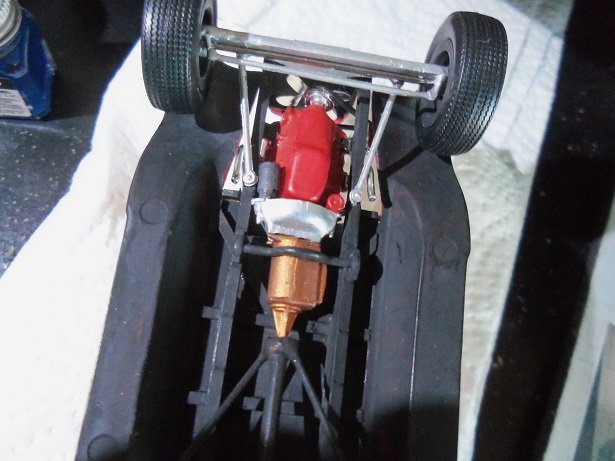
 yep....one definitely had to break a few eggs , to make it big I added a fan to the drive belt for the Olds engine. the picture above reminded me that in quite a few cases, some substituted an electric fan and did away with it. to save space. I'll need to check and see what kind of space I have. the front axle is out of the dip and cleaned up.......I've been doing some tinkering
 -
the fuselage looks really sweet! good to hear you won't need to modify the struts.
-
hello Jo......I just caught up with your log.....I see you've done a super job so far your about to fare the frame...the term folks call it. what you achieve here is to contour the frame edges, so that the planking rests on the full bulkhead.....not just the corner of it. if not done, the planking takes on a clunky look.......you'll see bulkhead ripples down the frame, particularly at the bow and stern. I use a dry wall sander for this, but you can also use any rectangular wood block.....as long as it's length spans over two or three bulkheads. the parts you've added { #21 & #22 - a pair of each} to the bow and stern stems, are called rabbits. your correct in thinking that the planking will cement to them........you'll need to fare them along with the rest of the frame. no need to bare down hard, but make long strokes over the bulkheads from bow to stern. when I do it, it makes a horrible noise......but as the bulkheads level out, it will become less and less noisy. I gauge it by this noise.......I call it making music........the admiral calls it terrible and sends me to the garage the weather is getting better.......I've got a few projects I need to bring out there....major sanding. be as even as you can and pay special attention to the bow and stern........make sure they are rounded to the contour of the ship your building. your staining fiasco isn't the end of the world.....you won't see that much of it anyway, and dark hides a lot of sin. as for the filler wood......I wouldn't bother. the only real places to do it is at the bow and stern, and these two areas are the sturdiest parts of the frame. added in any where else, and you may run the risk of seeing it through the holds. I read earlier, it was said that terminology wasn't that important...it is to a degree. it does help to know some parts of the ship.....it will help more when reading the plans. I don't care for their instructions any.....they don't explain too much either. I gotta go......but one more thing to remember, is to check the part your working with. it may need to be shaped or manipulated to fit properly. the manufacturer does give you a bit of material to work with when fitting the part on the model. fit and double check before cement is used. your doing fine.......don't let the model scare you.......you'll find what works and what doesn't remember........there's a masterpiece in that box somewhere........it's your task to find it
-
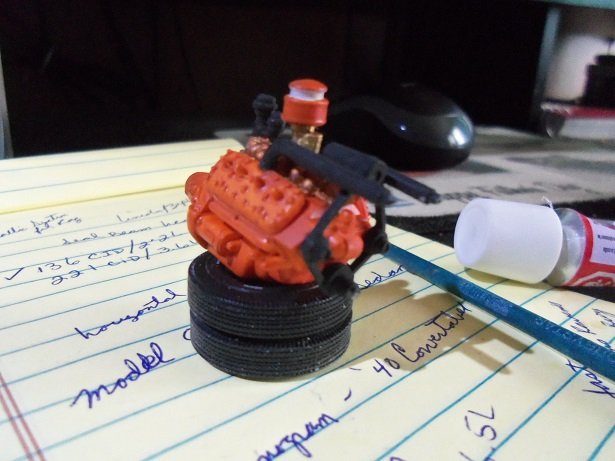
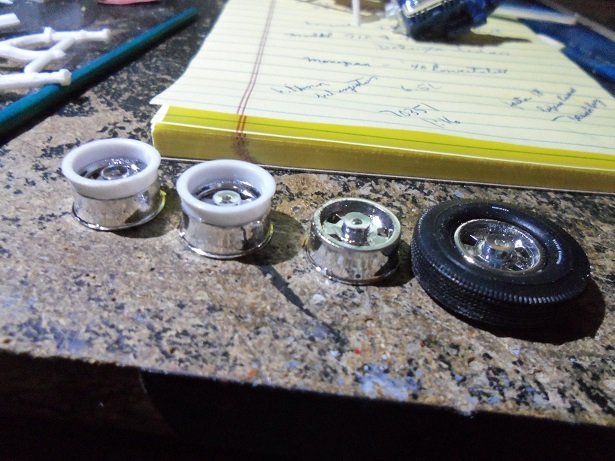
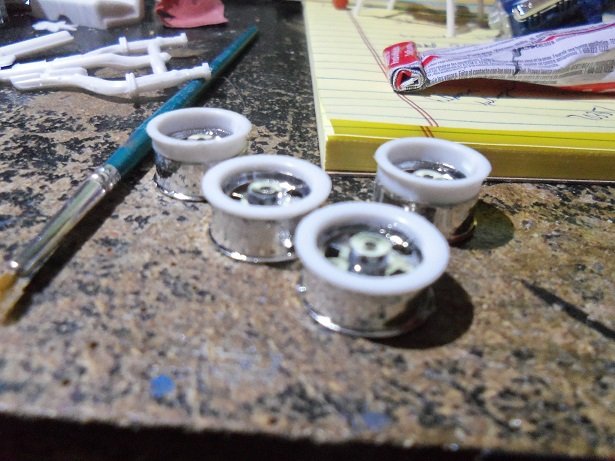
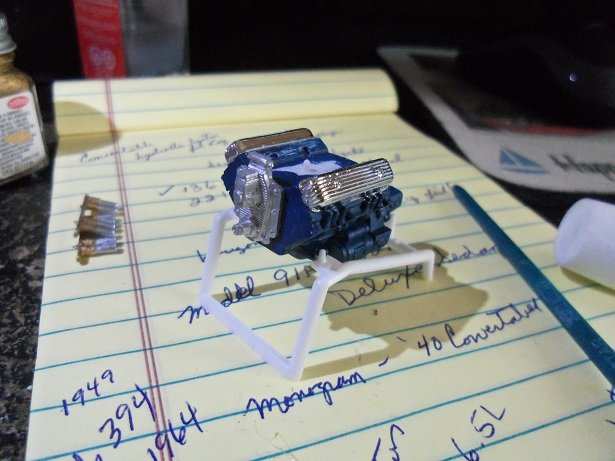
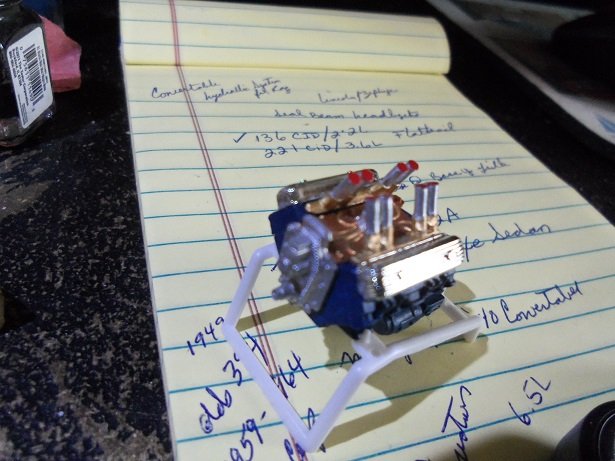
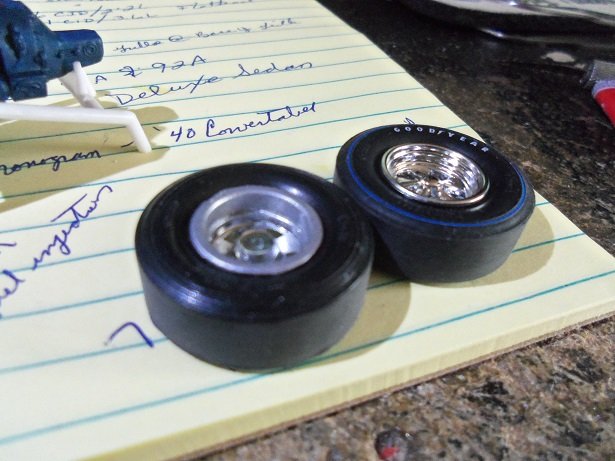
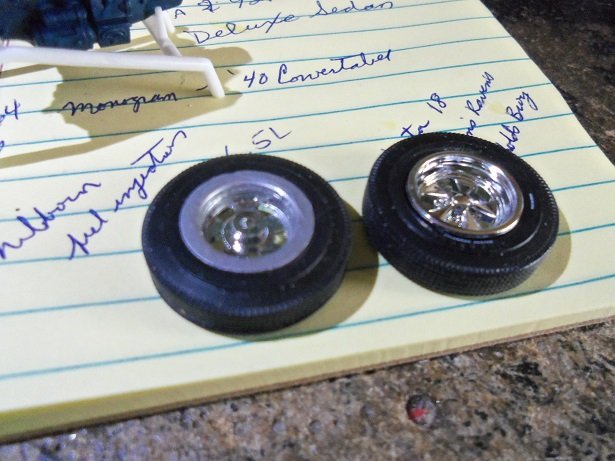
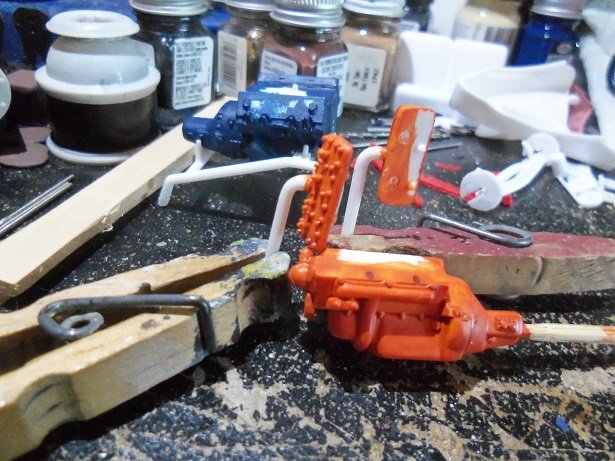
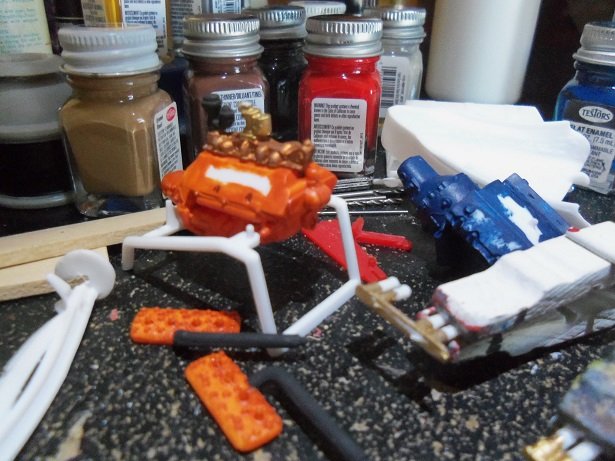
while I'm here........may just as well unload my progress. I have some.......no need to overload the camera engines and tires.........I did more to the flathead...... the intake and heads are on the flat head.....the timing cover and valve covers are on the 394........a couple more parts to go...... a bit more paint can add detail to it.......but I'll hold off since I'm not going to use it. I have a bigger problem that just cropped up.......the inner bead ring for the front rims. as can be seen, all four outer parts of the rims are the same height. on the slicks, this won't pose a problem.......but as for the front tires...... you can see that the rims almost go through the front tires....the rings, being too thick, would stick out from the tire and look terrible. there must be a way to thin the inn edge of the ring, saving the outer ring for the bead. rolling a piece of tape in a small circle {sticky side out}, the ring was stuck to it, and I was able to rub it on a sanding block.....anything flat really will do. kept in mind to inspect frequently, to insure it was sanding down evenly, the inner part of the ring was slowly removed. there is enough sticky side showing on the other side, that it helped me to handle the movement across the block........it stuck to my fingers I was able to use the same tape for the second one ........and the process continued until completion. with this done, it was time to assemble the front rims. they will be trimmed and painted later.. the height difference is very noticeable now.....I hope it is enough. too late now if it isn't. it's time to start adding to the 394 engine. the Hilborn injectors are lying nearby........the intake need to be detailed.........the regulator and fuel rails the headers are cleaned up and ready for paint. after some drying time, it was time to assemble the intake and injector tubes to the engine. ...added a touch of red paint on the tops of the injector tubes, and that's the bulk of this engine, aside from the headers and drive belt. I will have to modify the drive belt for this timing cover.......it only shows it for the stock {custom} timing cover {the pins are different on this one}. I did sand the finish off of the drag slicks.......I failed to do that for the Coke Mobile.....my bad the slicks fit nicely. huh......I just noticed.......Goodyear slicks. the front tires are Firestone......I'll have to check the sponsor decals and see if there are decals for them. I have one for Cragar rims........there's one for Goodyear.......no matter......I can make others. I'm trying to make some anyway.......along the lines of China Girl.......I'll show you what I have so far soon. the front tires are mounted........they came out good.......I'm happy that's all for now.........I hope to have more {the admiral's hinting at errands....... }

-
hello Steve.......welcome to the log yep.......he's not one of my absolute favorites, but I like a lot of his songs. one in particular is 'let's dance'.......a funny story for ya...... I was at work one morning....one bay had a trailer in it and one didn't, which has a profound effect on the acoustics in the shop. I was walking across the bay without a trailer in it, when the song 'let's dance' came on the radio. David uses his voice quite effectively on this song, and I do like to sing along with it..........so I did. I sounded pretty good with the acoustics {if I might say so myself}, so I kept going.... put on you red shoes and dance the blues........ to the song that's play'in on the radio.. just about ready to hit the chorus, my manager comes out of the parts room..........."way ta go Denis!" "You go......" big smile on his face! we both started laughing..........of course....that killed the concert of course, if you really want to hear something funny........I can do it in Elmer Fudd too as well as Popeye yas knows what I's mean? anyway......I hope you enjoy check'in in here and there.....appreciate ya popp'in in
-
welcome Sam, Jack and J! yes....my many projects.........and I'm constantly thinking of them too I know it's hard to follow, but when I get an idea or solution, I apply it right away. it keeps me busy and the admiral's head spinn'in glad to have ya aboard Jack! I can count on you J, to come up with some pretty cool stuff! now you'll have me wondering if there are any upgrades for L6 engines. I still haven't pulled the trigger on the corvair stuff.......curious to see what it's all about...the engine or just the upgrades. the kit came with the two V8's.......the flat head and the 394 Olds........I'm going to use the Olds engine with Hilborn injection, instead of the trip carbs
-
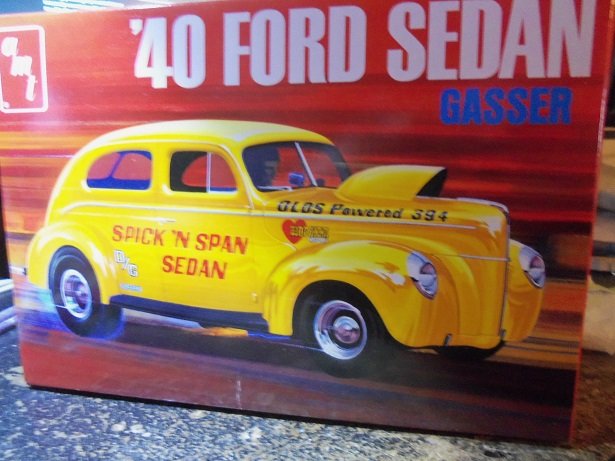
hi every one......welcome and hope you enjoy what I'm gonna do to this beast nothing spectacular really........I do have a couple thing I want to modify....this kit is an odd duck. as mentioned, there is no actual kit put out there by AMT.....they did have a stock version model kit at the time. I also saw that Monogram put one out back in 2000.......I forget offhand when they merged with Revell. there are other gasser models using this particular year and body........they were pretty popular with the racing community. I think it's safe to say that Duster and Mustang bodies took over the field by the '70s. the beauty of these older bodies was the frame........the the way {and how} it was constructed made them very strong, perfect as the start of adding in the elements of racing......roll cages and such. another aspect of this model is the suspension.......I'm use to seeing the dual spring set up, rather than the central spring suspension. if I had the spare parts stash I used to have {back in the day}, I could go nutz with it chances are your correct Mark......the decals depict the Mom & Pop race teams of the past, where money didn't ruin the sport yet. once it became to costly to keep up, most of the smaller teams faded away. back in the day, some used to drive it there, unhook the headers, put on the slicks, and toss out the admiral's hand bag {useless weight on the drag strip}. I agree with your assessment of British Scarlet.....as if I didn't have enough Orange, as well as International Orange in my paint stash Lou............! this is another color from the batch of paints you sent me Lou. there was a small group of Monogram and Humbrol paints in the batch, that I keep separate from the rest of the naval and armor paints {the white ensign stuff}. I am trying to transfer these paint to bottles......I find the tins a bit cumbersome. I have a habit of wiping the caps and lips of excess paint, so I don't end up with sealed shut bottles......then having to ruin the caps with pliers. the flathead V8 was the perfect 'poor man's' engine.......and is the basis for later racing engines. the valve in block set up was less labor intensive when it came to pulling the 'head'. I do find it kinda funny that ford first built the L6 engines, went to the flat head V8 engines, and then went back to the L6. the flat head was more than perfect for truck. when I was a lad, we had a '59 ford pick up with a flat head V8.........damn good runn'in truck! the Olds 394 engine was produced in 1949, although it saw the most use in 1959 thru 1964. this engine was another engine that saw a lot of application in racing. the valve train set up required it to have banked heads with two bolt on valve covers to shield the rockers and push rods, capping off the valve train chambers. these engine also enabled the use of two and four barreled carburetors as a single unit, rather than mount them as duals or triples. hello Ken........yepper! your places are both still there I don't move nothing.......I love company!!! that reminds me of my old Chevelle CDW.....it had a 305 in it, until I burned out some cylinders. I replaced the two barrel carb, with a four barrel carb {and intake}, and used to terrorize down town Manchester {we had a place to go to}. that is.........until the cops would break us up. but back then, it was just us kids having fun.........not like it is today any way.......our neighbor ran a small garage.......his only son had joined the army and I used to go up there to help him out {dad did too}. I was working at the nursing home at the time.....his wife was the head dietitian there....and I worked in the Kitchen under her. I got home to my father telling me to go up the hill.......Bill had something for me. getting there, entering the garage, there's old Bill.......working and spitt'in the juice from his chew in a pepsi bottle. Bill had an engine for my Chevelle..........I saw the small block 283 on the stand, but no........that was Willy's motor...not the one I was to have. he pointed to a tarp.......under it was the L6.....I forget what CID it was......I was bummed! but you know.......that was a damn good runn'in engine. the only thing I ever had to do to it was adjust the choke thermostat for the seasons. he rebuilt it......very tight and quiet for a six cylinder........usually you can hear the valve noise...but not this one. I did some more cleaning up last night.......the mold line are very prominent on some of the parts. I want to jack up the suspension, but what's in the kit is making it hard to do that. I'm in the process of checking the rear tire clearance.....here I ran into a small problem with the kit. the rims are a two piece affair......the outer mag halves are all the same height, but the inner bead rings for the front and rear are different, due to the thickness of the tires. they are a thick rubber and won't stretch outward to meet them. I haven't tried the slicks yet, but the front tires will have a very noticeable gap concerning the inner bead. these rings need to be thinned down........I came up with a way to do it. I'll tell ya in the next update
-
I need to update mine...as a matter of fact. all I use is Microsoft word.
-
there's still a bunch of 'em out there....the price tag is hard to swallow though
-
thanks Mark.......and thanks to those who hit the like button the body was fairly easy to replicate......even the taper at the bottom wasn't hard to do. I had fun doing it......the admiral really likes it. I was looking in Old Model's website this evening, and I happened to see a Lindberg 1:16 Concord Stagecoach. I inquired about it......we'll see what happens a huge thank you to all who followed along!

-
looks like they might have benefited by replacing the struts with the type used by the D VII
-
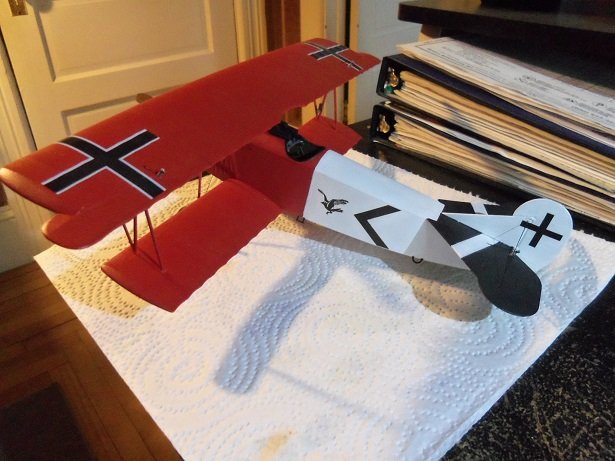
it's an older Revell kit...in the Pheon line up, it number 17. haven't found out who the pilot was here's a picture of it I'd like to collect a few more of these planes in this scale.......very nice build. I have a Guillow's Fokker Dr 1 that I want to do in either one of these squadrons {Raben or Berthold}. I have red and white tissue, so it may as well be Raben's Dr 1 20 inch wingspan...gonna be a big girl!
-
well....just be careful tak'in that inventory.......you may see something else that'll catch your eye
-
check out some of the decals here: PheonDecals.com - Home page I have a 1:28 scale Fokker D VII that is from Raben's Ravens, Jasta 18.........another squadron from this Jasta is Berthold's Boys. there are two Albatross sets they show here that are pretty neat. look'in real good my friend
-
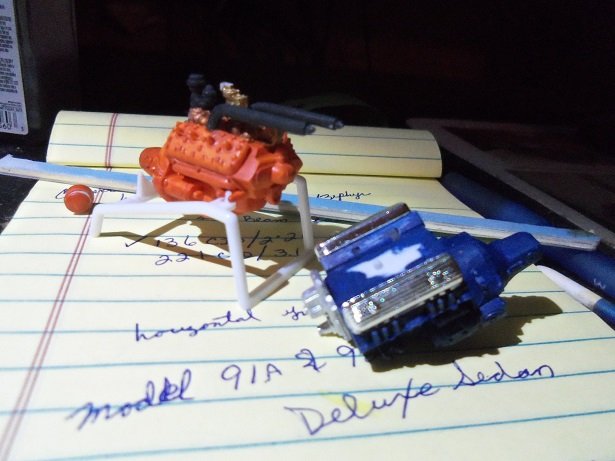
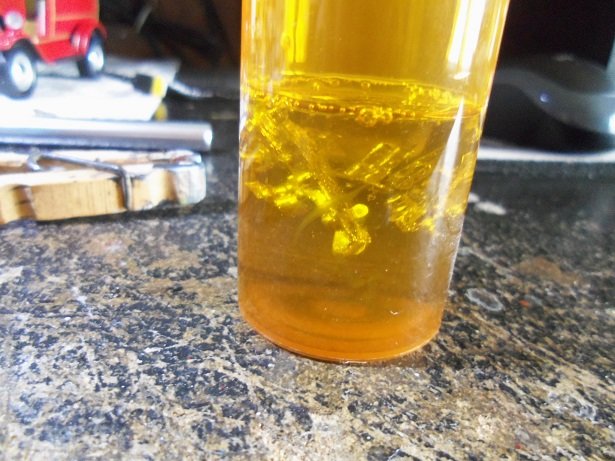
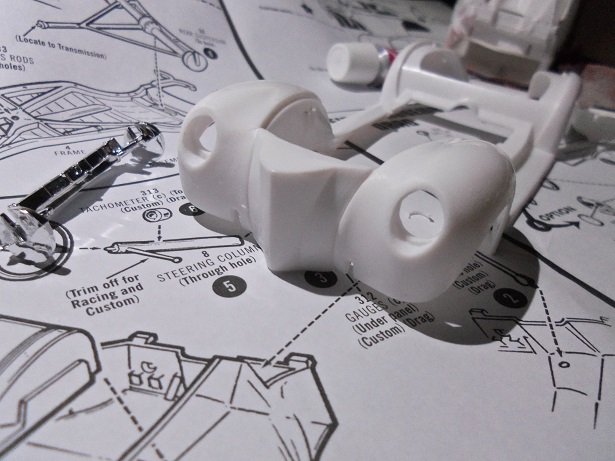
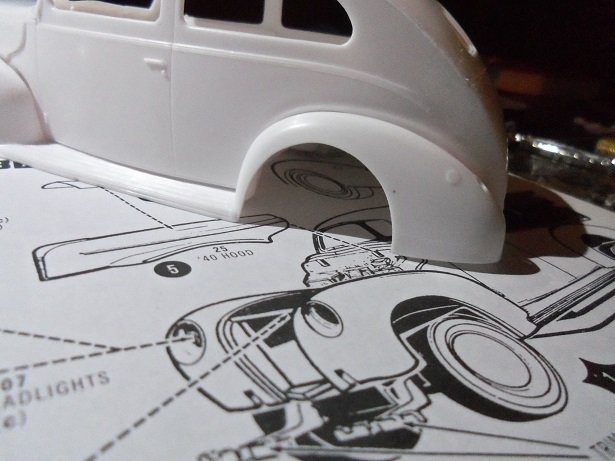
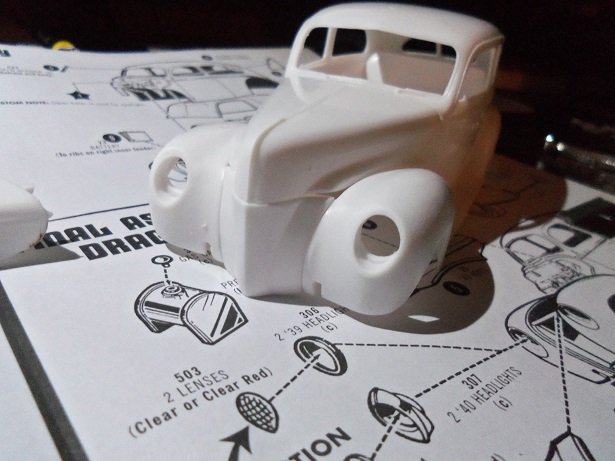
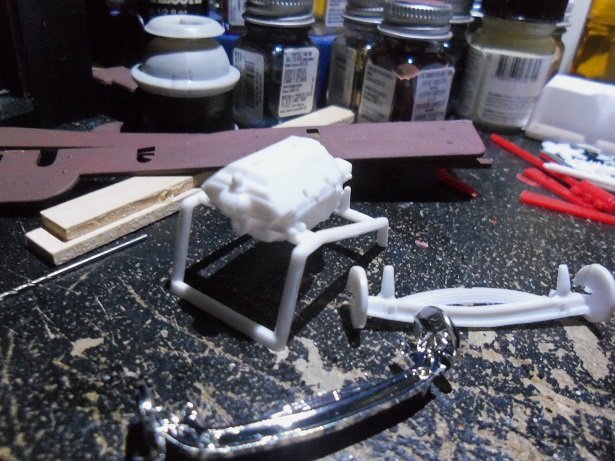
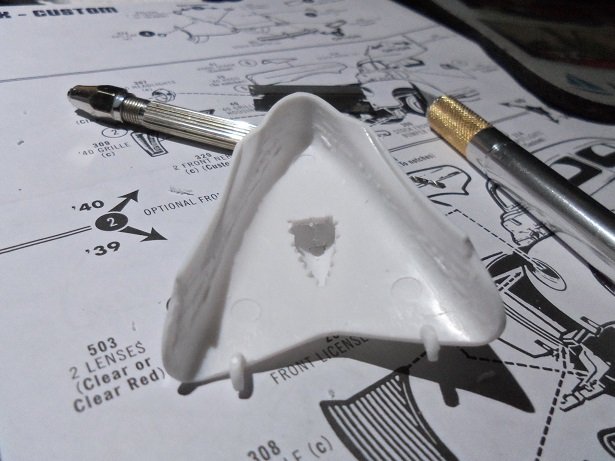
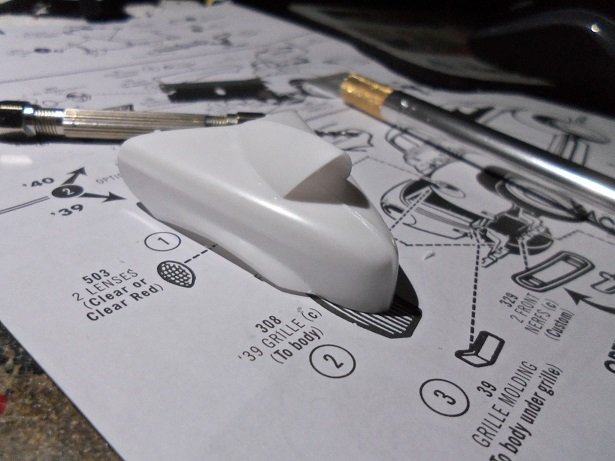
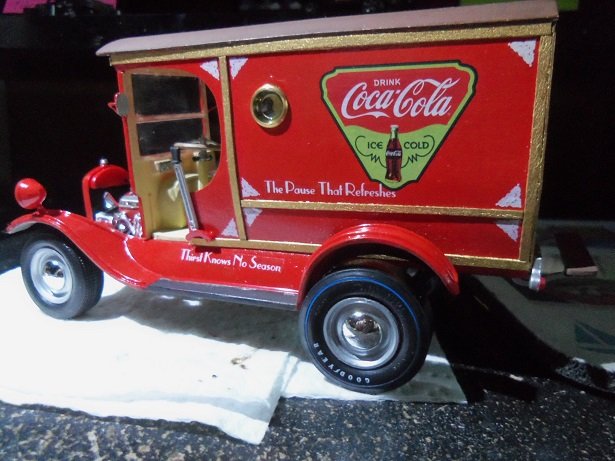
while looking for a victim for the 283 small block I had bought, I intended to use this model to house it.......but the admiral eyed the 1923 coke mobile, and the rest is history. just as well I think......this one is very strange. I have been trying to find it in the original AMT box, but have only found it in the stock variant. not only that, there are a few parts that are not in the instructions.......and a right side running board is included as well. it's not needed, since the running boards are already part of the lower body half {I've been using this face a lot today}....it does have some extra parts.....like a tow bar, the hook up to tow something, and an engine stand. if one was building a garage diorama, this would be one model I would suggest, just for that reason alone the model does build up to either the '39, or '40 Ford sedan.......but pictures I saw of a '40 ford, has a horizontal strip of grill running across the base of the center grill....the model does not have this. back in the day, ford didn't name their cars the flashy name they give them today. they were sold as models.......standard or DeLux. so the product name for this particular vehicle would be '39 Ford DeLux Model 92 A Sedan.......or Ford Standard Model 91 A Sedan. these cars were updated as a luxury car, to keep in pace with Lincoln / Zephyr {when was the last time you heard that name?}. this was the year that ford introduced the seal beam headlight.......and the hydraulic mechanism for the rag, for their convertible models. this model features two engines......the stock 136 CID / 2.2L engine and an Olds 394 CID / 6.5L....I think we know which one I'll be using . I've already started to clean up some of the parts.......I've also sent some of the chrome parts to the 'dip'. I'll build both engines, just for the fun of it.....the 2.2L is on the stand at the moment. I didn't bother to do a contents review, since I've already bagged some of the parts I won't be using {the humble beginnings of my spare parts bin}. for those who might be interested in finding the kit, Round 2 boxed it as a Gasser. there is a box size card included, in case you want to frame it and put it on your desk....or you can hang it on the wall , next to your mother in law {that will win you some bonus points with the admiral }. {HA........only if your Tim the Tool Man!} the decal sheet come with a few names for your creation.......I didn't care for any of them.....even the box art. I was mind listening to a David Bowie song.....yaaaaa China Girl......that's where I got the idea for the name...silly me. the molds are old.......I will caution you.......I had to clean some heavy mold lines off of the front fenders. I cemented the drag grille cover in place already. see the front suspension beside the body.......note the visible 'line' on what would be considered to be the disc rotor {or backing plate}. that is a heavy duty mold line........I worked diligently on both front suspension parts {one is raised and one is lowered}. the chrome one was just as bad as the unchromed one......the chromed one got thrown in the 'dip' too. I'll go over the front fenders now with some fine sandpaper to get rid of any scratches the rougher paper left. on most of these older kits, if a wheel well is to be enlarged, it will have a line depression, denoting where and how much to remove. this was the case her with the rear fender wells......I removed the excess to allow for the drag slicks. the hood was cleaned up and fitted.....there is a small gap on both sides of the hood I need to fill in. the 2.2 L on the stand the hood for the '39 will be used. the hood scoop was cemented in place, and the opening outline was drilled, to make removing the excess plastic easier. the opening is all cleaned up now...flush with the inner surface of the scoop. it saw it's first paint around this time....the 394 CID is painted flat Blue. the 136 CID is painted in British Scarlet.......never heard of British Scarlet....it's a Humbrol color. so......this is where I am now. still more cleaning to do though....I promise to stay busy
-
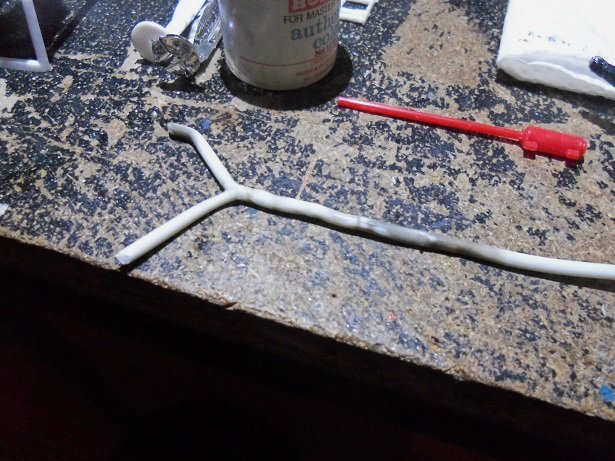
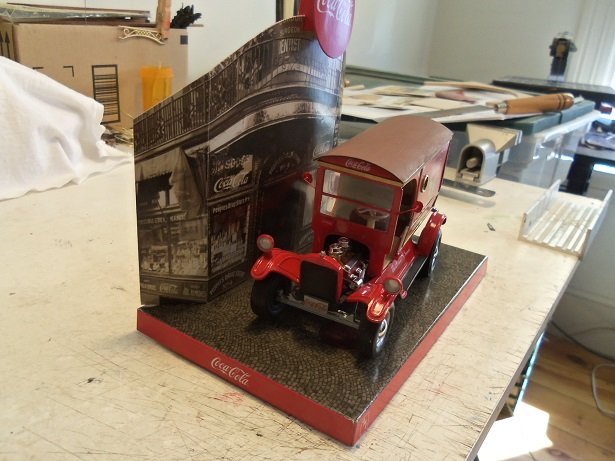
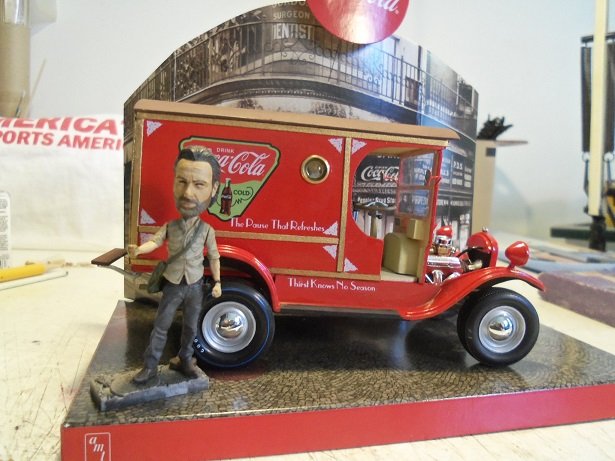
so folks........this is the last log. what a strange trip it's been........grateful that you folks followed along. back to work making the Y pipe.......this took some shaping........not sure if this is the first one I've ever made. I haven't bent sprue in quite a few years flipping the truck over on it's roof, I noticed something that I missed........the starter! looking in the bag I put all the other parts into......I found it {must have gathered them all up and it too. that was quick to remedy! in hind sight, I should have started at the passenger side header, and connected with the driver's side as I made the turn towards the rear. but I was thinking truck when I made it. the rear drive train didn't do me any favors either......I had to run the tail pipe through the gap between the leaf spring and the frame. in the end, it all worked out the tail pipe is far enough away from the body............no annoying rattles or bangs ...a couple of touch ups later, and I call it officially finished! here's the double whammy.........in the kit, there was a backdrop display for it. I got one with the Bat boat.....of course, I had to reinforce it with some wood, to make it sturdier. I did the same with this one.......just some strip wood, was all it needed. it's a cheezy.......but nice touch for the model. I know I failed to get a celebrity to one of my projects once before..........George Clooney must have been too busy to answer my invitation to the Andrea Gail gallery shoot. that would have been really cool........BTW so I've got something close to it, but not exactly. since the guy lives in England, I know it would be impossible for 'em to come here...........but it's on my wish list. here's Andrew Lincoln, who plays Rick, on the Walking Dead


- 91 replies
-
- 12
-

-
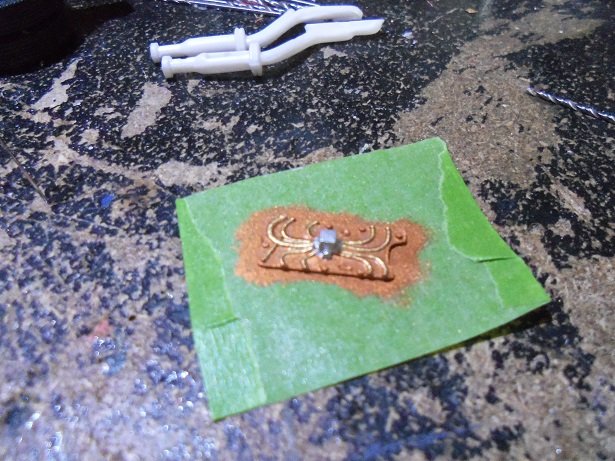
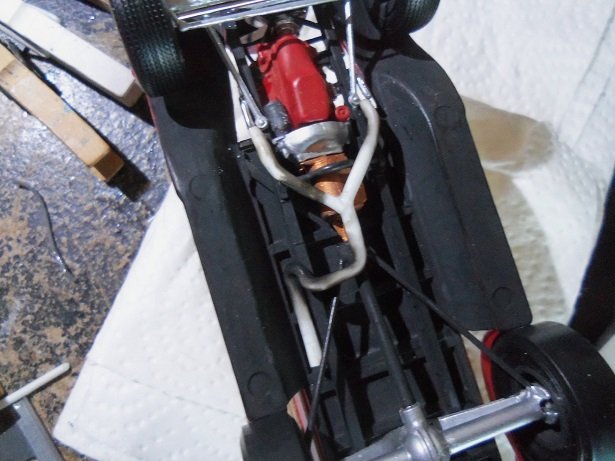
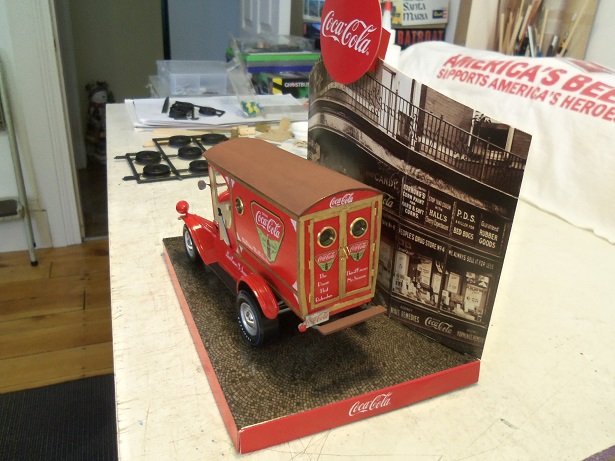
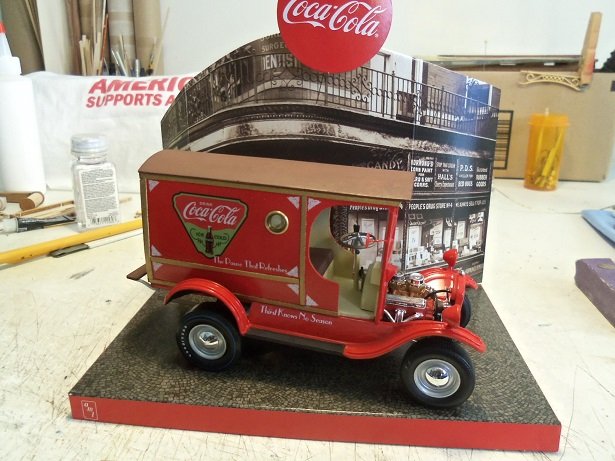
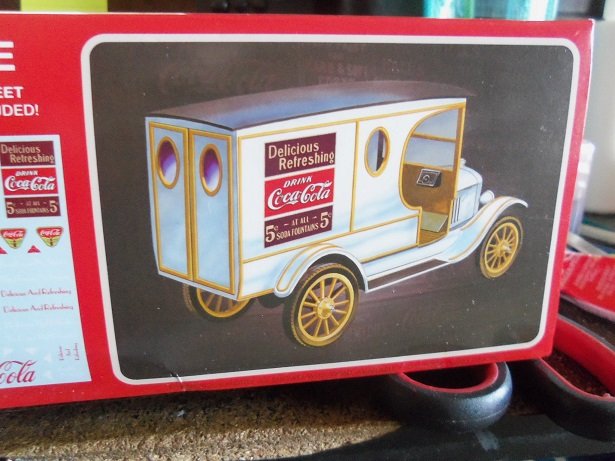
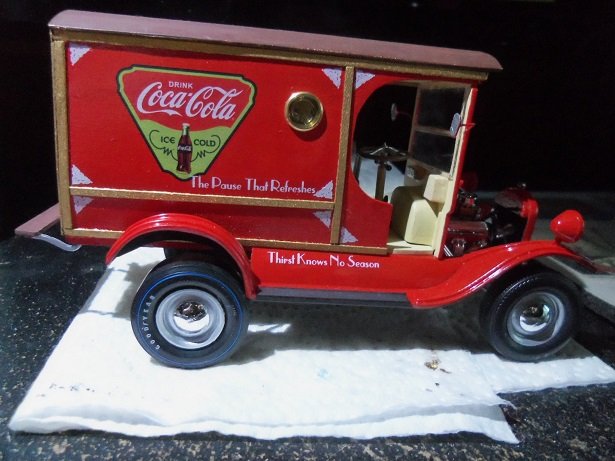
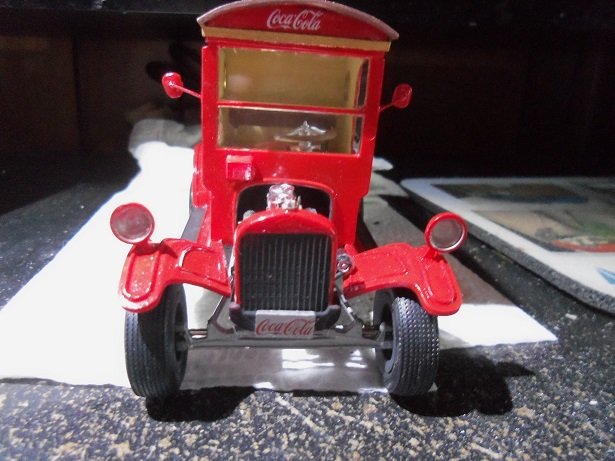
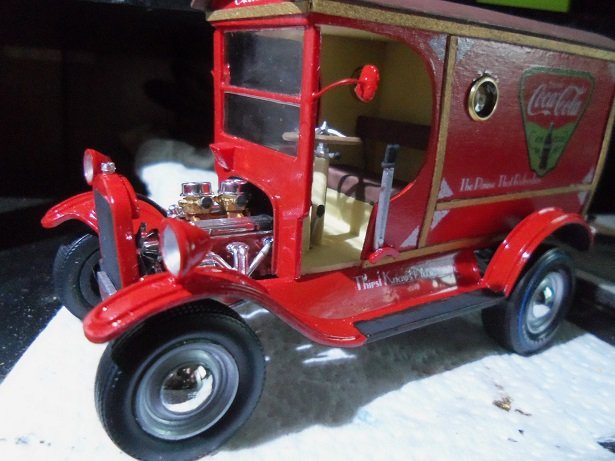
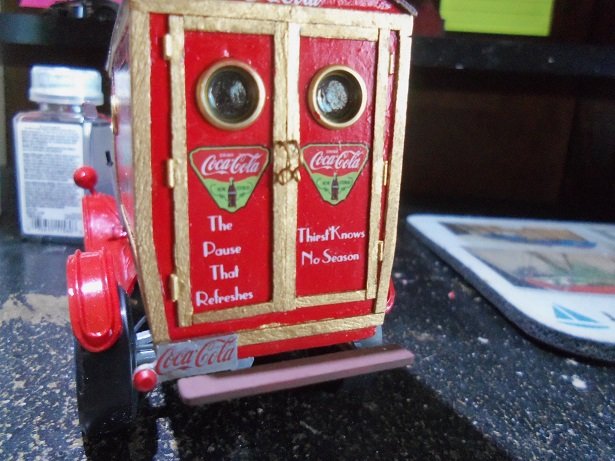
OK.........there's like a double whammy epilogue to this project...something neat that I used to see in only a selected number of kits. I'm not sure if it's a merchandising ploy.......I can take it or leave it take my word for it though......it's kinda cute I recall somewhere in the log, I mentioned seeing this model in white.......this color scheme is pretty nice too. darn thing is on the side of the box ! after I had started to work on the exhaust, cementing the Y together, I thought about what to do next. I got curious about the number of corner decorations there were in white. once I began to cut the decal sheet up, I guess I just got carried away. the logo selection is really good......I had a hard time making up my mind which one to use. I selected the one that matched up the best. there were 16 of the corner decorations.......a lacework frieze design commonly found on hot rods {or folks that think they're car is hot}......so I just put them in logical spots {or with my crooked mind, thought was logical}. I saw this next photo and thought "boy.....did I build a crooked car!".....but no.......it's sitting on paper towels, and not level. there are red frieze designs........they look better than the white ones. ........a look at the interior the radiator hose can also be seen. sorry I bagged out on some of the extra detail. with the engine tucked into the recess, I didn't even add the distributor. this in turn eliminated the wires. now.......I added the rear door hardware this morning........I took this shot before the exhaust was added. so this leaves the exhaust as the last frontier.....get it done and I can call this project finished

- 91 replies
-
- 10
-
-
hello Sam! it would be a good idea.........definitely would look the part too, but I don't think it would handle the constant changes very well. too many adjustments, and it would likely develop cracks. considering on how many I've done to get where I am now......it's a probability. it is an idea though, that I will keep in mind if I need to do another. it just so happens that the exhaust is installed, and she's purring like a kitten......a rather burly kitten.........that is pictures after I take the puppy out
-
WOW! I just caught up with your project, and I'm absolutely stunned with the detail you've put into the yards and sails it's some beautiful workmanship.......very nicely done!
-
nice process..........my word! for a while there, ya had me sneaking up to open a beer can......don't need no tentacle tickling my nose great job on the buoys !
- 714 replies
-
- 1
-
-
- lady nelson
- victory models
- (and 1 more)
-
thanks for the wedding pixs.......you kids enjoy yourselves! your still youngsters ....not say'in I'm old.......let's just say I'm older the sails look great........can't wait to see them rigged on the ship
-
wow! nice work on the ratlines. they really add a lot to the model.......well done so far
-
great progress Kevin rigging looks terrific! you'll fix the broken line with hardly any trouble.....still doesn't take away from the shots of the stun booms........awesome job!
- 1,319 replies
-
- 5
-
-
- caldercraft
- Victory
- (and 1 more)
-
she looks awesome.......added quite a few lines since I last saw her too!!! well done !
- 1,306 replies
-
- 6
-
-
- syren
- model shipways
- (and 1 more)
-
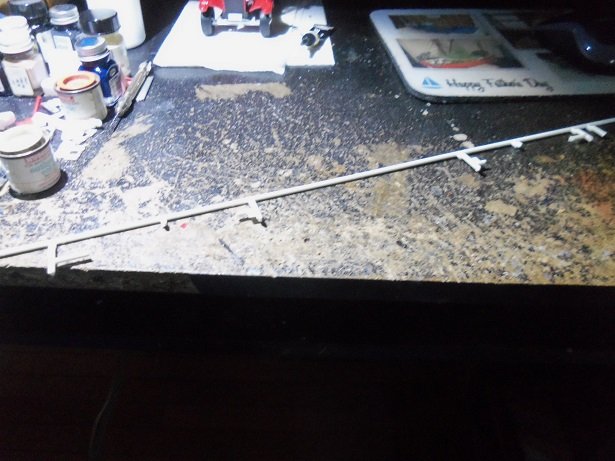
I made some progress towards the finish of this model........but I can't show you the whole thing. so at the moment, I'm in the process of making a Y pipe for the exhaust. I've been saving sprues since I started with the Titanic......lucky for me, since all the sprues I've got around me at the moment are a bit too thick. I've tried to heat the sprue to stretch it, but getting it to elongate evenly across the entire plastic "rod" has been a challenge. here is where I'm at at the moment......creating the Y shape, and about the define the rest of the shape. I'm going to use the muffler and tail pipe from the kit. last thing to do is add the hardware for the rear doors, and the decal work. hope to put the finish on it today.........I've already started on the next one.