


popeye the sailor
-
Posts
16,007 -
Joined
-
Last visited
Content Type
Profiles
Forums
Gallery
Events
Everything posted by popeye the sailor
-
 good to see your still making progress Mark. the deck is looking very nice, and that's a cool jig for the cannon hardware
 -
nice progress Russ......the planking looks very nice. I like to do the same pertaining to structures. I'm not a big fan of the separation gaps either the hull is looking real sweet!
- 420 replies
-
- 2
-

-
- captain roy
- lugger
- (and 2 more)
-
superb progress Nils.. the swivel guns look super, along with the decorations that adorn the hull I got word from the admiral, that I will be doing my first populated project {besides the M&M ship}. your projects have been a good source of learning material.....when I finally get around to building it, I certainly hope you follow along I'll need all the help I can get!
- 692 replies
-
- 4
-
-
- eagle of algier
- chebec
- (and 2 more)
-
in the hull pictures that avbiker posted...no big deal. just thought it was interesting.
-
back when I built the Connie, I never knew about all of the nuances that folks were experiencing. I used the plastic eye bolts, the pins for the breech ropes, loading the first steps of the masts with metal rods...to name a few of them. I had no trouble, in spite of all the complaints. don't get me wrong....I'm not disappointed in seeing these modifications.....the thing I had with the kits {I've built many}, are the decks. other than that, I still think that these are the best kits that Revell ever came out with she's looking good BTW.......the more I look at the stern, the more I hope I can scratch build the galley parts and get them into my United States build. why they omitted these parts is beyond me......there is just as much room for them, as in the Connie kit. the deck came out super...hope the spar deck comes out equally as nice good to see your progress. if your still having the problem with the deck pulling away from the hull, you may have to use CA and rubber bands, leaving it to dry for a day or two. a habit I have is to remove the hull parts from the box right away and rubber band them together, pulling the sides inward. leave it for a week or so......there's plenty to do in the meantime. of course, you can't do that now, but if you should pick up another, give it a try. this works for any hull.
-
this looks really neat Doug......I've see more stands being assembled like this I might even give this a try!
-
I knew there was another out there like me looks like your trying to beat my record planking looks good....the stern is always the tough spot. the differentiation between the transom and the counter is visible.......you won't have a hard time shaping the contour. very nice
- 79 replies
-
- 2
-
-
- marisstella
- barque
- (and 1 more)
-
hello Walter........so good to see you I hope all is well and you are back to the table, although I've seen no updates. thanks for the good word hello John......good to see you as well I hope to attain that much realism, but I'll settle for a nice looking model thanks for the good word!
- 378 replies
-
- 6
-
-
- t78 norden
- billing boats
- (and 1 more)
-
are you making sure that all of the fastening brads are below deck level? speaking from experience
- 1,306 replies
-
- 4
-
-
- syren
- model shipways
- (and 1 more)
-
still can't get over the white anchor chain........wouldn't expect it, considering it's function.
-
thanks John with all this painting, I should be able to really put some good progress on the model. I do have to say though, this has been an interesting build so far. raised a lot of questions. Billing's could have made this model a bit more distinct....there are so many model worthy examples of this boat out there it's a great kit for those who like to bash and scratch build
- 378 replies
-
- 5
-
-
- t78 norden
- billing boats
- (and 1 more)
-
I'm sorry.....am I drooling gotta have some weight to it when finished will it have a skin, or is the internals exposed?
-
did you notice the slight Joggling on the port side of the bow?
-
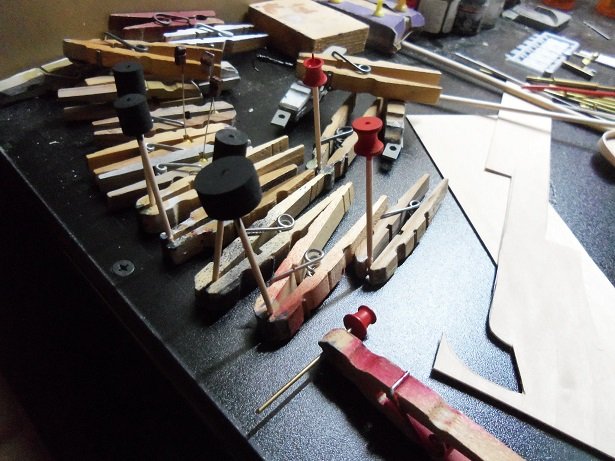
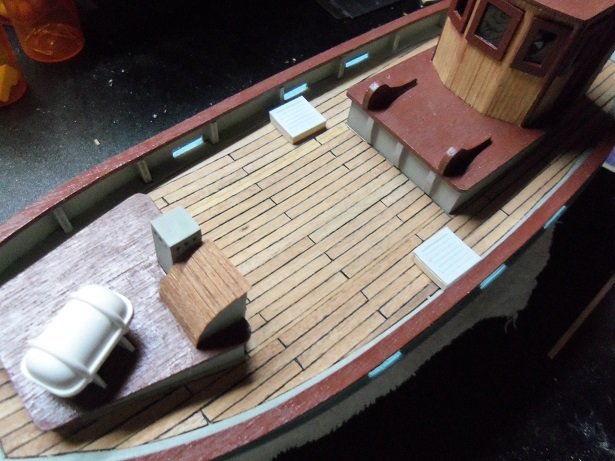
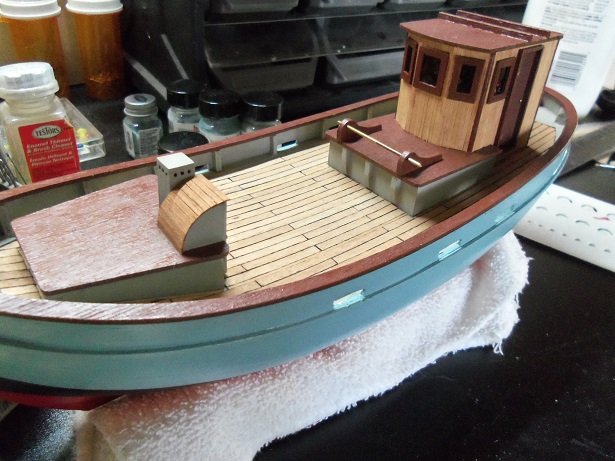
more was done this evening......mostly painting and prep. the winch drums, sampson post and the two smaller posts, the collar and bracket I made for the aft mast, as well as some touch ups. the admiral came over to the table and started play'in with the parts, putting the raft locker in the middle of the deck. then she proceeded to make fun of my sluice table........why doesn't it fit, and stuff like that. I'm laughing....I told her that the model is missing something. curious, she asked what it was........and I told her....ladders! I forgot when I made these.......had to be something silly. I could roll one up and stow it away in some out of the way place. OK now......go read something before you break your boat I did some assembly to the cold bin hatches....... cemented on the hold box......I'll be painting them soon. the nave light boxes are in place and painted, as well as the tow smaller posts....waiting for them to dry. the buoy bin, the spot light were assembled, but not complete. that little dog house is done too. more parts painted.....the raft locker and the anchor. have I mentioned that this model is being painted with mostly Billing's paint. some of it I'm having to thin, because it getting really thick. there are a pair of railings that go on the forward structure........they are assembled, but likely need some sanding. after, they will be painted flat white. the last thing I'm gonna do, before I hit the bunk, is fill the lenses on the lights. I fill them with Testor's window maker / cement. it's made to cement clear plastic parts..when it dries, it dries clear........barely can tell it's there. when it's dry in the lights, I'll take a fine paint brush and put the appropriate paint inside, to color the lenses..... red and green for the nave lights, either yellow, white, or silver for the other light. I'm gonna do something with the spot light too.....not gonna leave it like that. probably hard to see......here are all three. after they are filled, I usually lay them lense down, so the window maker doesn't slide inside......it's a gravity thing they'll be dry by morning. good night ladies and gentlemen

- 378 replies
-
- 16
-
-
- t78 norden
- billing boats
- (and 1 more)
-
I tried to send you one...I got a flag saying you weren't accepting messages. the garboard will lay without tapering...test fit the planks before you cement them on. chances are, you may need to taper to some degree. what will happen if you continue downward, is that you'll find that you'll need to taper too much. the rule of thumb is to taper up to half of the plank's width. what's going to happen coming up from the garboard, is that the planks will ride diagonal along the bow stem, until it meets the other planking....then it will terminate along the plank line. you should be able to keep the bow's shape reasonably well. soaking and bending the planks will help with this
-
very nice paint work OC........a nice tidy job
- 455 replies
-
- 3
-
-
- slightly modified
- greyhound
- (and 1 more)
-
seriously nice work what scale?
-
thanks Pat.......other than gluing on the forward structure before I sealed the deck..things are going smoothly. tonight is paint night...getting parts assembled that need it, and of course, painting. I had to laugh....the admiral actually played around a little with it. nothing serious.....just put some parts on, in strange places. I'm about to do an update on some of the antics. thanks for the good word
- 378 replies
-
- 4
-
-
- t78 norden
- billing boats
- (and 1 more)
-
I hate to be the wet blanket here....but do you want to risk damaging your model? the advice I would give to any beginner is to leave it as is. after you've done a couple more models, take a look at your first one. you'll see the experience you've gained. besides.......you called "done" thanks OC........the admiral and I were playing.......you should have seen her! having fun like a school girl! you ought to see what we came up with
- 378 replies
-
- 6
-
-
- t78 norden
- billing boats
- (and 1 more)
-
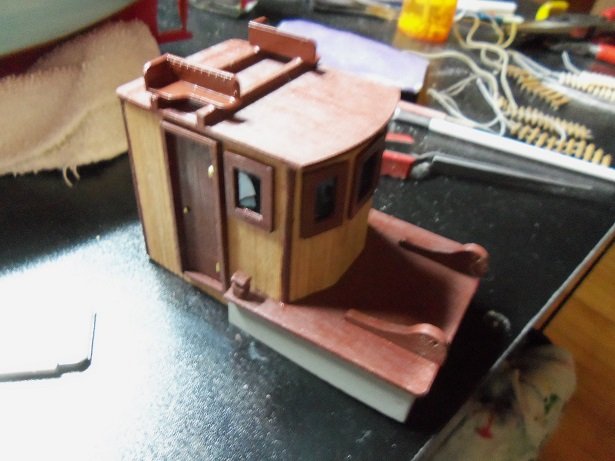
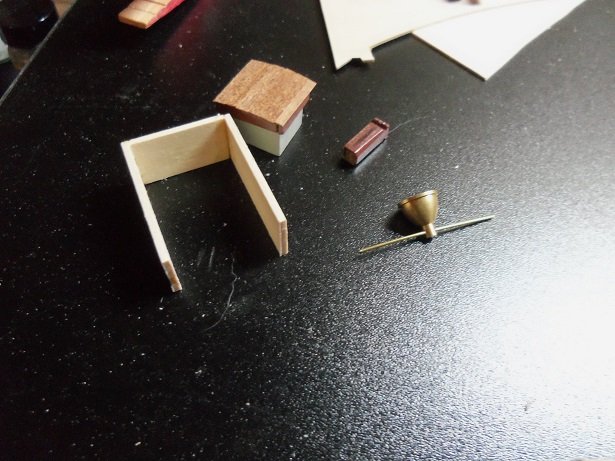
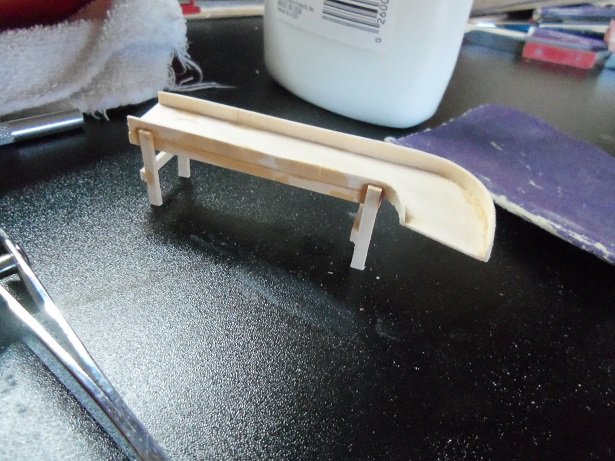
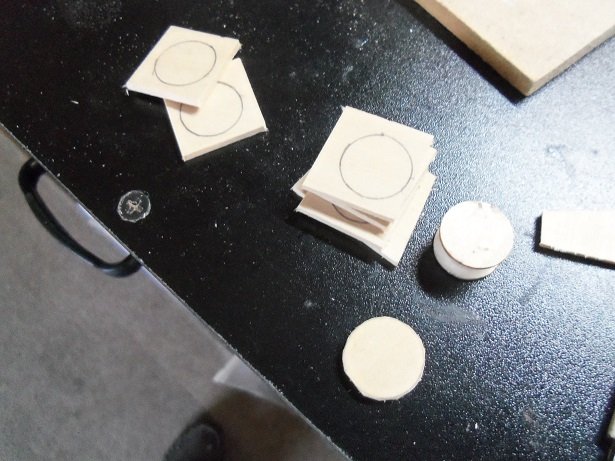
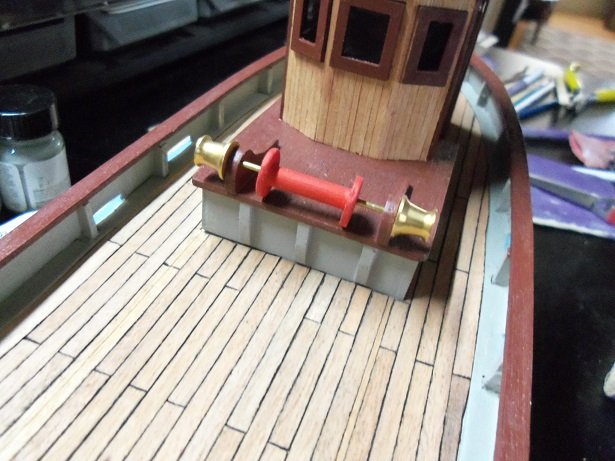
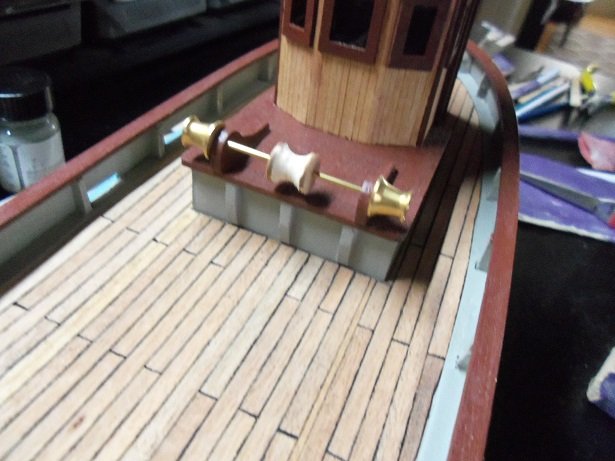
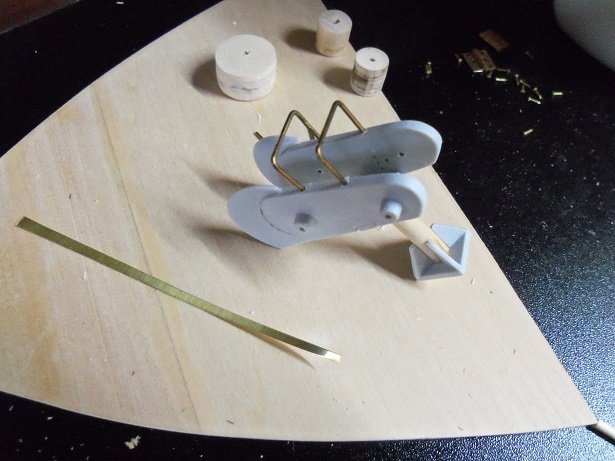
I made up a couple new drums, to replace the ones I modified. working on the winch and a few other things today.......update soon my friend I should check out you tube more often hi Mark.......yea, I wasn't going to omit the anchor, but the supplied one just didn't fit the boat never mind......I got enough for a small update I toyed around this morning and made up a sluice table {sounds like a good name for it} it really wasn't hard to come up with, although it's a bit too long. if I use it, I'll need to cut it down. the height is good though. I made another one last night...but it curves in the opposite direction. one change I could make, is how the buoys are stored. the bin that they are in can be for the net.......the buoys, I'll hang them off the bulwarks, or in handy places about the deck. it was time for me to pay the piper.......I modified the winch drums, now it's time to replace them. with the new info about this winch, I see that I'm going in the wrong direction. pt replace the larger drum, I traced circles on some 1/8 basswood and cut them out......four of them did the trick. they were then glued together........I did the same for the smaller one. these will be put in the odd parts bin.........or will they? I have such an urge to cement the pilot house on the deck.........but I can't at this time. I still have a few things to add to it. as for the winch on the pilot house base, since it seems that it has a multi purpose to it, I will address it as such. I'm going to replace that drum on it, load it up with rope, and put a hook or something on the end. I'll leave it at that but.......what will this drum look like? hmmmmmm....well, I do have an extra reel that I had made for the trawler Syborn....... .....or.....I can take the smaller drum that I modfied, and use it here. let's see........... hey now........put that little dog house in behind it, and I think we have a winner! wind some rope on it ans it should look fairly decent holes were drilled in the upper edge of the winch, and the frame bars for the upper drums were bent to shape and inserted in place. all they need now is the swivel bars and the brackets for the drums. yea.....I also drilled holes for the lower drum axles. the drums have been painted......and the cold bin holds have been assembled. I should have more before I hit the bunk tonight
- 378 replies
-
- 7
-
-
- t78 norden
- billing boats
- (and 1 more)
-
love the looks of those planes........I also like the Focke Wolf
-
the deck camber is normal....no cause for concern. is that one of the faulty decks? can't believe this kit is bad......it looks like a nice kit. look'in good so far.