


popeye the sailor
-
Posts
16,007 -
Joined
-
Last visited
Content Type
Profiles
Forums
Gallery
Events
Everything posted by popeye the sailor
-
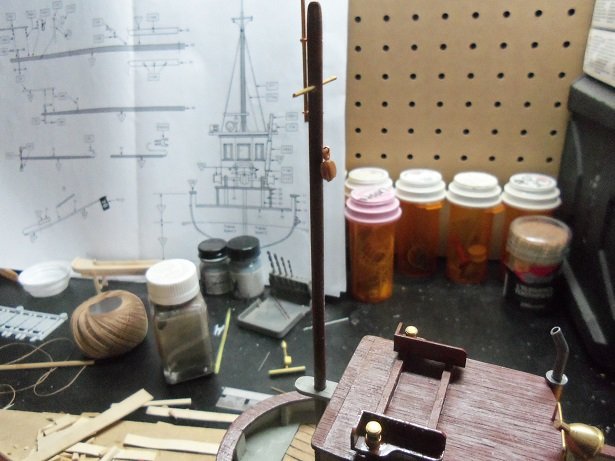
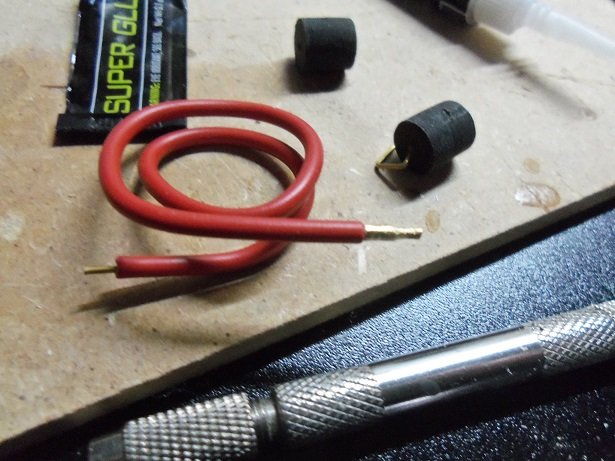
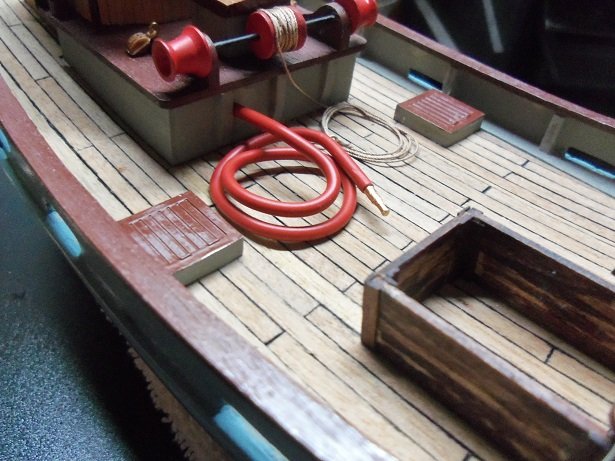
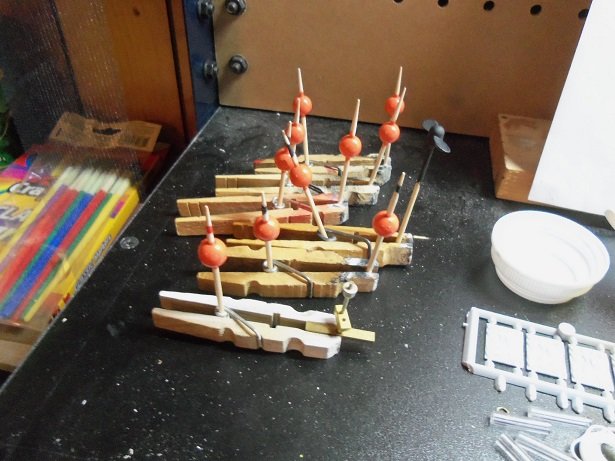
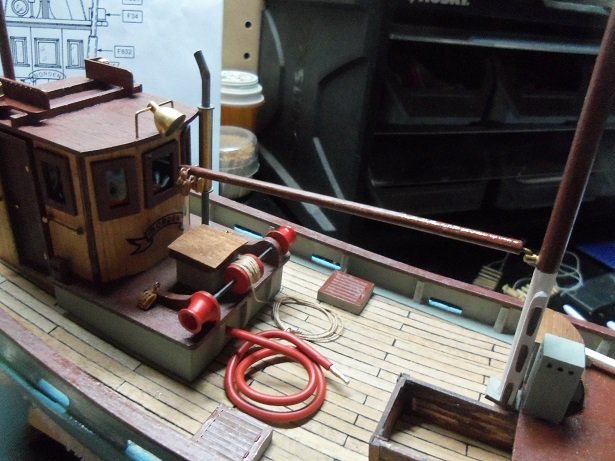
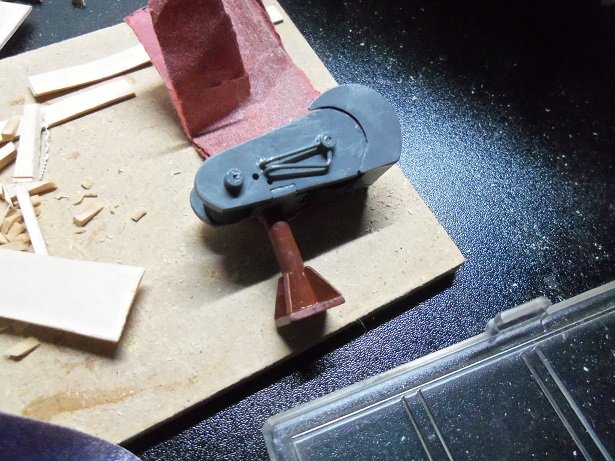
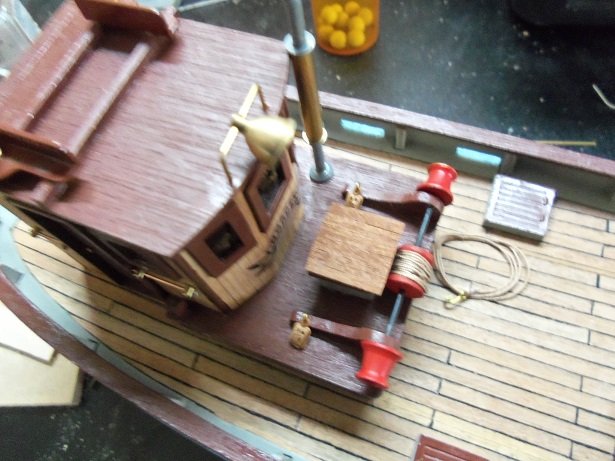
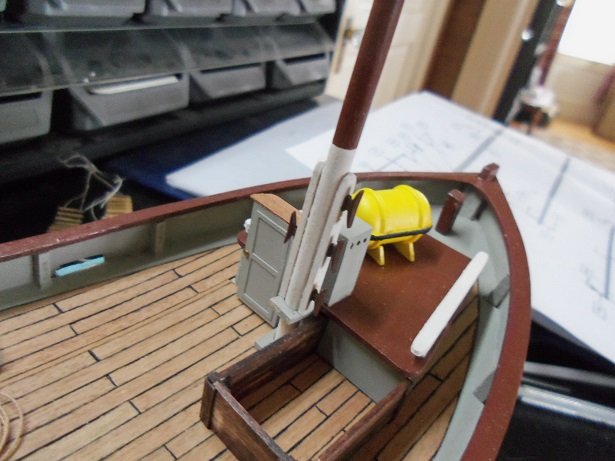
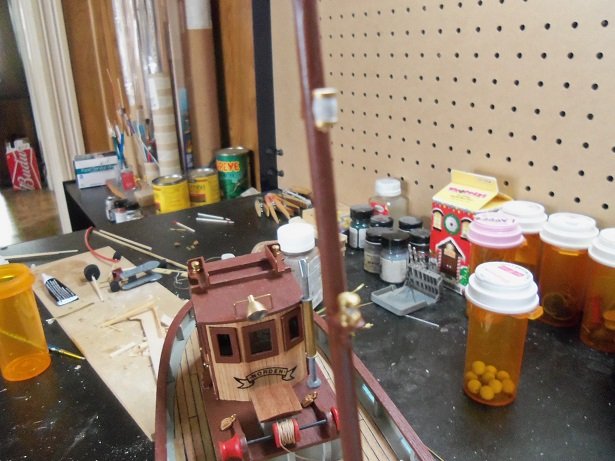
 hi there........excuse the spotty log the last couple of weeks. we are starting to get the jist of all the big changes that are to take place where I work. hate to say it, but if things don't work out, I may be job hunting. no love loss......I'm really starting to hate the place. not so much the people I work with, but the people who run it. my mind has been preoccupied....... I did some work on her through the week......it started by doing some assembly on the winch. the lower boom was fitted with the double blocks and the brass rod to fit into the gooseneck {or the reasonable facsimile of a gooseneck} I'll paint it later.... the aft mast was fitted out. instead of a ring for what appears to be a back stay, I substituted it with a single block. you recall my stripping out all the wire out of the red hose supplied in the kit. I had done this so a brass rod could be substituted, and a pin could be exposed at one end. it was coiled, and on the business end of the hose, I made a nozzle for it. the prop was shafted and painted.......and the float balls had to have the holes filled and concealed with wood. eye bolts will be added to them later, after they are painted. I started to paint the radar too. a hole was drilled in the base of the pilot house, and the hose was installed. the coiling was adjusted a bit more. it came to painting the flotation balls.......I was going to paint them red. I just couldn't shake the orange thing.......ha..ha! I have a bout five bottles of Billing's orange....I ended up tossing three of them out. they were bad....all jelled, and rendered useless. it must be the lighting.....but it's an odd color orange.....It'll do just fine though. the boom is now painted...... here is the Norden where she stands at the moment. if you can see the winch, I've added some of the lines that detail it. it appears that they suggest using thread for them, but to make these hug the casing better, I thought to use brass rod. the two that will go down to the base will be made up of soft wire, colored to simulate wiring. more tomorrow....thanks for look'in in
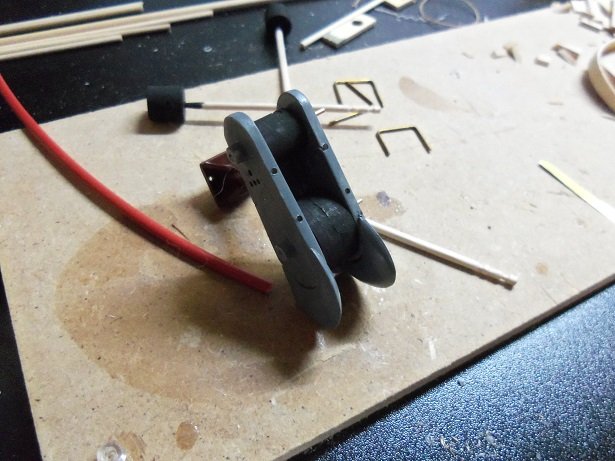

- 378 replies
-
- 12
-

-
- t78 norden
- billing boats
- (and 1 more)
-
hair spray is like spray starch........dried with a hair dryer, you'd likely get the same results. my grand mother swore by it!
-
likewise........I hope you get better soon
-
when you mentioned starch......I thought hair spray. although I think merely getting the rope wet and using the hair dryer might have been effective as well. you accomplished what you wanted to do, and the rope looks good as a result. very resourceful
-
looking good in the progress dept Piet. I'll be getting into some of that P.E. stuff myself soon. can't wait to see the model in it's present stage
- 378 replies
-
- 4
-
-
- java
- pacific crossroads
- (and 2 more)
-
great job on the plane s and rigging Dan..........if you order one of those...post it in Shore leave! I'd love to see you build one
-
I'm doing something a bit different with the hull. I had a devil of a time with the thin plywood side panels......the bow section didn't appear to be spilled correctly combined with my not faring the bow bulkheads completely. I probably should post a log.......but there are quite a few logs on this model already. I may post one though. if it looks like a dog's body.......perhaps not.
-
that's a small problem, with little to no consequences did both structures line up with the slots in the deck platform? both of mine are off.....the fore structure more than the aft structure. then again, the deck platform isn't cemented to the hull yet. yea......I bit the bullet.....your having way too much fun here it was too much for me....I had to join in!
-
I think time will decrease the slack in the cathead lanyard pulleys.......perhaps if you put a clamp on the anchors, as added weight for a short time, it may help. glad to see your back and enjoyed seeing your superb progress.
-
superb looking model Bob......the rigging is outstanding. very well done !
- 682 replies
-
- 2
-
-
- halifax
- lumberyard
- (and 1 more)
-
making great progress.........she's look'in very nice
-
I've built many Billing Boats kits. I've also done a little customer service with the shop I was dealing with. older kits have printed decks and parts, but the newer ones do not, due to complaints about it. I'm actually surprised that your kit didn't come with planking for the deck.......all of the Billing kits that I've dealt with supplied it. you can do it......just use thin strip .5 x 3 mm and it should come out looking fine. I use a wood called Annegre, sold By Billing Boats. it's not a blonde wood like basswood or obechi.......but has a varied tan to reddish look {not as dark as mahogany}. it had a very nice look, after it's sealed with a semi gloss lacquer or urethane. I suggest semi gloss, because you have more control over the sheen you want, depending how many coats you put on the deck. you can also make up a pair of waterways {margins}, to run along the bulwarks, so you don't have to do all that fancy trimming around the bulwark posts. this is what the borders around the decks are called
-
wonderful progress Tom.......she's look'in splendid
- 1,350 replies
-
- 1
-
-
- constitution
- model shipways
- (and 1 more)
-
she's really coming along nicely OC..........such a neat and tidy job.
- 455 replies
-
- 1
-
-
- slightly modified
- greyhound
- (and 1 more)
-
came out great Kevin very nice fix! imagine how she'll look when you have done it all over the structures........sweet!
-
planking looks pretty good Mike........if there is clinkering, it's minimal
-
I thought of something else......fit the bracket and cement in place. then cut the 'yard' in half and cement to each side of the bracket. this may be the perfect cheat
-
do you think you'd get less damage, if the part was fitted and cemented..then drill the hole out? your half there anyway.
-
one thing to keep in mind, is that not every one interprets the plans in the same way. whether it's an older kit, or a revised kit, it's all in the way you assembled it.....no two models will be the same making any adjustments with the height of the channel might not be good......could result in a mess. your best bet would be to adjust the chains, so they will reach the wale......the lesser of two evils. I really don't think it matters how they are fixed to the hull, but if the plans call for them to be attached to the wales, then you should fasten them there. you've done such a nice job......no need to skimp on a technicality how I taper masts, is by cutting the mast to length {with a little extra at the base}. sticking it in a drill, loosely wrapping sandpaper around it, and by running the drill at low speed, shape the mast. but wear a glove......the sandpaper can get a bit warm
-
very nice progress....the added detail looks great!
- 1,306 replies
-
- 4
-
-
- syren
- model shipways
- (and 1 more)
-
congratz Bob on a fine looking vessel! the swivel guns.....especially the anchors, are the crowning touch definitely museum quality
- 682 replies
-
- 3
-
-
- halifax
- lumberyard
- (and 1 more)
-
as far as creating the line goes, you already started....already past that stage looks good though if your finding the need to taper the planking, the second wale will not look even at the bow. what you could do, is if you have a thinner strip, you could continue with the planking and glue it on top. this way both wale strips will be the same height over the planking. if the woods are not the same, you could paint them flat black, or a darker wood brown.
-
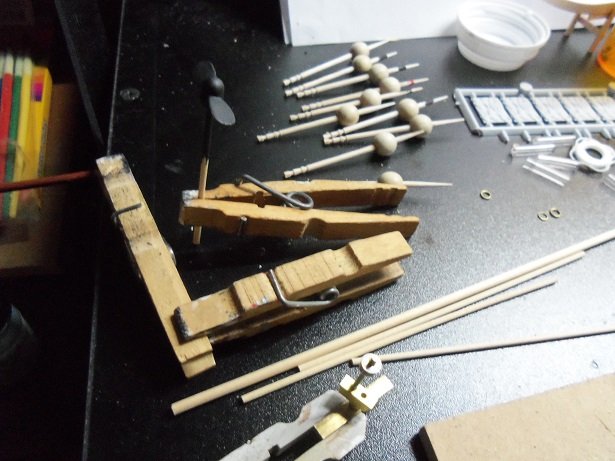
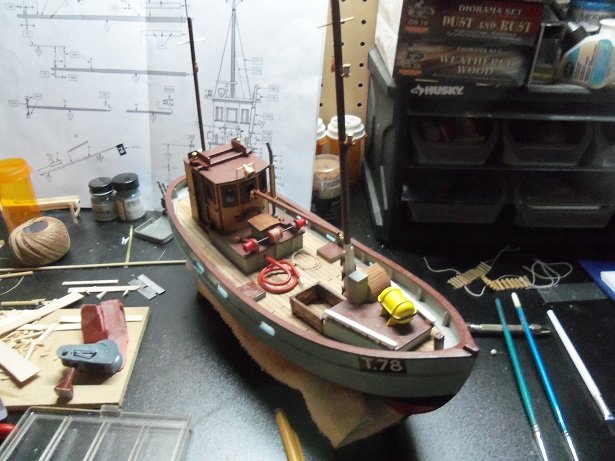
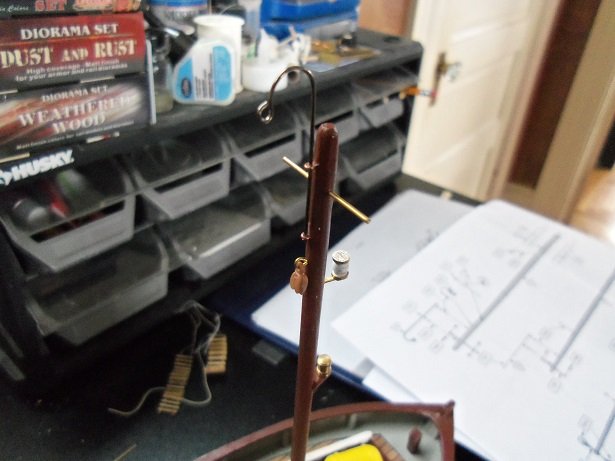
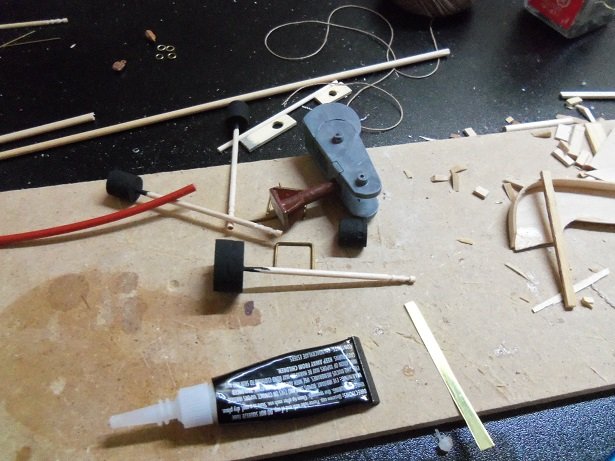
...and we waved a good bye to Kevin's car saw it on the flat bed.......wish I was home to see it get loaded up we were headed toward home when we saw it....snow encrusted and all. now that the saga is over......I can have the garage back yea.....been an up and down week. I did manage to get some progress accomplished on the Norden. the smoke stack is in place, as well as the block tackle for the main mast boom. the main mast is almost totally fitted out....just have the boom and gaff to add on there. the curved eye bracket at the top, is one of those eye bolts that I bought at Hobby lobby, in the bead section. they have a 2" shaft, so all I had to do was bend it to shape. at the base of the mast, all the cleats were added. this picture is a bit blurry, but you might be able to make out that the lenses are painted flat white. ....and of course, the winch is still in production....although now it's painted. when I get back to the table, this will likely be my starting point. at one point here, I was looking at the shroud / back stay parts and asking myself.......where's all the parts? I had them in a pill bottle......but apparently, these parts were what was on the floor. so, I began to assemble the parts again........because I put them in the Thermopylae tray, thinking that's where they came from. it's OK........I have more than enough spare parts to go around
- 378 replies
-
- 10
-
-
- t78 norden
- billing boats
- (and 1 more)