


popeye the sailor
-
Posts
16,007 -
Joined
-
Last visited
Content Type
Profiles
Forums
Gallery
Events
Everything posted by popeye the sailor
-
 very resourceful Piet.........tiny parts can be a pain!
- 378 replies
-
- 4
-

-
- java
- pacific crossroads
- (and 2 more)
-
hi there Chris.....glad to have ya look'in in { I had an urge to say 'Ya'll.......stems from the five years I spent down south}. that's one thing the admiral does want....I can't seen to get any leverage talk'in her into other things. I might do something with the windows......Britannia metal is not my idea of a window. I hope she doesn't hang over my shoulder, like she did with the M&M boat. I'll try and sneak a few thing in there you and Hugh are having too much fun......I couldn't resist! hope ya follow along for the rest of the ride
-
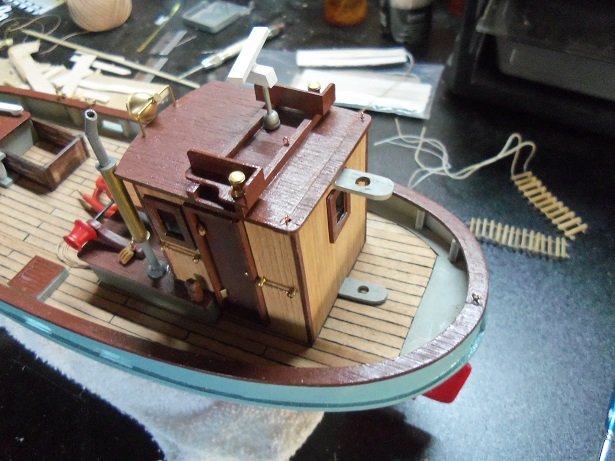
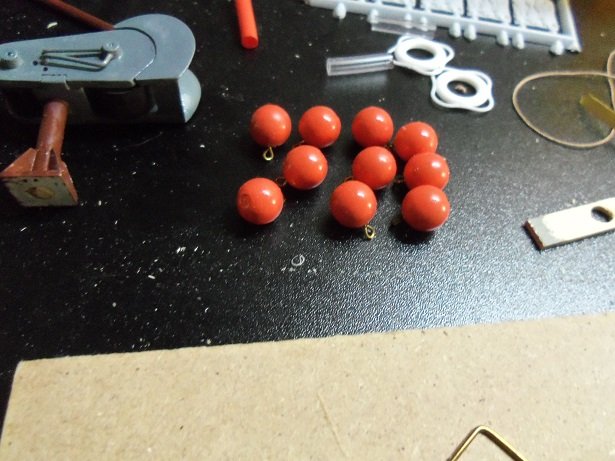
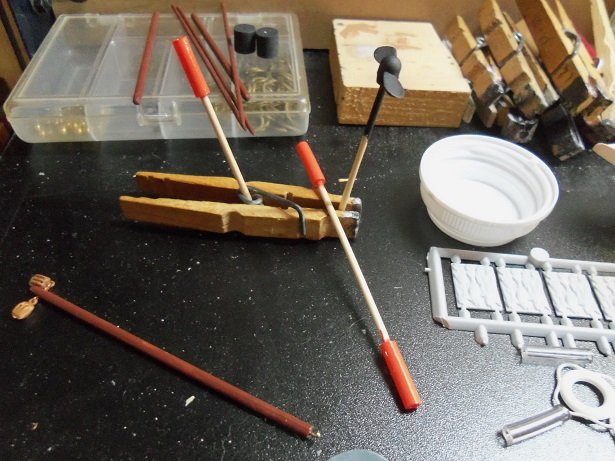
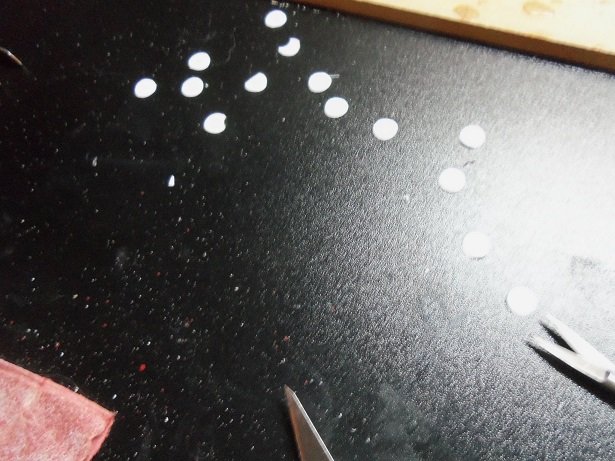
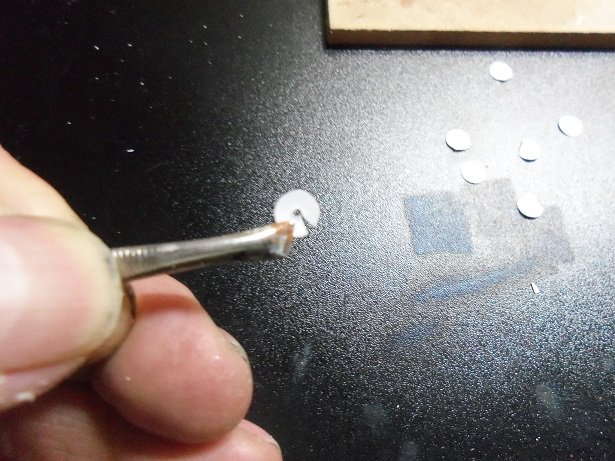
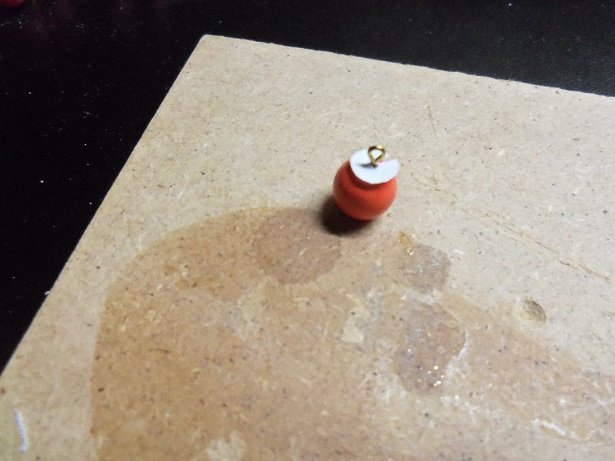
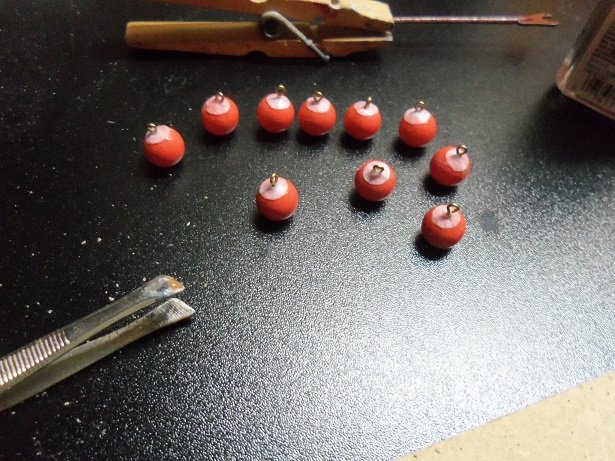
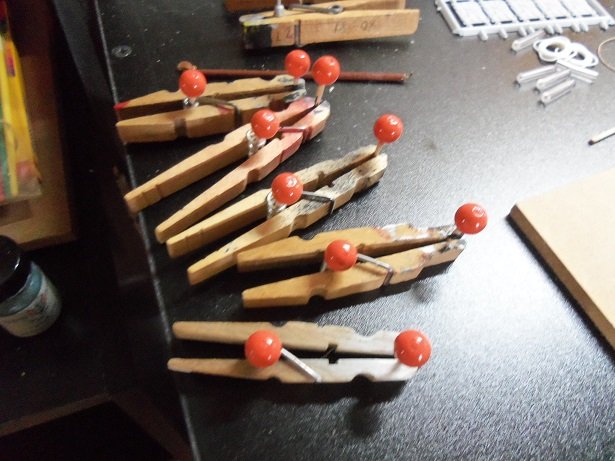
oh......buoy! it's been a really fun evening, play'in with buoys! bouncing, bulbous, and buoyant buoys! if you've looked at the videos posted throughout the log, there are buoys. unlike the ones I've added to my earlier builds, these are round.........there are many different types. looking at images online will show you the many types there are. and come in different sizes... I saw the bib around the eye bolt.......eyelet......whatever attachment, and I wondered if I could get this tiny bit of detail on my little bobbing orbs. the start of the session had me doing other things......like adding eye bolts to the stern rail and roof of the pilot house. the radar is in place now too. the protruding end of the buoys were snipped off and sanded flush.......hee..hee.....snipping orbs!........what a guy!...... what's worse, I added the eye bolts to them too! the parts for the other flotation devices and the roller bars were painted, along with the associated parts. I will never use that rubber tube on any other models......the paint is still tacky....I fear it won't dry totally either. I think it was the Mary Ann......I actually bought some oval beads.....should have done that instead {if I could find some small enough}. the aft mast has also been cemented in place at this time. so....the first thing I did in detailing my bevy of buoyant beauties, was to take my binder punch and make me some circles. I needed ten of them....pretty easy, since it can do three at a time. after drilling a hole in the center, a tiny wedge was cut out of it. this was placed around the eye bolt...like so. a tiny bit of CA was used to cement it down......as it was pressed into place, the edges of the paper closed up the wedge I had cut out of it, making it a closed circle again. it took a bit of time.........and we all know what Ca is famous for.........stuck fingers even the buoys stuck....took some paint off >darn it!< you know your having a bad day, when you have an orb stuck to your fingers....I can tell ya that! "what's that big boy, an orb stuck to your finger, or are ya just glad ta see me" >very funny Chester< anyway......they are all done now.........AT..ten.....shun! takes a man to have such control over his buoys....ahhhh...hem! OK.......now roll along and go play. be back in time for touch ups....understand! kids these days, their so well rounded I also finished the other buoys as well....added the orange plastic thingies, gave them some stripes and put the flags on top. I will need to make some sort of rack for them in the back of the pilot house. in the background, the boom for the aft mast is drying...it got assembled and painted. there are a few more things that need to be done yet.......I was thinking of making the catch rack that's featured in the Cux 87 model kit {I did one for the Mary Ann too}, but there really isn't much room for it. I thought that if I ever cloned another Mary Ann hull {1:33 scale}, I just might try and model this boat.......it would be bigger......with more room to get even more stuff on it in the words that my doctor told me......."no matter if it ties in the front or the back.......it's still a jacket" night all.......


- 378 replies
-
- 14
-
-
- t78 norden
- billing boats
- (and 1 more)
-
thank you Bob....pleasure to have you following along you as as well with the PDN......enjoy!
-
usually they are in racks that line the holds. one fellow overcame the cannonball problem like this: in a case where no racks existed, he bought some styrene strips about the same measurements as the hold frames, cut to length and laid them on both sides of the holds. he drilled impressions for the cannonballs with a larger drill bit, then drilled another tiny hole in the center of the impressions. he bought a package of pins with round balls on the ends, painted them flat black and cemented them in the impressions. if they look too large for you, you can try BB's....but I think you can actually buy them.....small cannonball BB's. I'm not sure where though. you can try any of the sponsors on the right side of the forum page...or I'm sure some one has bought them...perhaps they will chime in powder kegs were not left on the gun deck the risk of a stray cannon fire would cause an explosion. they were only brought up during battle from the lower deck, Orlop, I believe. the fellas responsible for fetching the kegs were nicknamed 'powder monkeys'
-
now that is just insanely cool! nothing short of sheer genius......very impressive!
- 1,306 replies
-
- 5
-
-
- syren
- model shipways
- (and 1 more)
-
welcome and thank you to all the kind comments and to those who hit the like button. it's still very early in the project. I haven't done very much as far as progress goes. I haven't given the bottom the clear coat, since it needs a little more prep and I want to install the rudders. before I look at the misalignment of the structures, I want to paint the underside of the main deck and have the bottom ready to assemble the deck to. this may be part of the issue. another thing I forgot to mention, pertains to the two paddle extensions. finding the correct wood to use led to my taking a hard look at the different woods in the kit. it's also convinced me to make another wood organizer. I'm pleased with your response.....humbled actually.....I just hope that you all enjoy the progress of the model, and combined with other build logs of the same subject, future modelers can avoid the nuances associated with the kit. the first one was very minor.....this next one will be a little more involved. others managed to come up with the solution for it, so it can't be too big a pill to take welcome Kevin, Jack and Piet...make yaselves ta home I'd offa ya sumpt'in at tha bar........but I gots ta built it first! welcome Michael.....I'm on time then.......I started it at the beginning of the month it's not a bad kit......the instructions are about as detailed as any others I've done in the past. I think there are enough build logs here on the site.....you'll have a wealth of information for when you do get this kit besides.....if you can do the level of work you did with the Wasa......this will be a piece of cake! enjoy! I haven't looked in the camera.......I may have done somth'in today.....I've been back and forth. if I did, I'll post it thanks again all!
-
thanks OC........got a little more sanding to do yet. it very close though thanks John......curiosity is gonna kill me yet. nawwwww, I'm too darn stubborn! I promise you John.....a lot more to go icky-mae
-
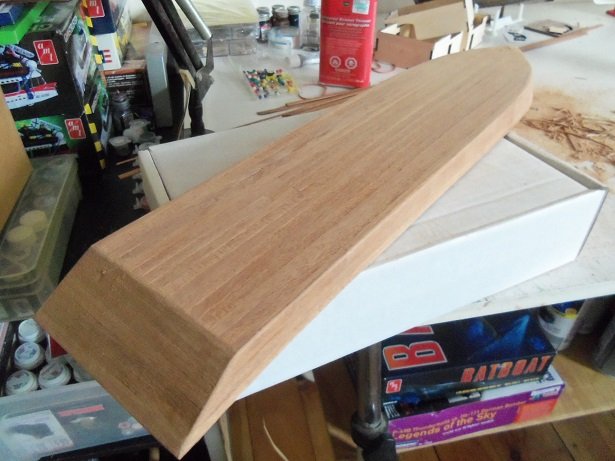
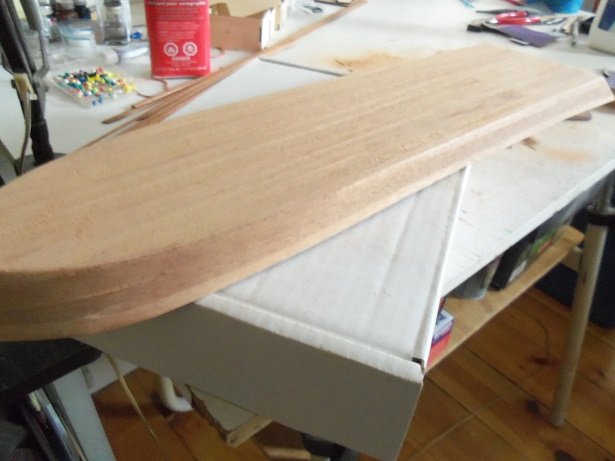
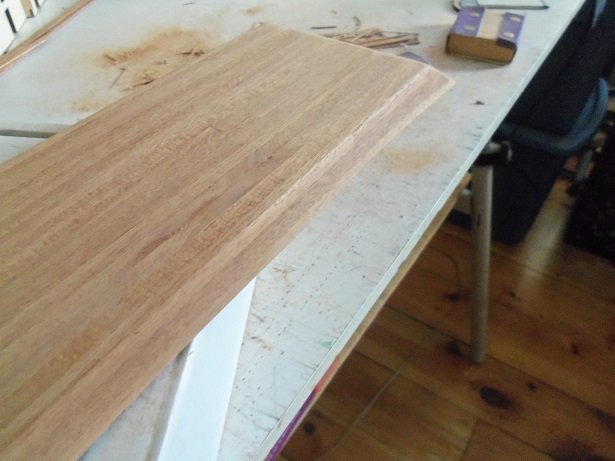
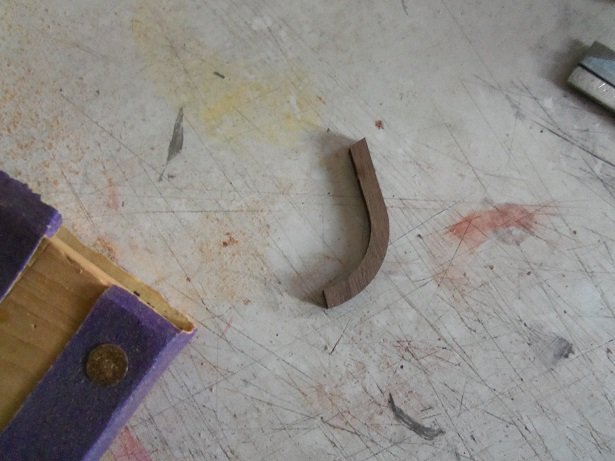
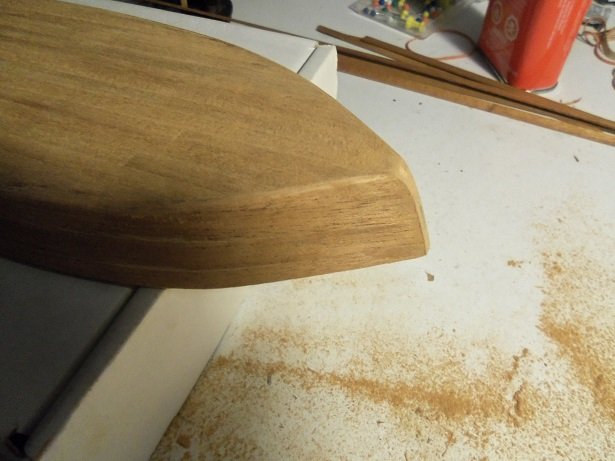
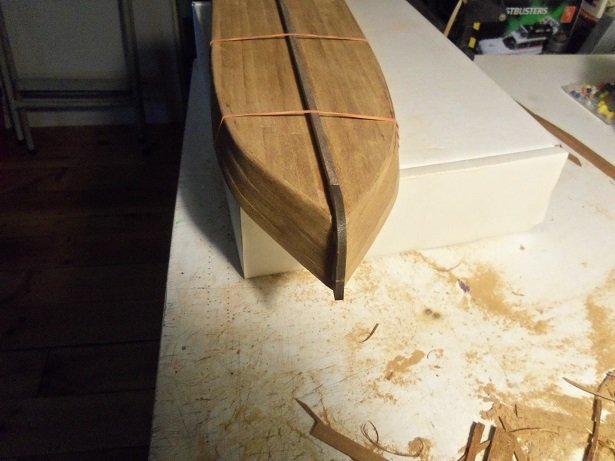
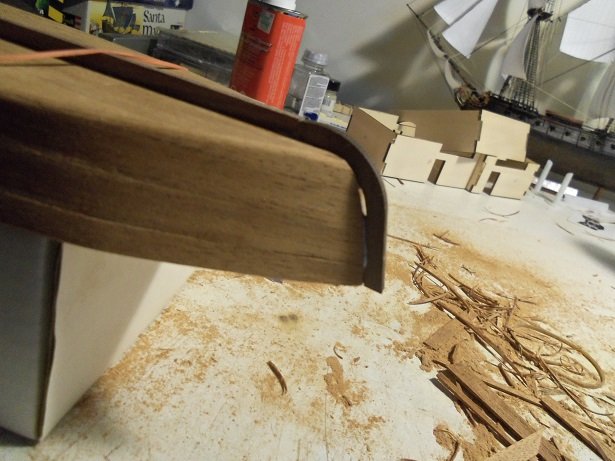
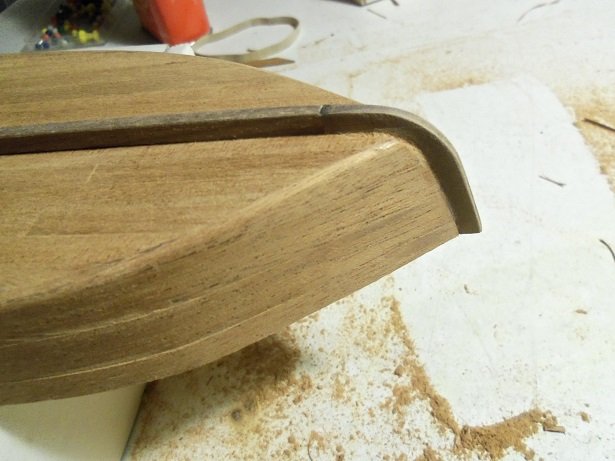
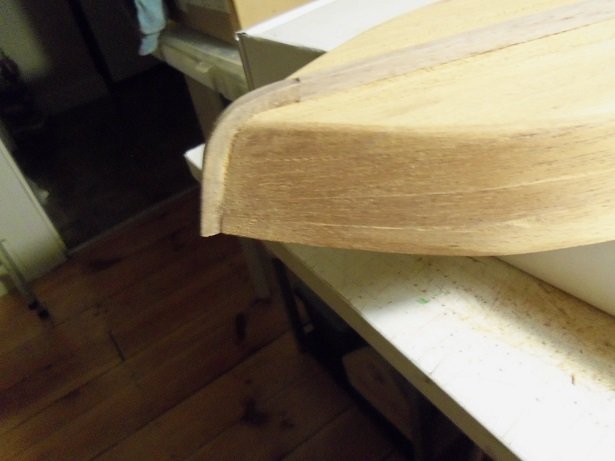
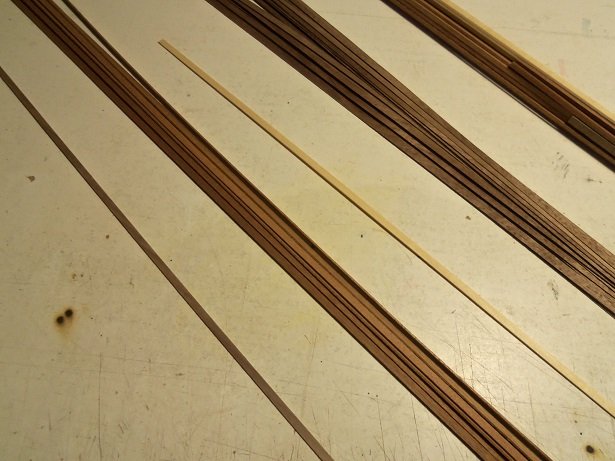
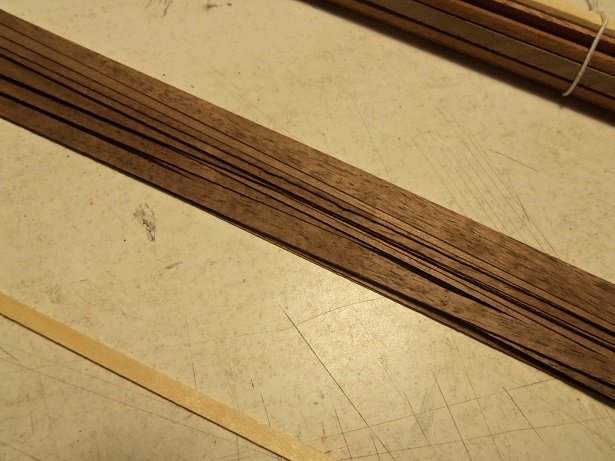
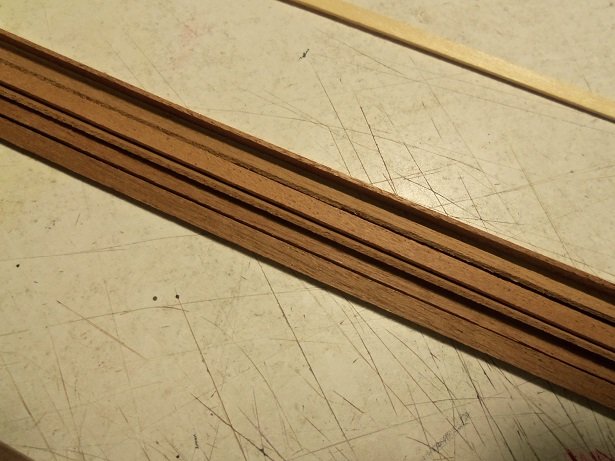
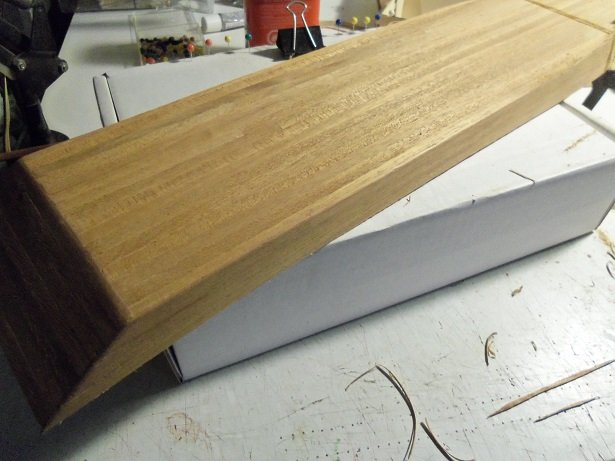
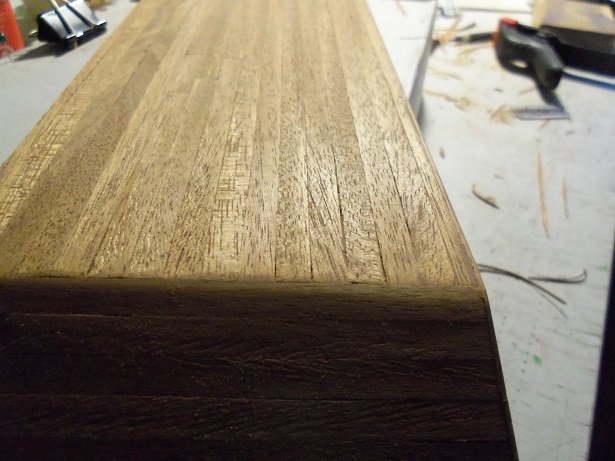
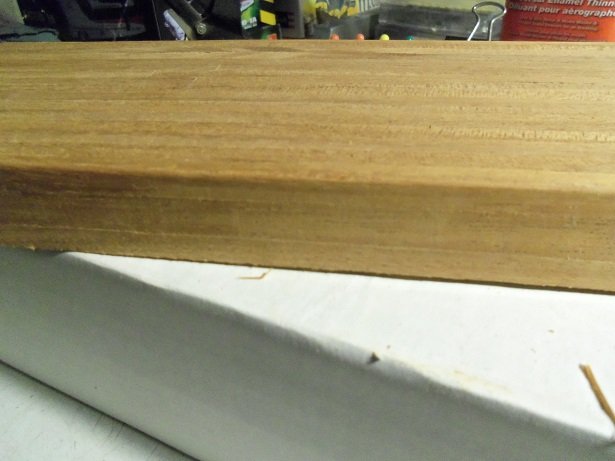
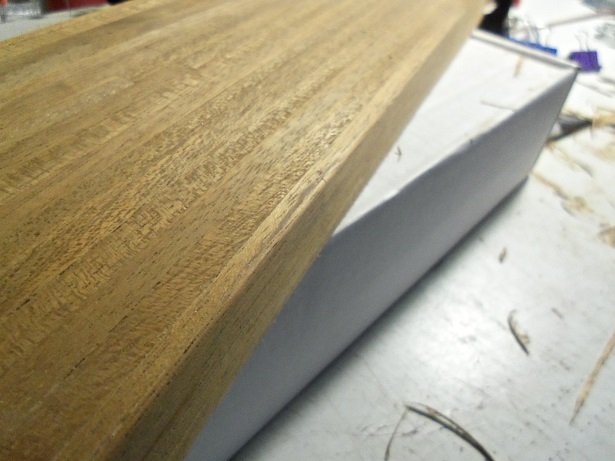
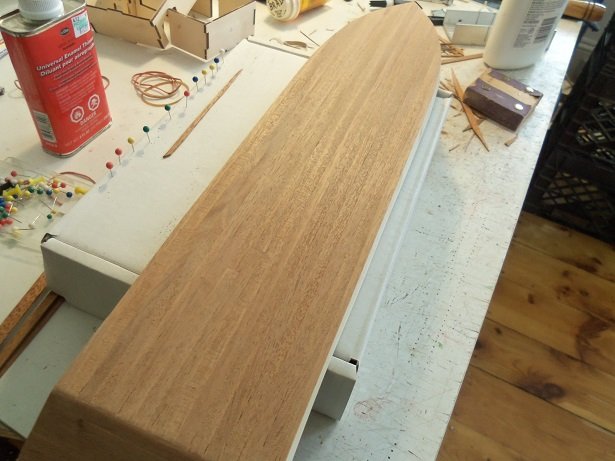
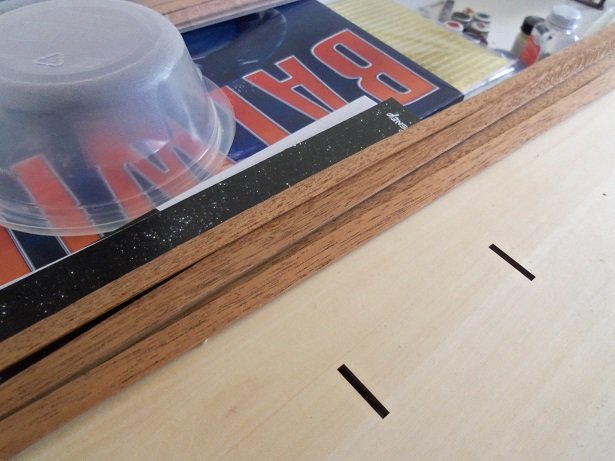
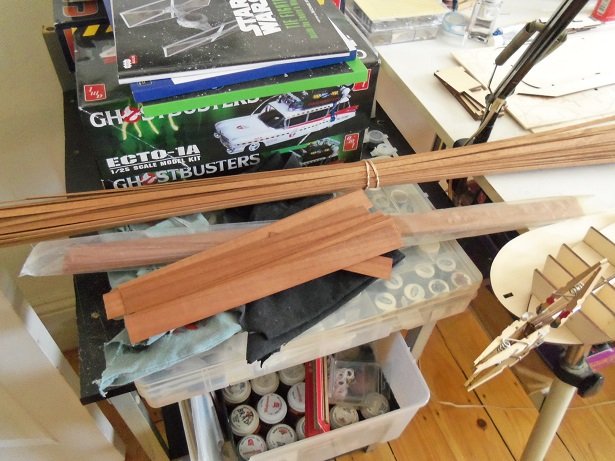
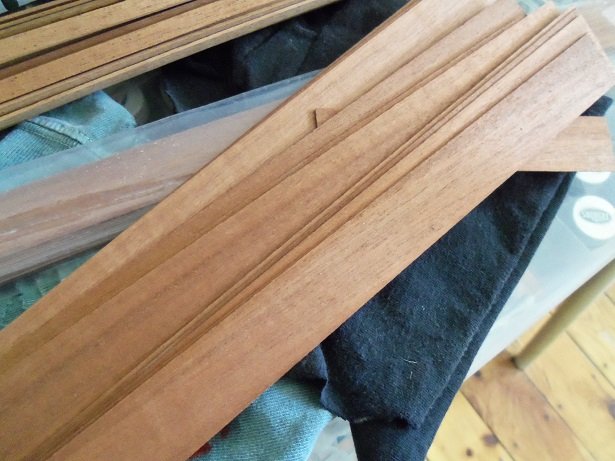
....which brings us to the most recent. the starboard side is done...... and an obscure shot of the bow..... over all, the bottom looks almost ready for the clear coat. I already had a look at the bow stem part......the shape...they're kidding....right!?!?! that's quite a curvature.......the bow is definitely not shaped that way. I knew I would need to create the curvature, but I also knew that it would bring it down to the bare plywood underneath. the more of a flat surface to the bow tip, the wider it would get. soon, it would go beyond the width of the part itself. taking a piece of wood, the same width as the part, sandpaper was cemented onto it, and was used to form the curved slot for the part. the sanding continued, until the part was close to fitting........I even sanded the part a little {but not too much}. again......I needed to select the keel strip from the bundle.......and again, nothing to denote the size, nor the length. taking an educated guess, I used the straightest 4 x 5 mm length of walnut {3 in the kit}, and cemented it on, after trimming the mating end and cutting the trailing end on an angle. one small adjustment, and it was ready to dry. when it is set enough to handle, I can address the gap. ....after fill it in....... I separated the bundle I got it from.......you have the dark walnut, pasty stuff that looks like mahogany.......a strip of .5 x 3 mm blonde stuff {could be sapelli}, and the other walnut strips. I like the color of this wood.......kinda has that 'barn plank look to it. the mahogany.....if that's what this is....doesn't have a lot of wood grain to it. some is very bland {seen it before}. I guess I'll have to make another organizer for this room. I've managed to finally bring the other organizer out by the main table. this project will remain here. I've put the brakes on any other plastic projects for the time being. the Norden.......she'll stay on the main table. once she's done, the Thermopylae will take her place, and continue that project there. thanks for look'in in
-
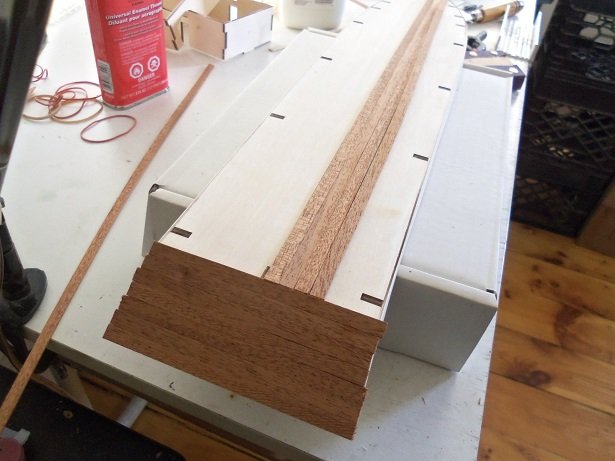
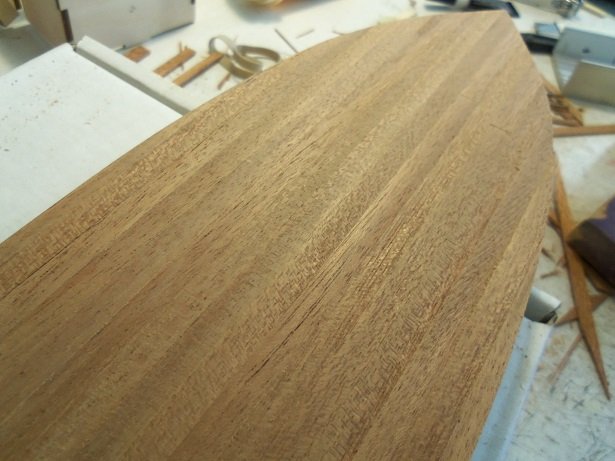
on 2 / 16 the hull planking continued. I'm having fun confusing the admiral.......I'm either out there with the Norden, or I'm in the spare room with the Dice AYYYYYYEEEEEE! {what an obnoxious man}. one side of the hull bottom is done at this time. there was some minor clinkering, but tapering the plank helped it to lay better. especially where I had spliced in planking and around where it met the bottom, the glue fill method worked well. all edges were rounded off.........I did some repairs as I was sanding. I did my best to stay away from CA....only using it where I needed a quick bond. sanding is never done.......spot checks and spot sanding was done all over. the wood called for is a lot darker than this......and a lot thinner. I can afford to sand as much as I want off.....the benefit using 1.5 mm as opposed to the .5 mm dark stuff {walnut}. the bow stem and keel is walnut......should be a nice contrast. I'll get the other side done now. I can wait on the port bow, to get rid of the remnant of the clinker affair.

-
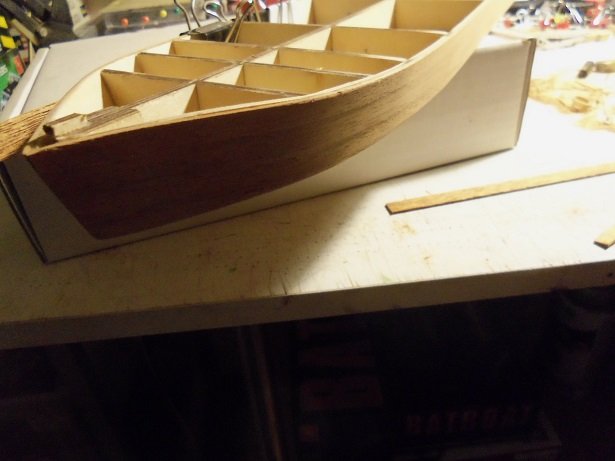
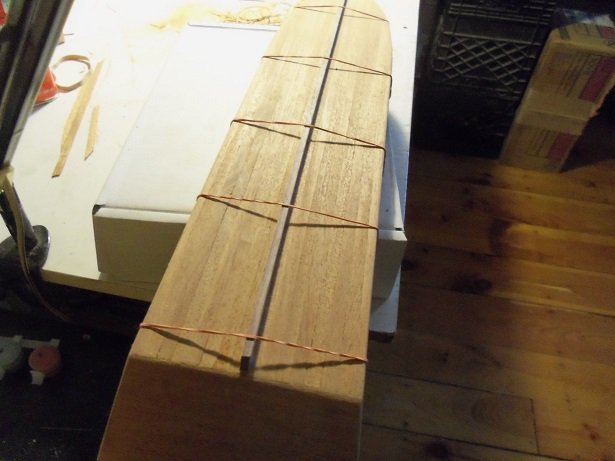
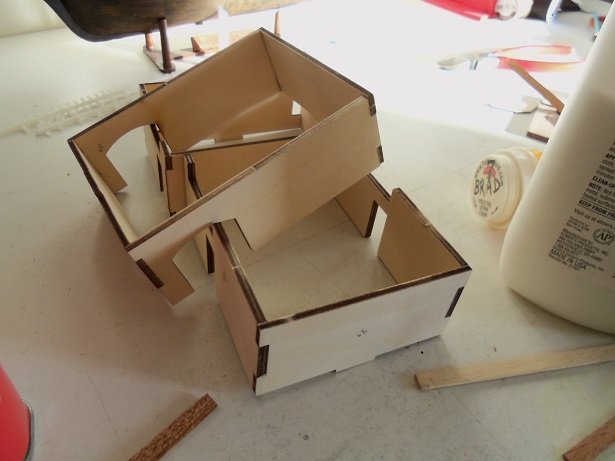
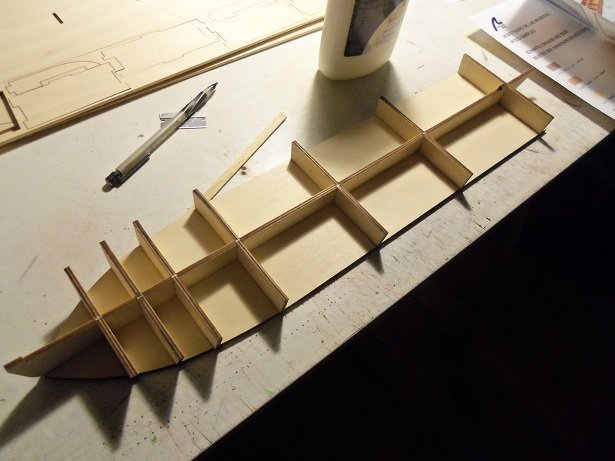
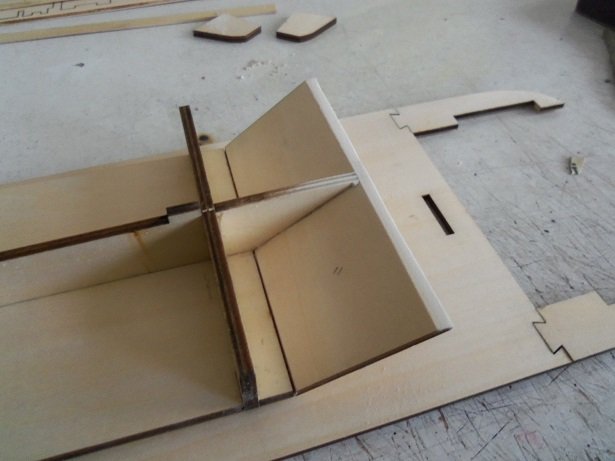
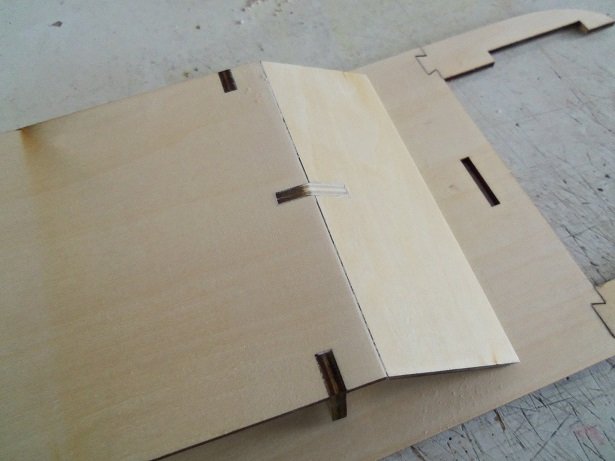
the sides were cemented in place......there was a little trouble here. for one thing, I failed to fare the bow section good enough, but I also thing that the spilling of these parts at the bow, were too aggressive. originally, I wasn't going to use them.......I was simply going to plank the sides. dry fitting planking.....I didn't like how it would have worked out, so I used the sides. the aft section was straight forward.......not much of a problem. first, the counter was planked over. this was done on 2/14 the ends {corners} will be sanded flush for the side planking. the center was marked on the bottom and the planking started from there. I plan to give this a clear coat to bring out the wood grain, so I'm saving all of the fine sawdust, in order to fill in any gaps or cracks. the mating at the counter was beveled on the planking for the bottom, to try and give it a seamless joint. as you can see in the picture above, the structures were assembled in between everything that has been going on. I'm looking at the second issue, with the structure tabs not lining up with the slots provided, in the main deck. so far, I see that both structures do not line up with their slots. it could be that the deck is not fitted to the bottom of the hull yet, which will give it a curvature. I haven't planked the deck, nor the structures yet, till this is cleared up. these structures only go together one way. further planking has been done.......1/2 almost finished. the bottom was completely done lickity split. sanding done to the counter bottom joint..... tiny cracks and gaps can be filled in by forcing glue in the crack and sanding over it....done this more times than I can count. after some sanding, the bottom is beginning to look fairly smooth. my imaginary line for the center can be readily seen....good! now, time to plank the sides. grabbing a plank strip.......and I notice that it looked a bit wider than the others.........well......nestled in all that planking were six 1.5 x 7 mm plank strips! sure that I had gotten the odd planking out of the bundle, the side planking started. I'm surprised that I didn't see them earlier. by the time I ended this session, one side was almost done. normally, the admiral and I don't celebrate Valentine's day.........too commercial and we don't need to have a day set aside to make kissy-face I did take her out to dinner though.......a great time at our local Applebee's


-
hello Mike.......welcome to my insanity that's right........I think it was the Chaperon...you finished it not long ago! there was some bending to do at this point, but nothing that I had to set aside planks for.....nothing that blunt. I have a couple more updates to post here.....glad to have ya following along
-
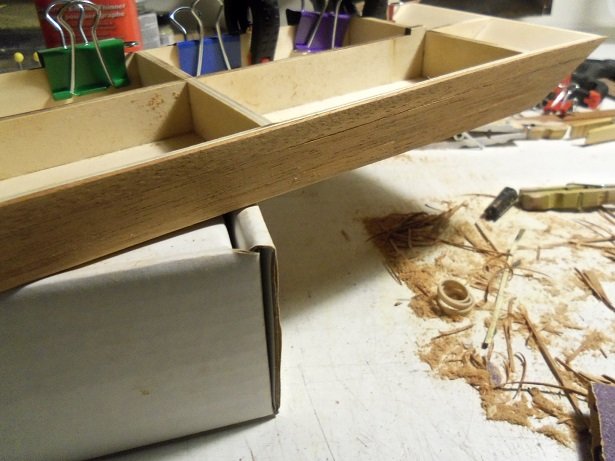
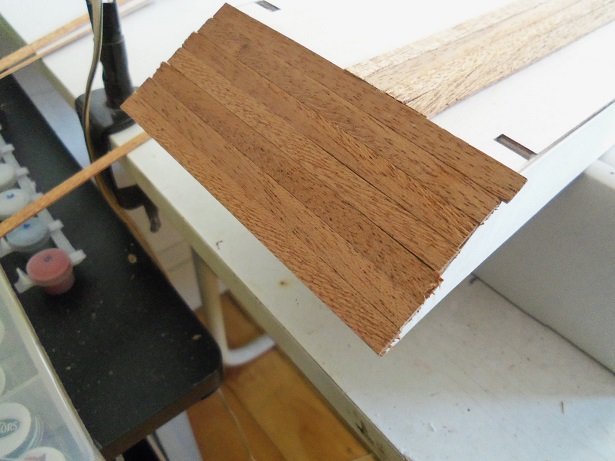
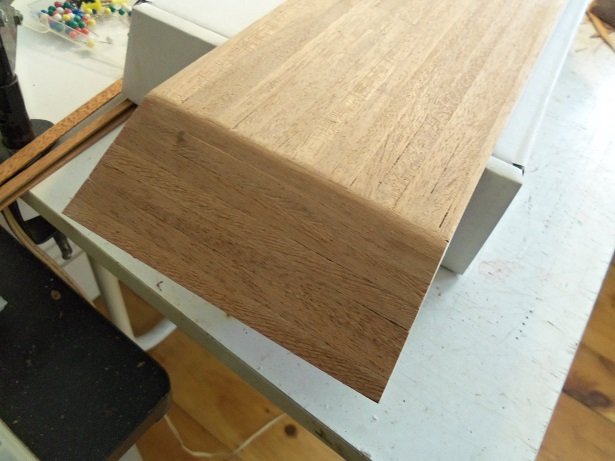
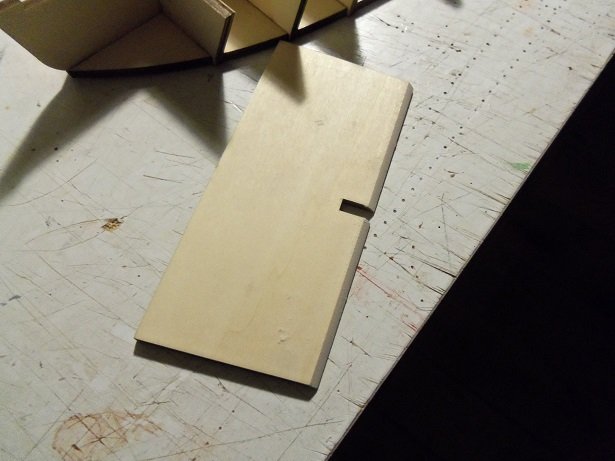
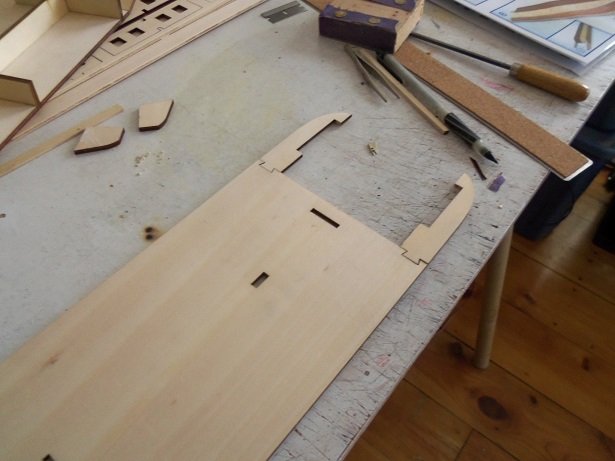
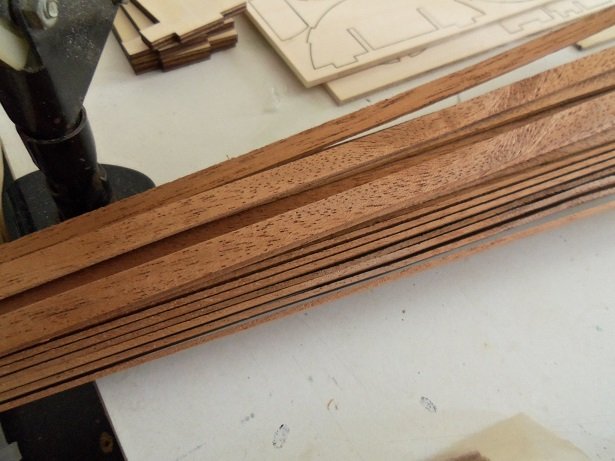
OK........I just started build'in.........popped out the base of the hull and the bulkhead parts and dug right in. it's true about bulkheads #4 & #5......the diagram used to number the parts are backwards. a simple swap. I started the build on 2/8. looking at the counter on this hull, I thought it better to sand the mating surface to the bottom diagonally and deepen the slot by a couple of mm's. there is more than enough meat on the part to do this.......and there will be enough to bevel the mating surface to the main decking too. in the meantime, while this was drying, the paddle wheel extensions were cemented on the main deck. by the time I got this set up to dry, the counter had dried enough to handle. some sanding took place. the top was beveled flush with the center spine and bulkheads.......the outer edge was rounded up as well. one thing that bugs me about this kit, is that they don't tell you the dimensions of the strip stock to use, nor the length that part are to be cut. all they give you are mere part numbers....I have yet to see a breakdown parts list. once the sides are in place, the hull is to be planked over. nothing in the bundles interested me...I had other plans. I have the pack of .5 x 25 mm mahogany strip stock, that I've had ....like forever........and I have the big bundle of 1.5 x 5 mahogany strips in the Nordkap kit. since I'm going to buy new planking to replace it {decorative wood should not be wasted}, I threw that into the consideration list too. I had cut some of the flat stock mahogany strips down to repair the deck on the Boulogne Etaples...it's apparent that I didn't use it. there is some really nice wood grain there......but I wondered how it would lay, once it got wet by the white glue. I think too much of a problem of it lifting in spots would be an issue, so I decided on the 1.5 mm planking....good wood grain there as well. these are about 880 mm long too......so there's plenty to go around.
-
I got this kit as a Christmas gift. I thought....cool!.....there have been quite a few of these models done here on the site. I will have plenty of info to follow when I get around to building it. we have two builds going on at the moment.....the Sergal Mississippi Riverboat being built by Vossy, and the King of the Mississippi, another A.L. kit, being built by oldbritabroad. there was another A.L. kit being built, but I think it's finished.......it was a combination of that build and Hugh's, that really got me thinking. the issues that were discovered, enticed me even more. I hadn't looked in the box.......not intending to start it any time soon........and I did........sorry I didn't do a parts inventory so to speak........I hardly ever do. what ain't there....I don't care........I always make do or improvise.......I'm just silly like that. I see things that I normally see in most kits......metal parts, that really should be wood......windows {really?!?!?!}.......there are other thing too. there are no decals......hence no name, so I gave it one. Tumbl'in Dice came to mind from the Rolling Stone's song {not the Keith Urban song}......funny, all I hear in my mind is the song 'Mixed Emotions'.....anyway.....there will be decals......I also have plenty of lattice work decals from the Susan A. build {are you kidding.....I have decals left over from all of my builds}. this won't be a quick project......I have so many ideas and so many modifications to make {beats my dream of a hillbilly PT boat } {that was a nightmare.......woke me right the heck up!} I started this a couple of weeks ago.......so far, all I have is the bottom of the hull pretty much done. I plan to make this as a show piece, rather than an actual boat.......I have been hampered though by the admiral. she doesn't want any lighting, or interior decorating....already ran things by her....no carpeting or chandeliers {pity}..........but you never know, I might be able to sneak something by her. I hope anyone who follows, will enjoy what I'm gonna do to this model.
-
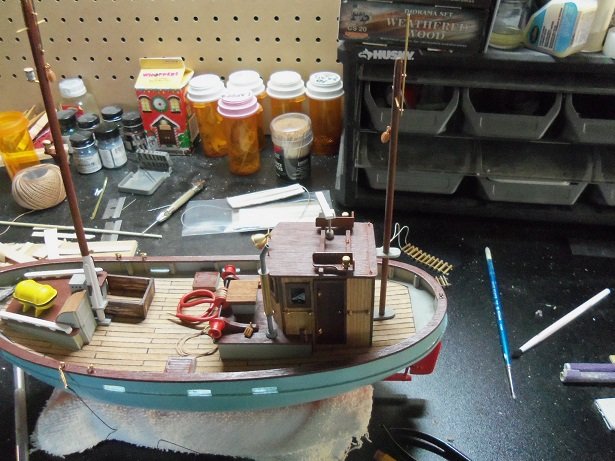
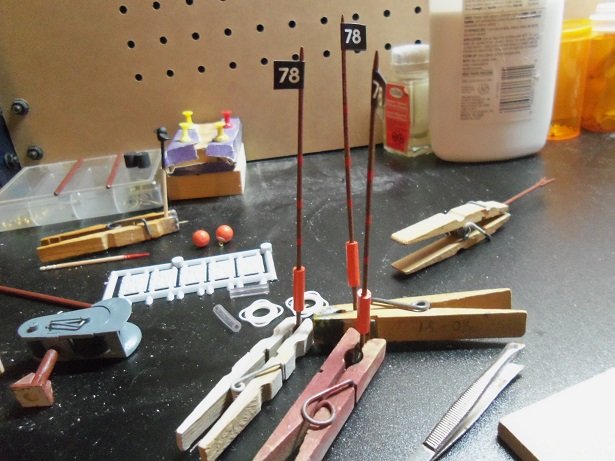
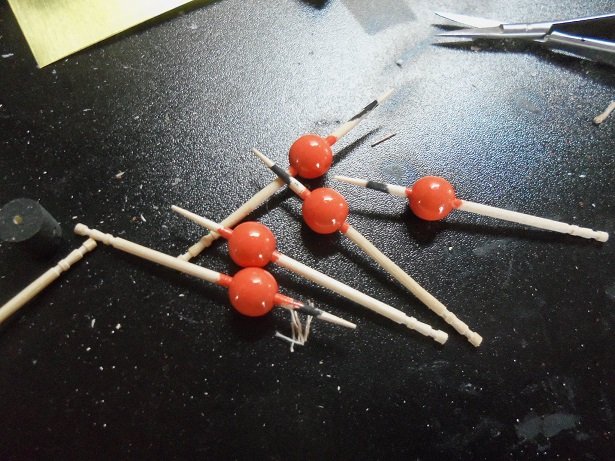
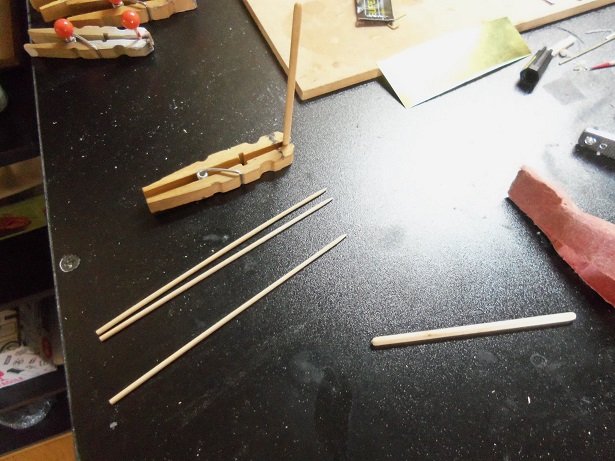
thanks for the kind comment Sam......at this point in time, I have four days to work on my projects. this will be ending by the 17th of next month....I will be going on a 4 / 10 schedule. currently I work three twelve hour days......makes for a long day, but the four days off makes up for it......although Tuesdays I'm usually recovering from the work week...a kind of 'work lag', I guess you can call it. I will give the new schedule and work assignment a try { I promised the admiral I would}, but I'm getting the thoughts that a change in venue might be in order.....extremely long story {boils down to the fact that I'm starting to hate the company I work for}. as far as the Hood goes........I believe your thinking of semorebutt's log of the Bismark....he was looking for the kit. I've seen a couple of other ones that I've been interested in..like the U.S.S. Arizona or the U.S.S. Missouri, but the admiral has yet allowed me to pull any trigger on them yet {I'm still working on it}. I do thank you for thinking that I deserve an award, but I don't think I'm alone....there are others that have projects on the back burner, waiting for an idea to whisk them back to the forefront. I am about to add to the roster..crazy as it sounds......but it won't impact my plans on the main table while I'm here, I should post my update from yesterday. I painted the buoys with the Billing's orange......by now, they should be quite dry. as I've mentioned before, the Billing's paint really isn't a bad paint. it dries fairly quick, has a hard finish, and the gloss paints have a really good shine finish to them. the smell isn't the greatest though, which makes them better suited to be used {if doing a large task}, in an area other than the house. the buoys came out looking really good ....no brush streaks.....just a very smooth finish. I ran toothpicks through them, since the buoys don't need a hole running through them. these are the kit supplied beads........I have quite an assortment of them on hand, that I bought at Hobby Lobby. if I need more............but I don't think so.....they give you ten of them. so, one end is chopped off, the stub touched up by sanding {I could get very comical here, but this is a family show}, and then touched up with paint. we end up with these at the moment. I'll dab them a little later to build up the paint and hide the dimple. the rest of the radar mast has been painted......that's waiting to dry. the main mast is cemented in place as well....I can start the rigging process. I'm trying to depict what is the standing rigging, and what is the running rigging.......and what appears to be communication lines, judging by the insulators shown in the drawings. I believe that's what they are....I'll go with it there are three other buoys that are to be located behind the pilot house.....they have been tapered and painted, and so have the rollers that line both sides of the bulwarks. more assembly is being done with the net winch too......getting the assembly for the upper rollers is being a pain, for some reason. another aspect that eludes me pertains to the buoys. when I trim the other end, in the stub's place will be an eye bolt. pictures and video I have shows a bib around the eye bolt. my first attempt to make them was a flop.........I'm going to try my hand at making them from paper, so I don't damage another tool...... especially when that tool is my binder hole punch. I hope to have more for you later on in the day. thanks for look'in in....
- 378 replies
-
- 14
-
-
- t78 norden
- billing boats
- (and 1 more)
-
thanks Pat......I've been waiting for photos of her in entirety......very nice looking ship so far super paint work and a lot of detail......your efforts are really paying off. has that Kearsarge / Alabama look to her..........love it!
- 1,013 replies
-
- 2
-
-
- gun dispatch vessel
- victoria
- (and 2 more)
-
neat looking cleats Russ, but would they serve the purpose better if they were turned downward? it's probably just me, not grasping how they would be lashed. great looking hatch......nice fit on the covers.
- 420 replies
-
- 3
-
-
- captain roy
- lugger
- (and 2 more)
-
such beautiful work Doris........and the fact that it is card makes it even more amazing. I had a look at your links and I was taken with seeing that you have the C.S.S. Alabama and the U.S.S. Kearsarge....those kits are quite rare in our country. I built the Alabama in my younger days.....no where near the level that you possess. your skill is beyond compare.......always a pleasure to see an update
- 1,035 replies
-
- 5
-
-
- royal katherine
- ship of the line
- (and 1 more)
-
look'in really good........nice
-
thanks Sam....the decals proved to be the biggest headache. they were very fragile...and the kit lacked decals for the Helicopters, so I had to make some. thanks for the good word
- 133 replies
-
- 3
-
-
- jeanne d arc
- heller
- (and 2 more)
-
congratz on the wedding...I wish you two the best! progress is progress my friend........it looks good will look forward in seeing more.
-
nicely done...great progress