


popeye the sailor
-
Posts
16,007 -
Joined
-
Last visited
Content Type
Profiles
Forums
Gallery
Events
Everything posted by popeye the sailor
-
 that's the one I have........you must have had an earlier release?
- 1,090 replies
-
- 5
-

-
- showcase models
- vendetta
- (and 2 more)
-
better yet.......I'll just get another light........with what's in this light, it's blinding me already.. this one is too short....it's in my face then again, if I get another crane lamp like I do on the other tables, I'll put it on table black and move the operation over there the Gundalow sustained a bit more damage than I first saw.....broke free fife rails and broke the tiller off the rudder. she's back on the shelf, along with the Spanish Galleon, which had a few things wrong with it too. as far as the other two.......well, they don't look too good.....broken yards and bow spirits, life boat davits broken.....just some of the damage. time to blow taps, I think ⚓
- 1,090 replies
-
- 5
-

-
- showcase models
- vendetta
- (and 2 more)
-
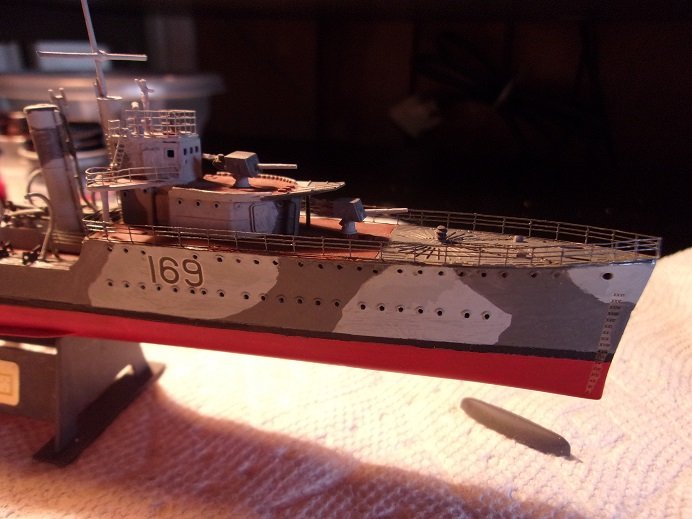
thanks Lou I can only go with a 40W bulb.......I'll see what I have in the drawer. I got some painting done.......the life rings and the props once the blade issue was repaired........along with a few touch ups. gotta lay off macro........makes the model look like a giant paint blob. the starboard davits were set in place, and the boat will rest on a pair of PE chocks......touched up the port side when I did this side. the kit came with five life boats.......was thinking of adding one or two extra, but pictures I have don't show them, so I won't. I gave it the 'ole college try and managed to pull off painting the bow railings. a little creative brushwork along the back of the foredeck rails came out pretty good I was going on to the next task, which would have been the anchors.........I noticed that one of the chains didn't lead to the hawse hole, so I fixed that. I say was, because it was that time, when the admiral harped about changing the rug in the living room. this of course turned into a chain of honey do's starting with reconnecting a spring under the recliner, that helps support the tushie..........what a PITA!!!!! finally getting around to the old carpet, I rolled it up {Gibbs had a ball with this going on} and proceeded to carry it out the door........this set off a chain reaction crash of four of my smaller ship models....sent them crashing to the floor! they are around the scale size of the Vendetta........the Thermopylae and the Connie are models I built some time ago....they received the most damage........the only wood ship in the melee is the Gundalow.......I'm certain I can repair her. a 1600 Spanish Galleon received only minor damage. the Devil Dog, the B25 I just finished almost hit the floor as well.......and a P51 Mustang got a gear flap broken off. this basically wiped out the top two rows of models! they are all waiting on table black at the moment awaiting evaluation. I fear that two of them might not fair too well.........but they had a great life...........I think I built them in the 90's. I look on the bright side.........I can put off putting up a new shelf a little longer oh...........I also painted the aft railings too.
- 1,090 replies
-
- 6
-
-
-
- showcase models
- vendetta
- (and 2 more)
-
that's a good fix at the bow nicely shaped frame.....off to a good start!
- 14 replies
-
- 5
-
-

-
- Osborn Models
- Sea Flea
- (and 1 more)
-
you've had quite the renovation going on there........nice to see she's all sorted out you've done a superb job!
- 273 replies
-
- 1
-
-
- panart
- amerigo vespucci
- (and 1 more)
-
I think I saw them ...........if I do, I'd go with the complete set........I bookmarked it thank you!
-
I have the Hood PE too.........might have some railings in there
- 1,090 replies
-
- 6
-
-
- showcase models
- vendetta
- (and 2 more)
-
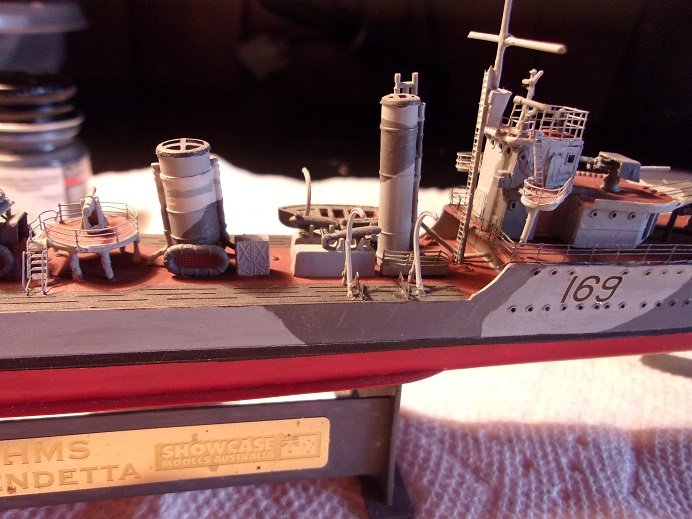
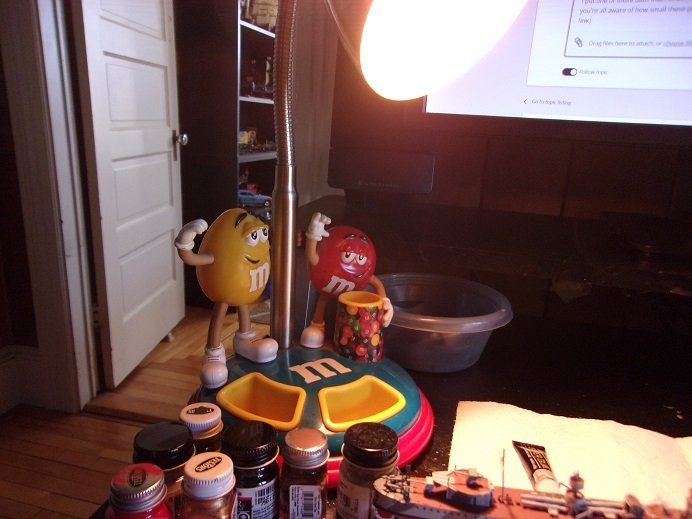
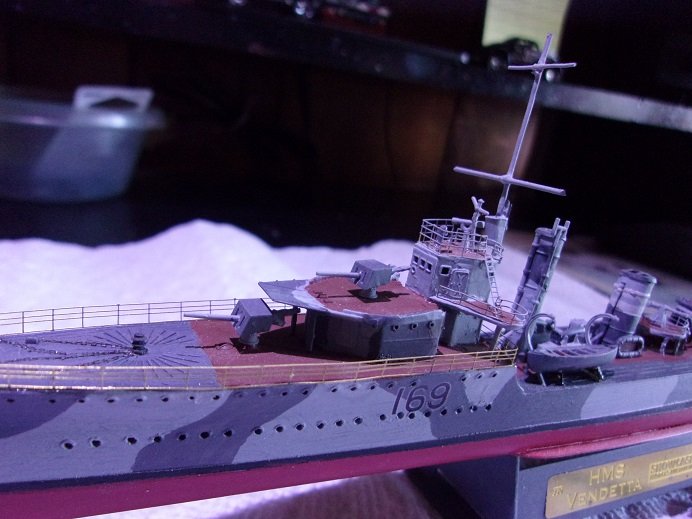
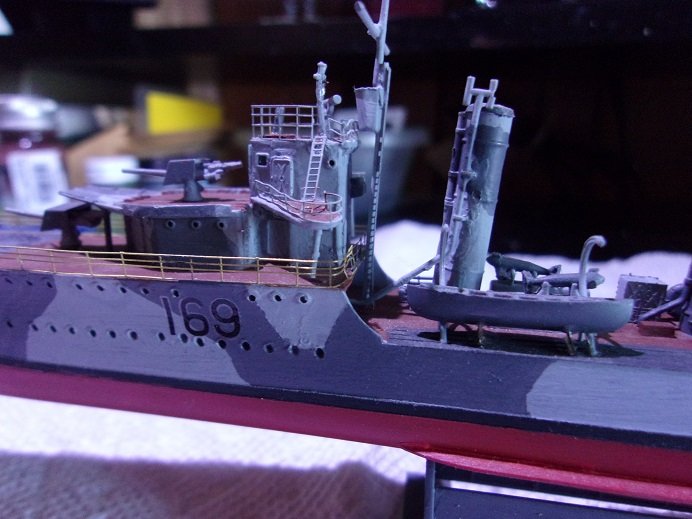
hi Mike......thanks glad that I was able to come to that realization before the other railings were added. gonna be a sticky wicket, that's for sure. one hope, is as I paint them, the paint will leech over to the other side and solve the problem for me.......just my luck though, I go and paint.......and it doesn't happen I can just imagine what you have to do to a model of that scale the Vendetta is the smallest war ship I've ever done. it's presented a whole new bunch of problems, for a guy with big fingers. I just got done trimming all the vents.......they were held on the sprue by a thick injection tab, that still had distinct reminisces of it after I cut them off. to trim them was a feat.....can't even tell ya how many times I dropped them. to deter lost parts, I put one of those bath mats under my desk........it's got a thick pile which limits bouncing. seems to be doing the job ....I haven't lost any yet. I'm sure you're all aware of how small these parts are, so I'll refrain from doing the Penny comparison. I must not have done any touch ups either........I can see a few. I brought the light issue up to the admiral.......another crane light would be nice. she had other ideas......couldn't shoot her down.....she was trying to help. with everything laid out on the desk, she starts to clean. what's a little dust? I managed to take over the task before anything happened. she offered me her desk light.......couldn't say no without trying it out. the light is a bit better........ a bit yellow of hue.........not tall enough though.......I'd likely knock it in a heartbeat. the motif is a bit off too.......better if I had a coffee mug here they'd likely try to talk me into another model............although I do have one in the back of my mind

- 1,090 replies
-
- 8
-
-
- showcase models
- vendetta
- (and 2 more)
-
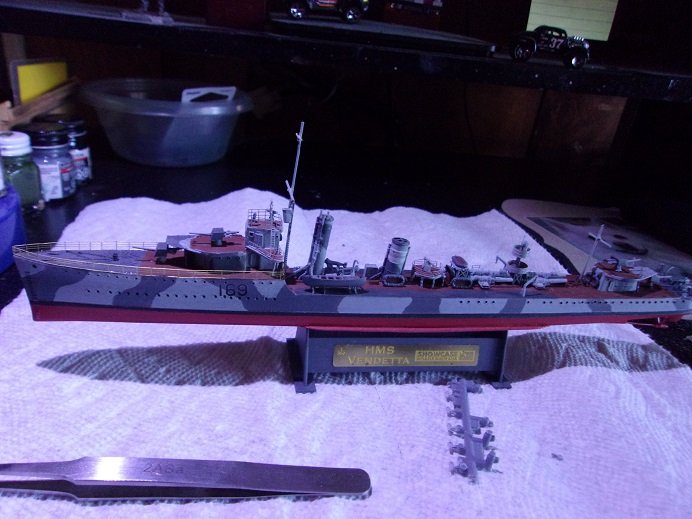
I finally have her back on the table. assessing where I left off and my next move....... ....gotta do something about this silly light ........gett'in on my nerves. first I think I'll add the vents......there are ten of them, and that will open the door to adding the aft railings. I still need to add the starboard life boat....among a few other things. I did note that one of the blades on one of the props was ready to break off.....bent it back and cemented it......I'll get them on soon as well. one thing I did learn....was to paint the railings before you put them on... I think this is one of the reasons I stopped.......pondering how to do them without making a huge mess. don't even know how I'm going to paint back here....... too close for comfort. just a small refresher

- 1,090 replies
-
- 8
-
-
- showcase models
- vendetta
- (and 2 more)
-
yes....I'm looking into shapeways........some of the aftermarket looks very good. mikes tubs are so sweet.........right down to the ammo
-
looks like a very nice kit......very good molded detail doing a superb job with the PE......something I'm rather new at. I just received my first IJN warship for Christmas, so it will be my first exposure of their wartime colors. I think it's good to show images of the instructions......you may have the English version of the instructions and it will help those who don't. the instructions for the ship I have are in Japanese....I'm currently looking for an English version, if they are available. that.....and it will help those who are confused how the step is correctly done, and what needs to be removed for add ons like the deck. your doing a great job so far
-
an interesting feature of most waterline models....the bottom is colored differently {usually in an anti-foil color such as red}. looks like a really well molded kit......I also agree about the chain detail. it looks detailed and pronounce enough to bring out with paint. I too have had my ups and downs with removal of molded detail.
-
I've been looking for figures.........but what I've seen so far are way too cartoony. I know a friend in Florida who is an avid collector of figures {Marvel, DC, Batman.......you name it}.......I haven't asked him yet, but I think he could find them for me. I do have a project on the back burner.......I took some freeze frames of the Sinbad cartoon, of the S.S. Olive Oyl. one of these days........a pipe dream........one of many
-
I see you've already cut off the spine and tabs....now you can plank the bottom. did you leave a little extra around the circumference at the bow? you can get a more defined edge after the hull is closed up. nice job on the planking
- 55 replies
-
- 1
-
-
- hydroplane
- Slo-mo-shun IV
- (and 1 more)
-
it's not often we see pictures of artists at work the hull looks very good.......you did a great job!
-
awesome job Kevin........she is definitely a jewel! Dora is such a fitting name for her.......I was gonna suggest BlueBelle, but I figured you'd find one on your own looks absolutely stunning.........and very jealous......my admiral won't do my sails either! congratz on a beautiful build!
-
no......I'm only planning two screws, to simplify things. it would have been good if these parts were included in the kit, since the kit does lean towards R/C more than static. I don't frequent too many bodies of water, so R/C would be a waste on this one. I do have a kit that has a good head start on the parts {I got it for Christmas}, so it will be my first one. I'll find some place to float her when done. for those who like large models........this one's for you.......at 33 inches long.......the admiral is still wondering where I'm going to display it
-
sorry to hear you got sick Tom.......good to see you weathered the storm. will you be able to get the shot, now that you've had it already? you've one up on me with the crow's nests.......most of those parts were missing from the kit I have. they look very good......far better than the ones I hobbled together was that vacuum form hull supplied in the kit?........if so I didn't have it. your first attempt looked pretty good...........I'm sure this second one will look even better. this point where you are now, will put you just about where I am with mine. glad that my log was helpful glad your feeling better.......
- 135 replies
-
- 1
-
-
- billing boats
- half moon
- (and 1 more)
-
thanks John..........a little at a time
-
thanks.....Mog is a lot farther than I am it's slow at the moment, until I can get the hardware installed. then I can resin the hull. getting very close to retirement........I can't wait
-
the rigging looked sweet Mike........it was nice to get an idea on the gauge of this wire I'm using electrical cord wire for the rigging on the Arizona. it can be a bit unforgiving.......having to work kinks out when they occur. sag isn't a problem...once fashioned, it keeps it very well. I've bought a few types of thin beading wire in the past, that I thought would work......but in application, I found they they would work better on fishing vessels, and not on what I was using it for. I've heard of using human hair.......but I don't think it would last too long
- 179 replies
-
- 7
-
-
- hatsuzakura
- pit road
- (and 2 more)

